
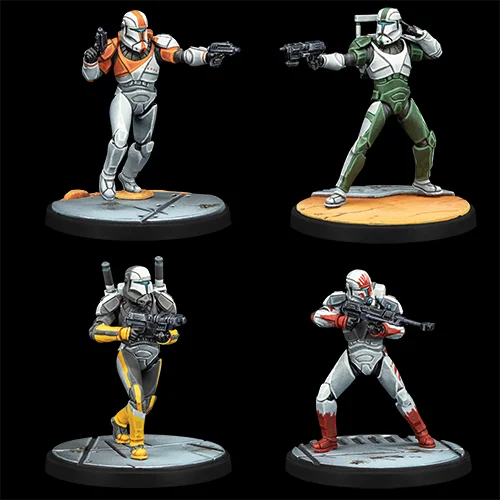
Delta Squad, the elite unit of enhanced Clone Troopers for the Galactic Republic, has made its way onto the tabletop for Star Wars: Shatterpoint. GamingTrend has previously covered the unboxing, including the stat cards and abilities, for the Delta Squad, Form Up Expansion Pack. For this article, I will be providing a step-by-step guide to paint up these Republic Commandos in their iconic Katarn-class armor.
Star Wars: Shatterpoint is a skirmish-scale miniatures wargame where players build and command a strike team composed of iconic Star Wars characters from throughout the galaxy. Unlike typical games with rounds, Shatterpoint is a continuously-flowing series of turns and actions where players battle over objectives. Players can build, paint, and play their favorite characters from before the Clone Wars all the way up to and through the Sequel Trilogy, giving their strike teams a lot of creative freedom and narrative storytelling within a game.
Assembling Your Models
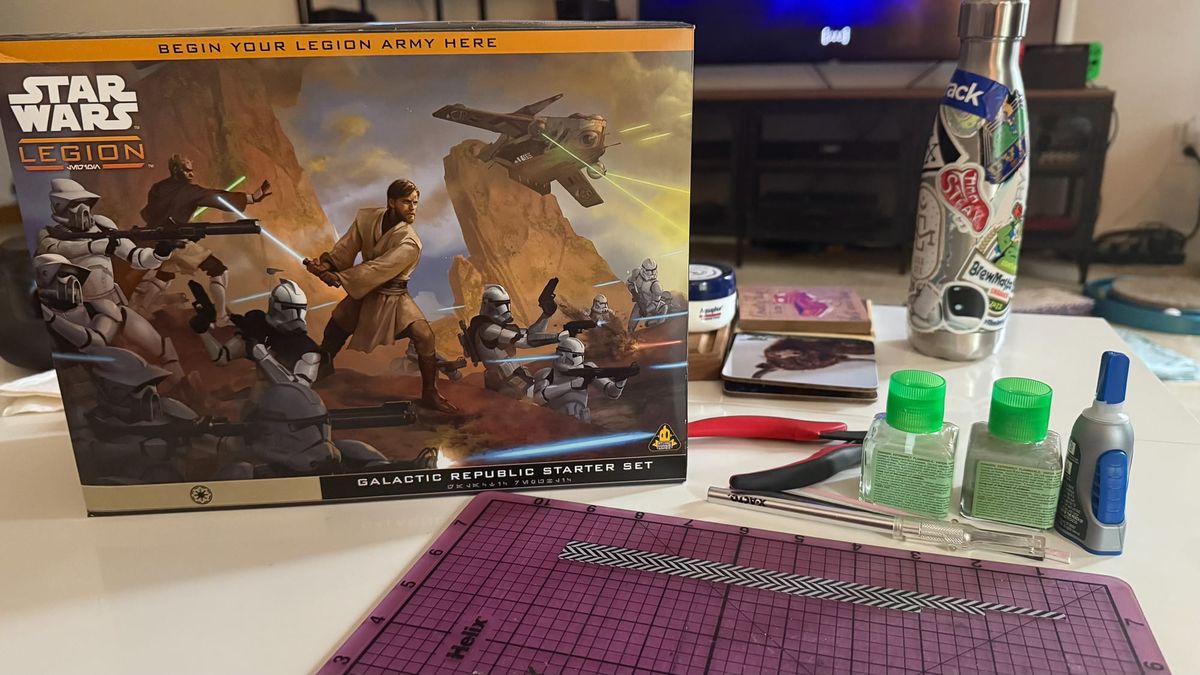
Prepping Your Models & The Tools
Our previous review covered the unboxing and building of the contents of the expansion, so for this article, I will be providing a step-by-step guide for how to paint this squad up.
GamingTrend has put together a guide for you to follow for how best to clean, cut, and assemble your models, regardless of the game. While the materials for the models may be different between games (plastic, resin, metal, etc.) there are simple techniques you can do to help make your painting experience go that much smoother.
Additionally, if you are new to painting and are not sure what brushes or tools you need, check out the article. This is just a starting place, and every painter has different preferences and recommendations. These are my recommendations based on the last decade or so of painting and I hope you find them helpful!
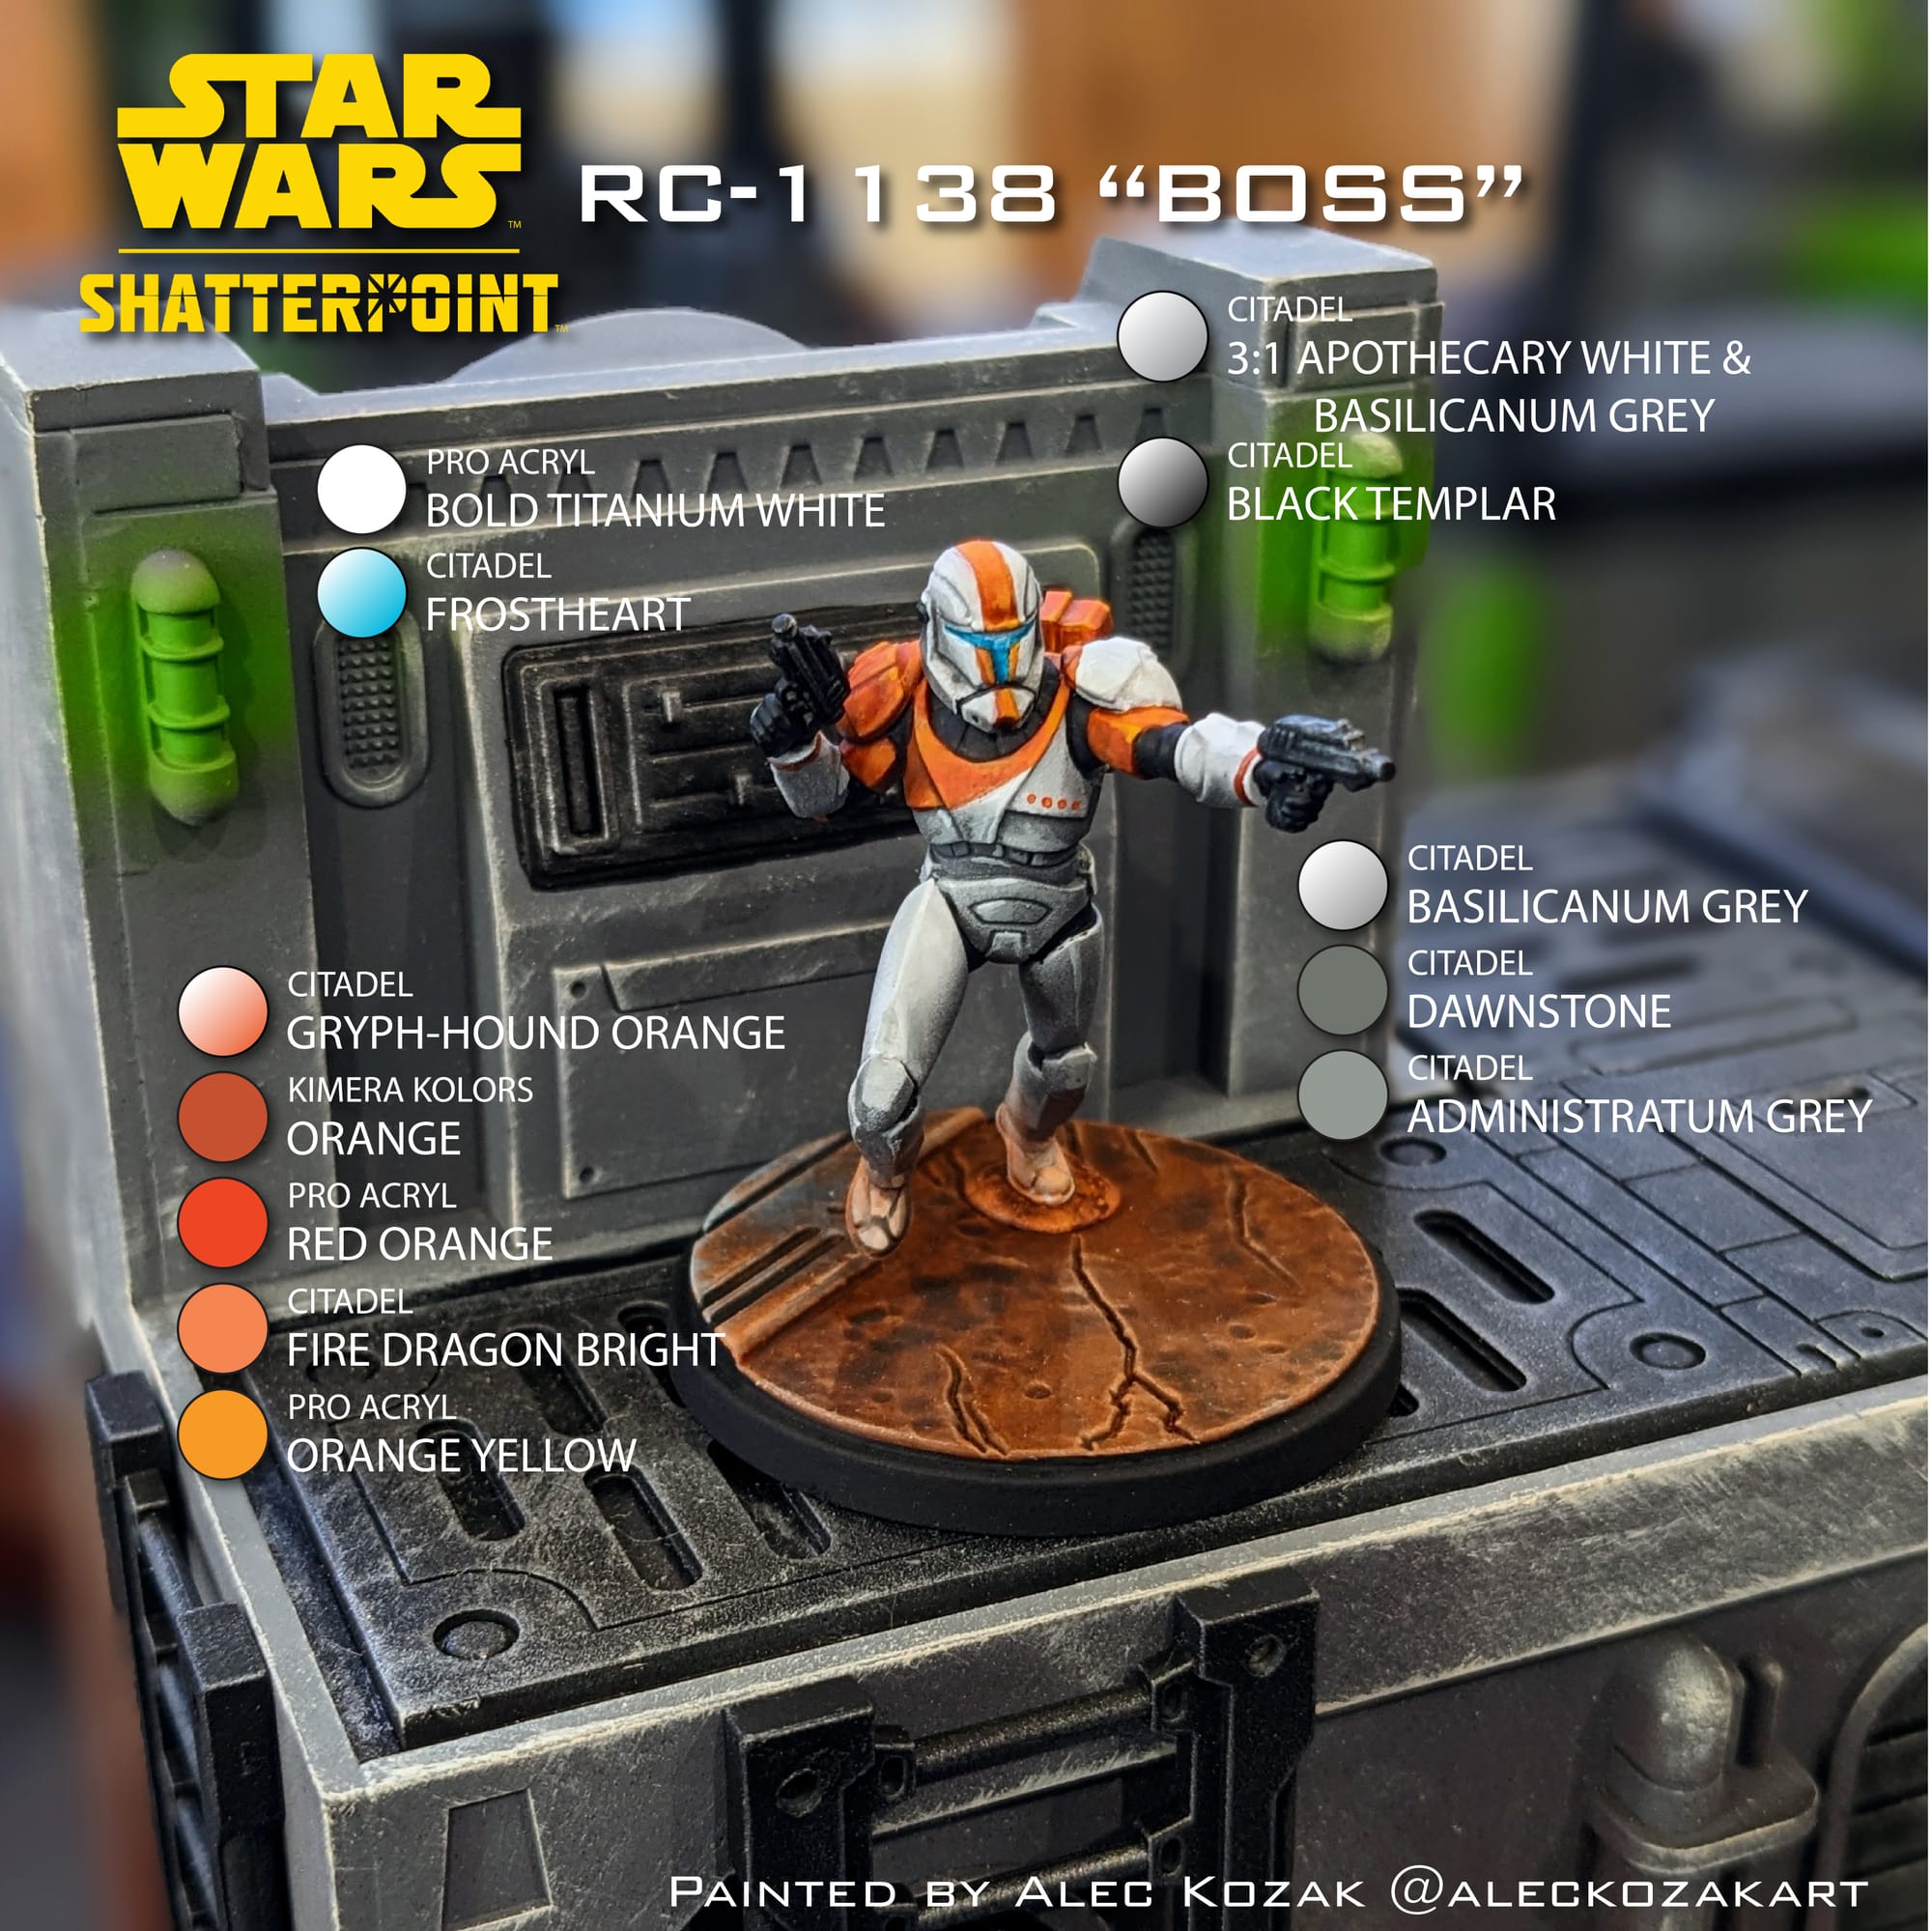
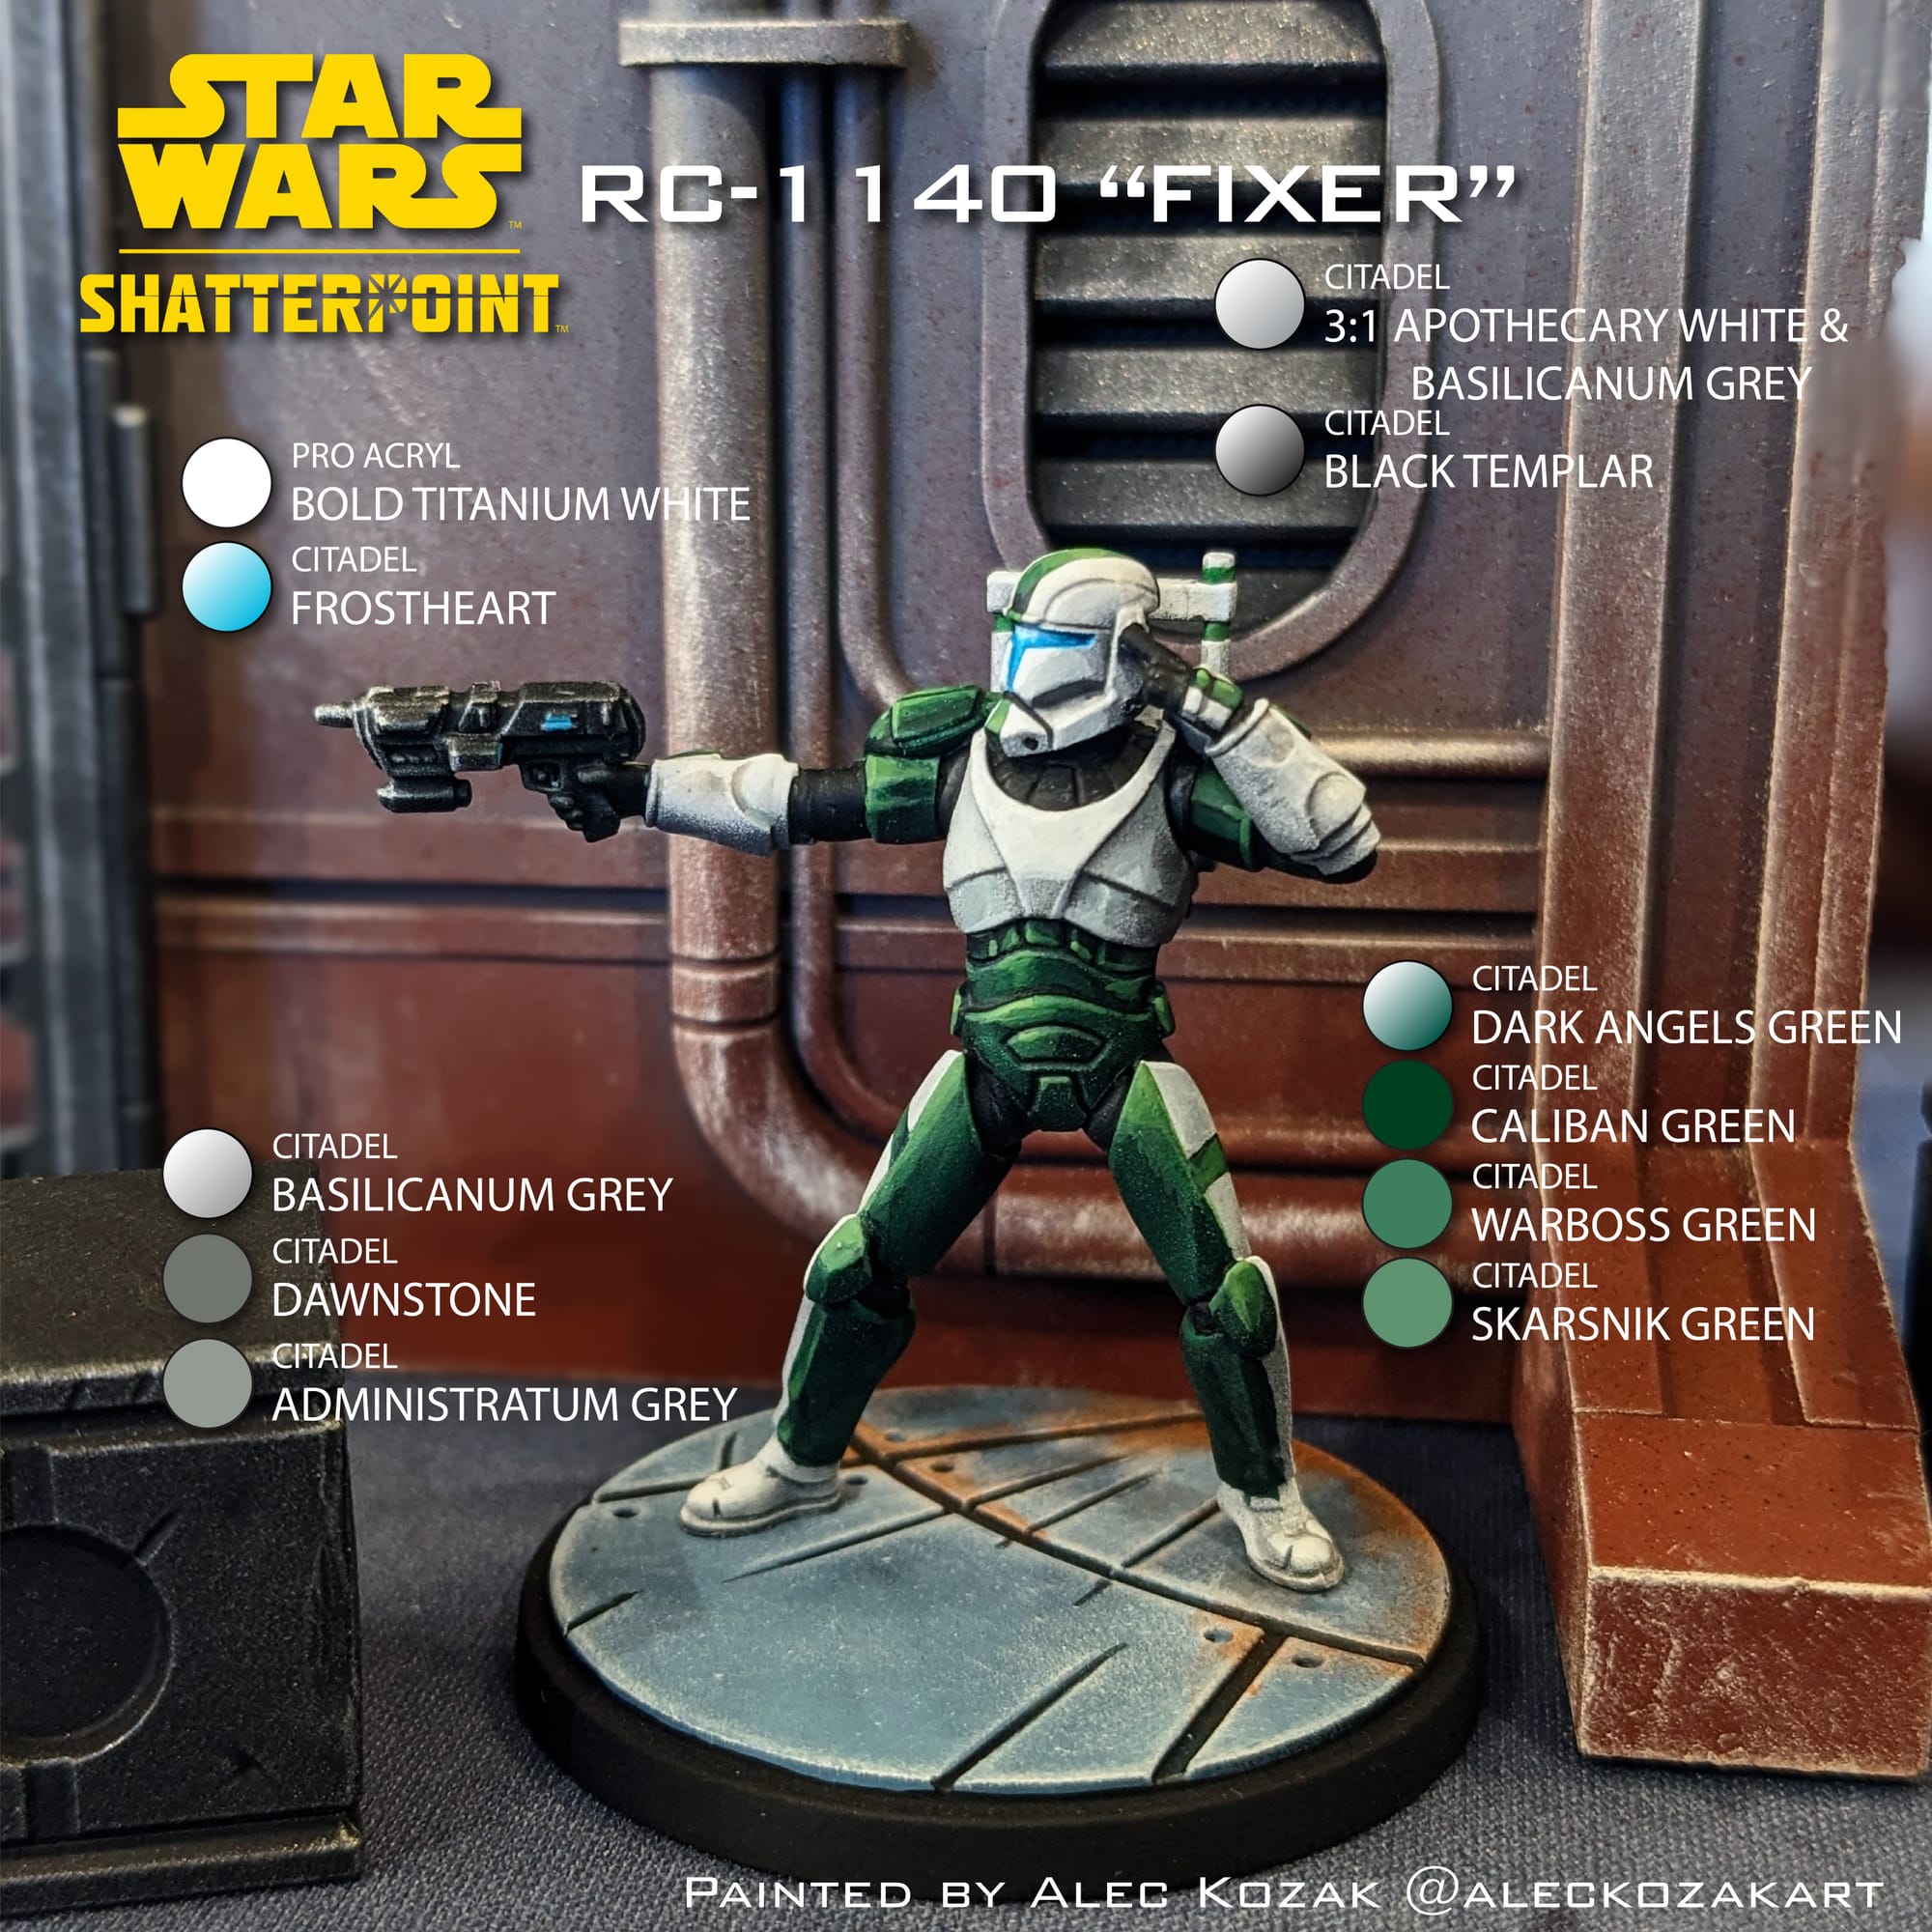
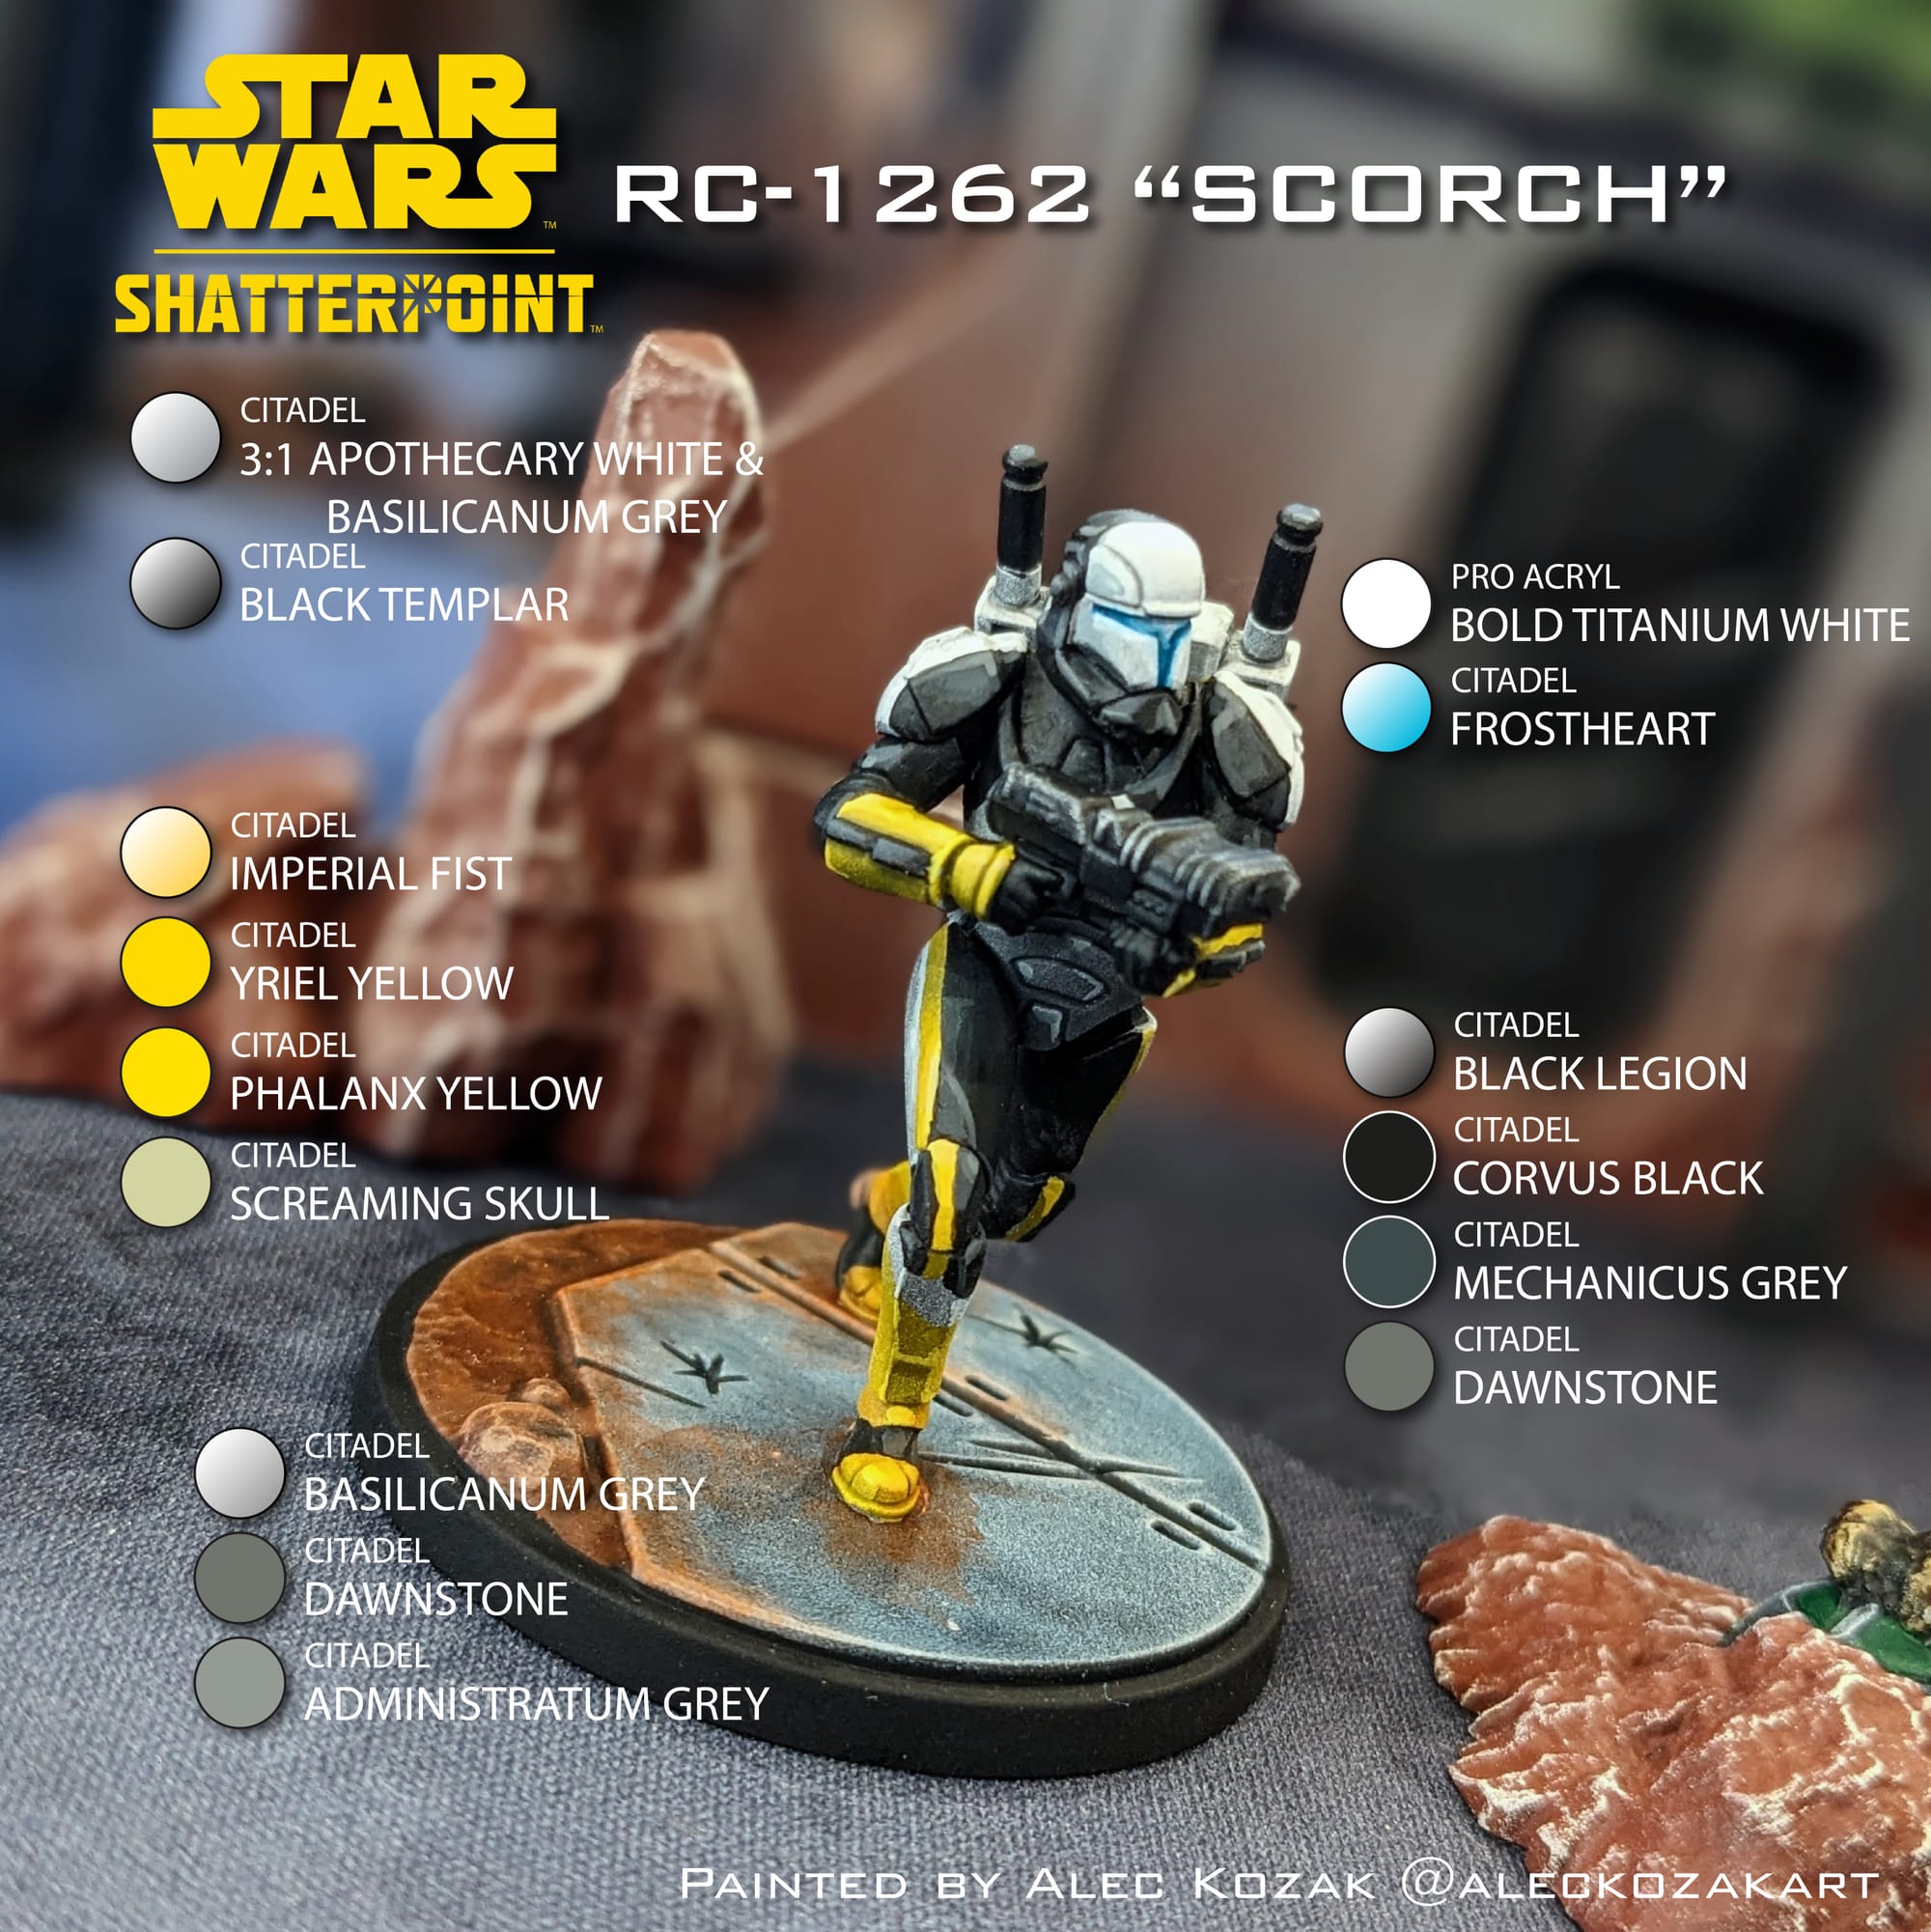
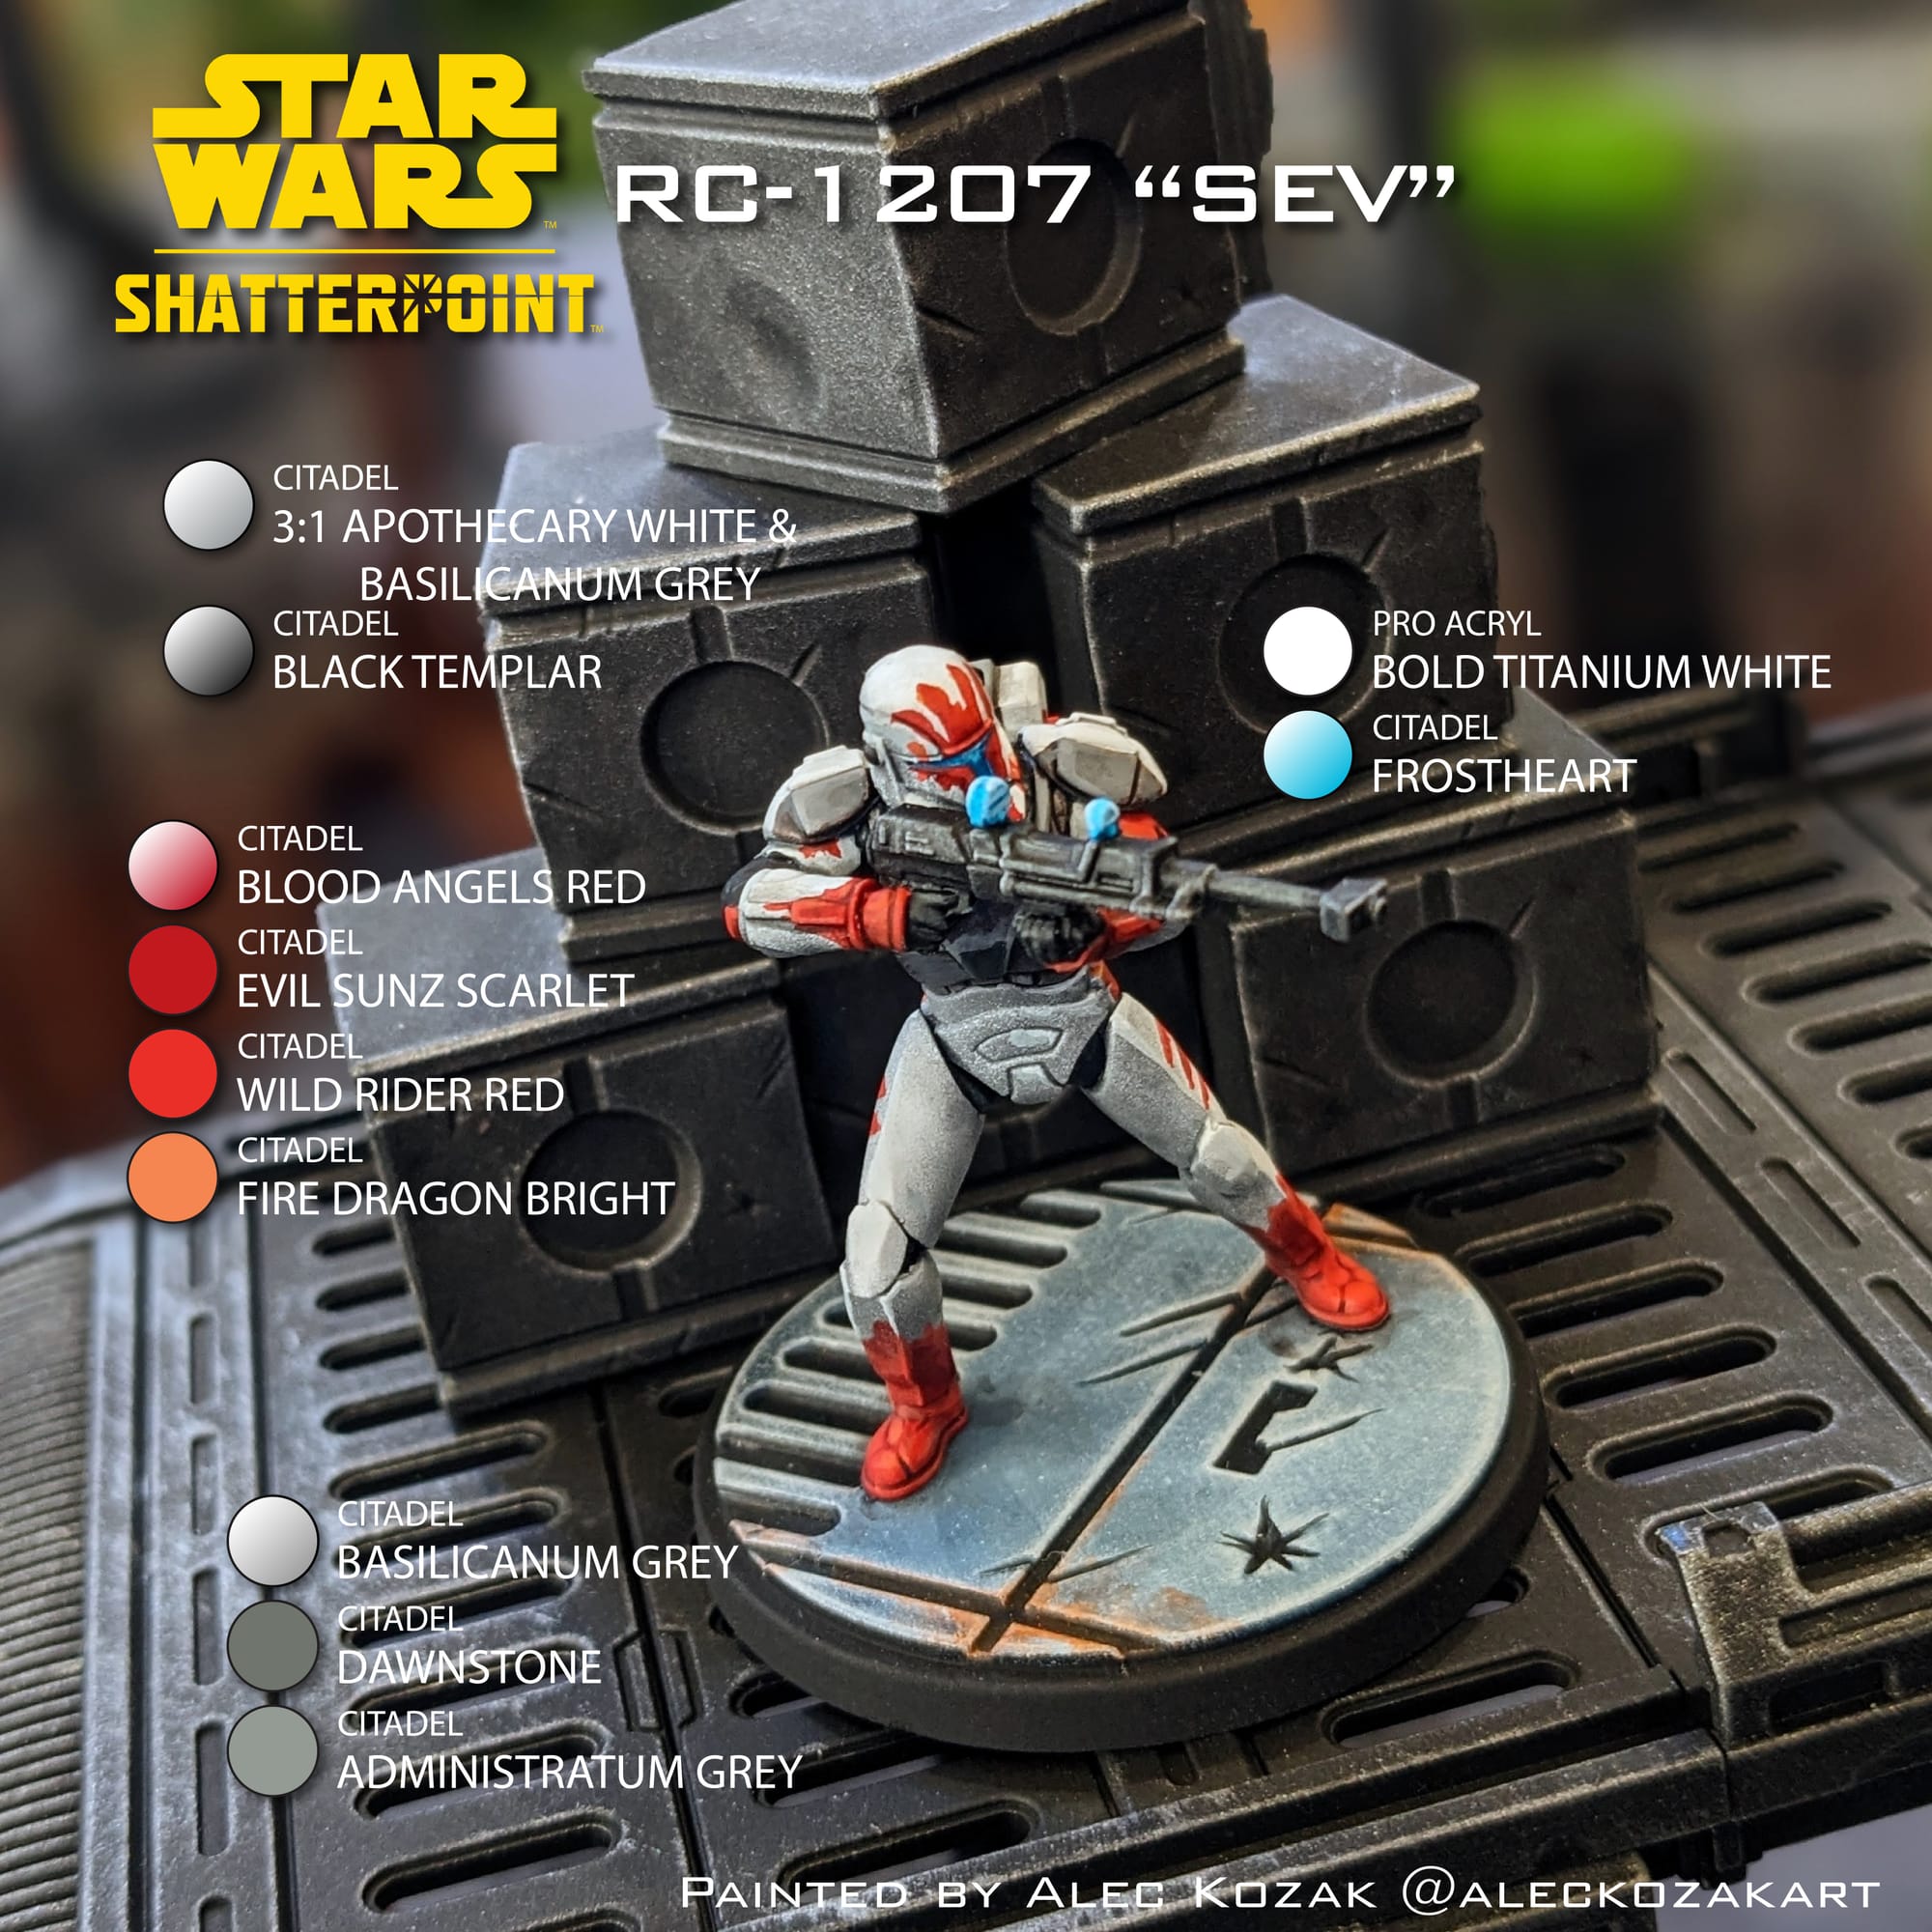
For this tutorial, I have included a visual guide (below) of the paints I used for the miniatures so you have an easily-accessible list to refer to if you need to go shopping. The paints are noted on the picture.
Painting Your Miniatures
The Paint Plan
For pretty much every miniature painting project I do, I start with a plan. Even before putting the primer and paint on a model, I find photo references of the paint schemes and details I am looking for. Most times, this means having a browser window up with different web pages and images next to my painting area, so I can quickly refer to them as I paint. I also come up with a paint plan, choosing what colors I am going to use and what order I apply them in.
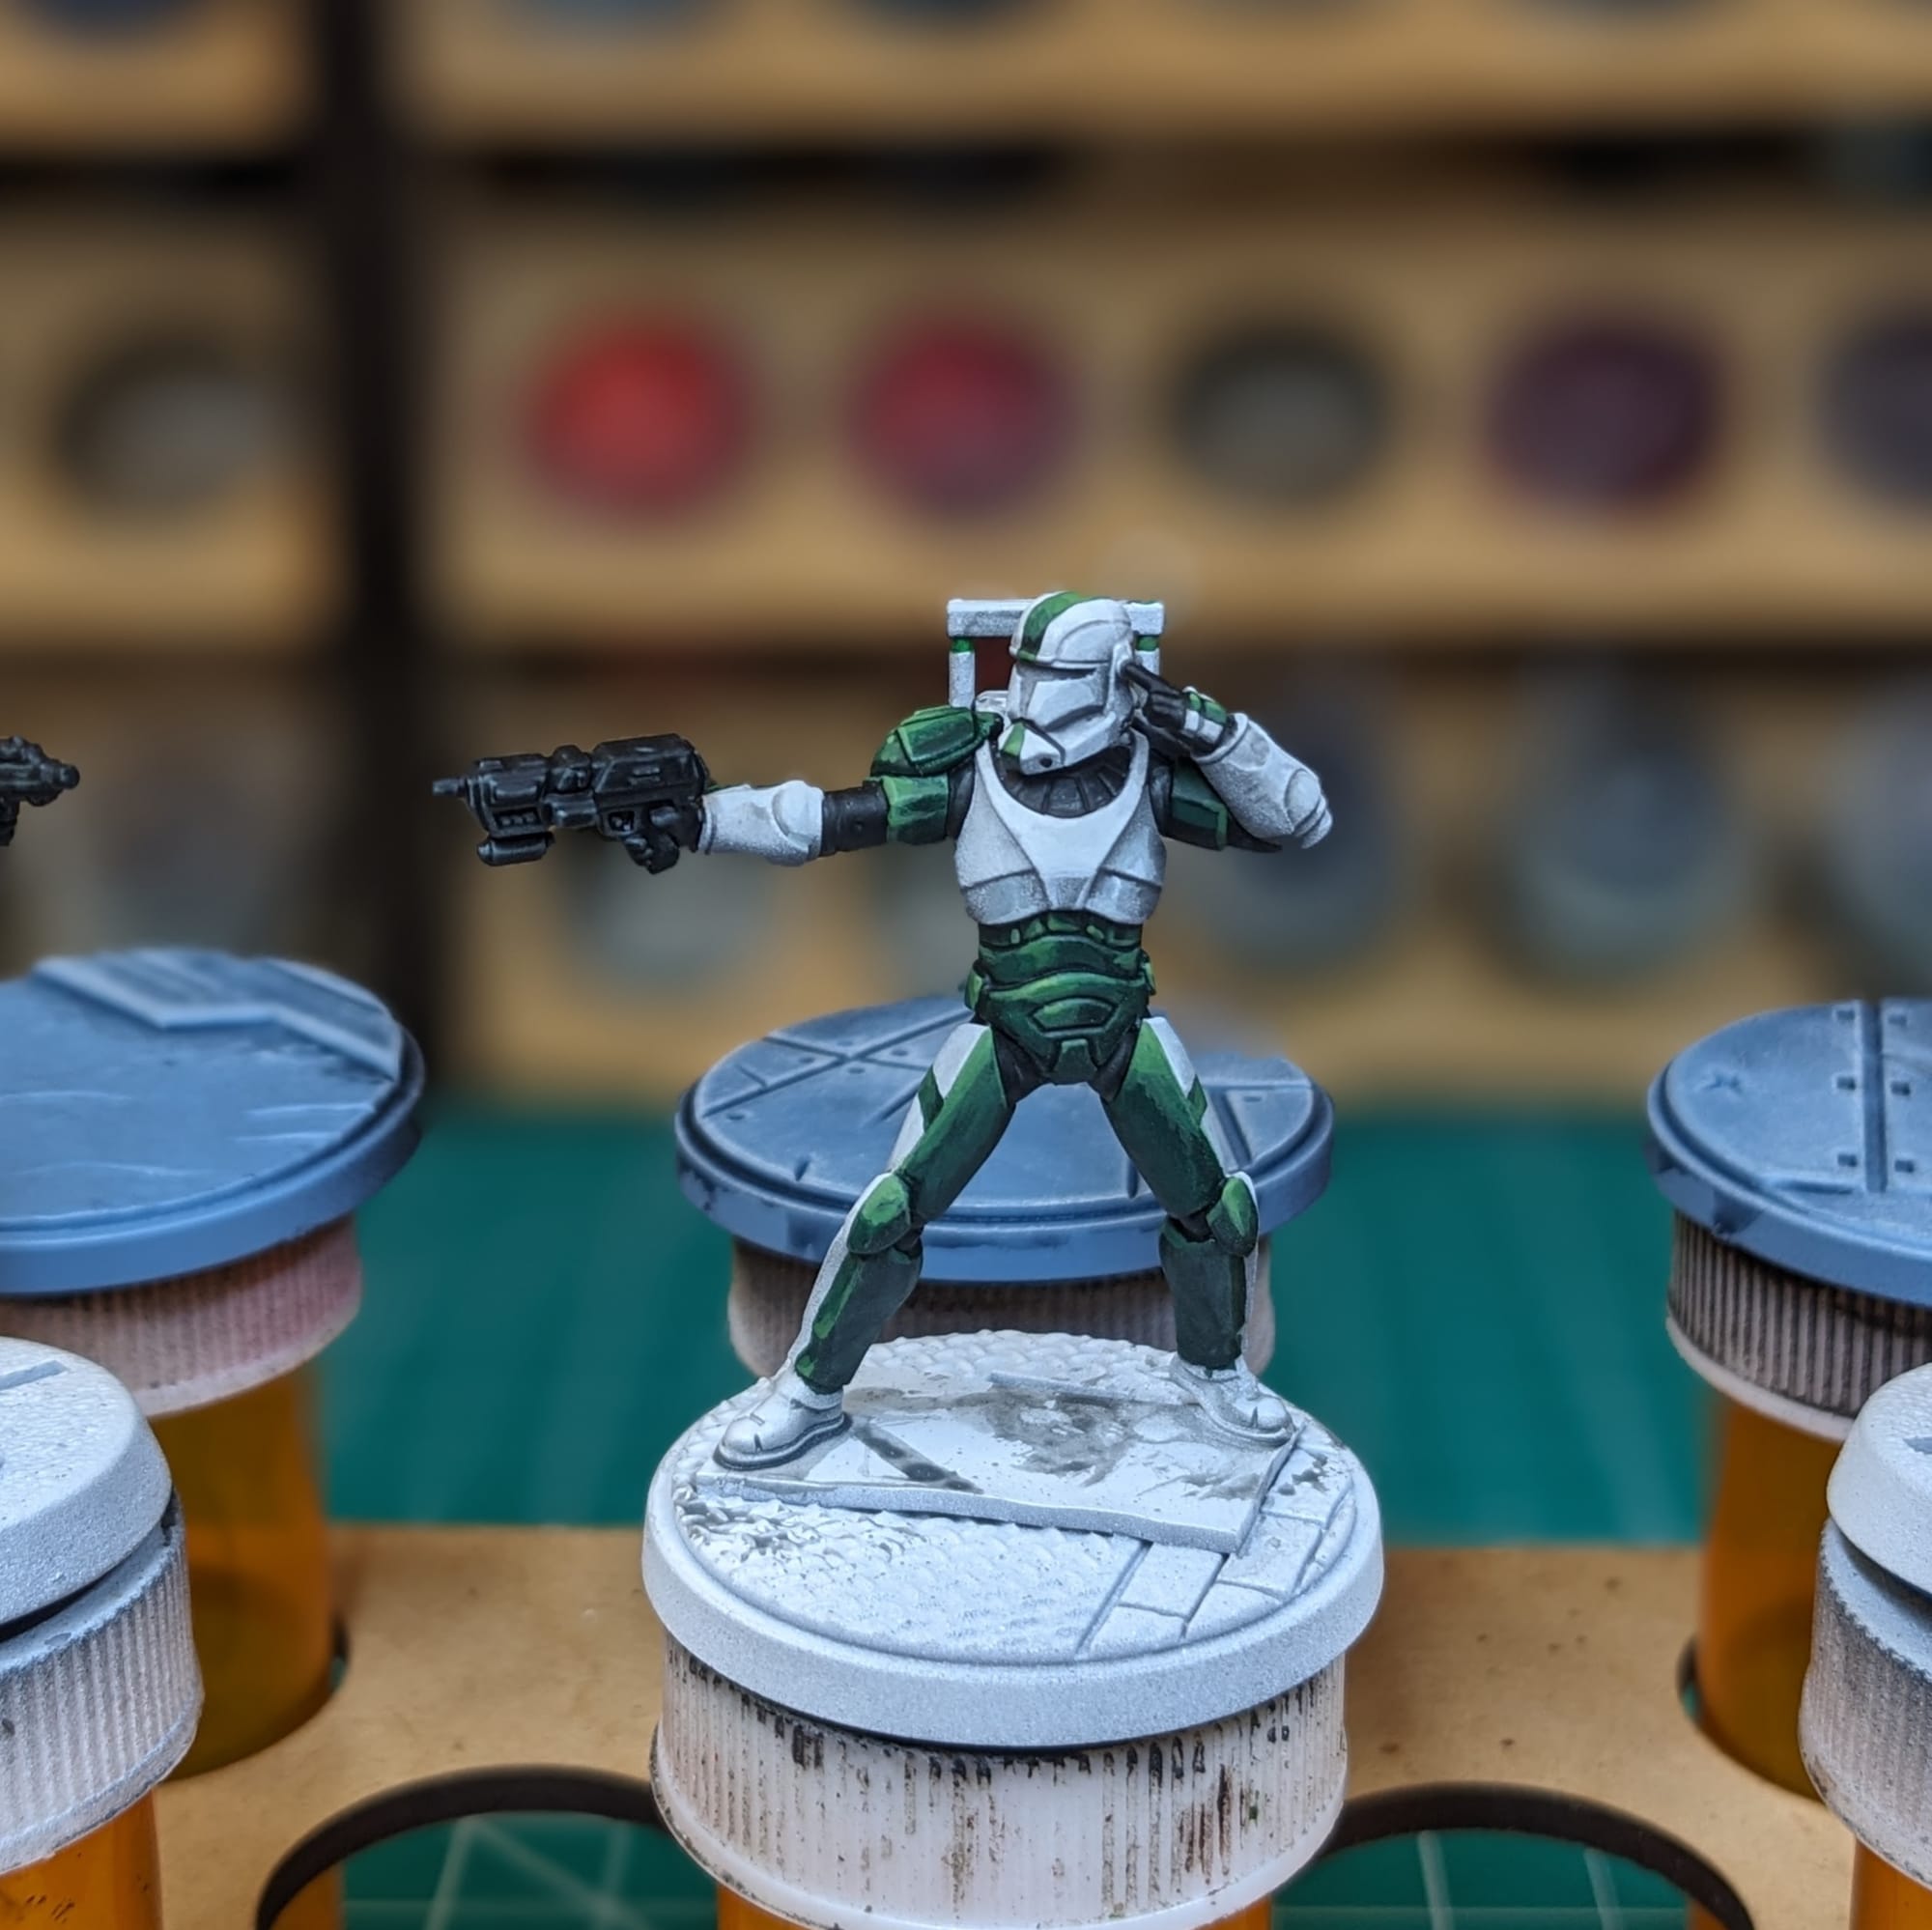
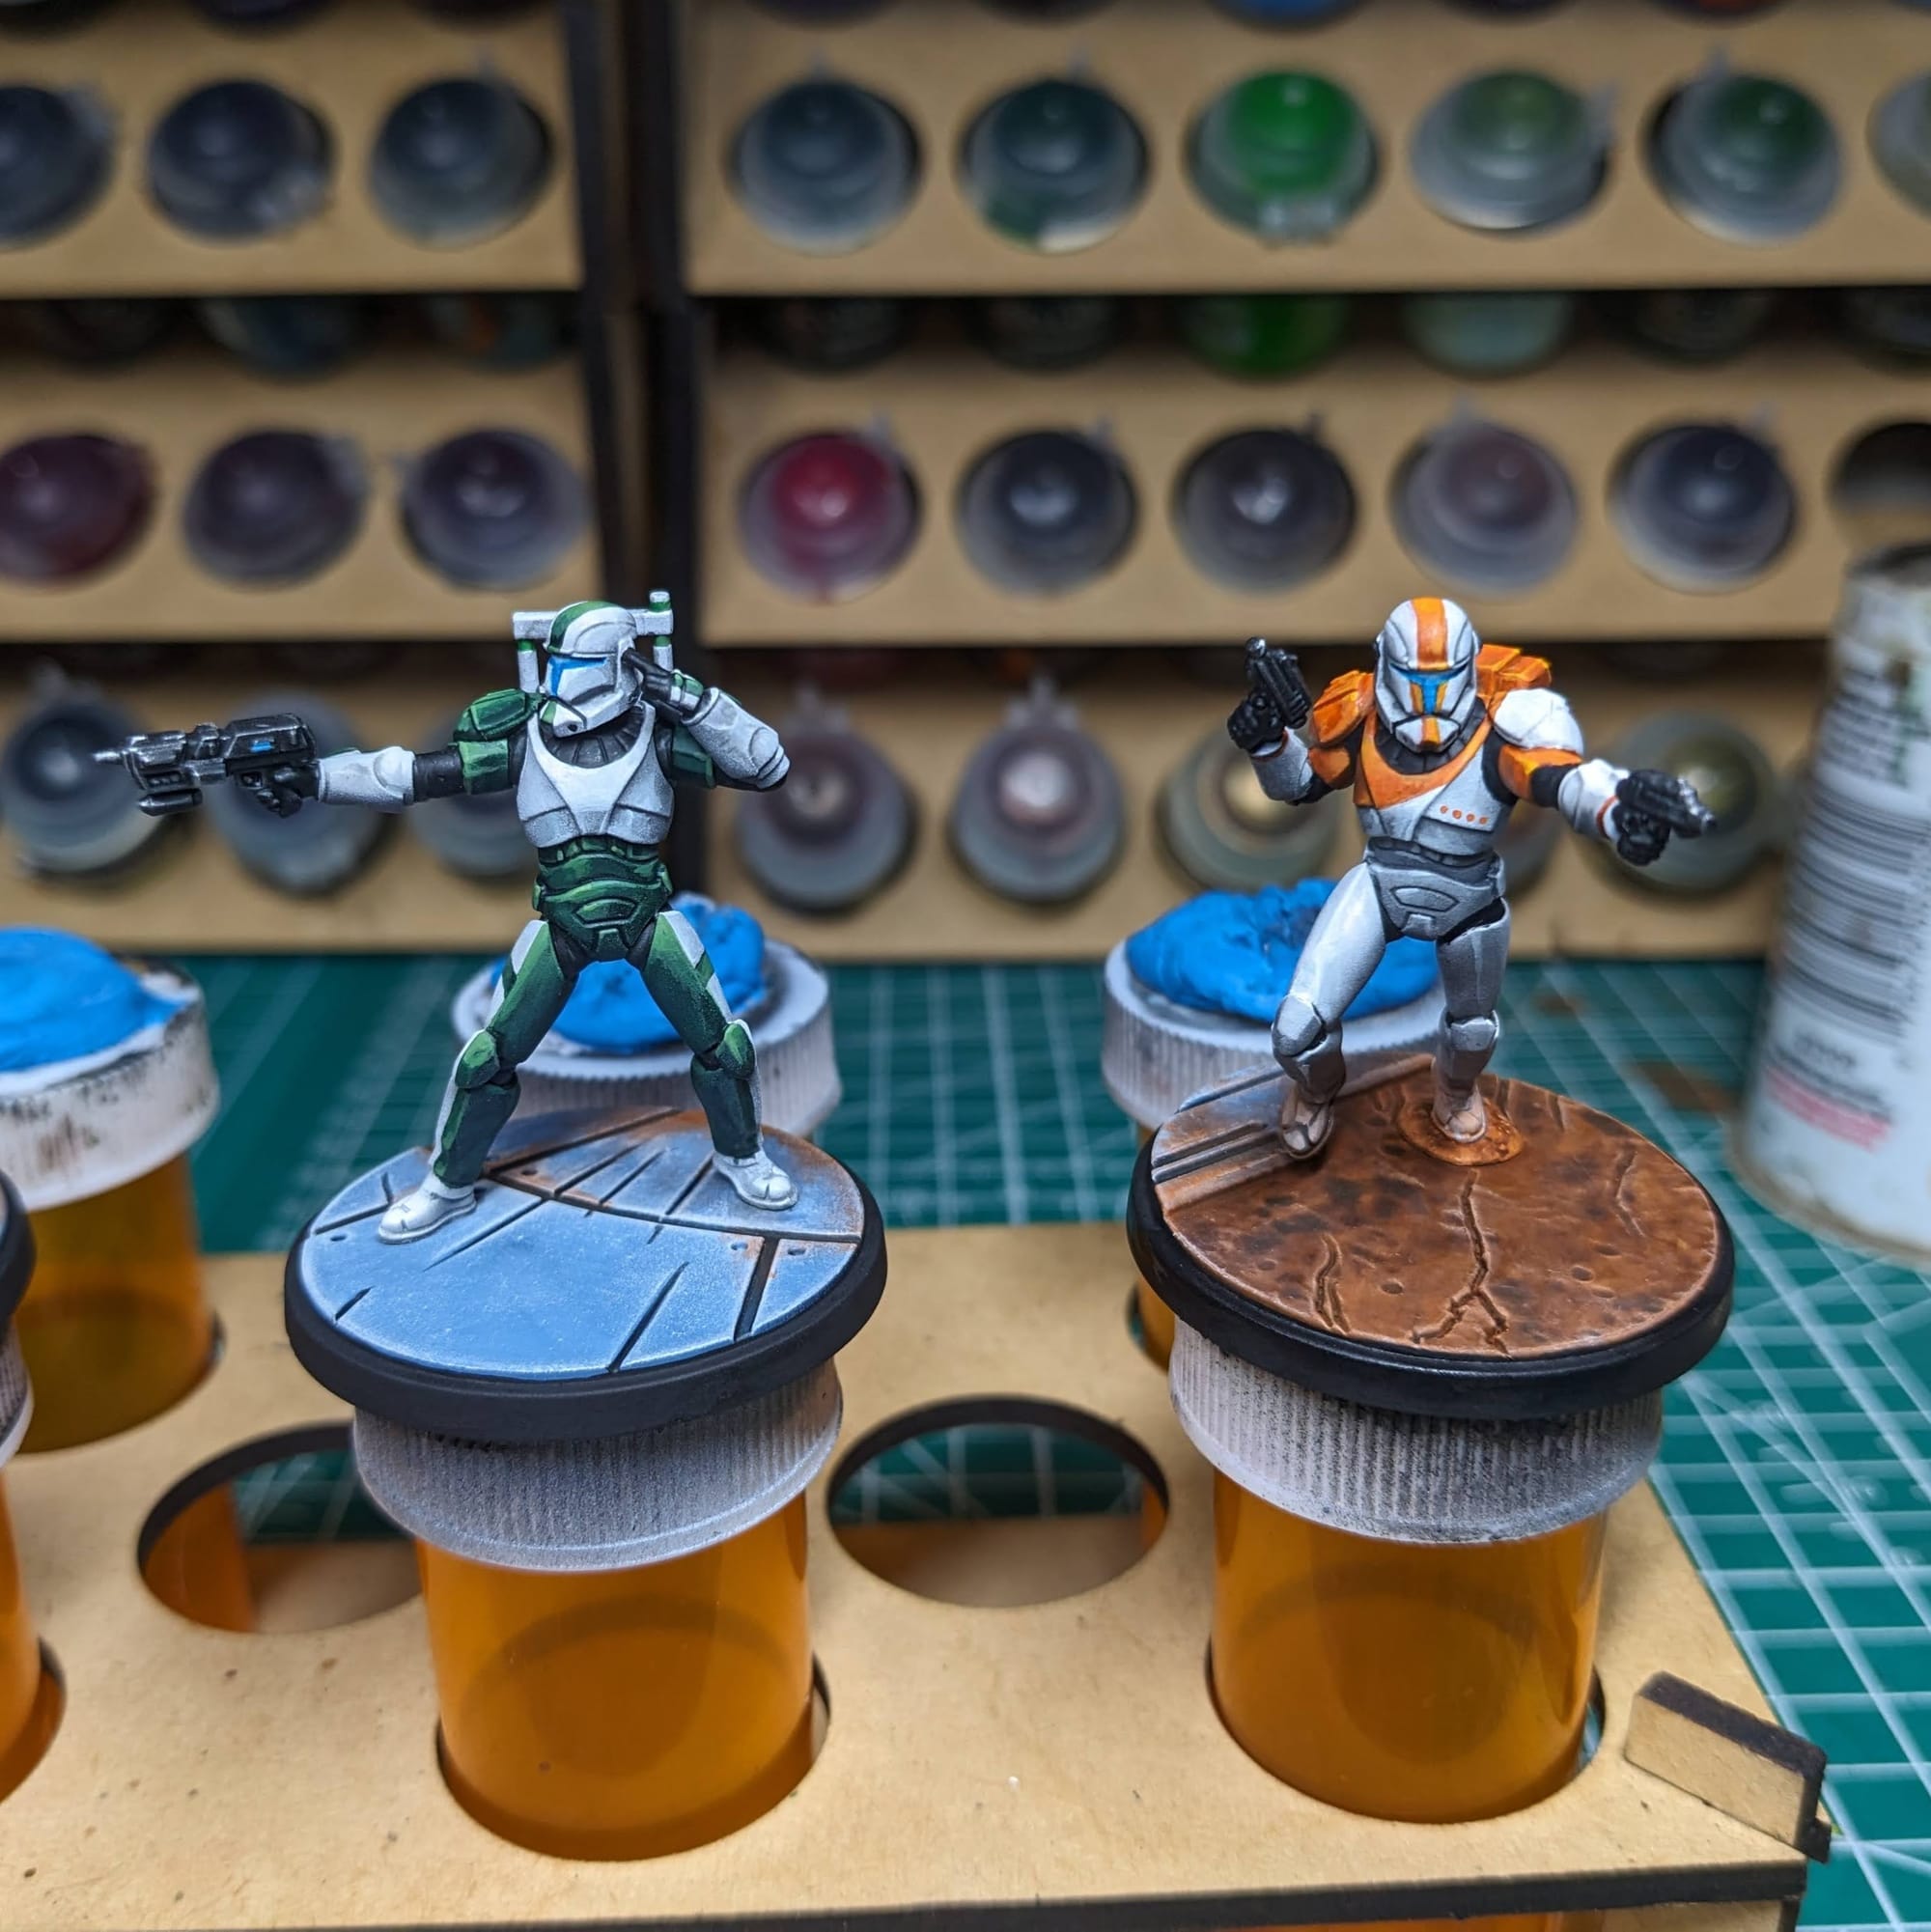
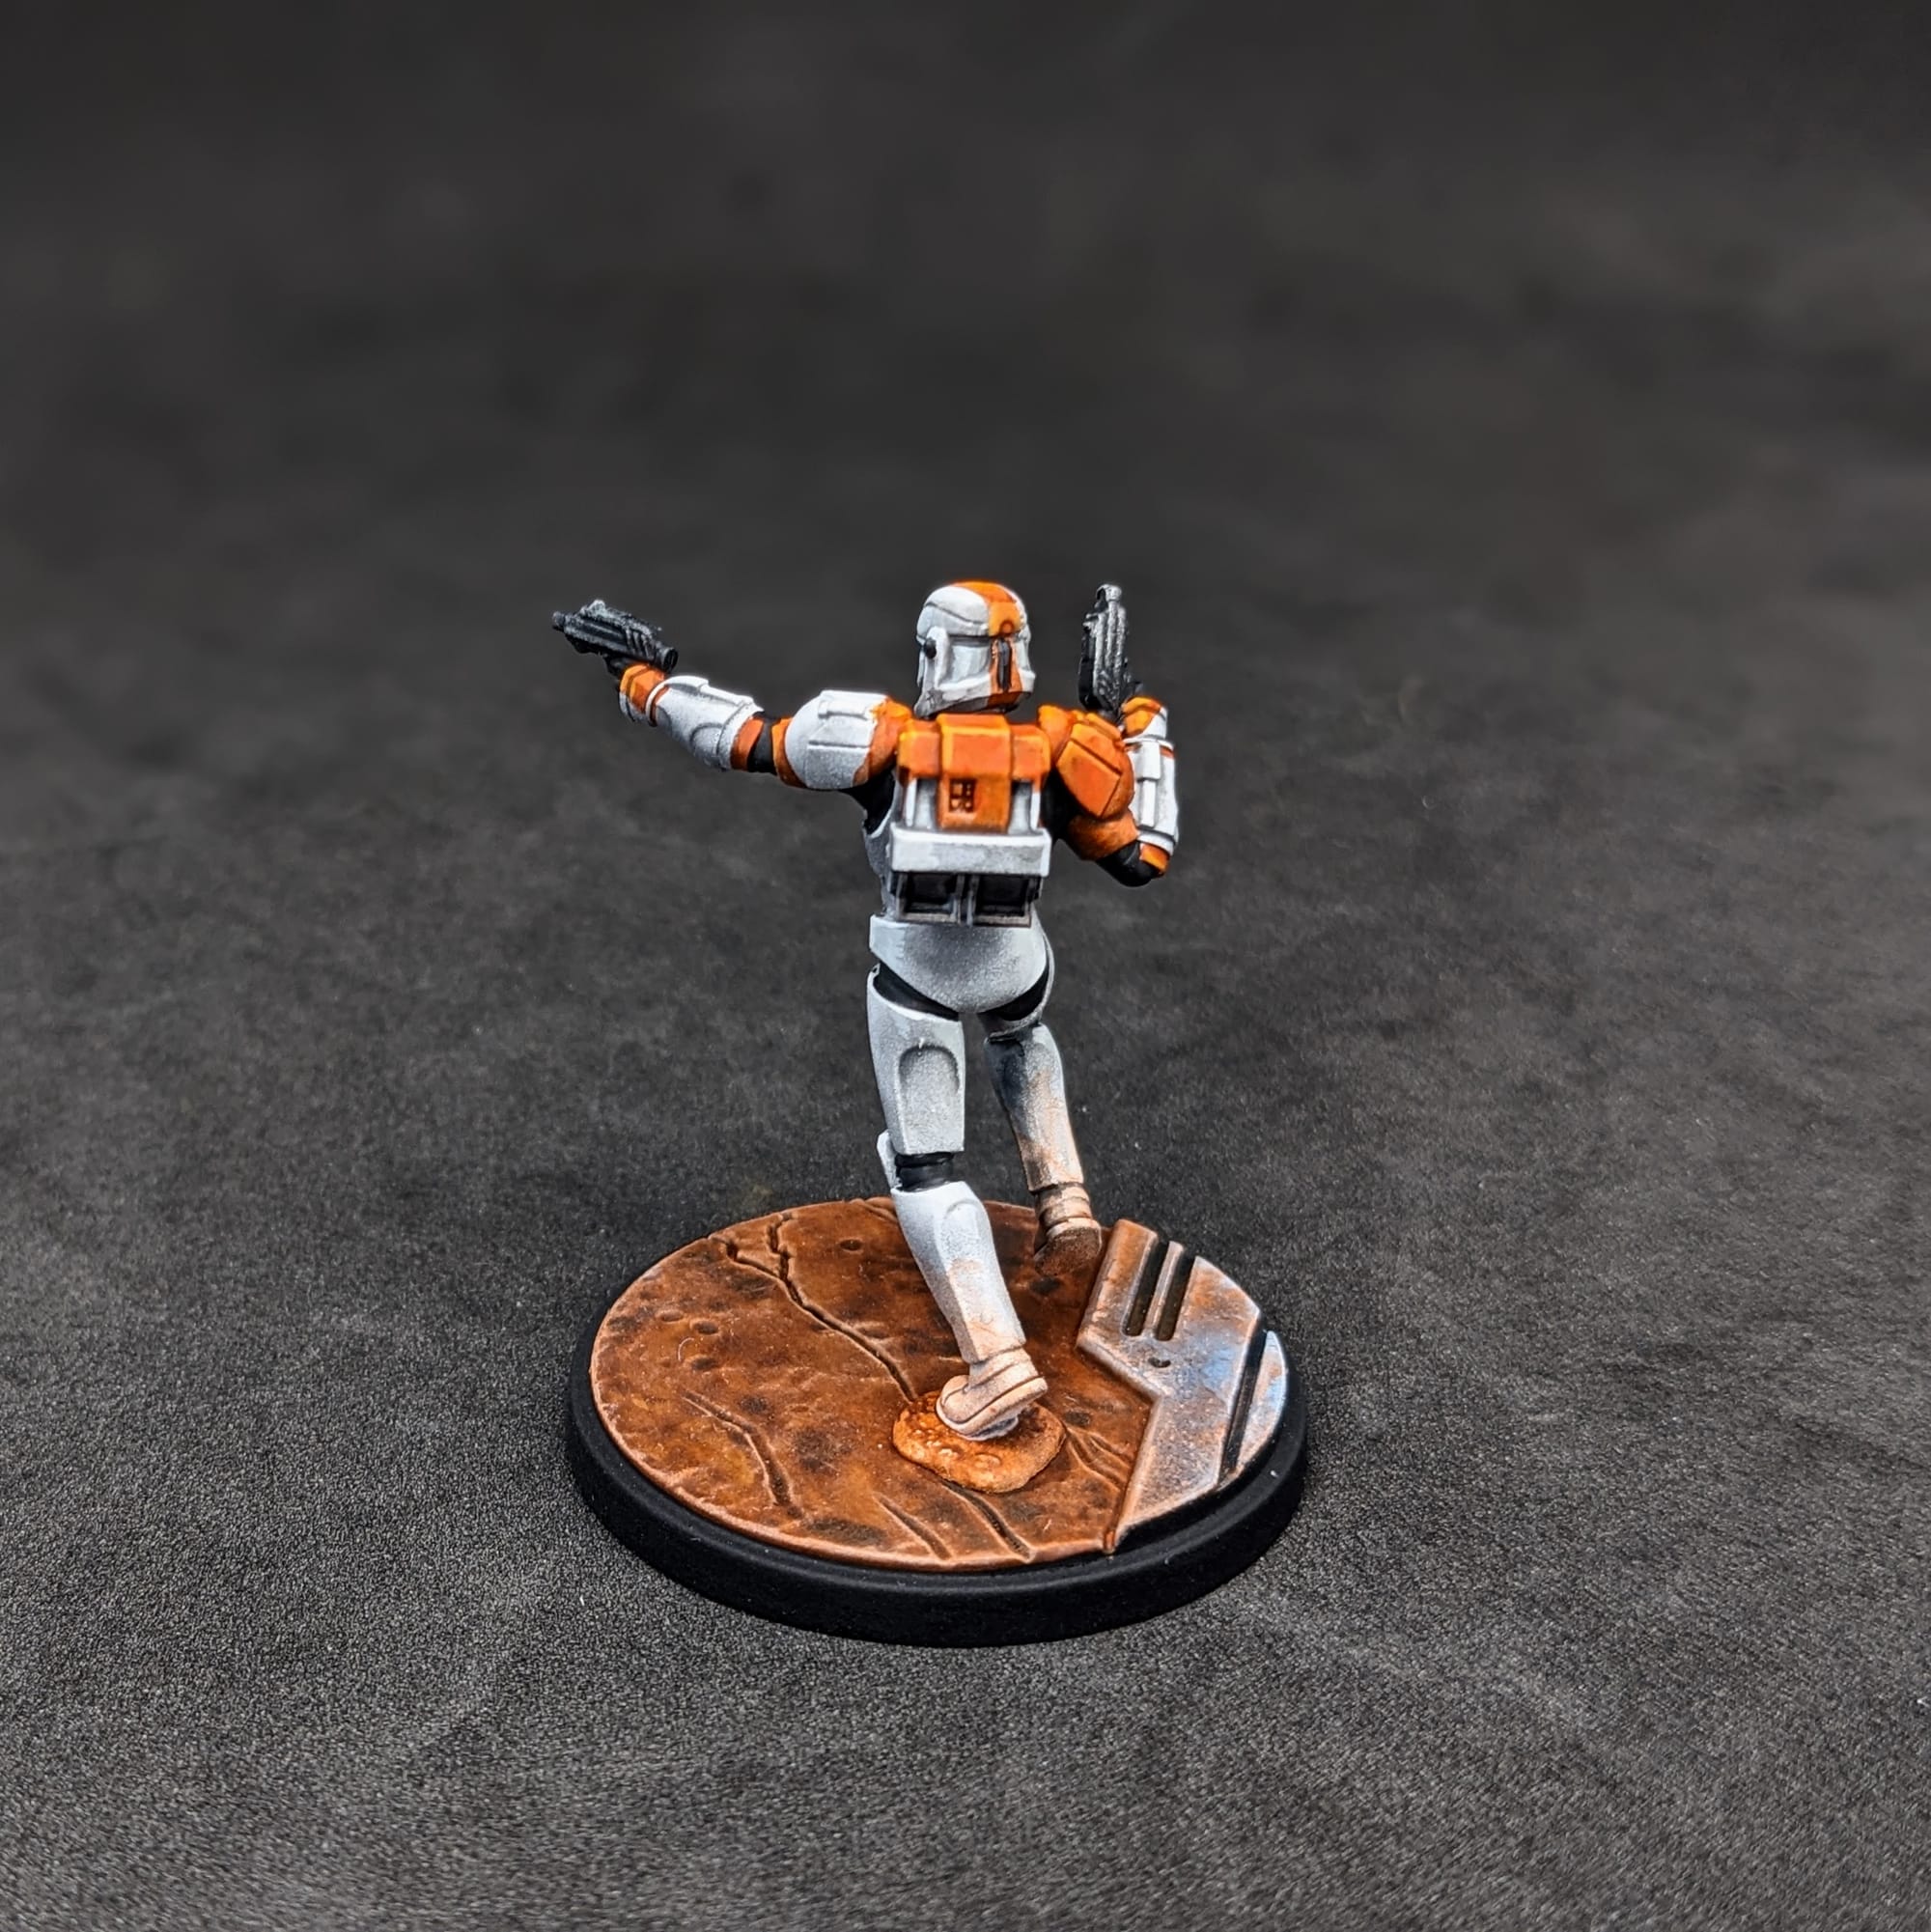
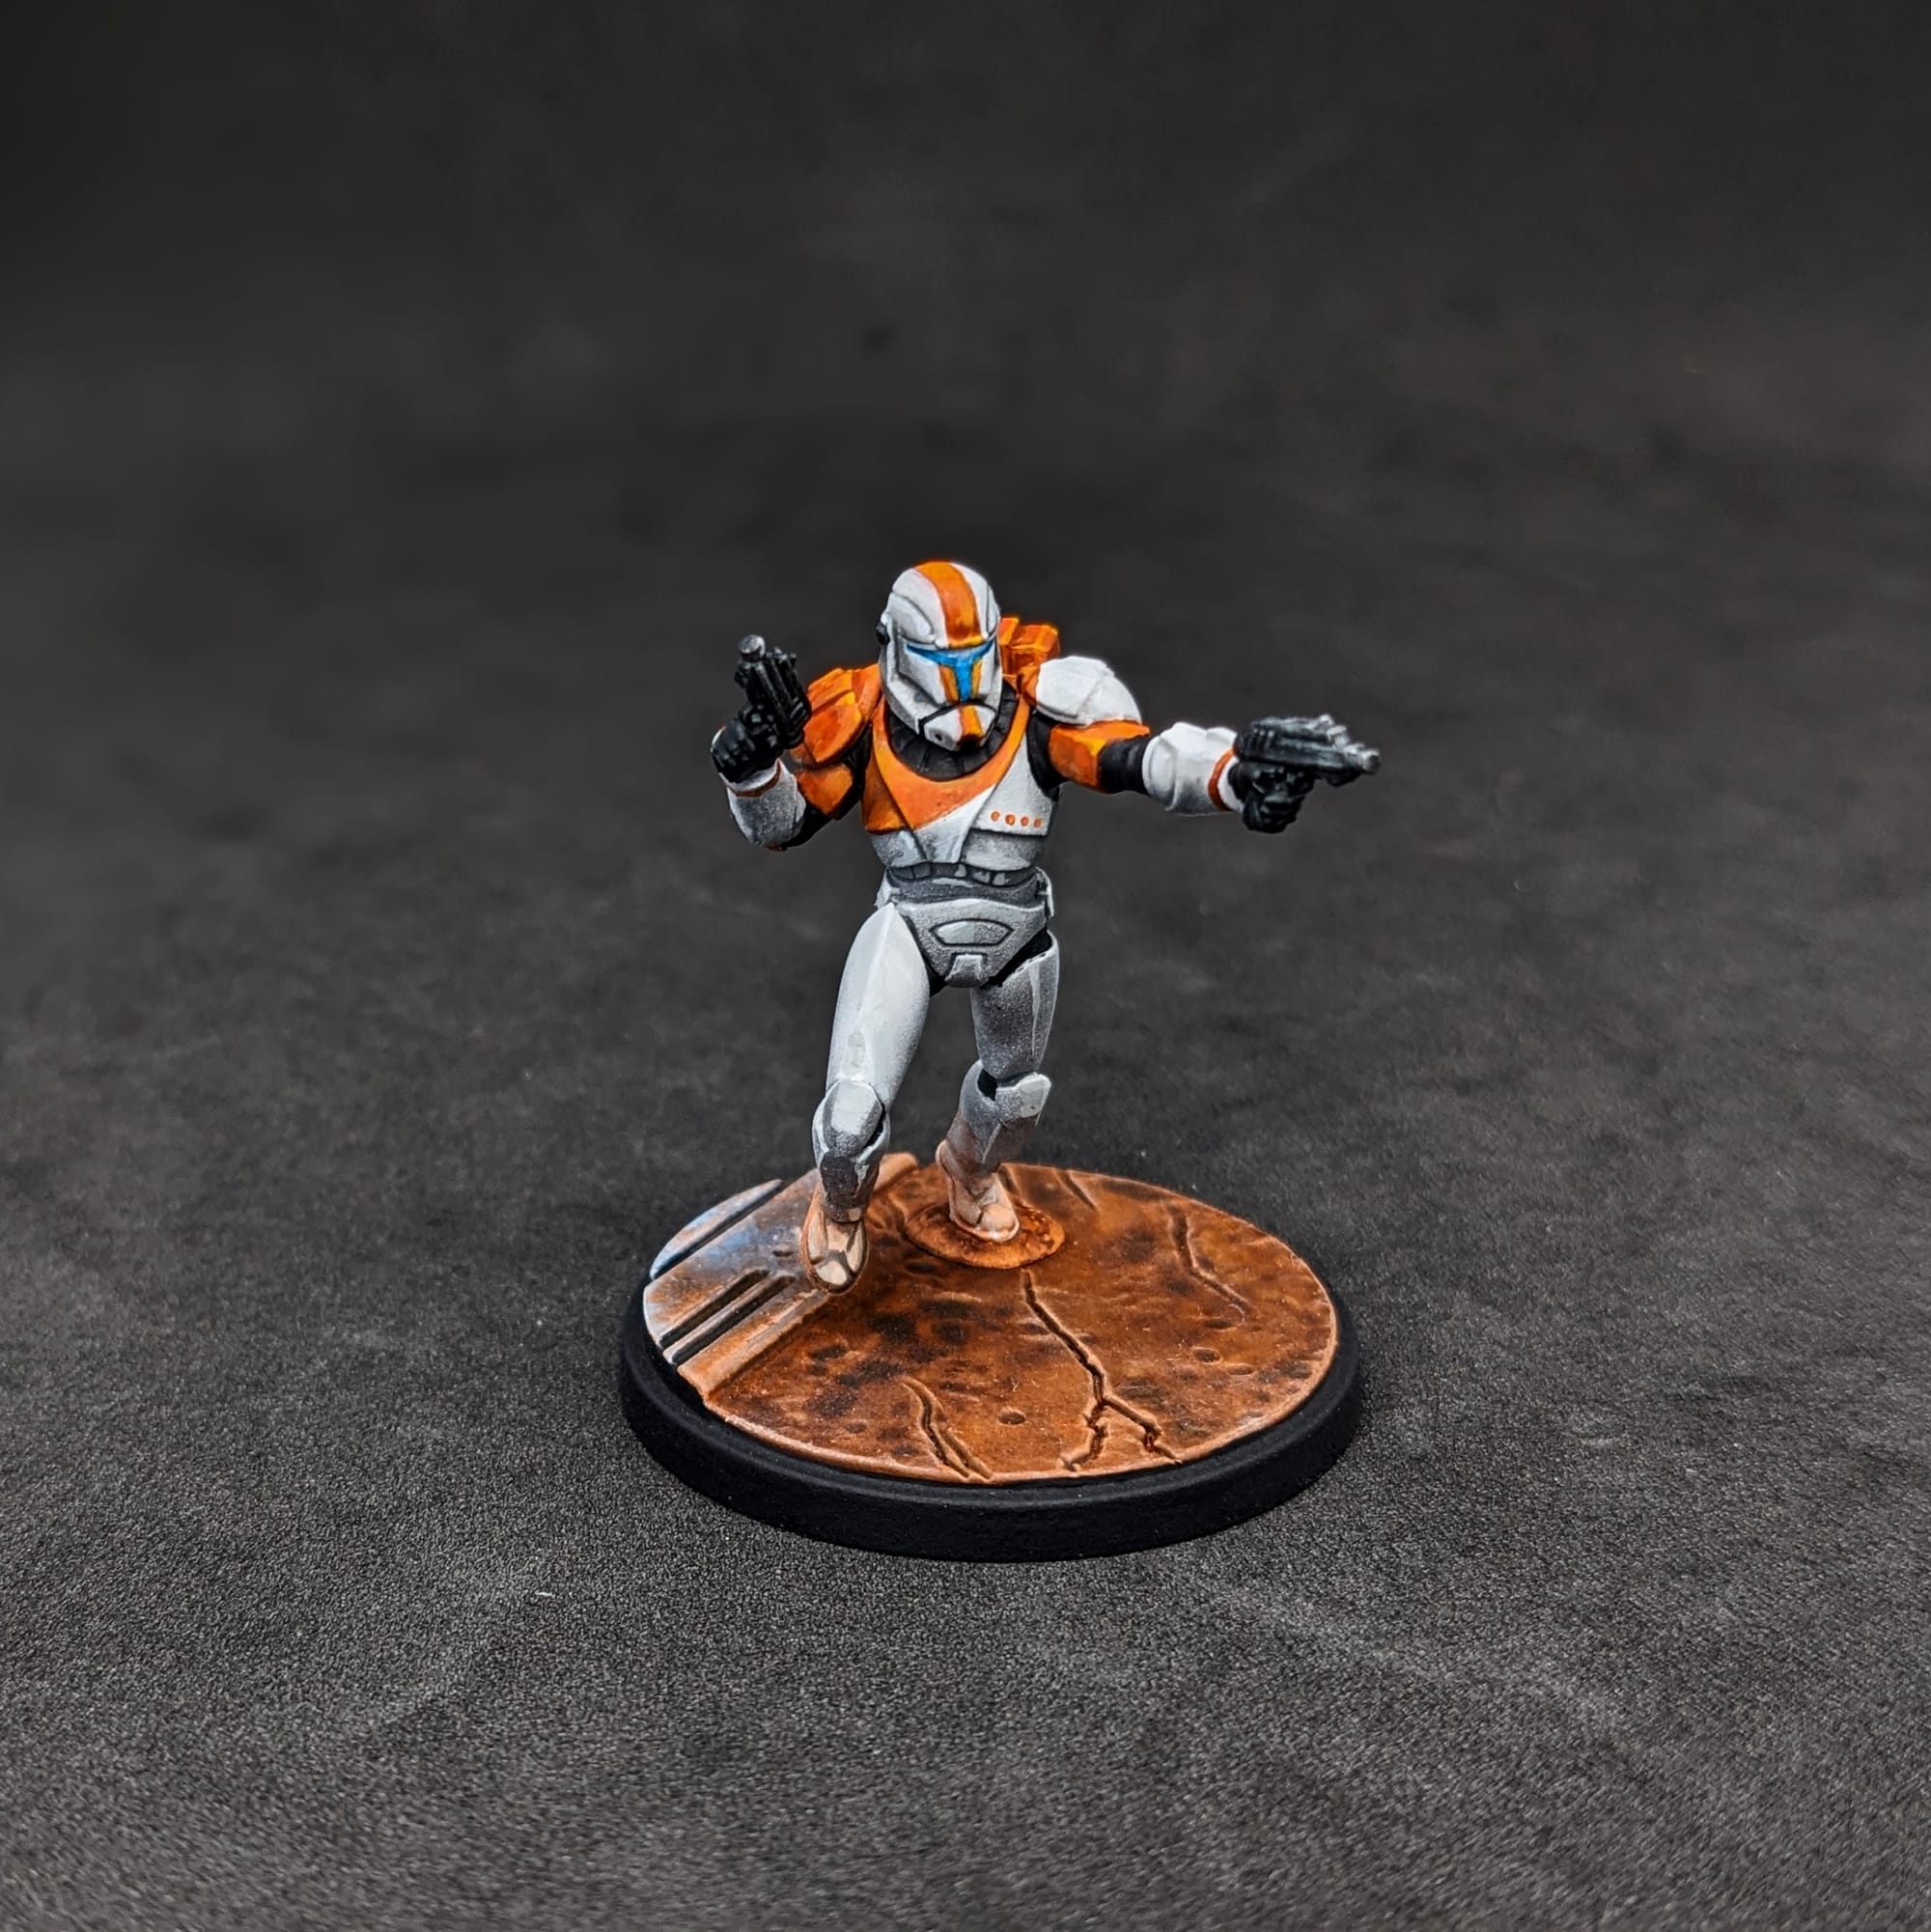
Delta Squad members have a very specific color scheme to their armor, replete with markings and details to help bring a sense of individuality to each member. The Atomic Mass Games website has 360-degree turnaround images that are helpful to get proper angles of all of the details, specifically where color markings are located. I highly recommend having a webpage open with that link so you have an easily-accessible guide to follow.
Remember that done is better than perfect!
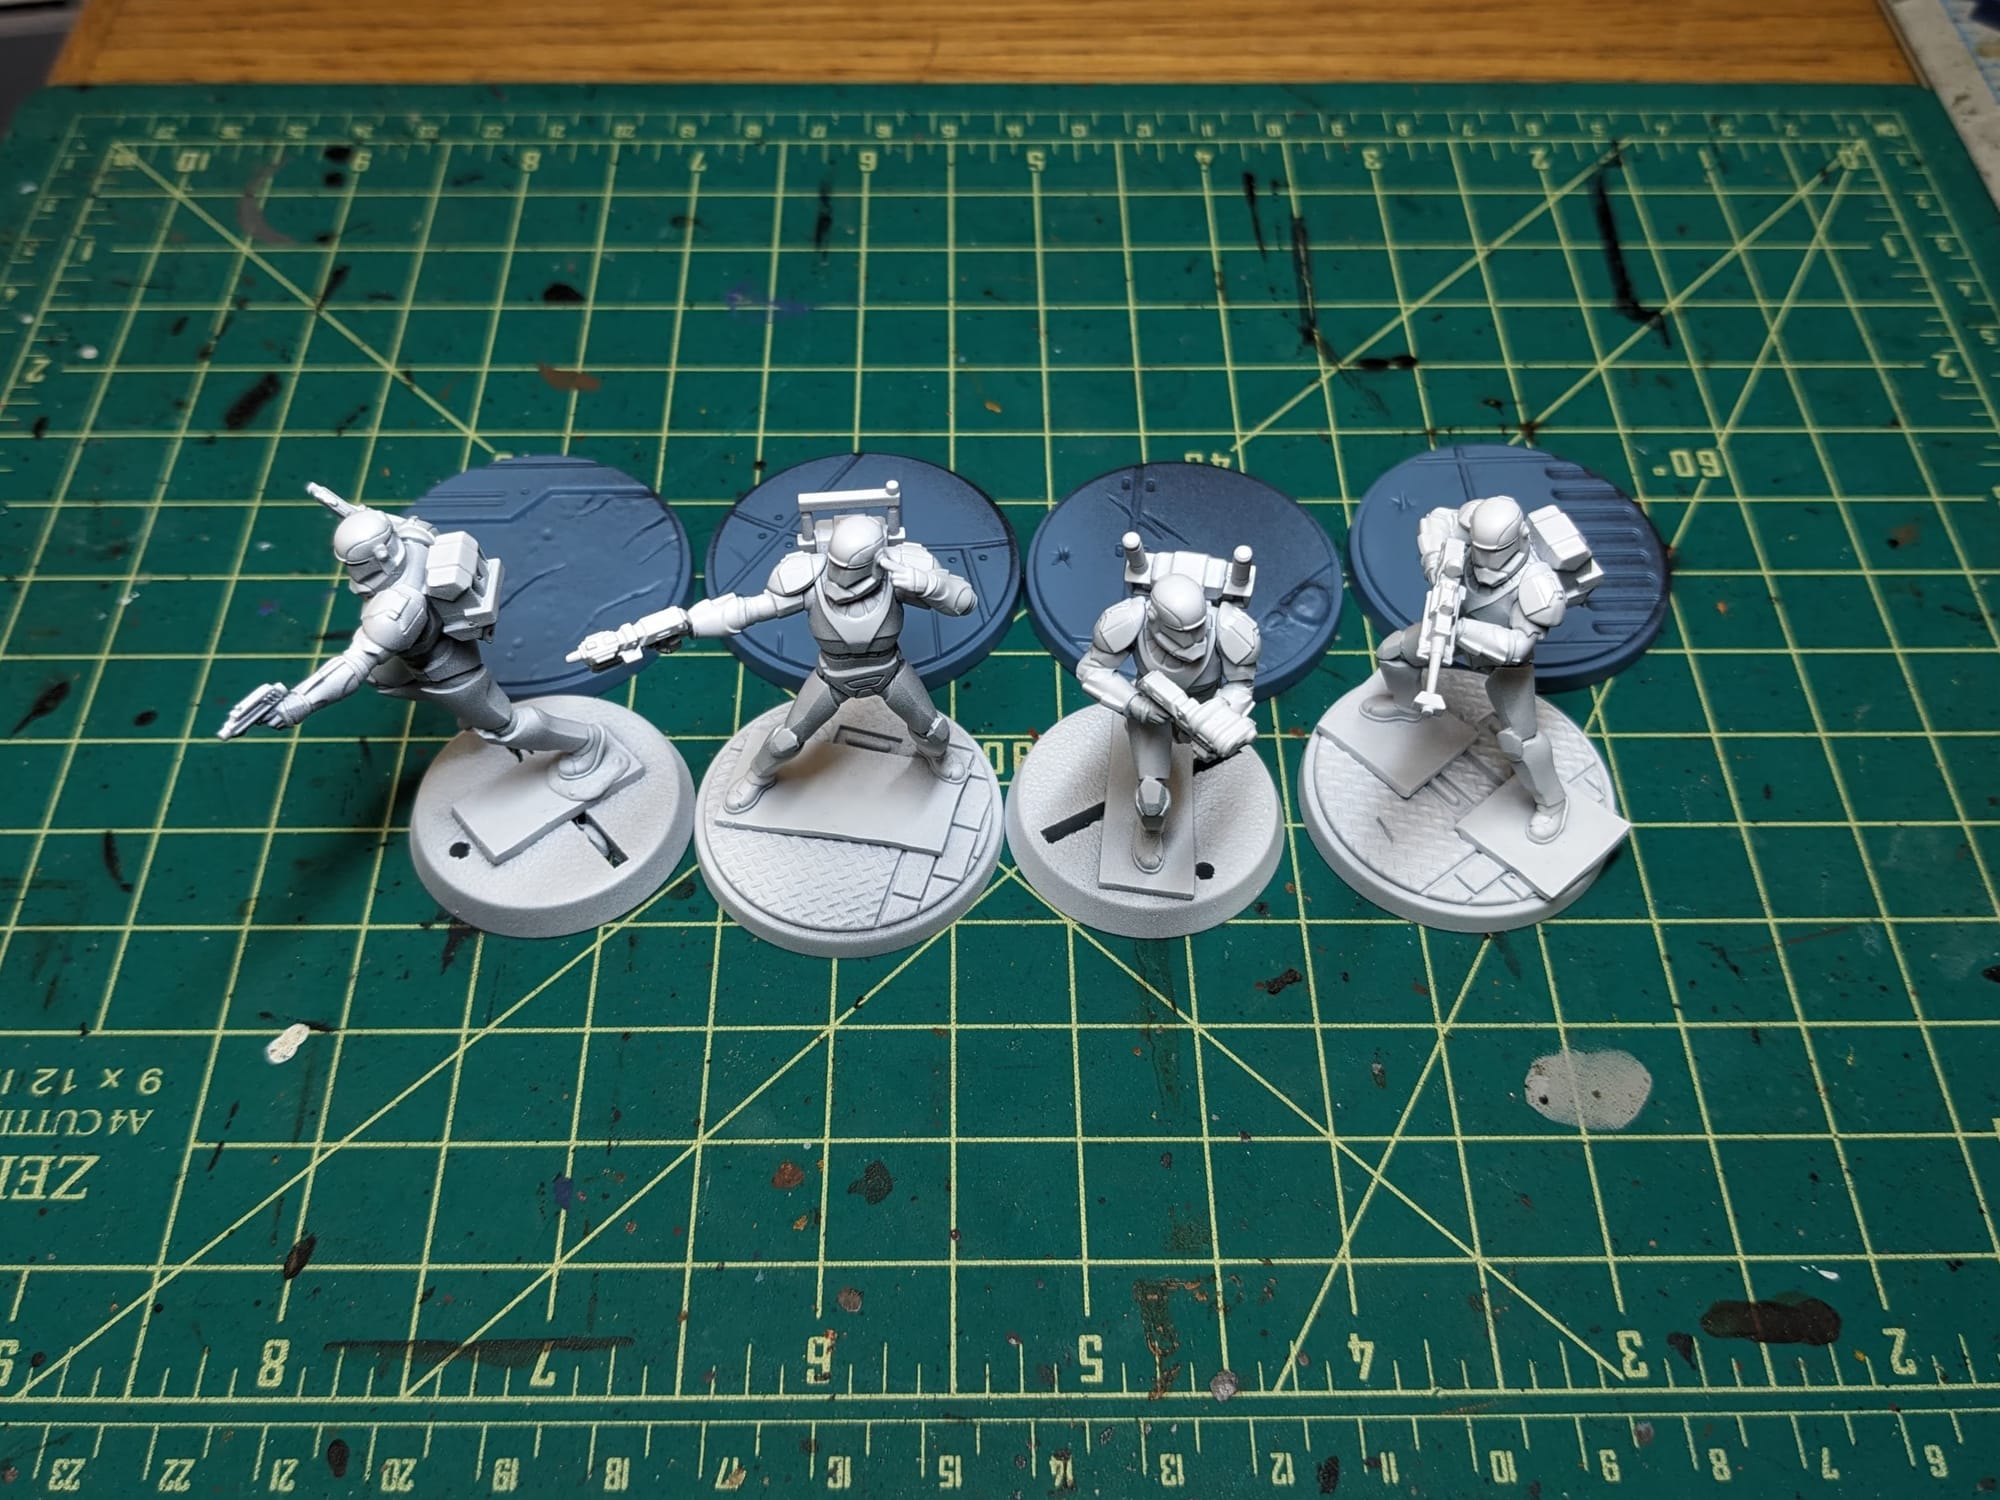
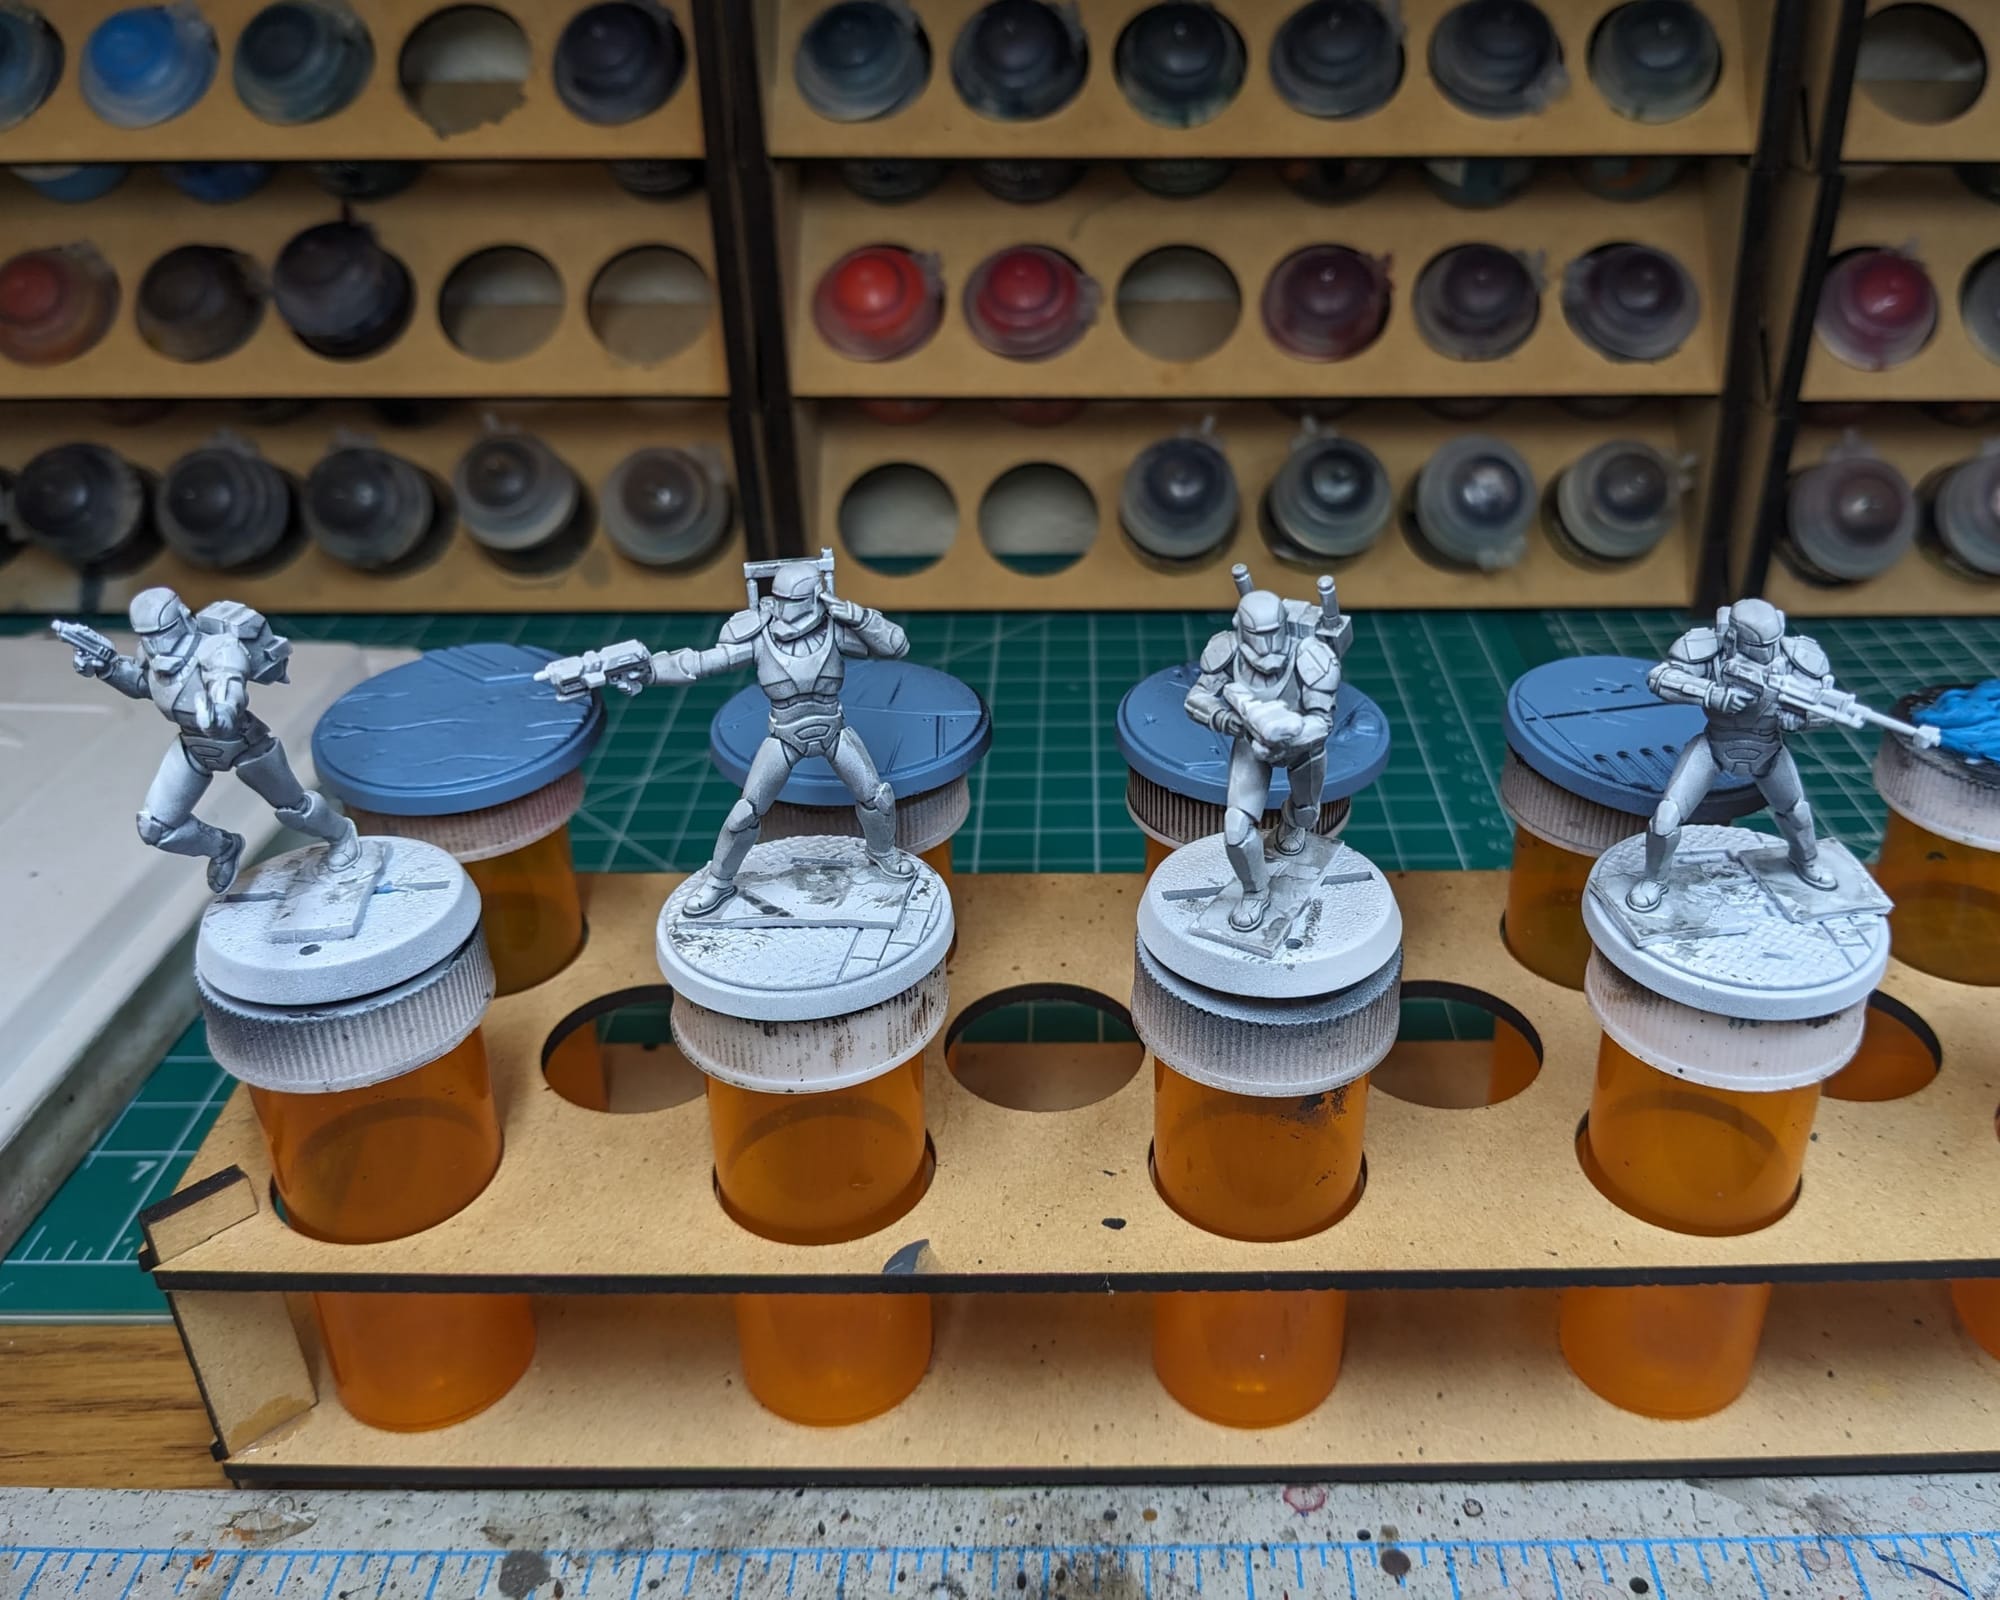
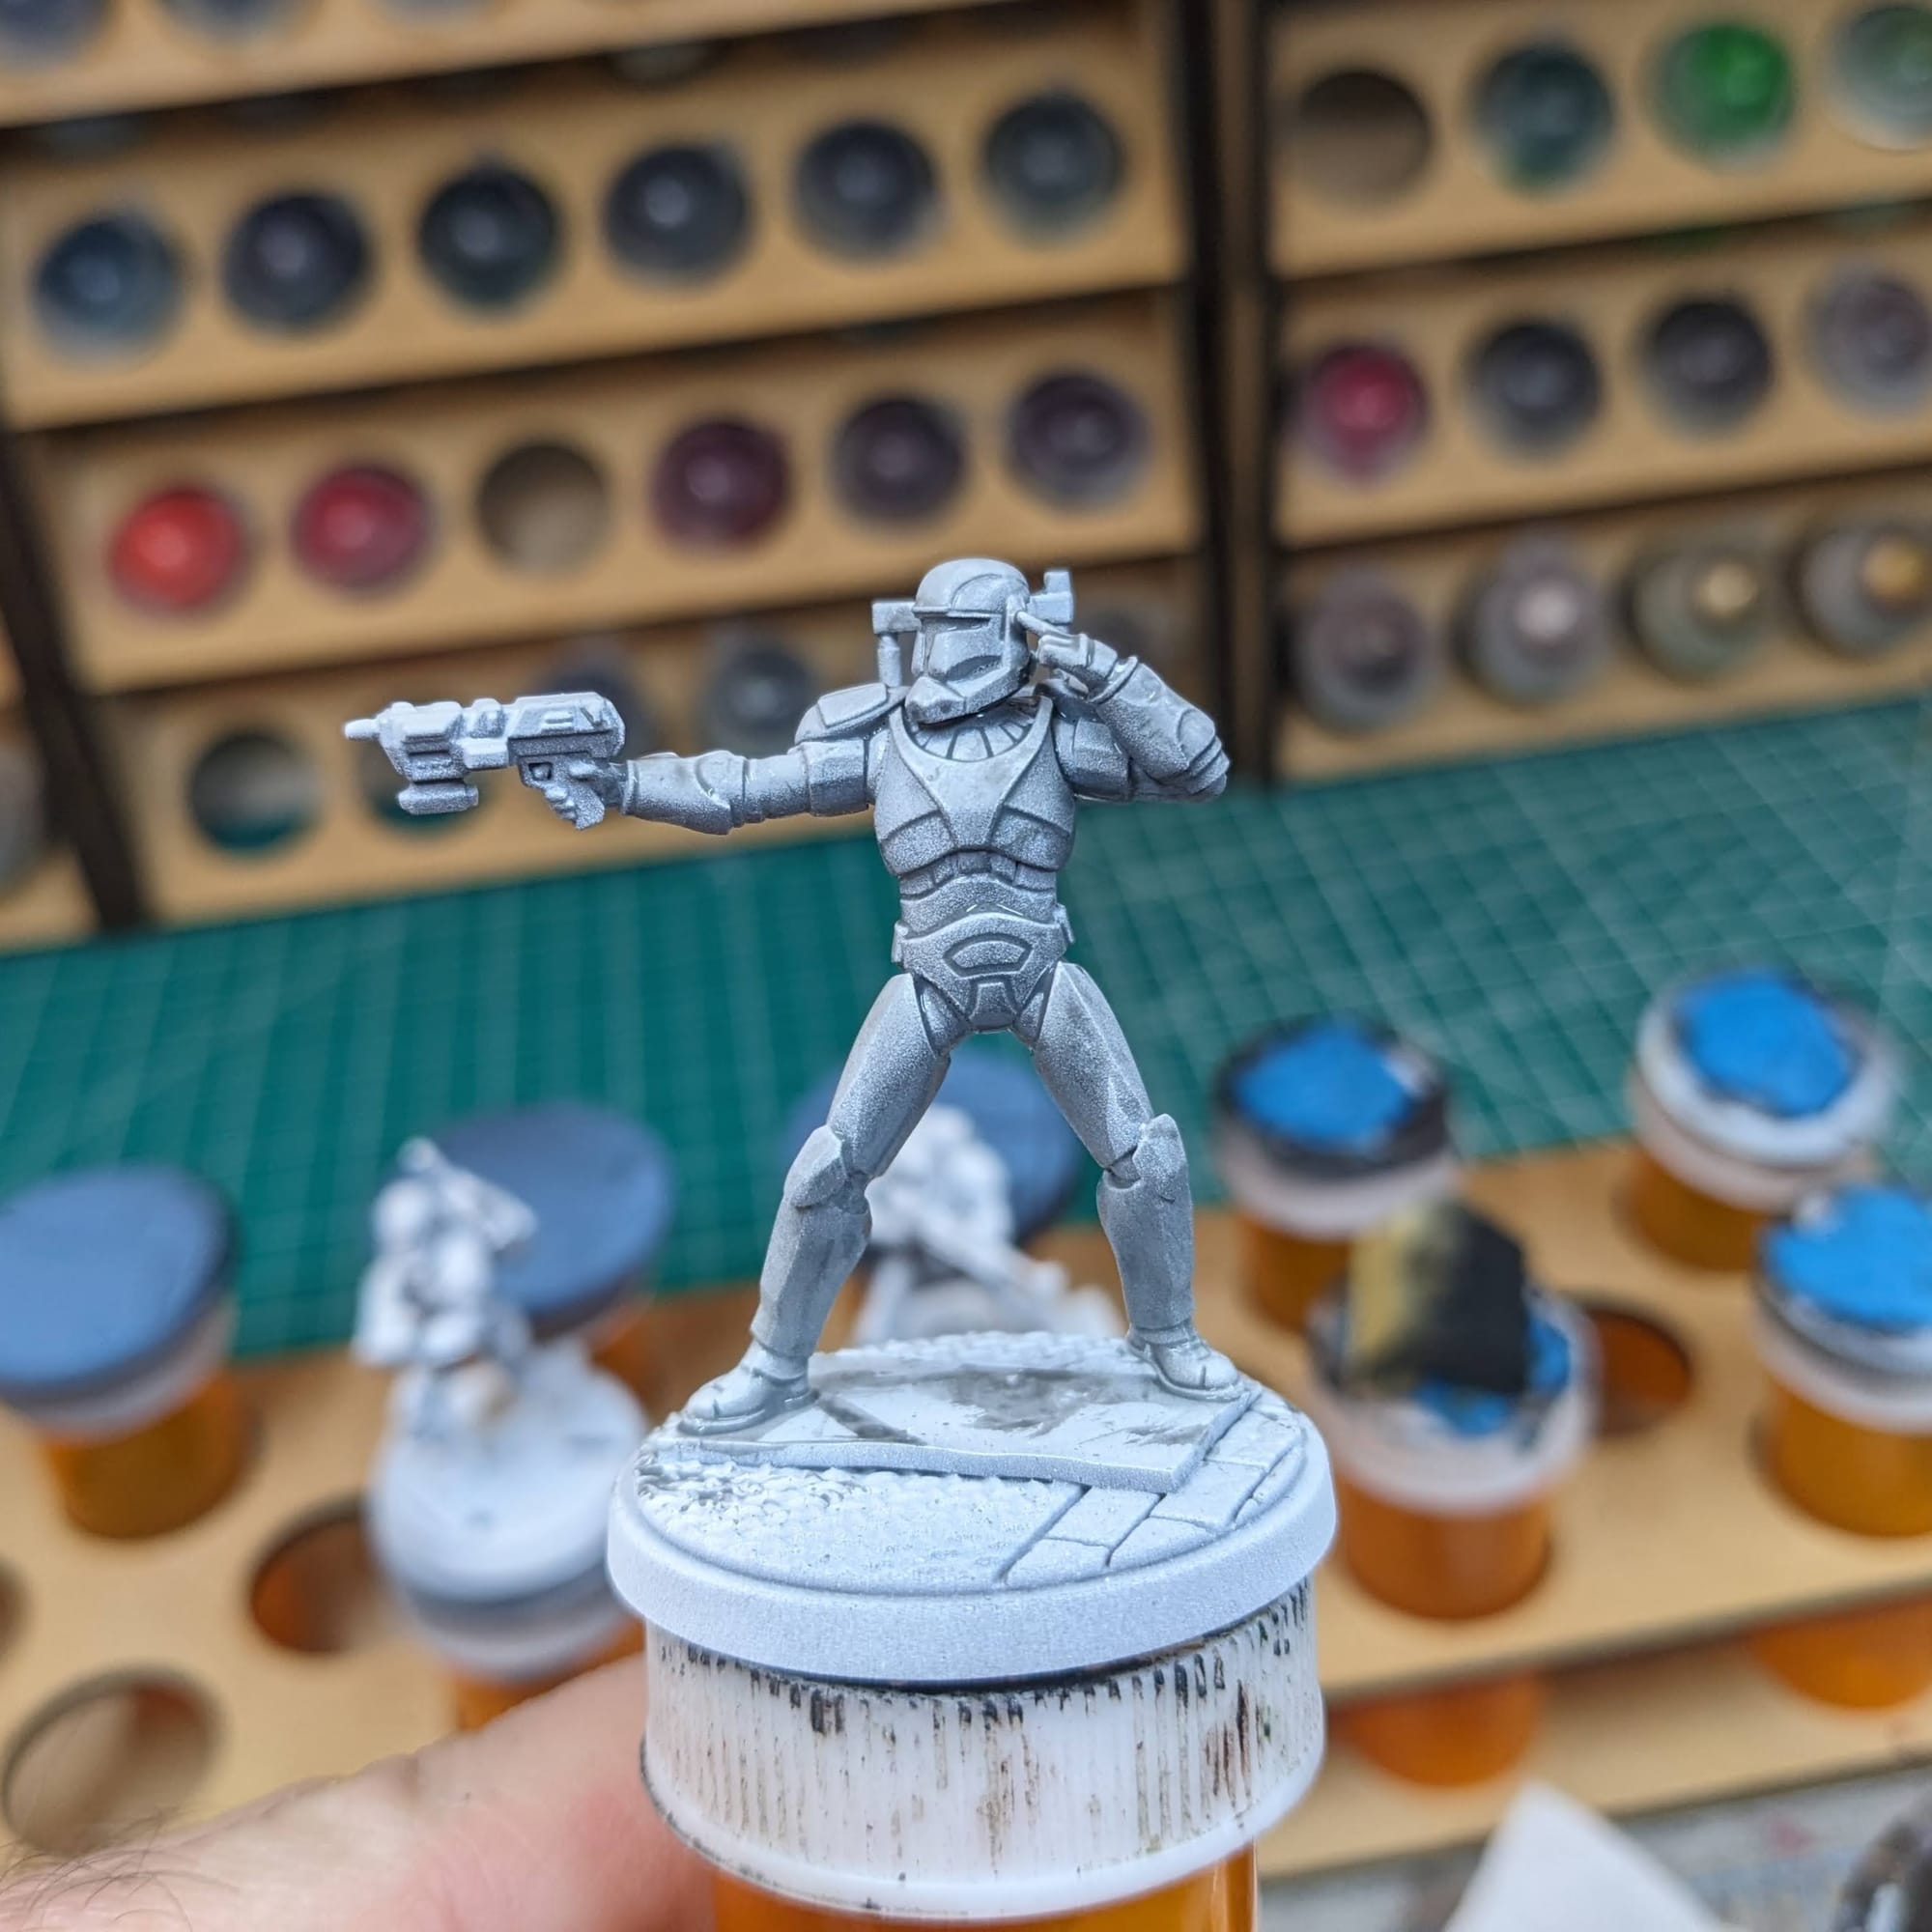
Priming the Models
In general terms, getting the majority of a color for a model applied via a rattle can or airbrush saves a lot of time. For these figures, I started with a base coat of Rustoleum Flat Gray and applied a zenithal top coat of Army Painter Matte White. The gray/white combo helps with the Clone Contrast Mix I use for this kind of armor.
Step-by-Step Painting
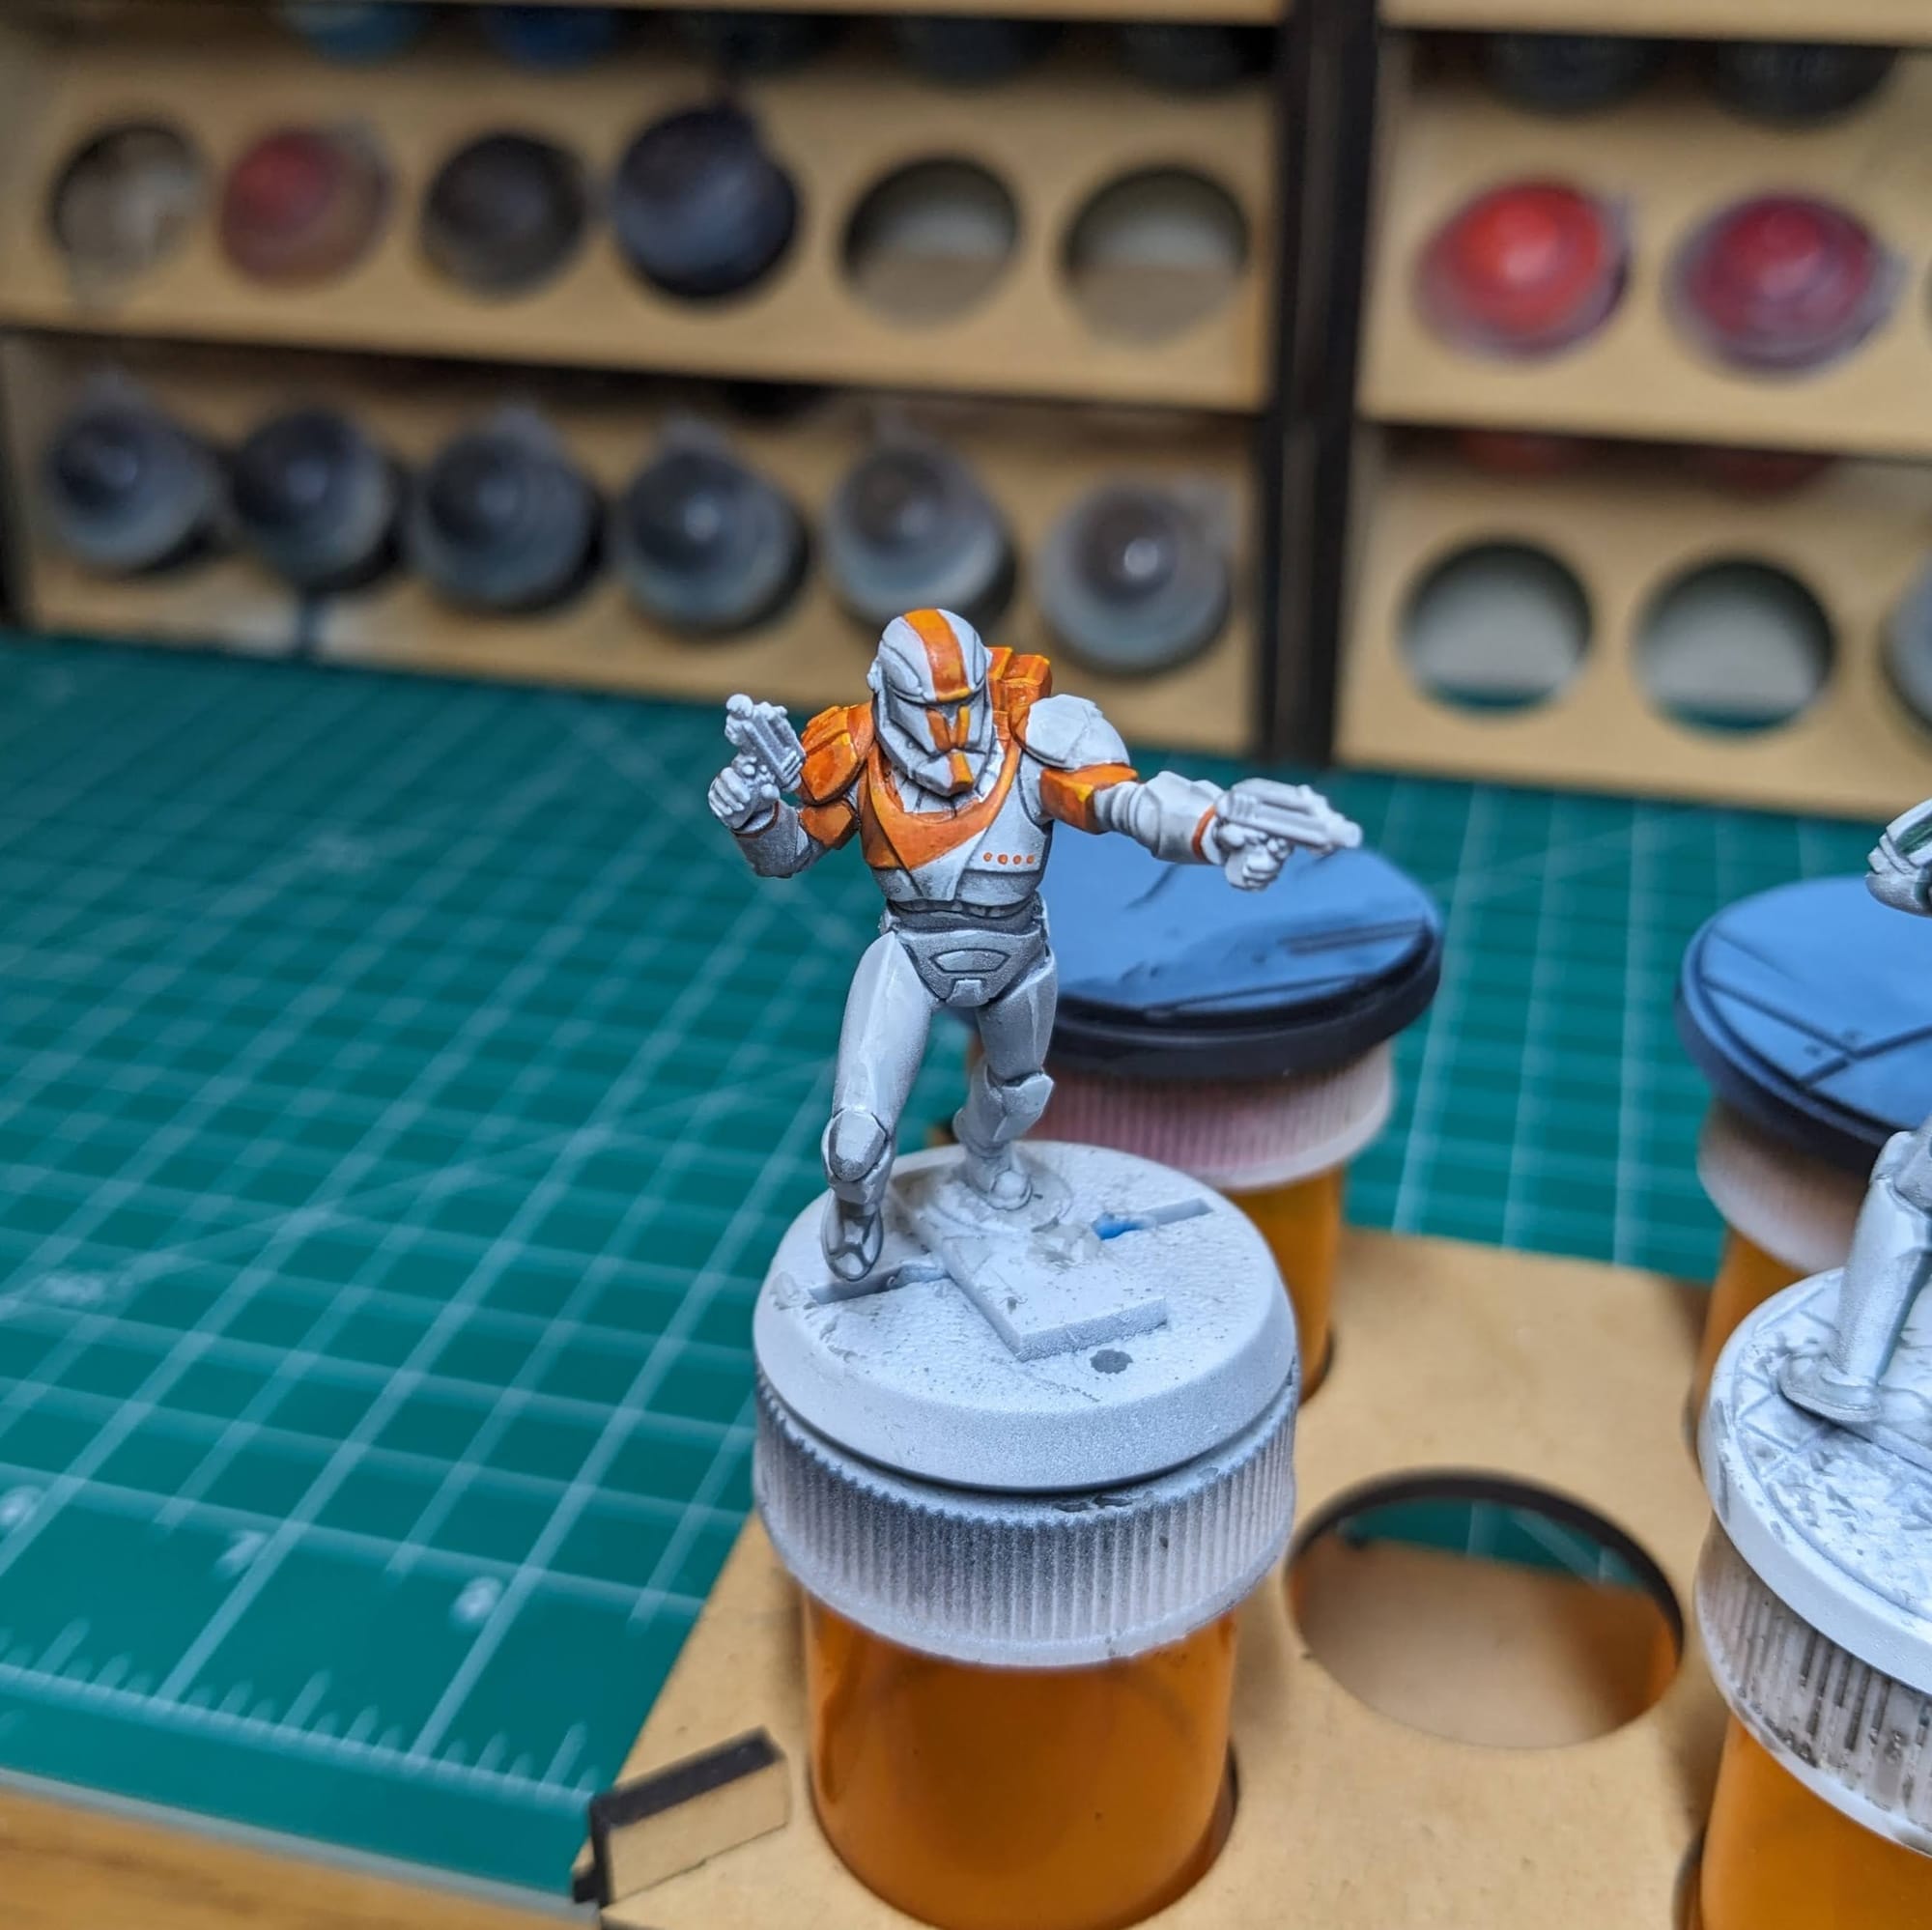
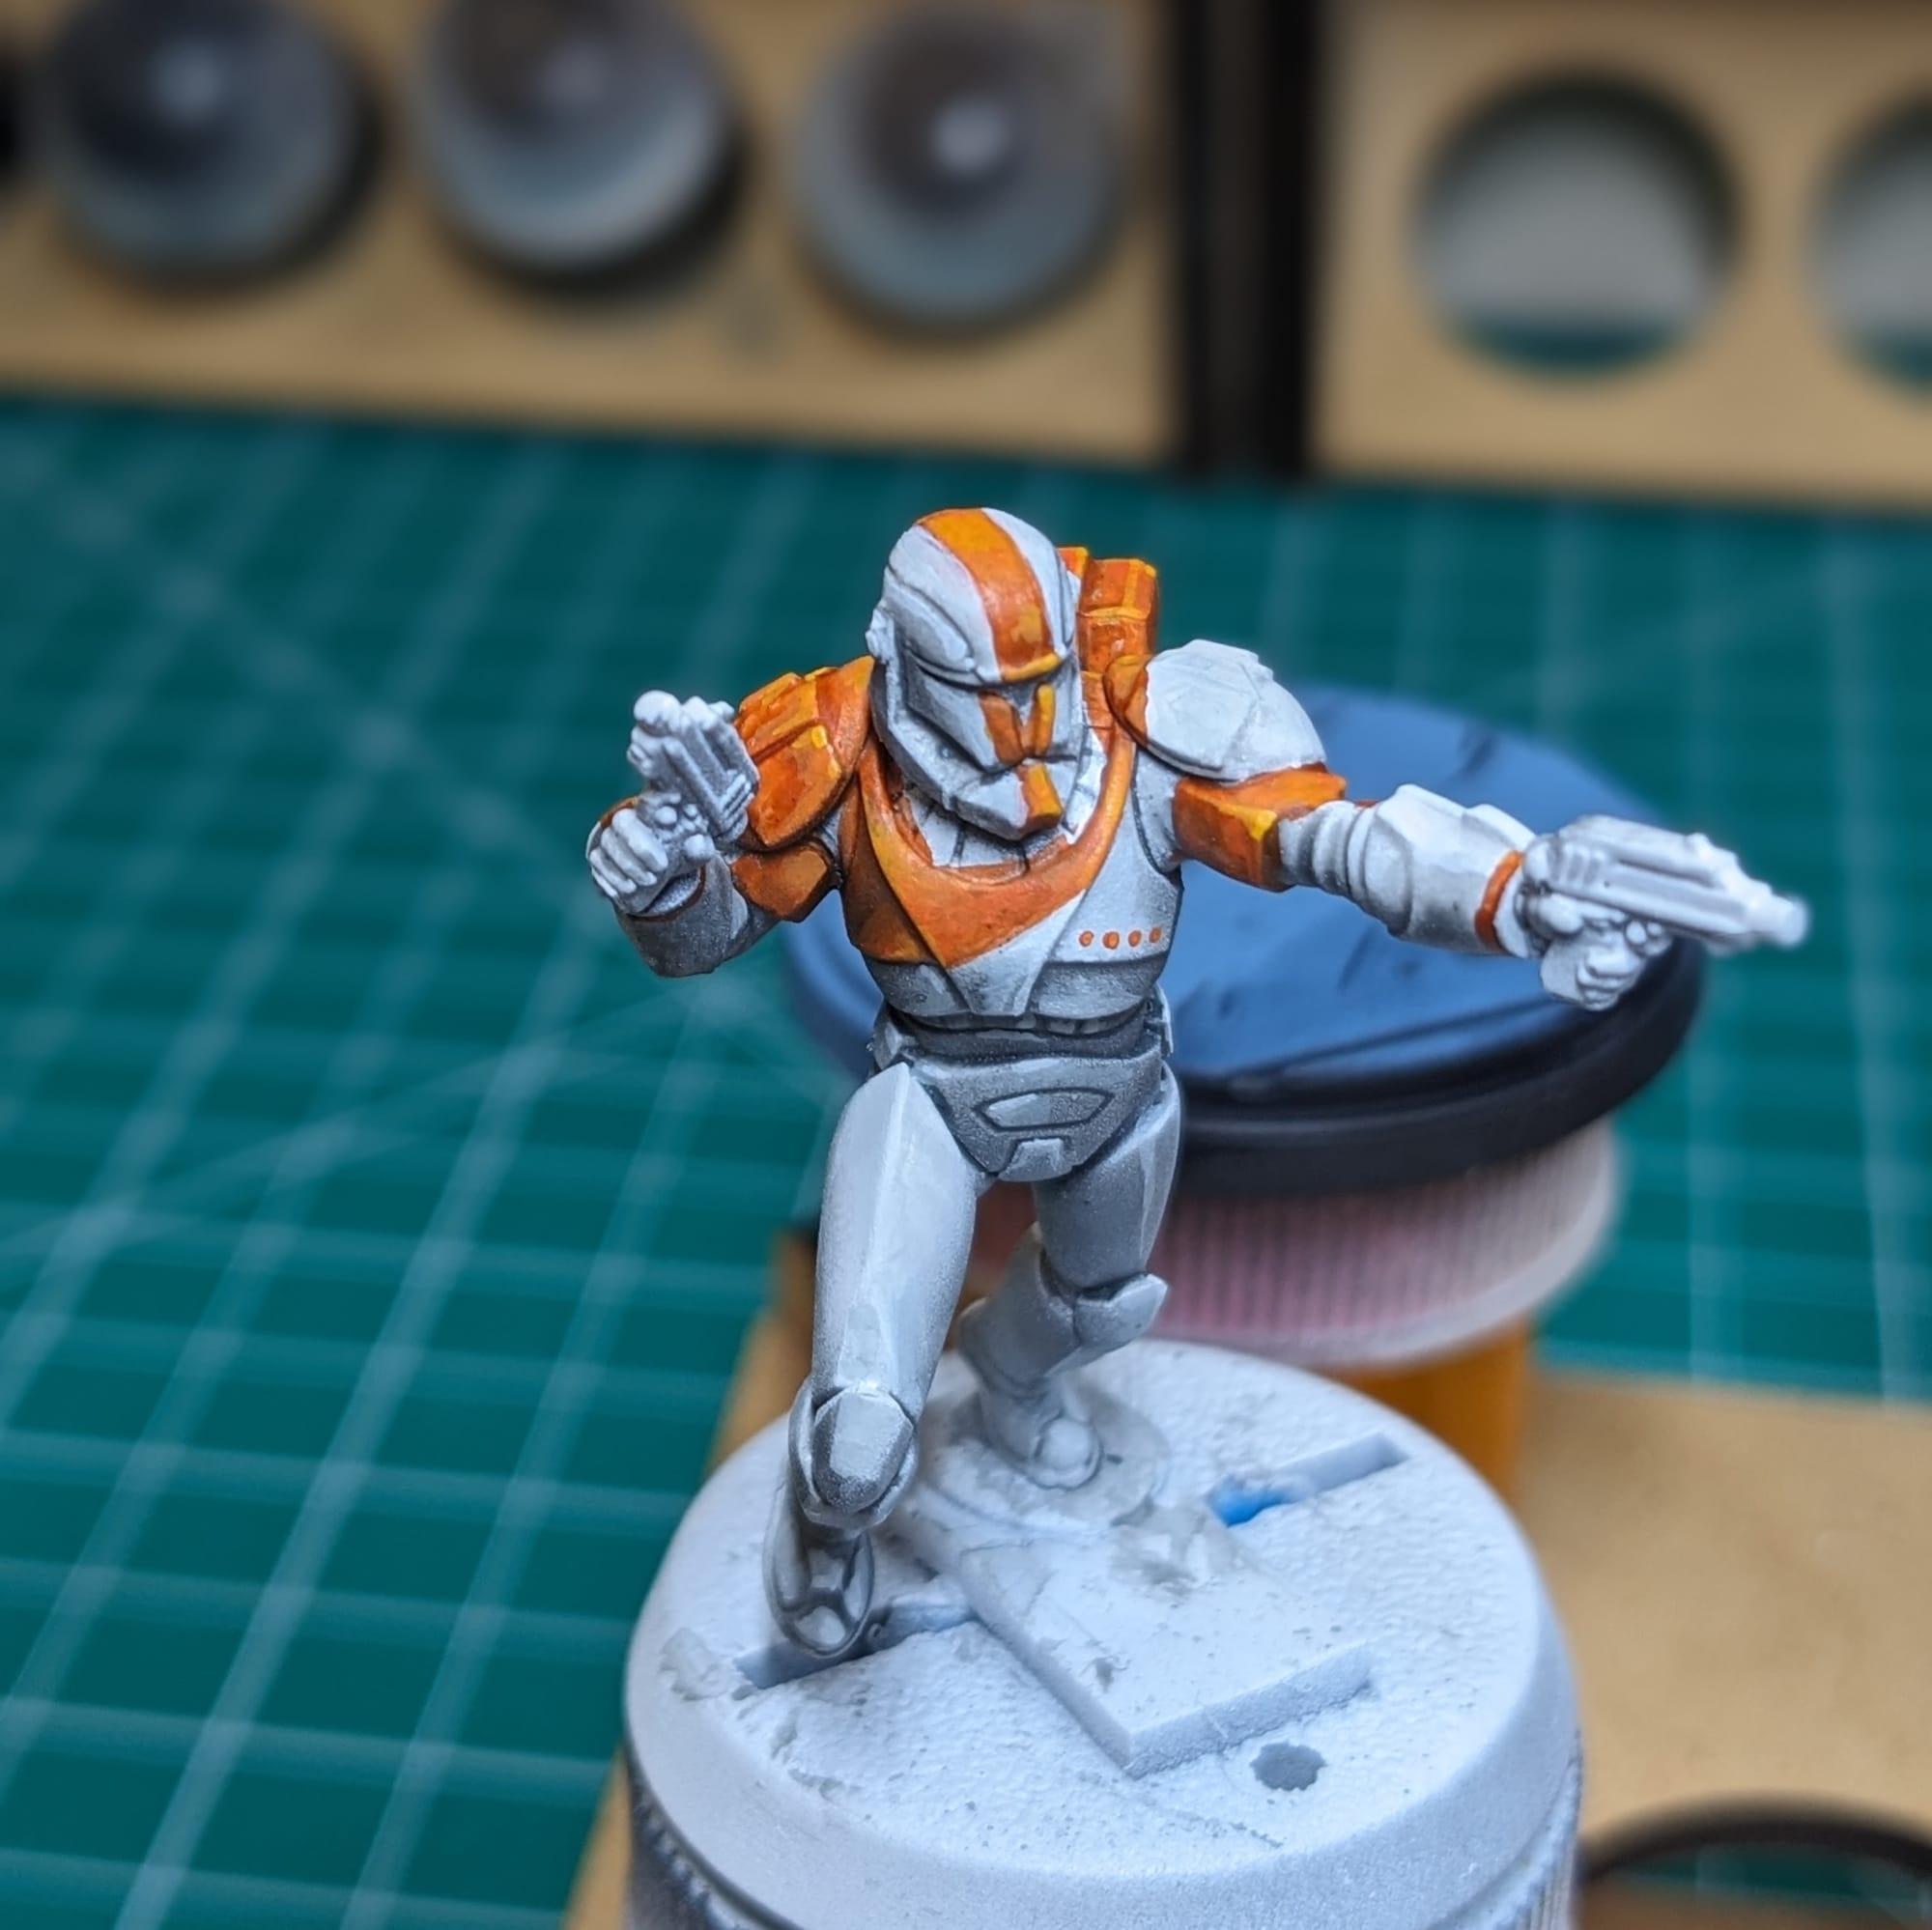
Painting Clone Trooper & Stormtrooper White Armor
Painting white armor is one of the most difficult subjects to paint in miniatures and models!!!
We have a couple of recommendations for painting clones. First, Randy has put together an entire tutorial on how to paint Star Wars: Legion Clone troopers. His step-by-step guide is fantastic for going through the armor process. Regardless of scale or pose, this is a great GamingTrend guide for how to tackle the Clones!
Additionally, Sorastro’s Painting has a wonderful painting guide video (below) for how to paint Clone Troopers, which you should check out now. Both Randy and I has used this guide for all of my Clone Trooper and Stormtroopers for Star Wars: Legion and Star Wars: Shatterpoint. Not only is the guide incredibly easy to follow, but it has great music.
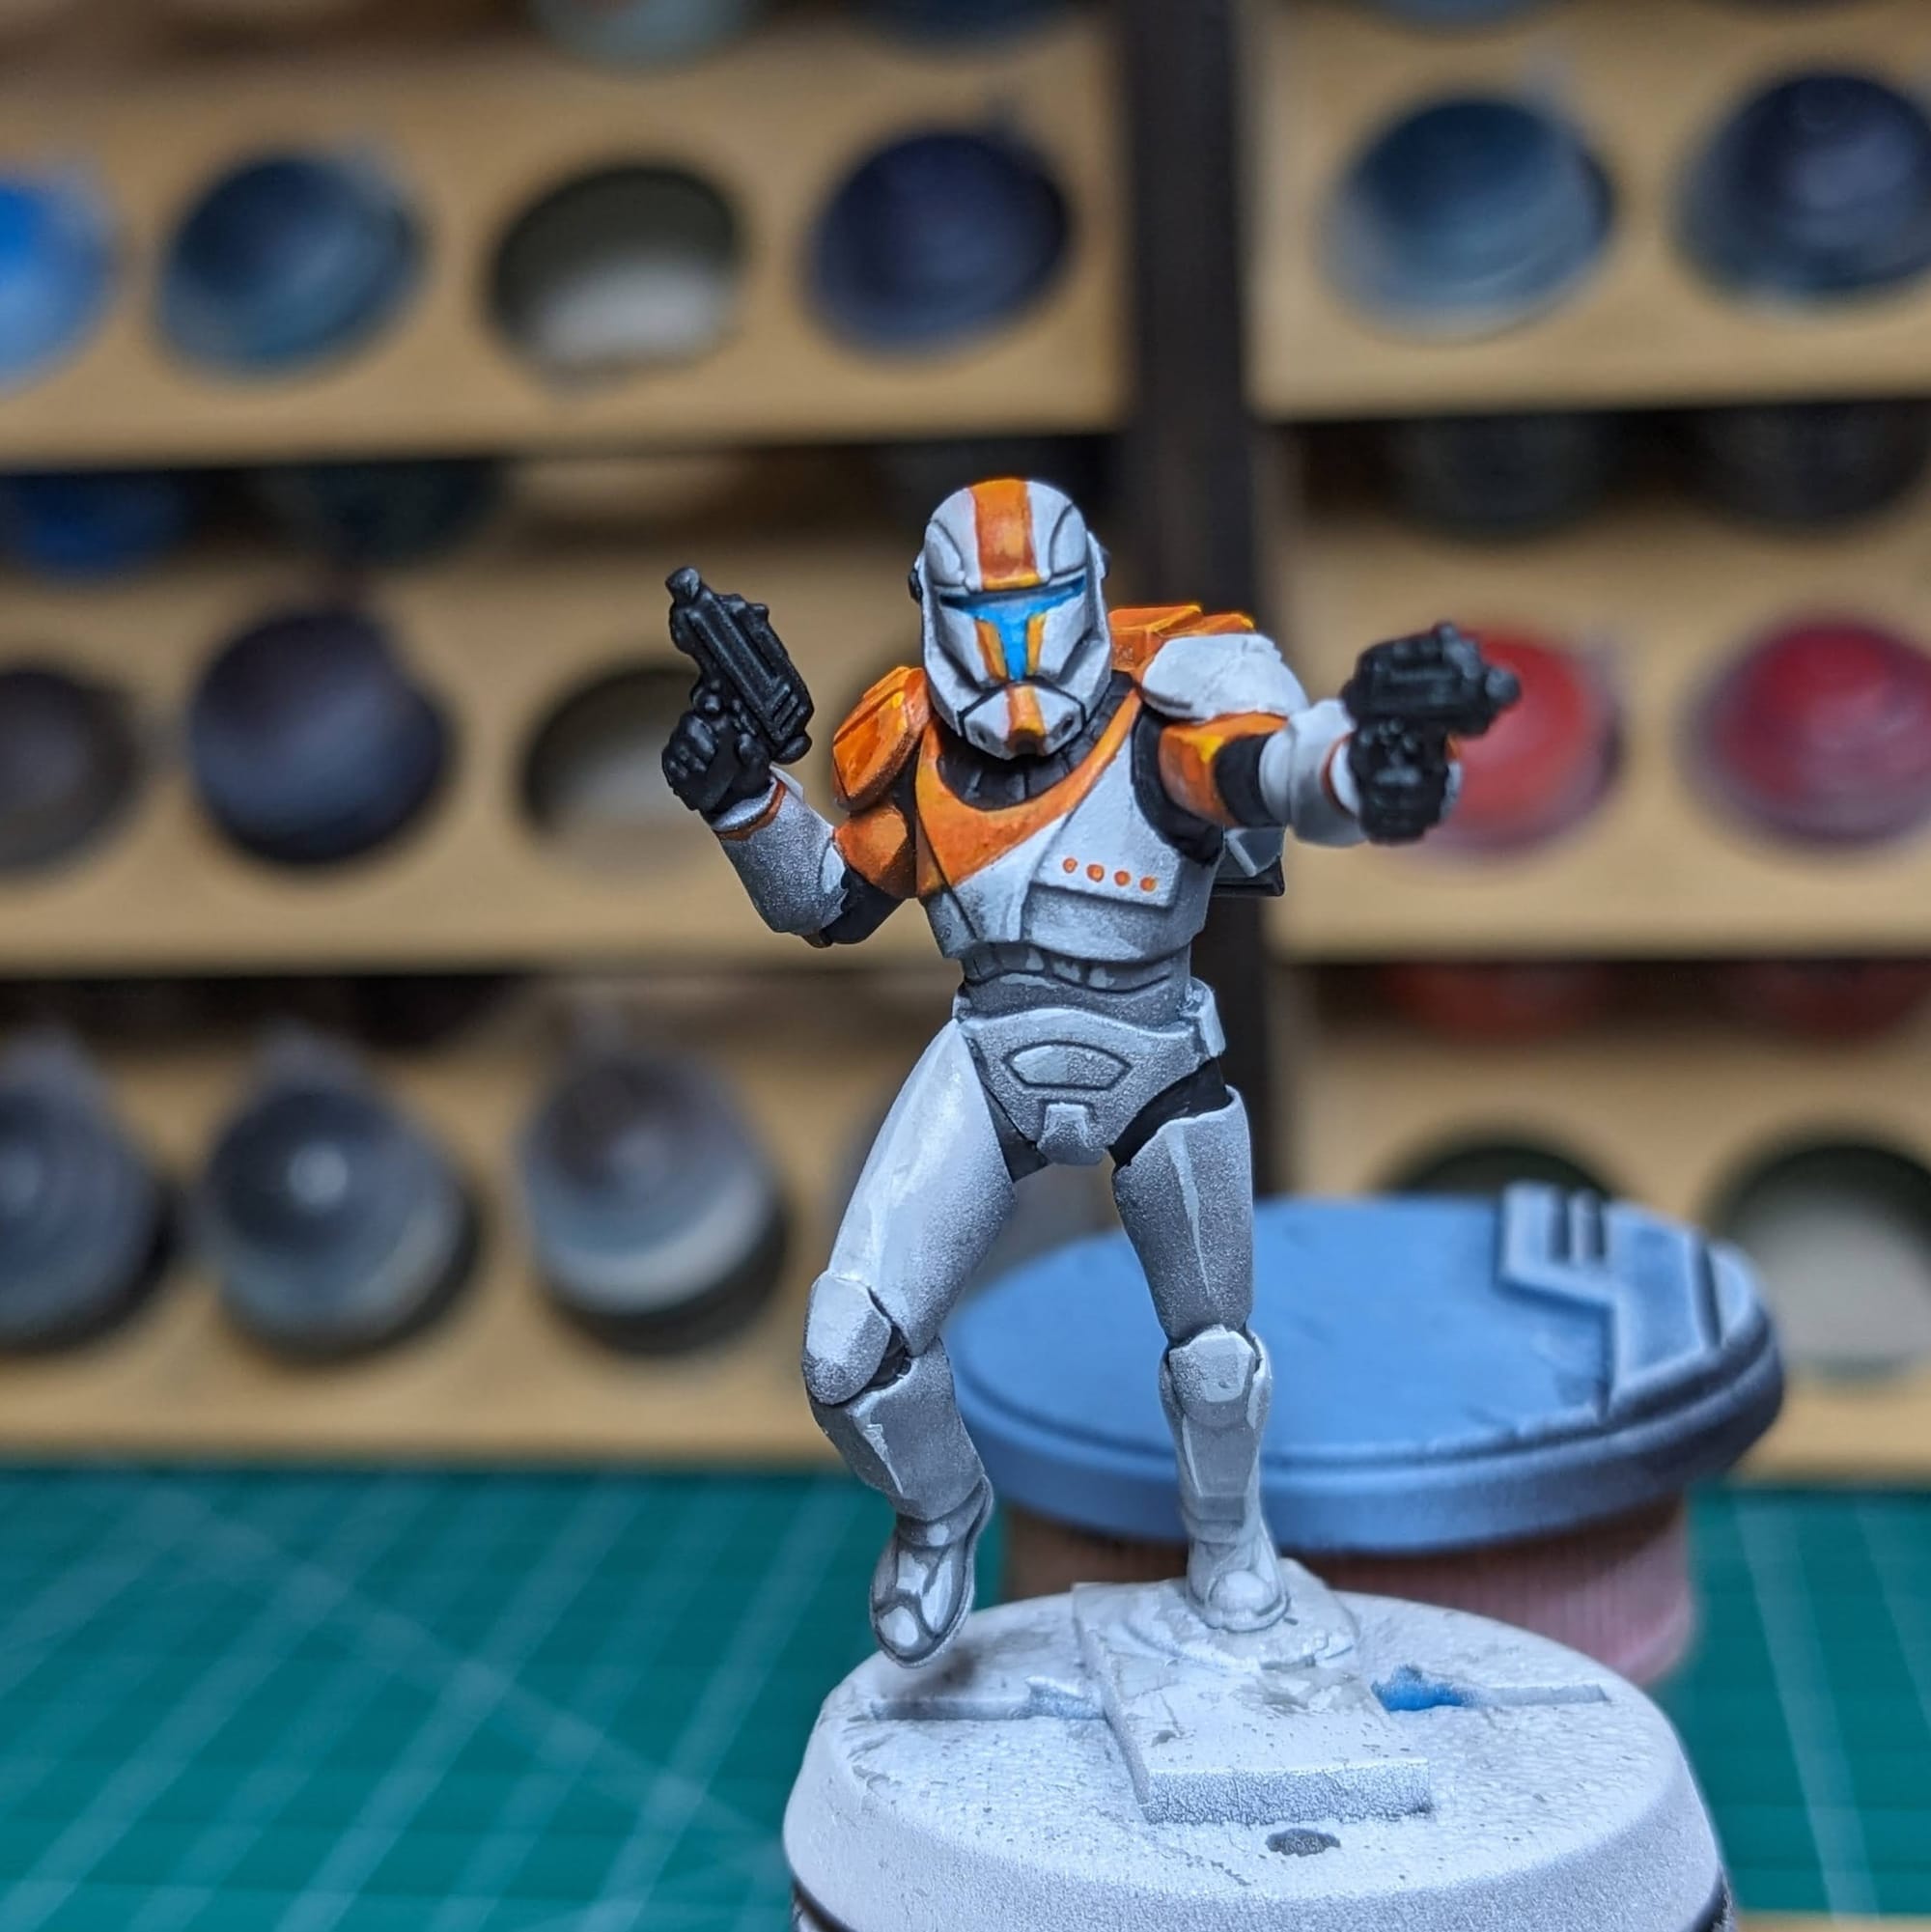
Painting the armor with Sorastro's guide is super helpful .It takes care of like 80% of the armor painting. Any spots that I missed, or maybe let paint pool up on, I fixed with highlighting up to white. Contrary to common sense, white armor is mostly grey and light blue, with the white highlight tricking the eye into believing the whole model is just white.
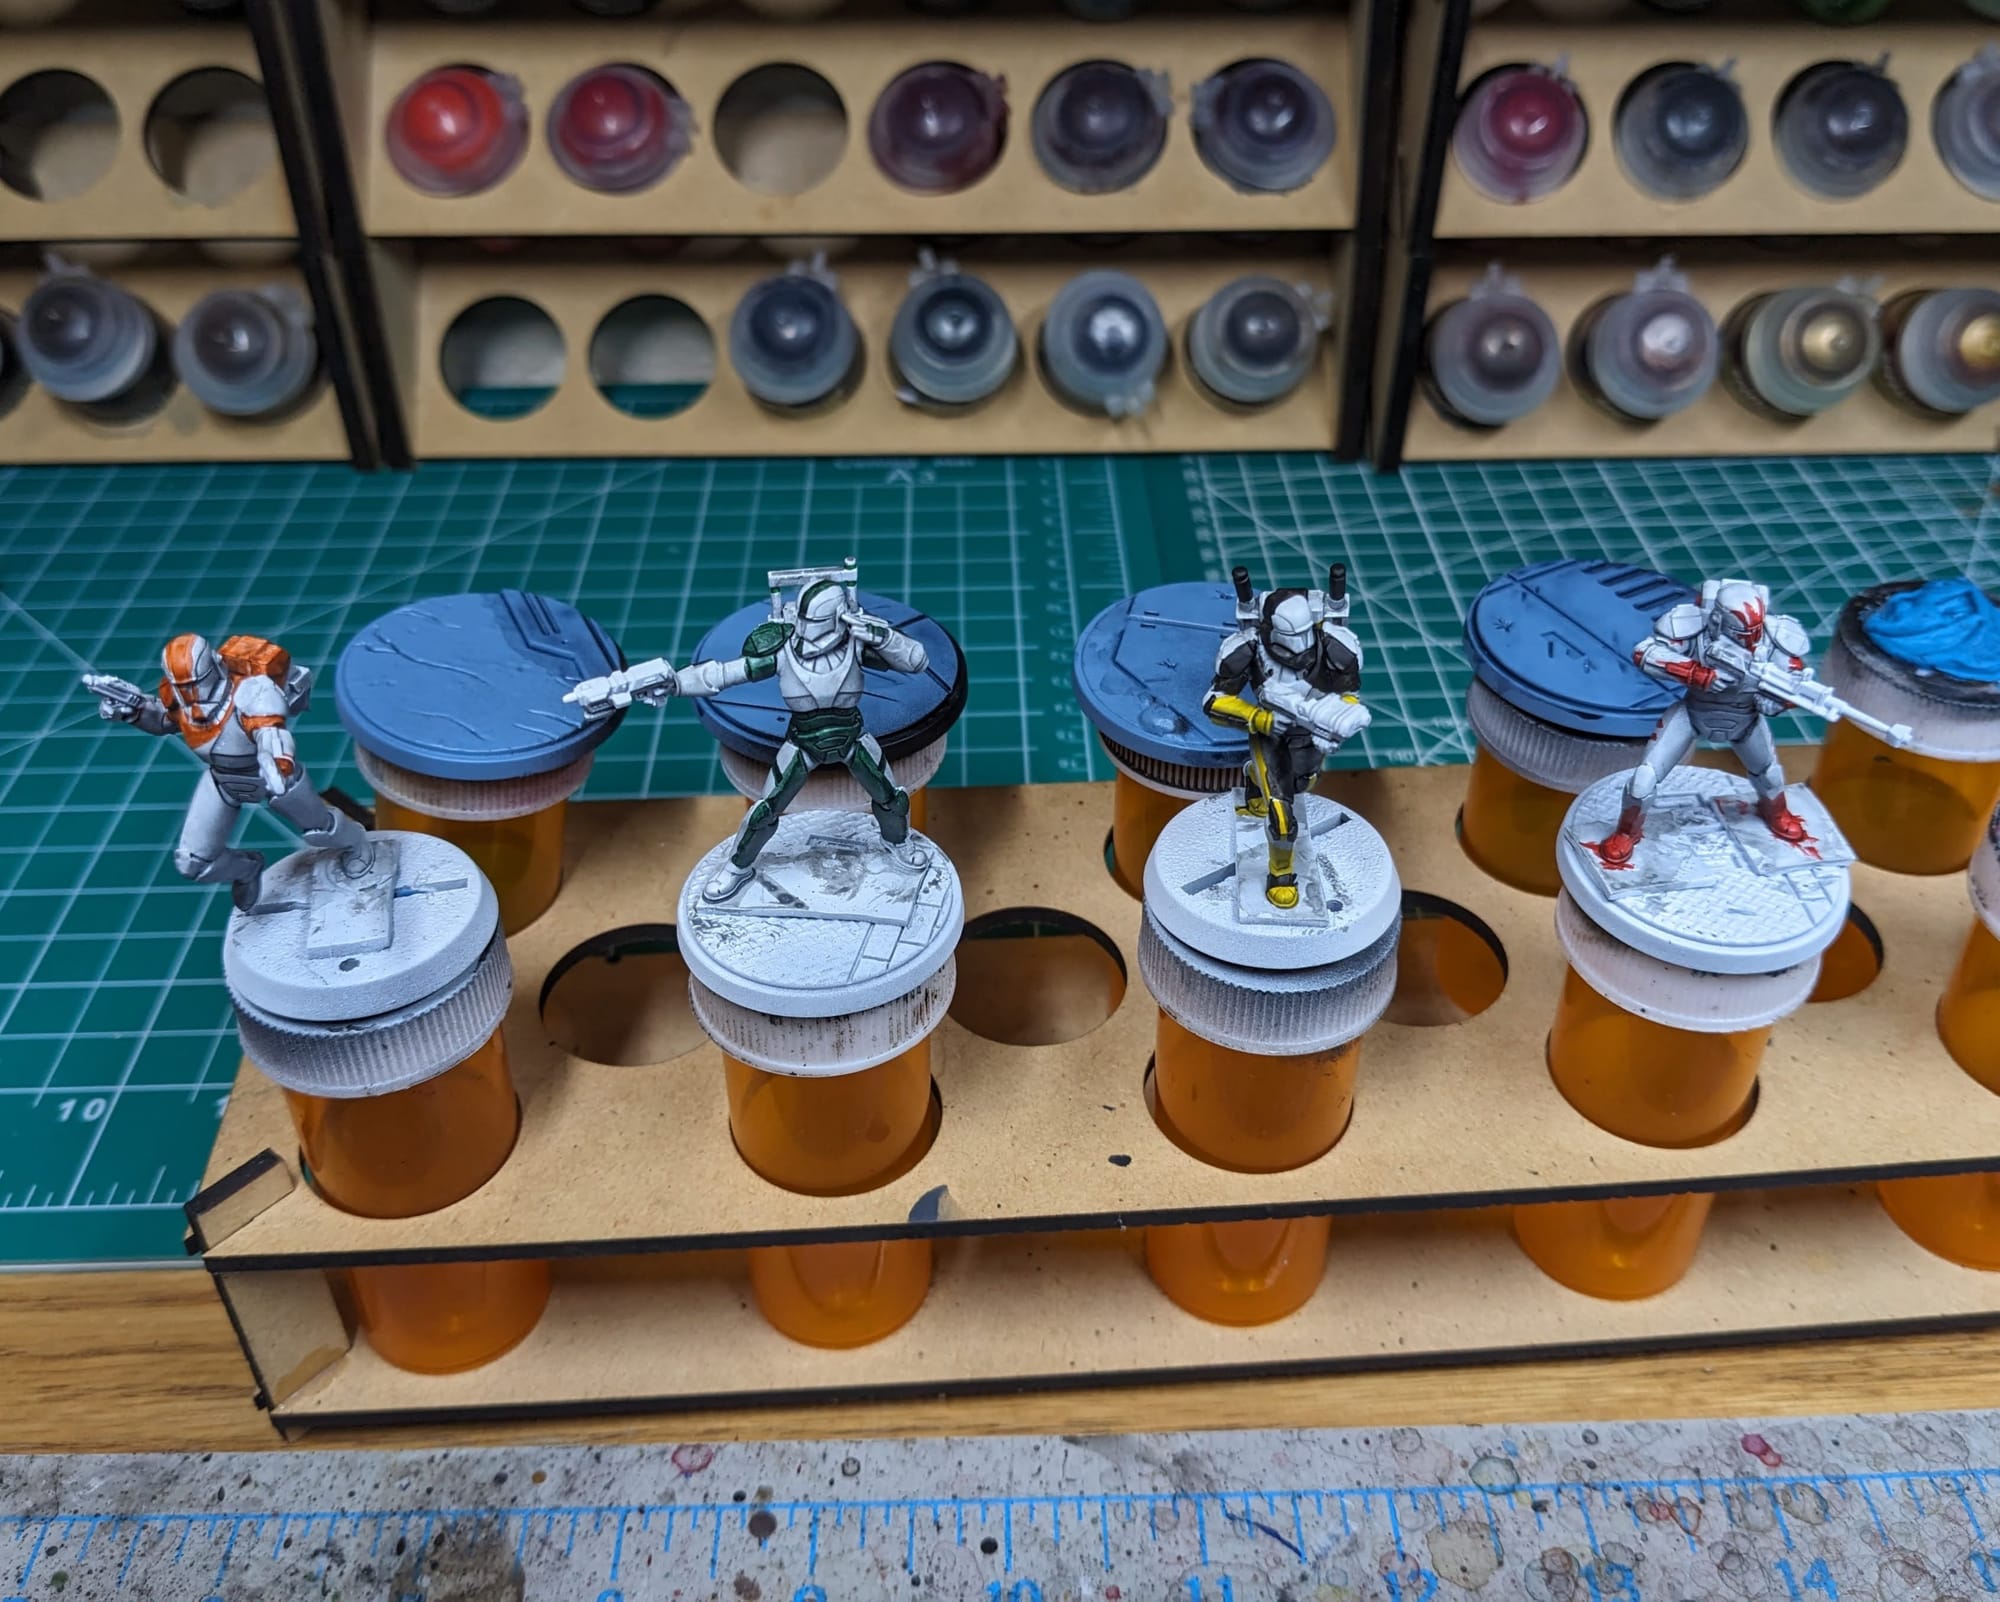
Using the color blocking technique, I outlined all of the areas on the squad members with contrast paints. This allowed me to apply a smooth and even layer of color over the white armor, which I could then highlight on top of.

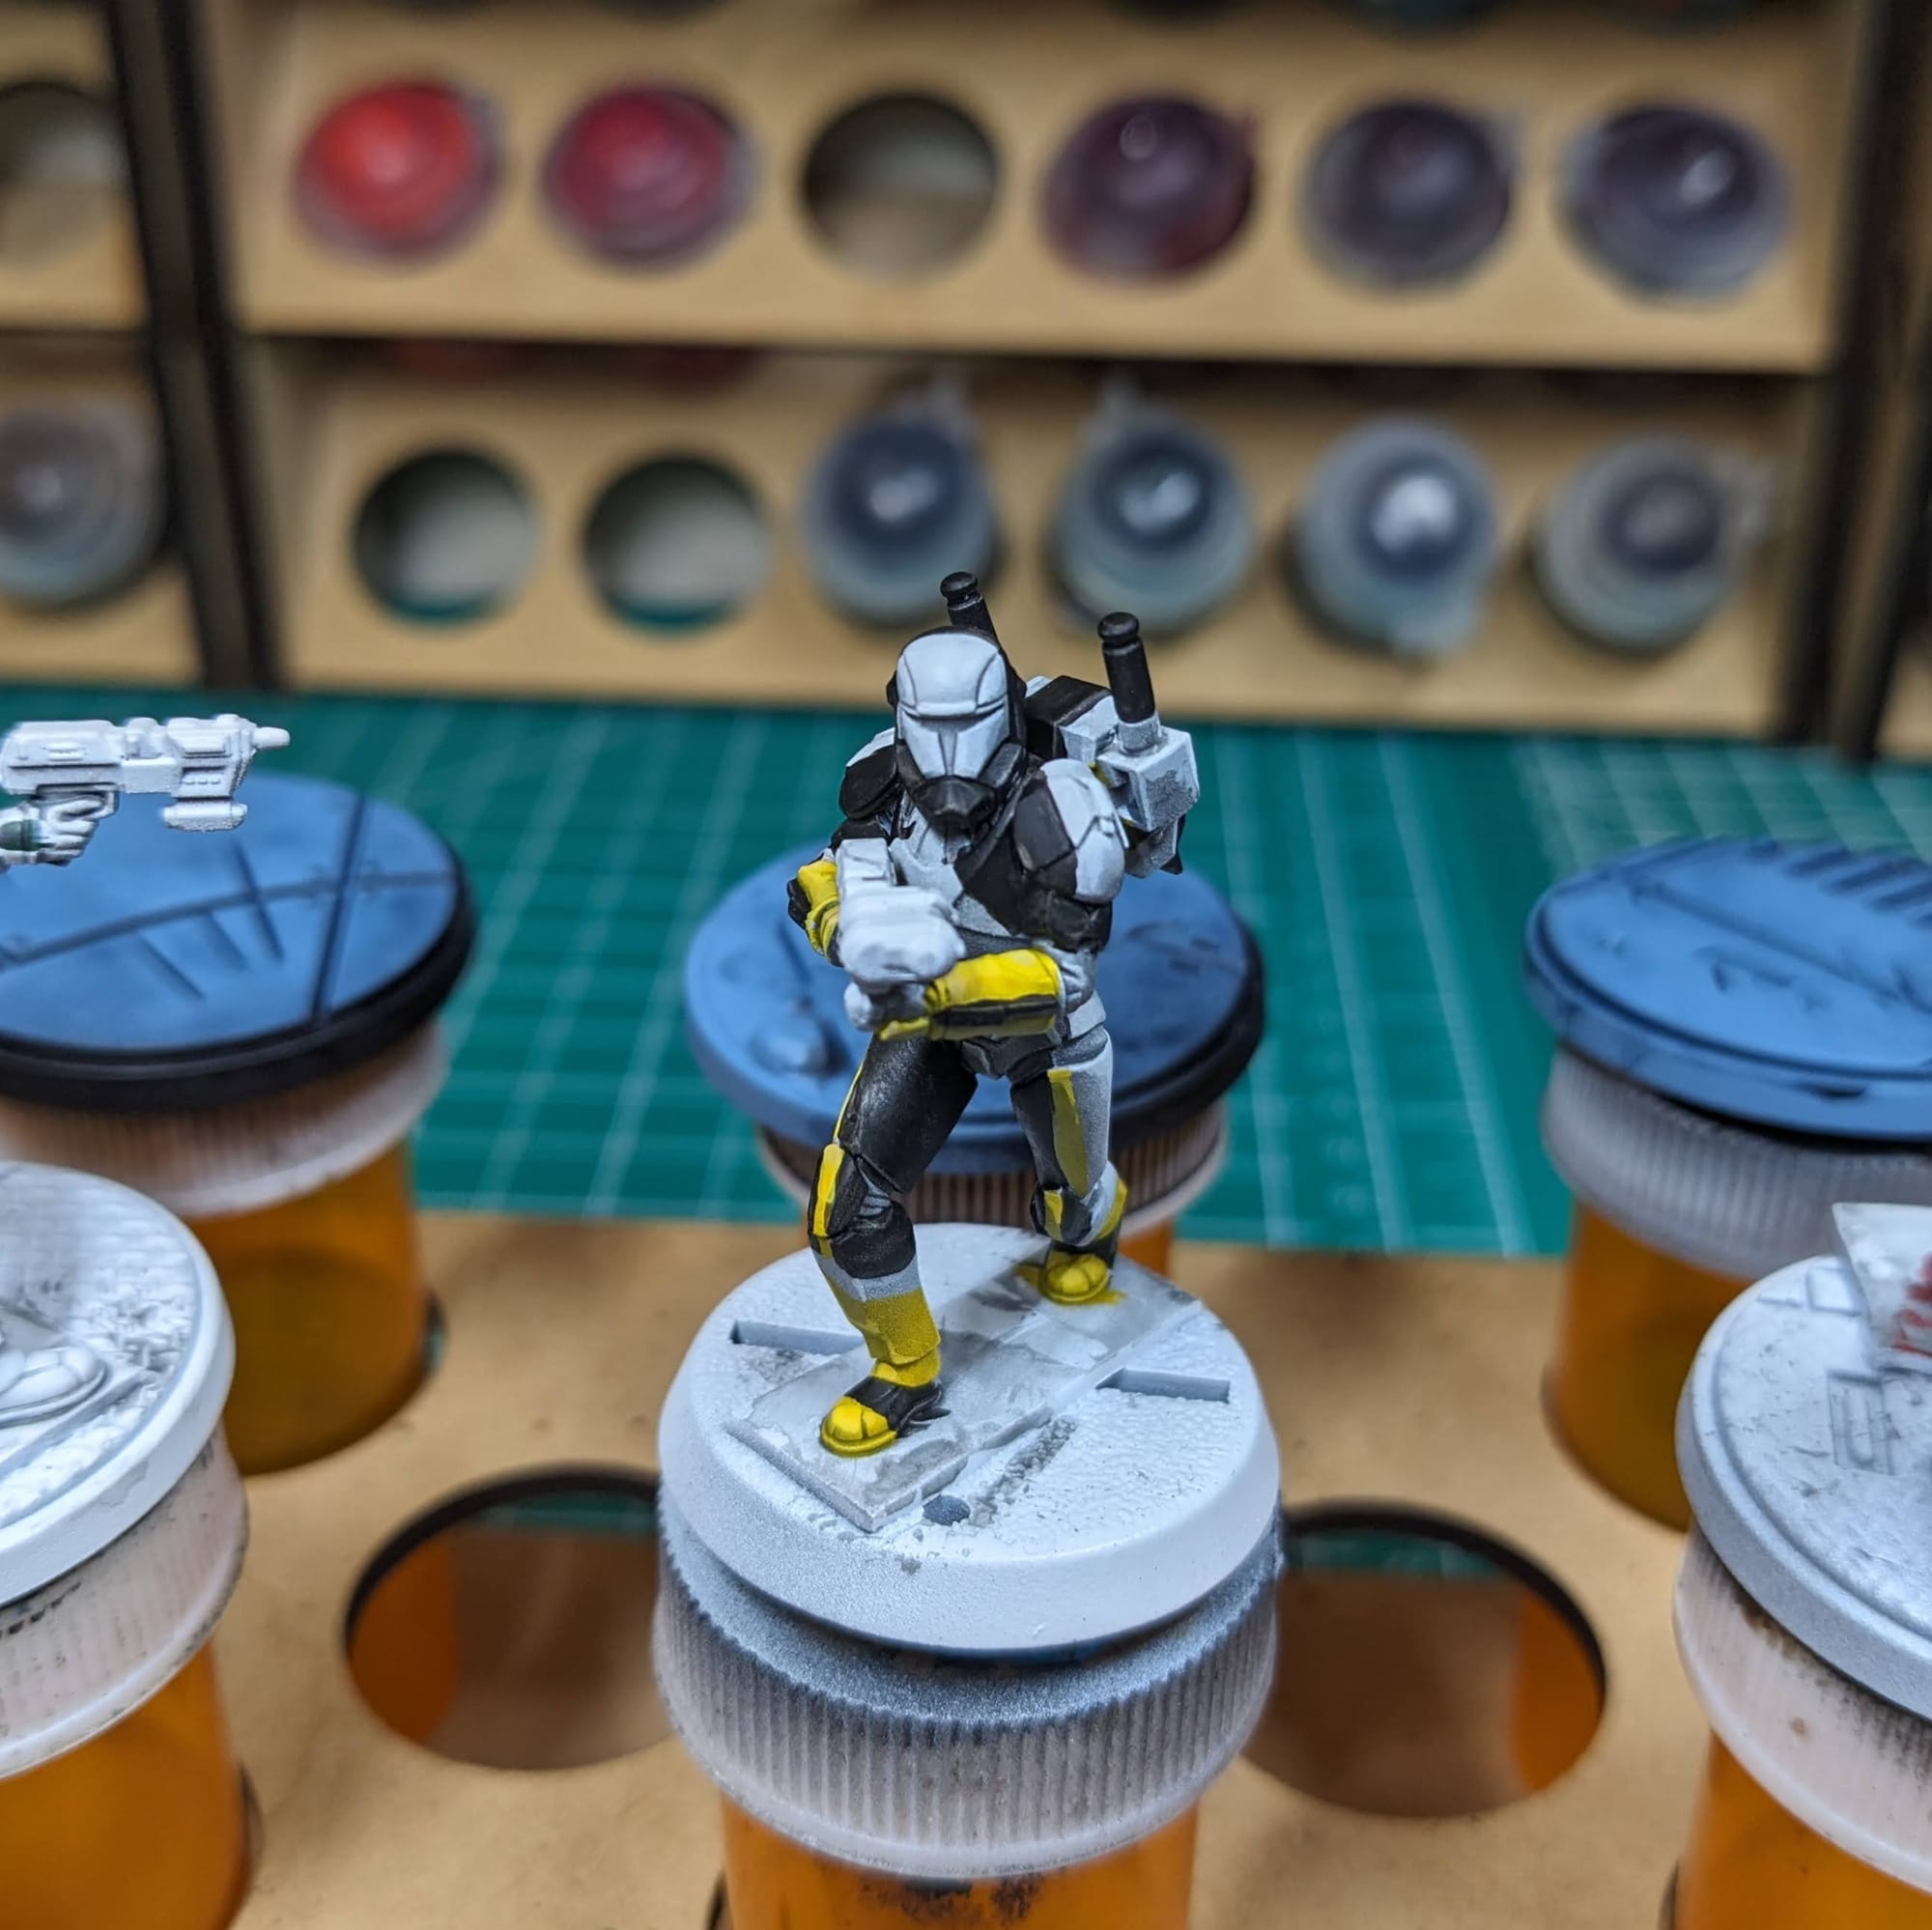
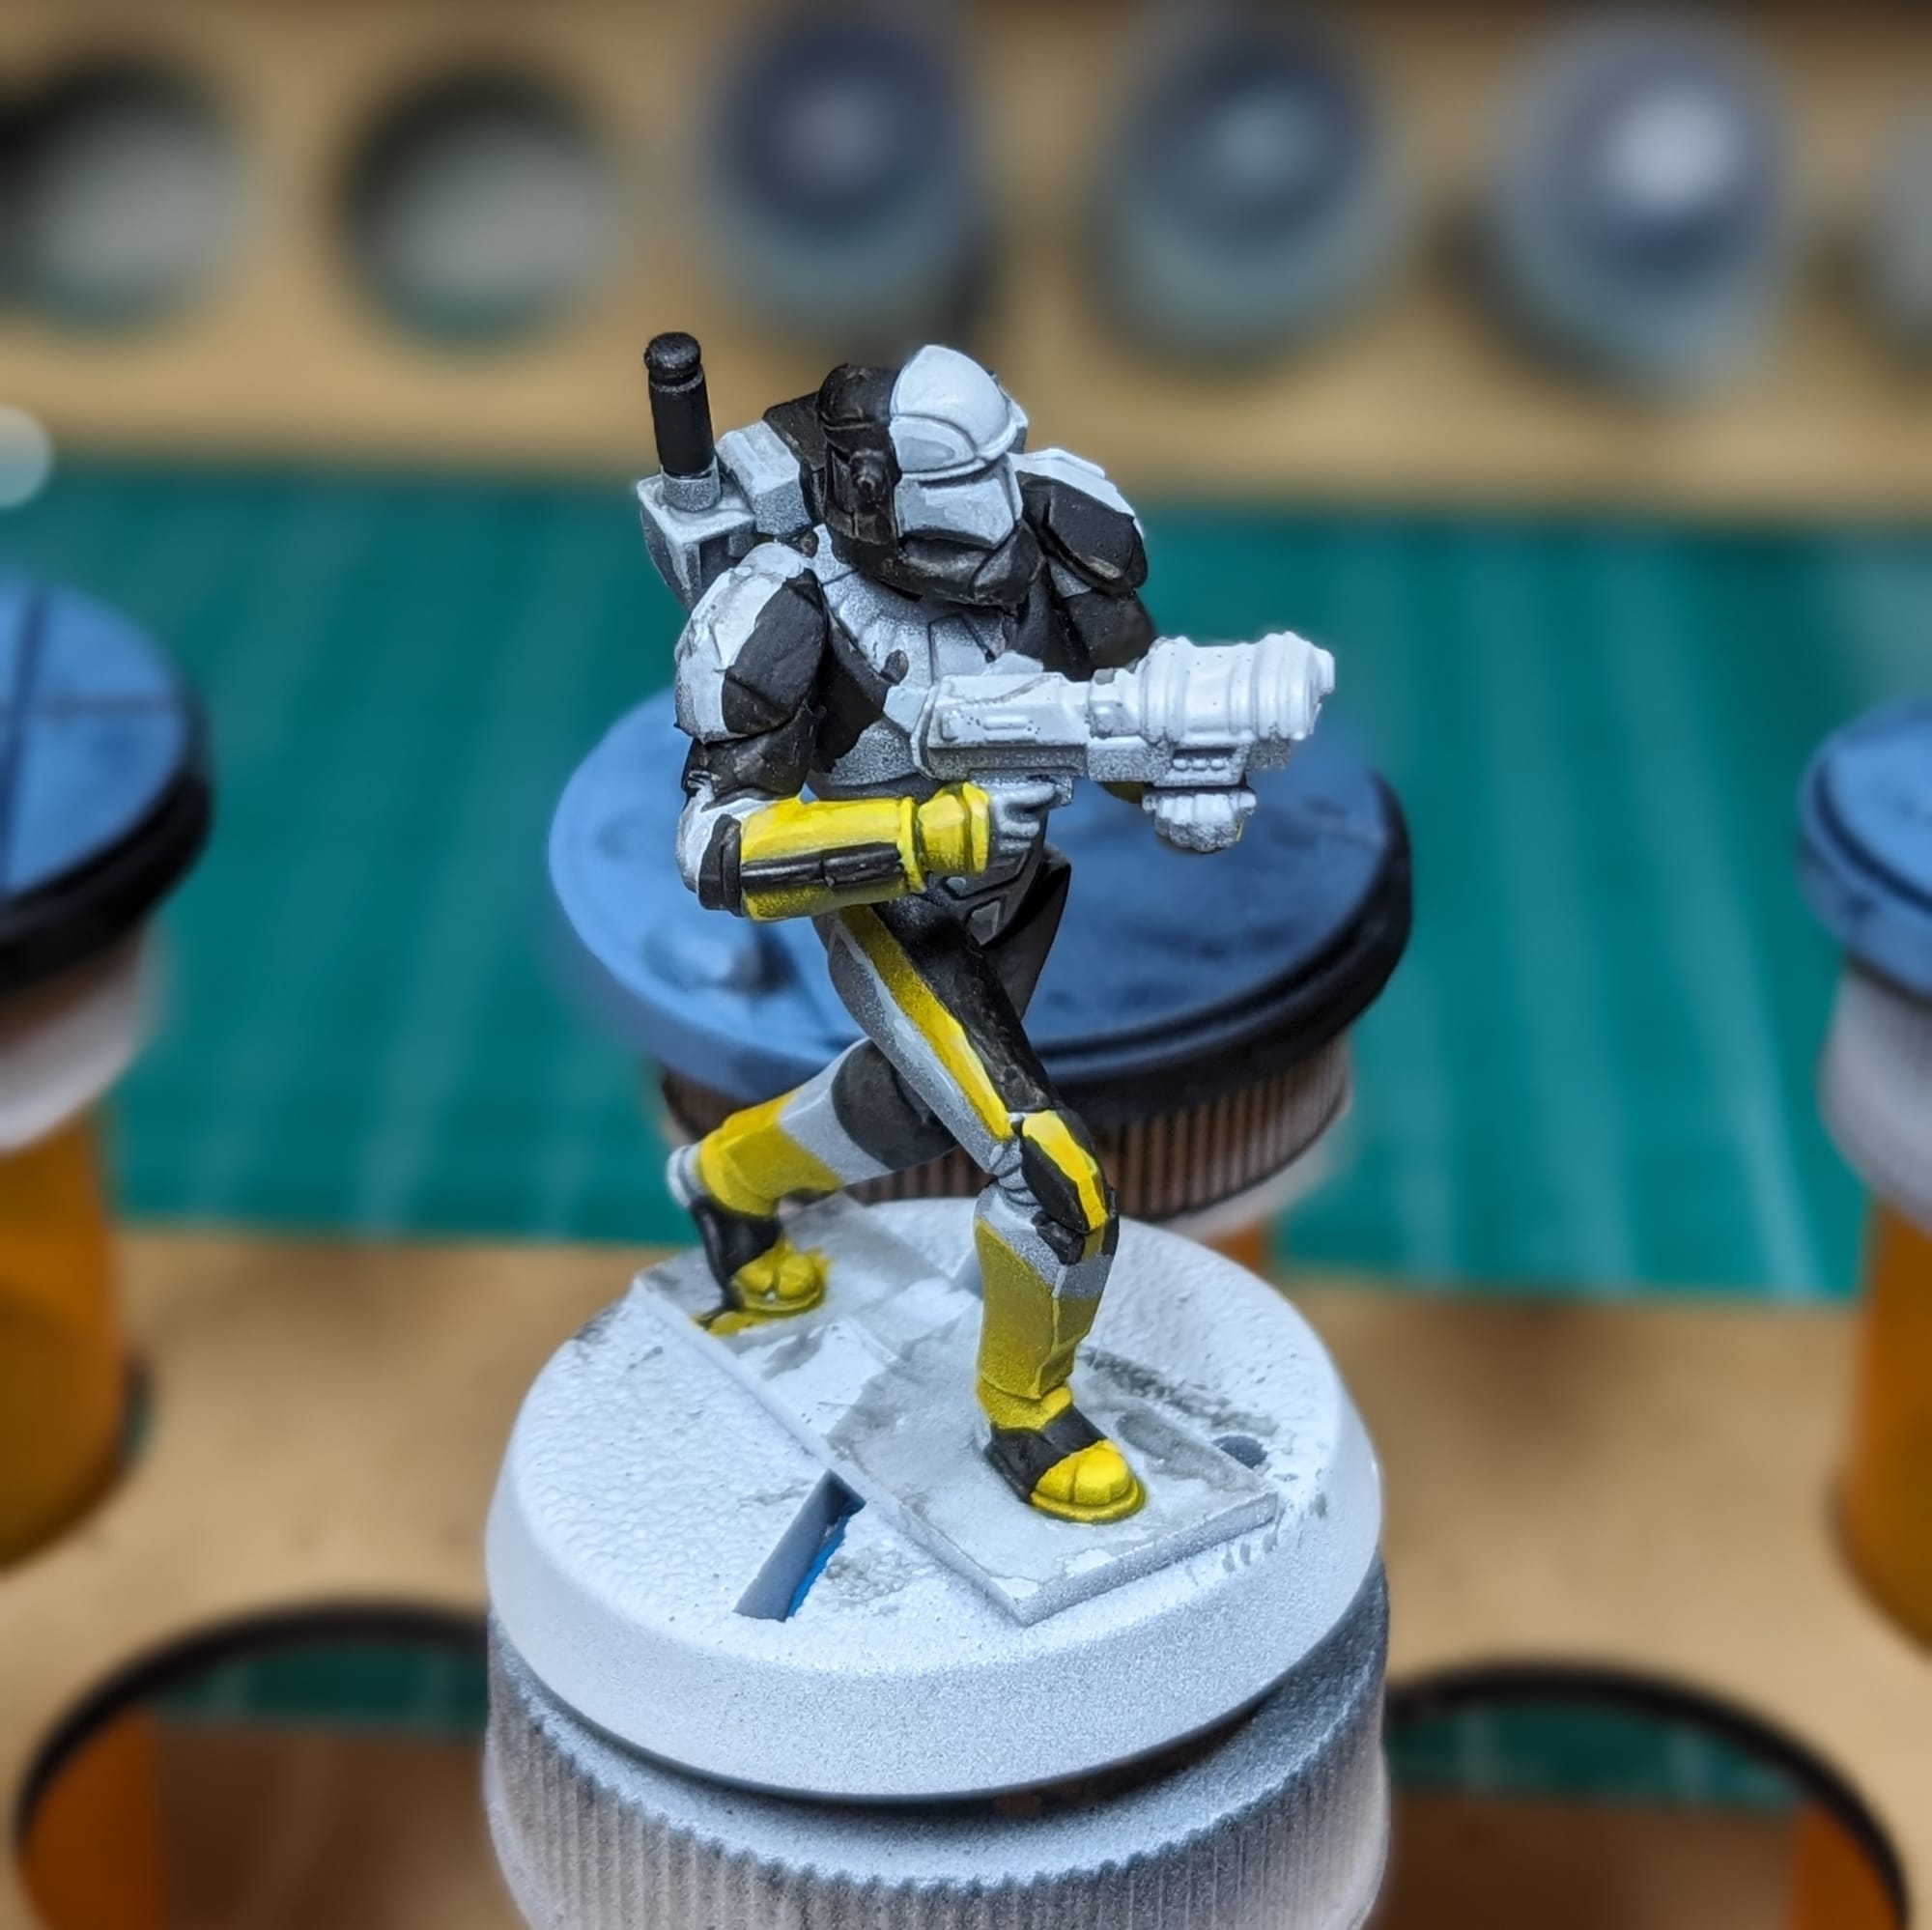
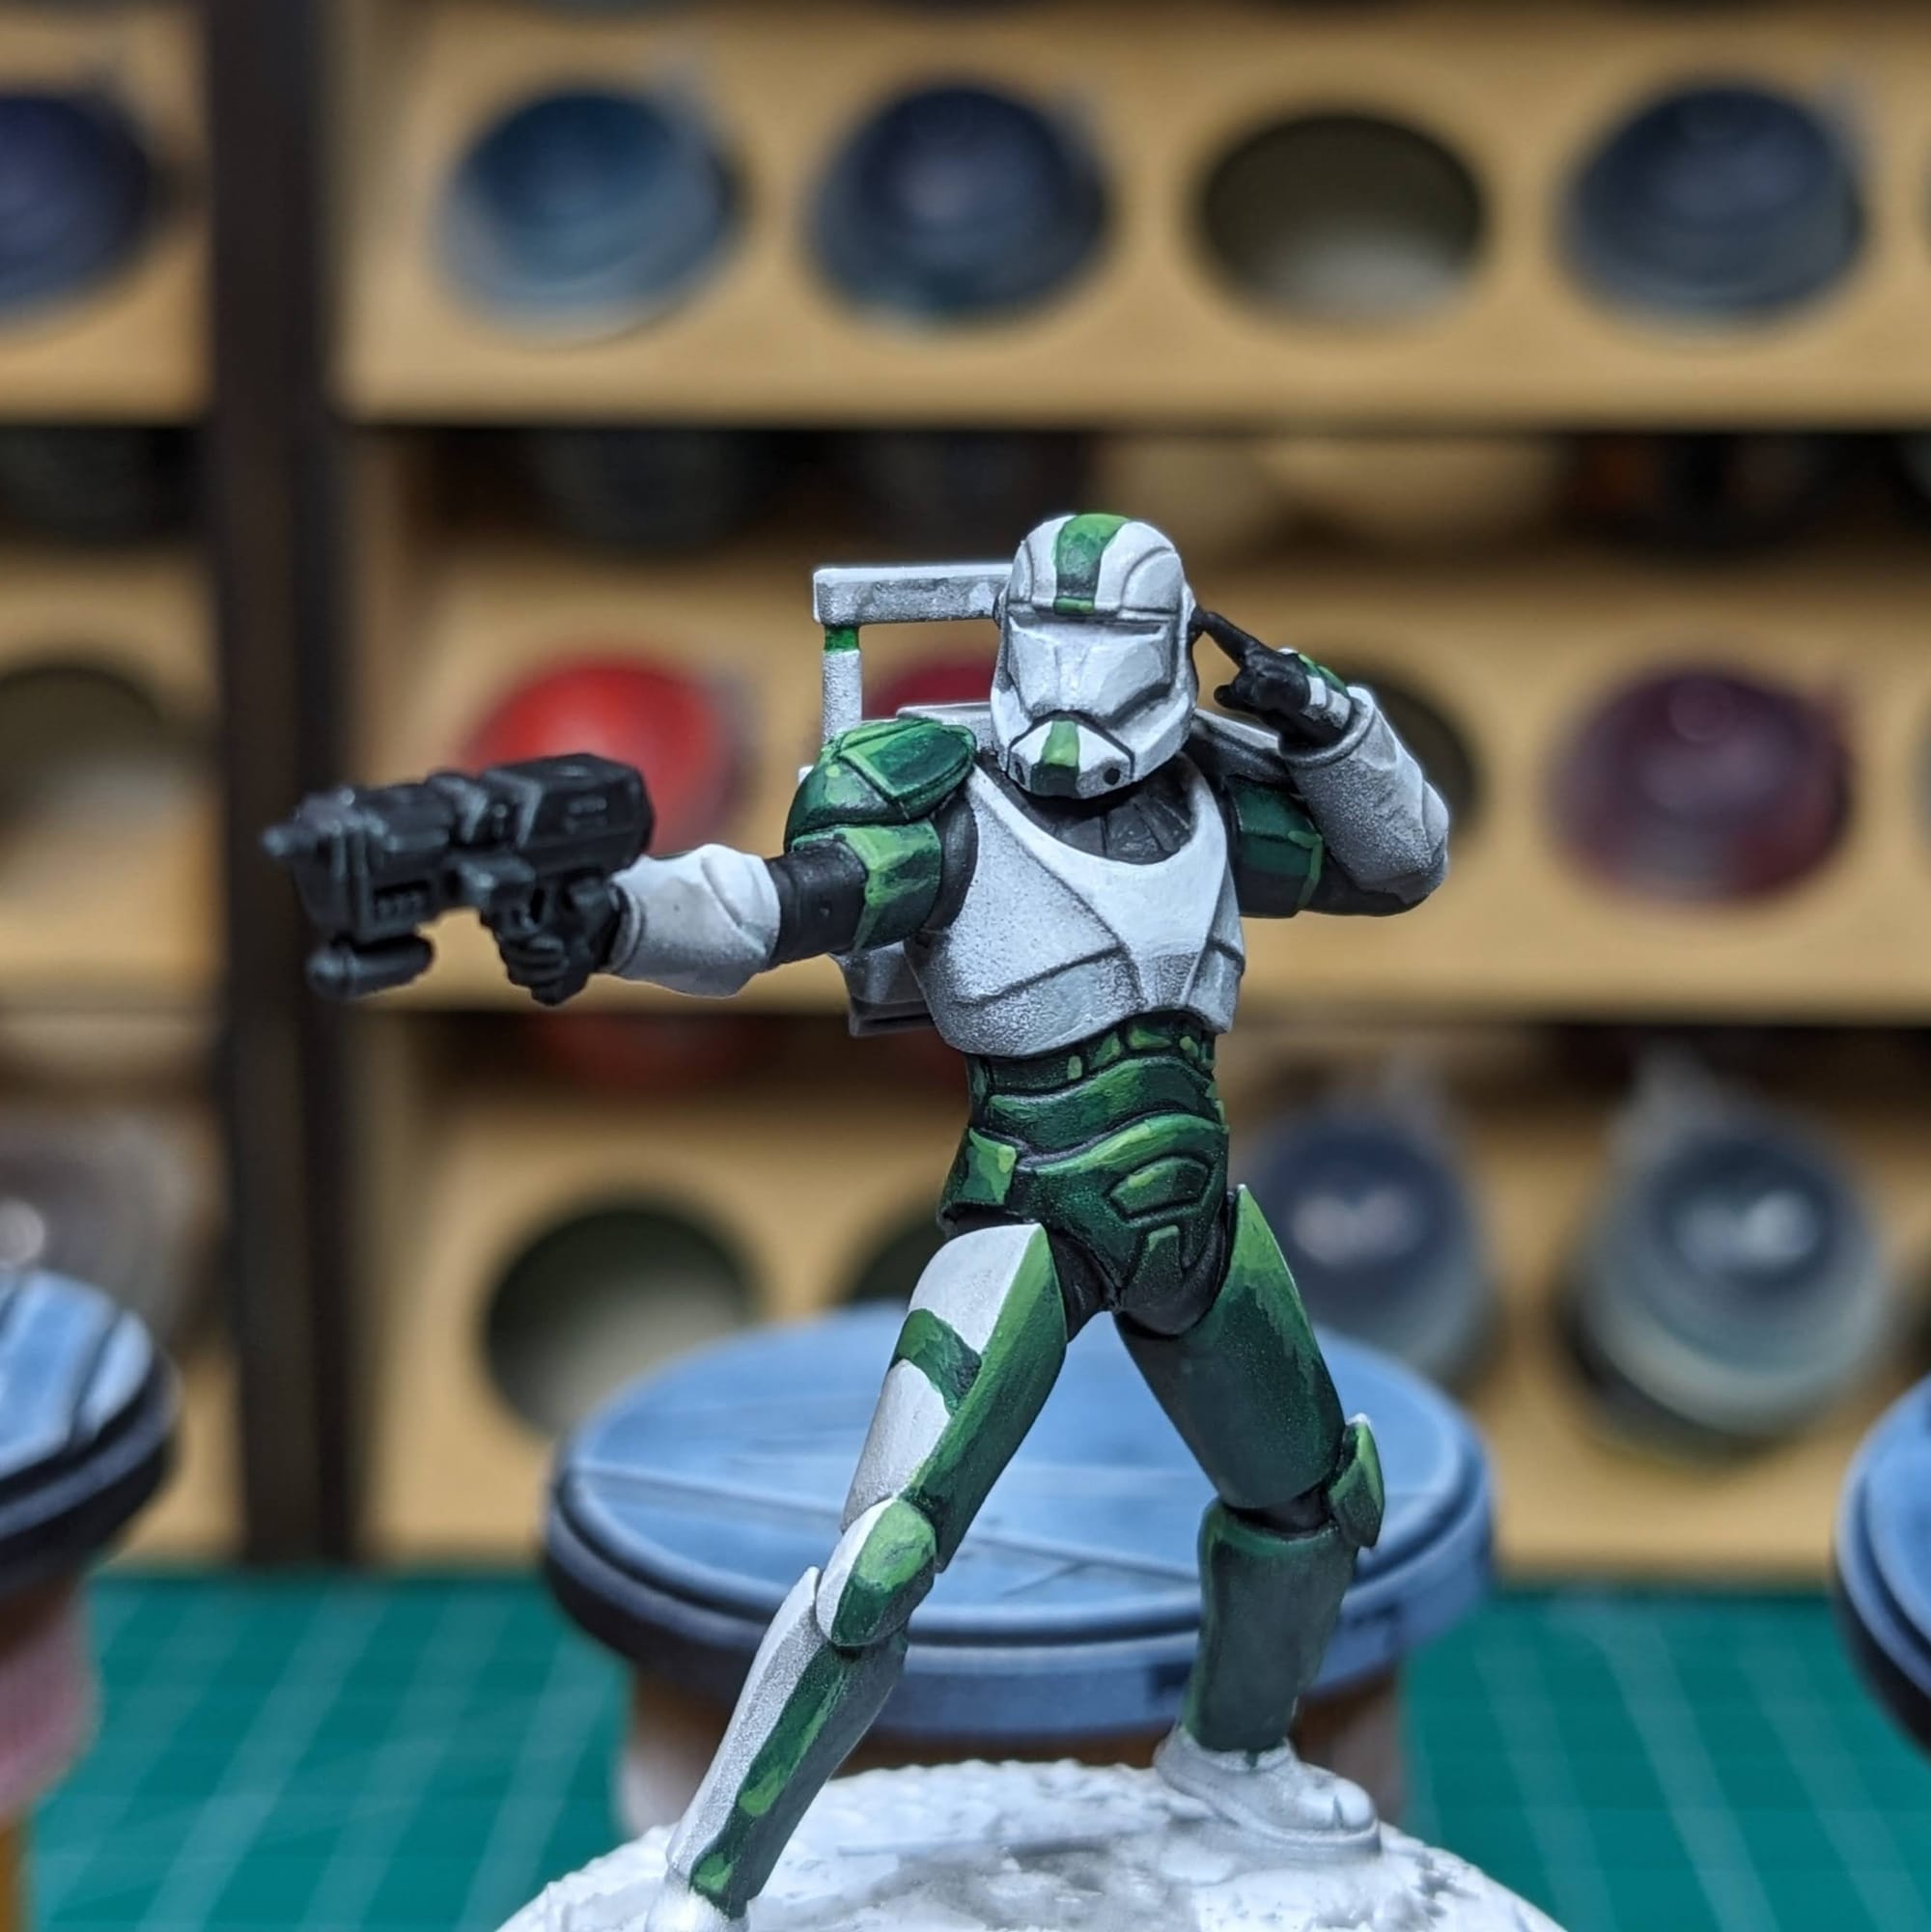
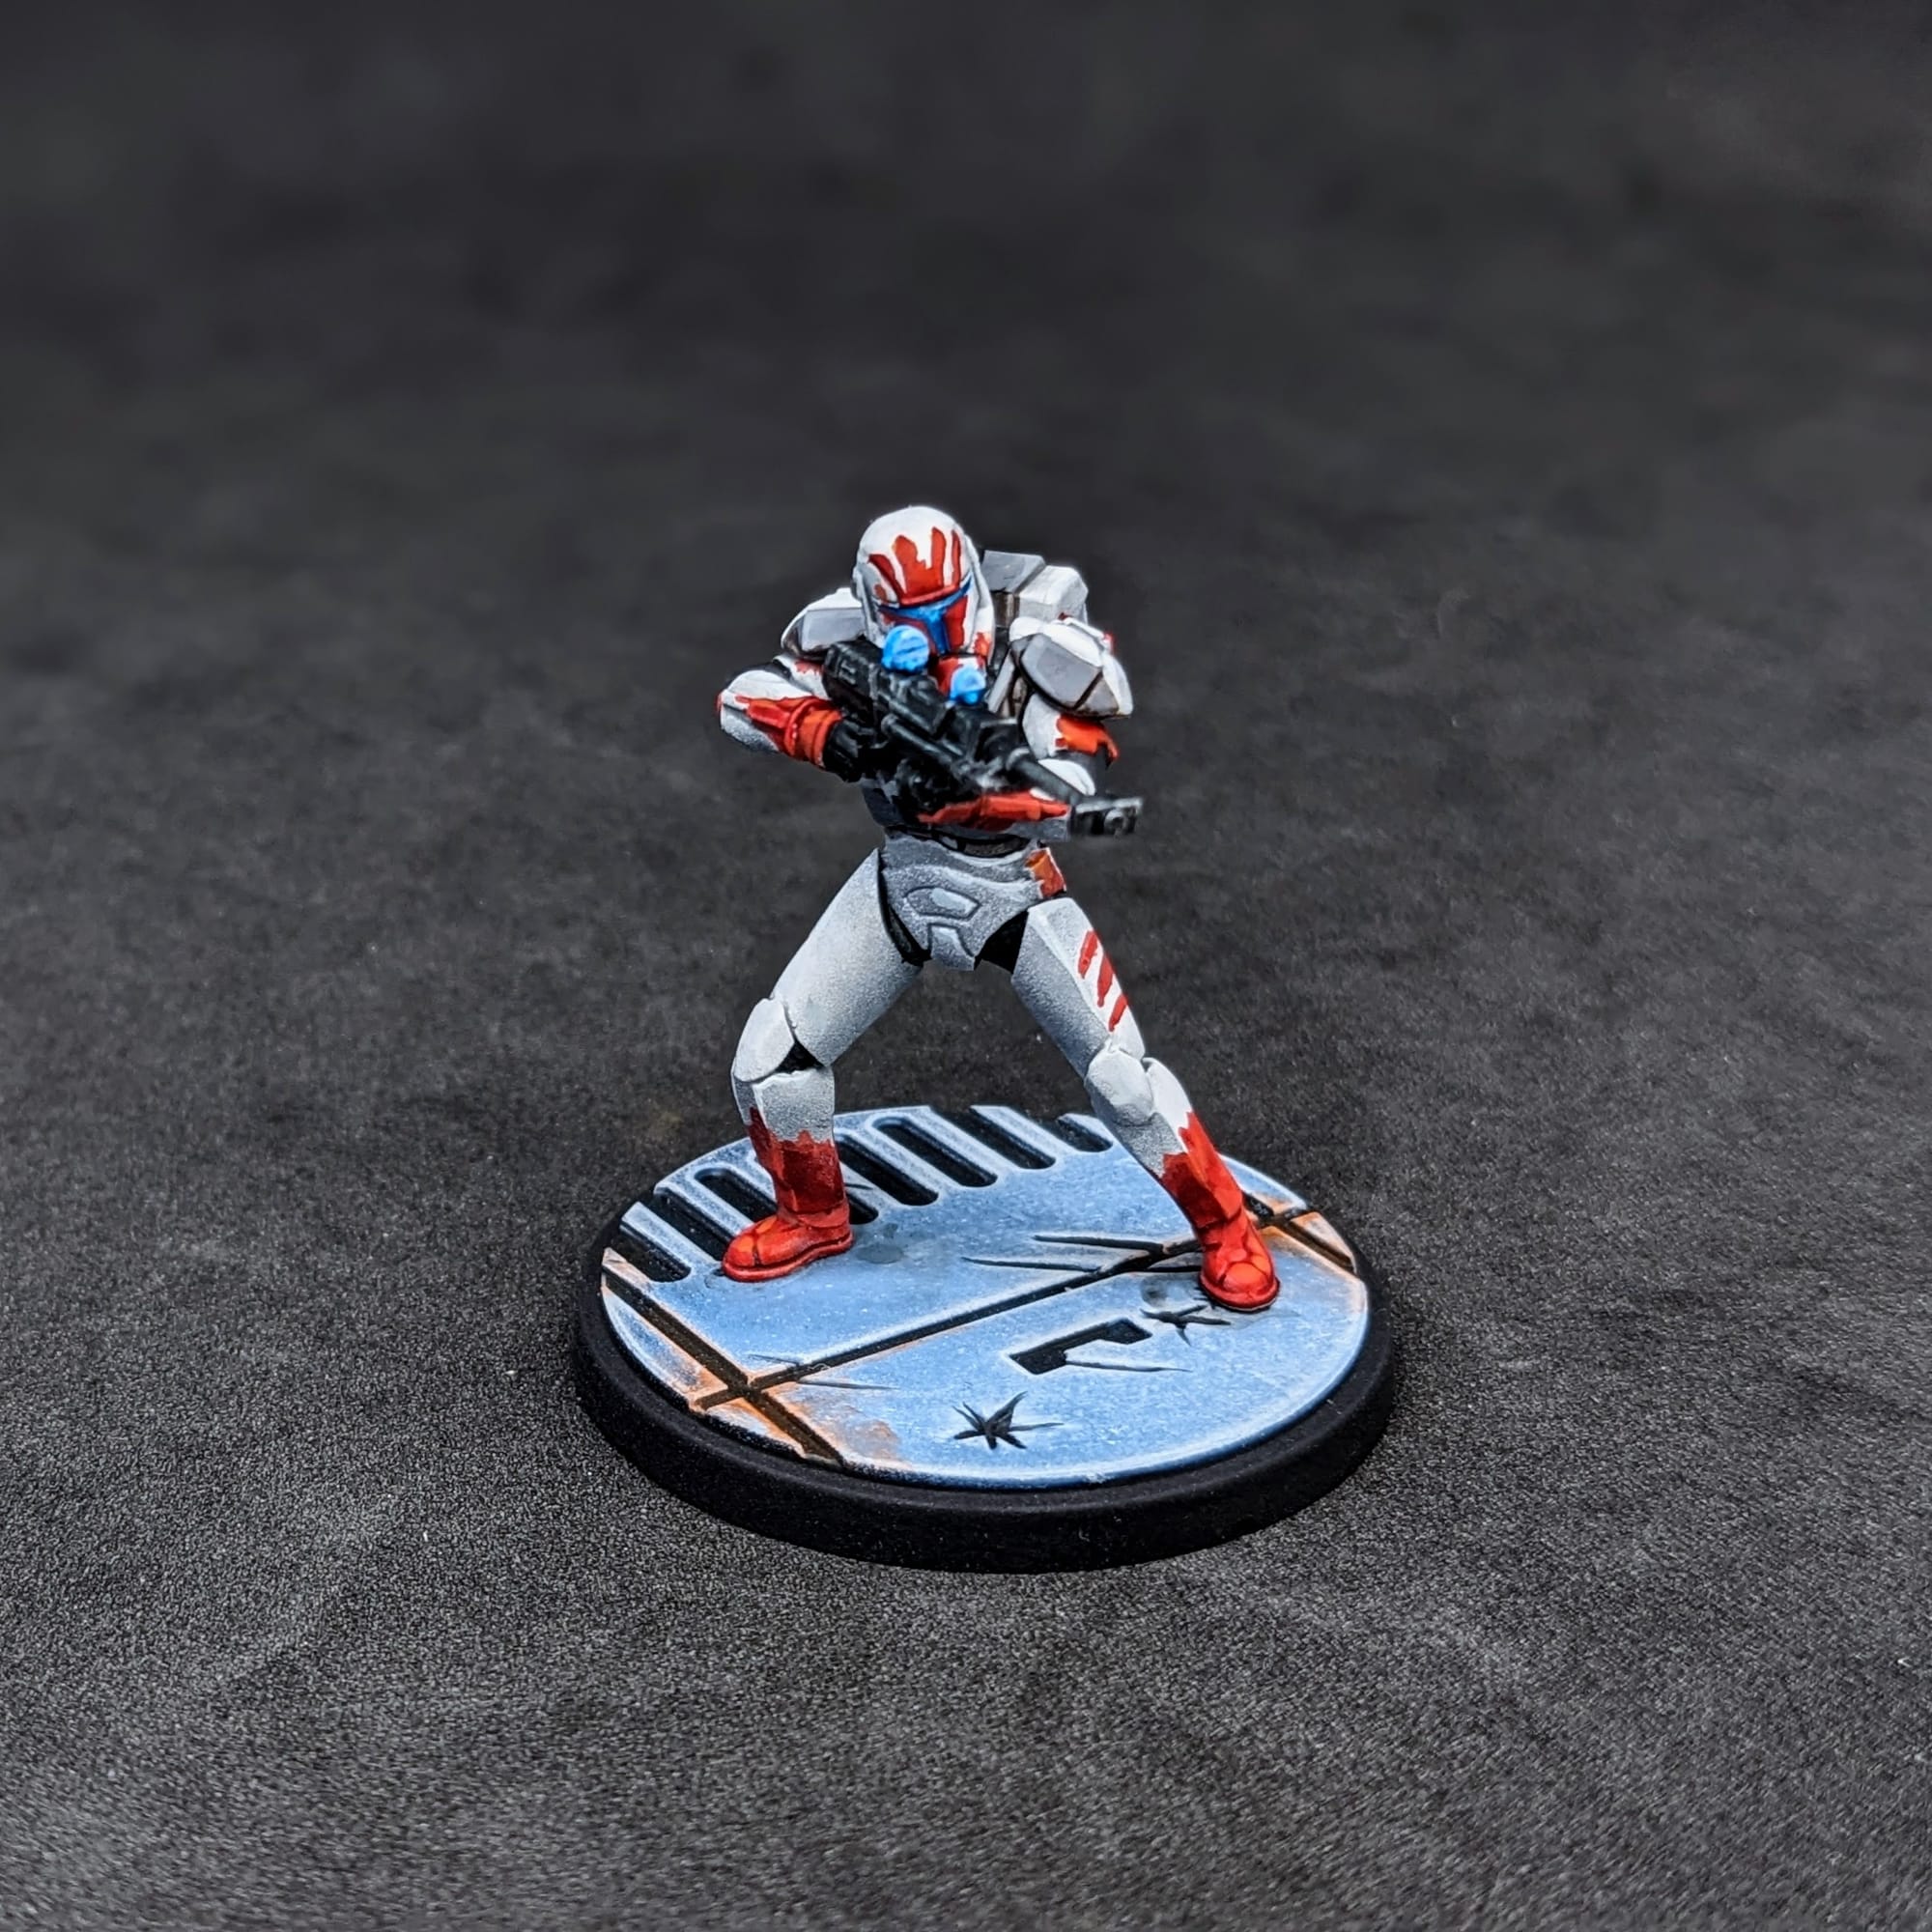
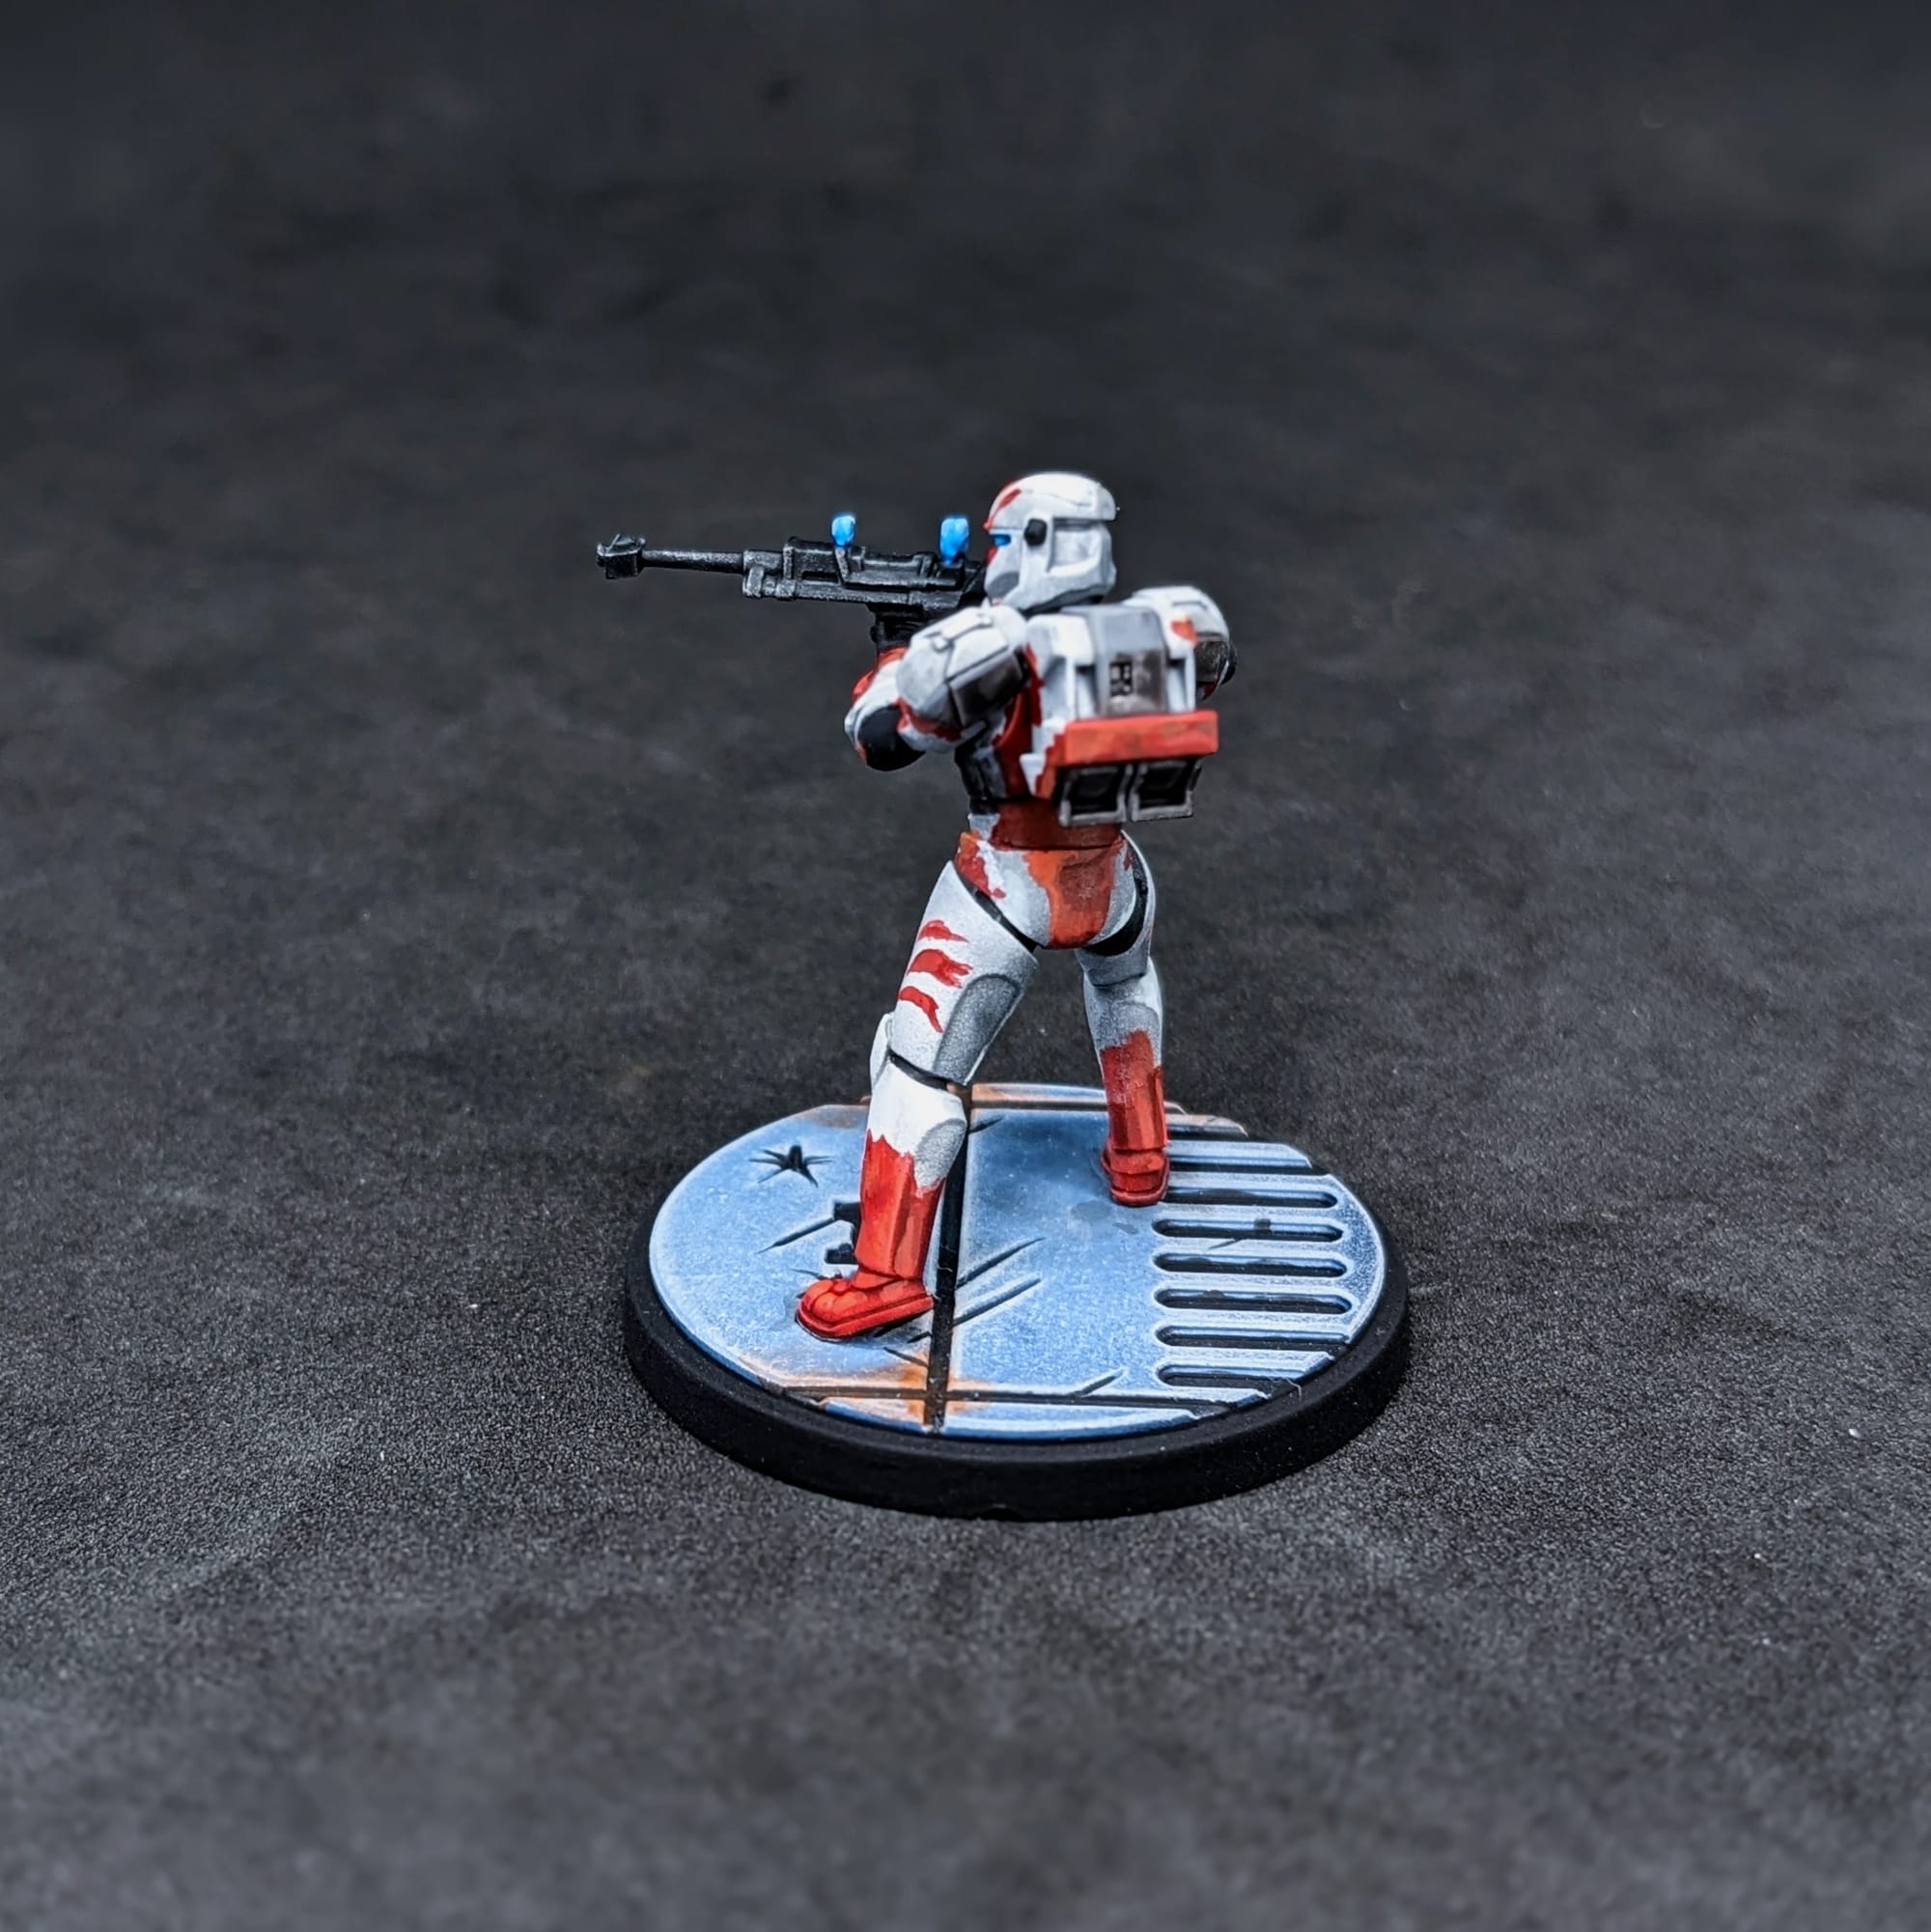
After highlighting up the different armor colors, I went back over the black under suit areas and blasters with Black Templar. I applied a little silver drybrushing to the guns themselves, to help make their hard angle edges pop.
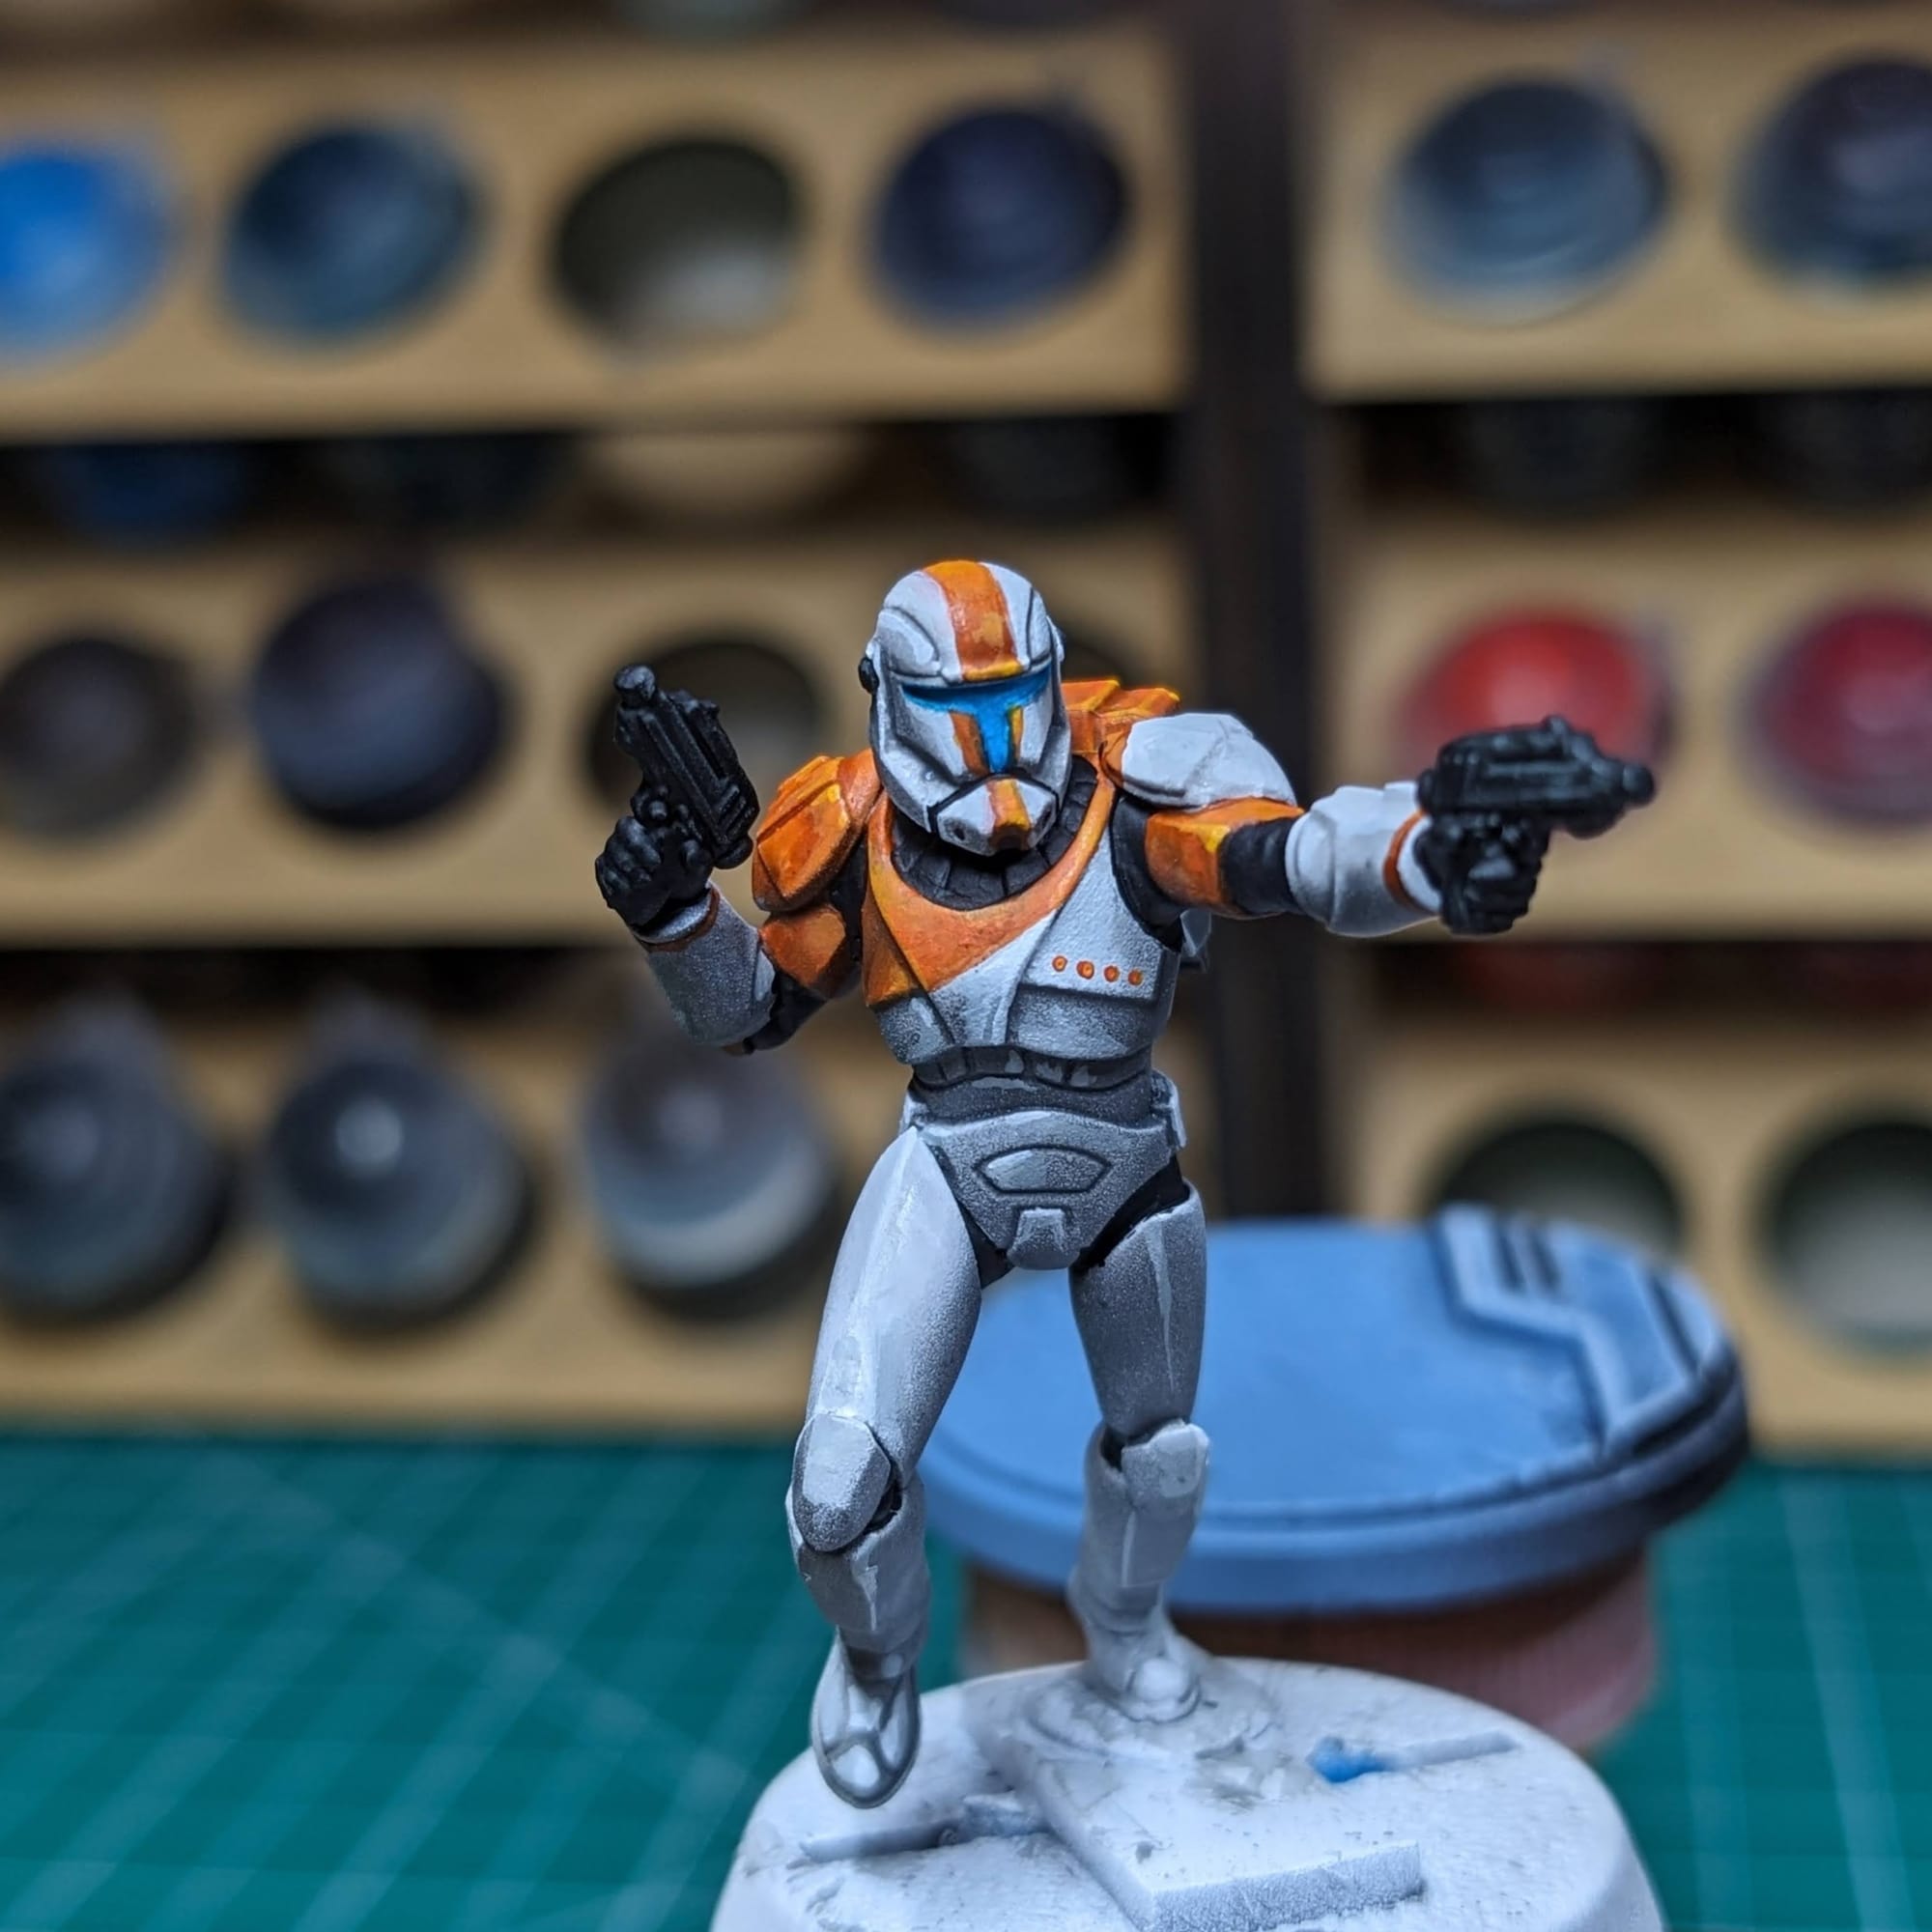
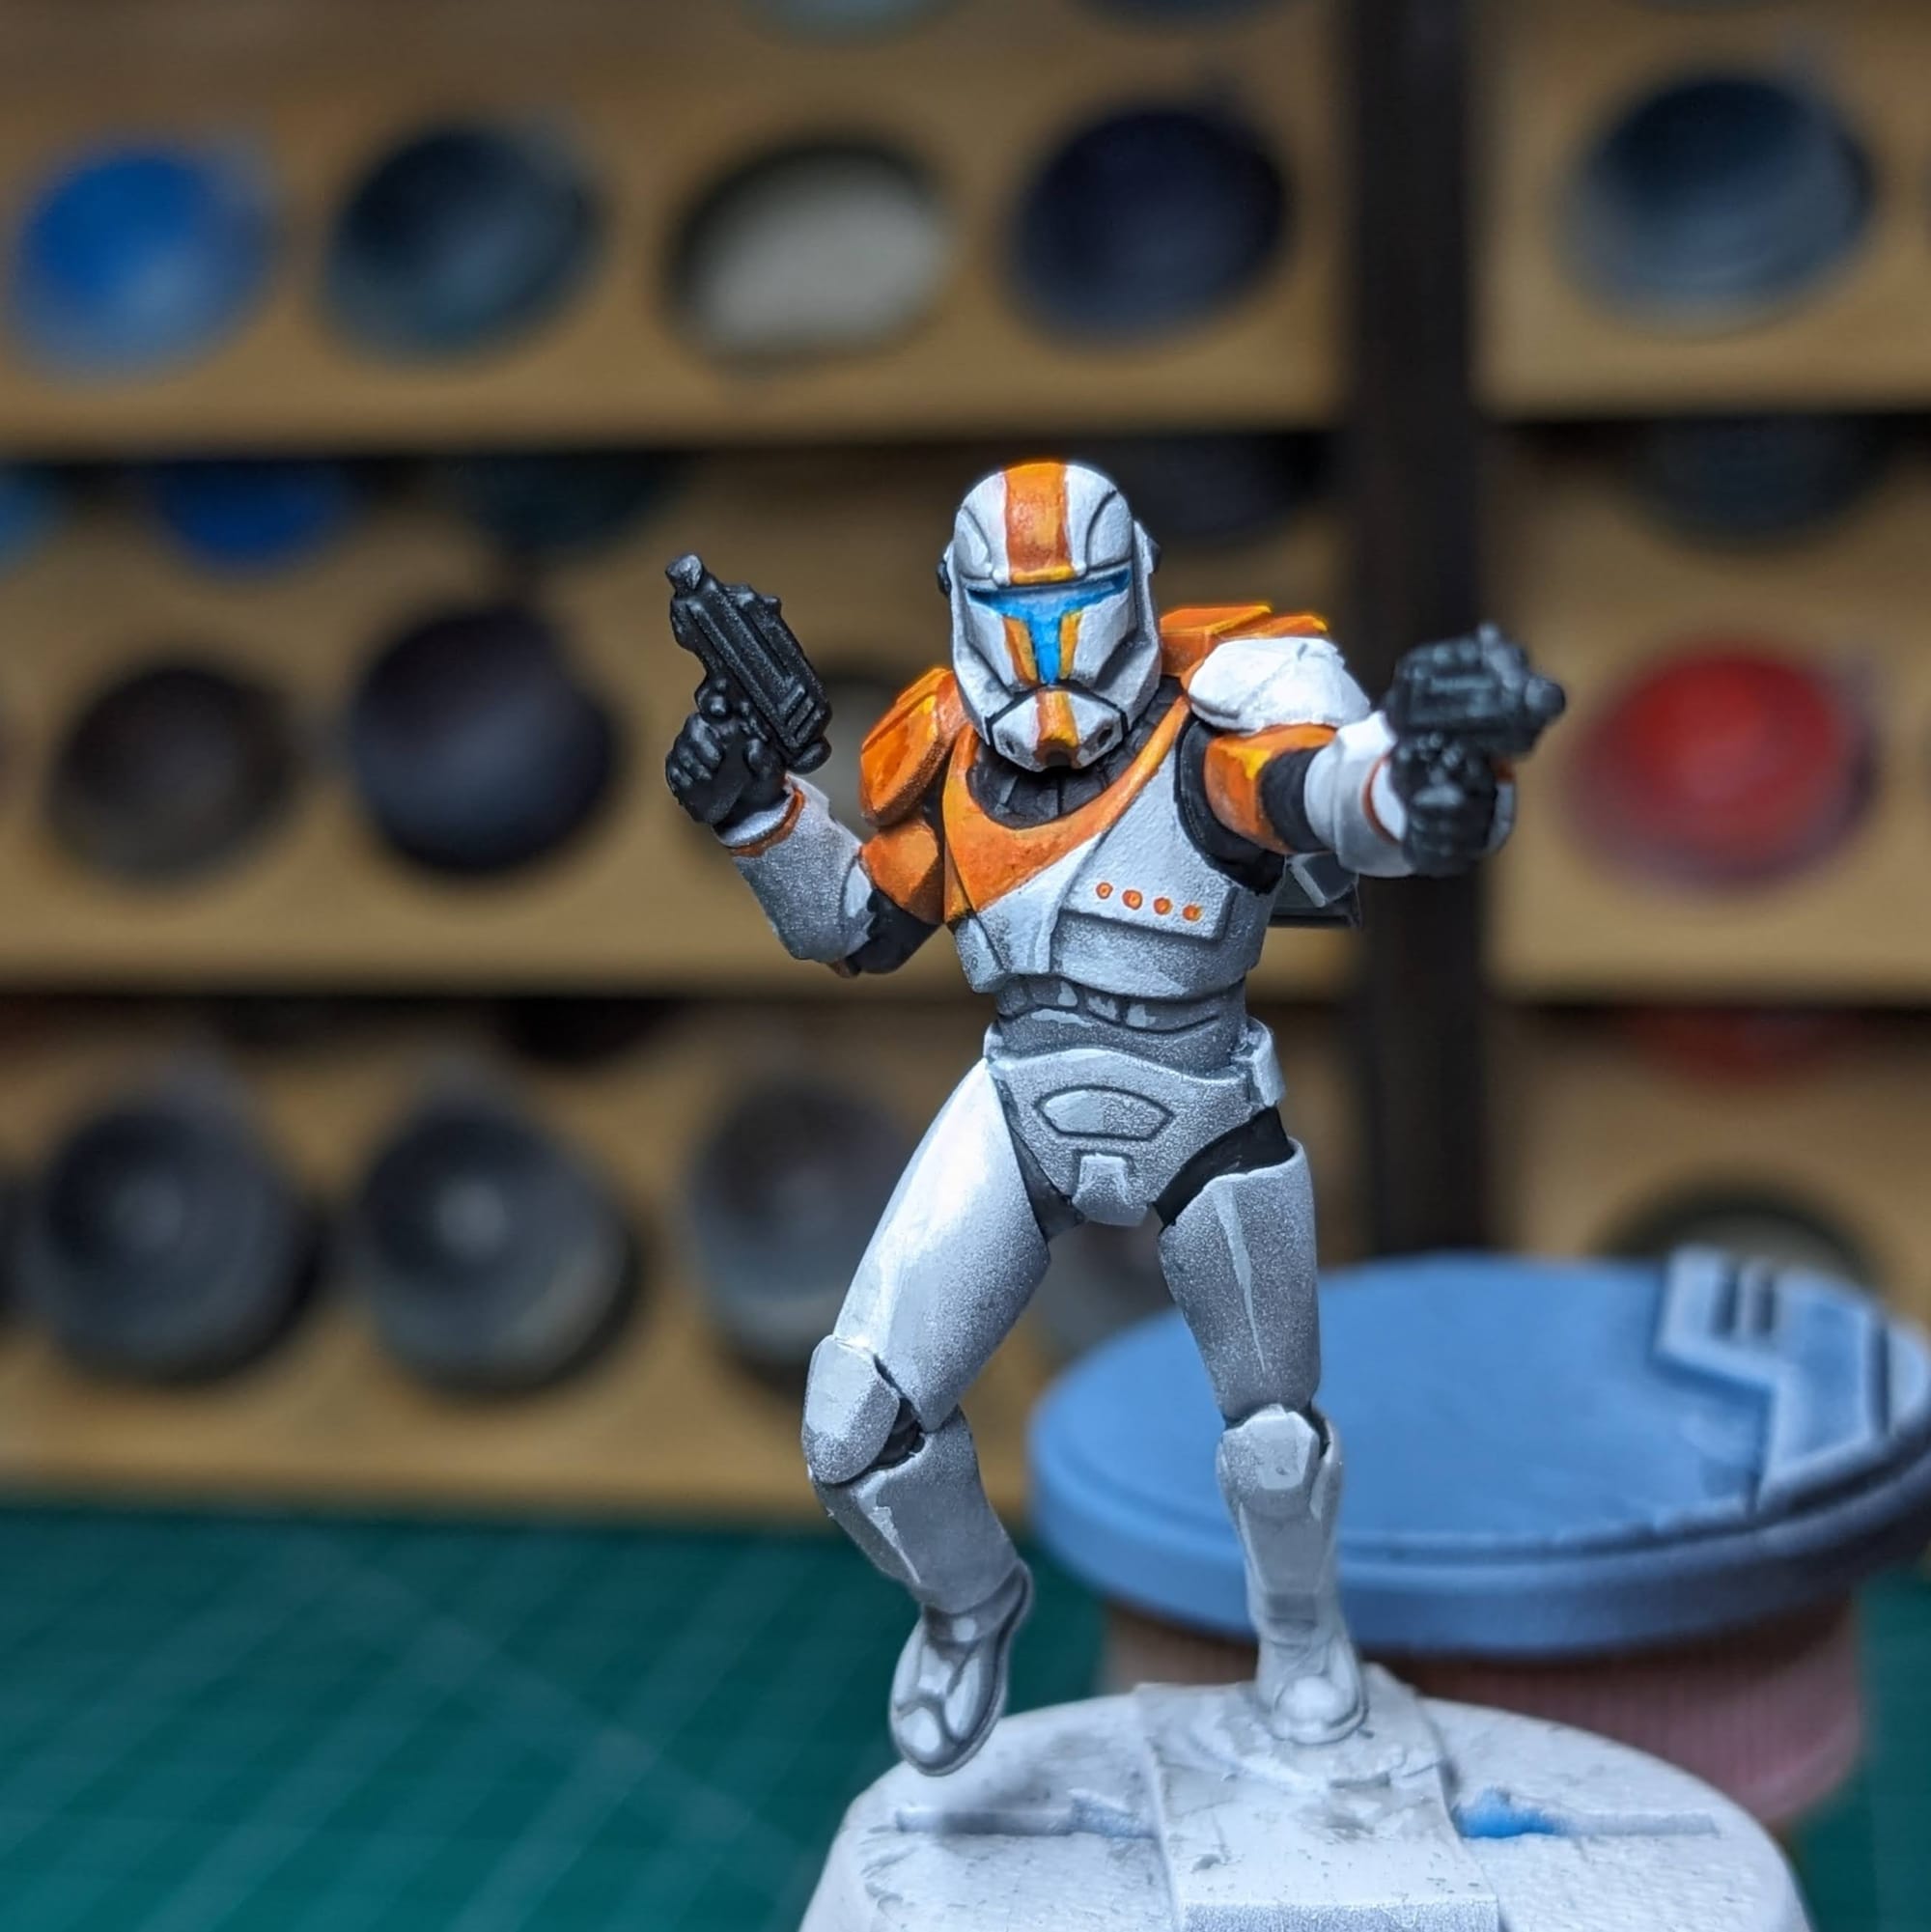
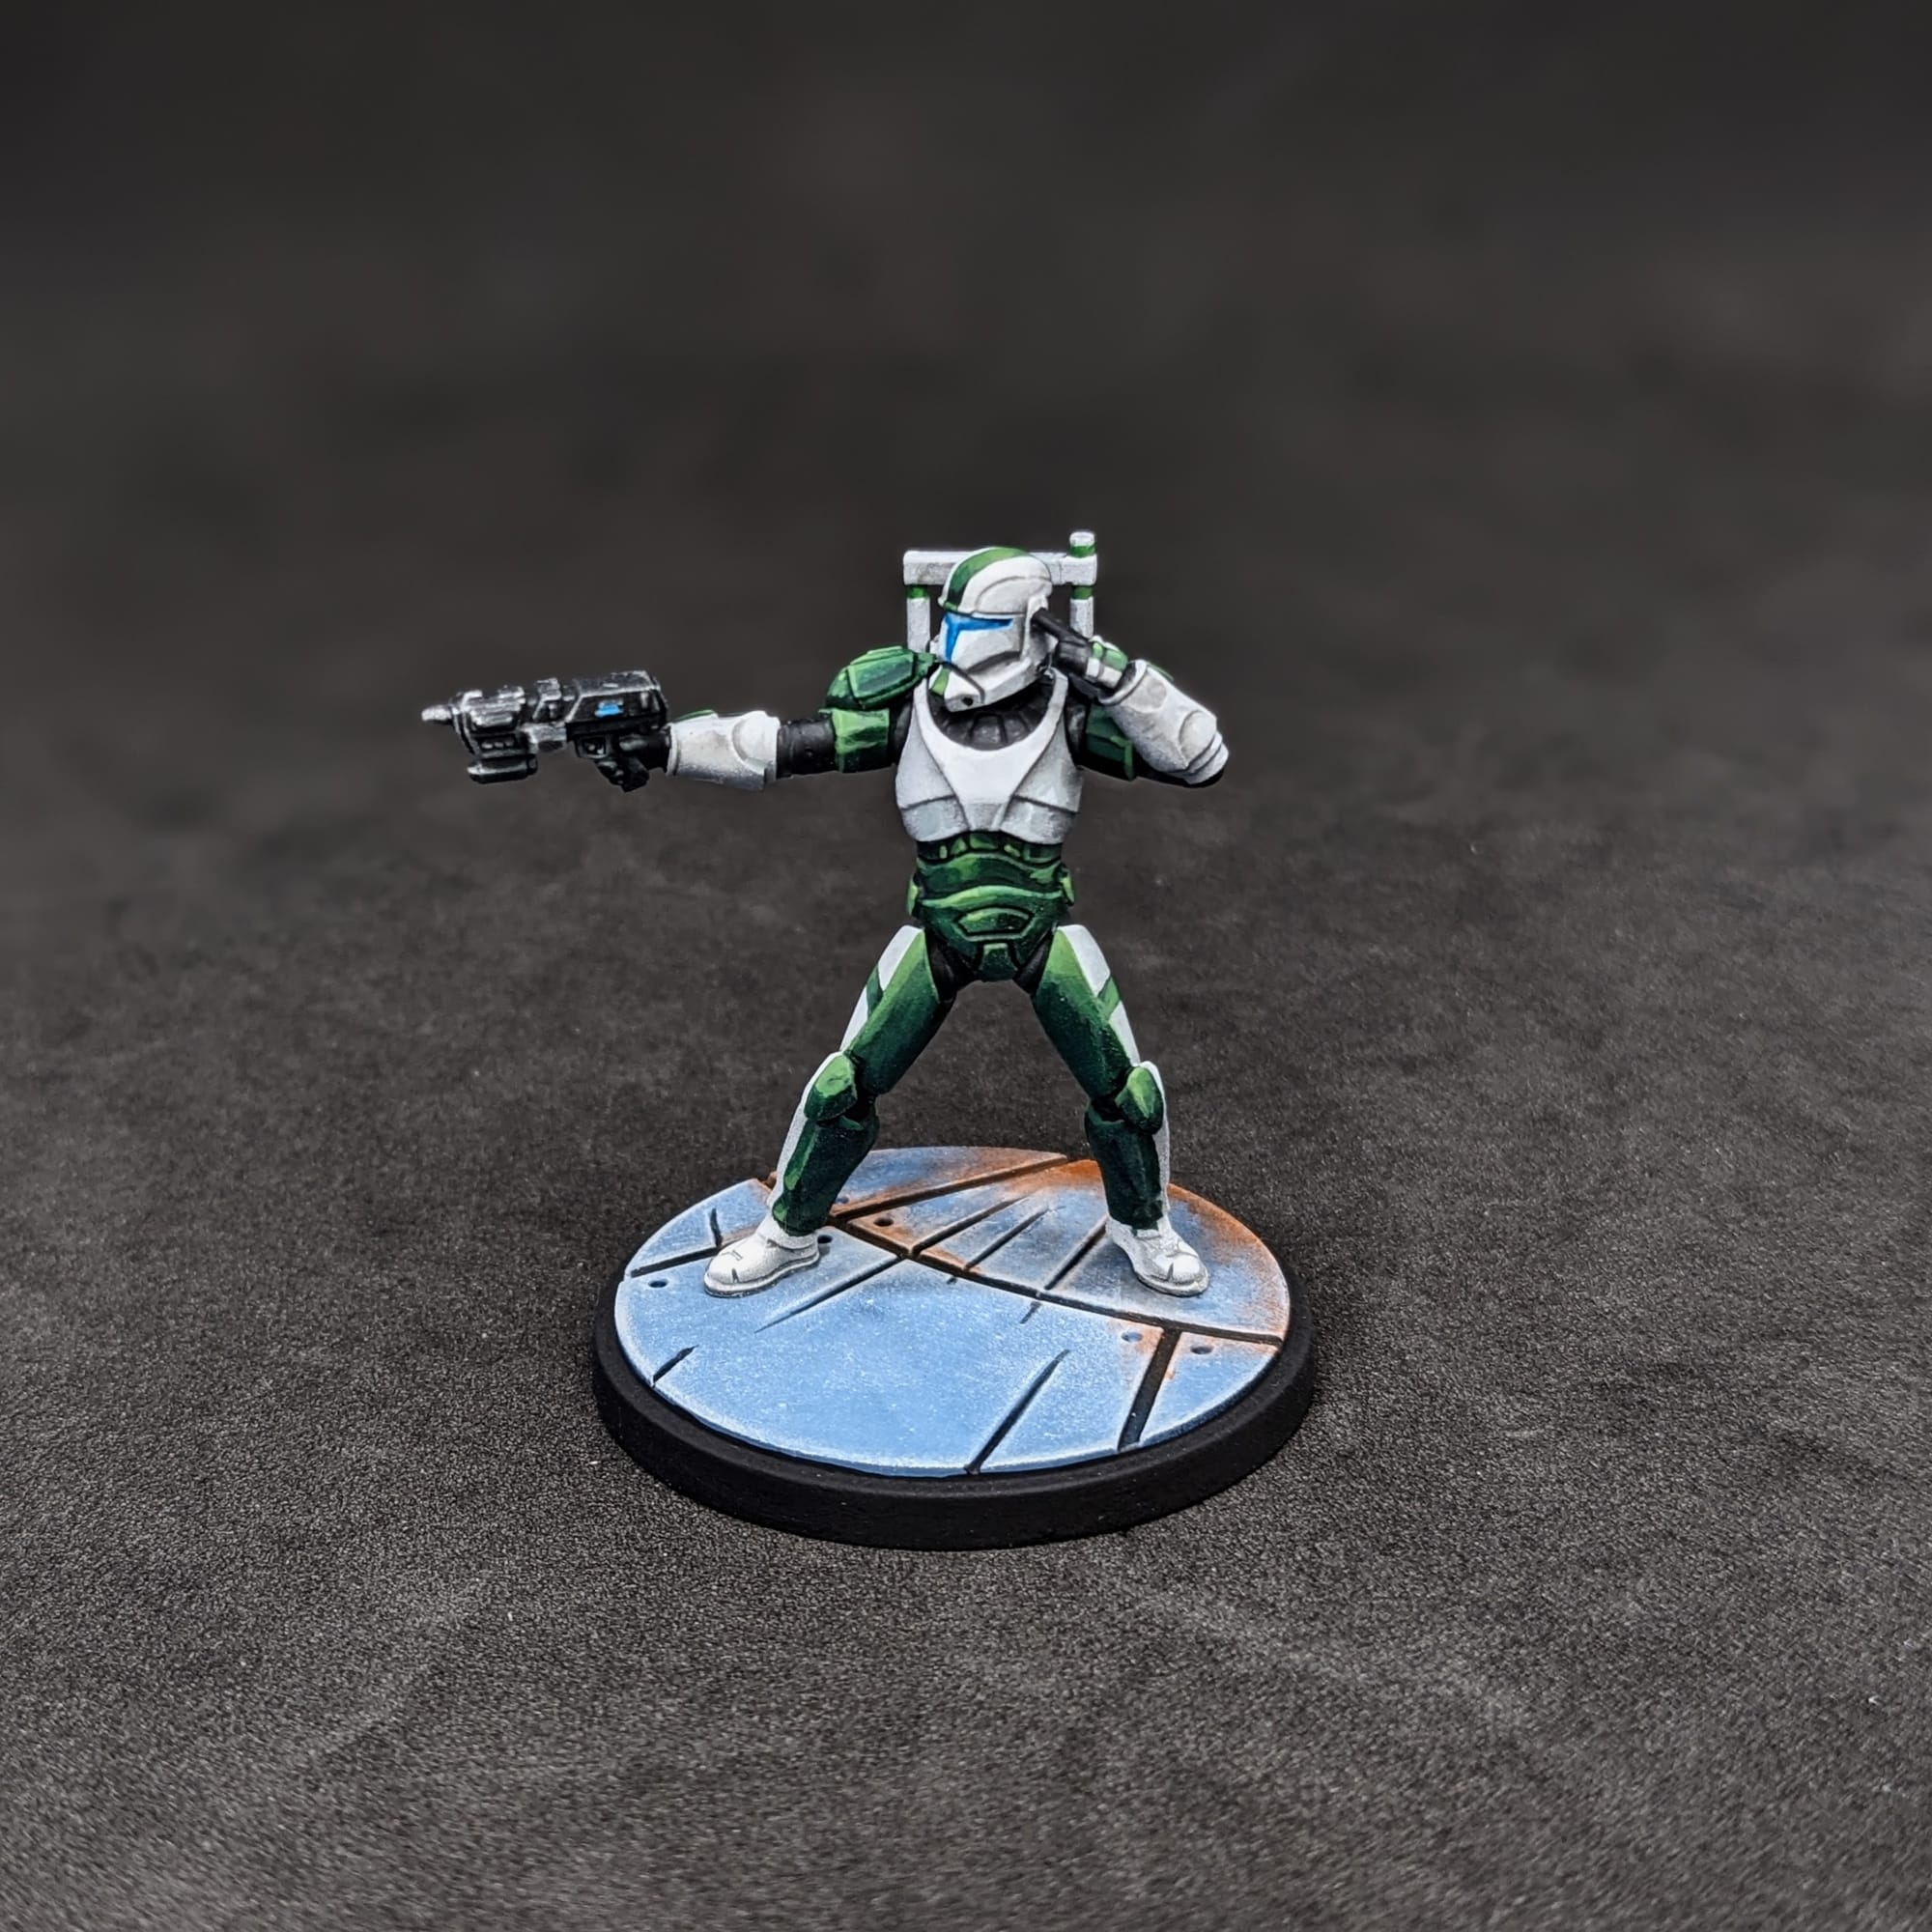
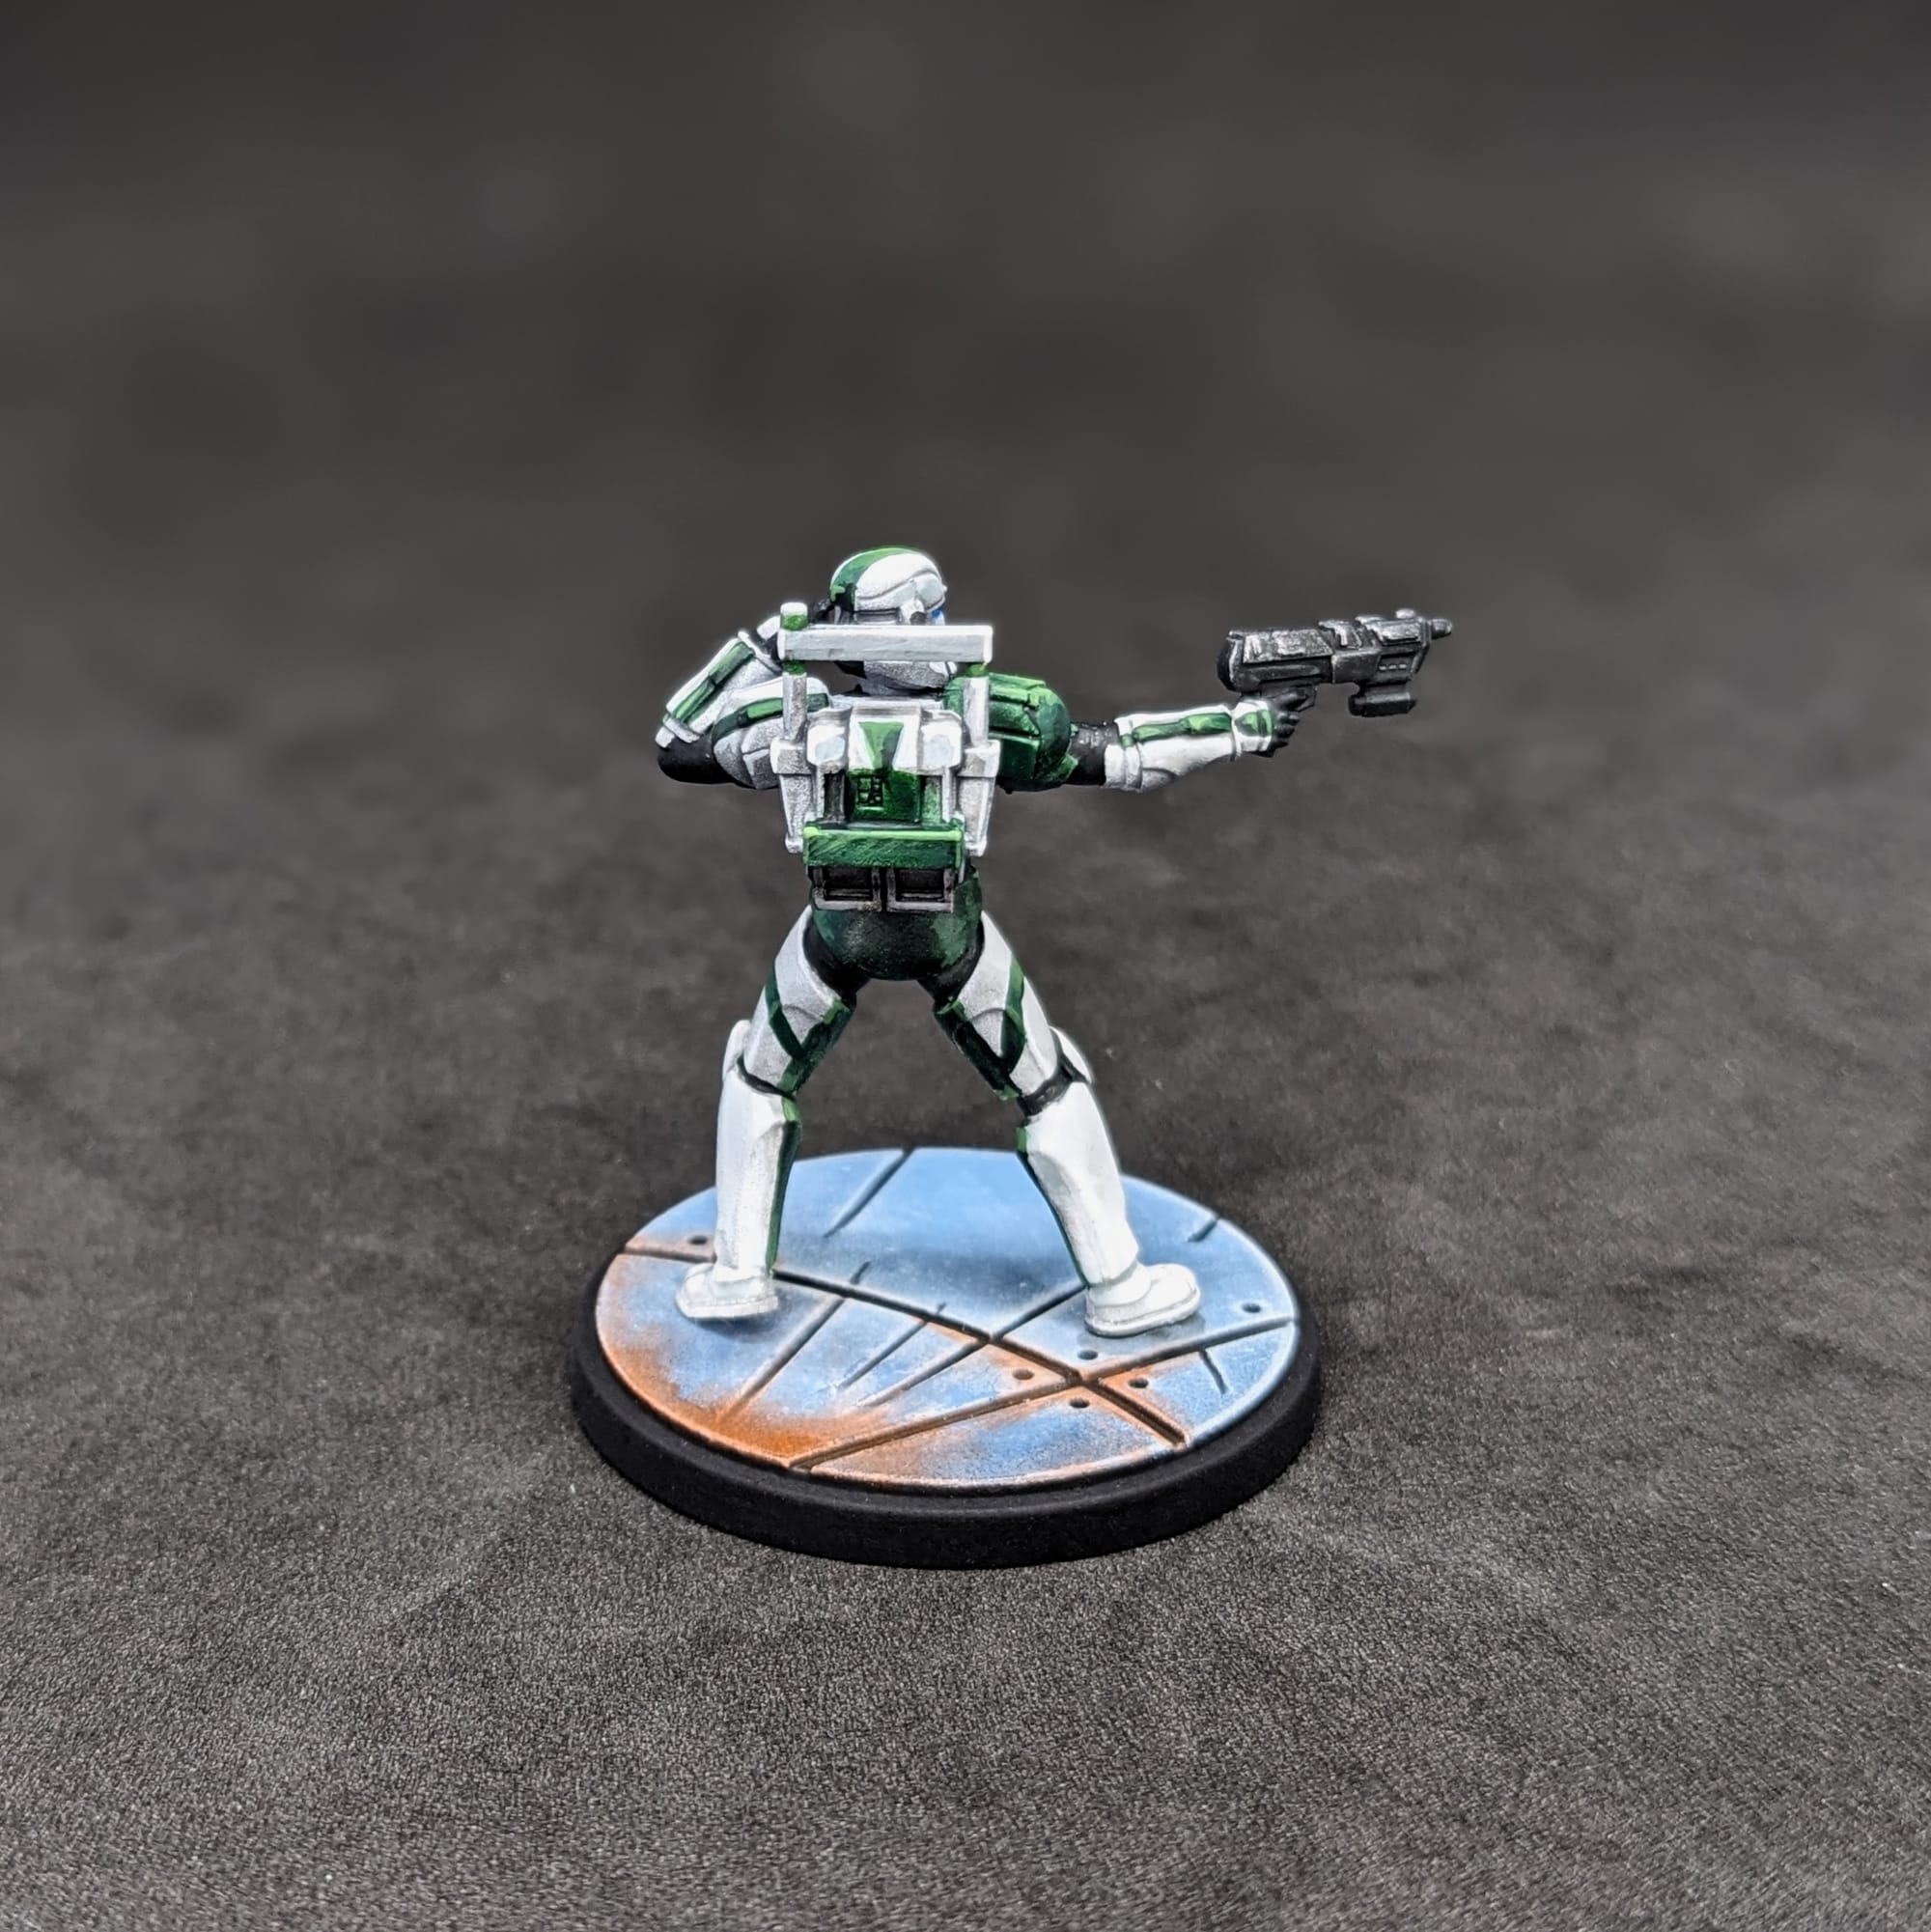
Lastly, using Frostheart Contrast and white, I filled in the visors. I went back and forth with using the blue contrast over the white to help blend it a little more and give it that liquid style you see in all of the screenshots. I think the blue visor is critical in tying the whole model together, so I took my time with this. Any blue that spilled over I touched up with whatever color I needed.
Basing the Models
These metal bases are pretty straightforward to paint. This base was primed with Army Painter Wolf Grey. I filled in the blast marks with Black Templar, let that dry, then did a coat of Drakenhoff Nightshade. After that dried, I applied Longbeard Drybrushing over the blue areas. Outside of the drying, the total paint for these bases will take less than 5 minutes, which is a big reason why I paint the figures and bases separately. Otherwise, I have to carefully paint around the feet/base of every figure, which just takes extra time.
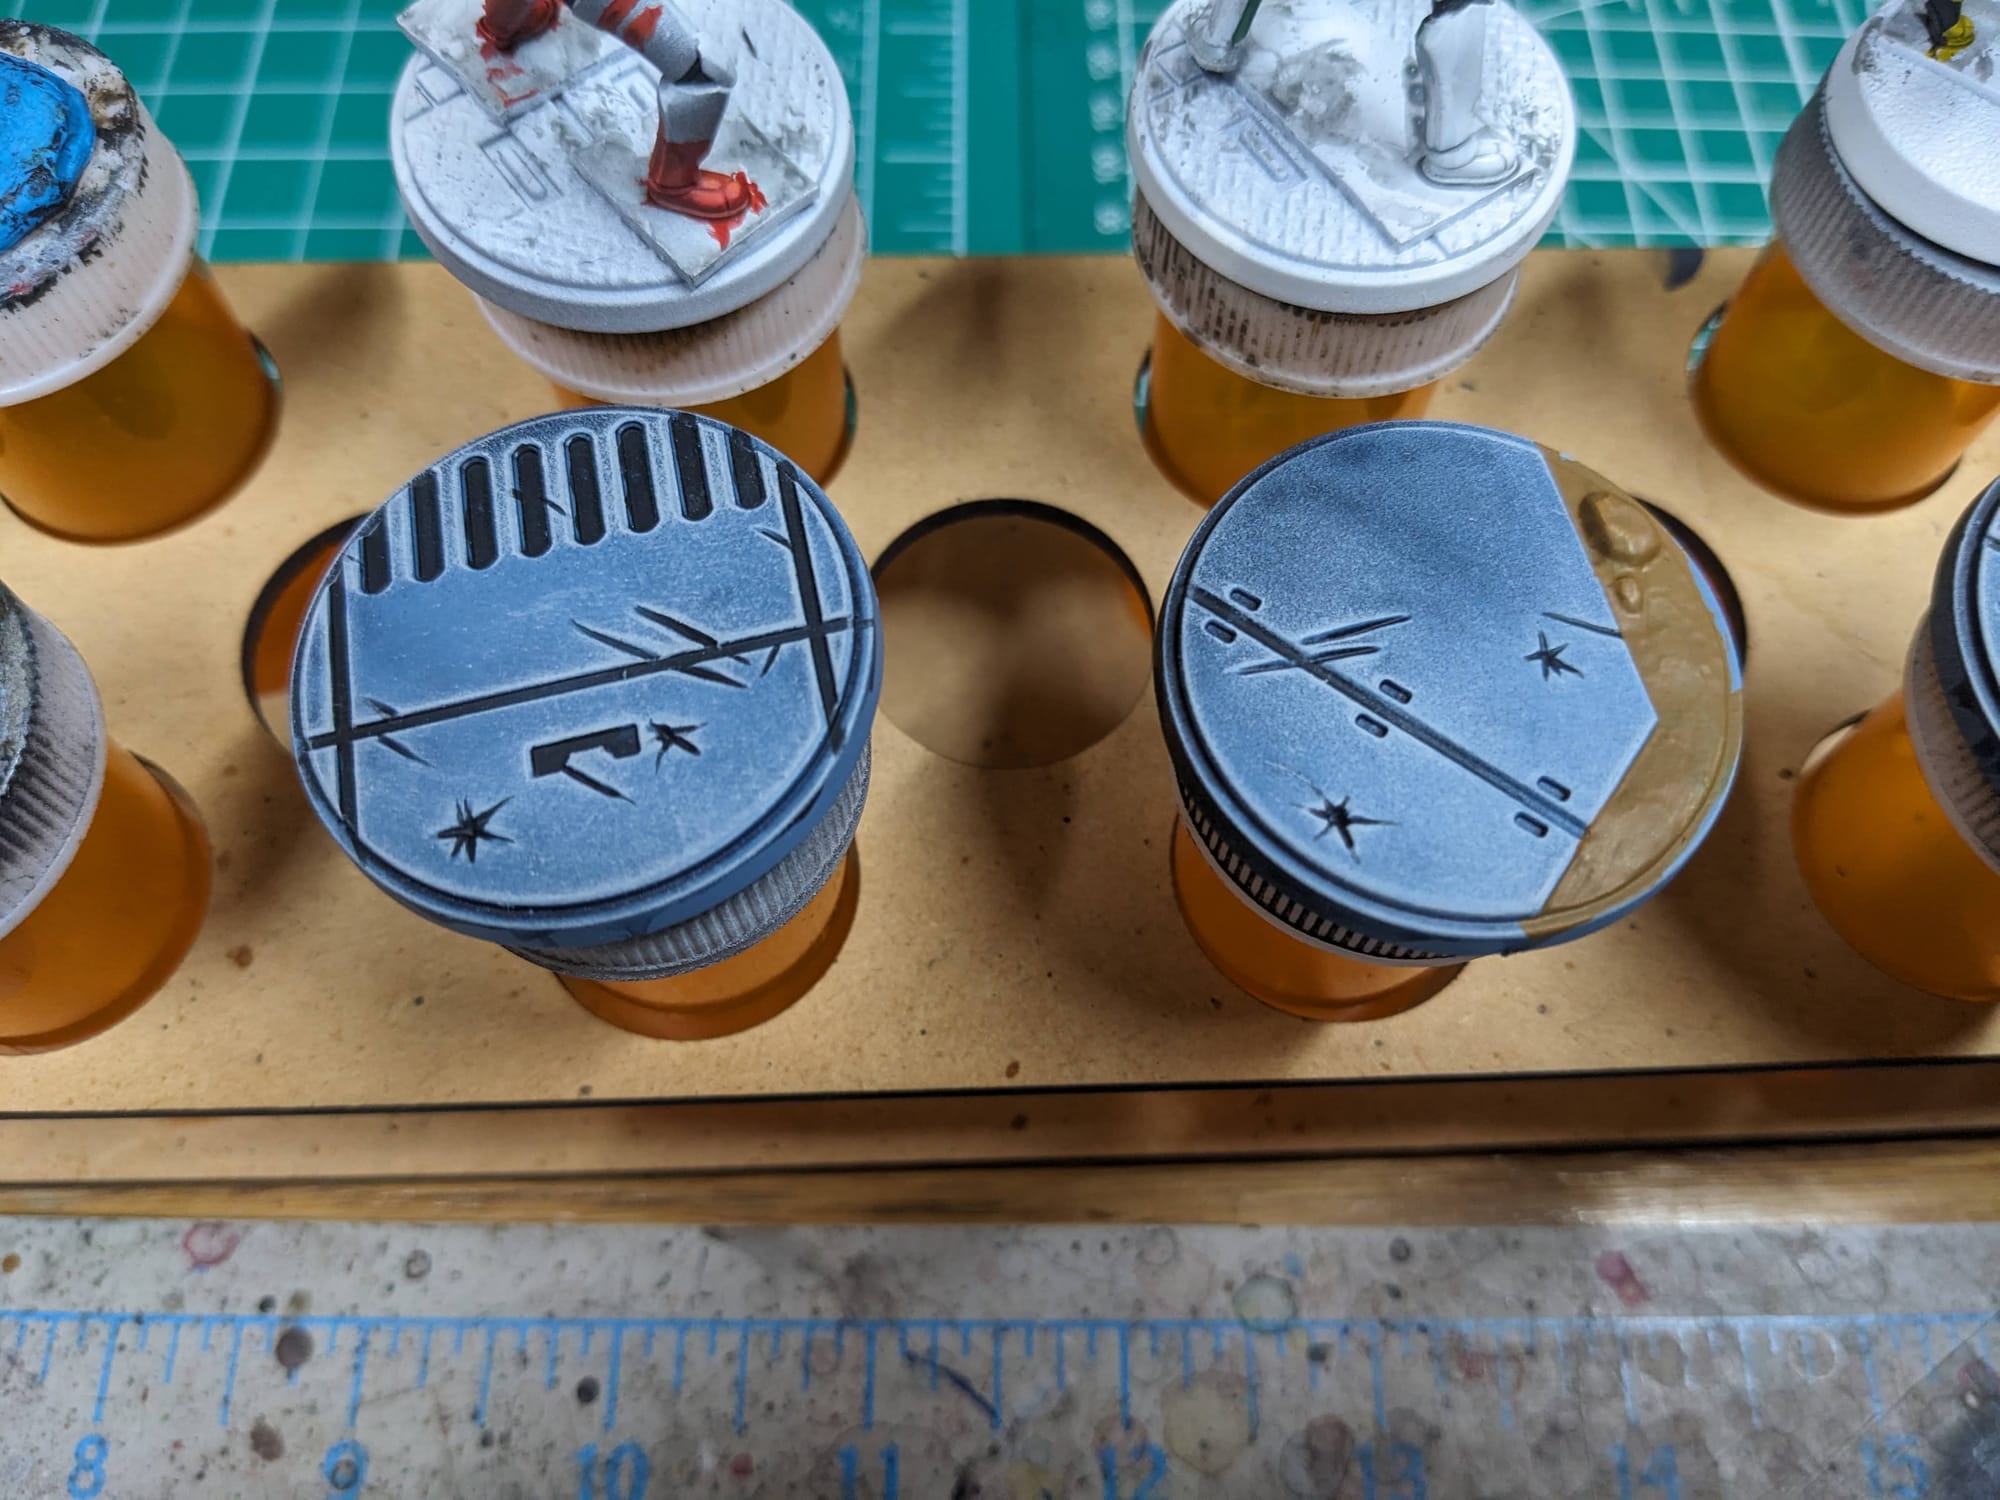
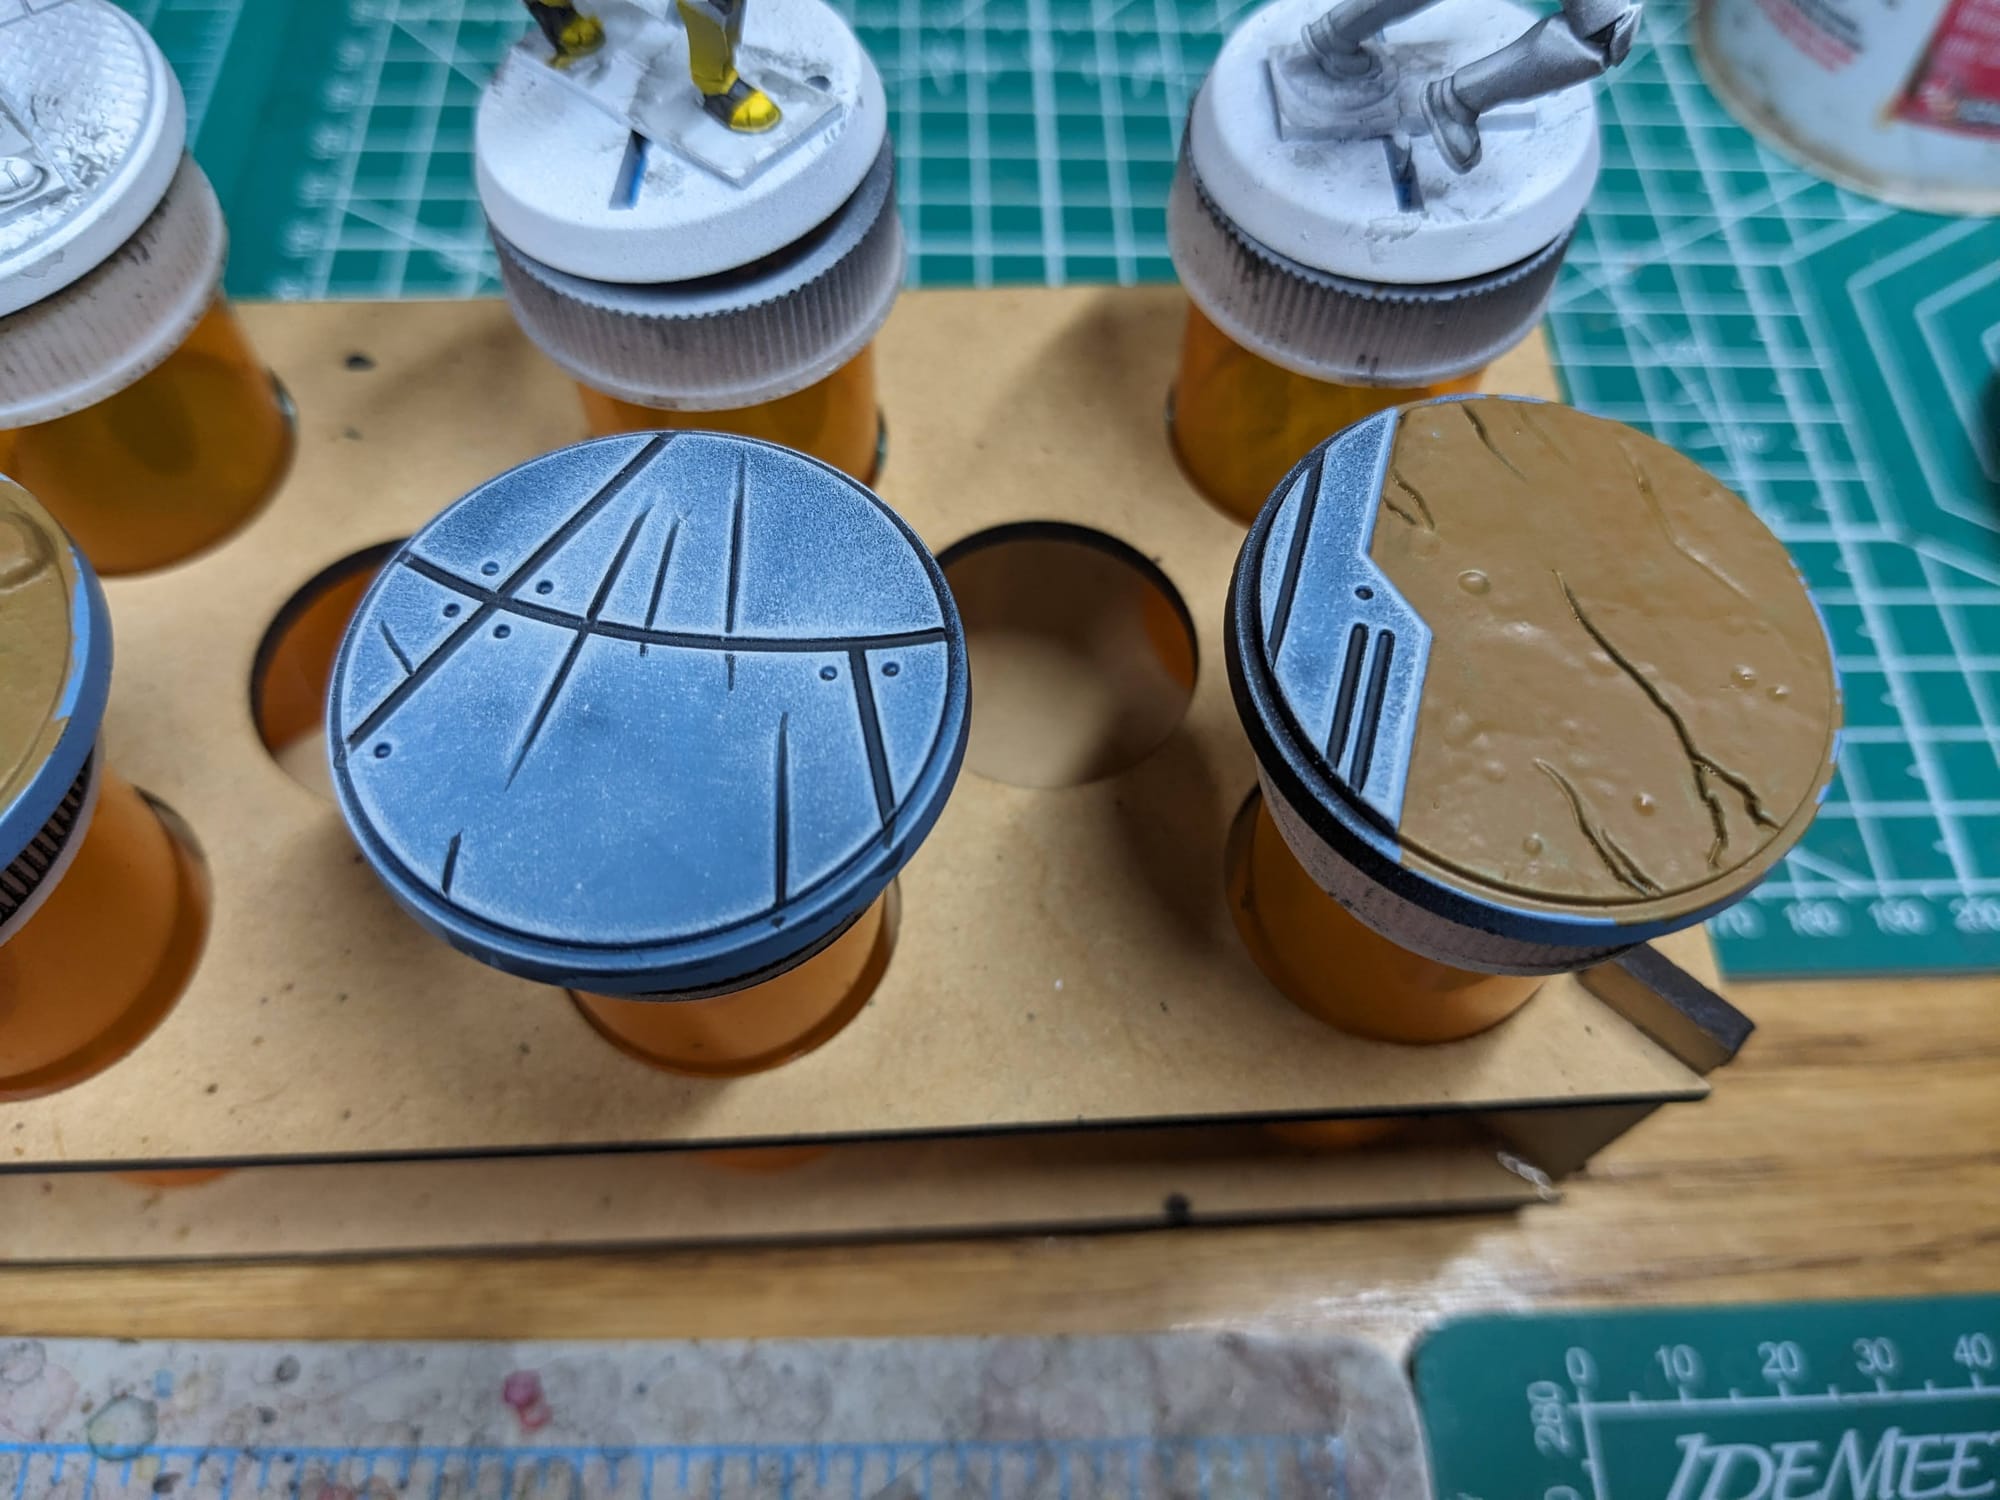

After the basing was done, I glued the figures to them and painted the rims black.
Sealing Your Models
As I do with all of the models I paint that I also play, I applied a protective clear coating over the paint. This helps preserve the paint on the model and keeps oils from your hands from rubbing off the paint as you continuously touch the models during games. There are many different kinds of clear varnishes to use, but I typically use any matte or anti-shine varnishes, as satin, semi-gloss, and gloss tend to distort the colors of the models (not to mention that most models aren’t supposed to be shiny).
Brands that have been reliable for me are Krylon Matte Clear Spray, Rustoleum Matte Clear Coat, which is slightly glossy, and Testors Dullcote, although the latter can be expensive and difficult to find. For a coat with no shine that really enhances the colors, I use AK Interactive’s Ultra Matte Varnish, applied with an airbrush.
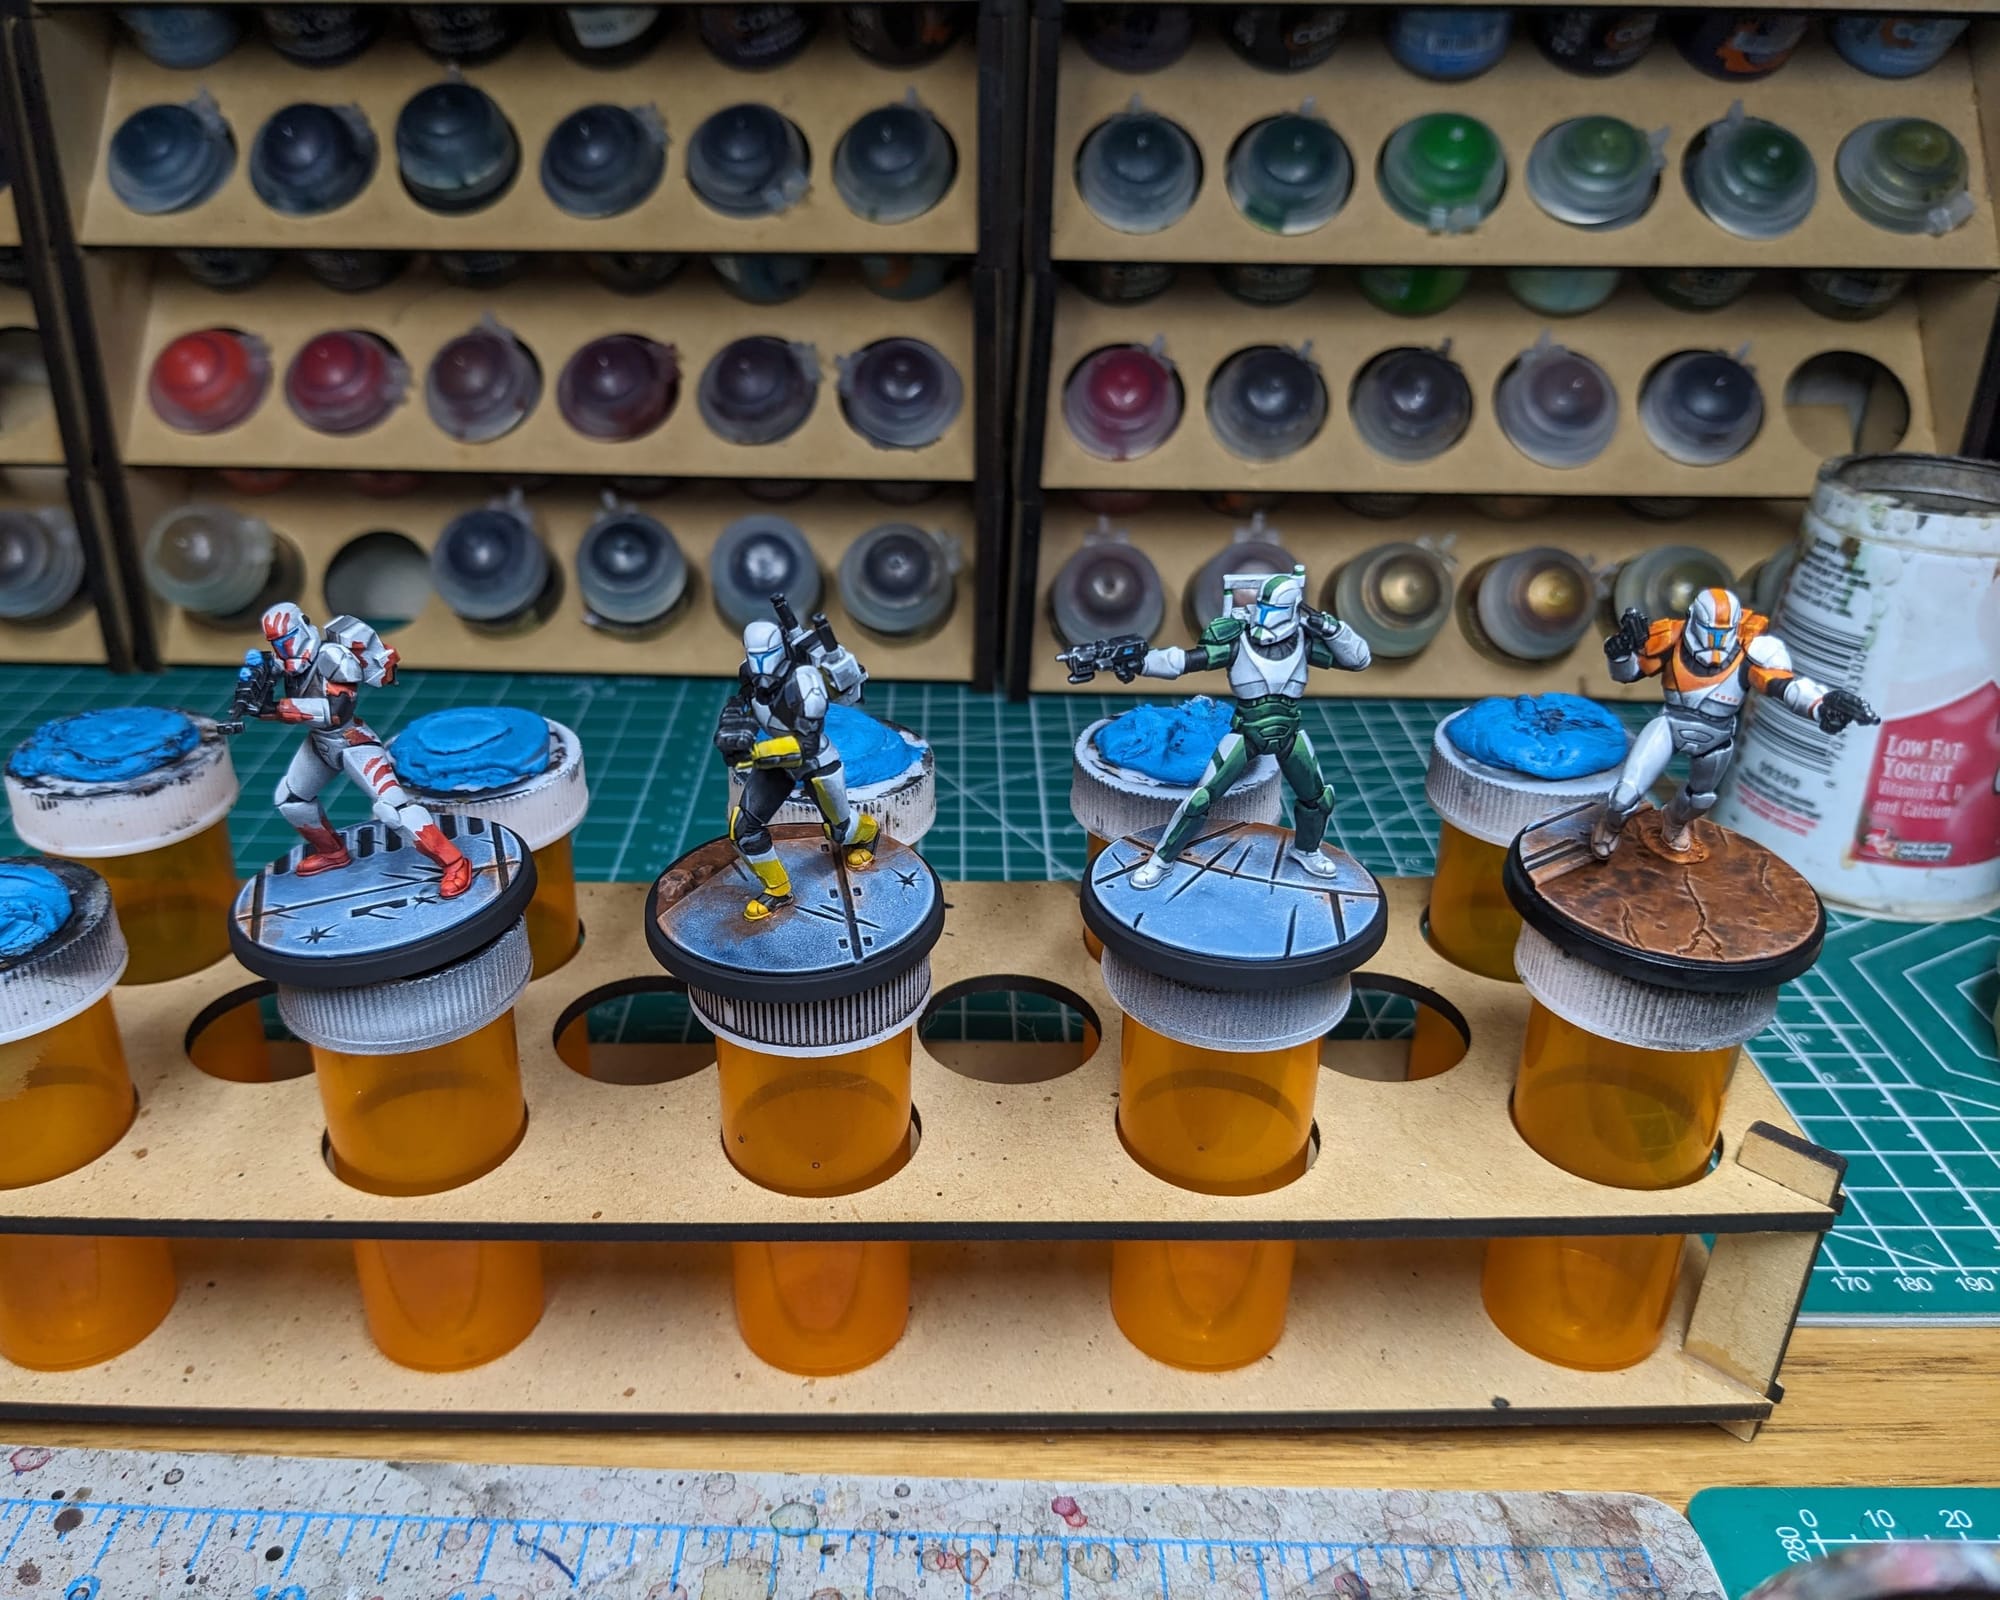
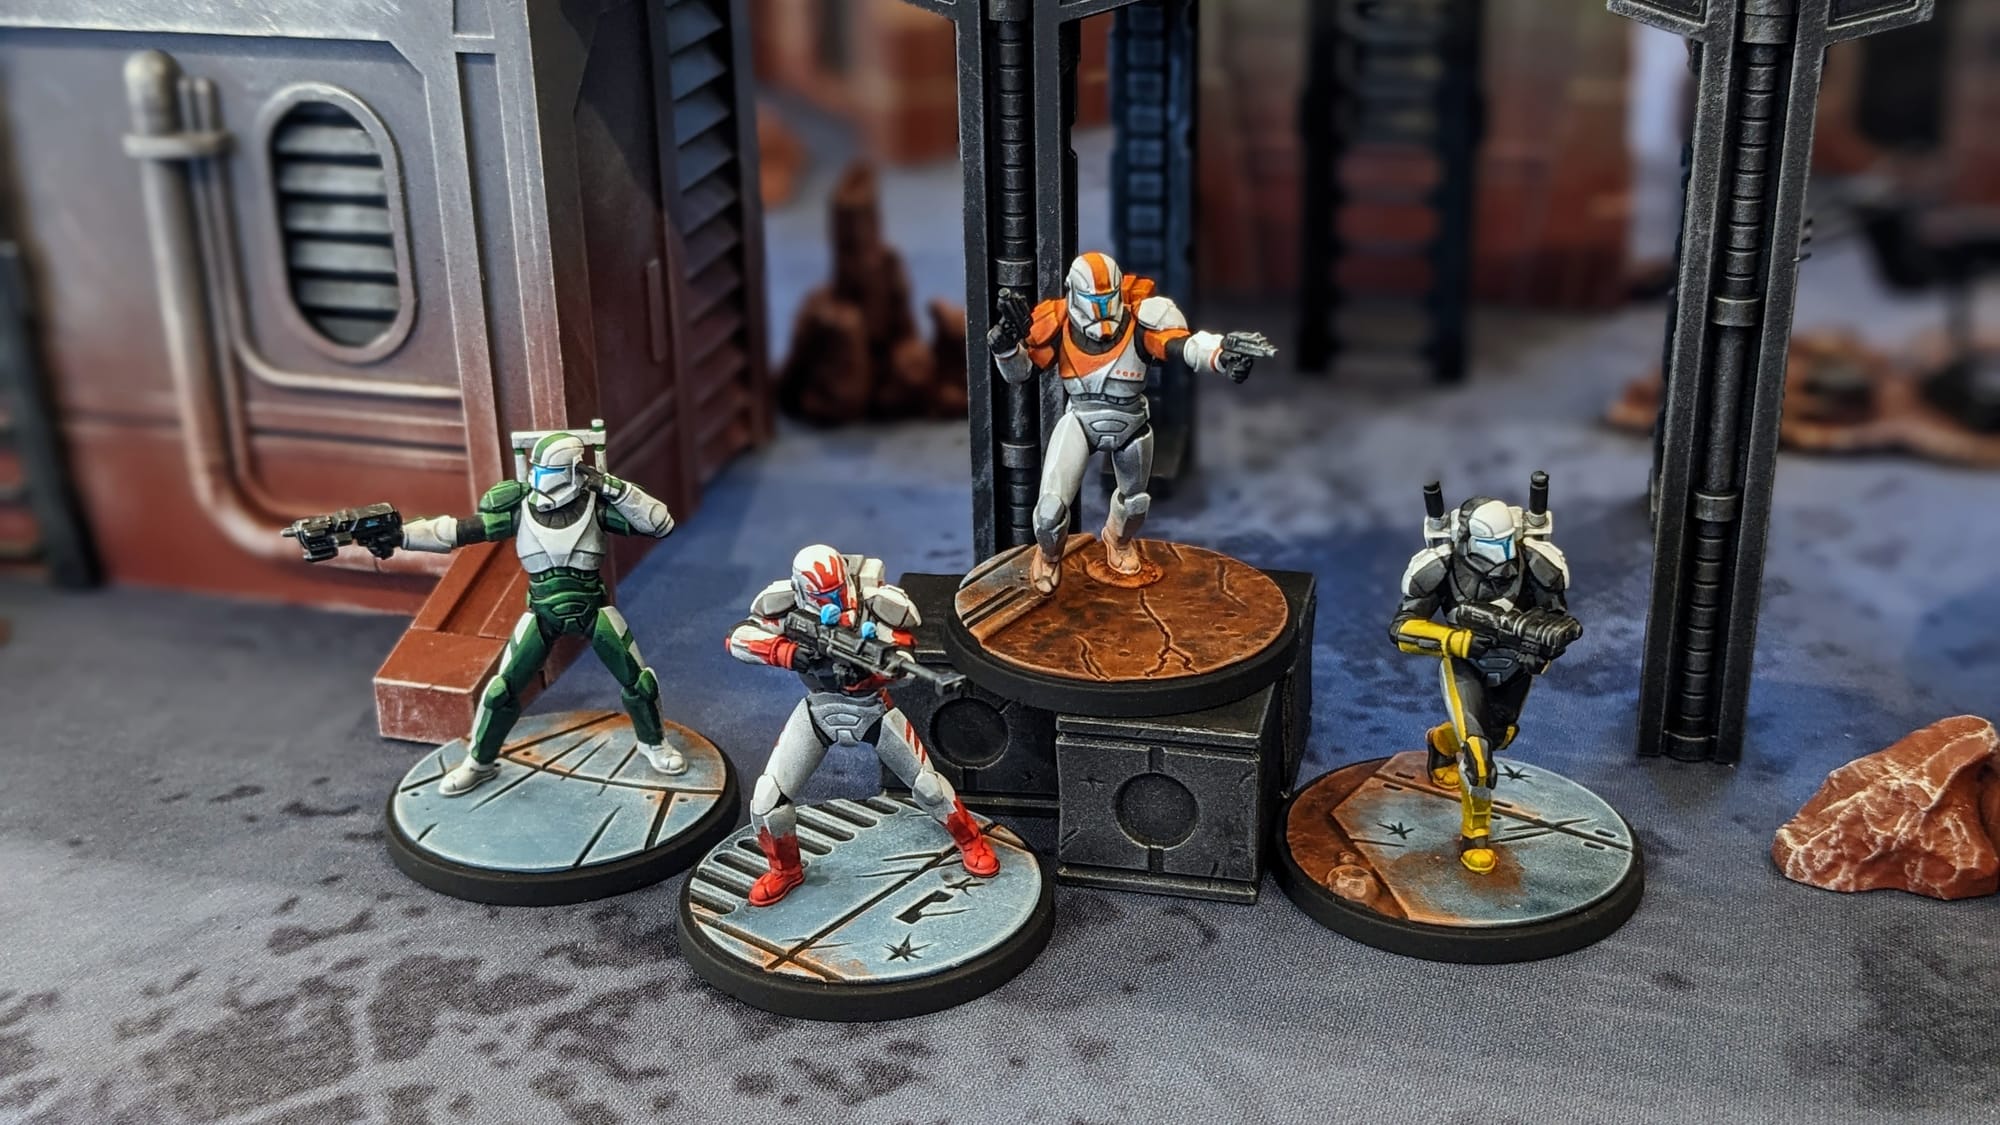
Painted and Ready for Play
Impressions
What Worked
Utilizing the Clone Contrast paint mix makes a huge difference for getting 80% of the model done. Applying speed/contrast paints over the top really helps block out the areas that need highlighting, making the layering/highlighting part go that much faster. Honestly, the hardest paint about painting ‘lore accurate’ models is having enough different angles to refer to while painting, and so the 360-degree turnaround images on AMG just made everything so easy to refer to.
What Didn’t Work
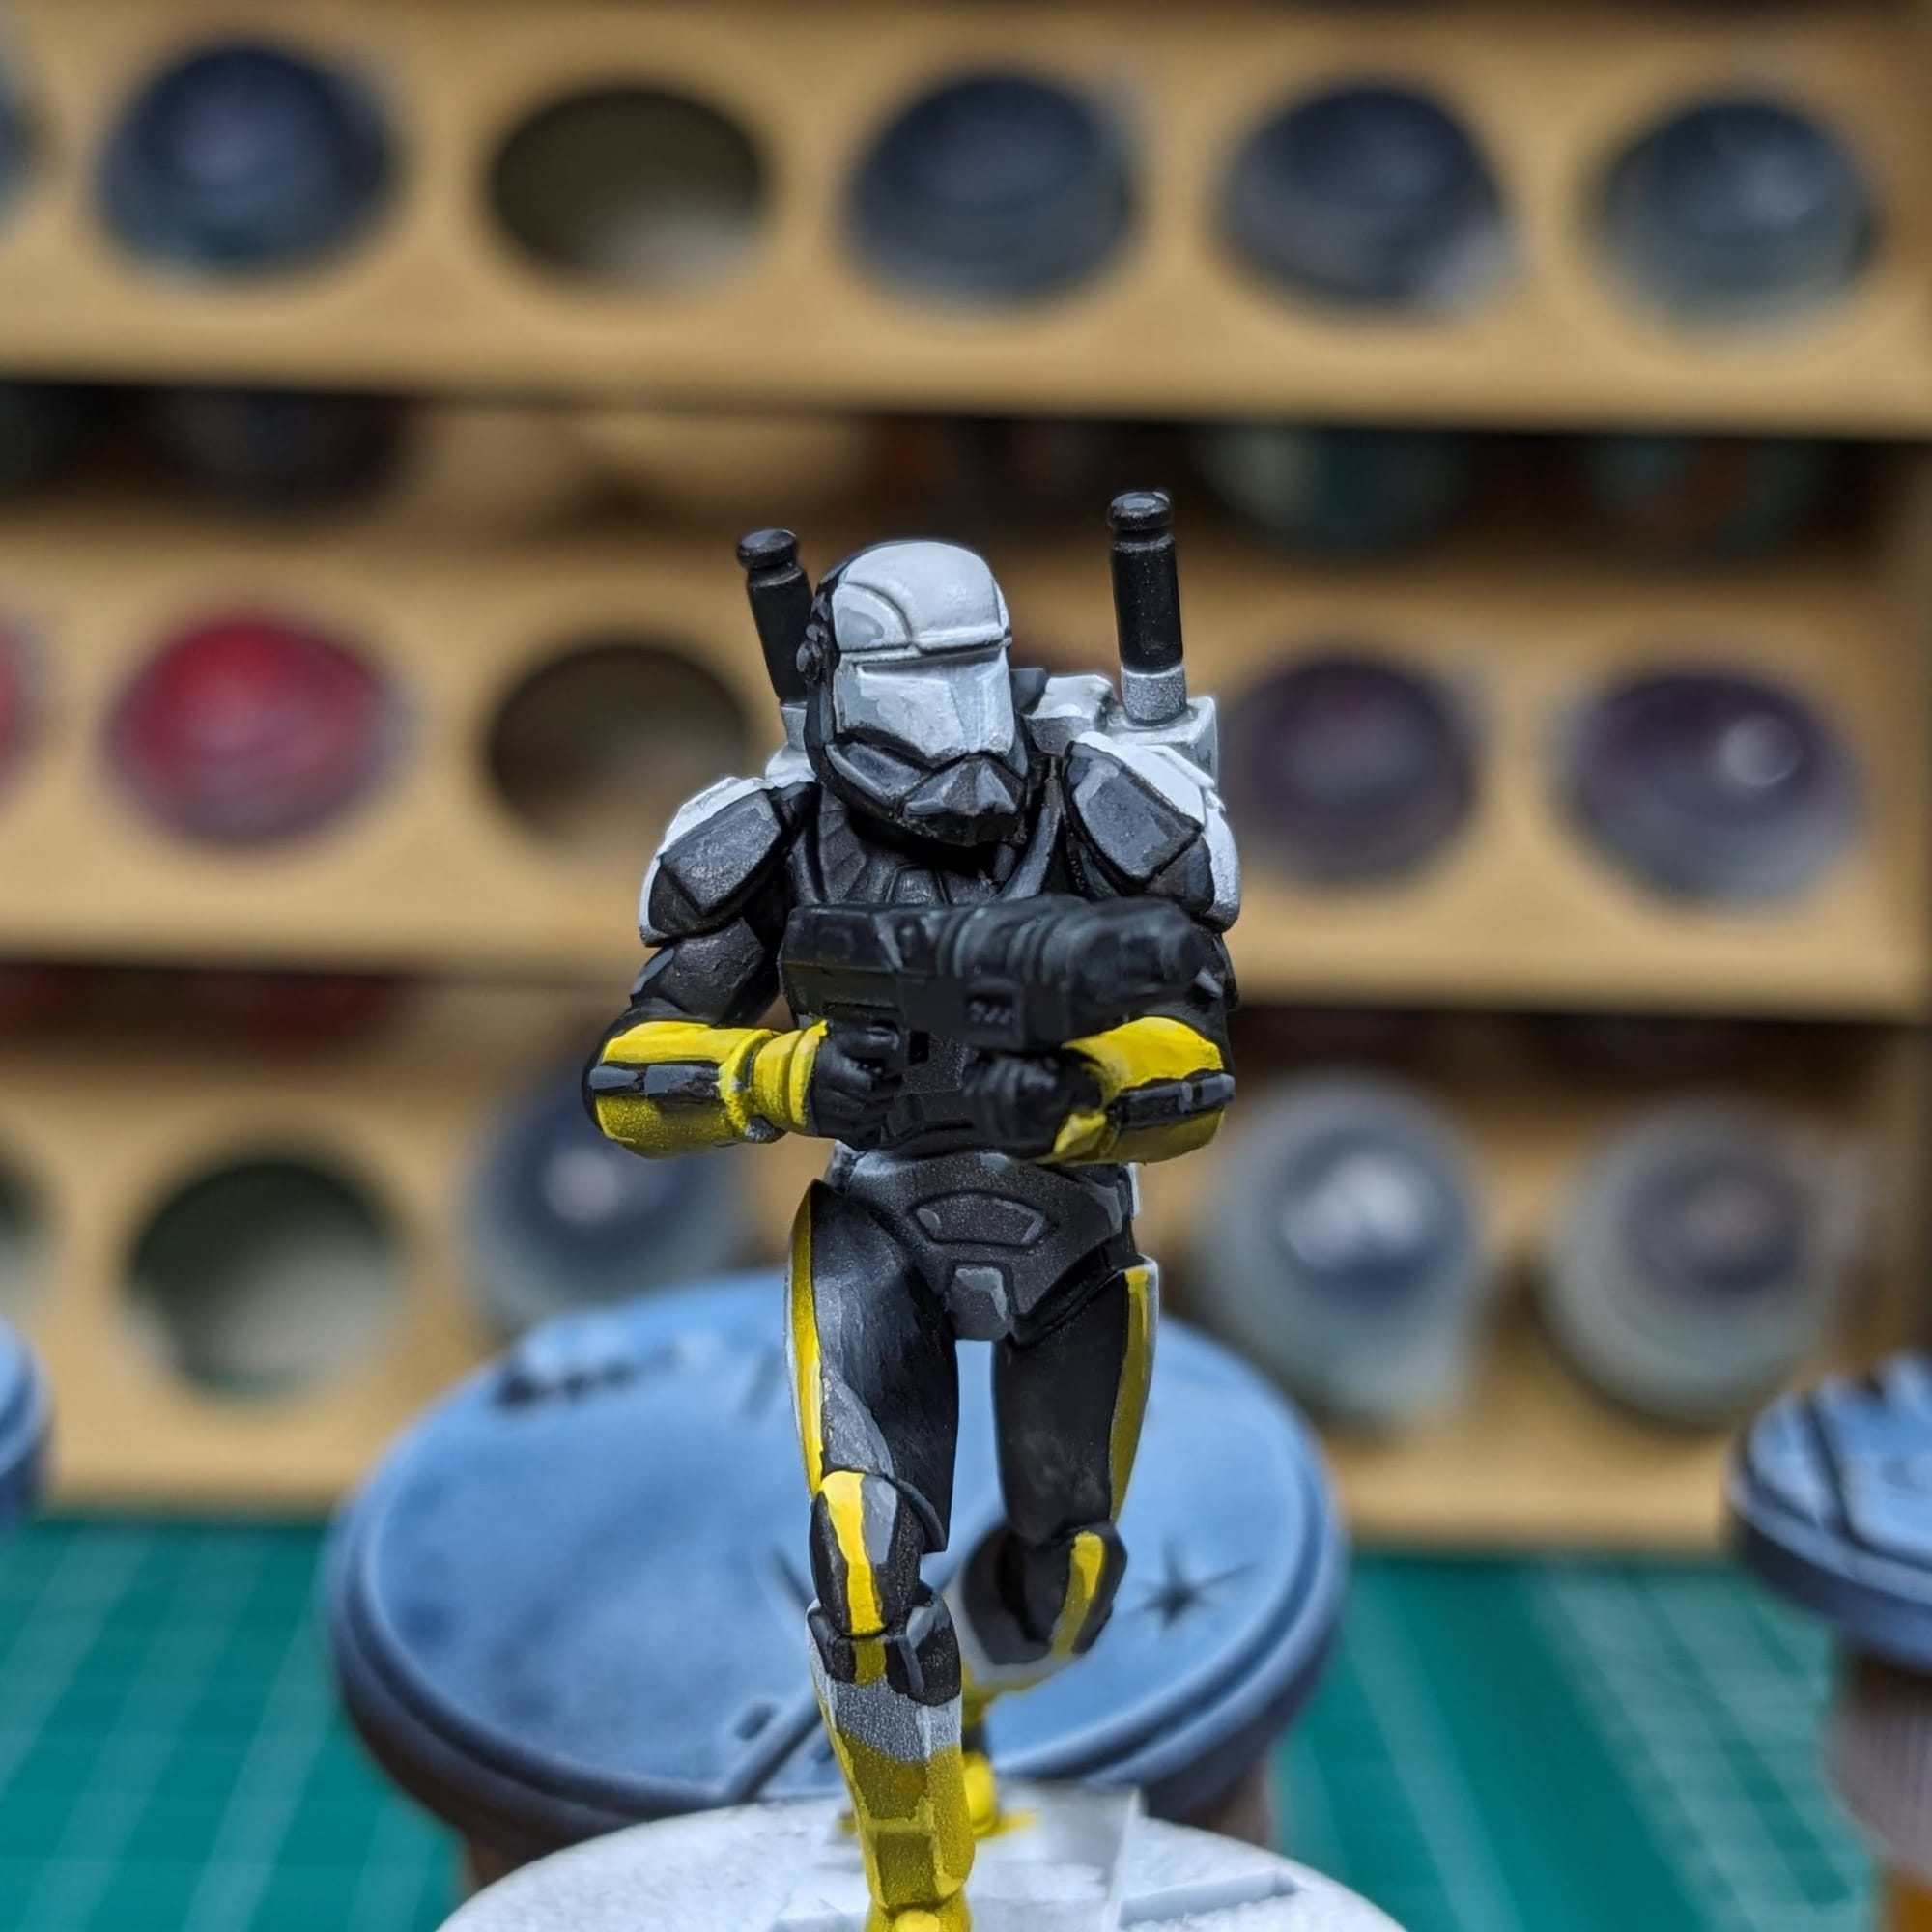
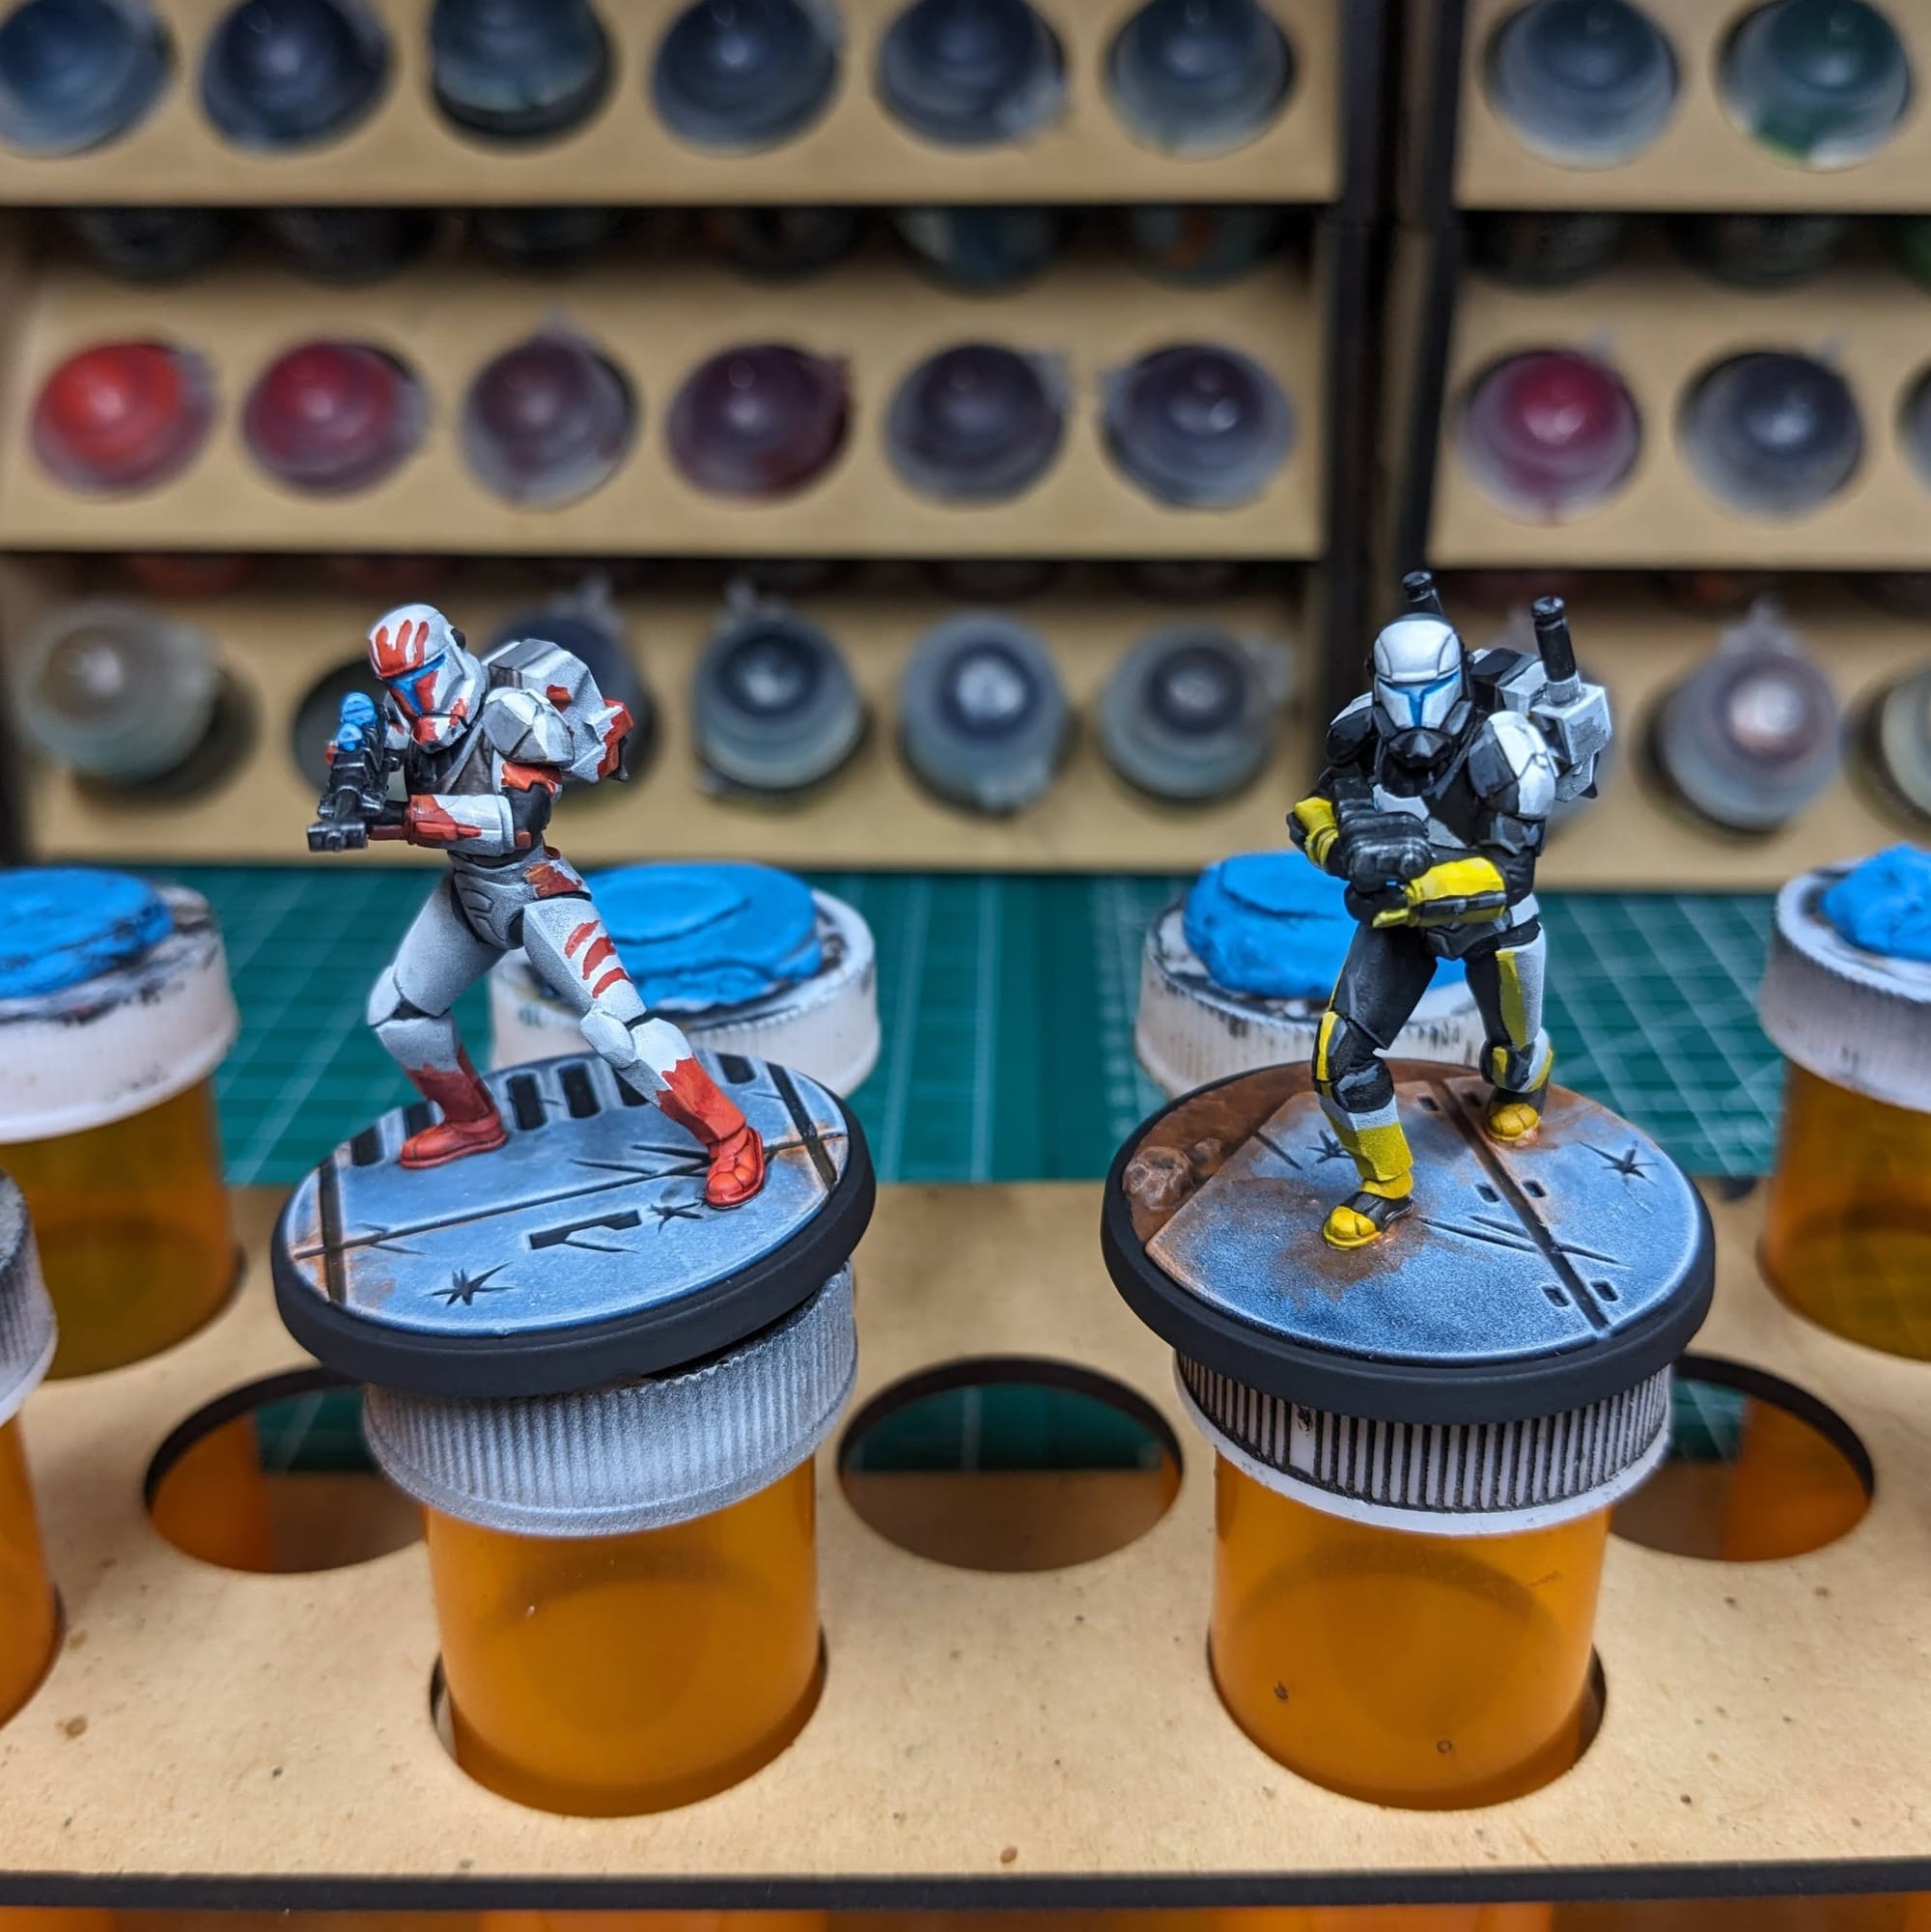
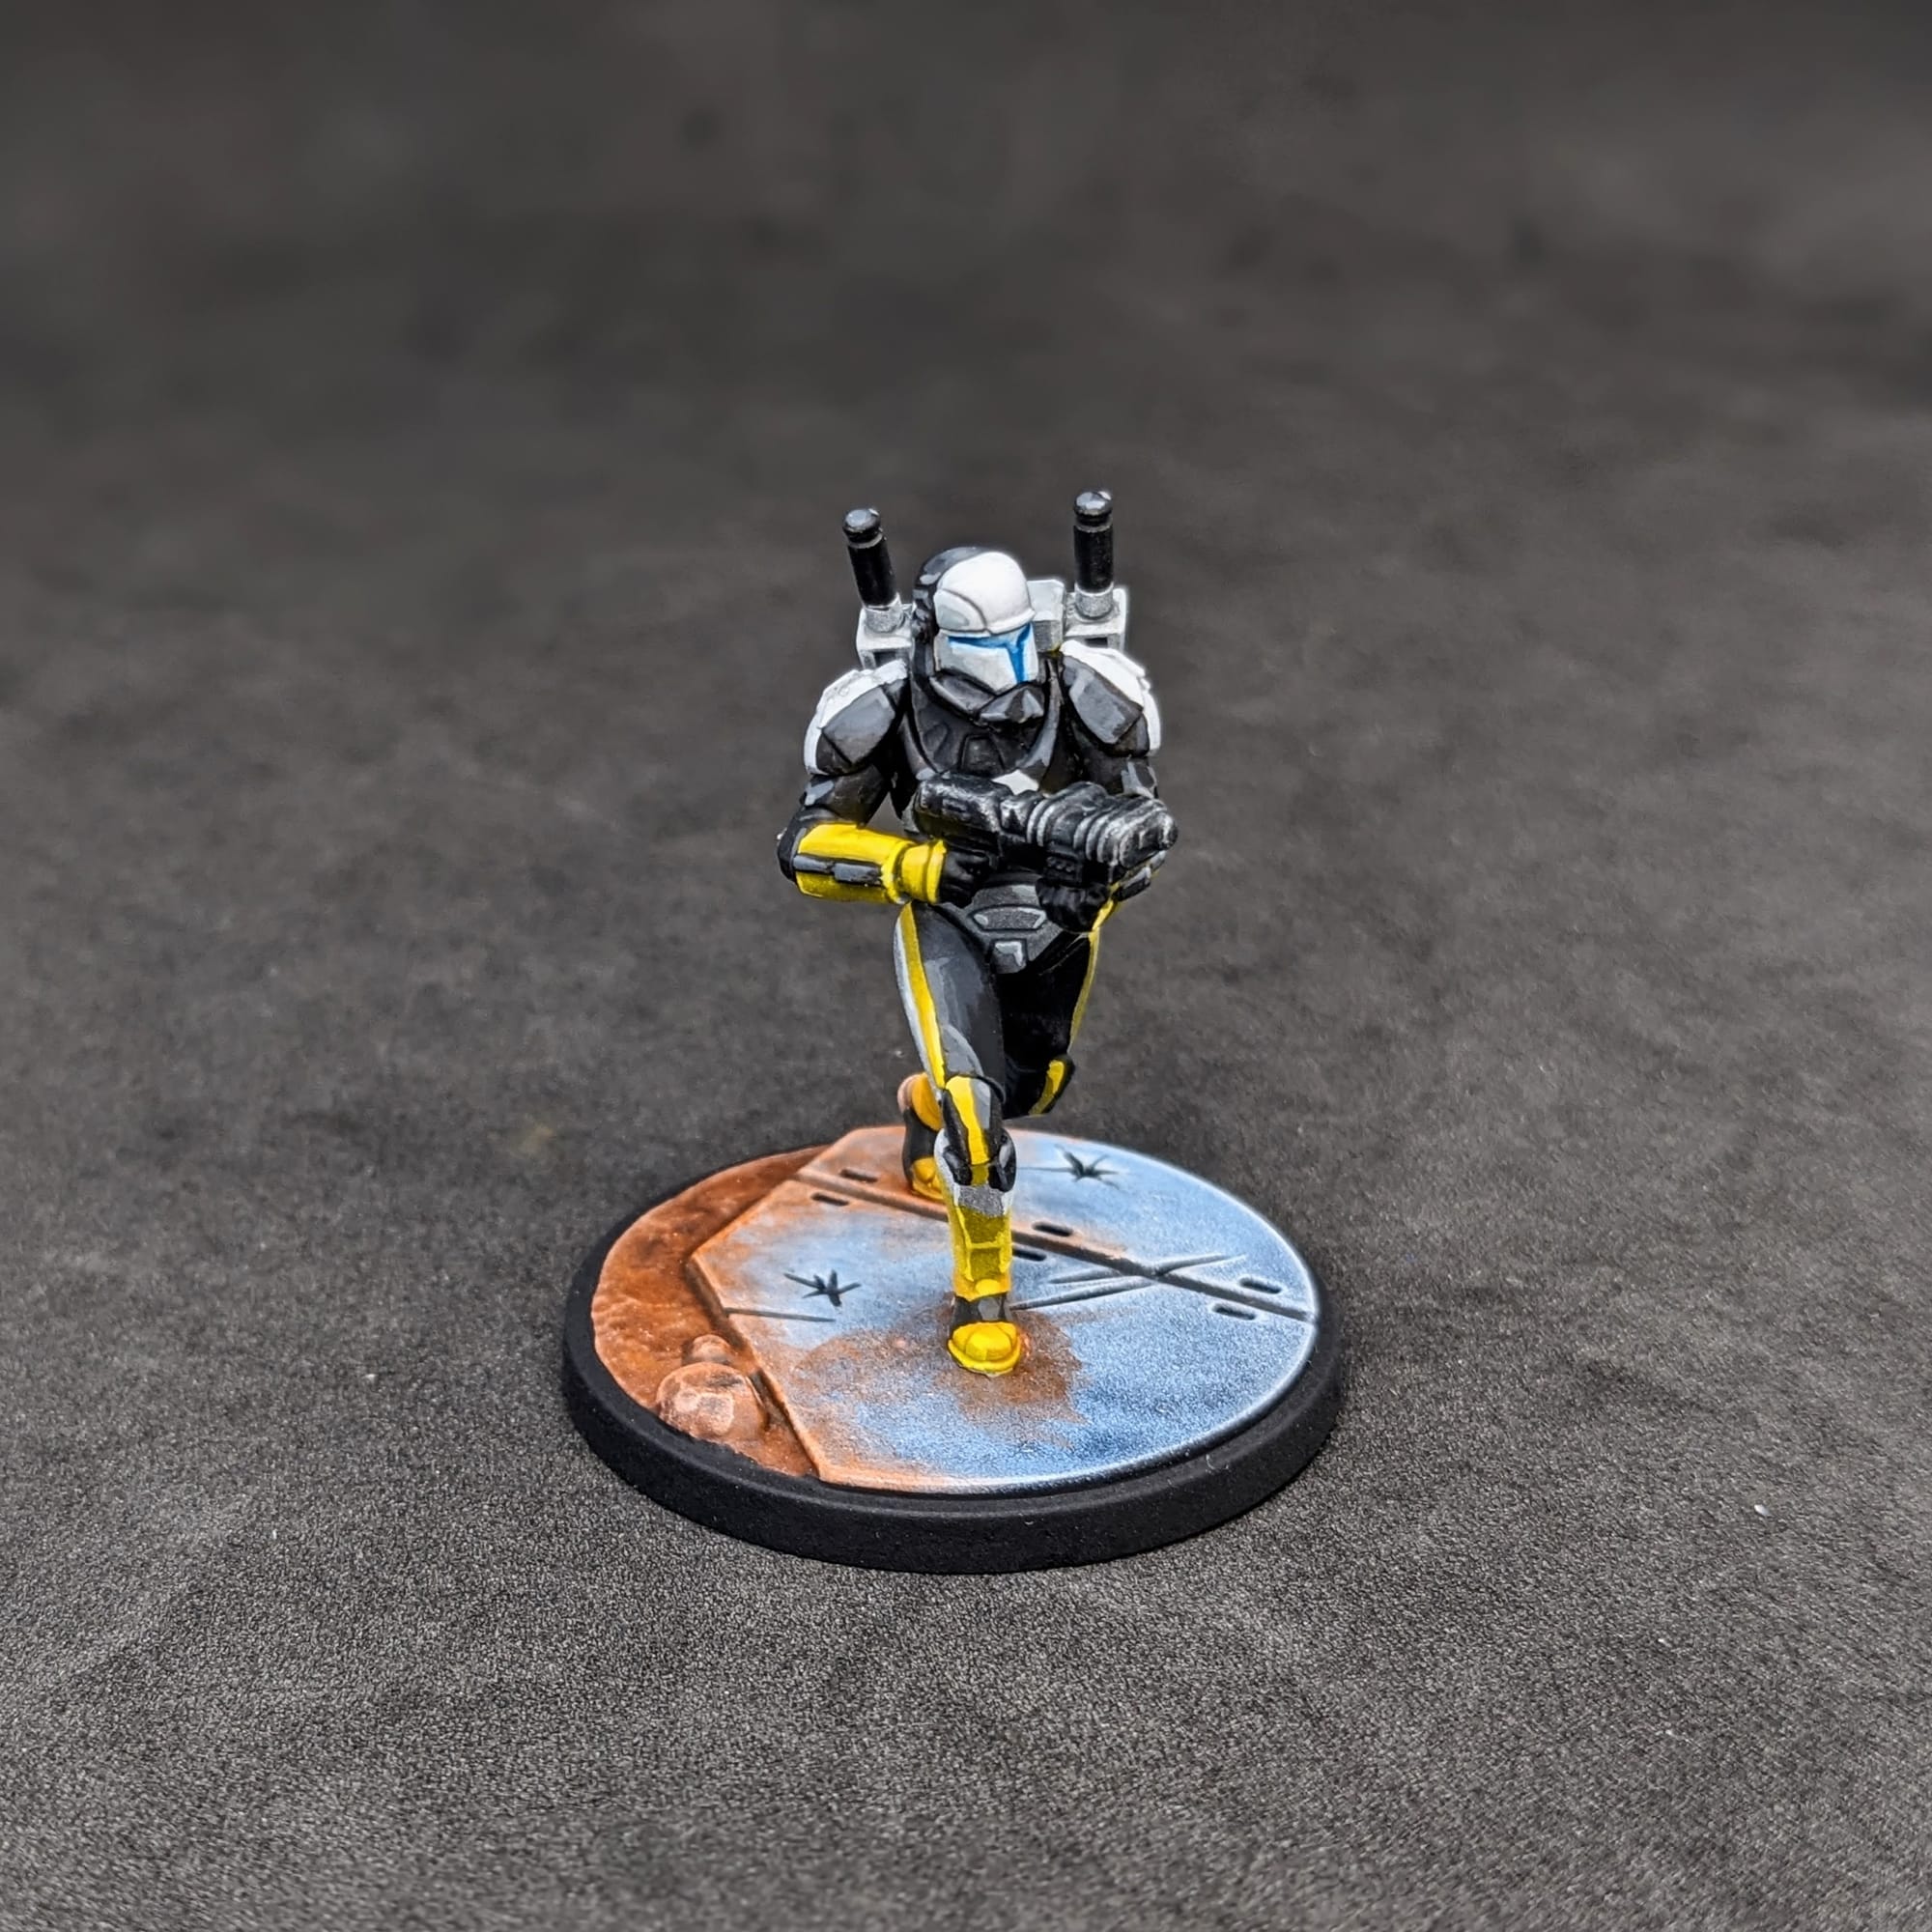
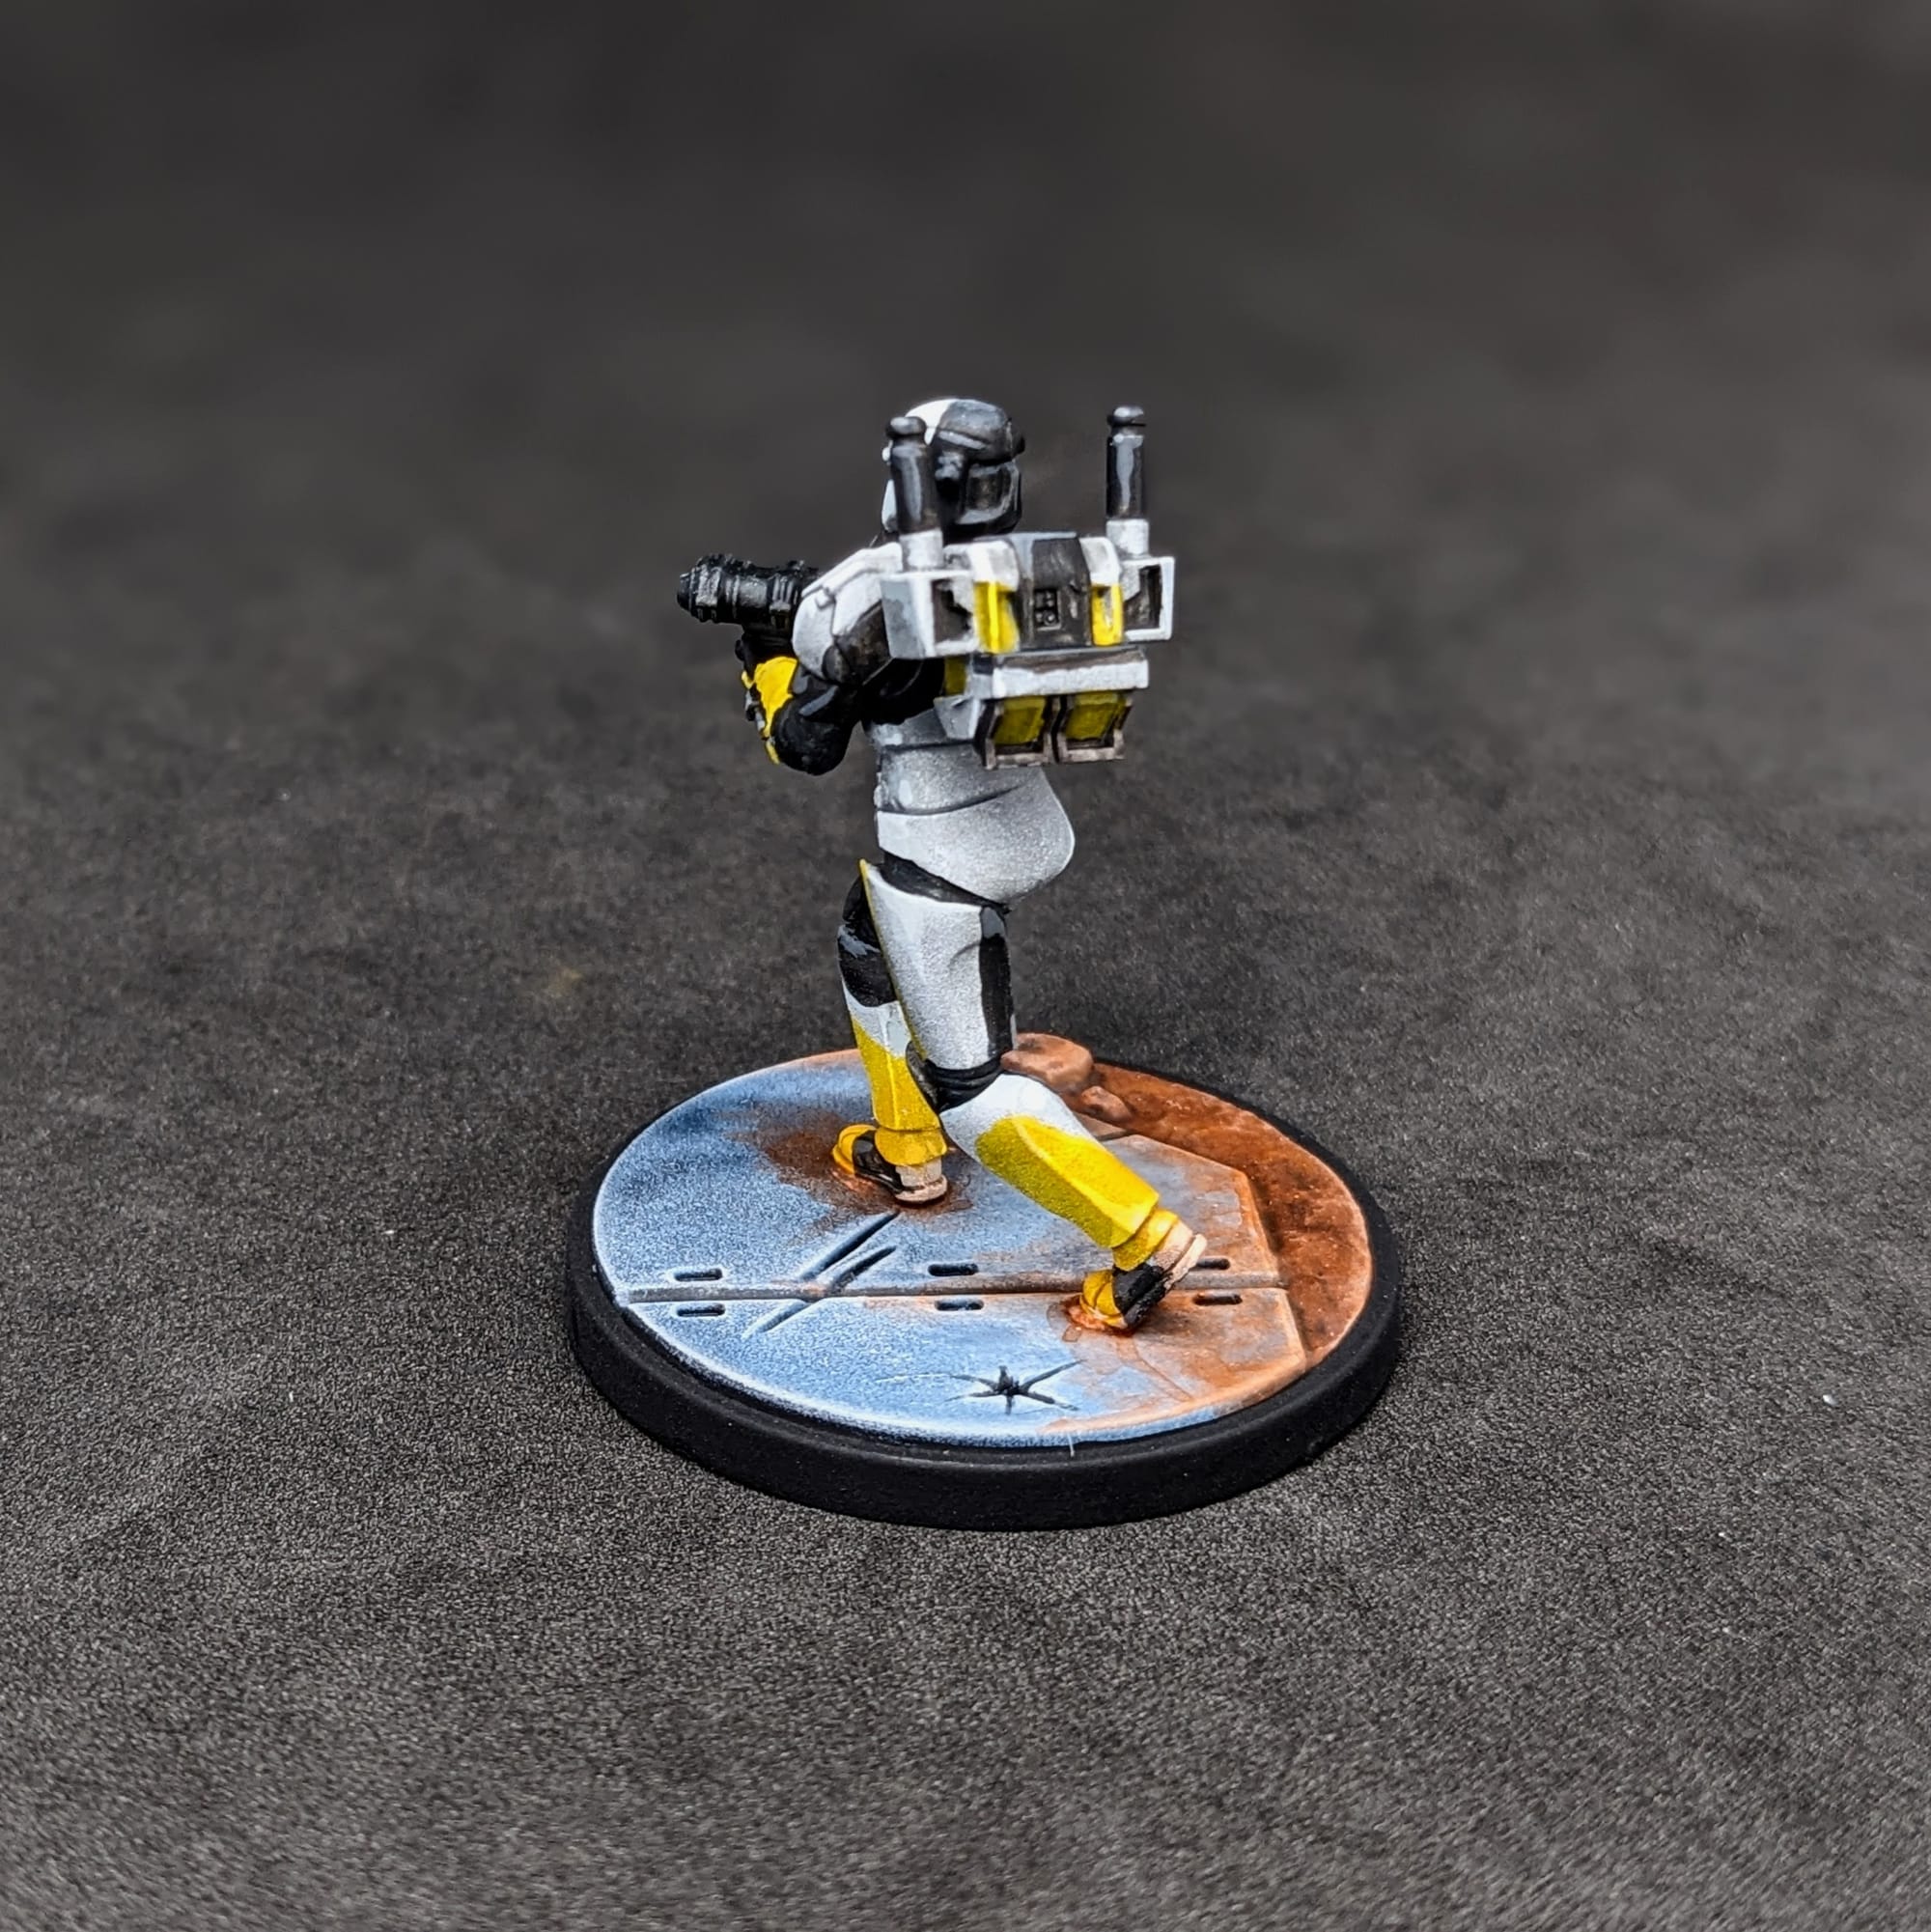
Painting Scorch was tough with all of the yellow and black. Going slower would have helped me not make as many mistakes that I needed to go back and fix. It was very minor overall, and I was happy with the end result.
What I would do differently next time
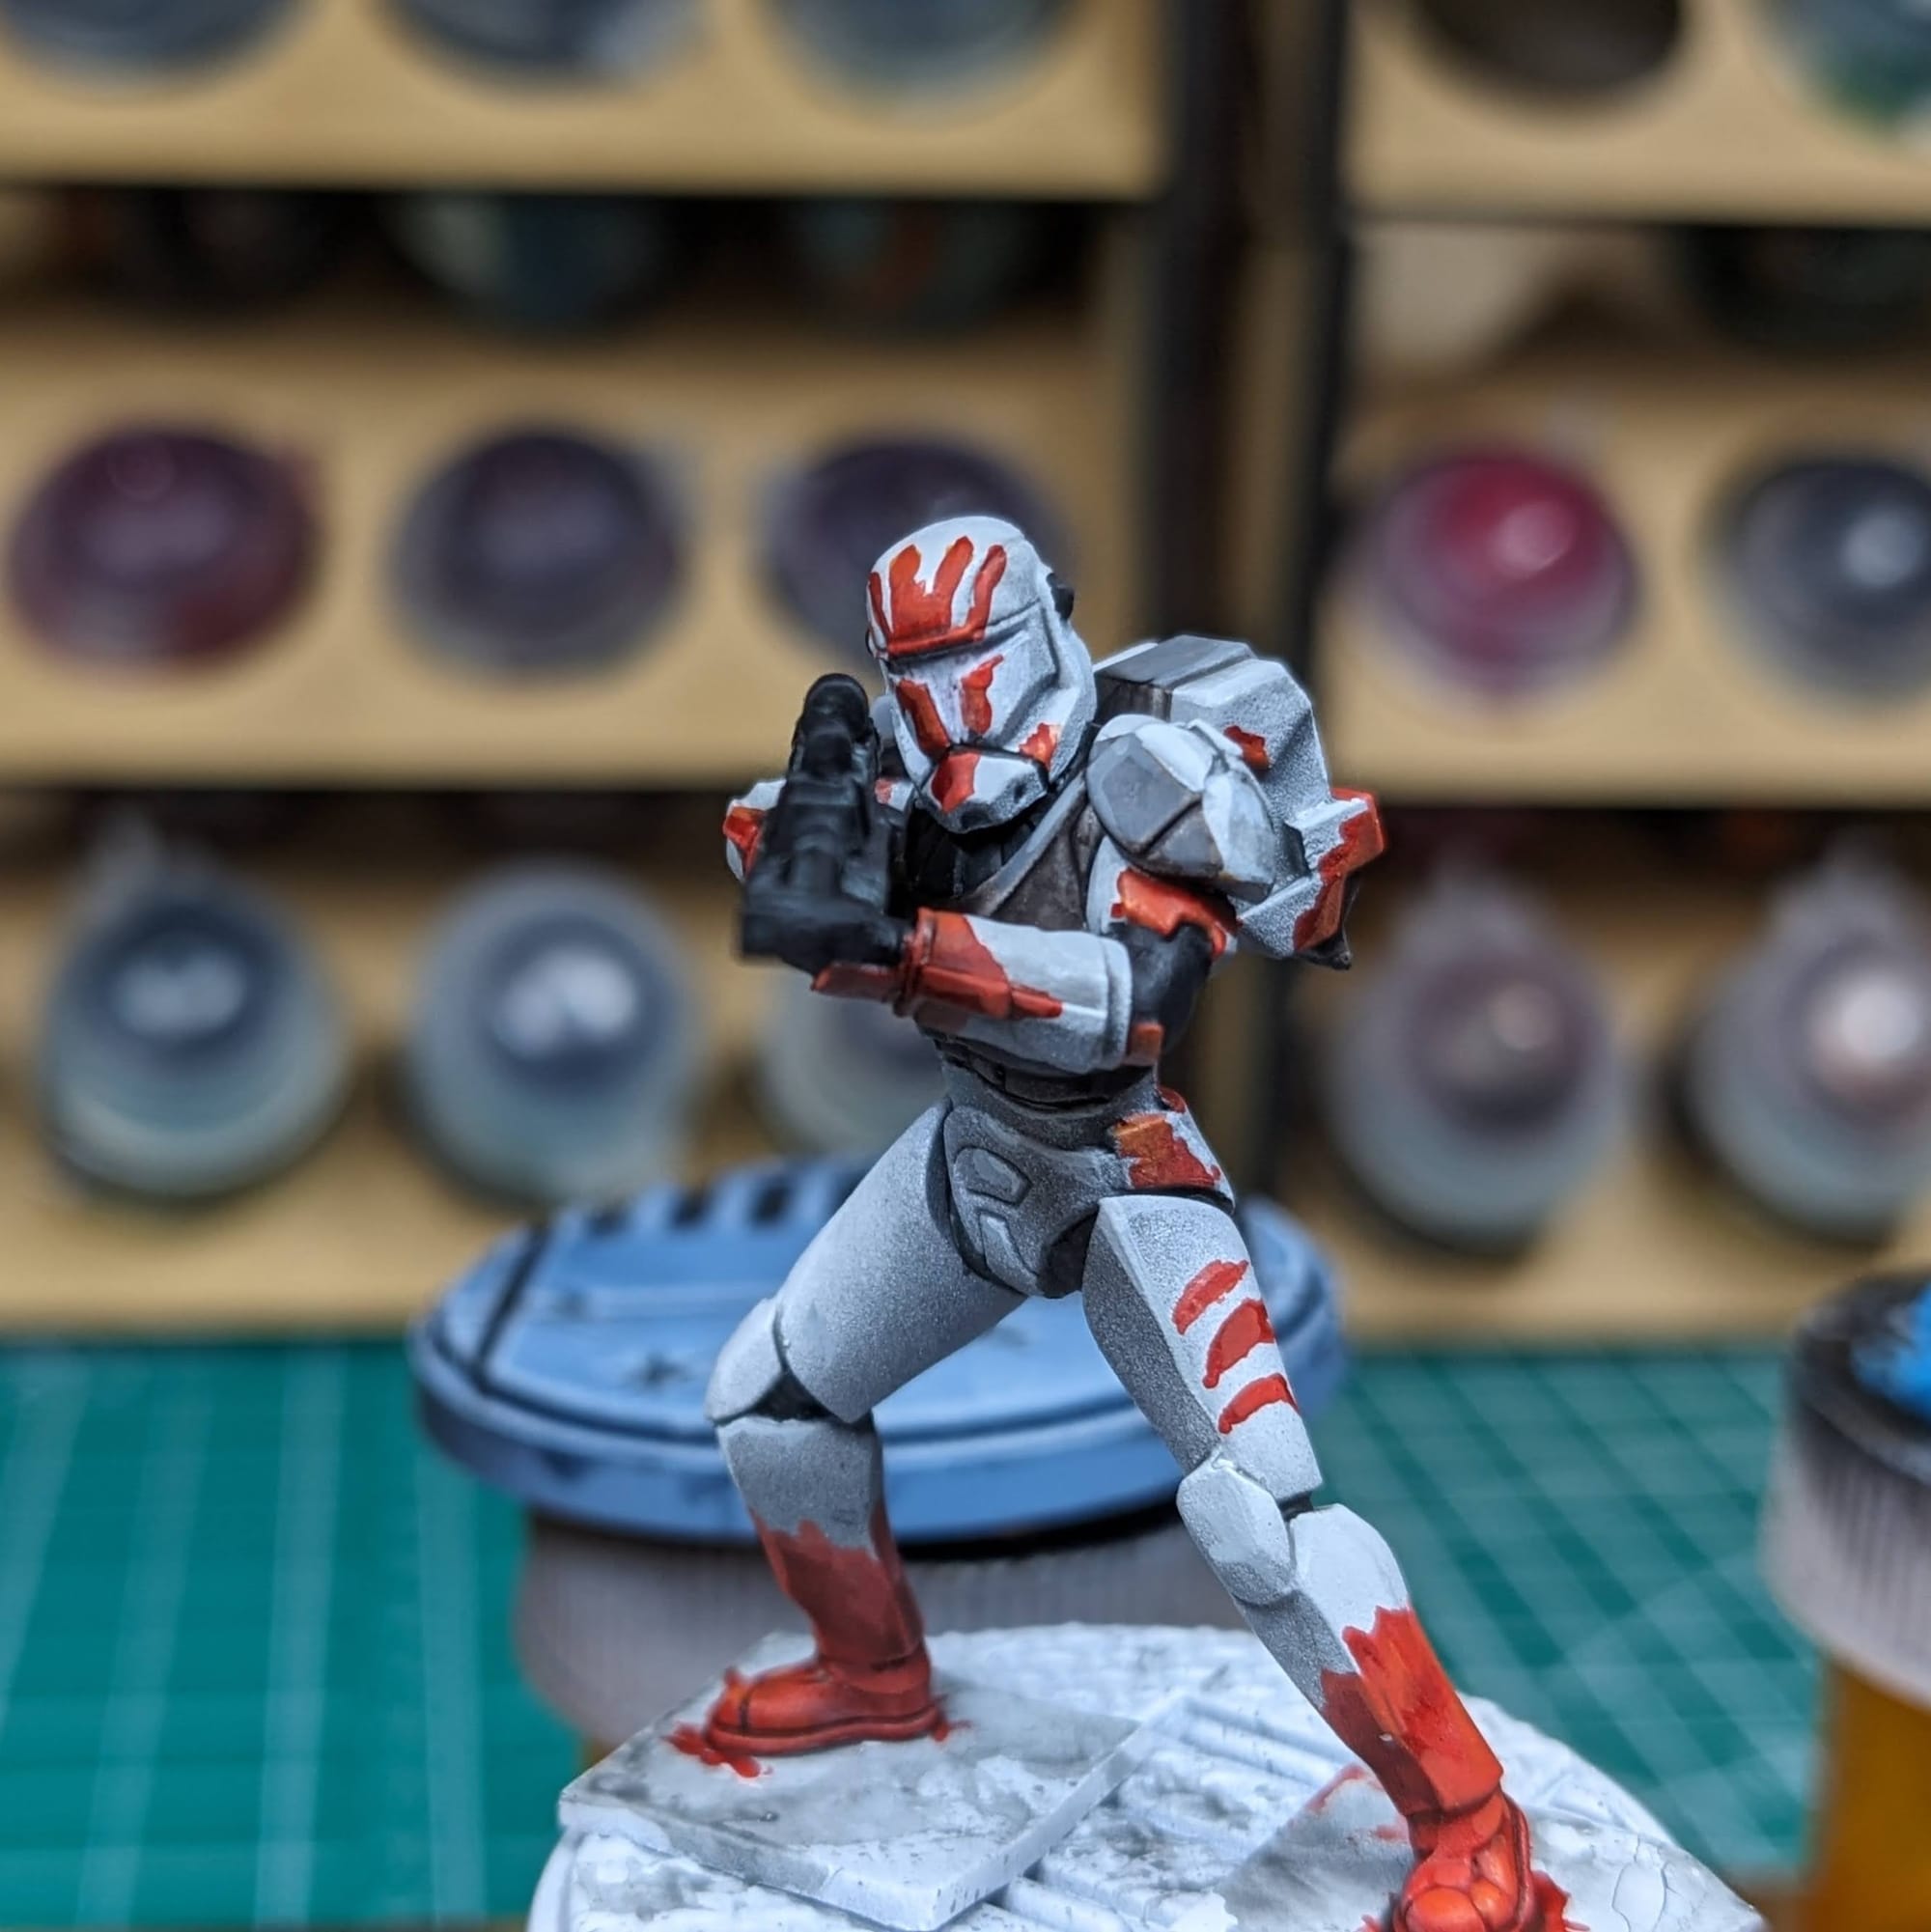
I am not a huge fan of the blasters Boss is wielding. I think if I were to paint him again, I would swap his hand out for one of the Plans and Preparations Squad Pack Republic Commando arms. They’re a little more interesting visually. It would take some careful modification and surgery for sure.
Final Assessment
I’m incredibly happy with how these turned out. I can’t wait to use them in my next game, especially since, on paper, they look insanely good. While they’re waiting for deployment, I am happy to have them on display.
Have you painted Star Wars: Shatterpoint miniatures yet? Share your work with us!
Don’t forget to subscribe and follow us on Instagram, Bluesky, and YouTube for more Star Wars: Shatterpoint reviews and painting guides, as well as more hobby and tabletop news and reviews!


