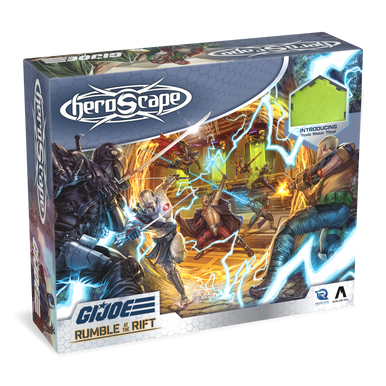
Renegade Game Studios has opened up the rift to Valhalla, where G.I. Joe and Cobra are continuing their eternal struggle. This standalone game, which also acts as an expansion to Heroscape, uses the same core rules of Heroscape, with some thematic additions including some Toxic Sludge tiles.
Recently, Renegade provided us with a review copy of the G.I. JOE Heroscape: Rumble at the Rift Battle Box. Heroscape expansions can come unpainted, or painted with a premium price tag. If you’re someone like me who loves painting miniatures, Heroscape, and defeating Cobra, then this is the guide for you! In this guide, I’ll show you how to quickly paint up the figures to get them ready to ruummmmbllle!
Product Description from Renegade Game Studios:
On Earth, G.I. JOE is the codename of a highly trained covert special missions force. Their enemy: COBRA, a terrorist organization bent on ruling the world! Thanks to the bizarre inventions of the crazed Doctor Mindbender, both forces have been transported far from Earth, to another world known only as “Valhalla”. While they search for a way back home, both factions must get accustomed to this new place, where magic and mystery are afoot. All that is different here are the stakes. Now not only Earth hangs in the balance: for on Valhalla, when troops battle, they battle for ALL TIME!
This Battle Box includes everything two players need to jump into Heroscape, featuring 8 highly detailed miniatures, modular hex terrain, COBRA fortifications, dice, markers, and all the cards, rules, and scenarios needed for endless replayability. Duke, Scarlett, Roadblock, Snake Eyes, COBRA Commander, Destro, Storm Shadow, and Doctor Mindbender are here to wage all-out war in this new world! This Battle Box is fully compatible with all other Heroscape releases. Expand your forces with any Heroscape expansion for even greater battles!
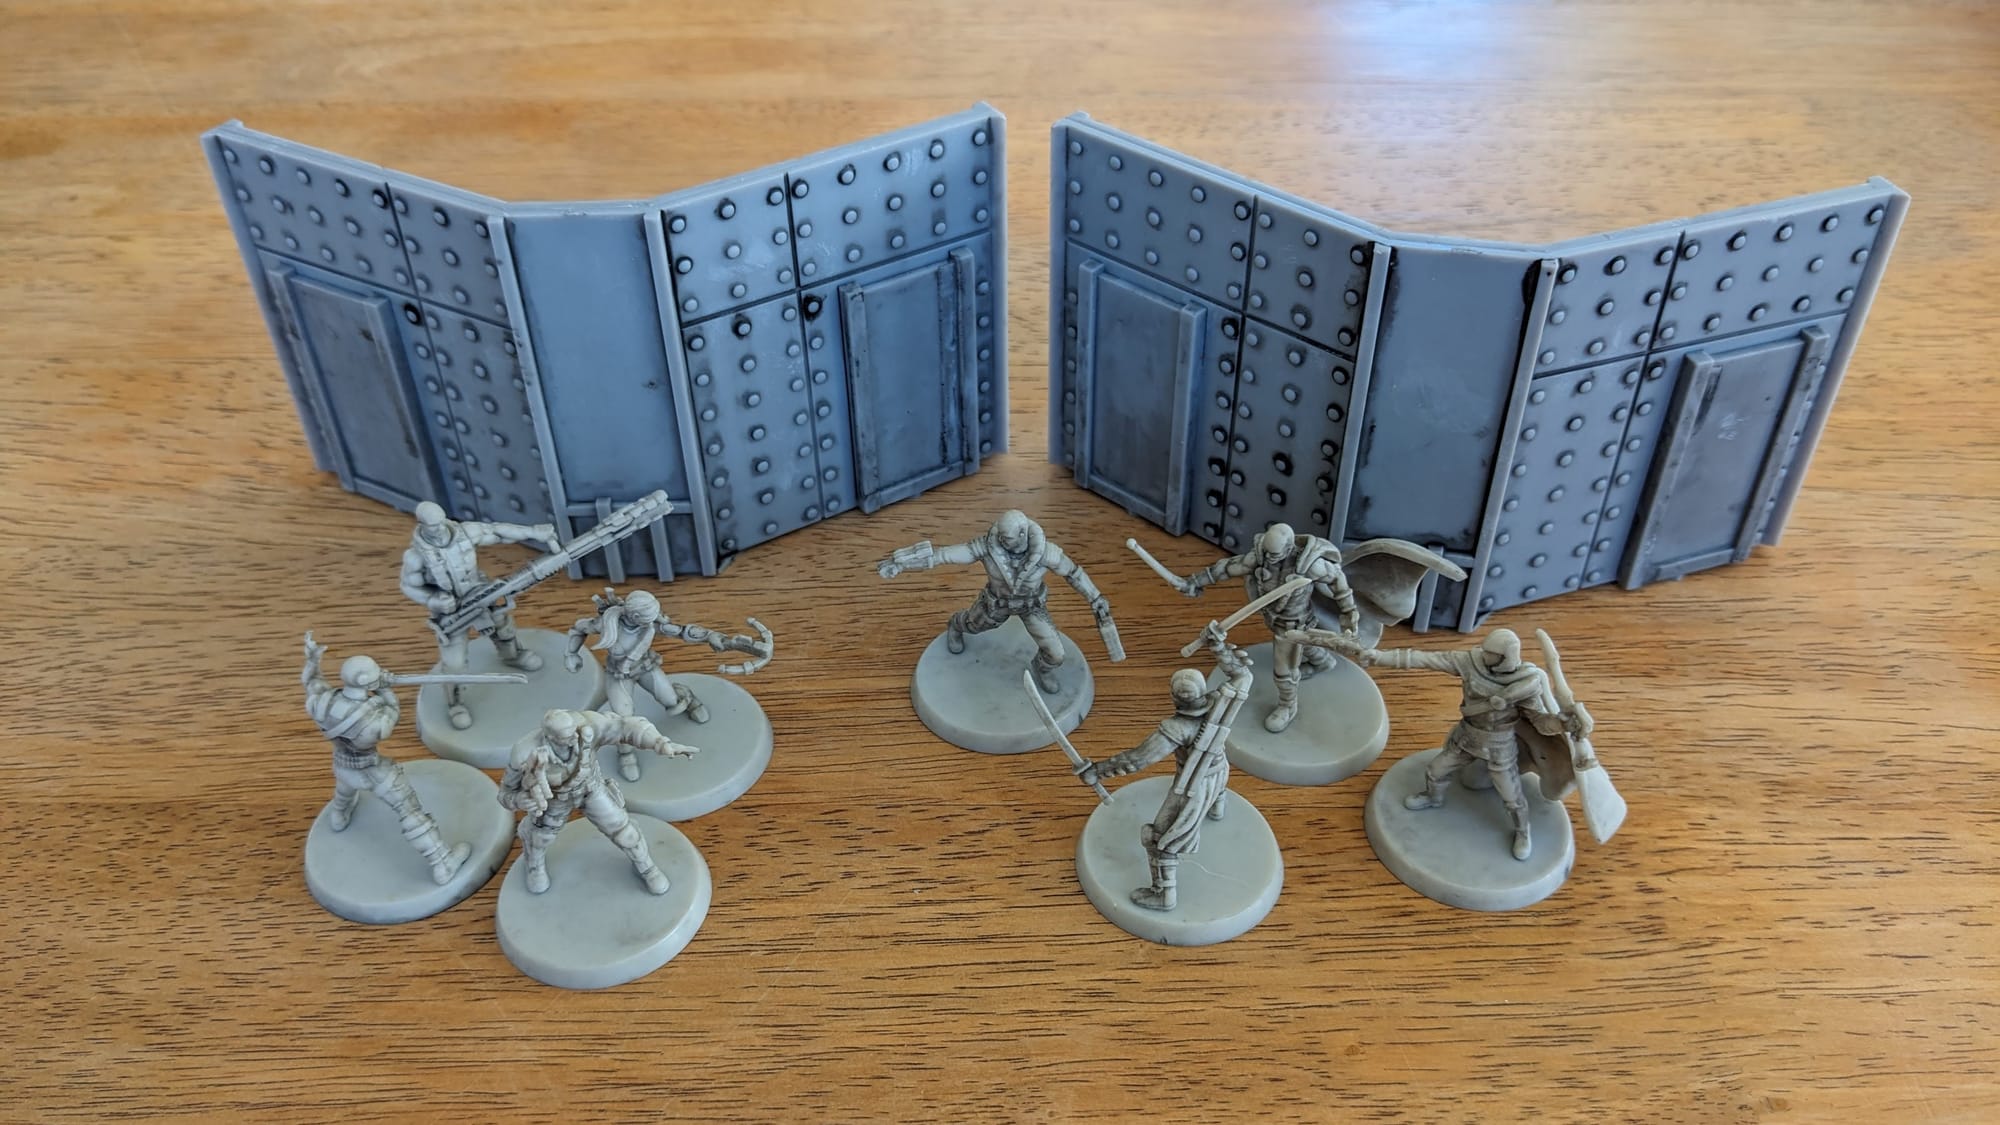
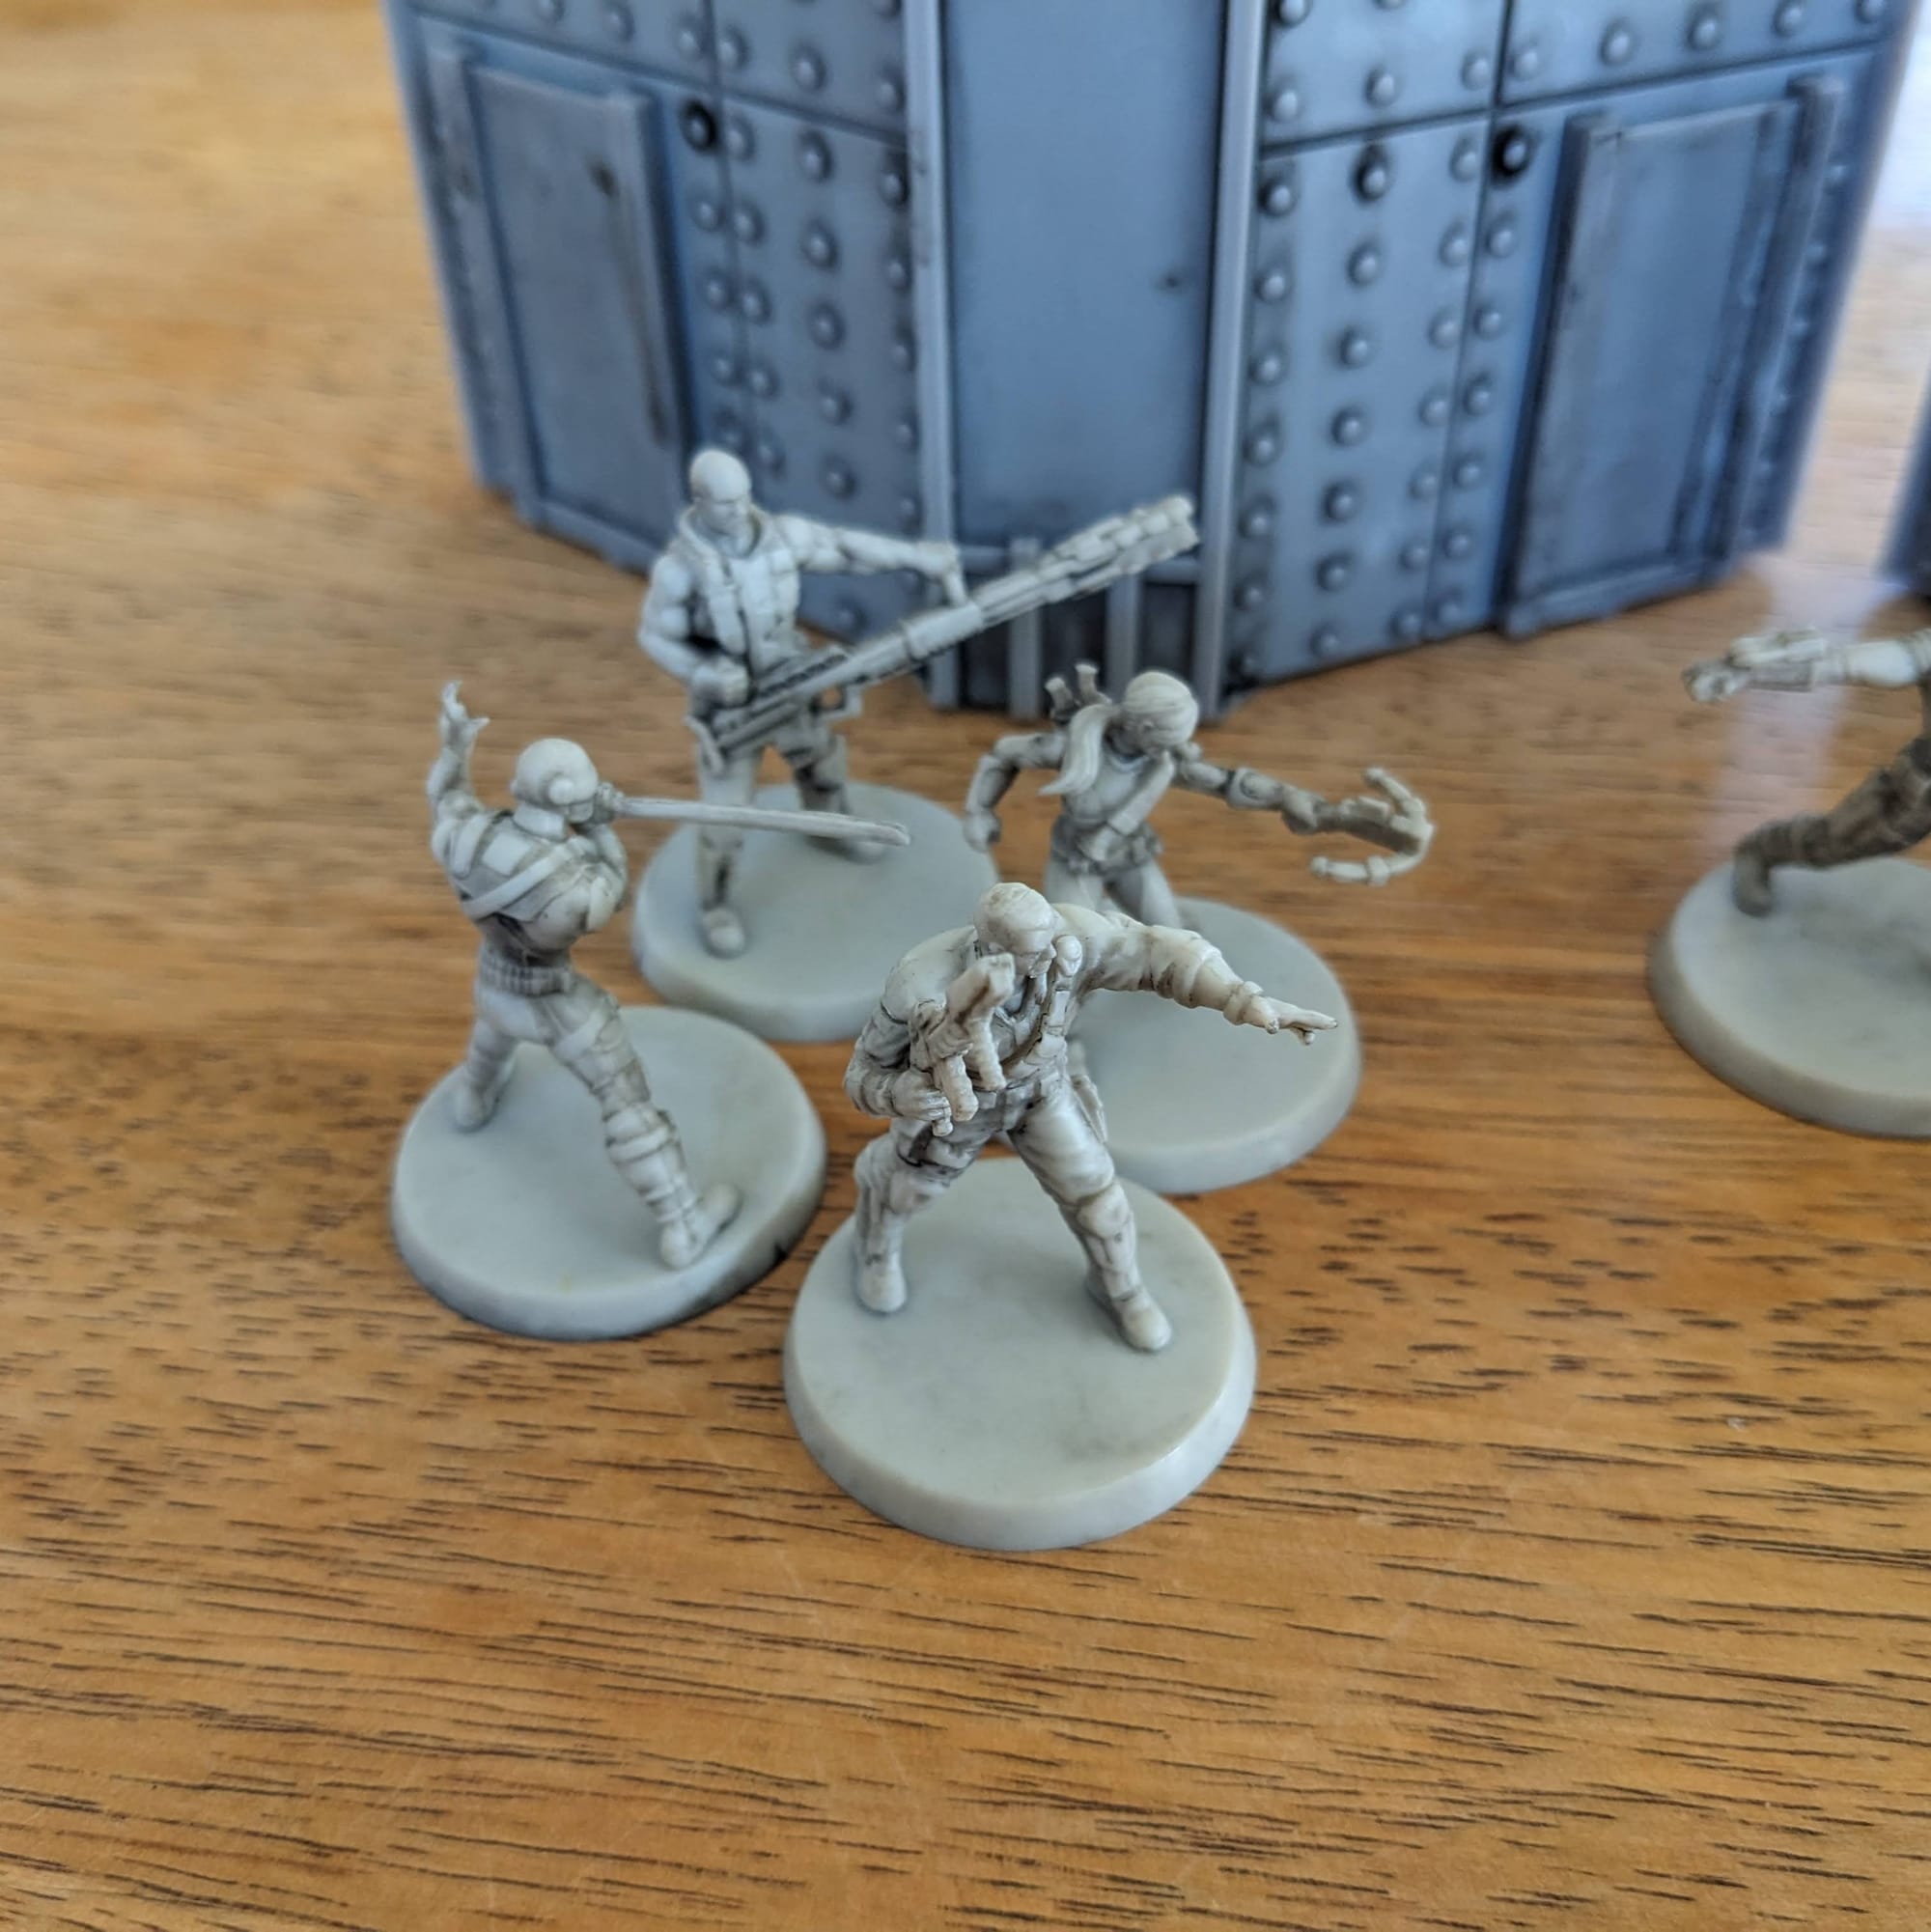
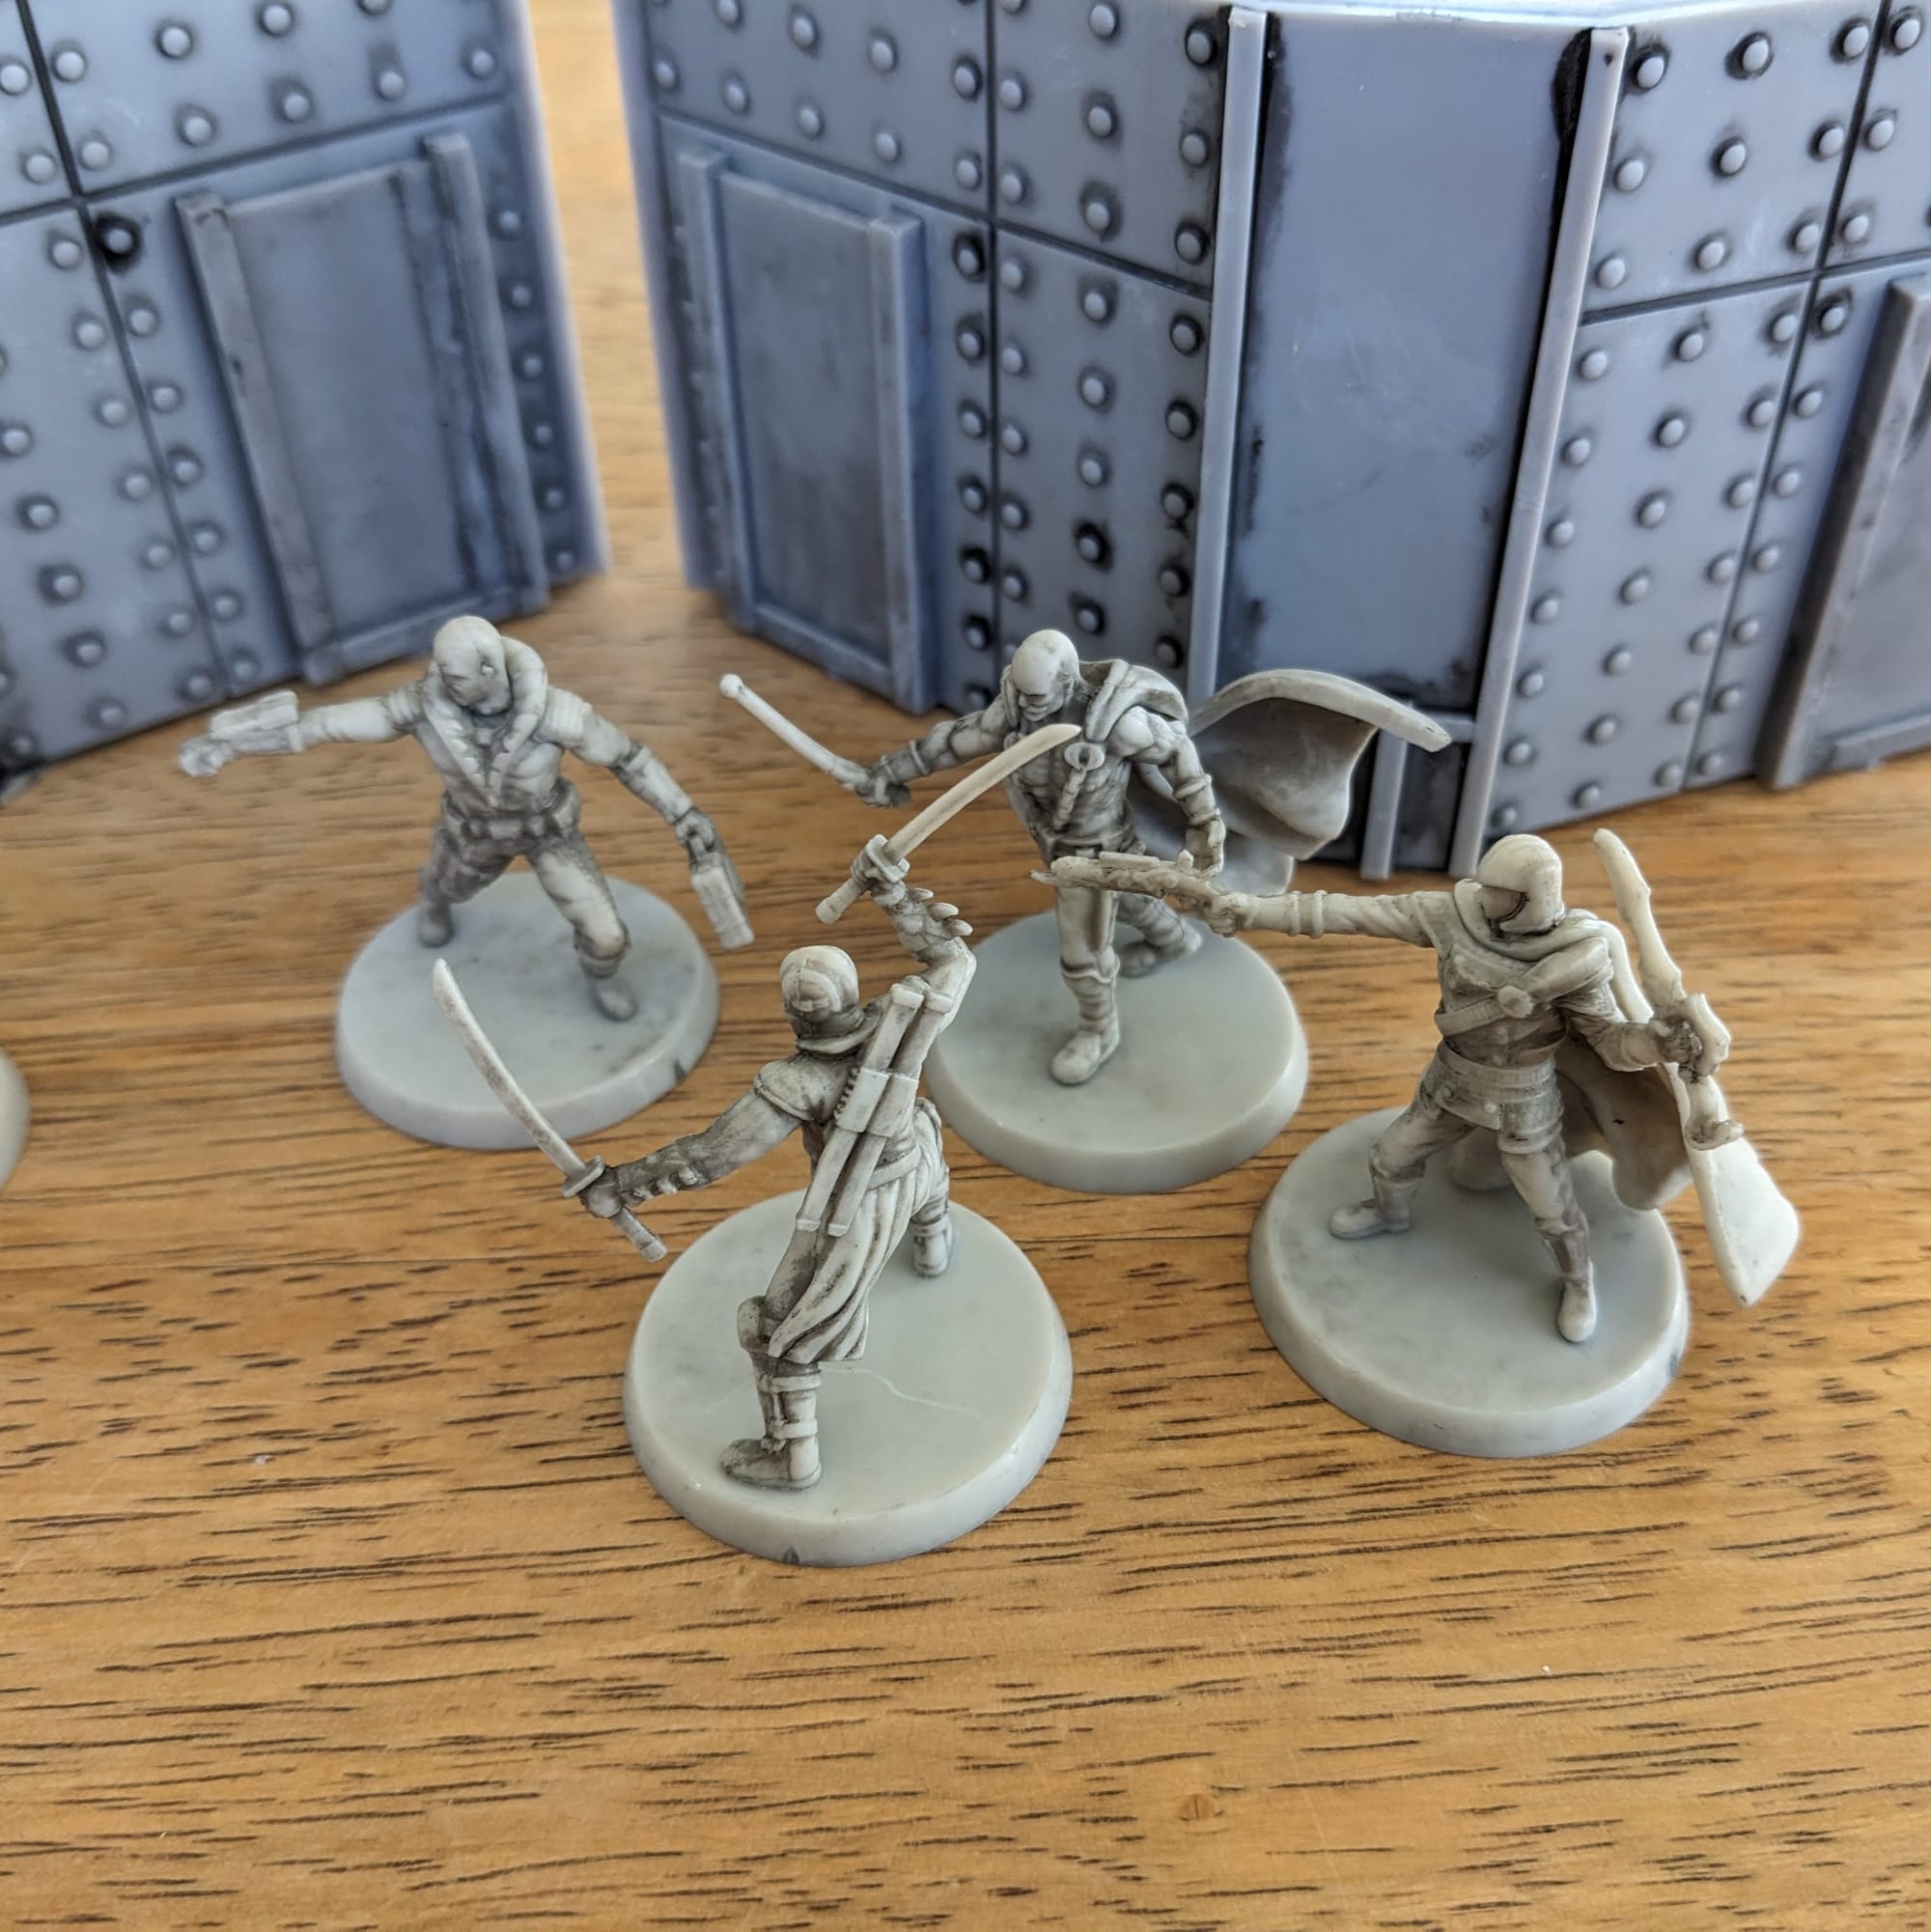
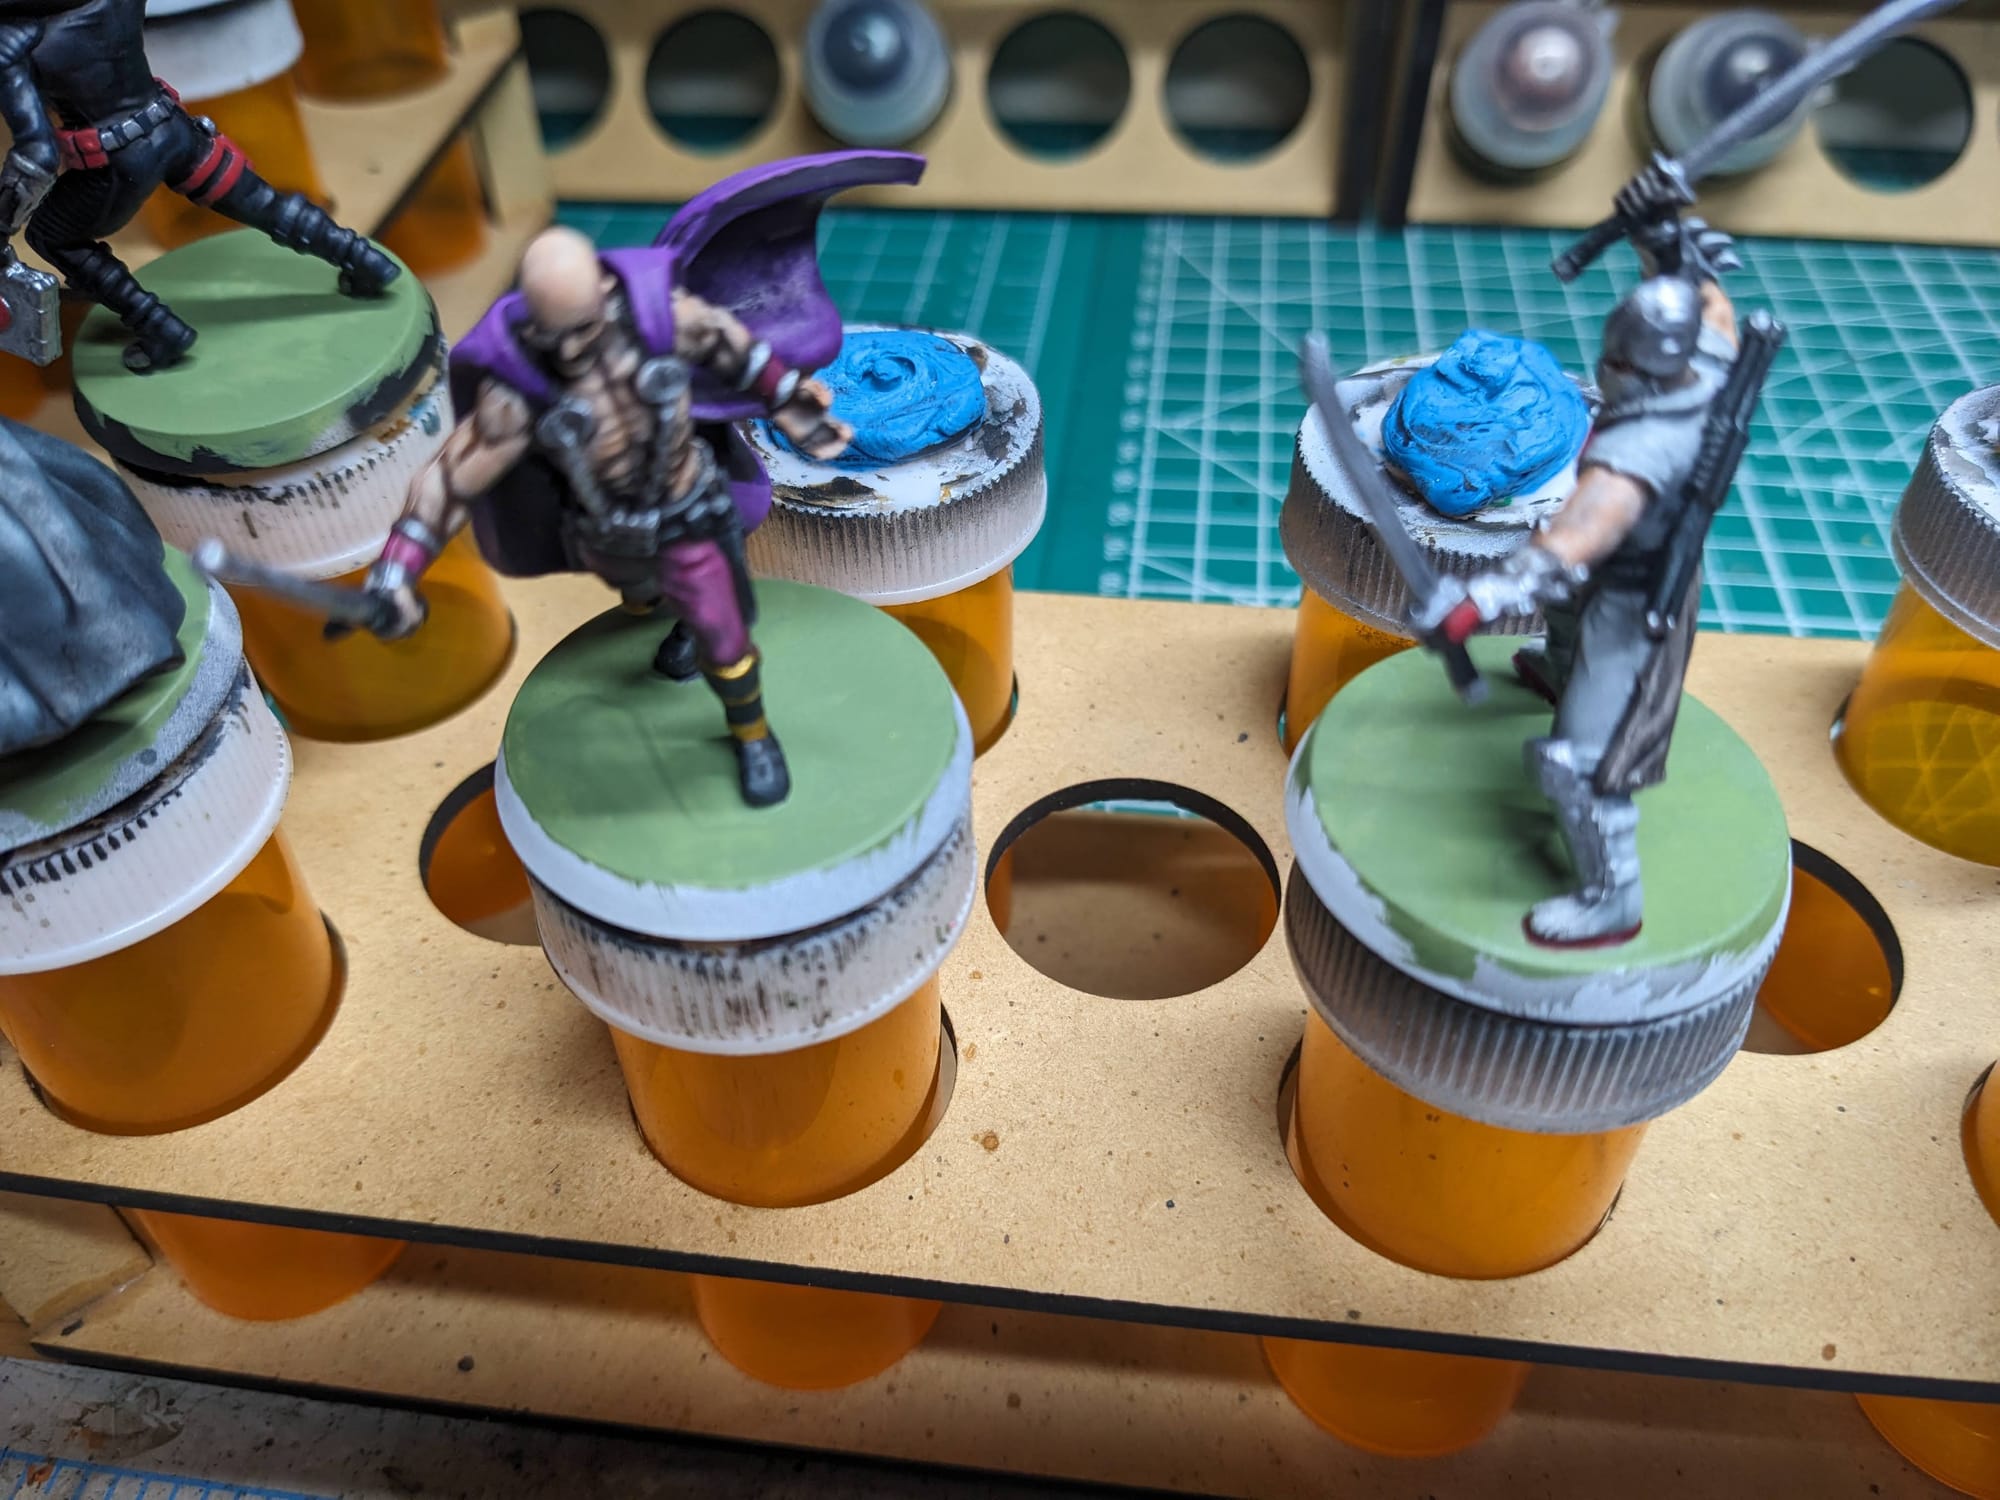
Assembling Your Models
Prepping Your Models & The Tools
GamingTrend has put together a guide for you to follow for how best to clean, cut, and assemble your models, regardless of the game. While the materials for the models may be different between games (plastic, resin, metal, etc.) there are simple techniques you can do to help make your painting experience go that much smoother.
Additionally, if you are new to painting and are not sure what brushes or tools you need, check out the article. This is just a starting place, and every painter has different preferences and recommendations. These are my recommendations based on the last decade or so of painting and I hope you find them helpful!
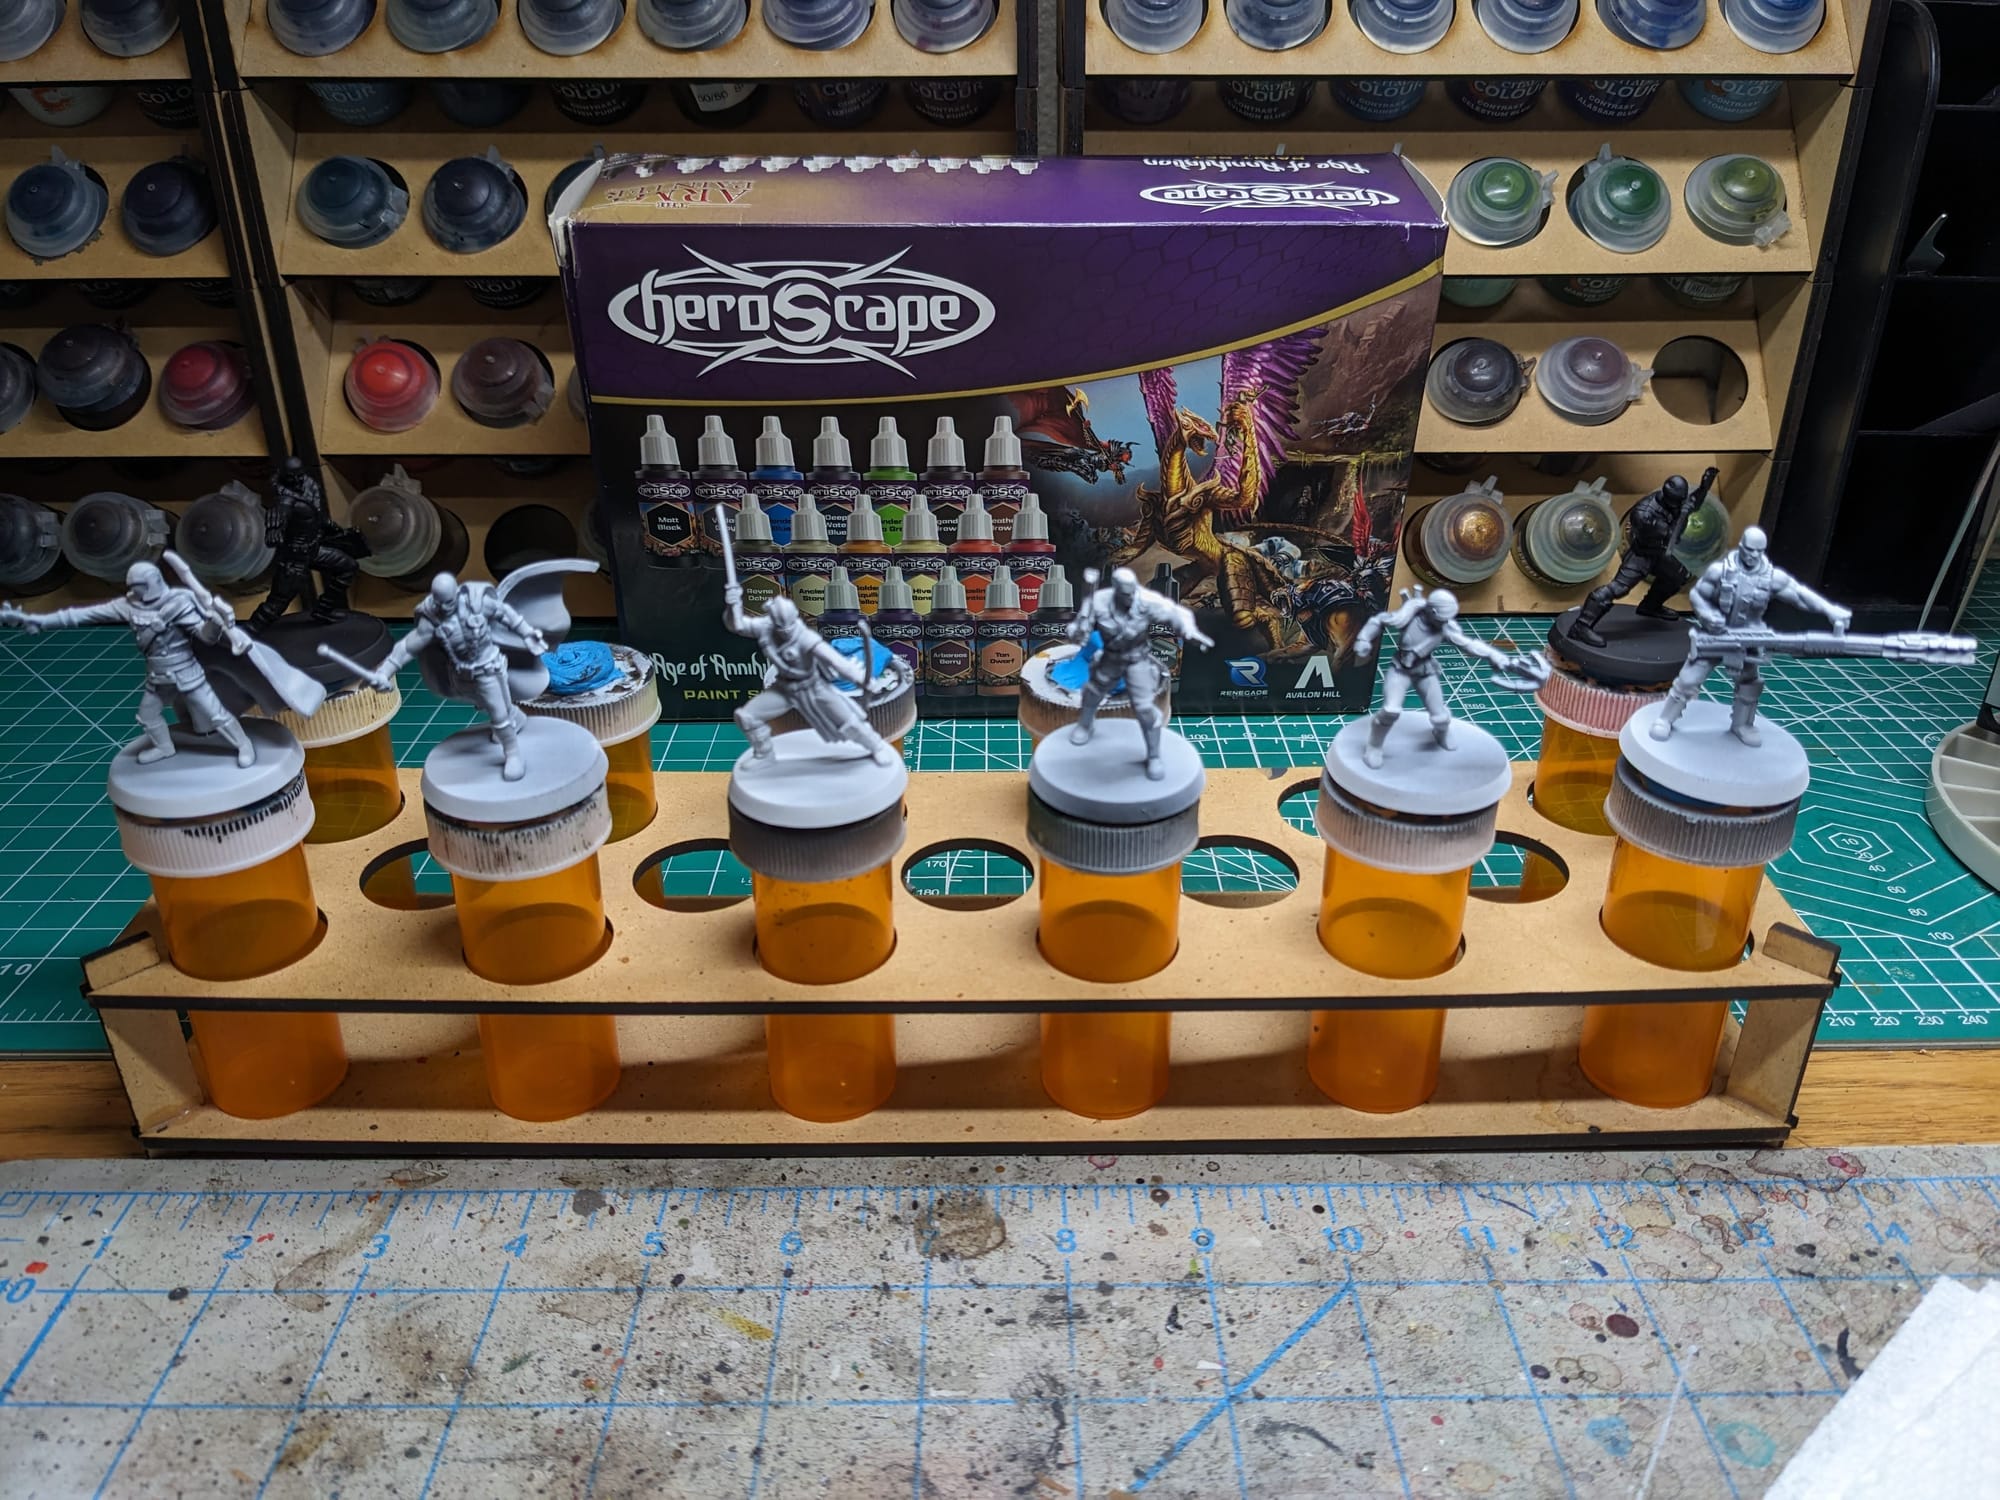
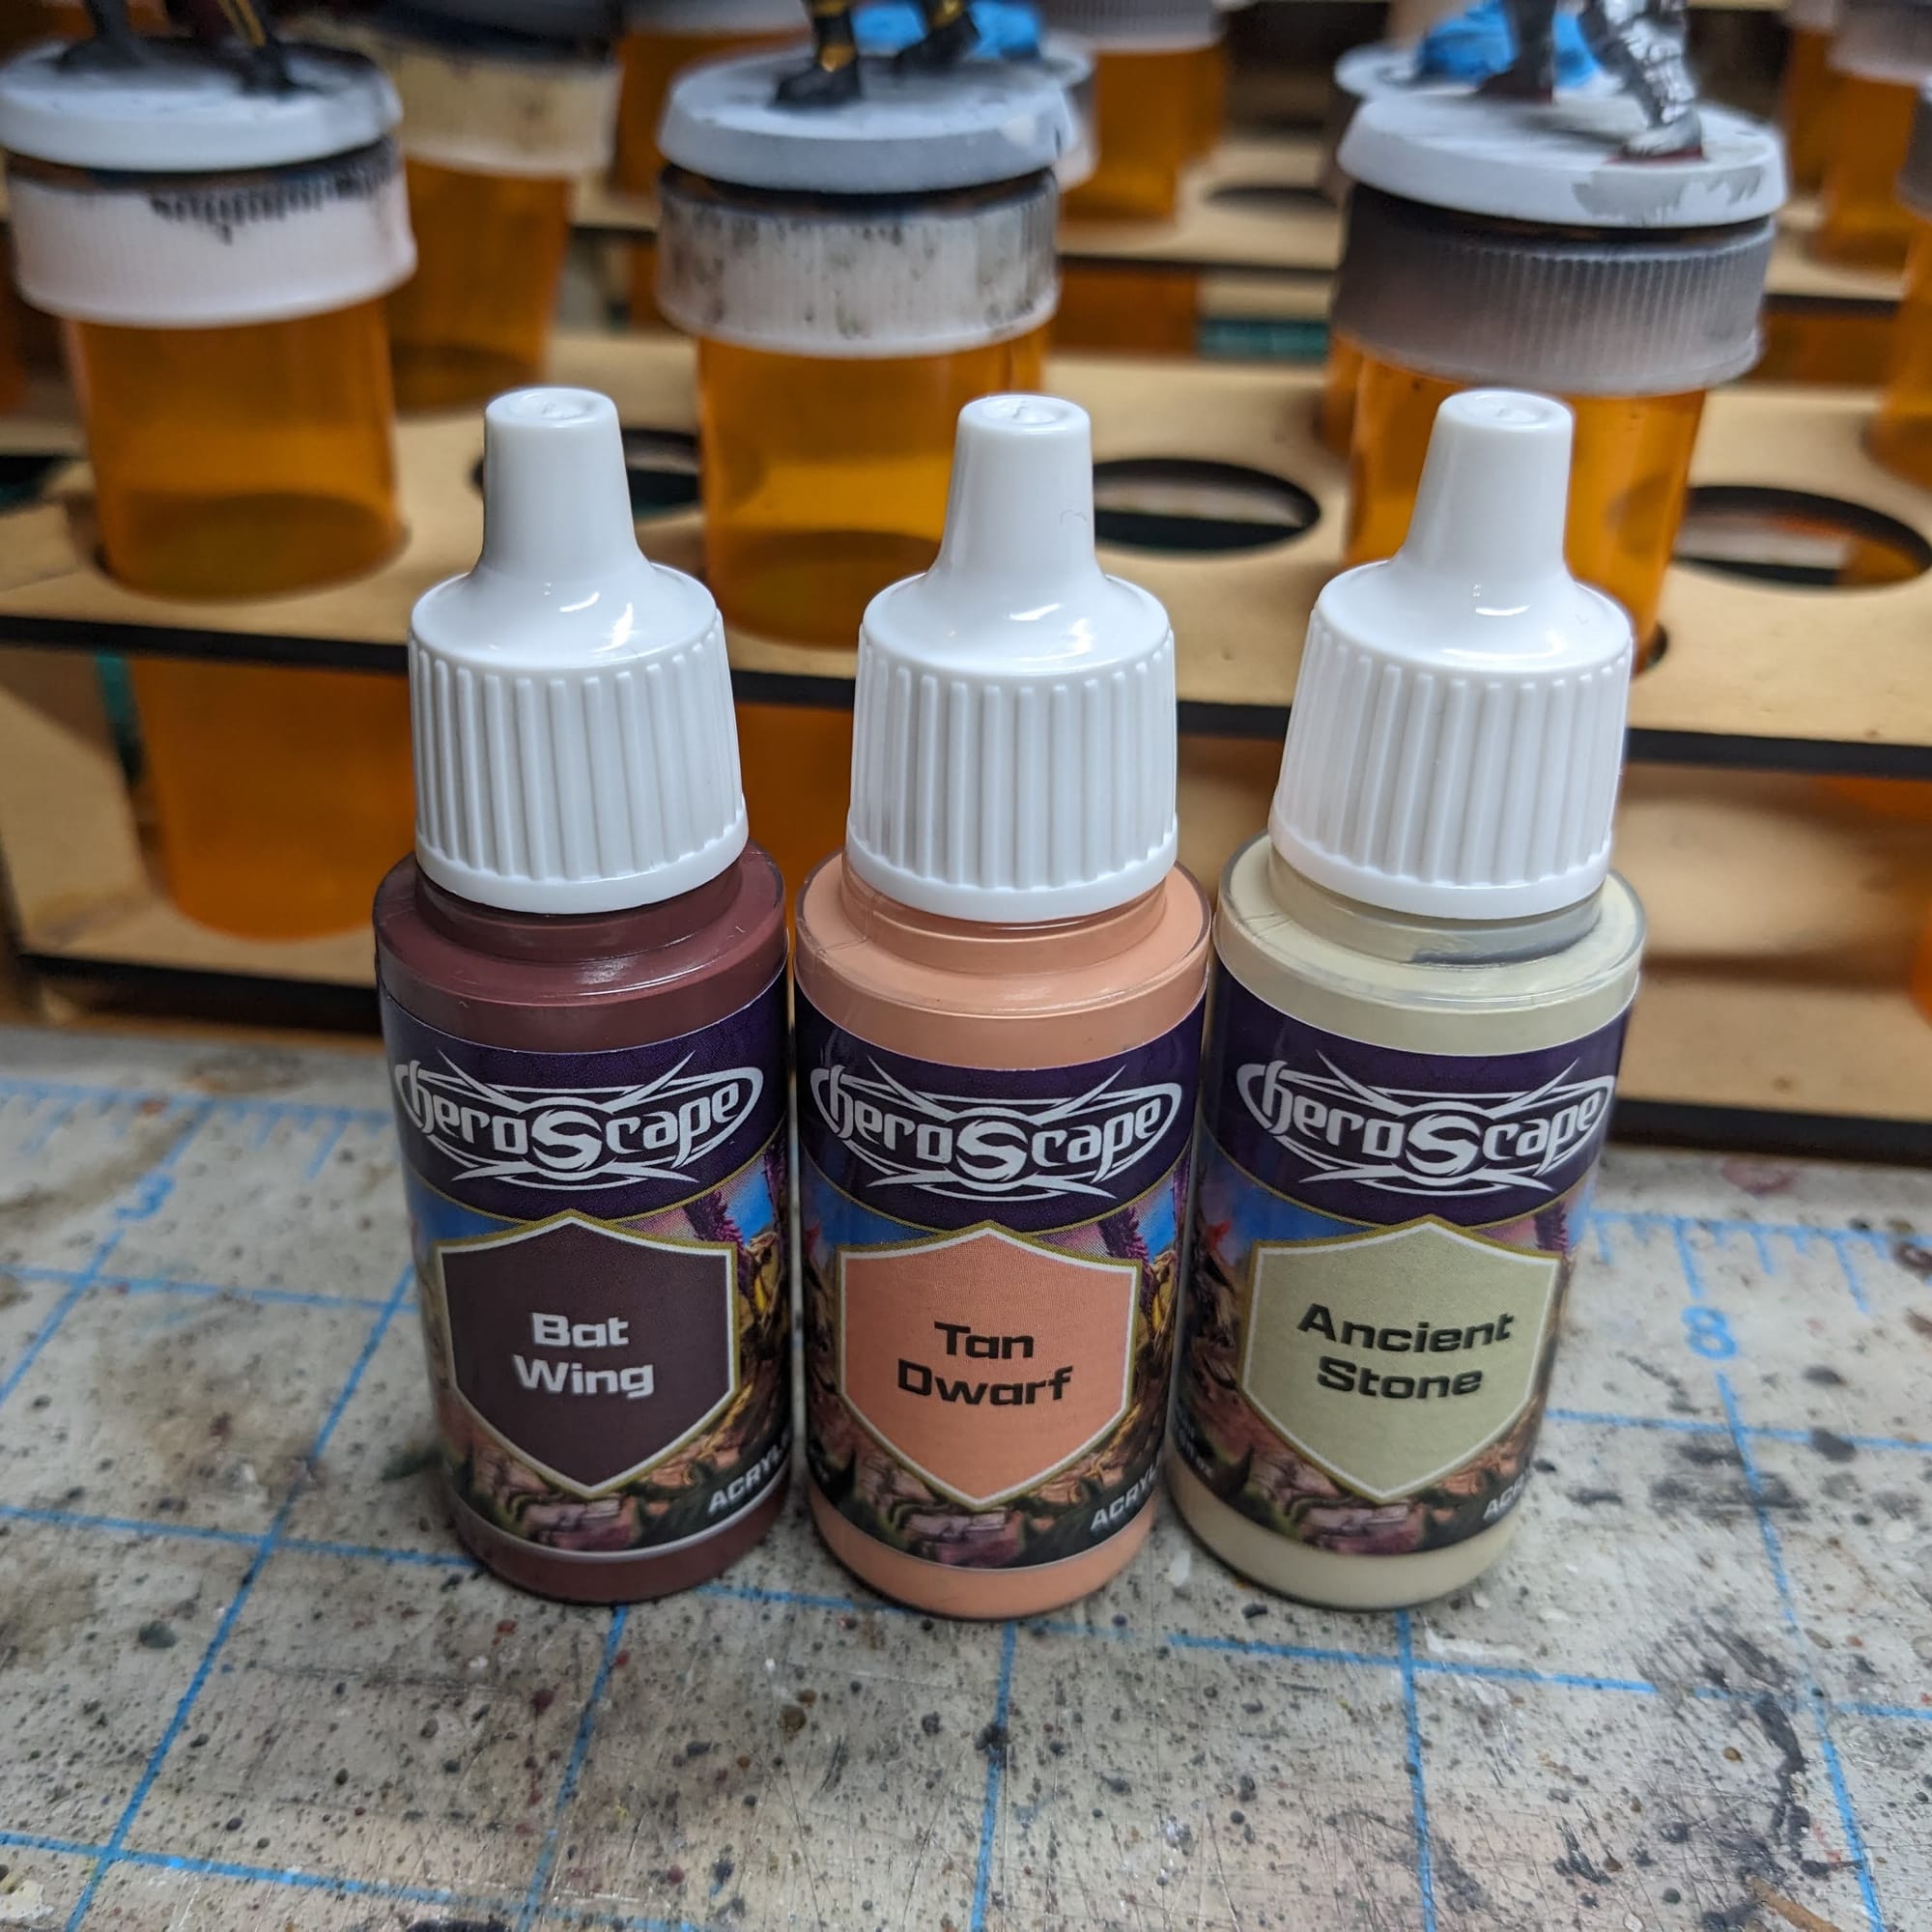
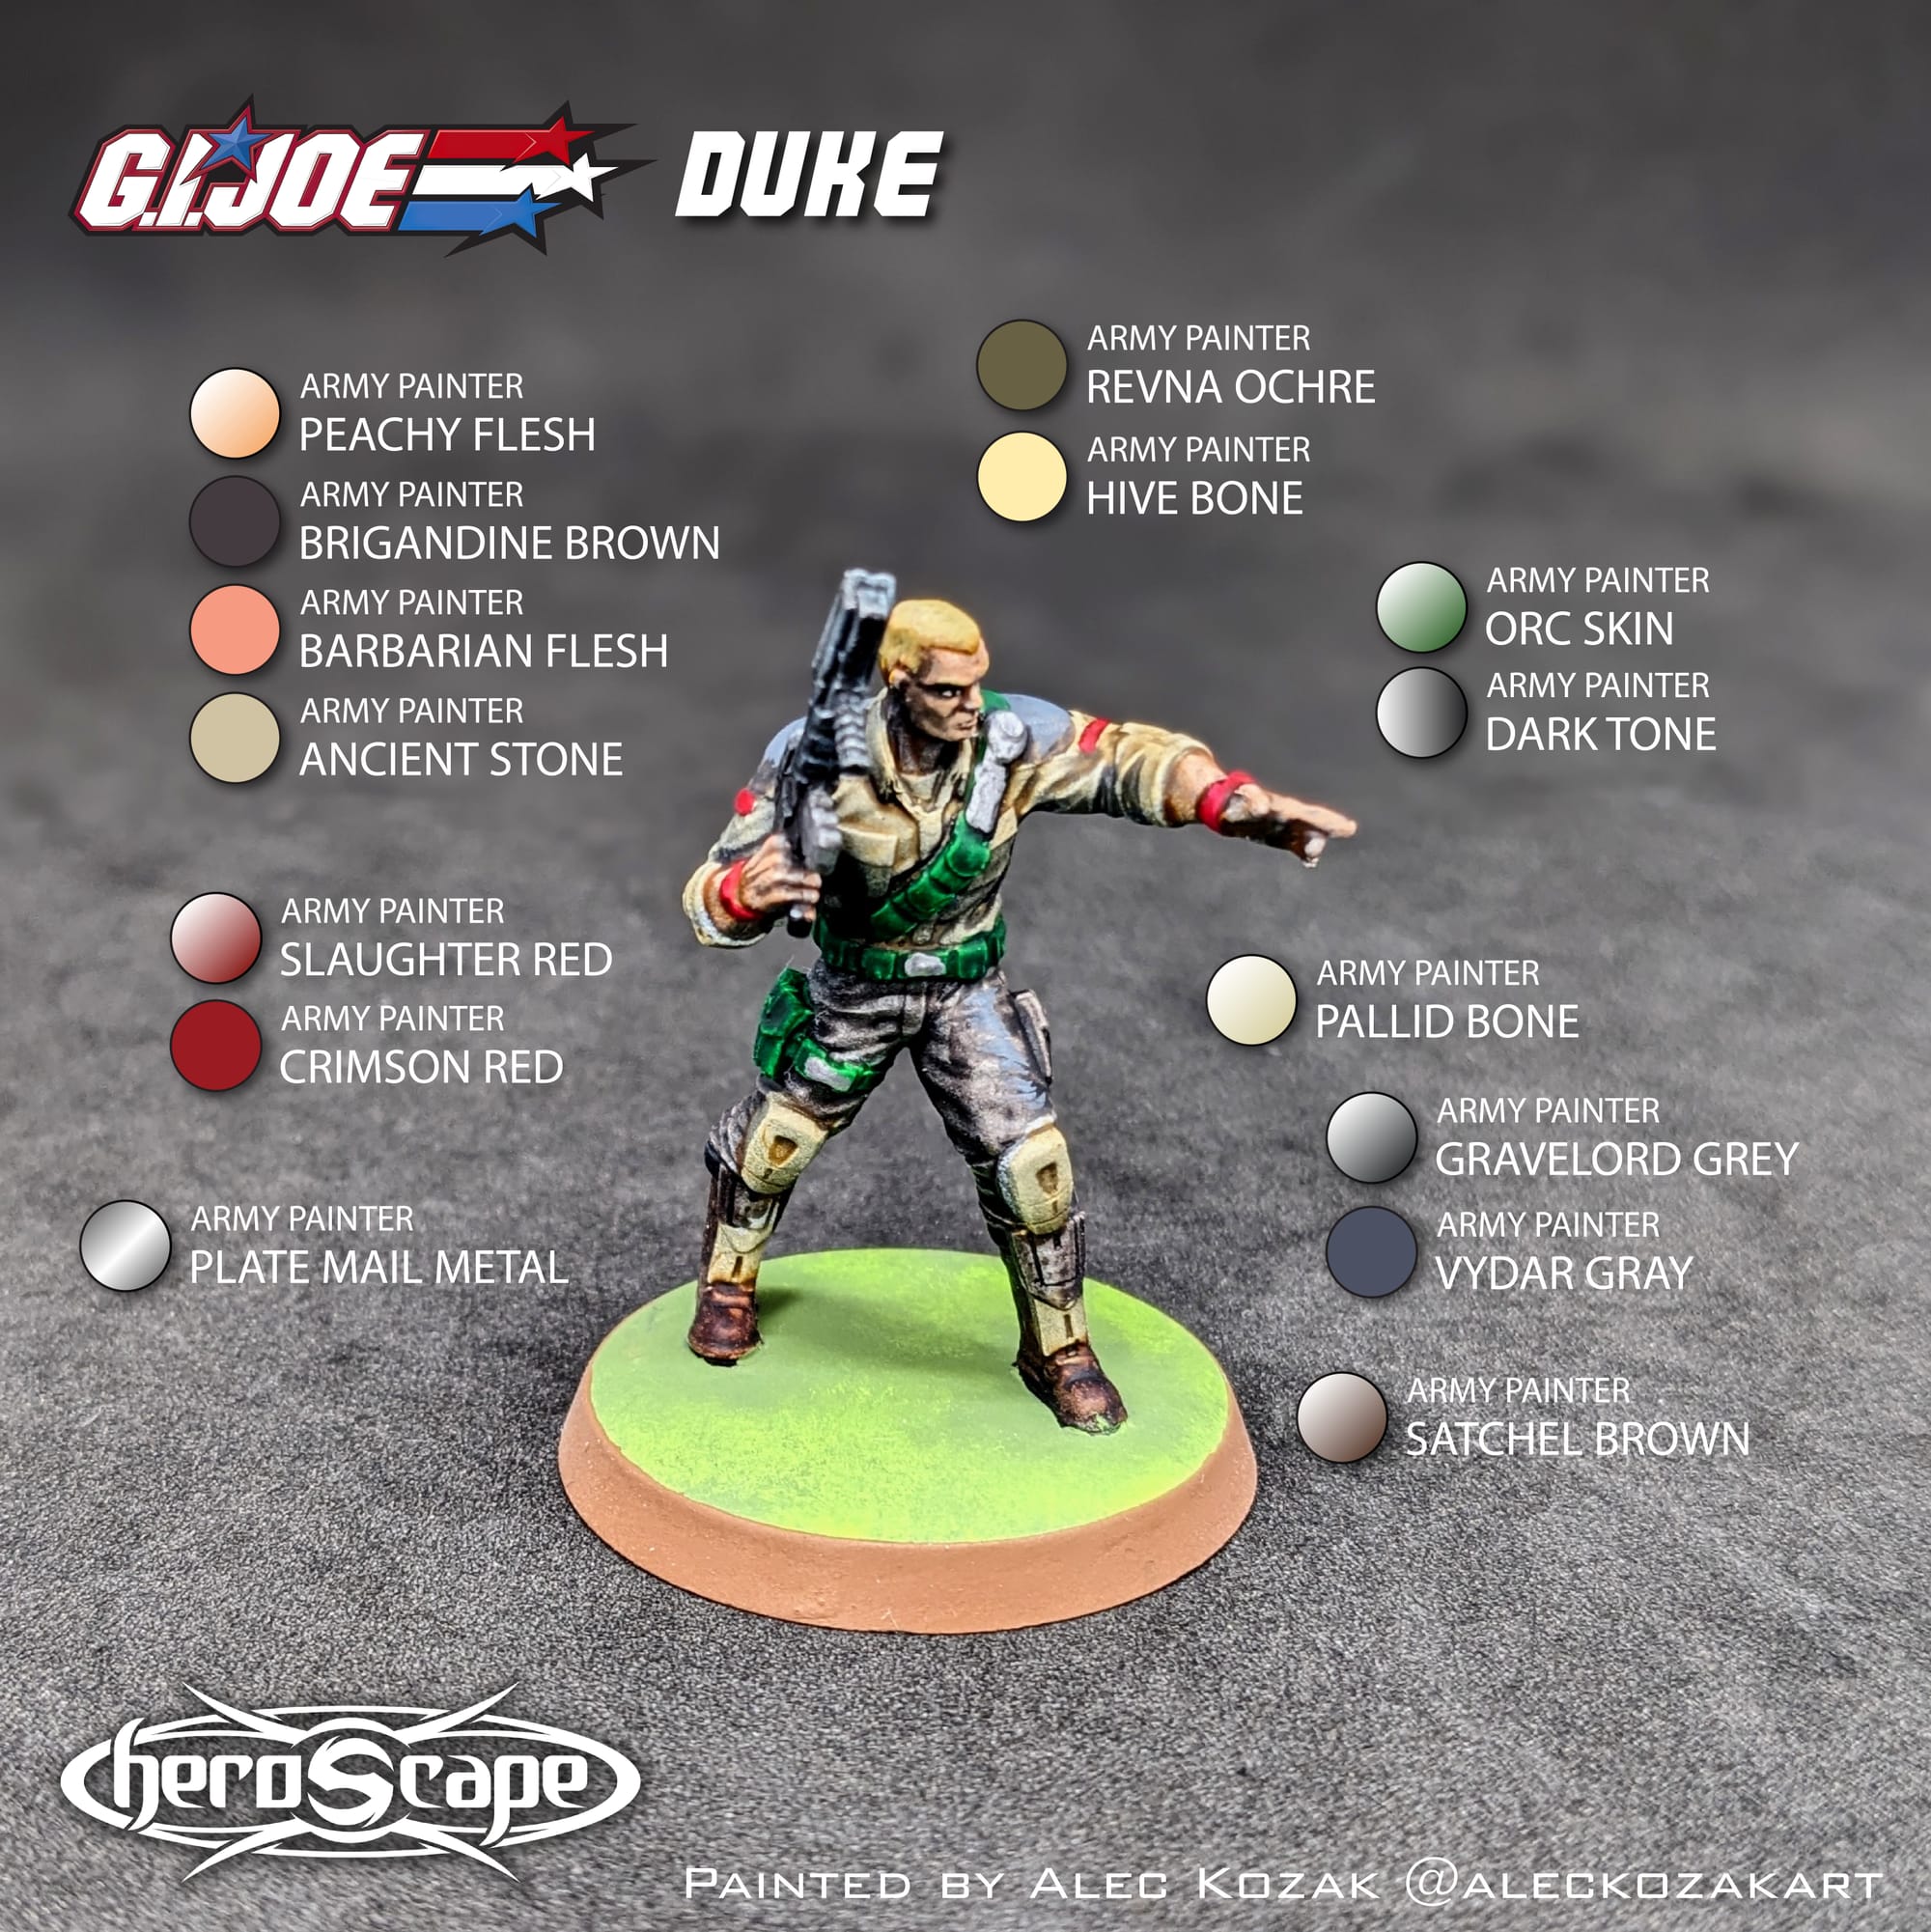
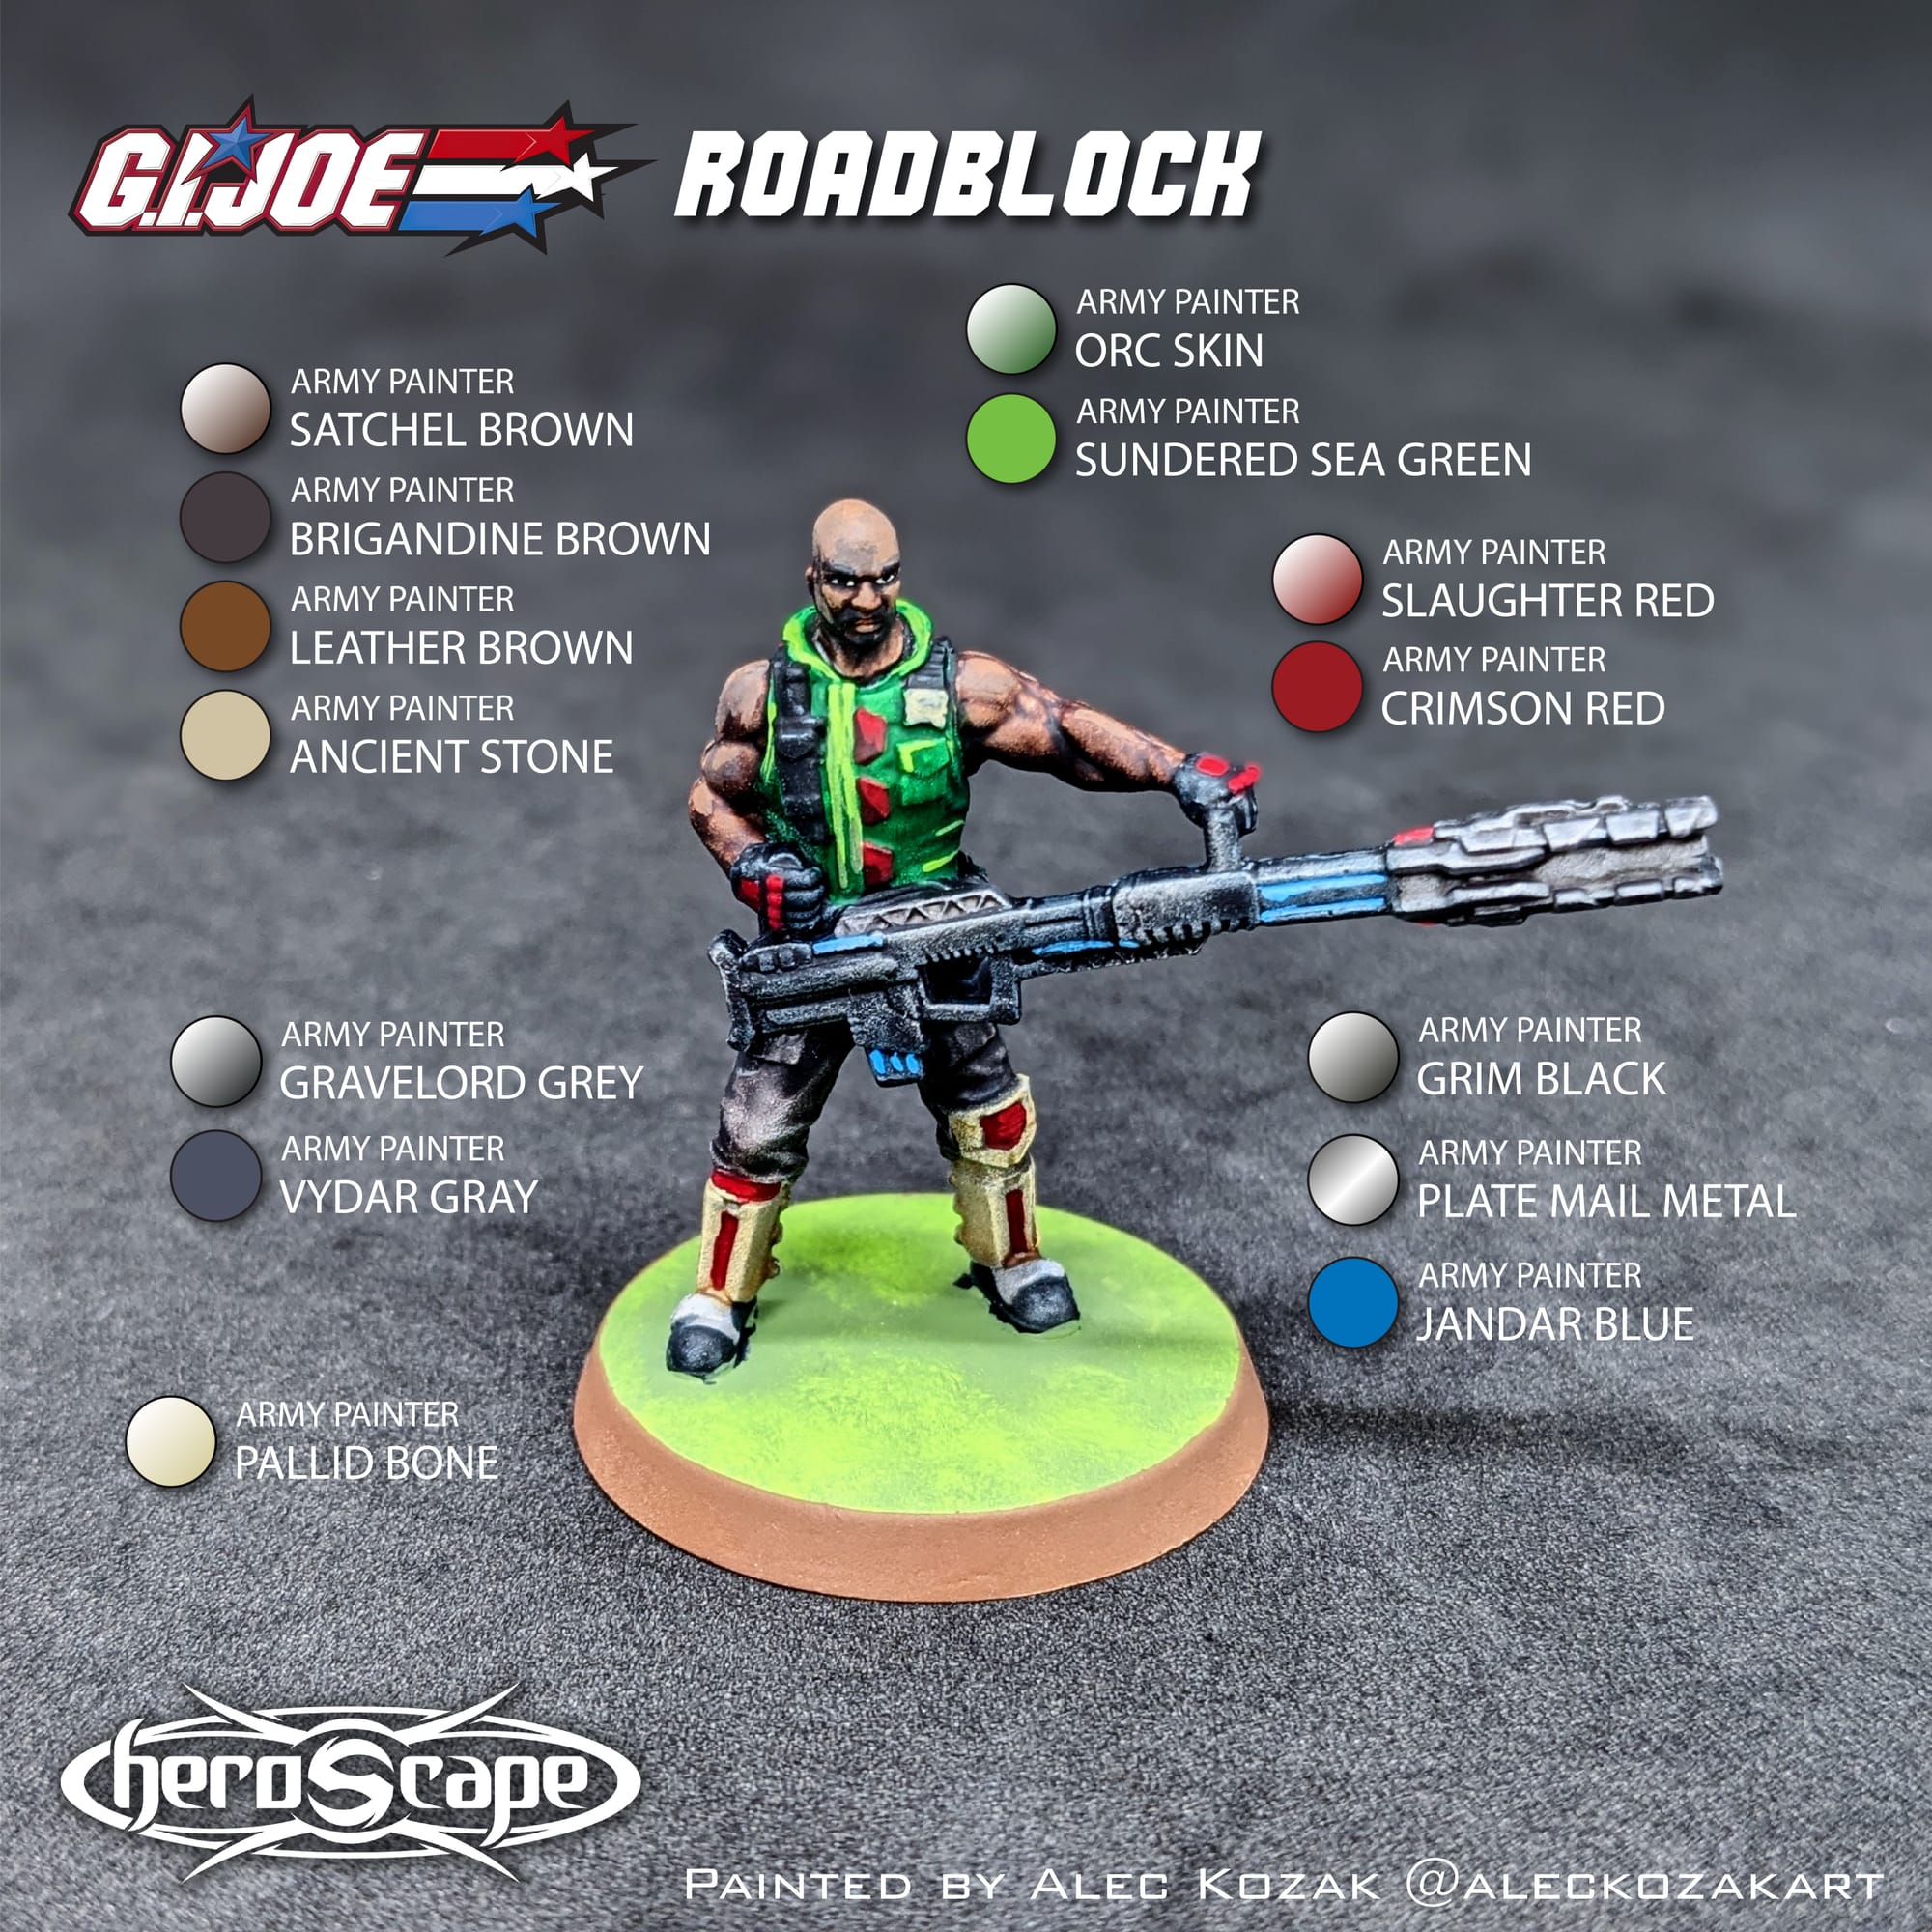
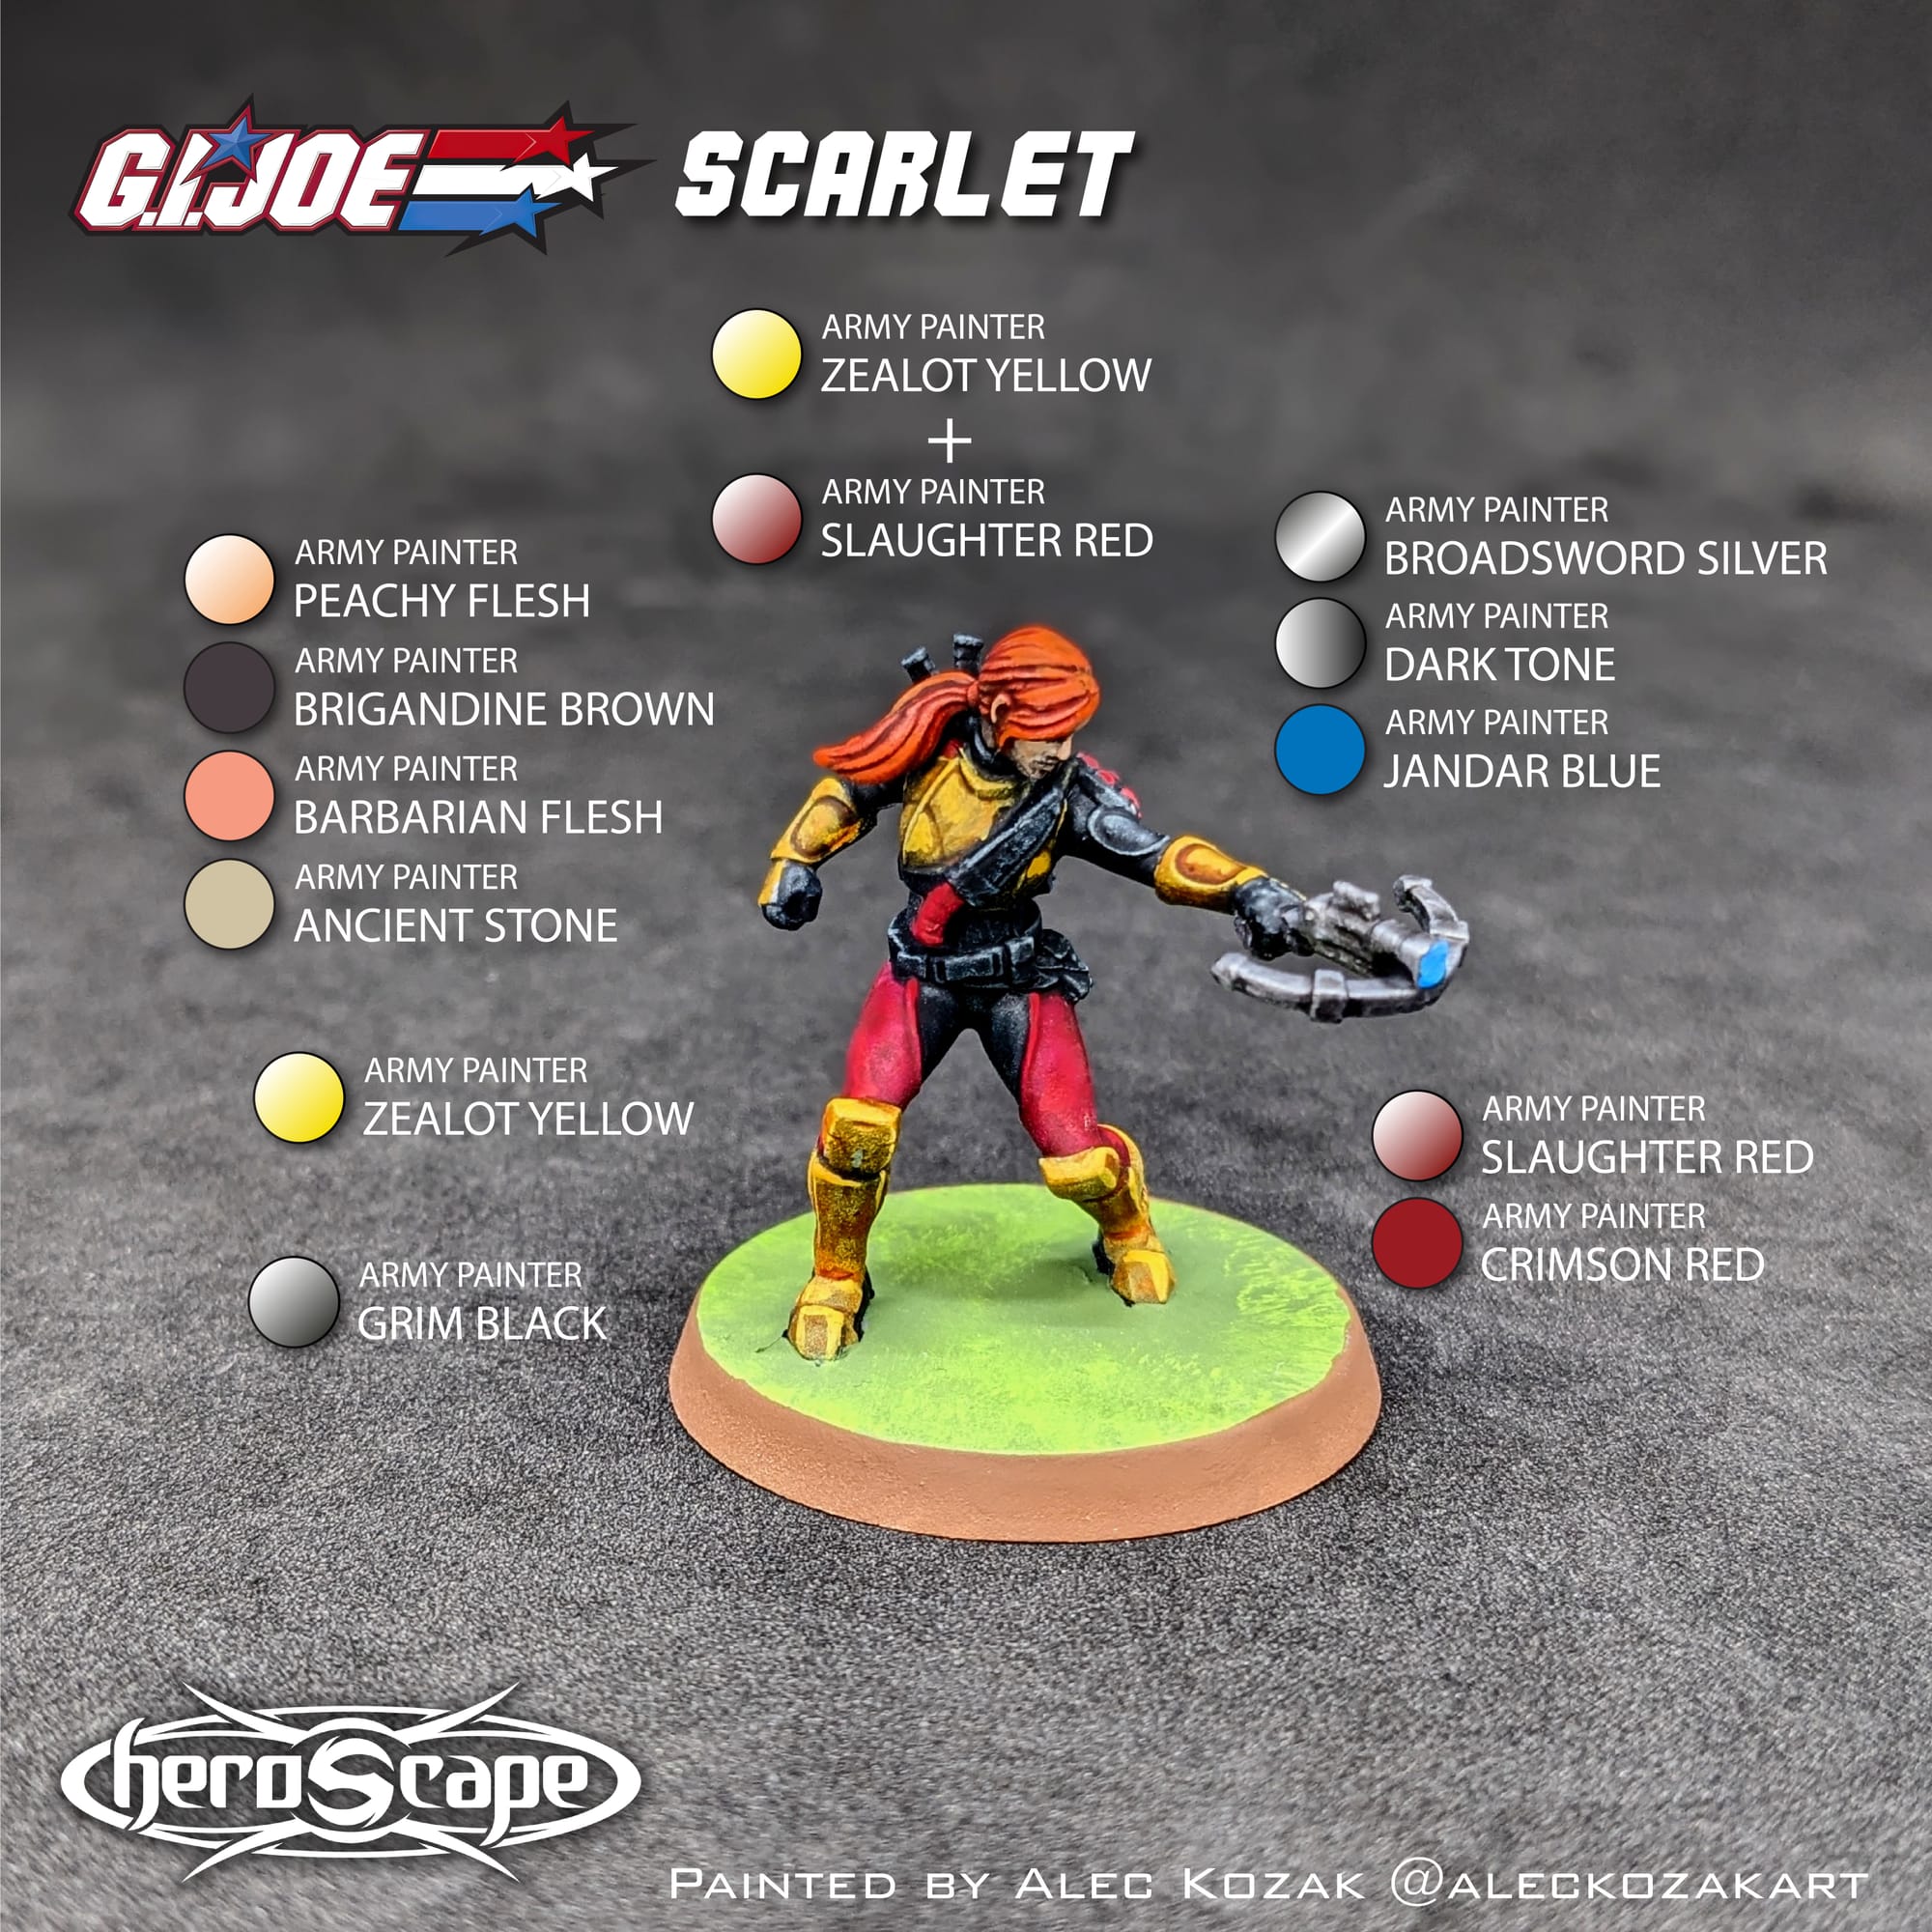
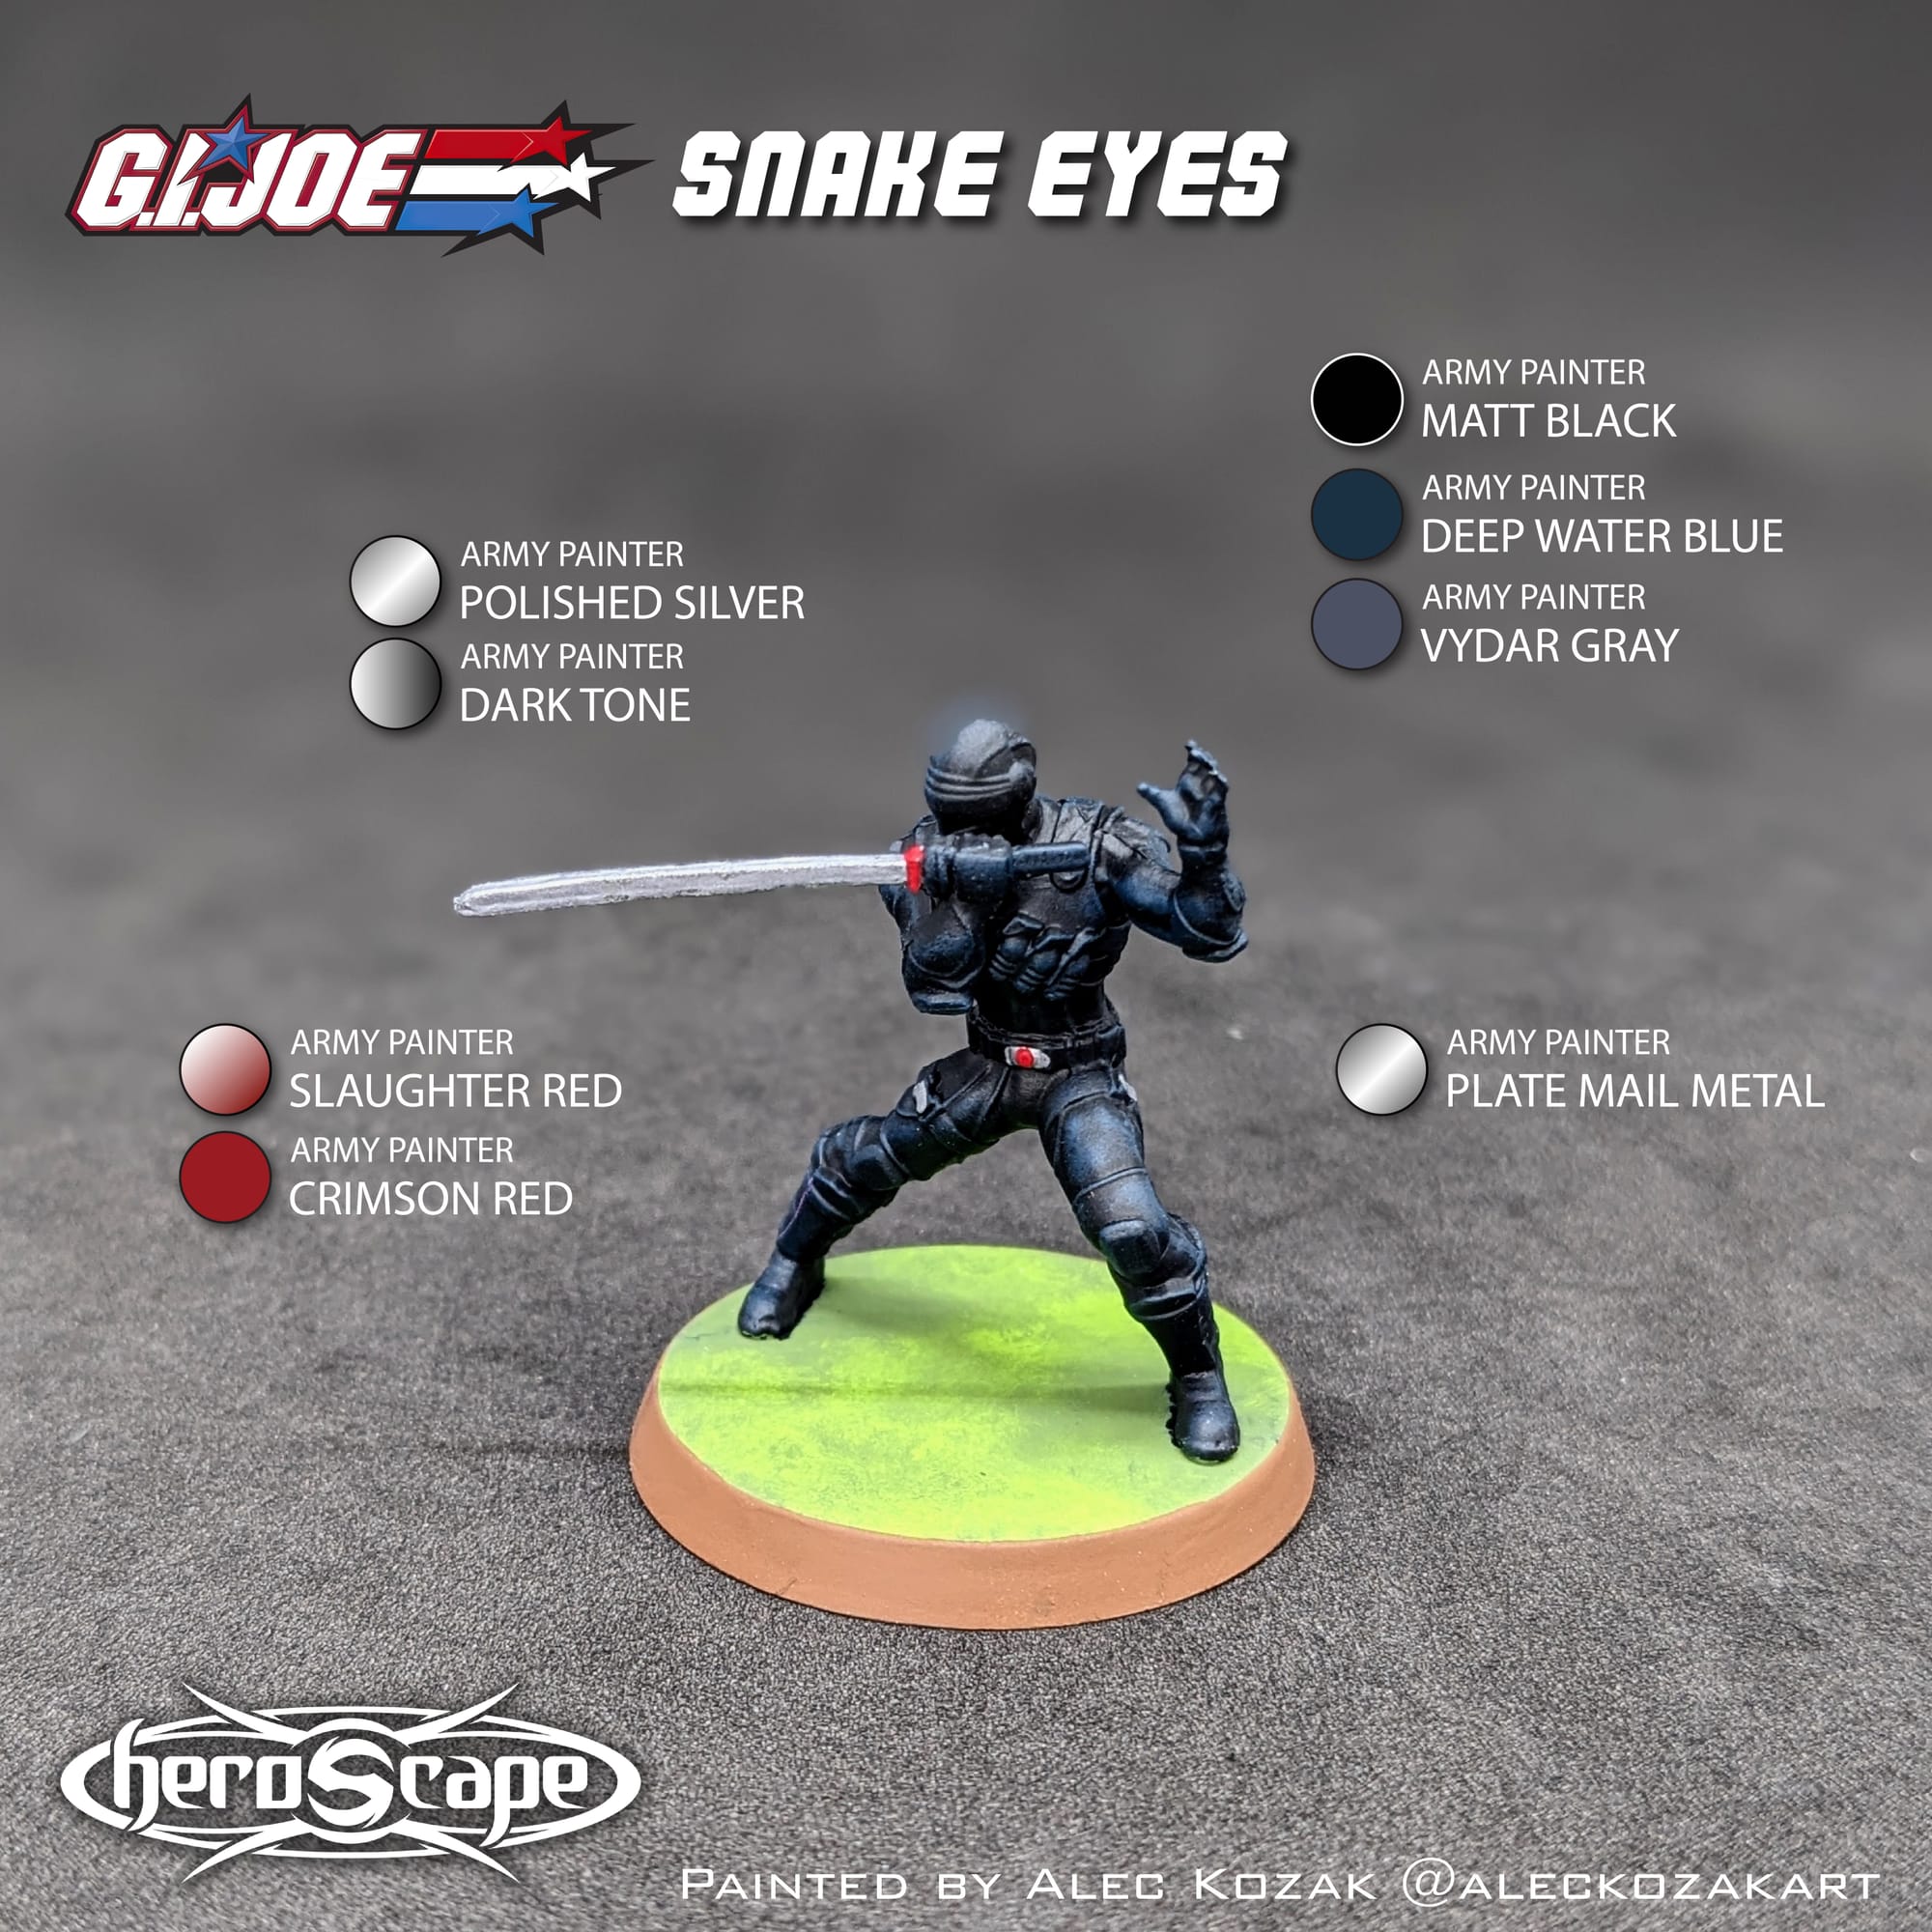
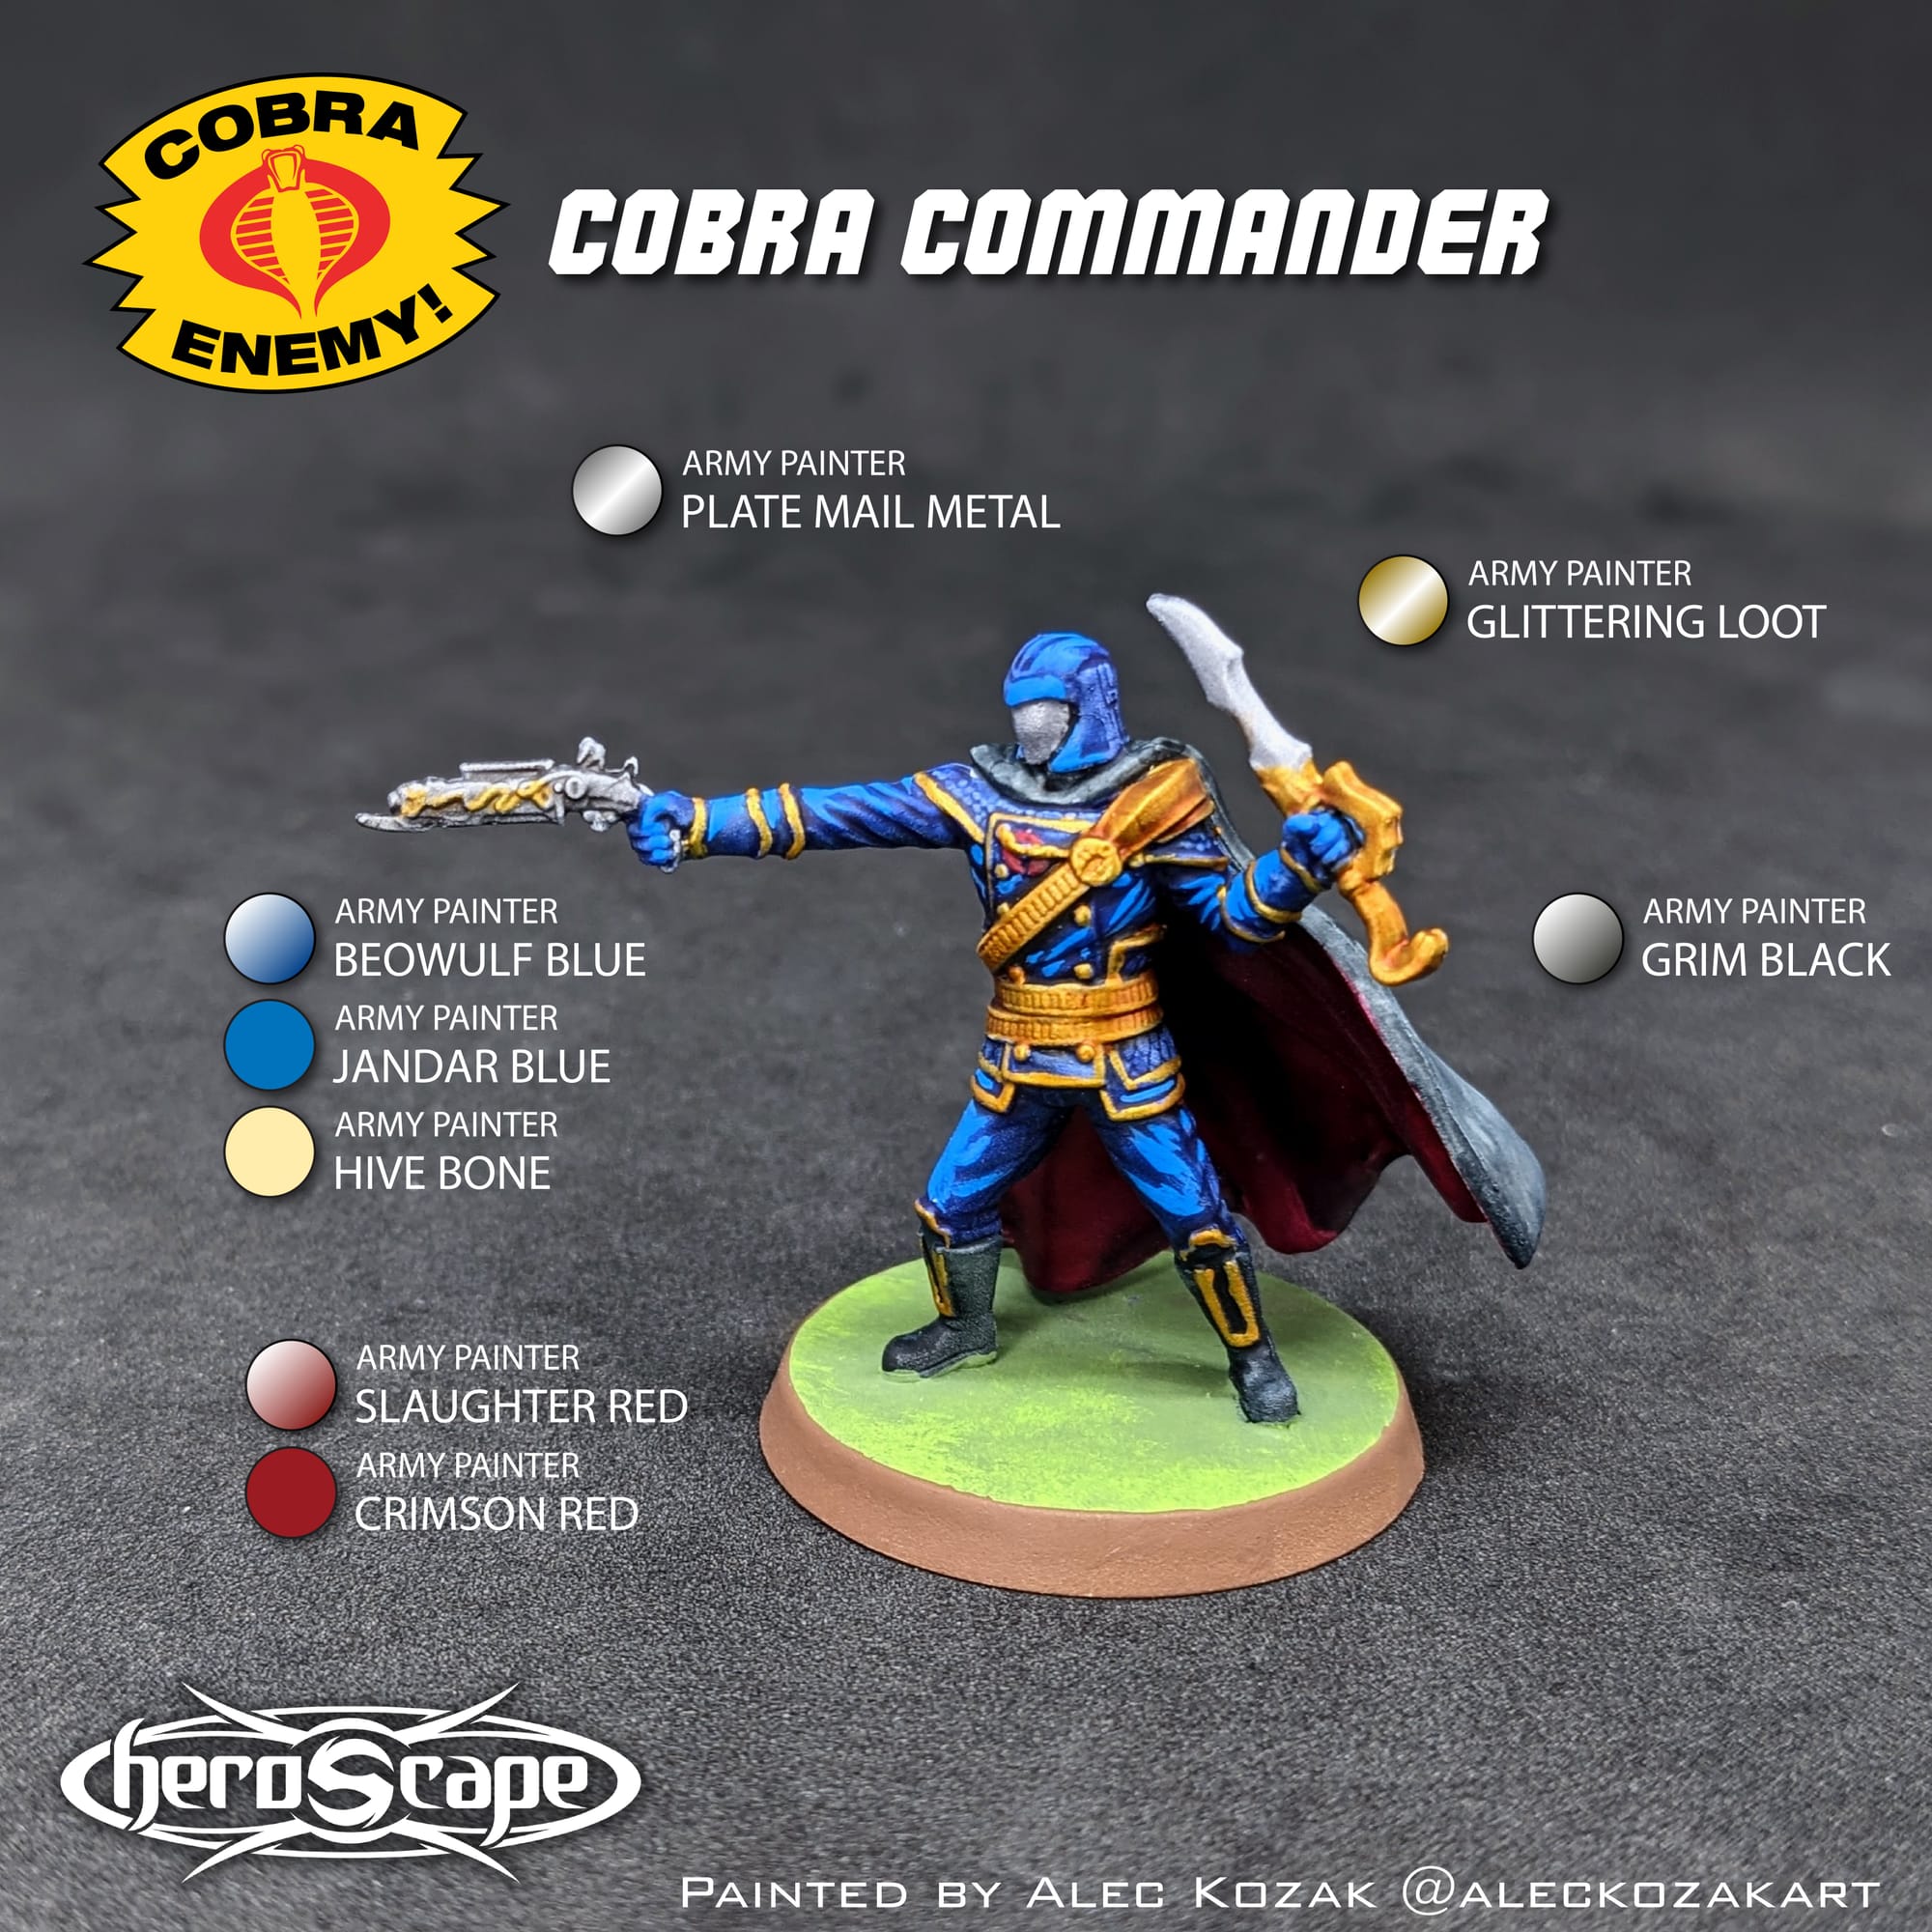
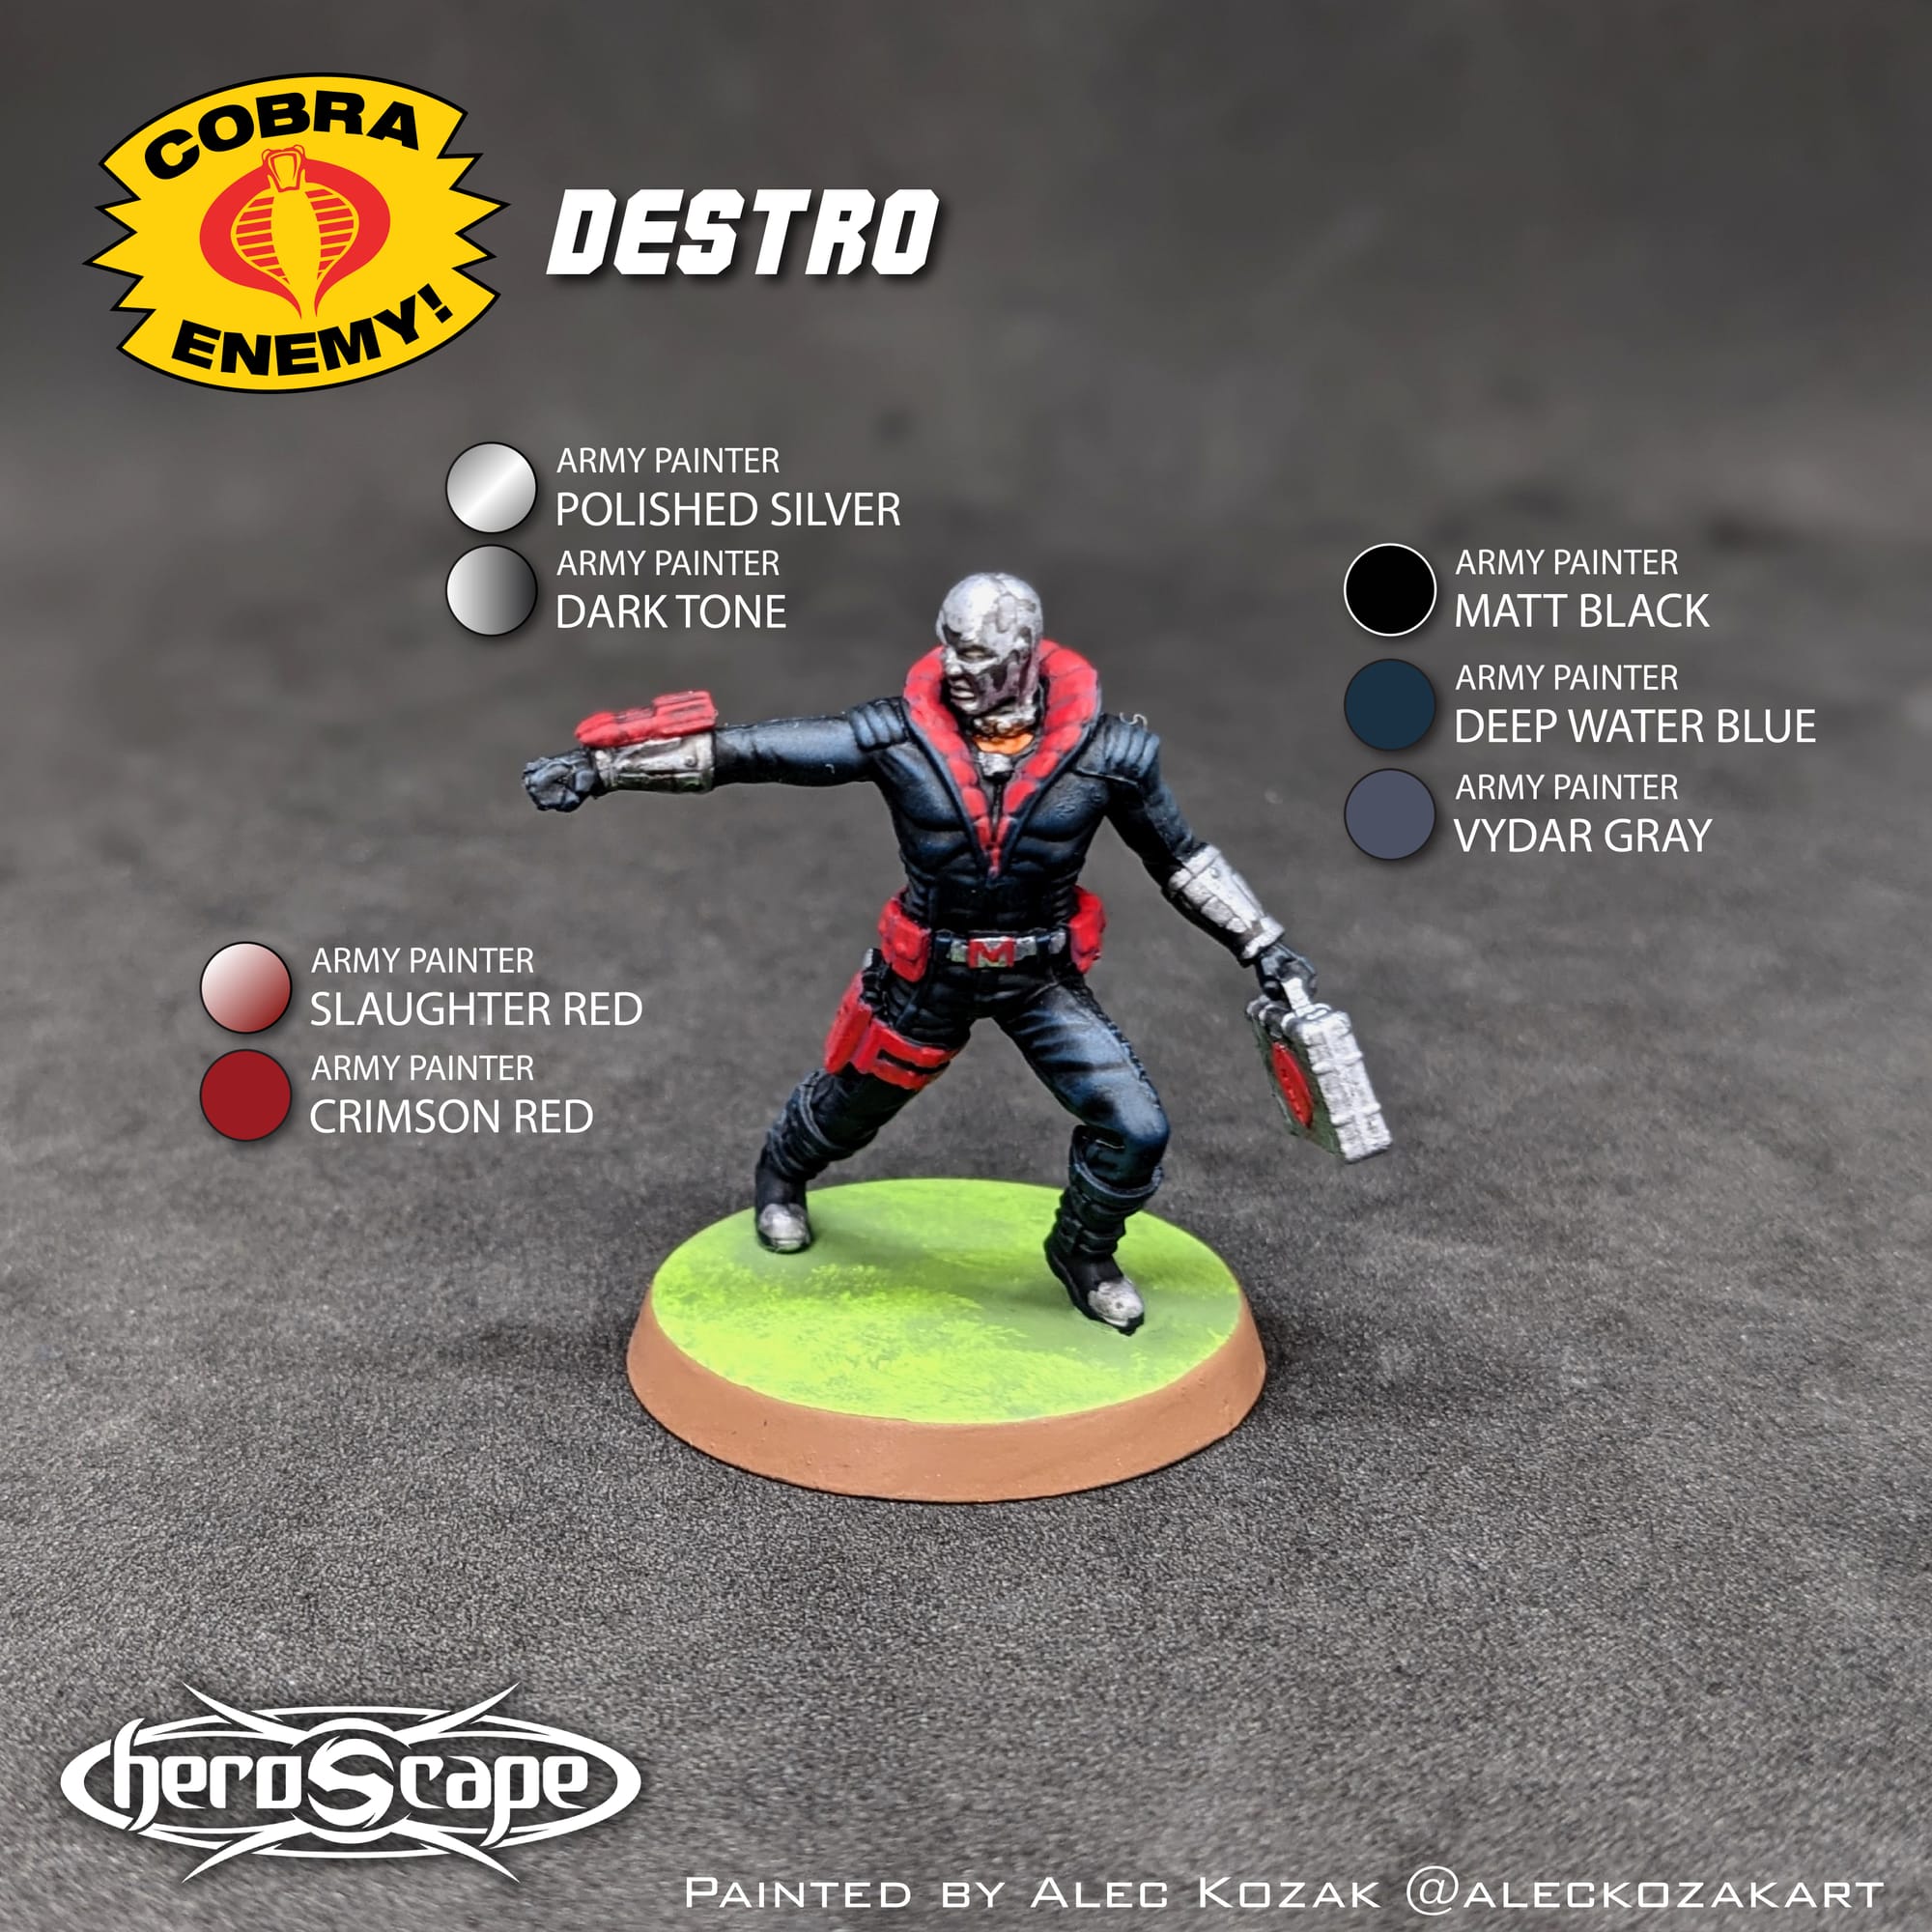
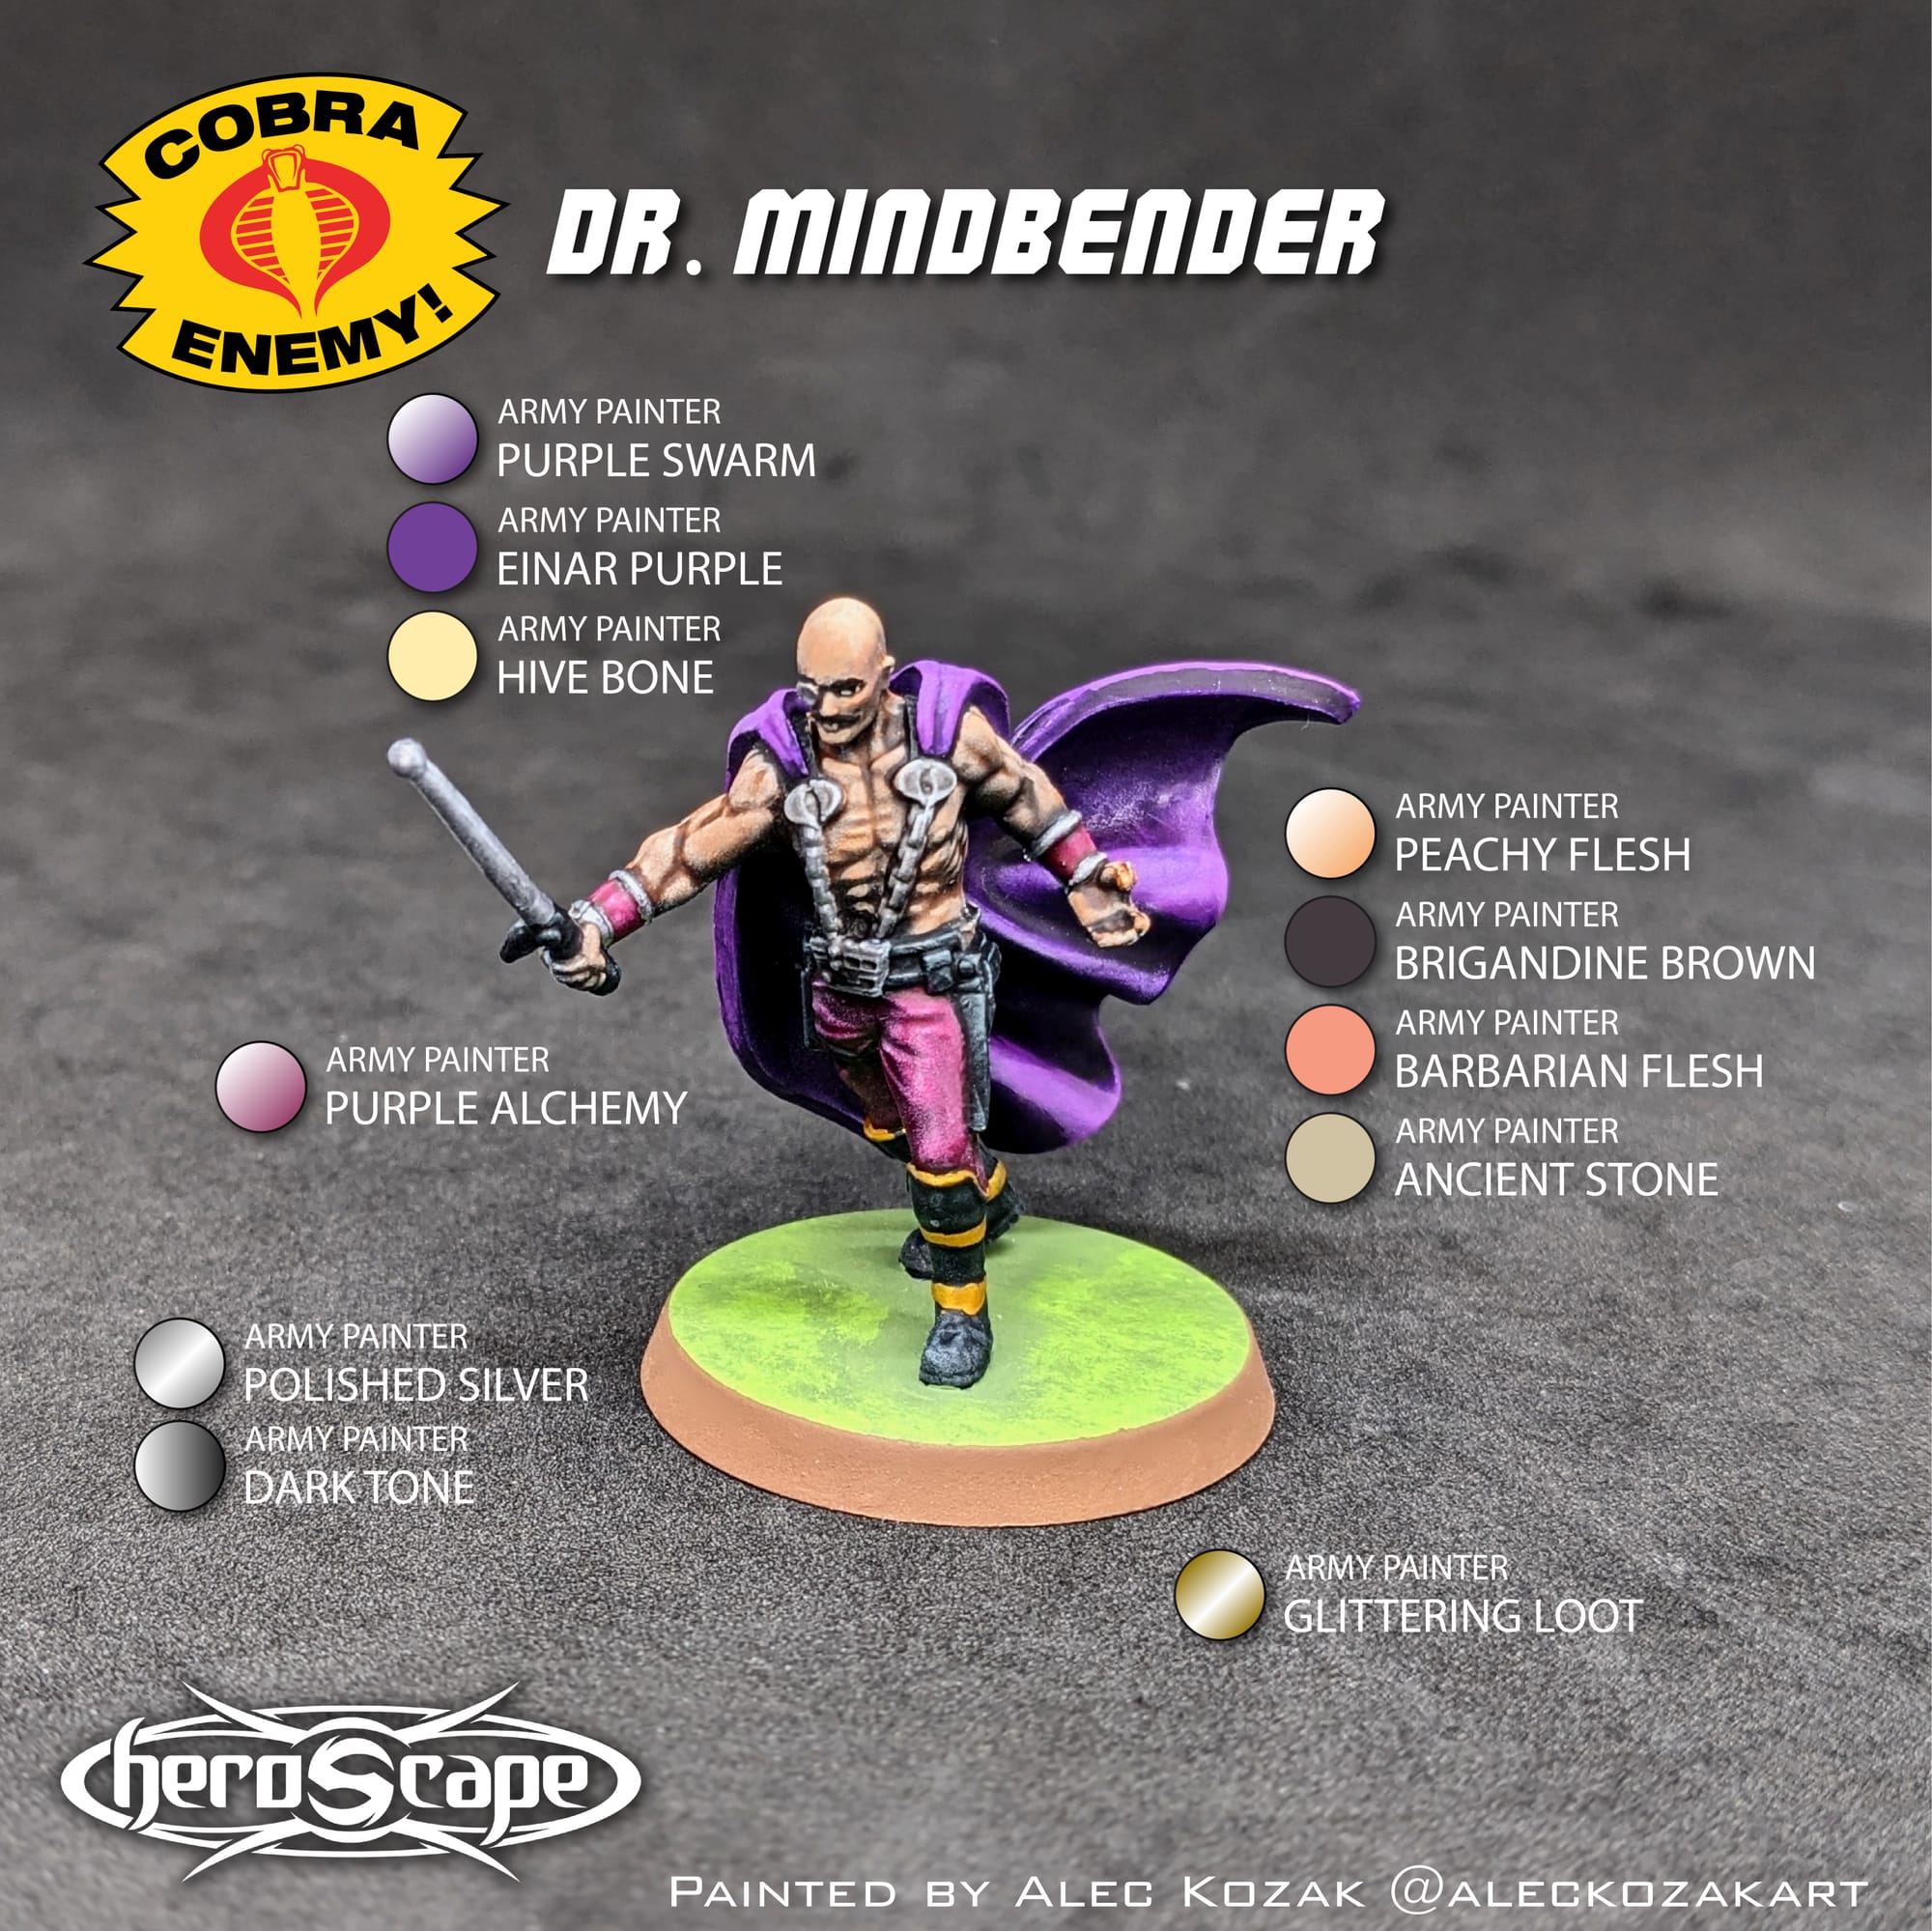
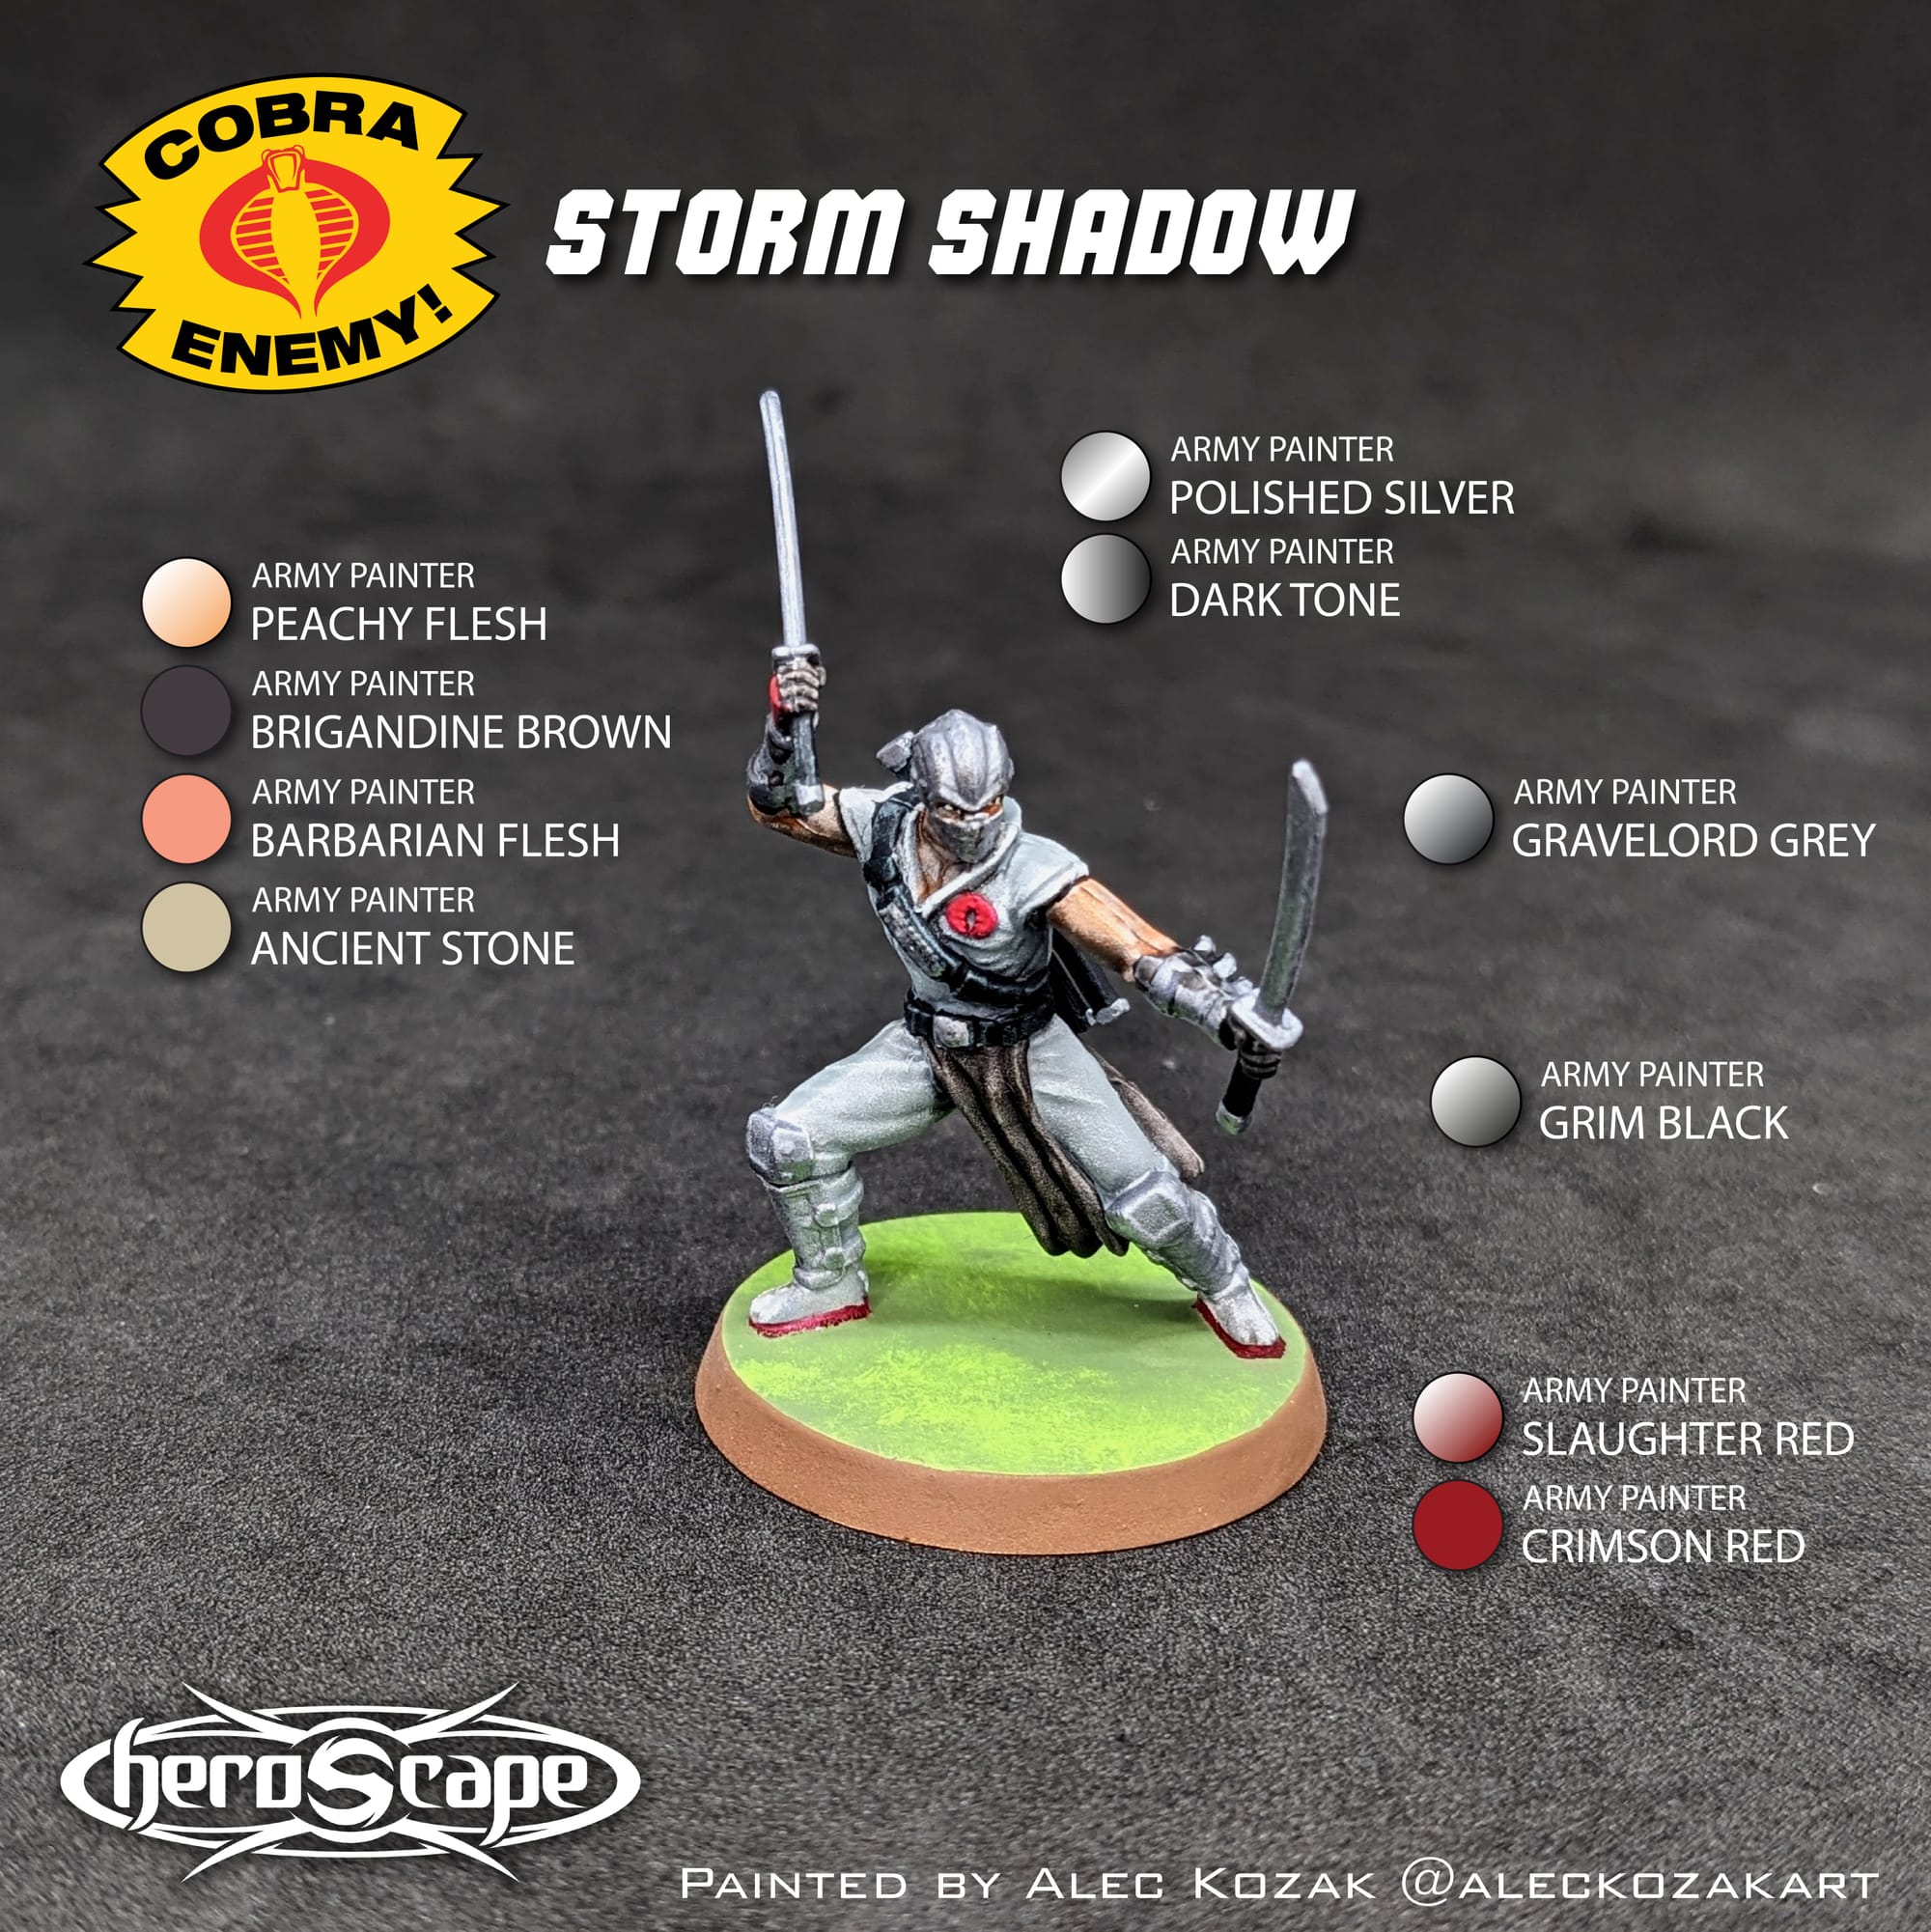
For this tutorial, I have included a visual guide (below) of the paints I used for the miniatures so you have an easily-accessible list to refer to if you need to go shopping. The paints are noted on the picture.
Painting Your Miniatures
The Paint Plan
For pretty much every miniature painting project I do, I start with a plan. Even before putting the primer and paint on a model, I find photo references of the paint schemes and details I am looking for. Most times, this means having a browser window up with different web pages and images next to my painting area, so I can quickly refer to them as I paint. I also come up with a paint plan, choosing what colors I am going to use and what order I apply them in.
Renegade Games Studios provides a wonderful series of images to use as guides for painting up their Heroscape miniatures, which are current and up-to-date with their releases. I used different paints, but I wanted to make sure I painted the pieces appropriately and similarly as they appeared in the guide.
Remember that done is better than perfect!
Paints
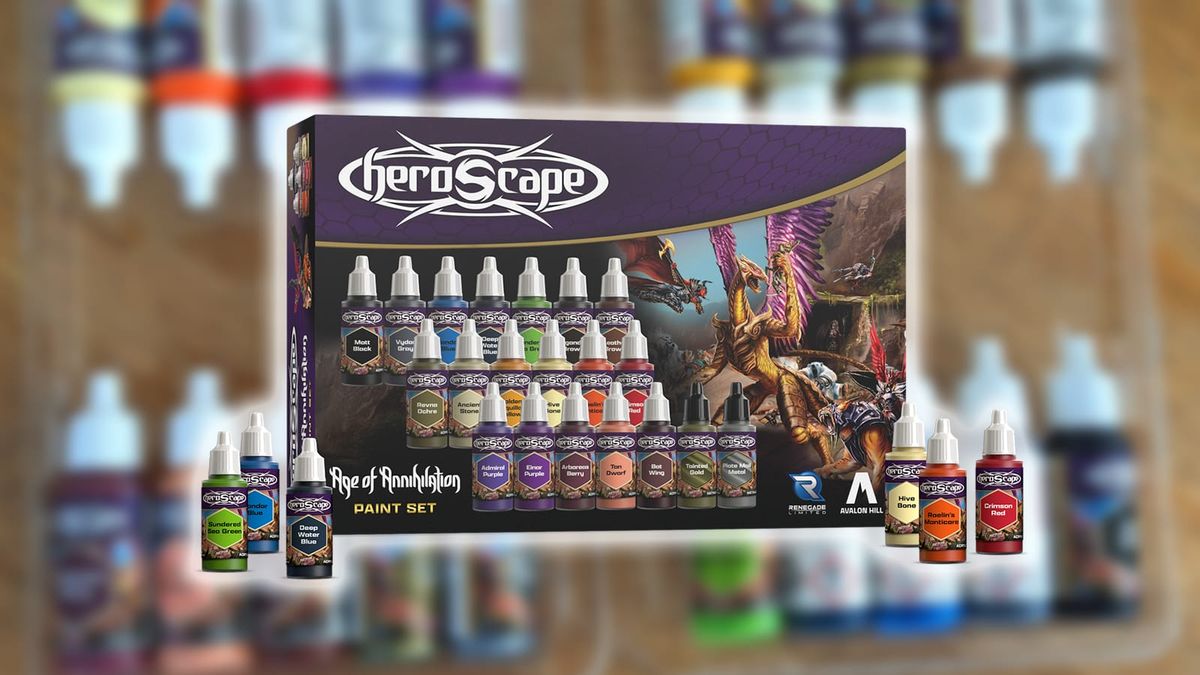
In addition to miniature expansions, Renegade Game Studios also offers Heroscape-themed paint sets. They were kind enough to send me a review copy of the Heroscape: Age of Annihilation Paint Set, an Army Painter Starter Paint Set with colors appropriate to paint up the Heroscape: Age of Annihilation Master Set.
You can check out my review for the Heroscape Age of Annihilation Paint Set here:
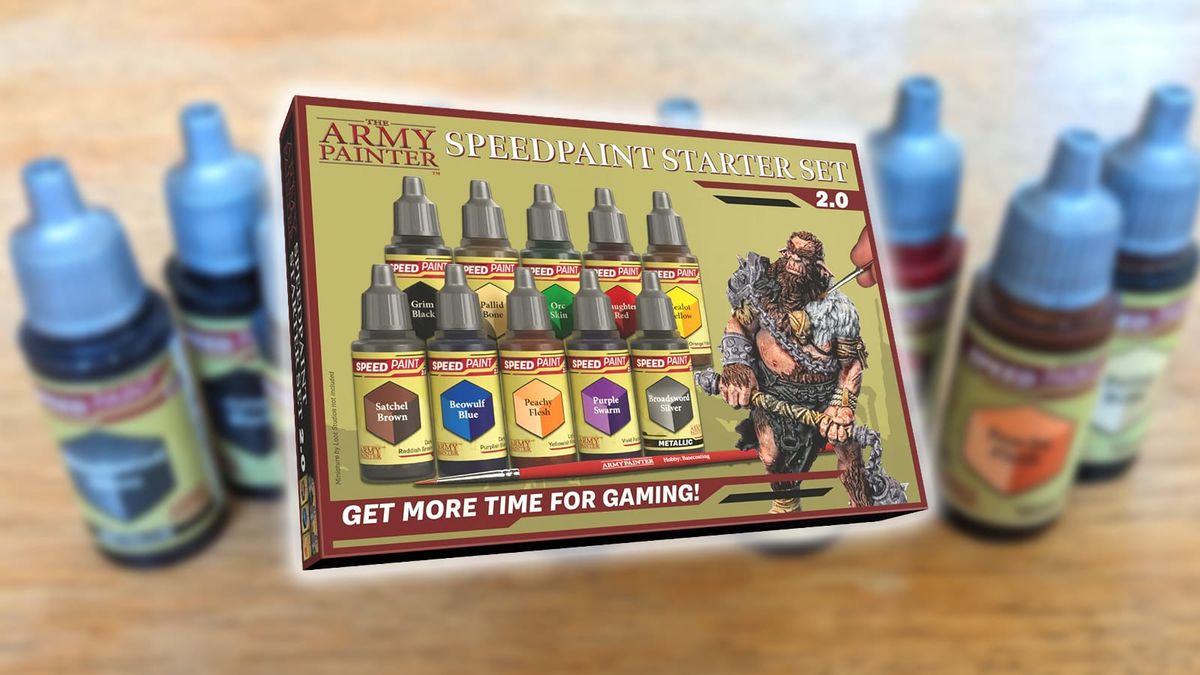
Additionally, I used Army Painter Speedpaint 2.0 Starter Set for these pieces, which acted like a base layer.
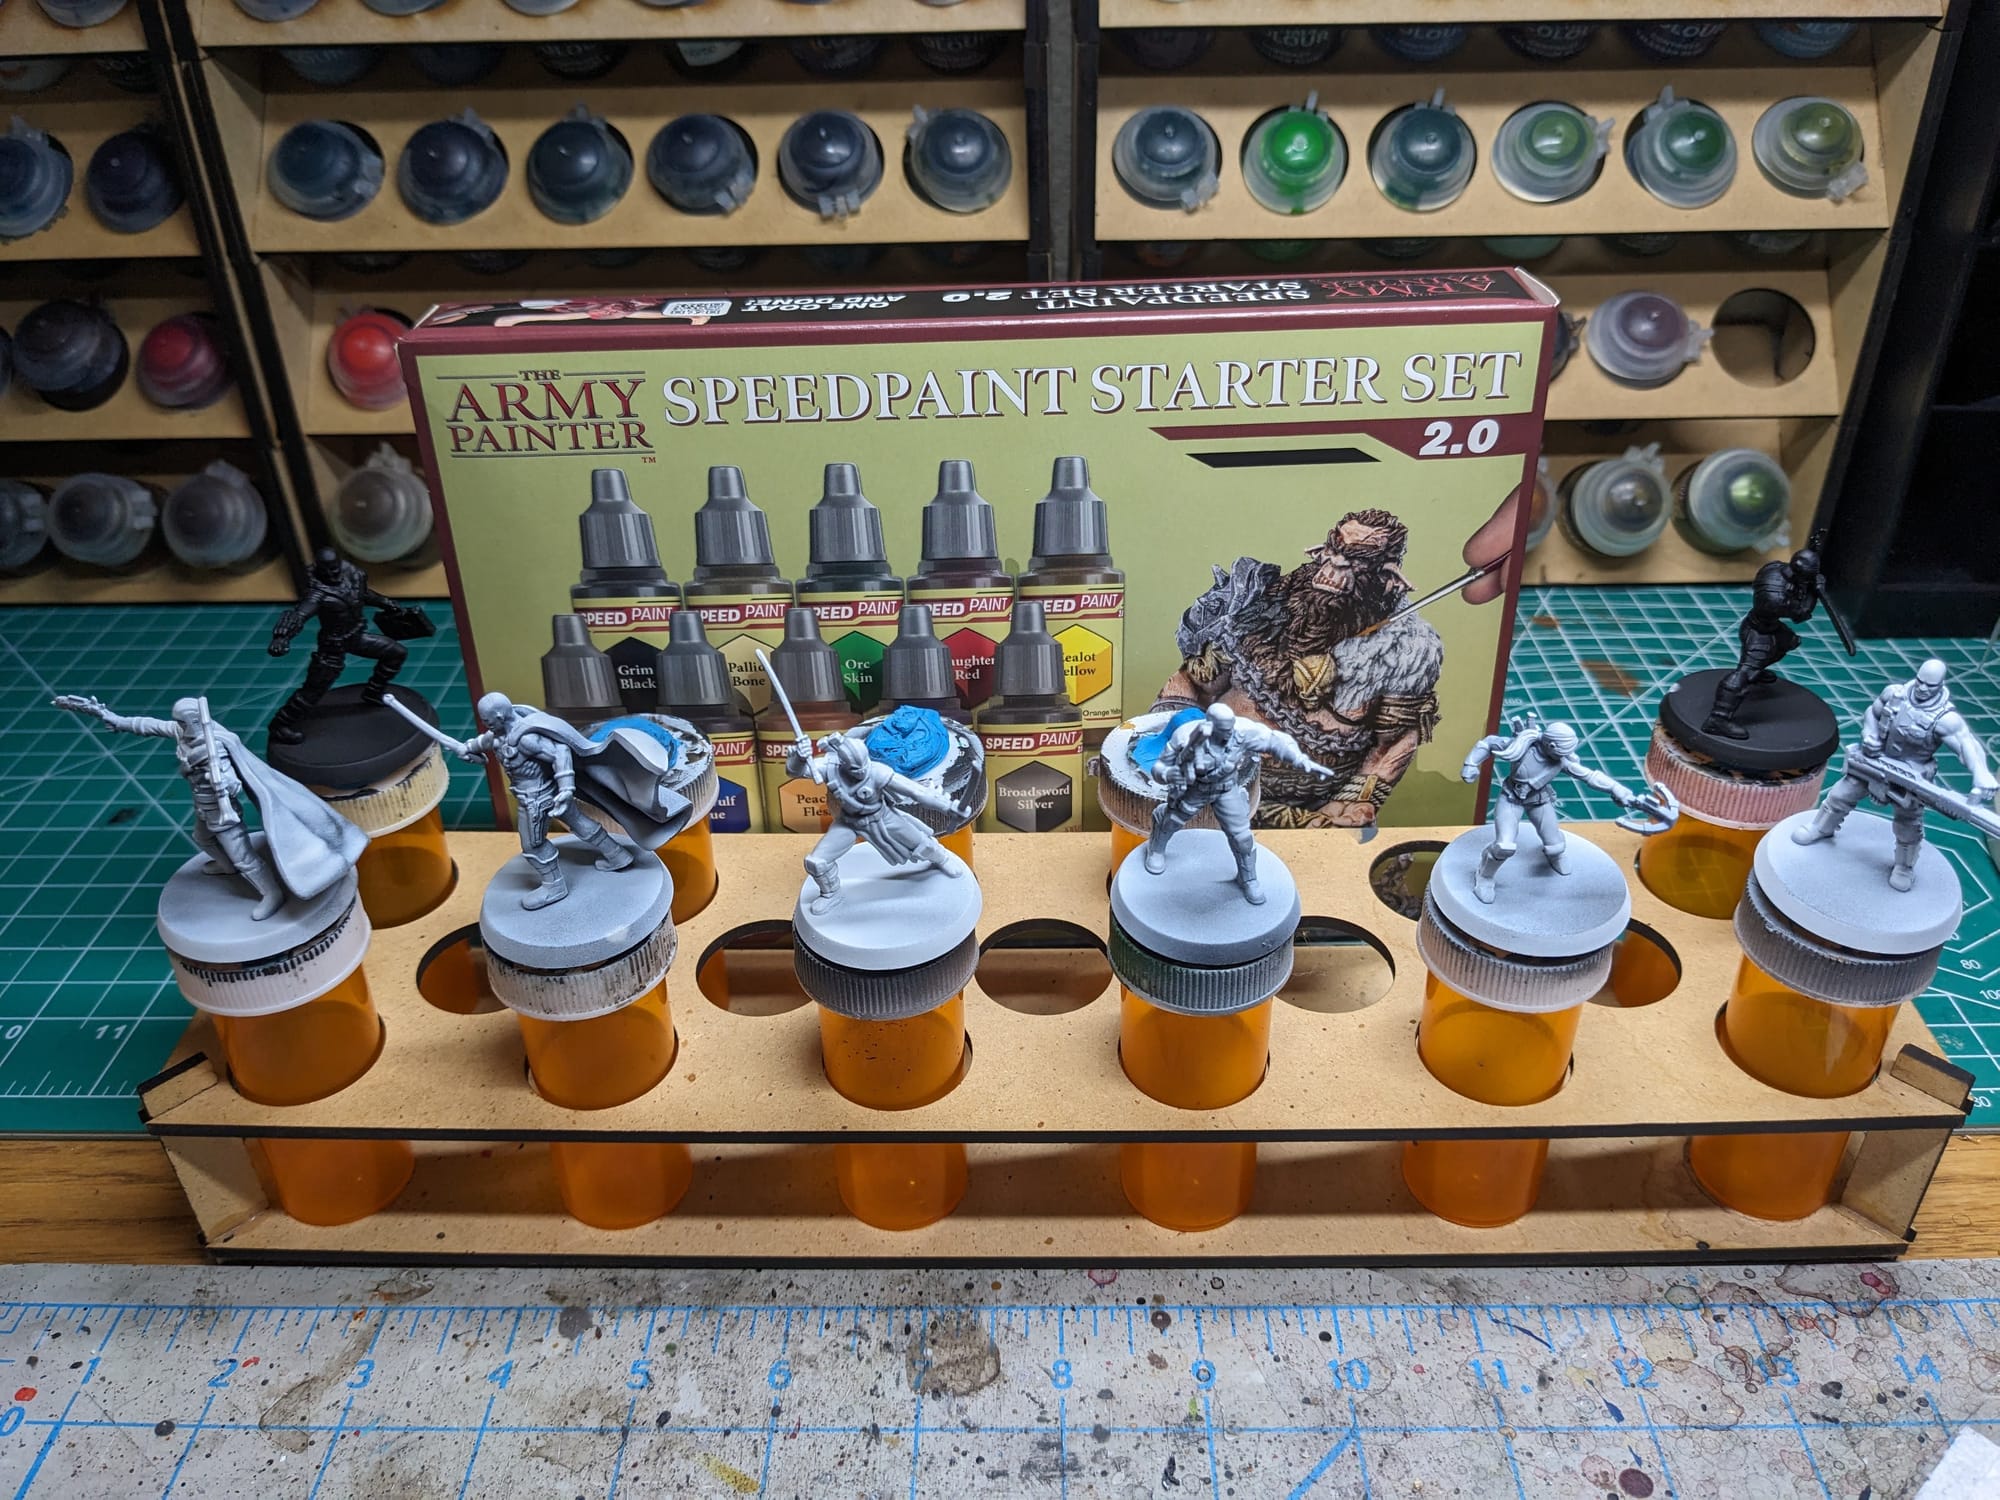
You can check out my review for the Army Painter Speedpaint 2.0 paint set here:
These paint sets, plus a few additional Army Painter paints I purchased at my local game store, were all I needed to paint up this set and have the beginnings of a solid Army Painter paint collection!
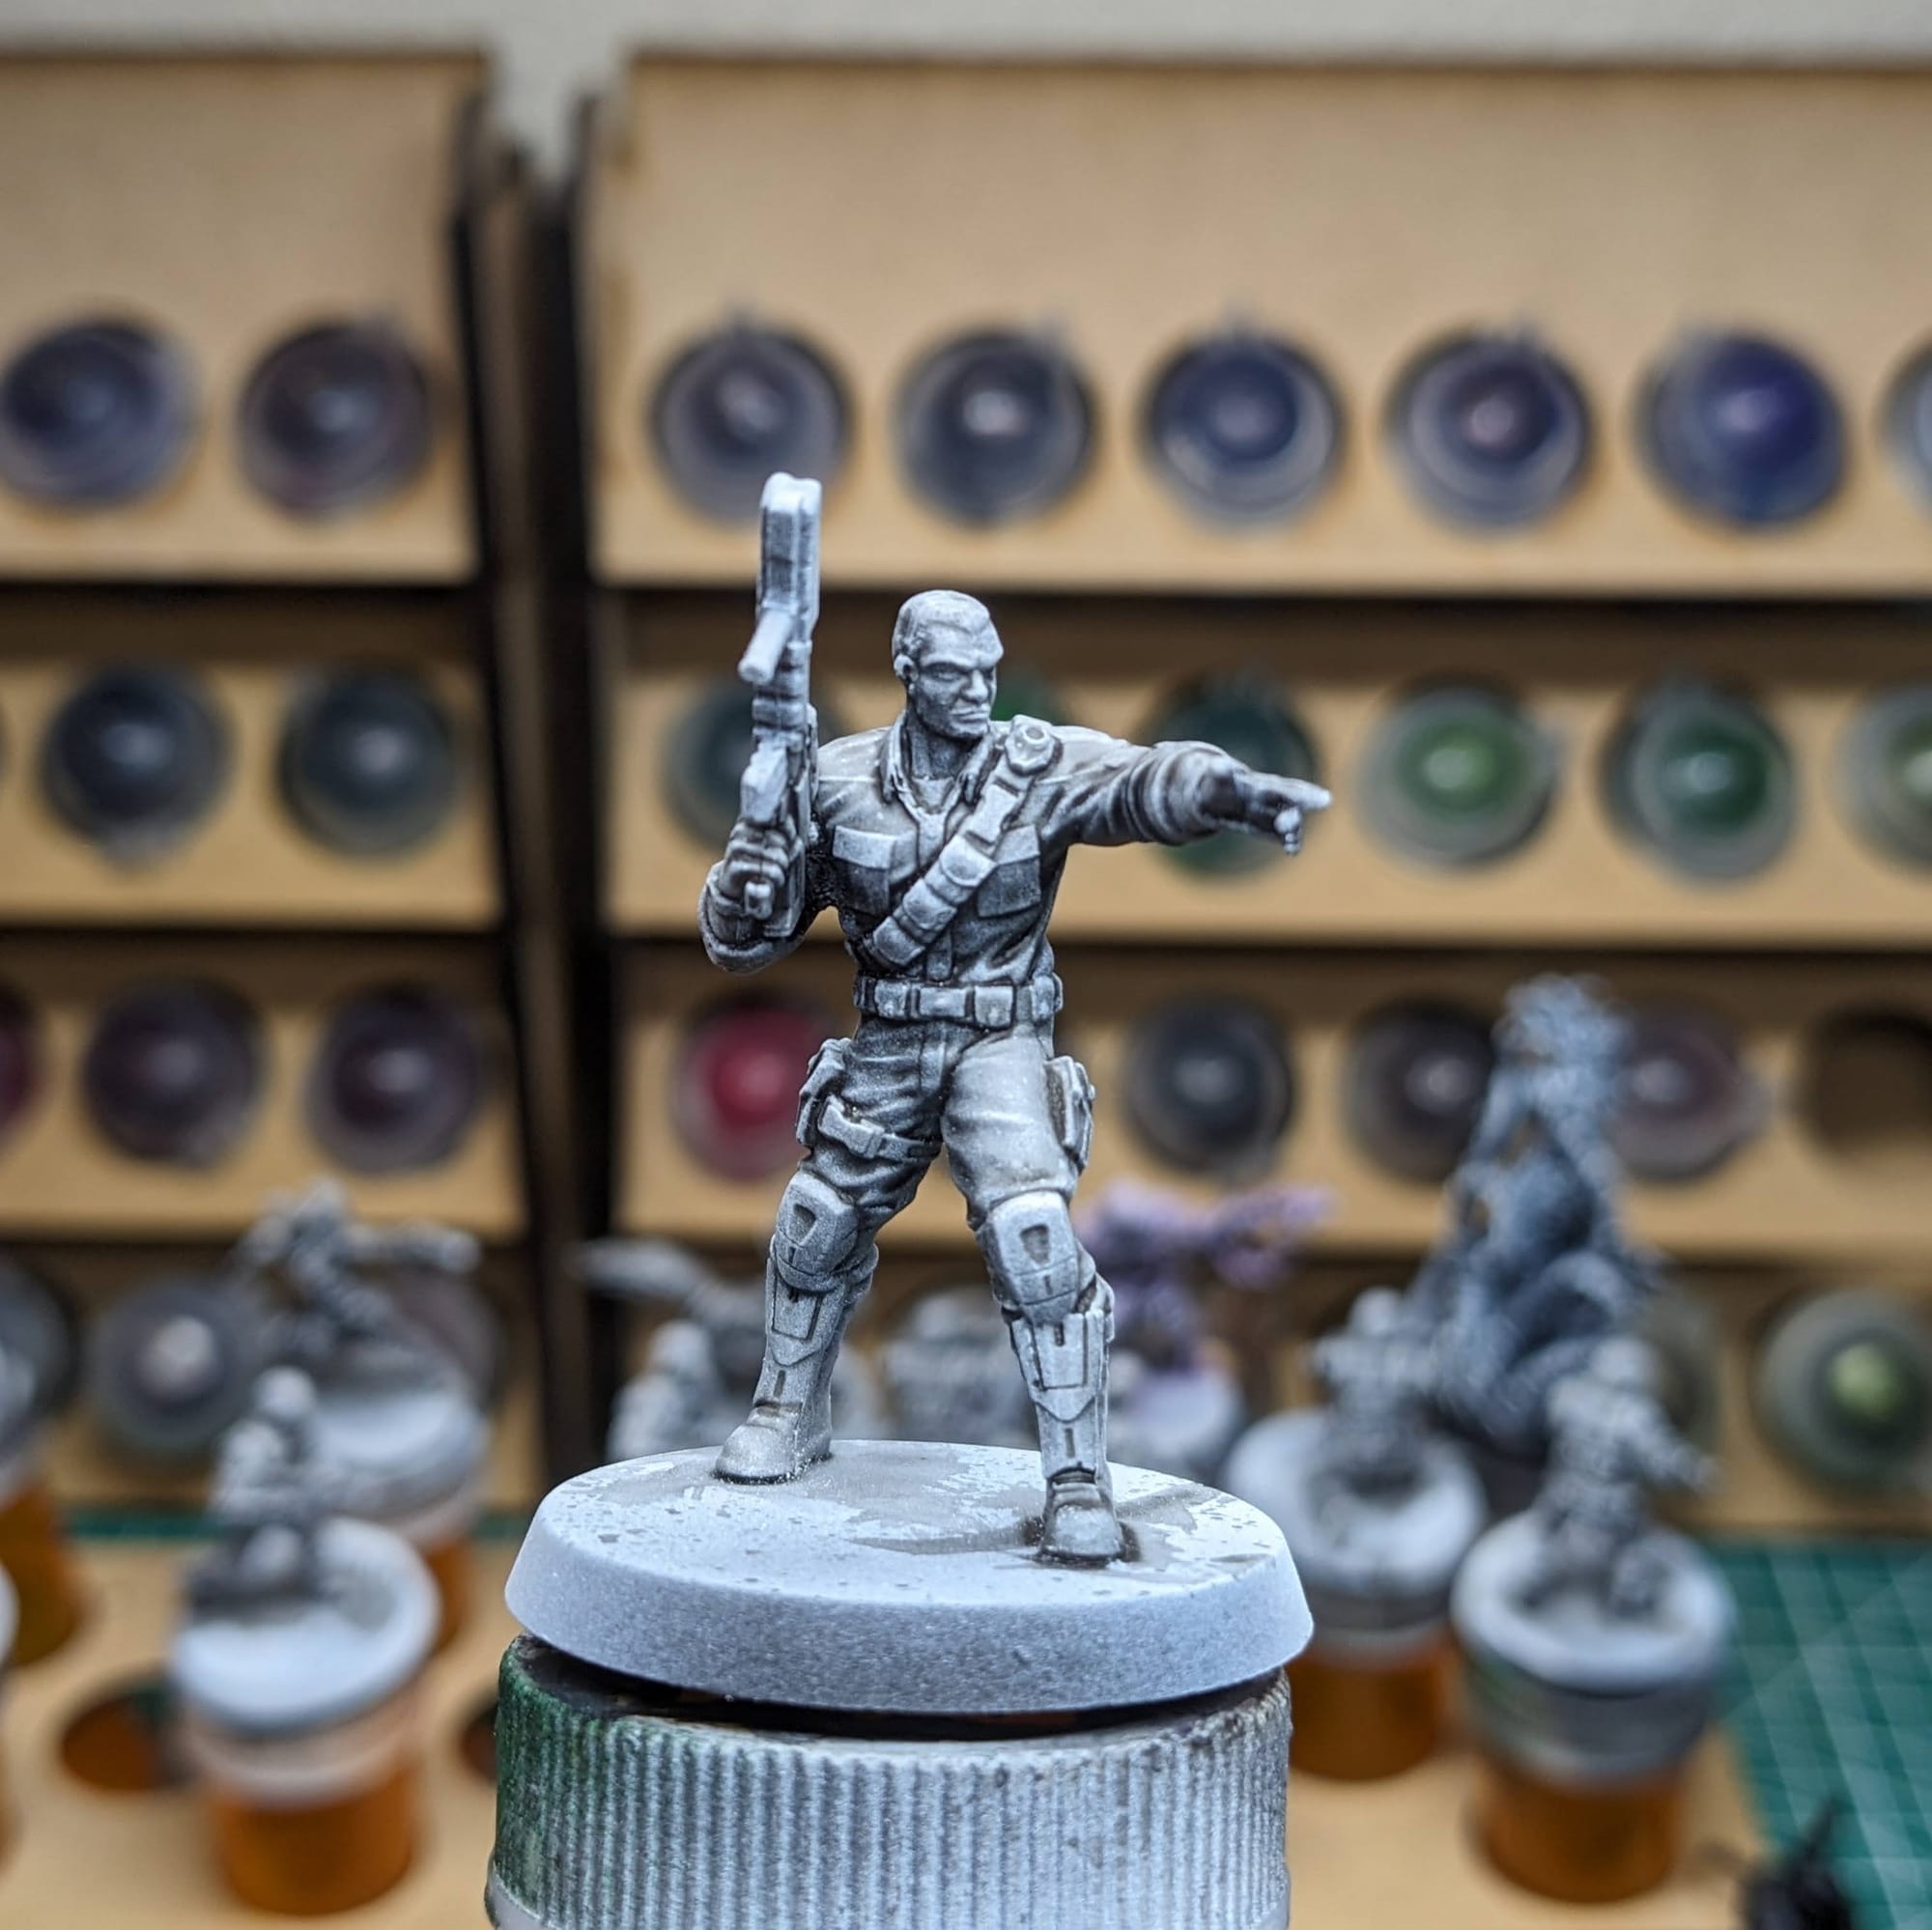
Priming the Models
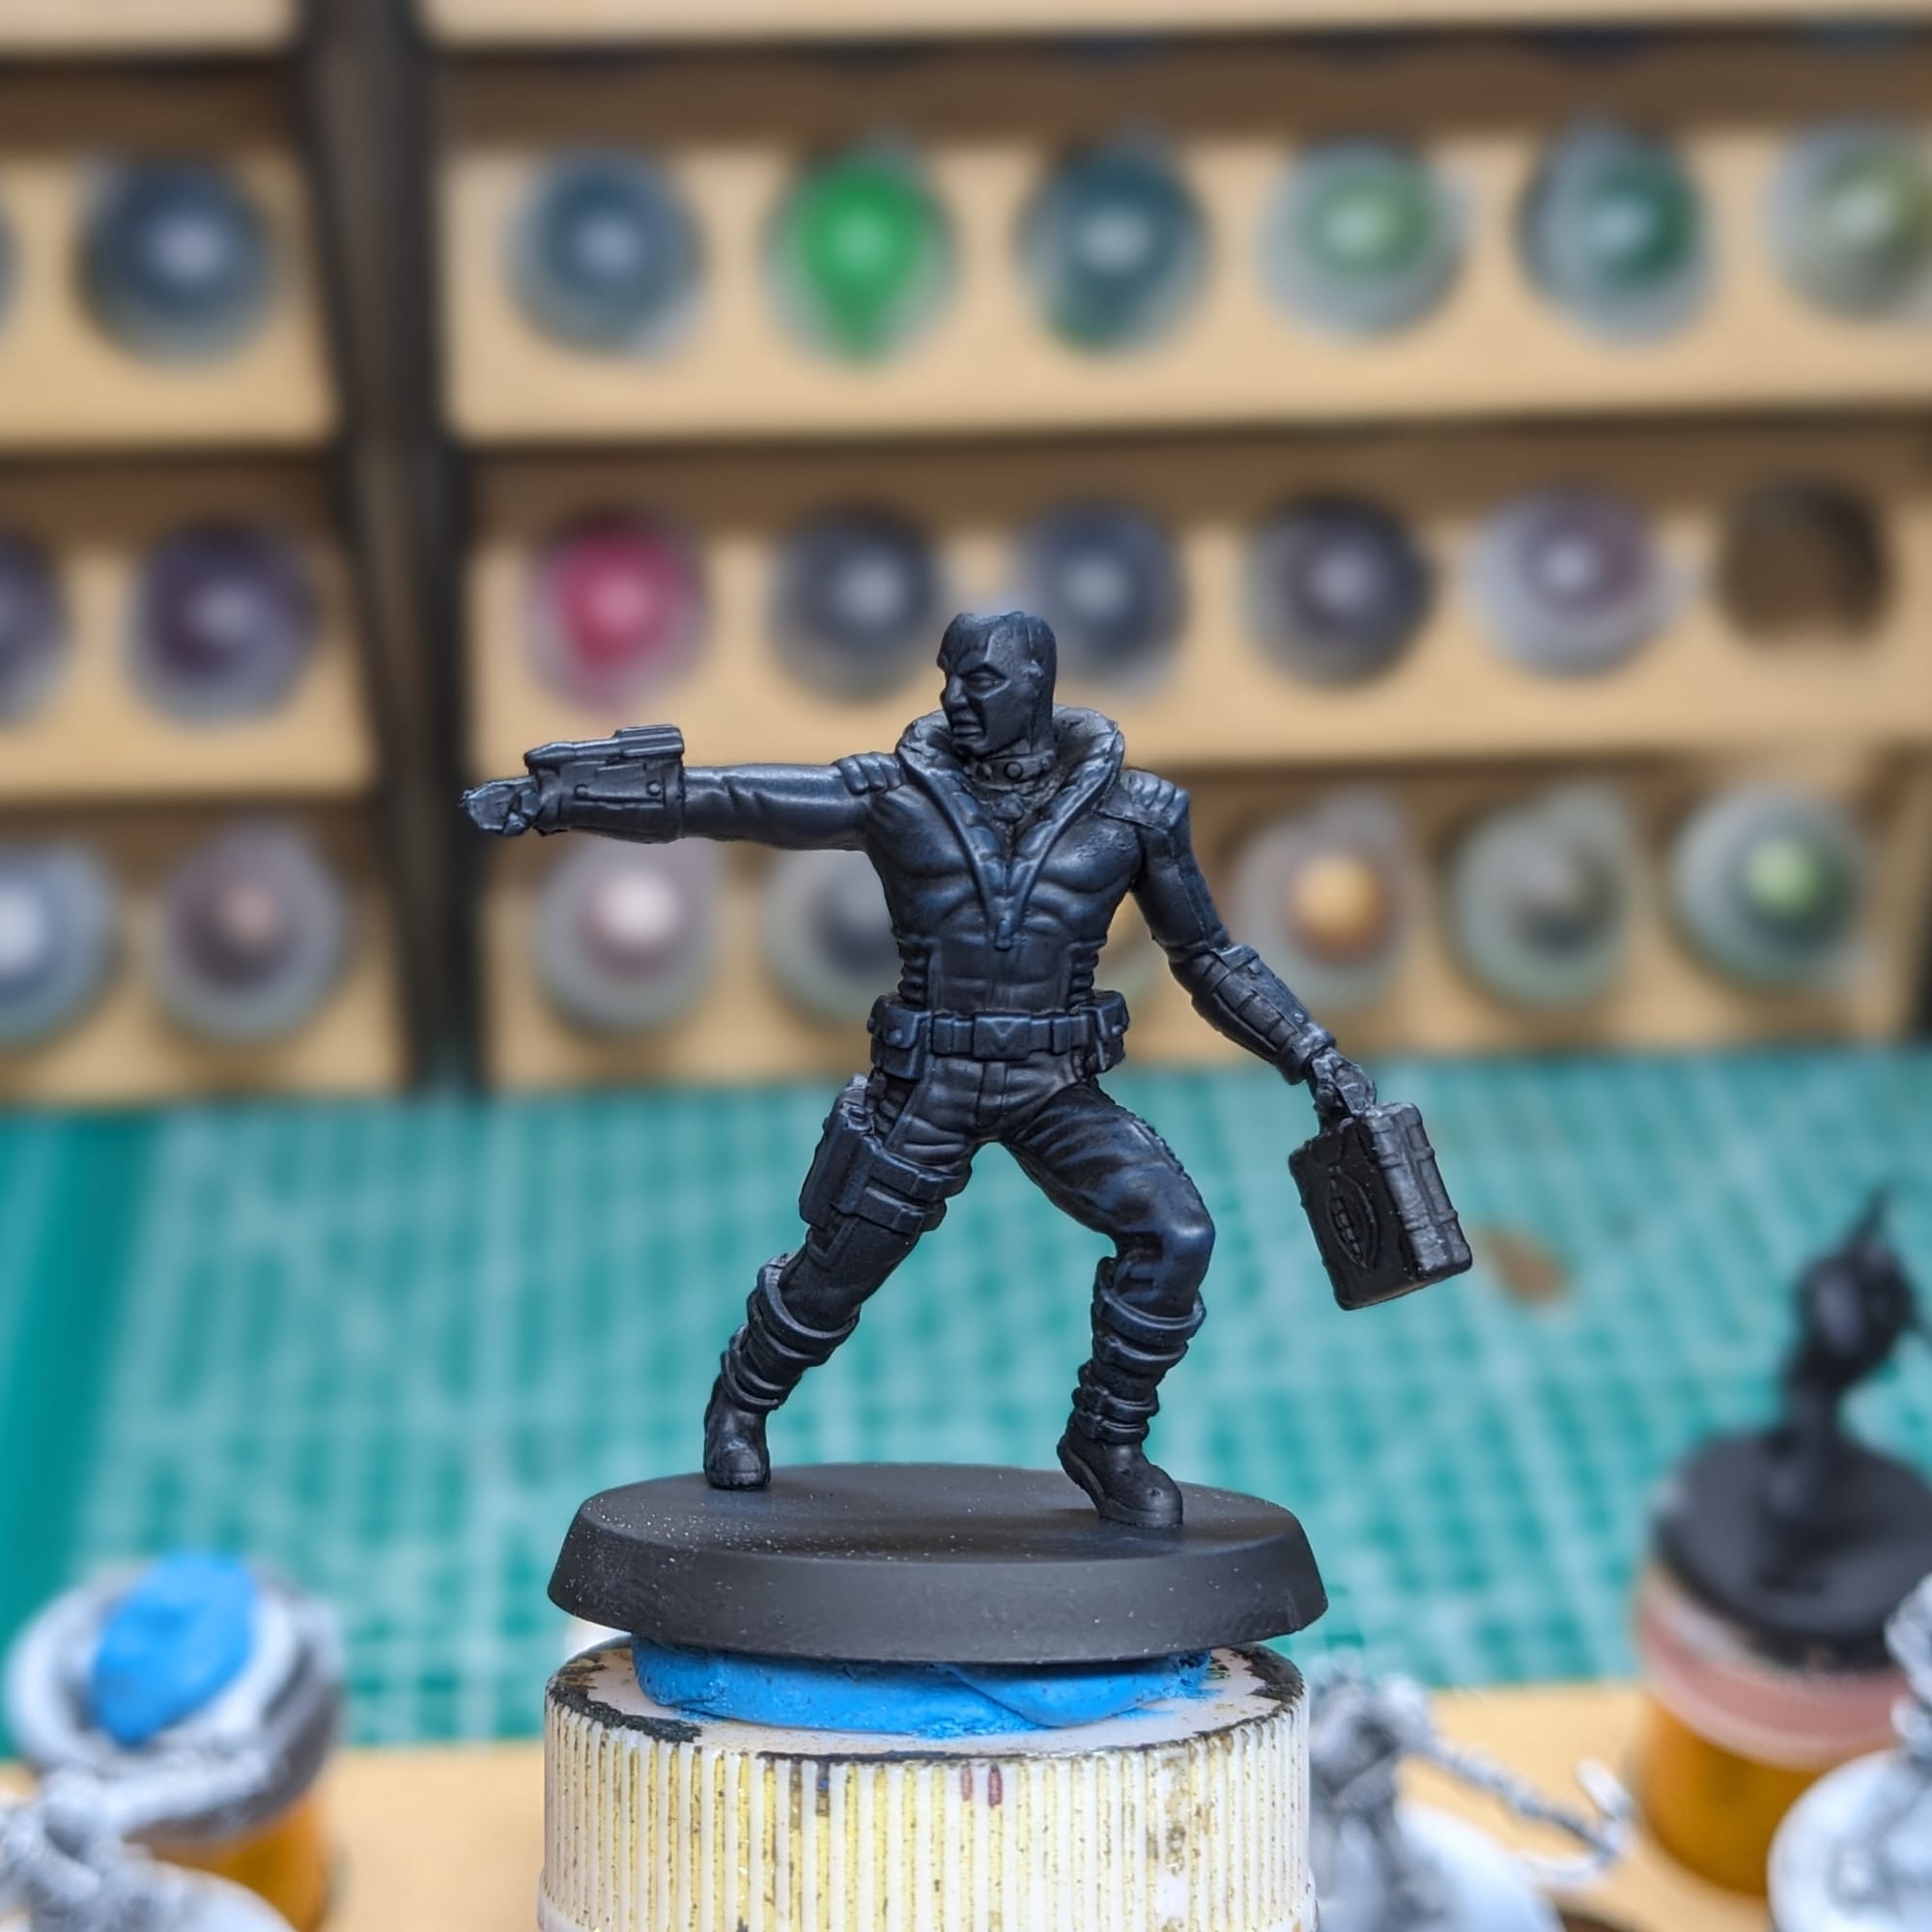
In general terms, getting the majority of a color for a model applied via a rattle can or airbrush saves a lot of time. For these figures, I started with a base coat of Rustoleum Flat Black and applied a zenithal top coat of Army Painter Matte White. The white and black combo helps with the next steps for the Slapchop method. To save on time and effort, both Destro and Snake Eyes were primed in only black.
Additionally, I used Rustoleum Flat Black and Army Painter Gun Metal Primer for the metal walls.
Slapchop Method
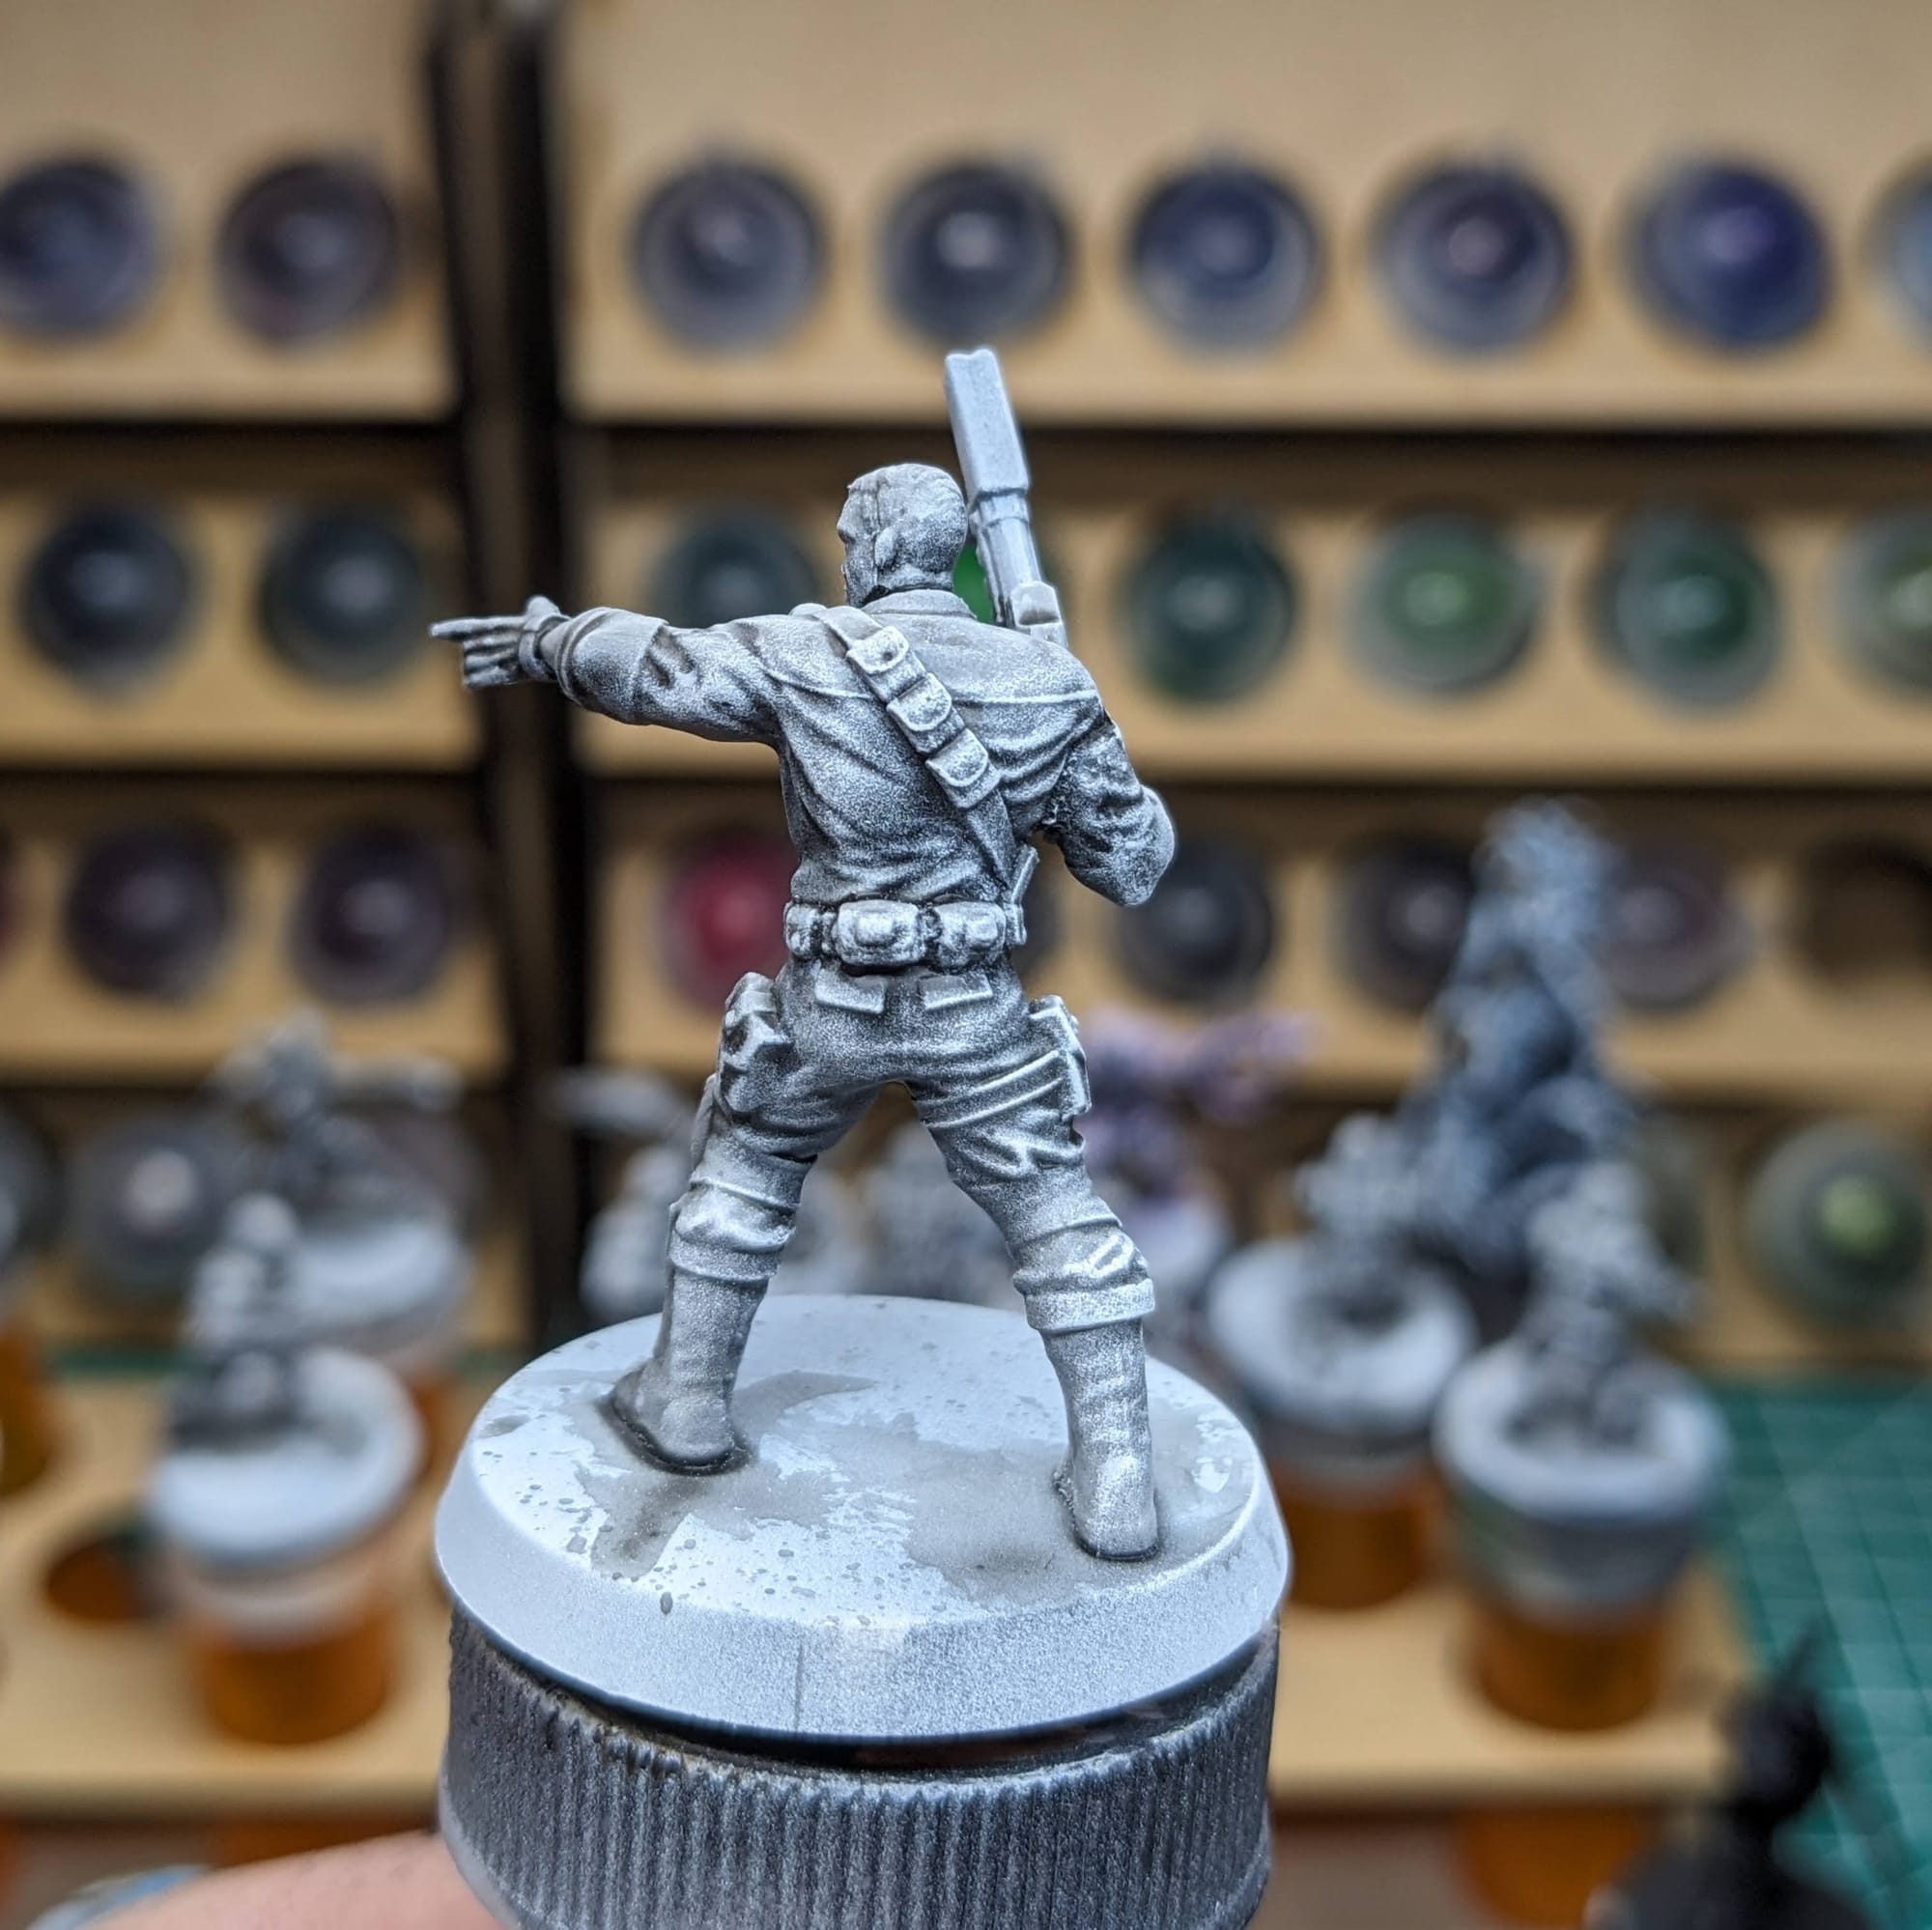
For these pieces, I chose to take a variation of the “slapchop” approach for them. Slapchop is a painting method where you accent the details of the models by dry brushing shades of gray and white. Then, using speed paints, contrast paints, and/or washes, you paint a single coat over the top of the model, creating shadows, mid-tones, and highlights in a single pass. This would be akin to using Multiply or Screen layers in Photoshop to establish color values on a gray underlayer. This is a very fast and efficient way to paint a lot of models that you don’t want to put a lot of detail into, and instead rely on the mold of the model to provide enough detail and contrast to make it stand out on the table.
Step-by-Step Painting
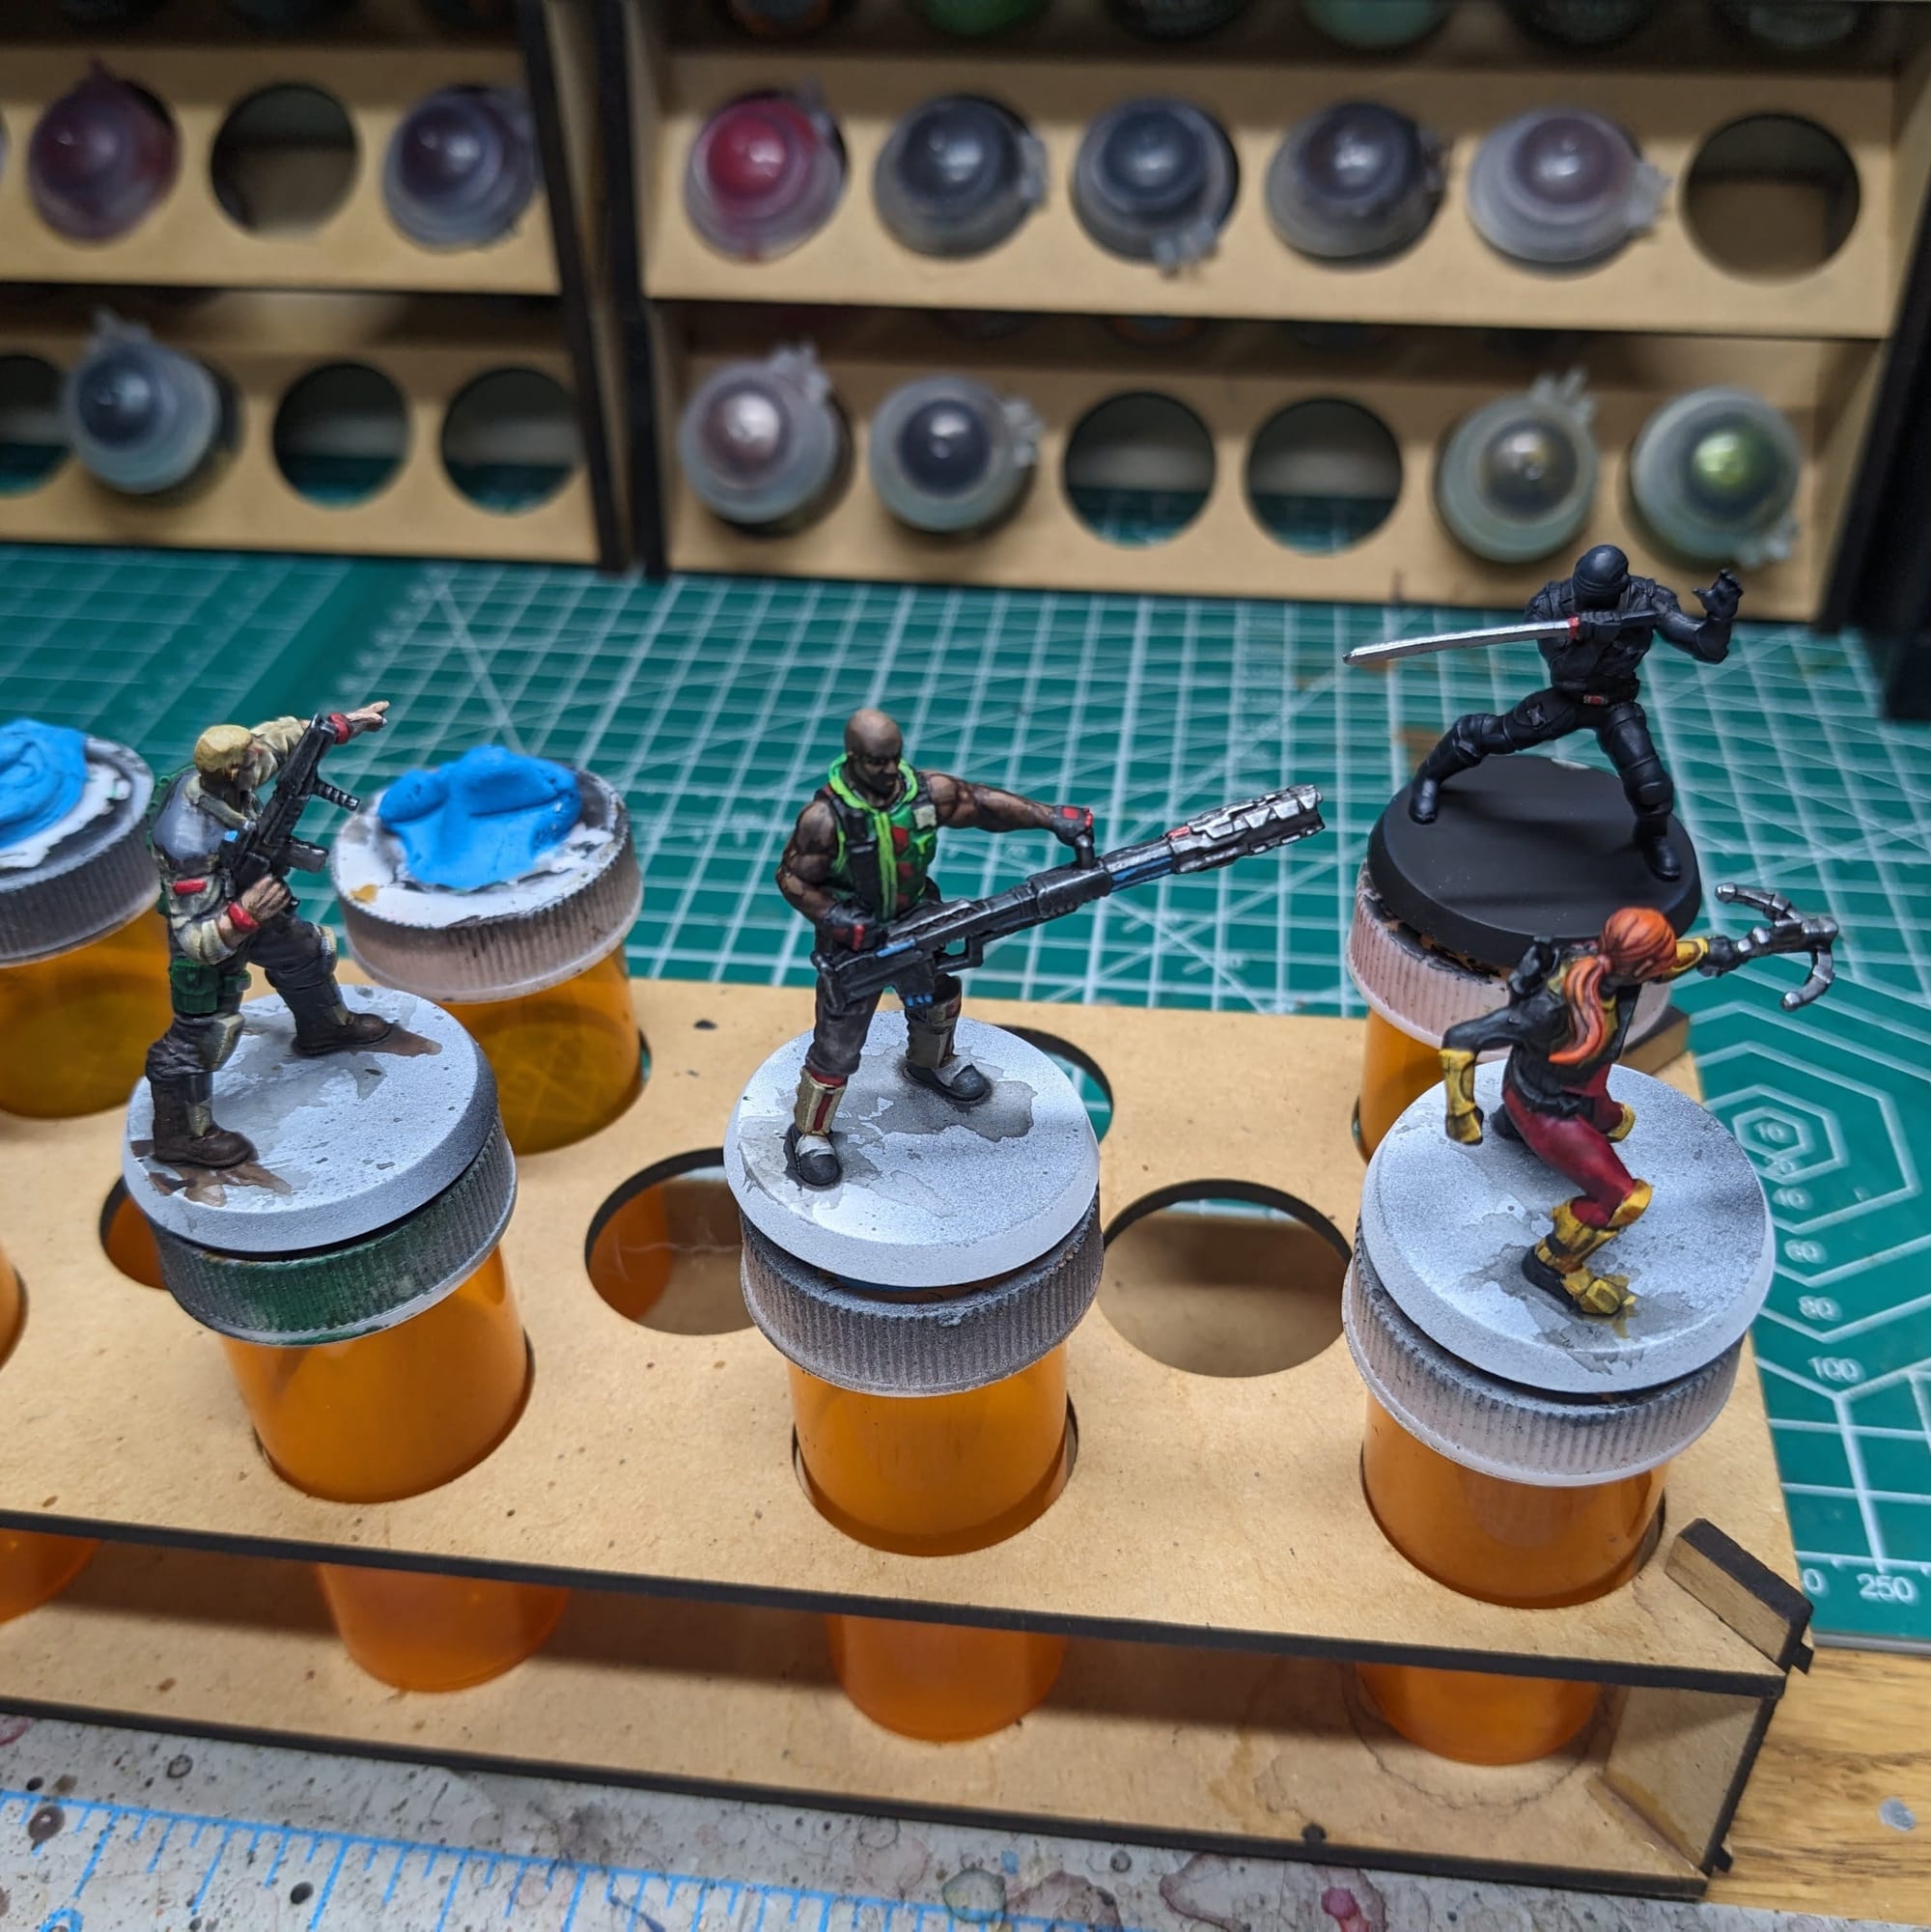
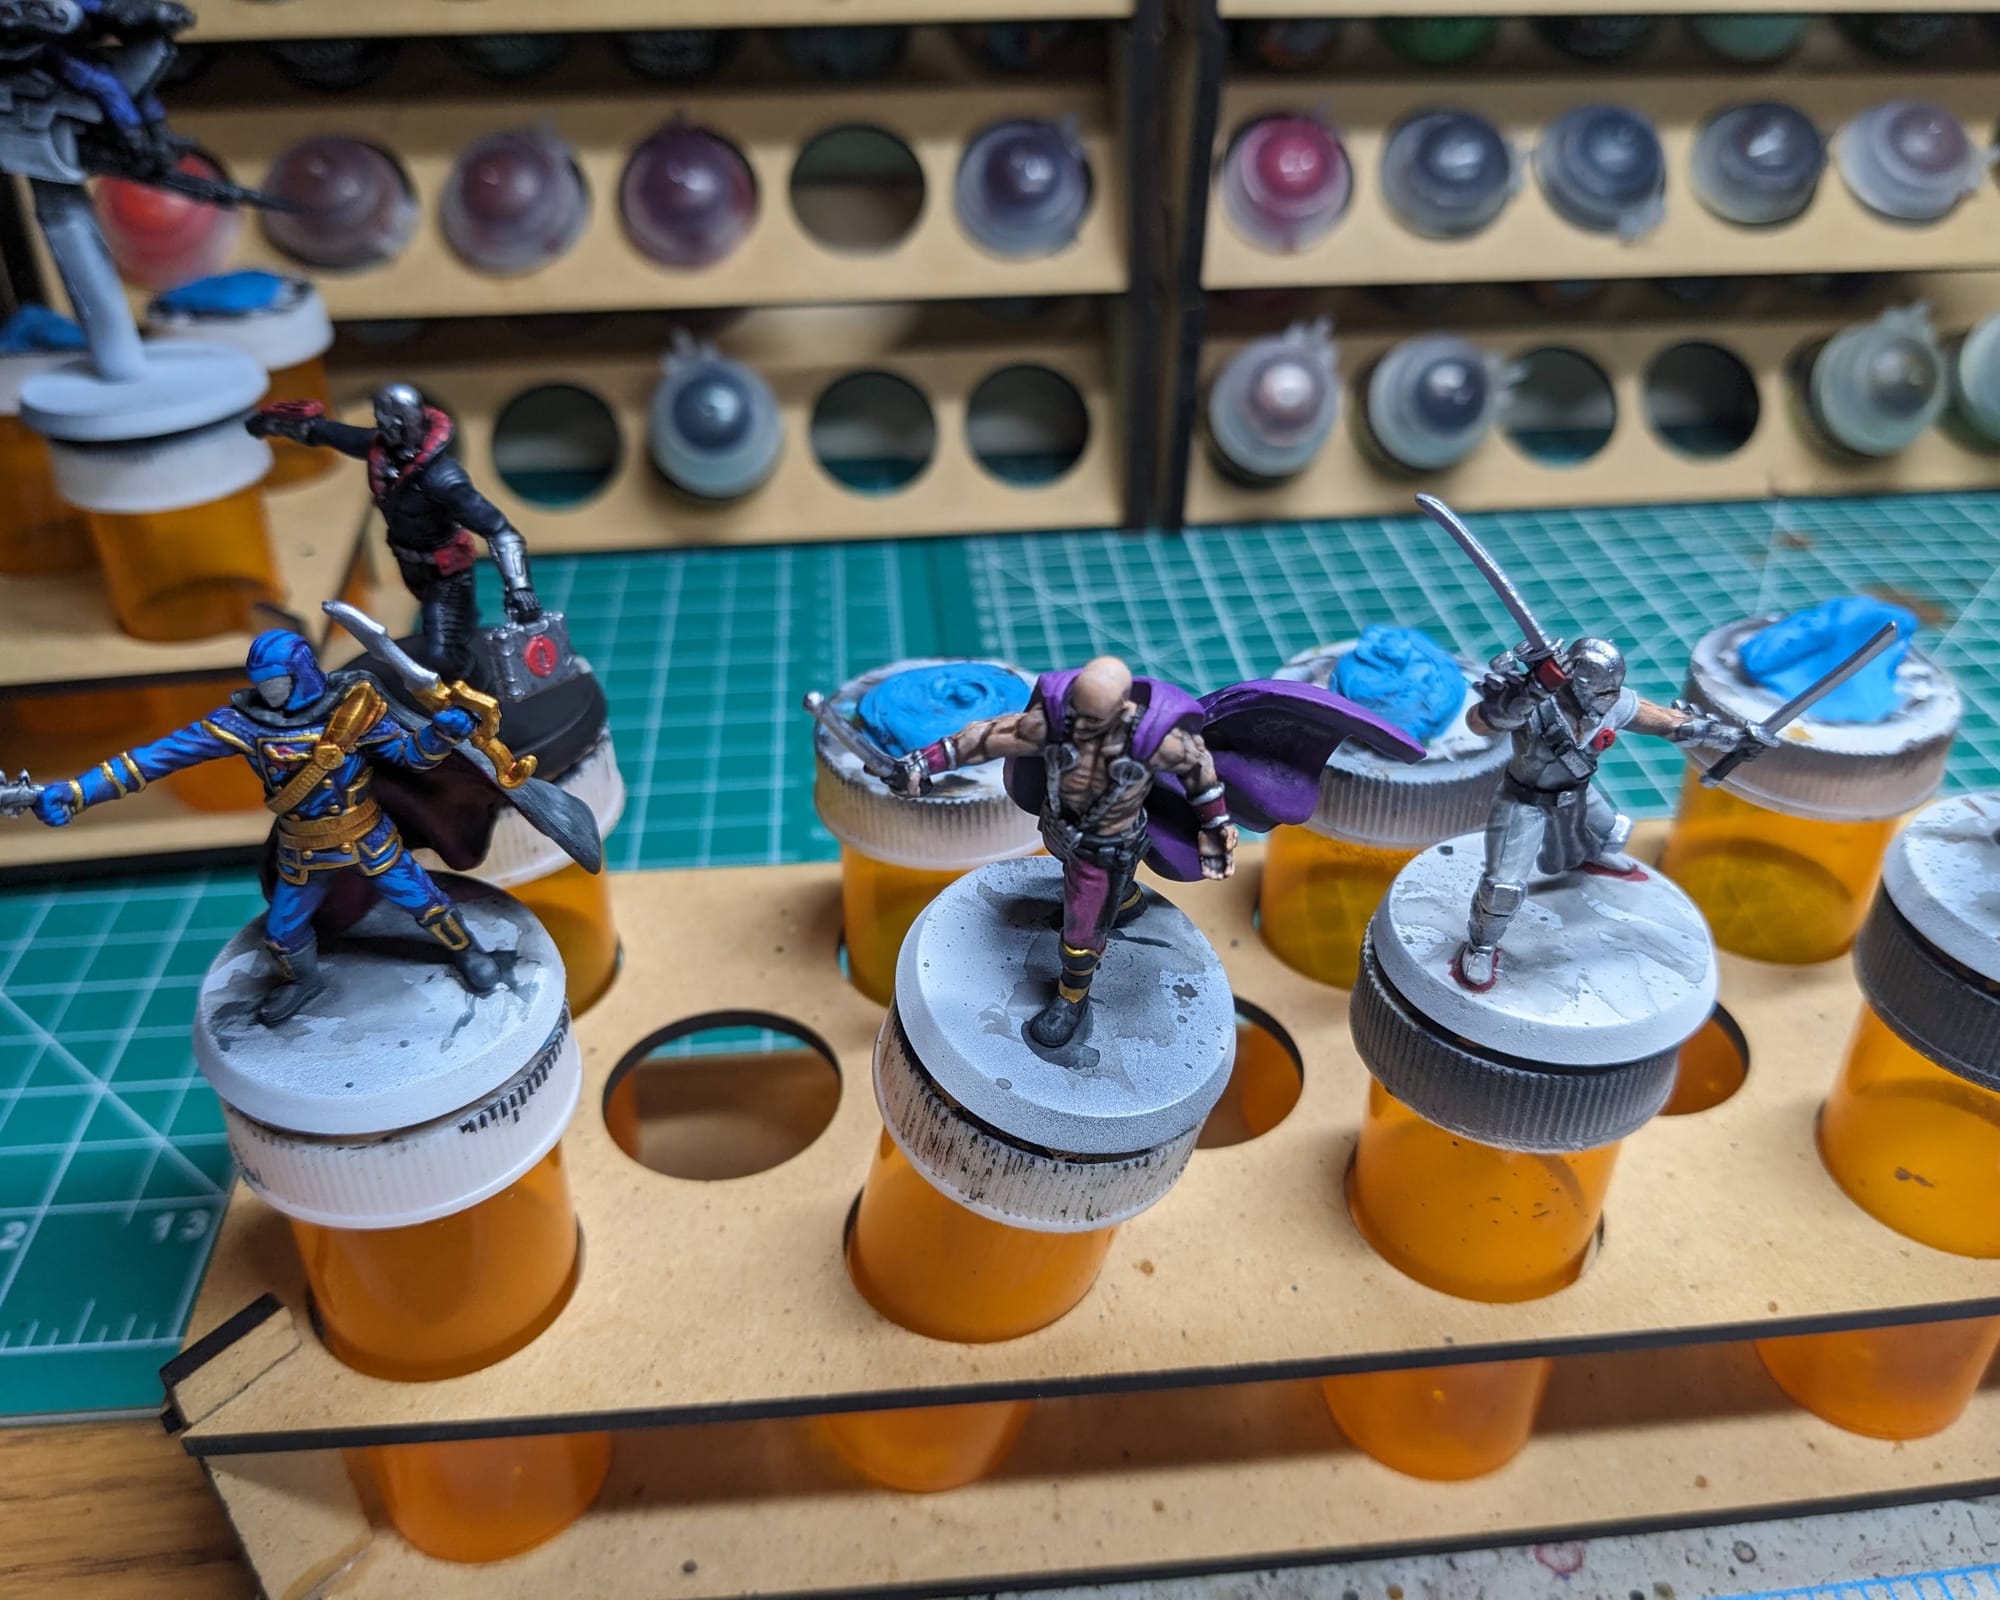
Once I applied the Dark Tone and subsequent white dry-brushing, I started my color blocking. Using the Speedpaints, I started with the lightest colors (skin tone, tan, white), and painted the areas of those models that would be in that color.
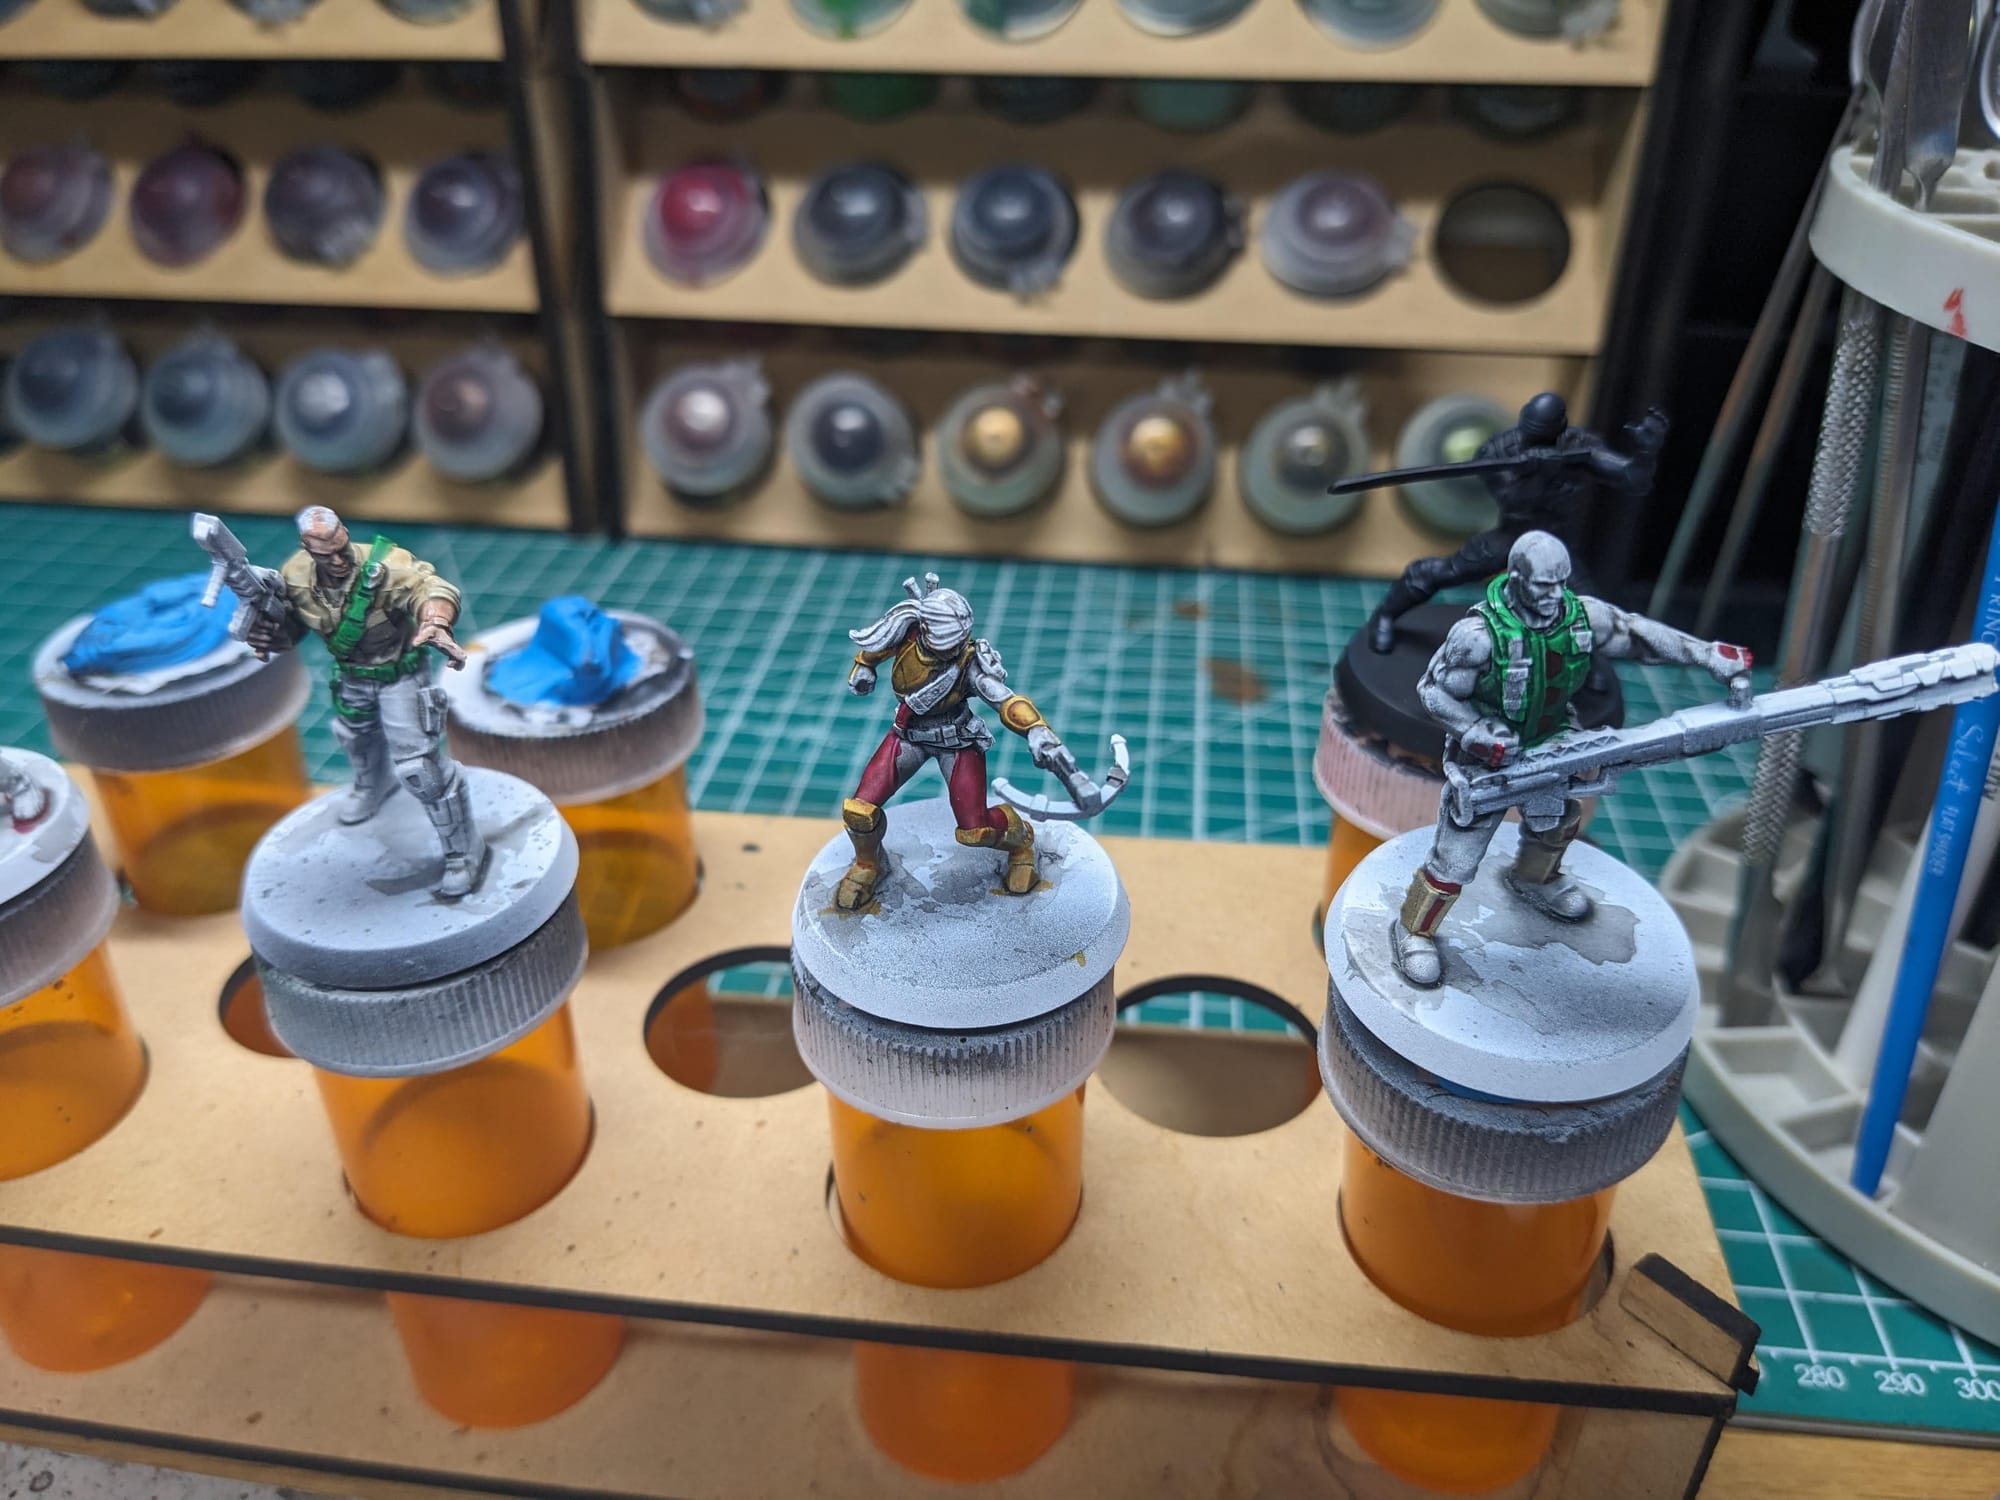
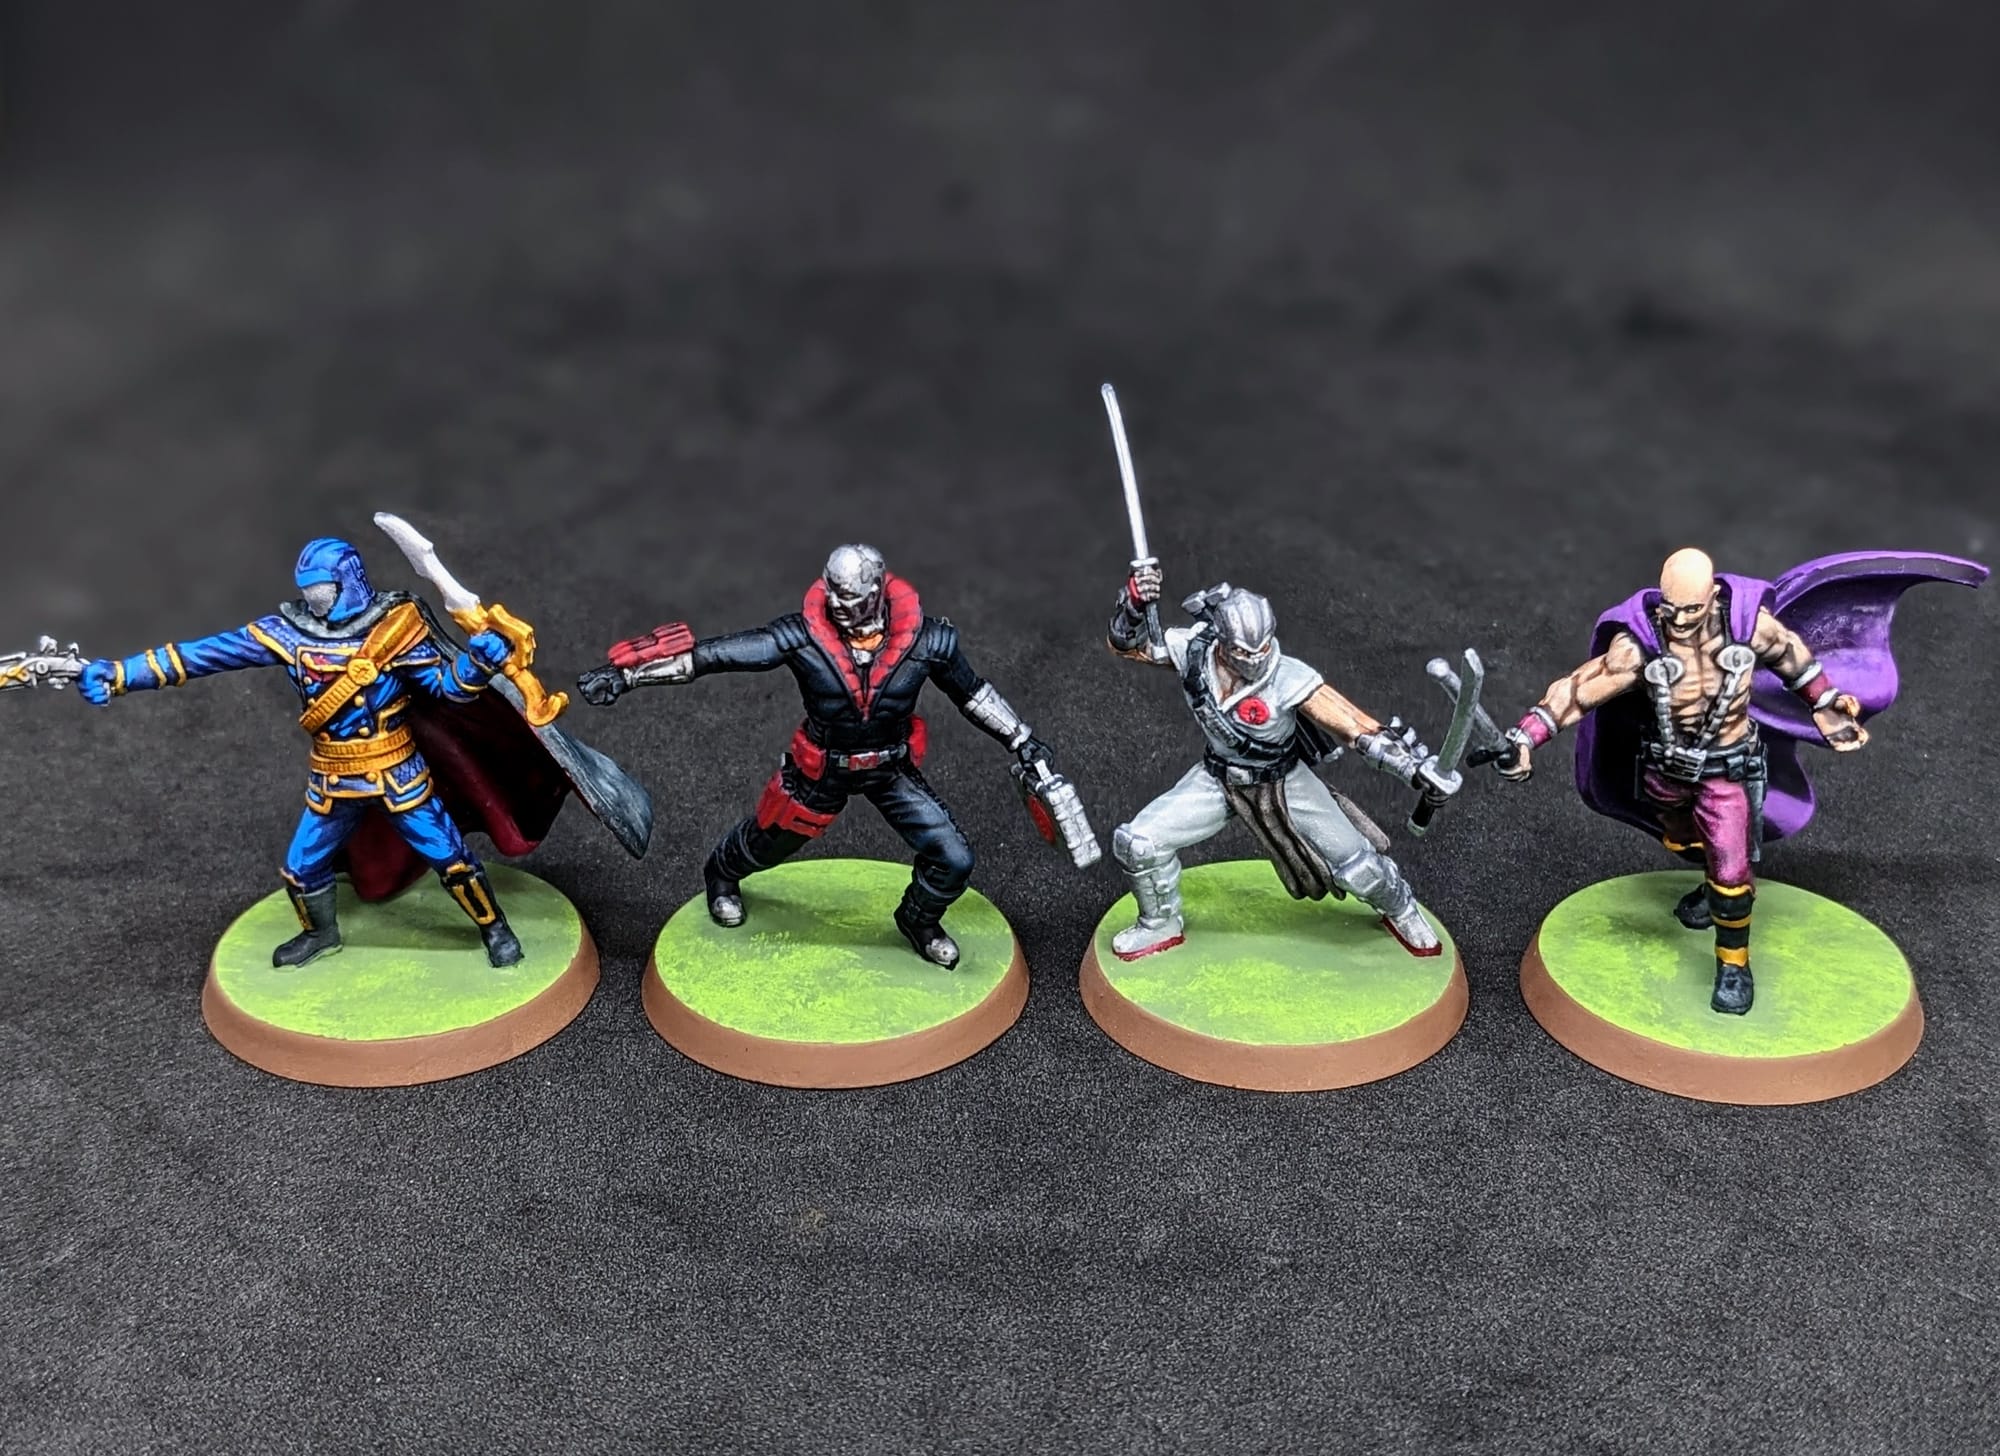
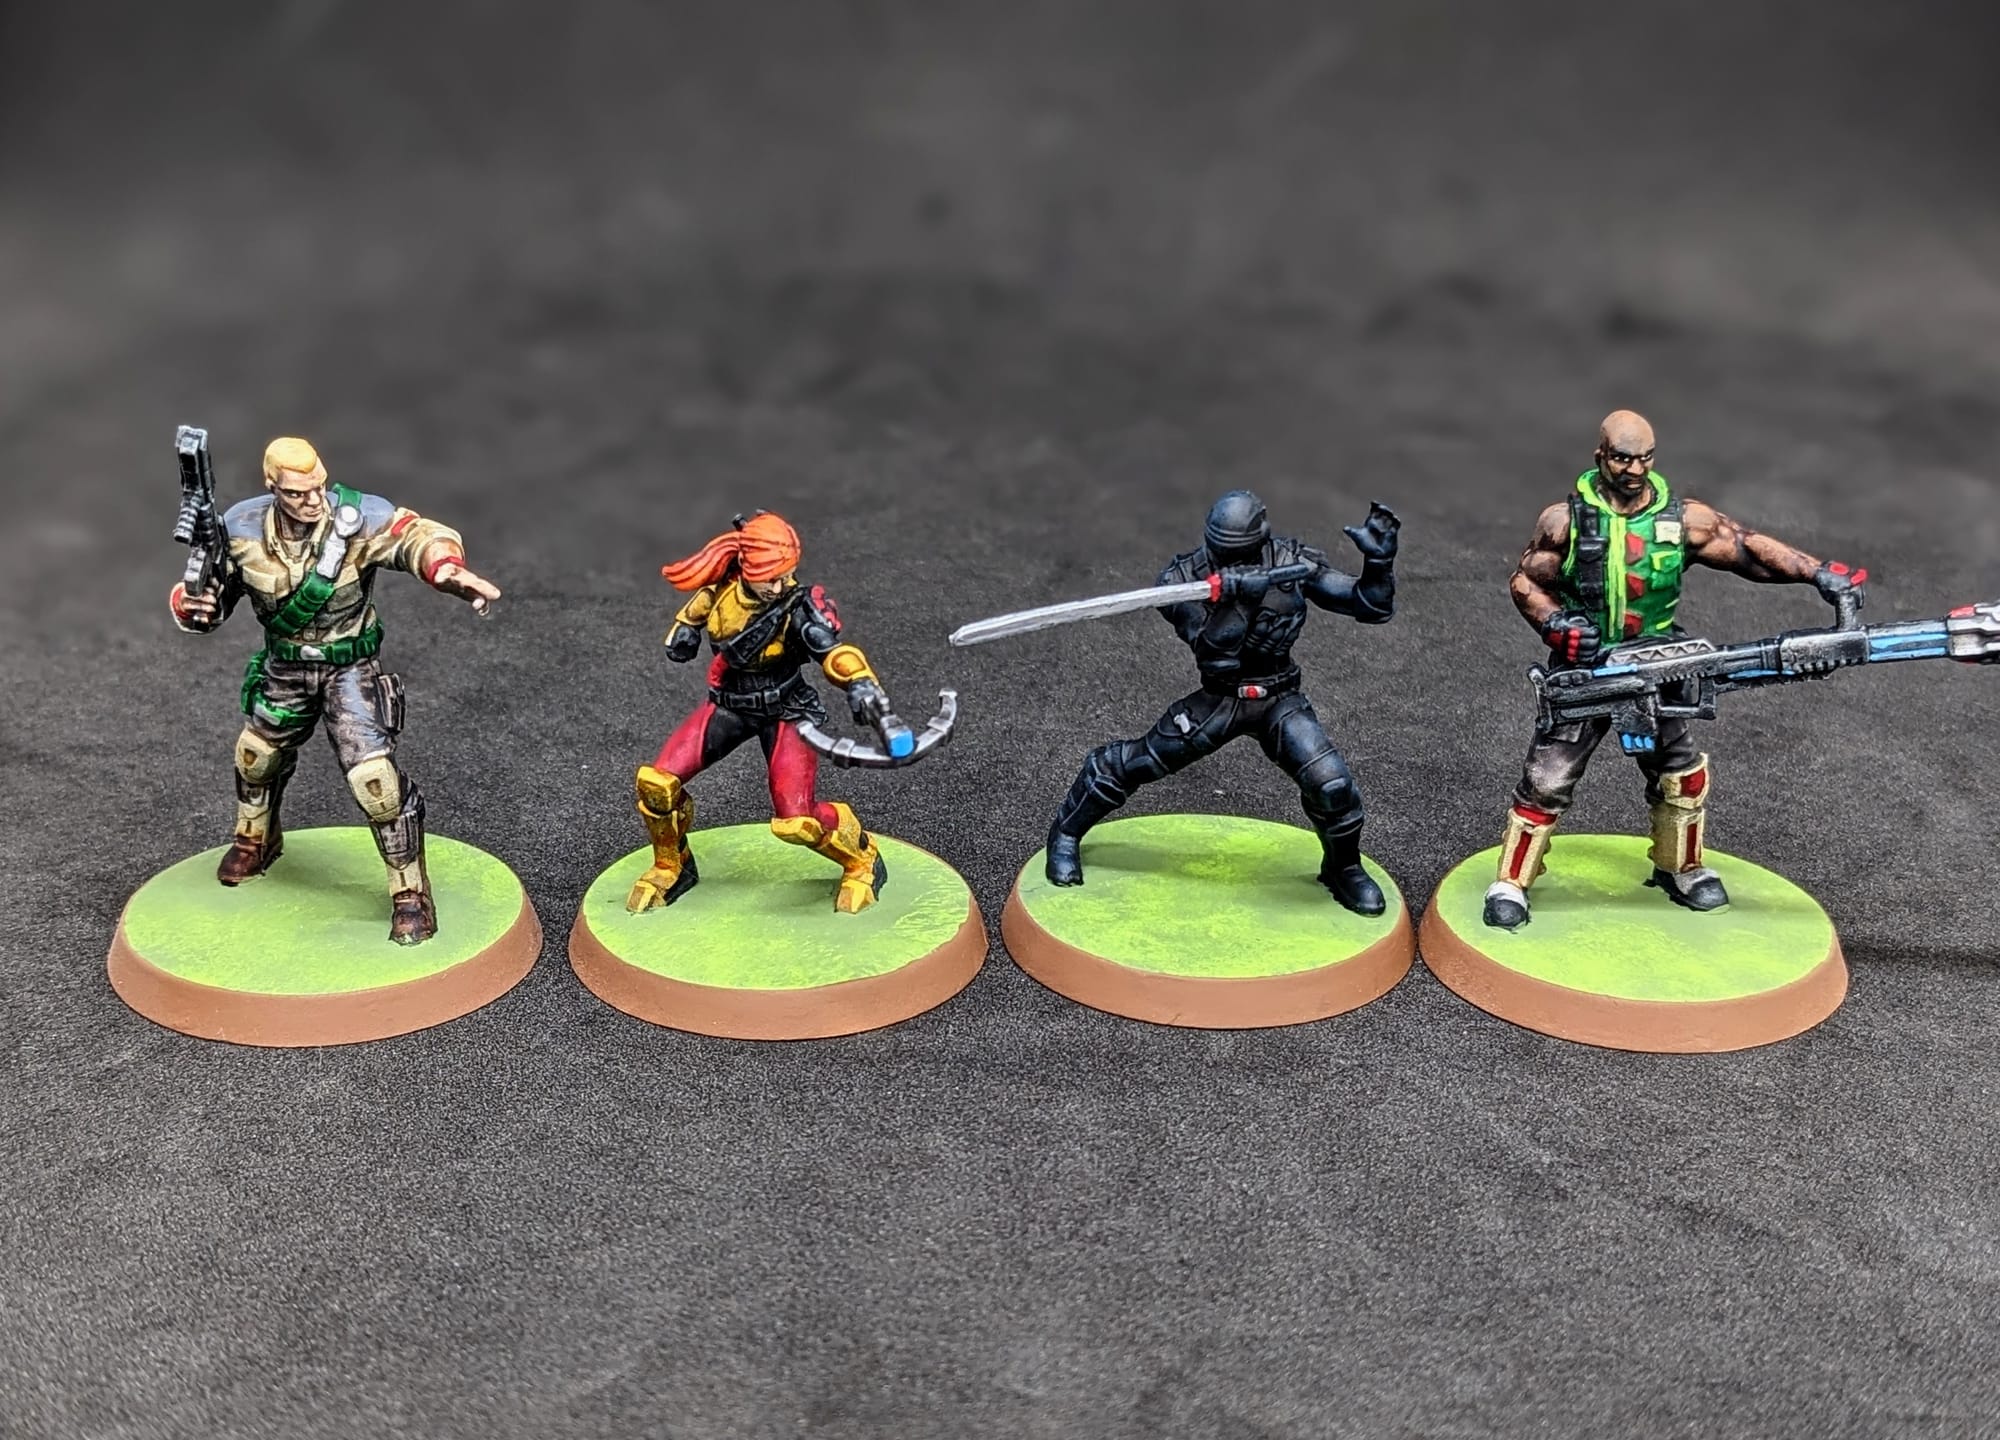
Destro and Snake Eyes were primed black, so I dry-brushed the Deep Water Blue and Vydar Gray over the top, since most of their outfit is black. Using Matte White, I went back over the parts of his outfit I planned on painting red, and the applied the Slaughter Red Speedpaint to that. With the way the Speedpaint metallics work, I was able to just paint over the black with it (Destro's helmet, Snake Eyes' sword, etc.)
With the Slapchop and the way that Speedpaints work, I was able to achieve shadows, midtones, and highlights on the models pretty quickly. If you're just looking to have your models have full color, and don't care about the detailing, then you can stop right here, go to the basing, and call it good. For me, I continued on using the regular Army Painter paints.
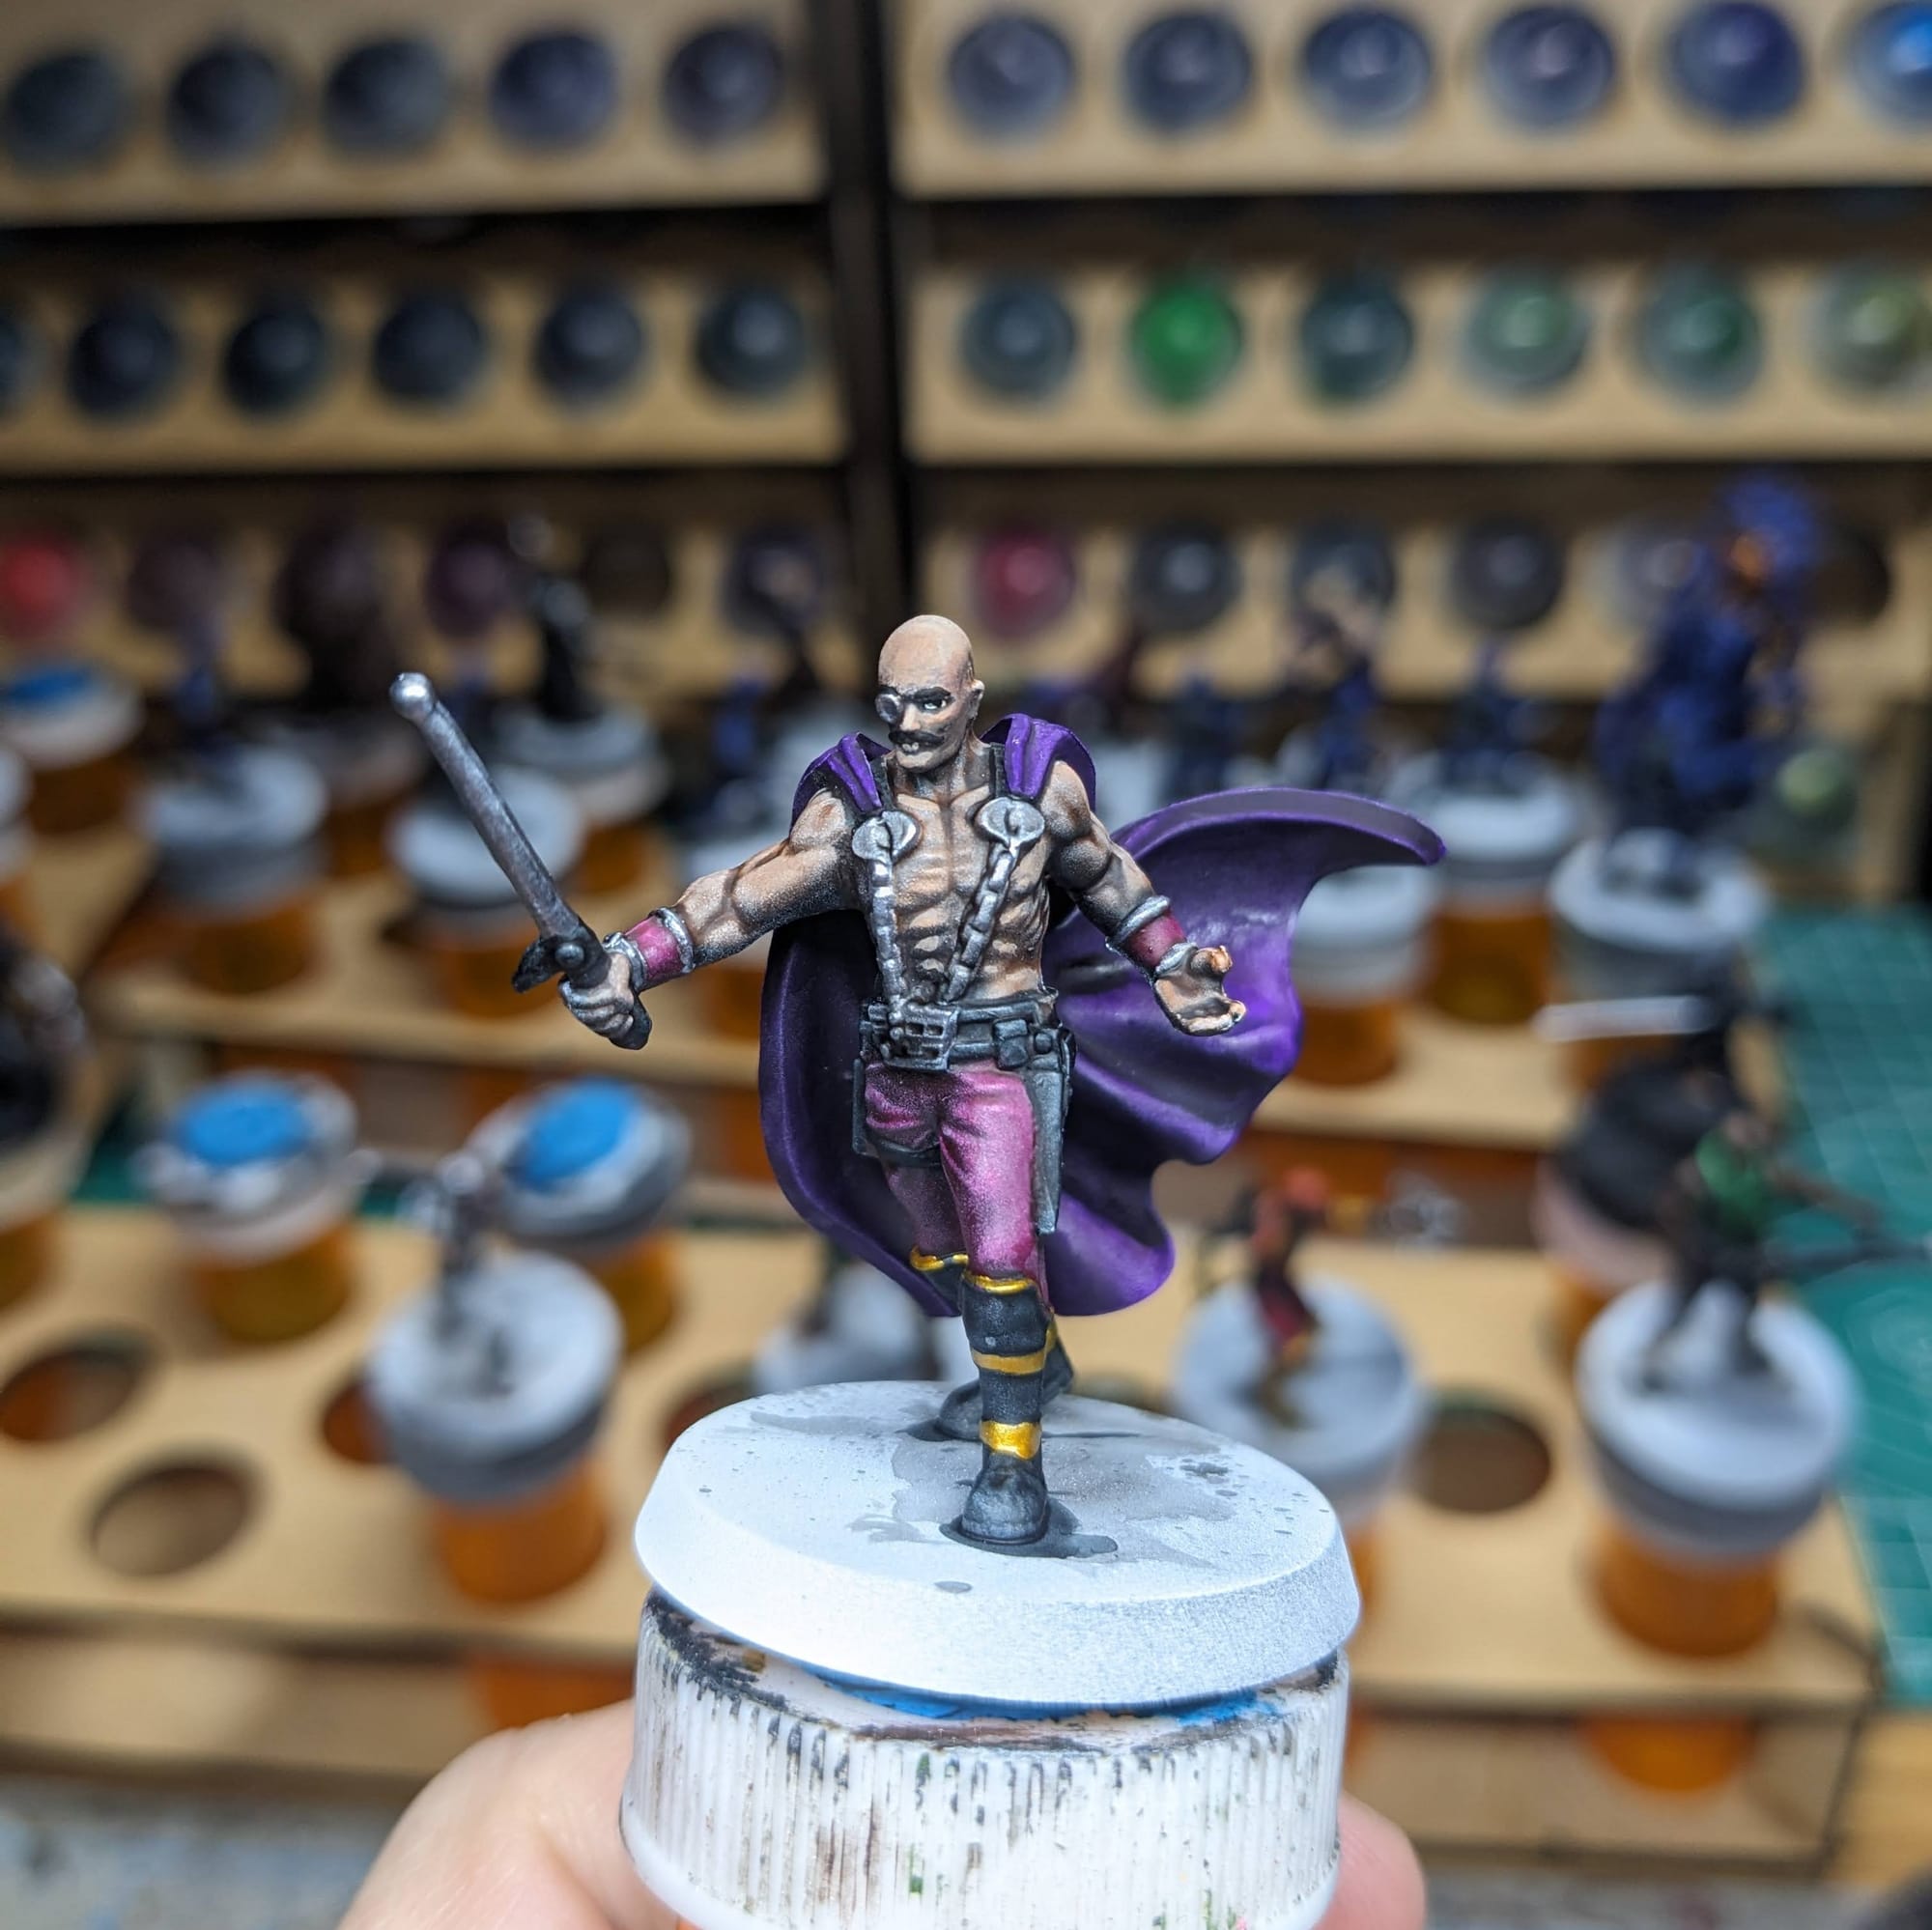
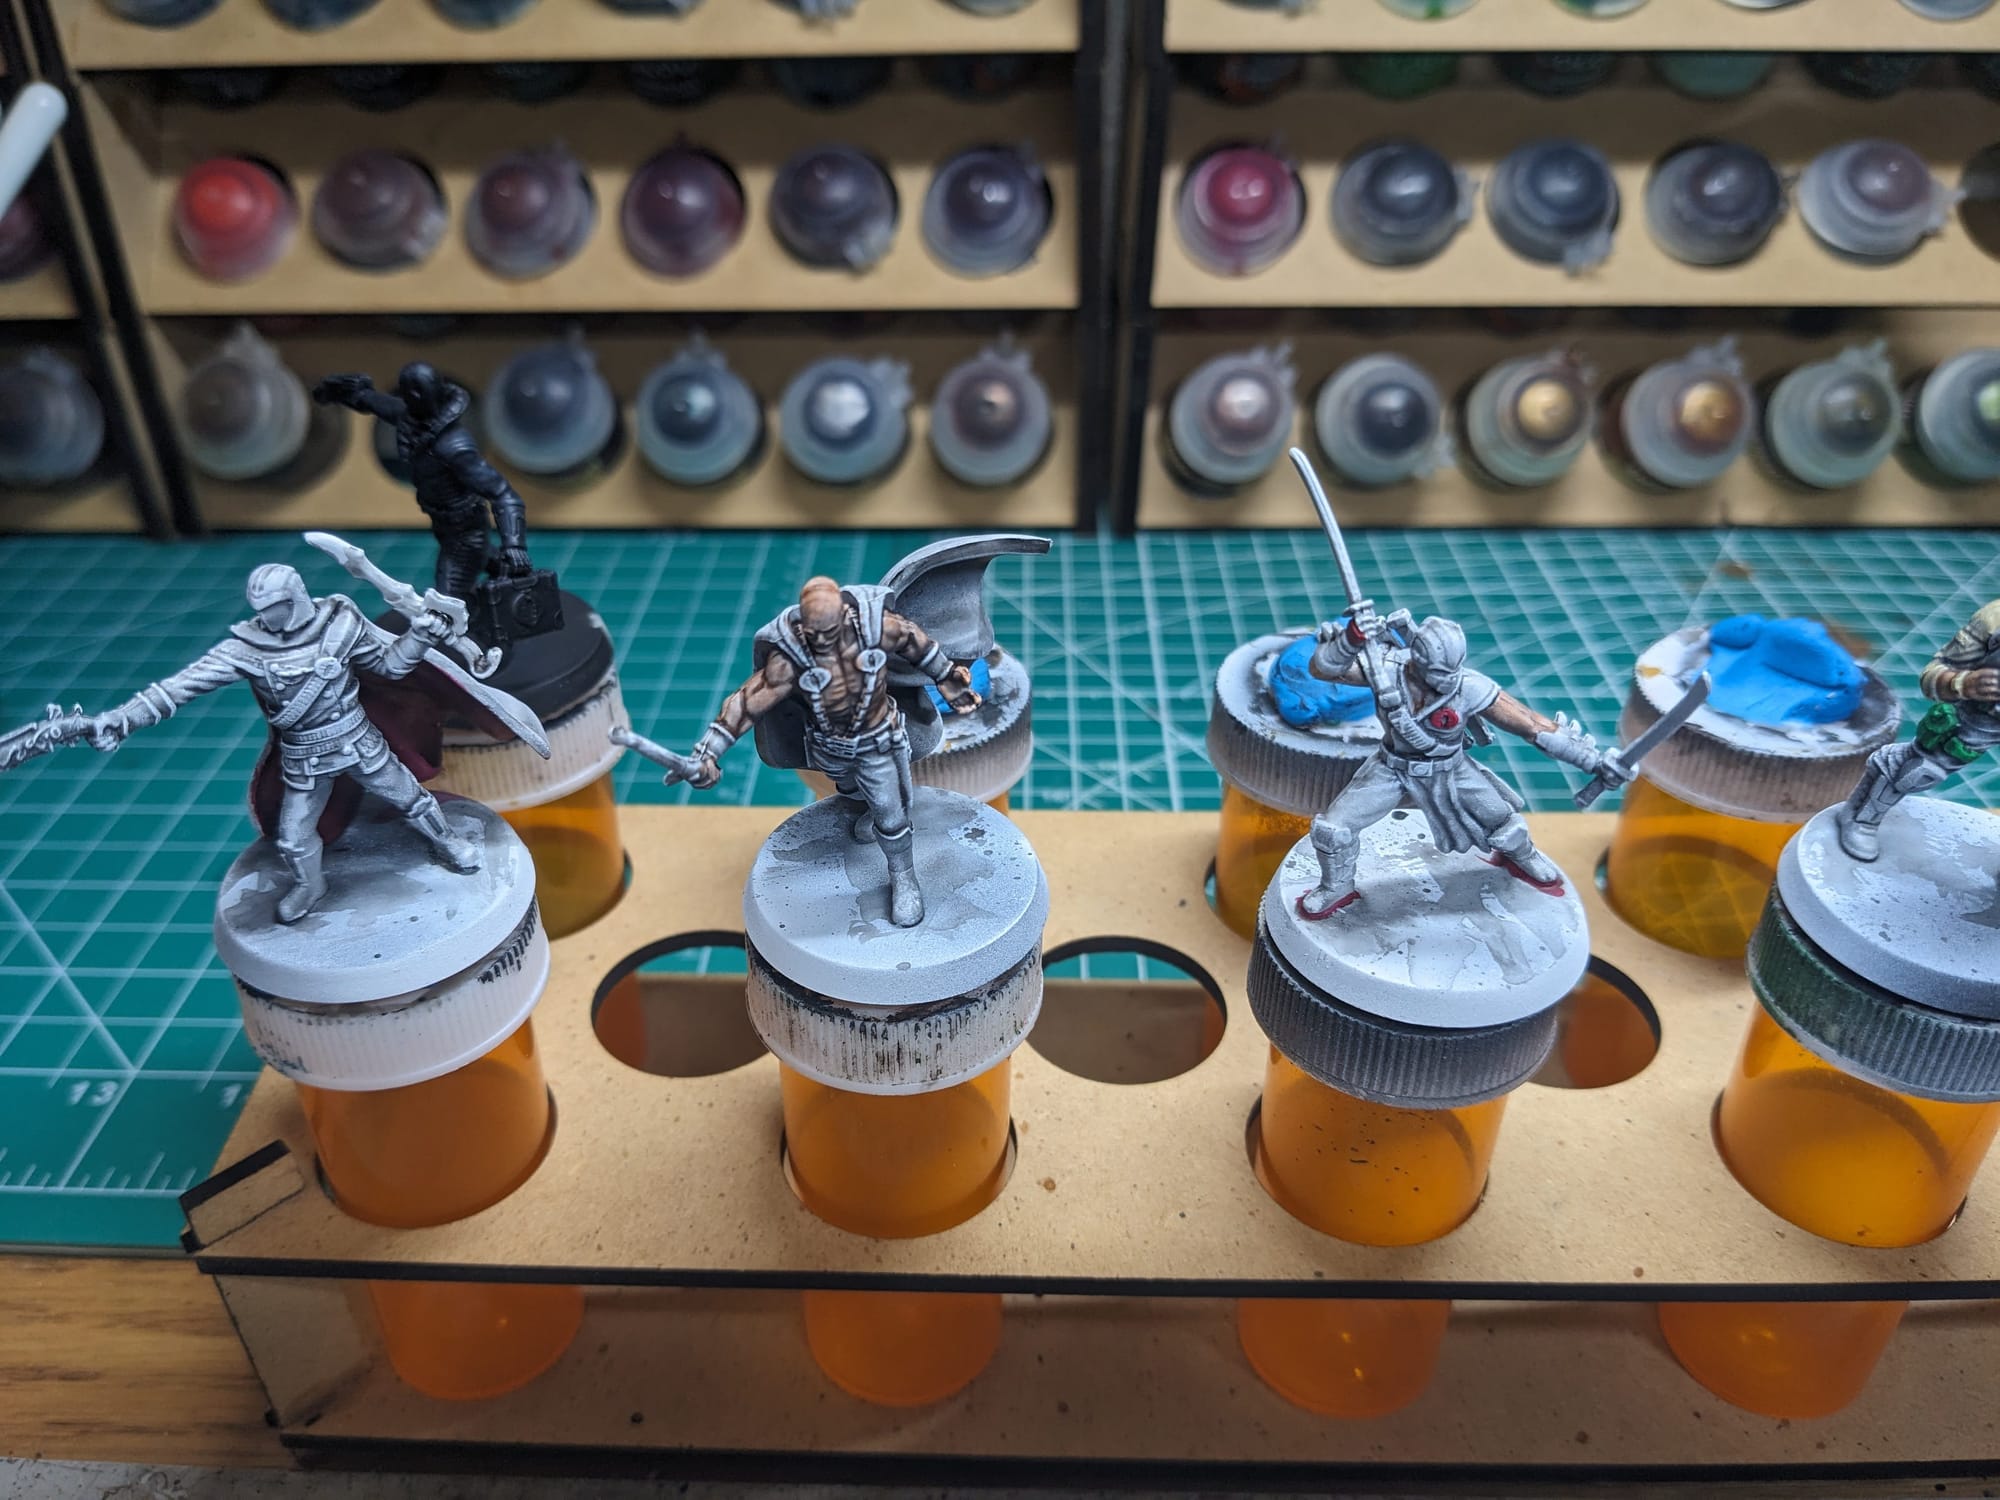
Following the same order as the Speedpaints, I started with the lightest colors on the models and worked my through the models going back over the speed paint areas. Since the Speedpaints took care of the majority of the highlights/midtones/shadows, my goal was to go back through and paint more detailed faces, touch up areas, add uniform/outfit details, and just kind of clean up and spots that needed it.
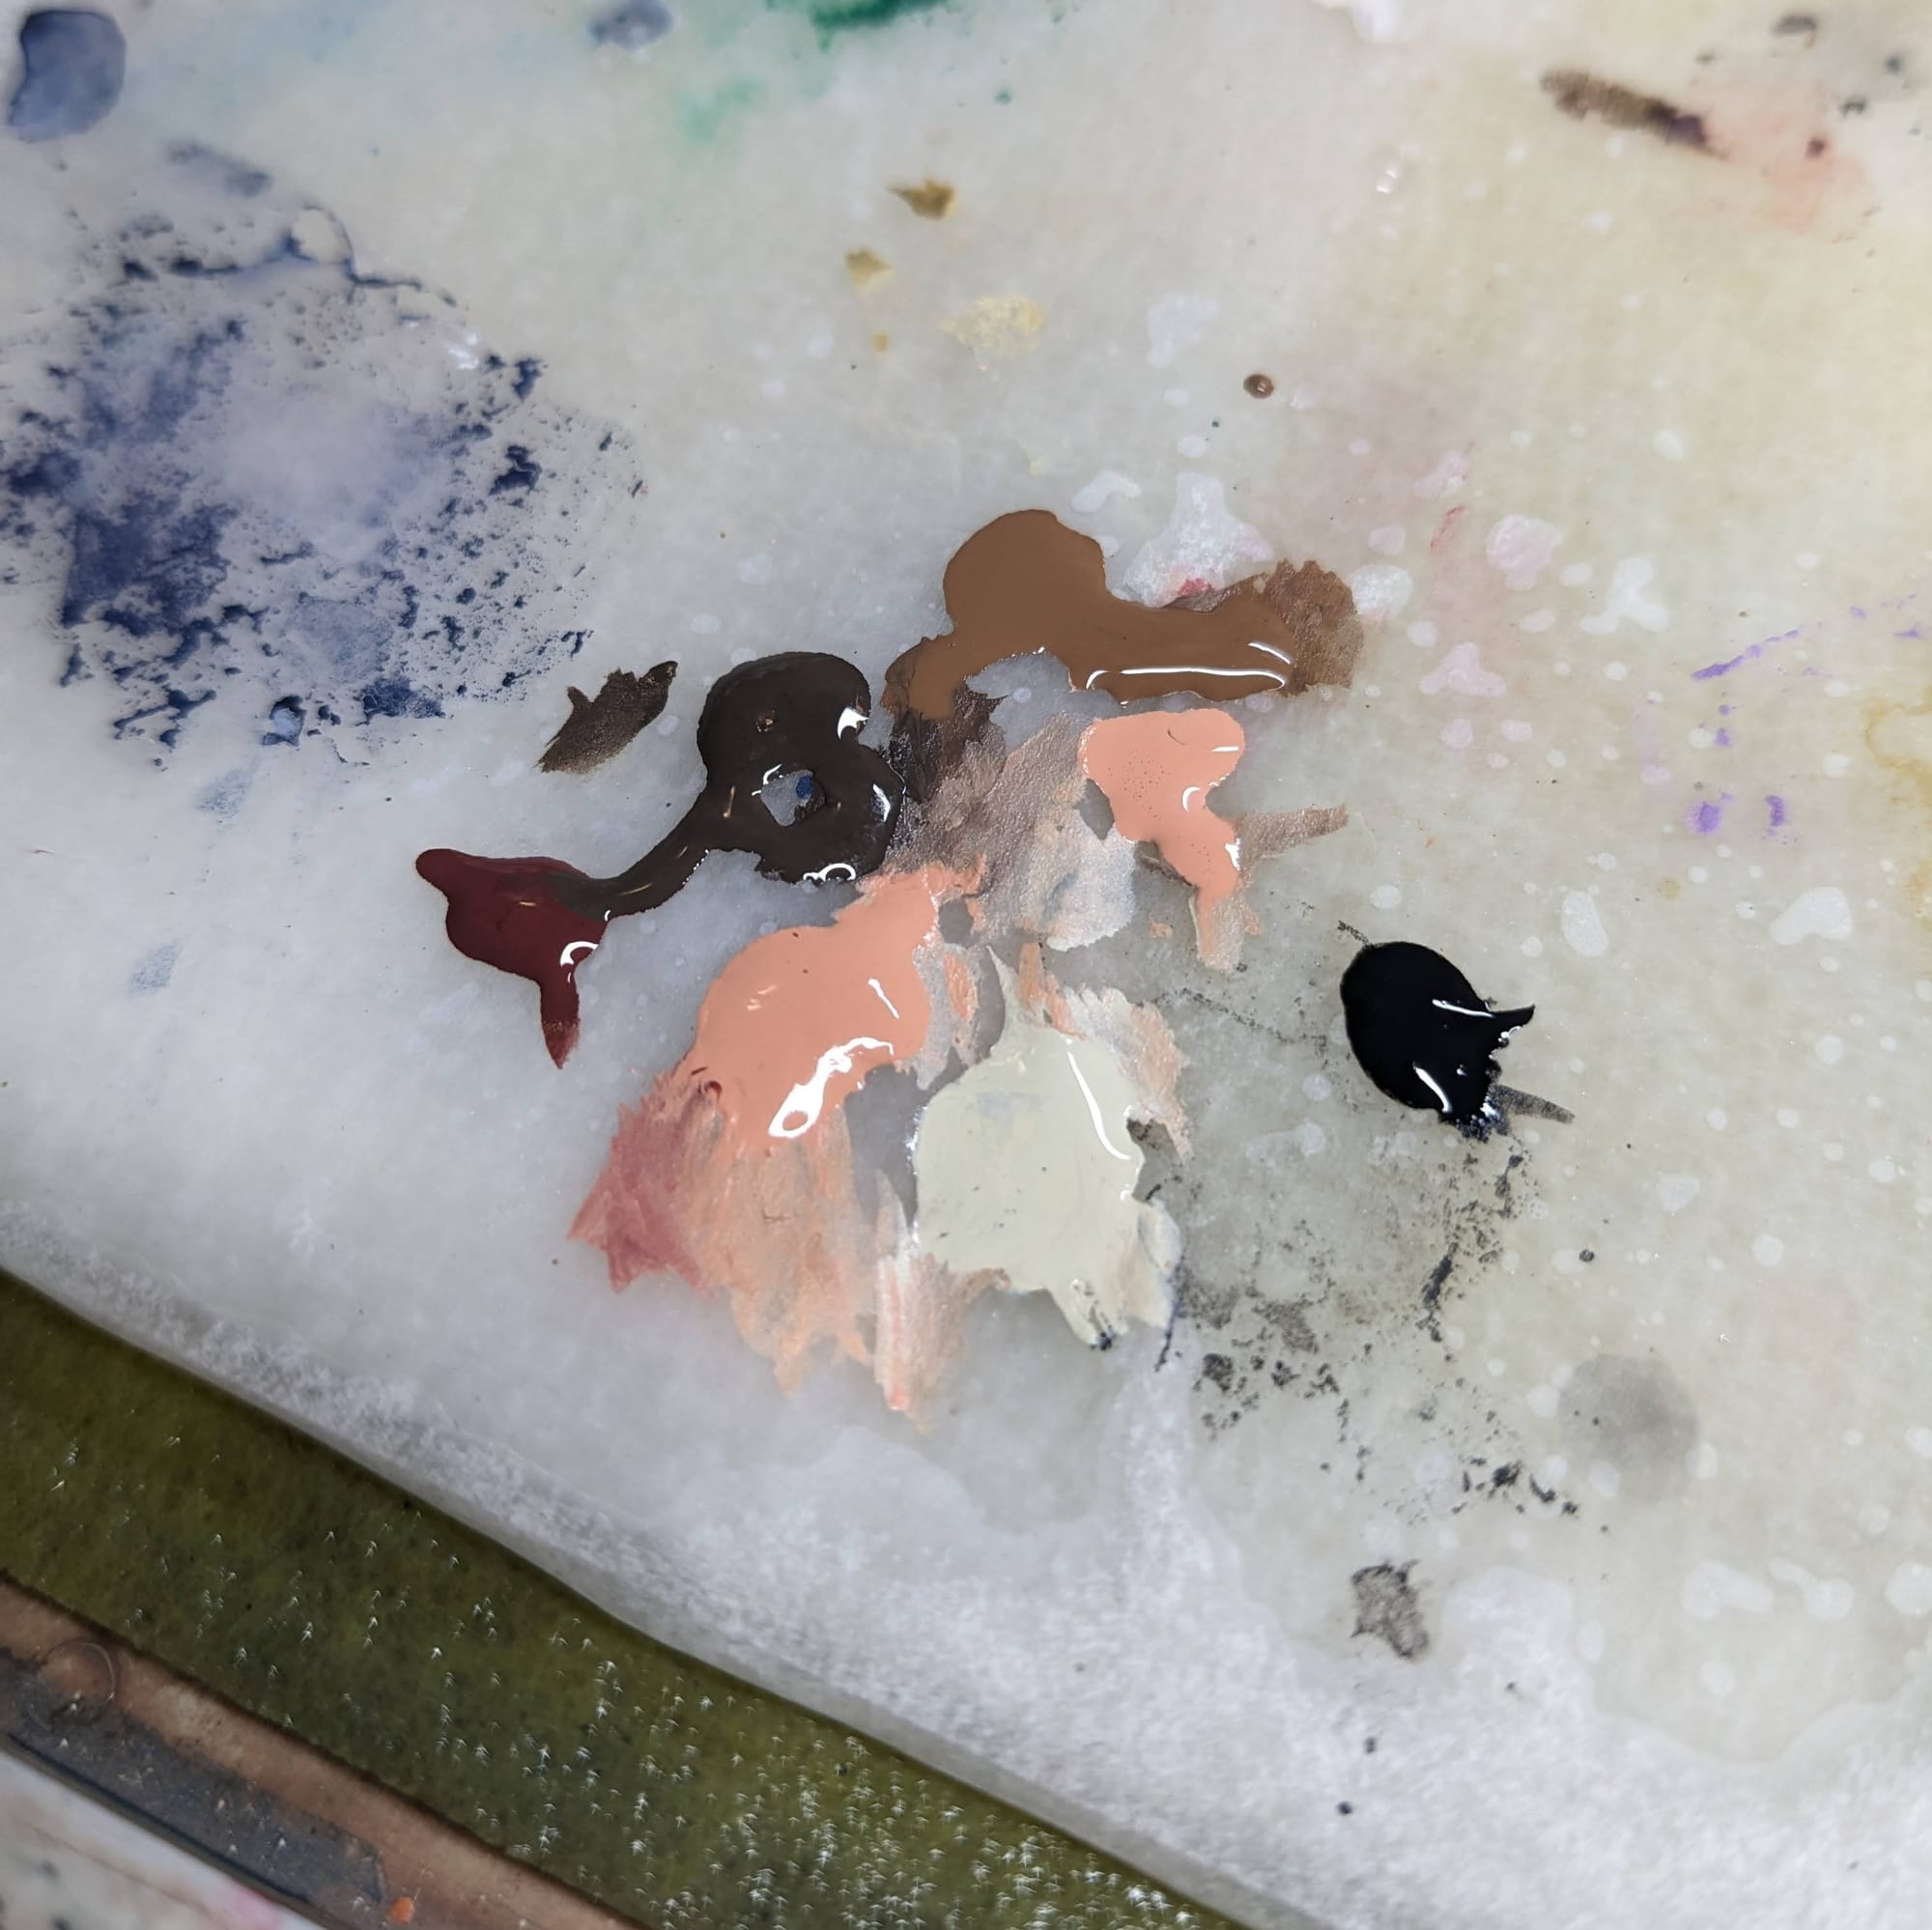
For the skin, I experimented with both Bat Wing and Brigandine Brown for the skin, and it gave me some nice variation for the skin tones. i used the Ancient Stone for the eyeballs. Surprisingly, the faces on these single-cast pieces are quite detailed so it was pretty easy to paint up the faces.
I used very little of the paints from the AoA set, which is great because those are going to last me a while. Most pair right out of the bottle with the Speedpaints, which also saves on time for mixing and keeping colors consistent. I used Hive Bone for the blue and purple to add a little bit brighter highlight, but that was used sparingly.
Once I was happy with all the highlighting and detailing, it was time to move onto the basing.
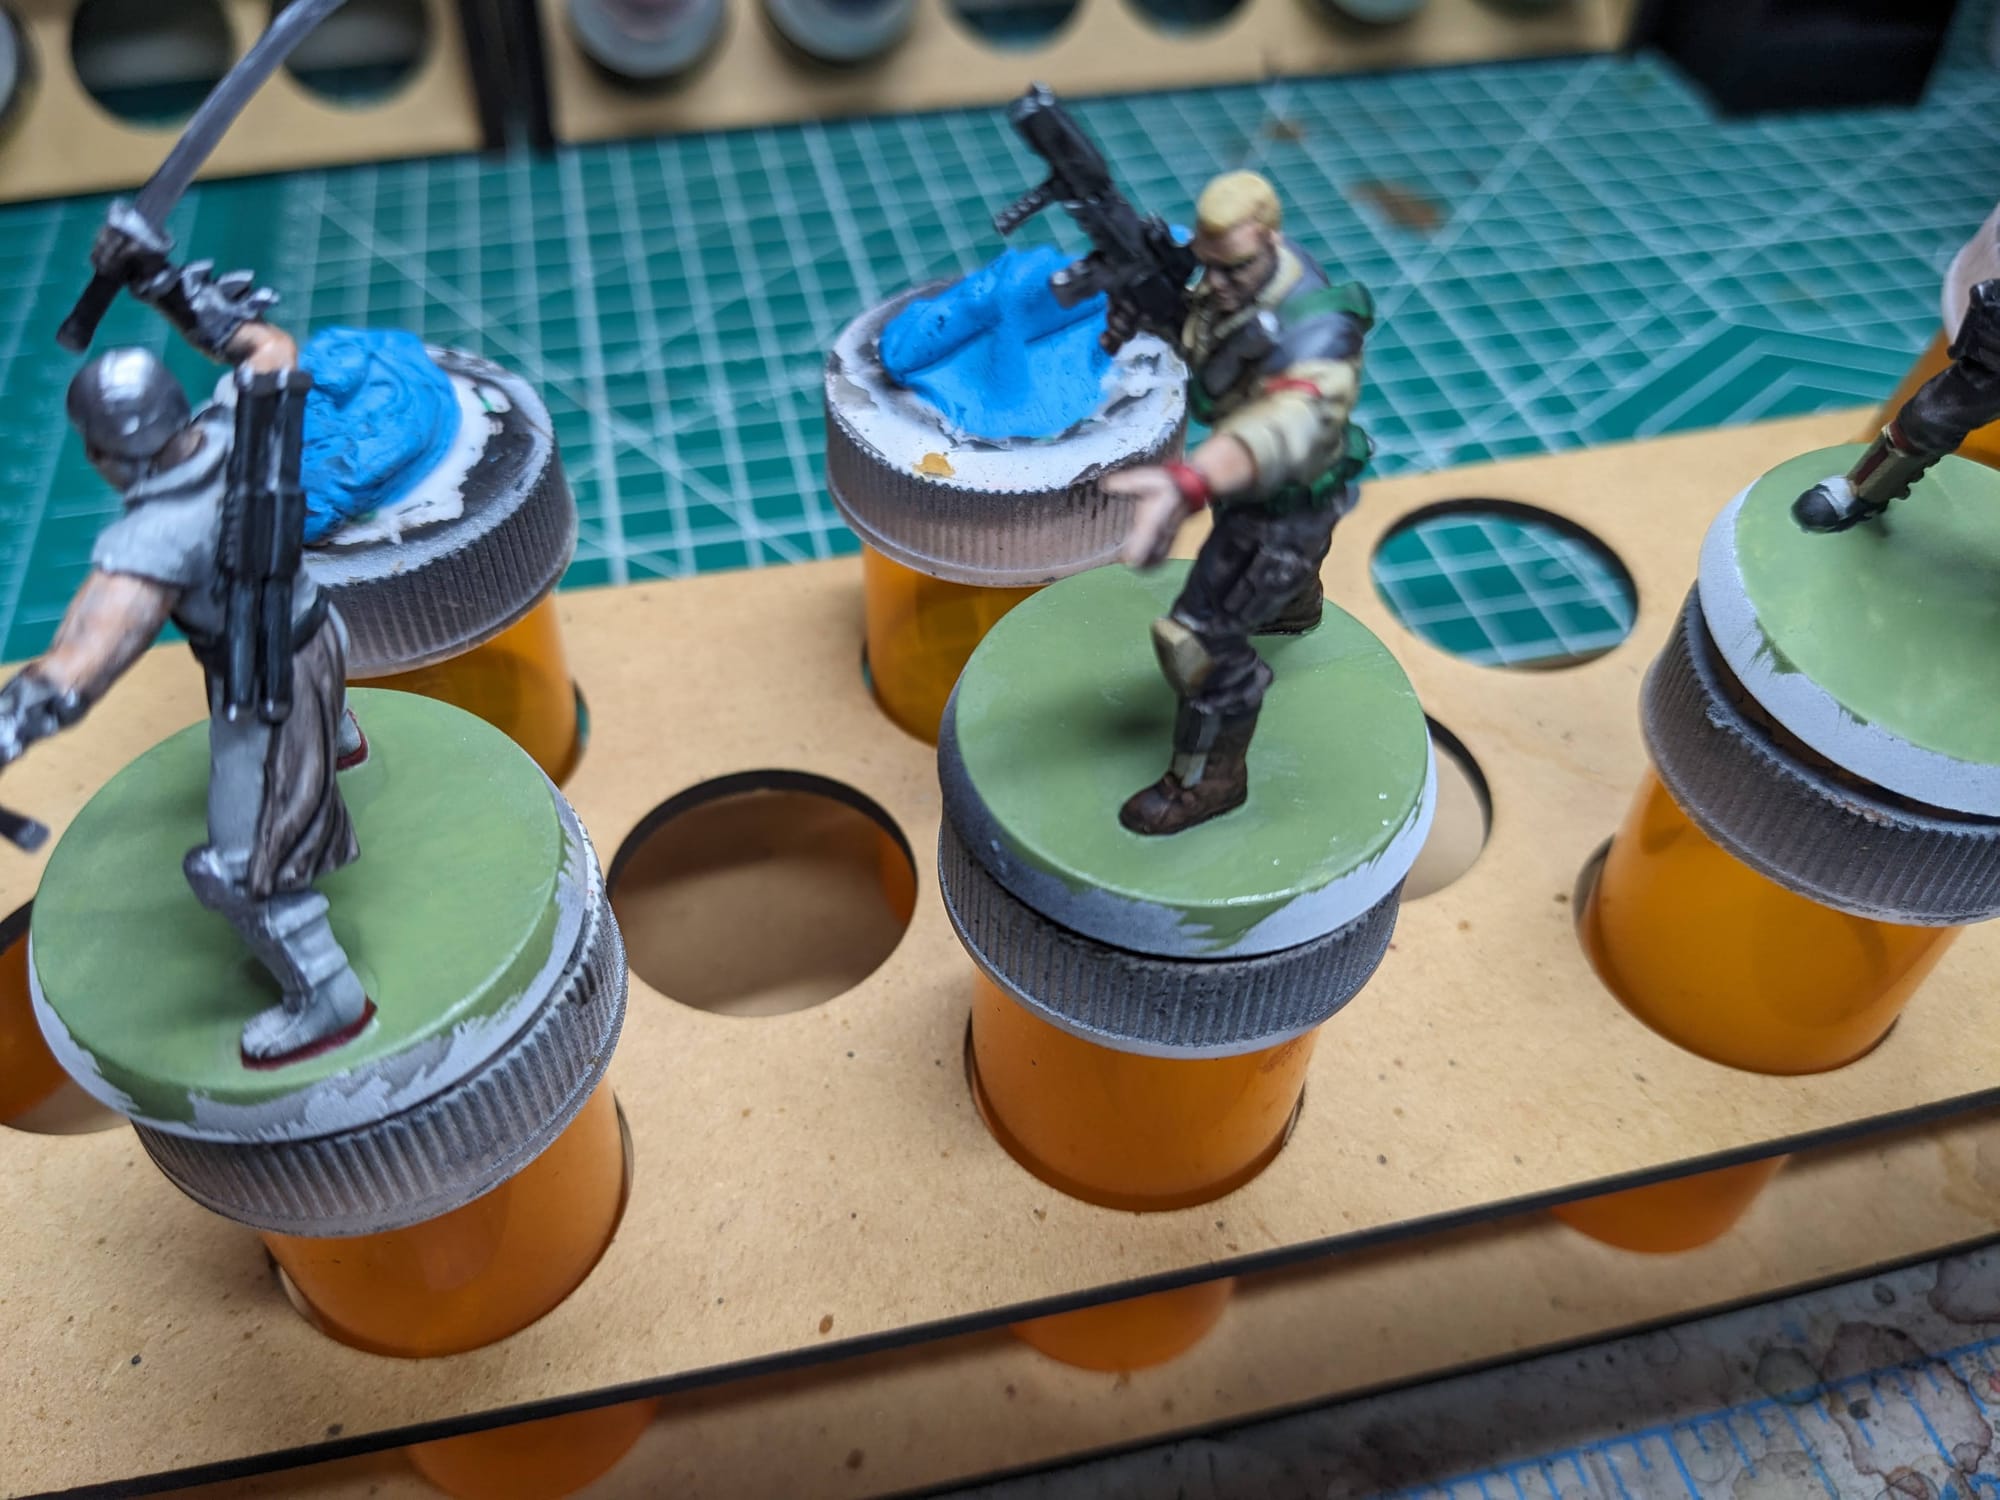
Basing the Models
Unlike other miniatures that I’ve painted, with texture basing and Battlefield grass, I really wanted to do my best to stay true to the original Heroscape base design. What was basically just a sticker on a brown piece of the plastic, the base itself really didn’t have any defining features. So, using some techniques similar to what I used for my Battle Droids, I used some greens for the ‘grass’ look and painted the rim brown. If you want to go this route, I recommend a combination of sponging and dry-brushing, unevenly and successively applied over the base, to get that grassy look you see on the originals.
Sealing Your Models
As I do with all of the models I paint that I also play, I applied a protective clear coating over the paint. This helps preserve the paint on the model and keeps oils from your hands from rubbing off the paint as you continuously touch the models during games. There are many different kinds of clear varnishes to use, but I typically use any matte or anti-shine varnishes, as satin, semi-gloss, and gloss tend to distort the colors of the models (not to mention that most models aren’t supposed to be shiny).
Brands that have been reliable for me are Krylon Matte Clear Spray, Rustoleum Matte Clear Coat, which is slightly glossy, and Testors Dullcote, although the latter can be expensive and difficult to find. For a coat with no shine that really enhances the colors, I use AK Interactive’s Ultra Matte Varnish, applied with an airbrush.
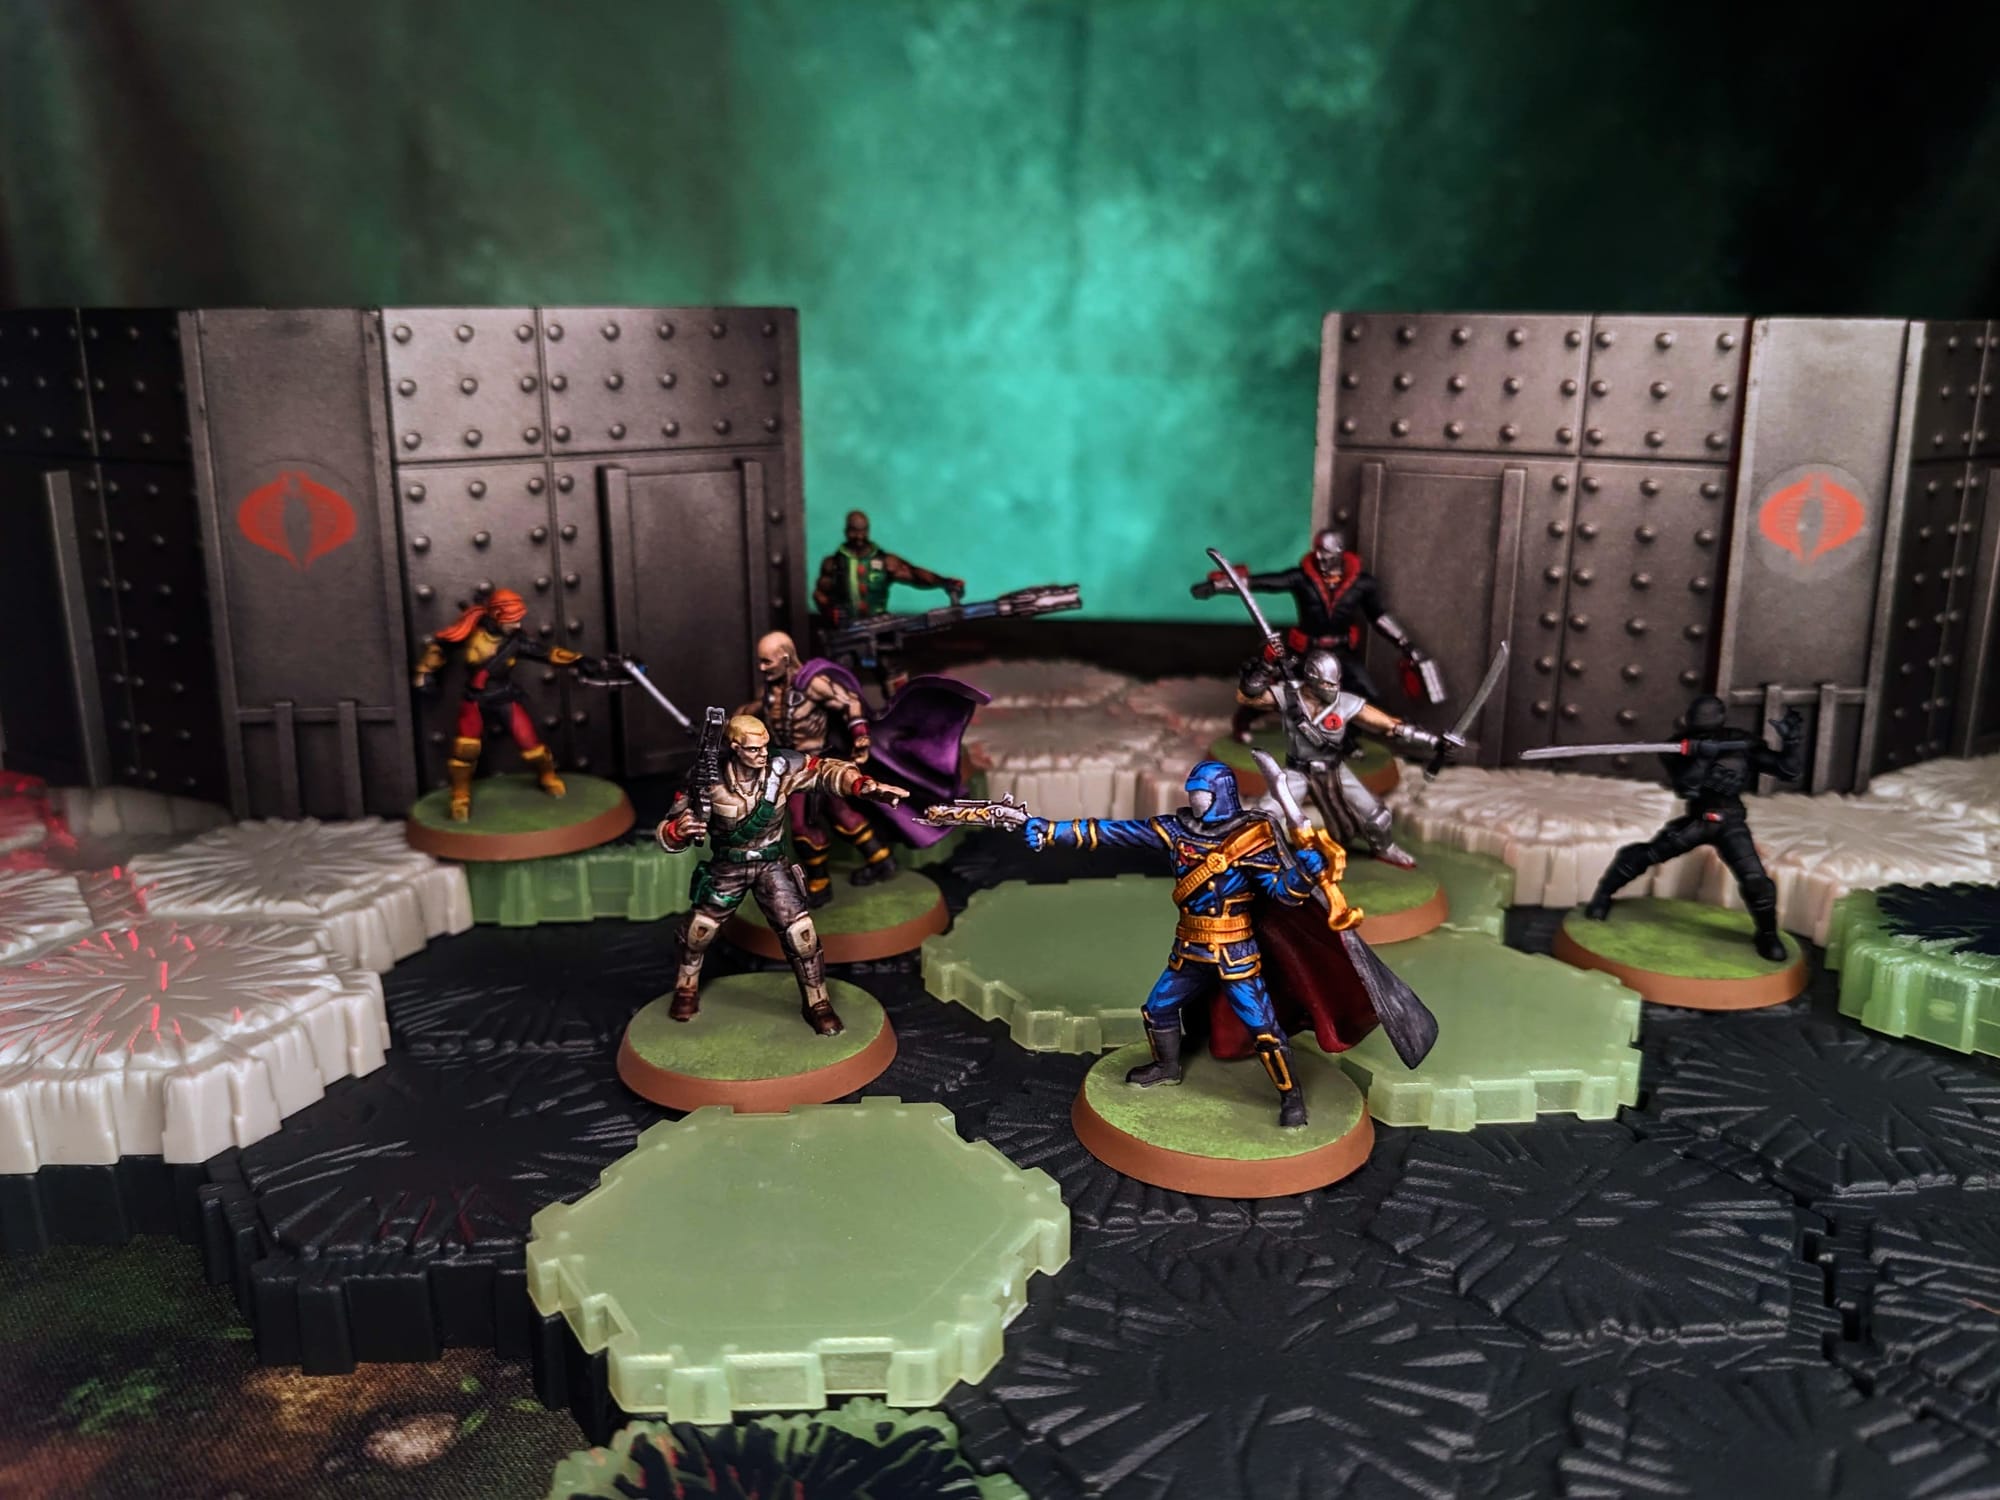
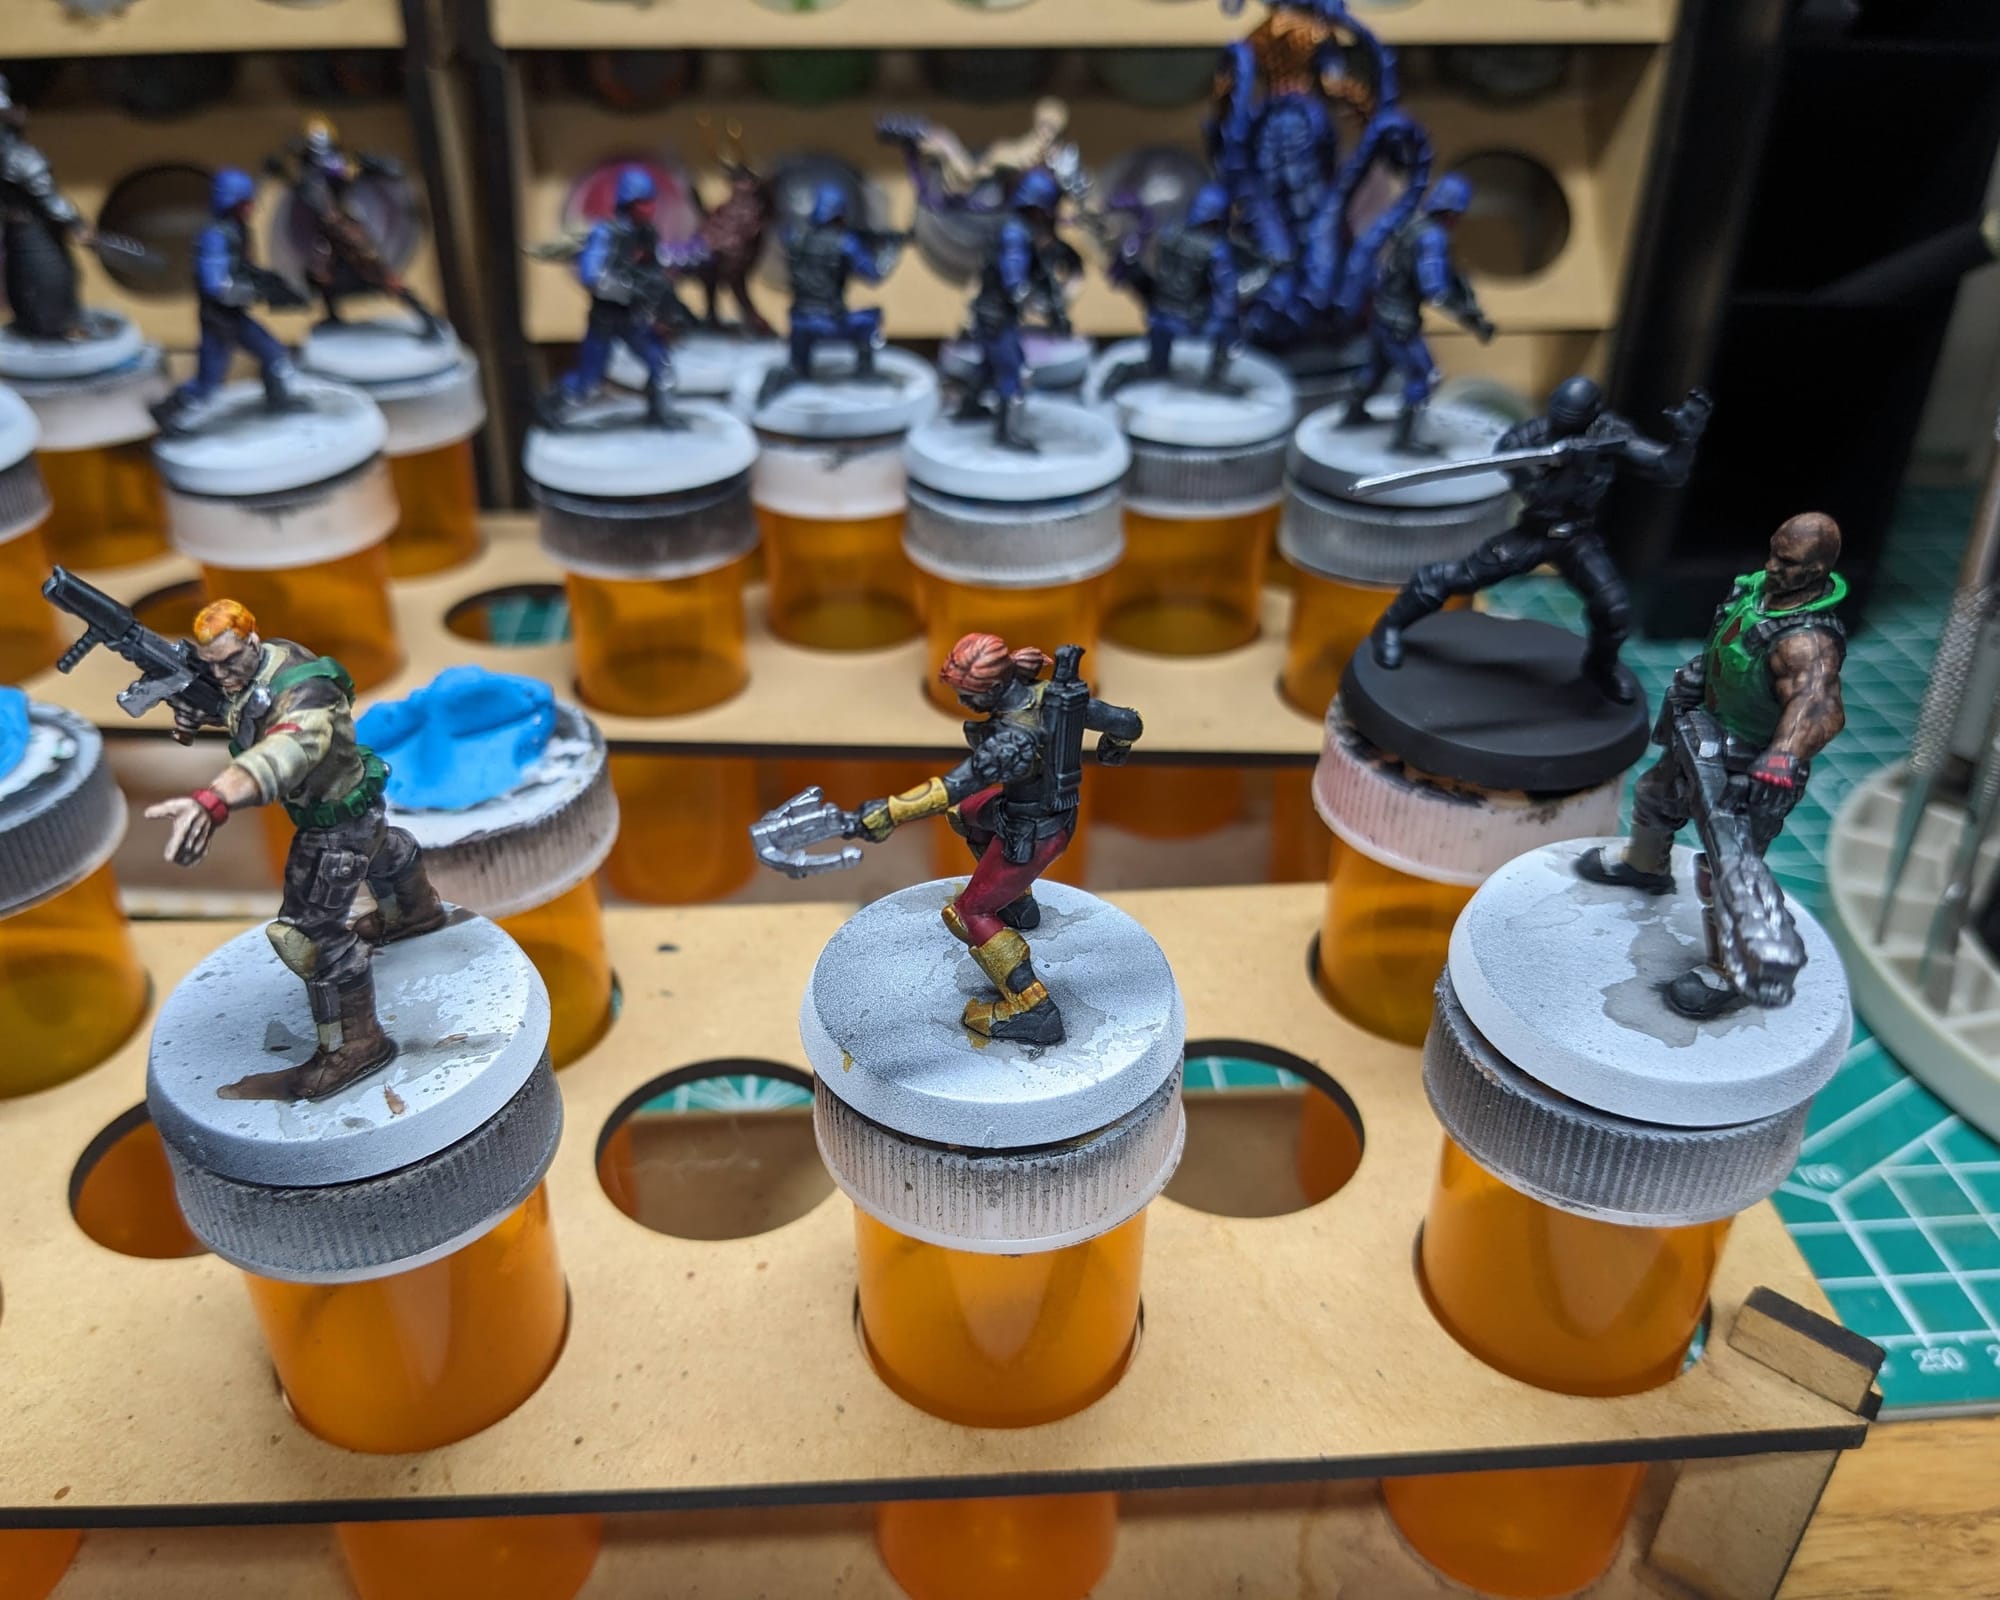
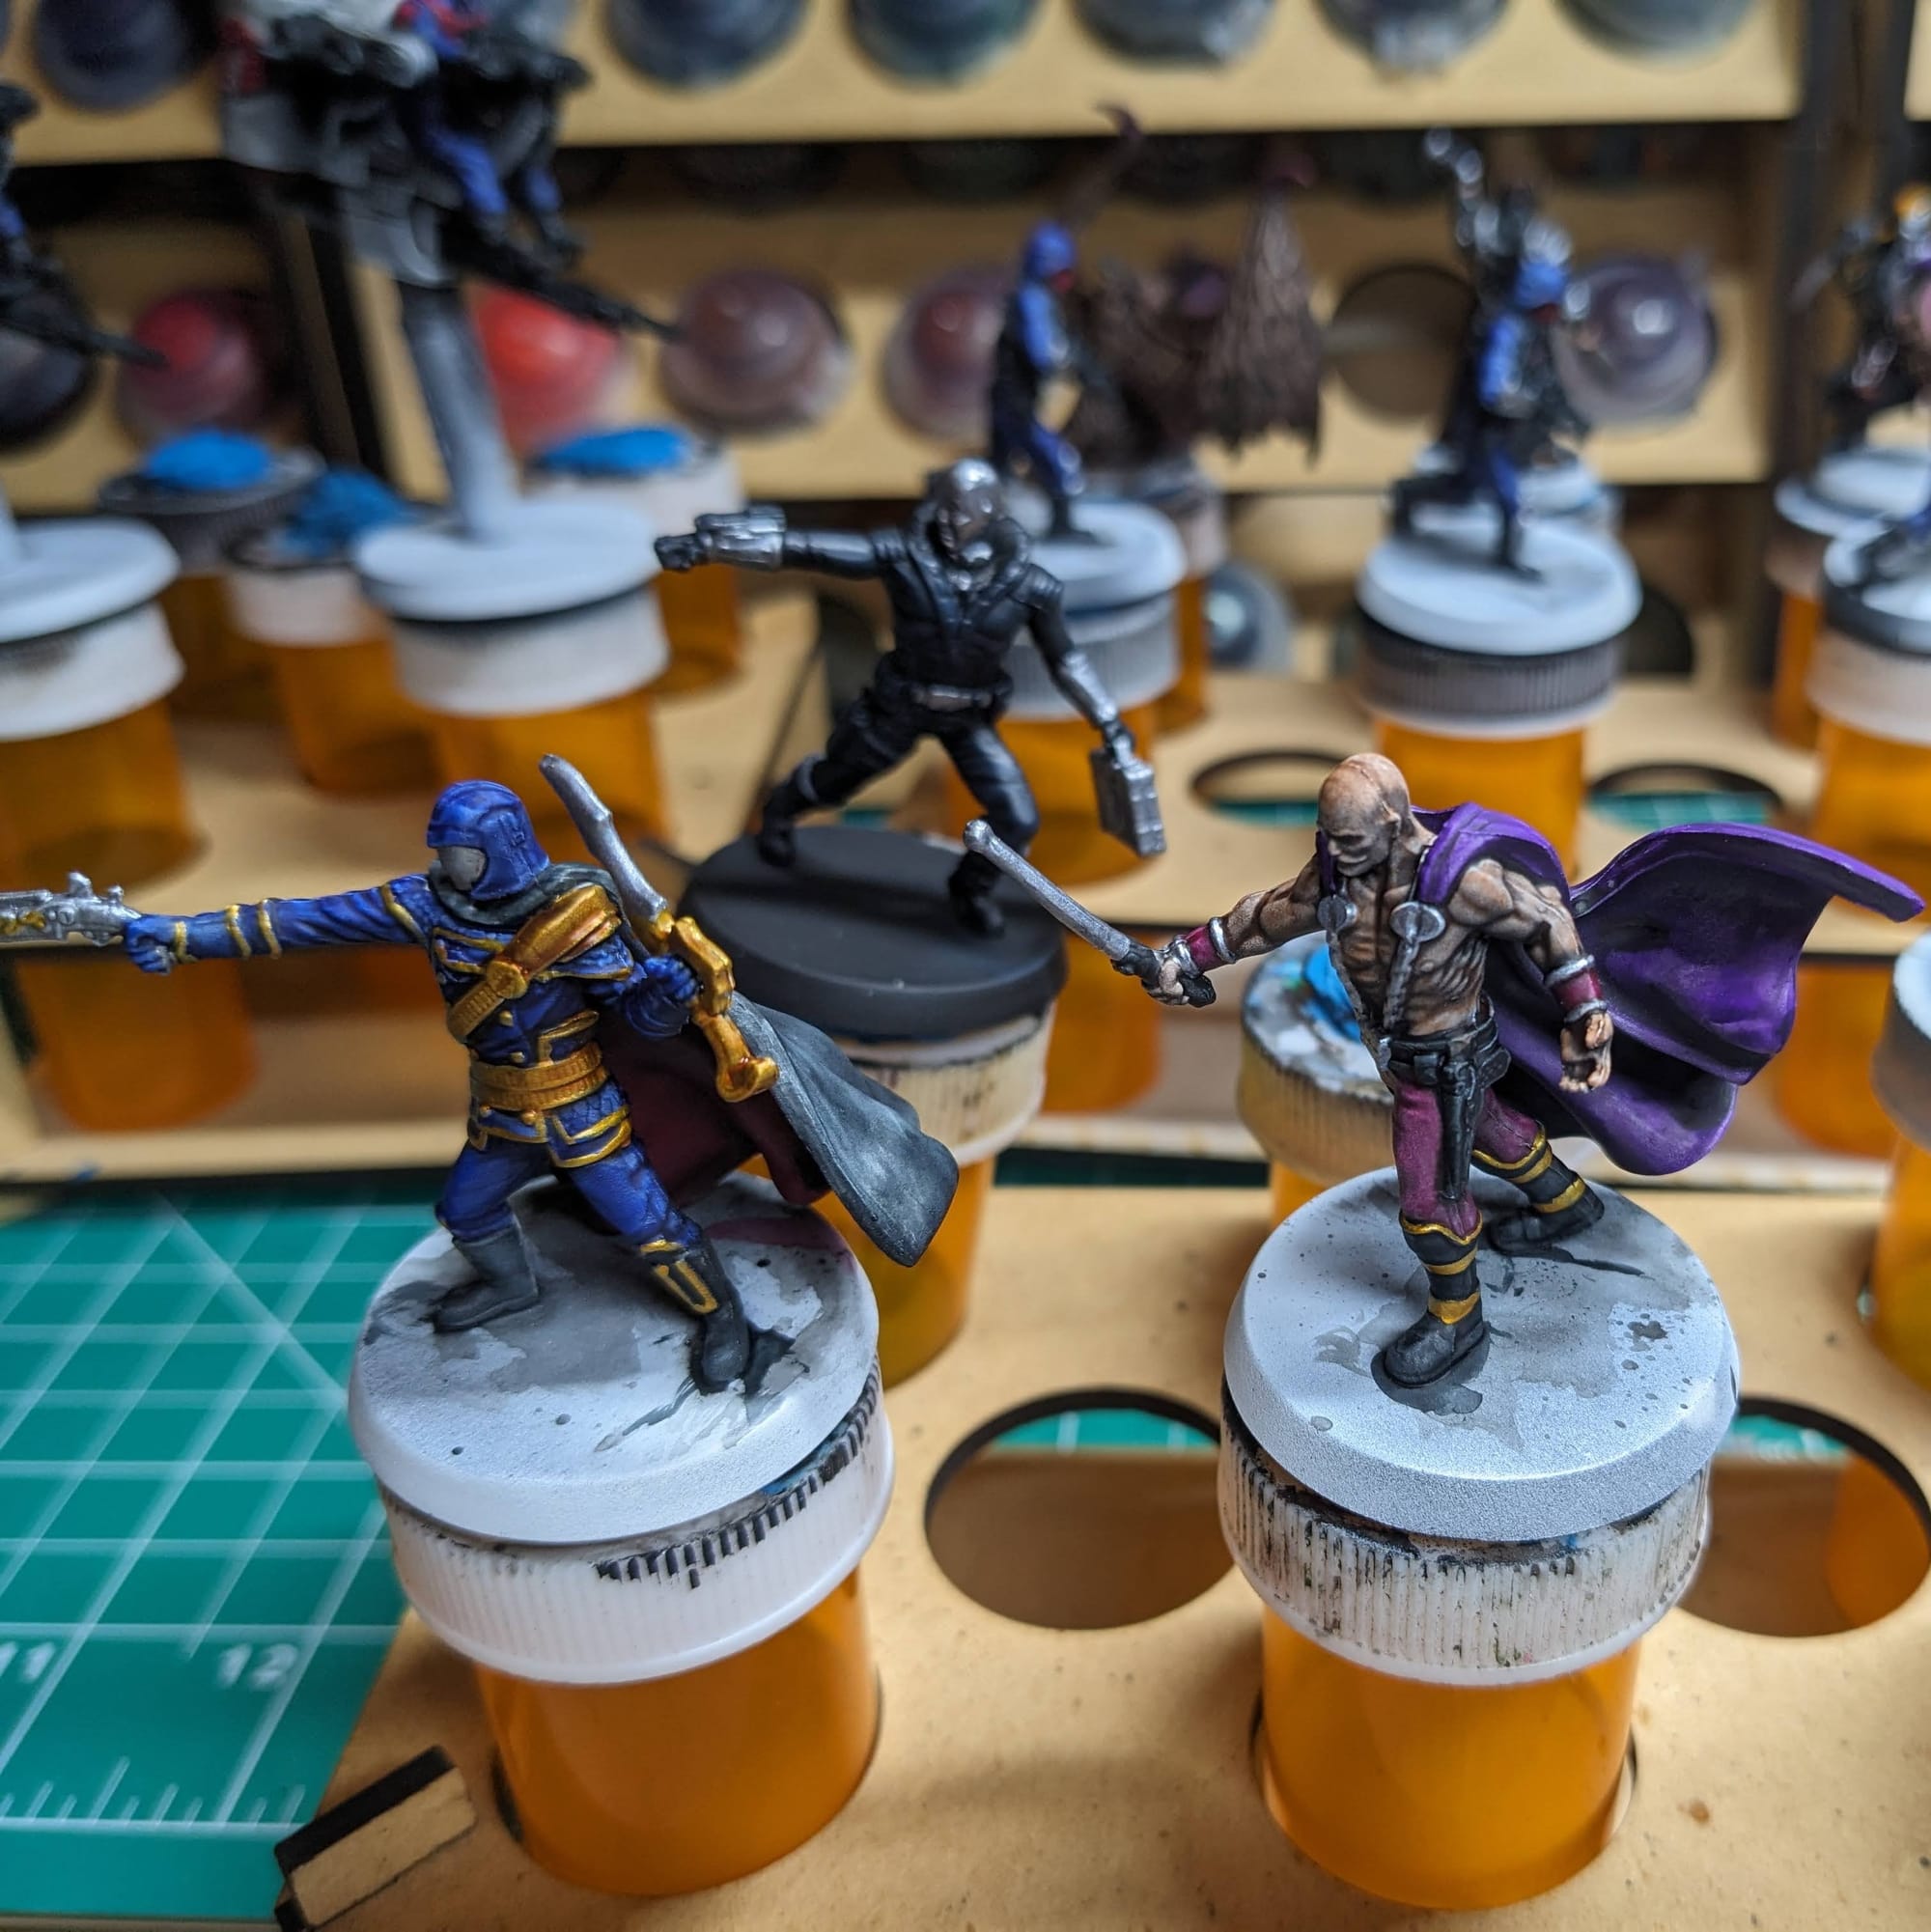
Painted and Ready for Play
Impressions
What Worked
These pieces I painted using only Army Painter Speedpaints and the Age of Annihilation Paint Set boxes. This was partially to challenge myself and use only the Heroscape-themed paints, but also experiment and see if these two boxes would be enough for a new player to start their Heroscape painting journey with.
They are perfect! I applied base coats of the Speedpaints to color block out the model, and then used the paints from the AoA set to highlight up. The face paint mixture worked out incredibly well, and I was pleased with how they worked on the details. I think it took me maybe a few paint nights to get everything done, so basically someone could buy this box at the start of the week, paint up the models, and have it ready for a game night that Friday or Saturday. The paint night could be a fun activity for friends and family!
What Didn’t Work
I am disappointed in myself for missing so many mold lines. Because these are single-piece minis, there are typical mold lines that need to be removed. Frankly, I just missed them, and because of that, I had a more difficult time painting (using Slapchop, speed paints, etc.)
What I would do differently next time
Aside from fixing the mold lines, I think I would probably do the basing differently. While I do like the classic Heroscape look, I think I would like to play around with some more interesting basing styles. Maybe a battlefield, or some black rock with a green rift underneath. Perhaps even different basing between the Joes and Cobra. There are so many great options out there for basing, so it just depends on how someone would want to showcase them!
Affiliate Purchase Links
Final Assessment
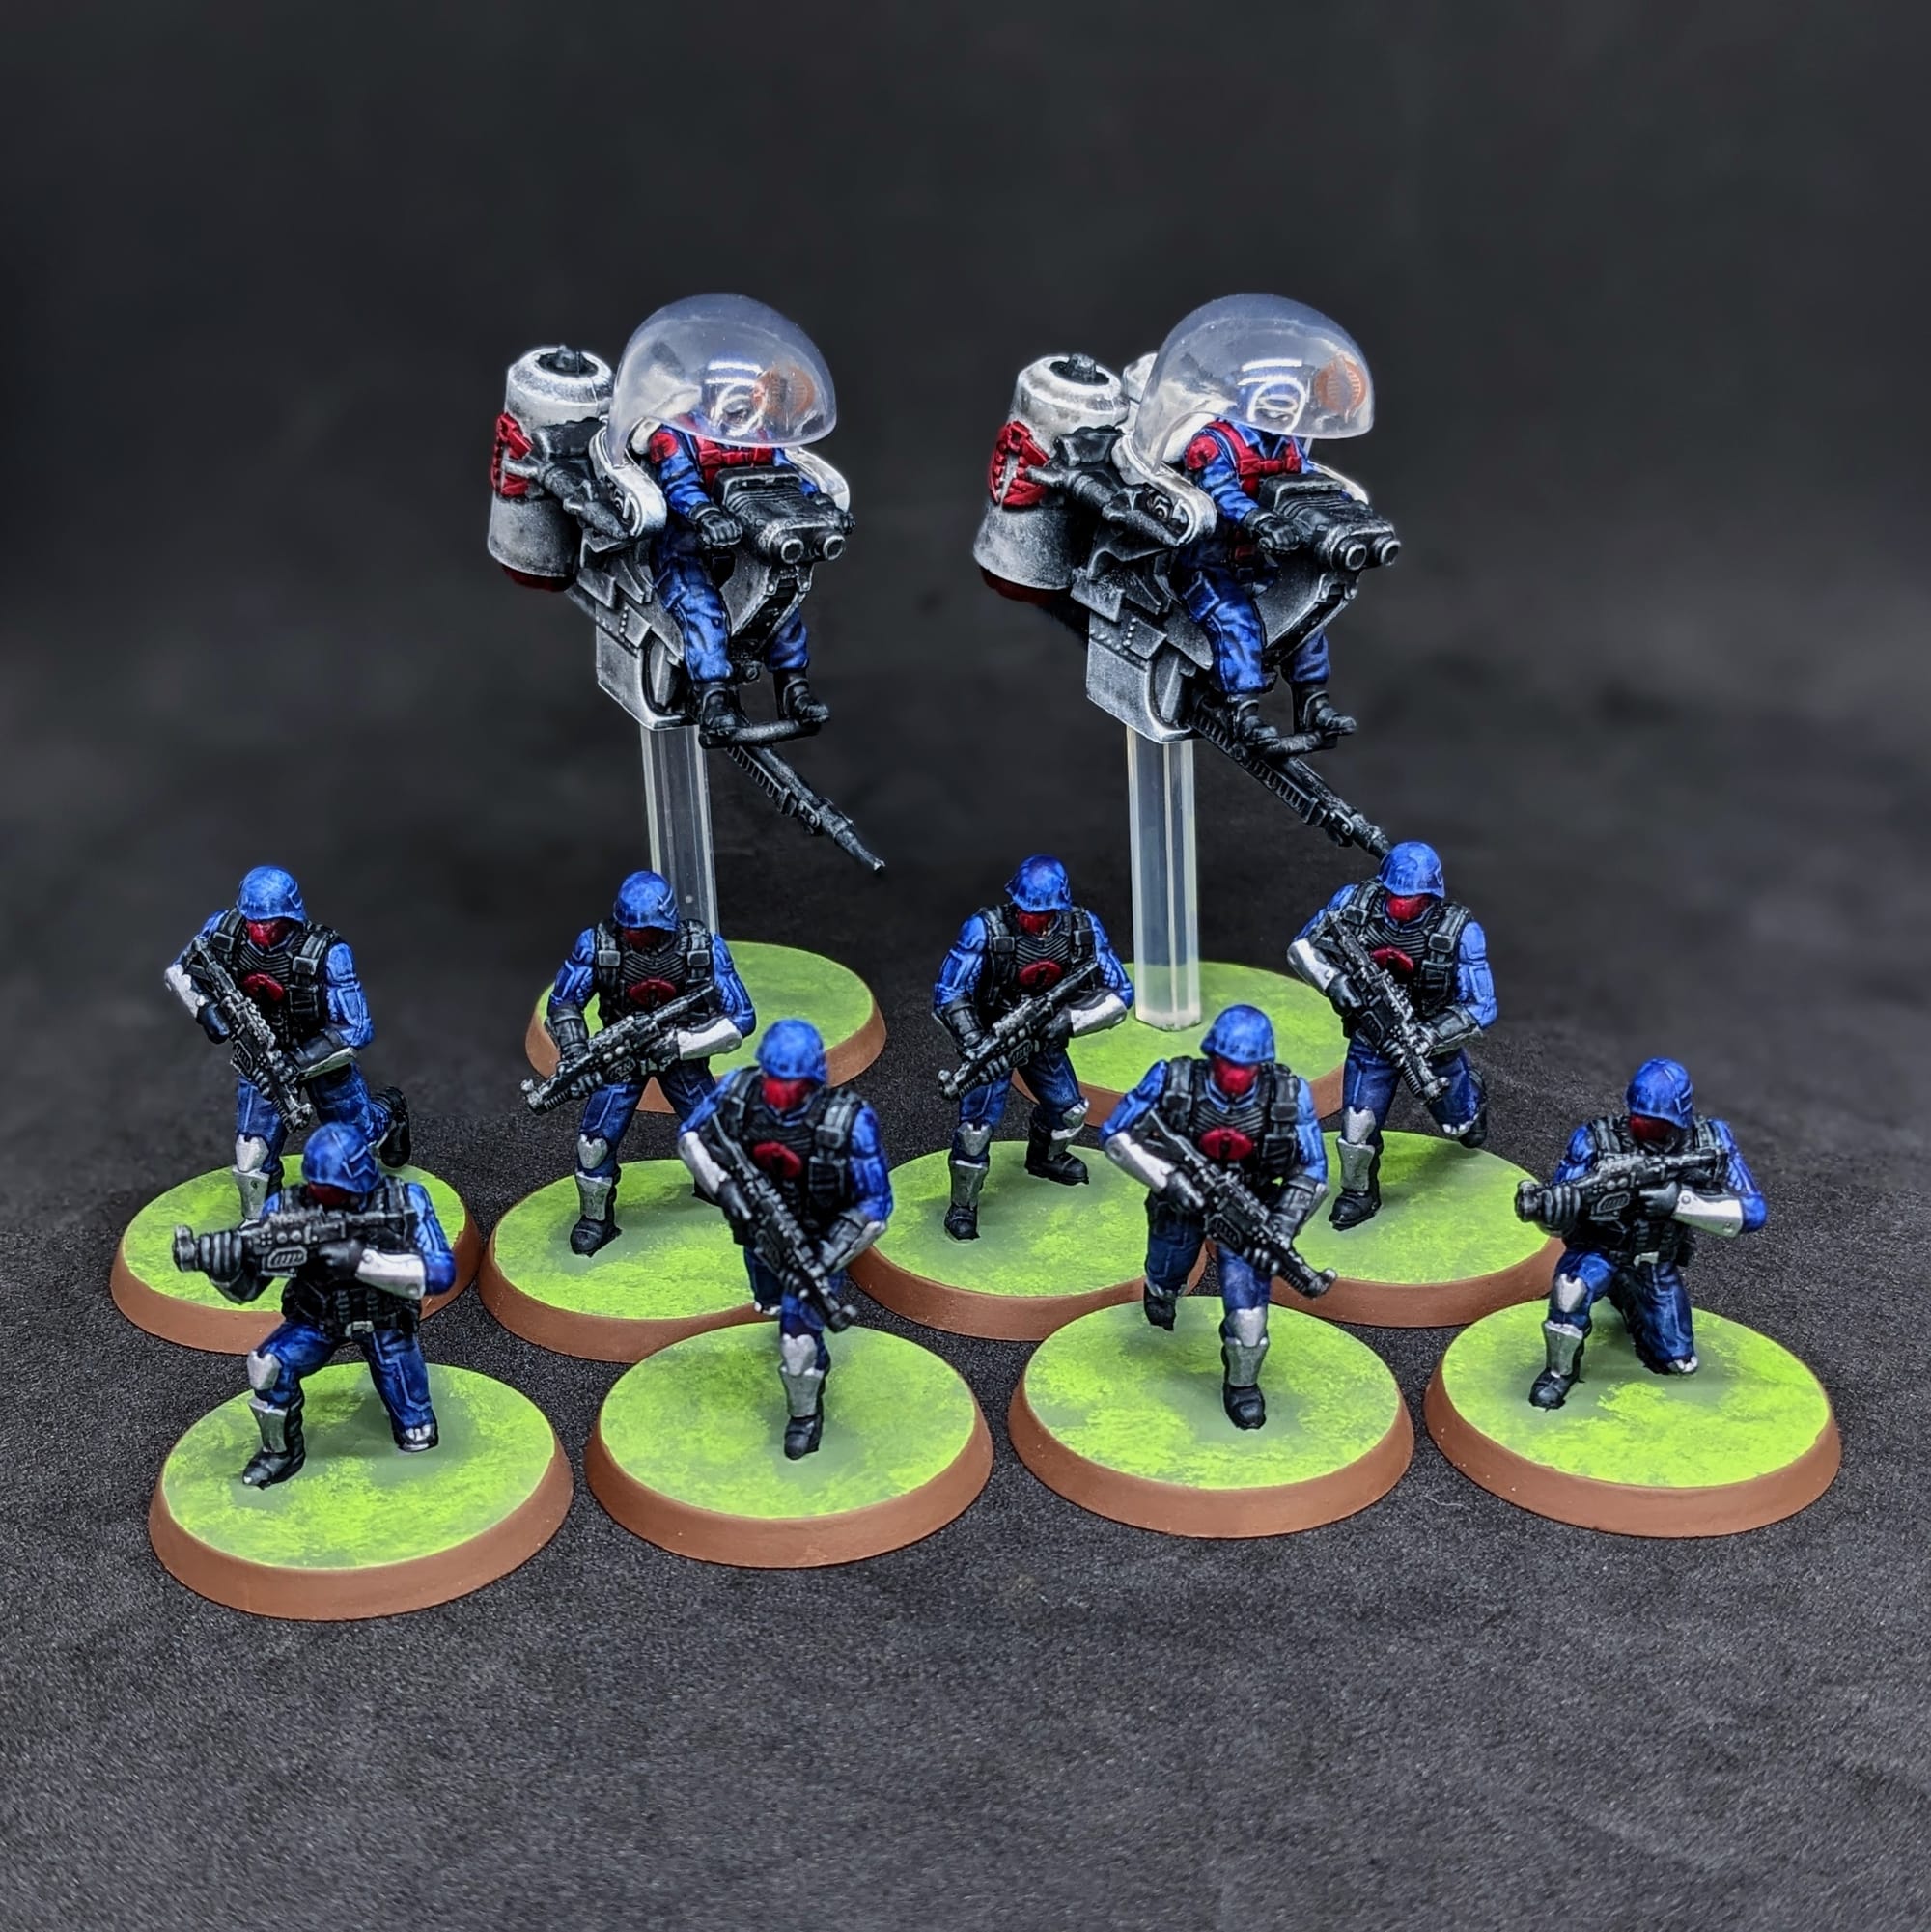
I’m incredibly happy with how both the G.I. Joe and Cobras turned out. They are truly fantastic sculpts for Heroscape and very beginner-friendly to paint. If this is your time painting, or even just your first time painting Heroscape, this is a fantastic set to get. Painters can get a lot of mileage out of just the Army Painter Speedpaint 2.0 set and the Heroscape: Age of Annihilation paint set. I was able to use them to paint up the COBRA Troopers & COBRA Flight Pod expansion, and so I am confident I could use them to paint up the other G.I. Joe expansions. I am excited for what else to come! I can’t wait to play a game with friends and family using these painted pieces. In the meantime, they’re going to look great on the shelf!
Have you painted Heroscape miniatures yet? Share your work with us!
Don’t forget to subscribe and follow us on Instagram, Bluesky, and YouTube for more Heroscape reviews and painting guides, as well as more hobby and tabletop news and reviews!