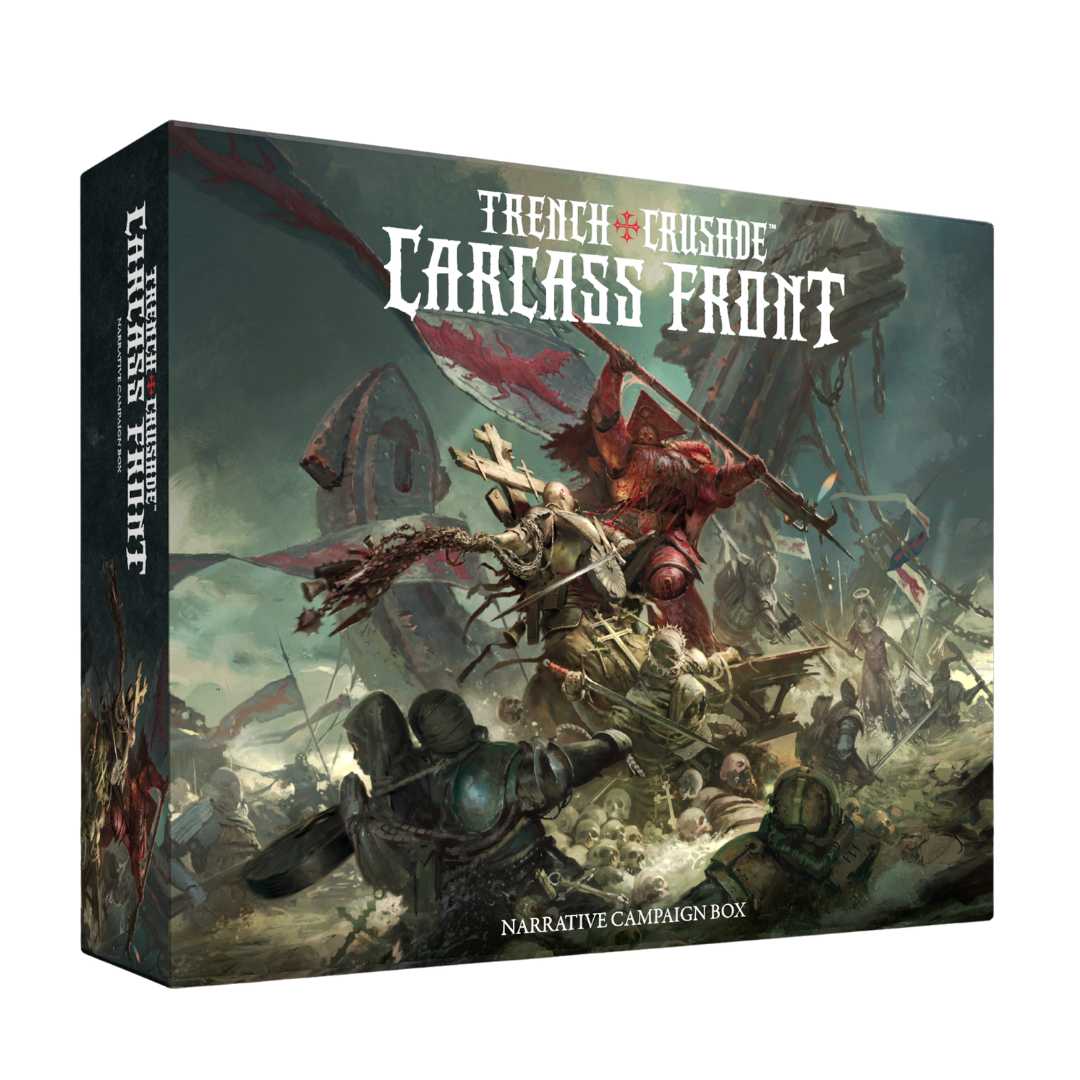
The Carcass Front is open and the eternal war continues. Will you summon the great Leviathan, to fight for your cause to claim the Earth? Or will you defeat it, feasting upon its scaly flesh?
Whichever way you chose to fight your campaign across Carcass Front, we have put together a step-by-step guide for painting up the miniatures for the The Procession of the Sacred Affliction and Heretic Naval Raiders, as well as the beach landing-themed scatter terrain included. Previously, GamingTrend did an unboxing article and video, which covers the contents of the box. In it, we also go over how to build the models, so be sure to check it out!
 Trench Crusade
Assembling Your Models
Prepping Your Models & The Tools
GamingTrend has put together a handy guide for you to follow for how best to clean, clip, and assemble your models, regardless of the game. While the materials for the models may be different between games (plastic, resin, metal, etc.) there are simple techniques you can do to help make your painting experience go that much smoother.
 Alec Kozak
Additionally, if you are new to painting and are not sure what brushes or tools you need, check out the article. This is just a starting place, and every painter has different preferences and recommendations. These are my recommendations based on the last decade or so of painting, and I hope you find them helpful!
For this tutorial, we have included a visual guide (below) of the paints we used for the miniatures so you have an easily accessible list to refer to if you need to go shopping. Many paints are used for multiple figures, so a single bottle of each will be more than enough.
Painting Your Miniatures
The Paint Plan
Every miniature painting project we do, we start with a plan. Even before putting the primer and paint on a model, we find photo references of the paint schemes and details we are looking for. Most times, this means having a browser window up with different web pages and images next to our painting area, so we can quickly refer to them as we paint. We also come up with a paint plan, choosing what colors we are going to use and what order we apply them in.
If you’re looking to paint these pieces with the “box art” style, you can view the official gallery here:

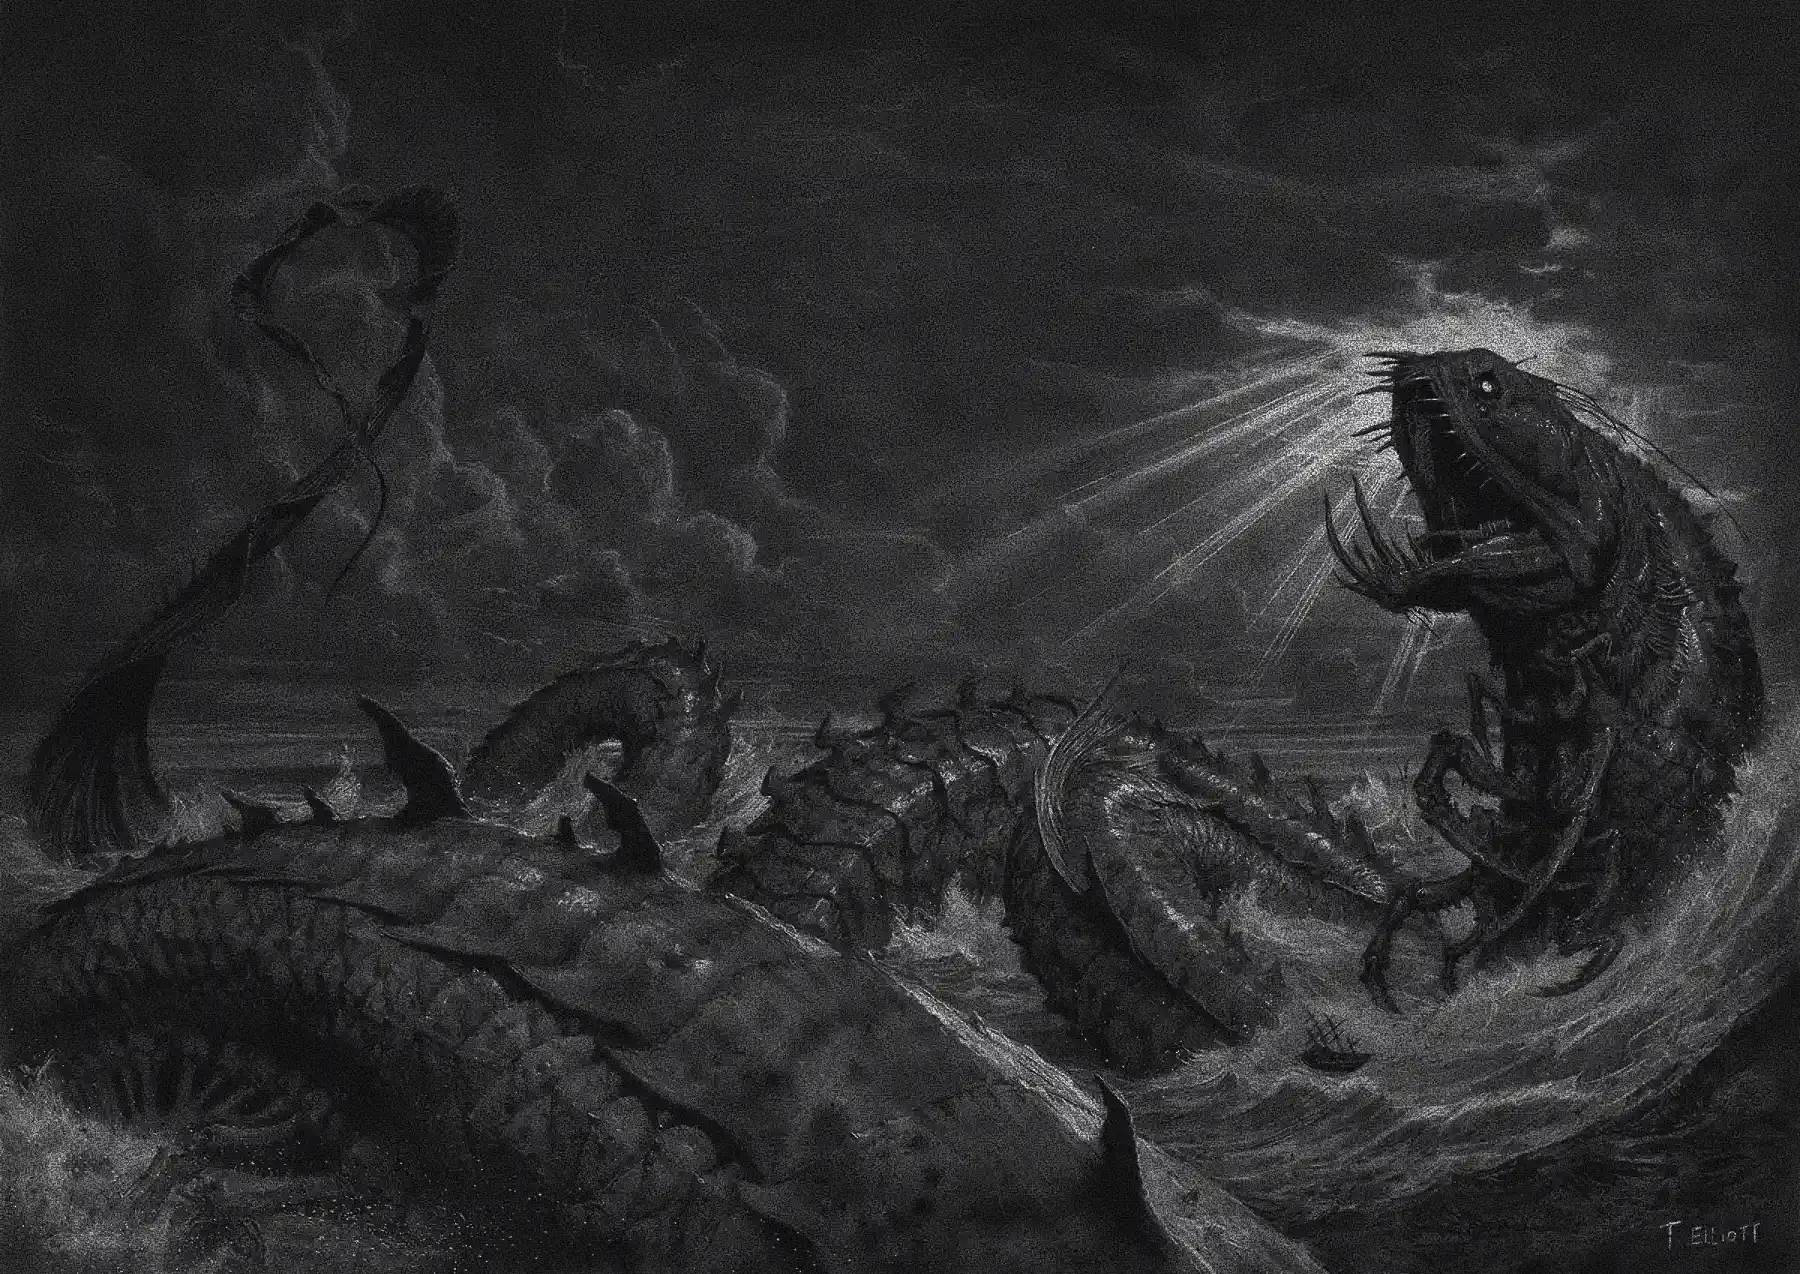
For us, we had really one goal with the painting: make them look as appropriately grimdark as possible. Dirt, mud, rust, verdigris, blood, etc. etc., are all going to shine here, ironically. So the more grit and grime we added, the better it would look. We used a lot of old brushes for drybrushing, washes, and grim effects. So, if you can squeeze a little more use out of those dull, tired, and worn-out brushes, this is a perfect project to do so. In the alternate history of Word War 1, no one should have clean, crisp uniforms or armor.
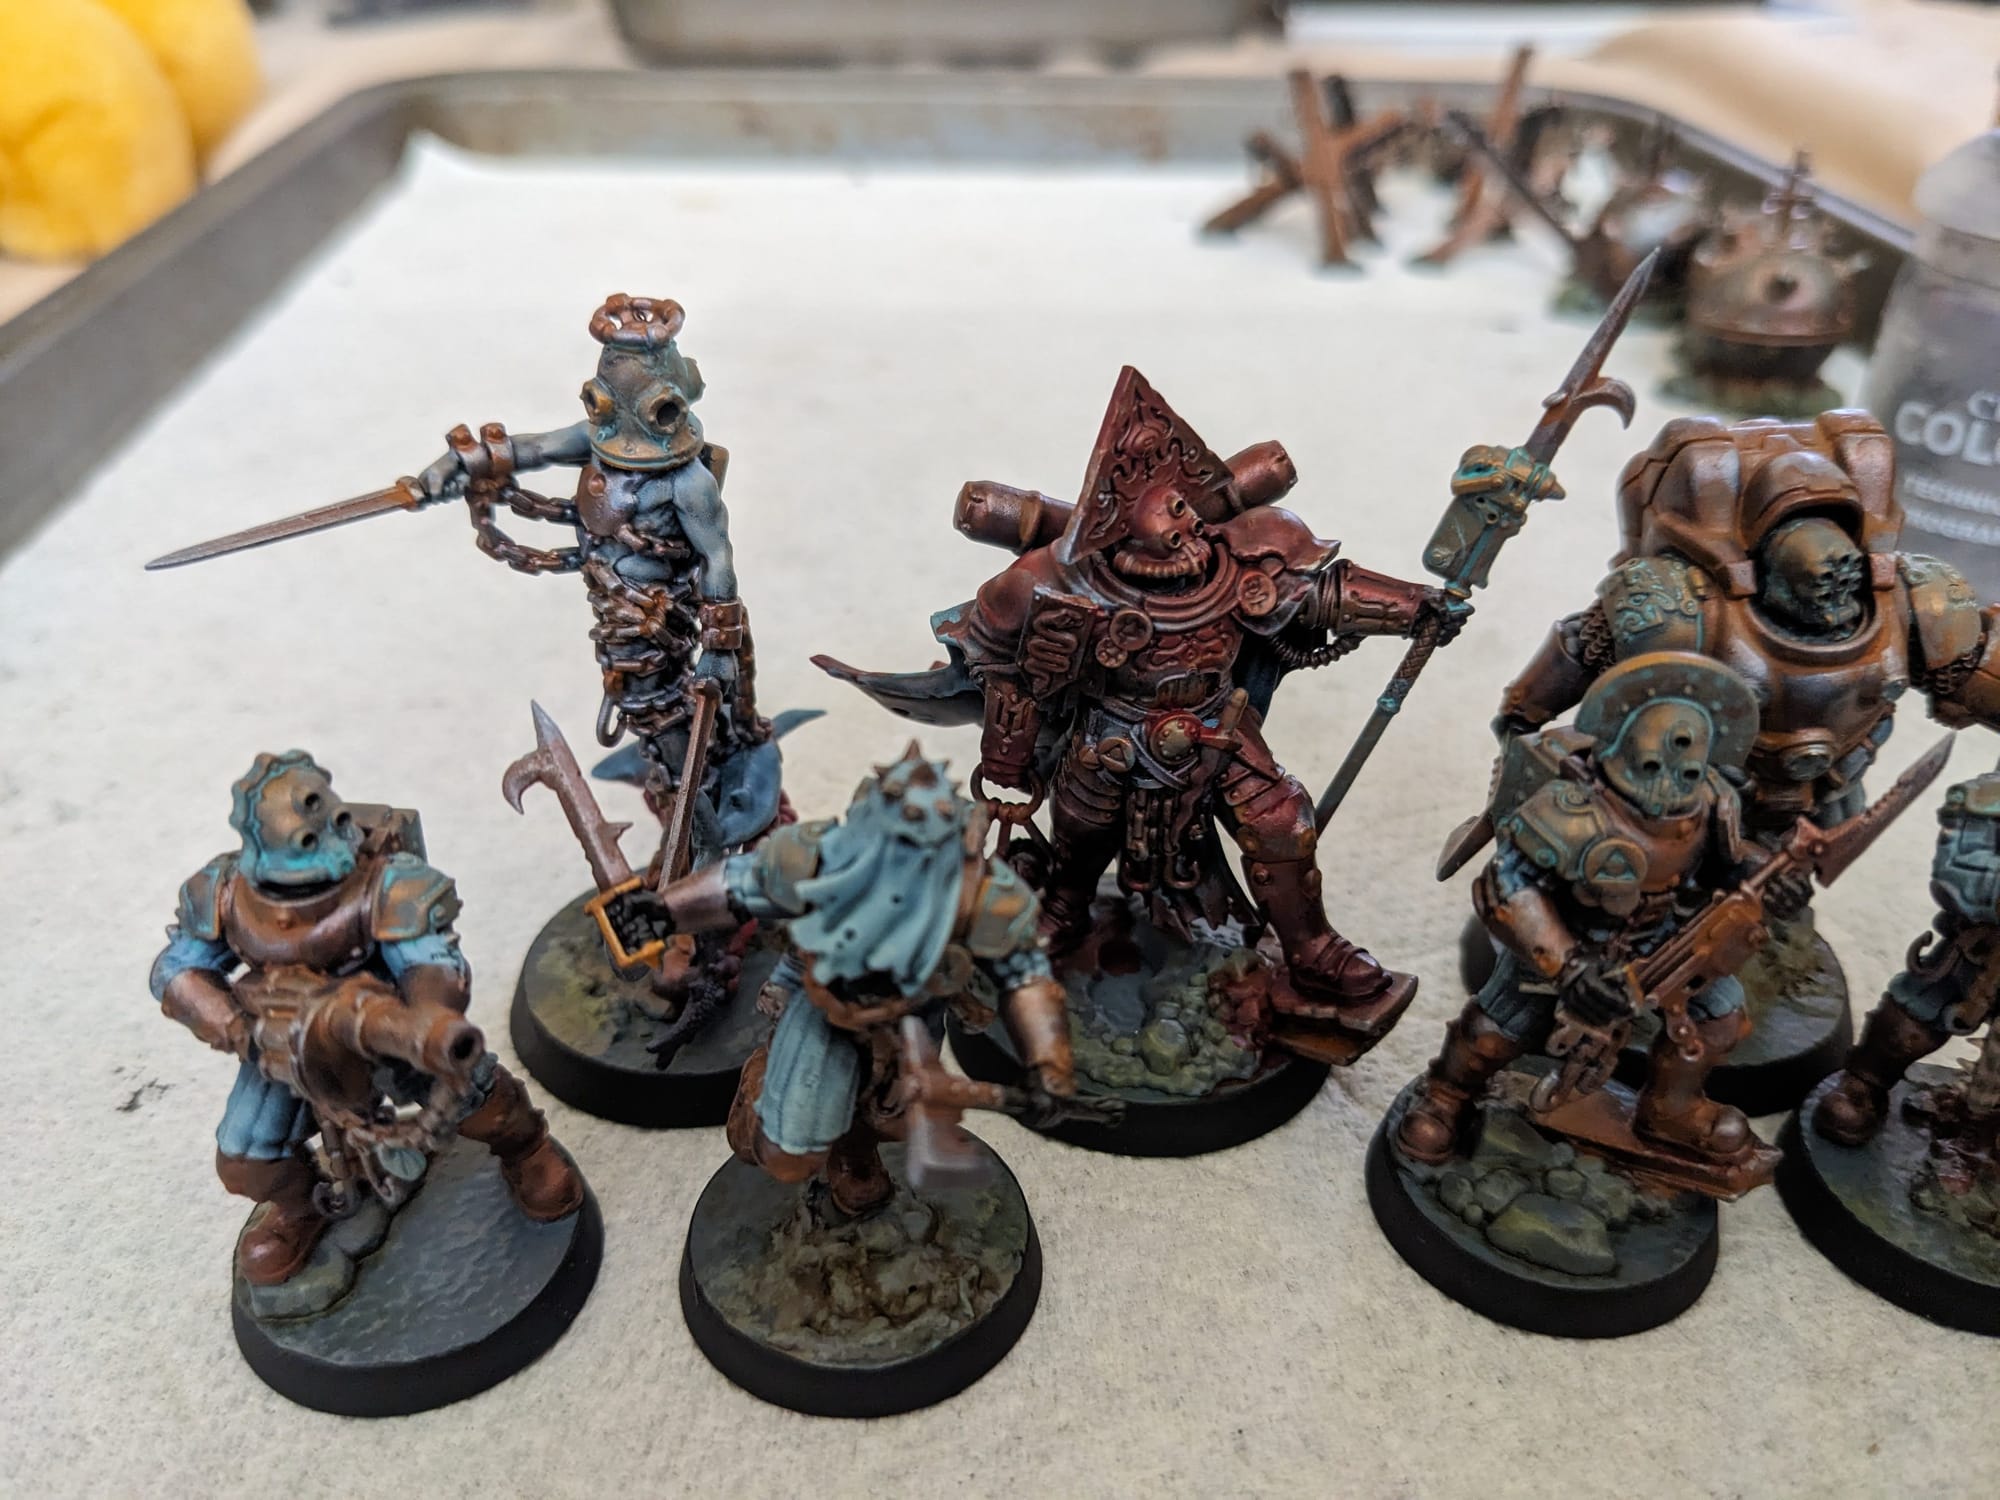
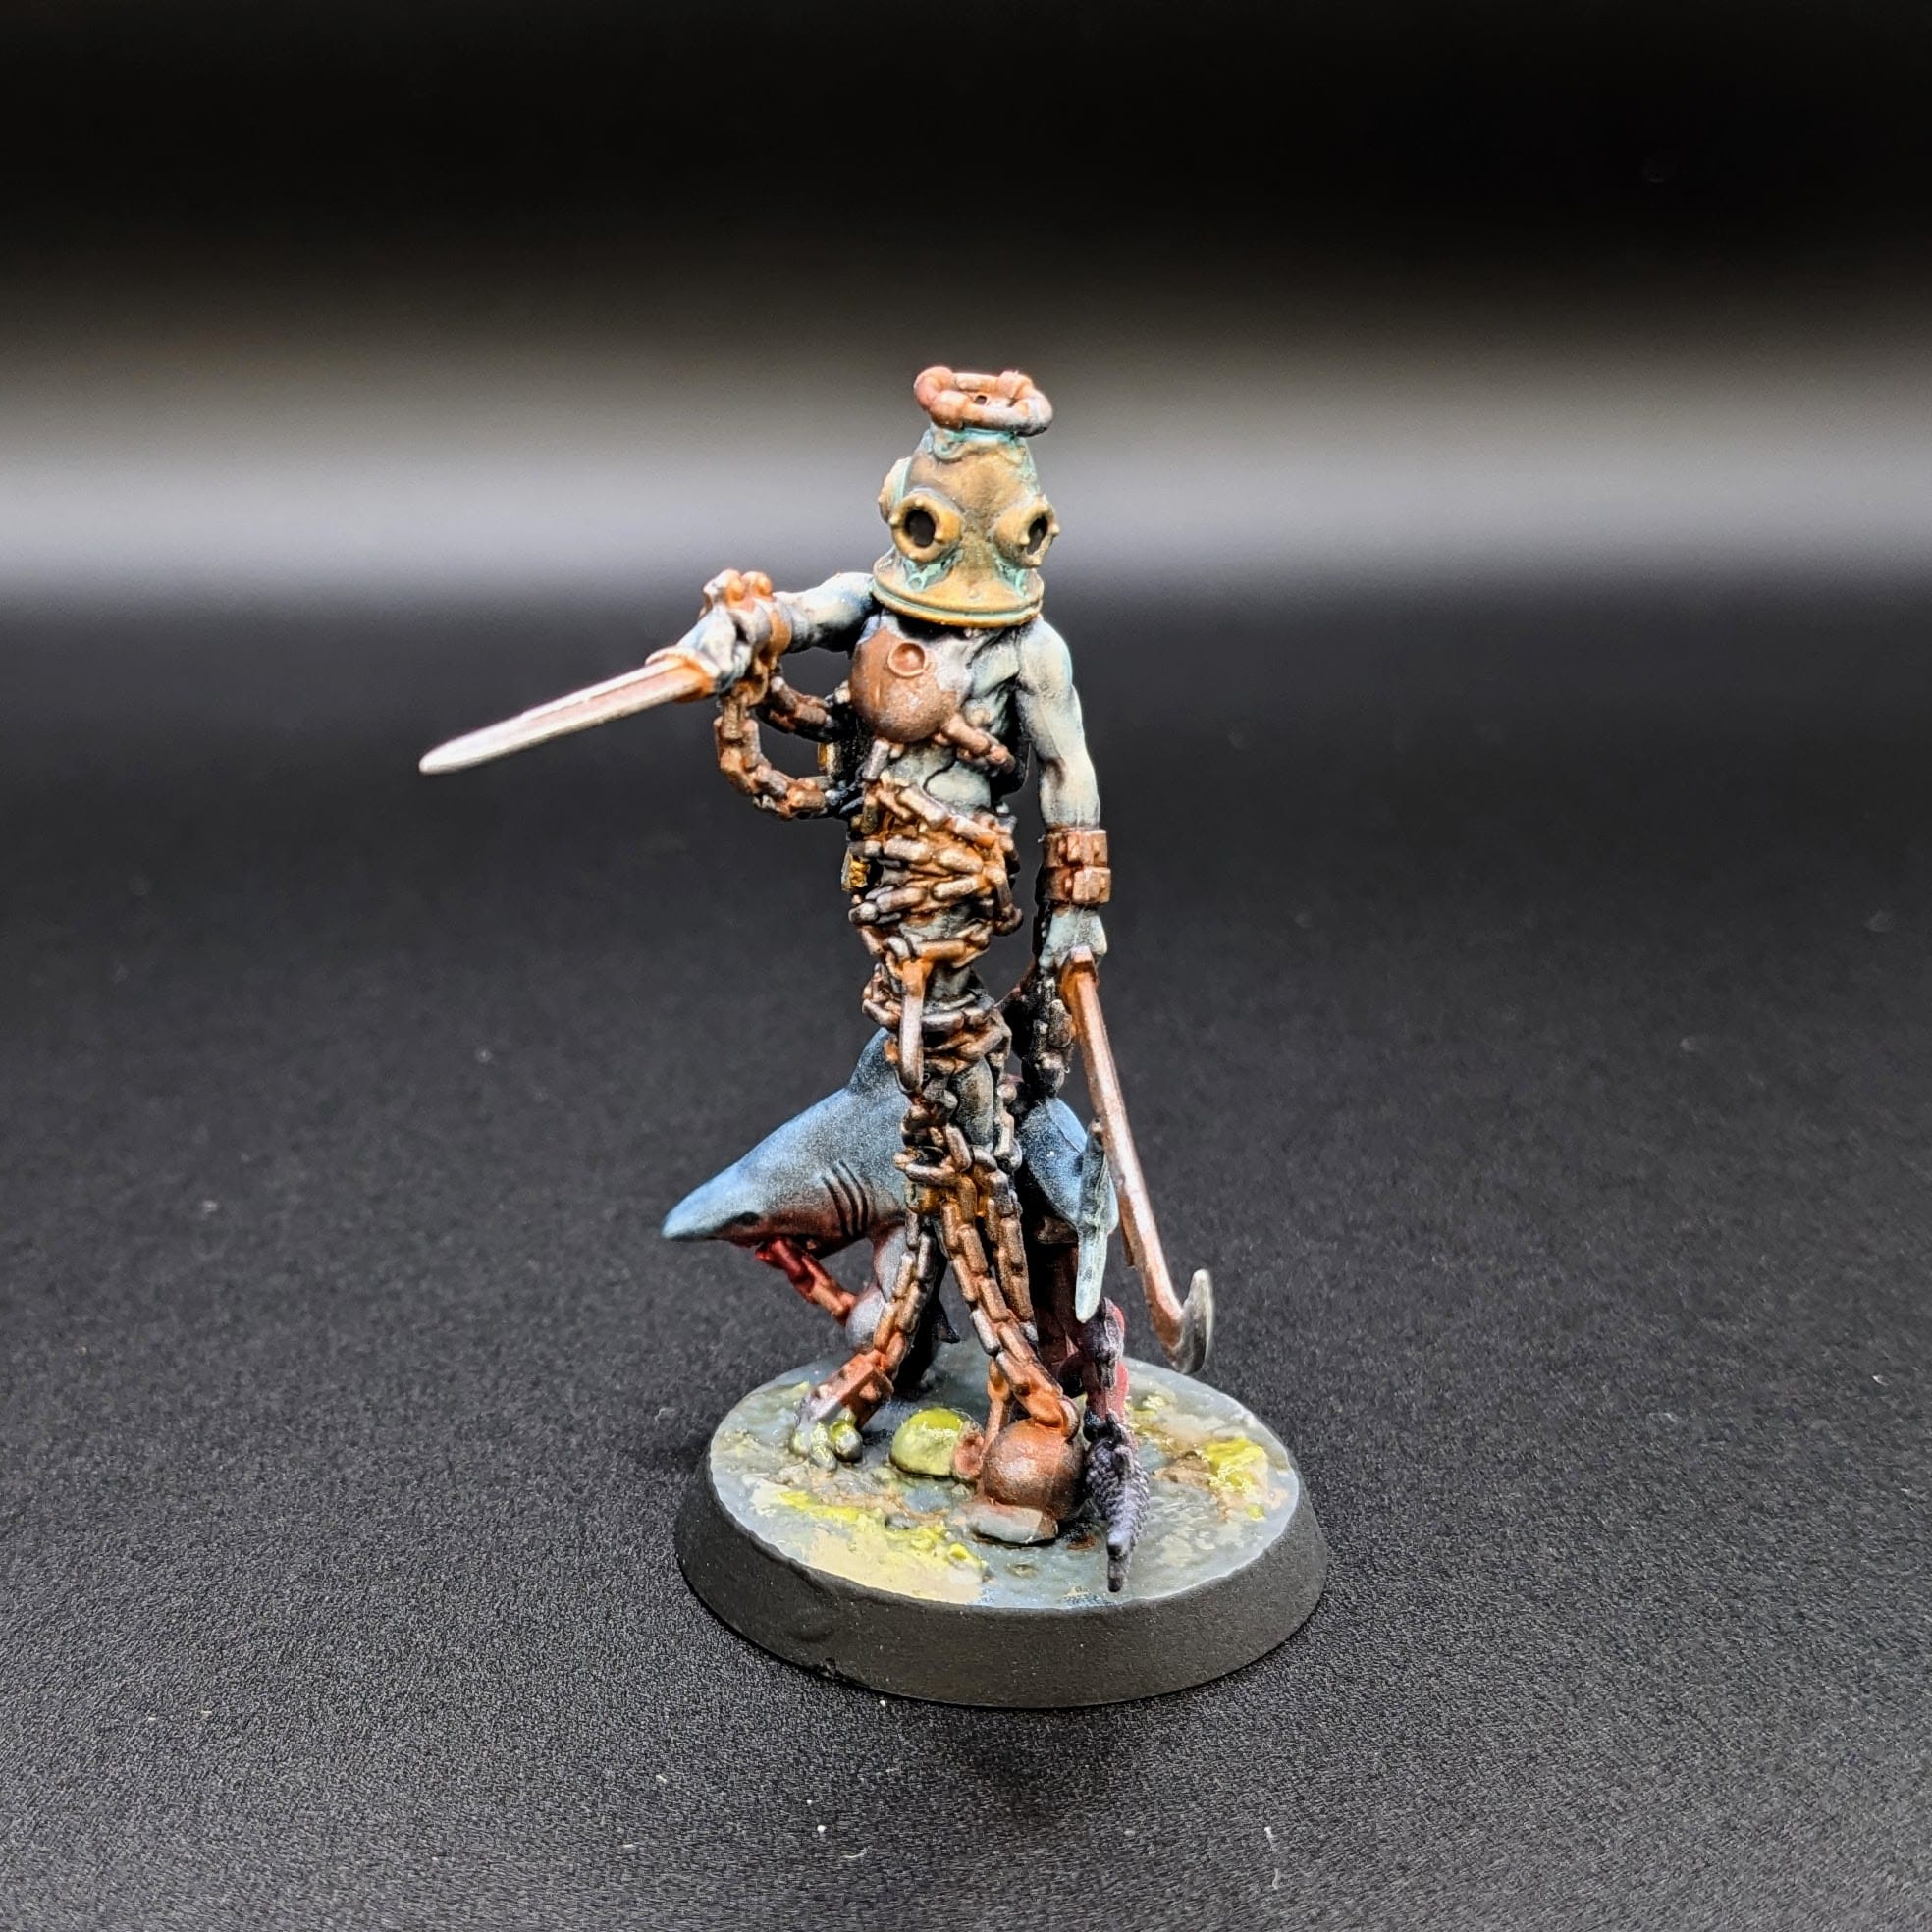
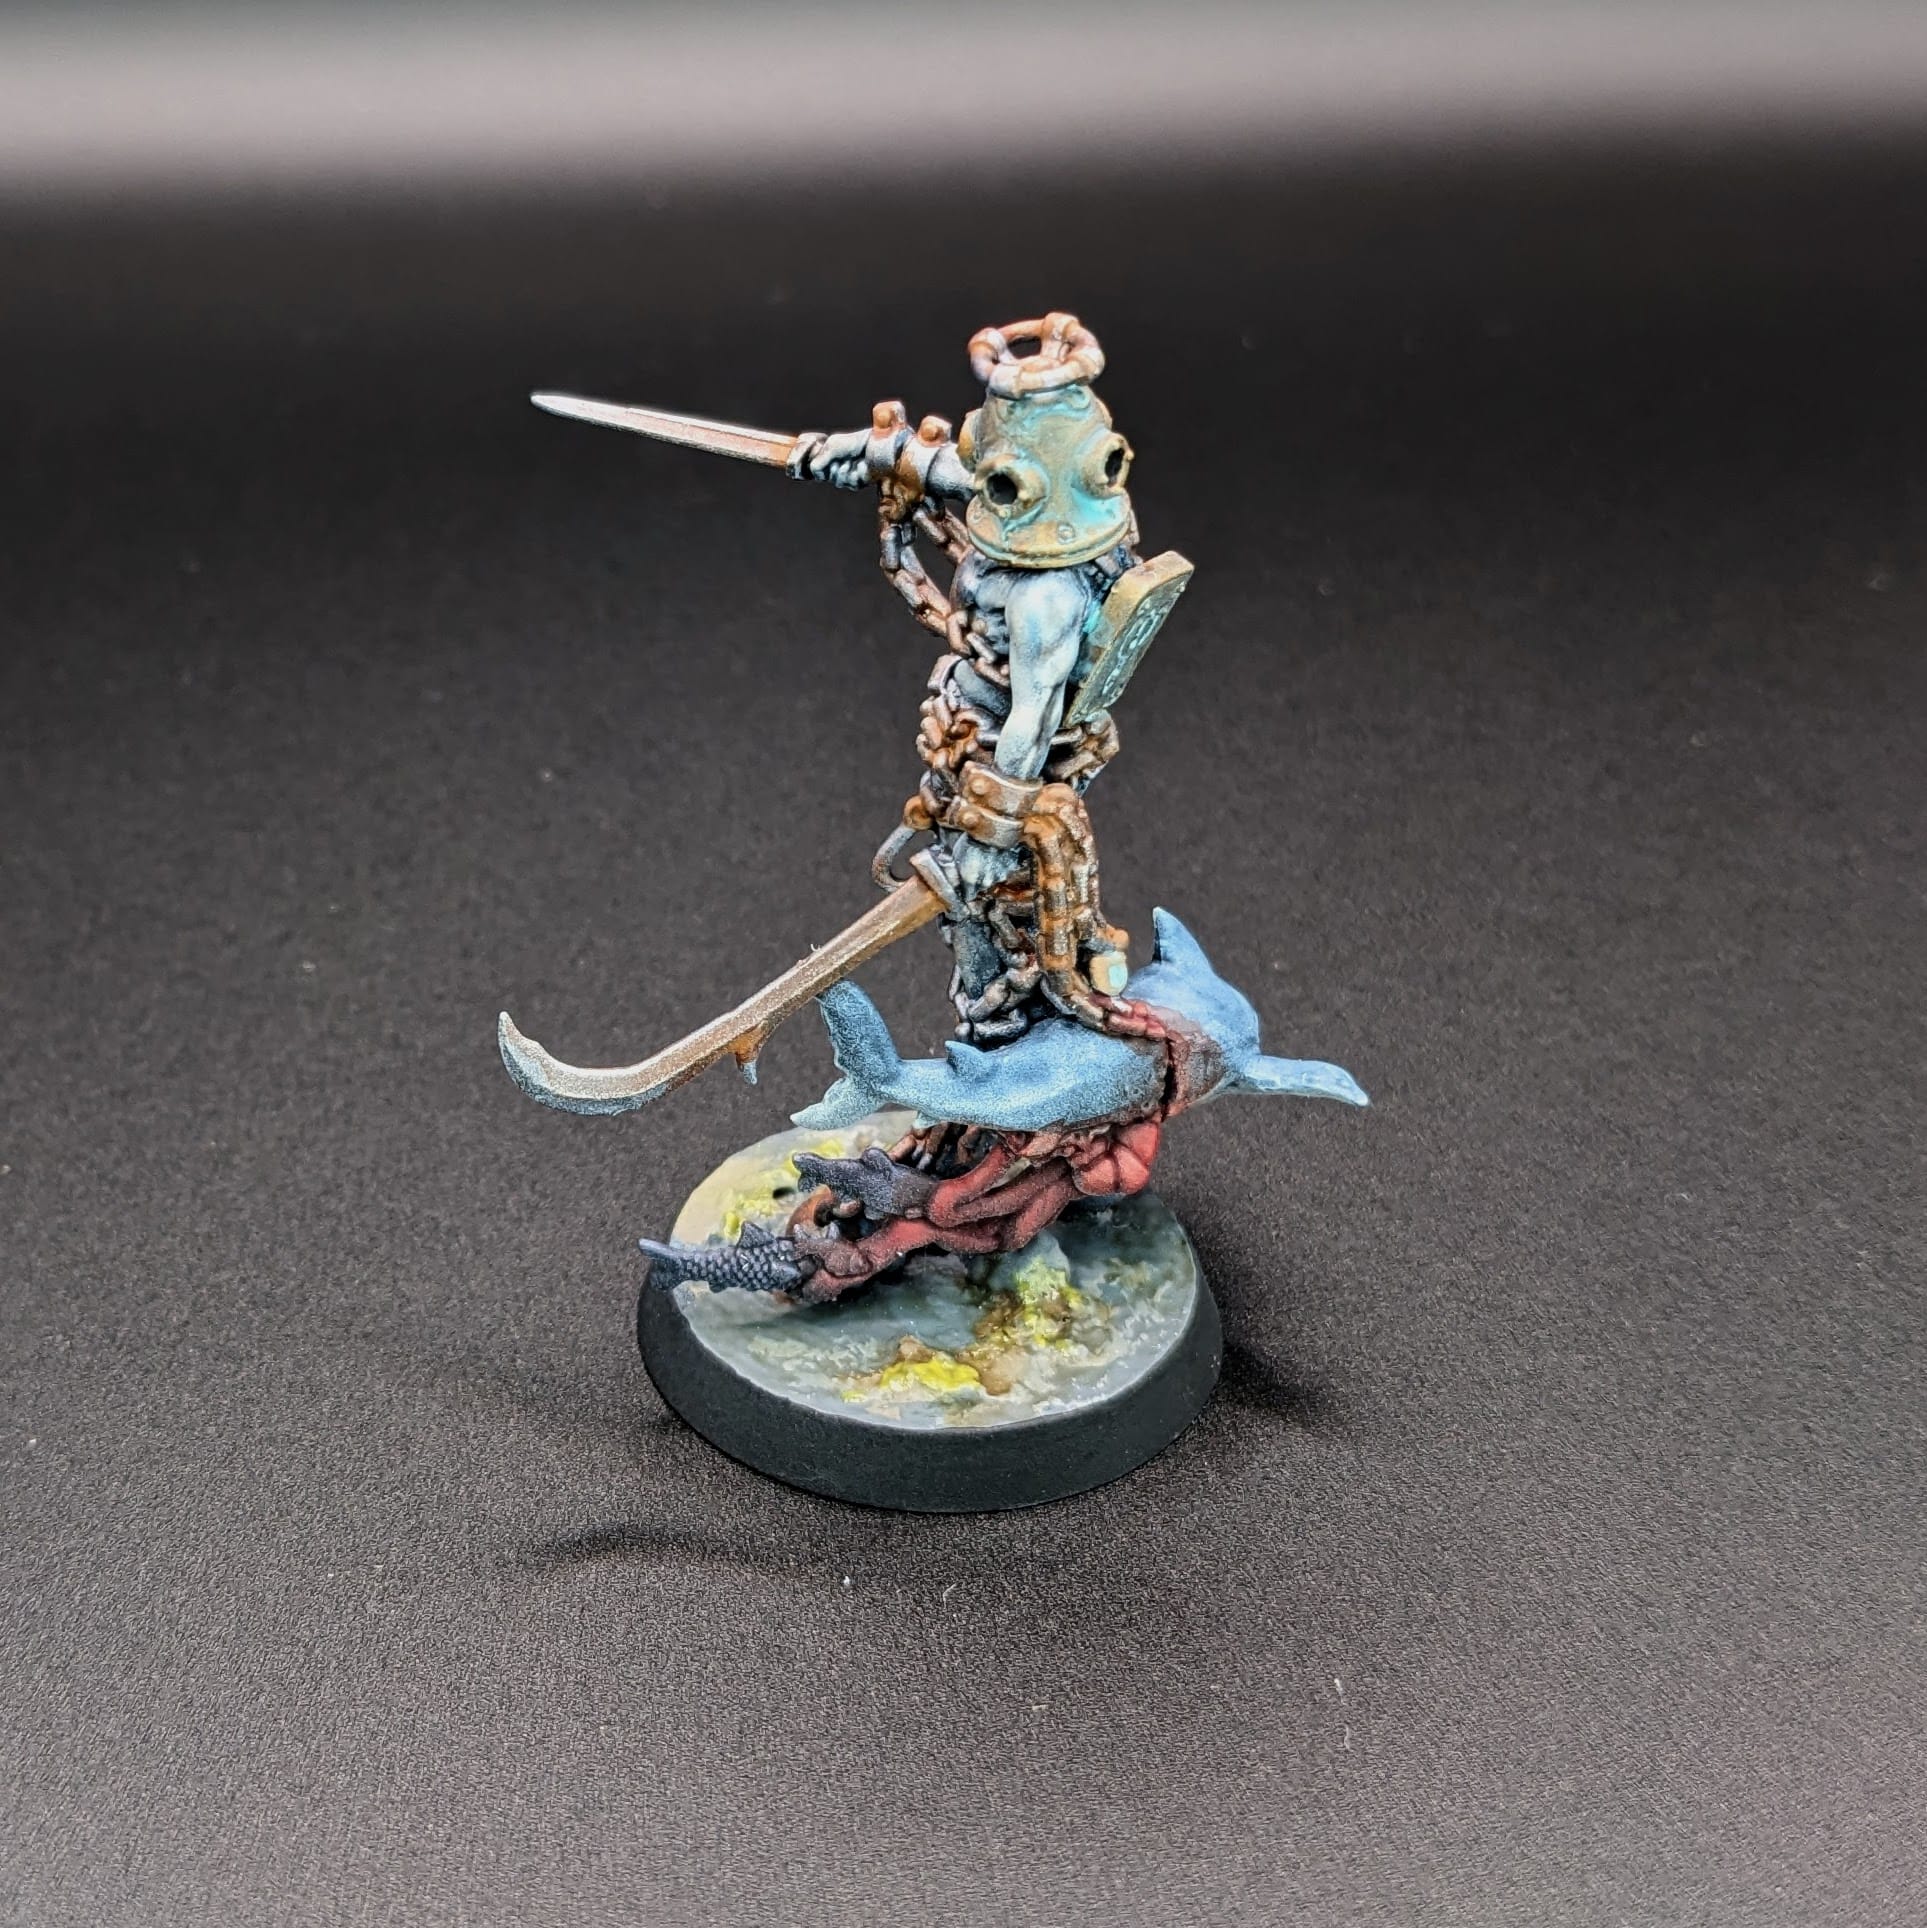
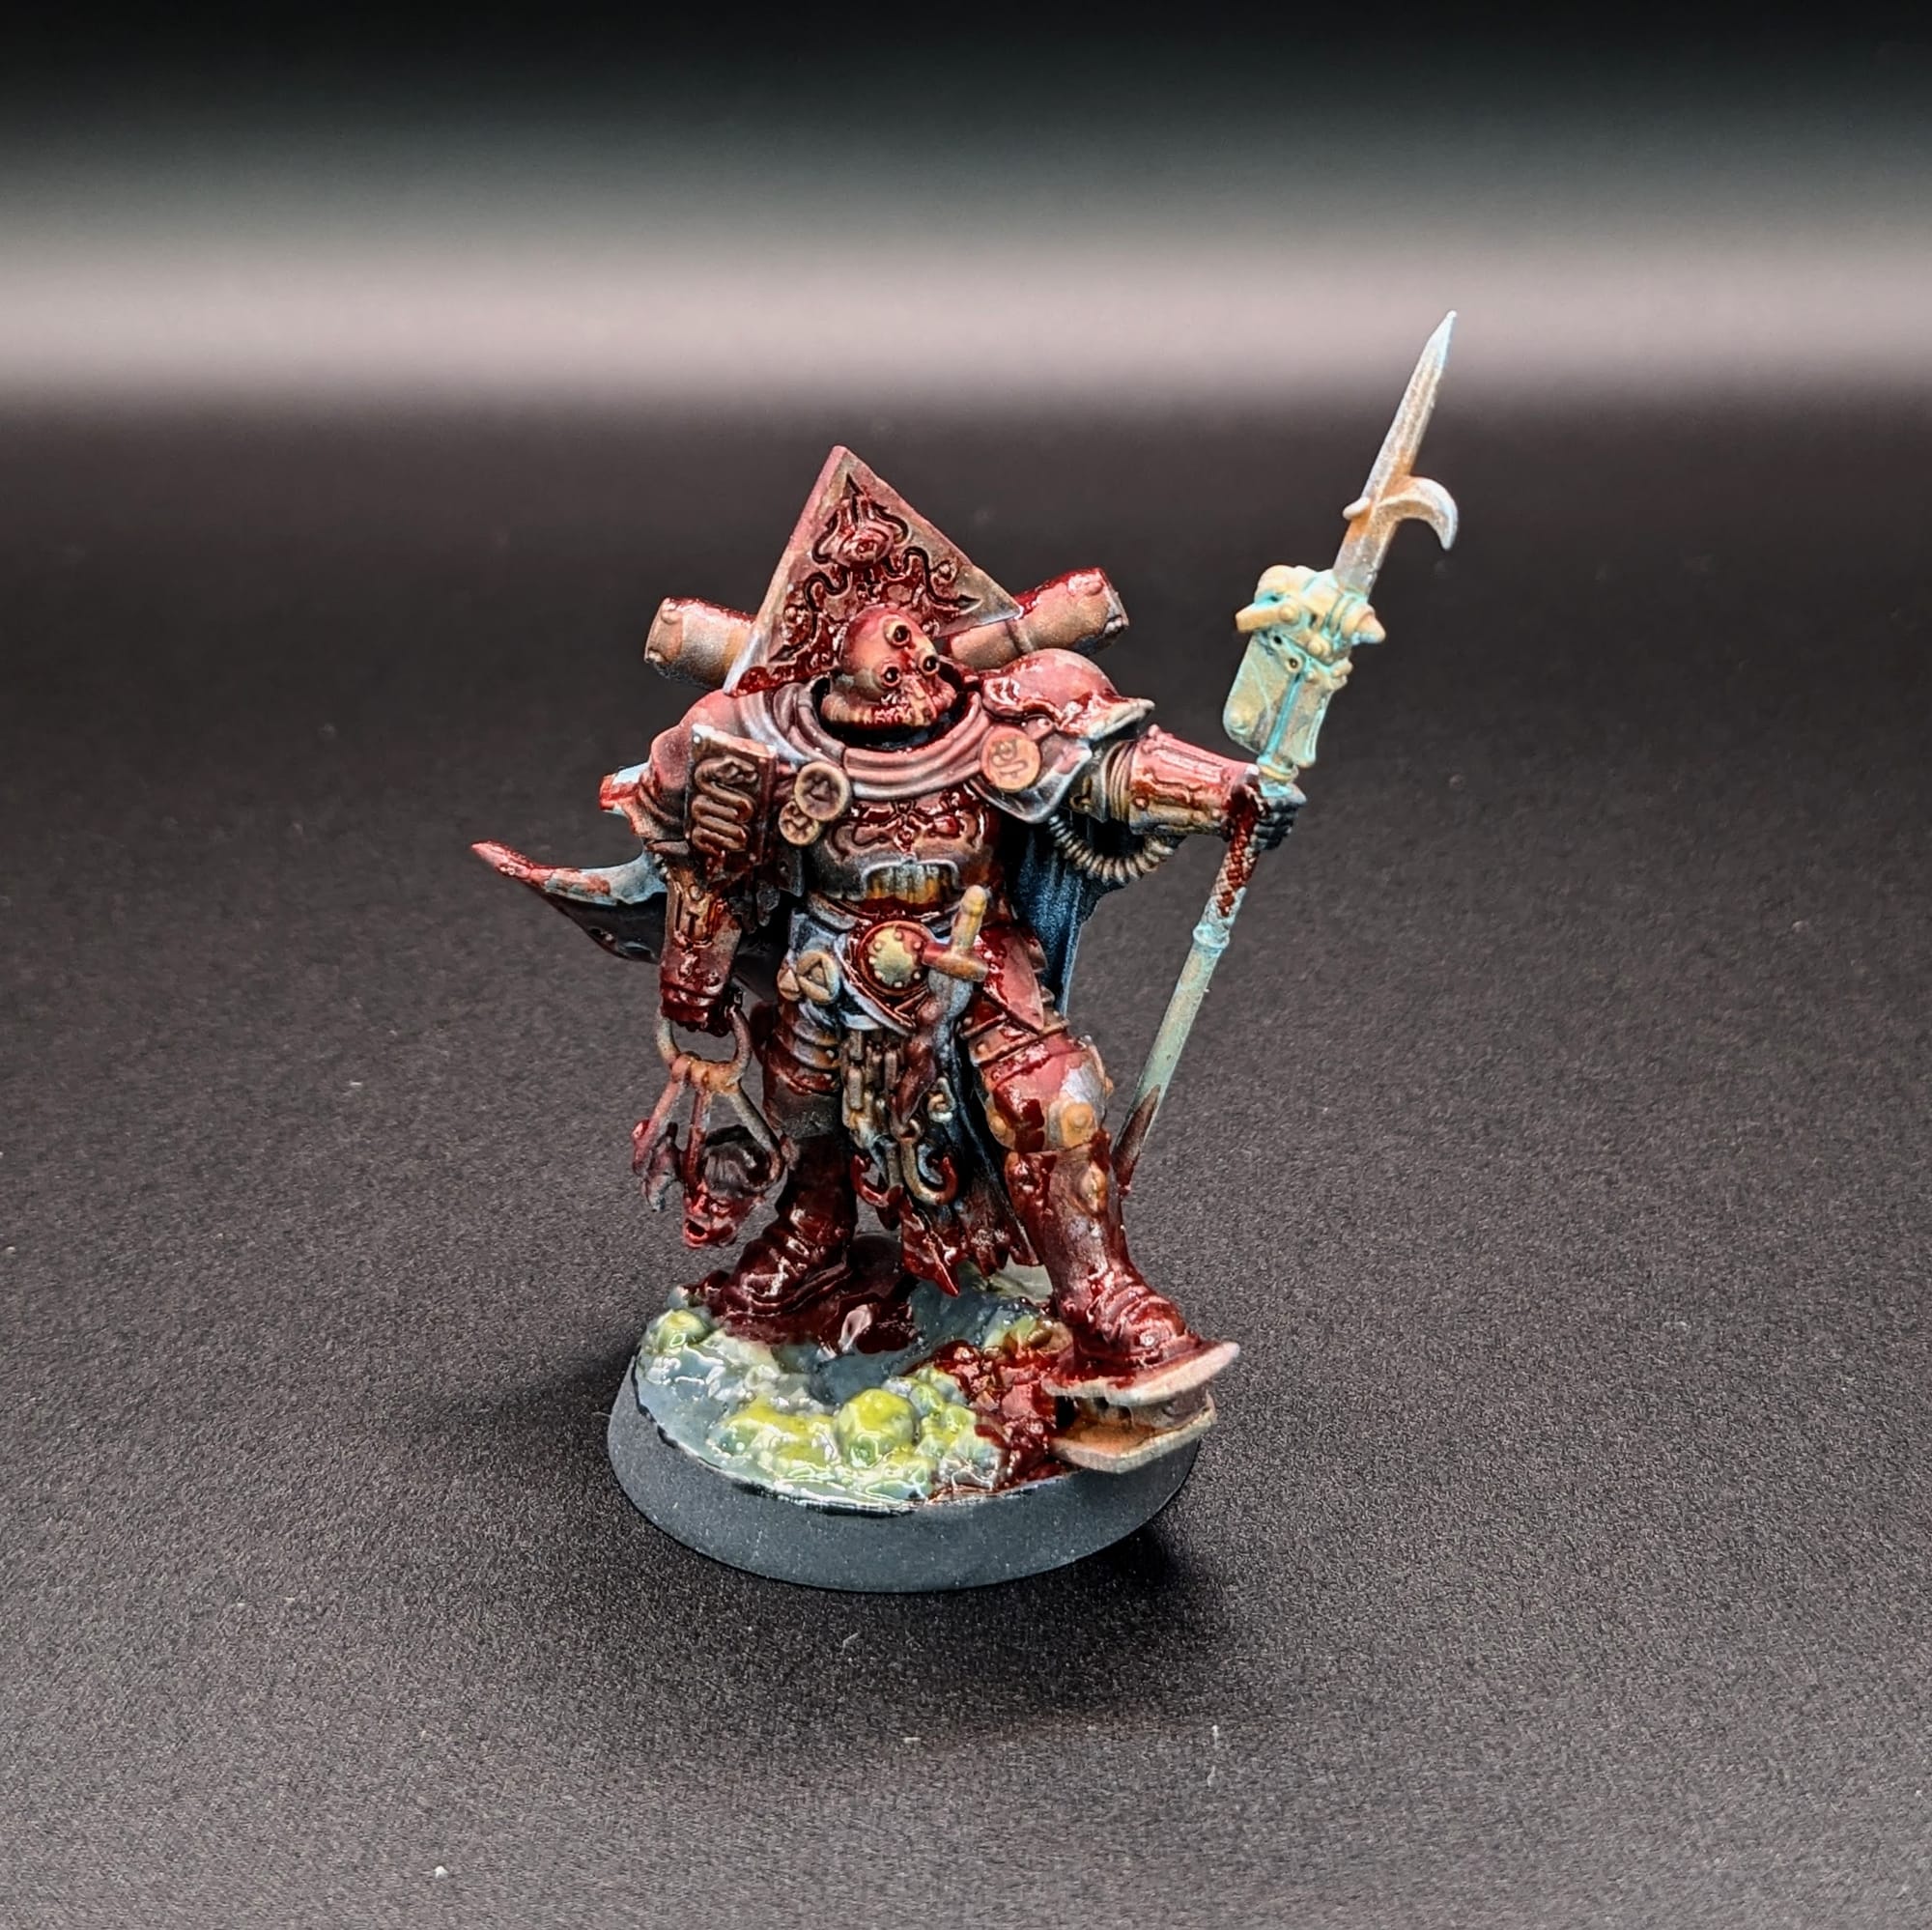
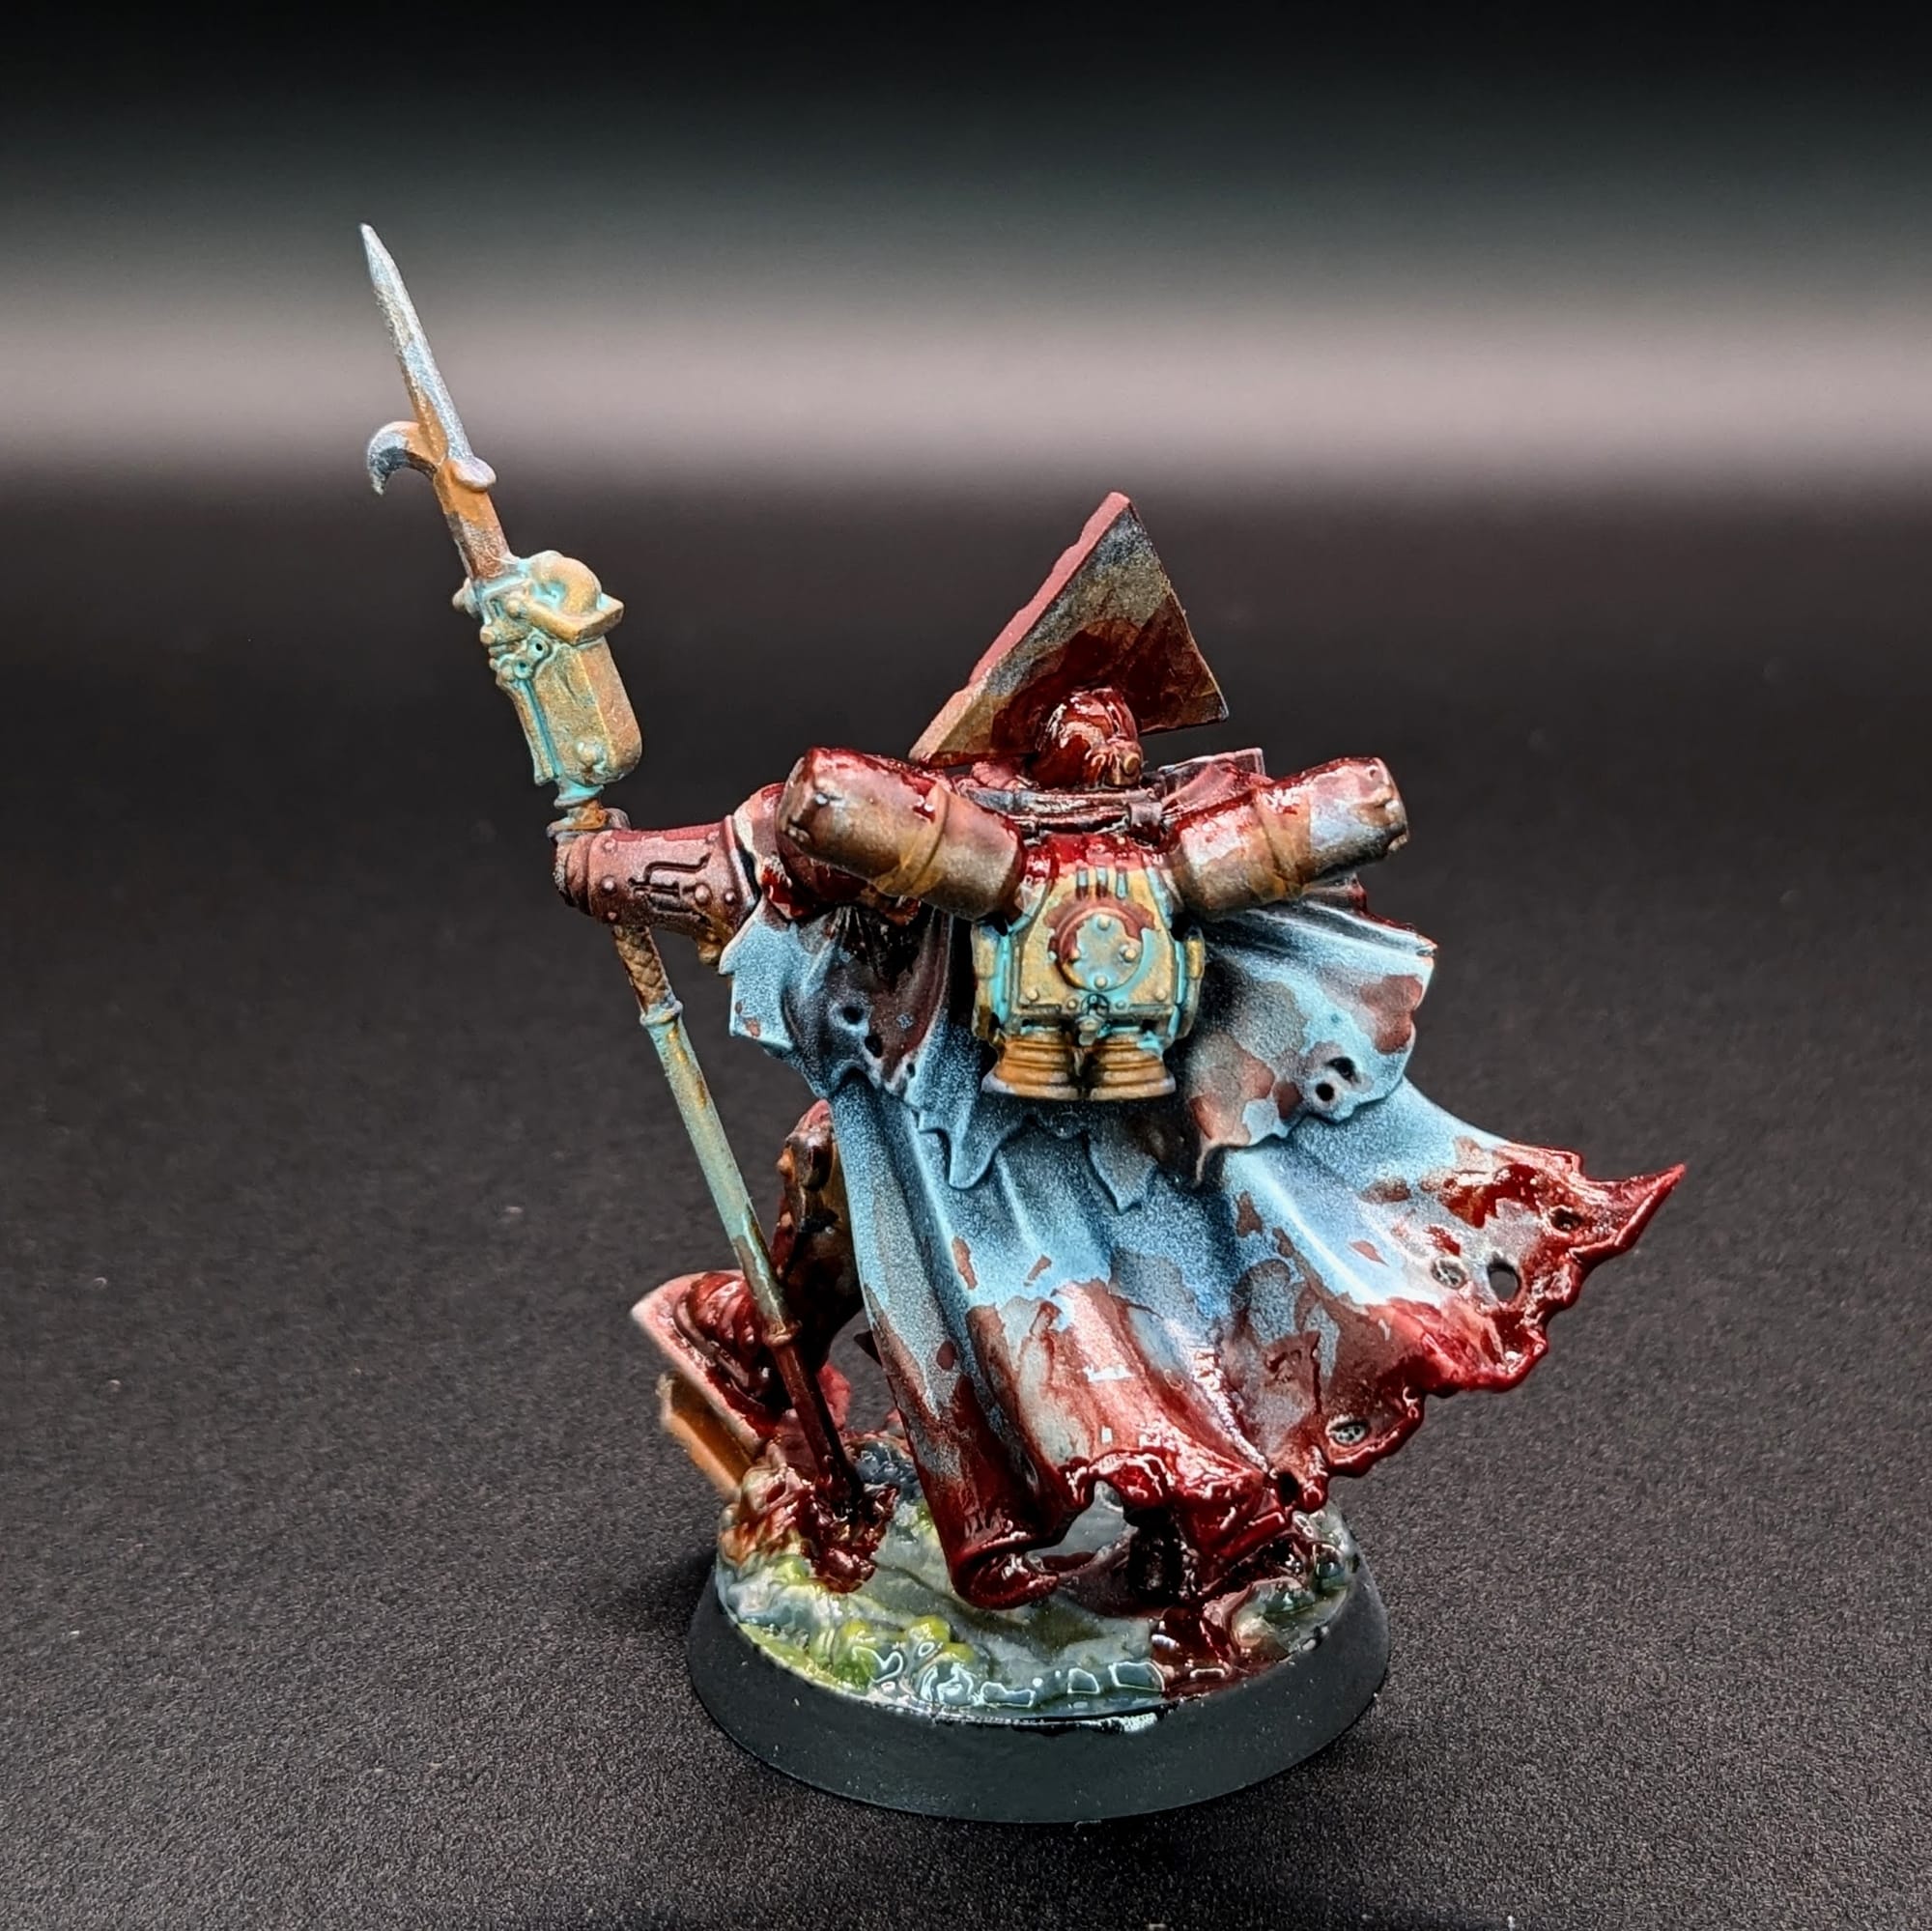
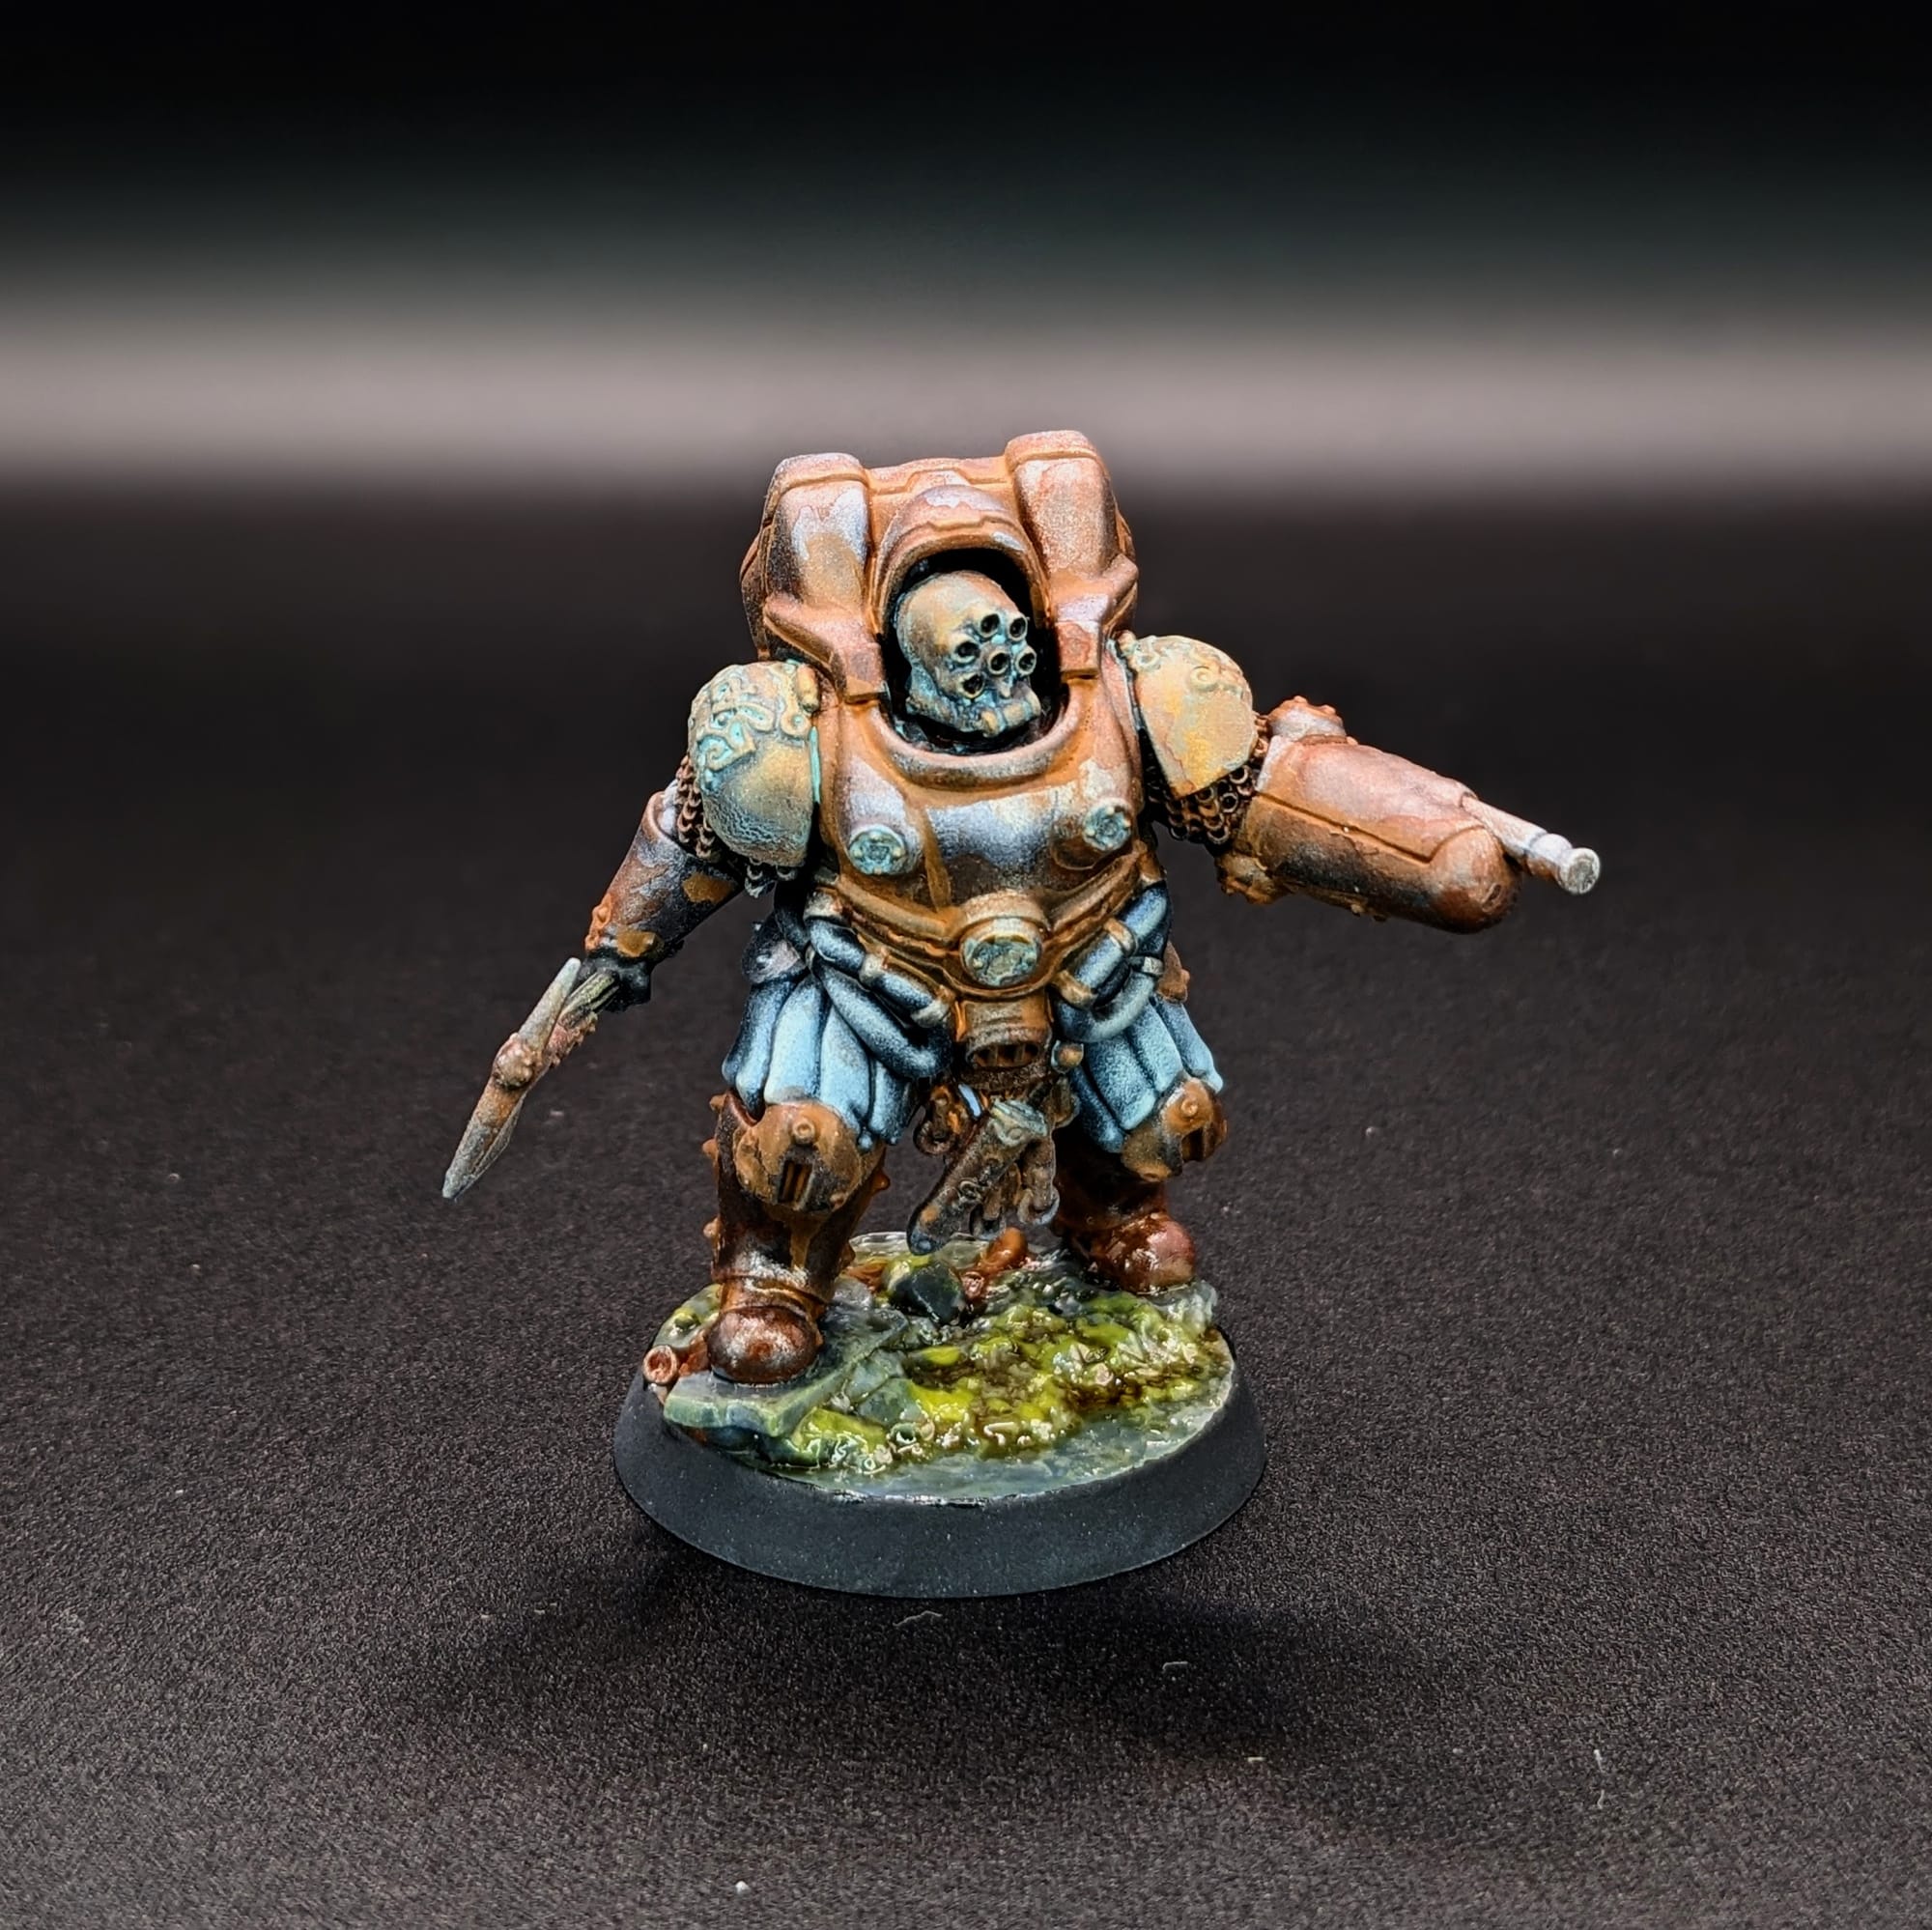
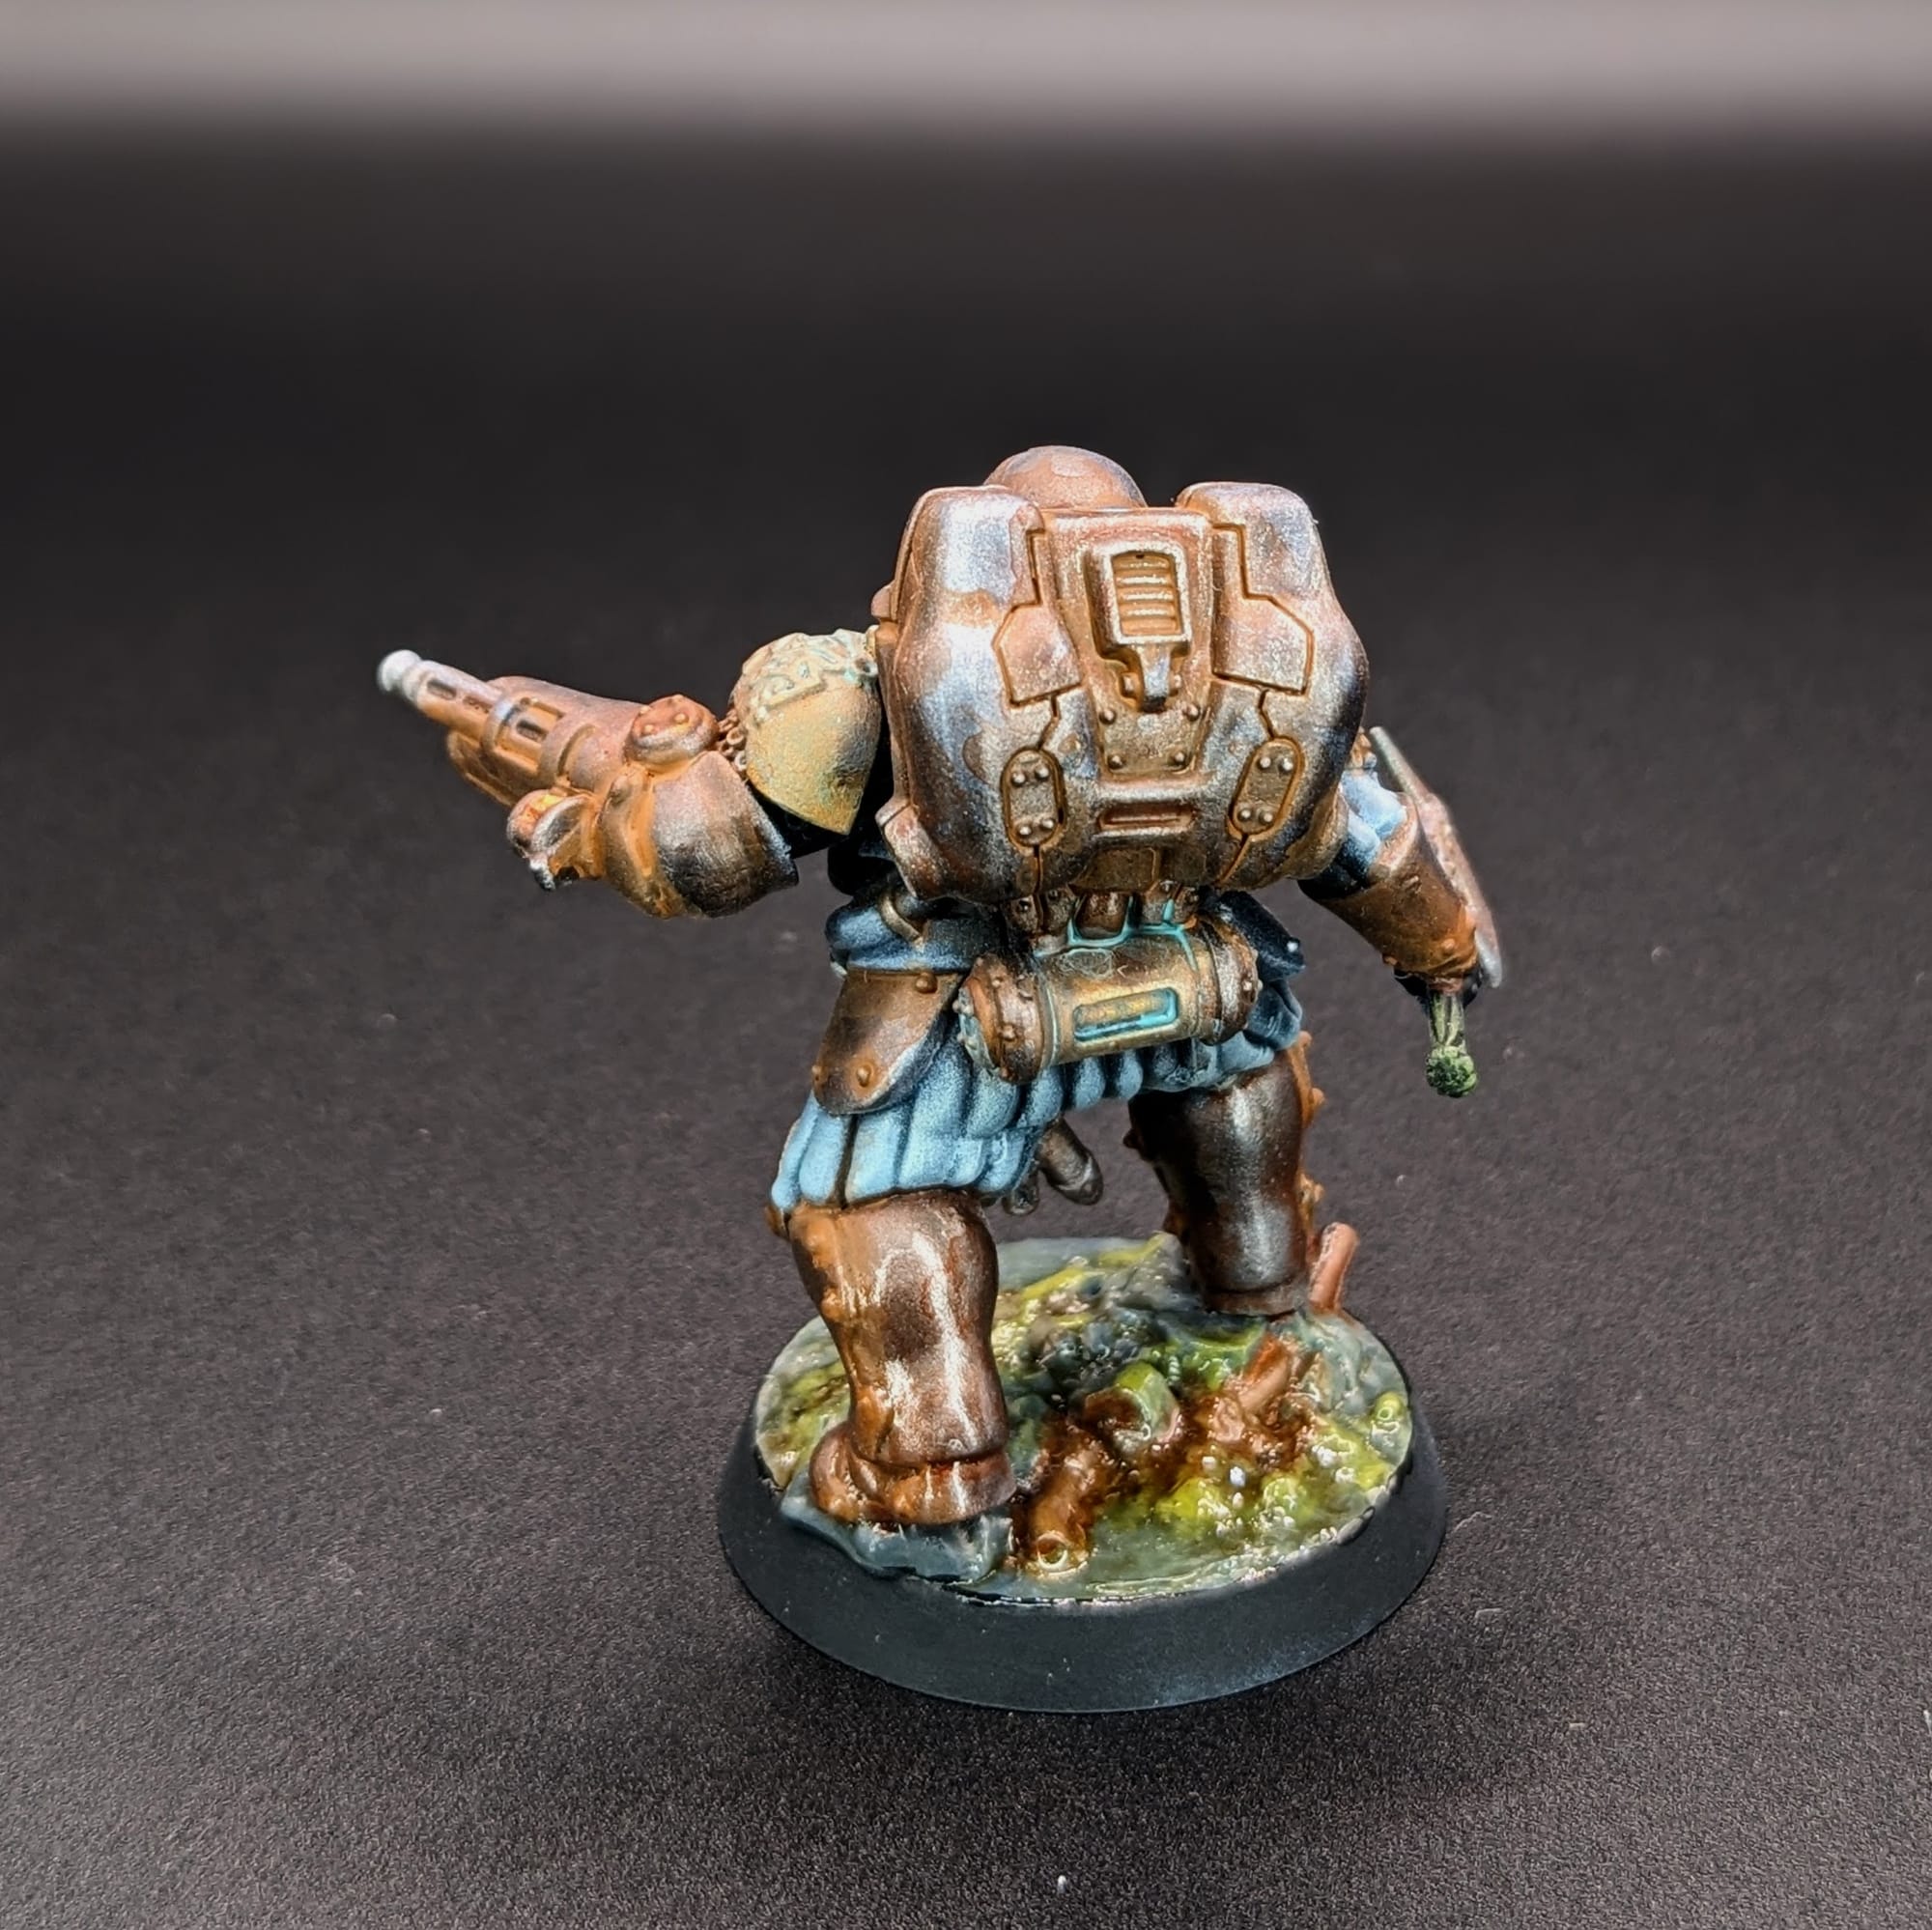
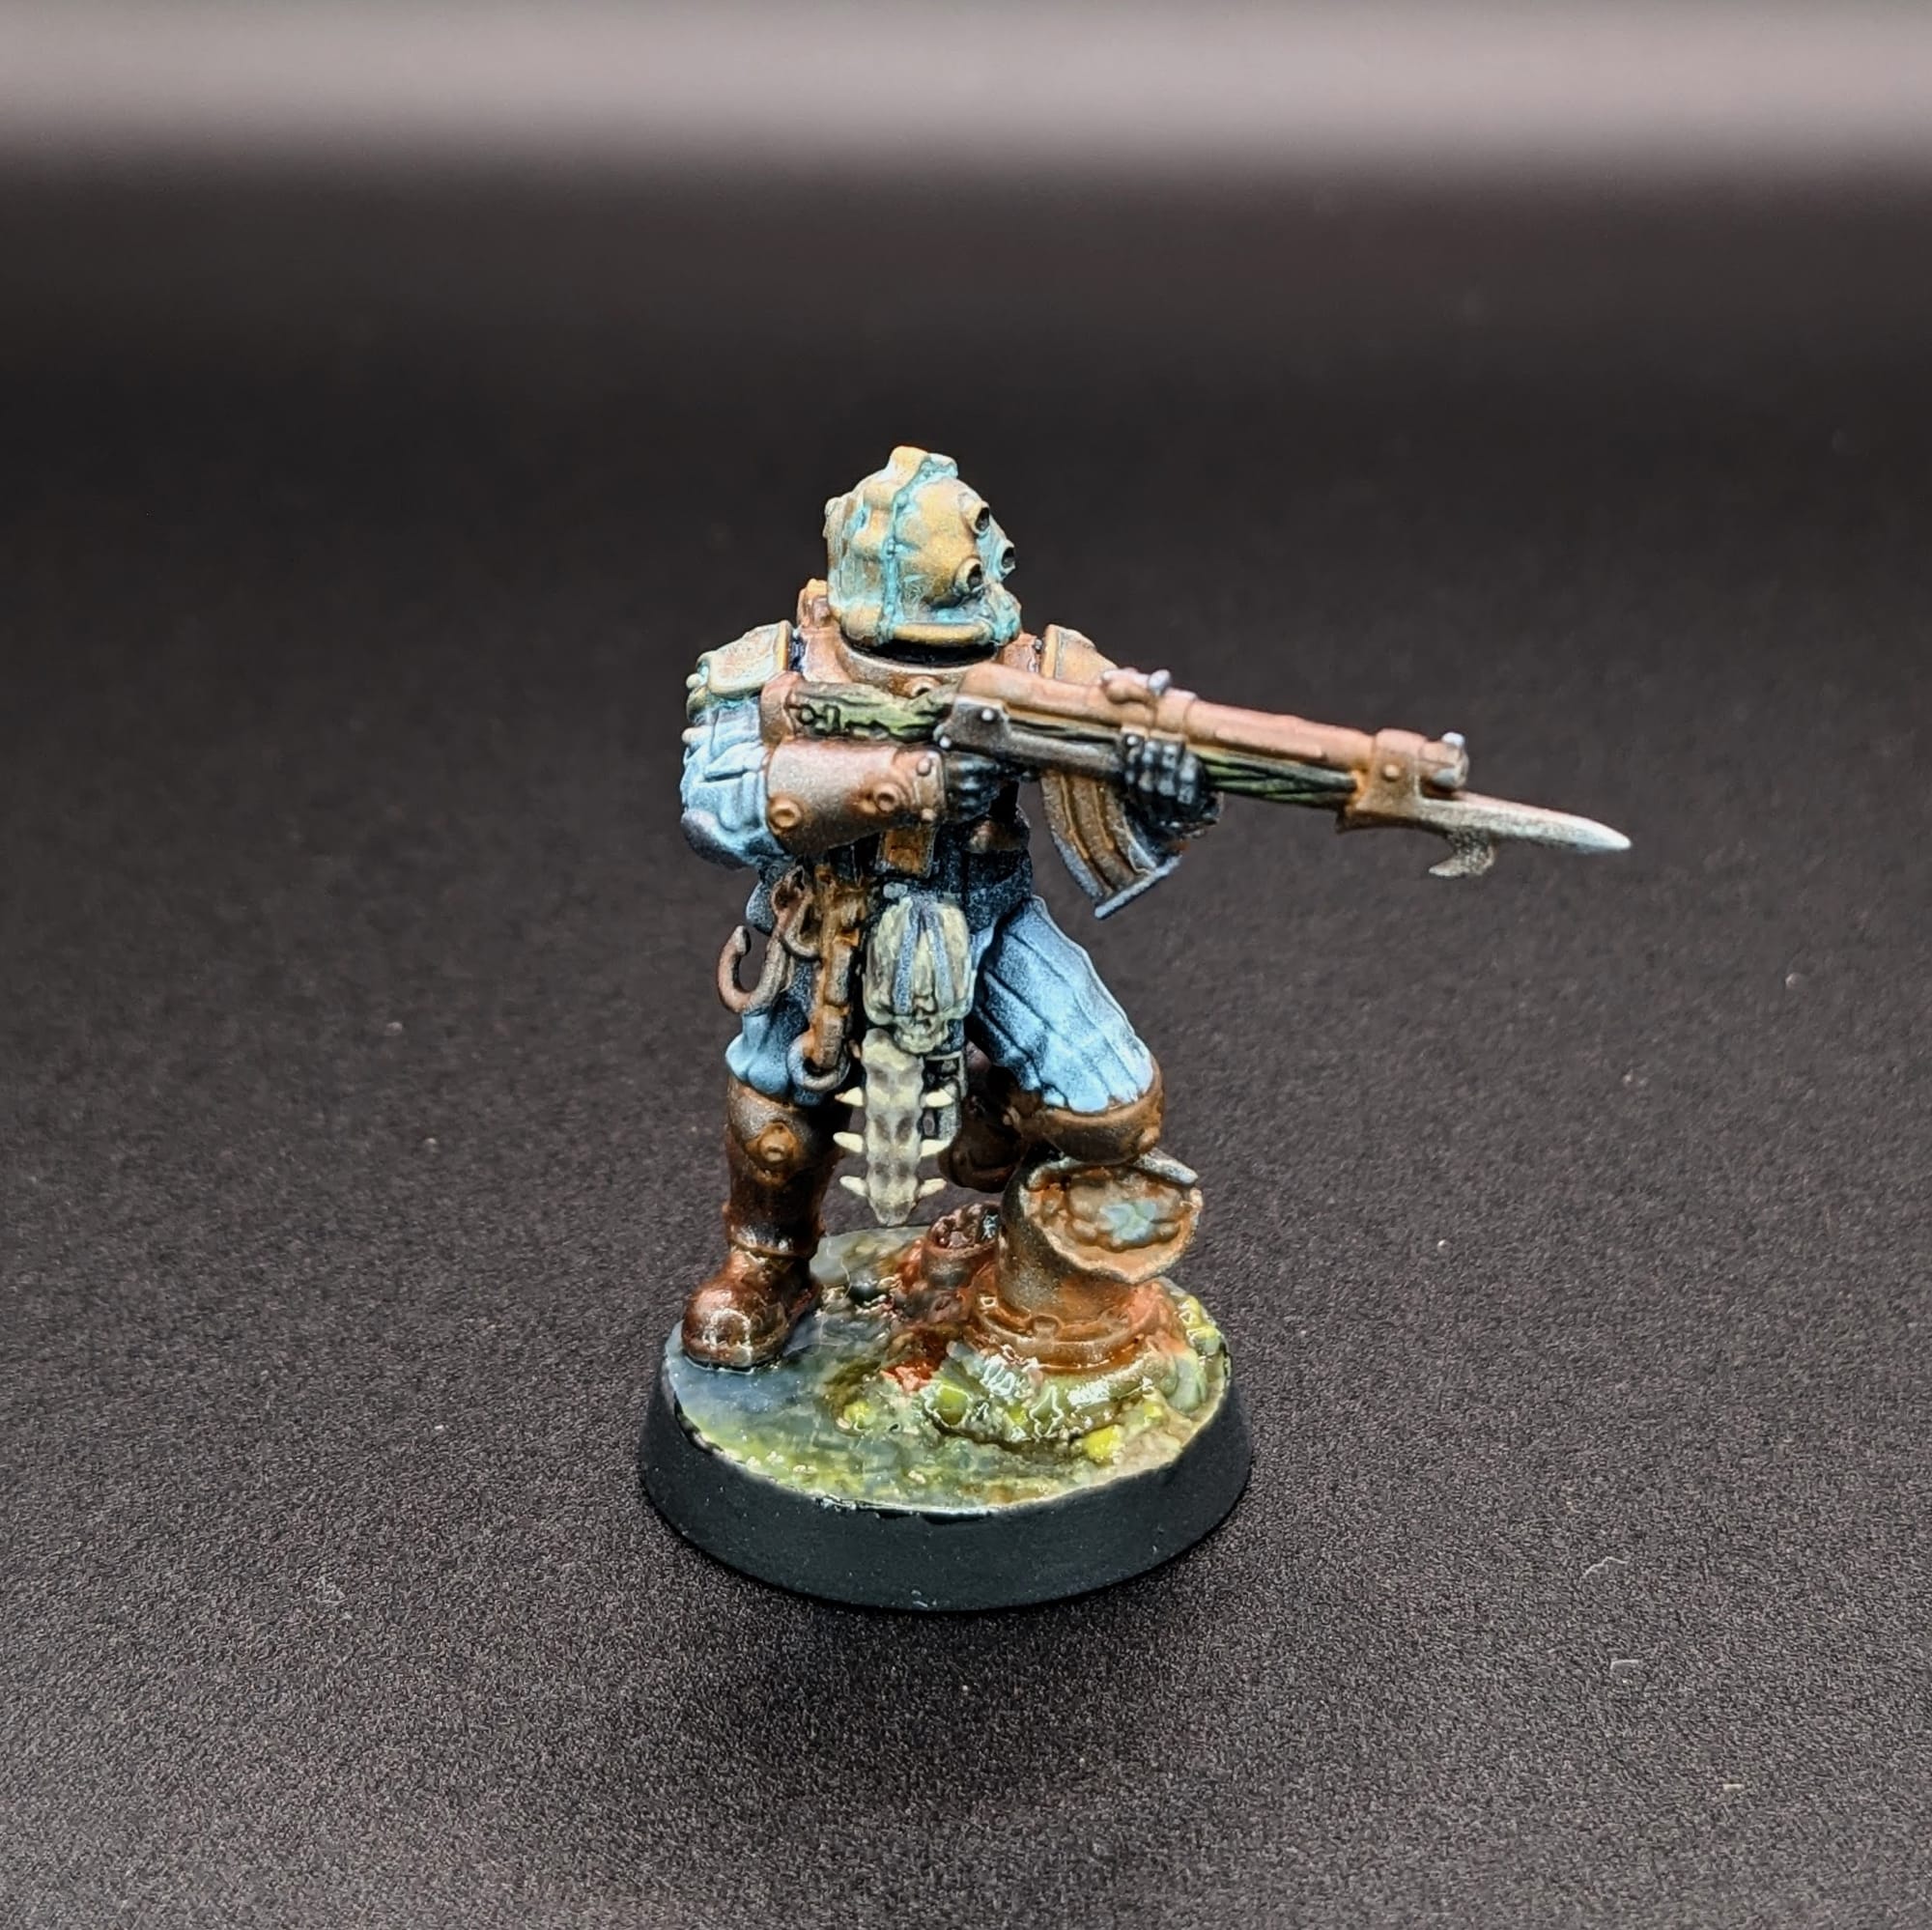
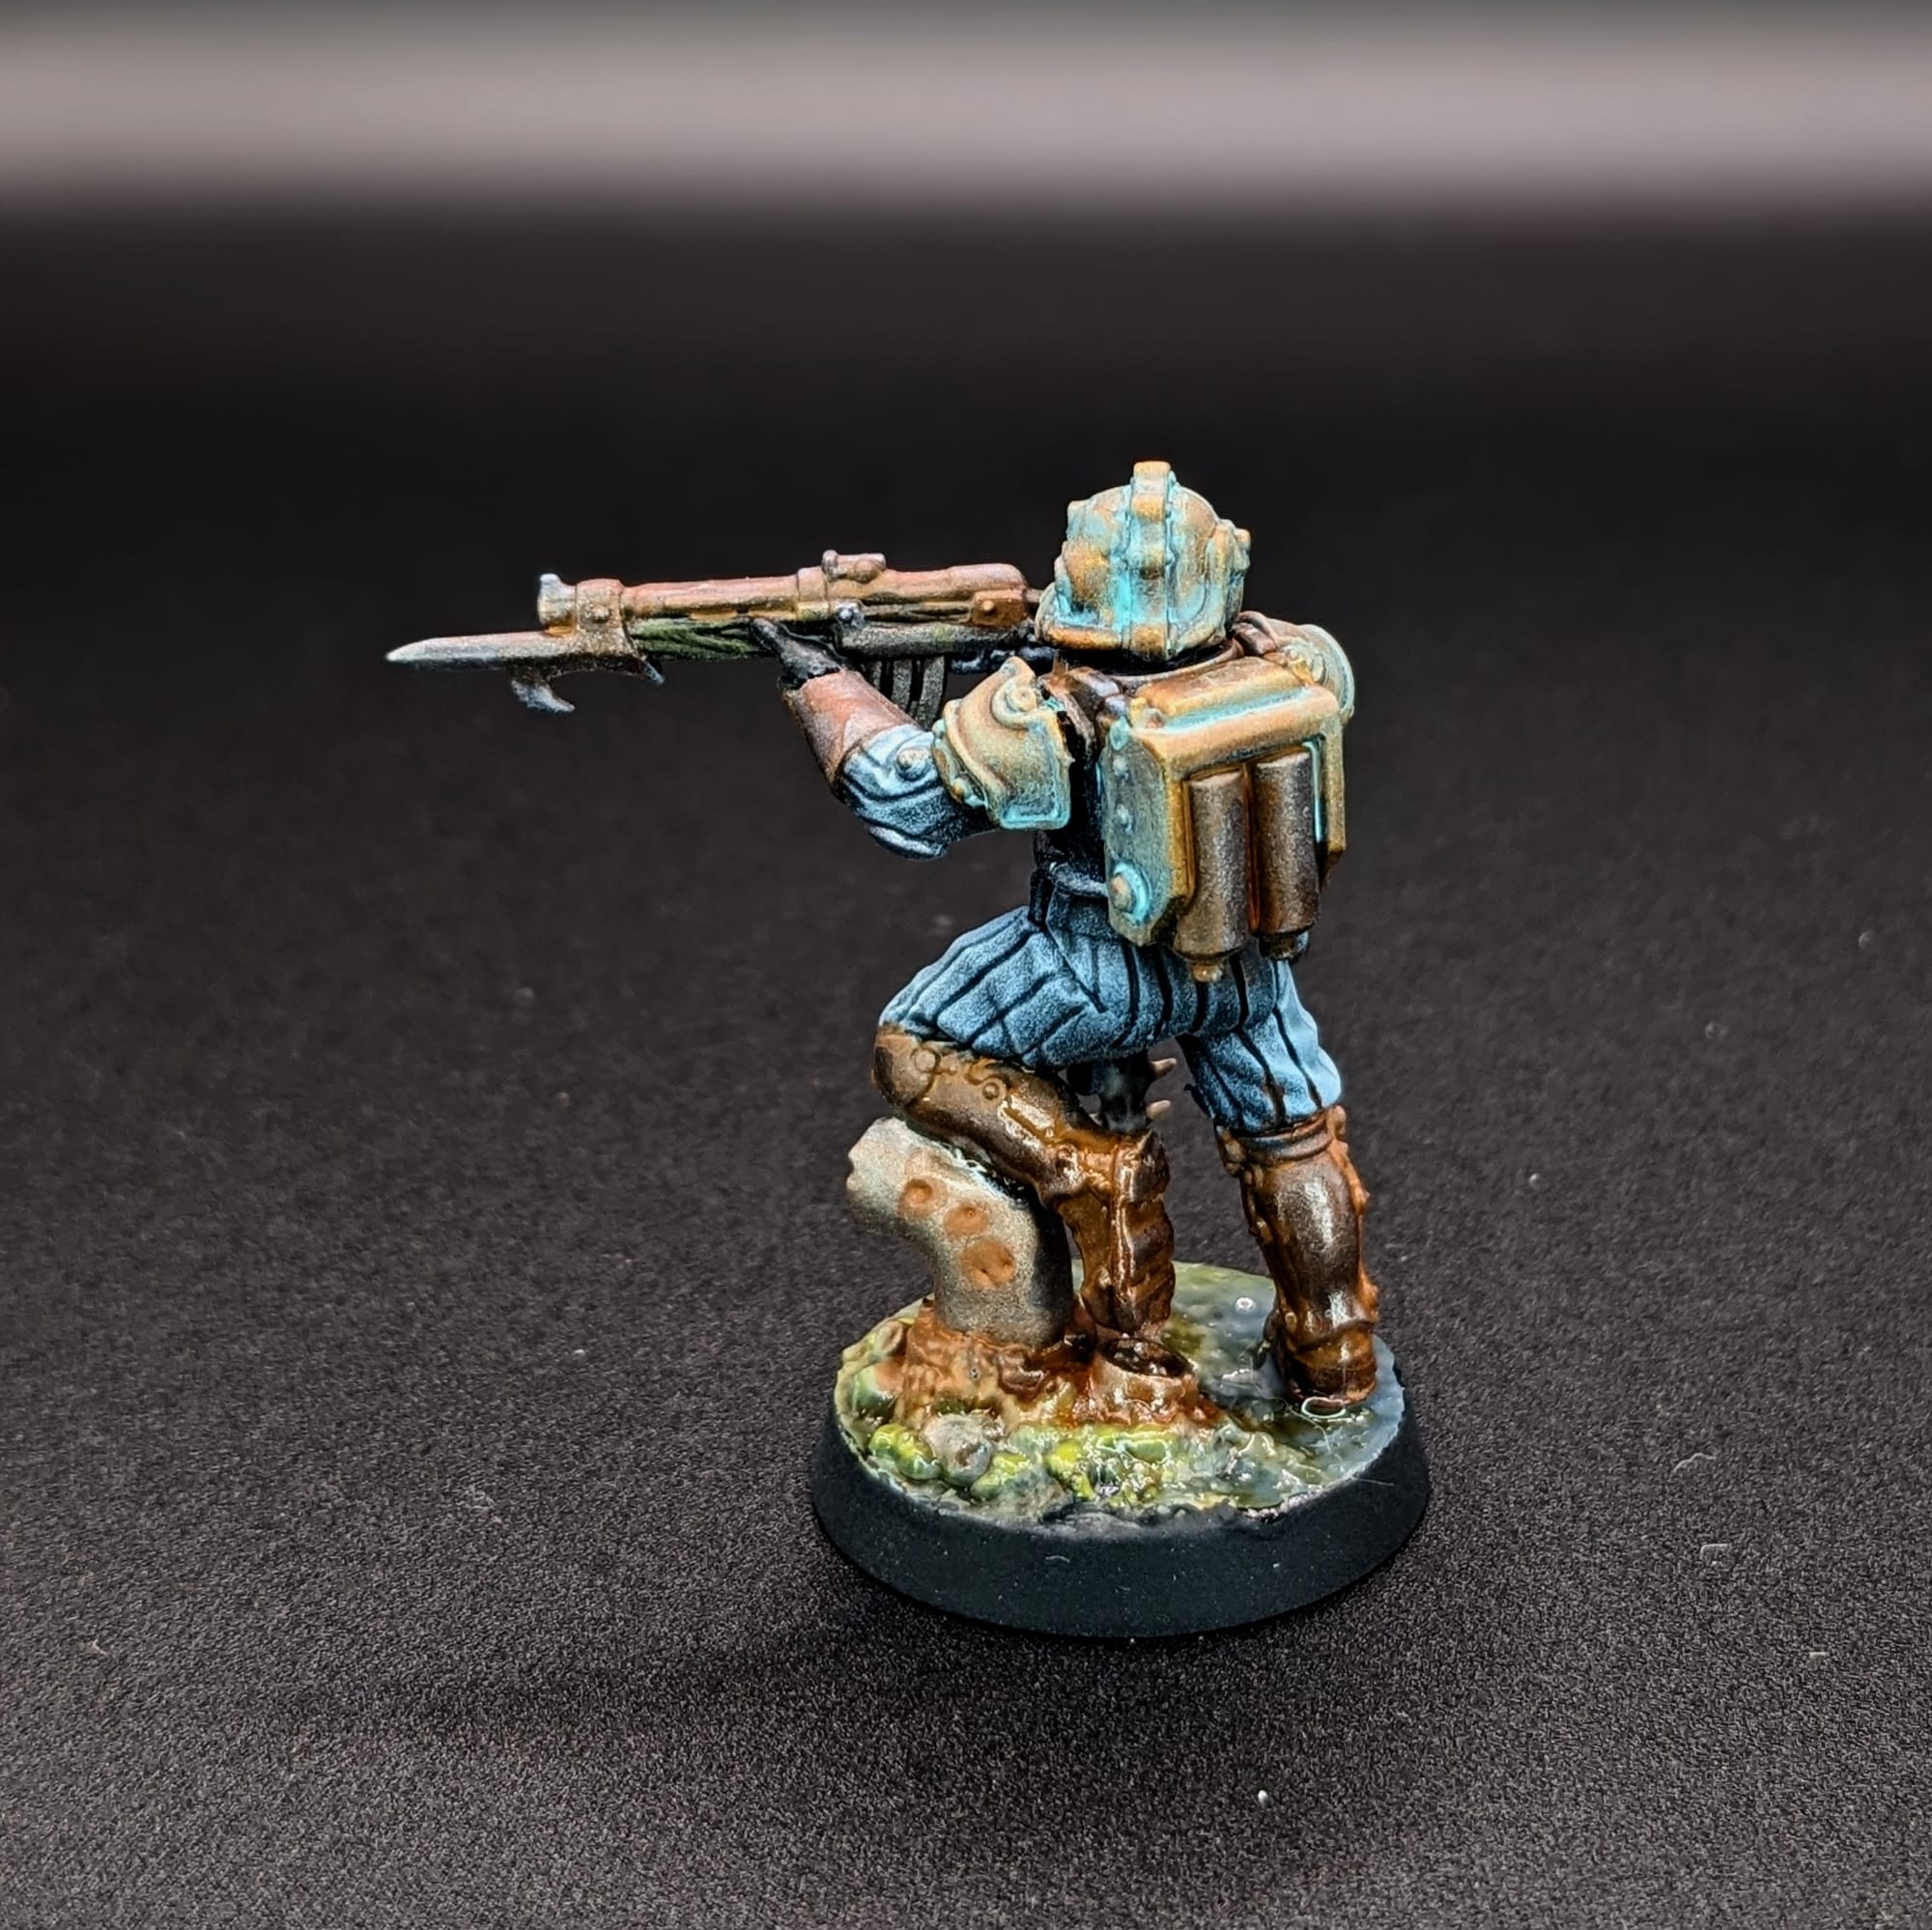
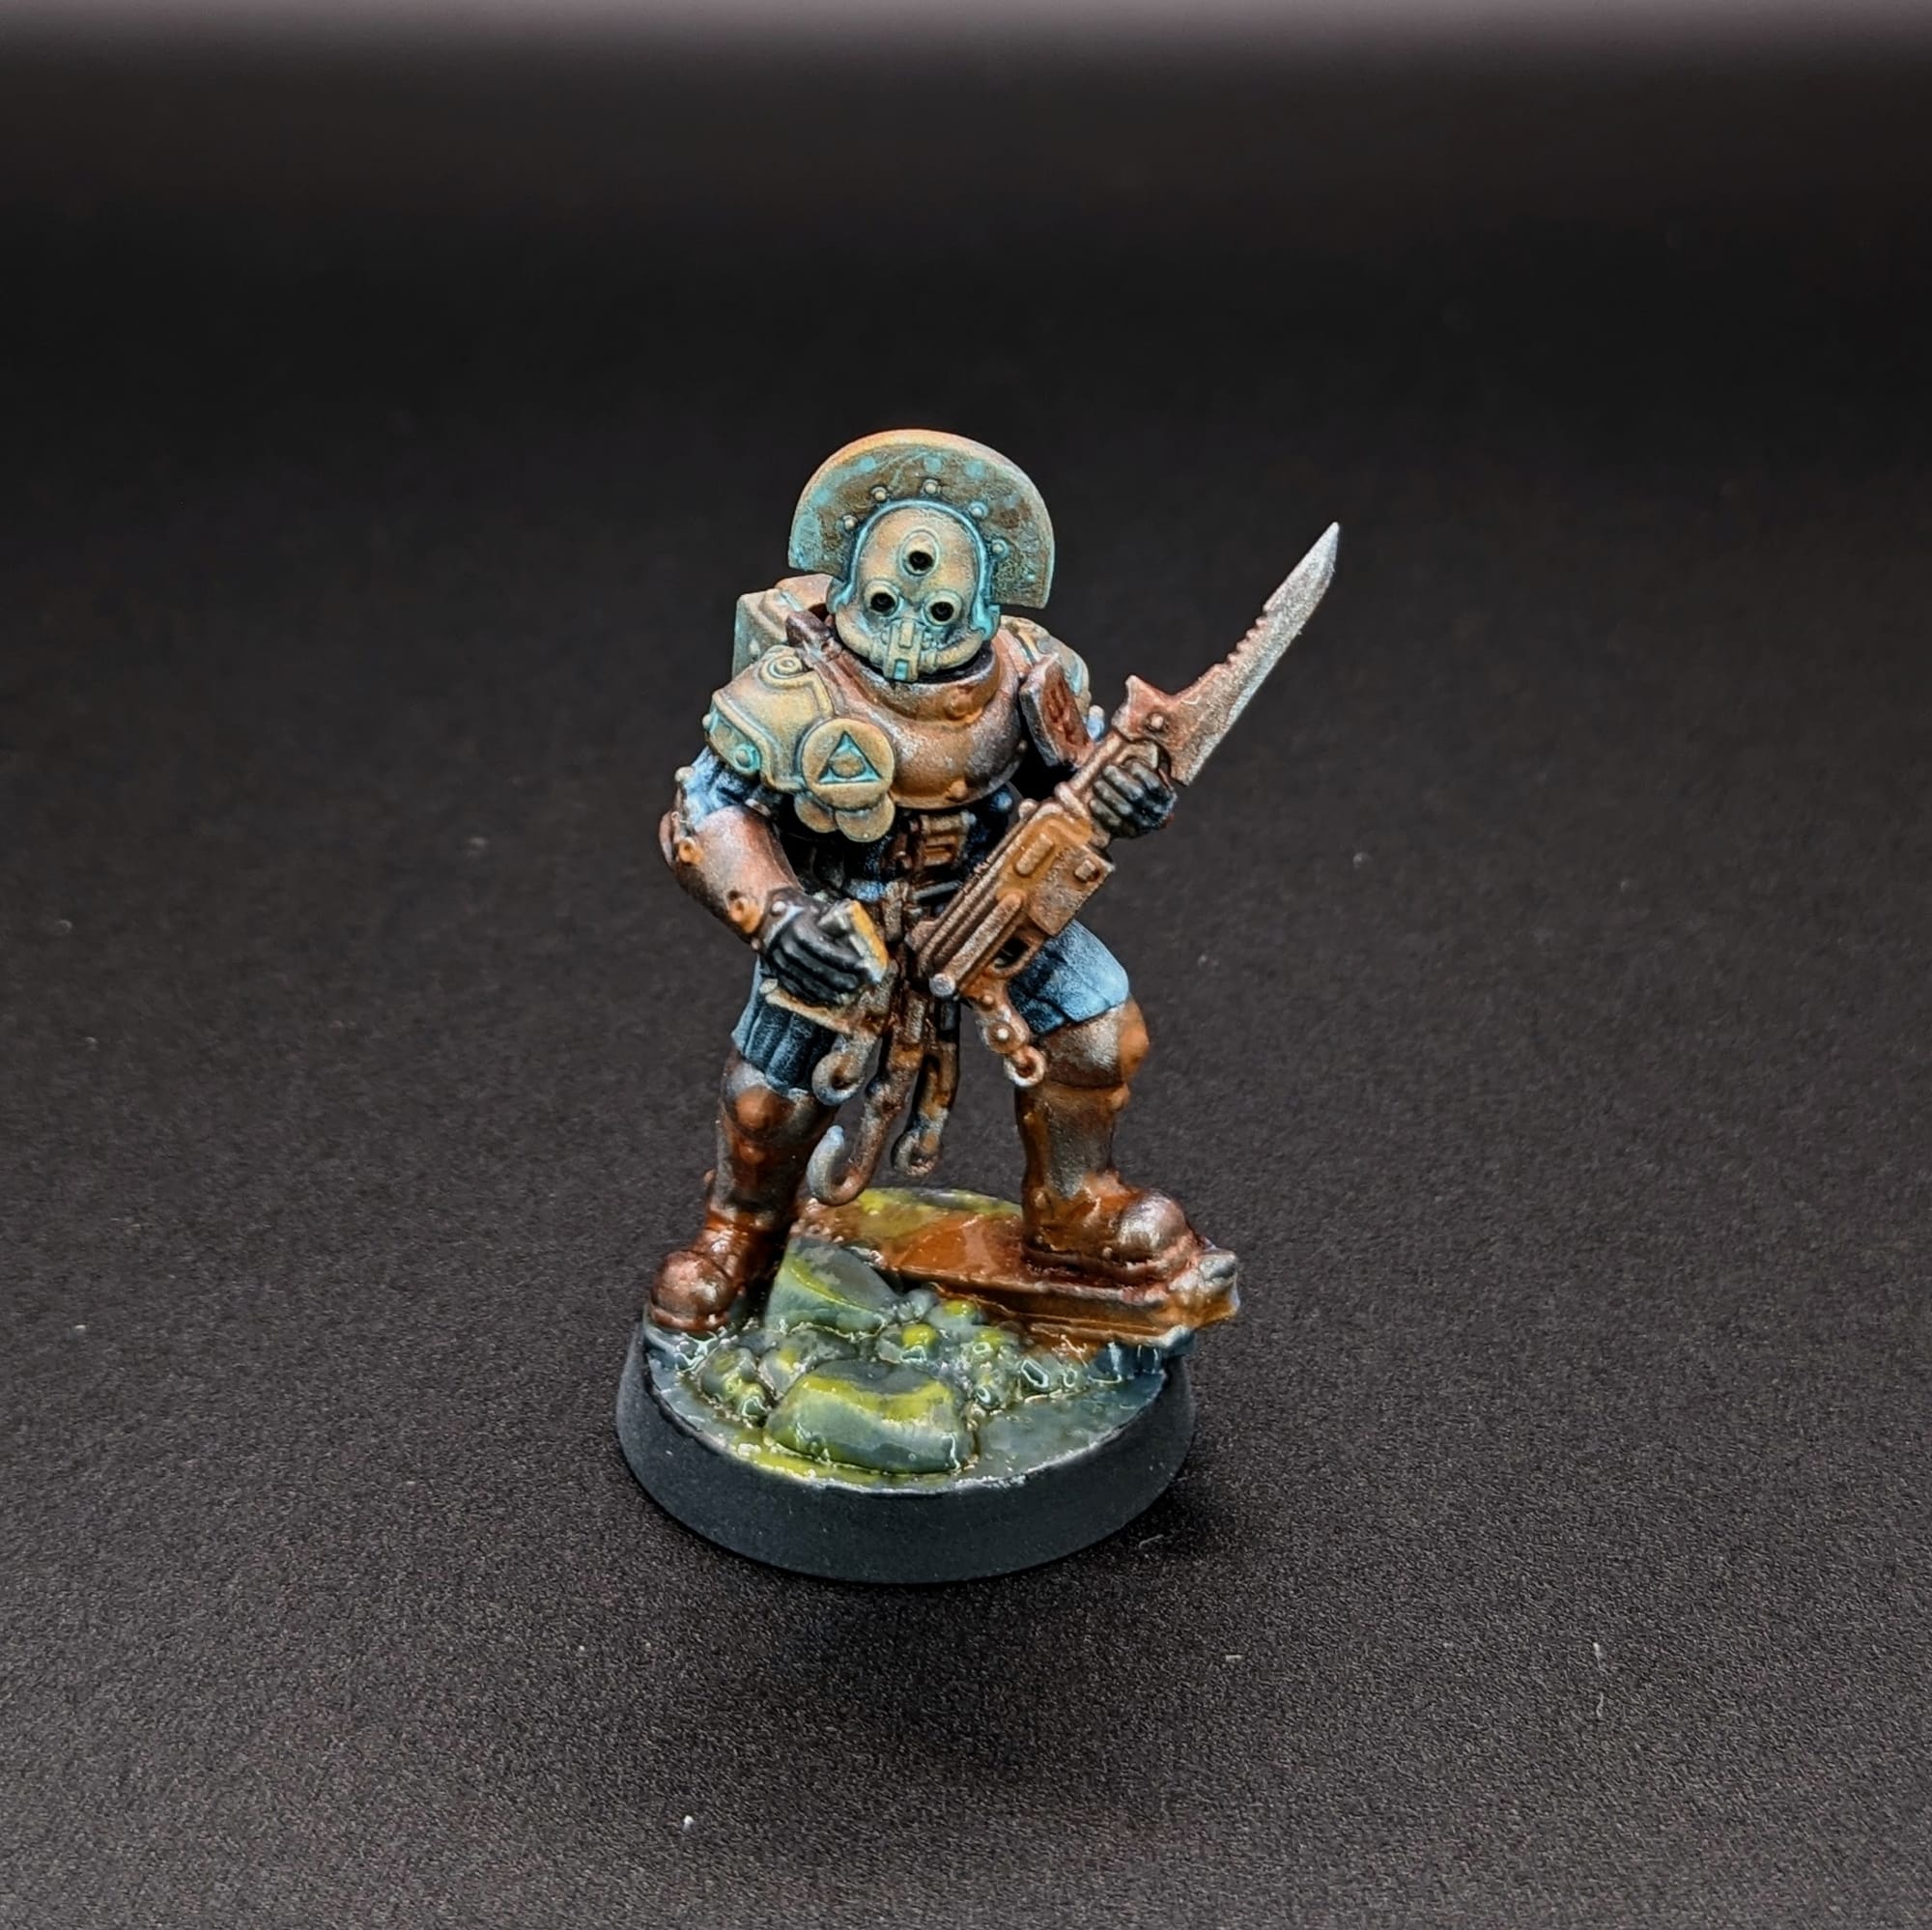
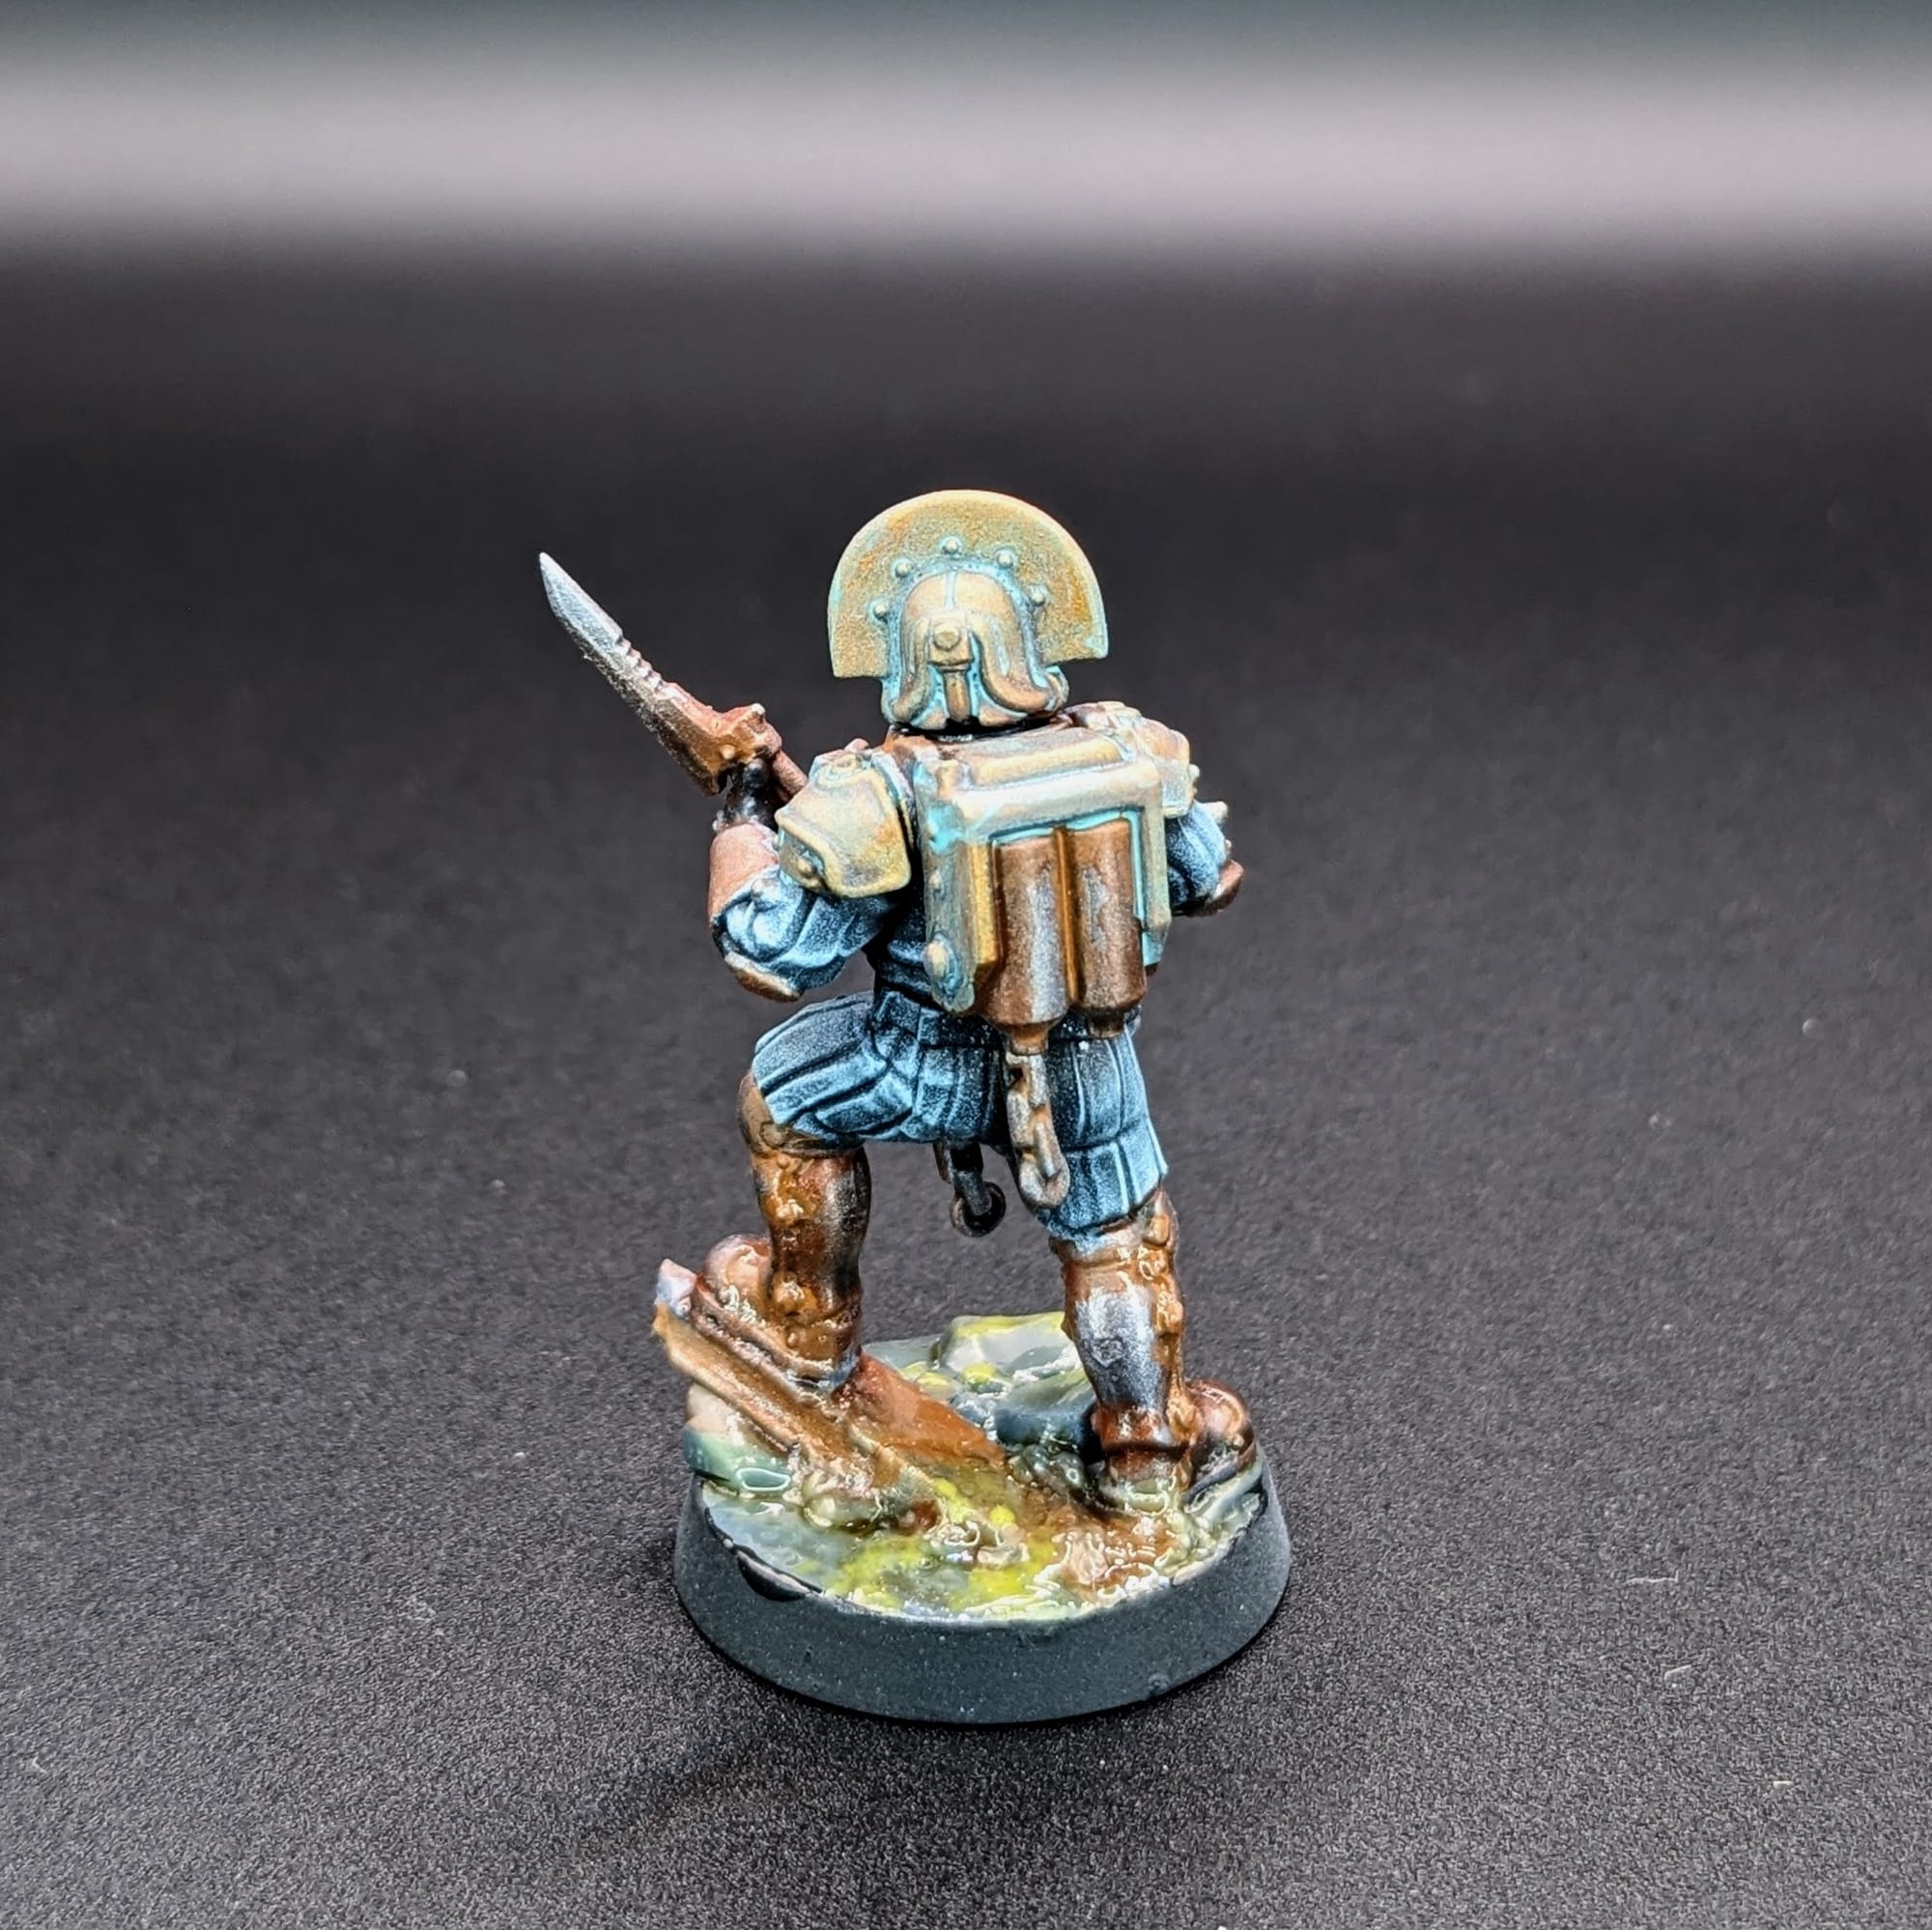
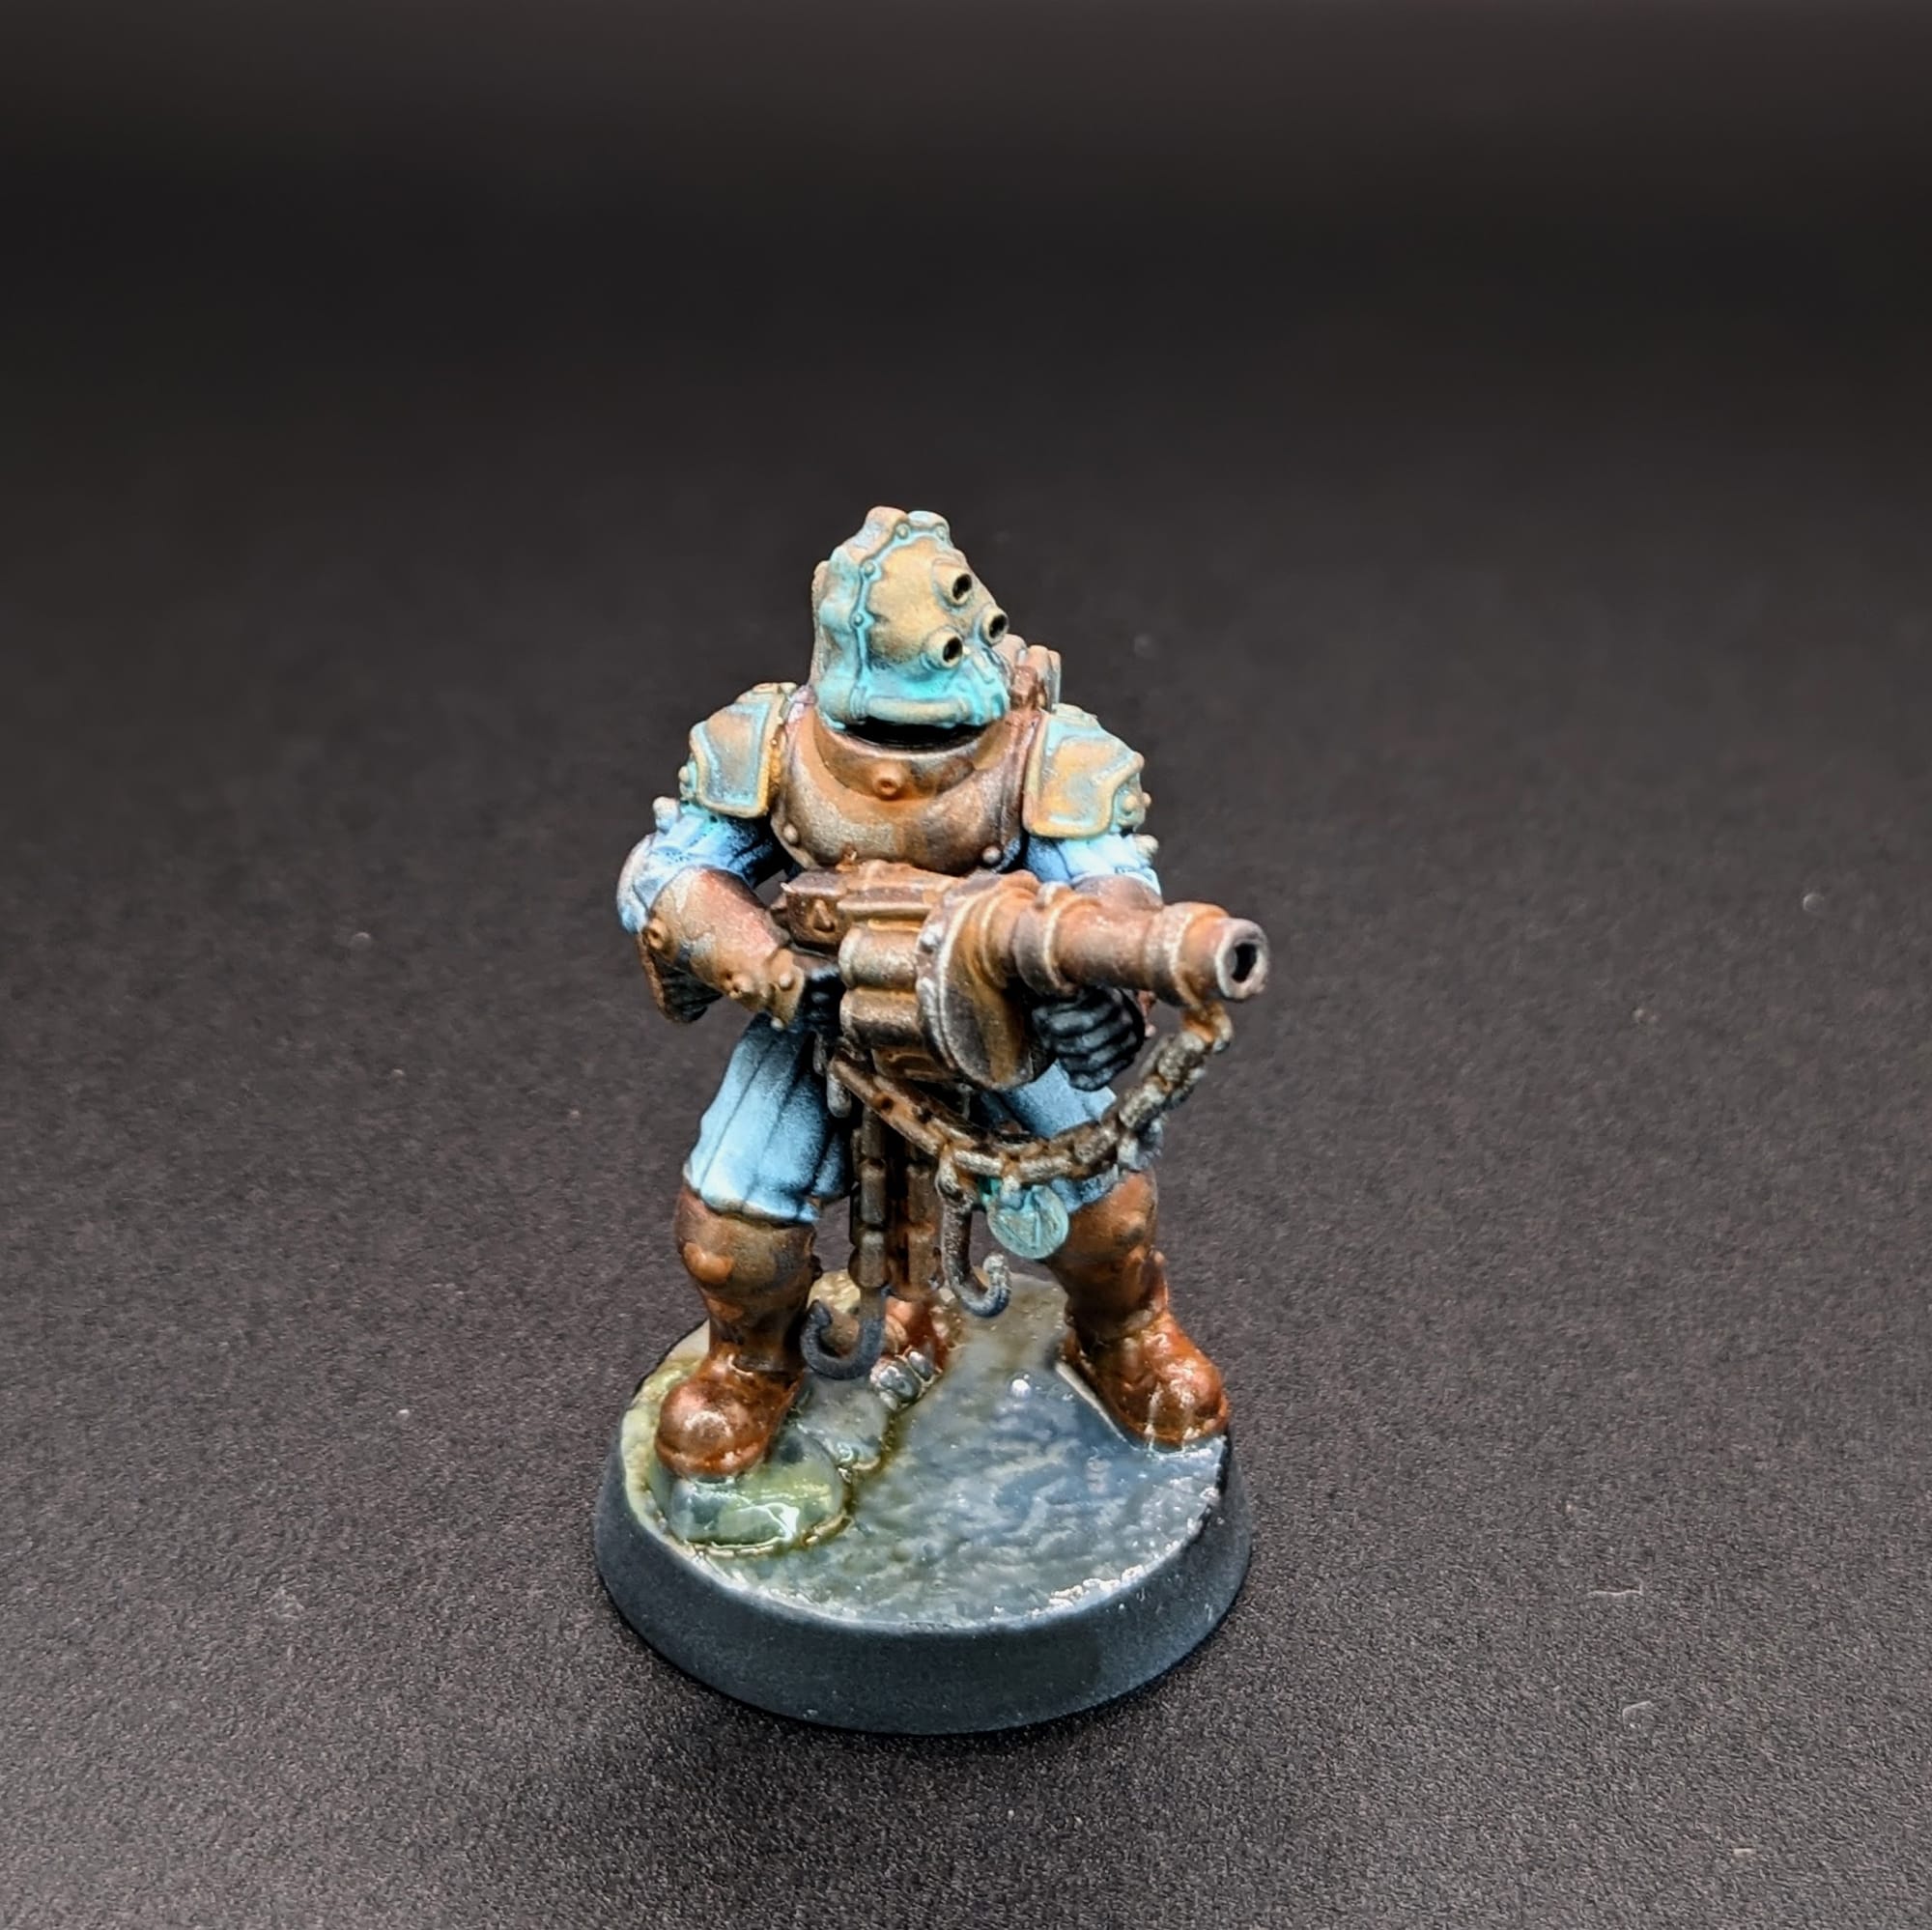
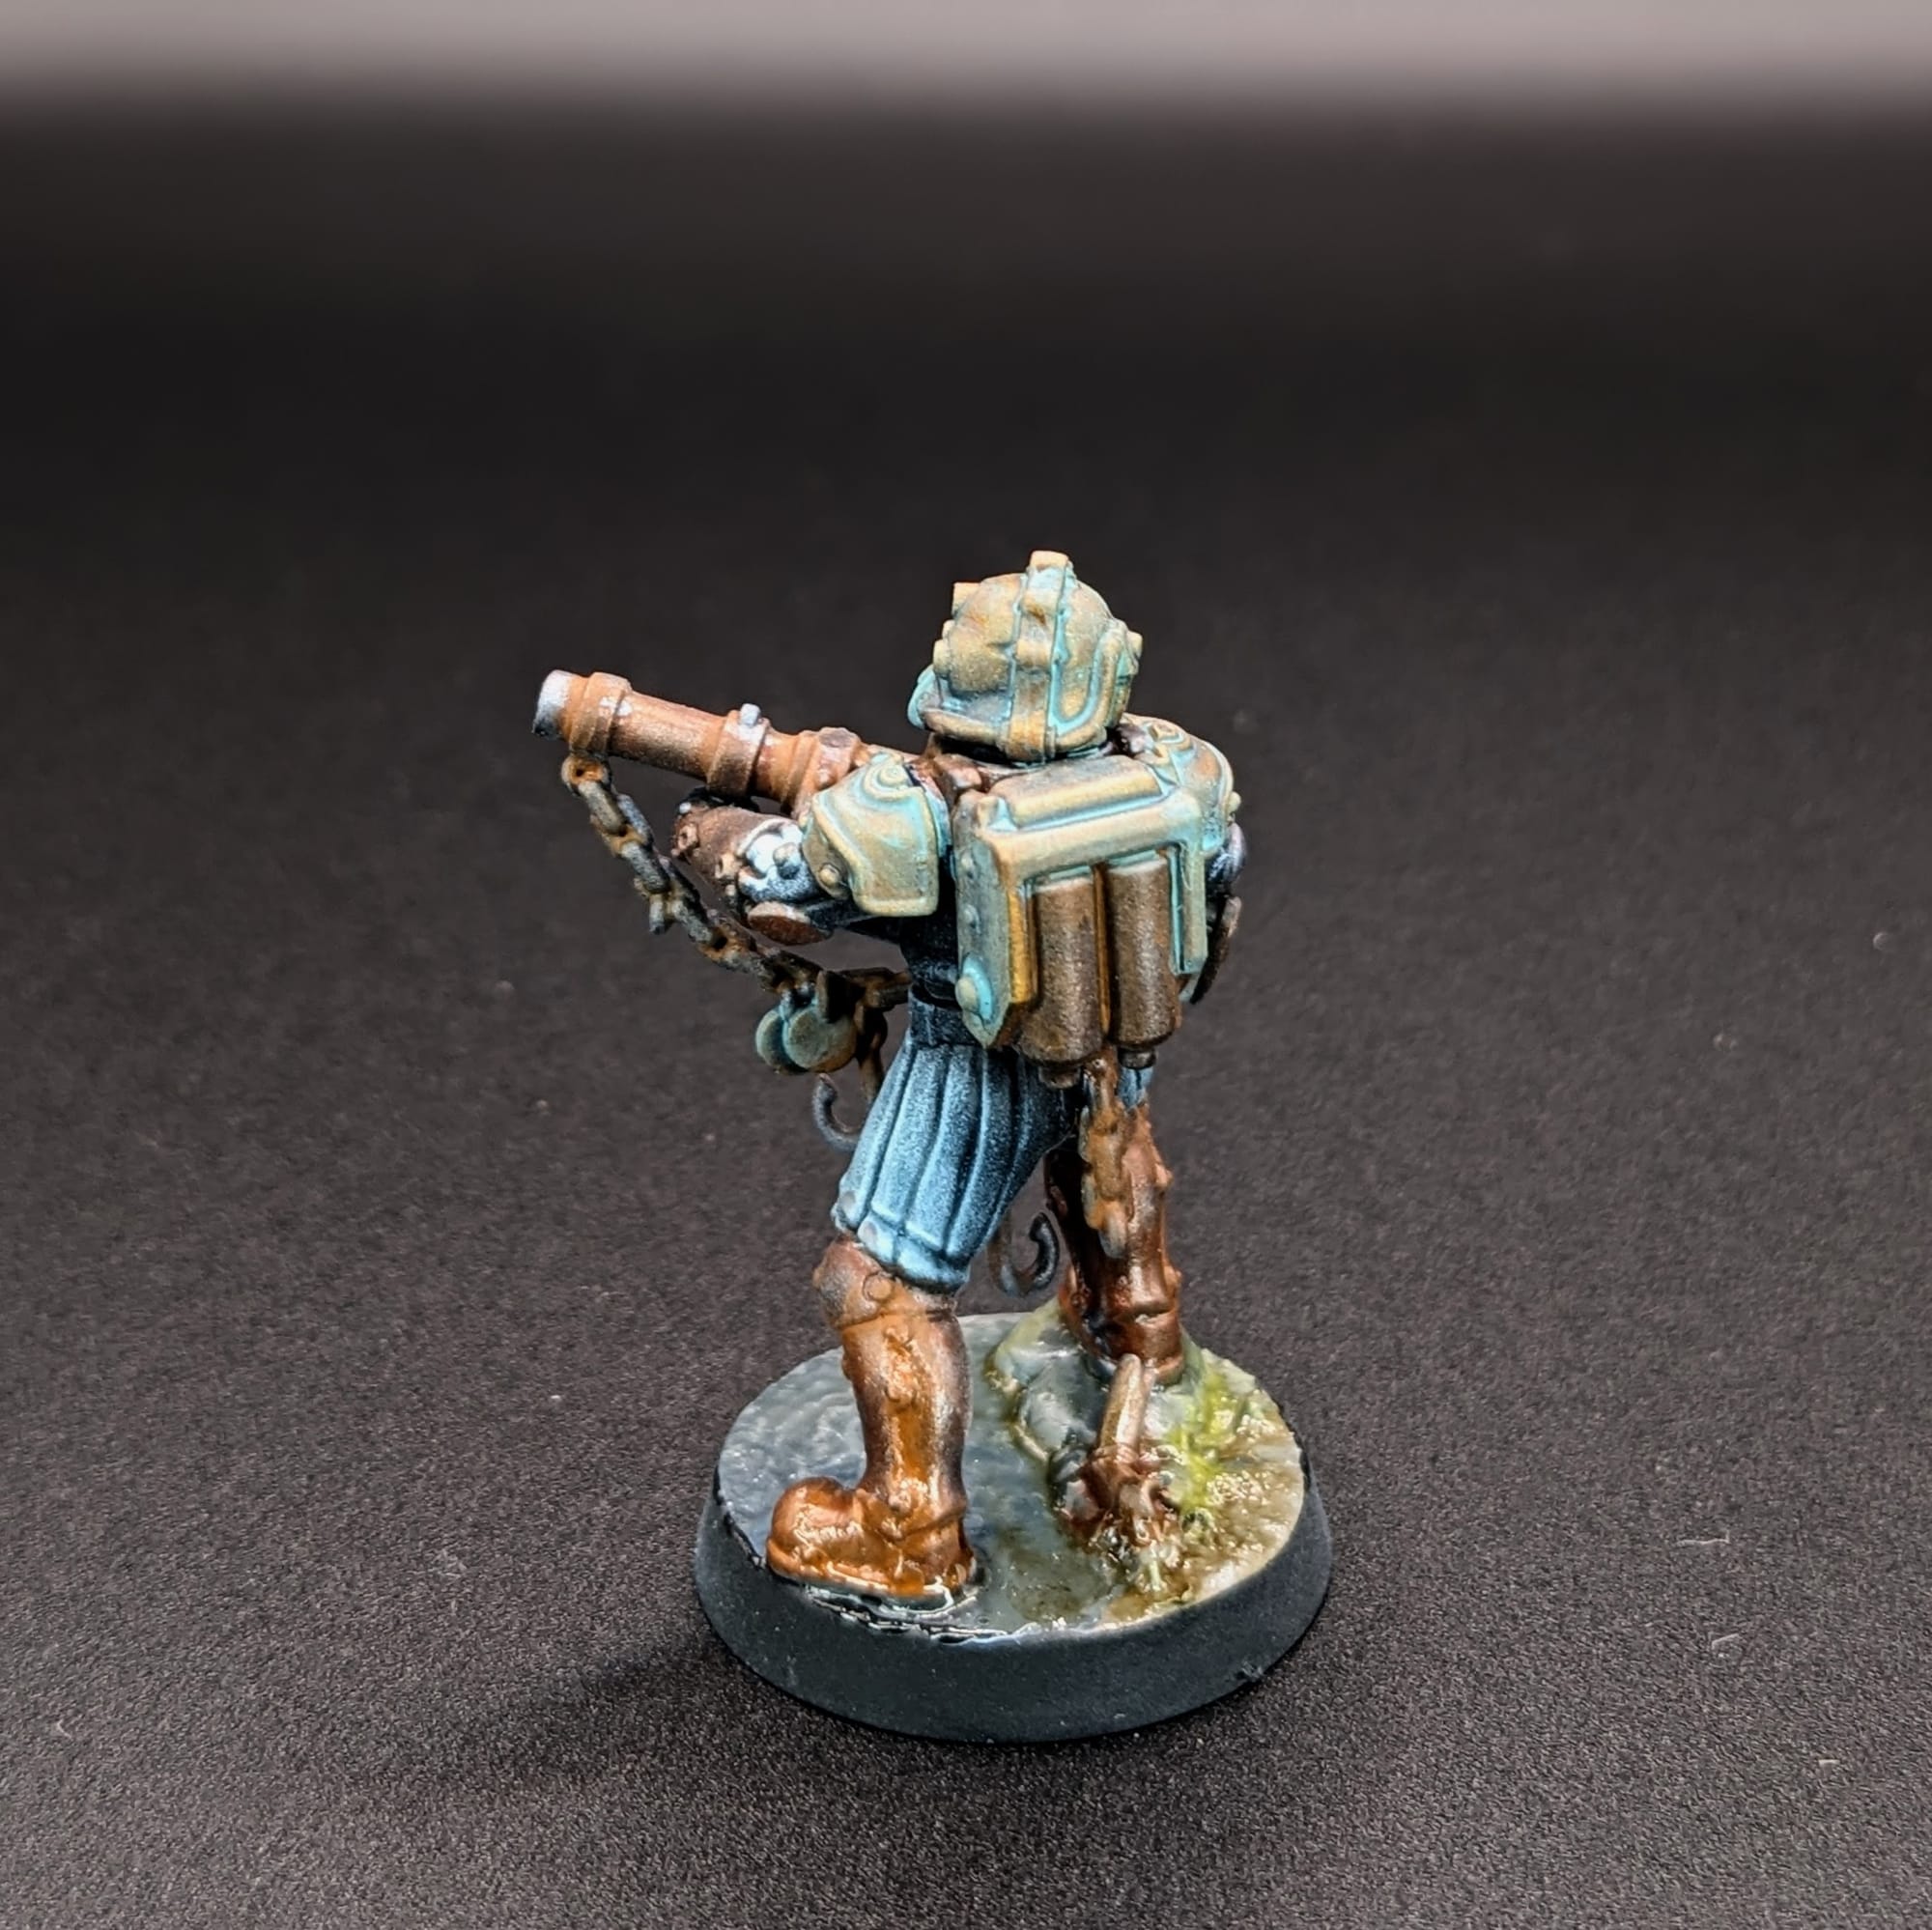
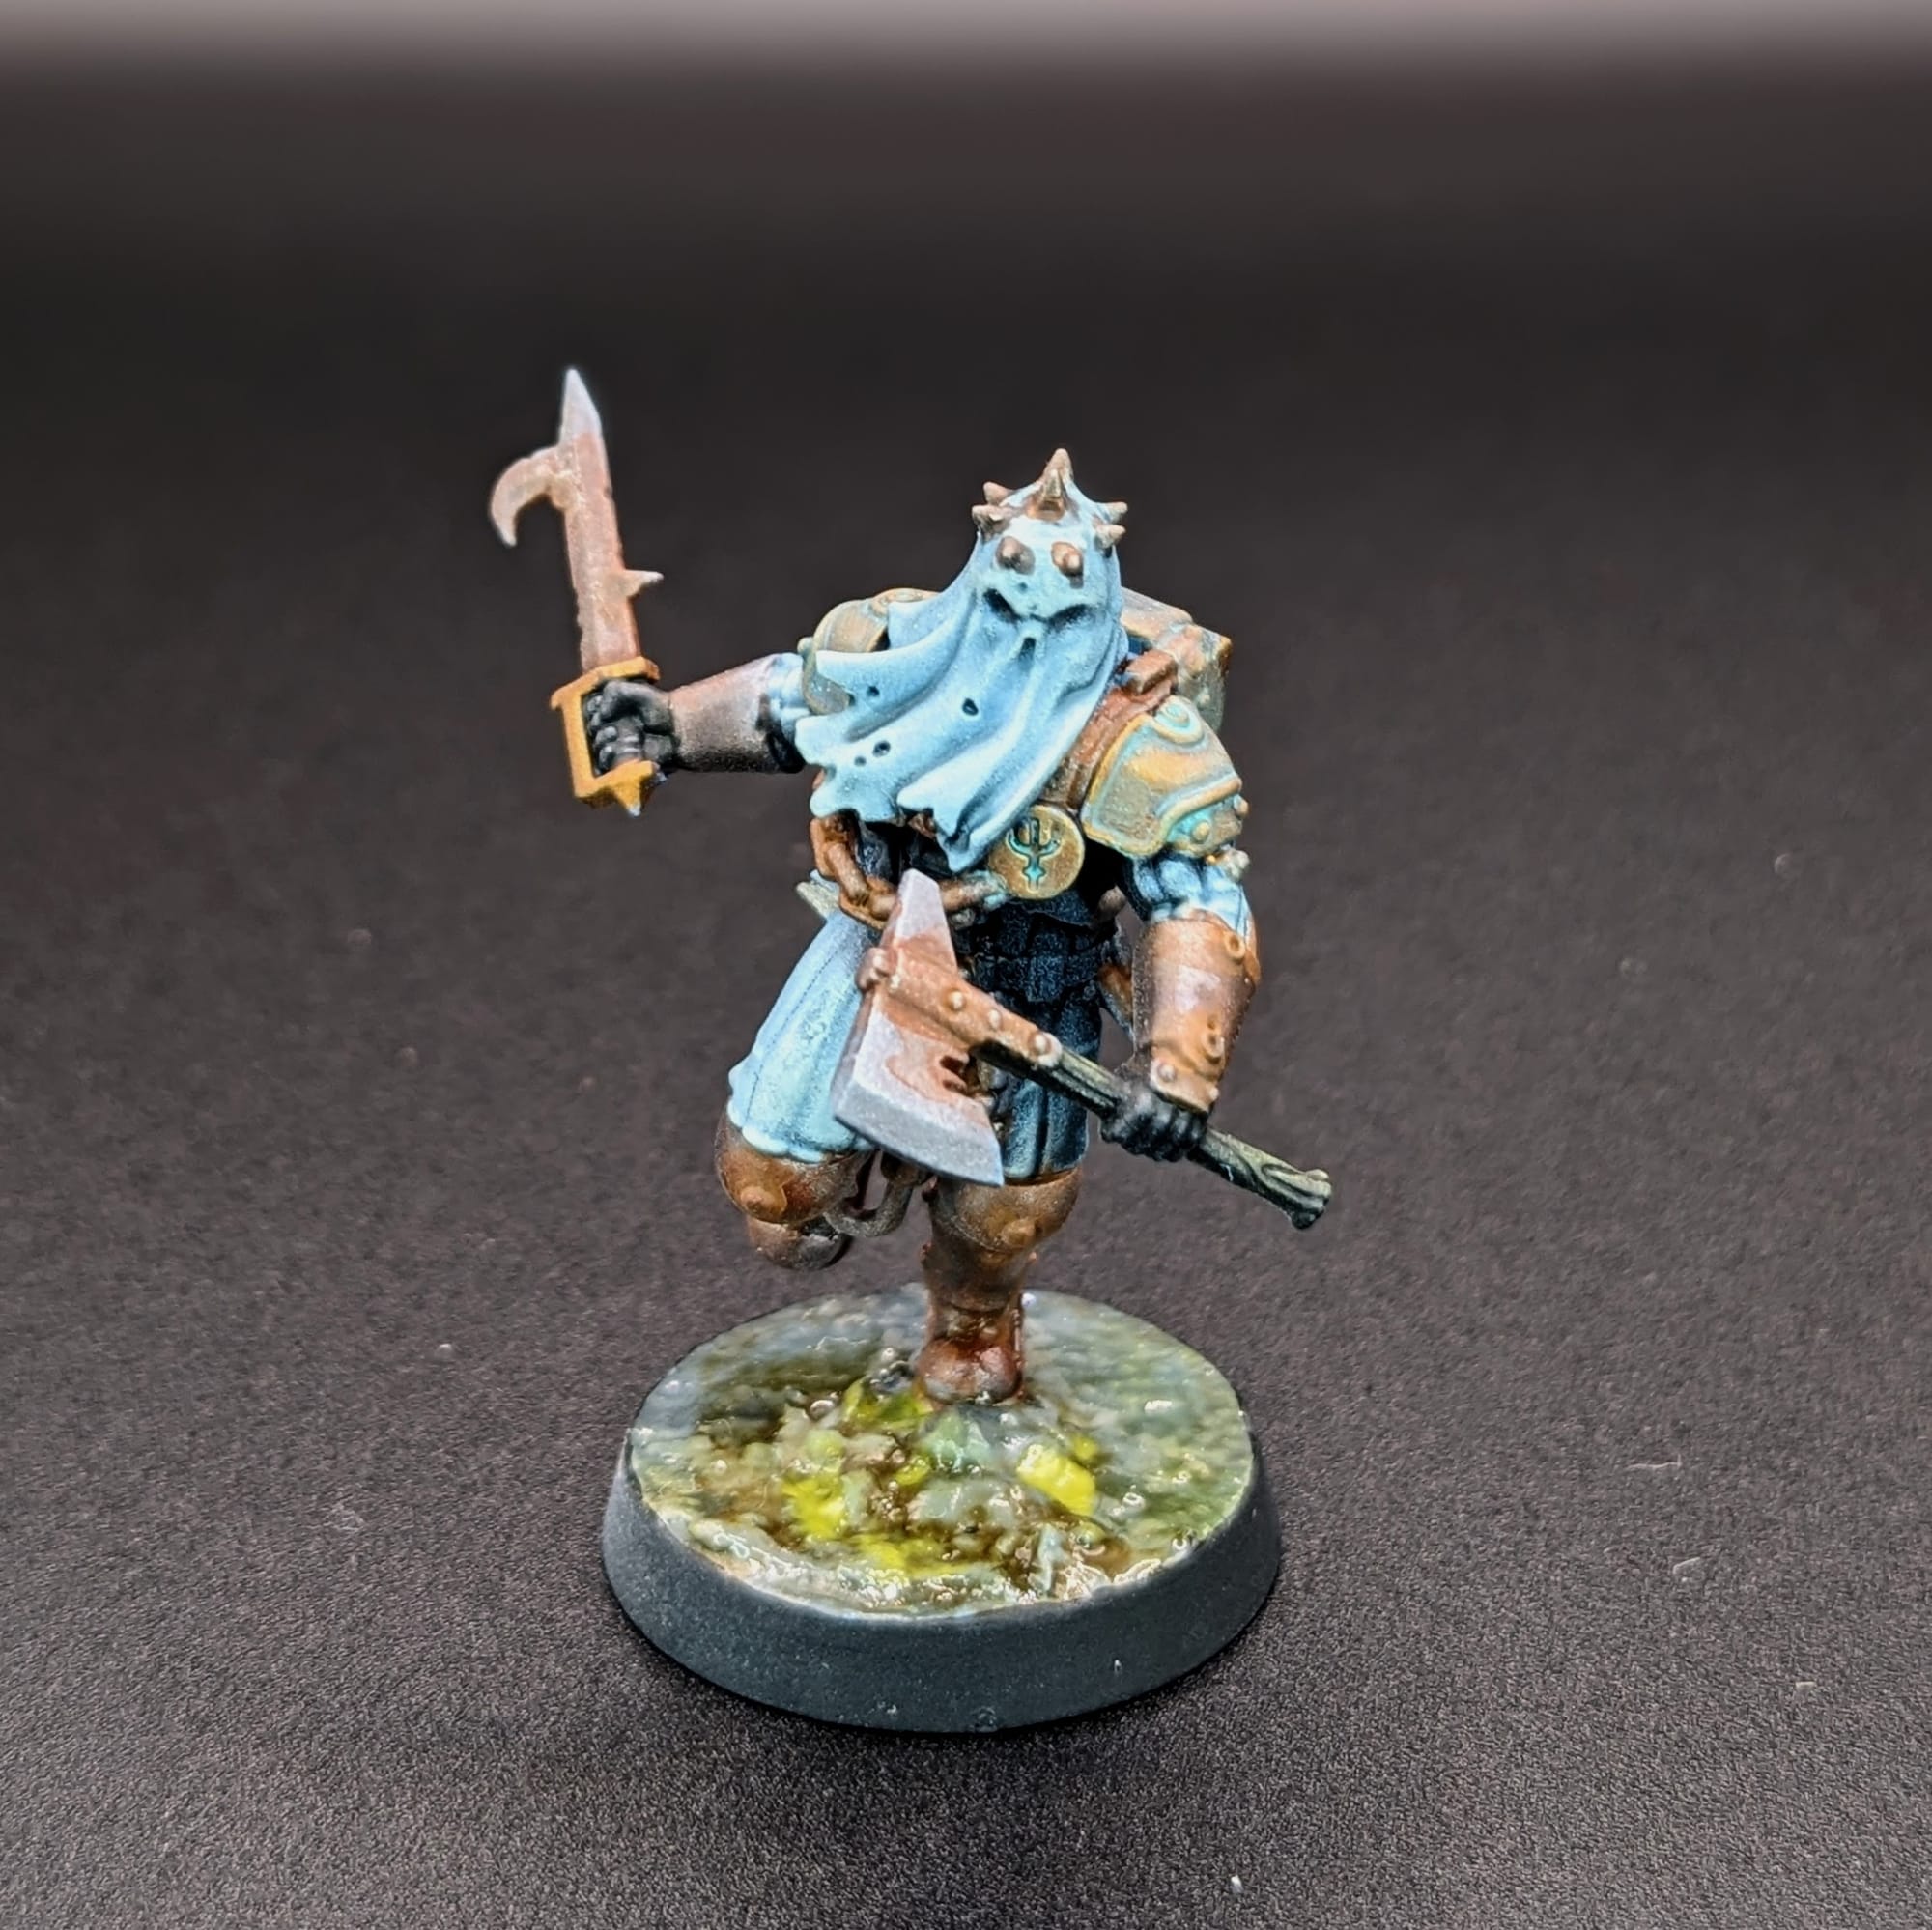
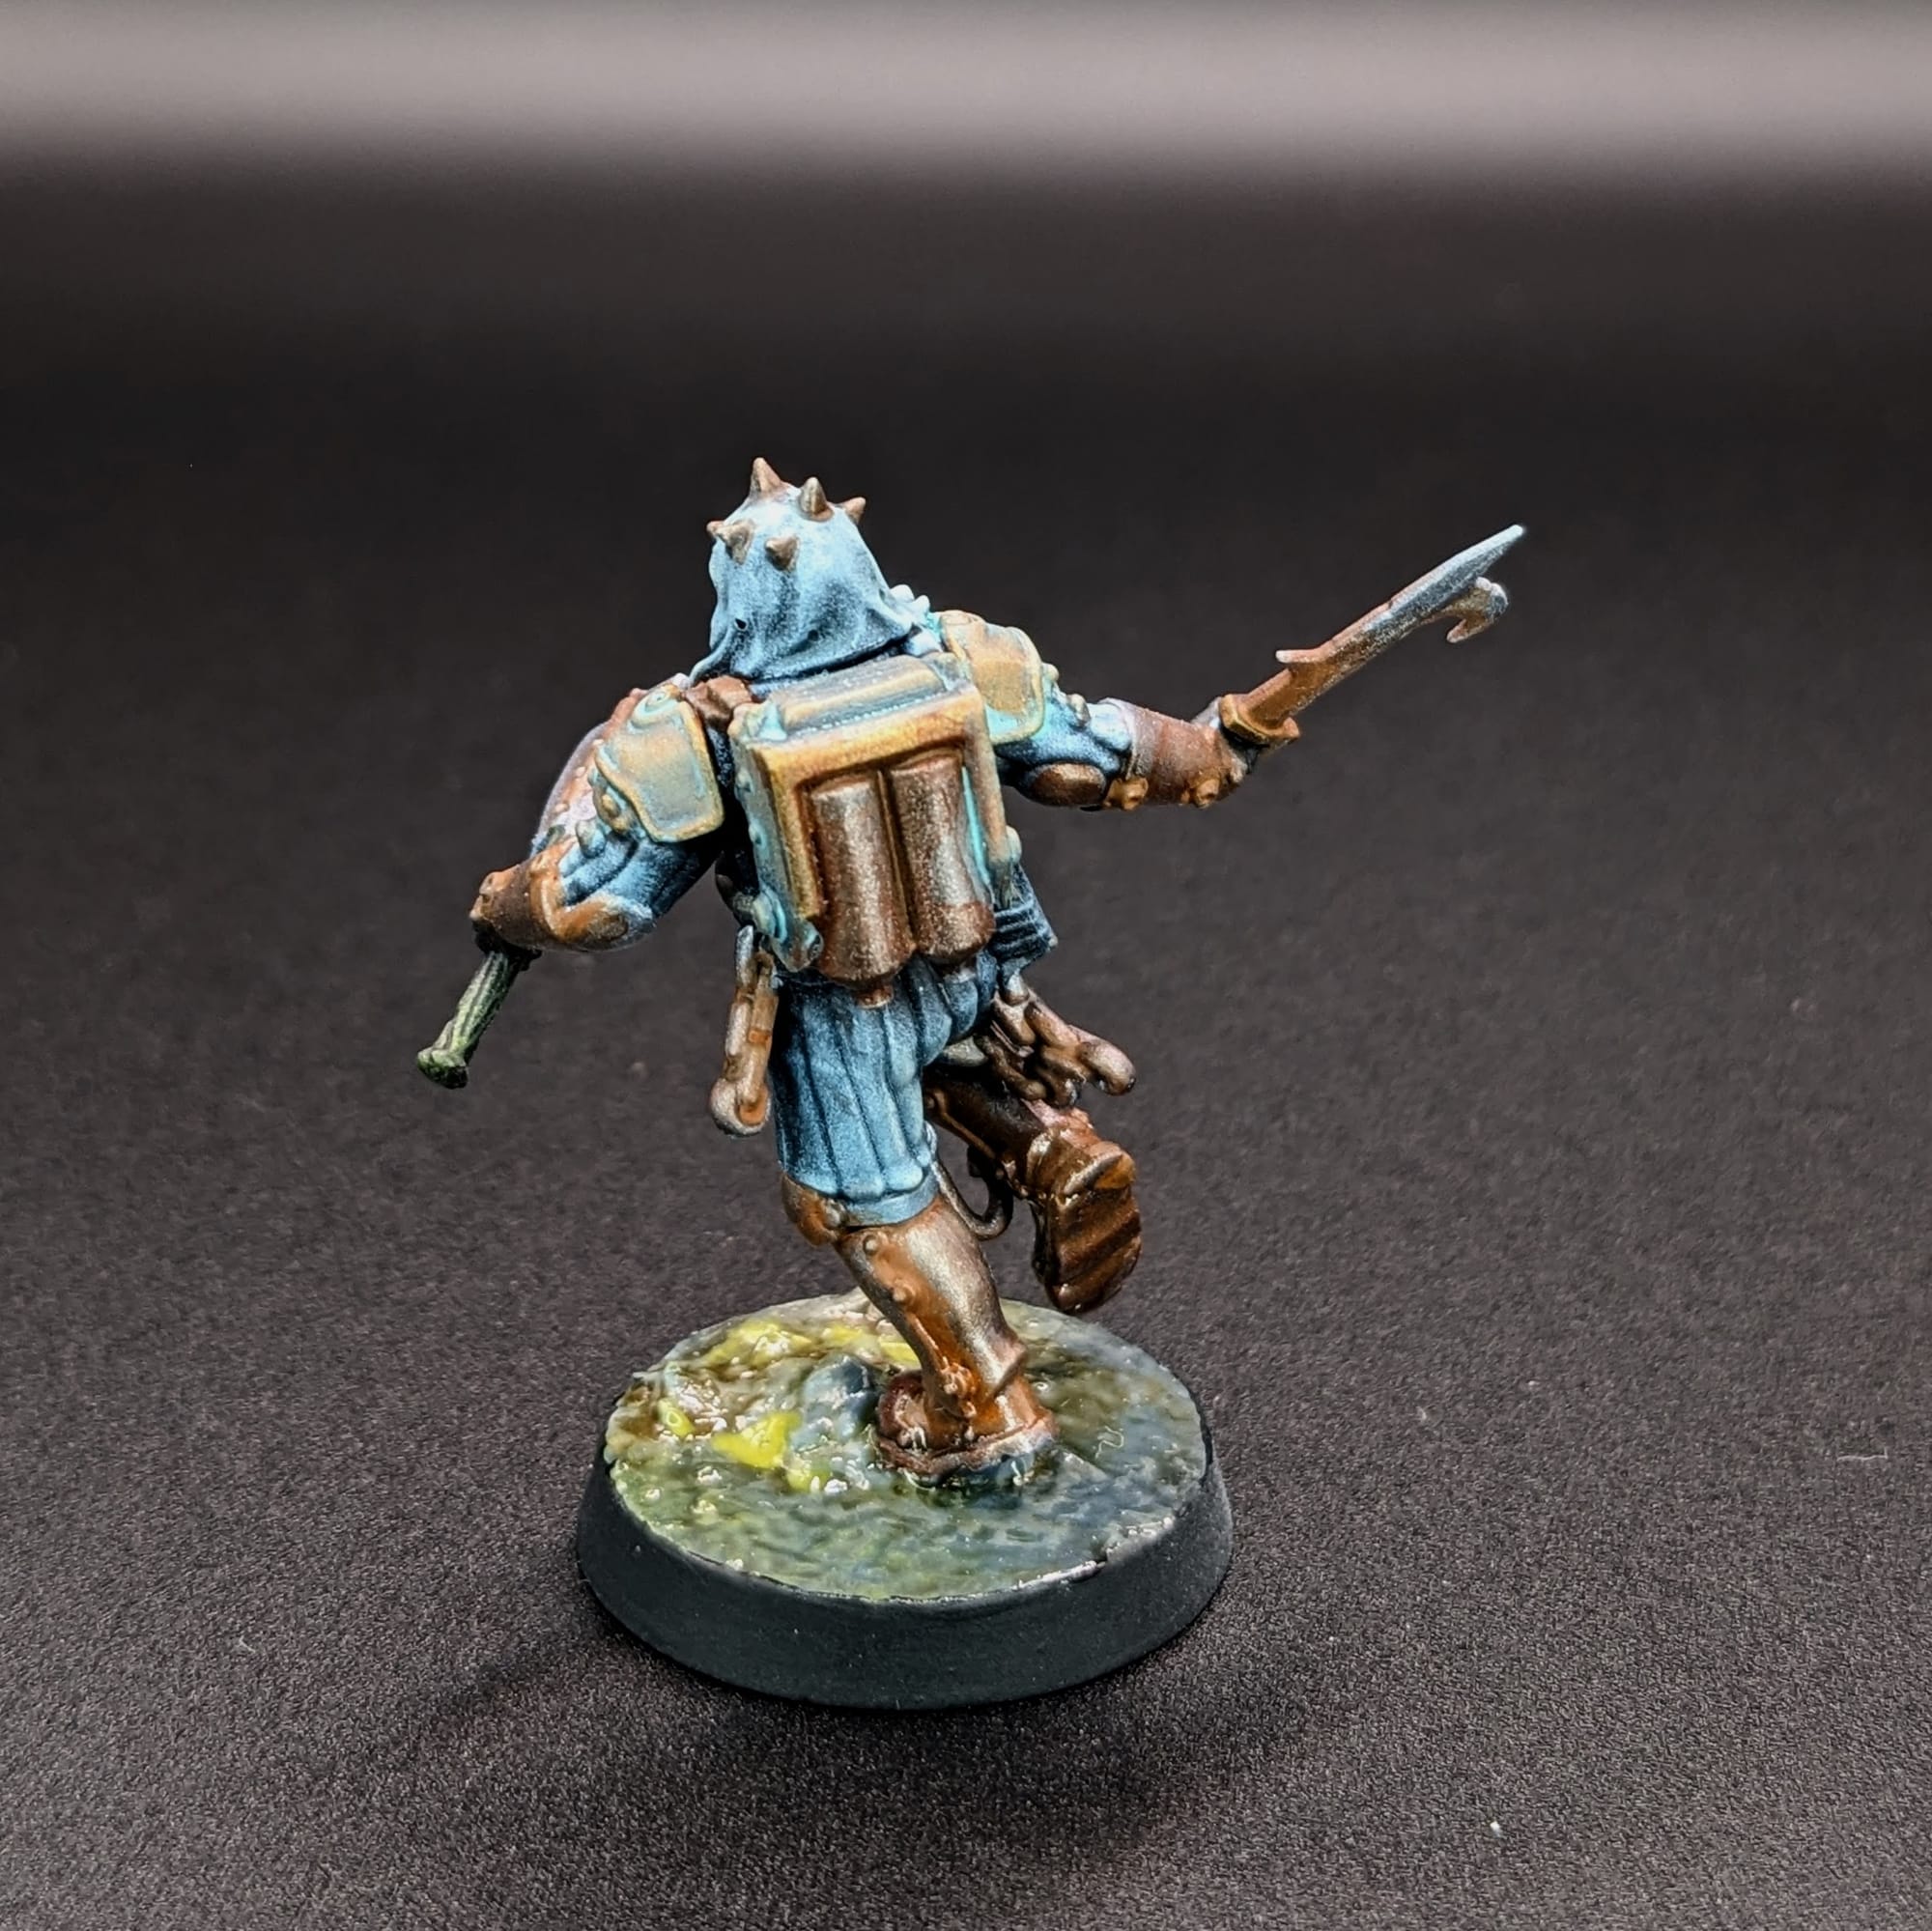
Alec: Since the Heretic Naval Raiders are of the ocean, I wanted to capture as much of the rust and verdigris look from the 1954 movie of Jules Verne’s 20,000 Leagues Under the Sea as I could. So, blues, bronzes, and rust browns. Additionally, the Captain and Chorister should have an appropriate amount of blood. Since they will be on land, I also want to include tide pool effects on their basing.
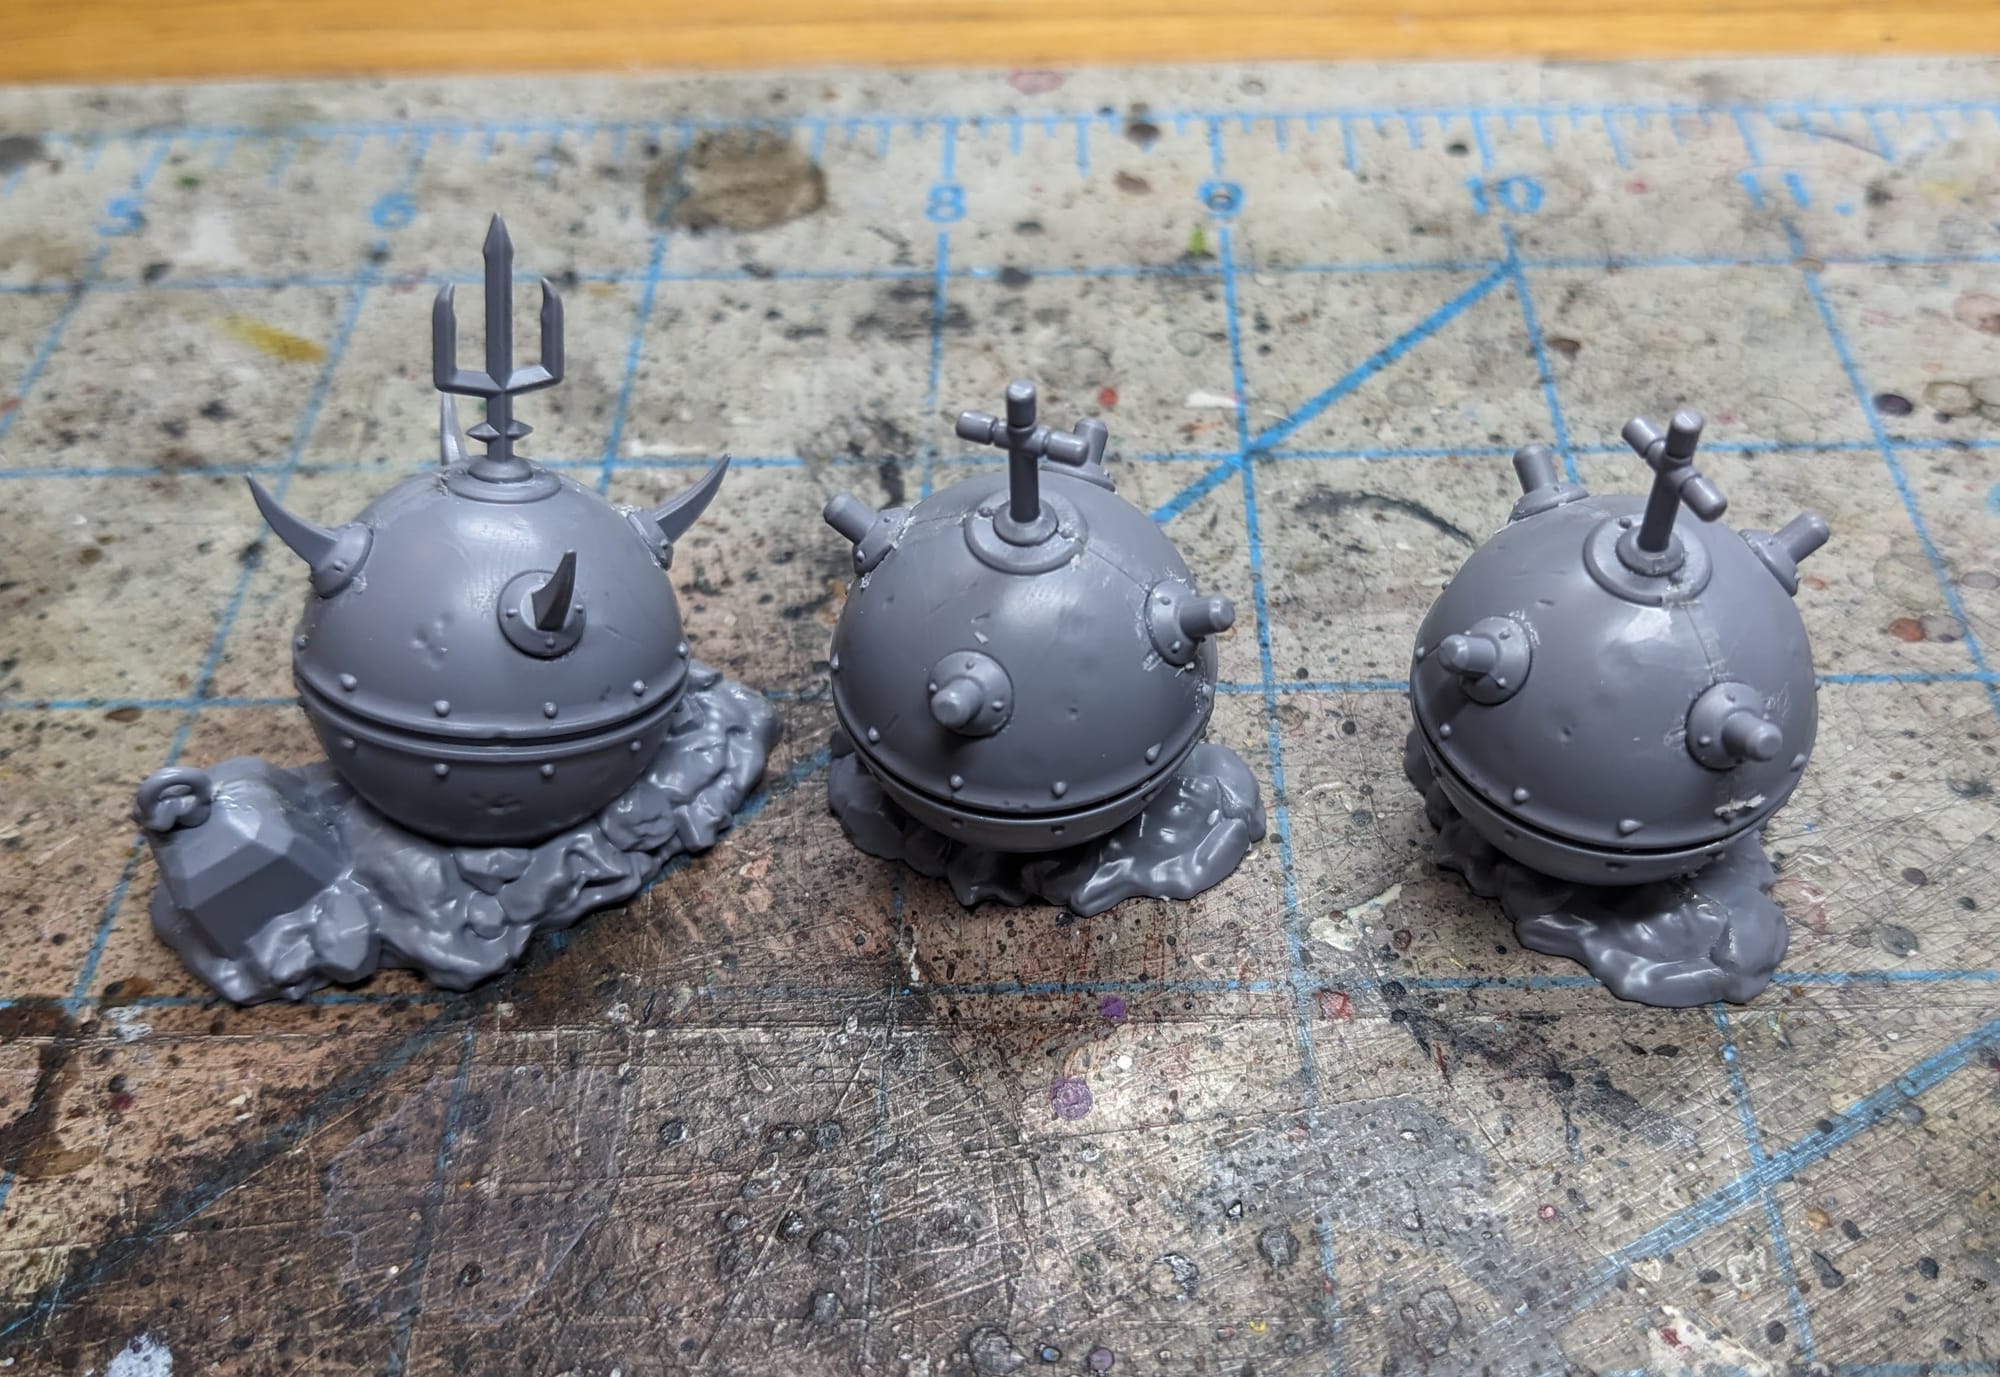
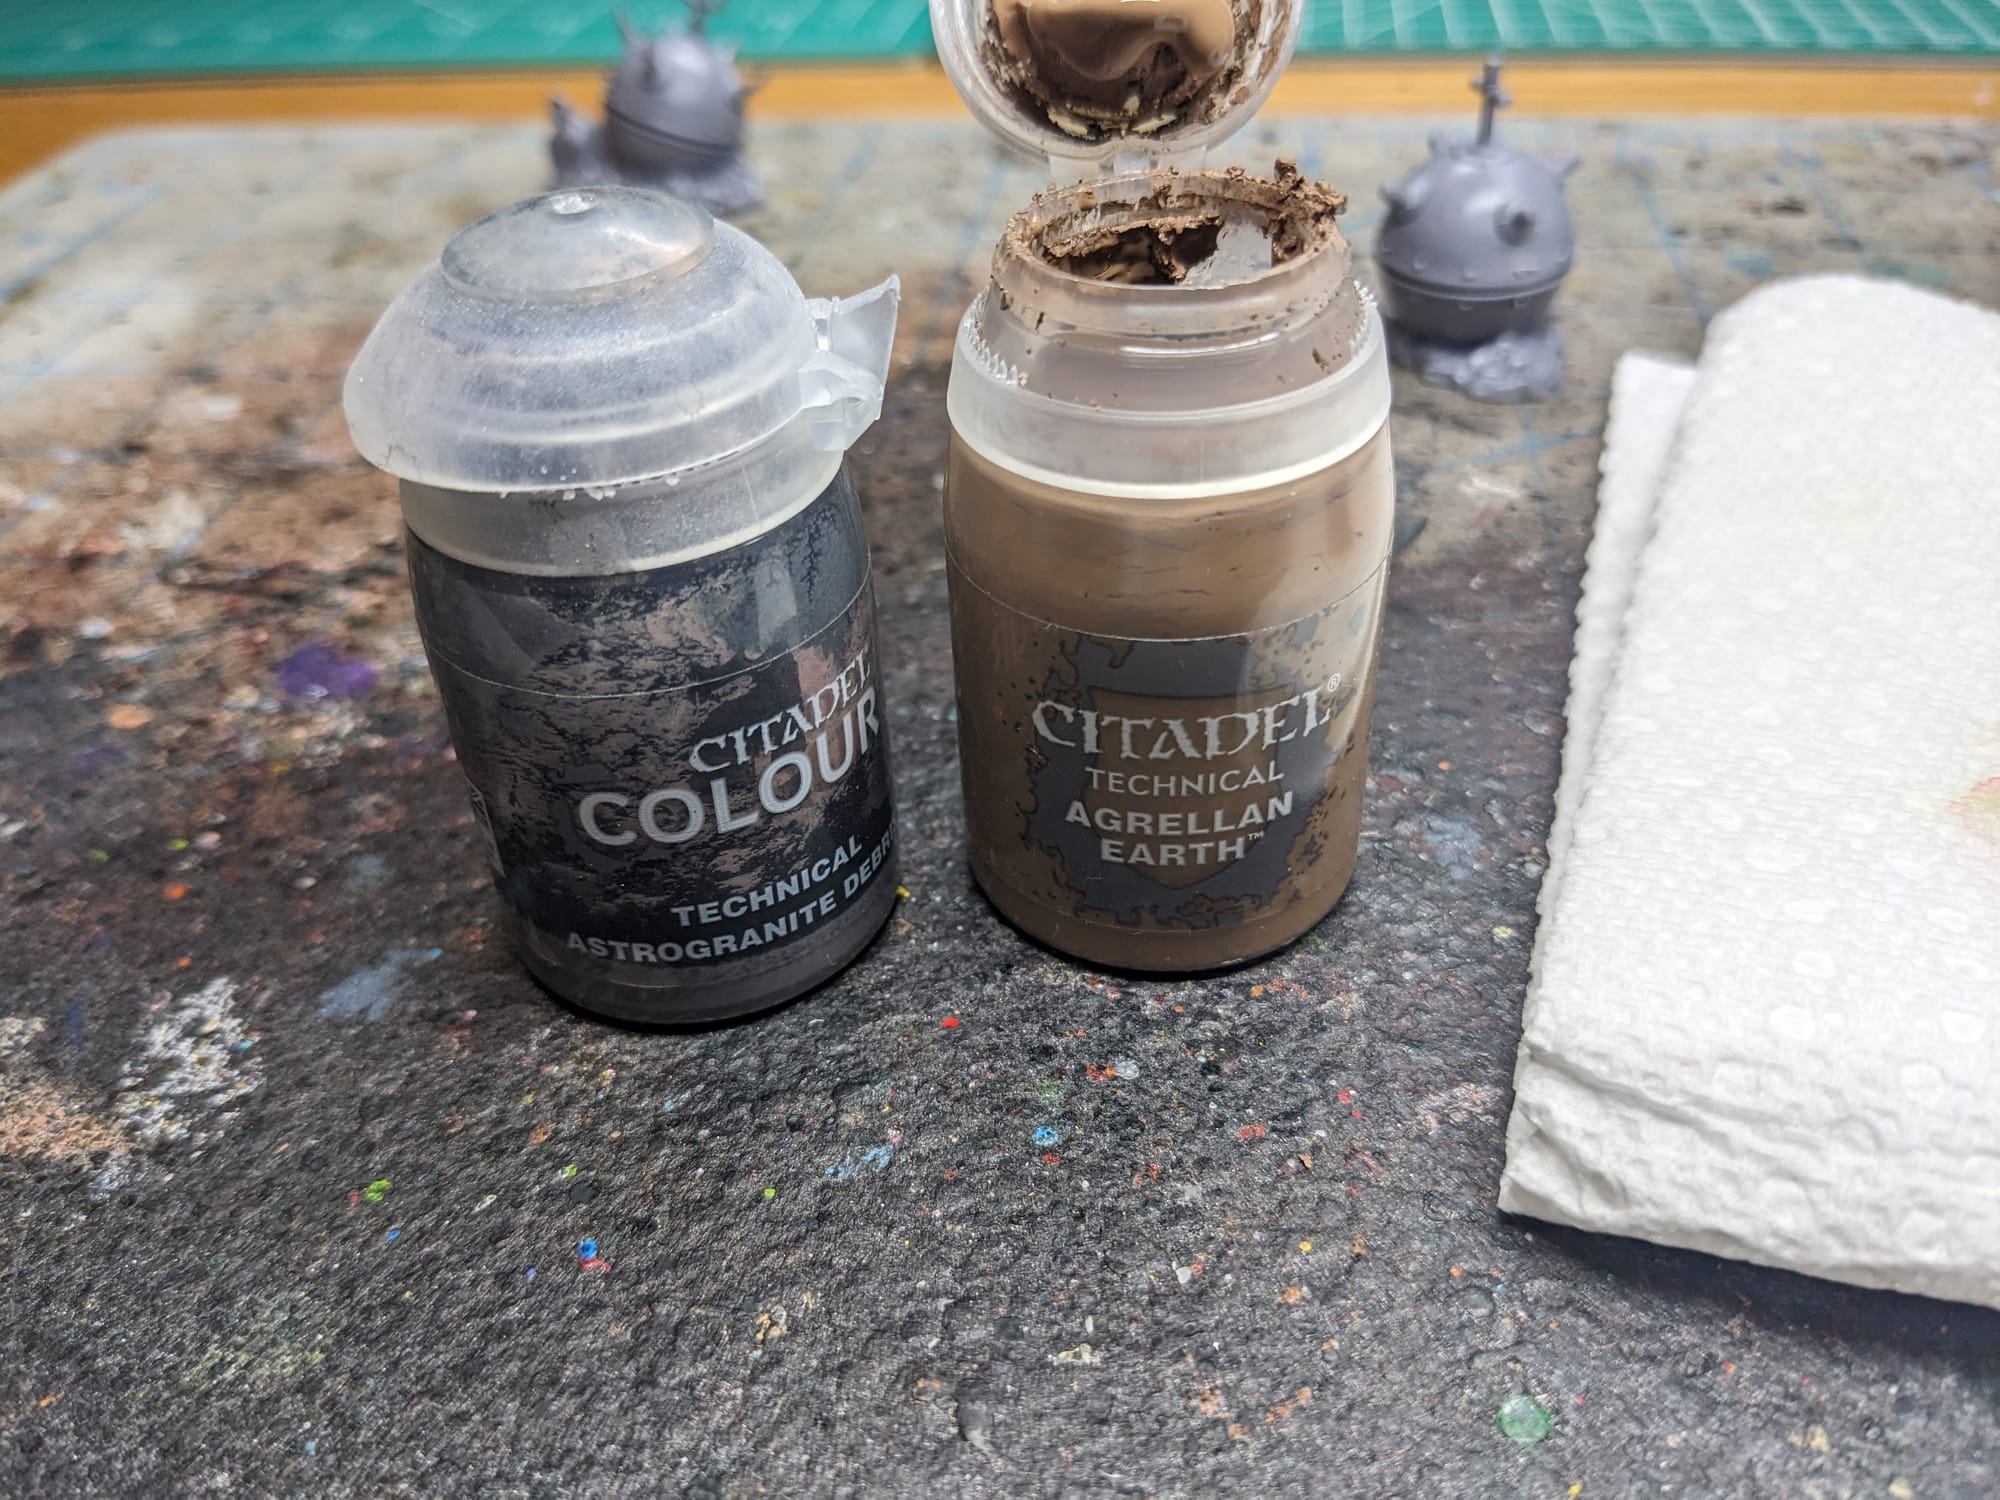
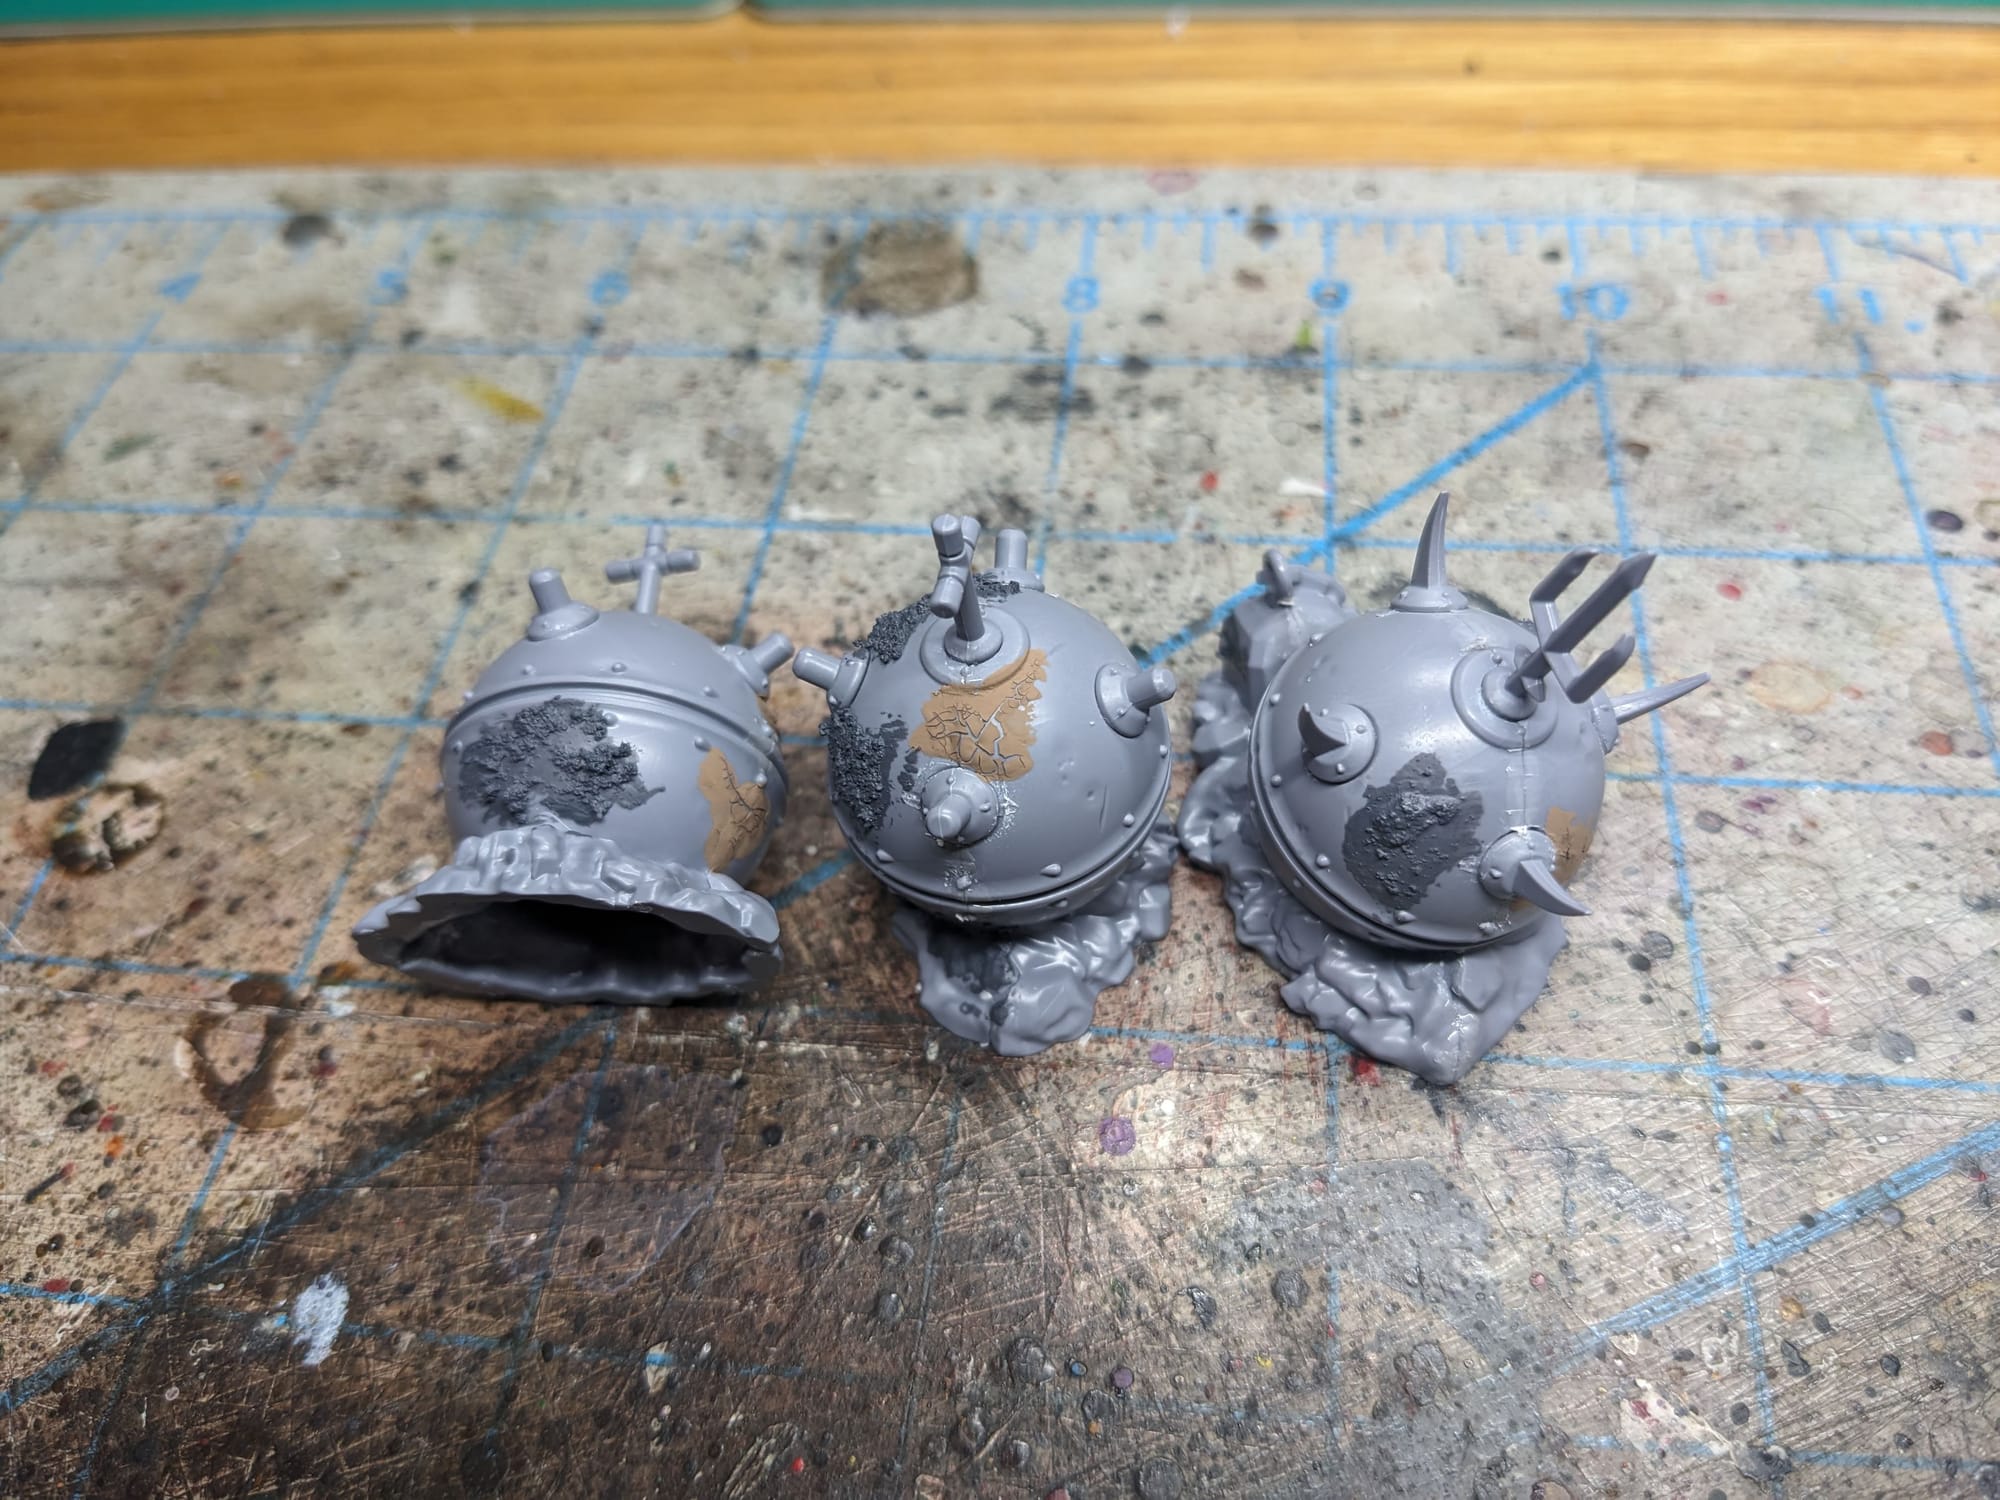
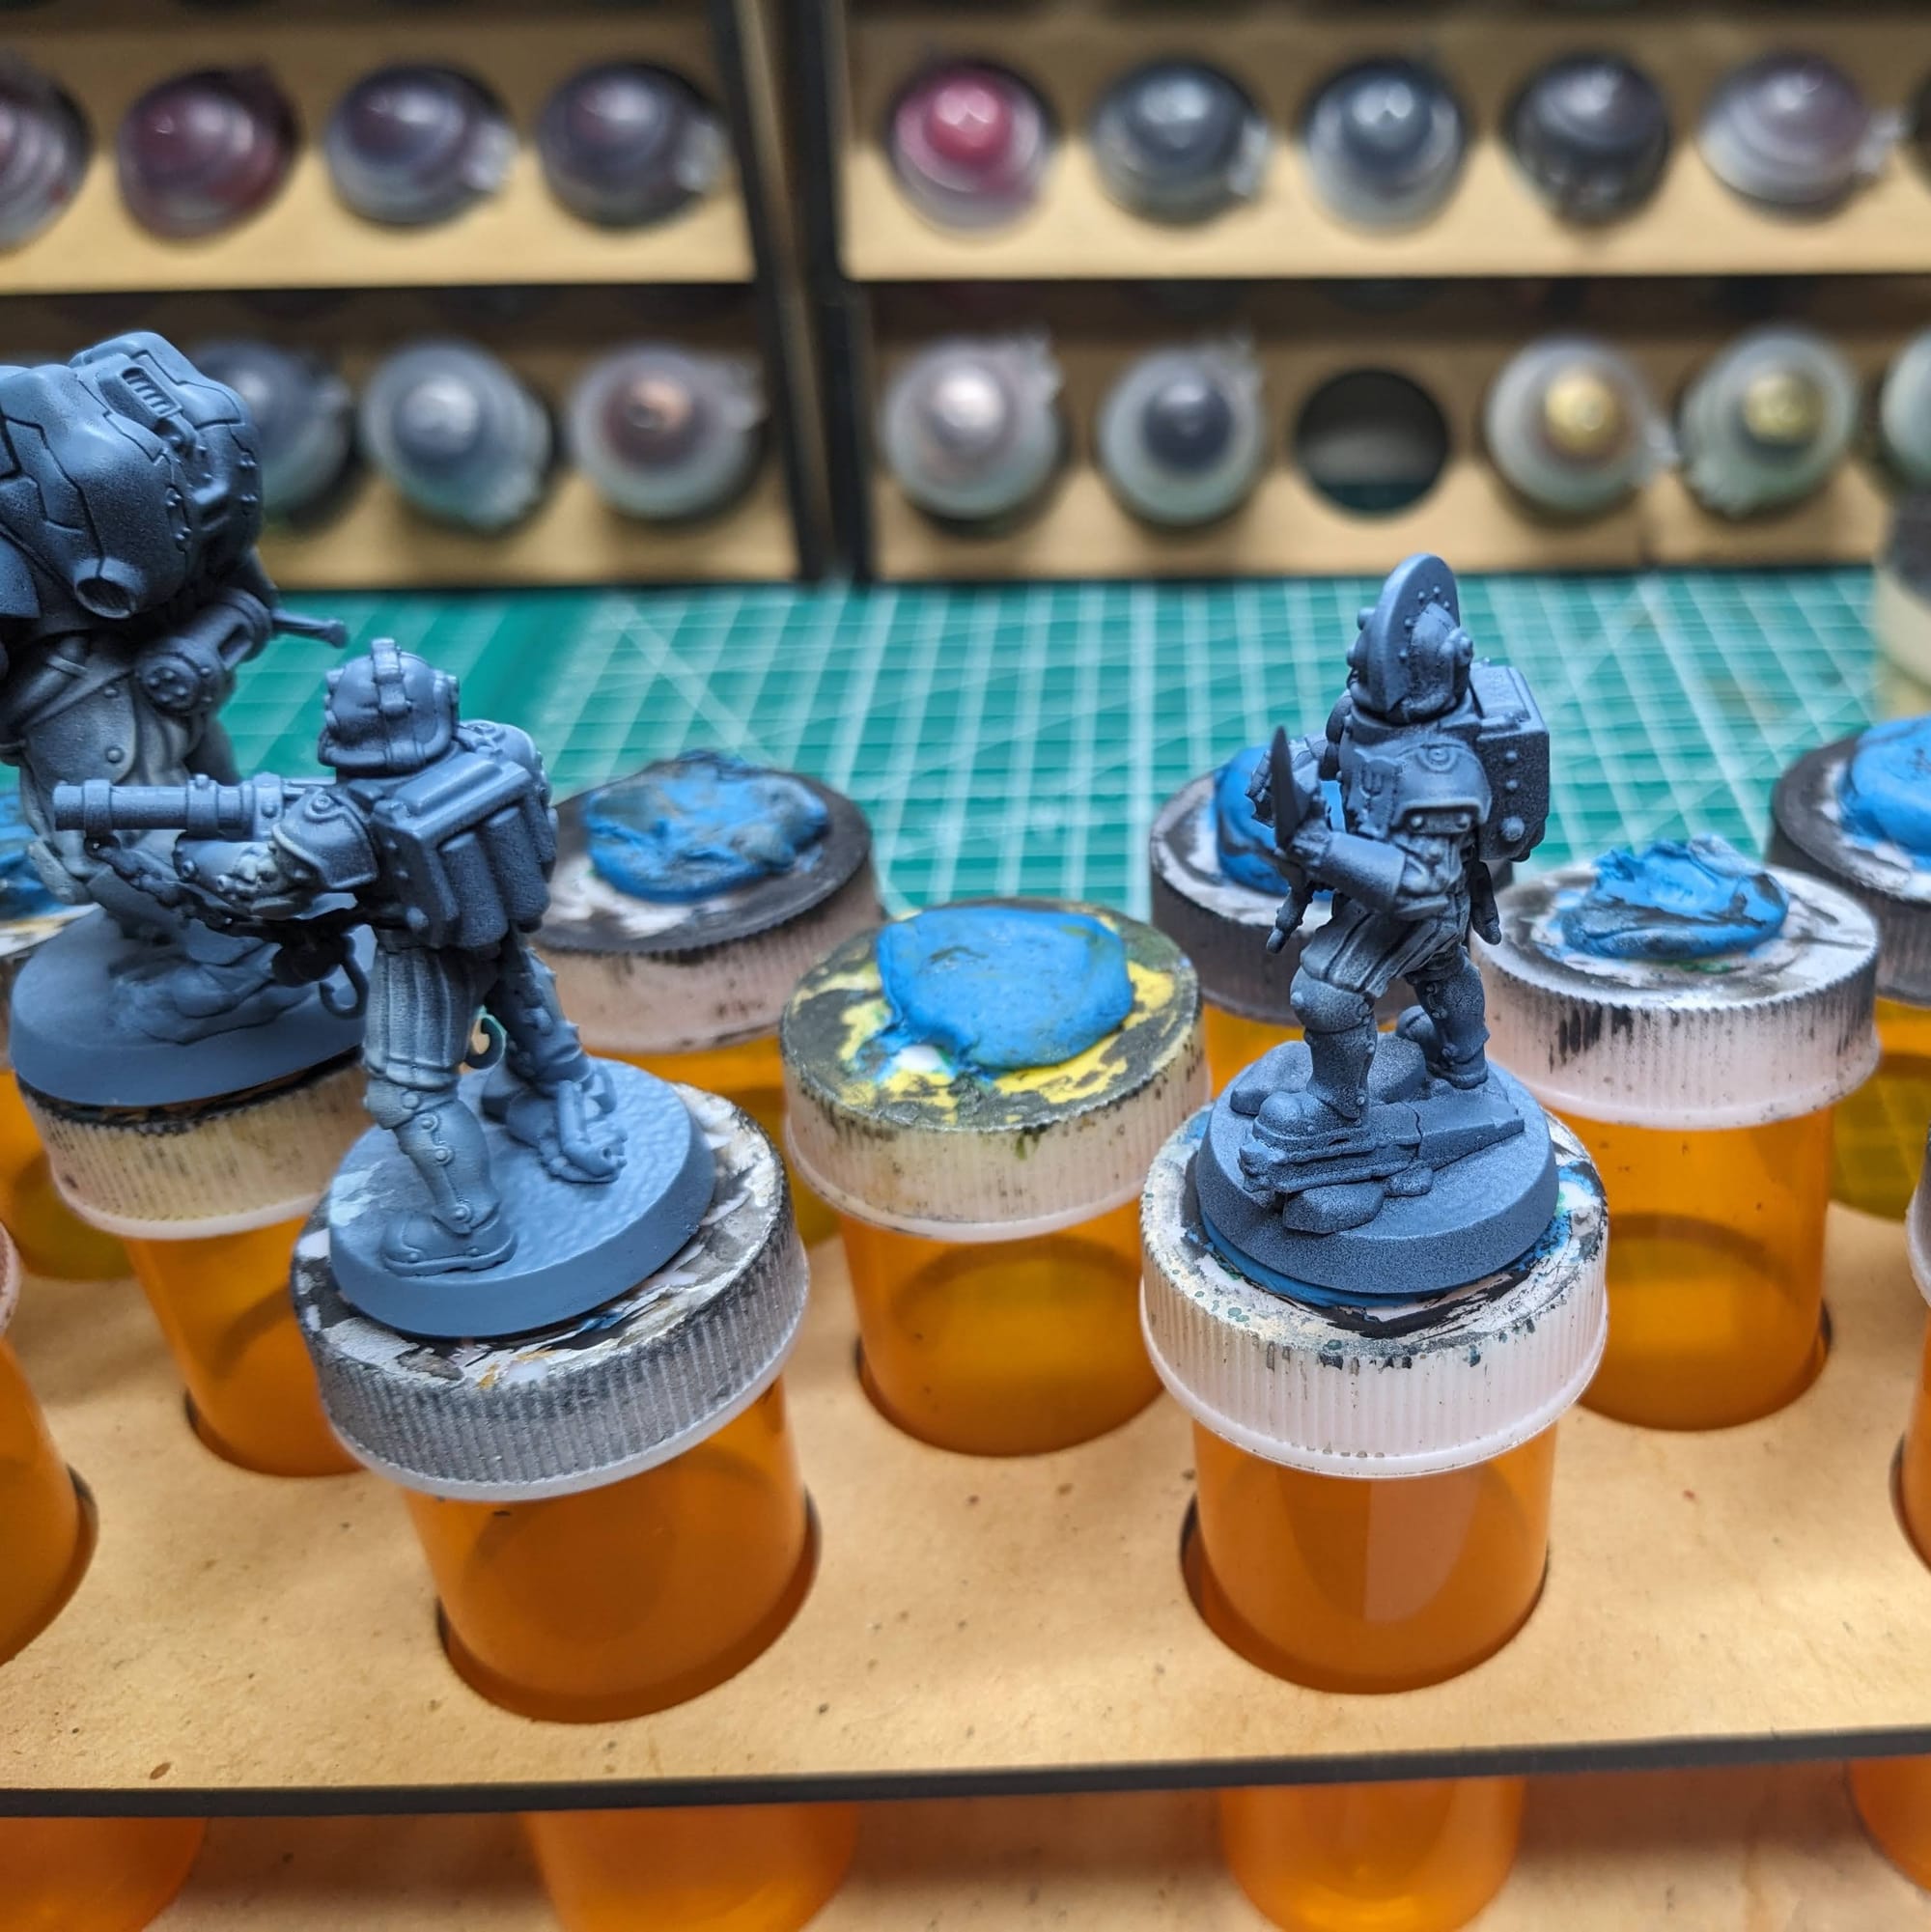
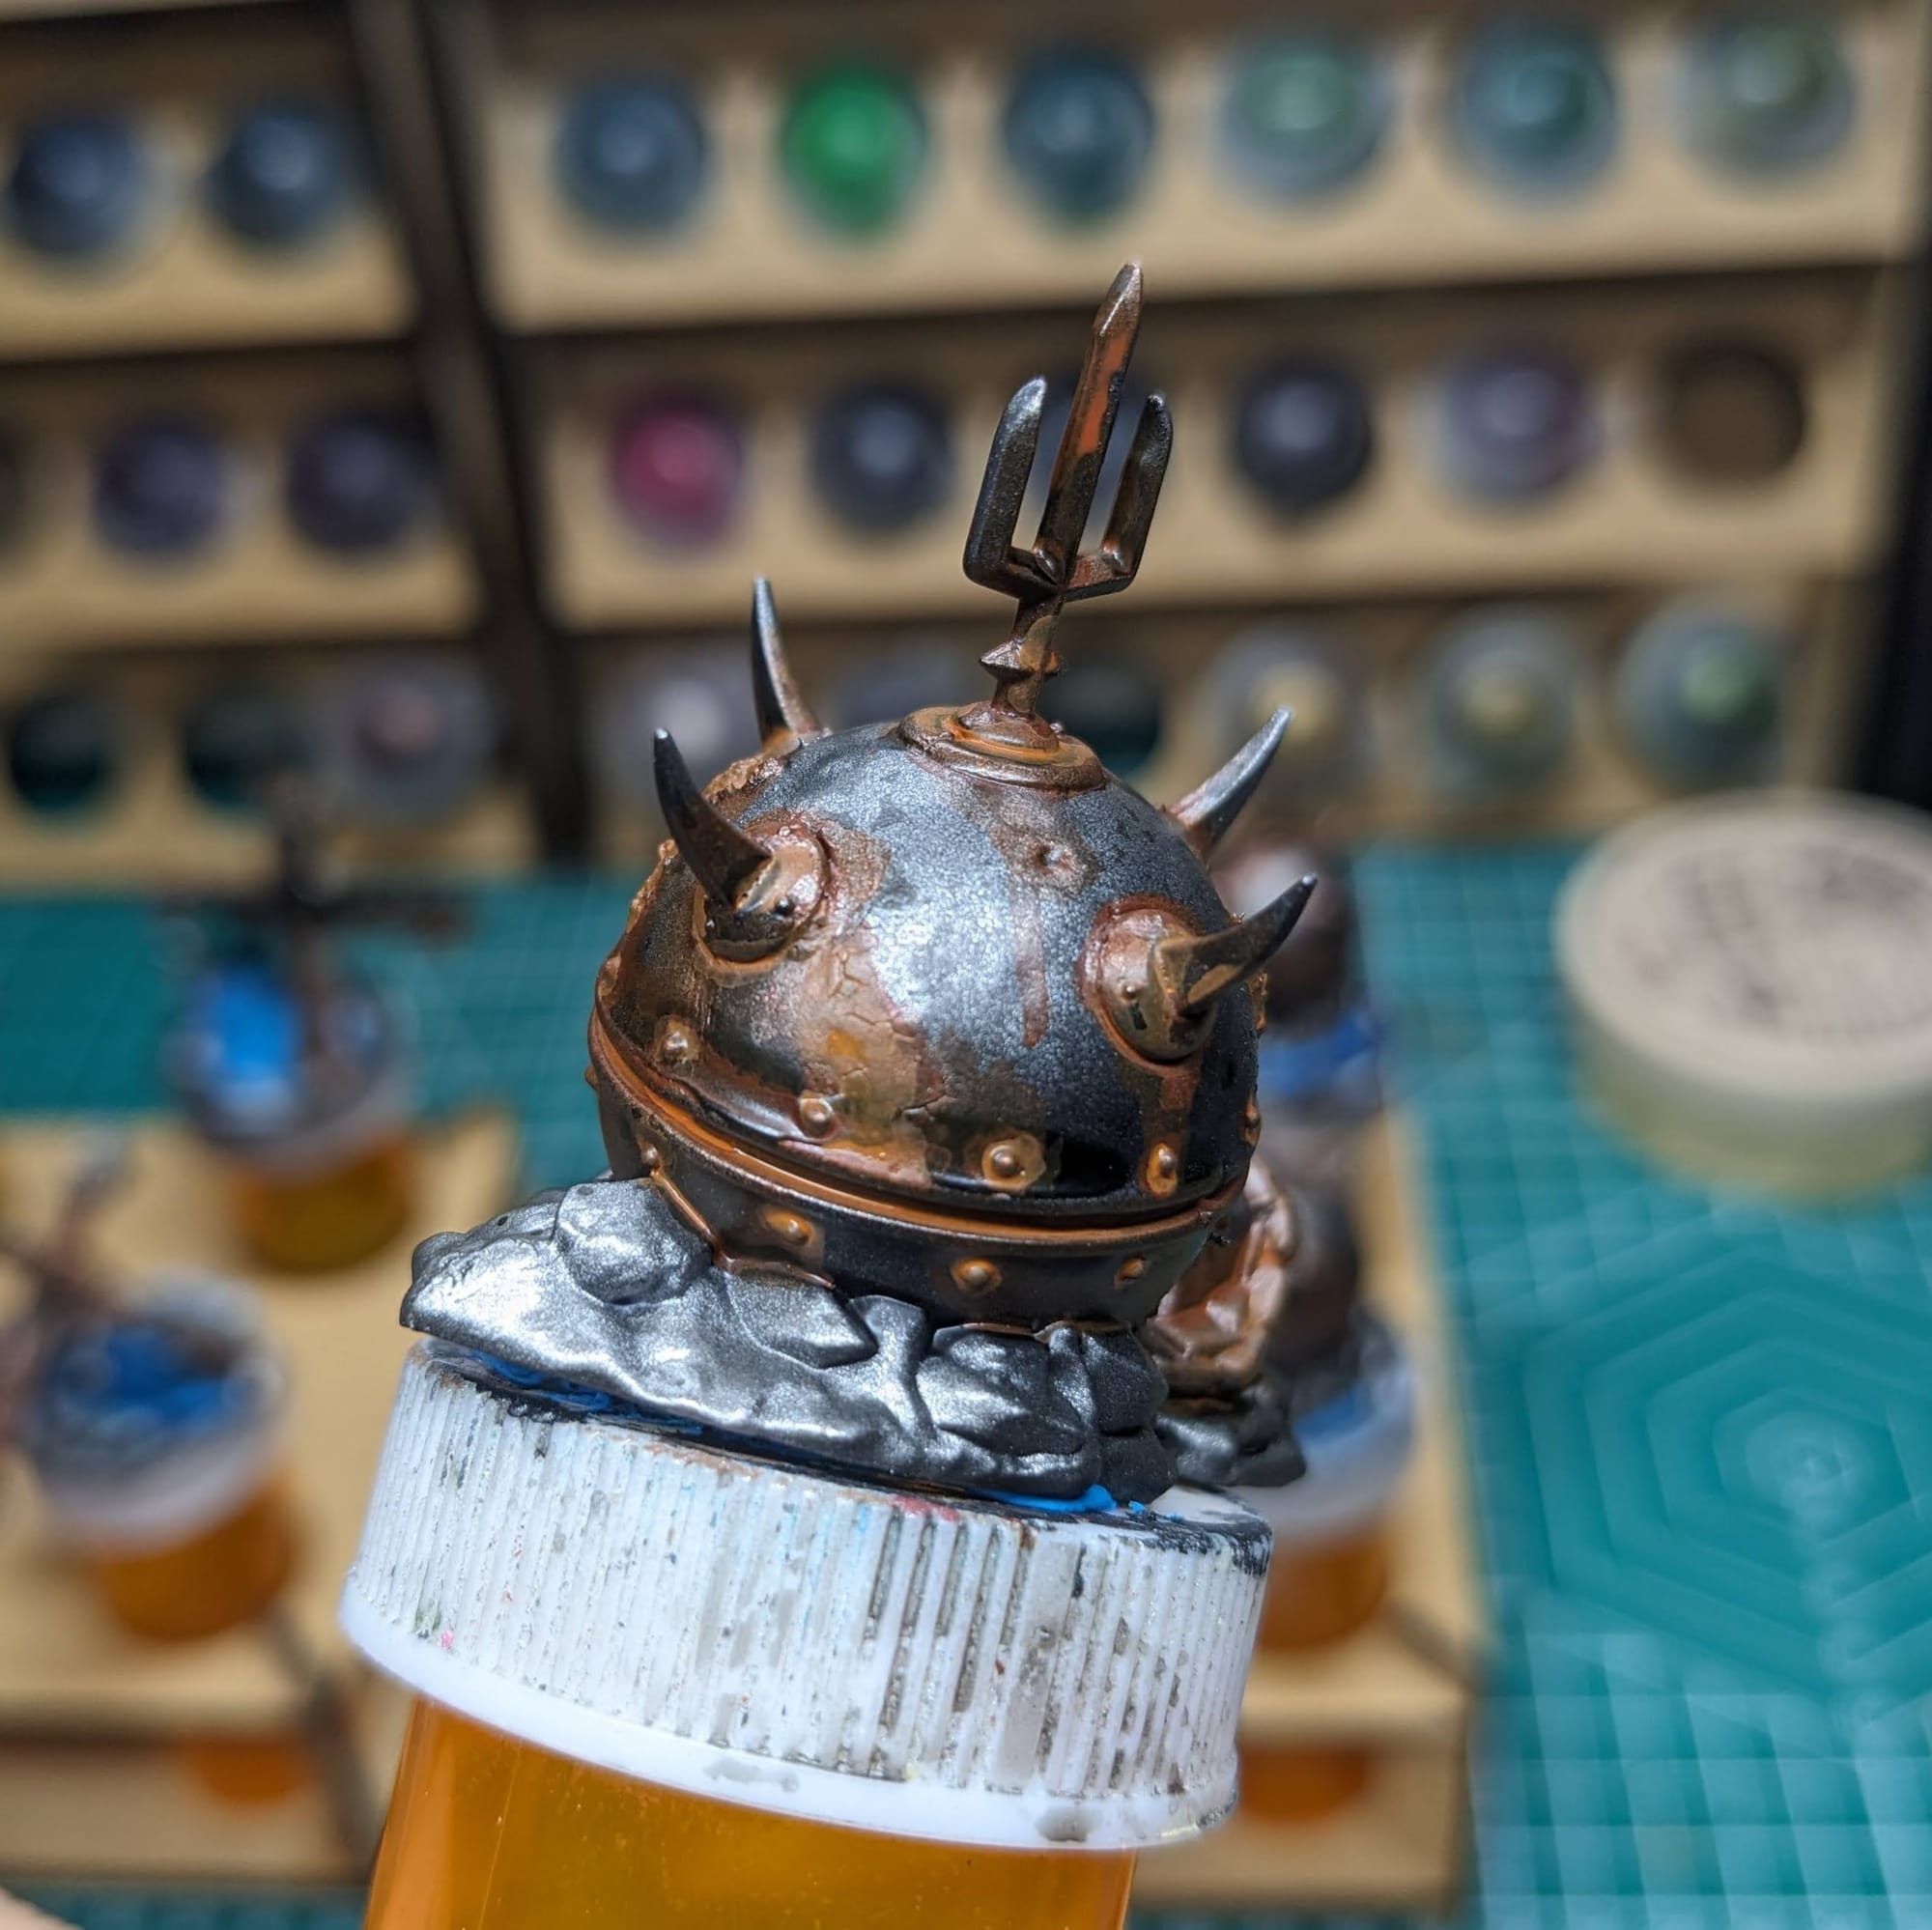
Prior to priming, I applied some Citadel Astrogranite Debris and Agrellan Earth to the mines. I wanted to pre-apply texture so that it would match with the priming base coat, knowing that this texture would be the basis for rust effects. So, between the plastic mold and now added rust effects, these pieces look sufficiently rusted for the Carcass Front.
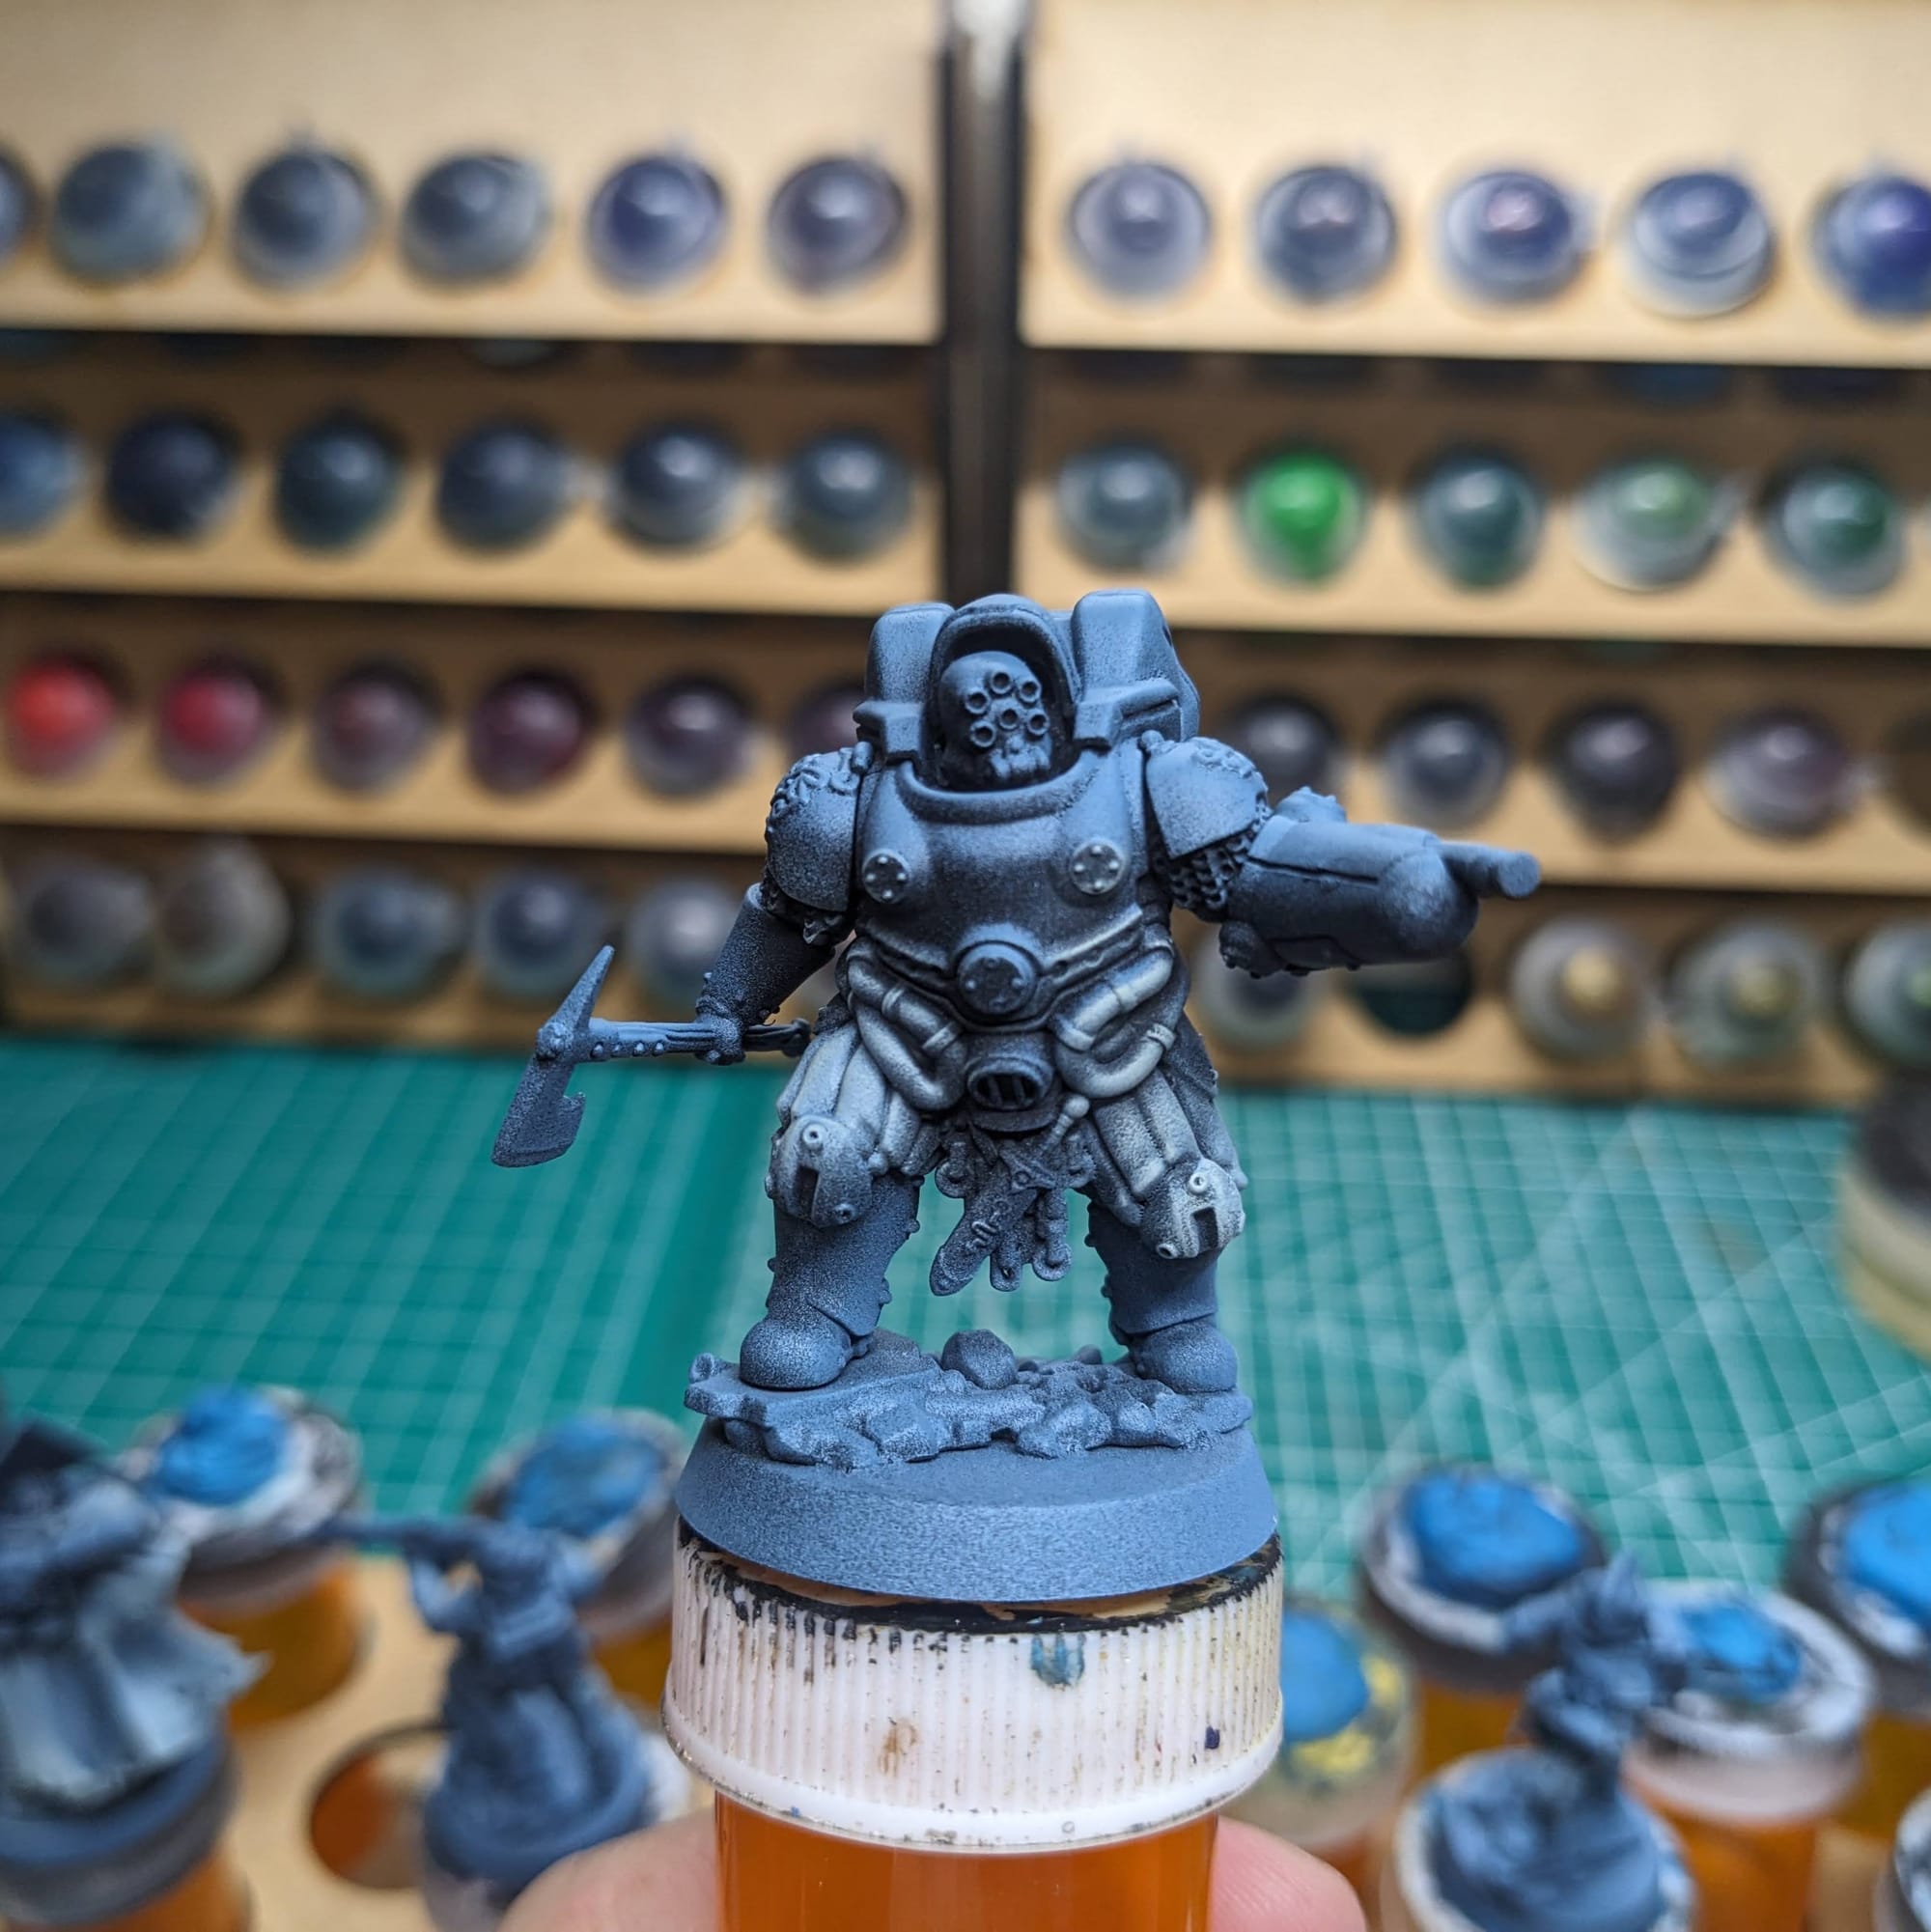
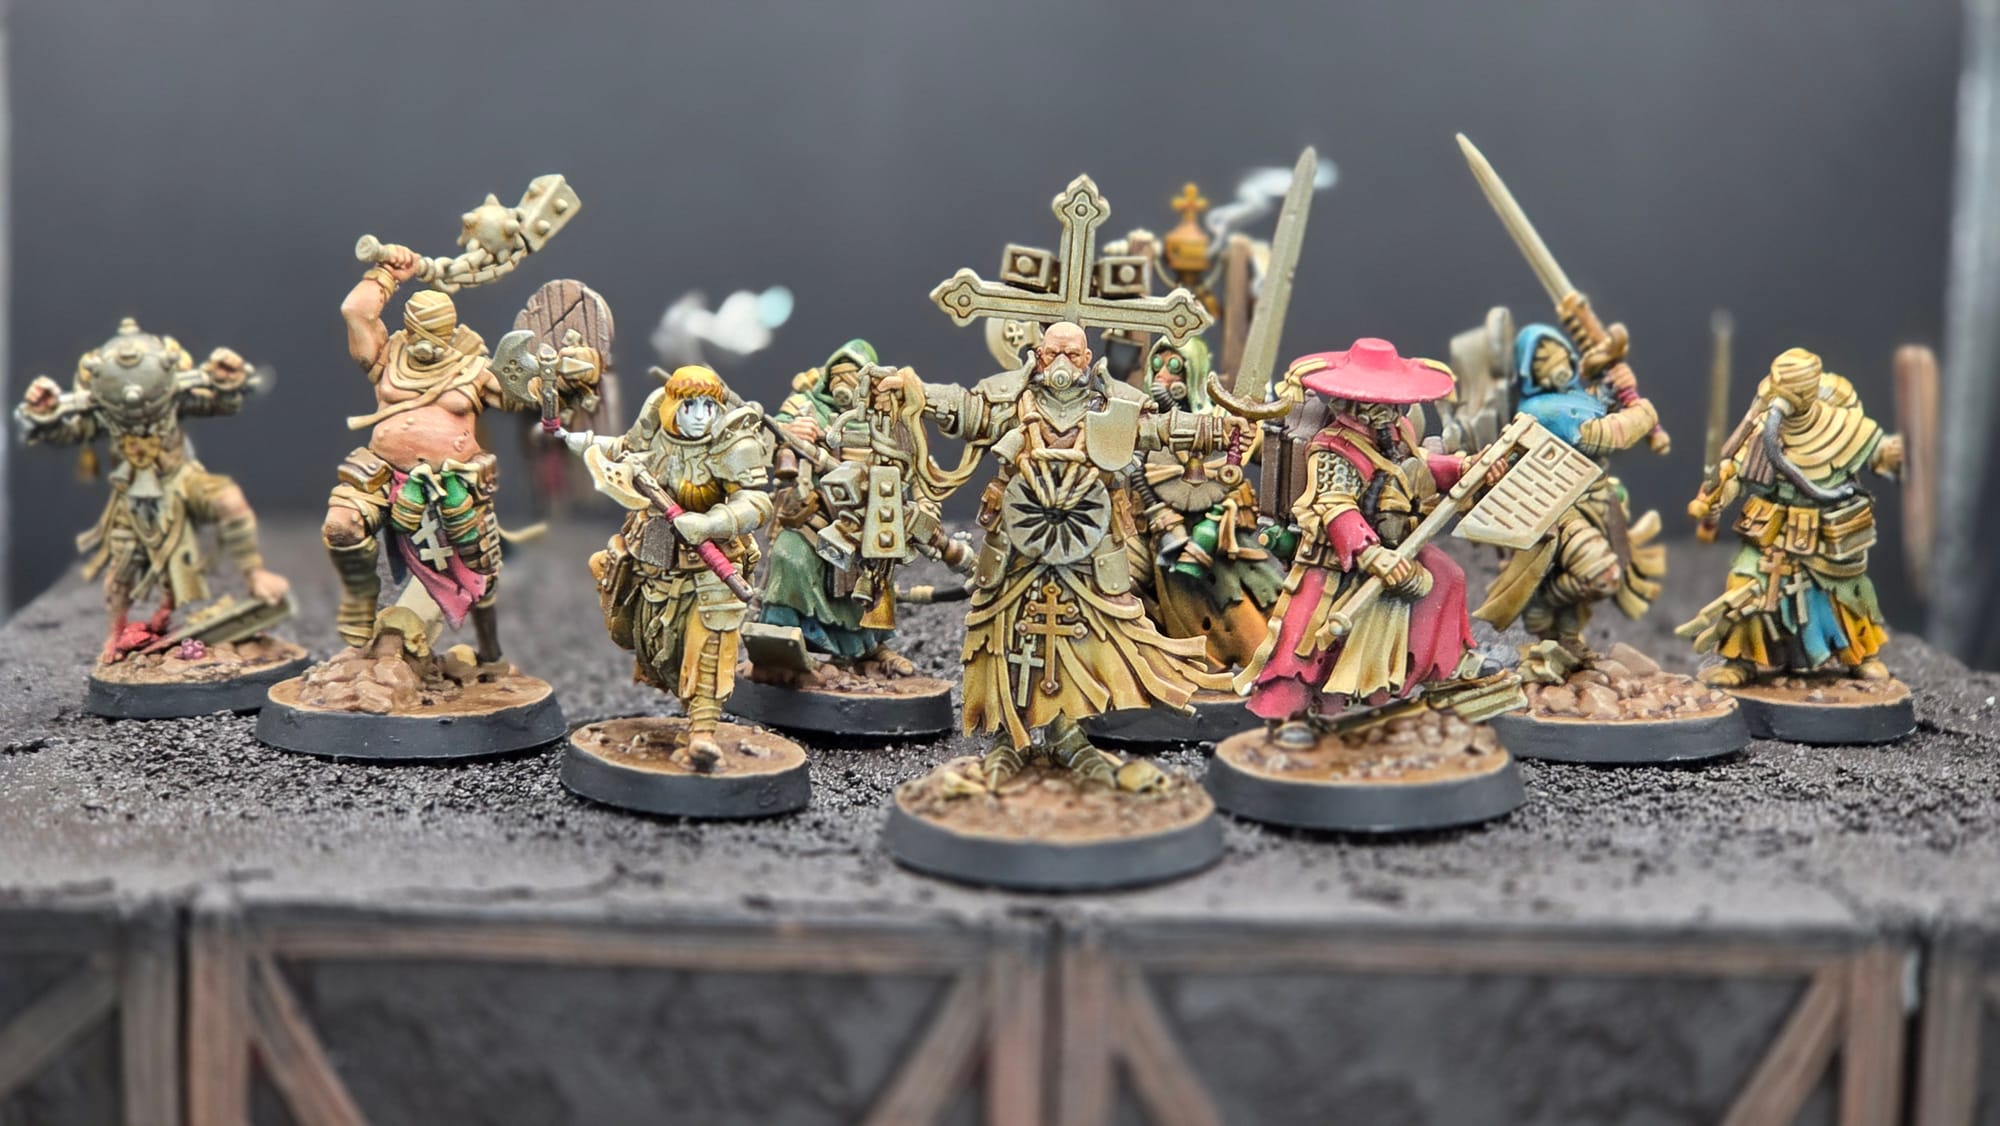
Ronn: I wanted to keep this as simple as I could, but retain some personality to my models. With that I wanted to give them the look of medieval peasants, I thought this would fit with the large amount of rags and robes that covered every character. When I primed I did full coverage in black, followed by a zenithal of Wraithbone at a 45 degree angle, and lastly a hit of white from the top.
Unlike what most movies will tell you, a lot of peasants wanted to wear as much color to show as much status as one could, so with that in mind I used as many bright colors as possible.
Randy: For my Sacred Affliction, I wanted to challenge myself with a limited palette that could be easily repeated but not have every model look the same… this works well with the models themselves, and the Sacred Affliction are refugees who have scavenged their outfits. The only real binding item between them all is their Millstones. Blues, reds, light tan/yellow, various browns all make the mix, so there is uniformity, if not conformity across the models. Like Alec, I also pre-based my warband with a “special mix” of several All Game Terrain sands and gravel thrown together, along with a few random skulls and bones that I have sitting around, because who doesn’t have a bunch of skulls and bones sitting around?
Remember that done is better than perfect!
Priming Your Miniatures
Alec: Ideally, if you can get the majority of a color for a model applied via a rattle can or airbrush it saves a lot of time. Typically, I prime all of the figures with a zenithal prime. In this case, I used Army Painter Wolf Grey over Rust-oleum Flat Black for the figures, and then Citadel Leadbelcher (Spray Can) over Rust-oleum Flat Black for the mines and Czech hedgehog tank traps.
Slapchop Method
Alec: For these pieces, I chose to take a variation of the “slapchop” approach for them. Slapchop is a painting method where you accent the details of the models by dry brushing shades of gray and white. Then, using speed paints, contrast paints, and/or washes, you paint a single coat over the top of the model, creating shadows, mid-tones, and highlights in a single pass. This would be akin to using Multiply or Screen layers in Photoshop to establish color values on a gray underlayer. This is a very fast and efficient way to paint a lot of models that you don’t want to put a lot of detail into, and instead rely on the mold of the model to provide enough detail and contrast to make it stand out on the table.
Layering Method
Randy: For me, I’ve been feeling a little “old school” with my models, so I went for a more traditional “layering” method. This is an additive process where you basecoat everything, apply a wash to hit all of the recesses, and then refine with highlights. For expediencies sake, I used acrylic wash vs. oil wash, but I moved fast to keep my washes from interfering with the skin layers as you’ll see later on. This is the “classic” GW method you may have heard about.
Step-by-Step Painting The Carcass Front
Painting The Heretic Naval Raiders
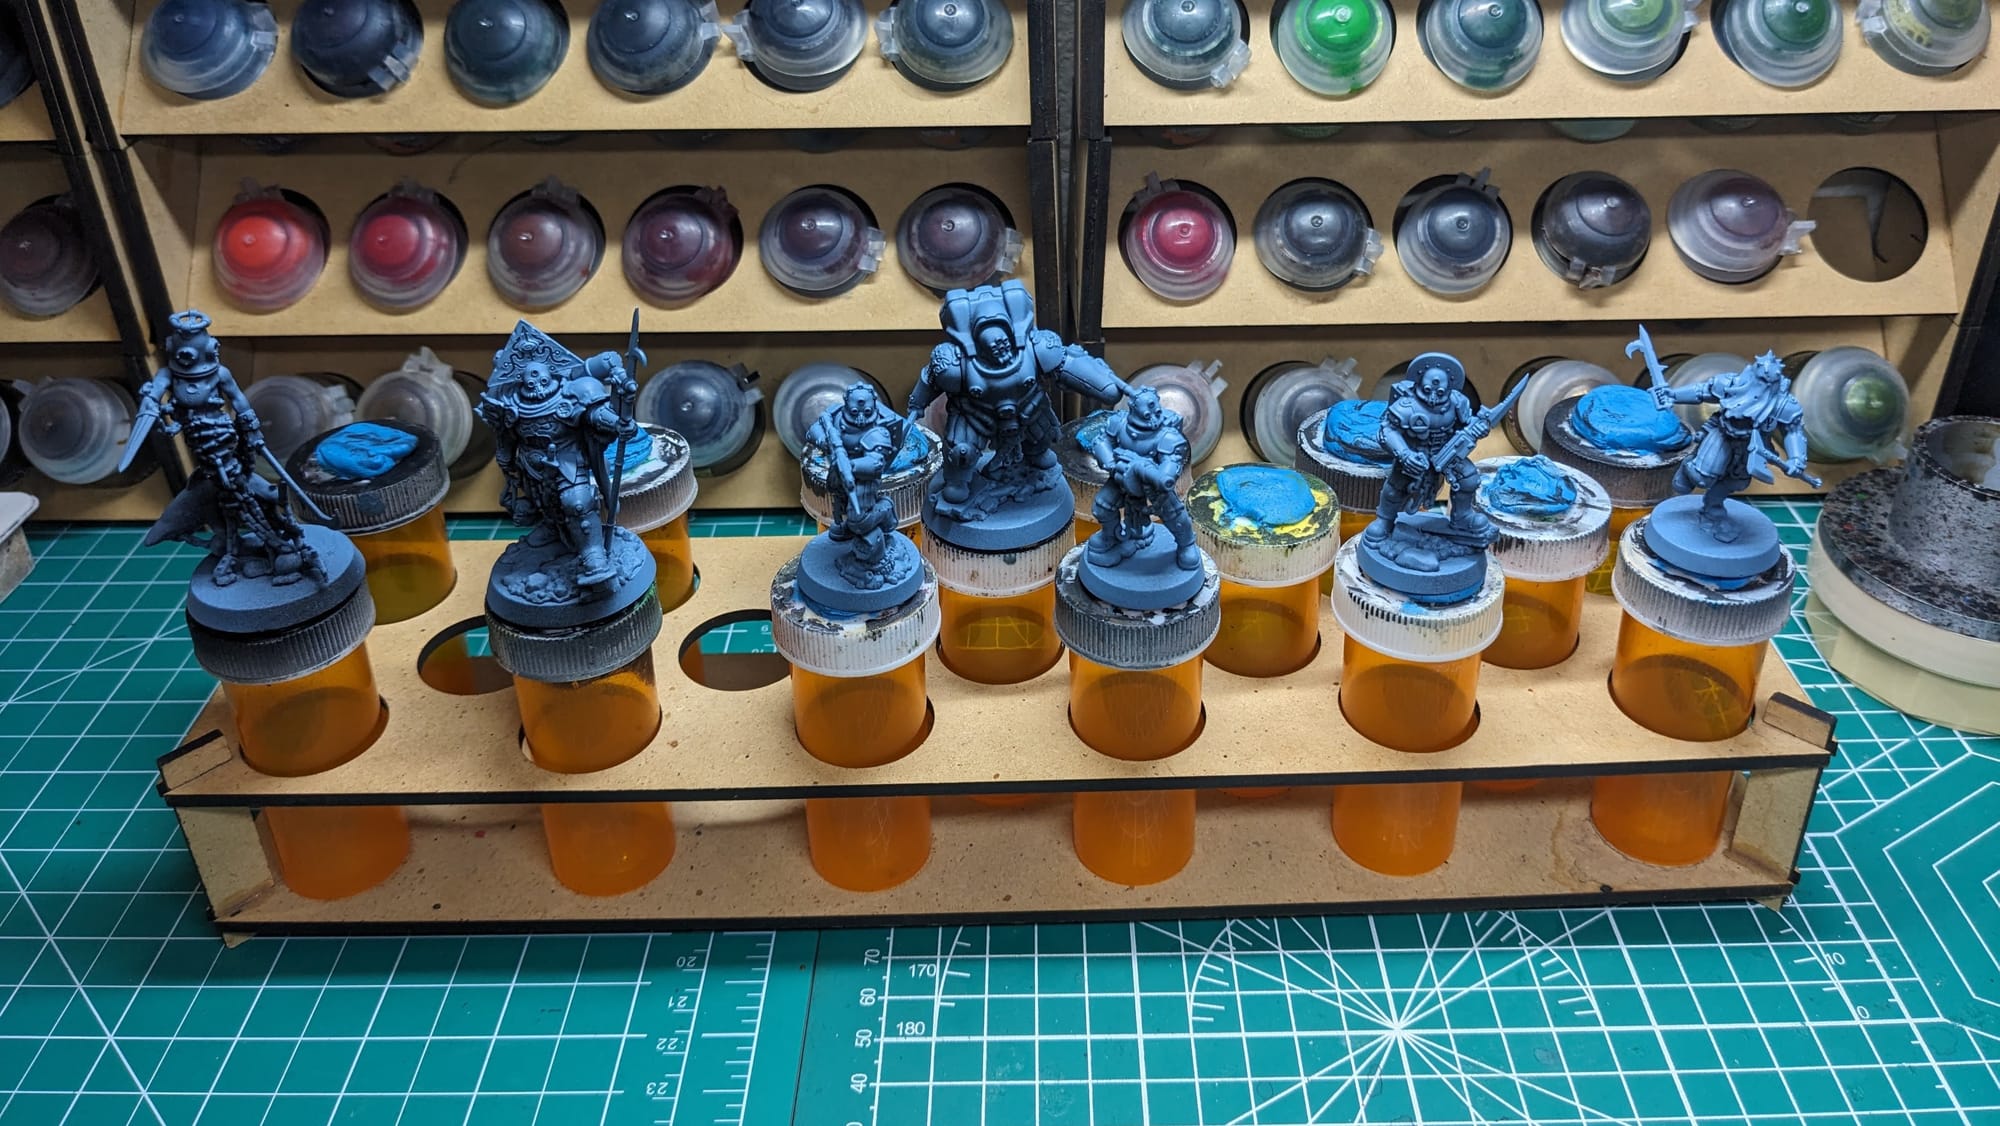
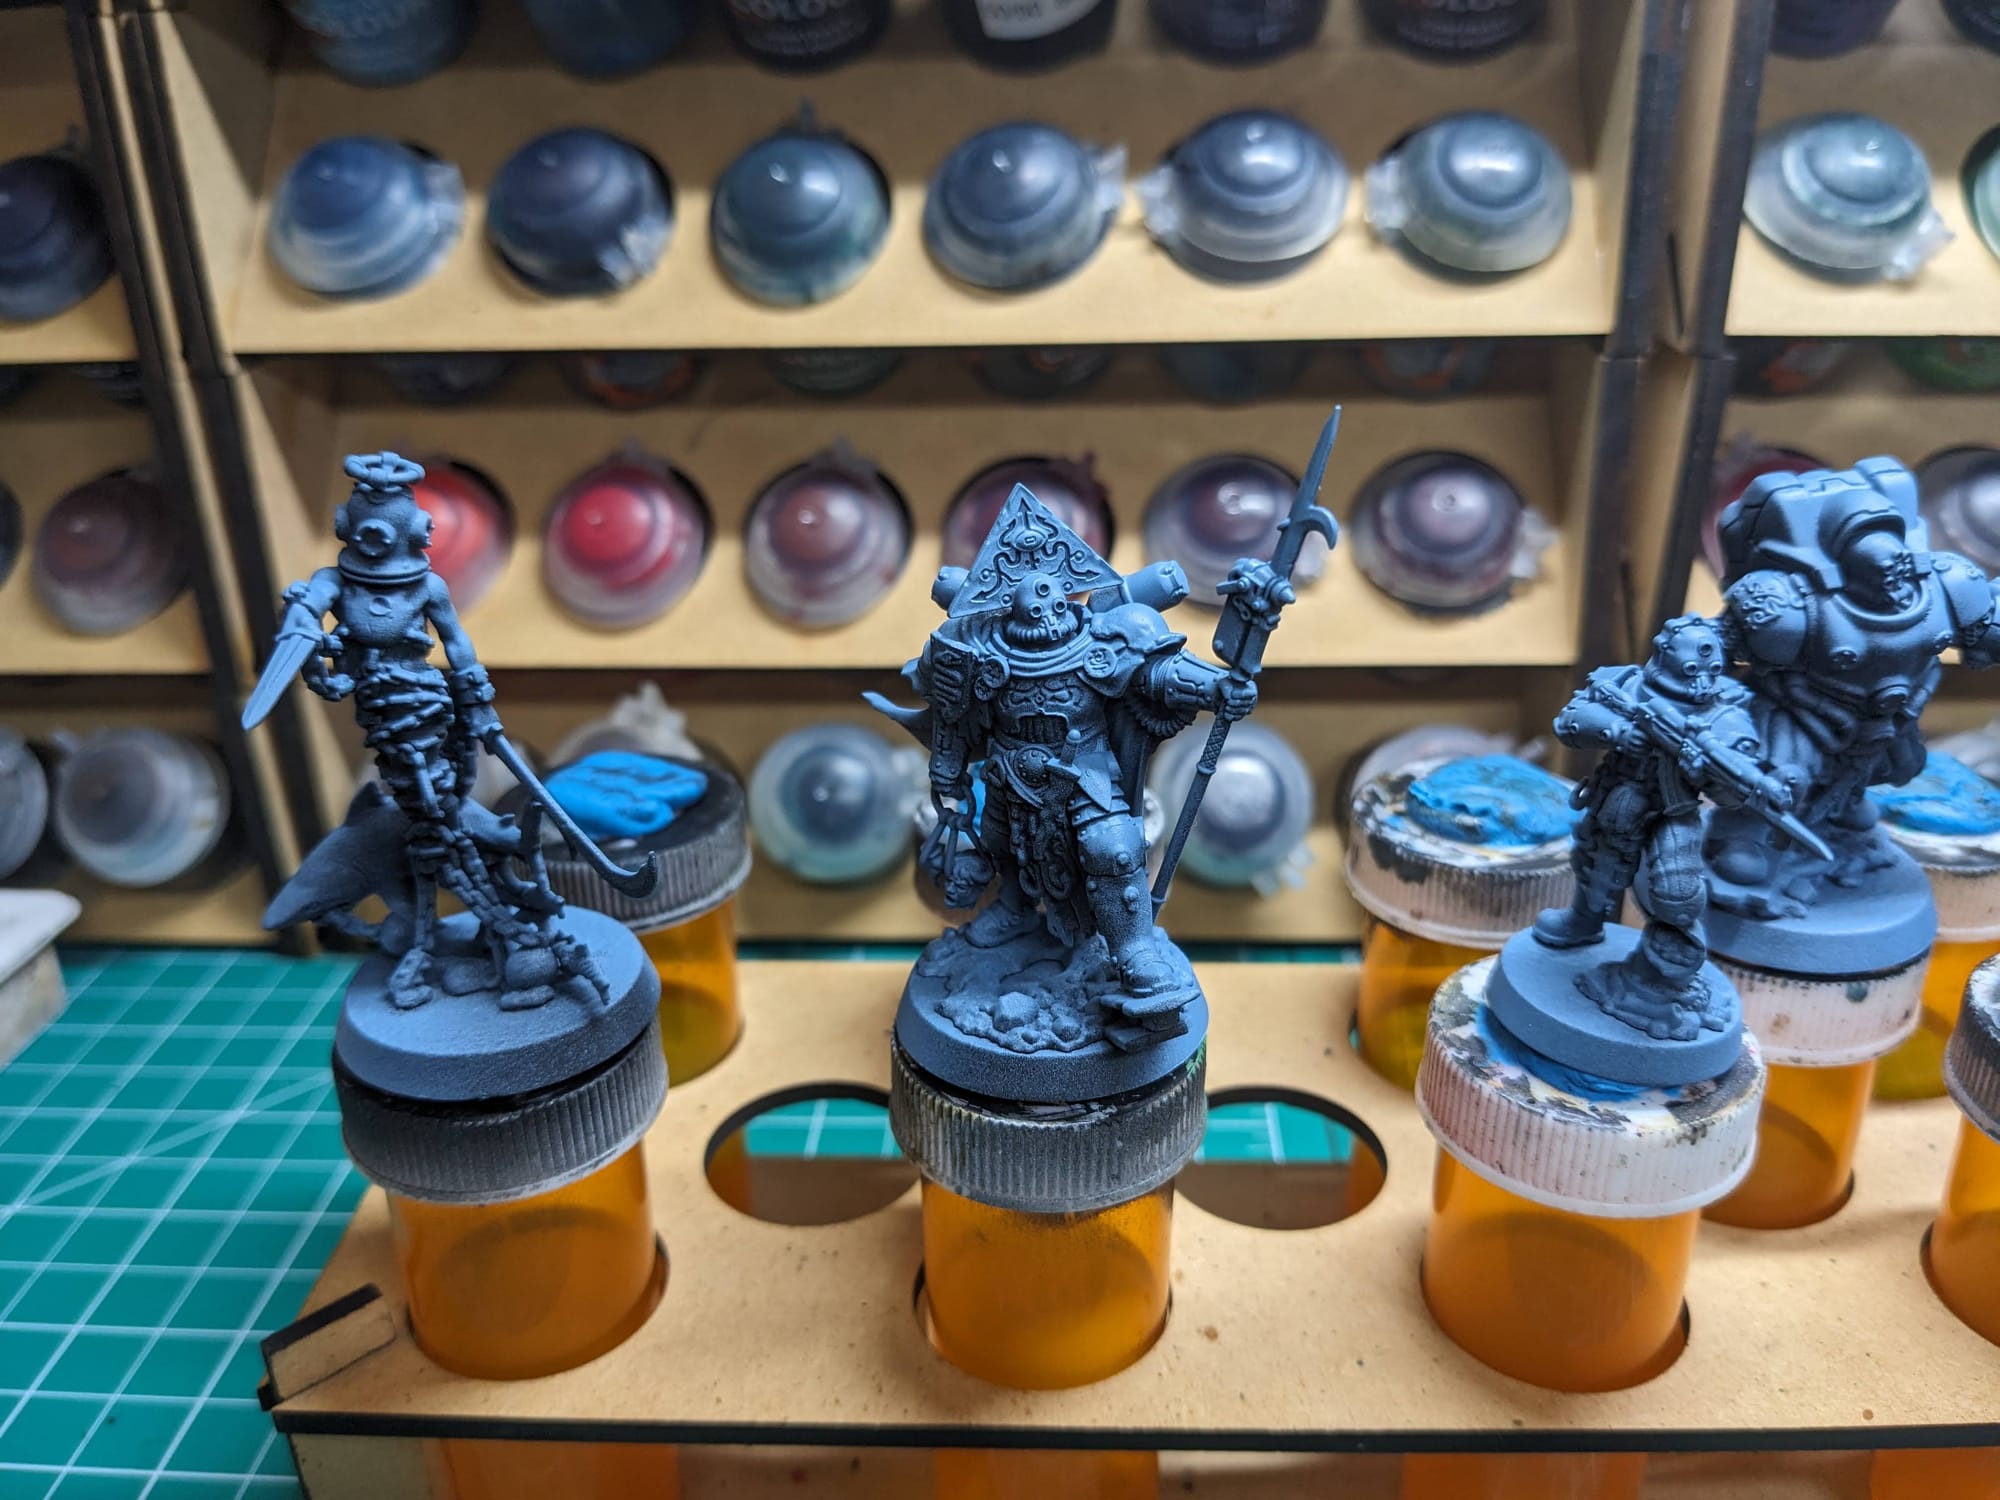
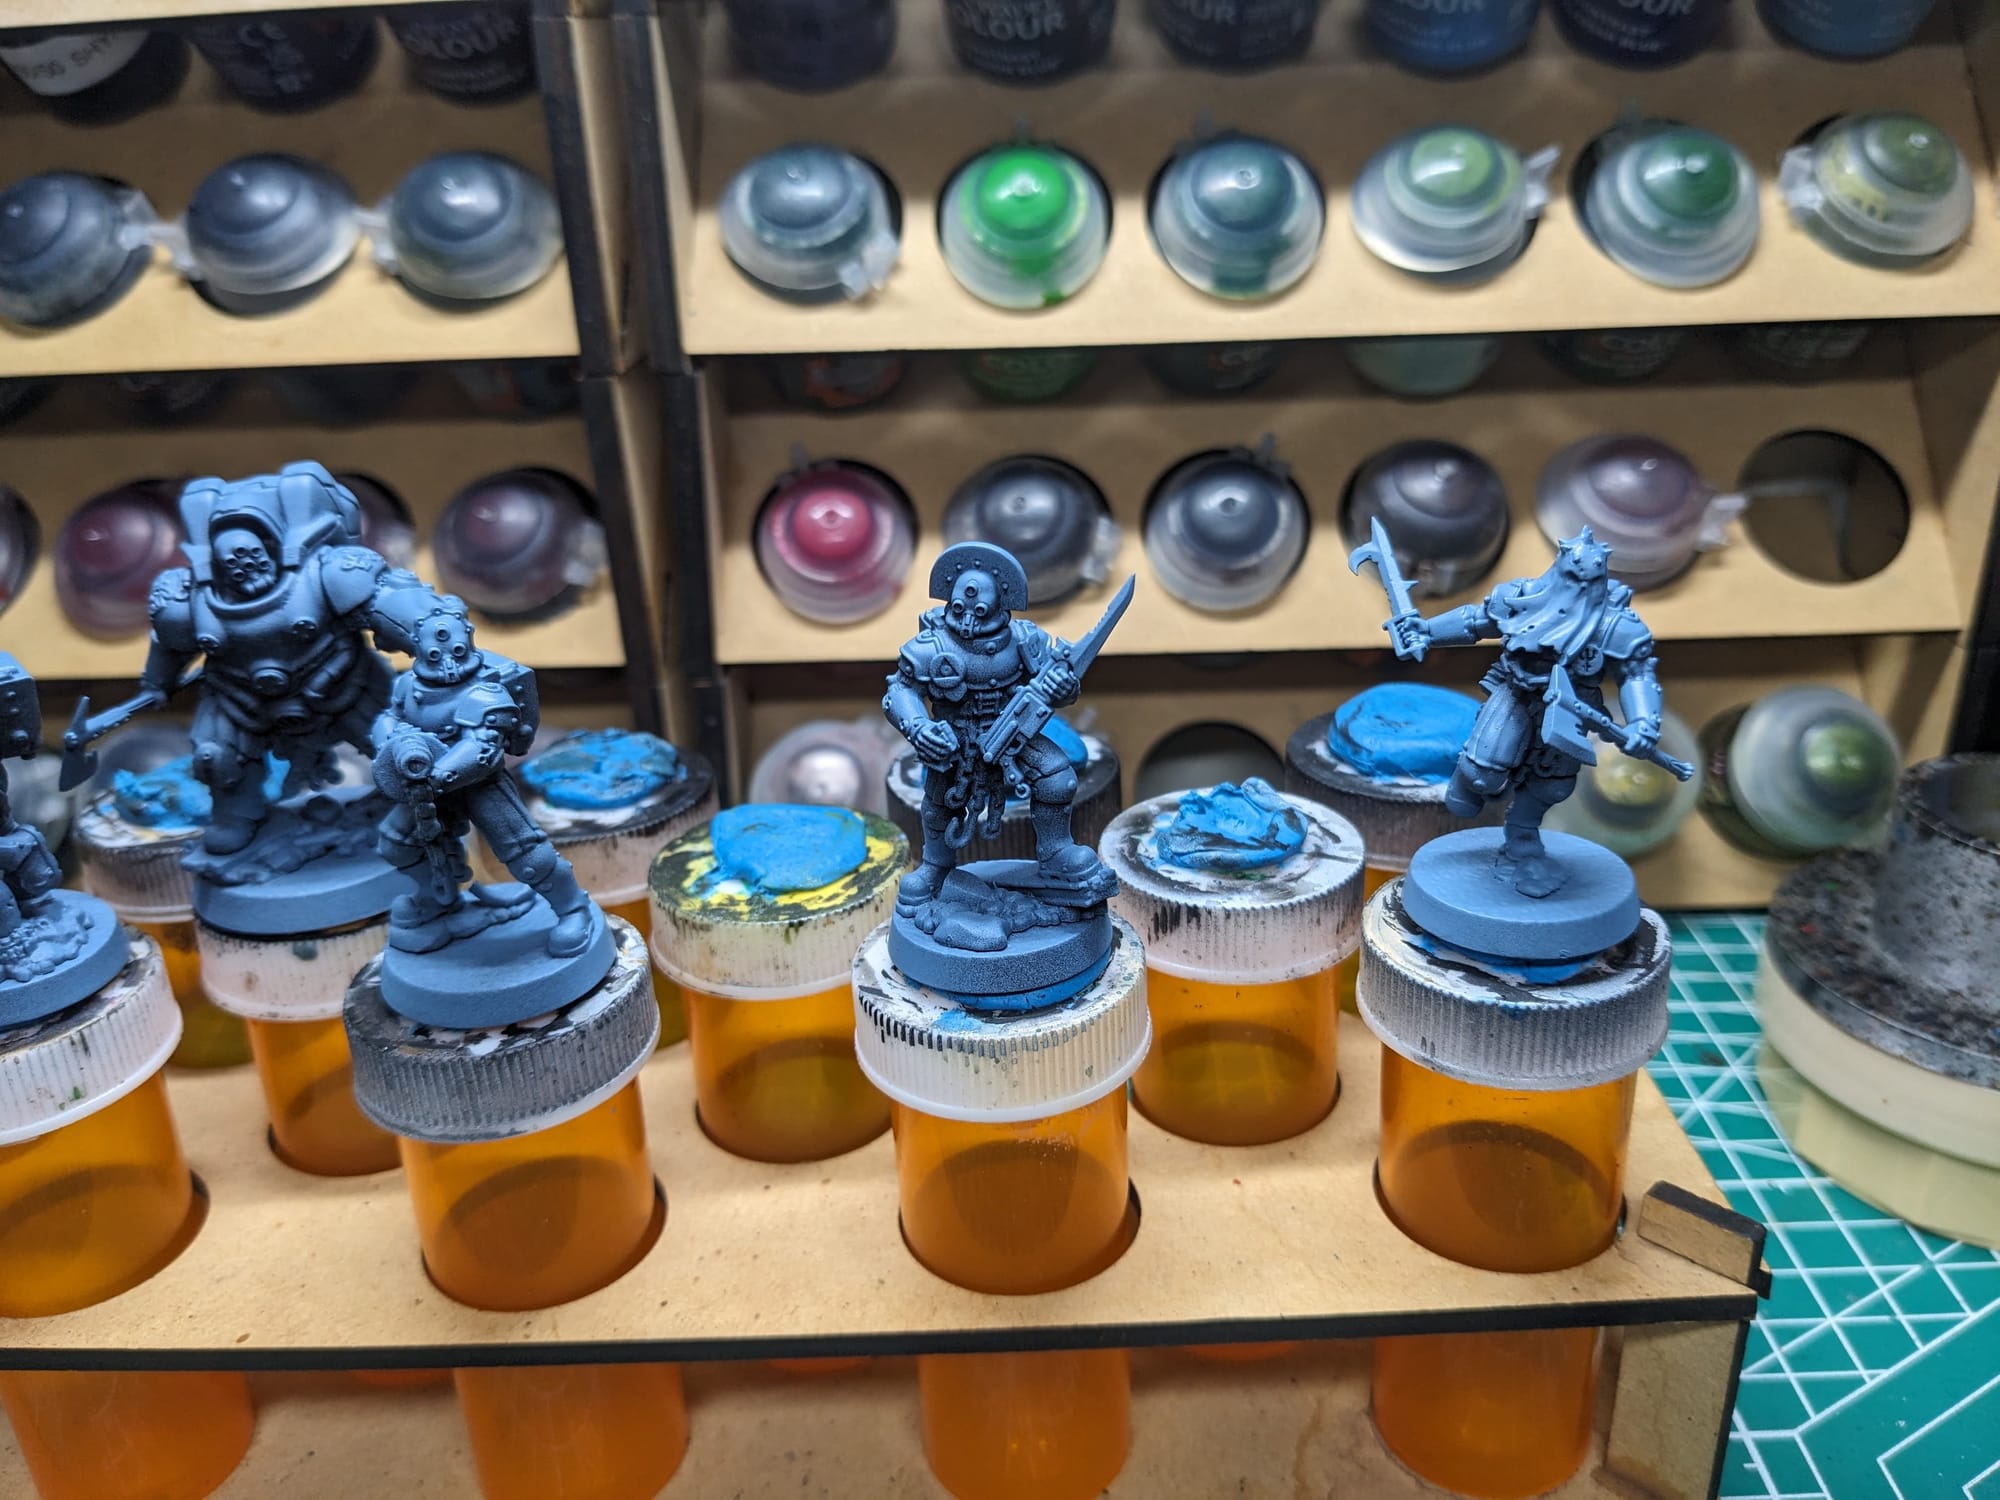
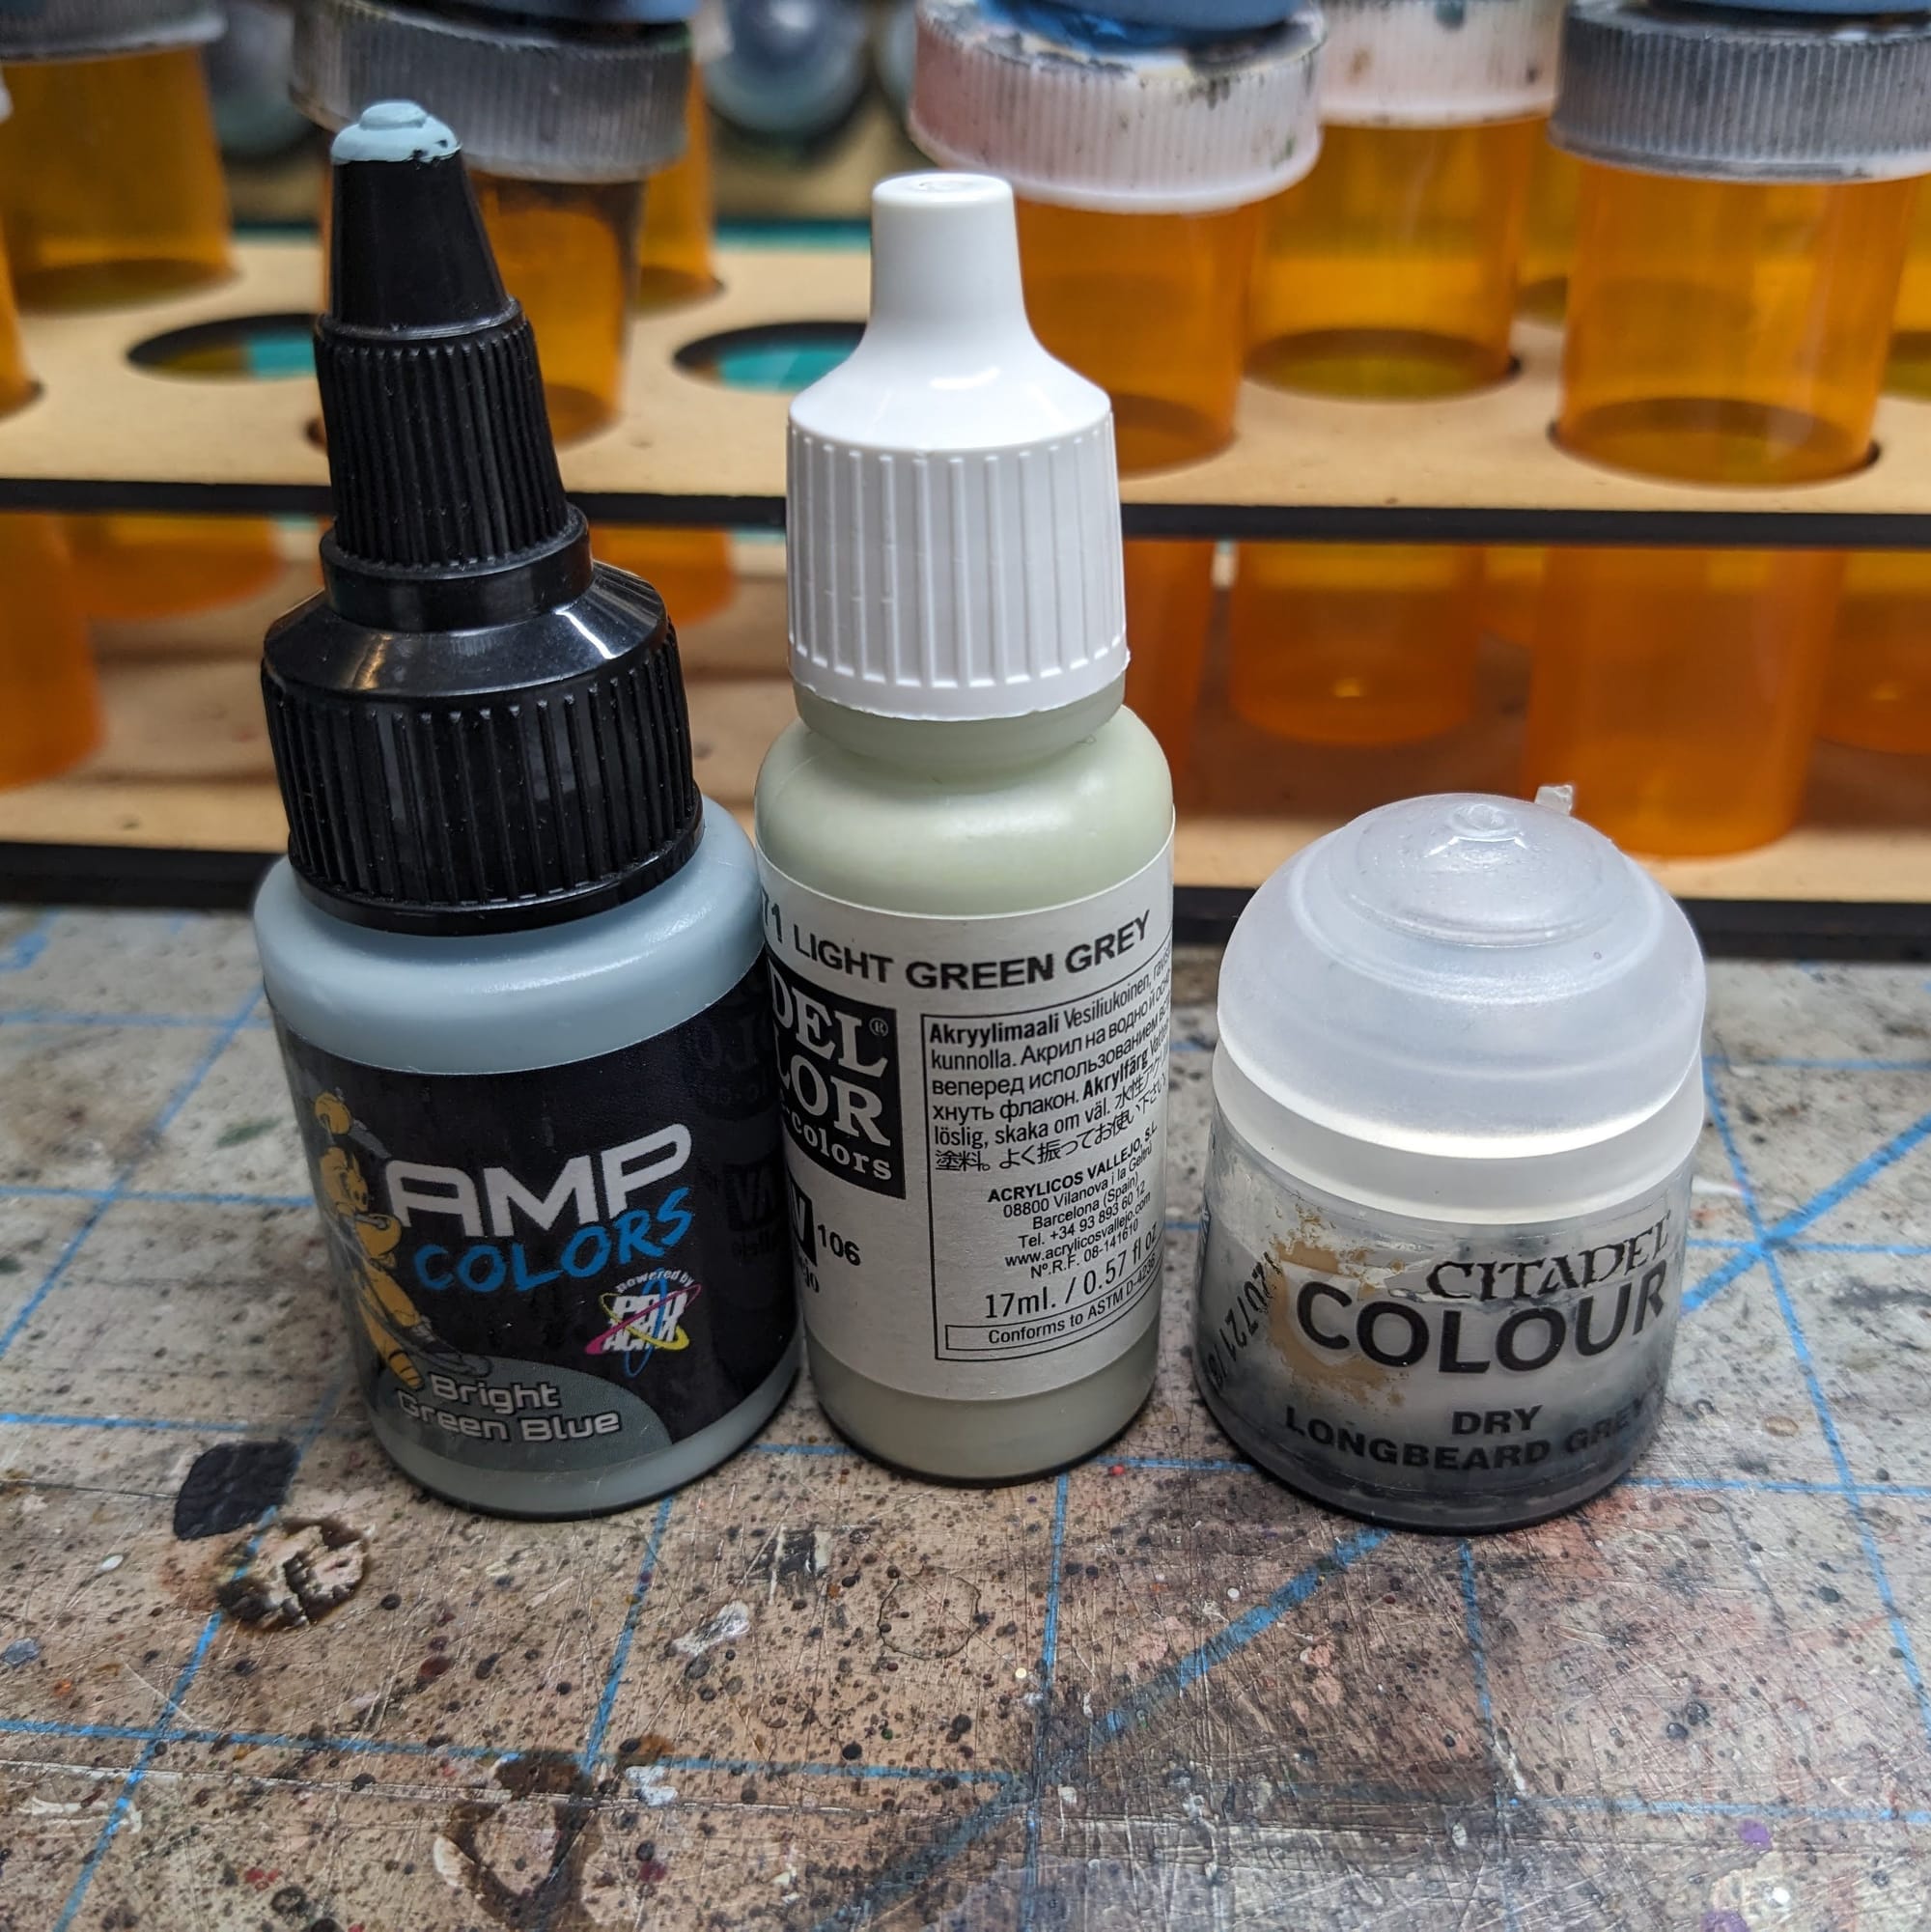
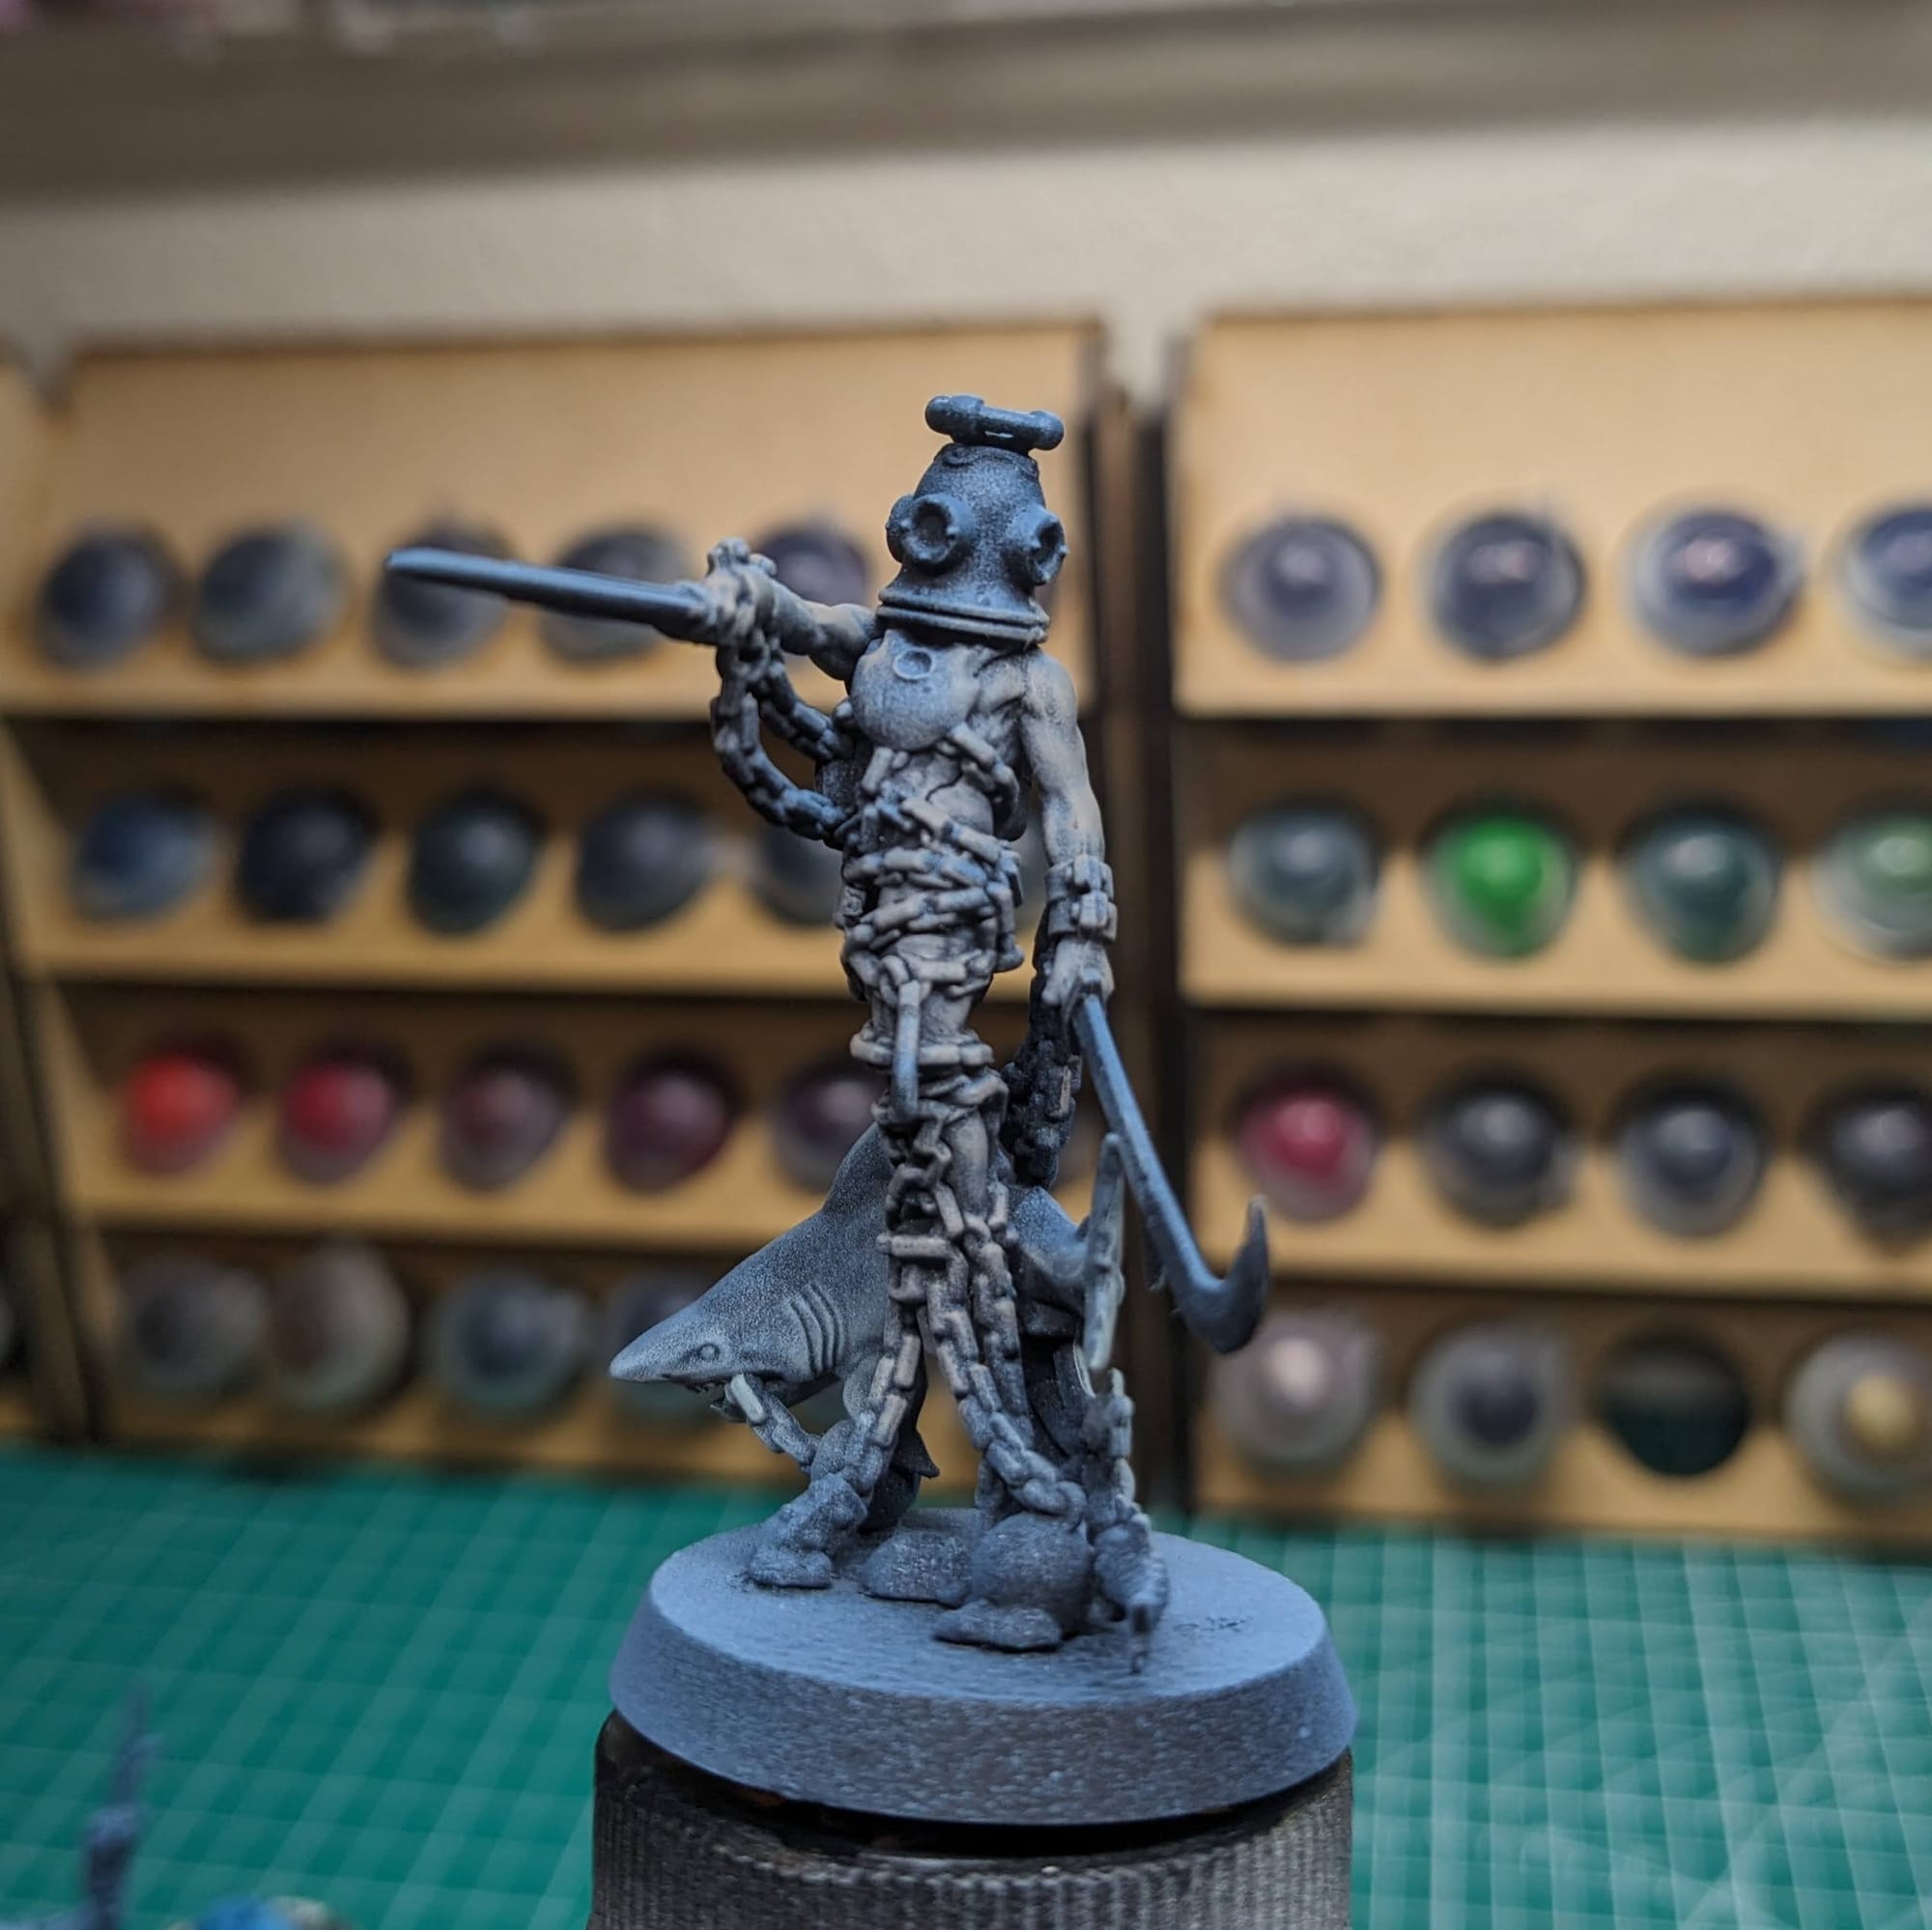
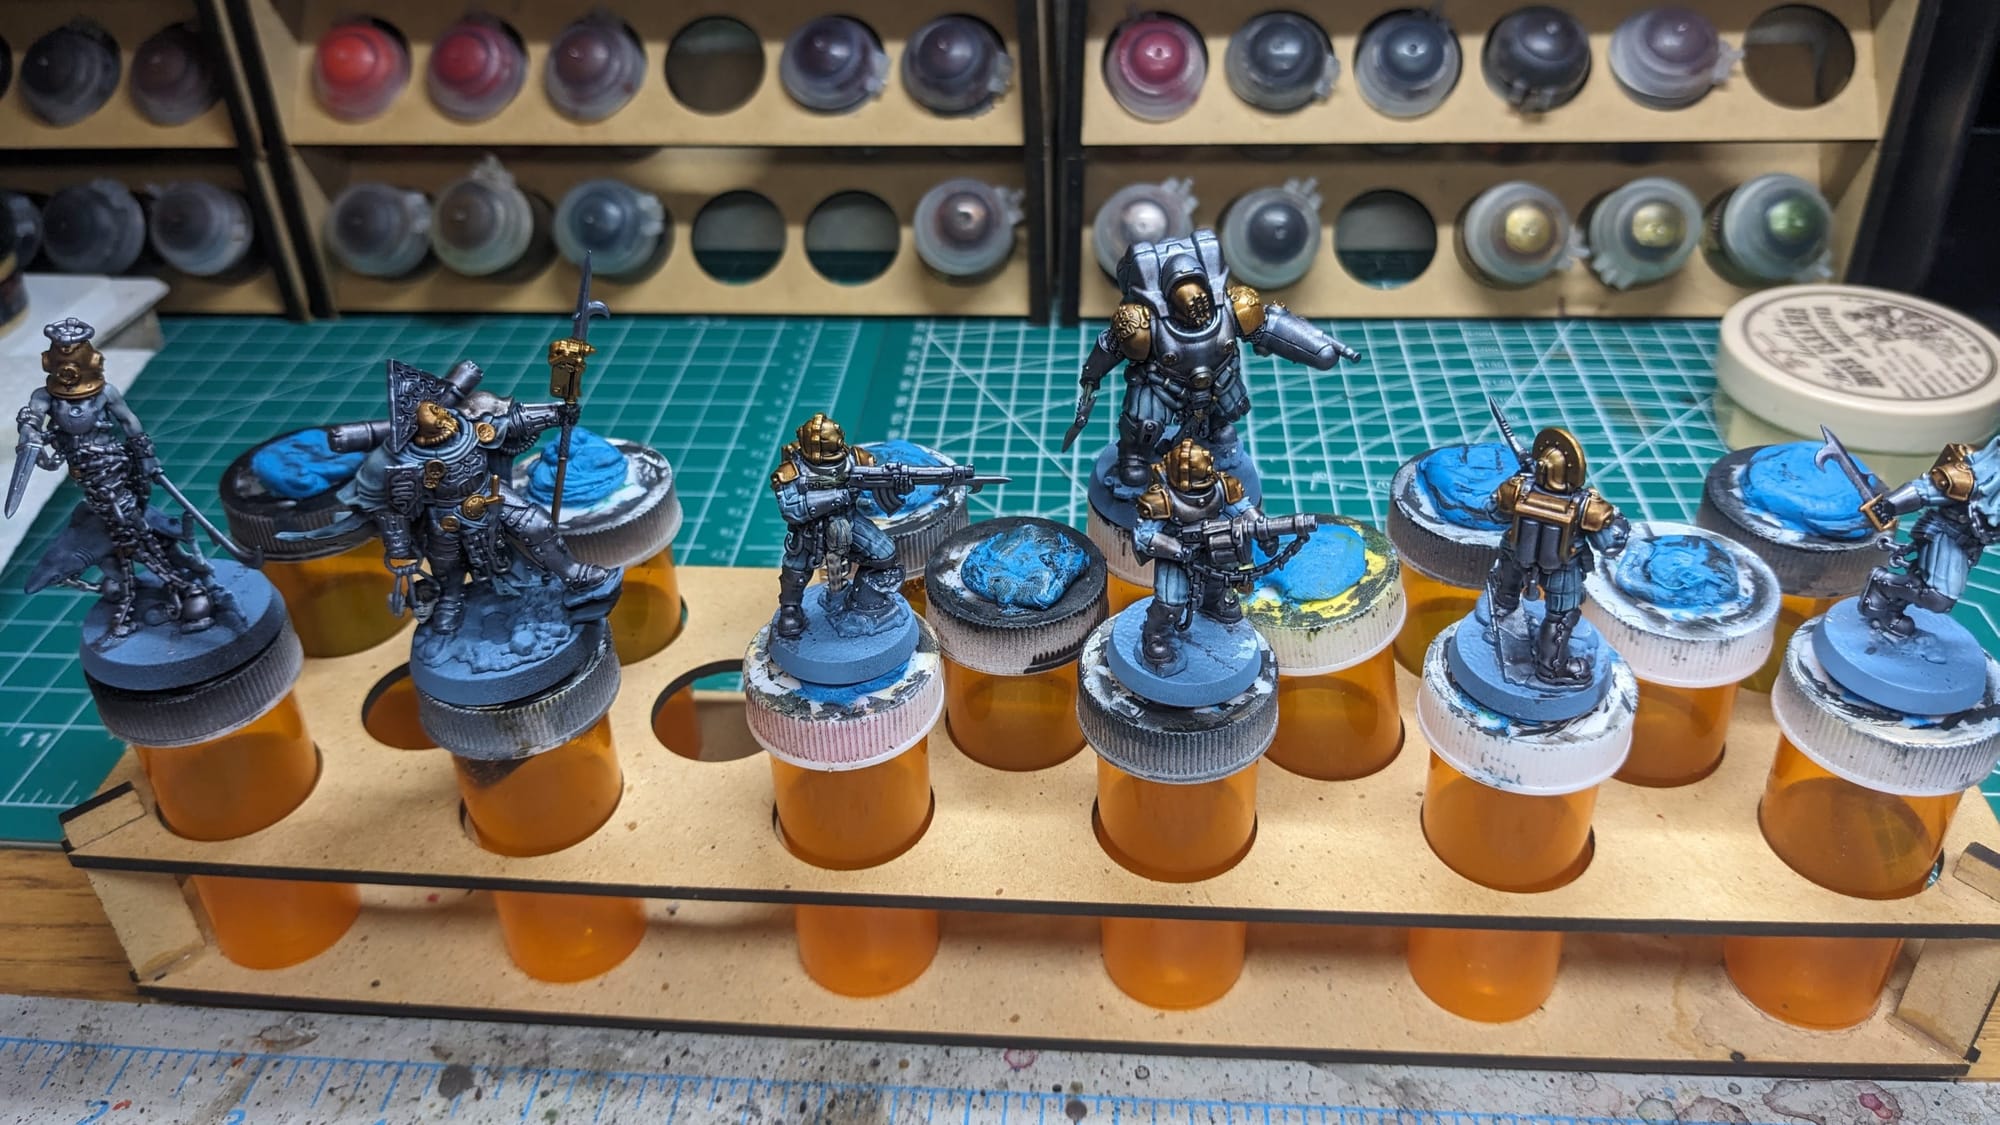
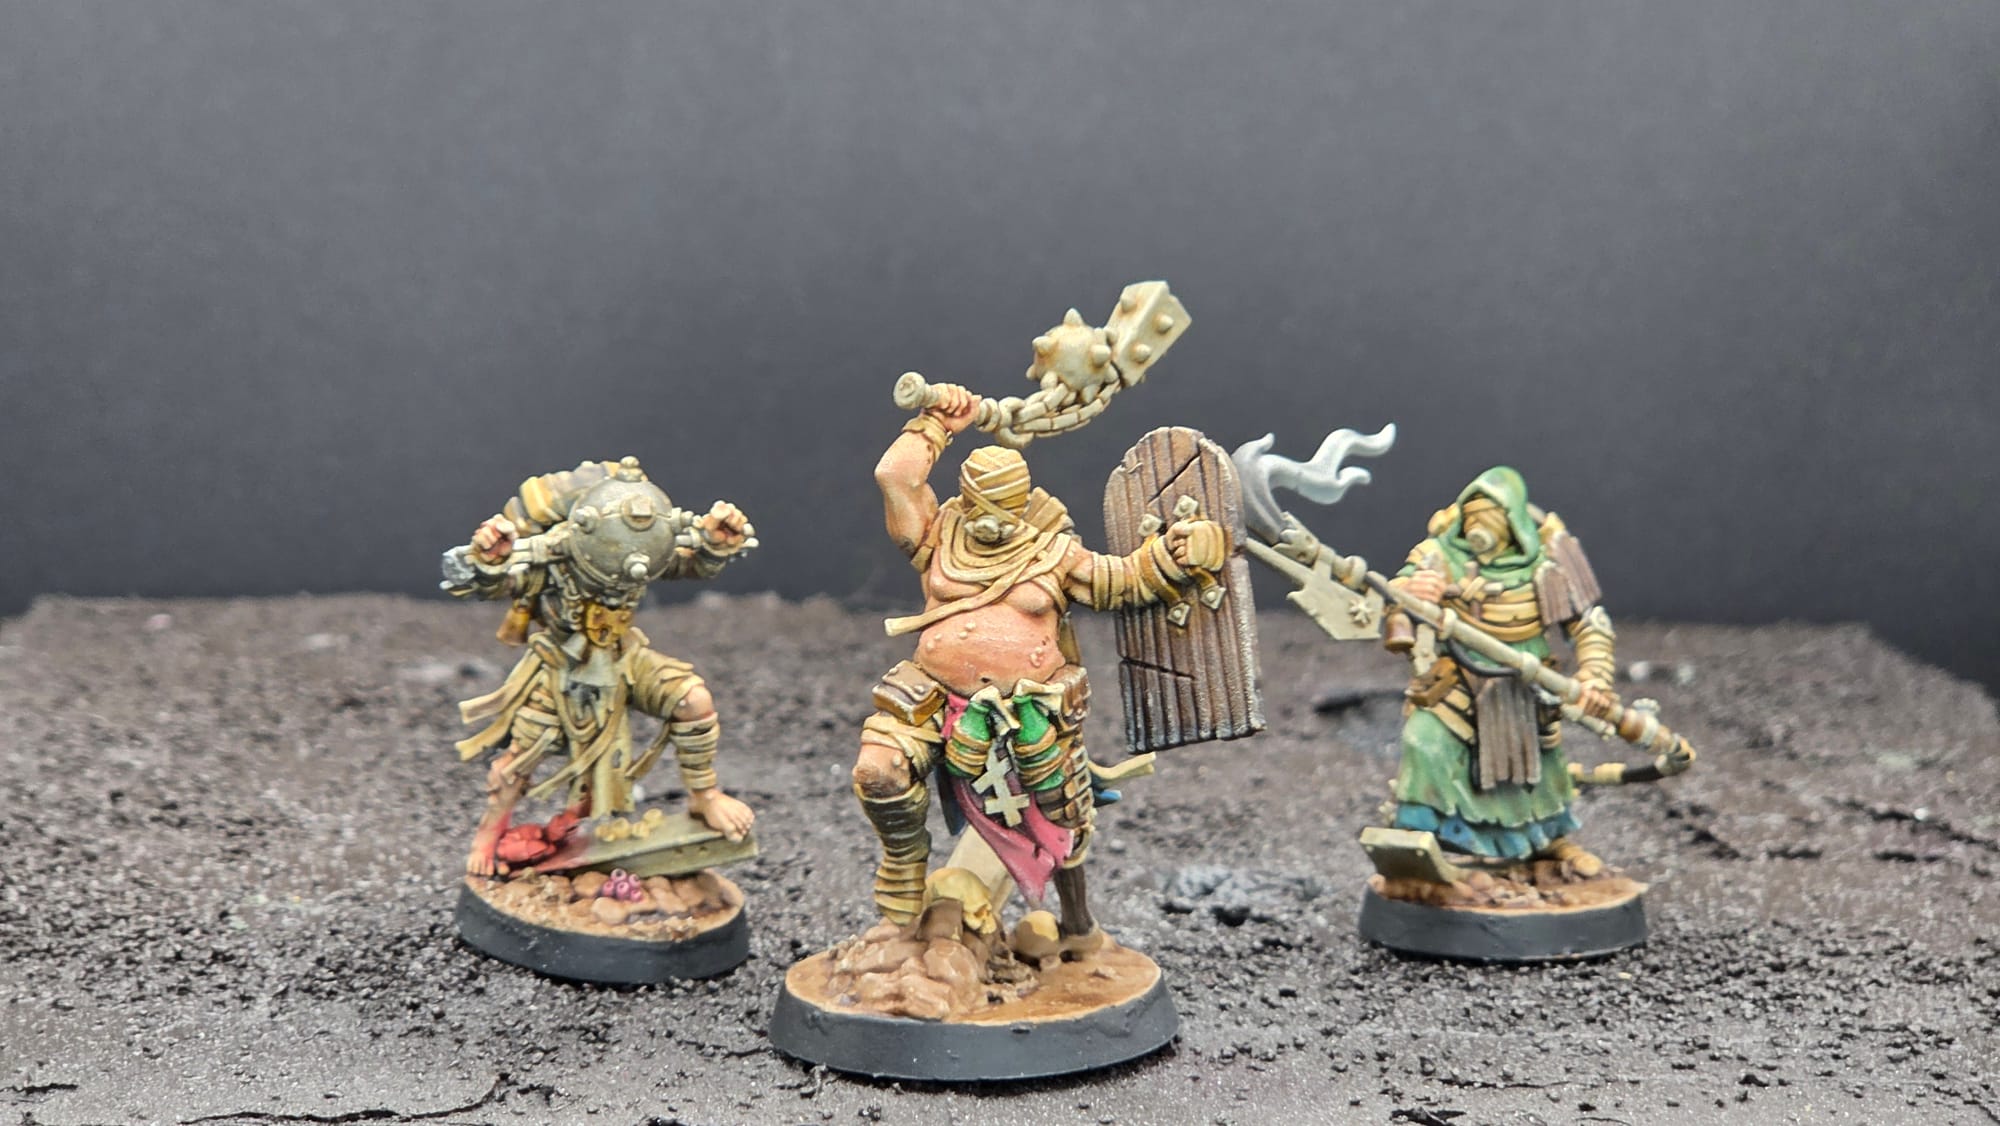
Since the priming took care of about 70% of the painting to start, I wanted to work with wide brush strokes (literally and figuraitvely) to then get down to details. I started by doing a series of passes with dry-brushing, starting with Pro Acryl Bright Green Blue, then with Vallejo Light Green Grey, and then with Citadel Longbeard Grey. I did a light pass with Citadel Drakenhof Nightshade & Gryph-Charger Grey to bring back a little definition in the pants and shark body.
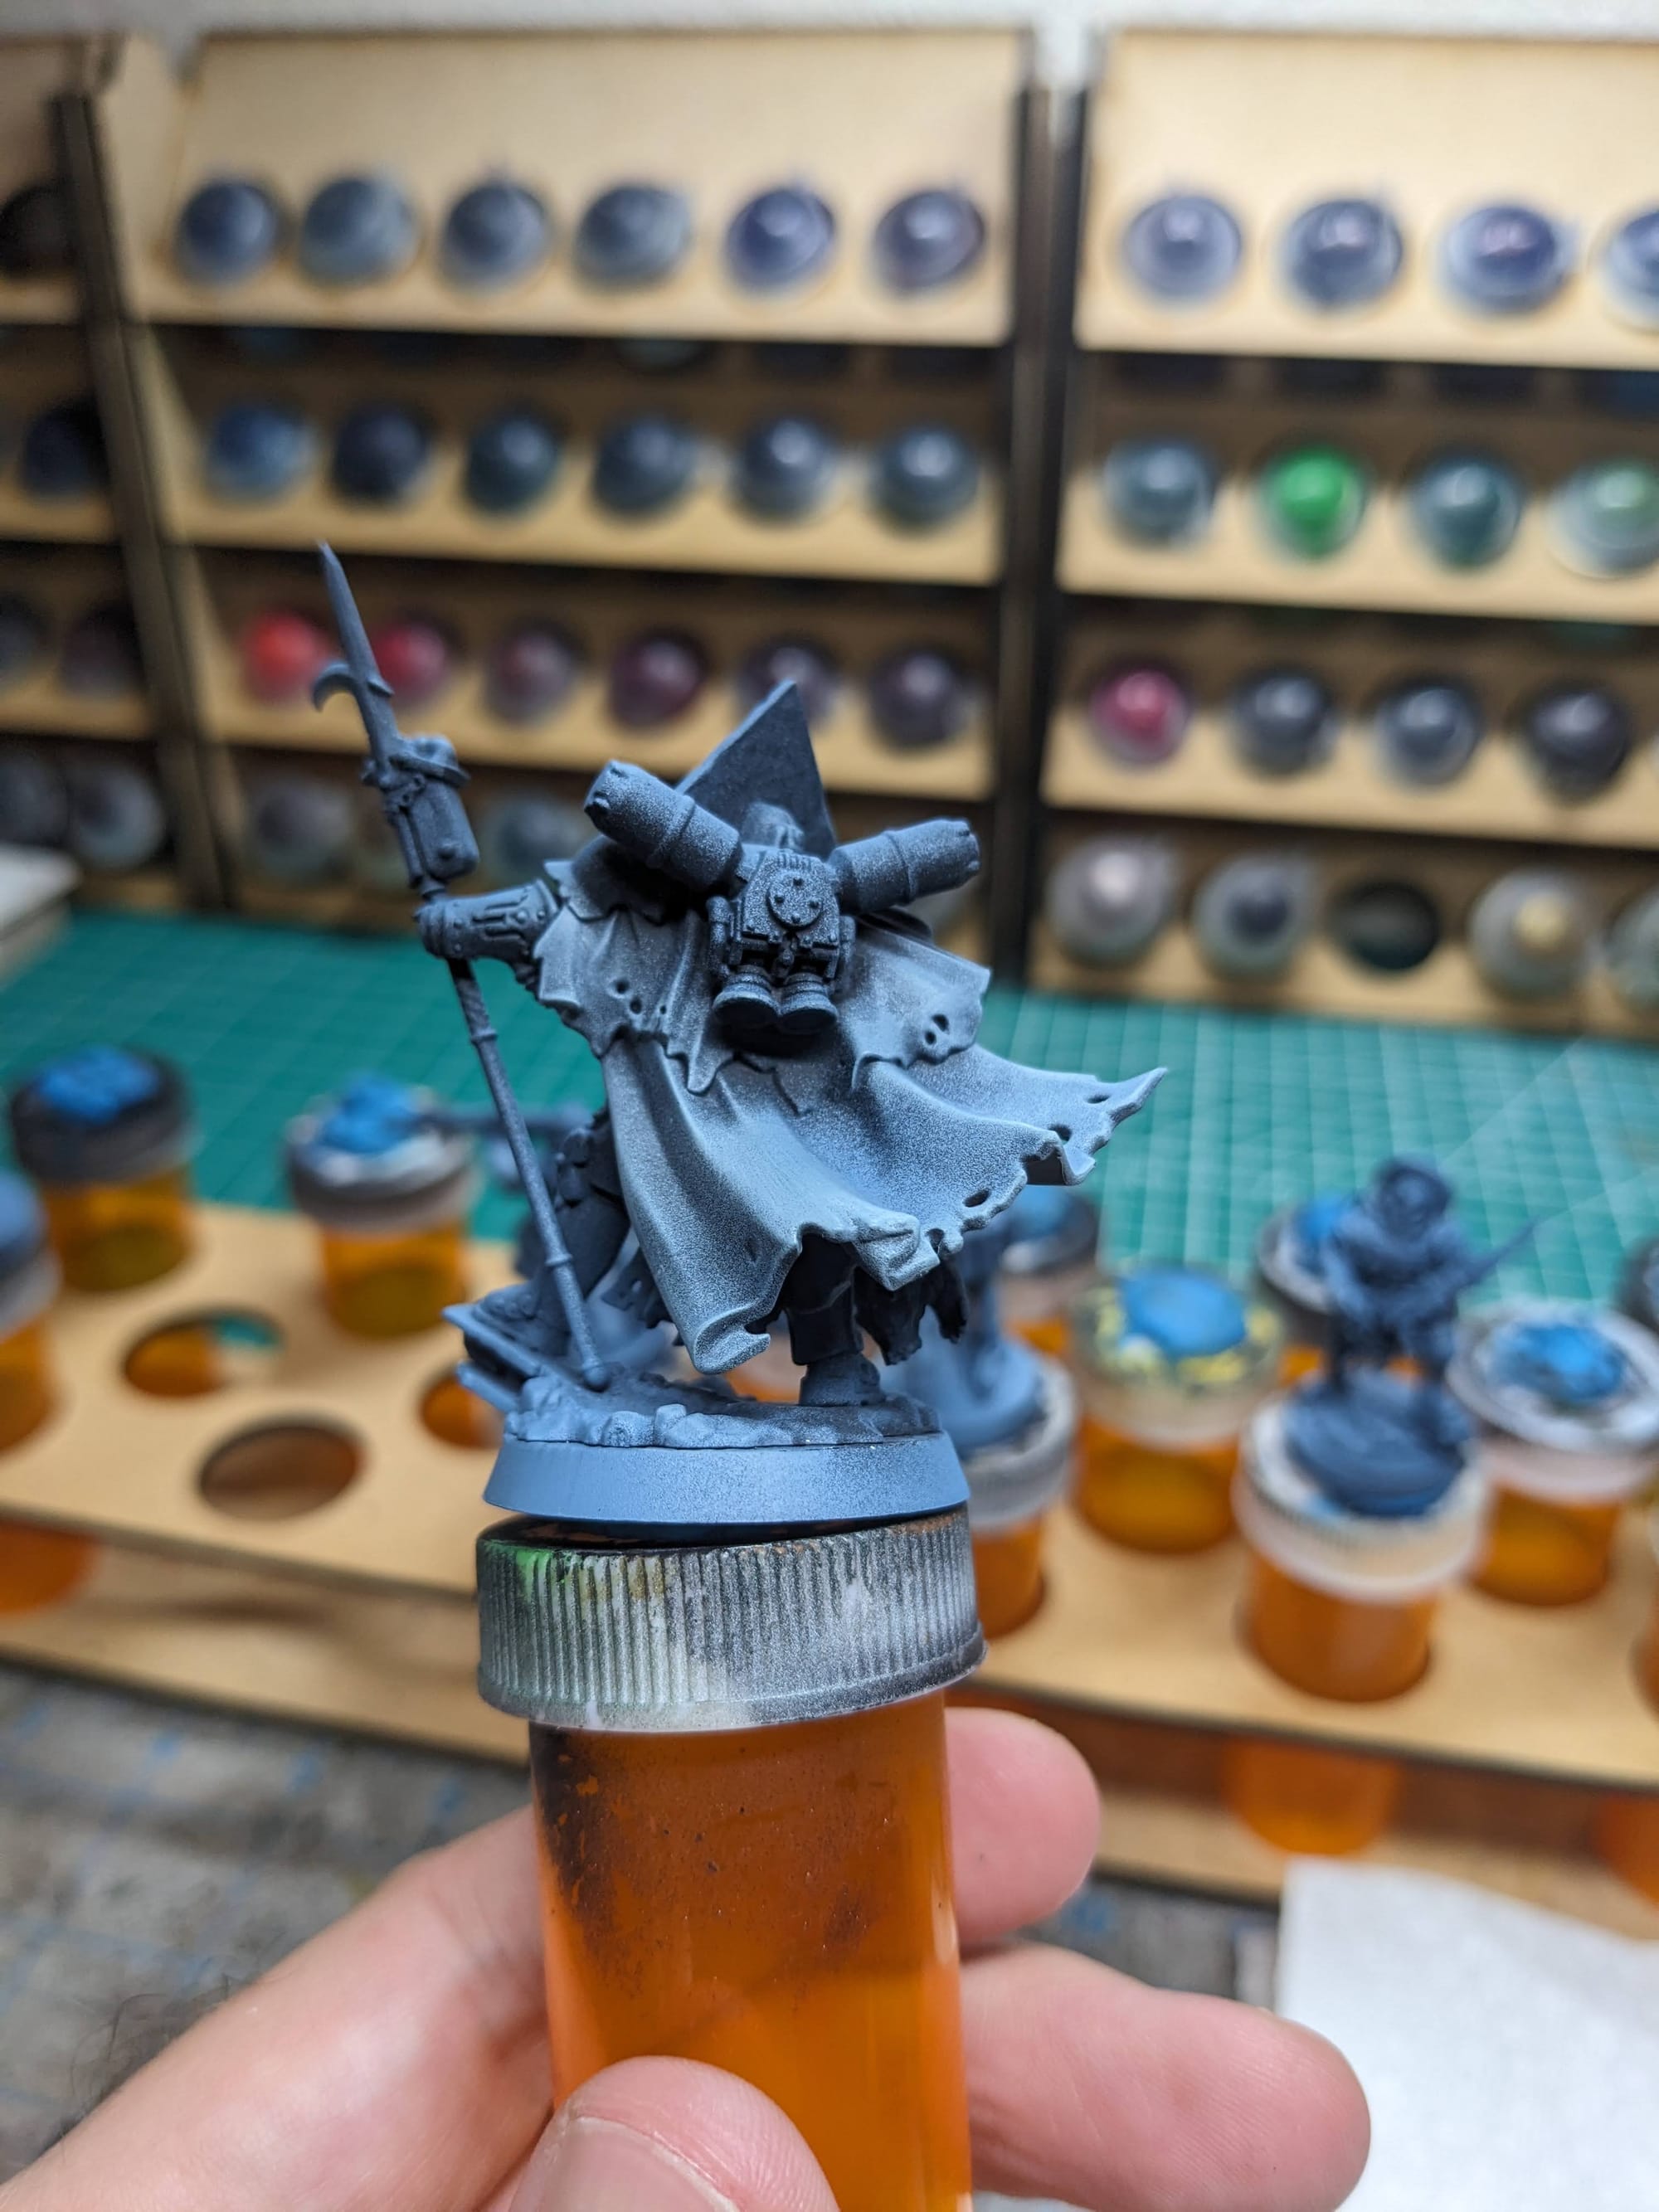
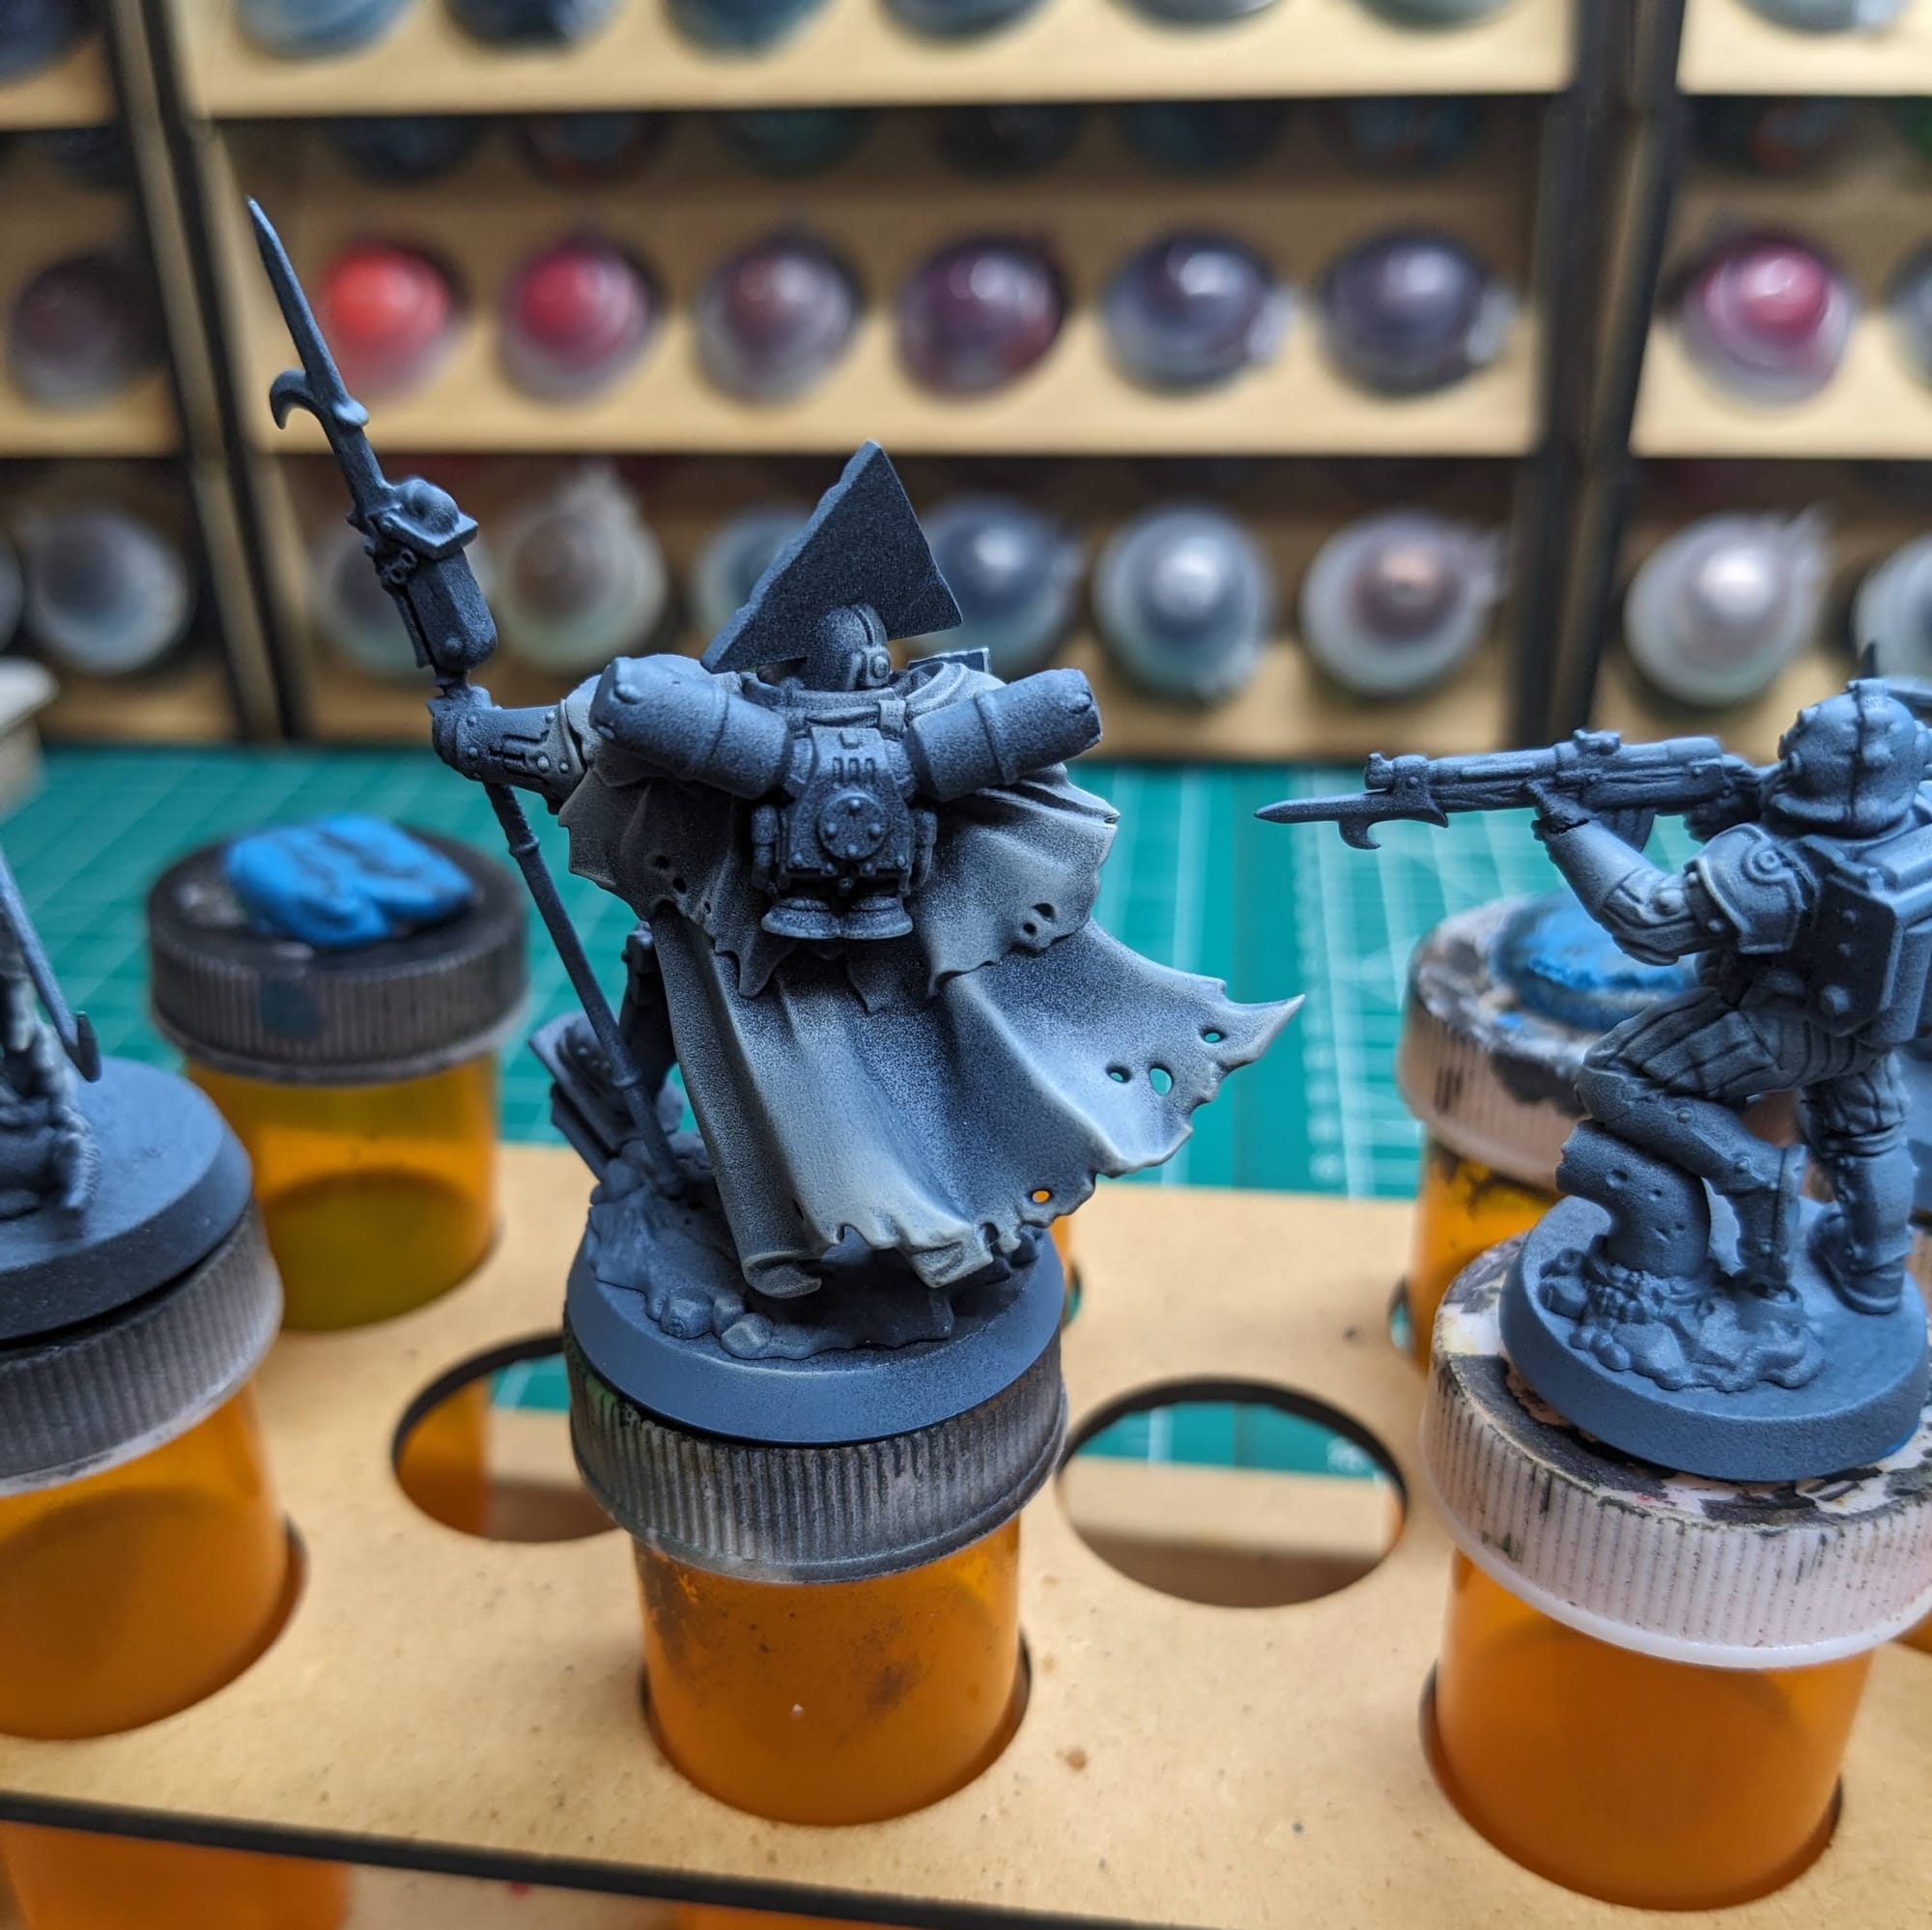
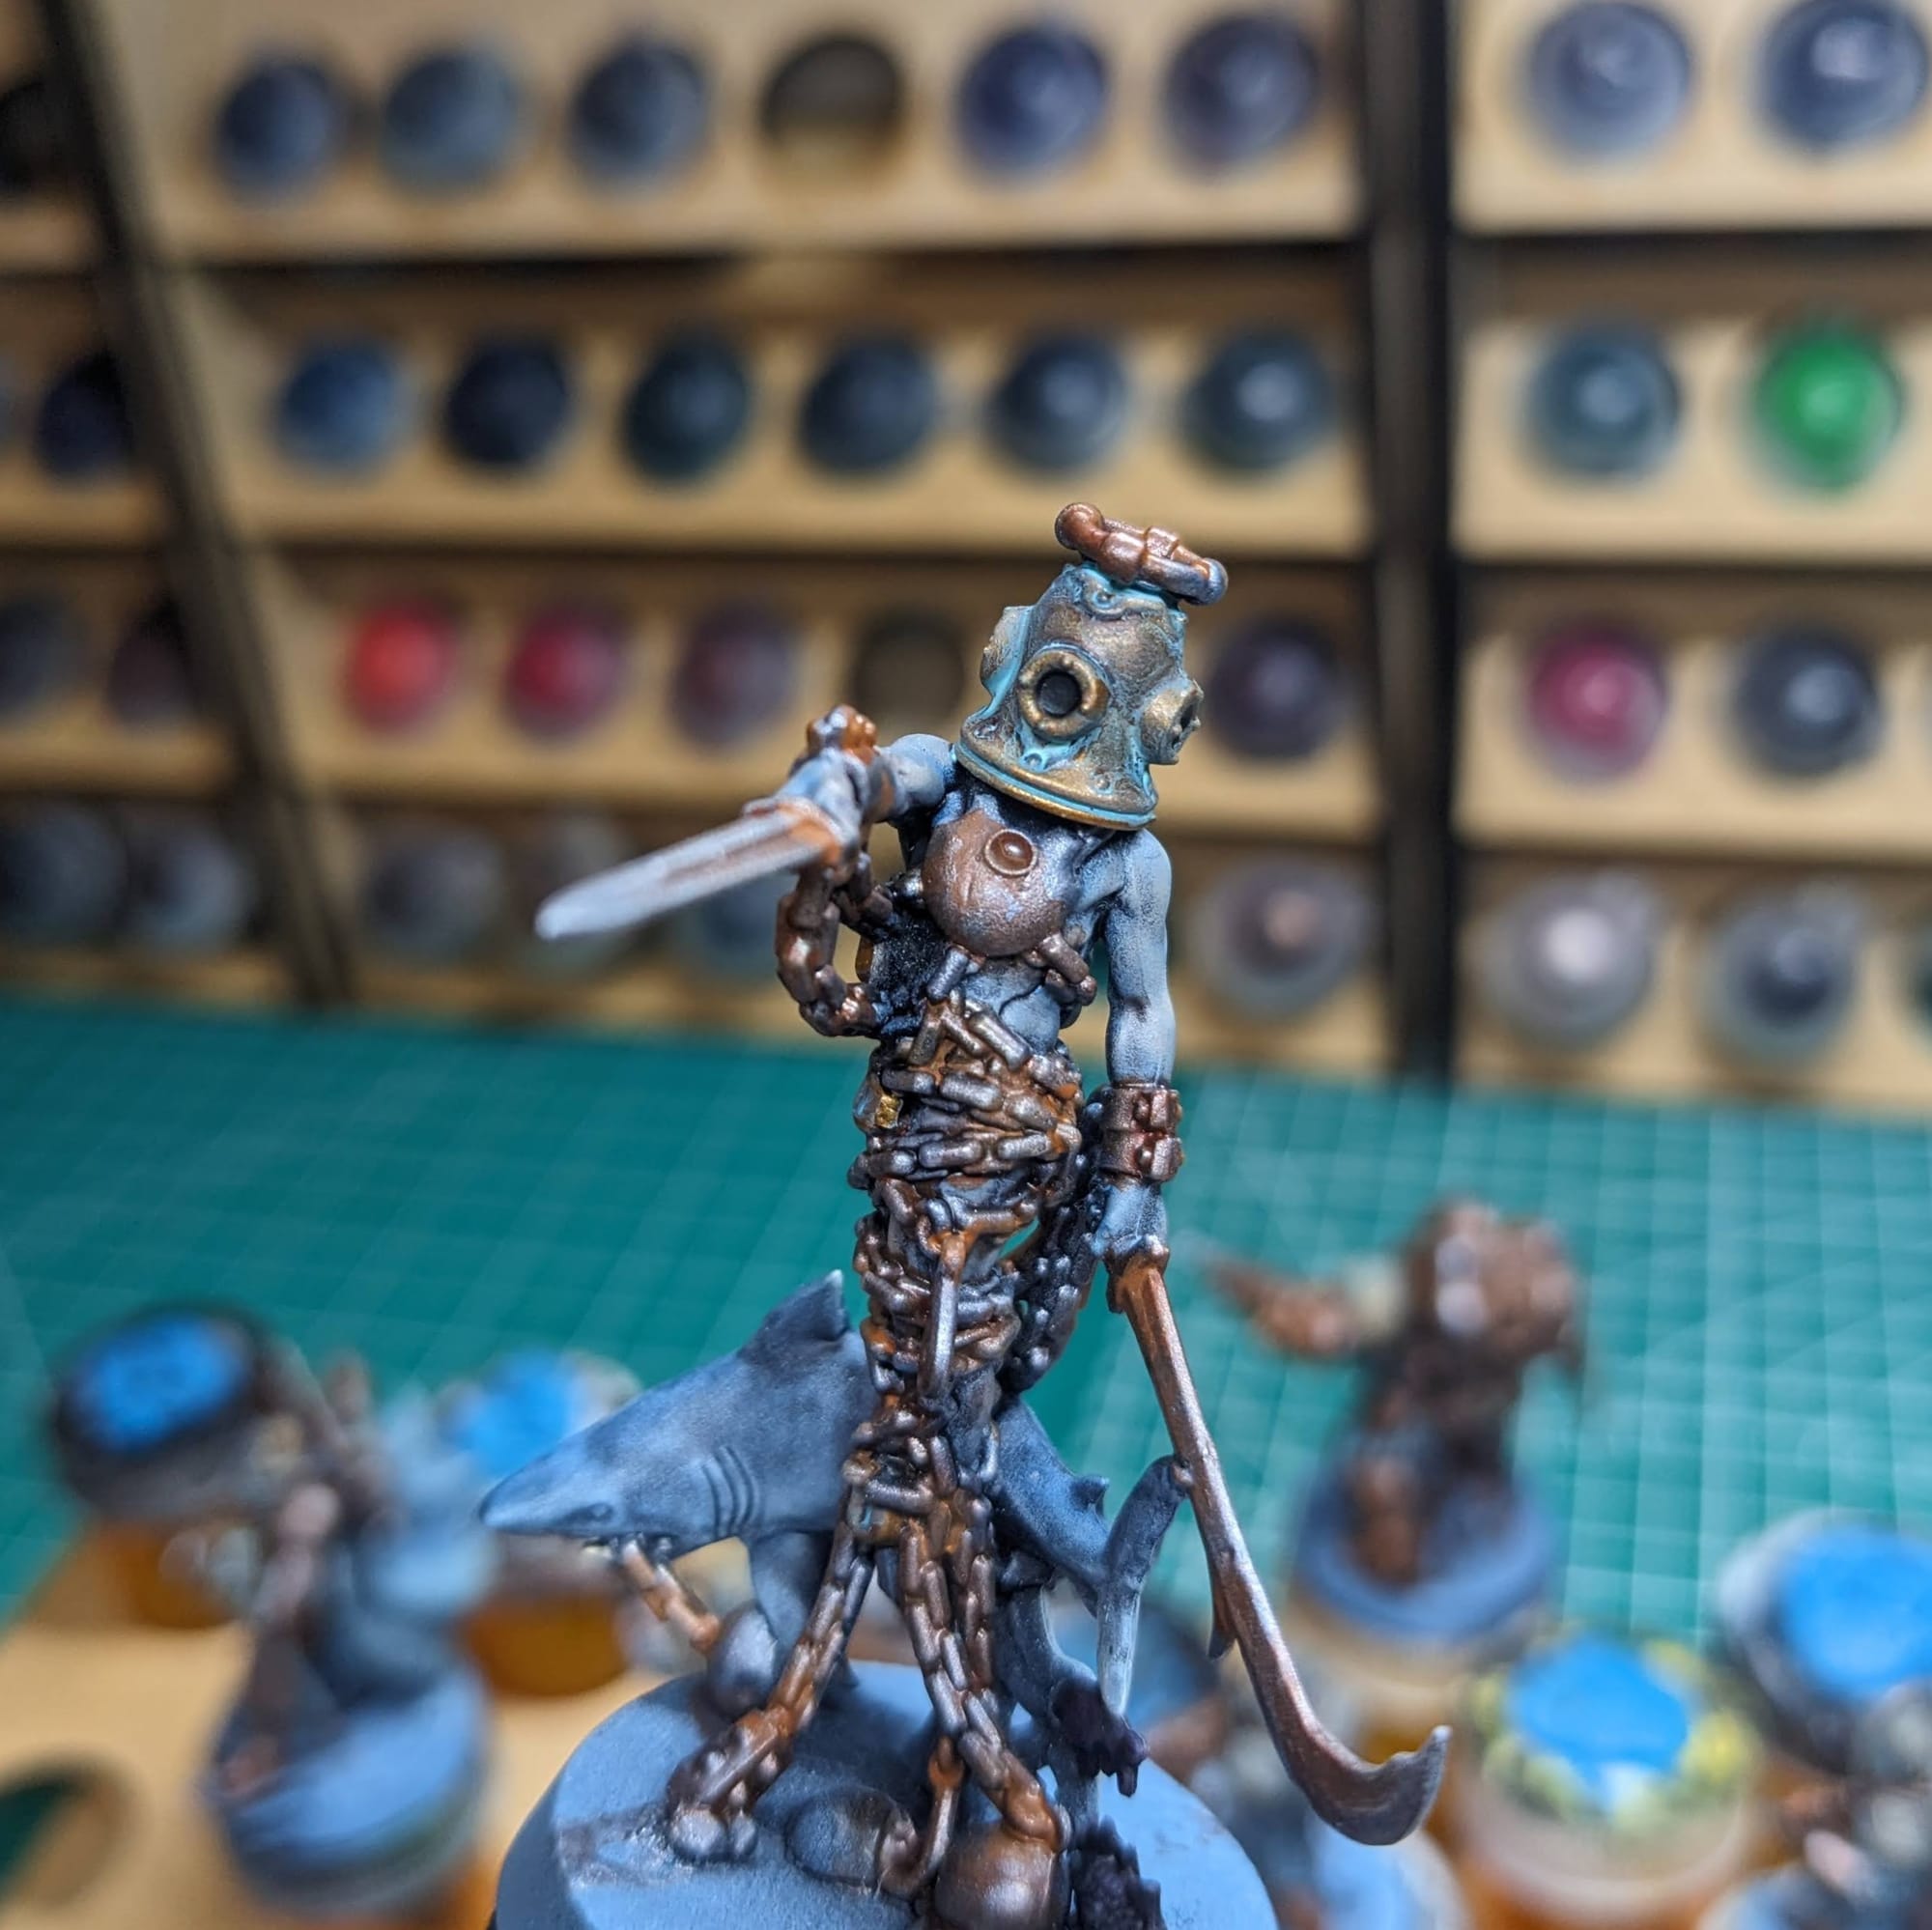
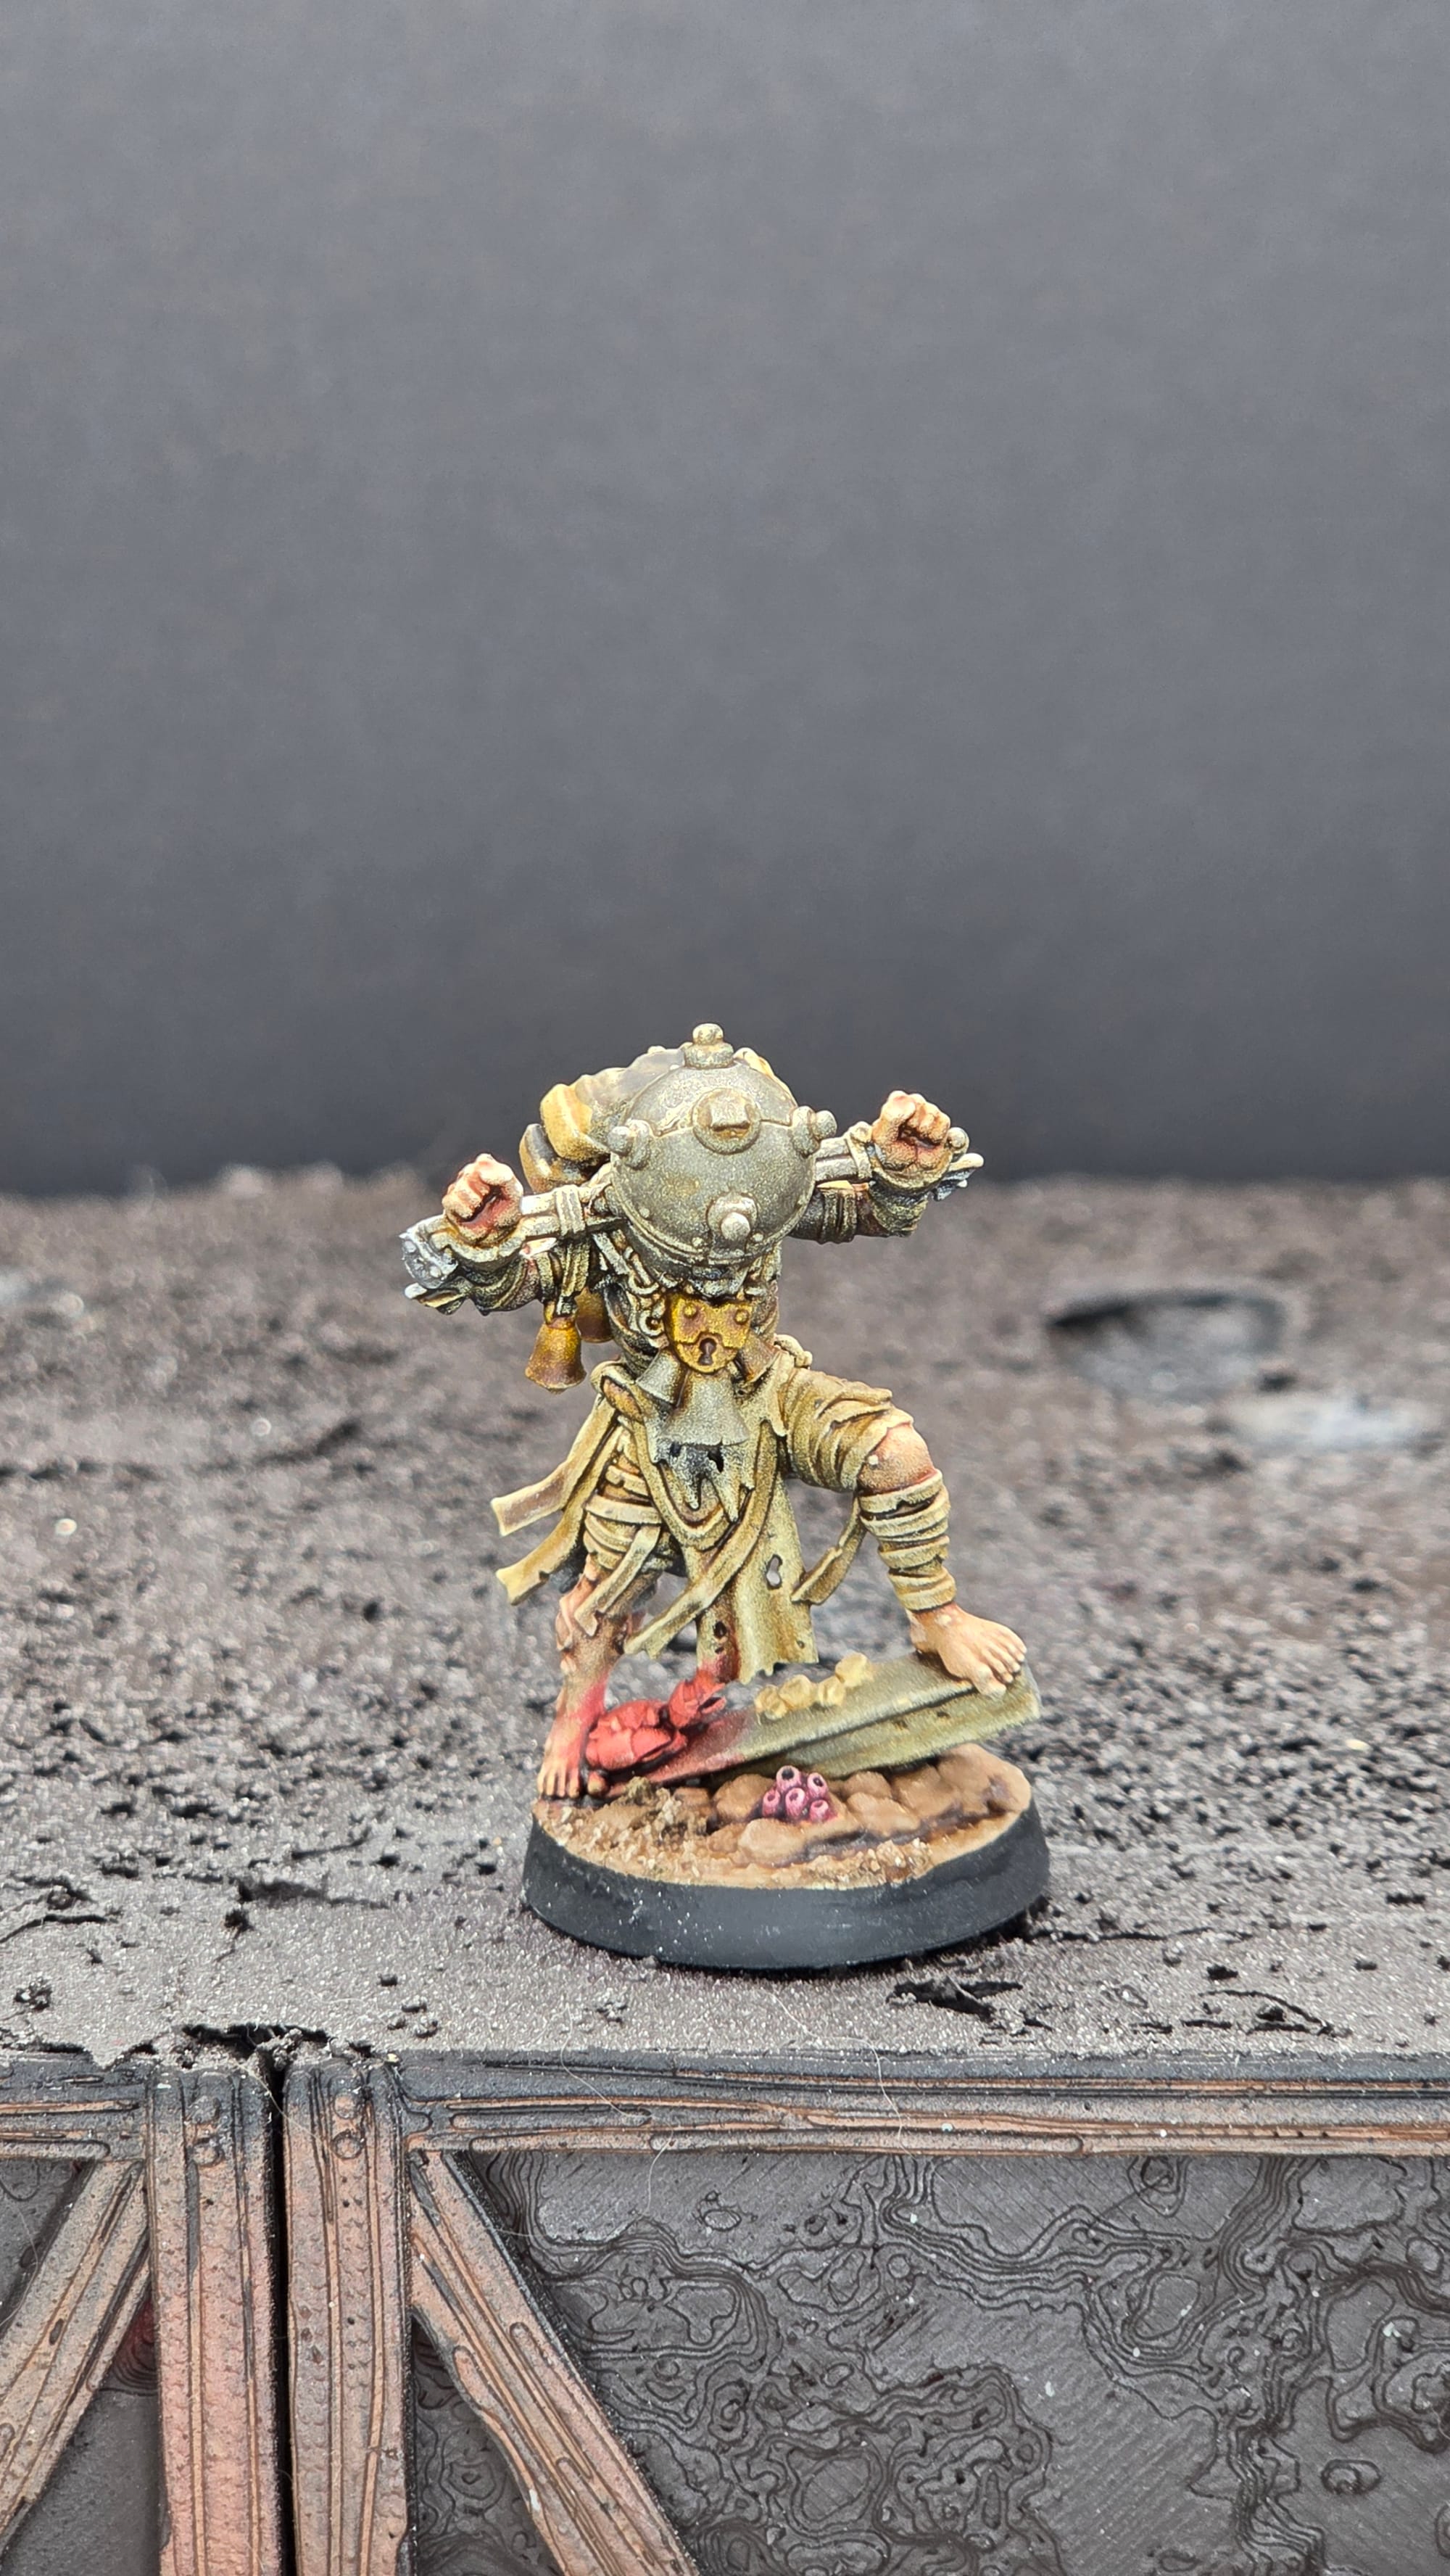
For the Chorister, I applied the same technique to the skin, but added a layer of Rakarth Flesh instead of Longbeard Grey, and then passed over it with a 6:1 Apothecary White / Talassar Blue Contrast to help give his skin a cold and clammy look to it.
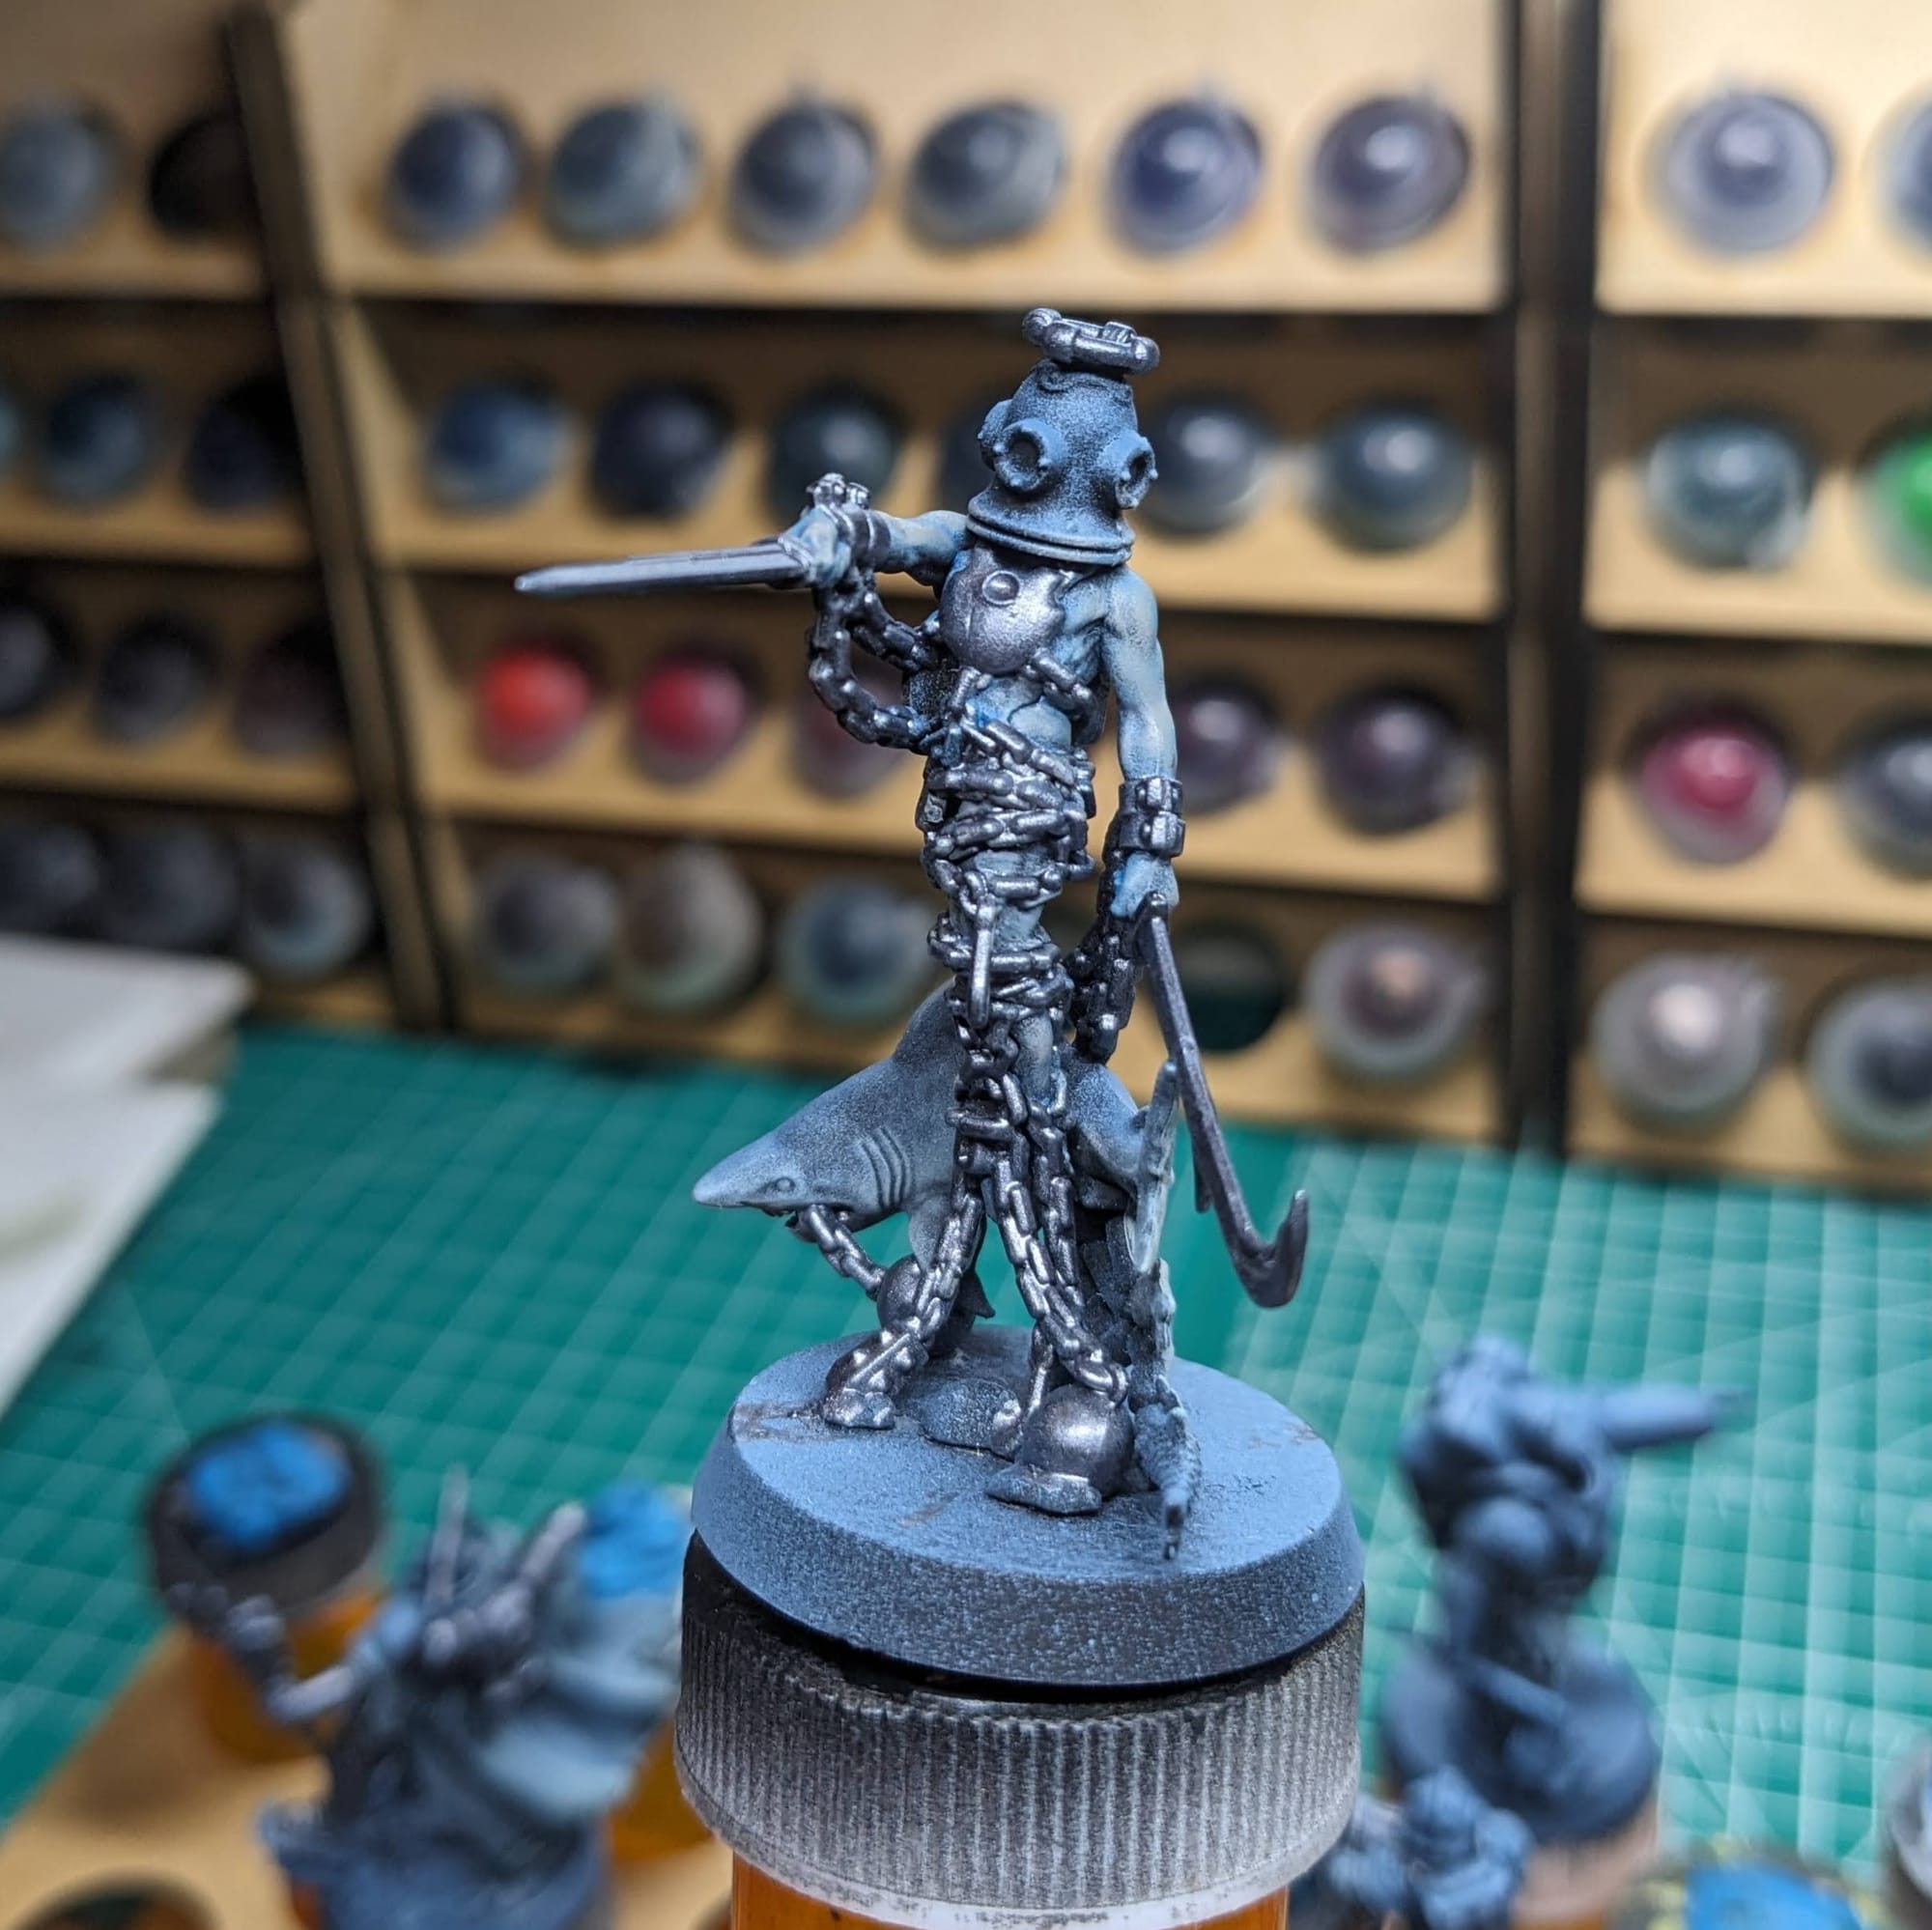
Once I was satisfied with the cloth and skin, both for the Chorister and Shark, I moved to the metals, which were the next most predominant color. Starting with a 1:1 mix of Polished Silver + Broadsword Silver Metallic Speedpaint, I painted all of the areas that were going to have an iron look to them. Any small details I went back over with Citadel Leadbelcher.
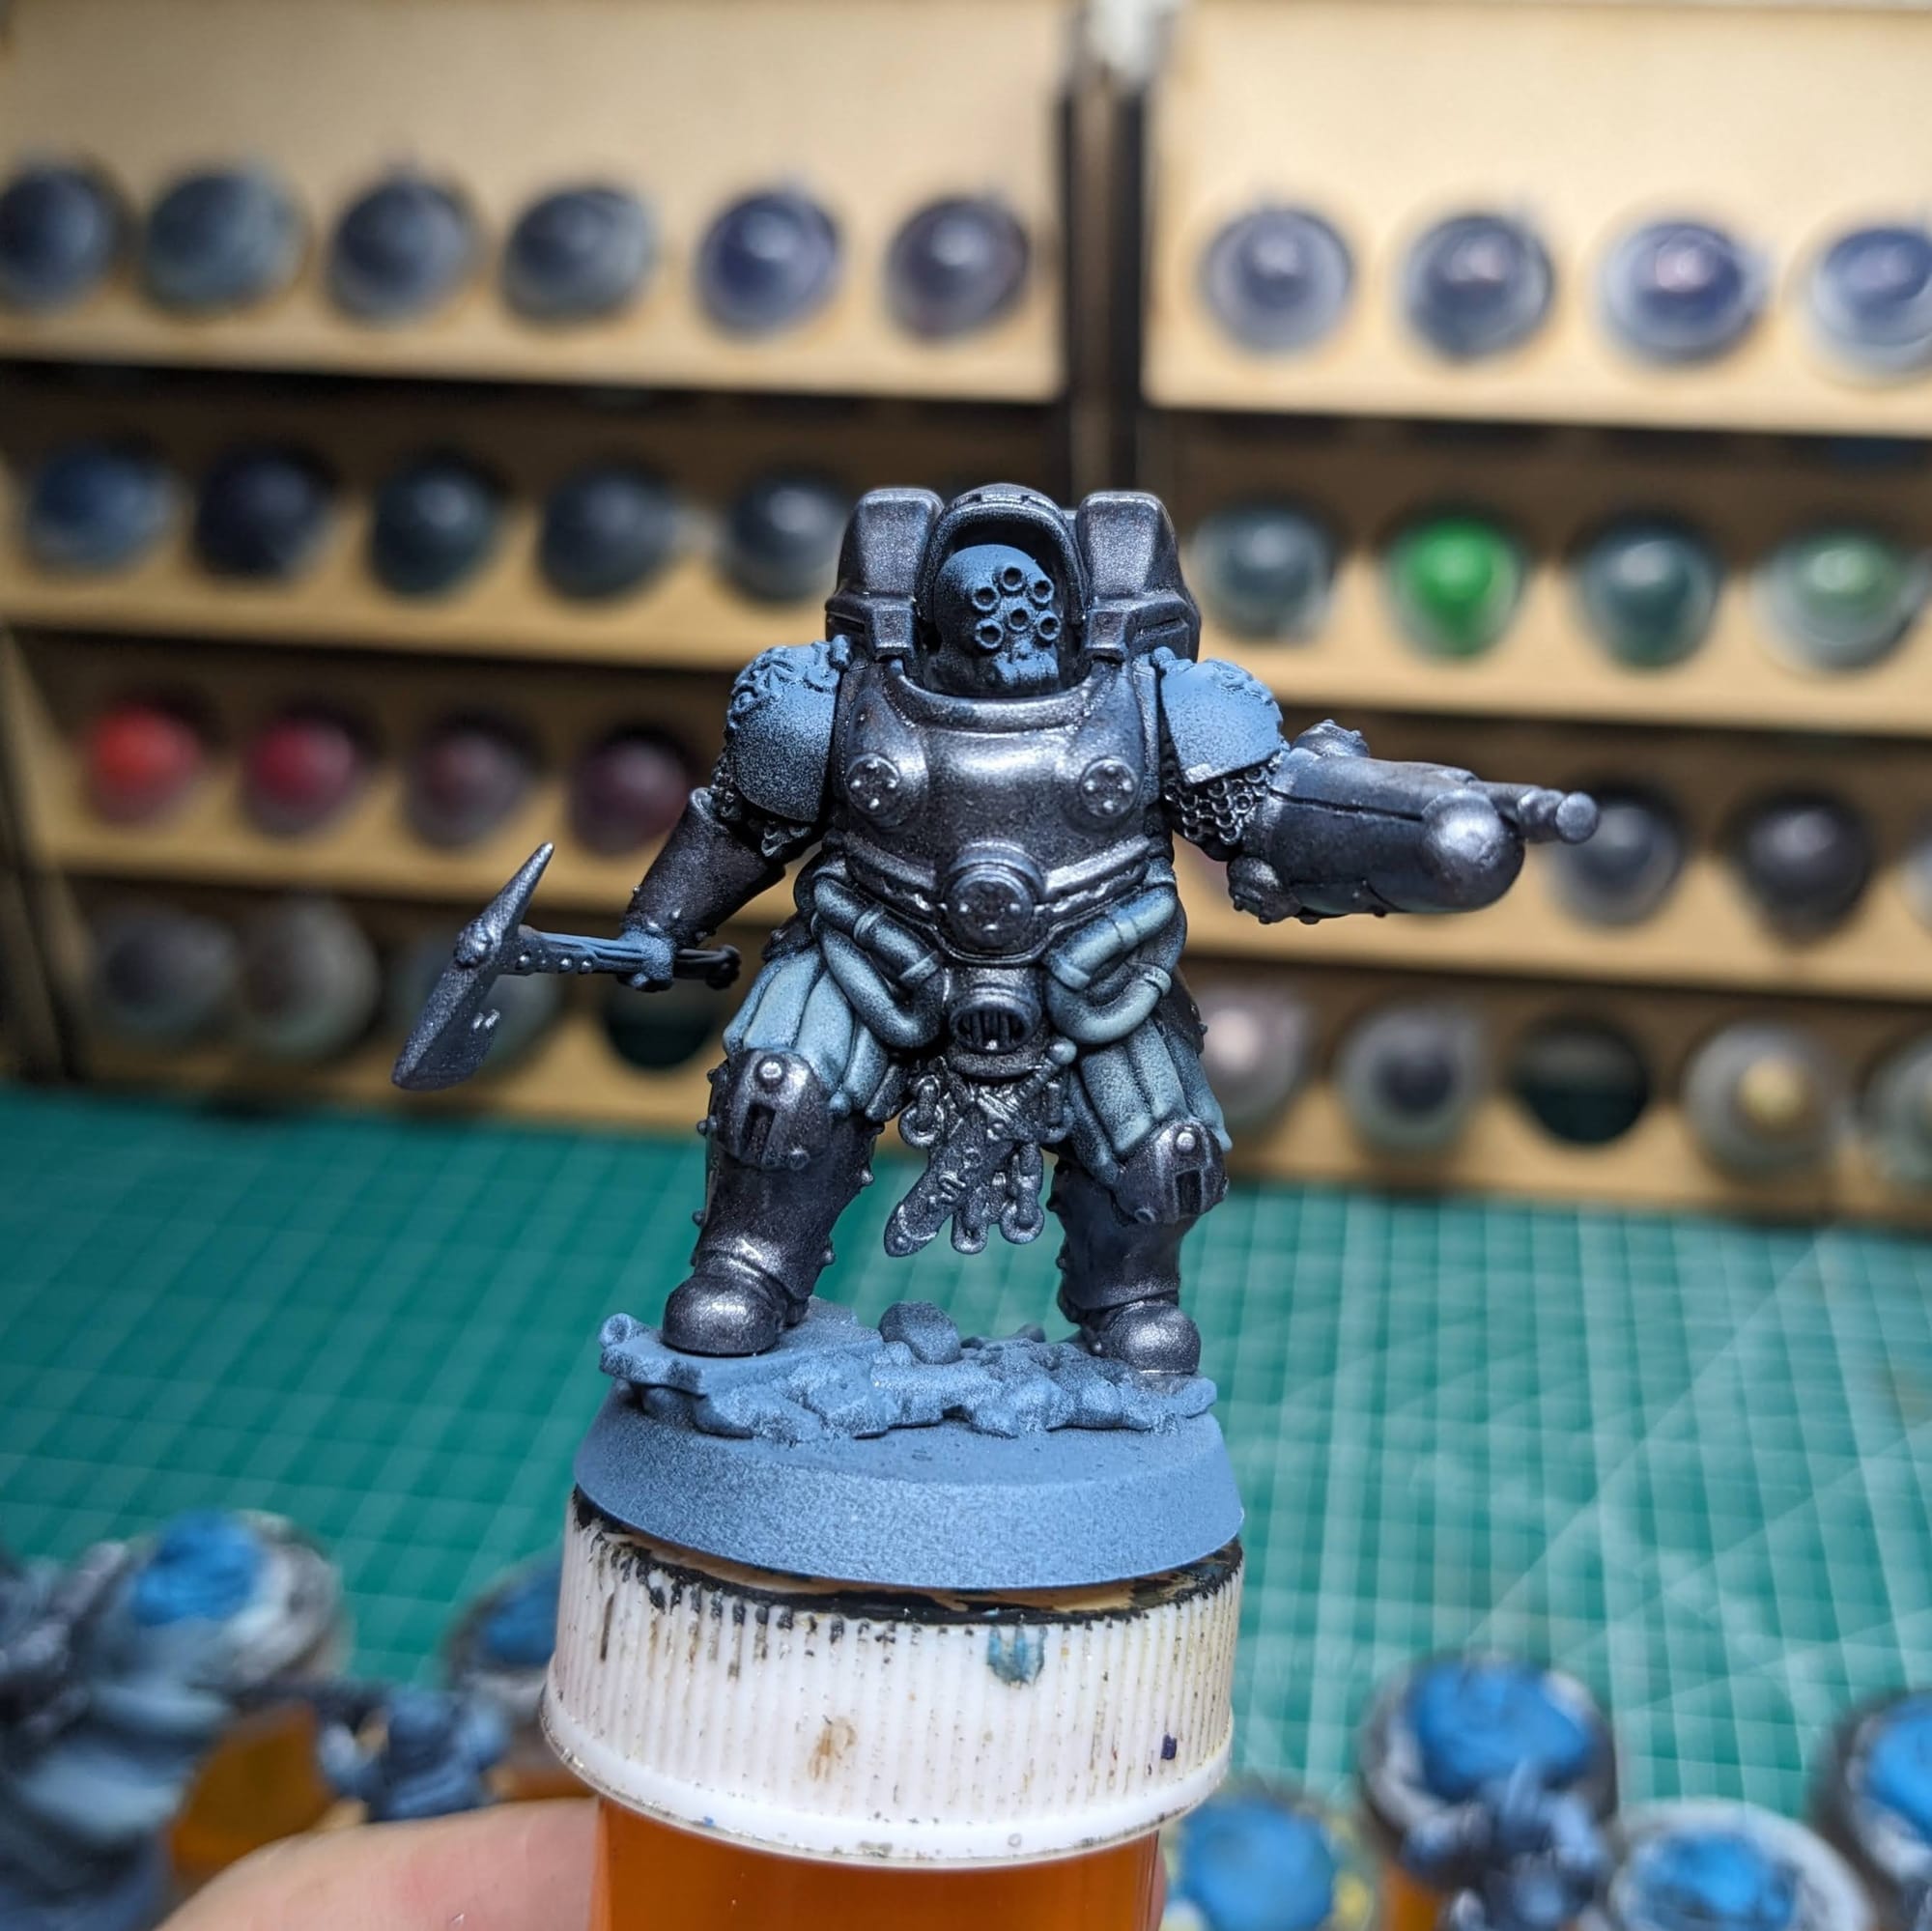
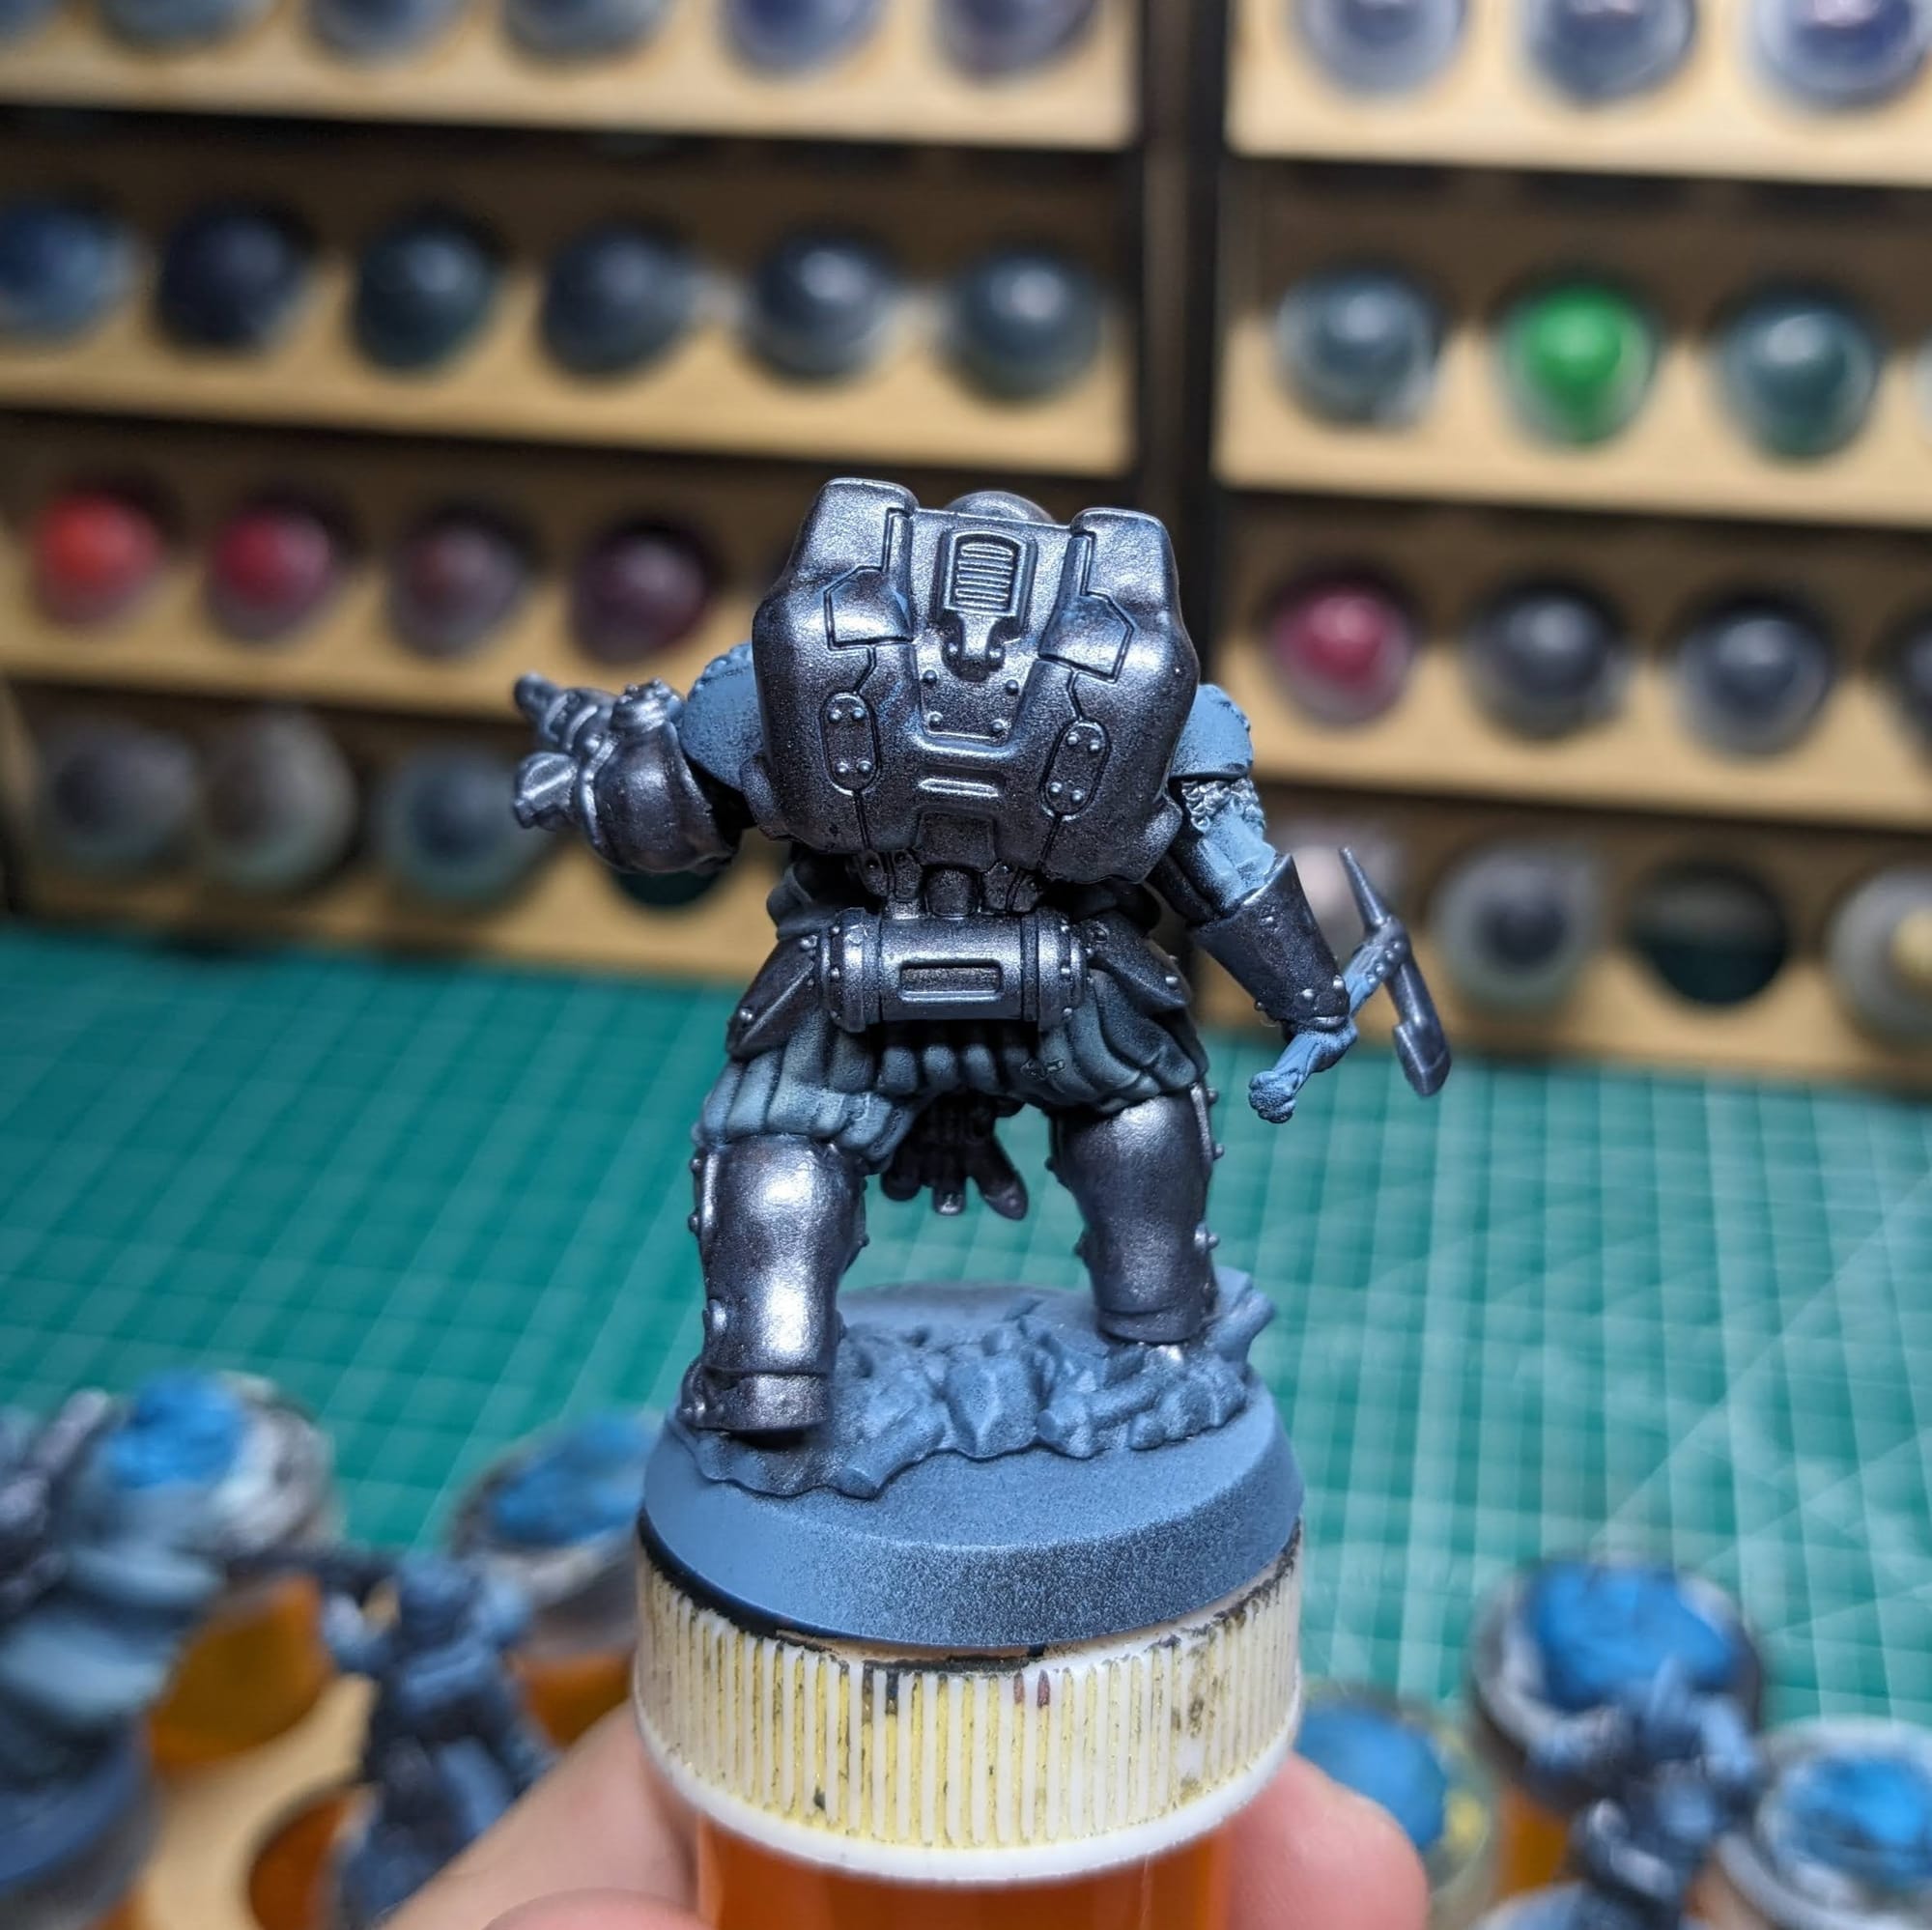
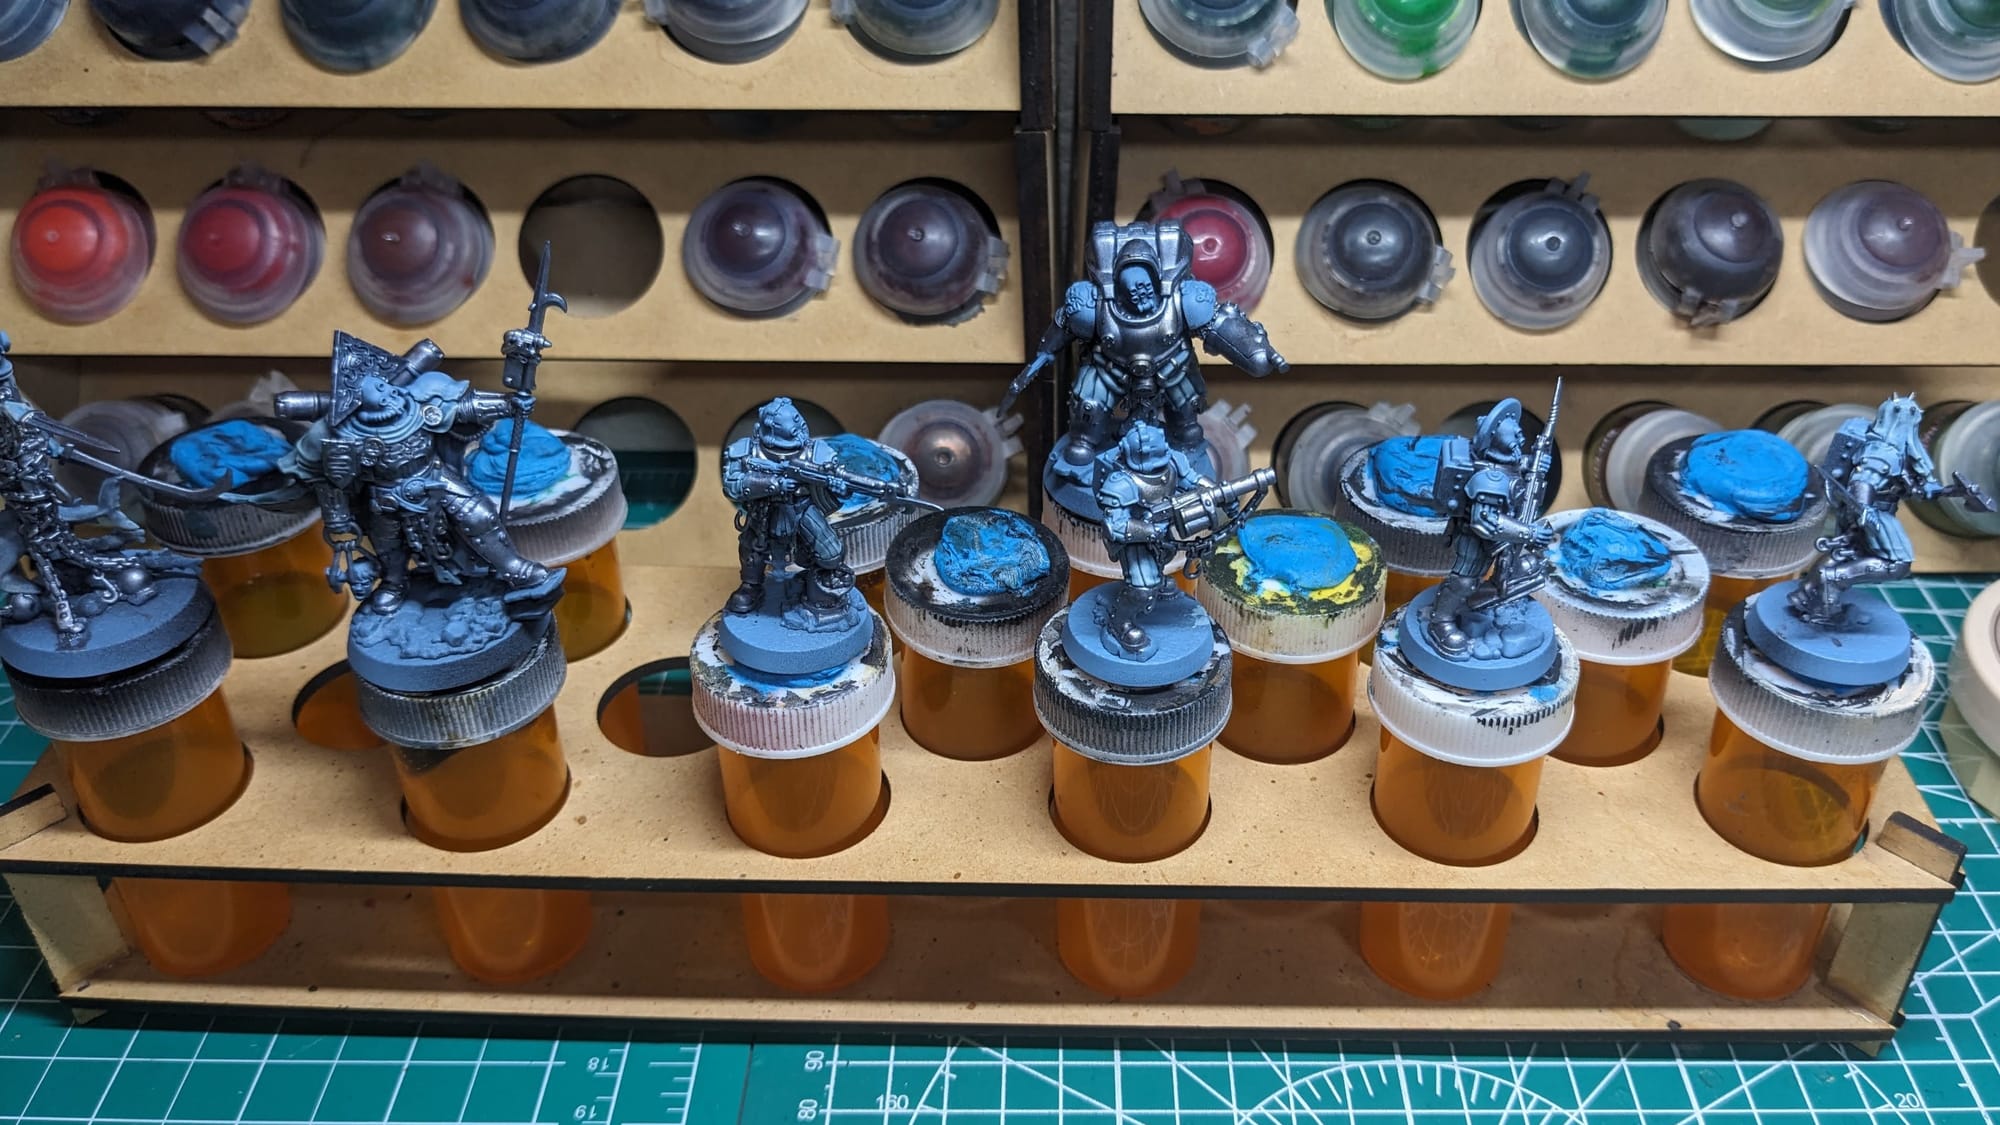
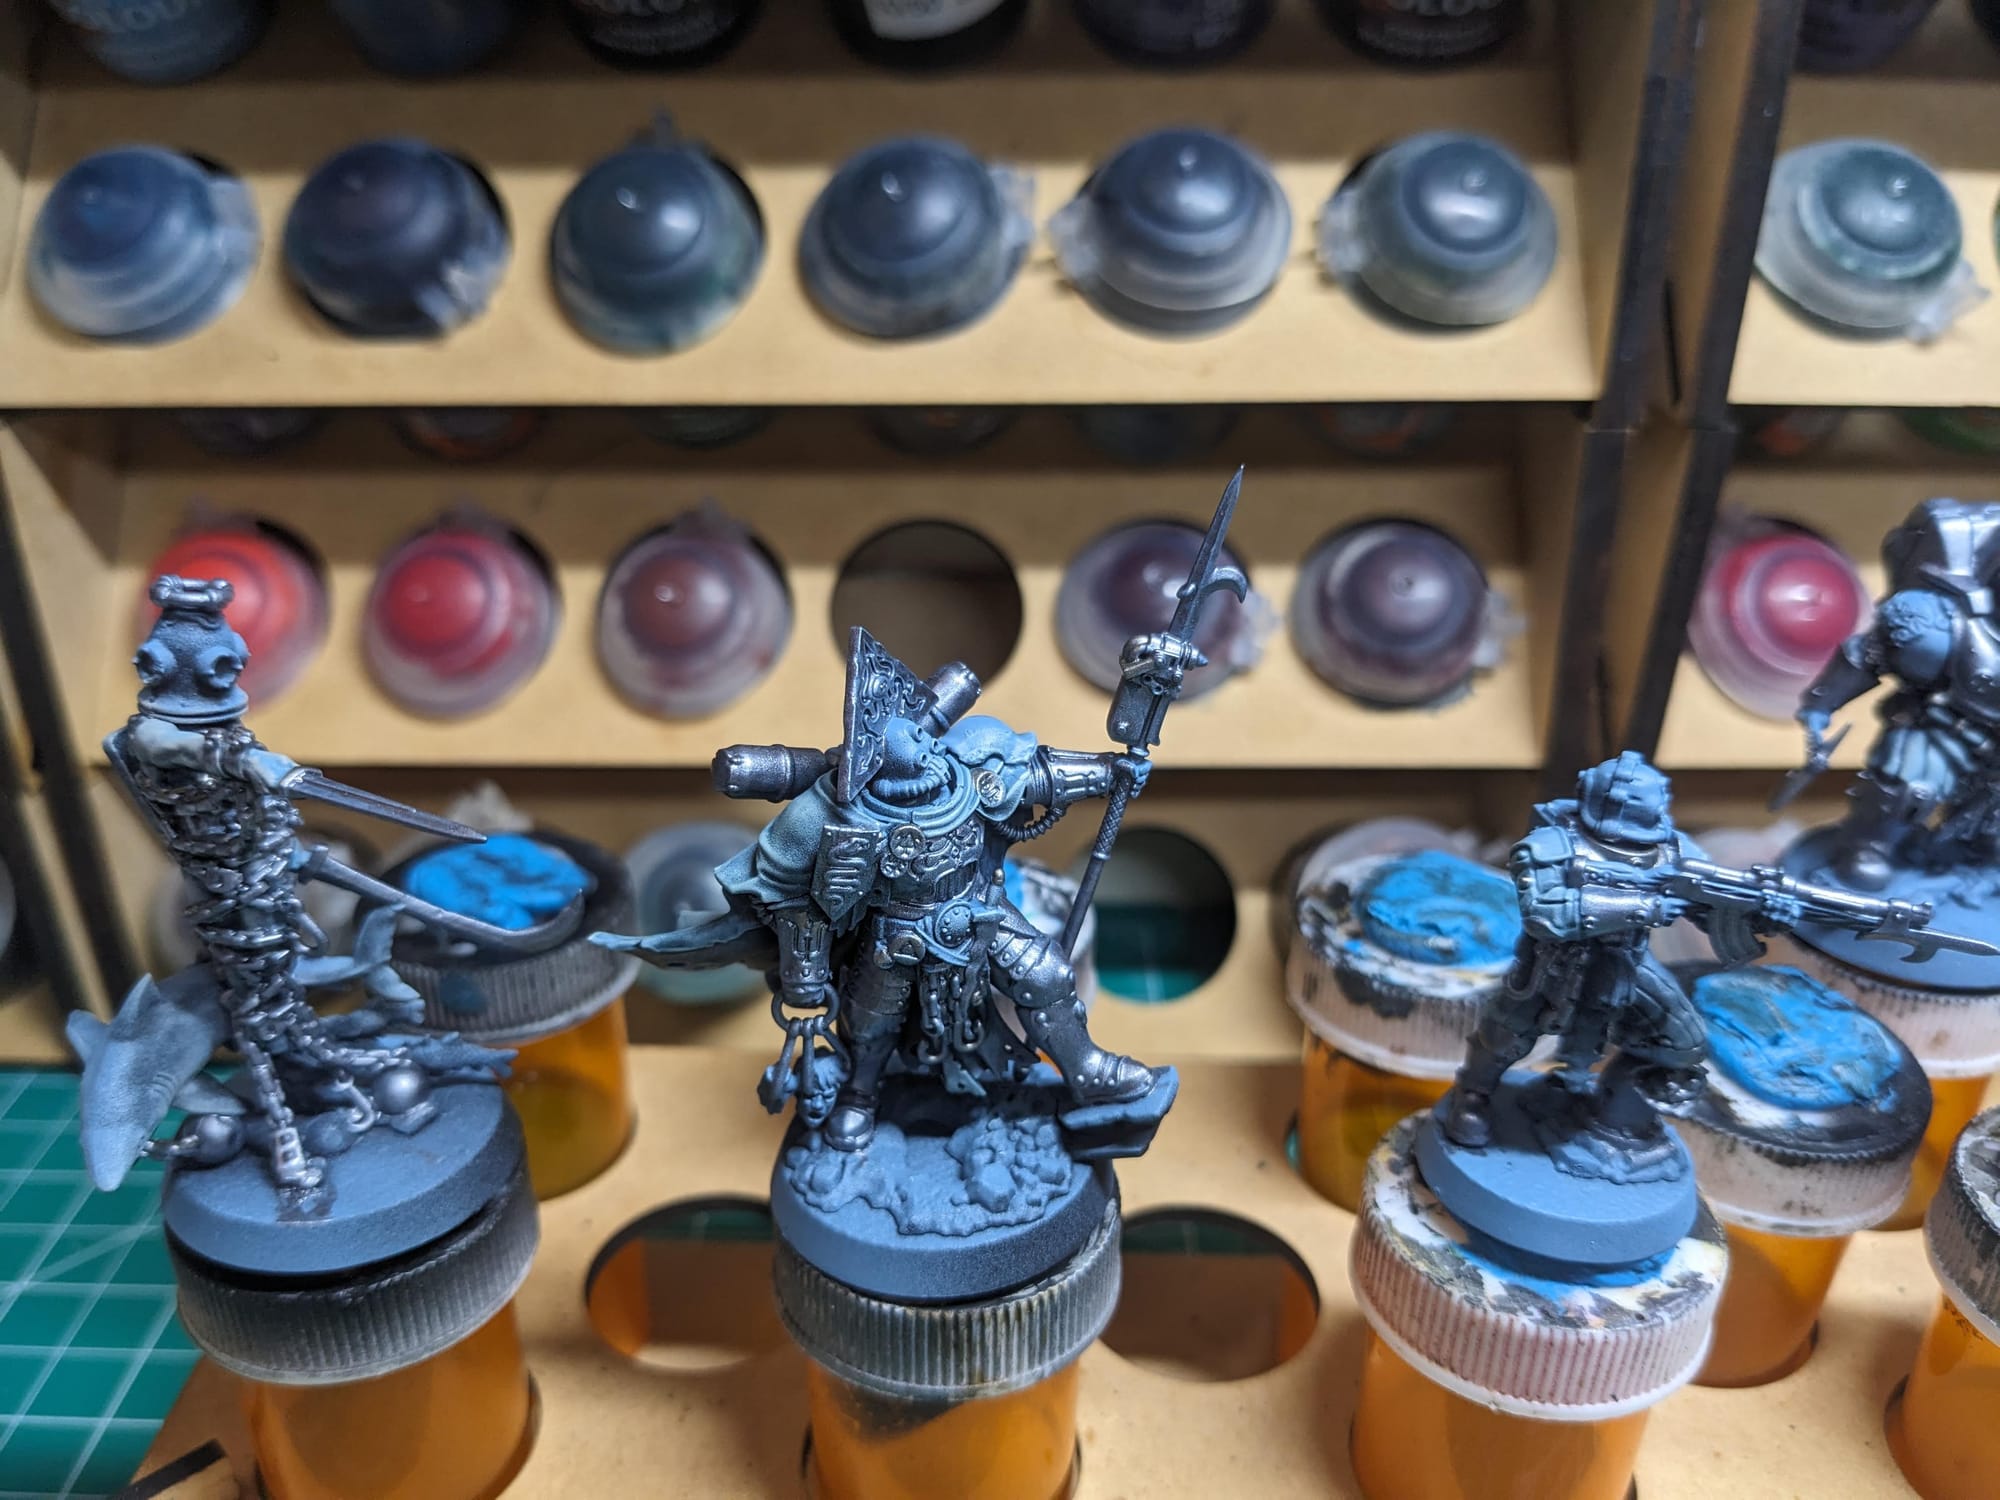
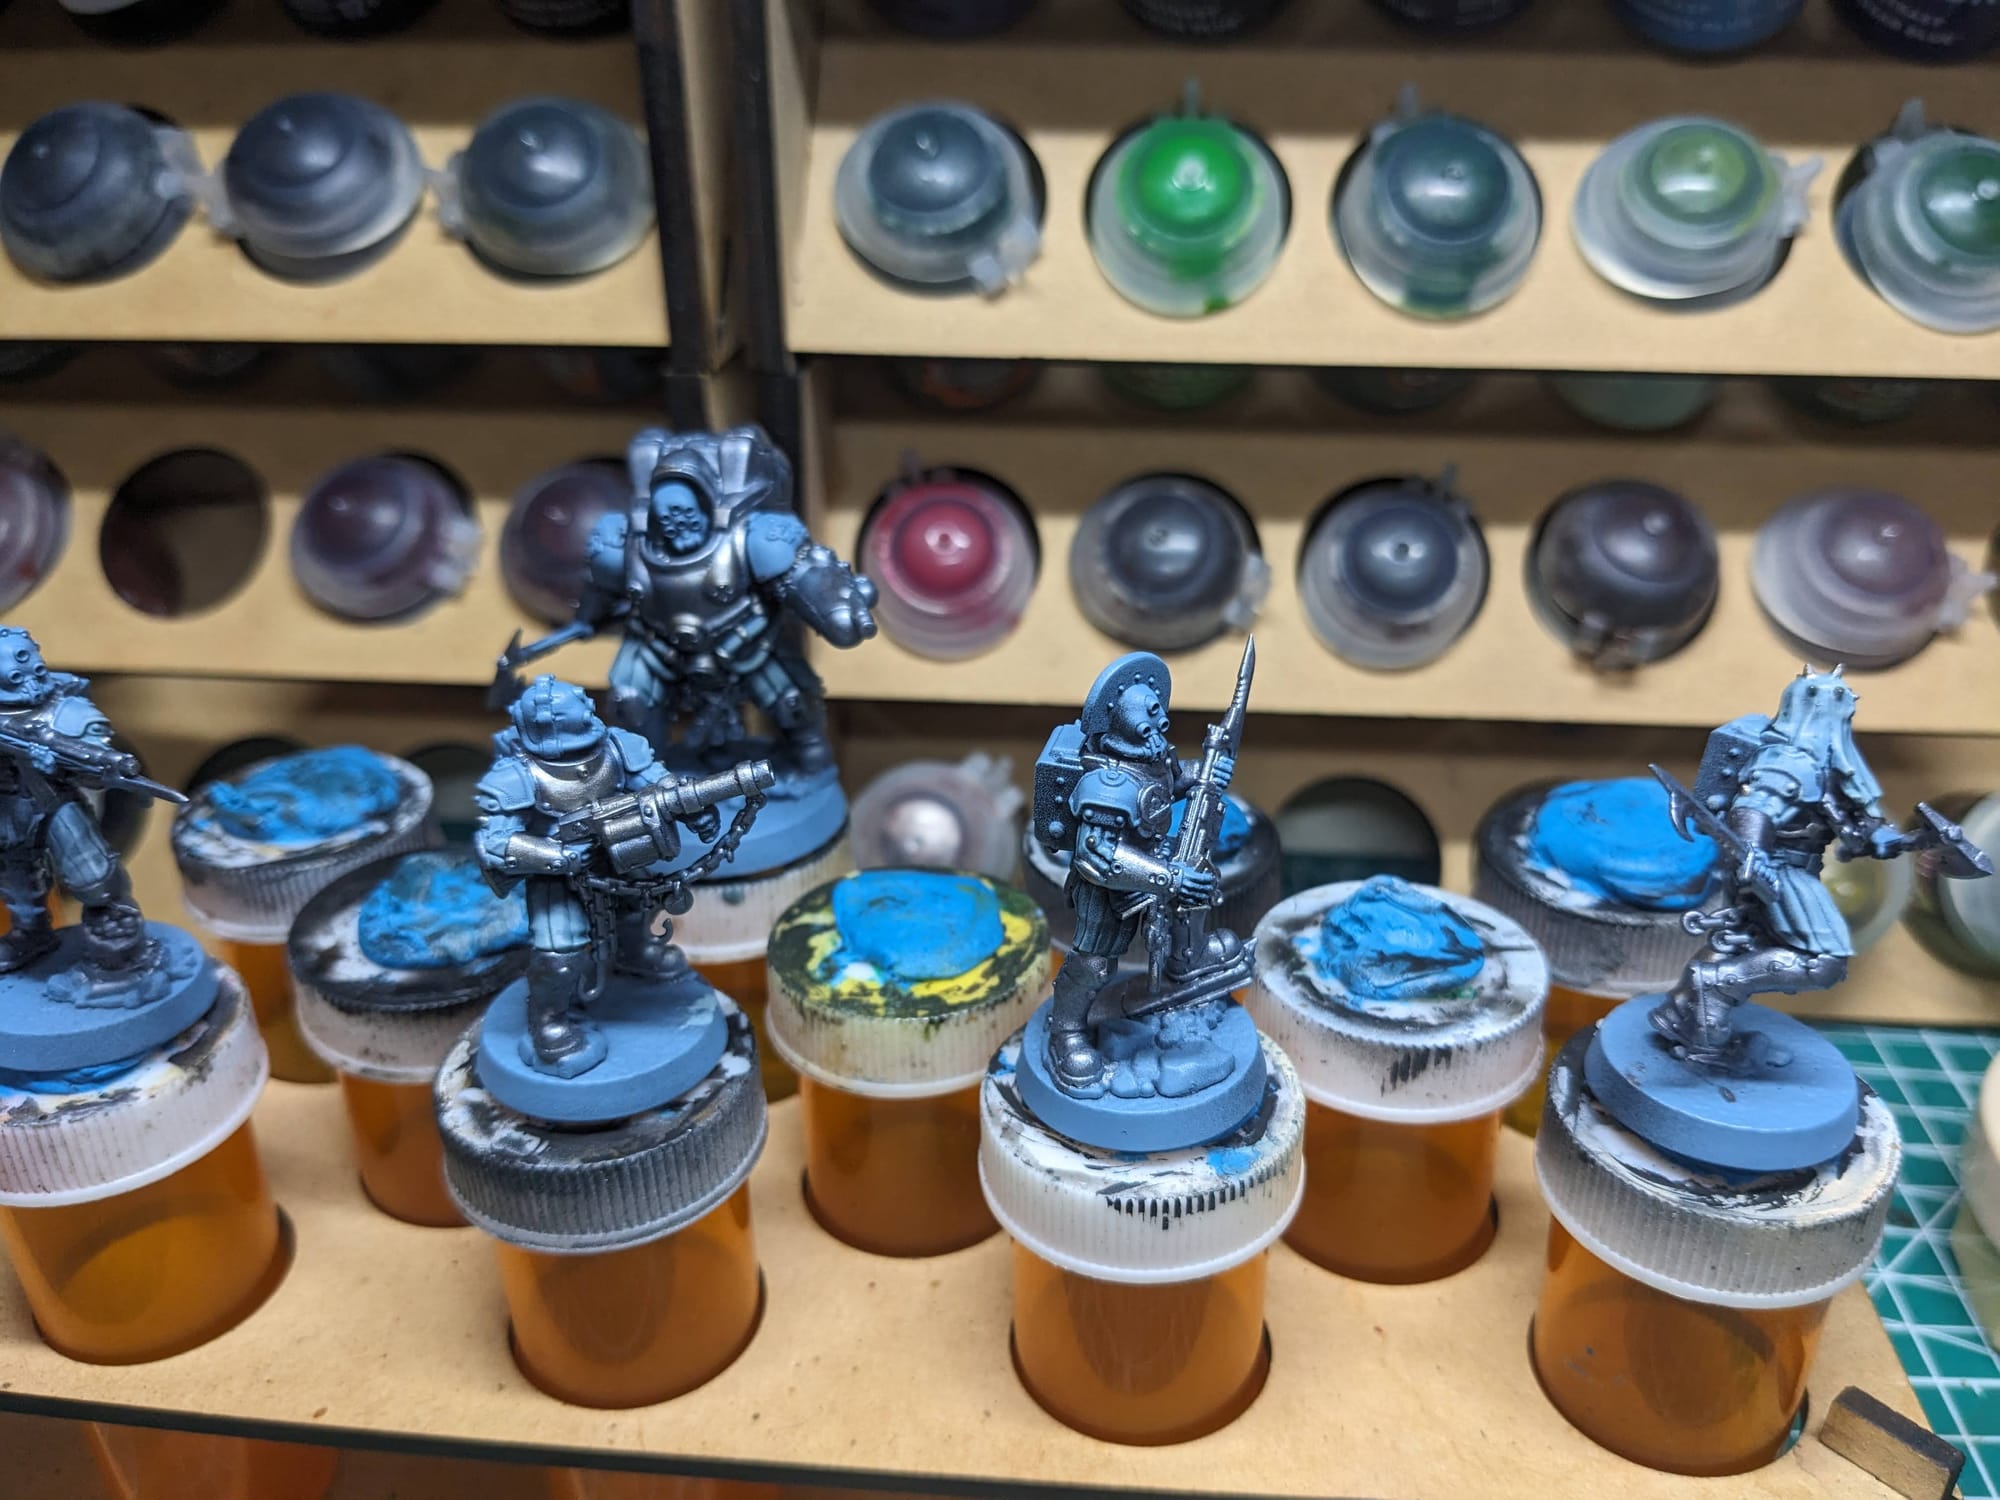
Next I moved onto the golden armor, using army Painter Golden Armour Speedpaint, which is going to provide the base color for that nice verdigris look. Once that was finished, I started working down into the smaller details, like the wood parts of the weapons (using Citadel Wyldwood Contrast and Elysian Green Layer Paints), the sawfish and human skulls (Rakarth Flesh and Wraithbone), and the (literal) bowels of the shark. I used Basilicanum Grey for gloves and pouches,
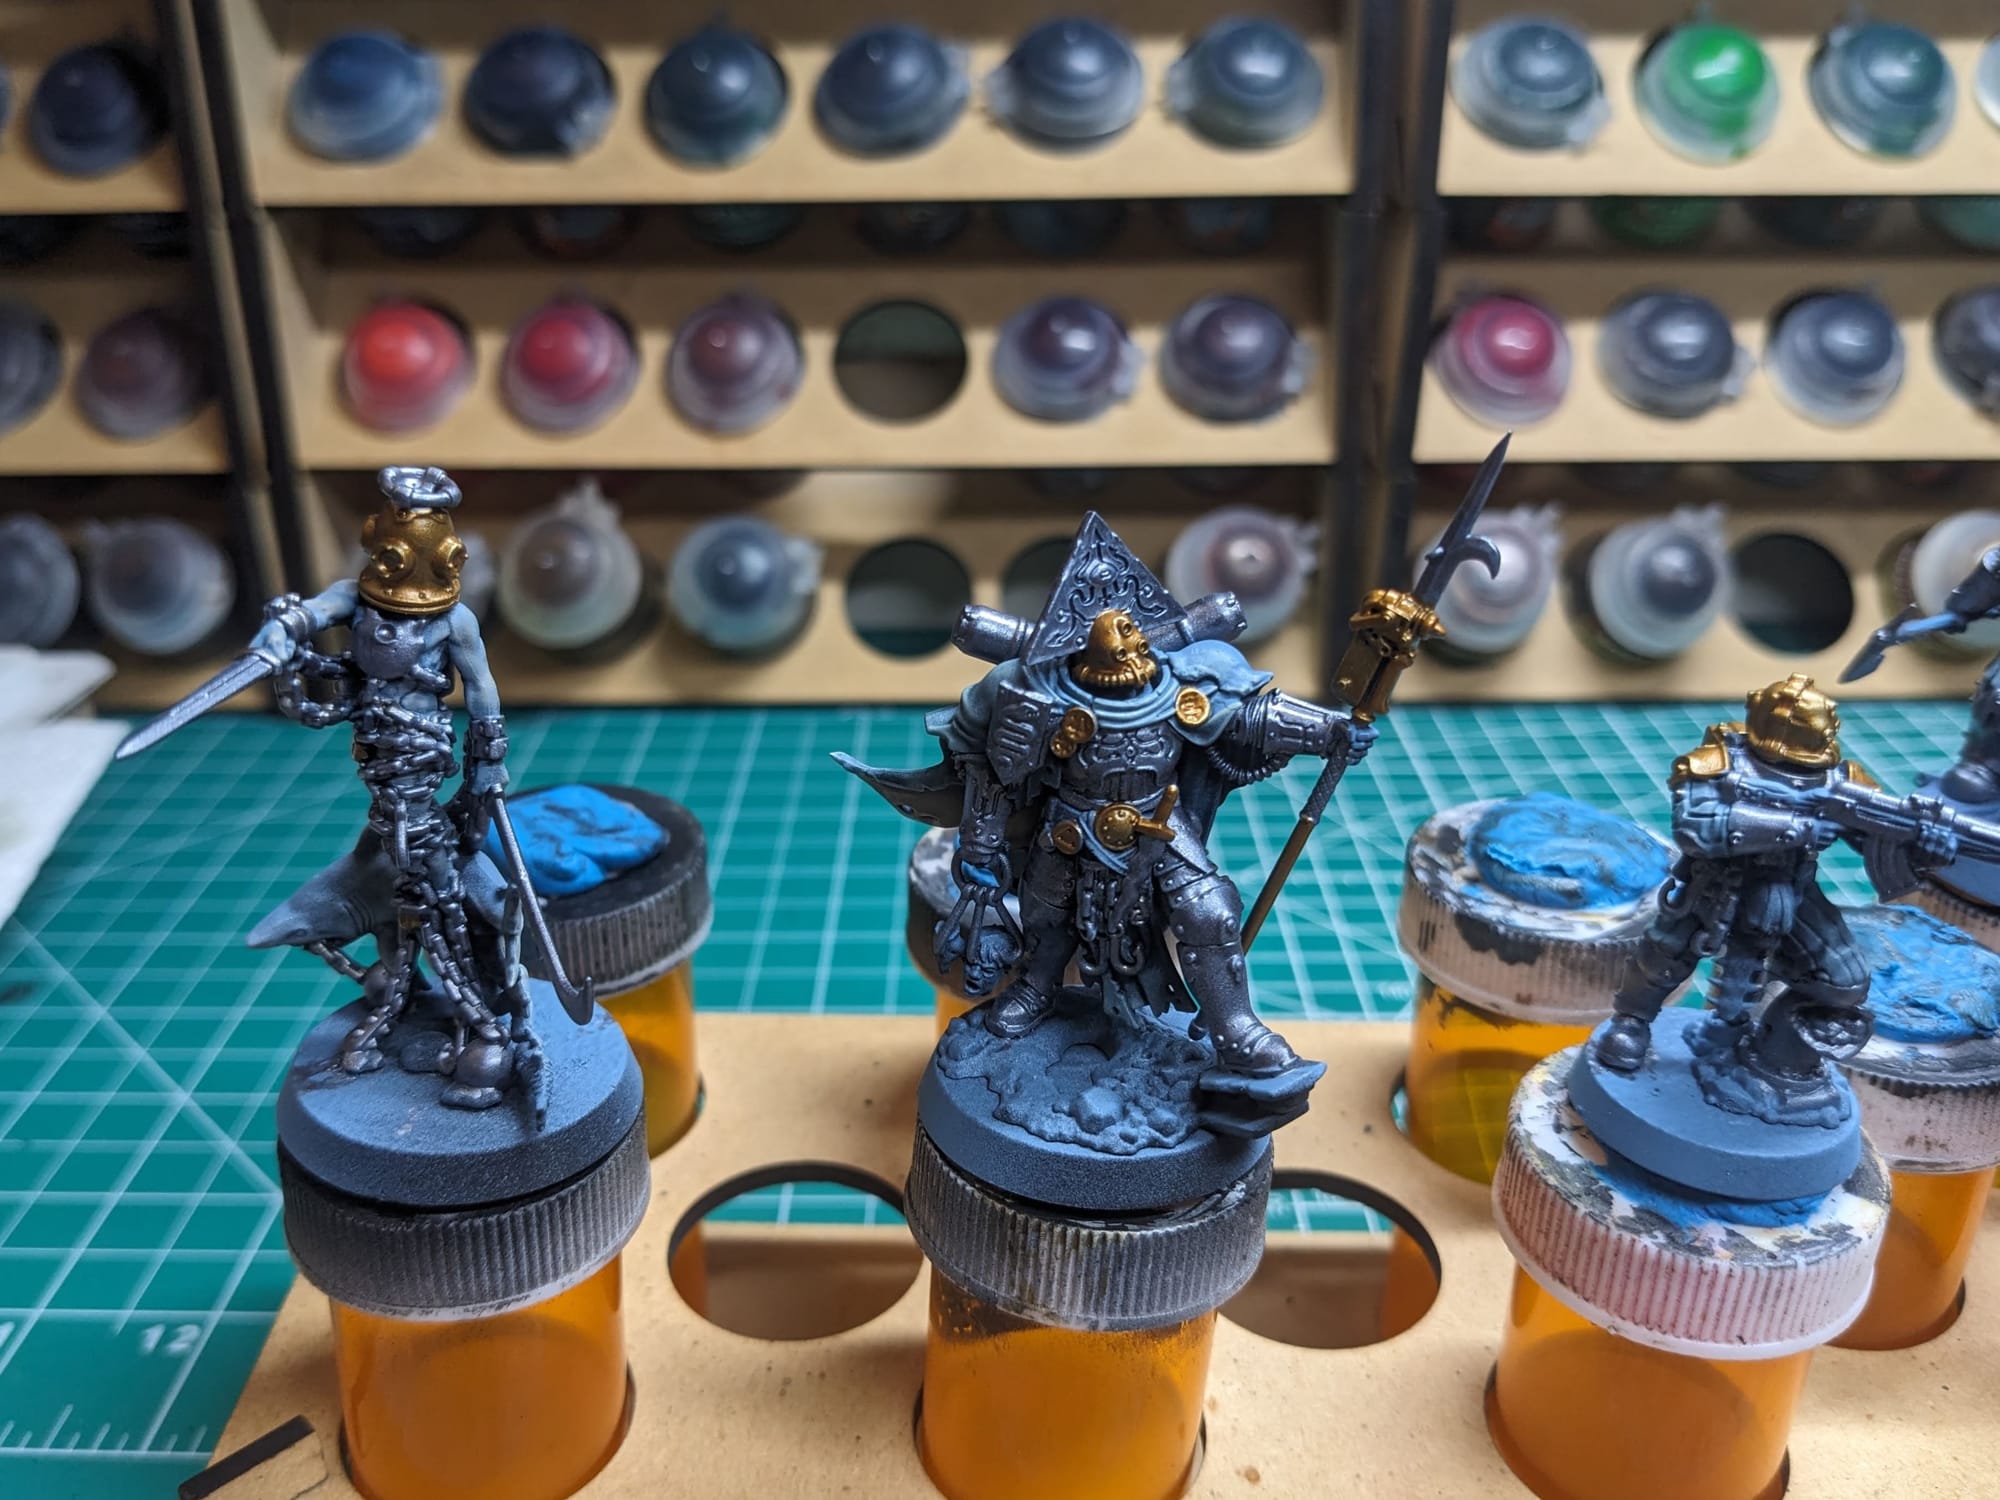
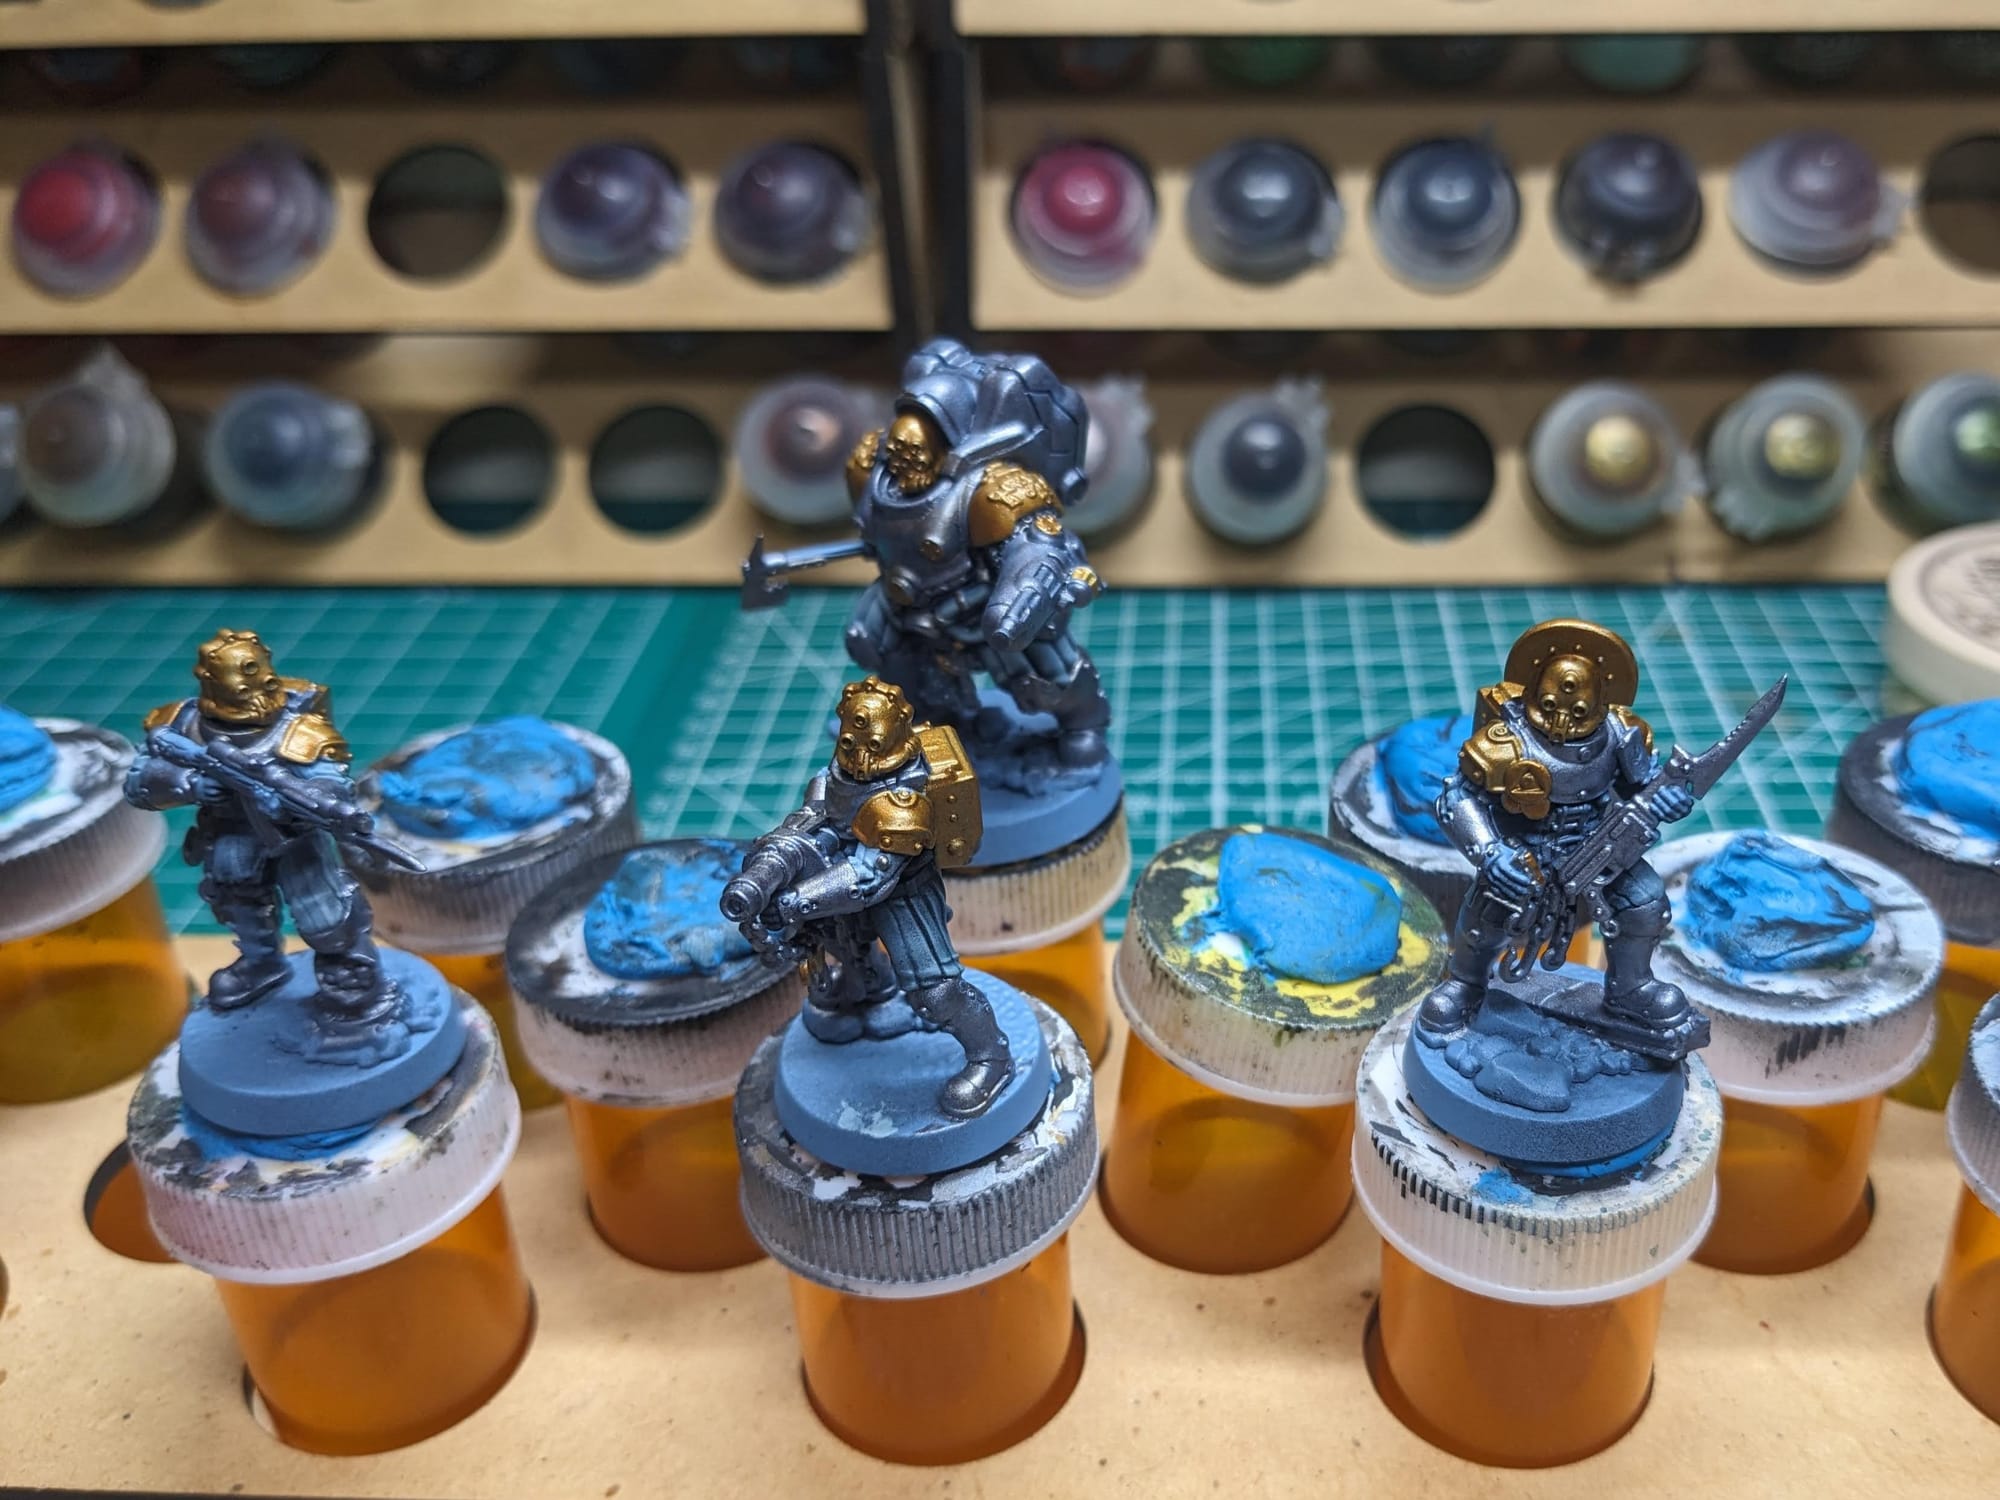
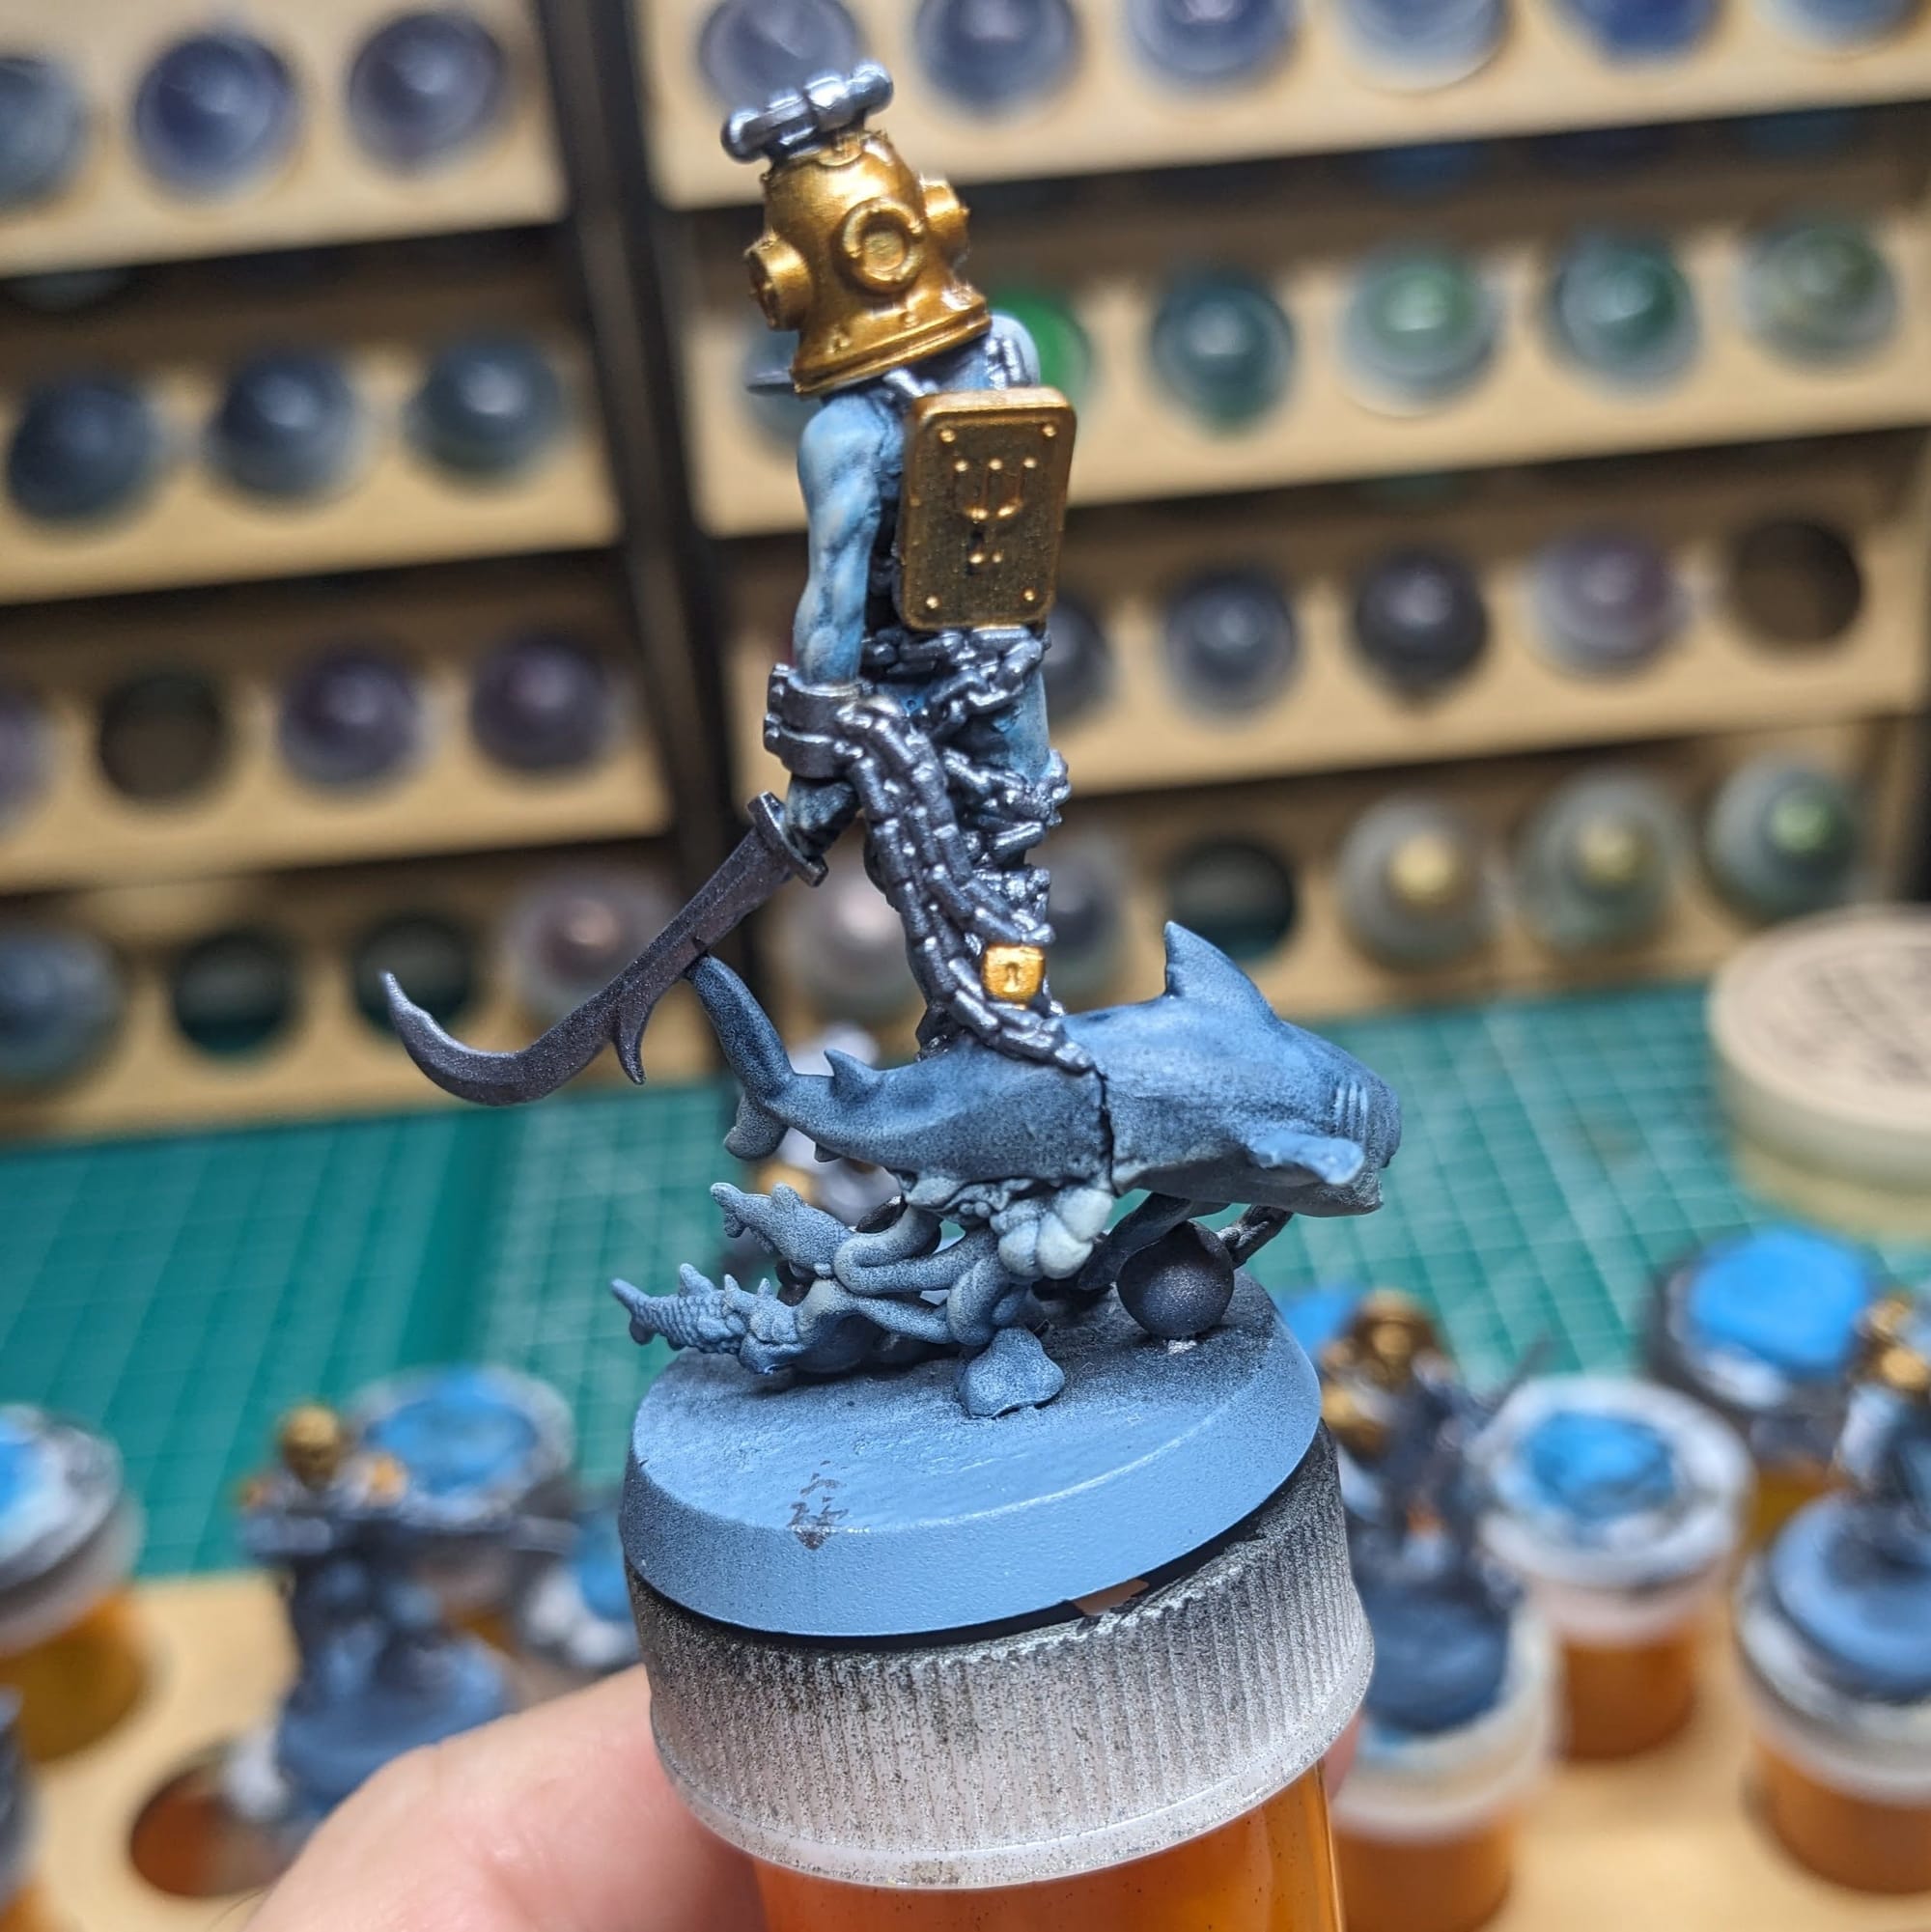
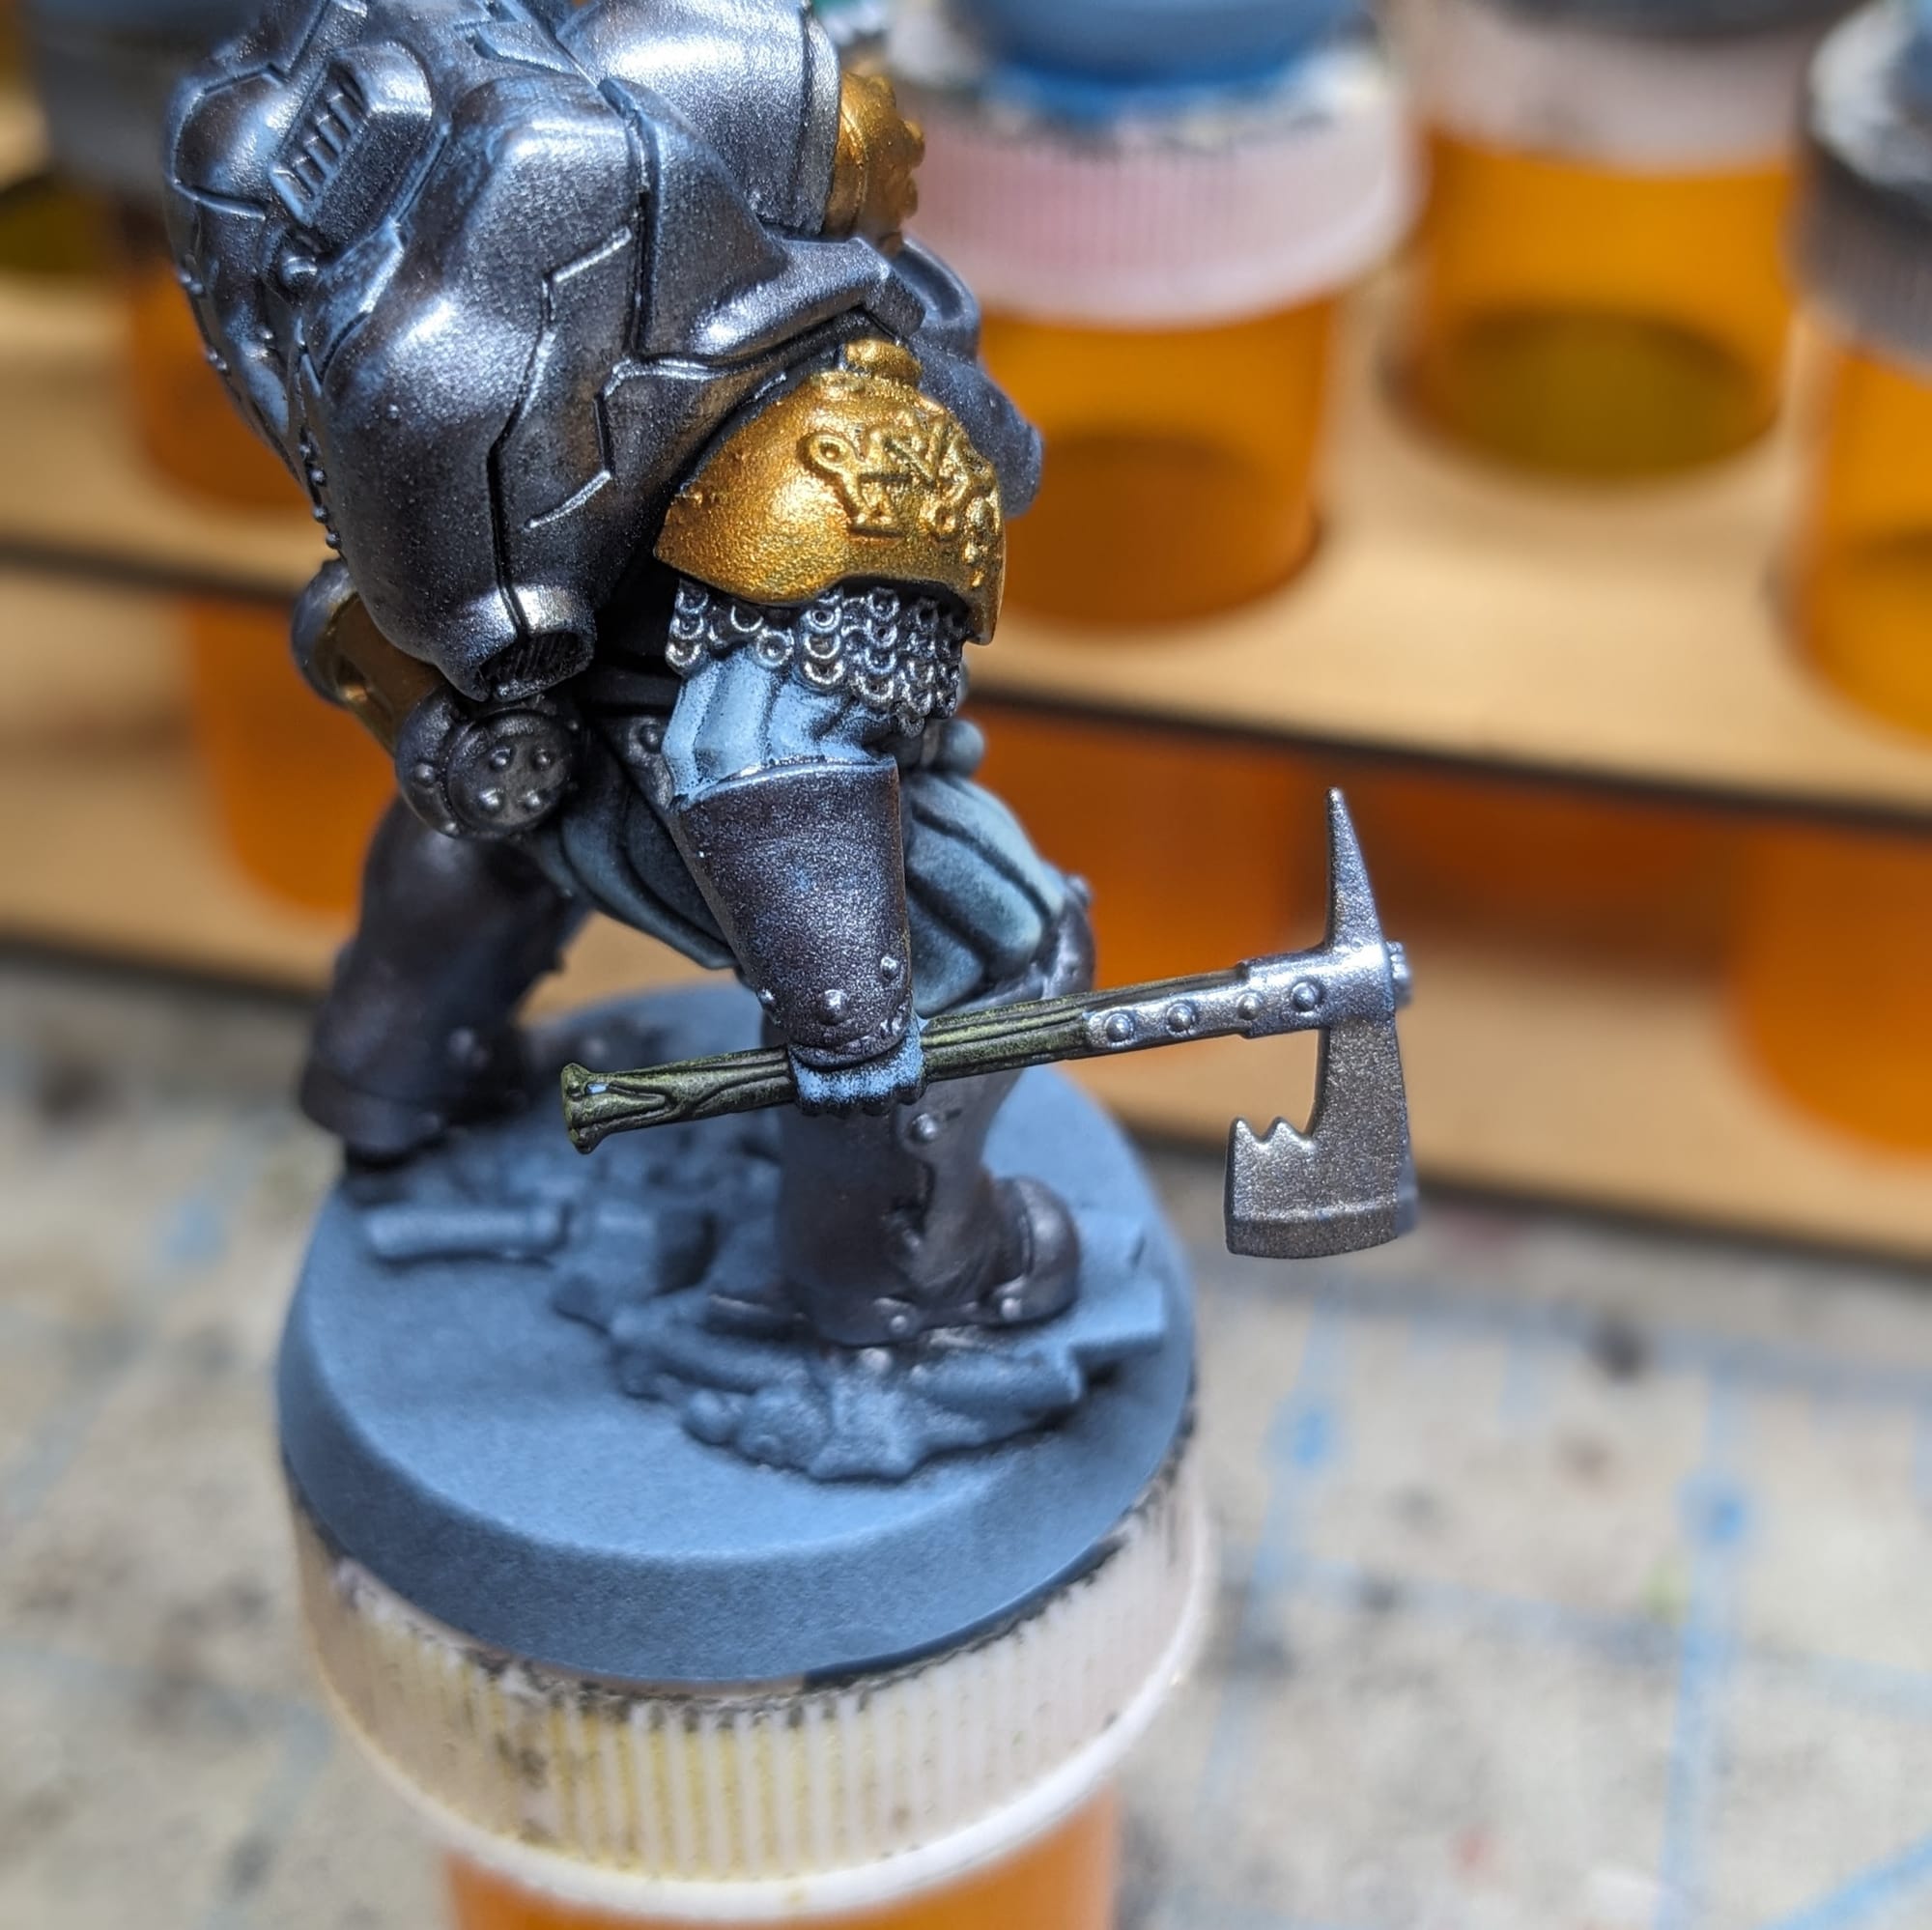
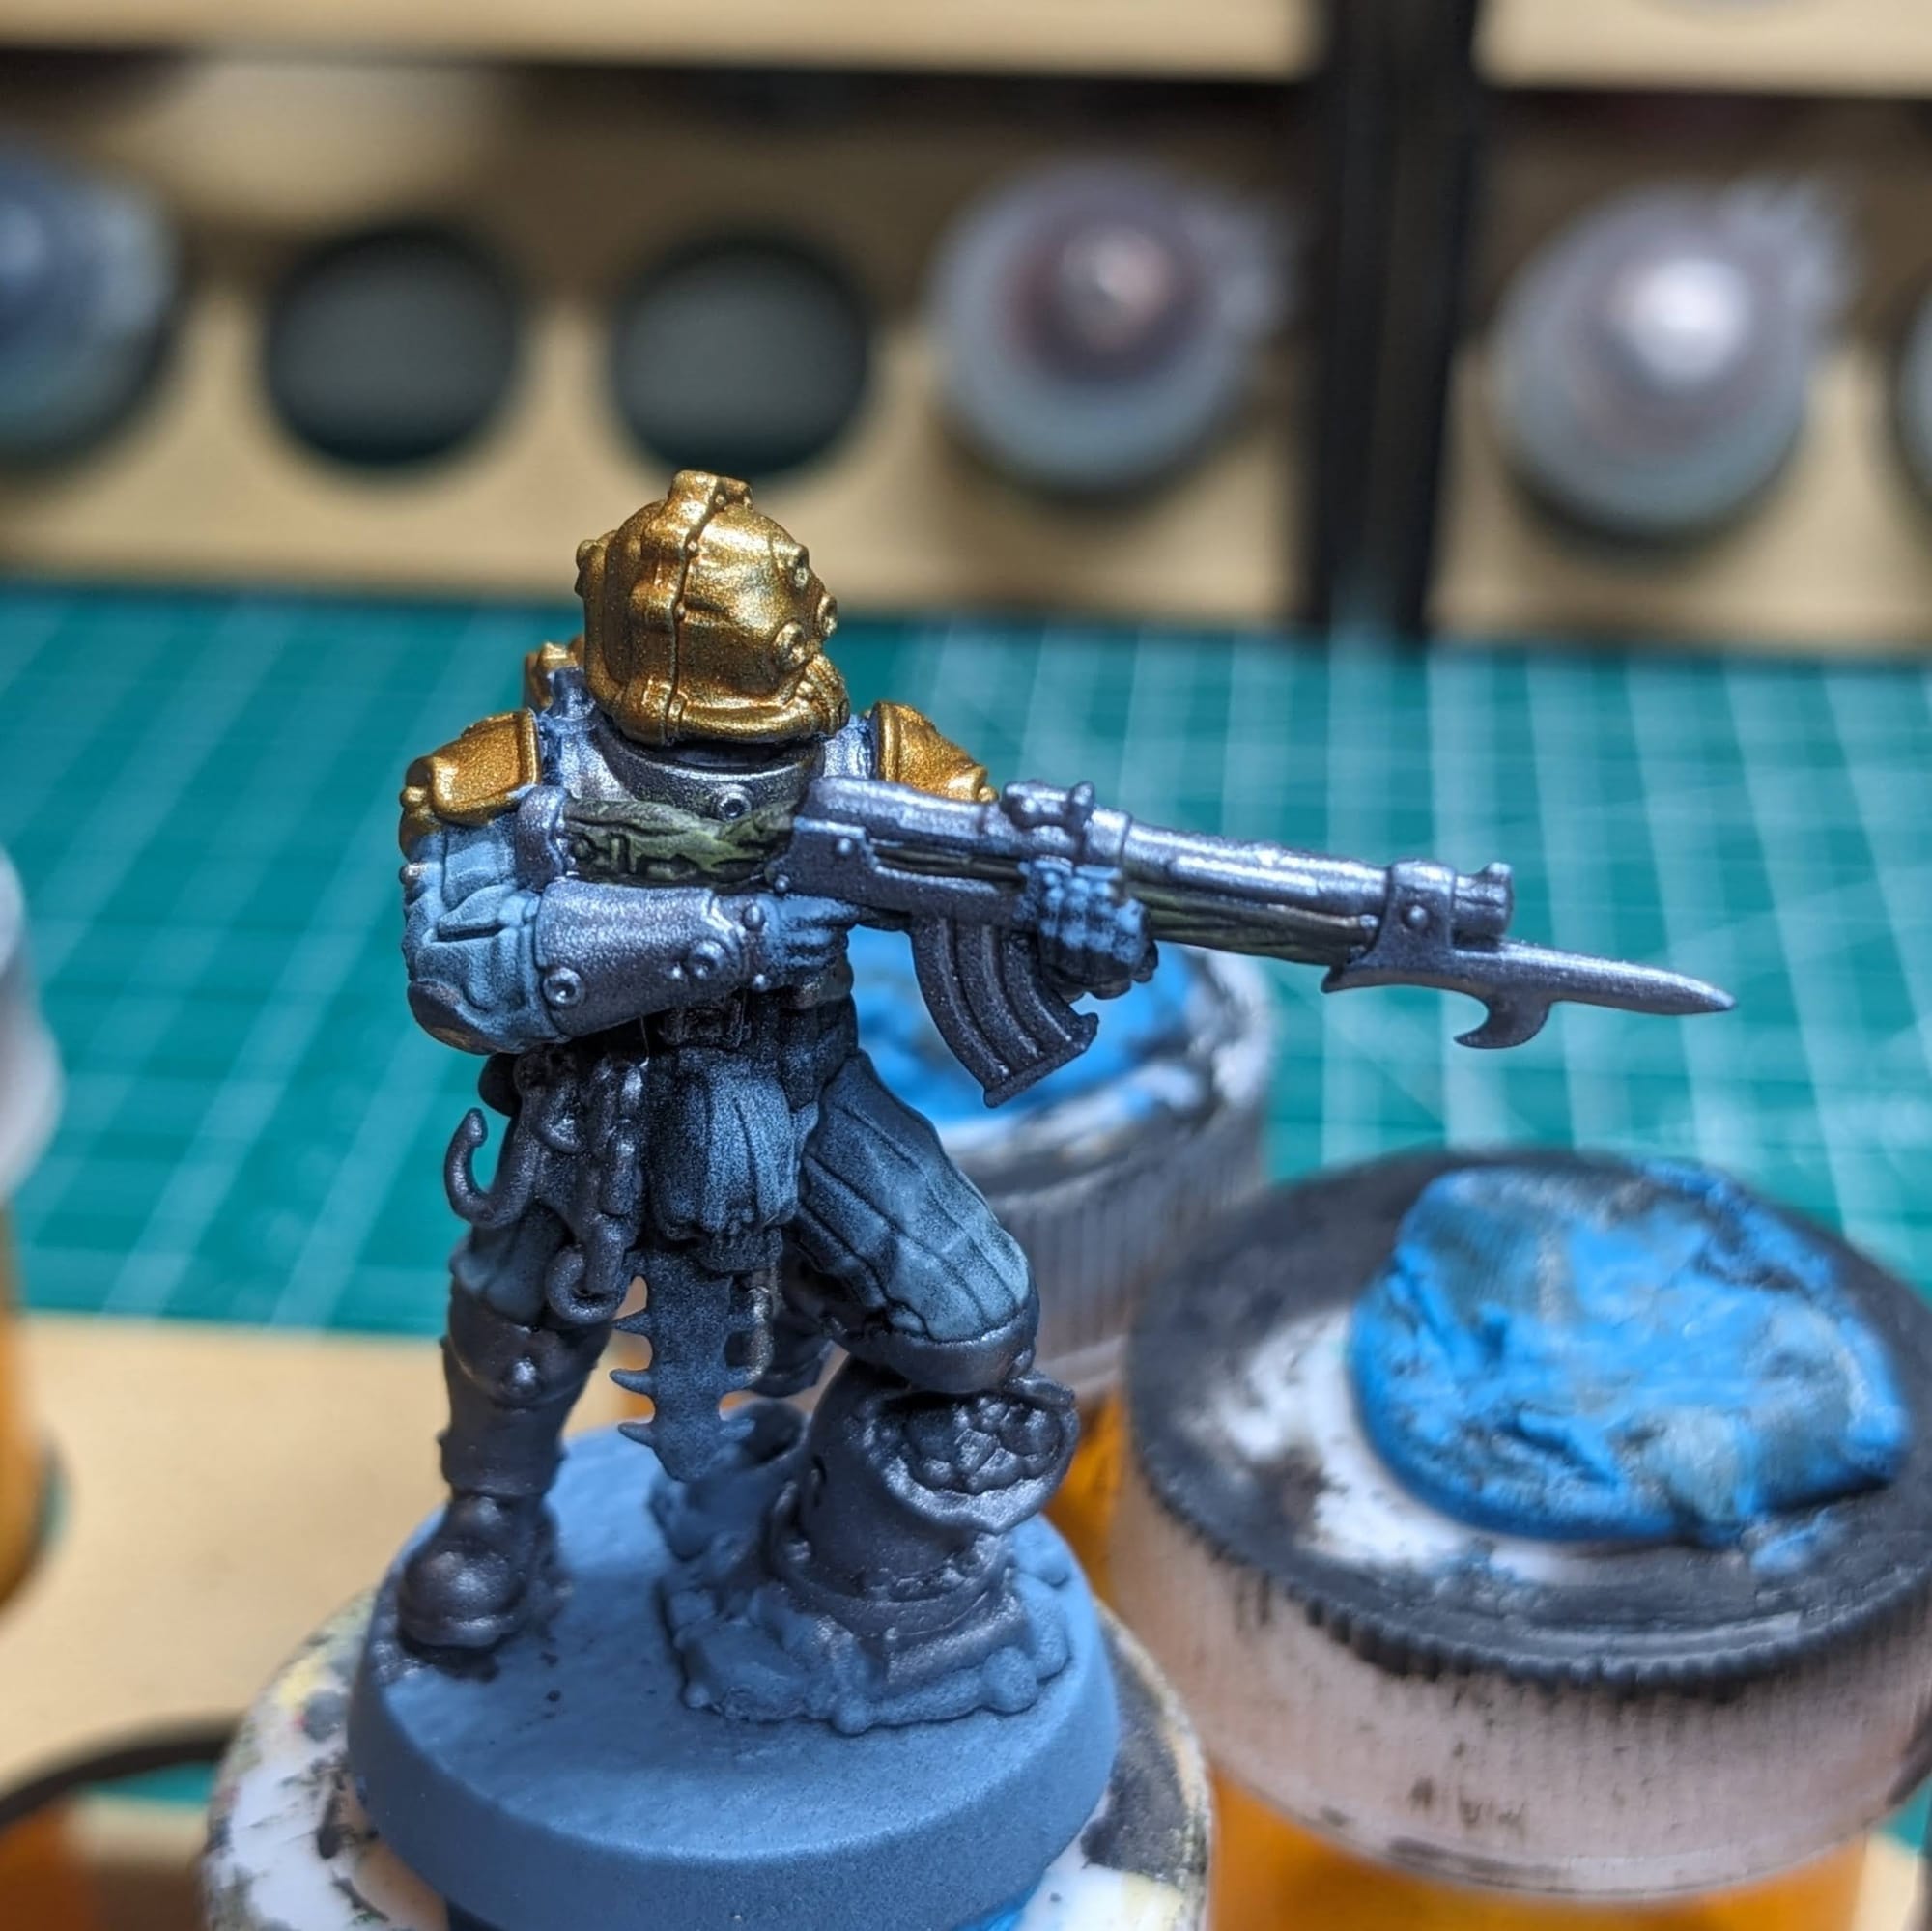
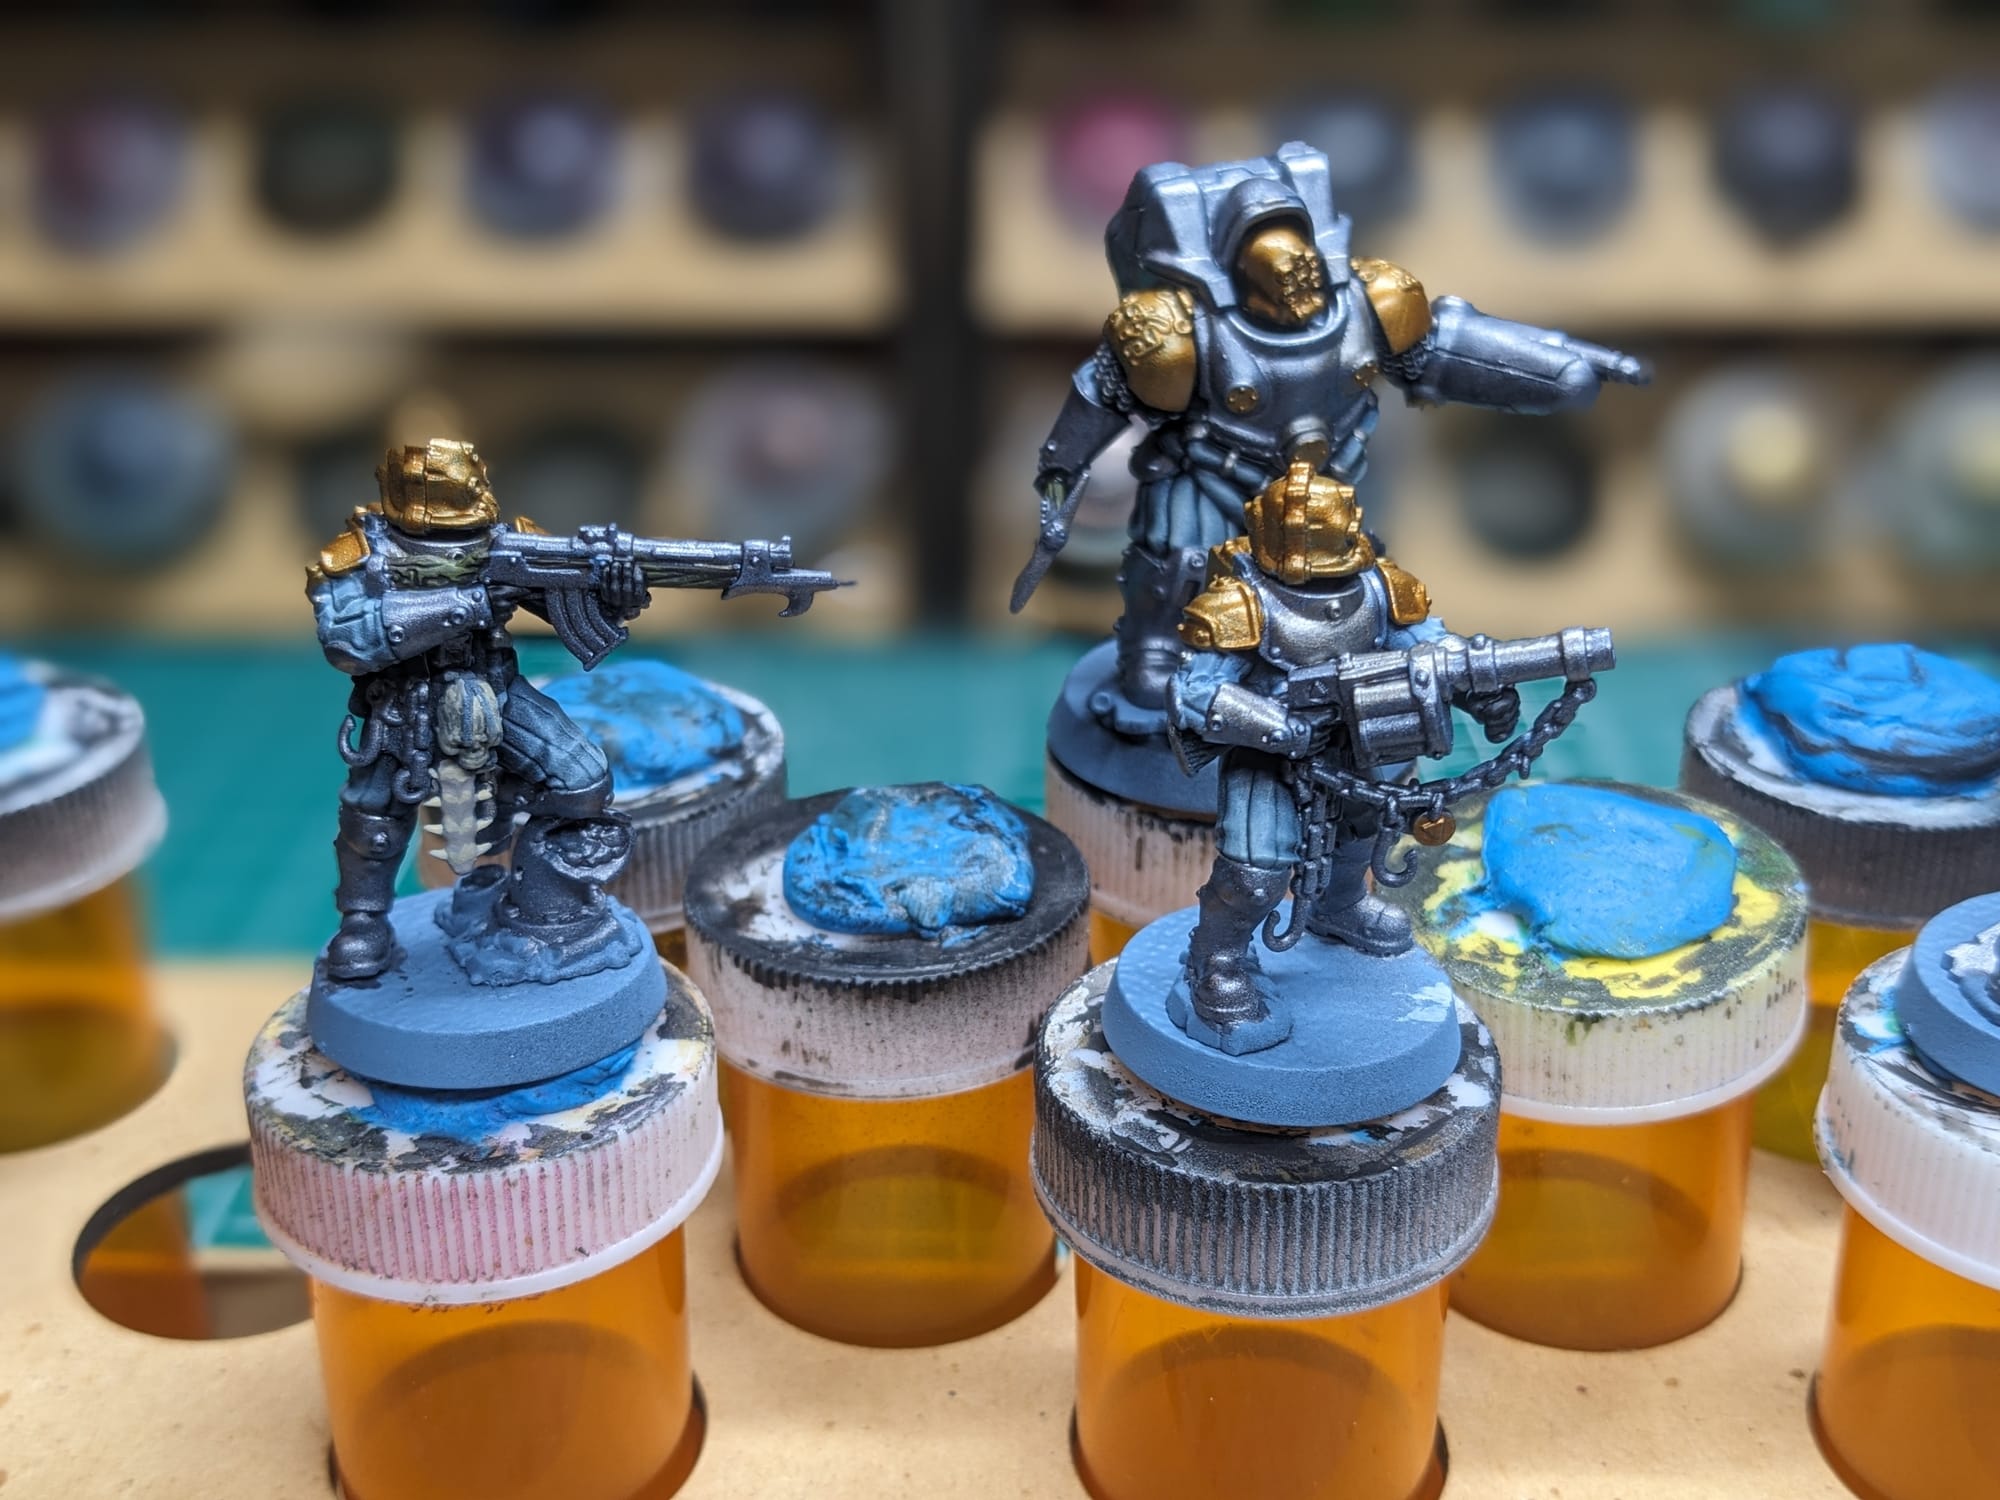
With all of those details painted out, I then did a pass with Citadel Targor Rageshade to darken up the metal and bright grey skulls.
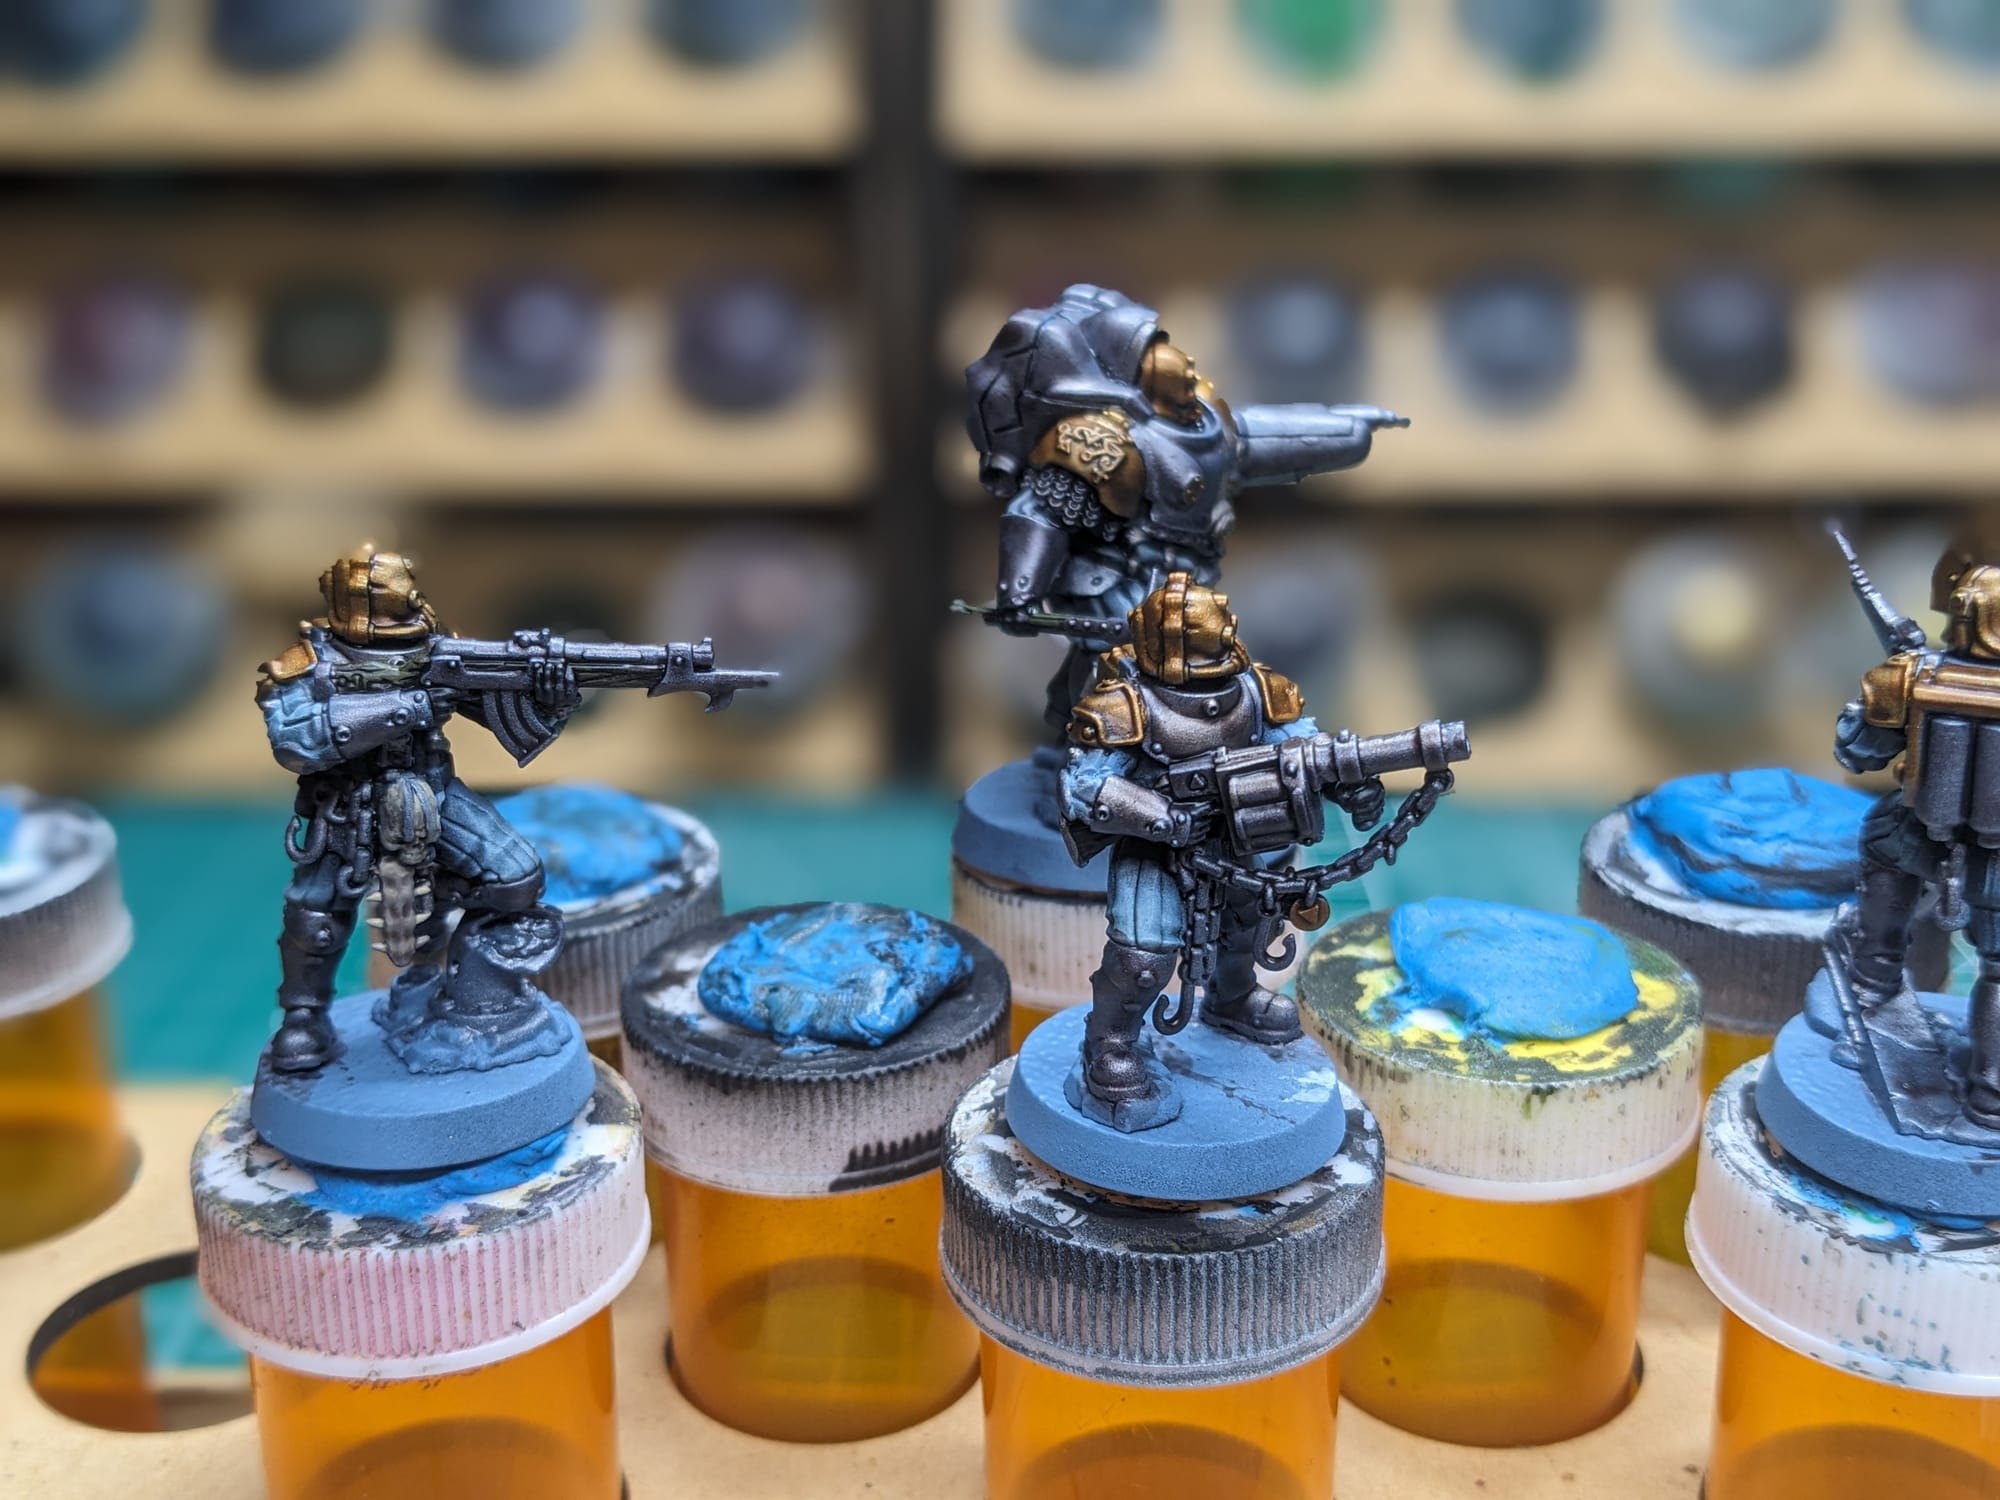
Rust and Verdigris Effects
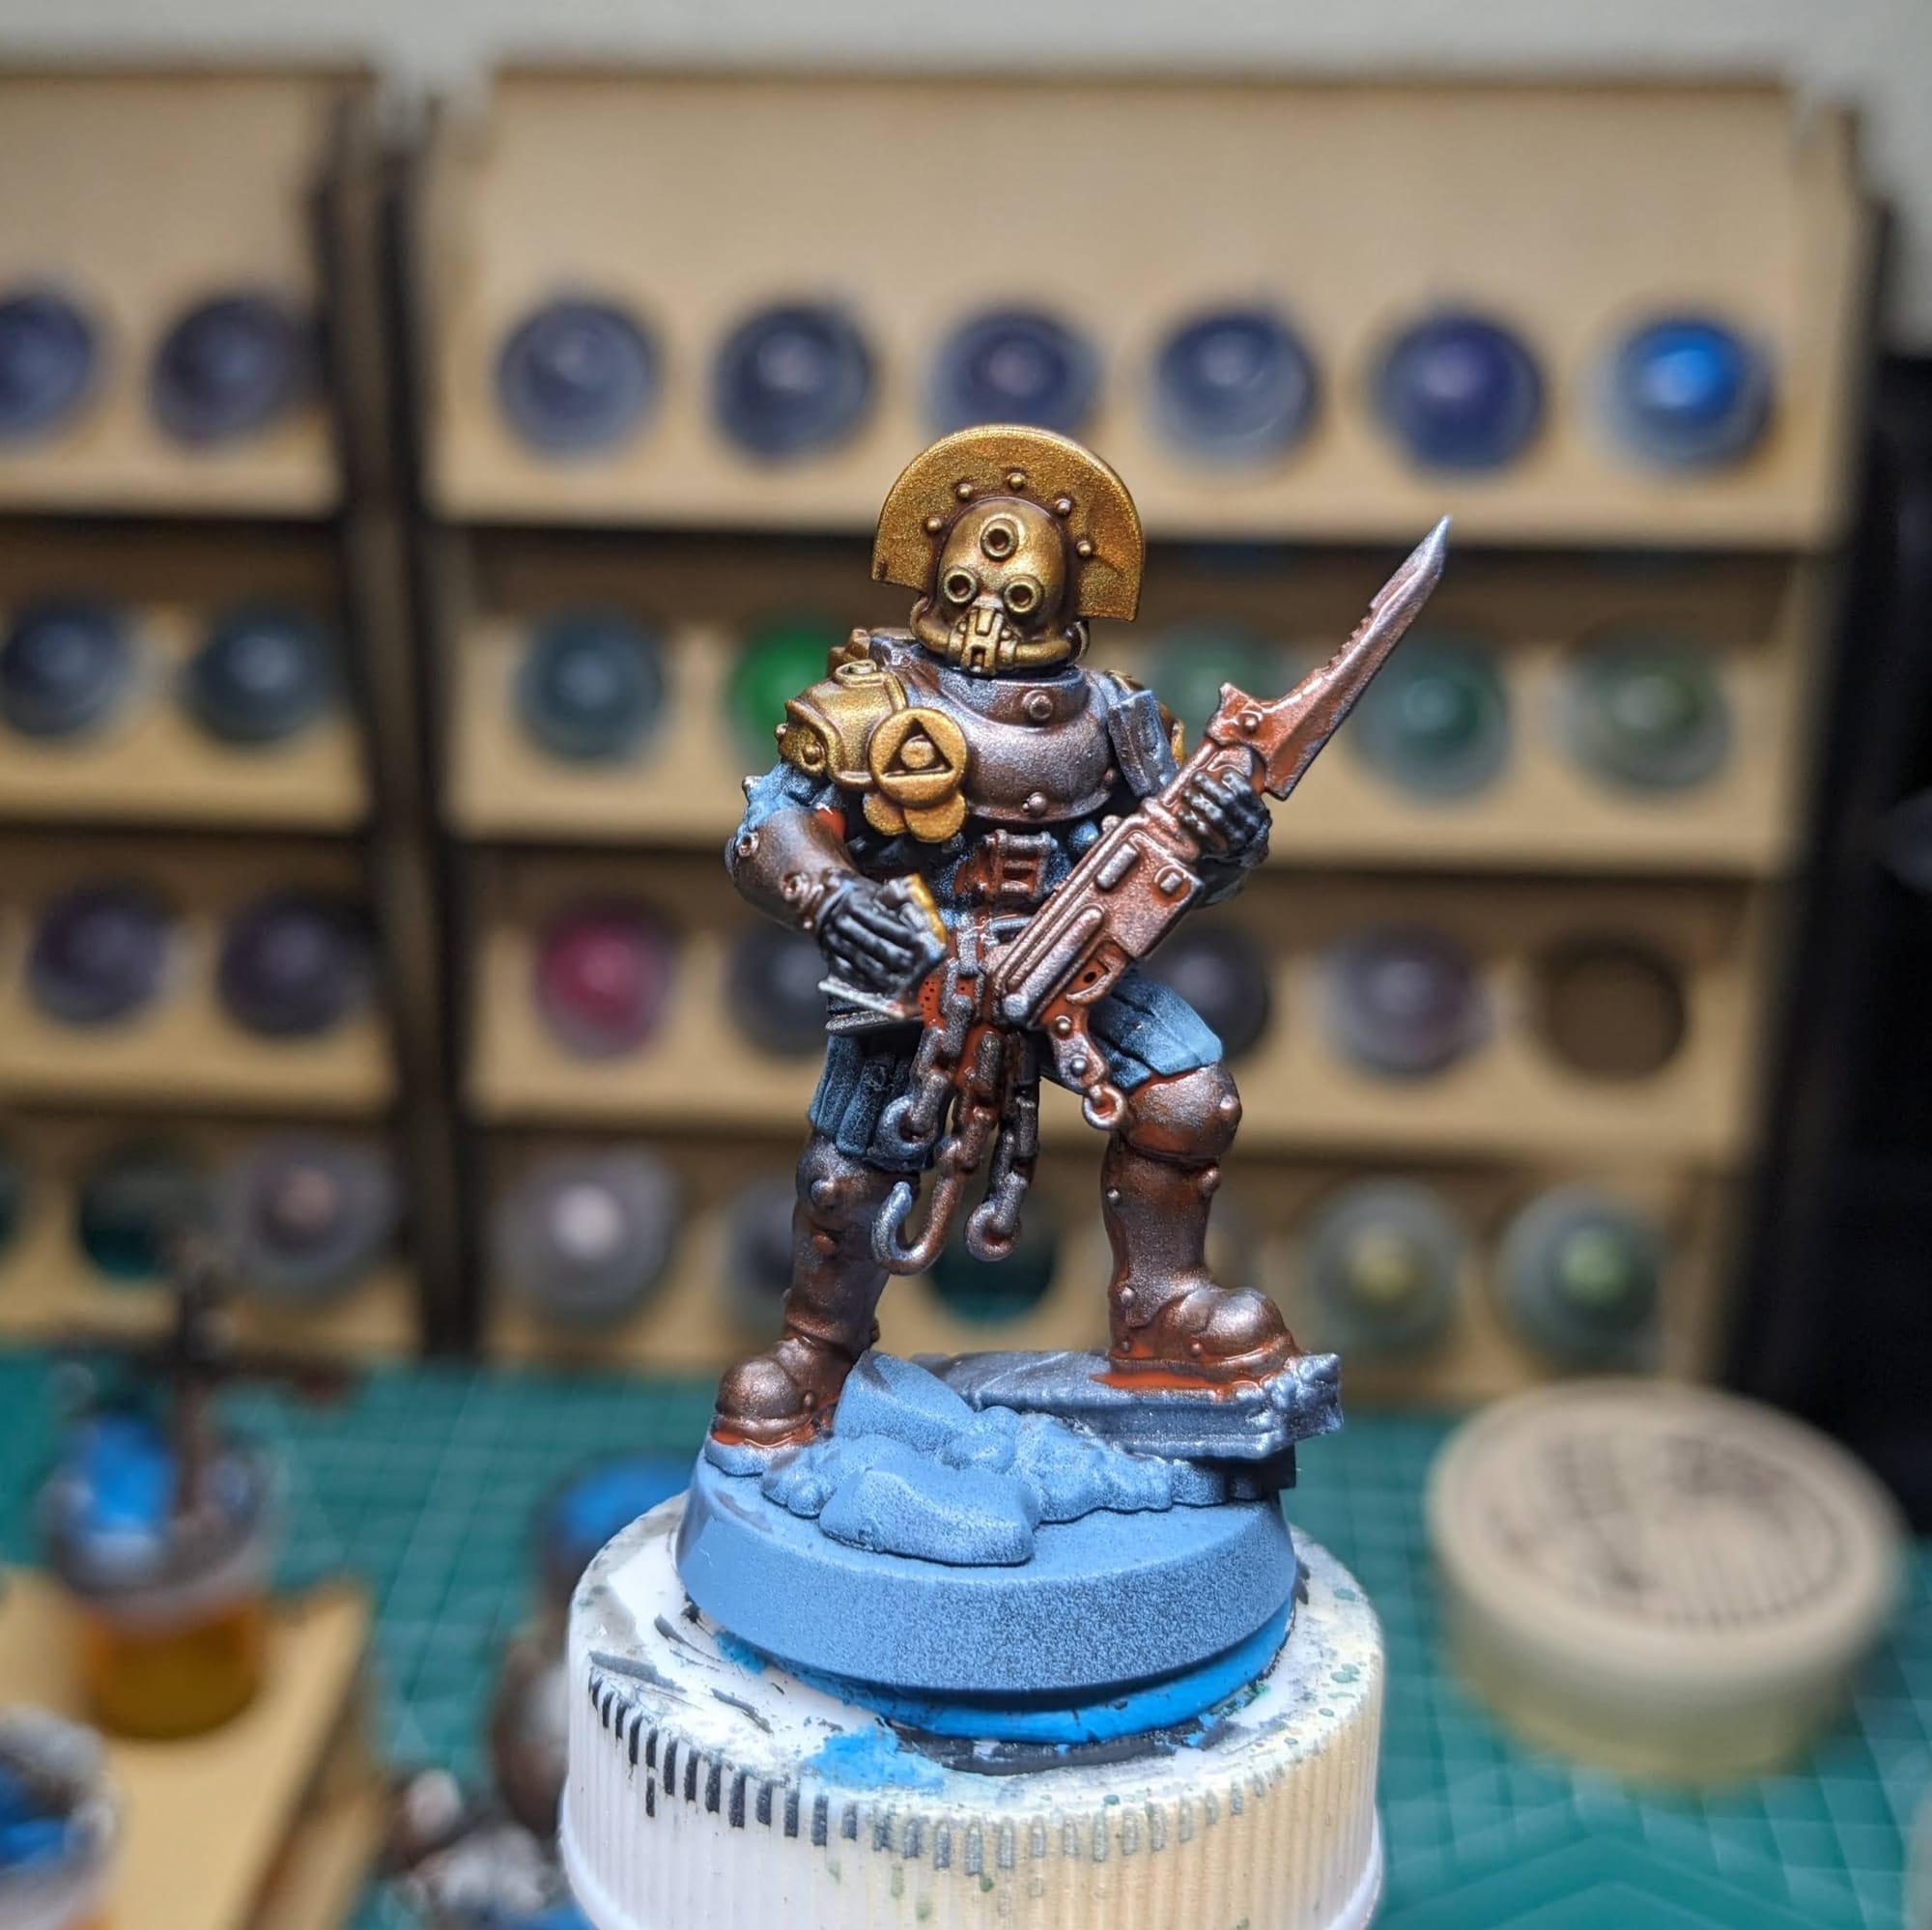
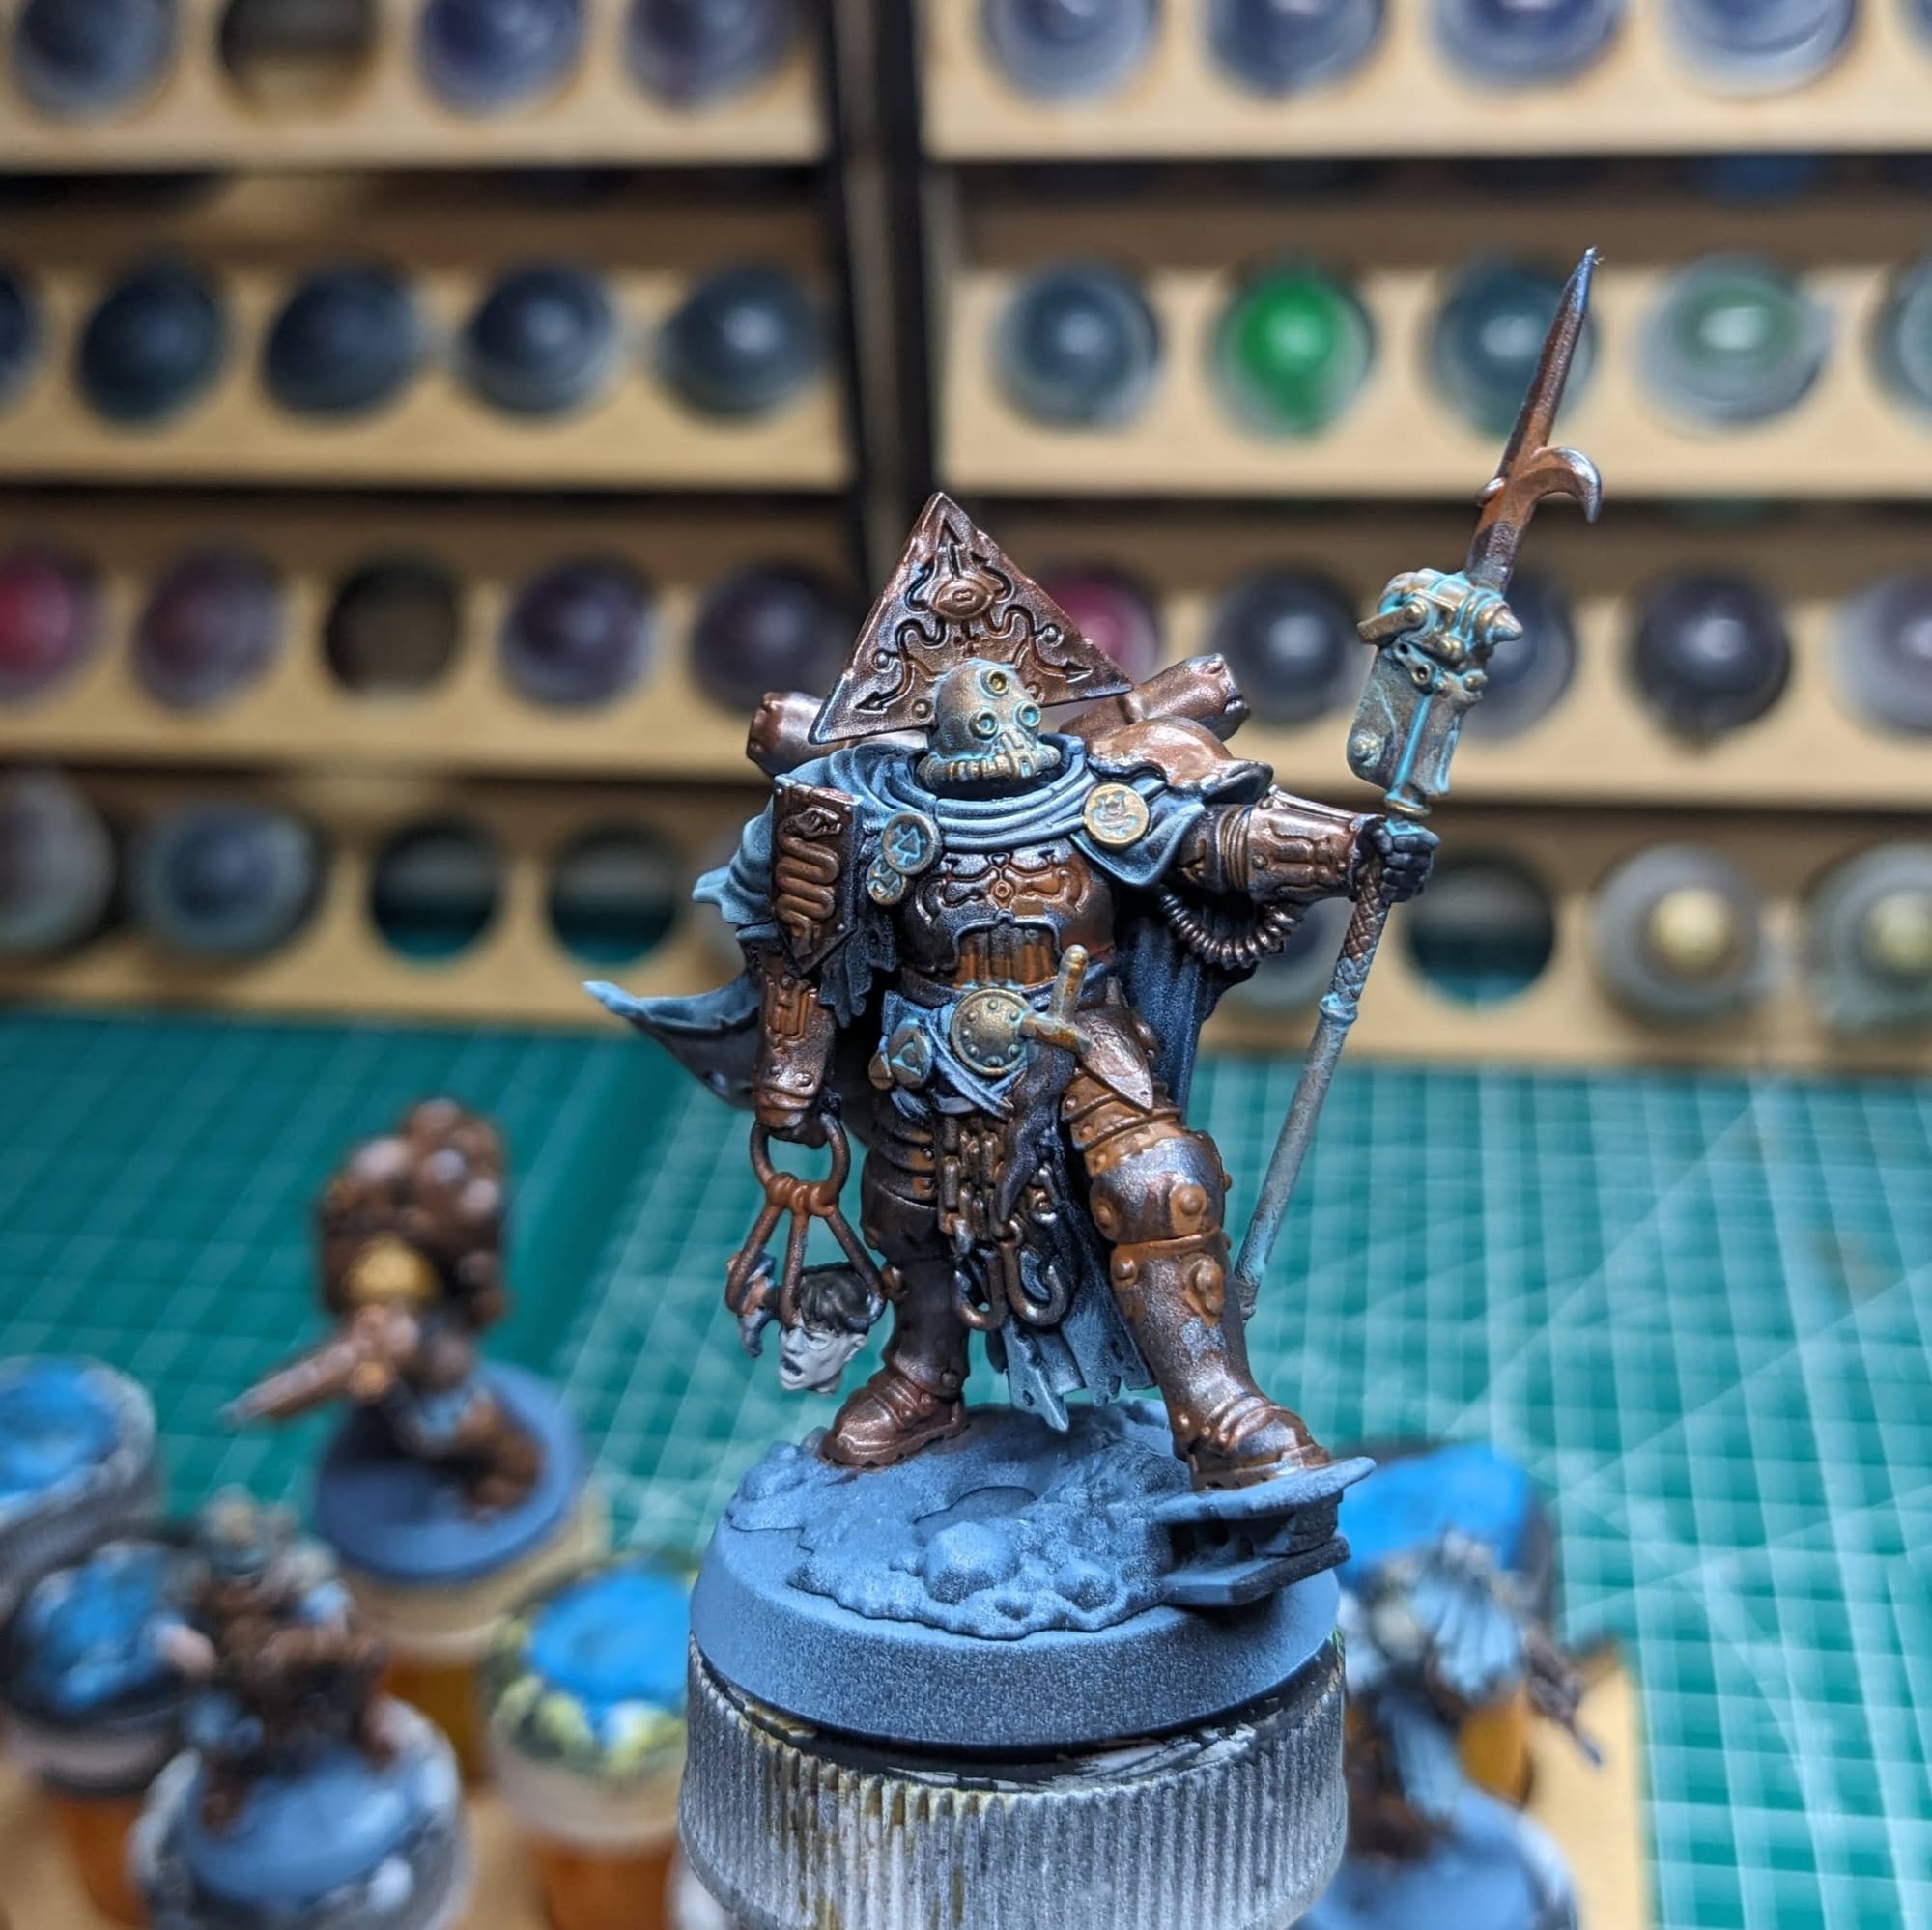
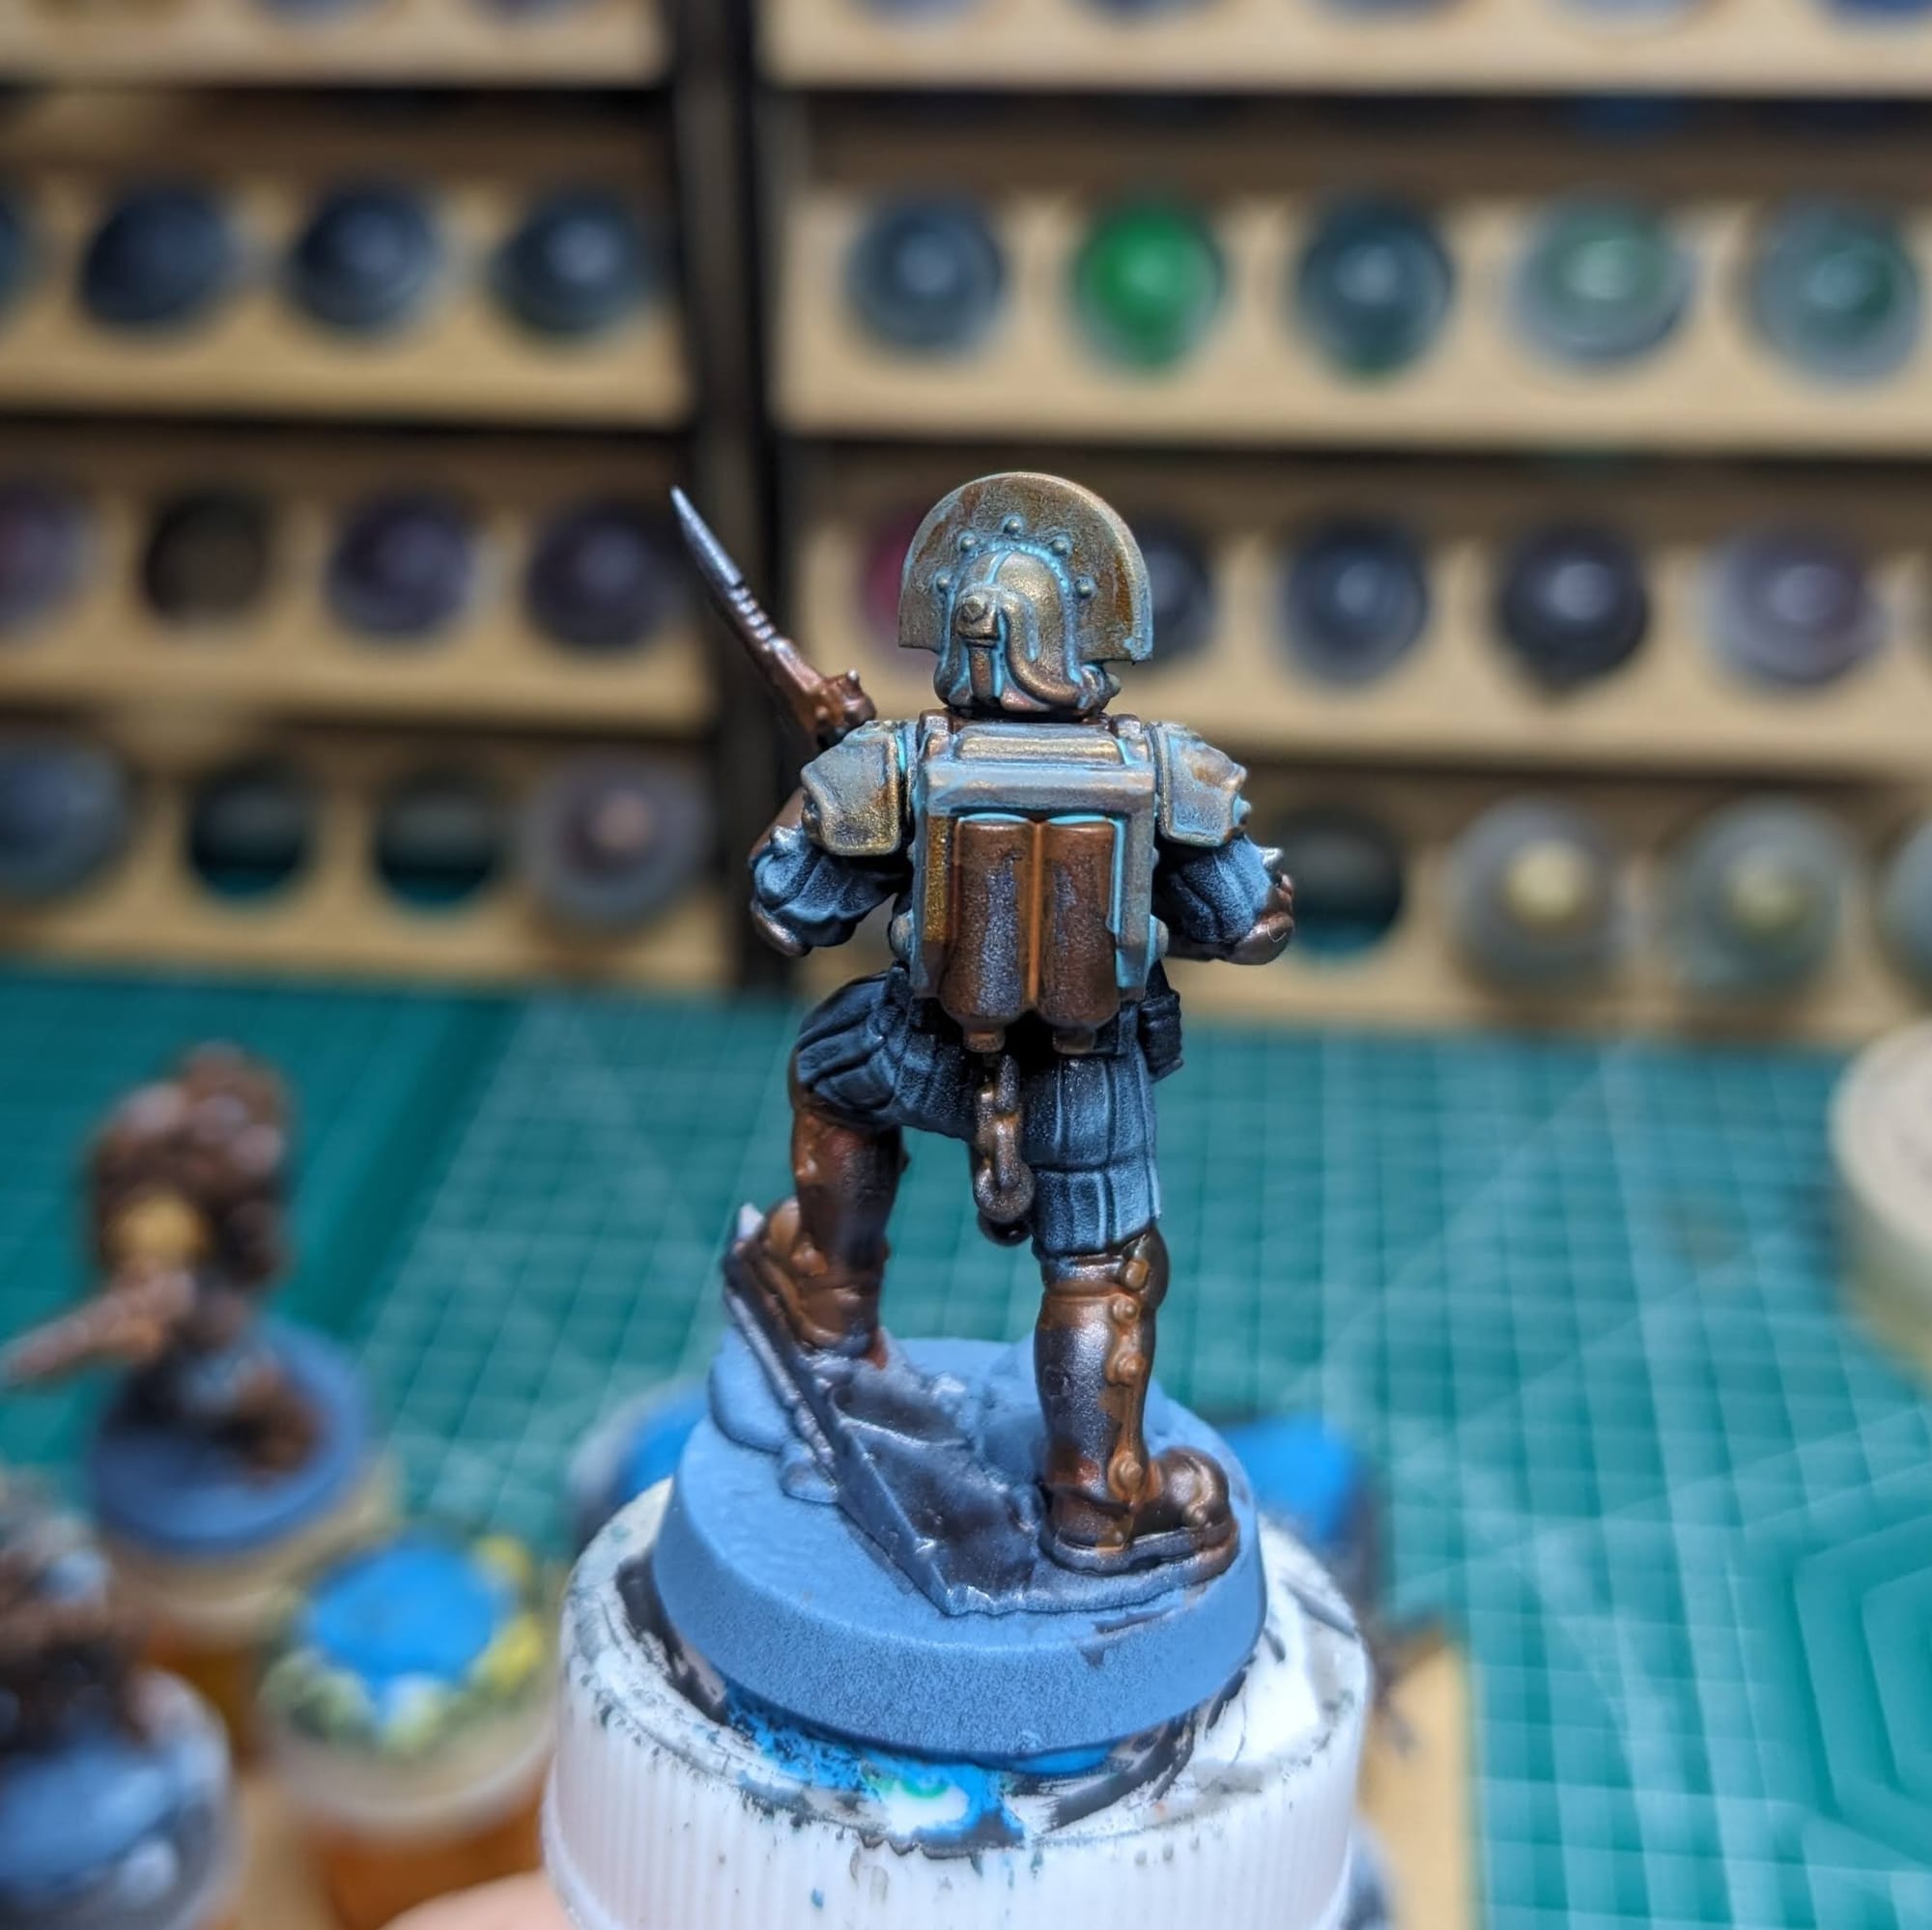
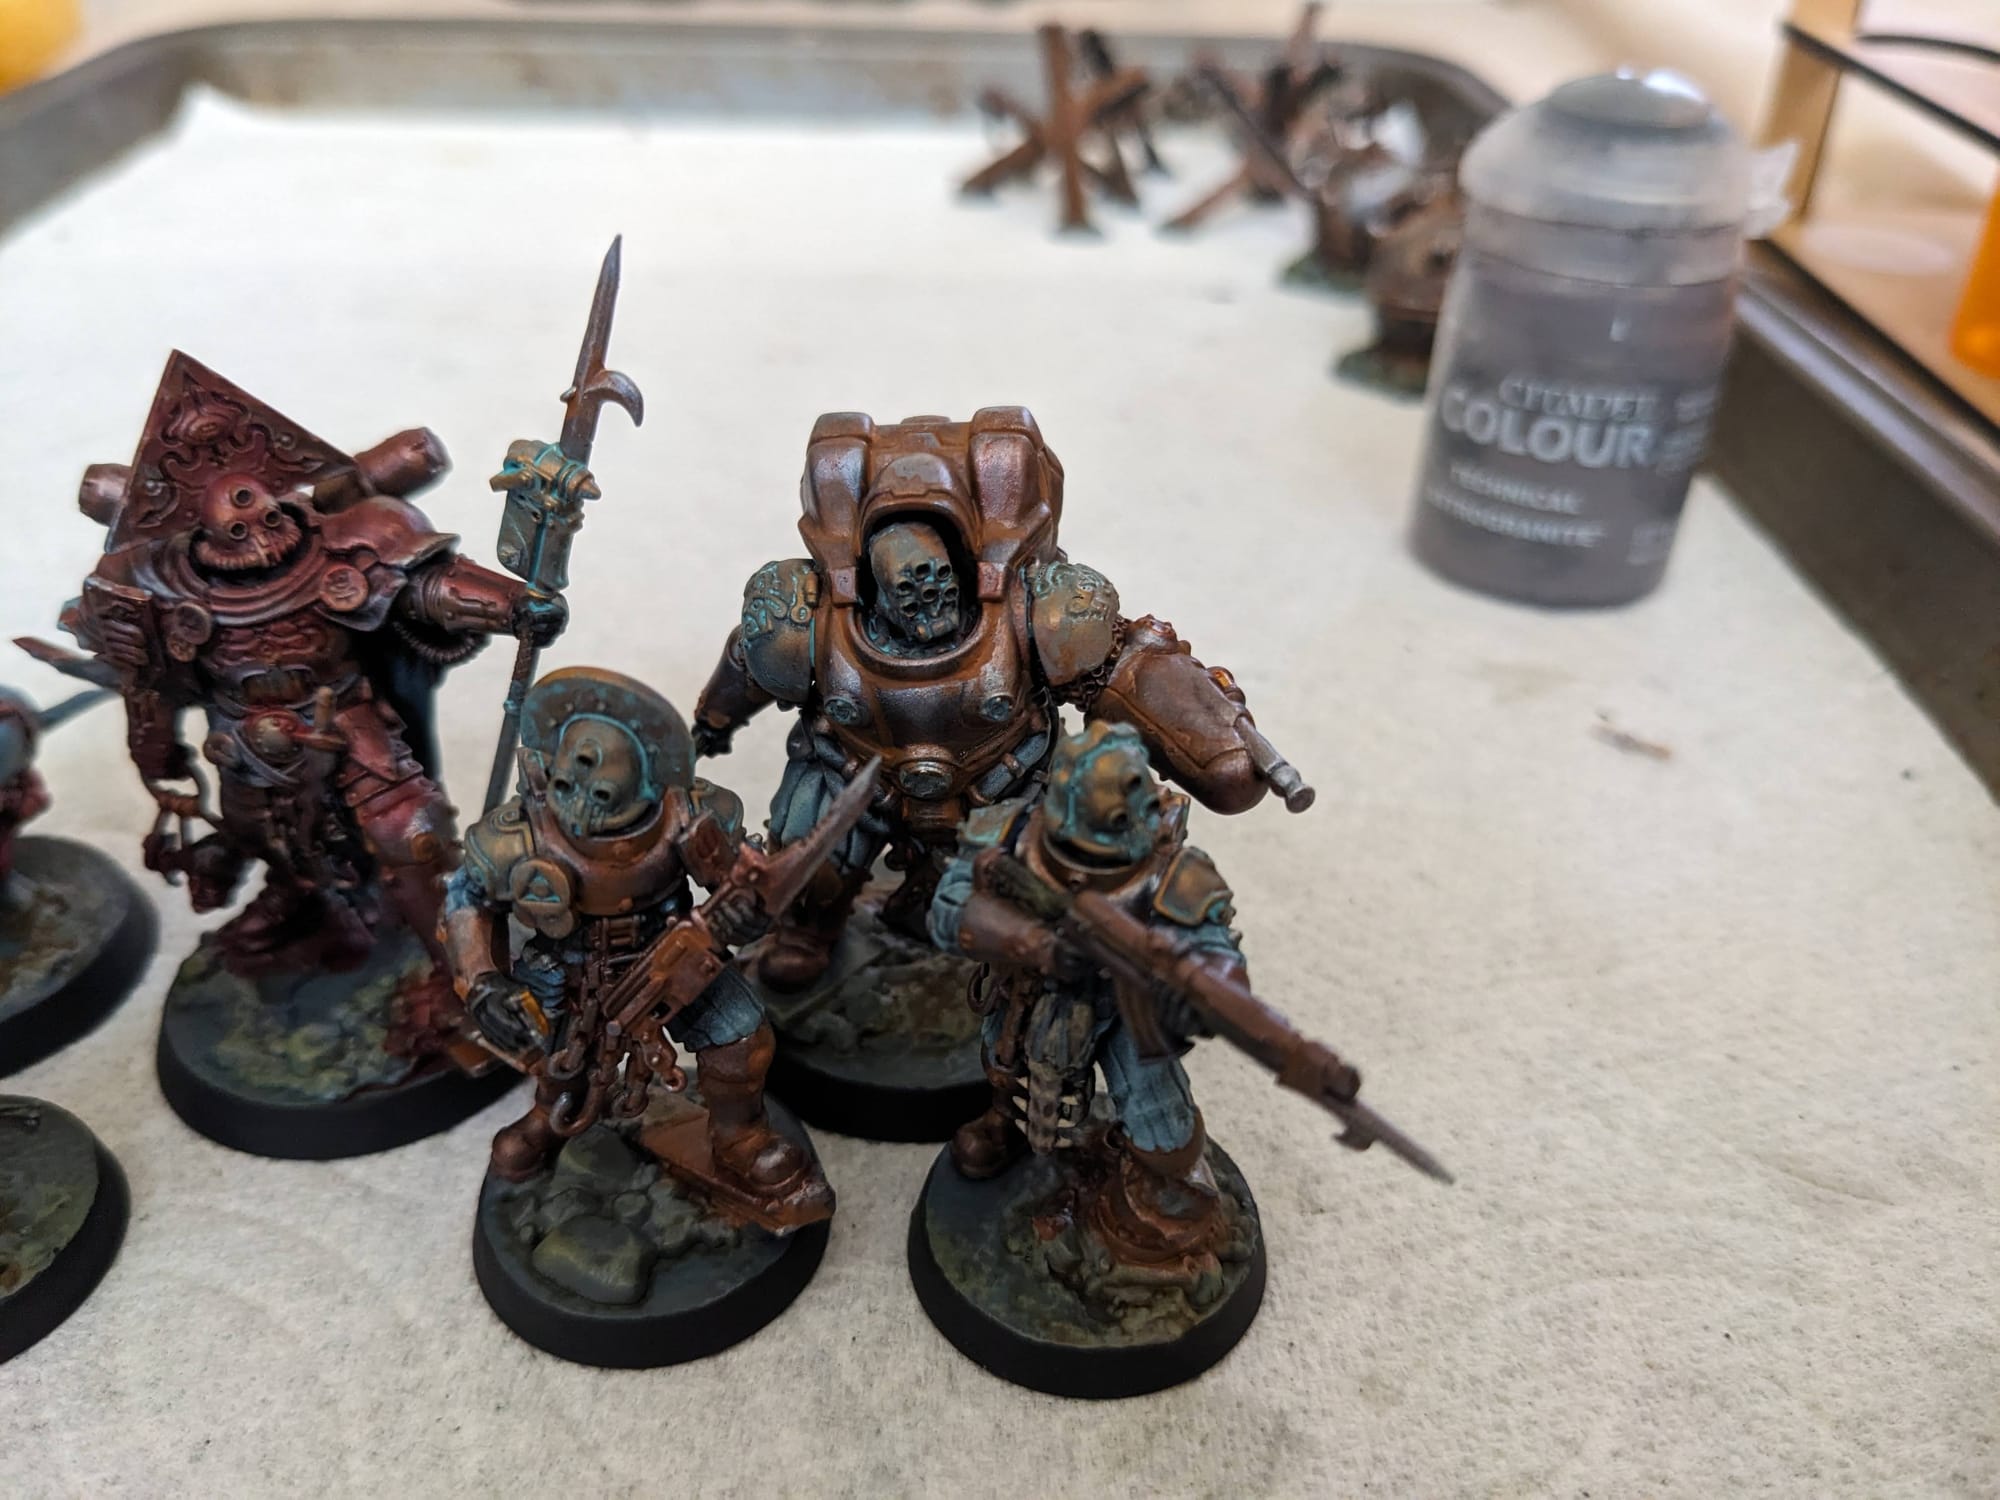
With the base colors done, it was time to move into the weathering effects of rust and vedigris. Since these raiders are spending time above and below the waves, it makes sense that their armor will tarnish heavily.
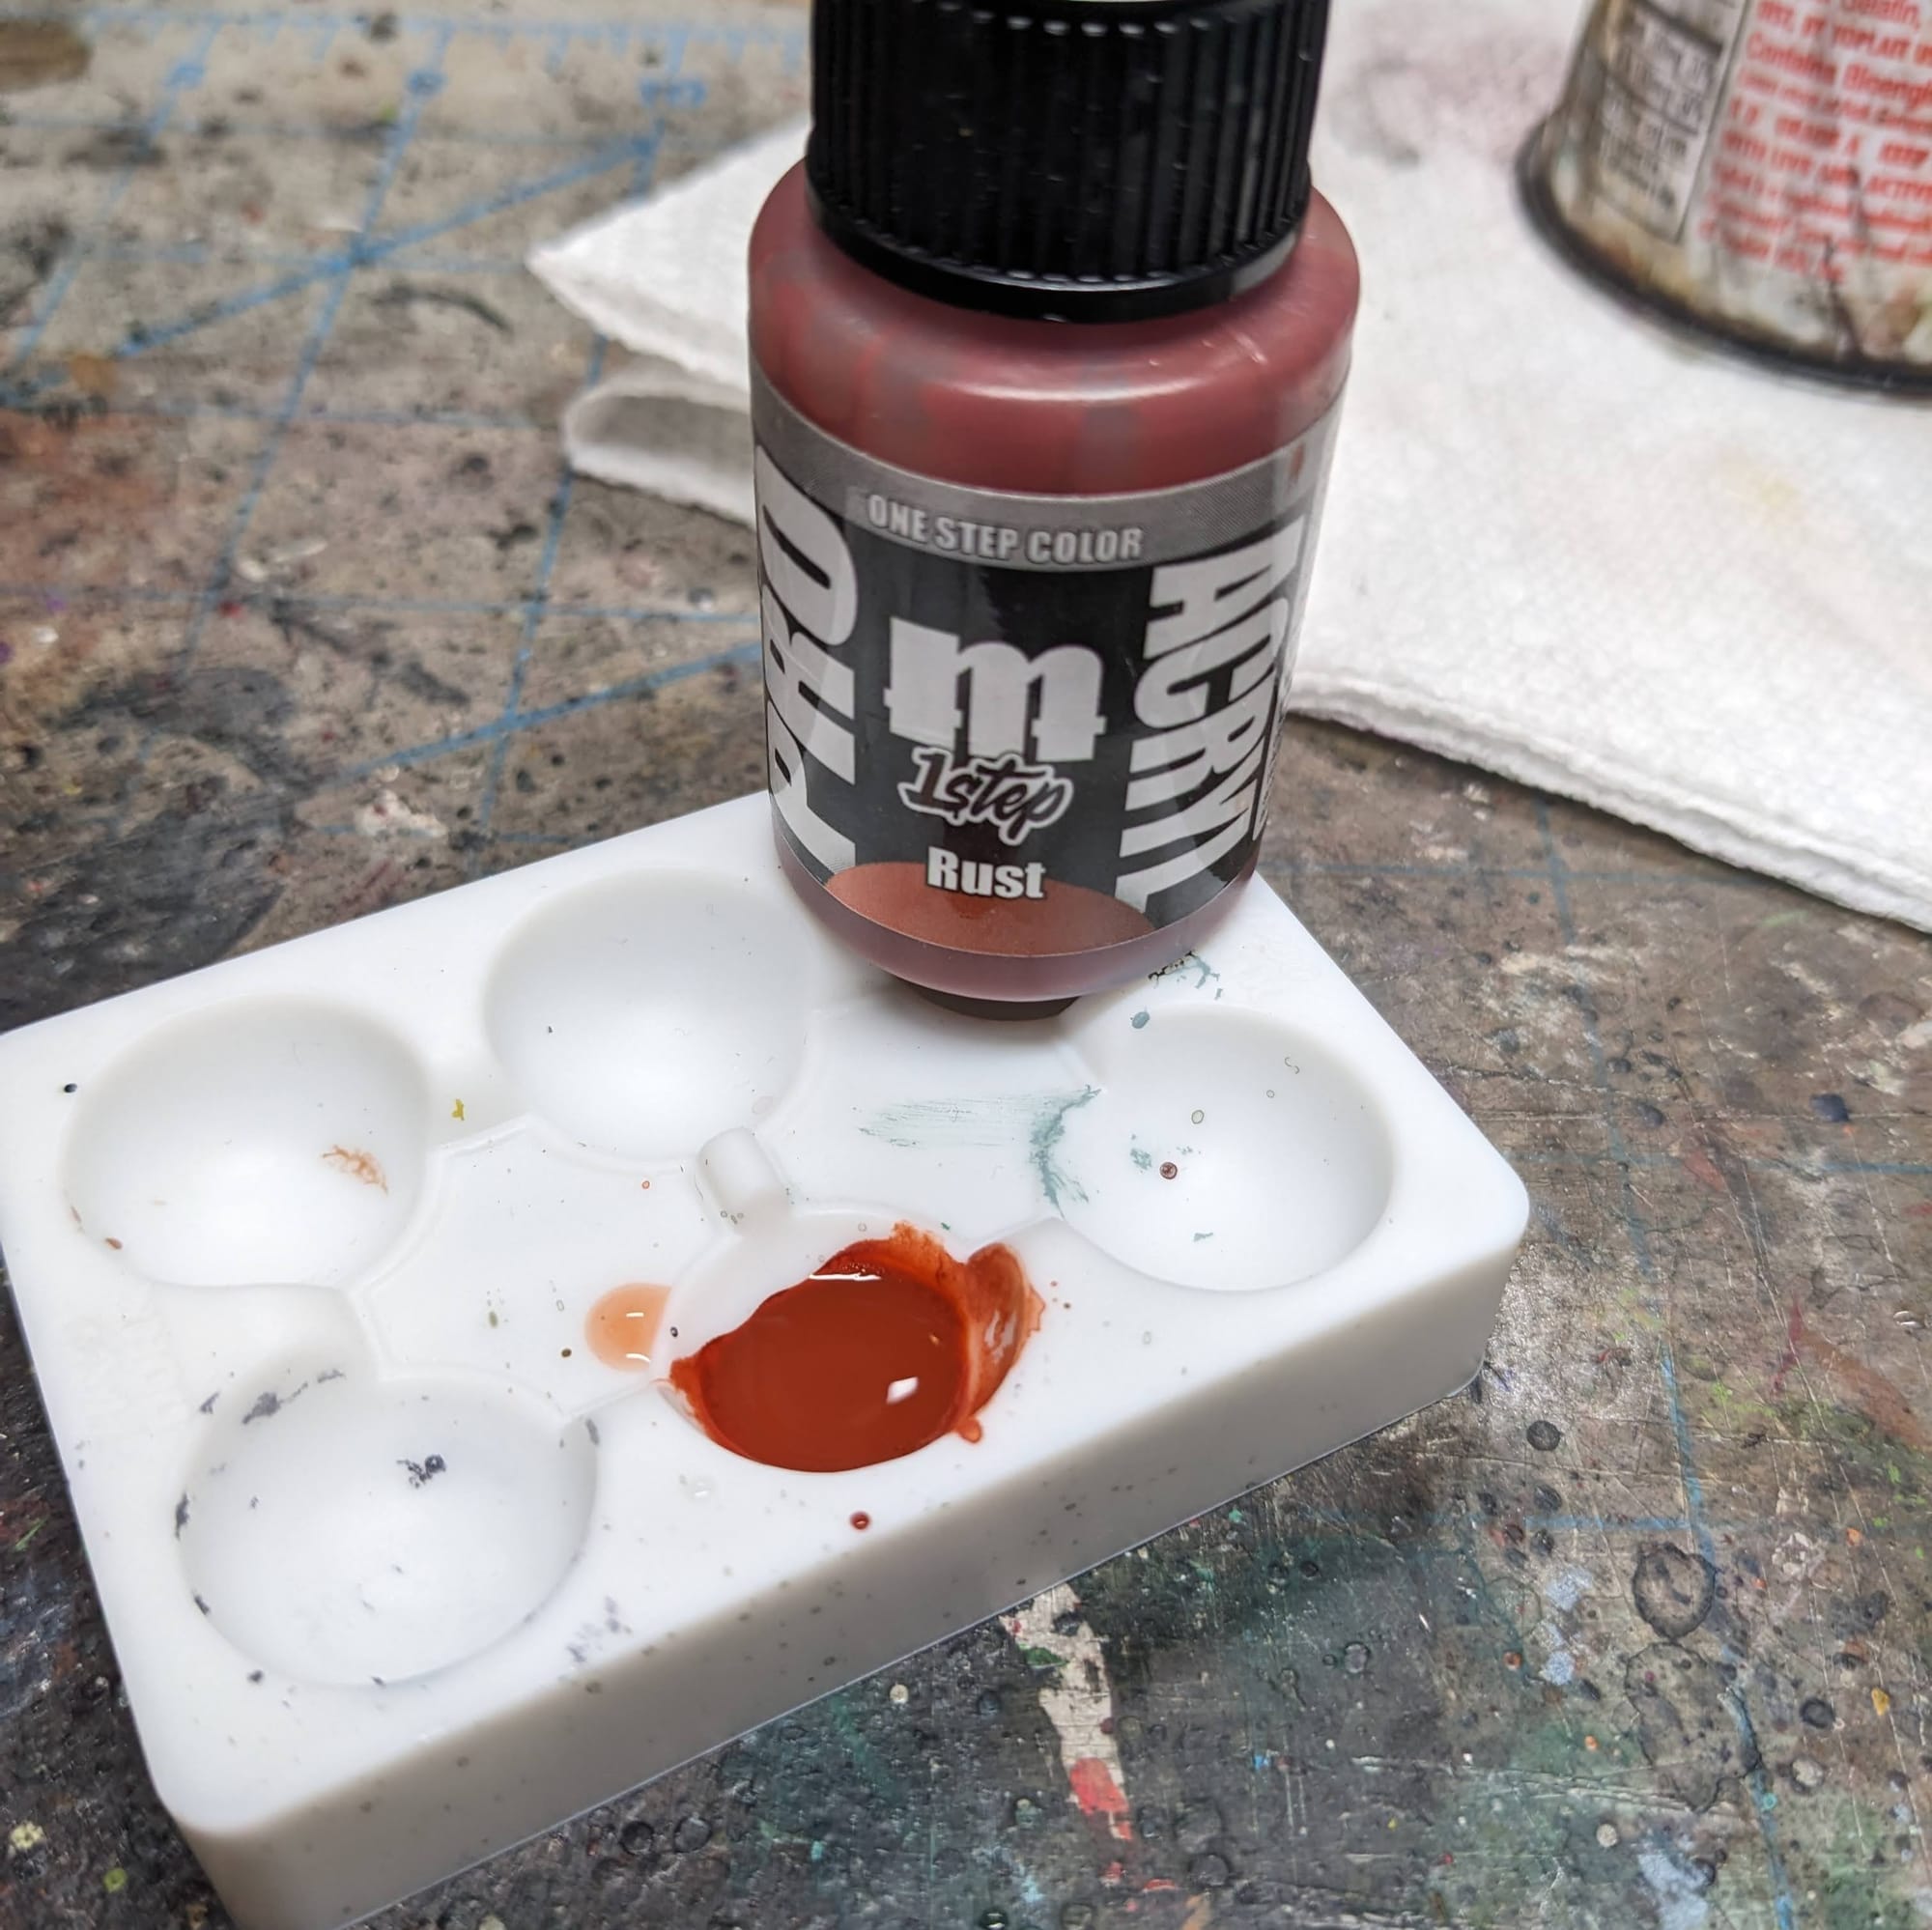
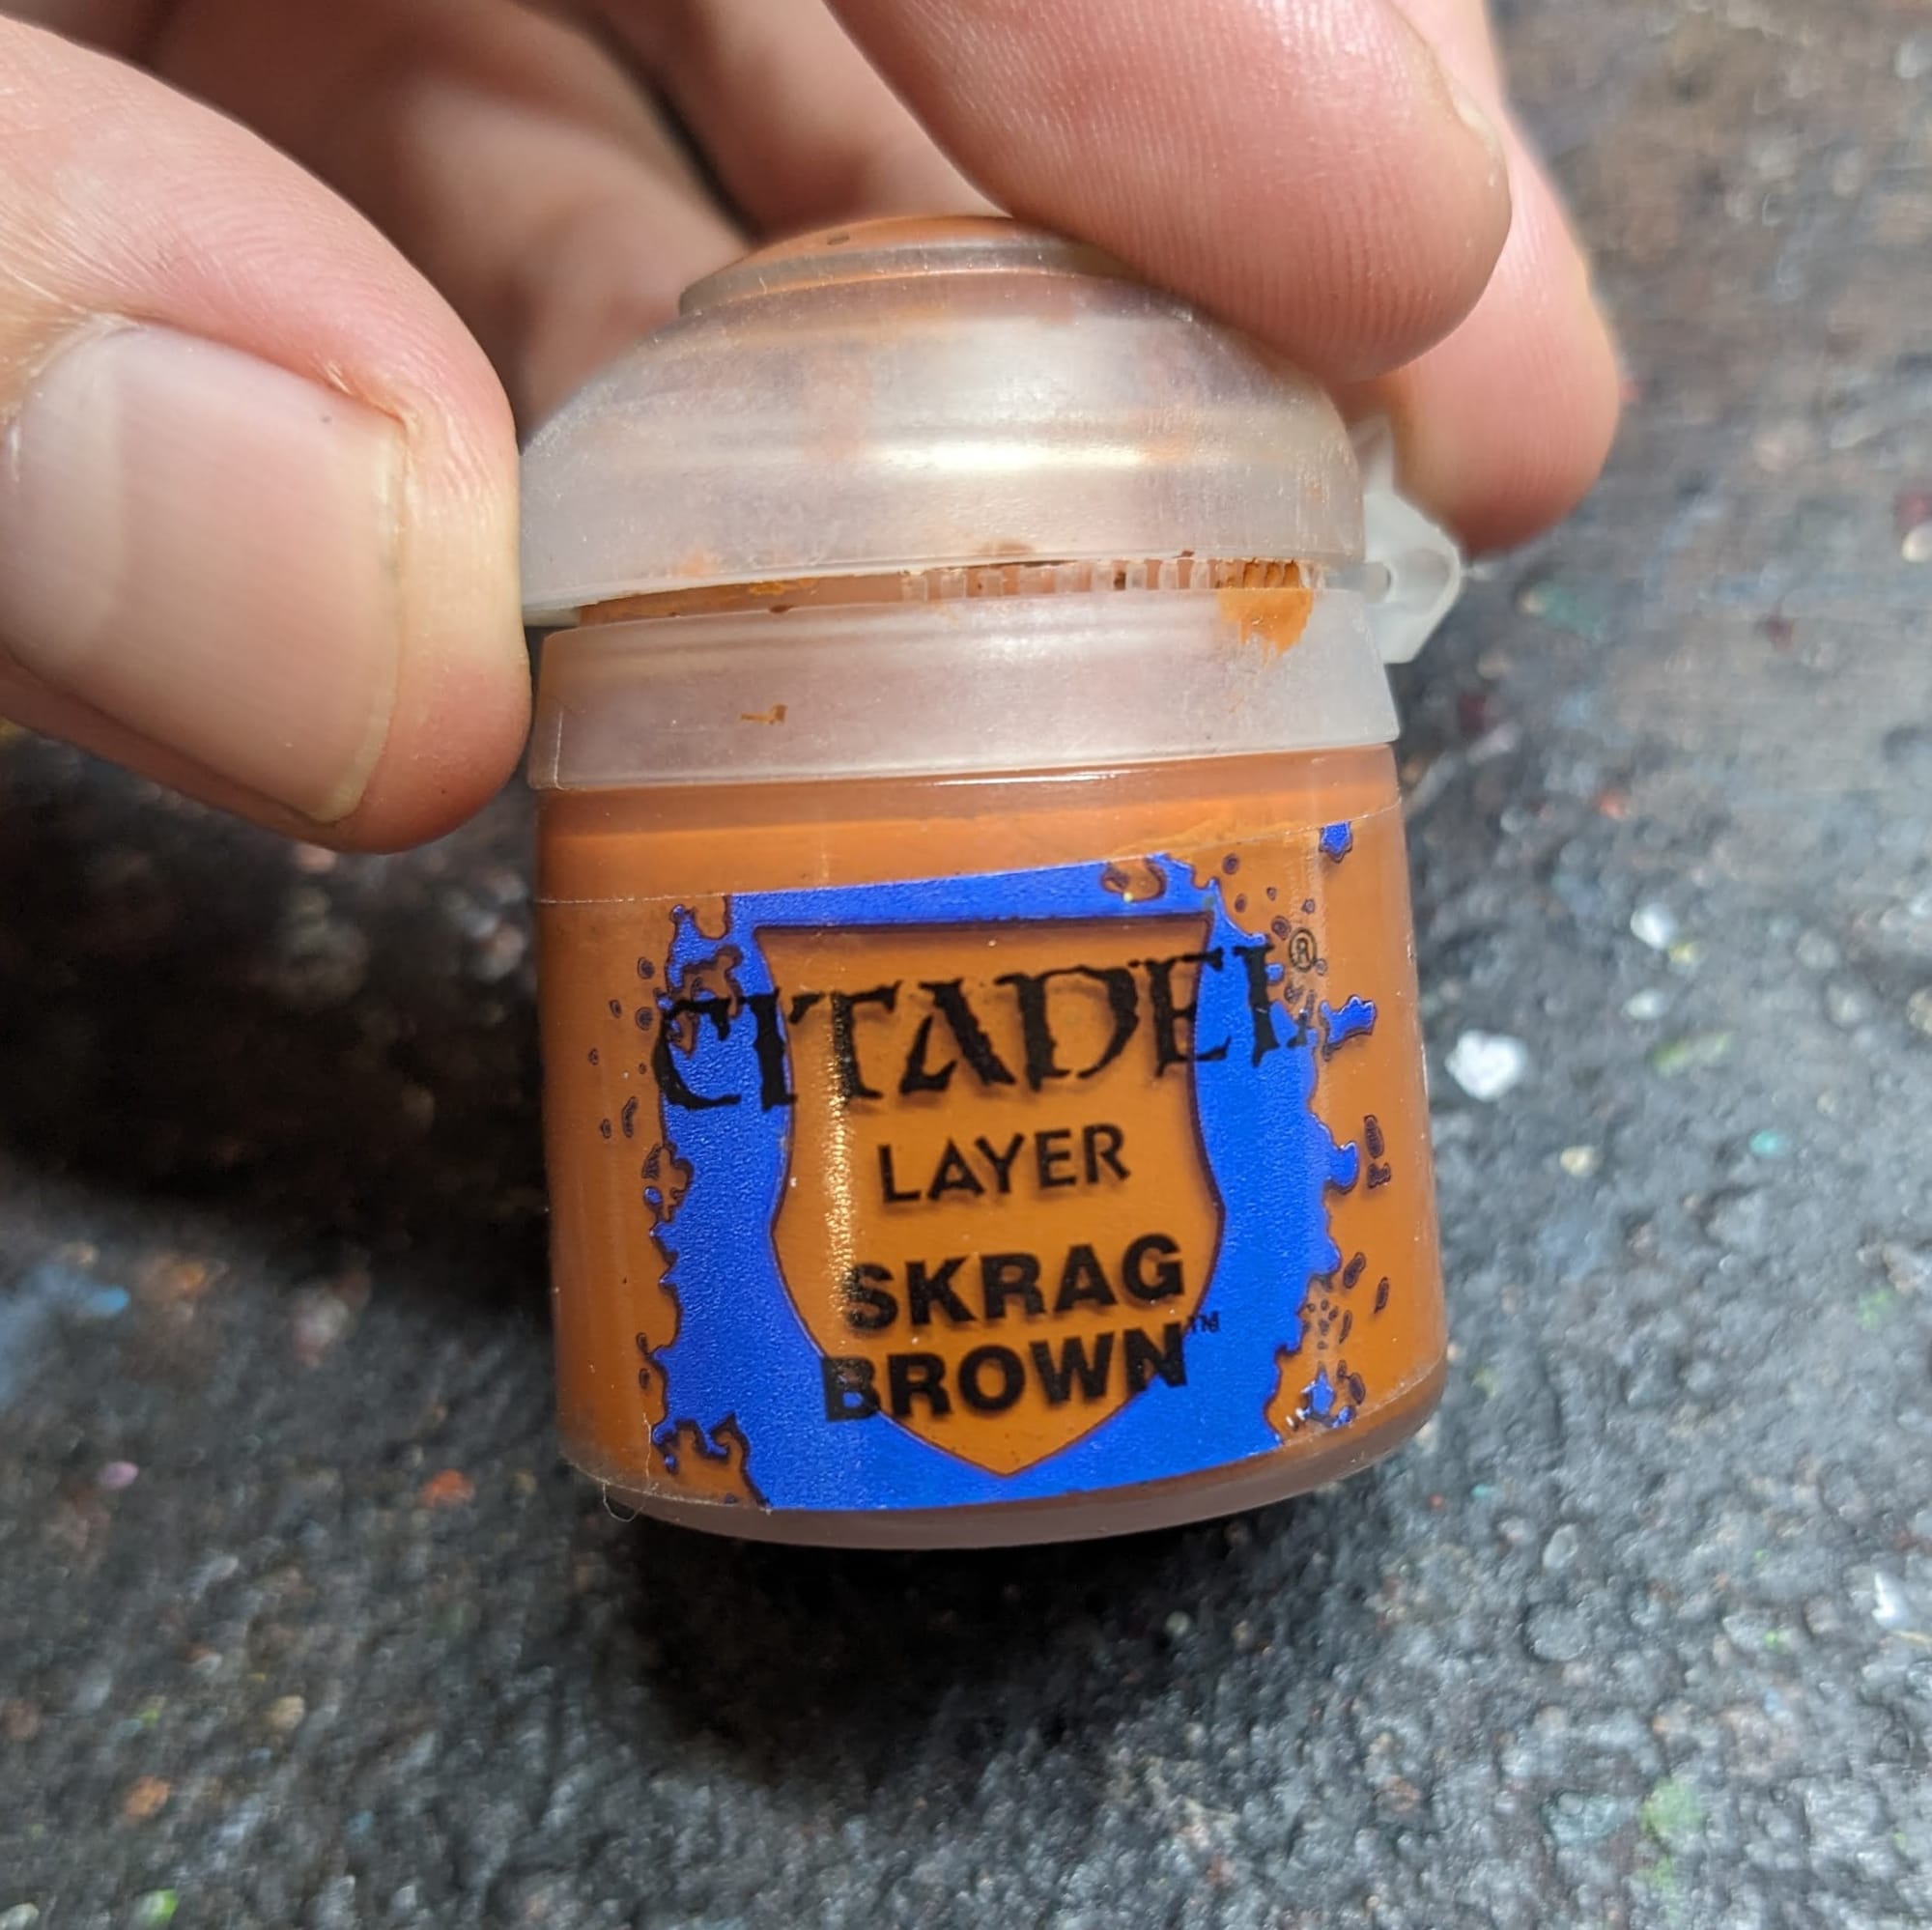
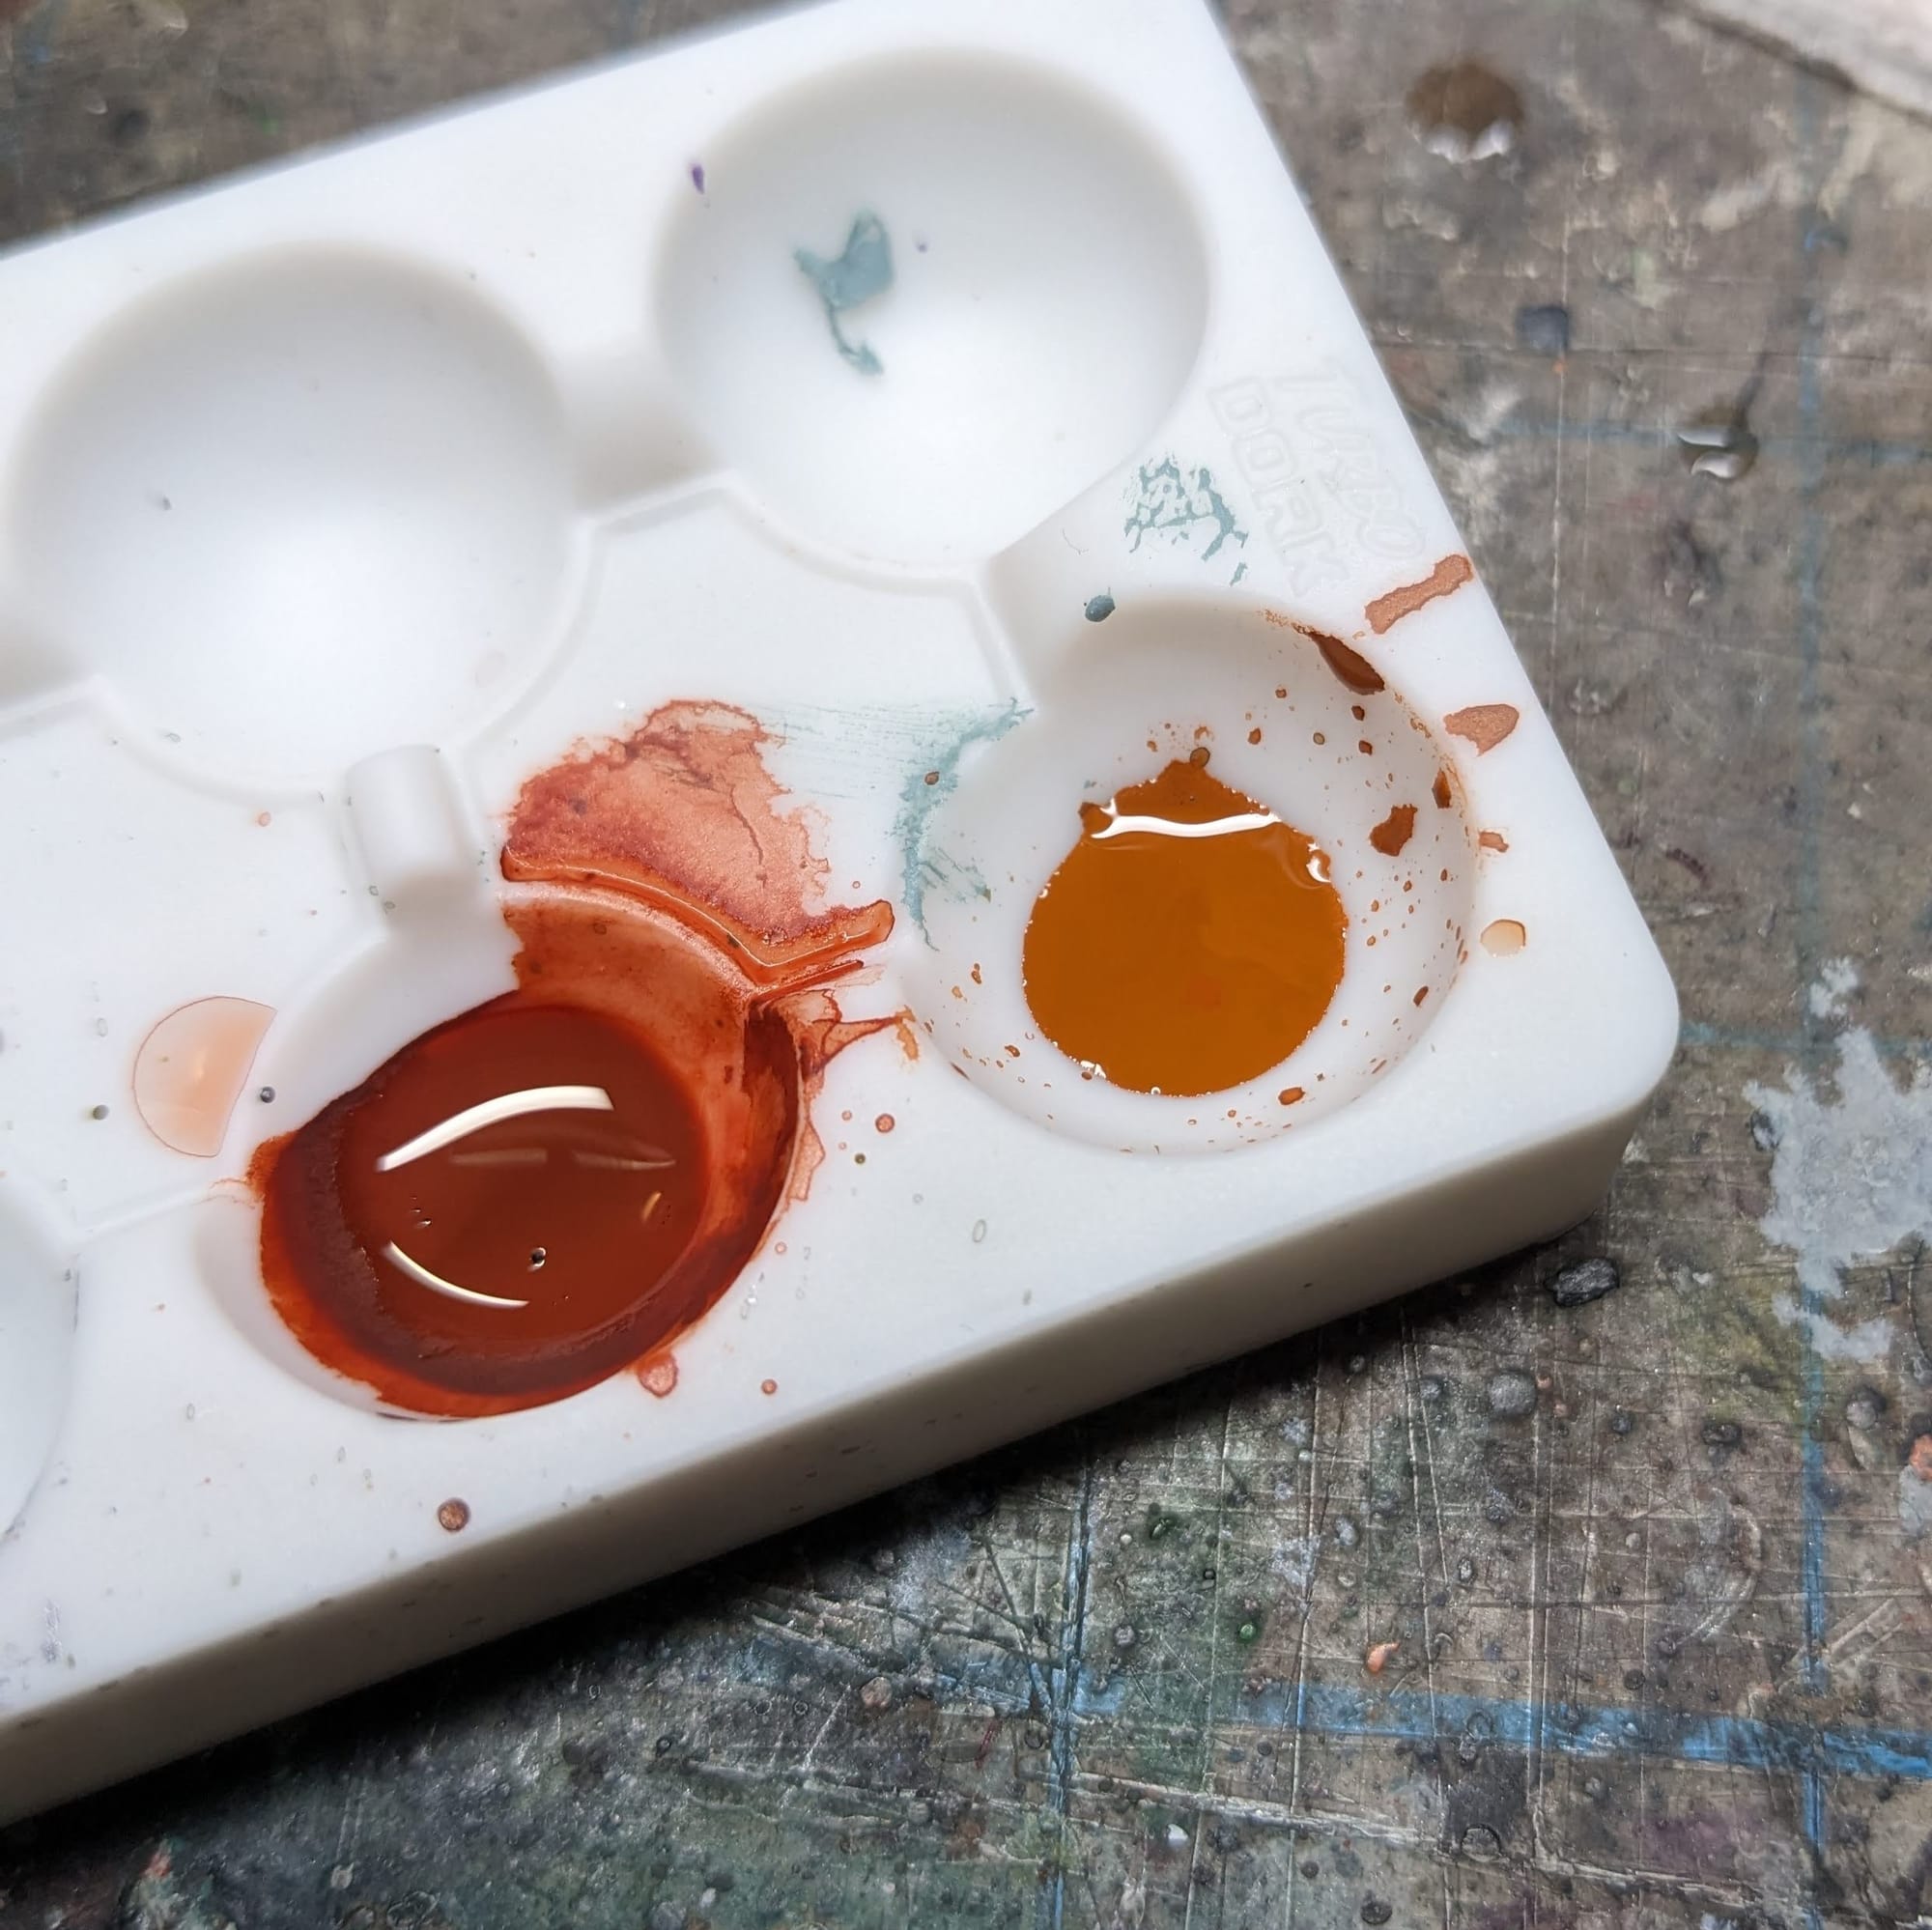
Starting with the silver metal, I applied a thin, darker orange rust color with the Pro Acryl Rust 1-Step paint. Once that dried, I then thinned & water-down Citadel Skrag Brown to give a brighter orange rust color. This will be the brightest of the rust, which should rest between two pieces of metal where water would normally pool and then dry.
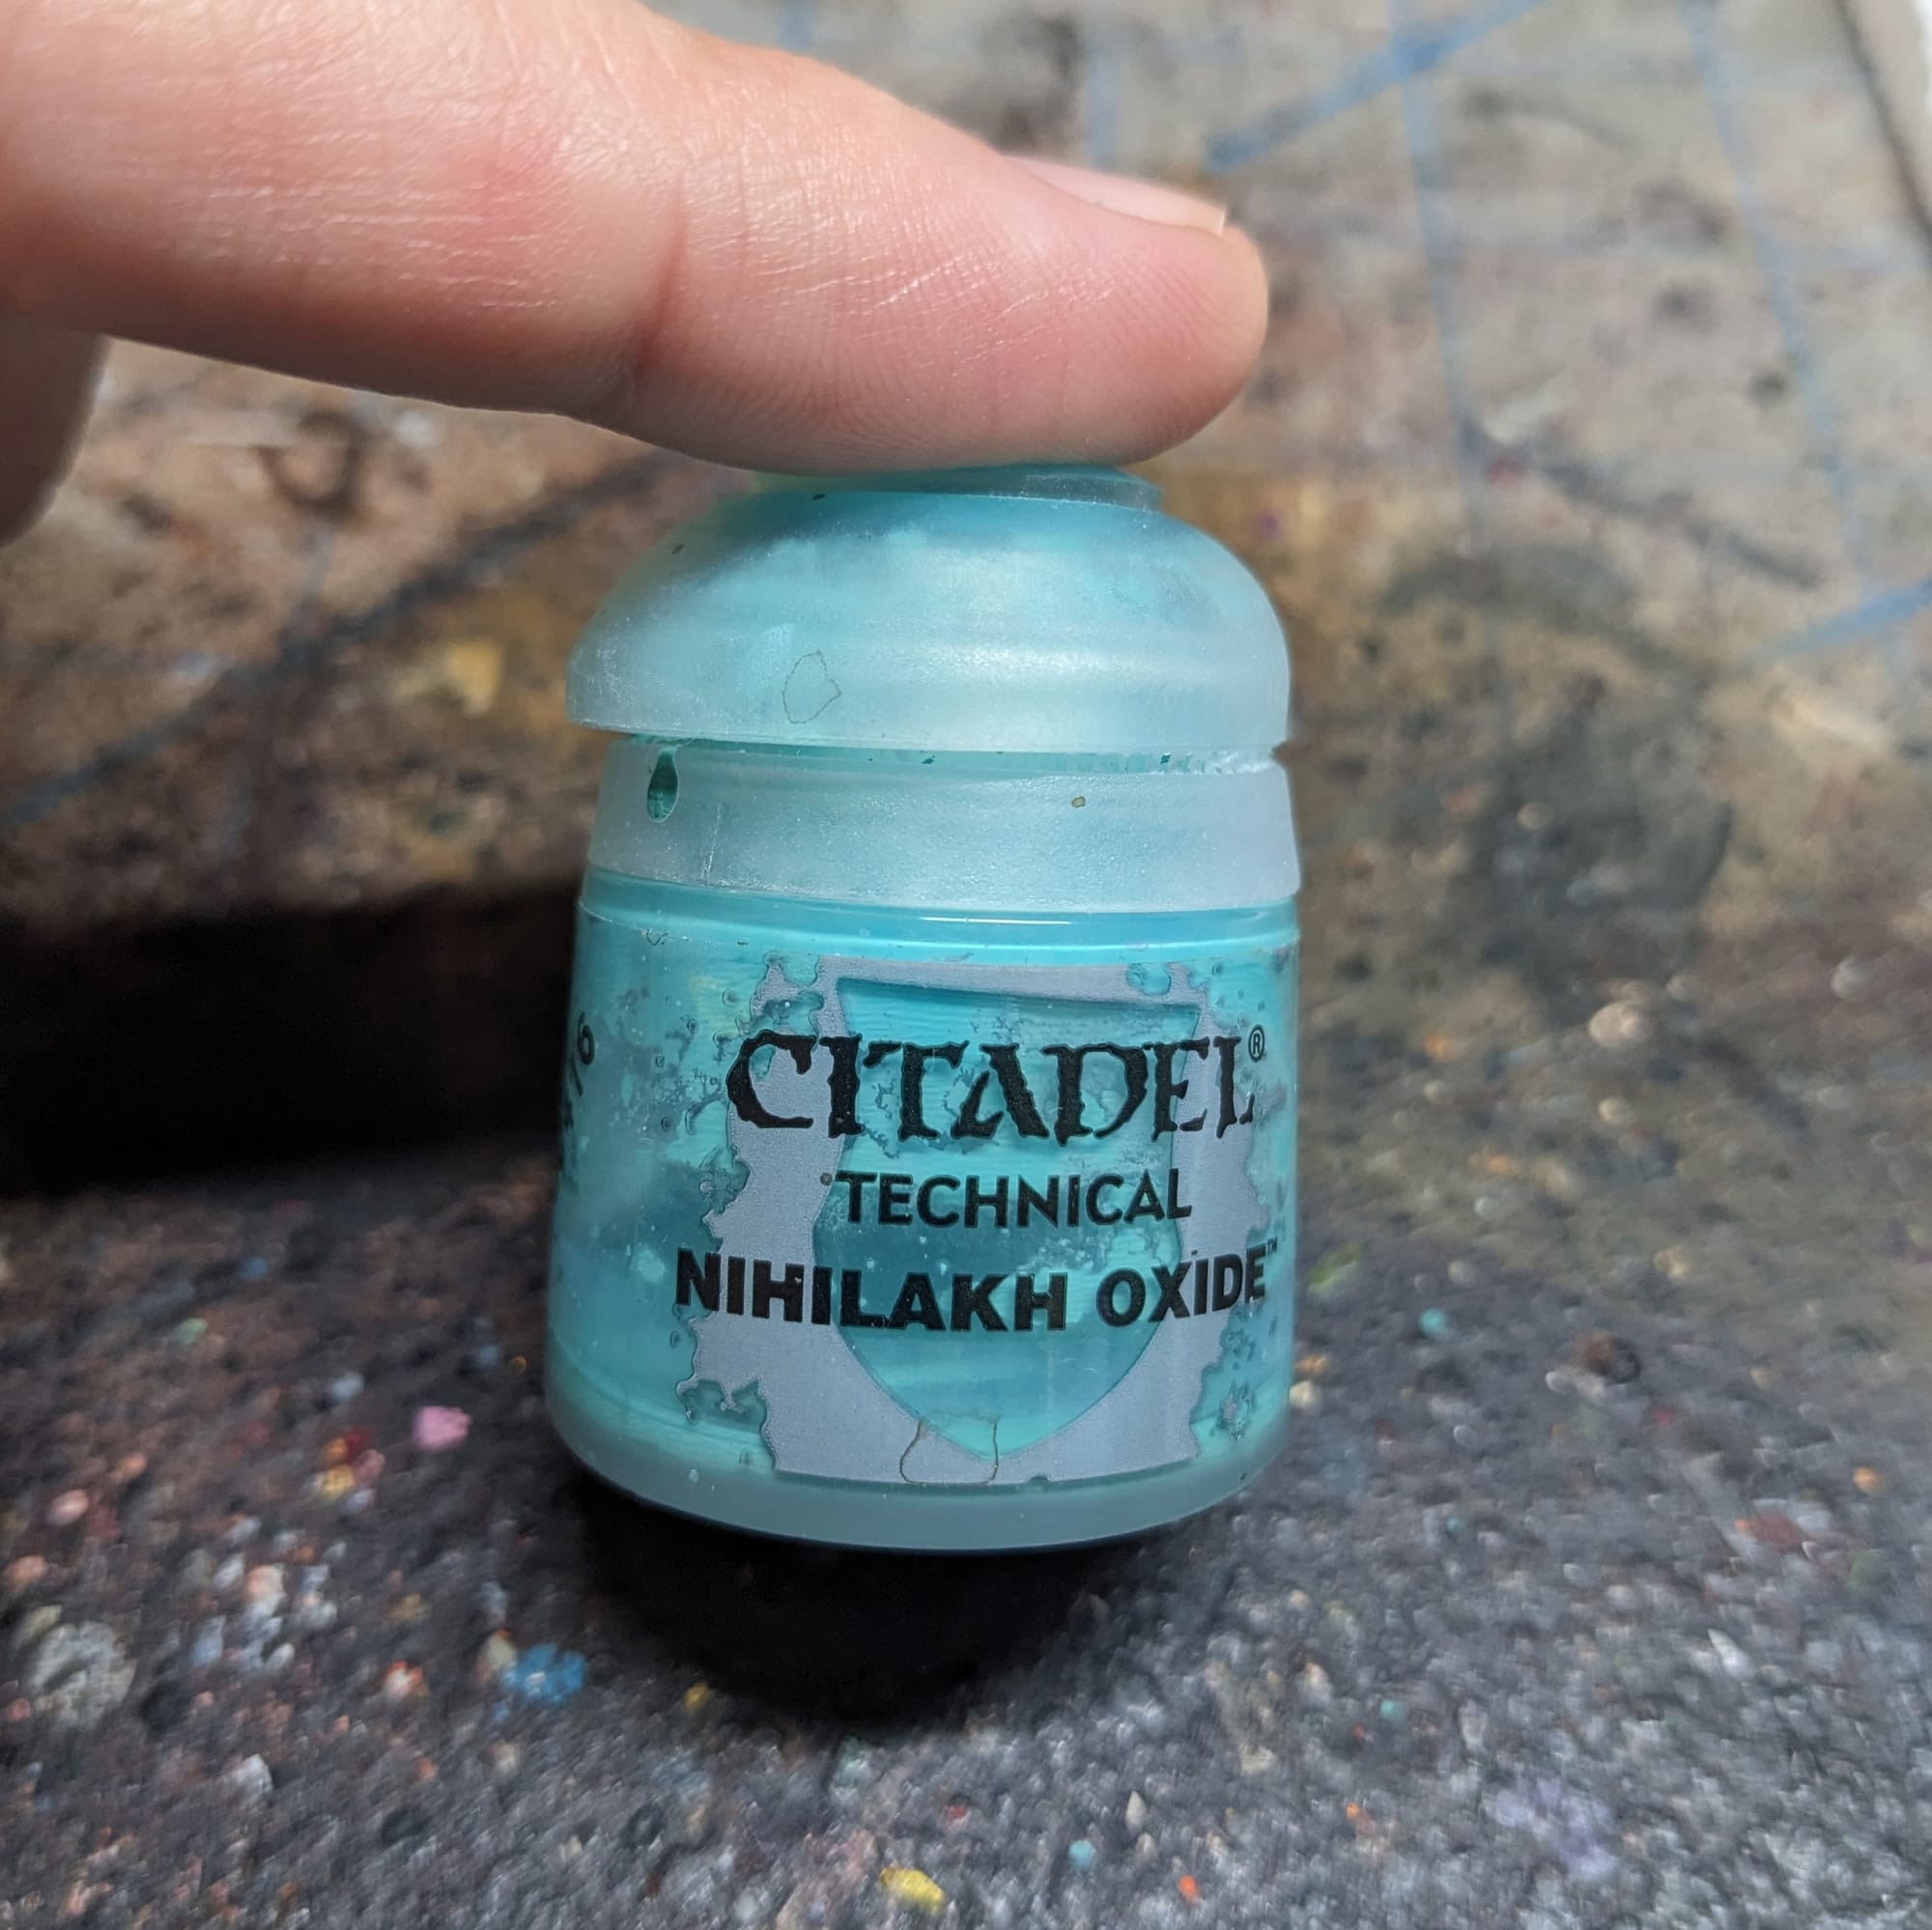
For the gold armor, I applied Citadel Nihilakh Oxide, again thinning down with water. Because vedrigris is a oxidation of brass/bronze, cause by exposure to moisture or other chemicals, the more I can give it a natural look with water, allowing it flow into recesses, the better the outcome will be. A little Nihilakh Oxide goes a long way, so if it's too much, wipe it off before it dries.
Blood Effects
It's important to note that painting the blood for the Heretic Captain and Drowned Chorister occurs in two parts: before sealing and after sealing with matte varnish.
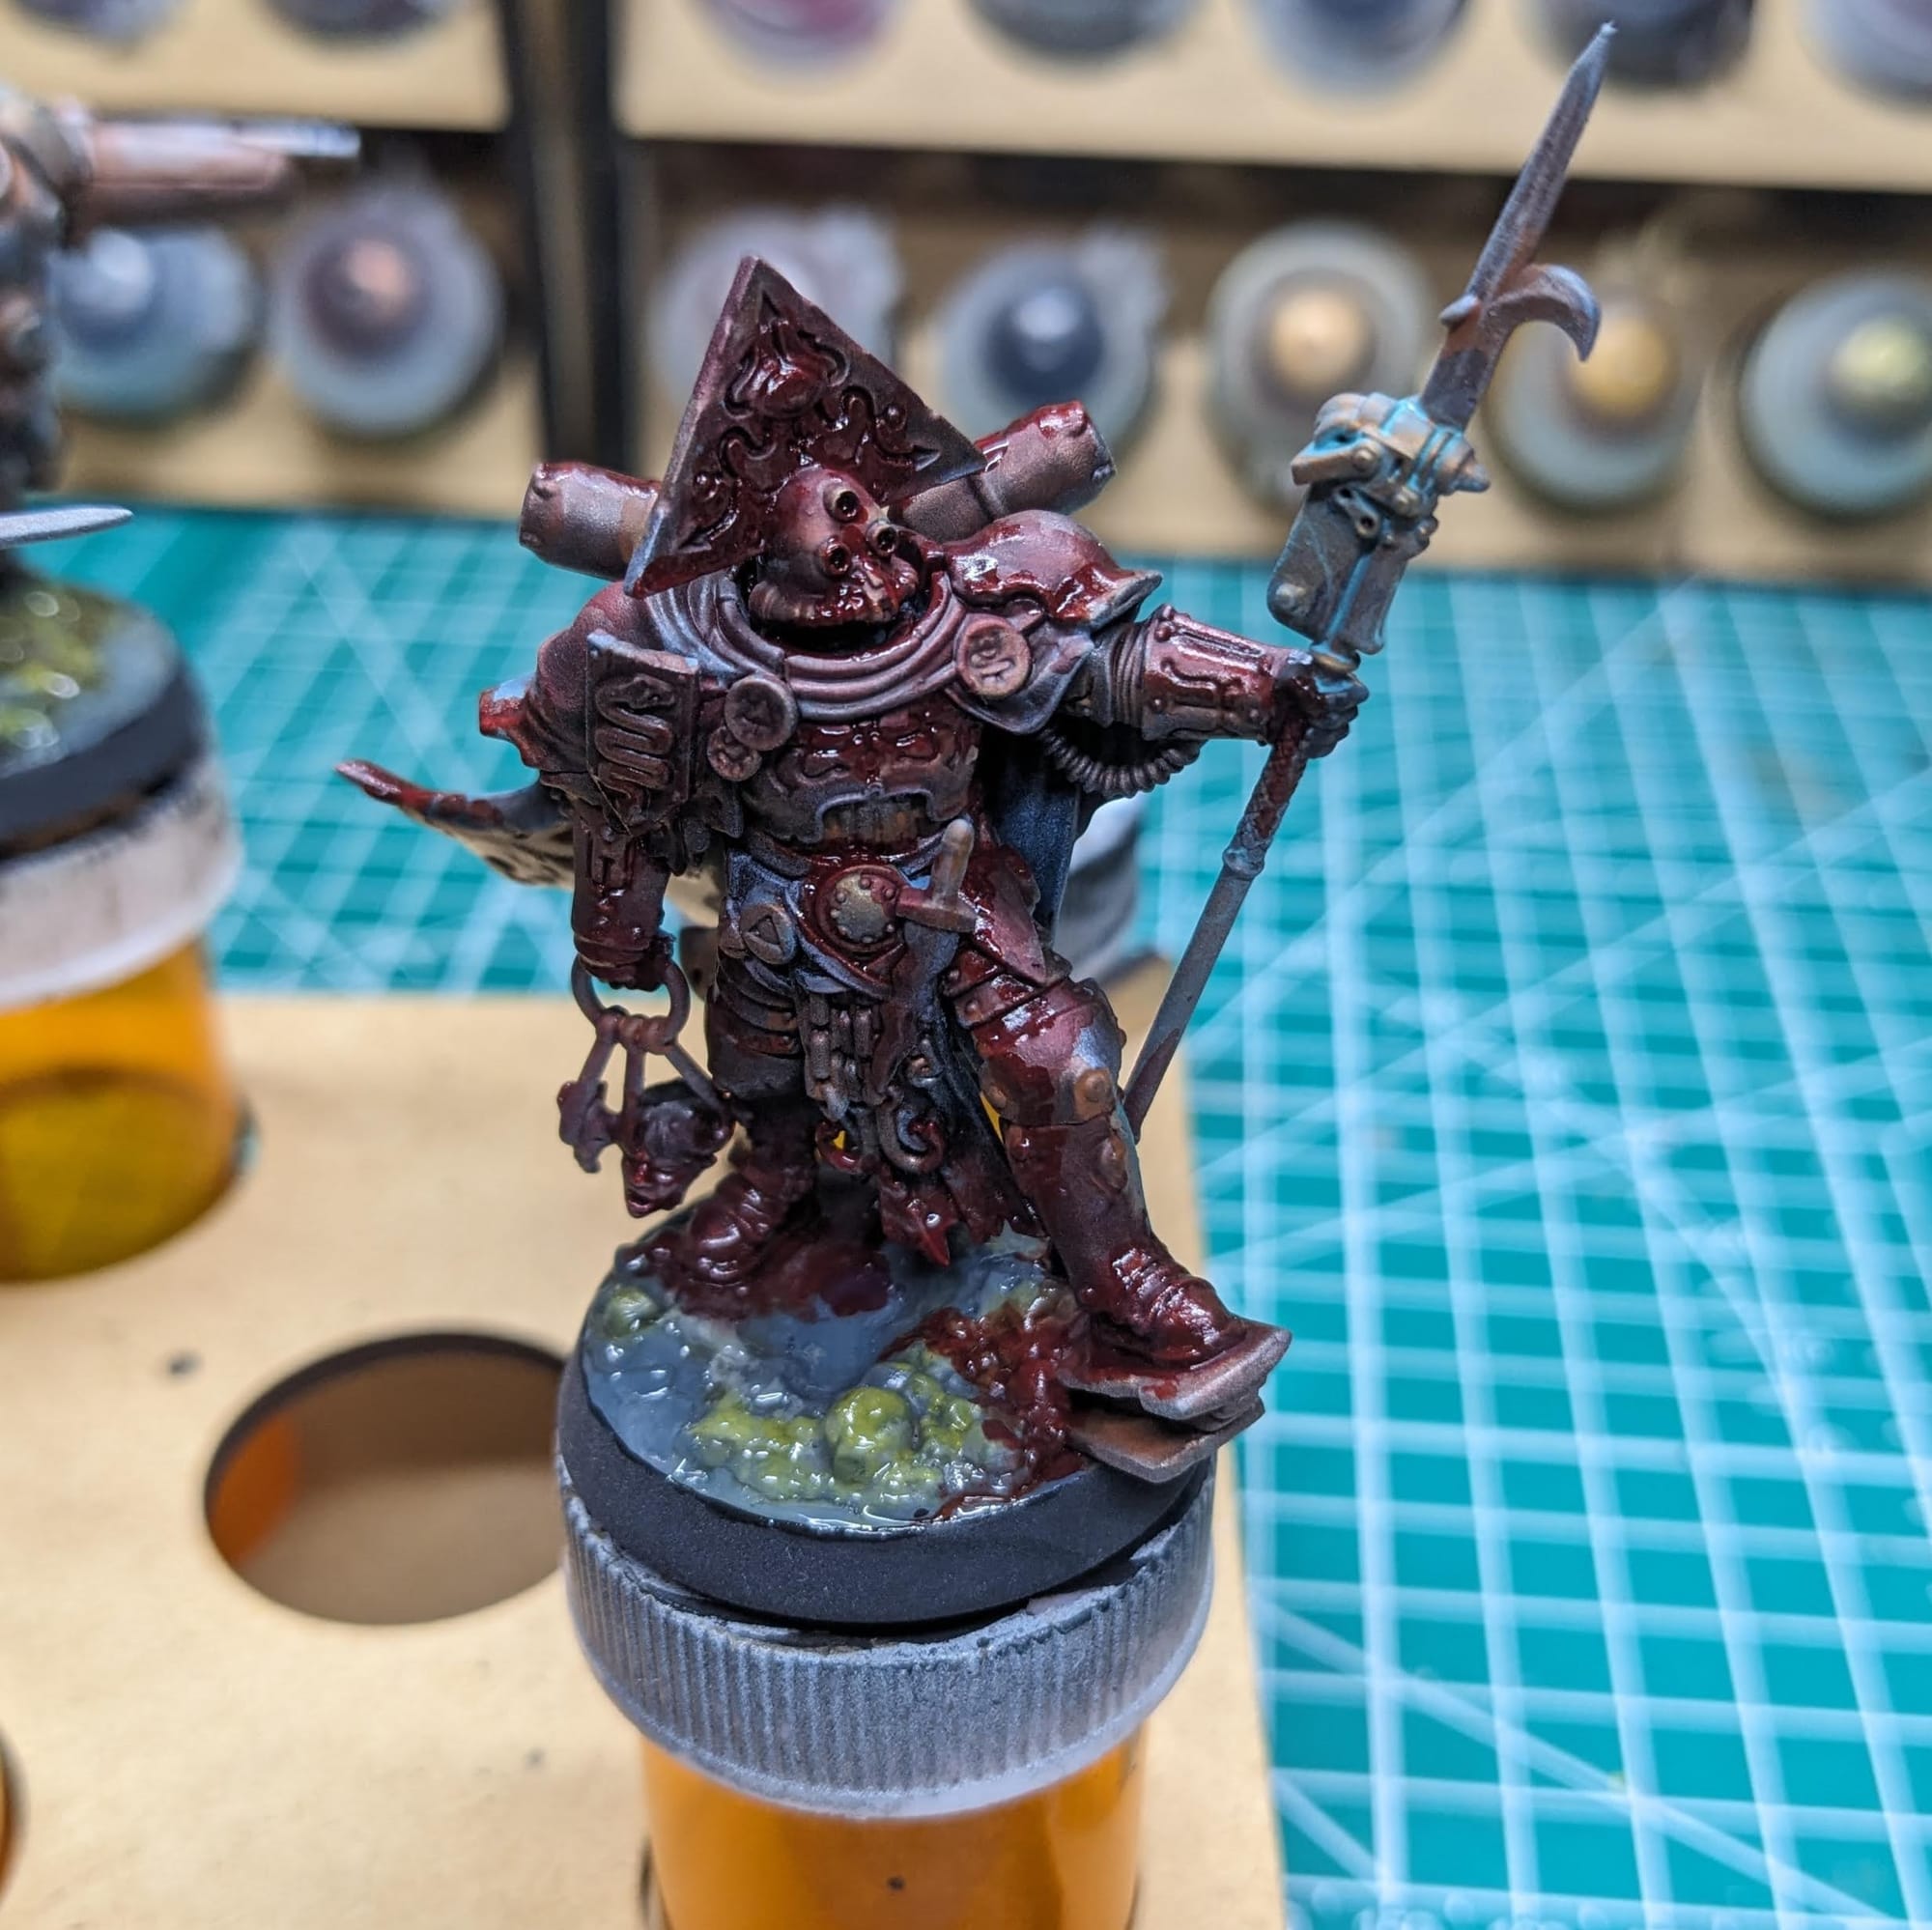
The first step is to lightly apply Citadel Berserker Bloodshade and Citadel Flesh Tearer Contrast paint in varying degrees on the model, giving the impression of varying levels of blood soaking. This can also be applied to the shark circling the feet of the Chorister. You can apply as much or as little as you'd like, just remember a little blood goes a long way. You can even see where I just pretty much covered up all of the preceding work on the Captain.
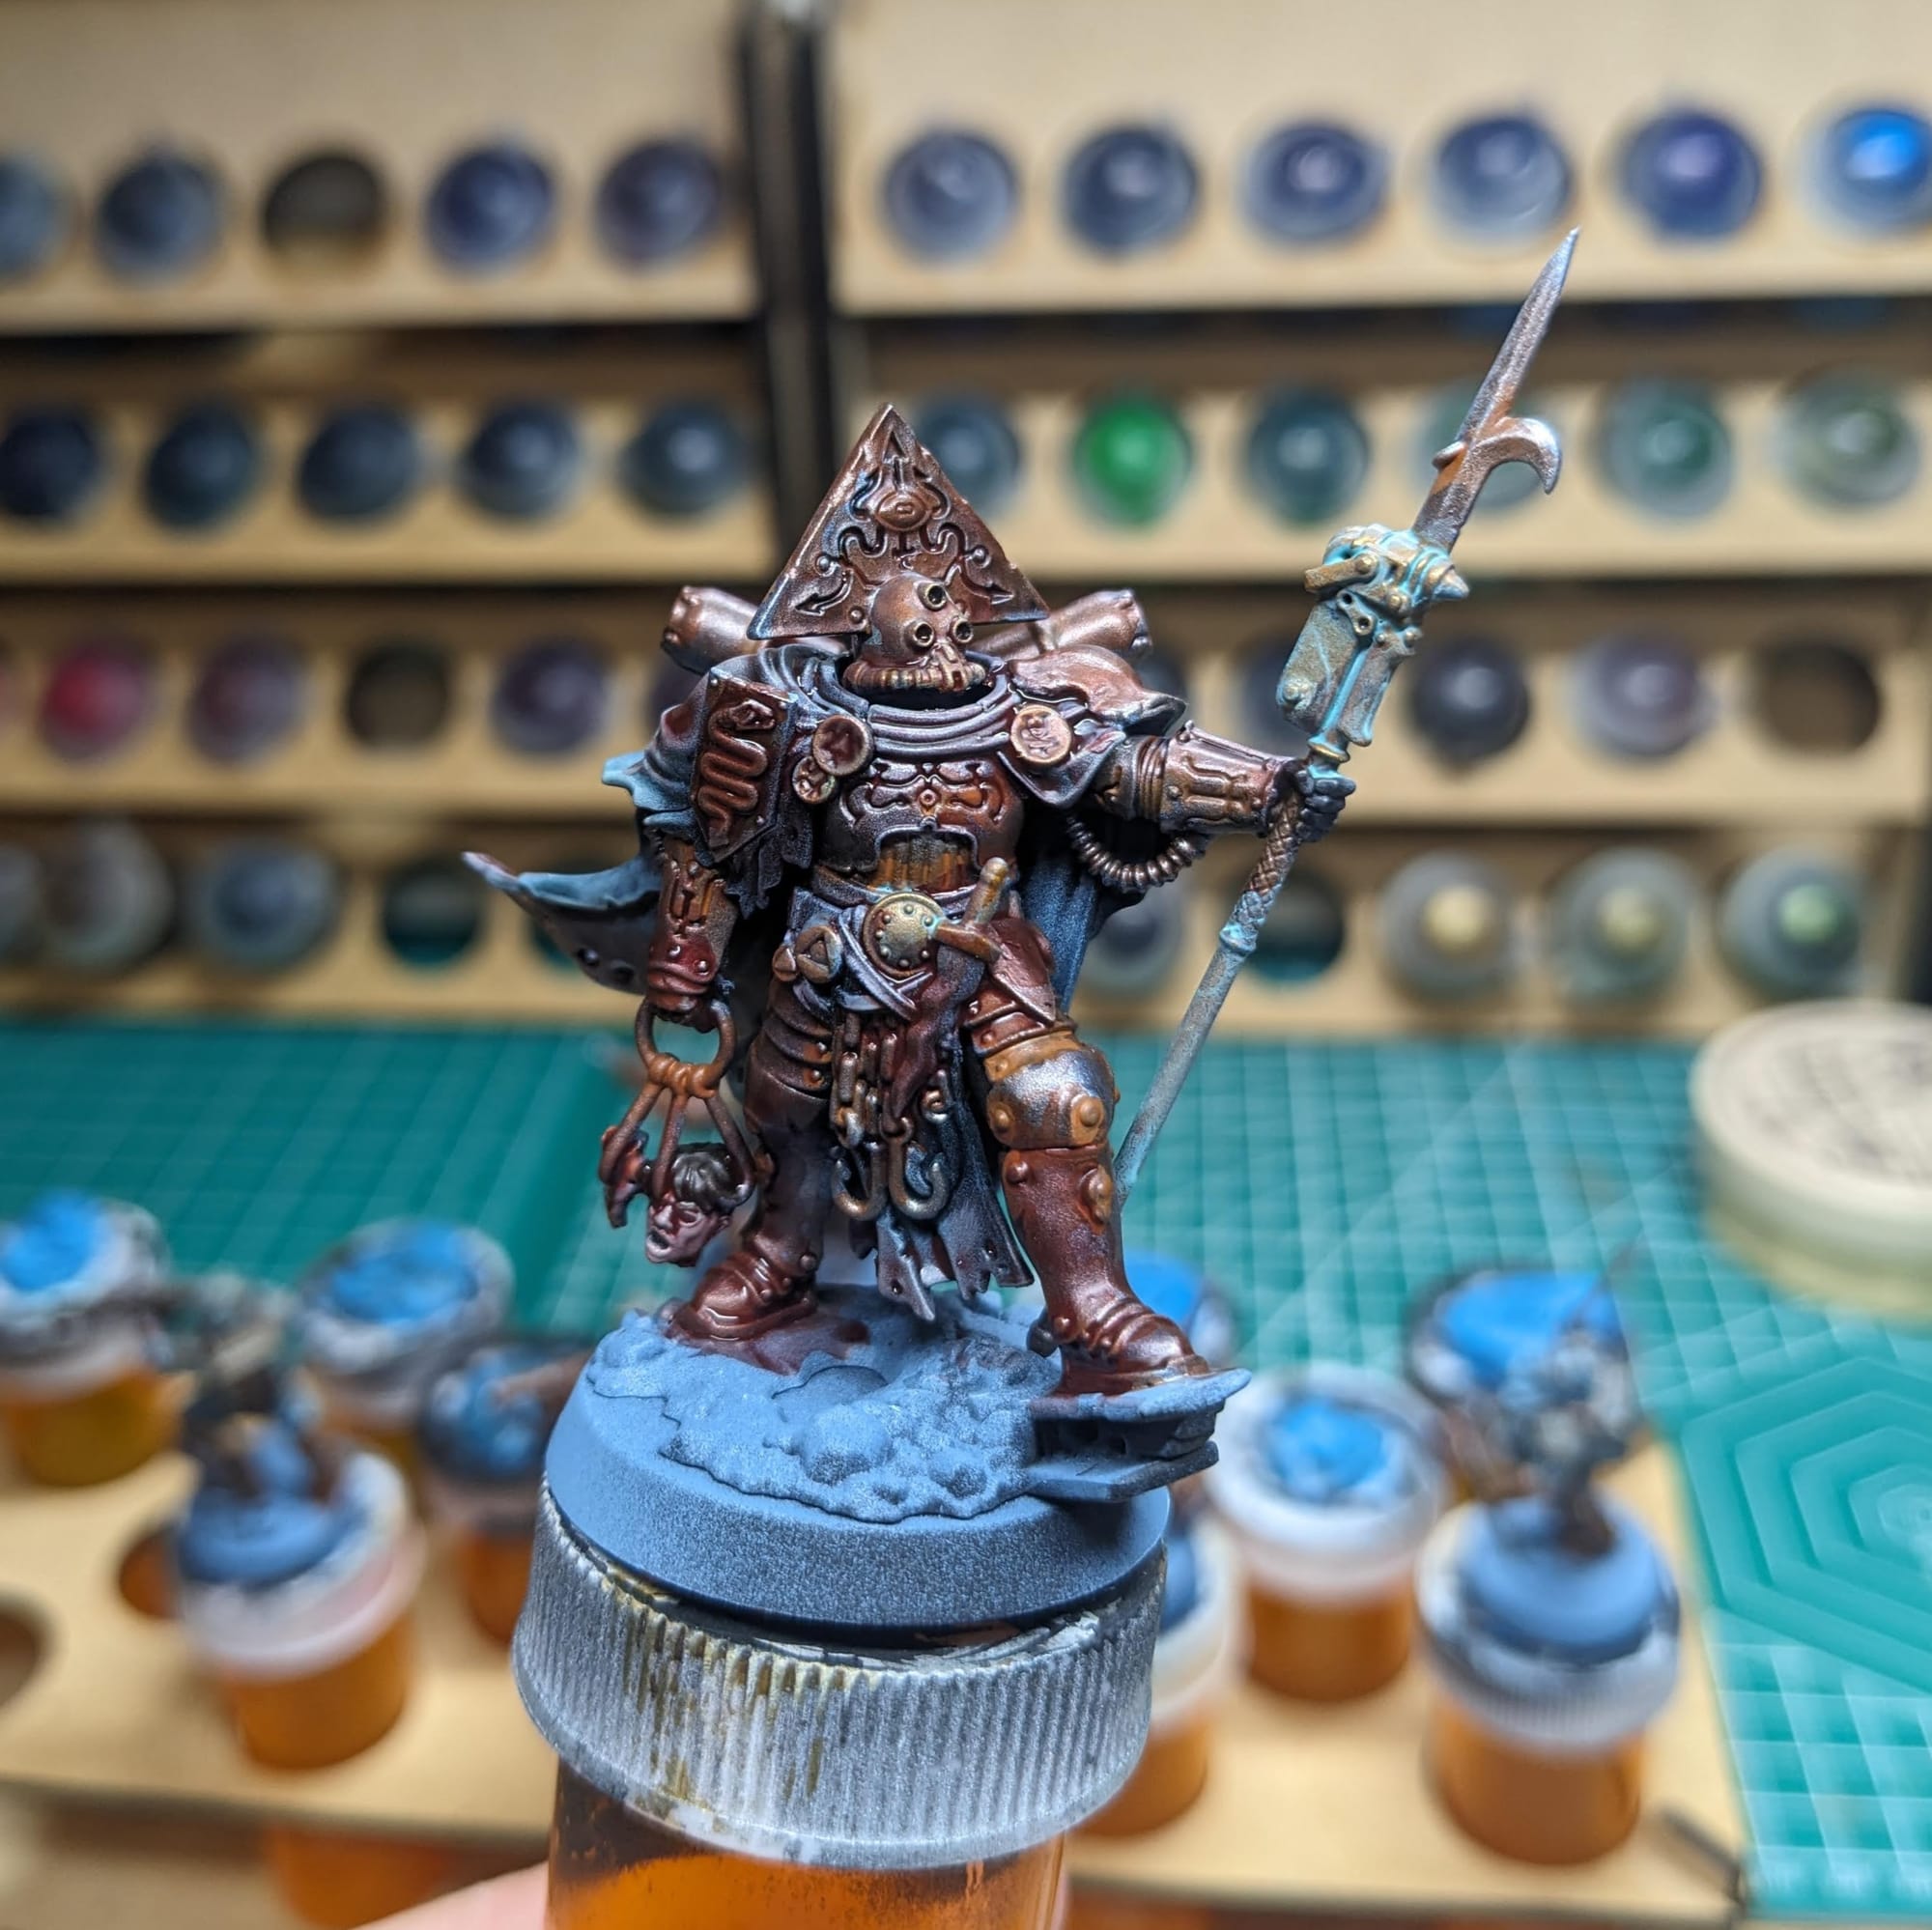
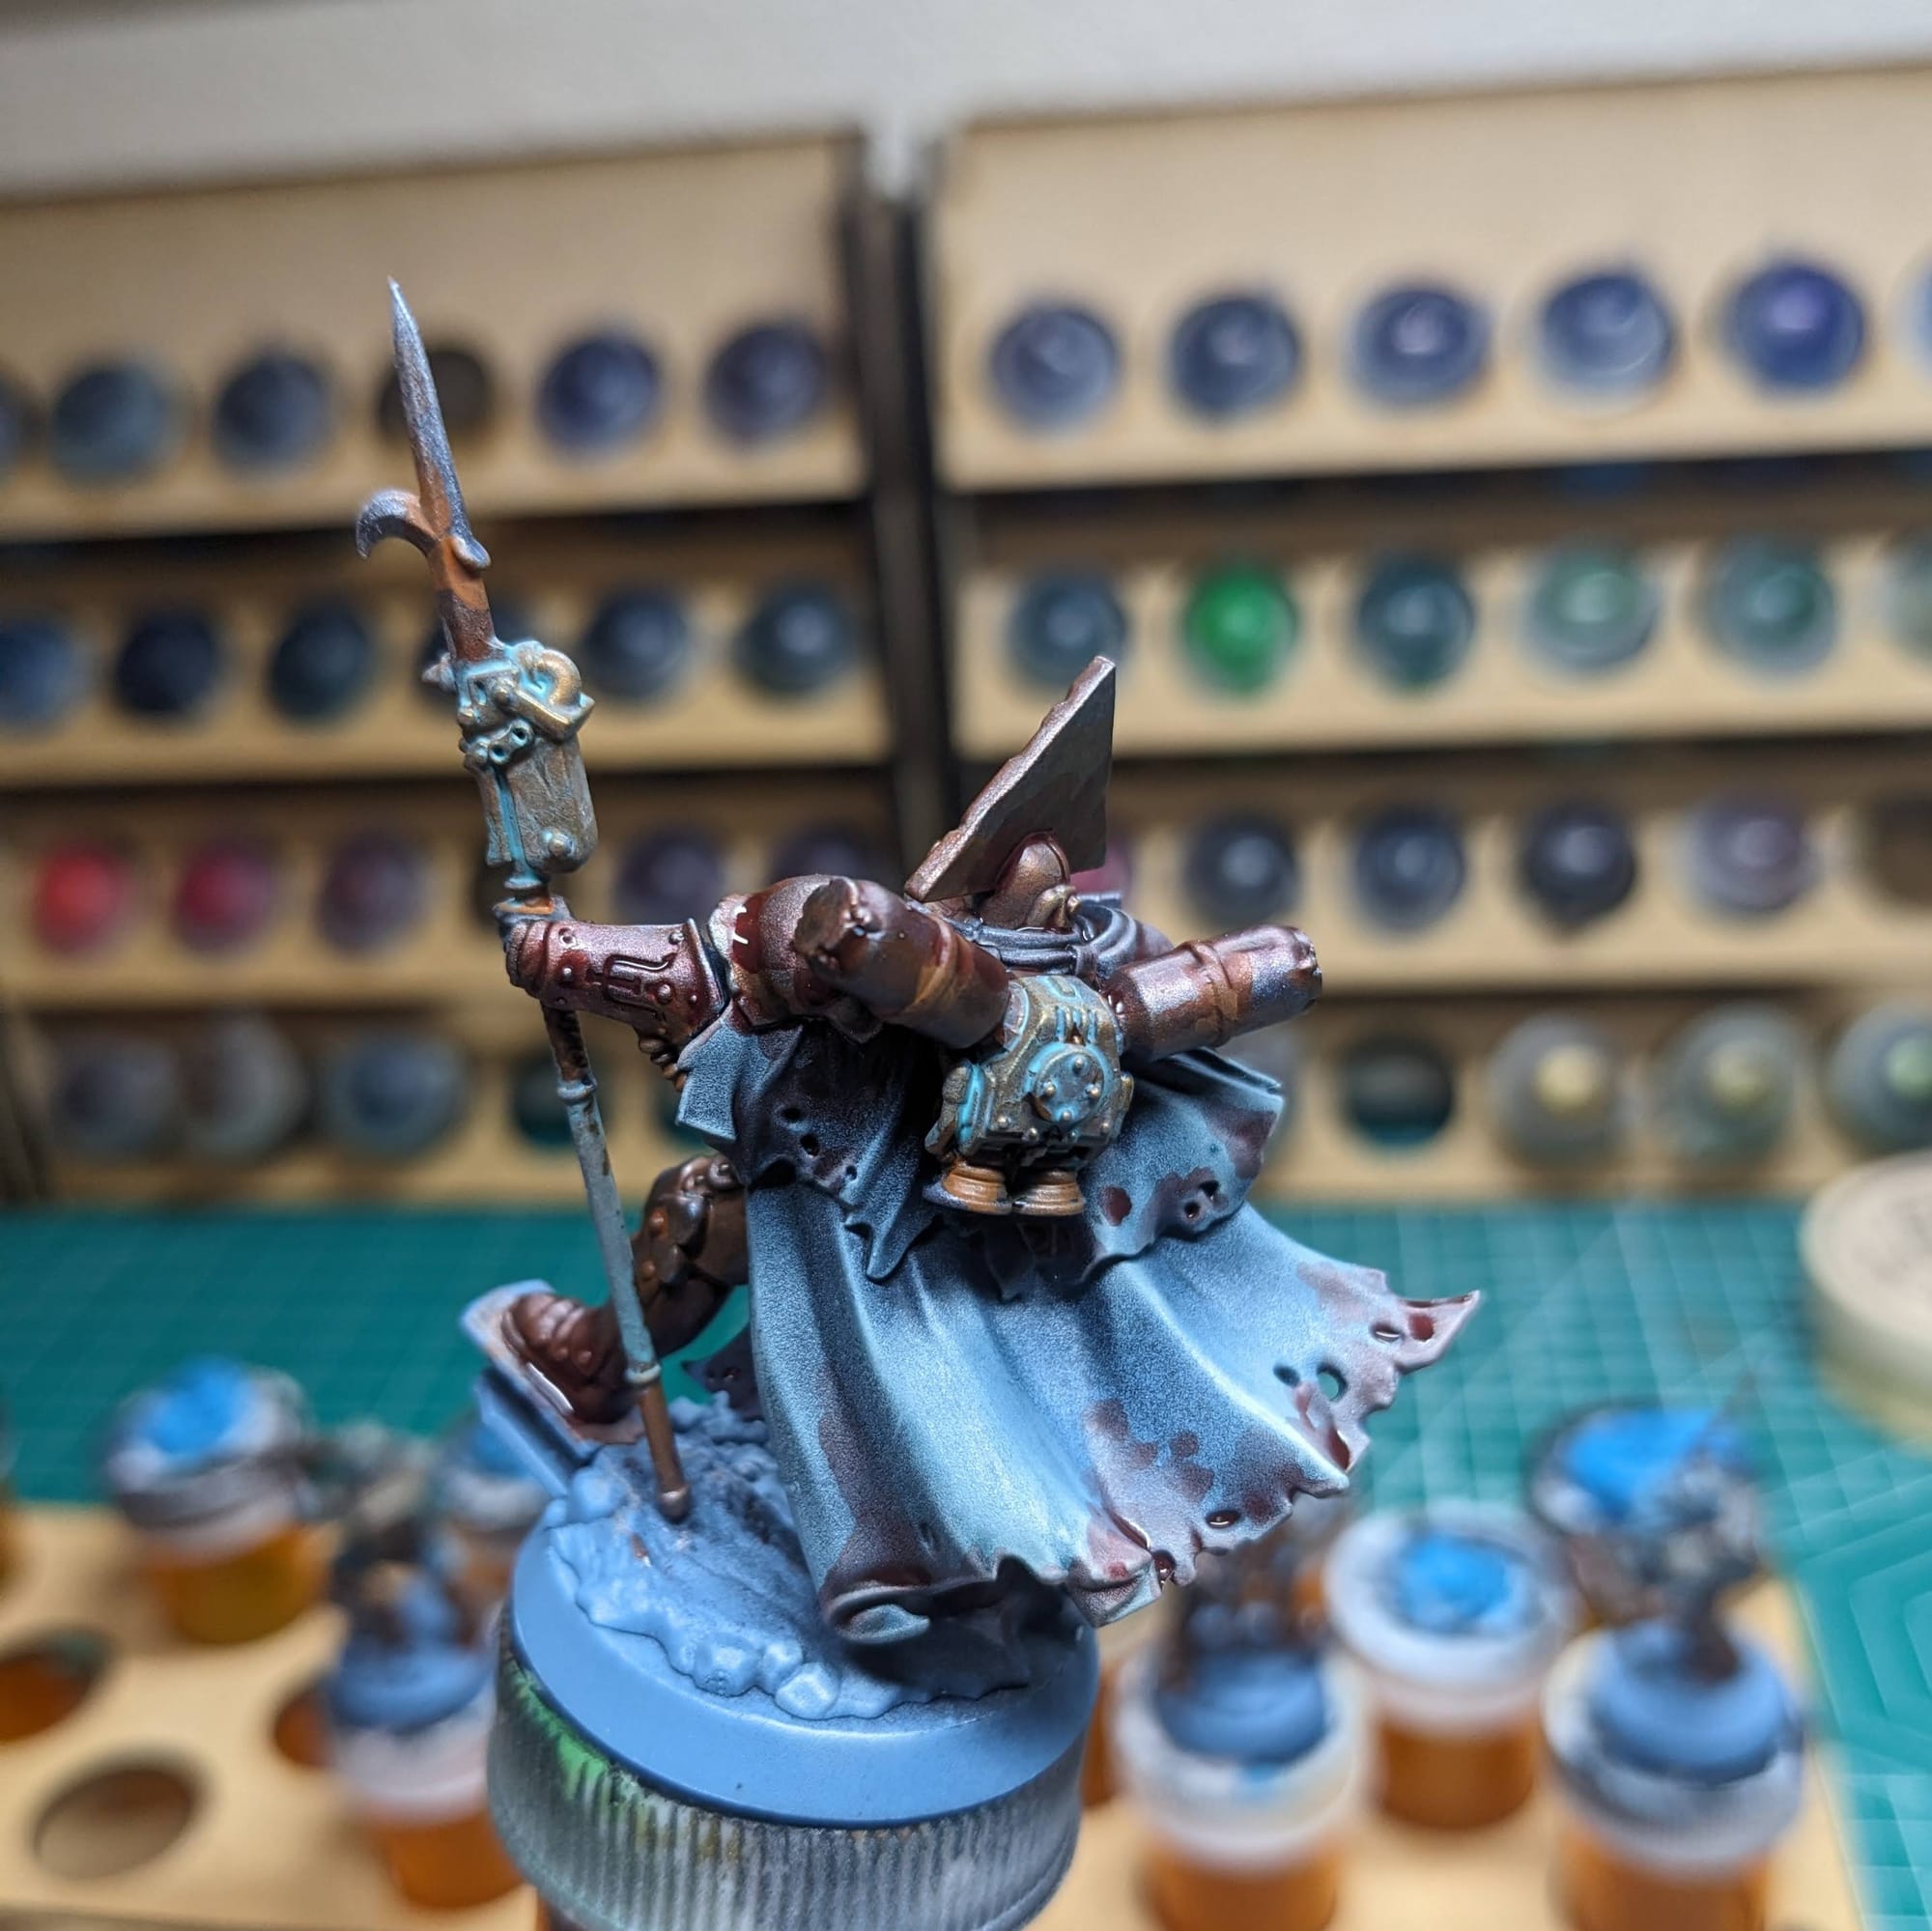
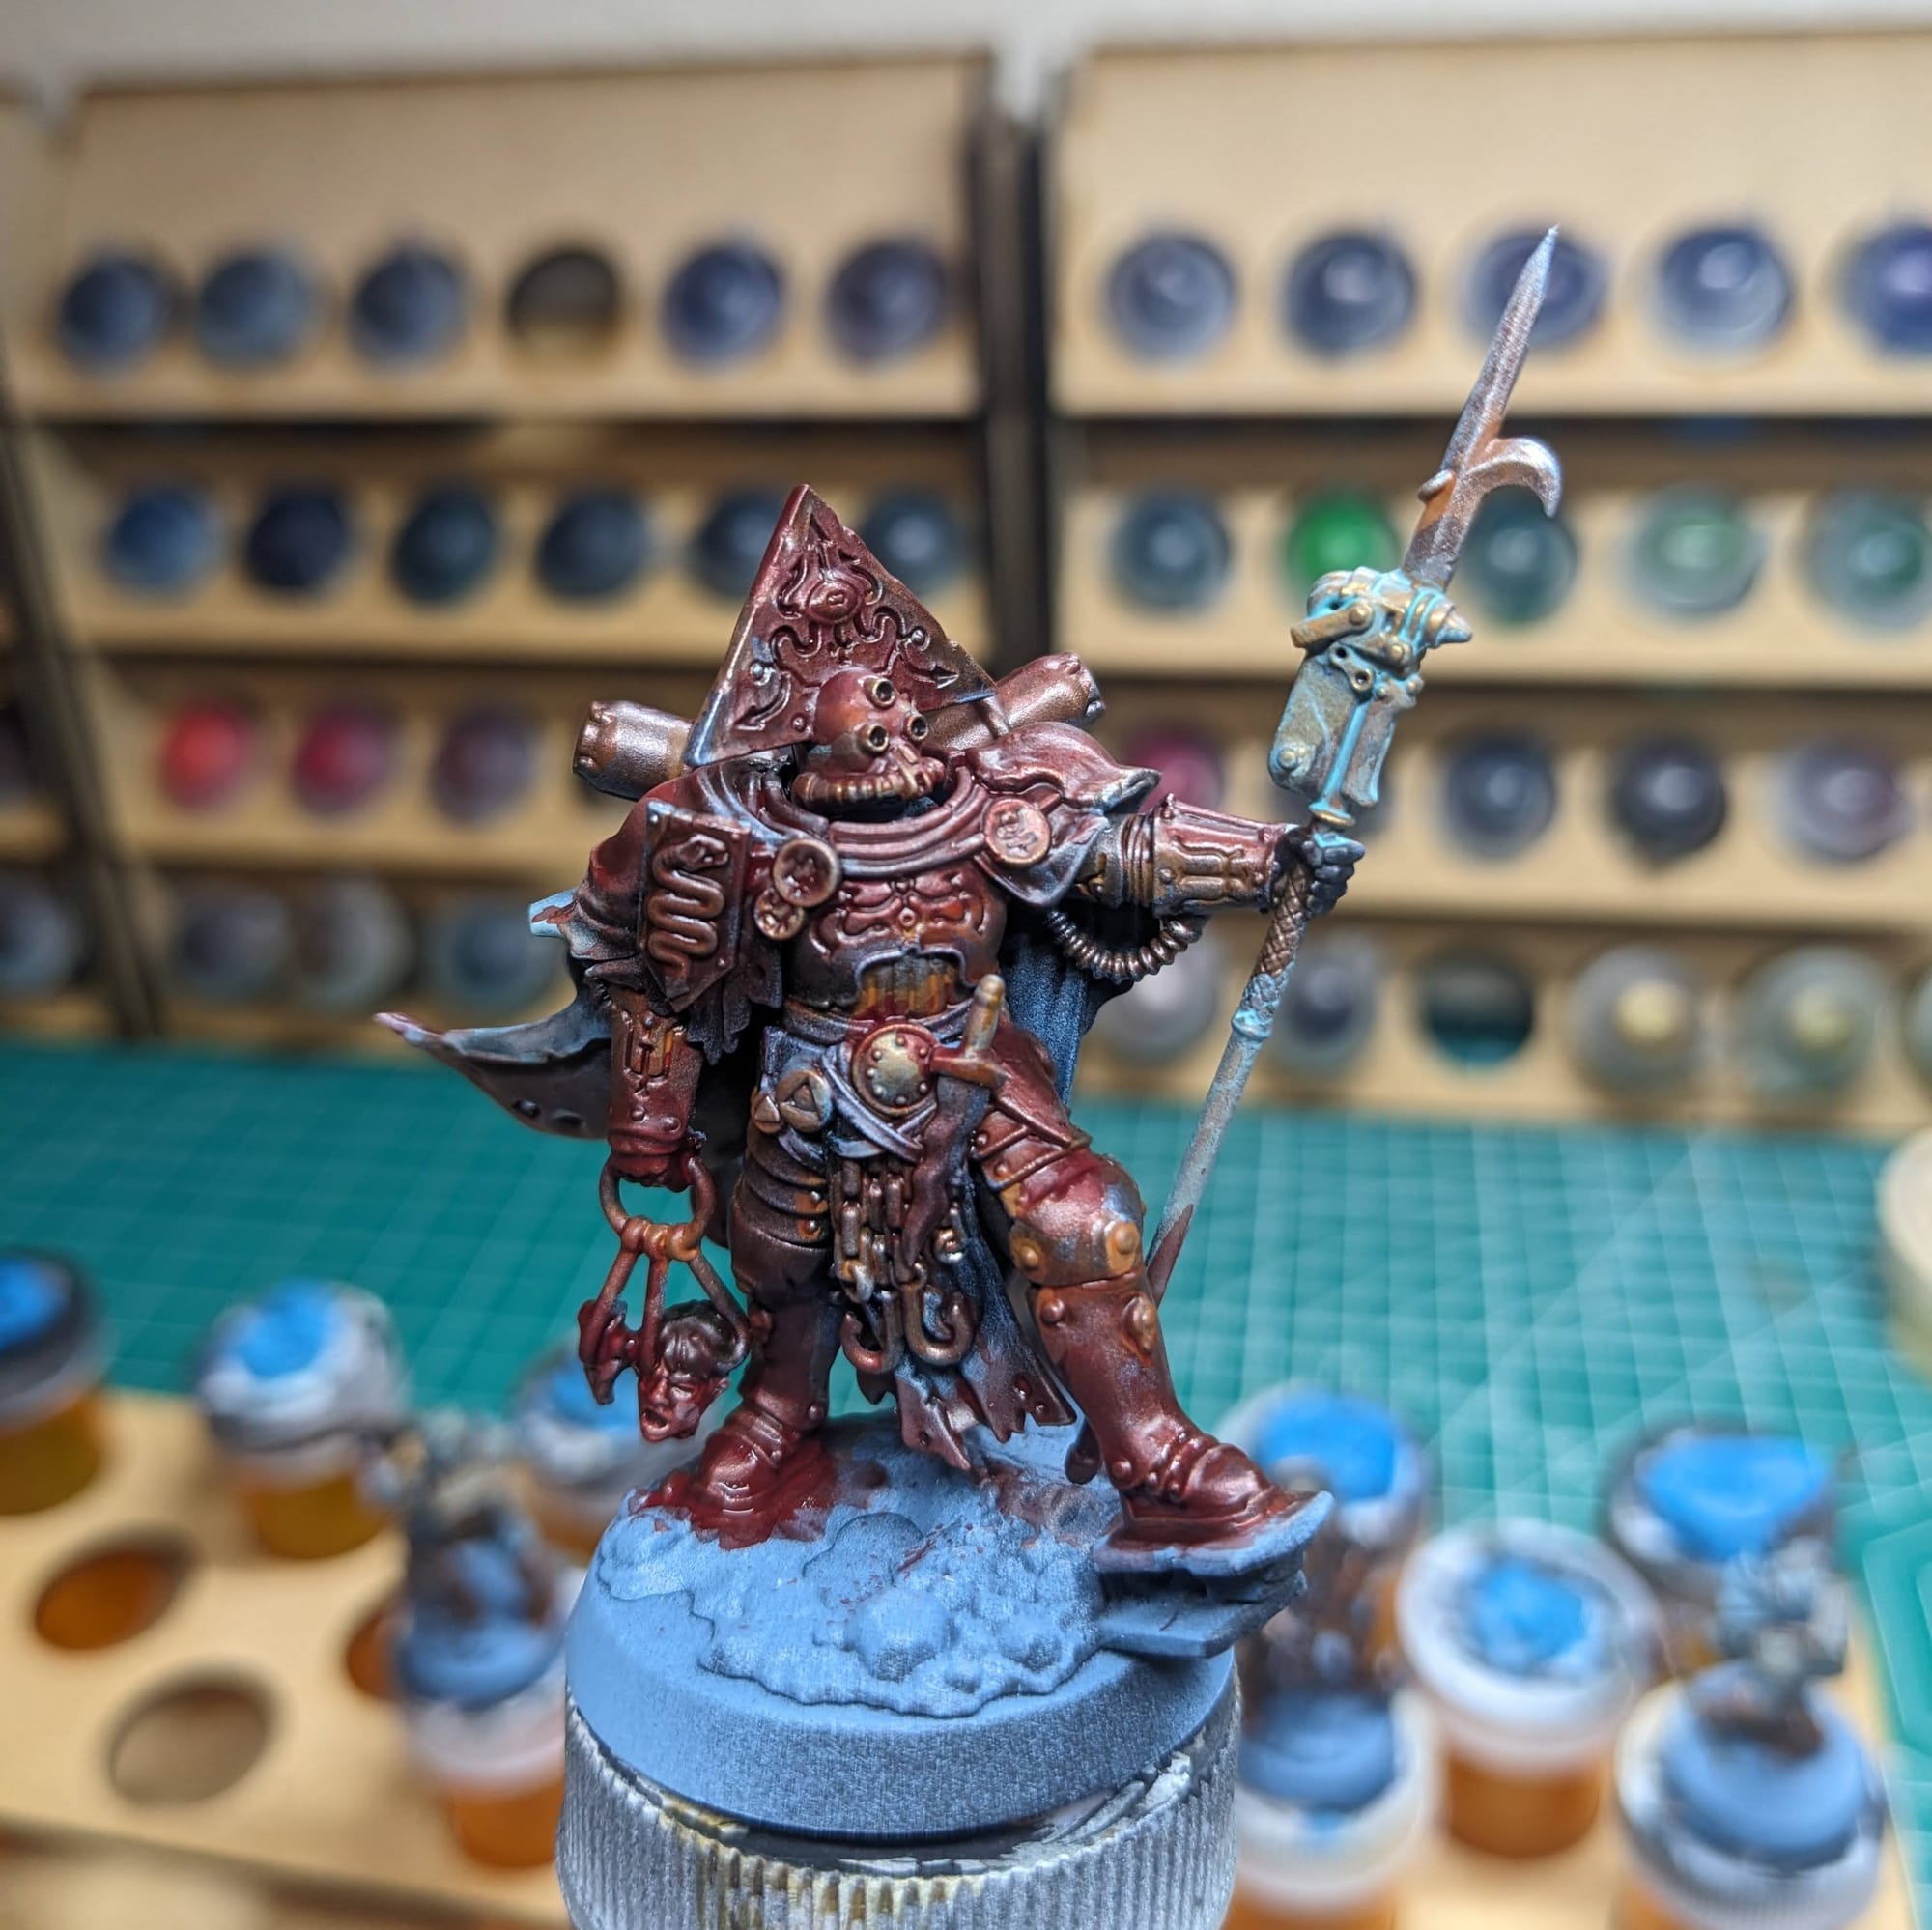
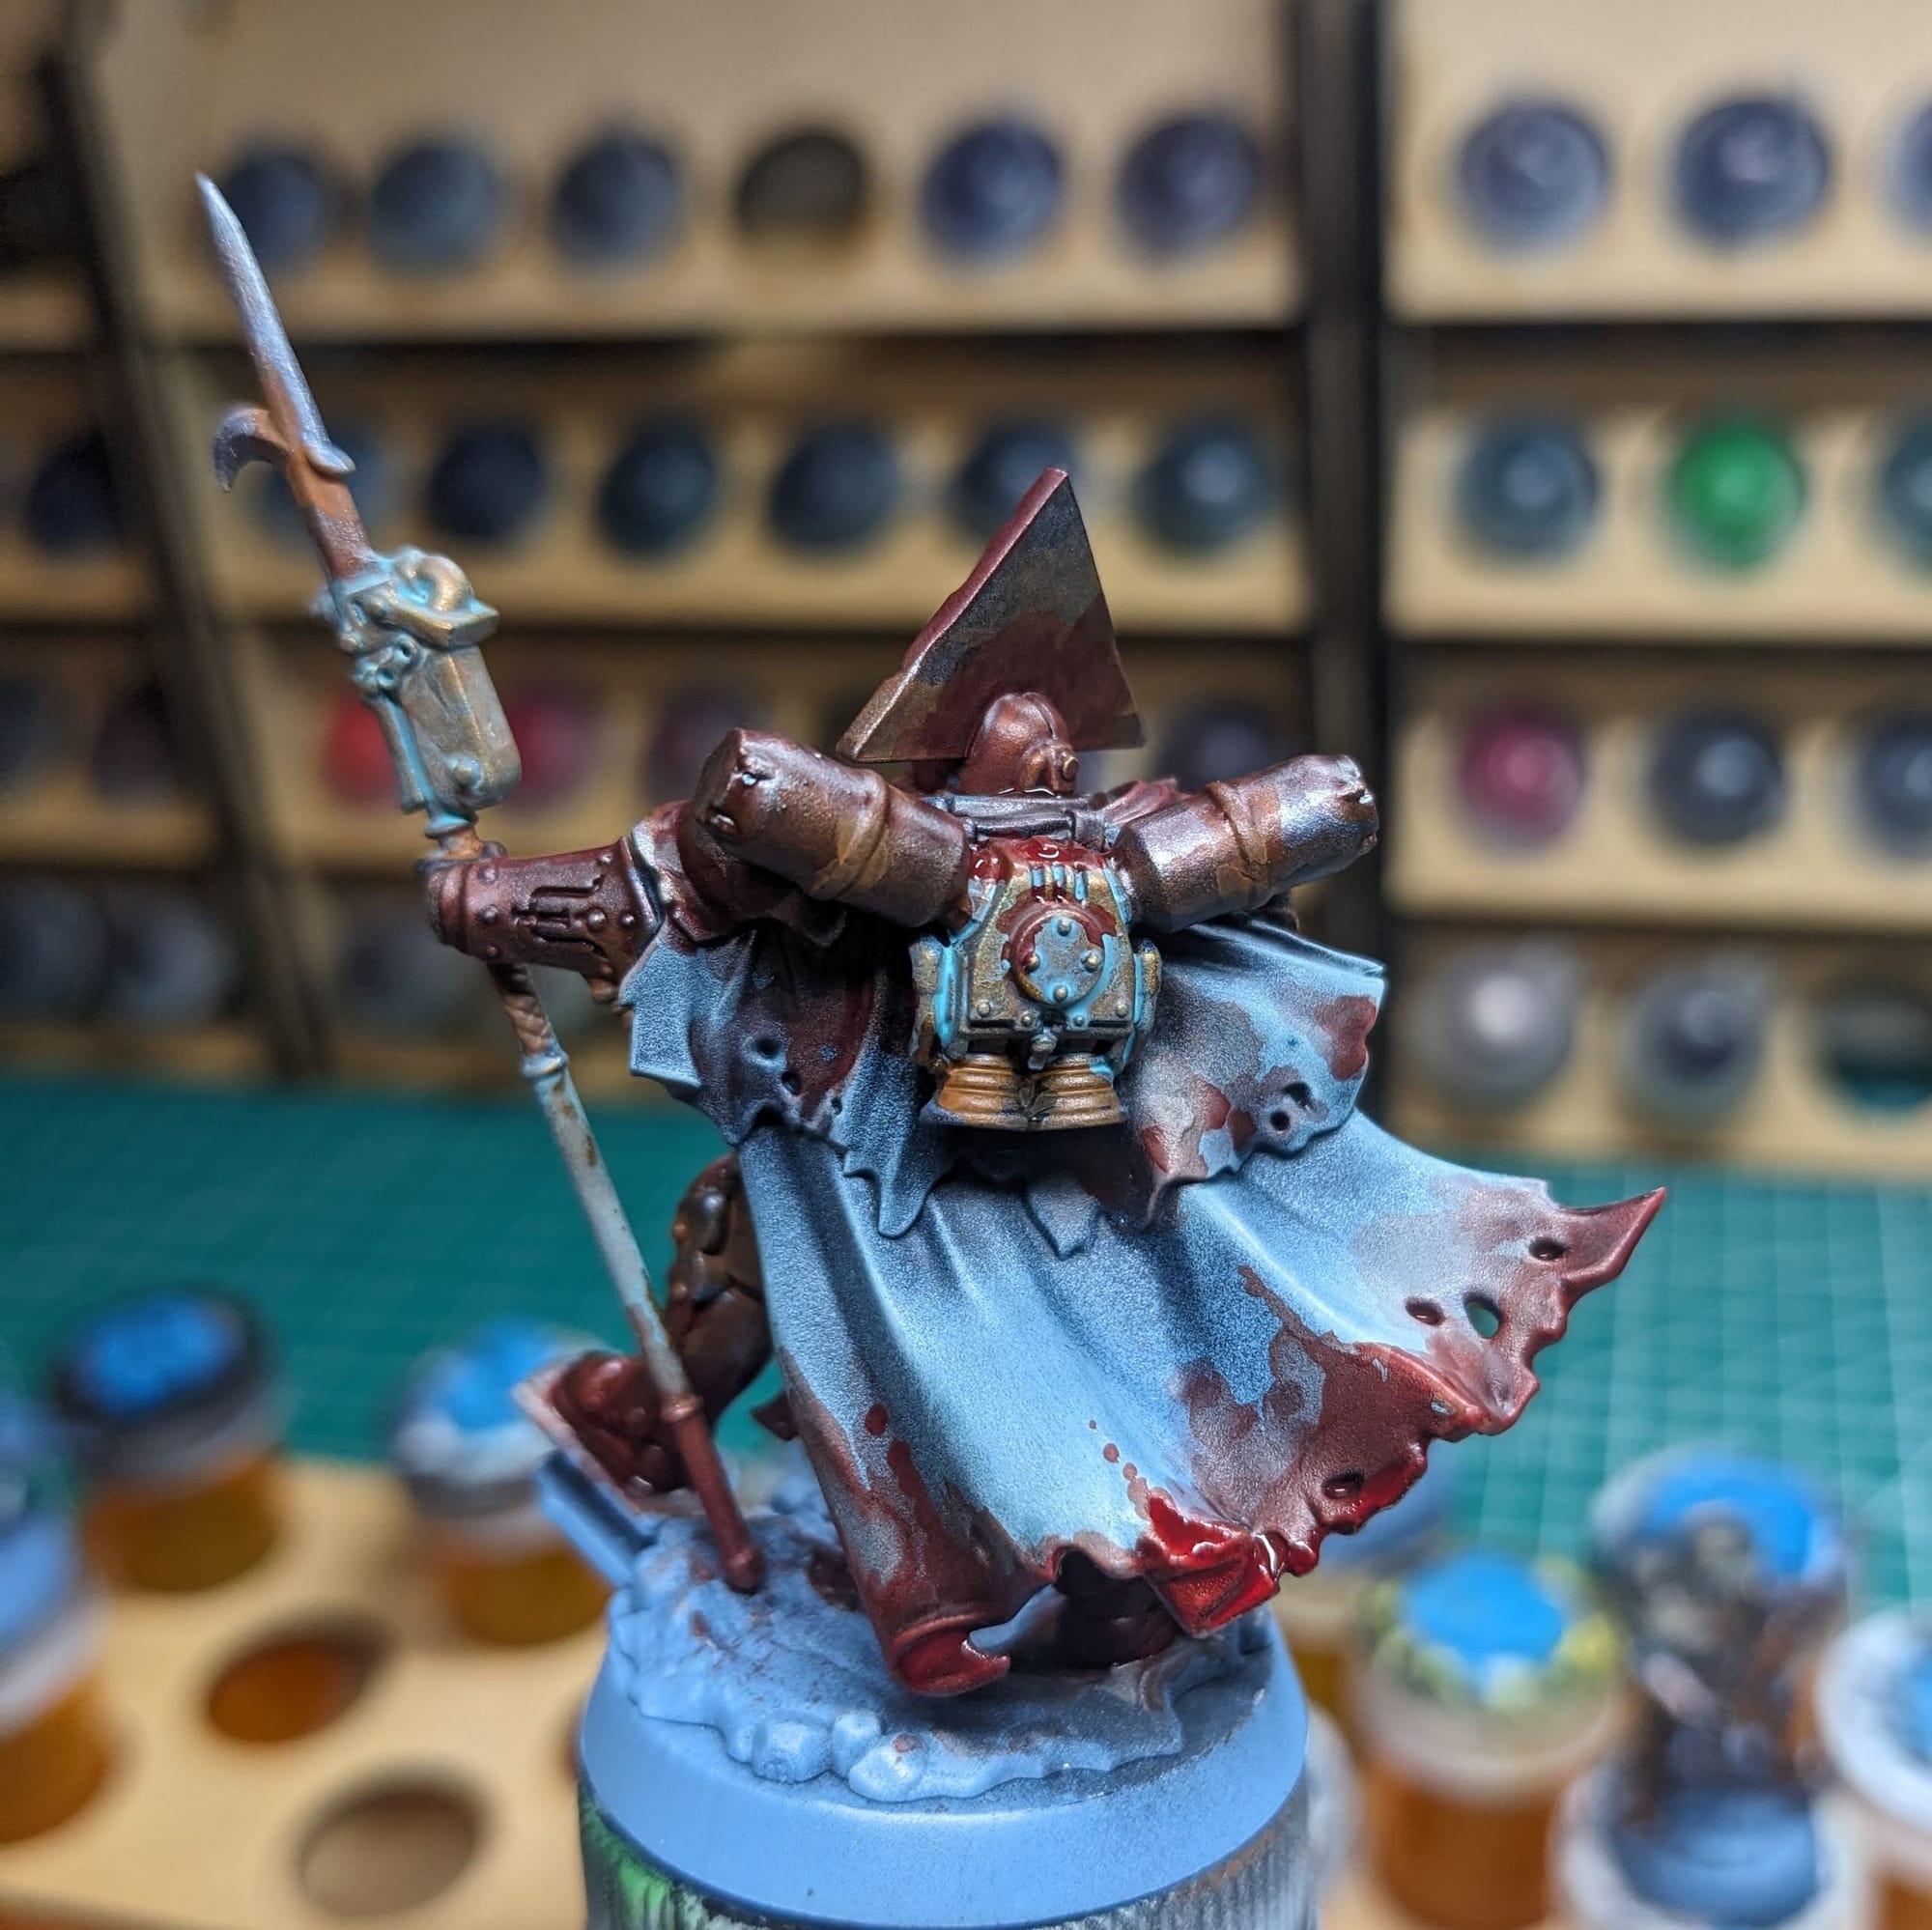
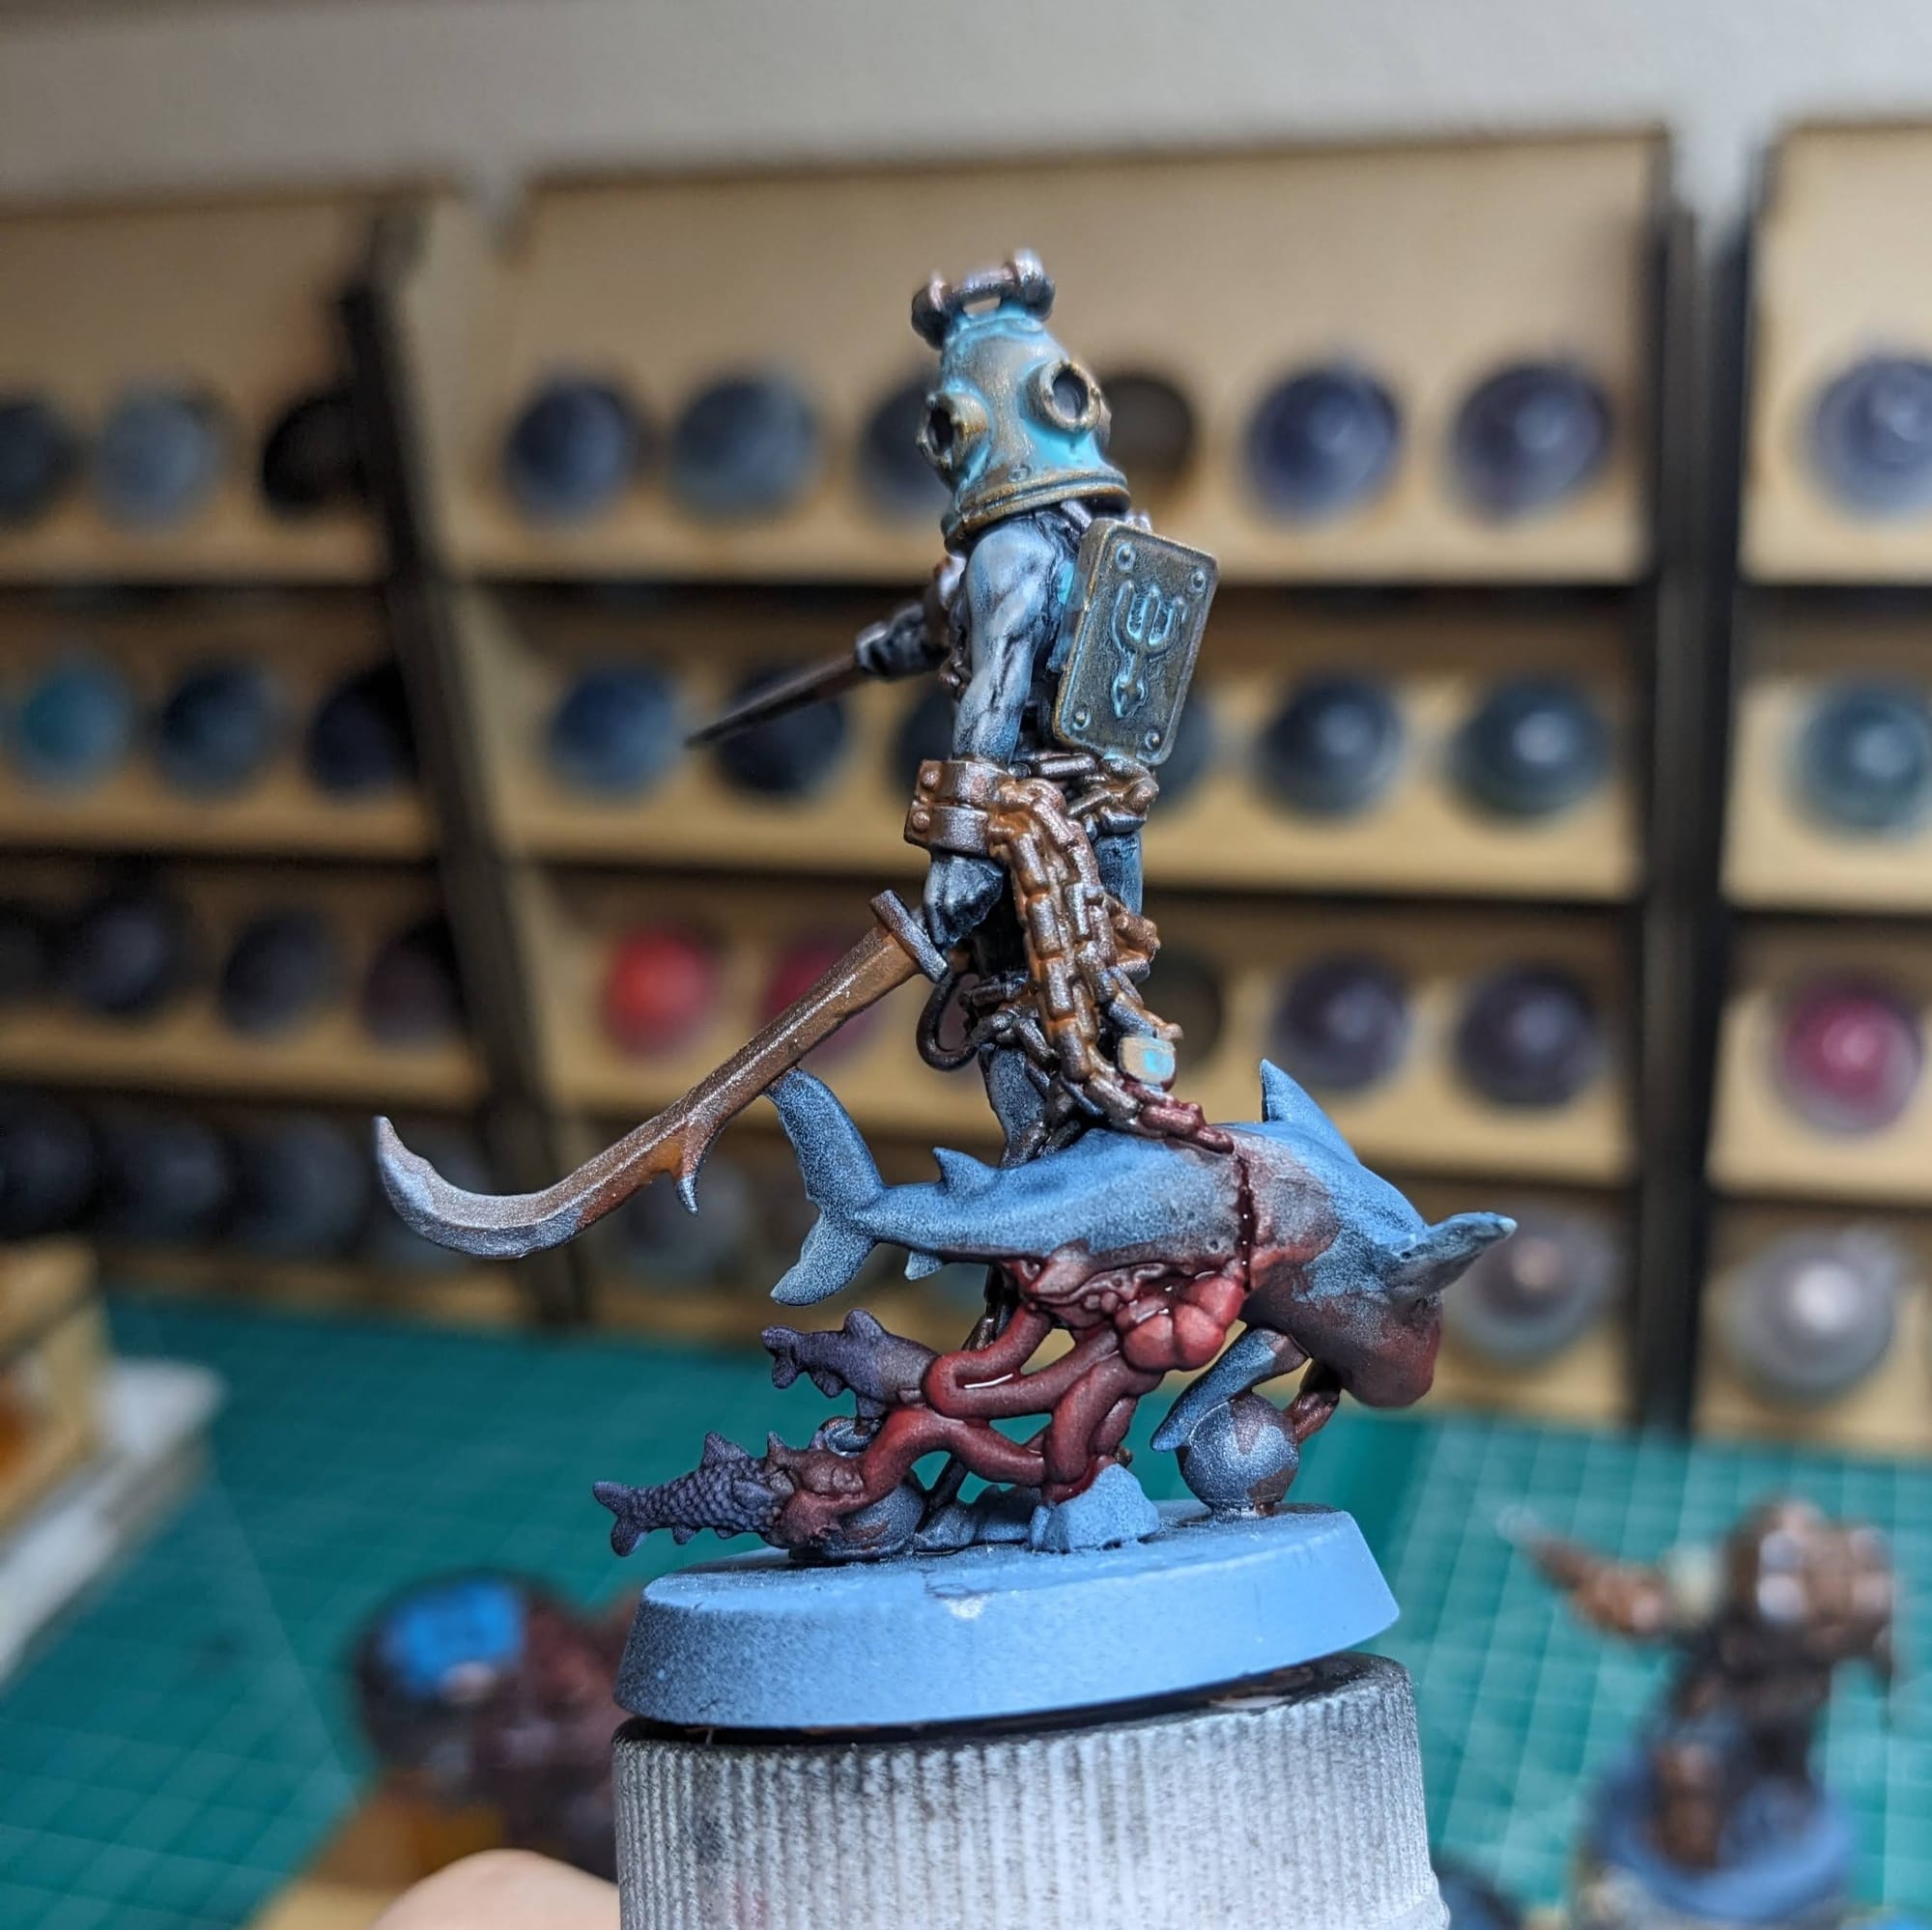
The second part occurs after sealing the figures with matte varnish (so also after basing).
Using one of my favorite paints of all time, Citadel Blood for the Blood God, which is a glossy deep red, I applied it to the edges of the model and boots. Essentially, anywhere where the blood is still wet.
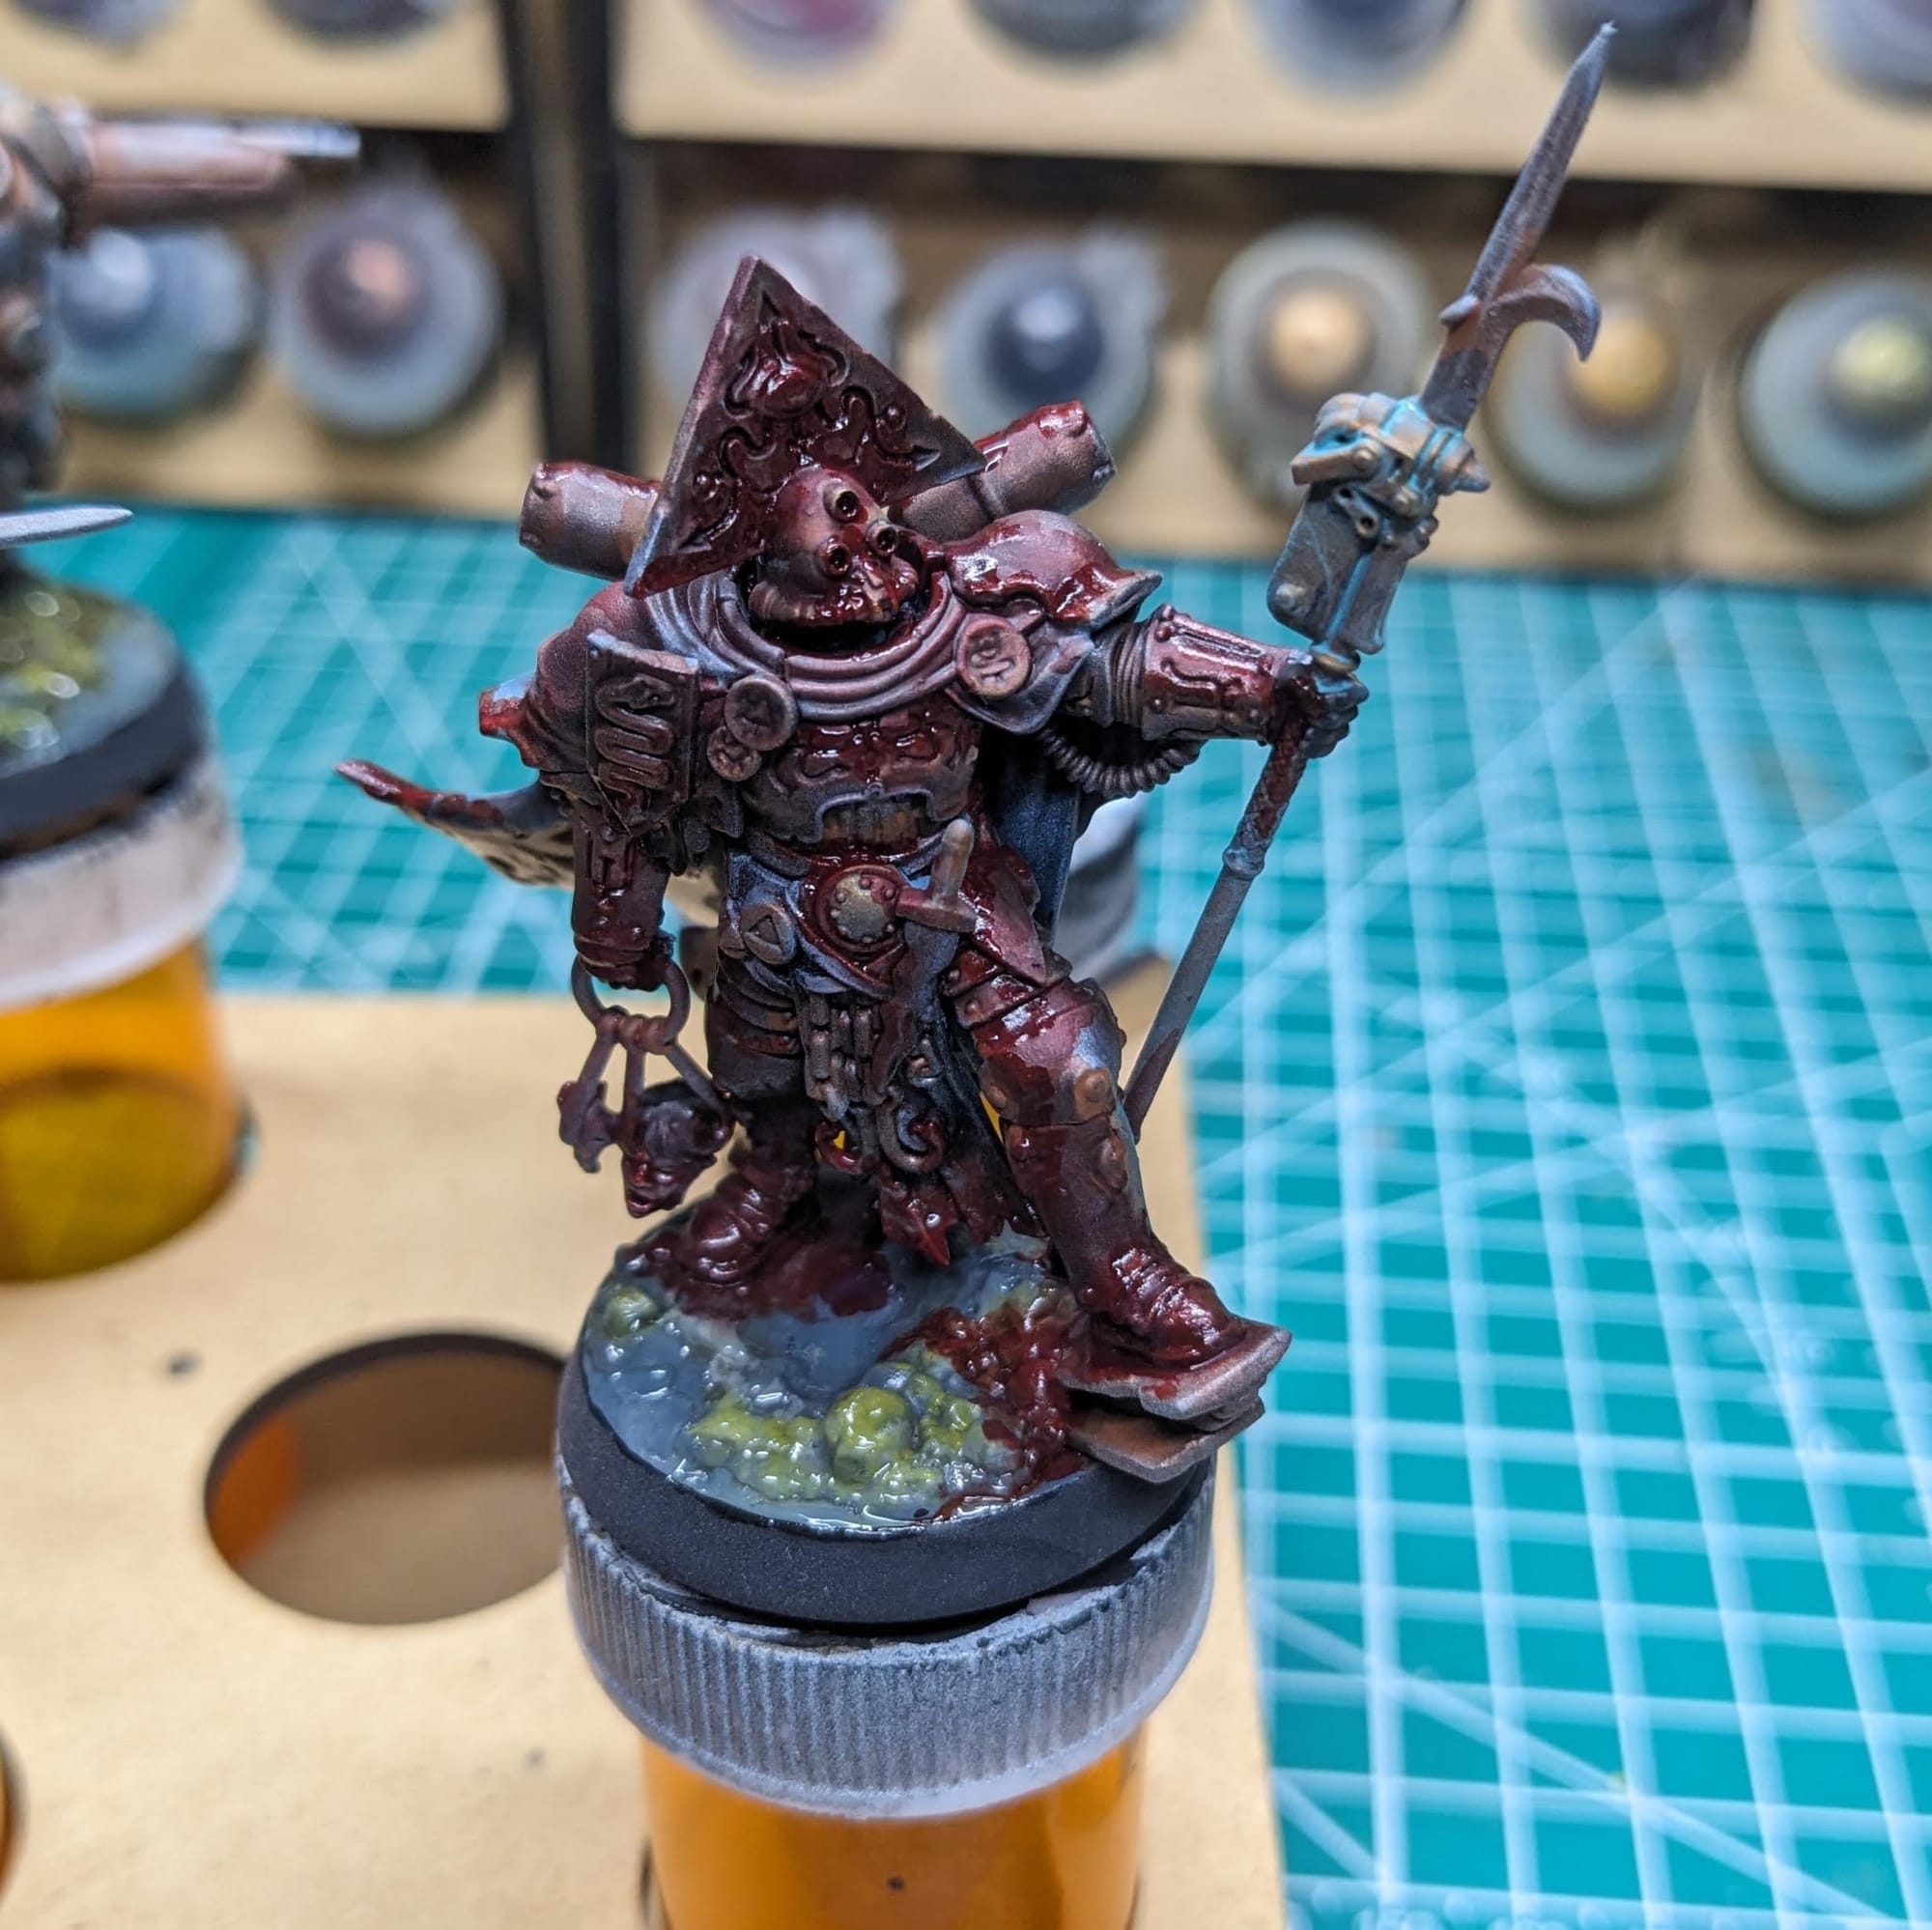
So, with the painting and first part of the Blood Effect step completed, these figures are ready to be sealed.
Painting The Procession of the Sacred Affliction
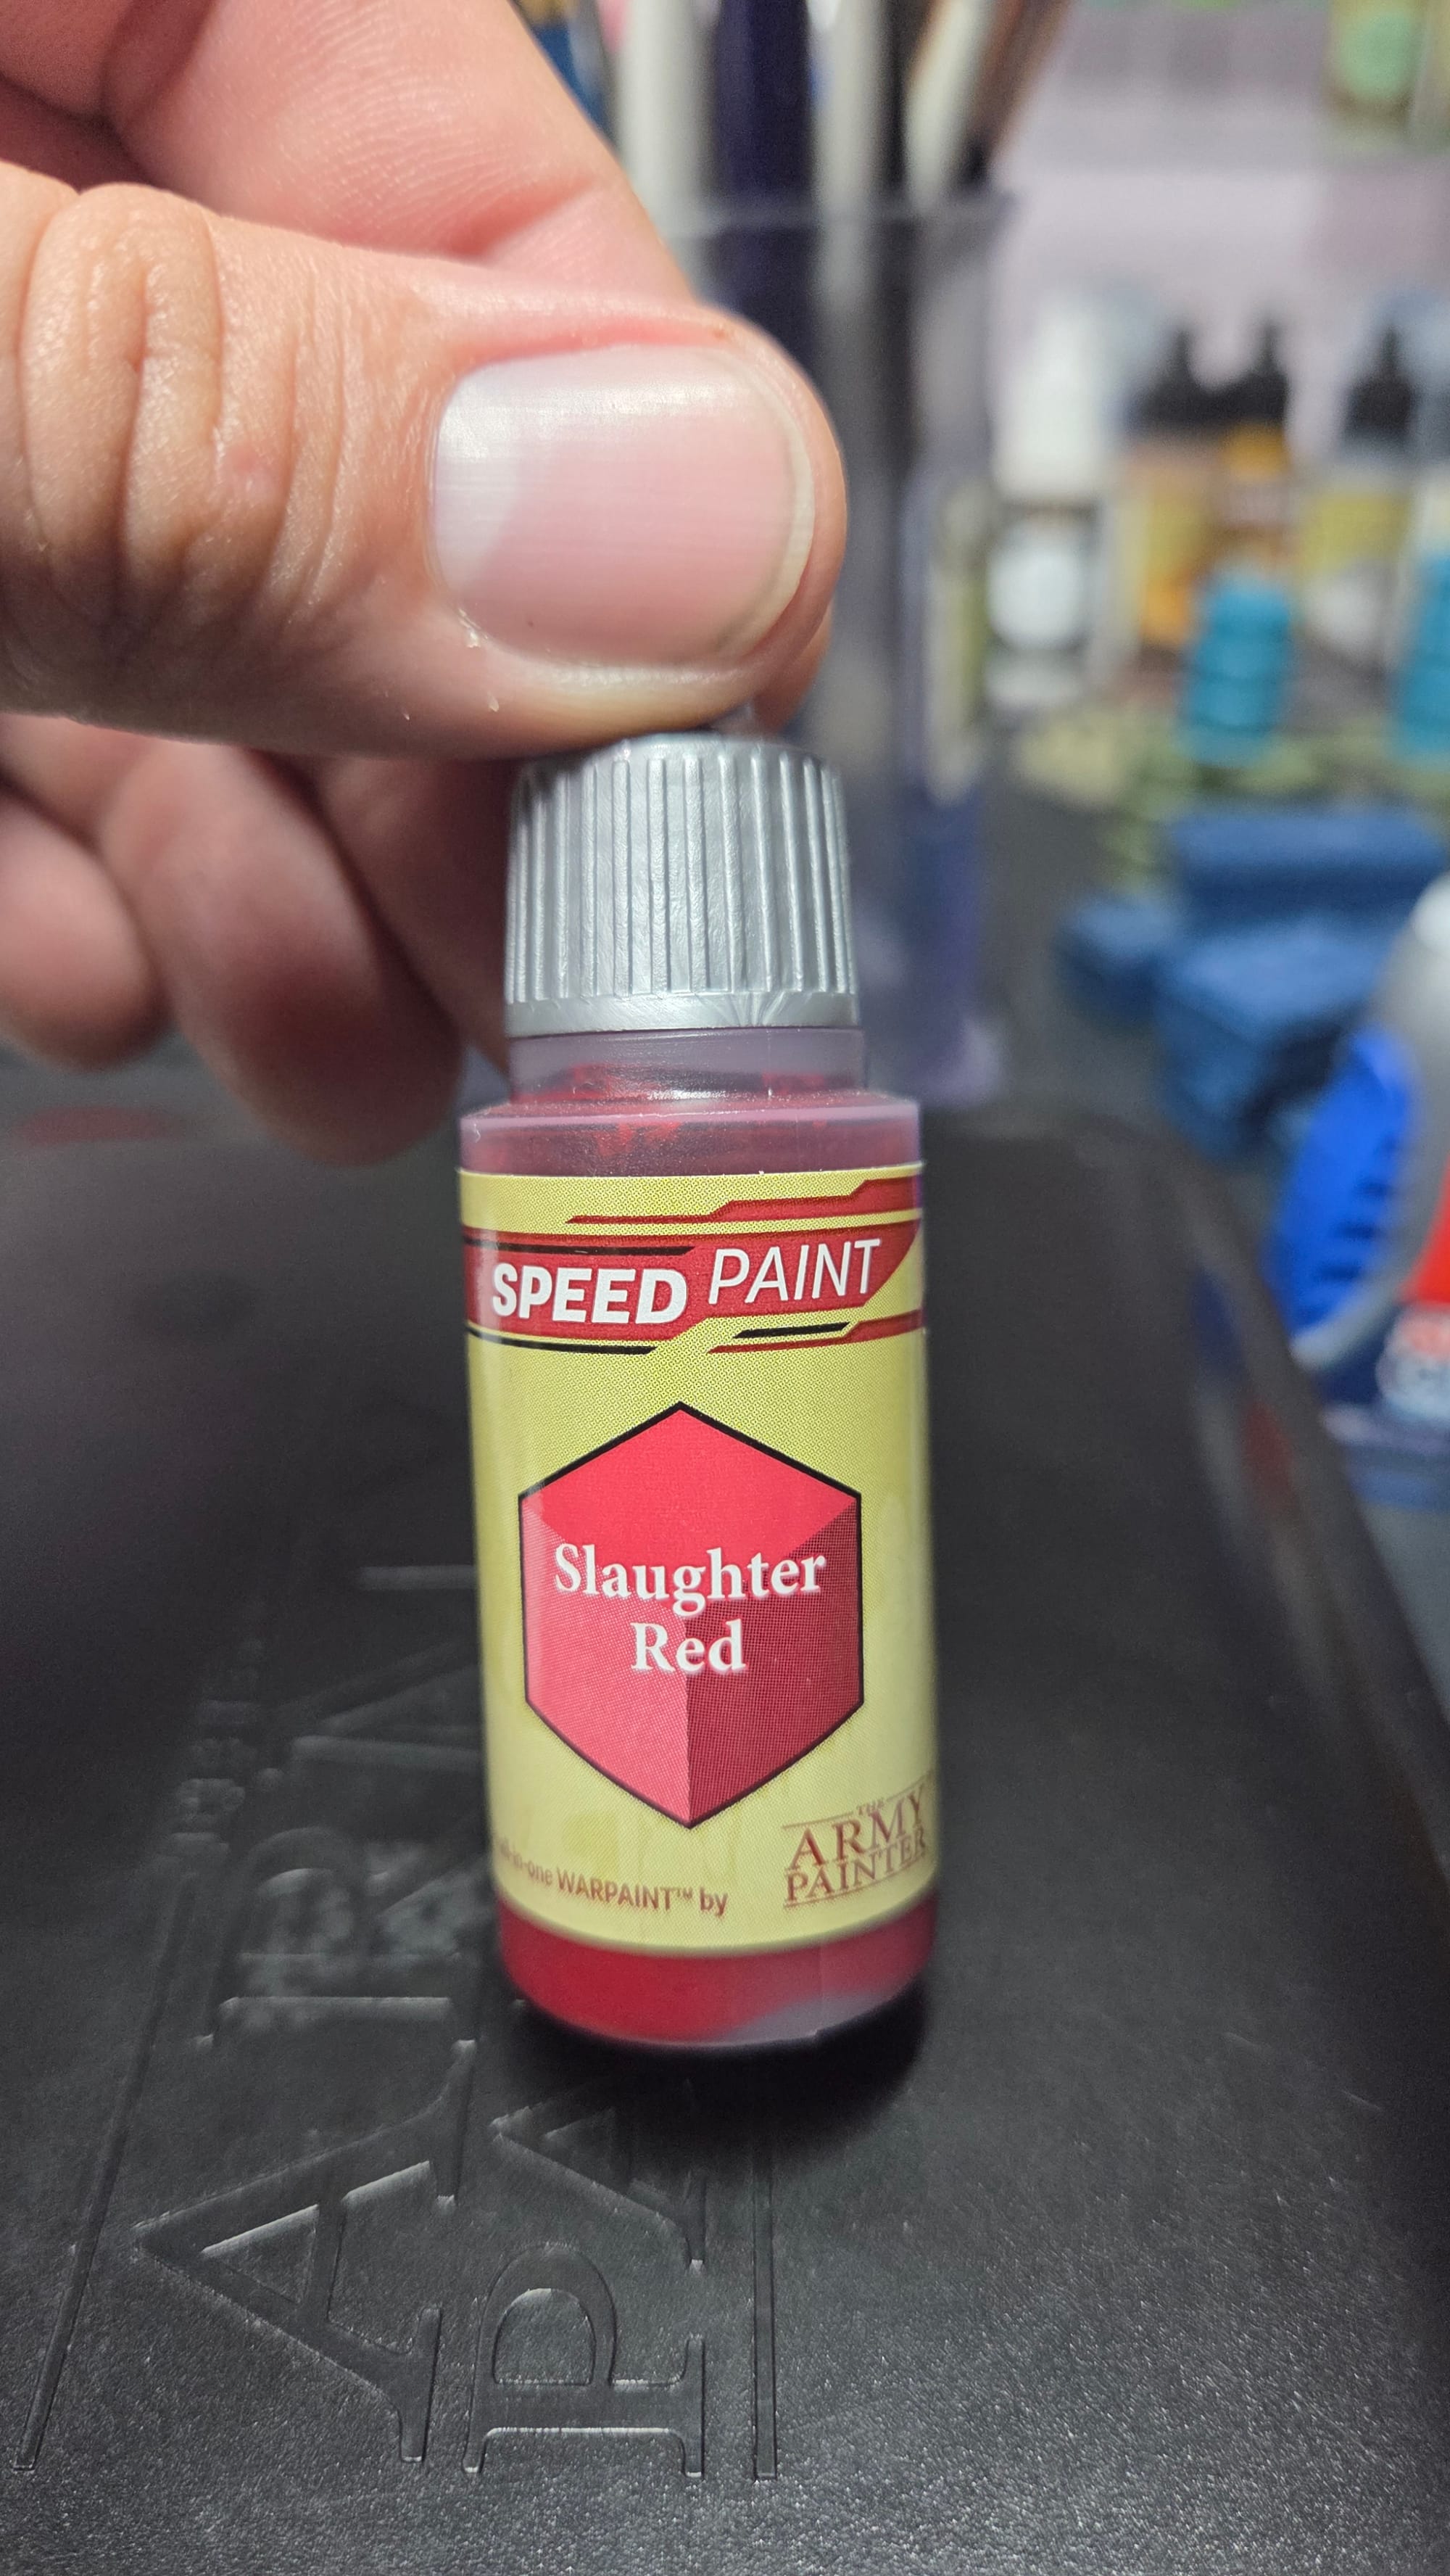
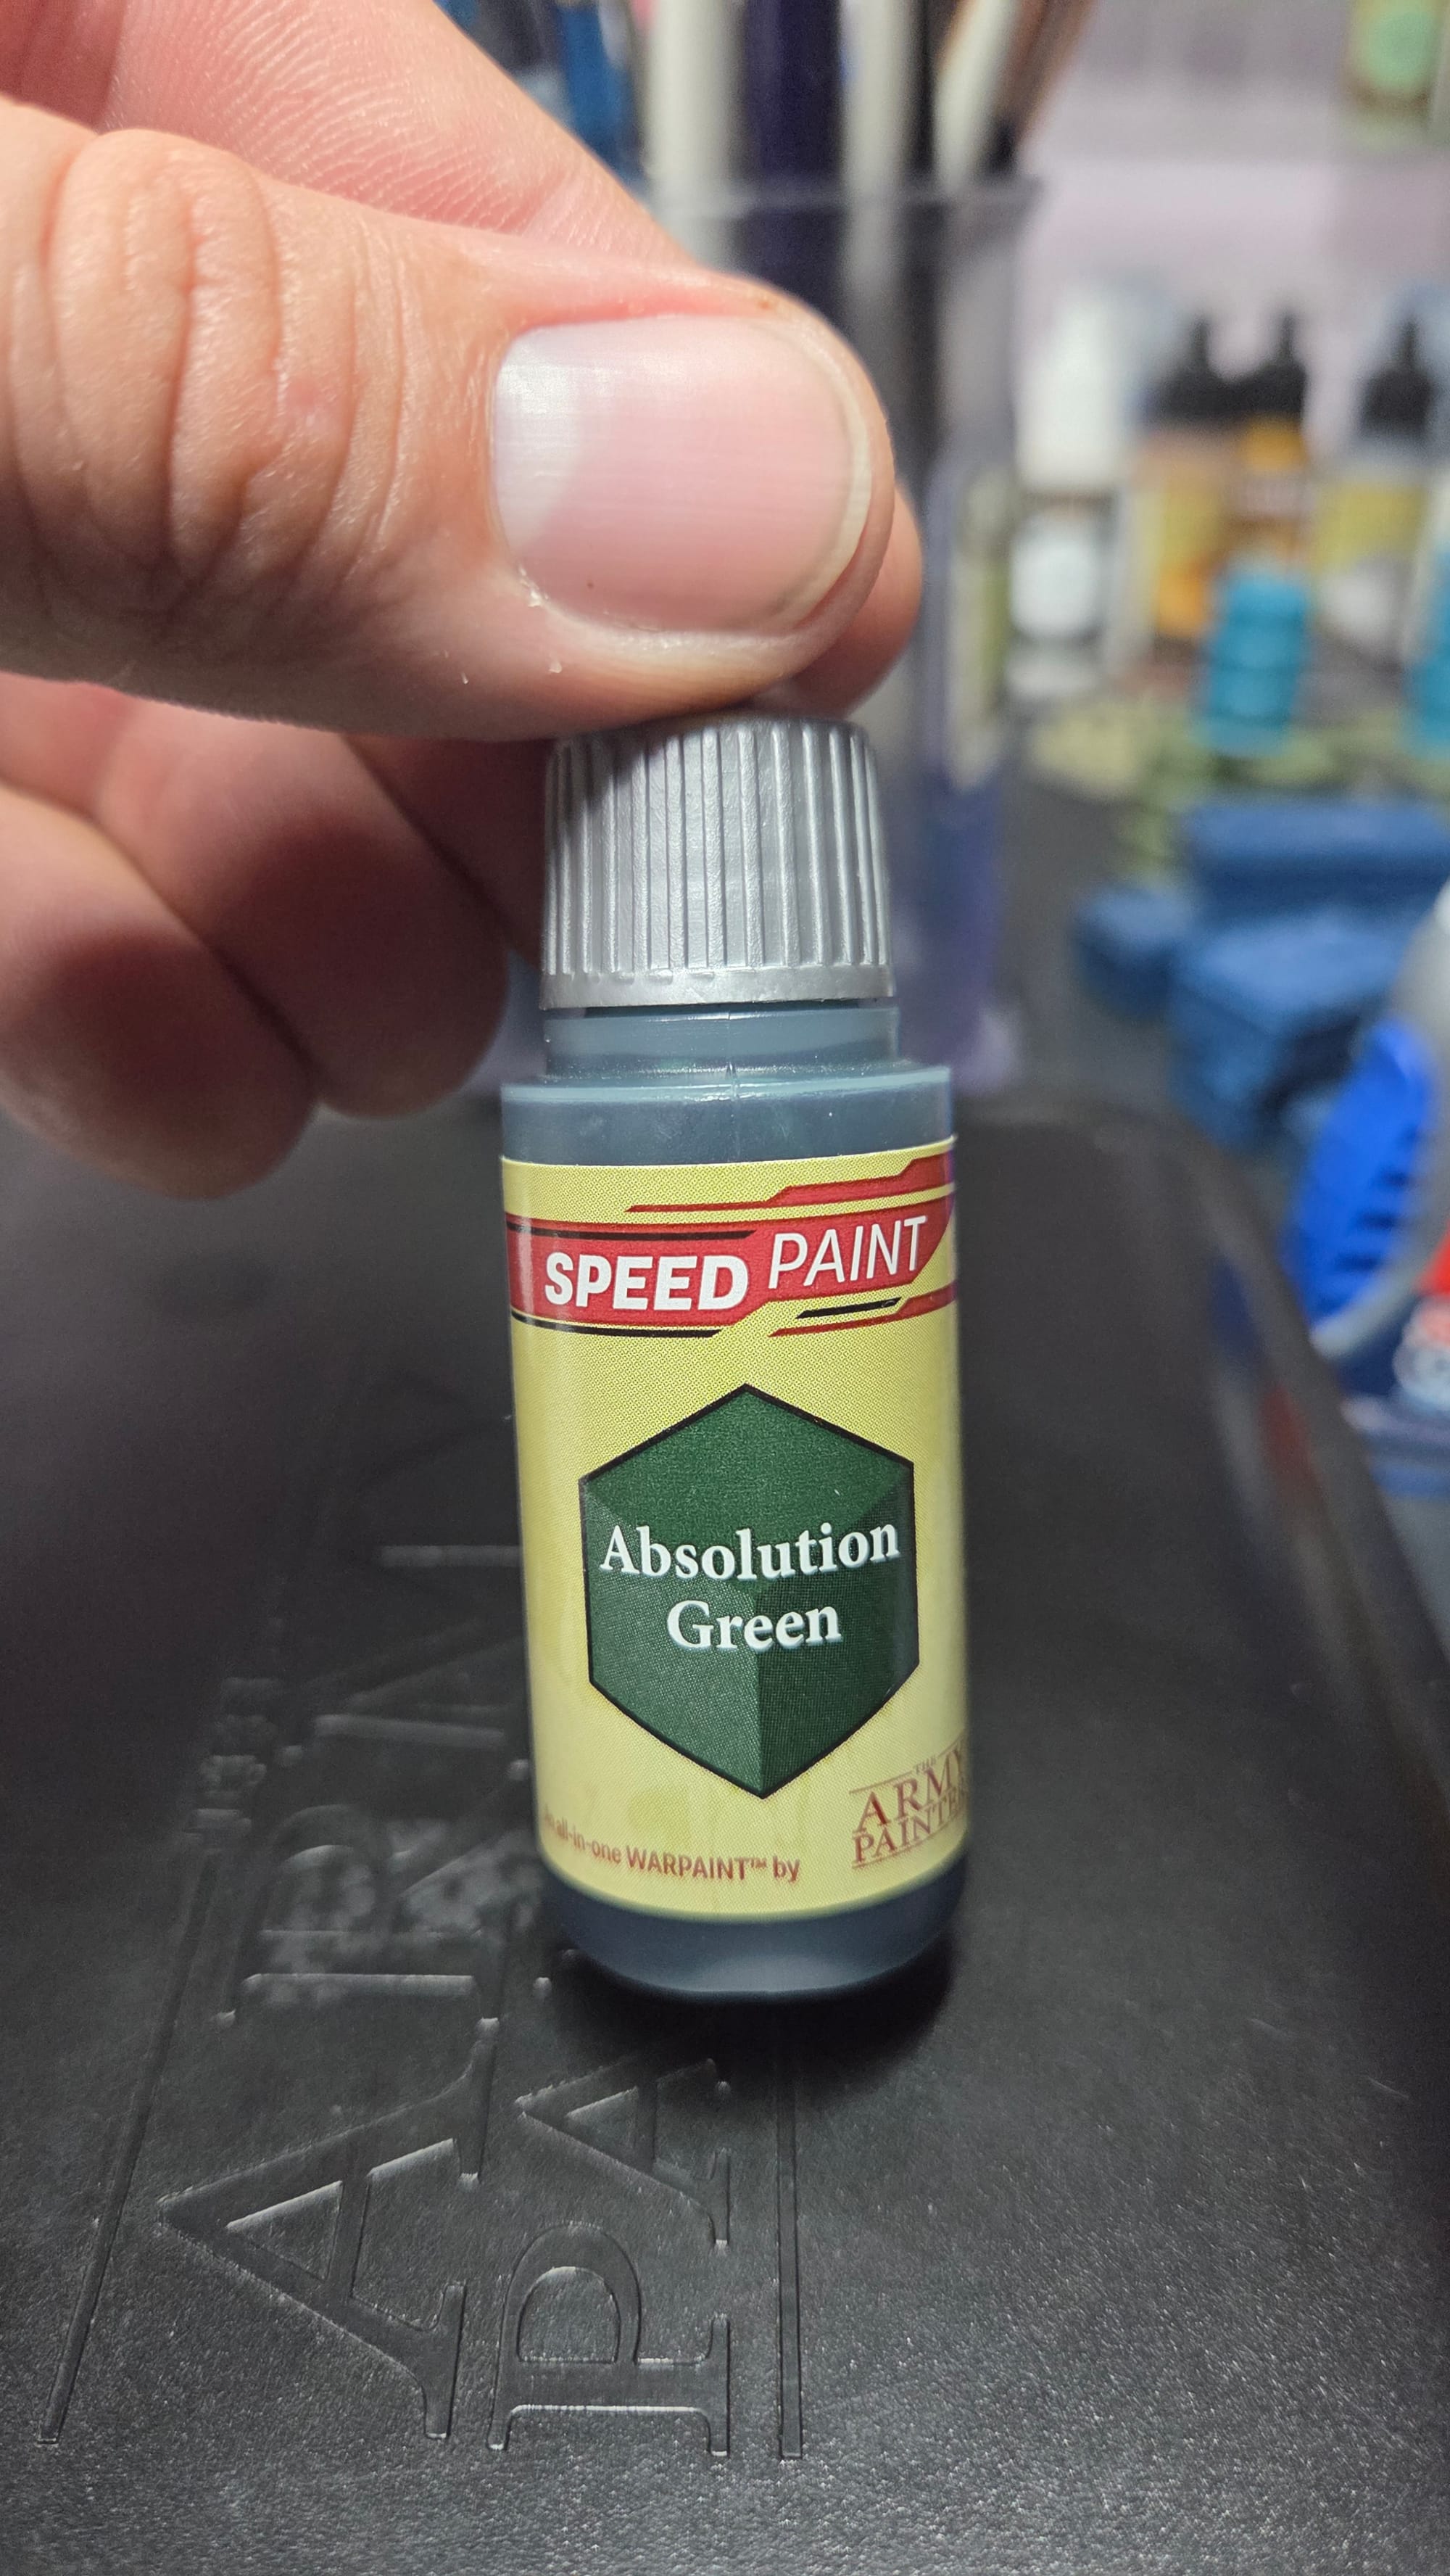
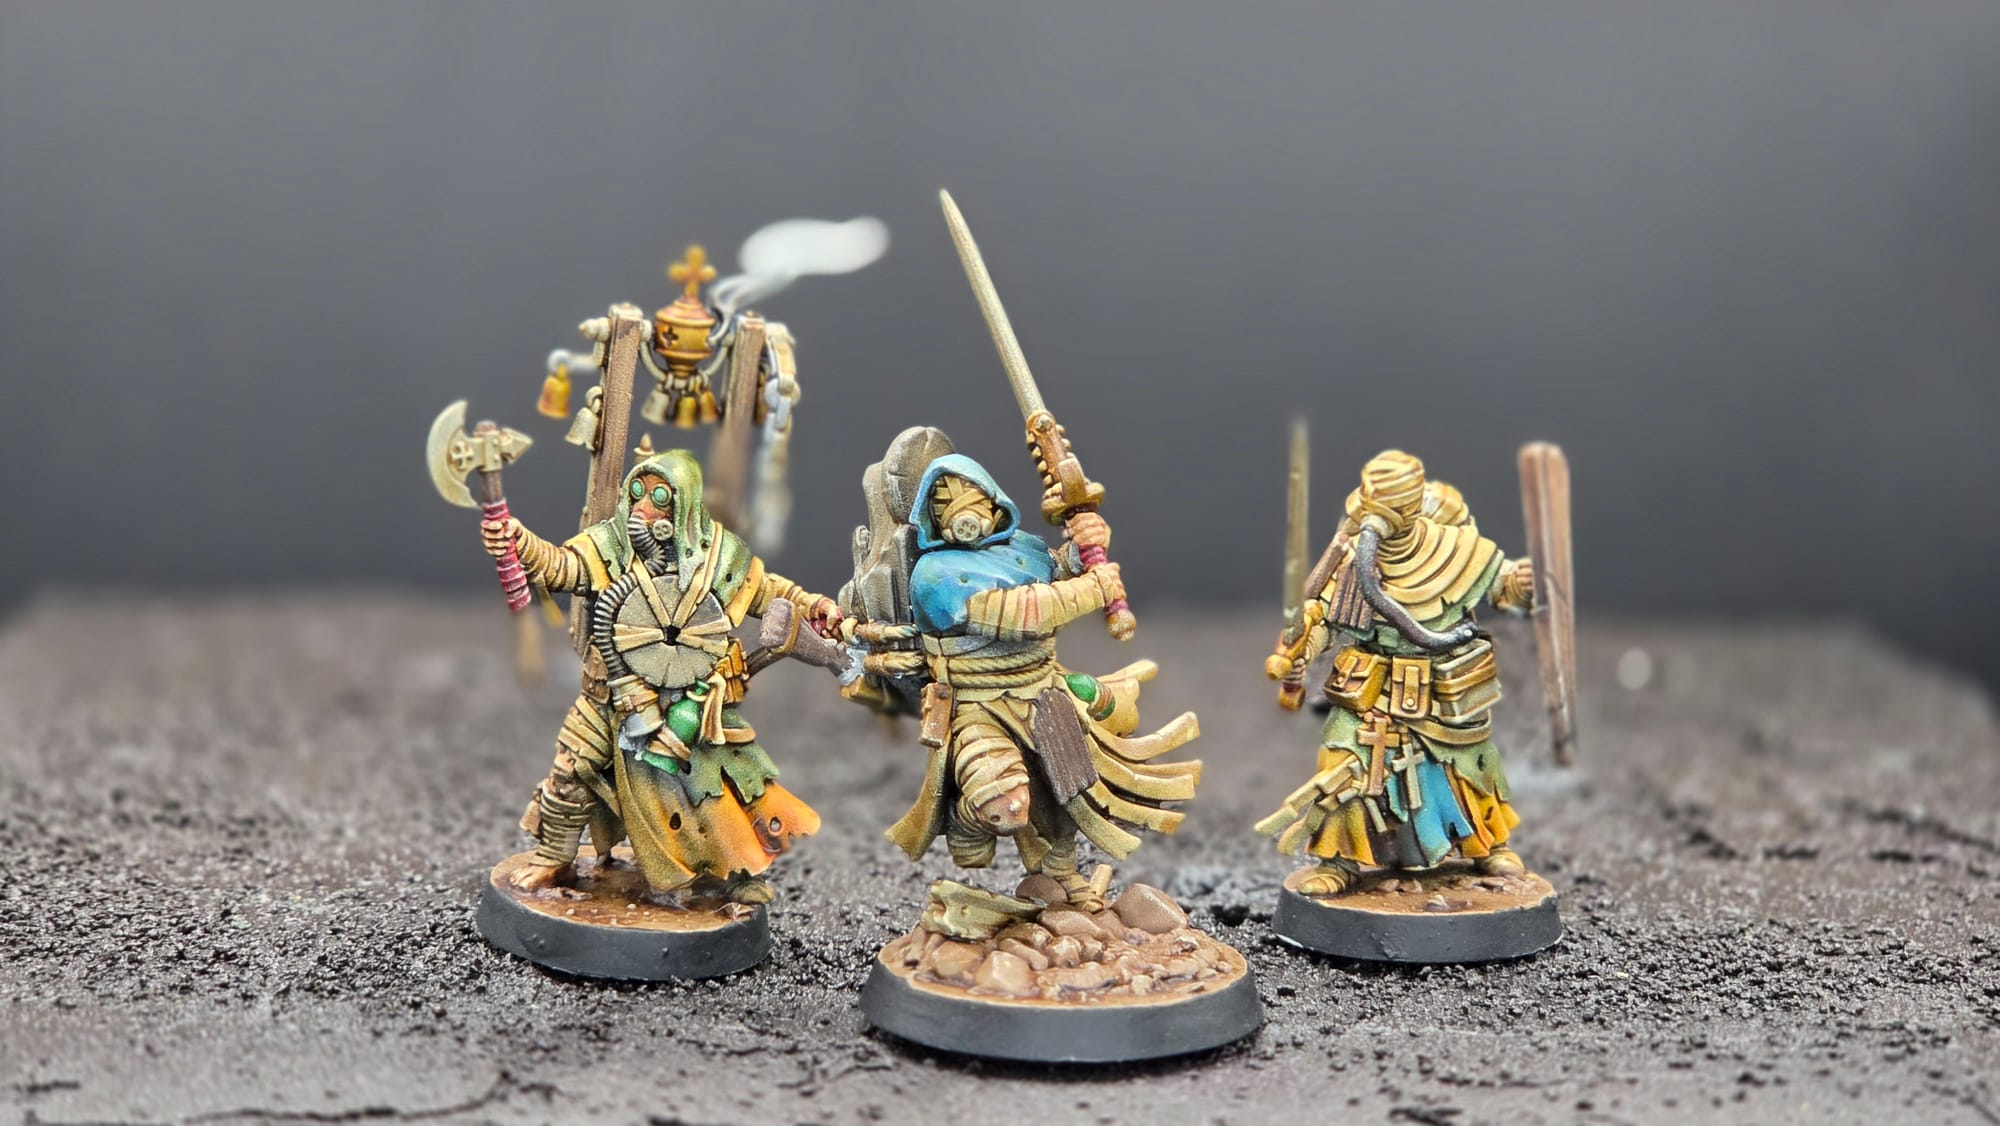
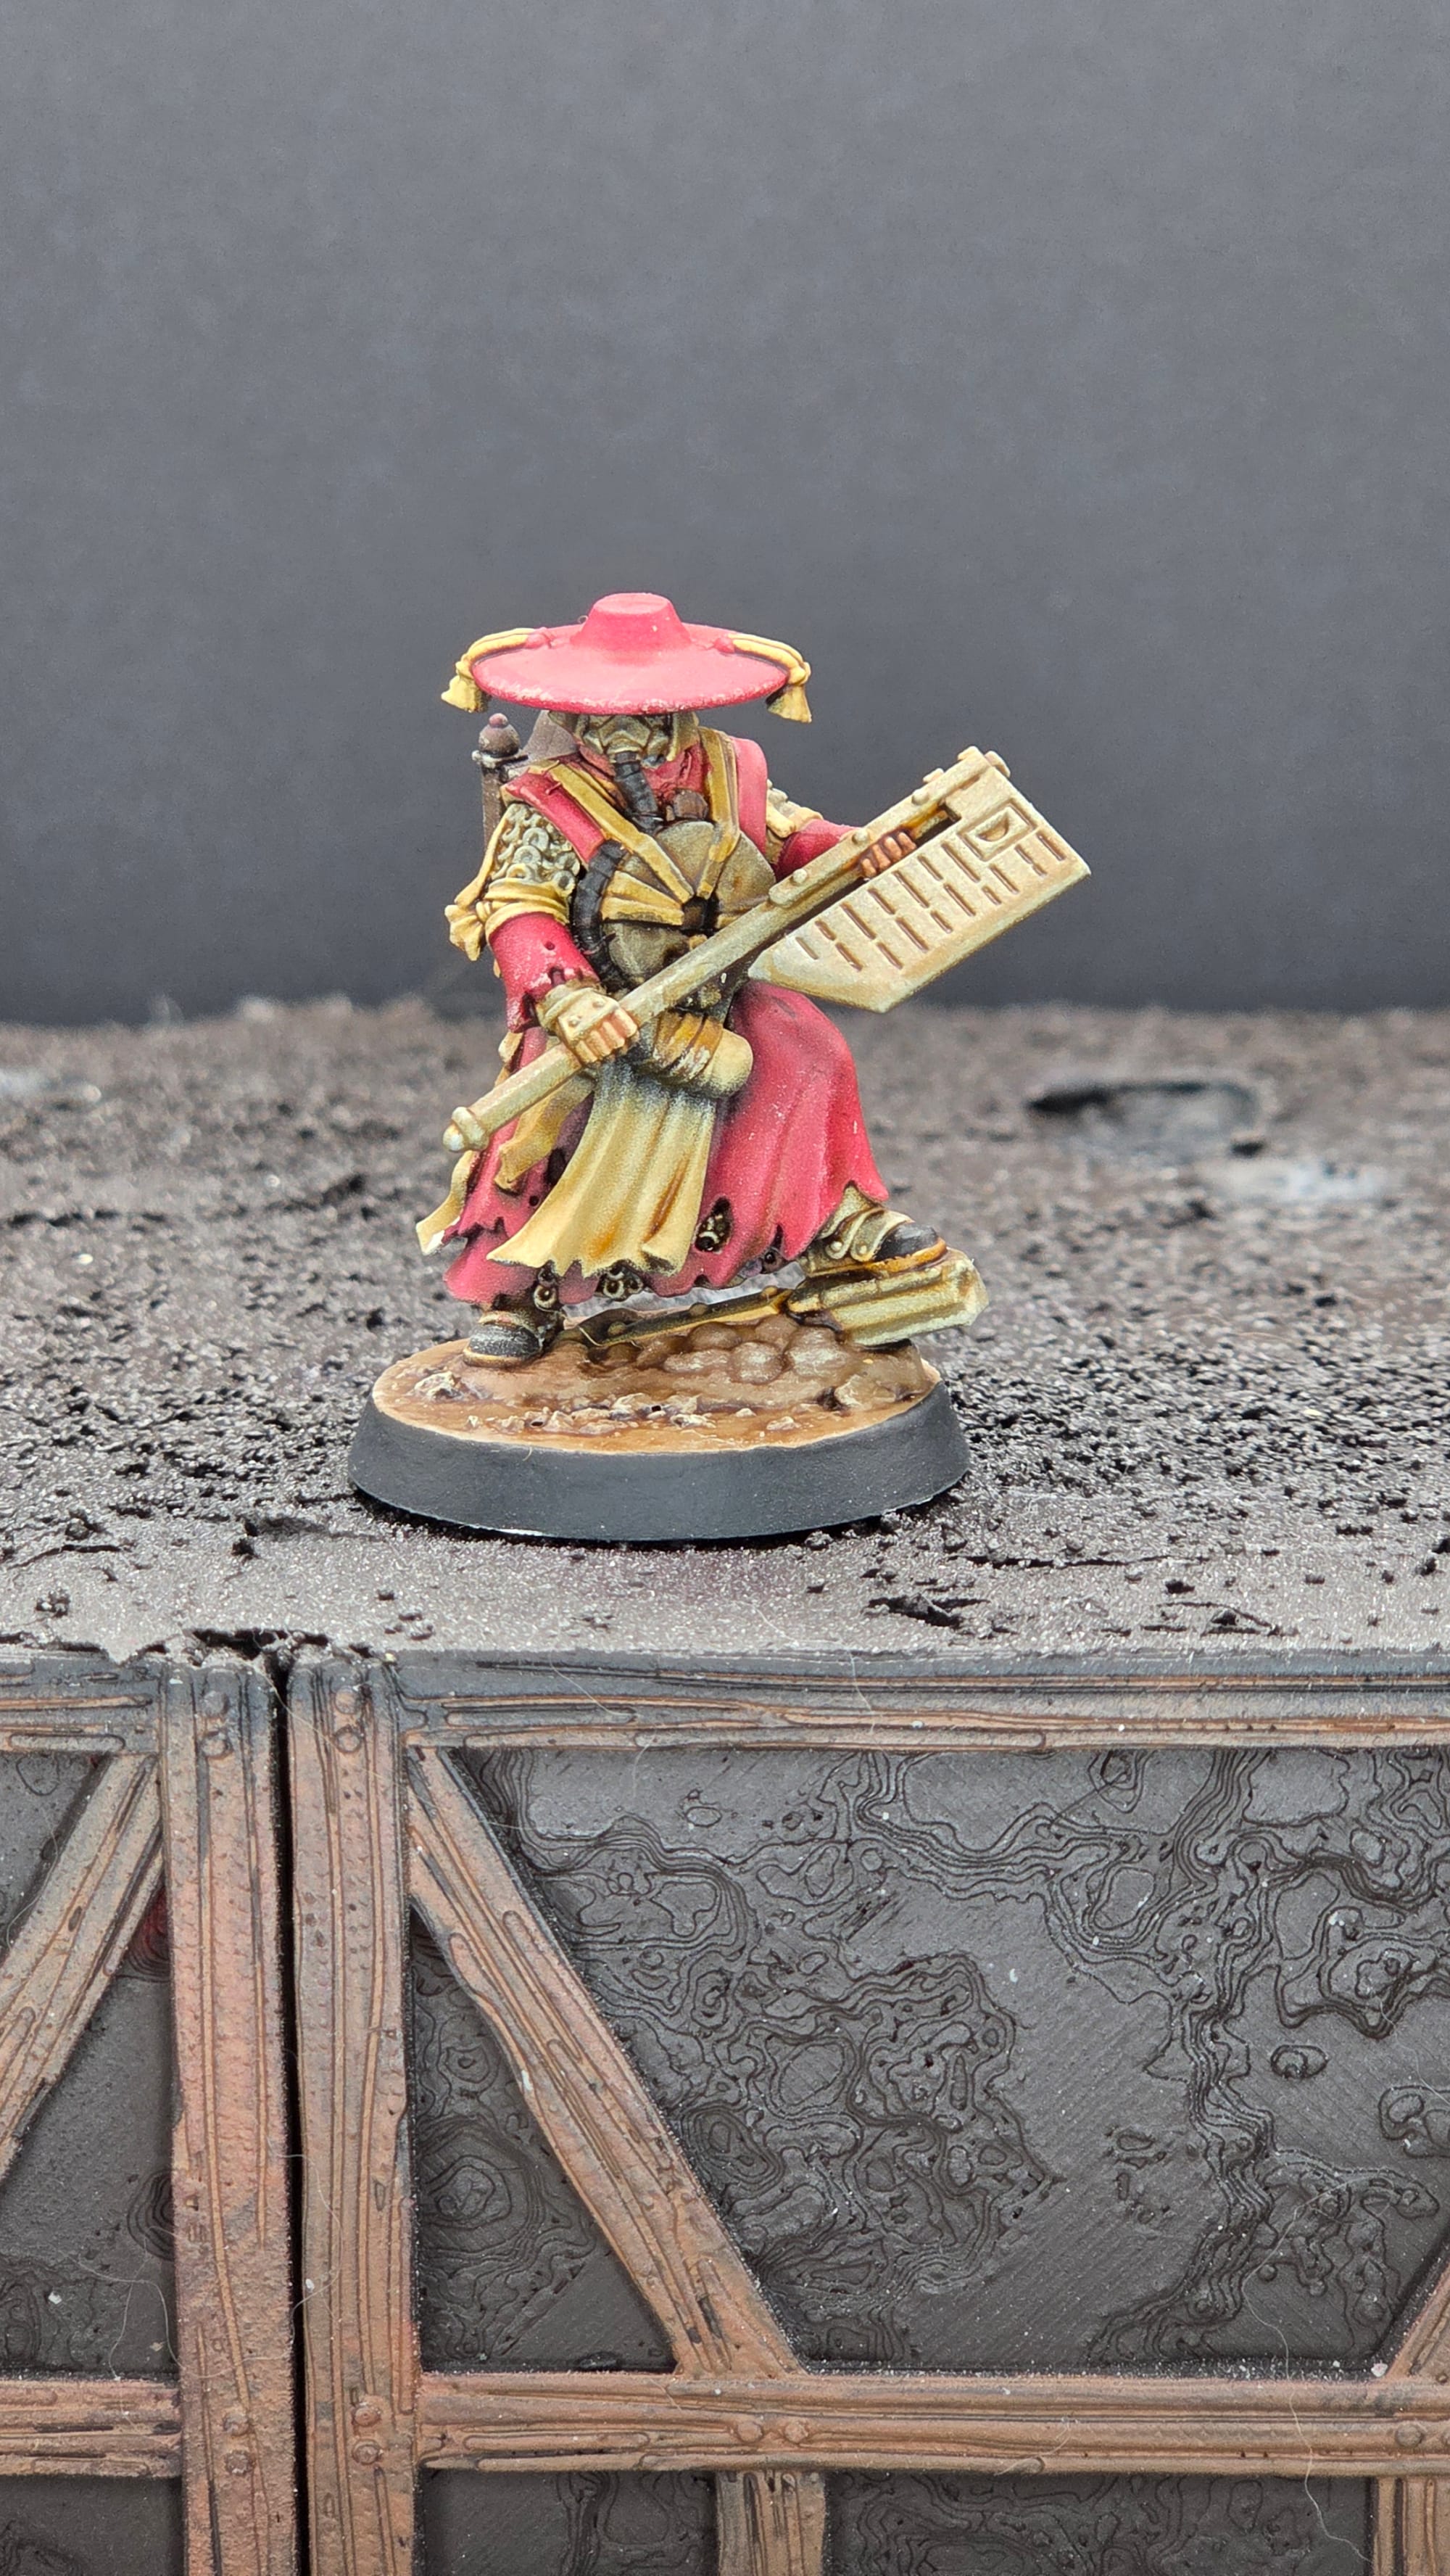
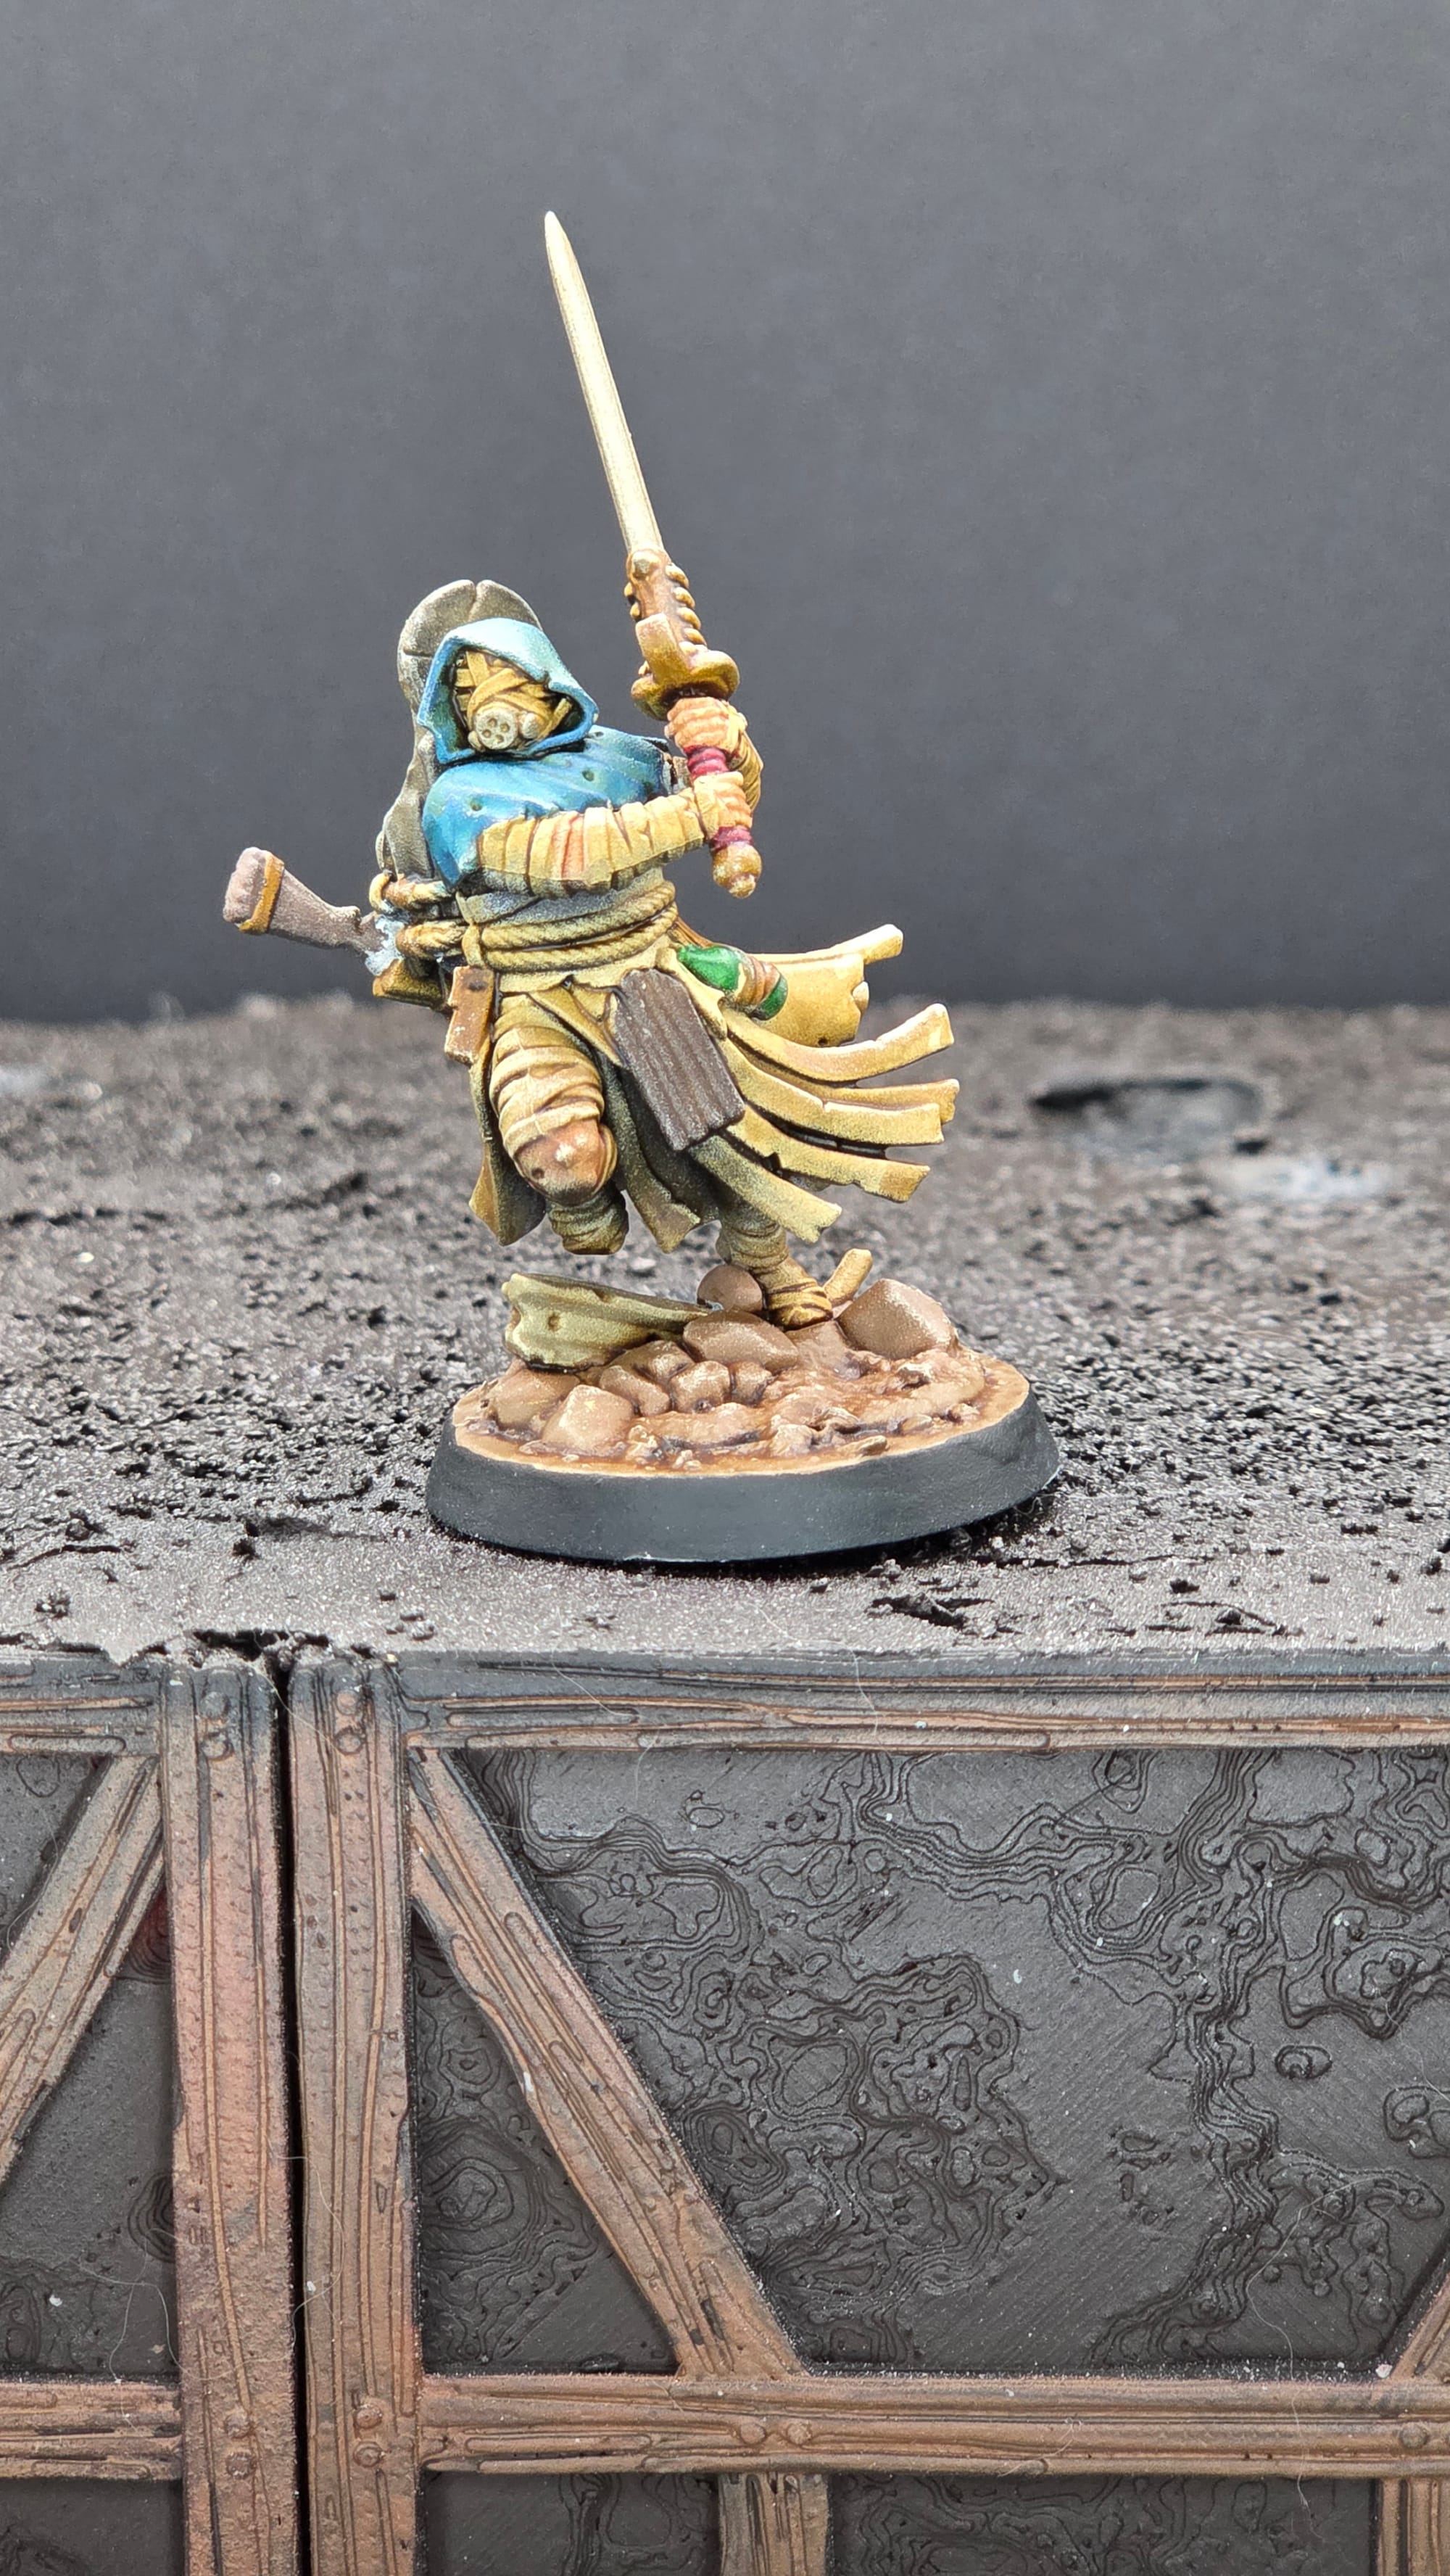
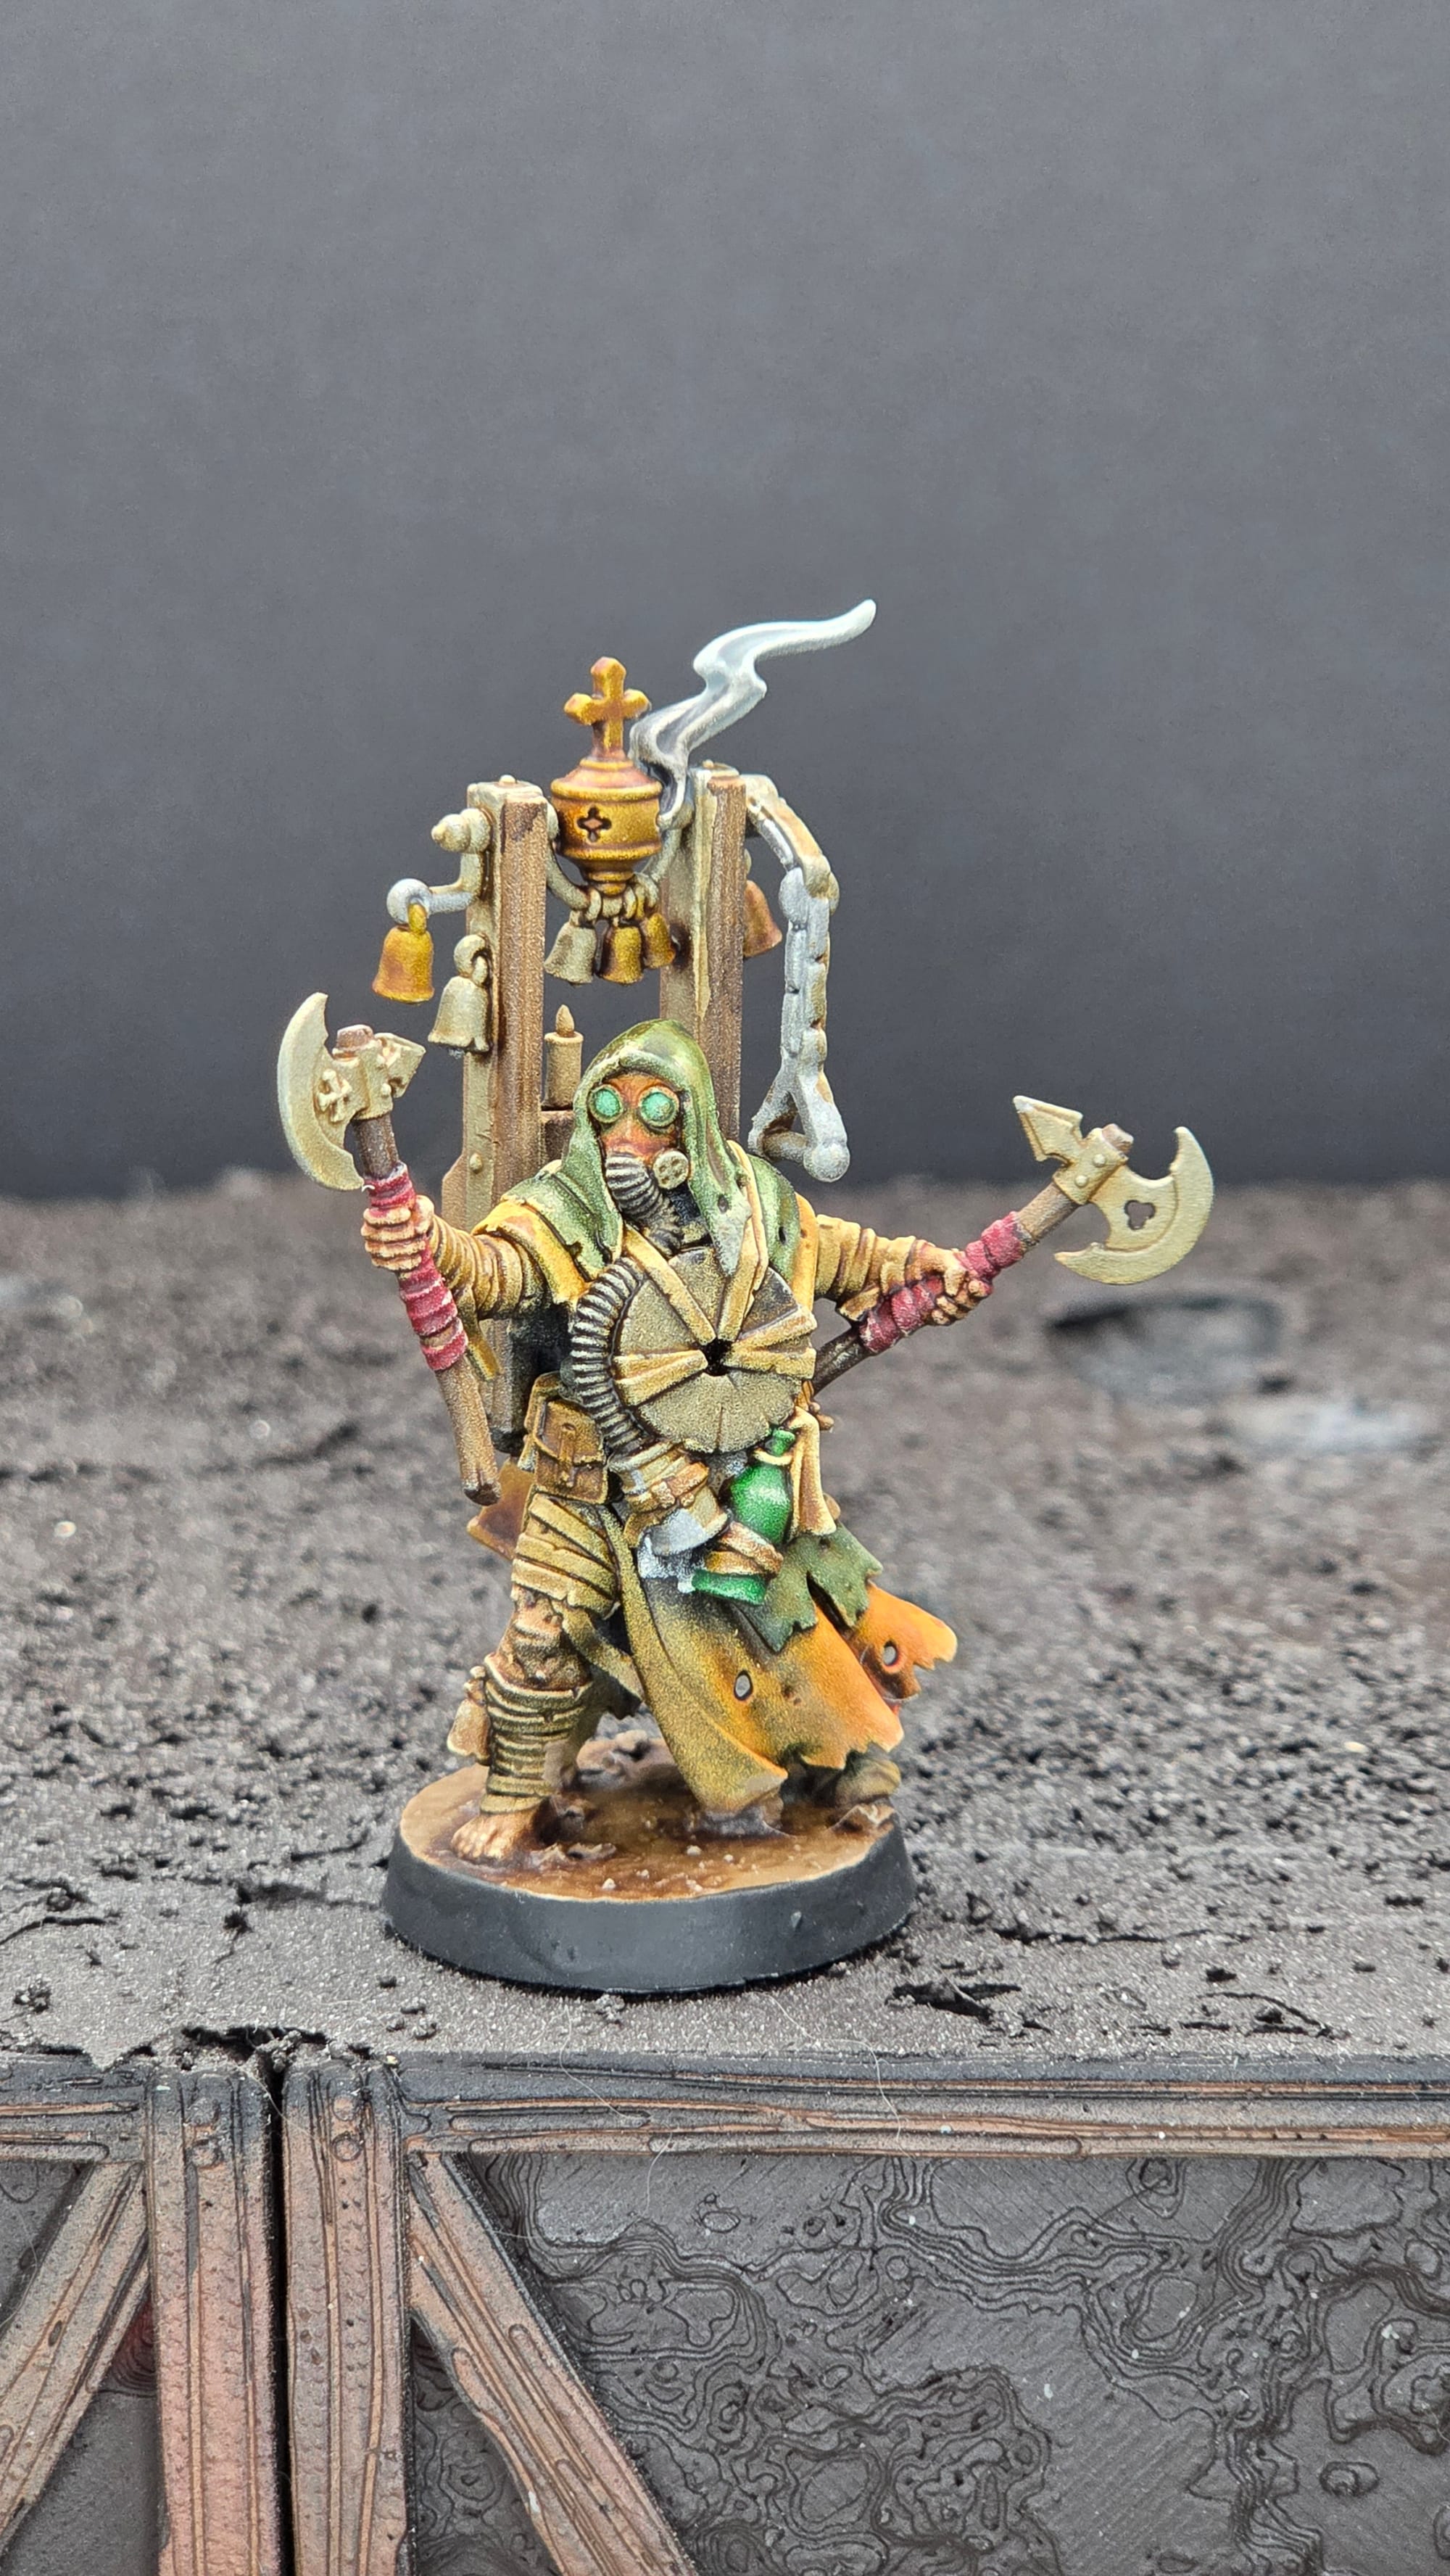
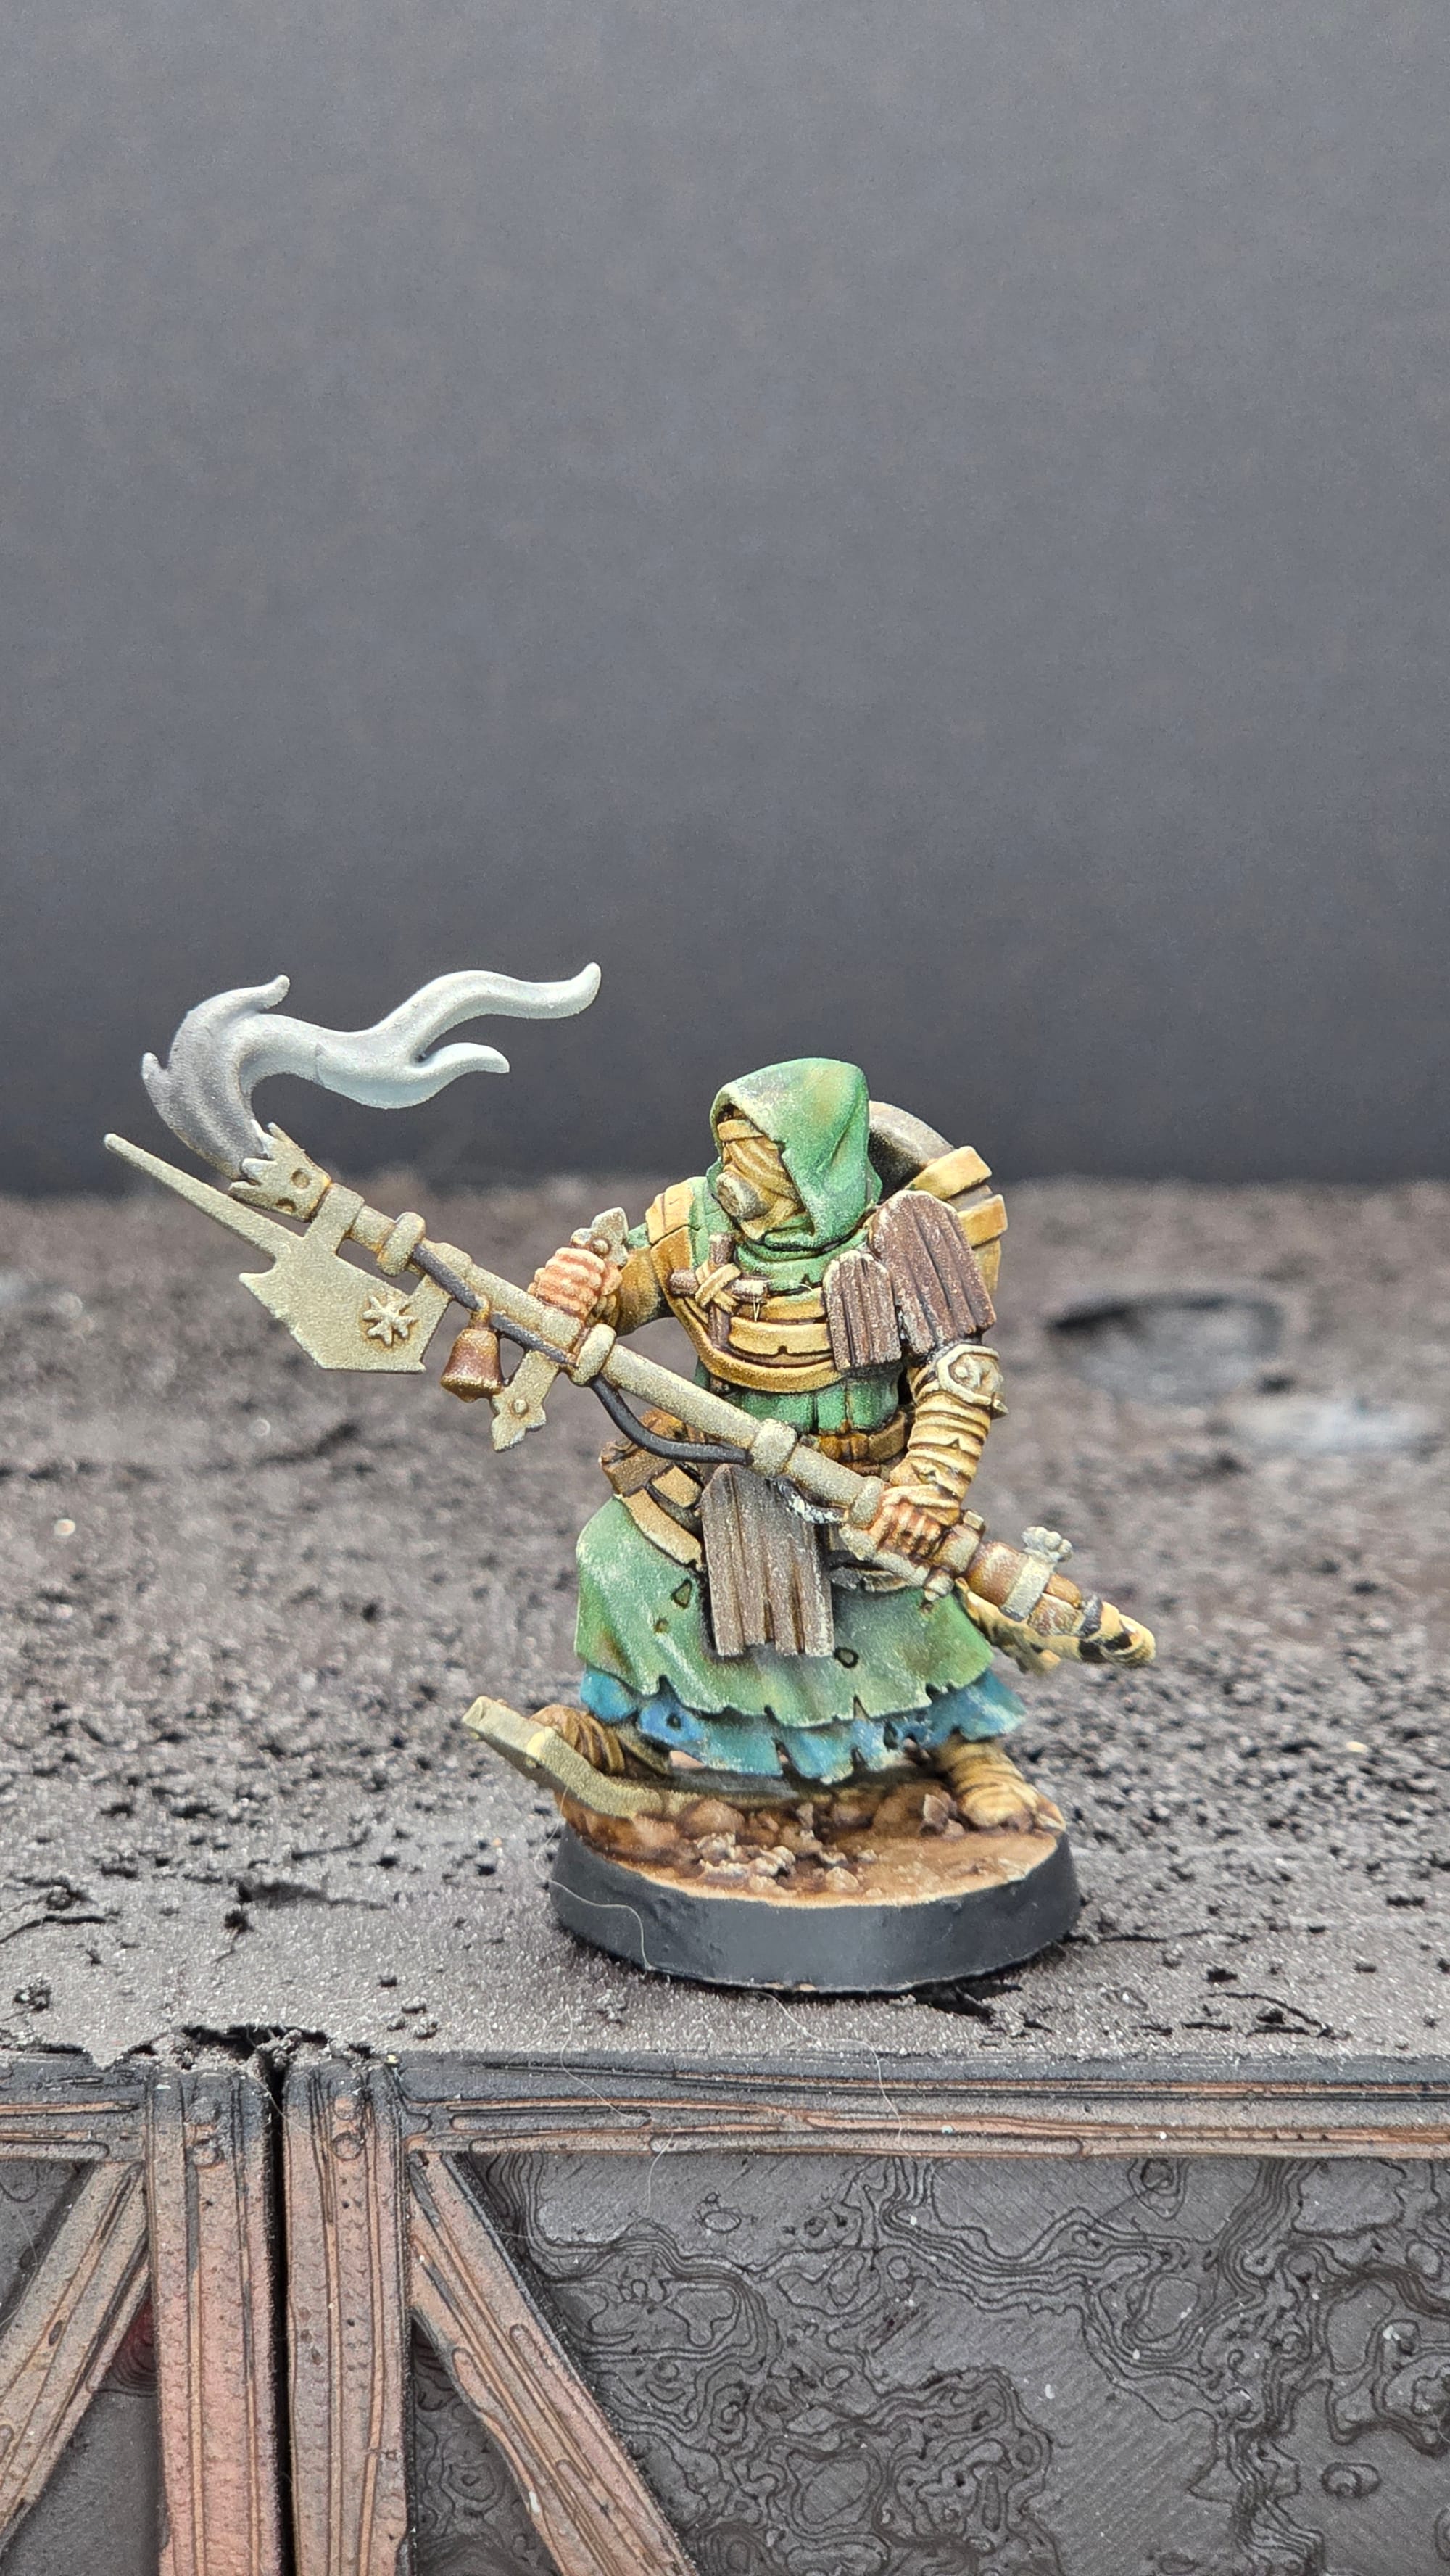
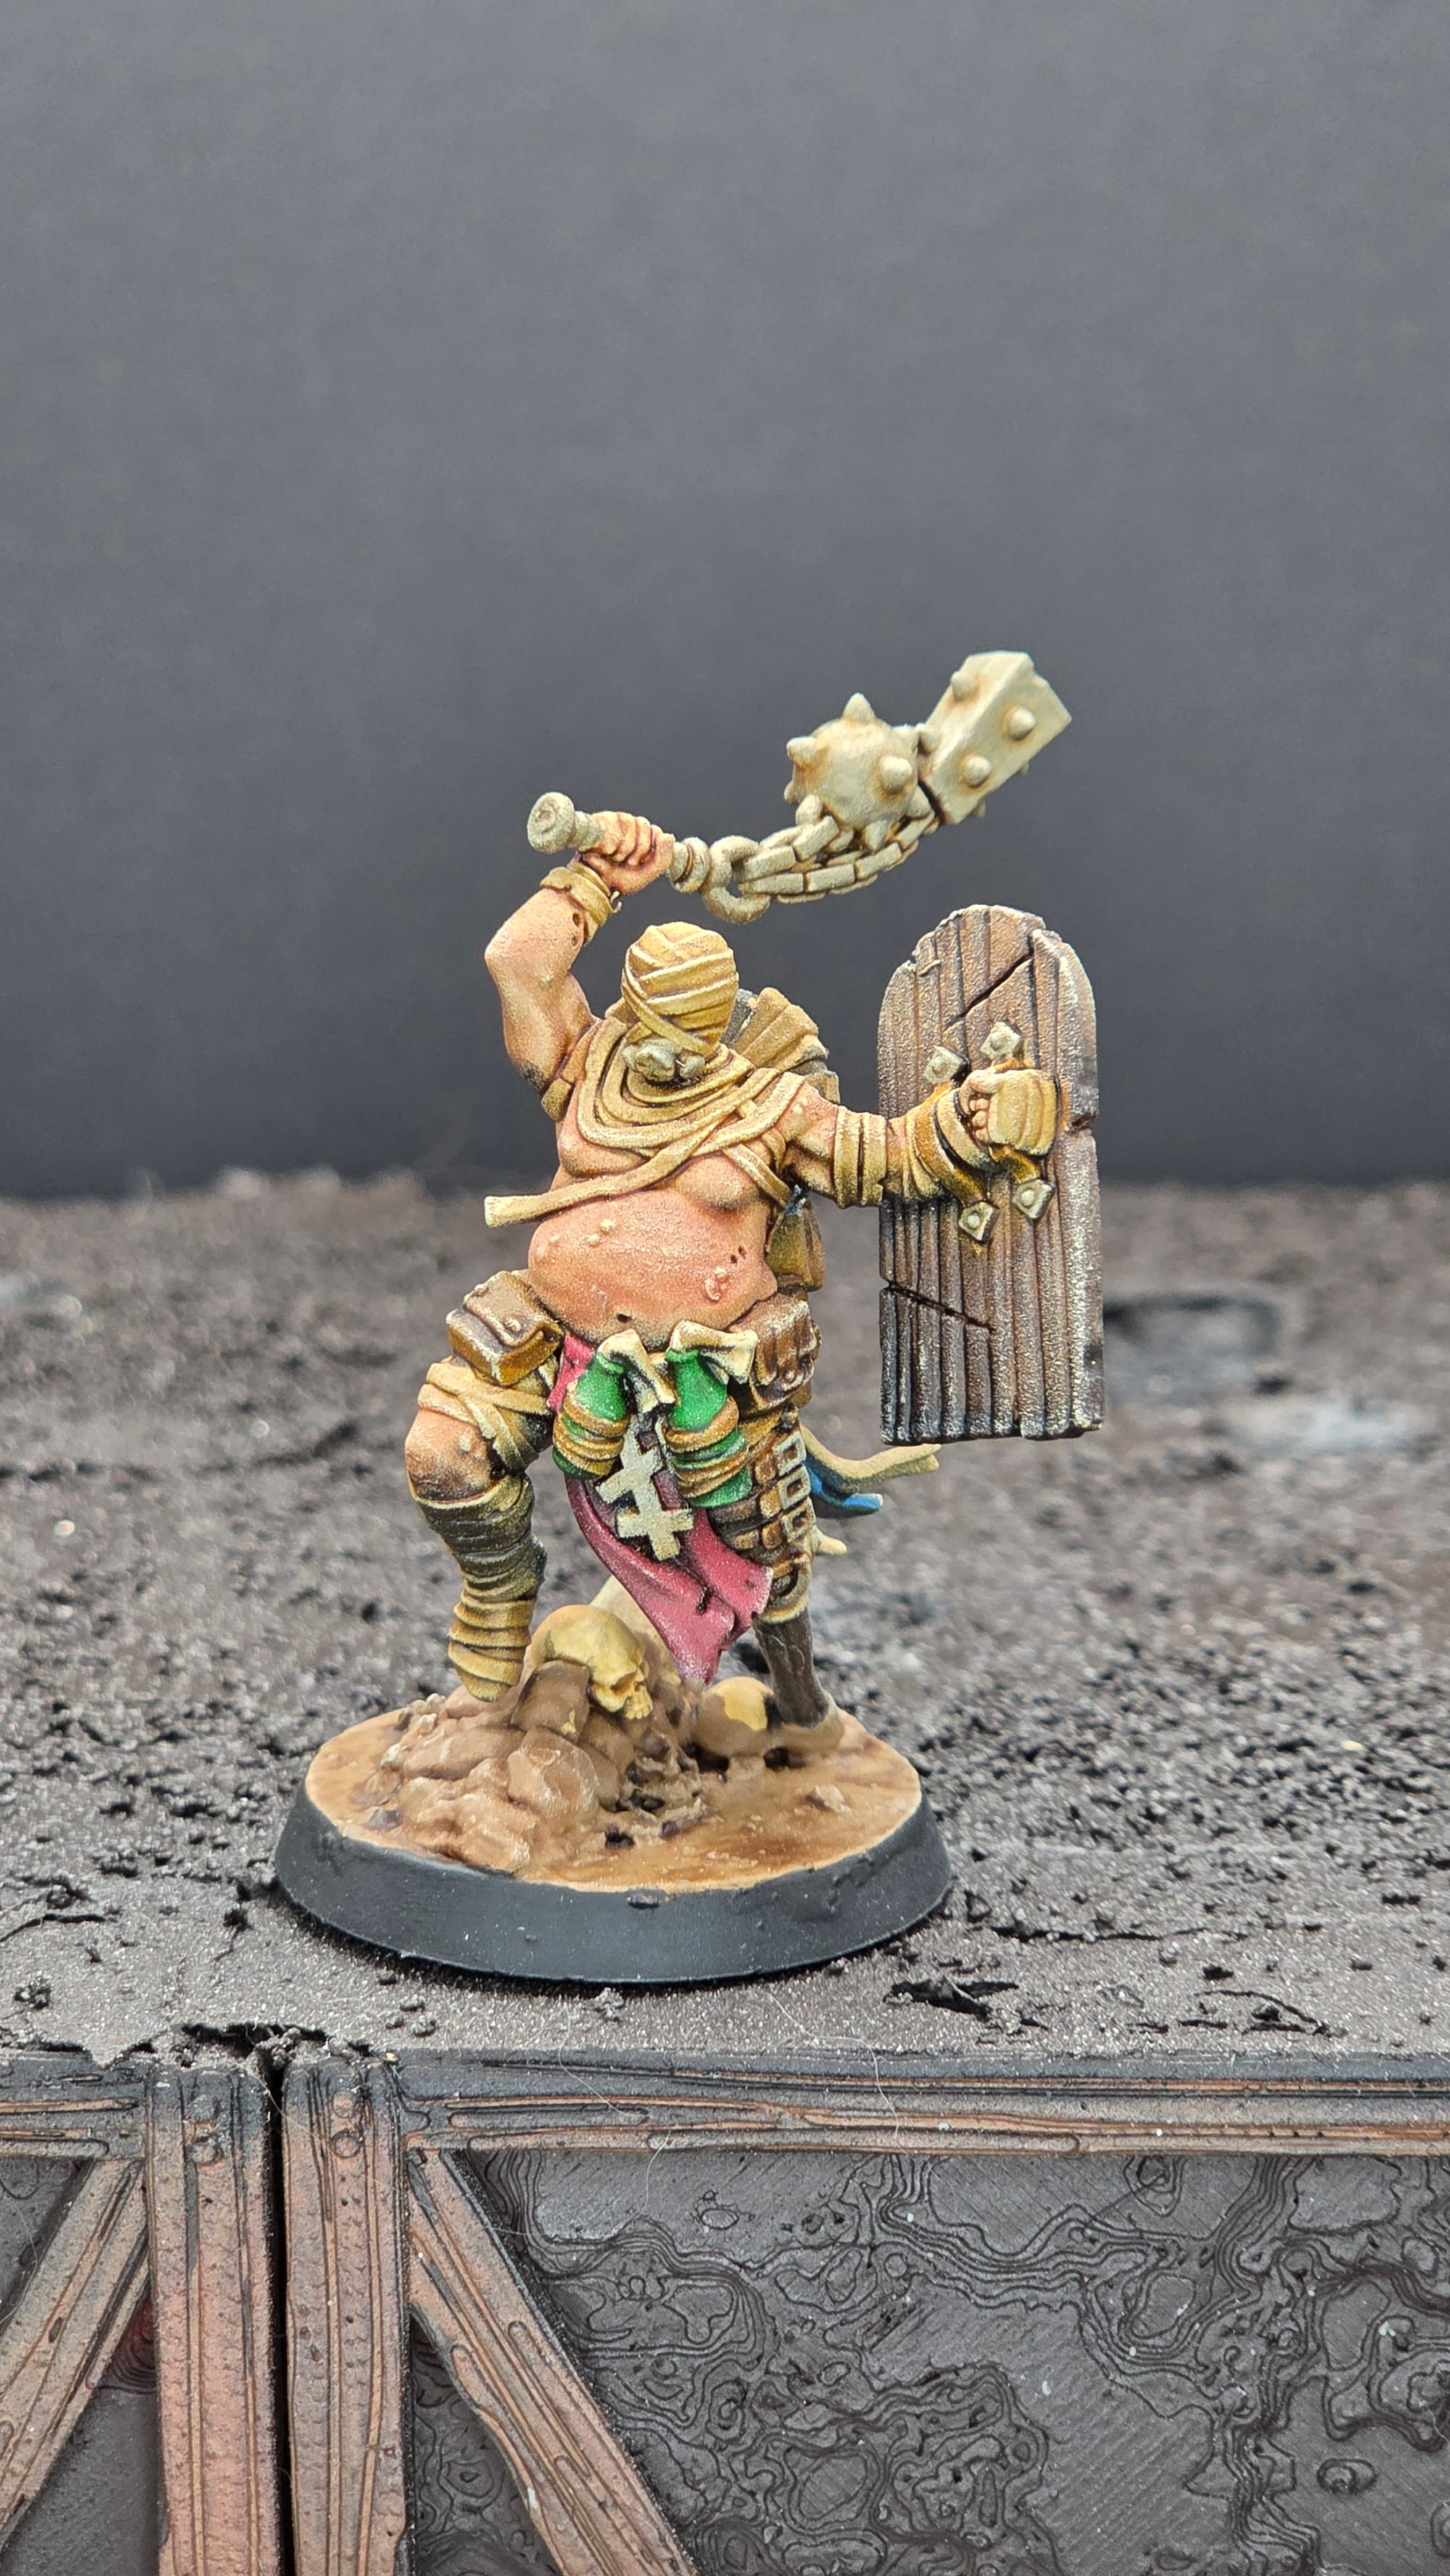
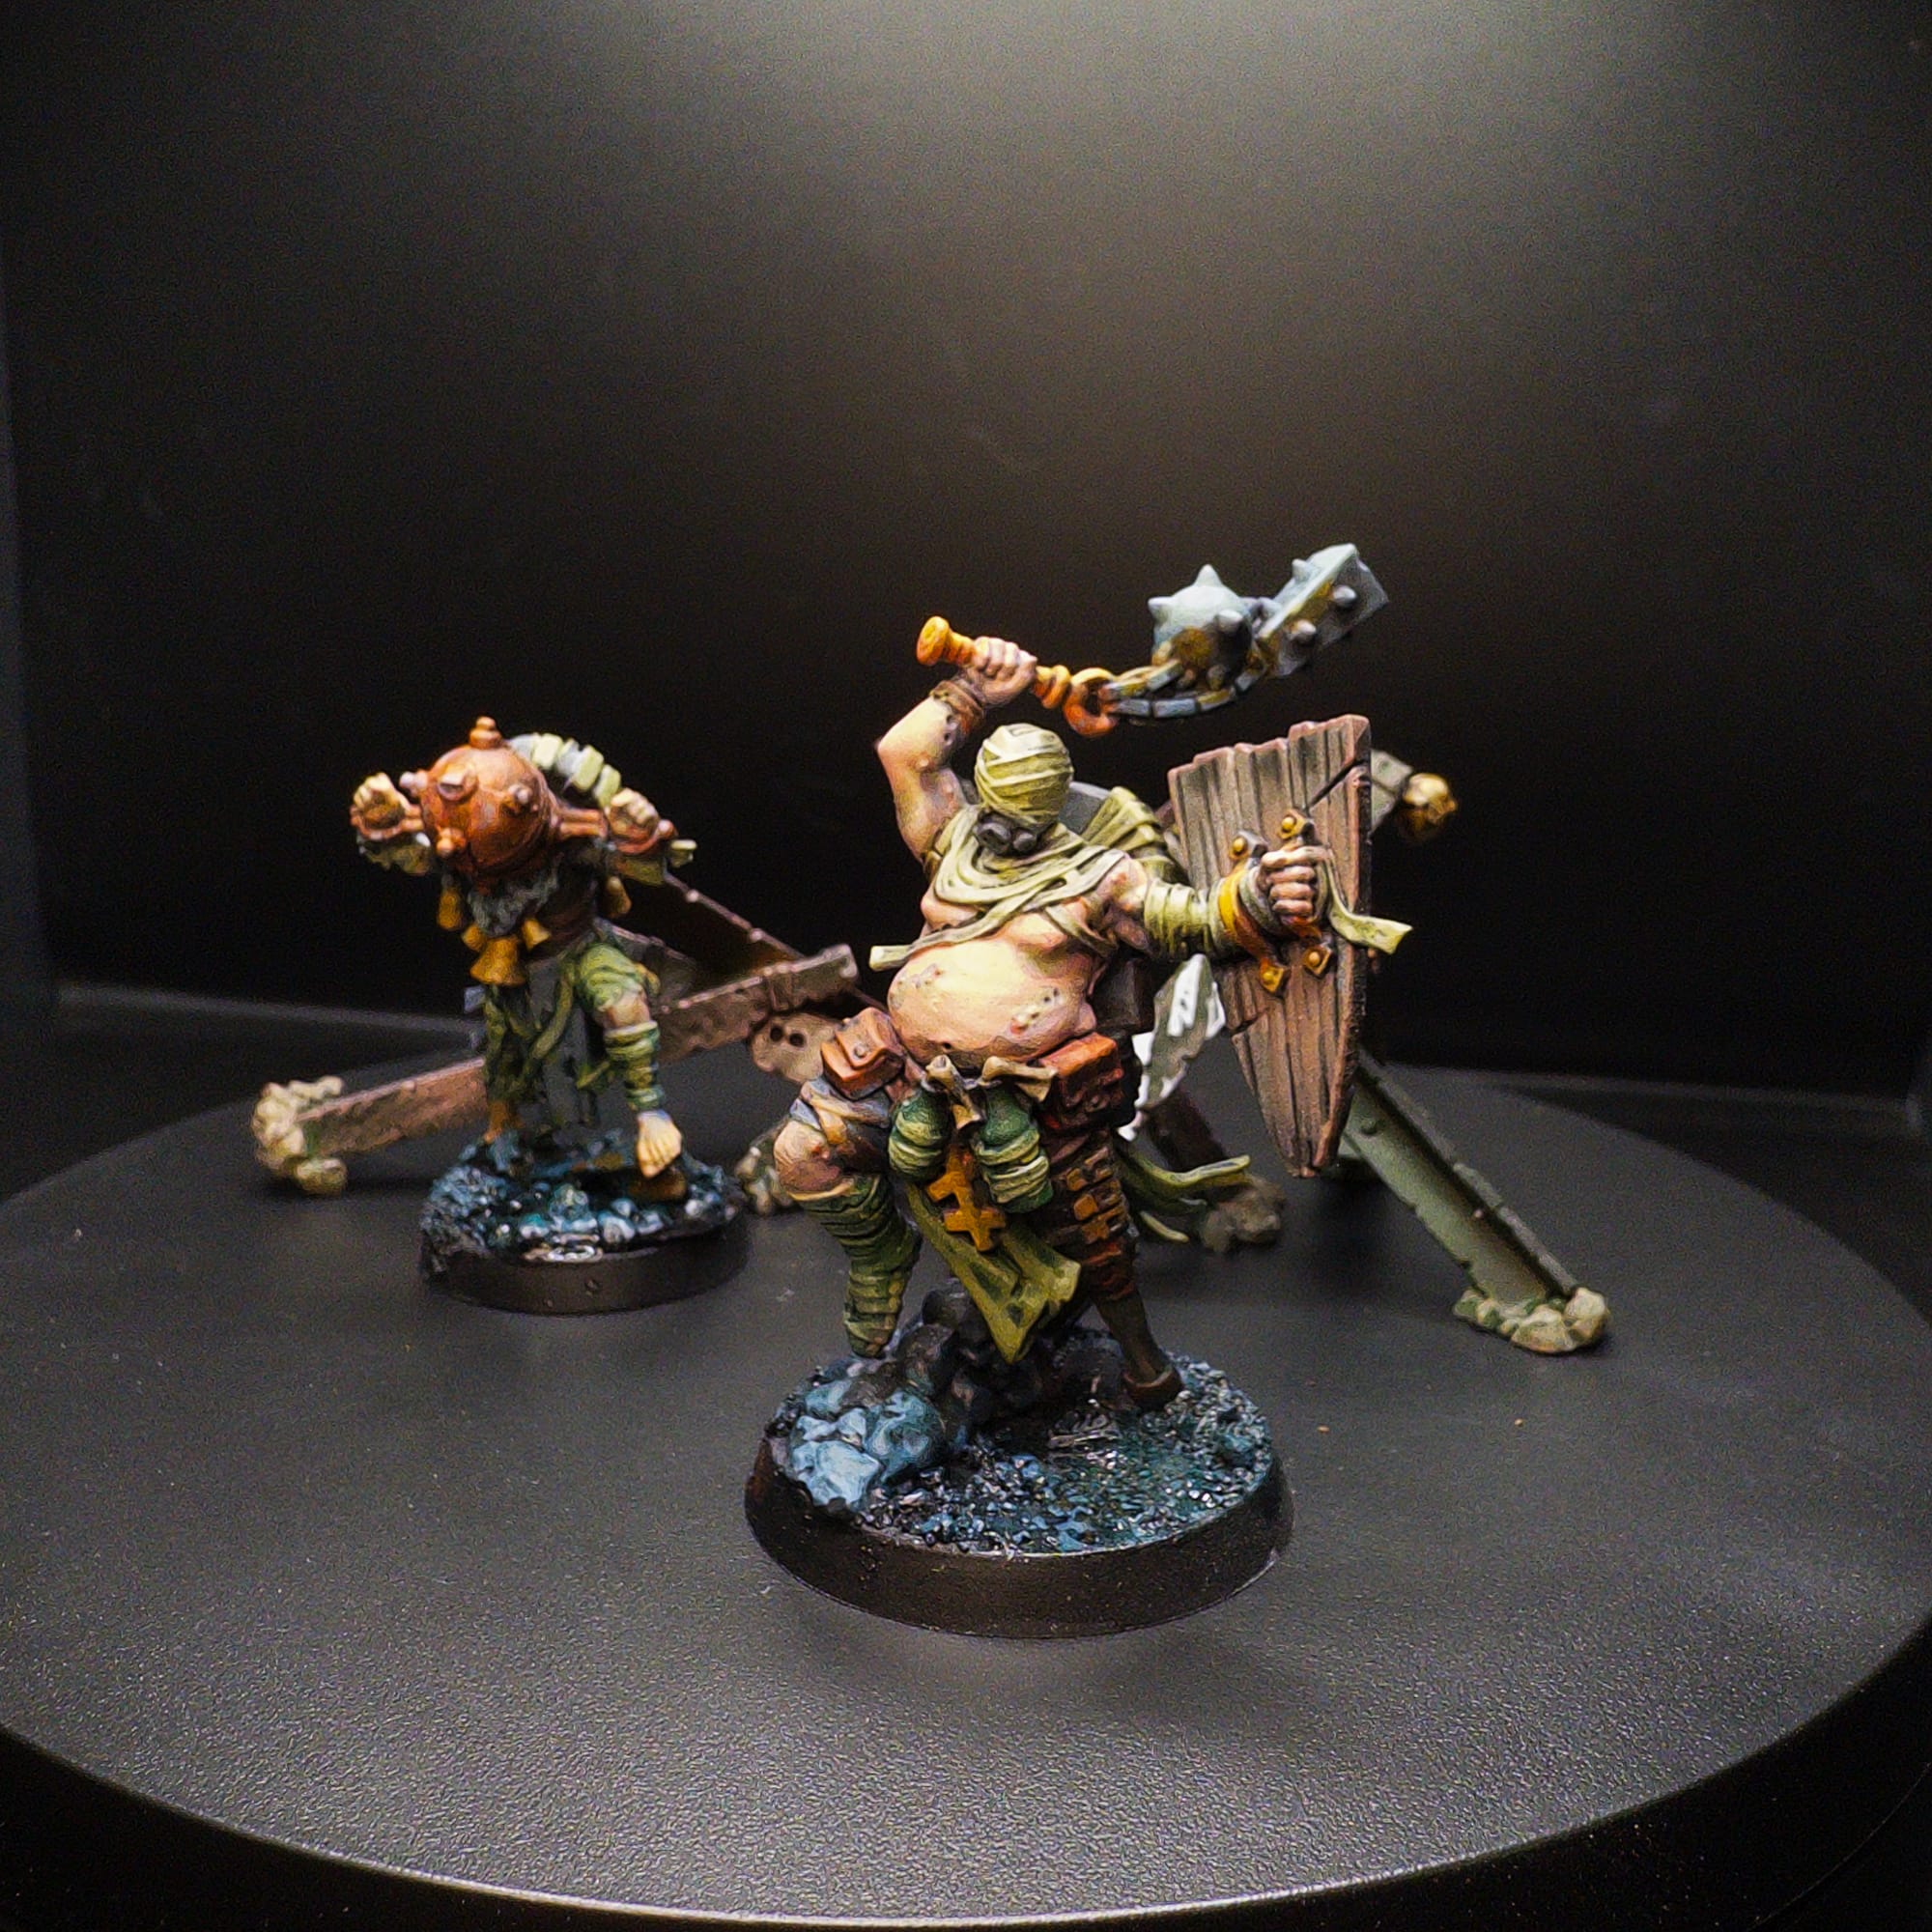
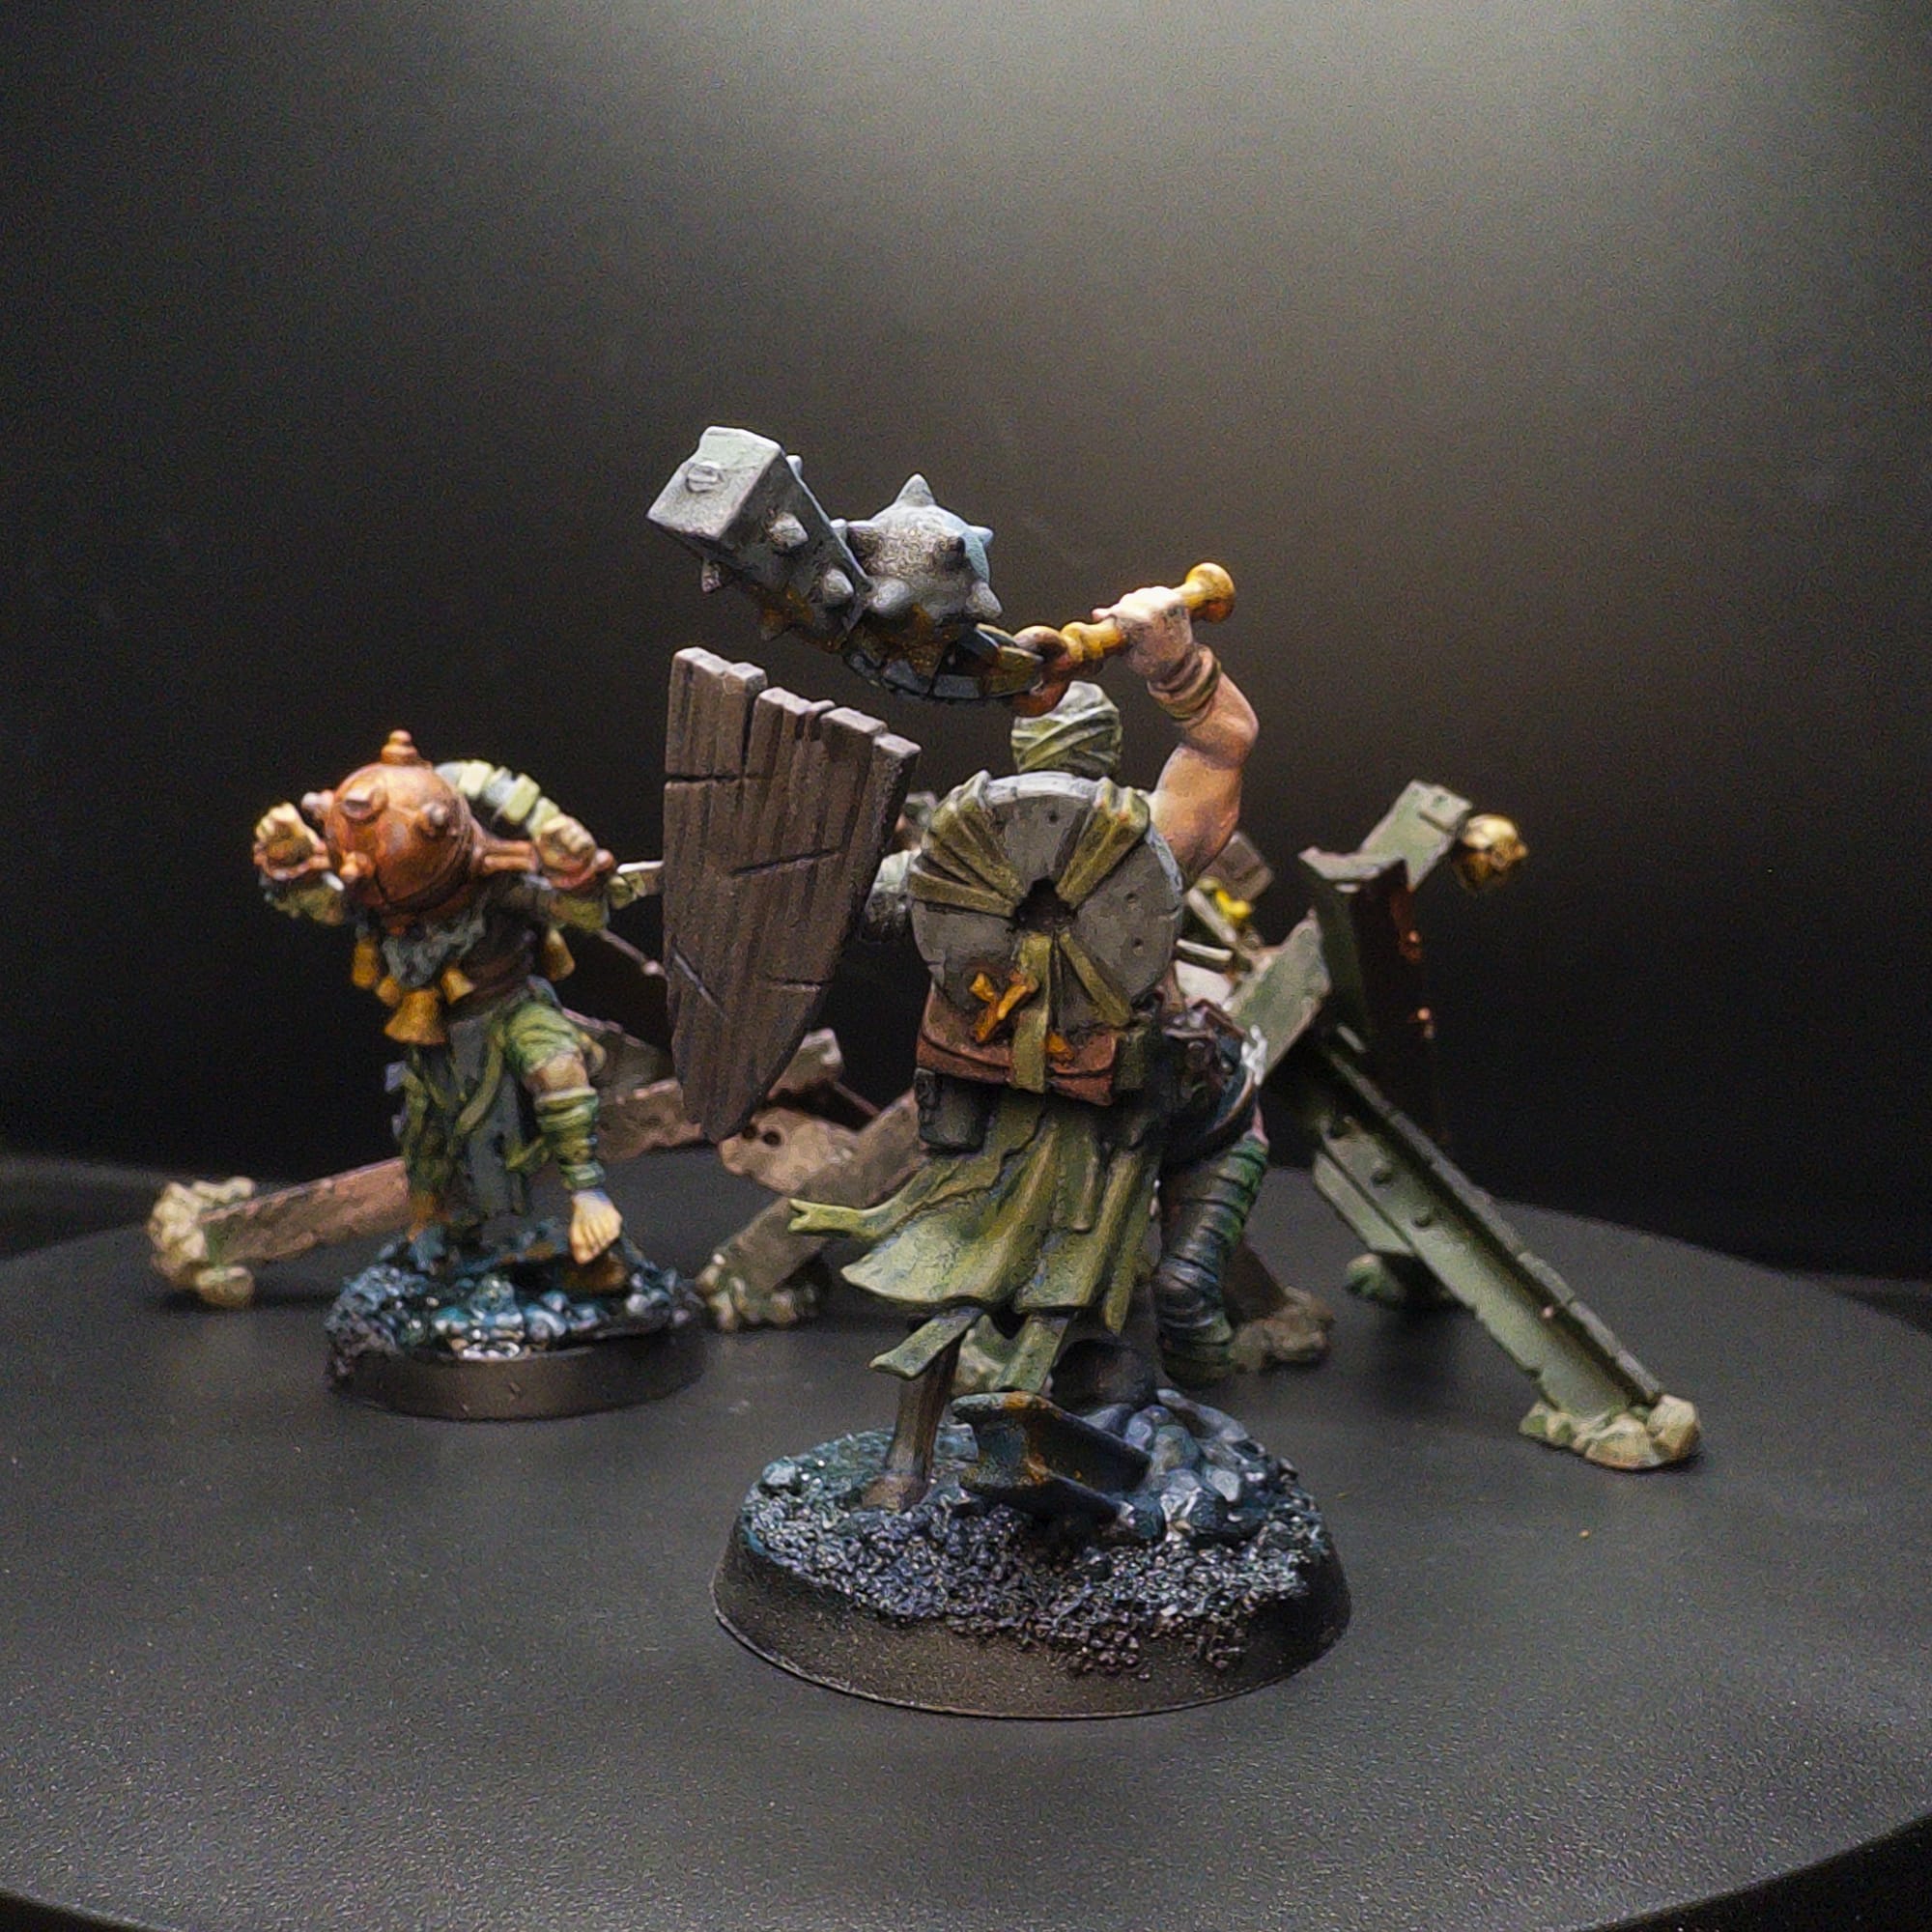
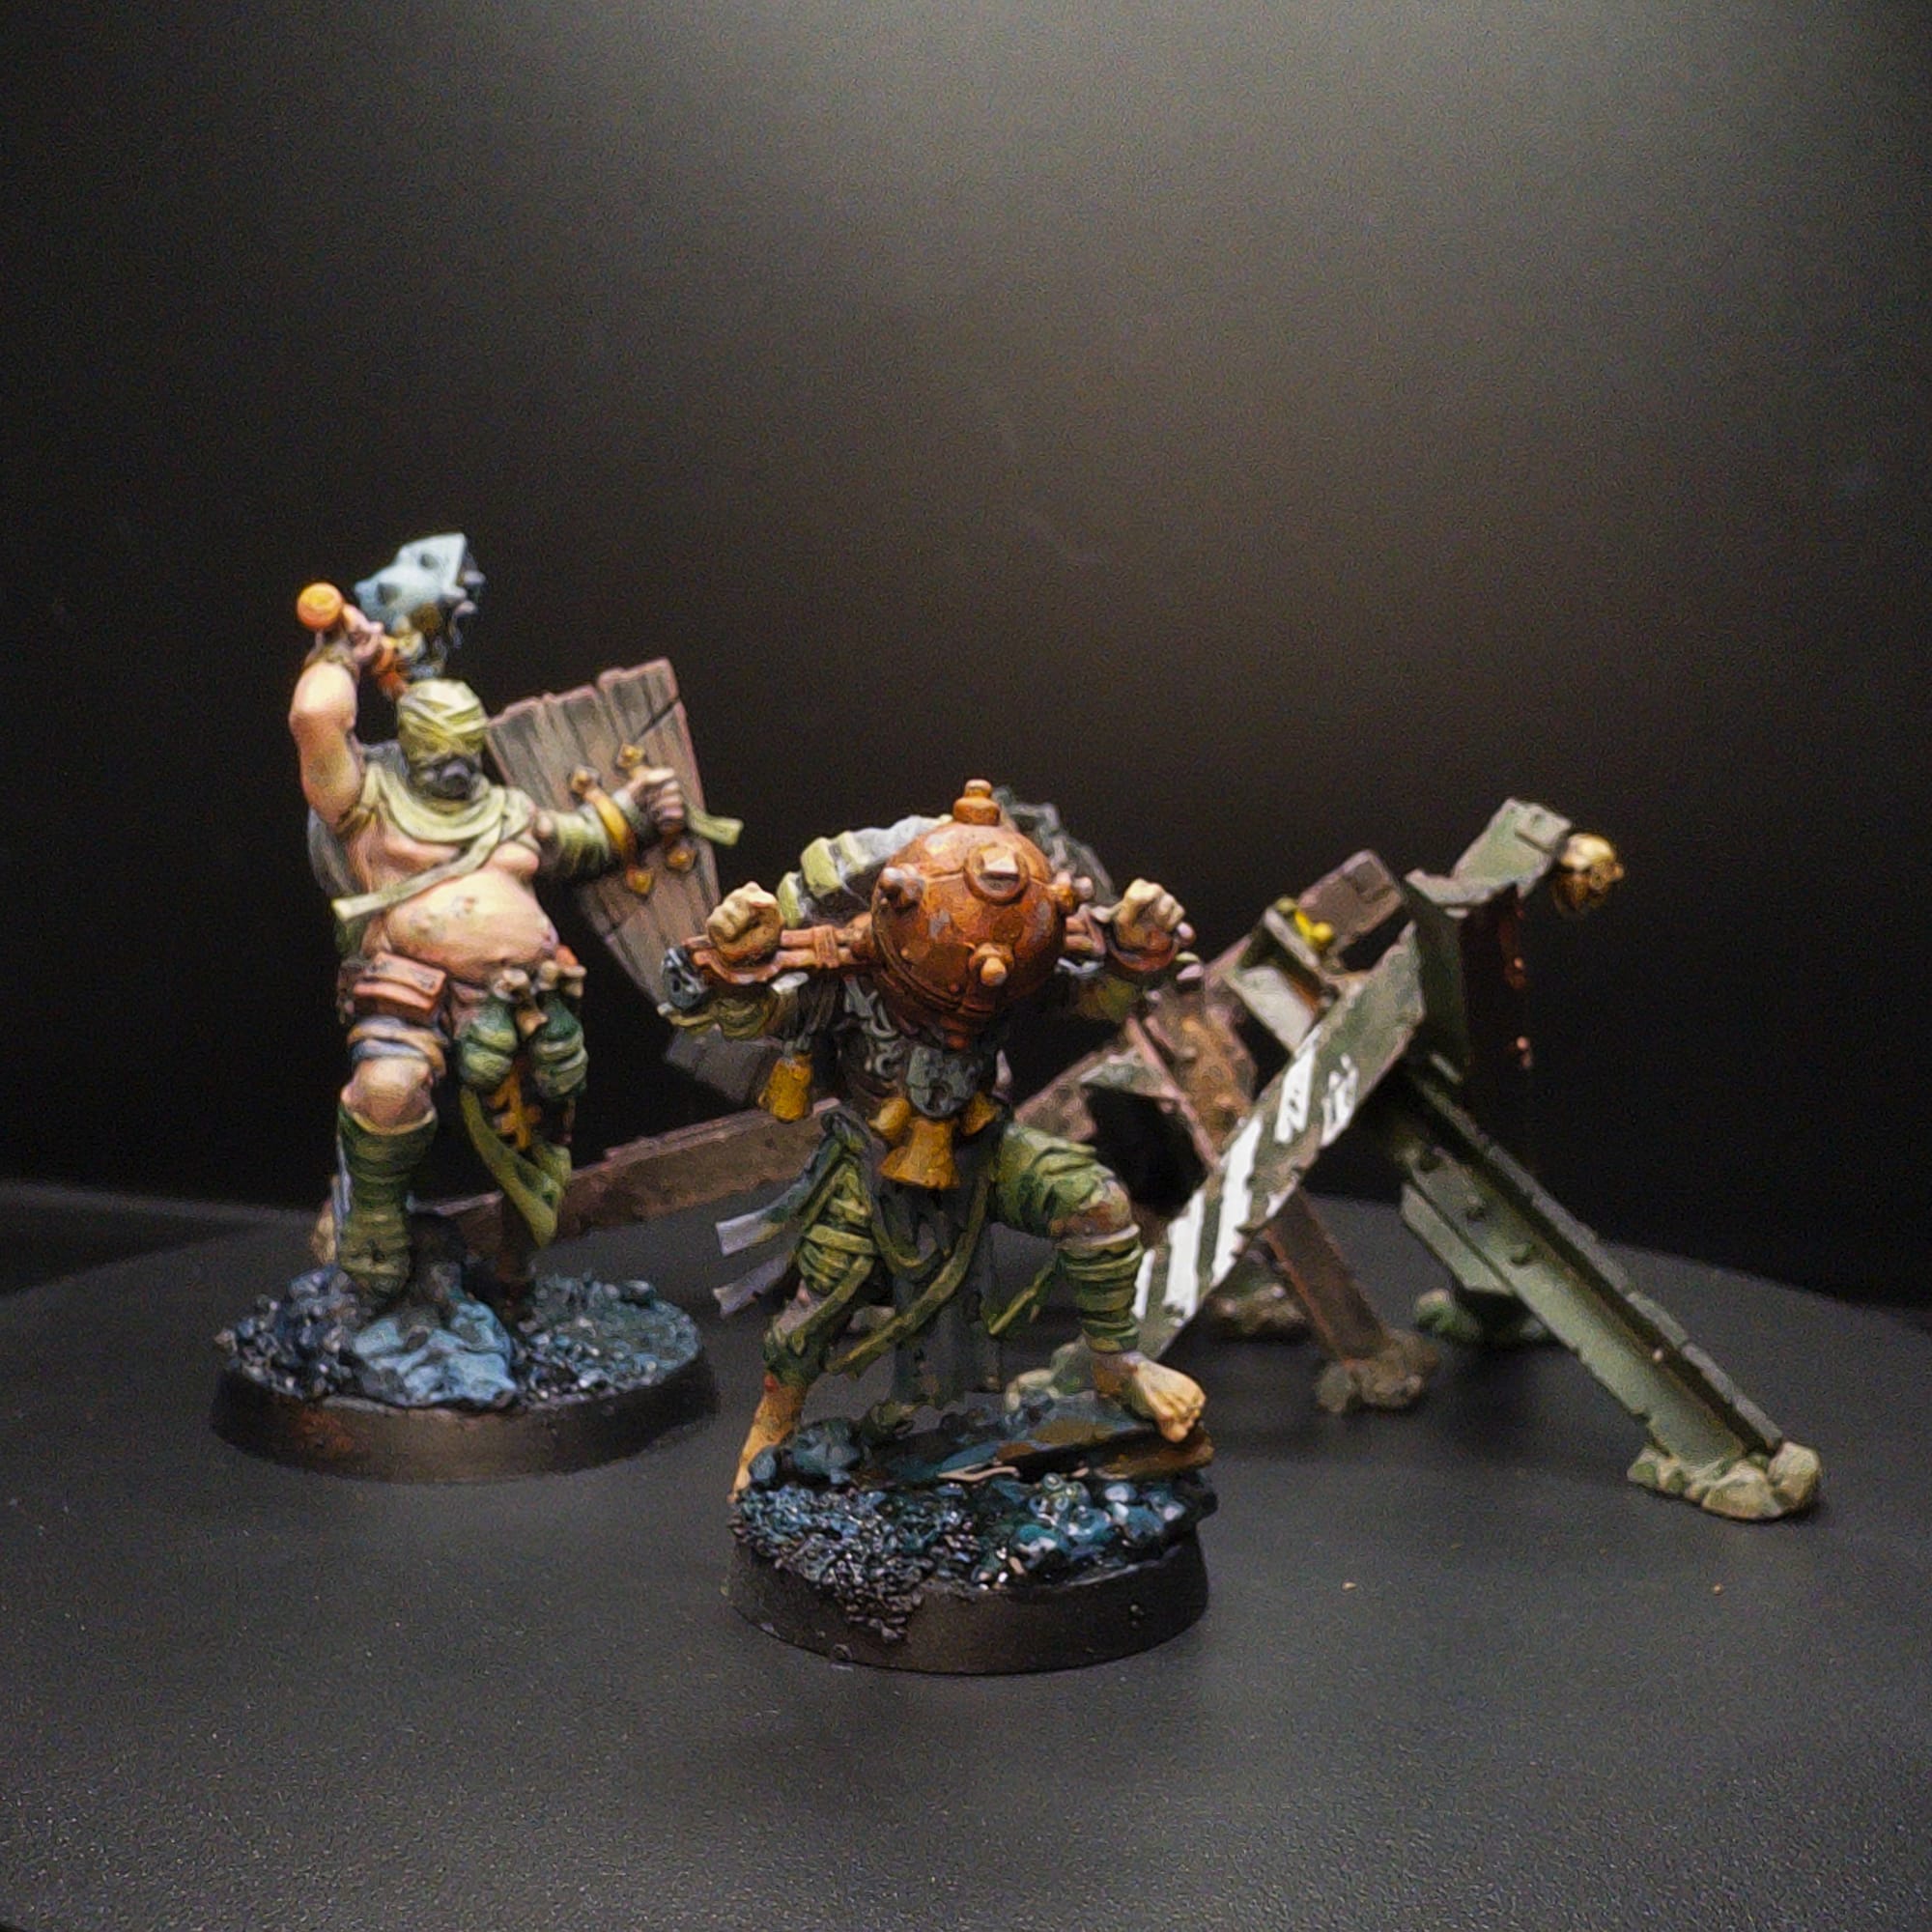
Ronn: As I mentioned before, I did a Zenithal prime for my models to maintain my shadows and help my Army Painter speed paints pop better. I tried to pick just basic primary colors and just a couple of colors across the color wheel across; Highlord Blue, Zealot Yellow and Absolution Green for the Trench Pilgrims and Stigmatic Nun, with Slaughter Red for the man in the fancy hat (the Castigator).
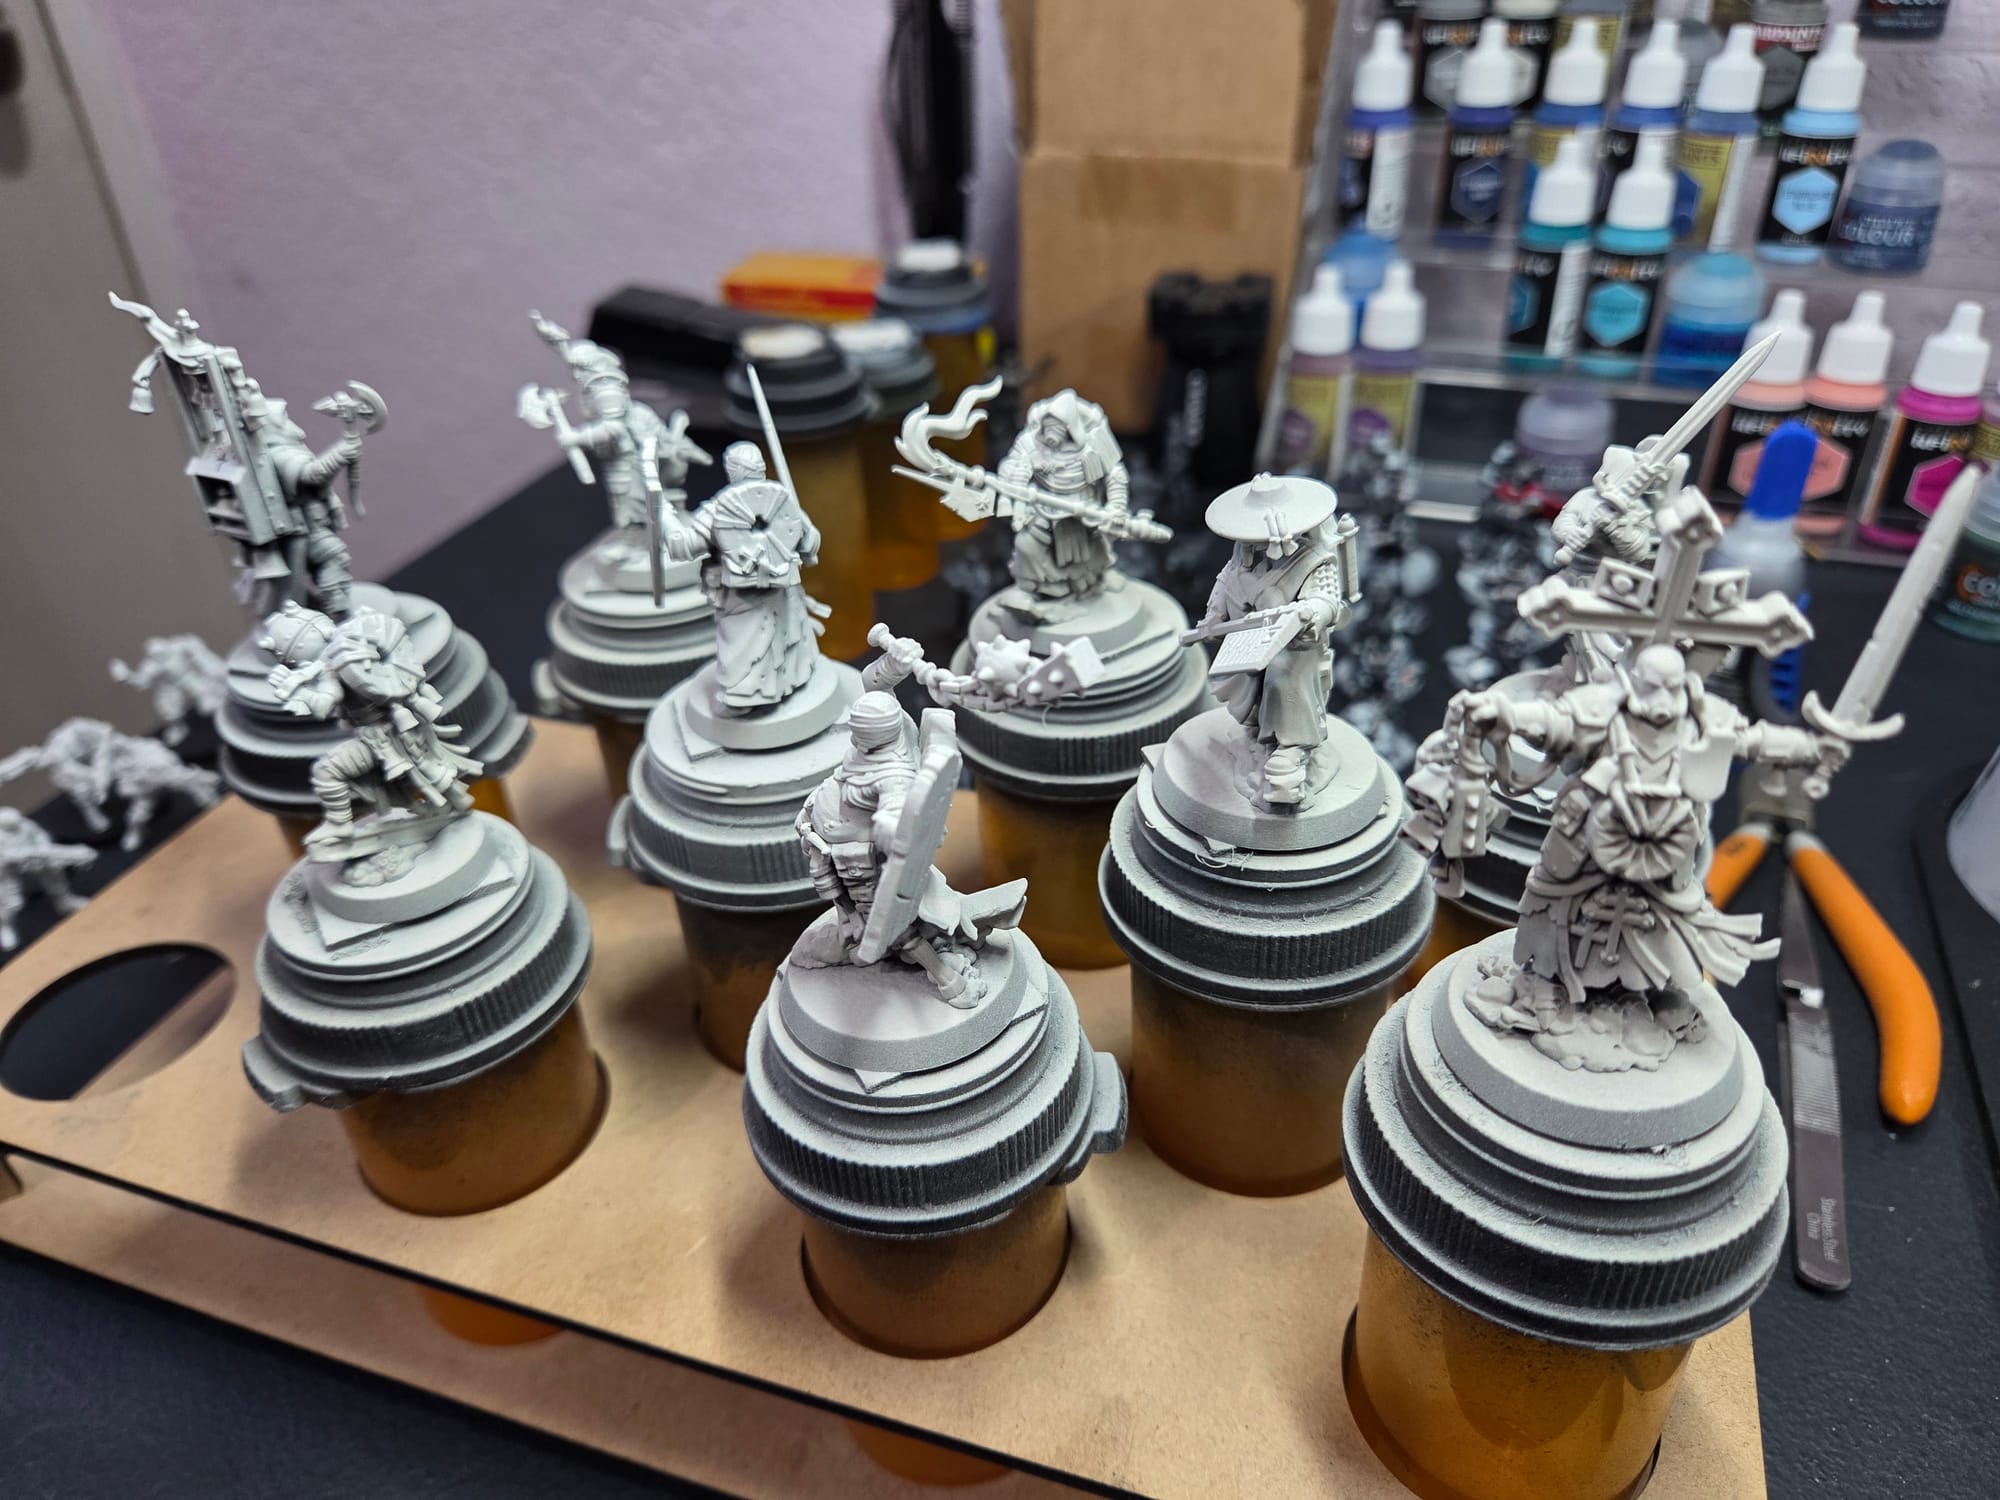
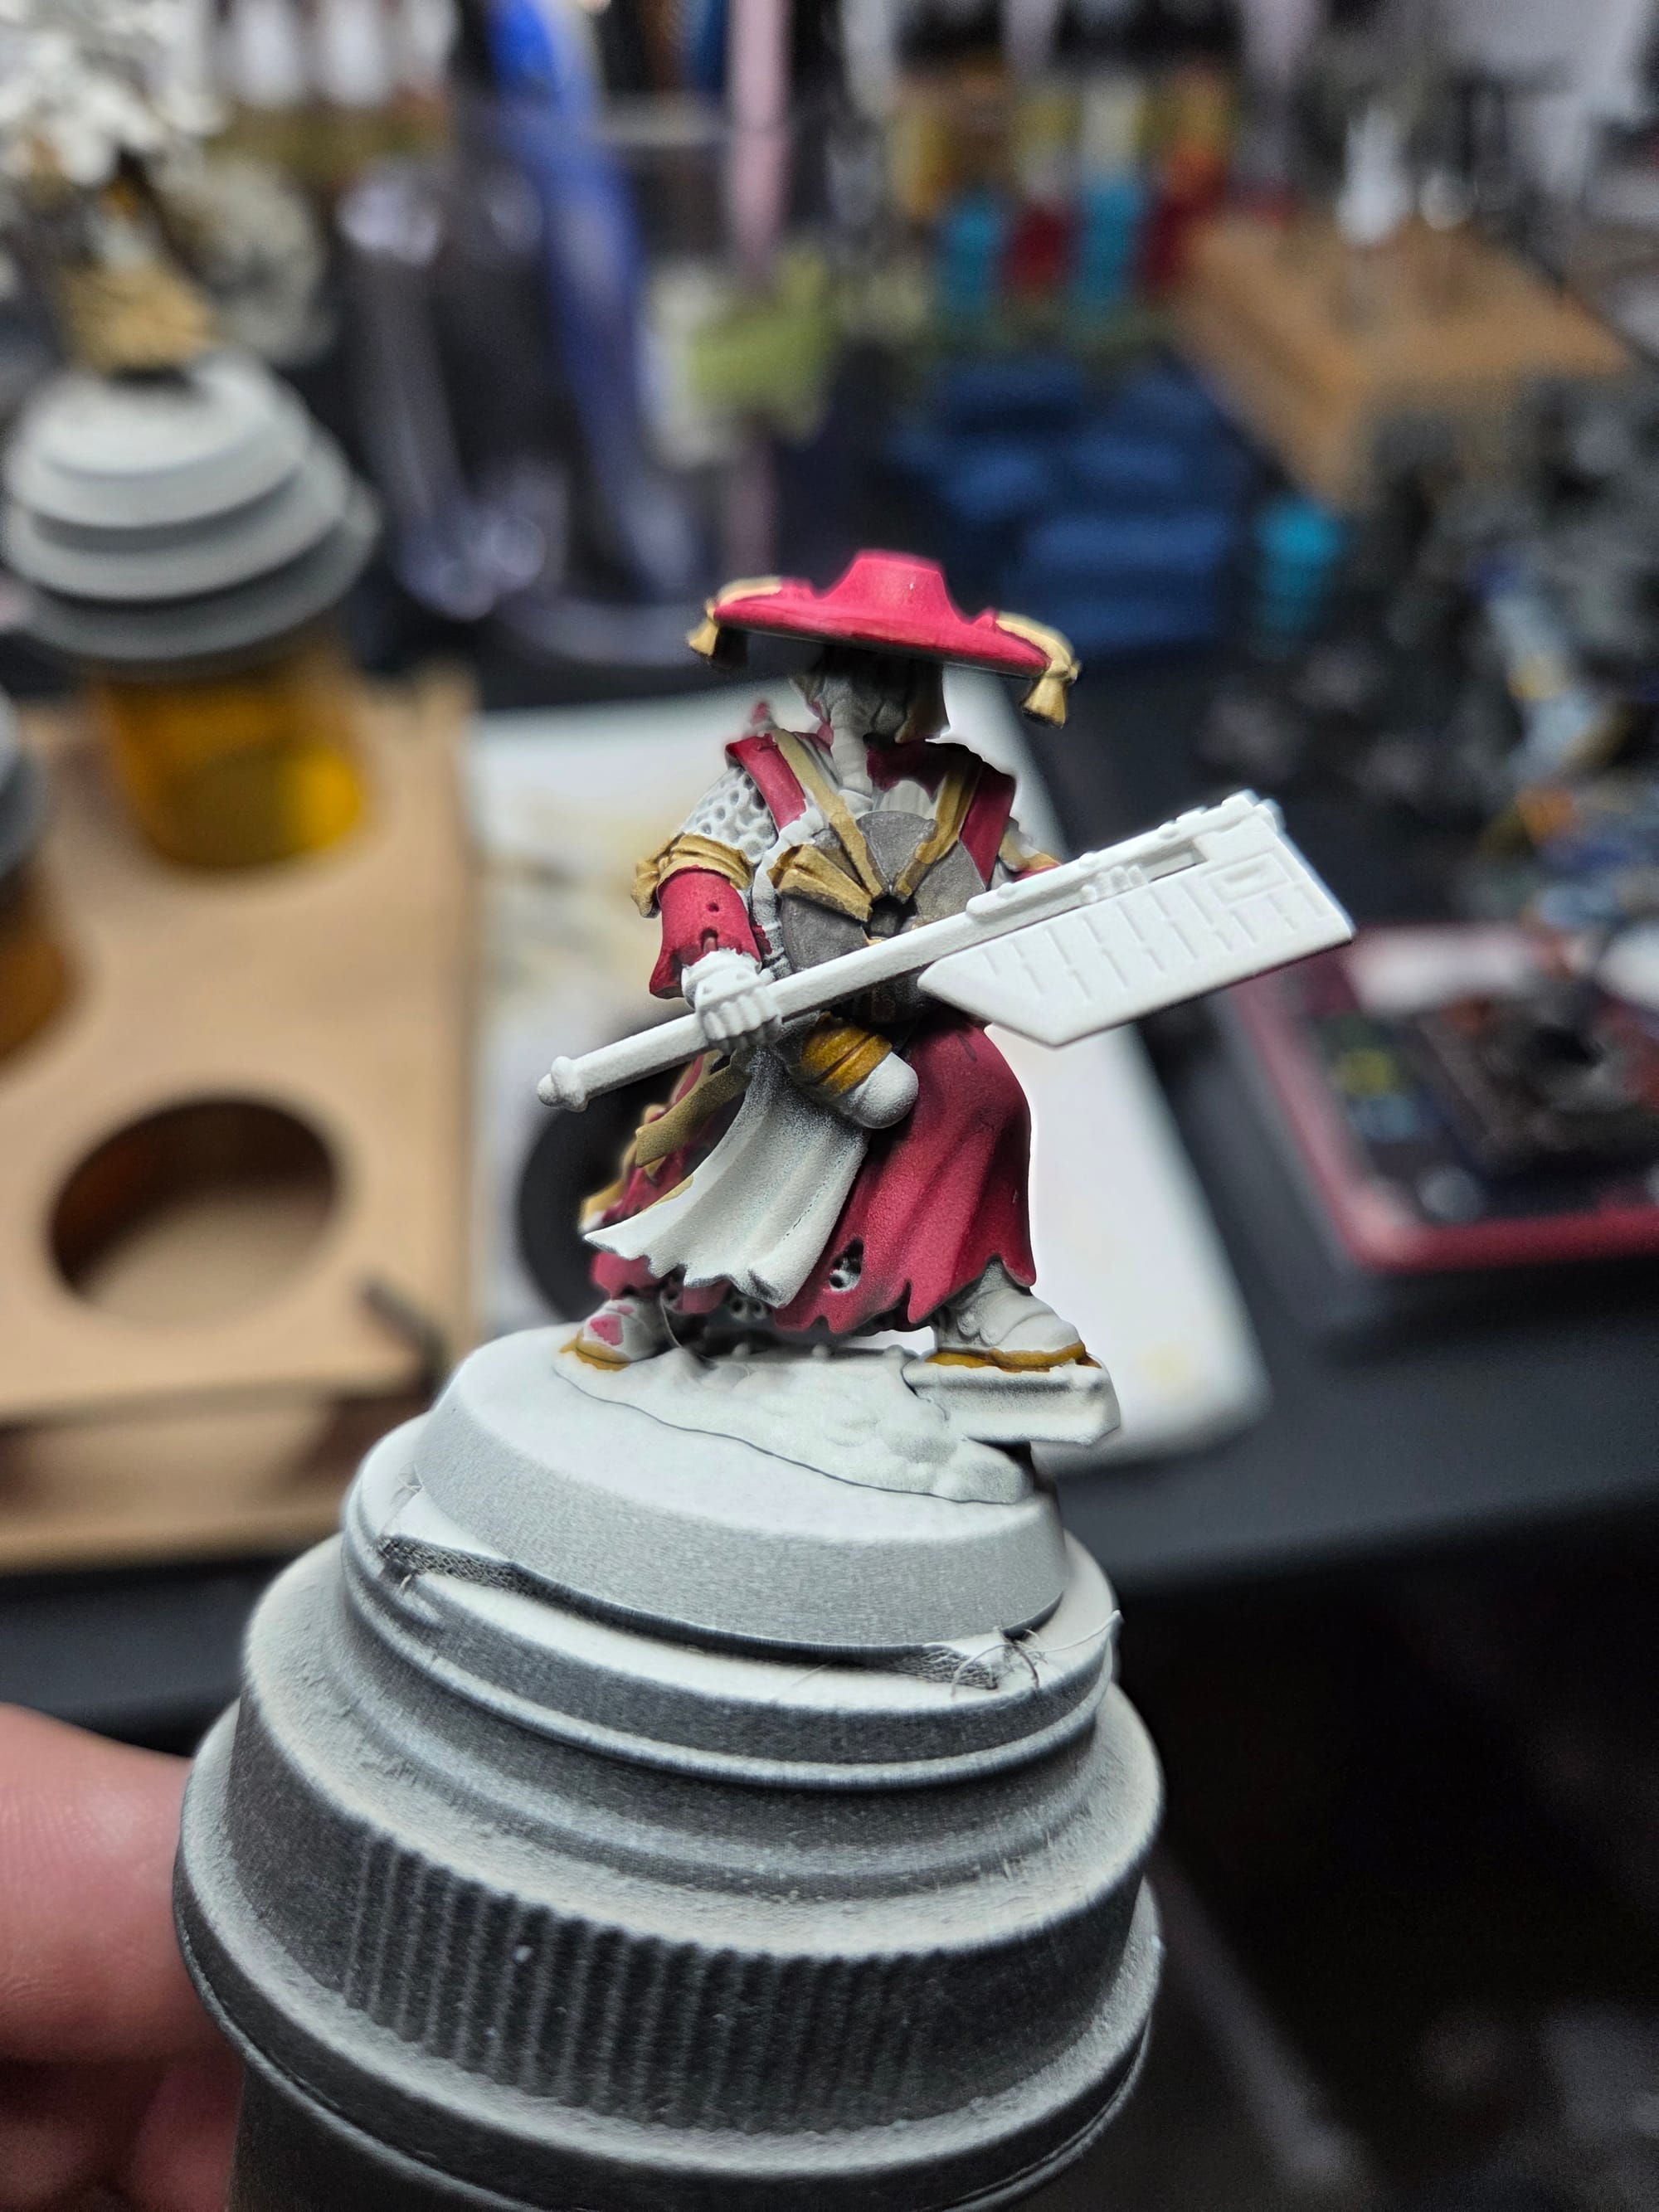
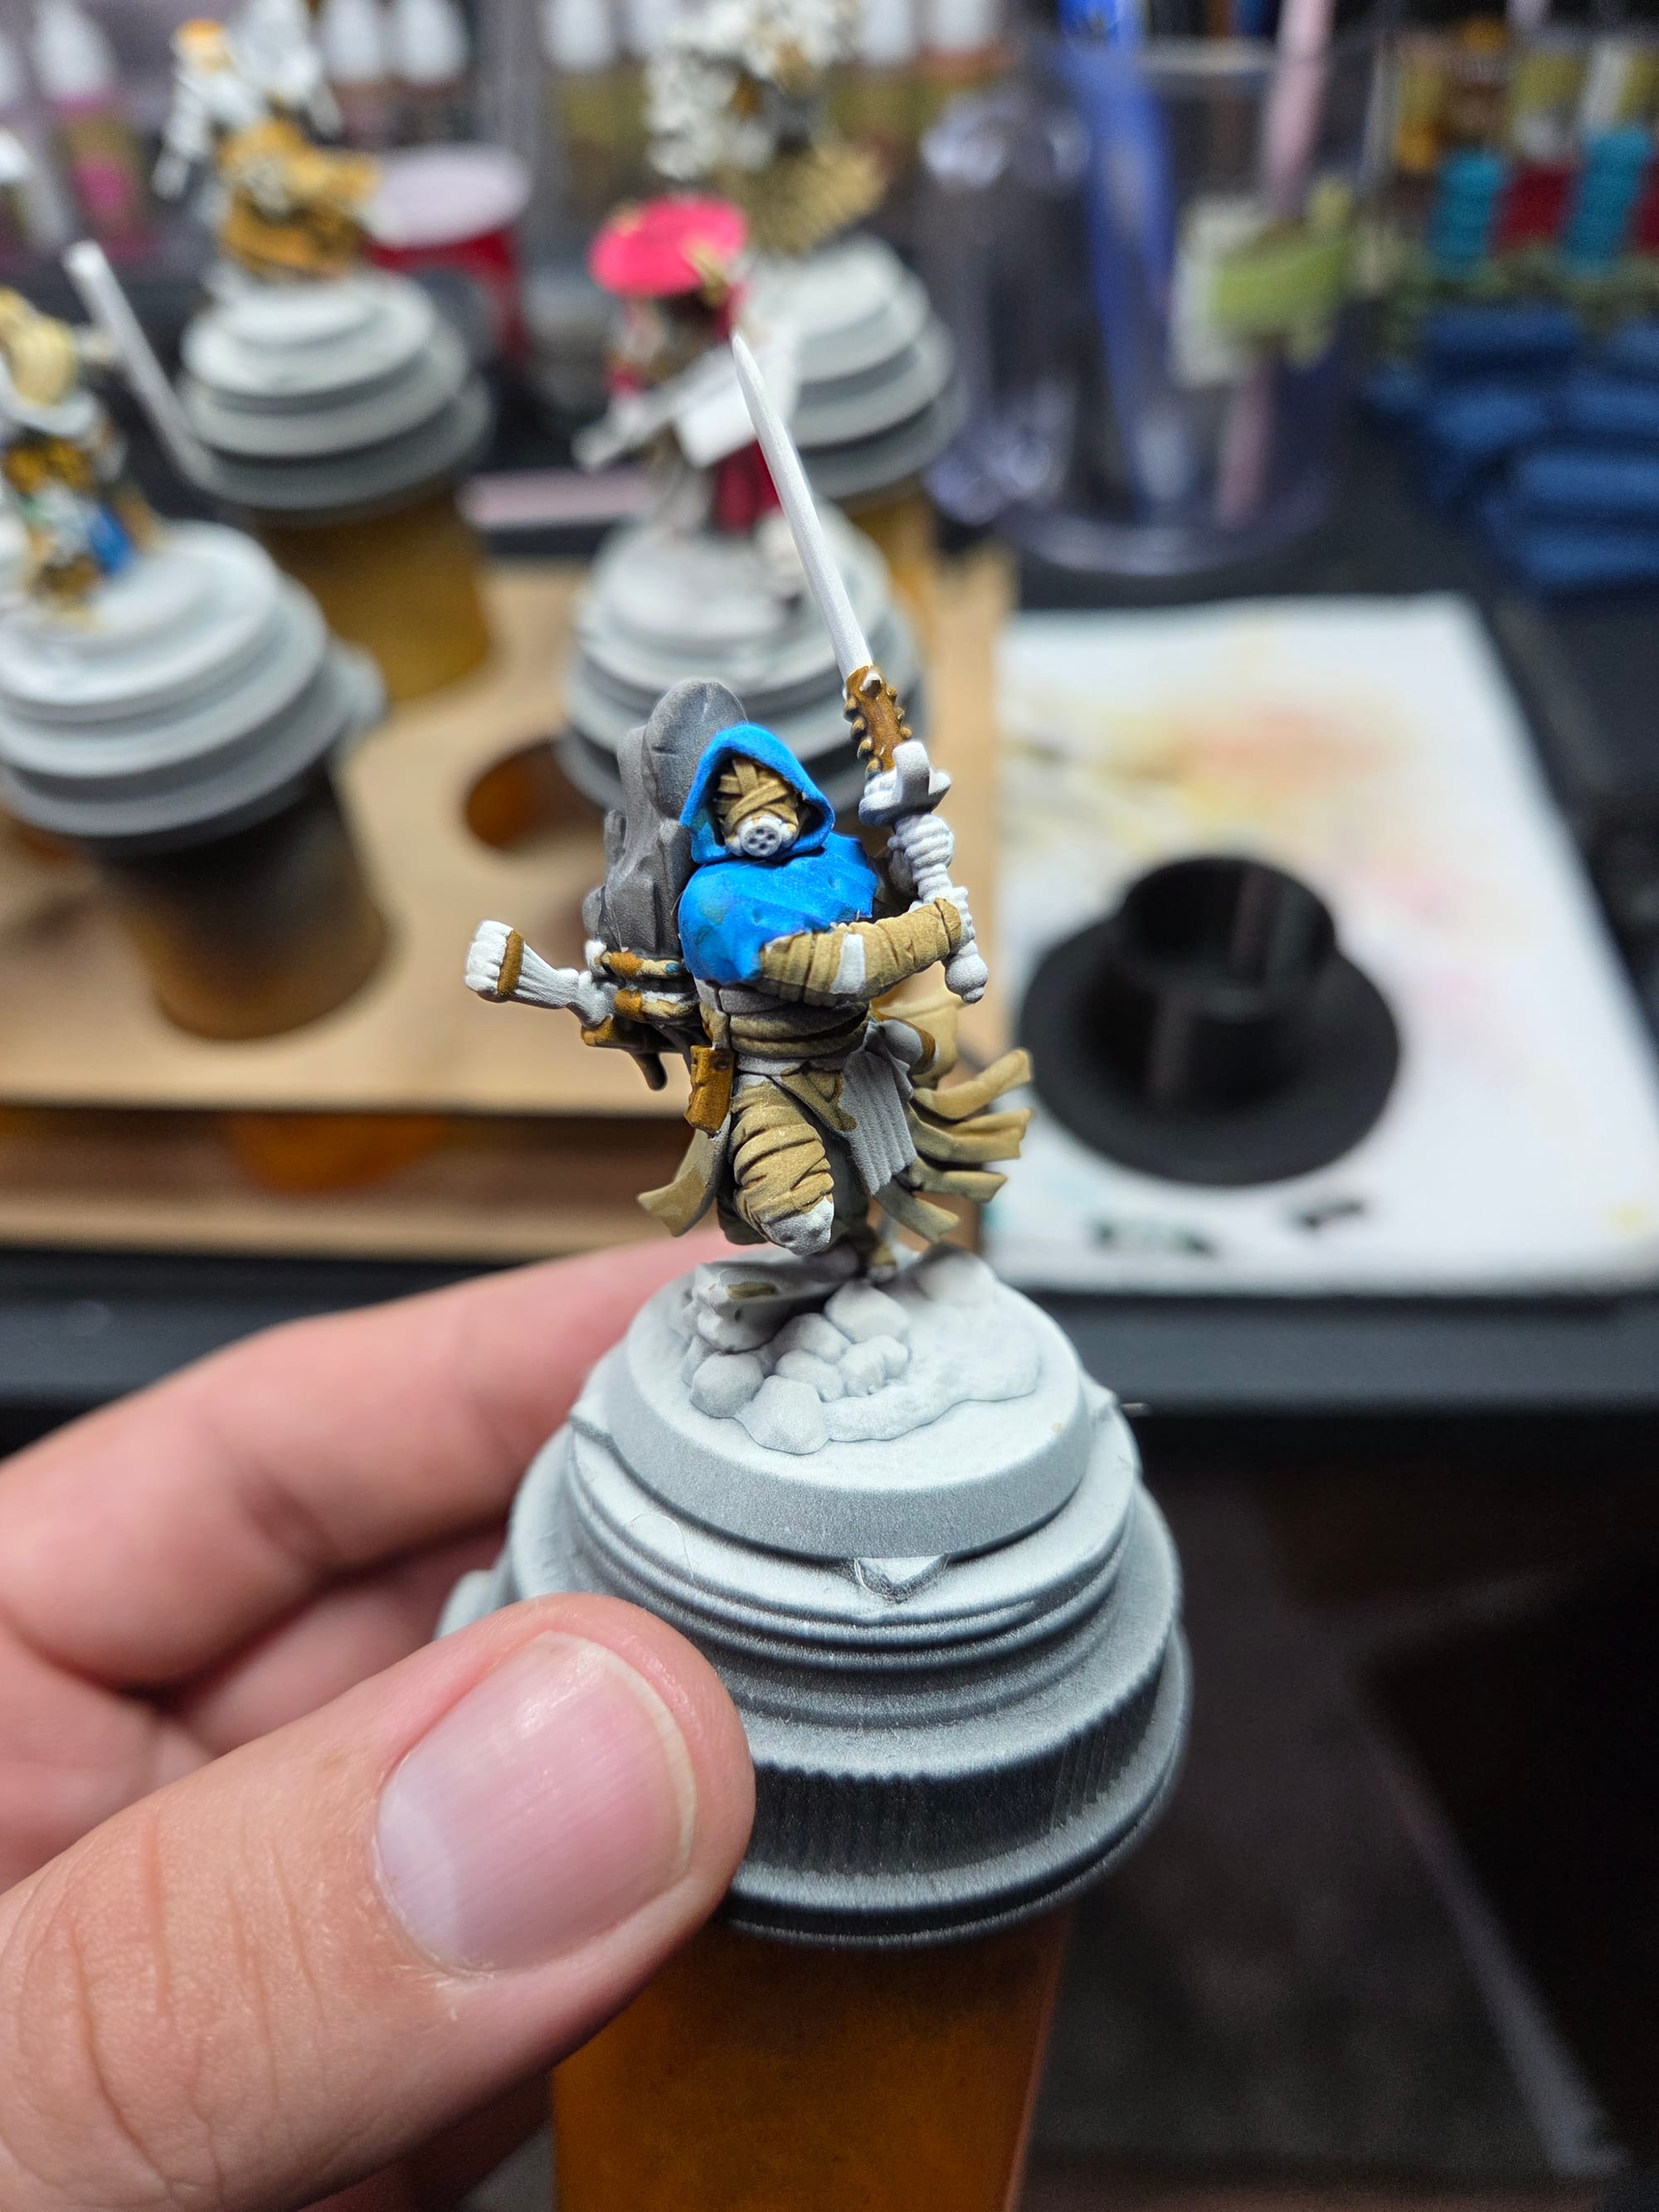
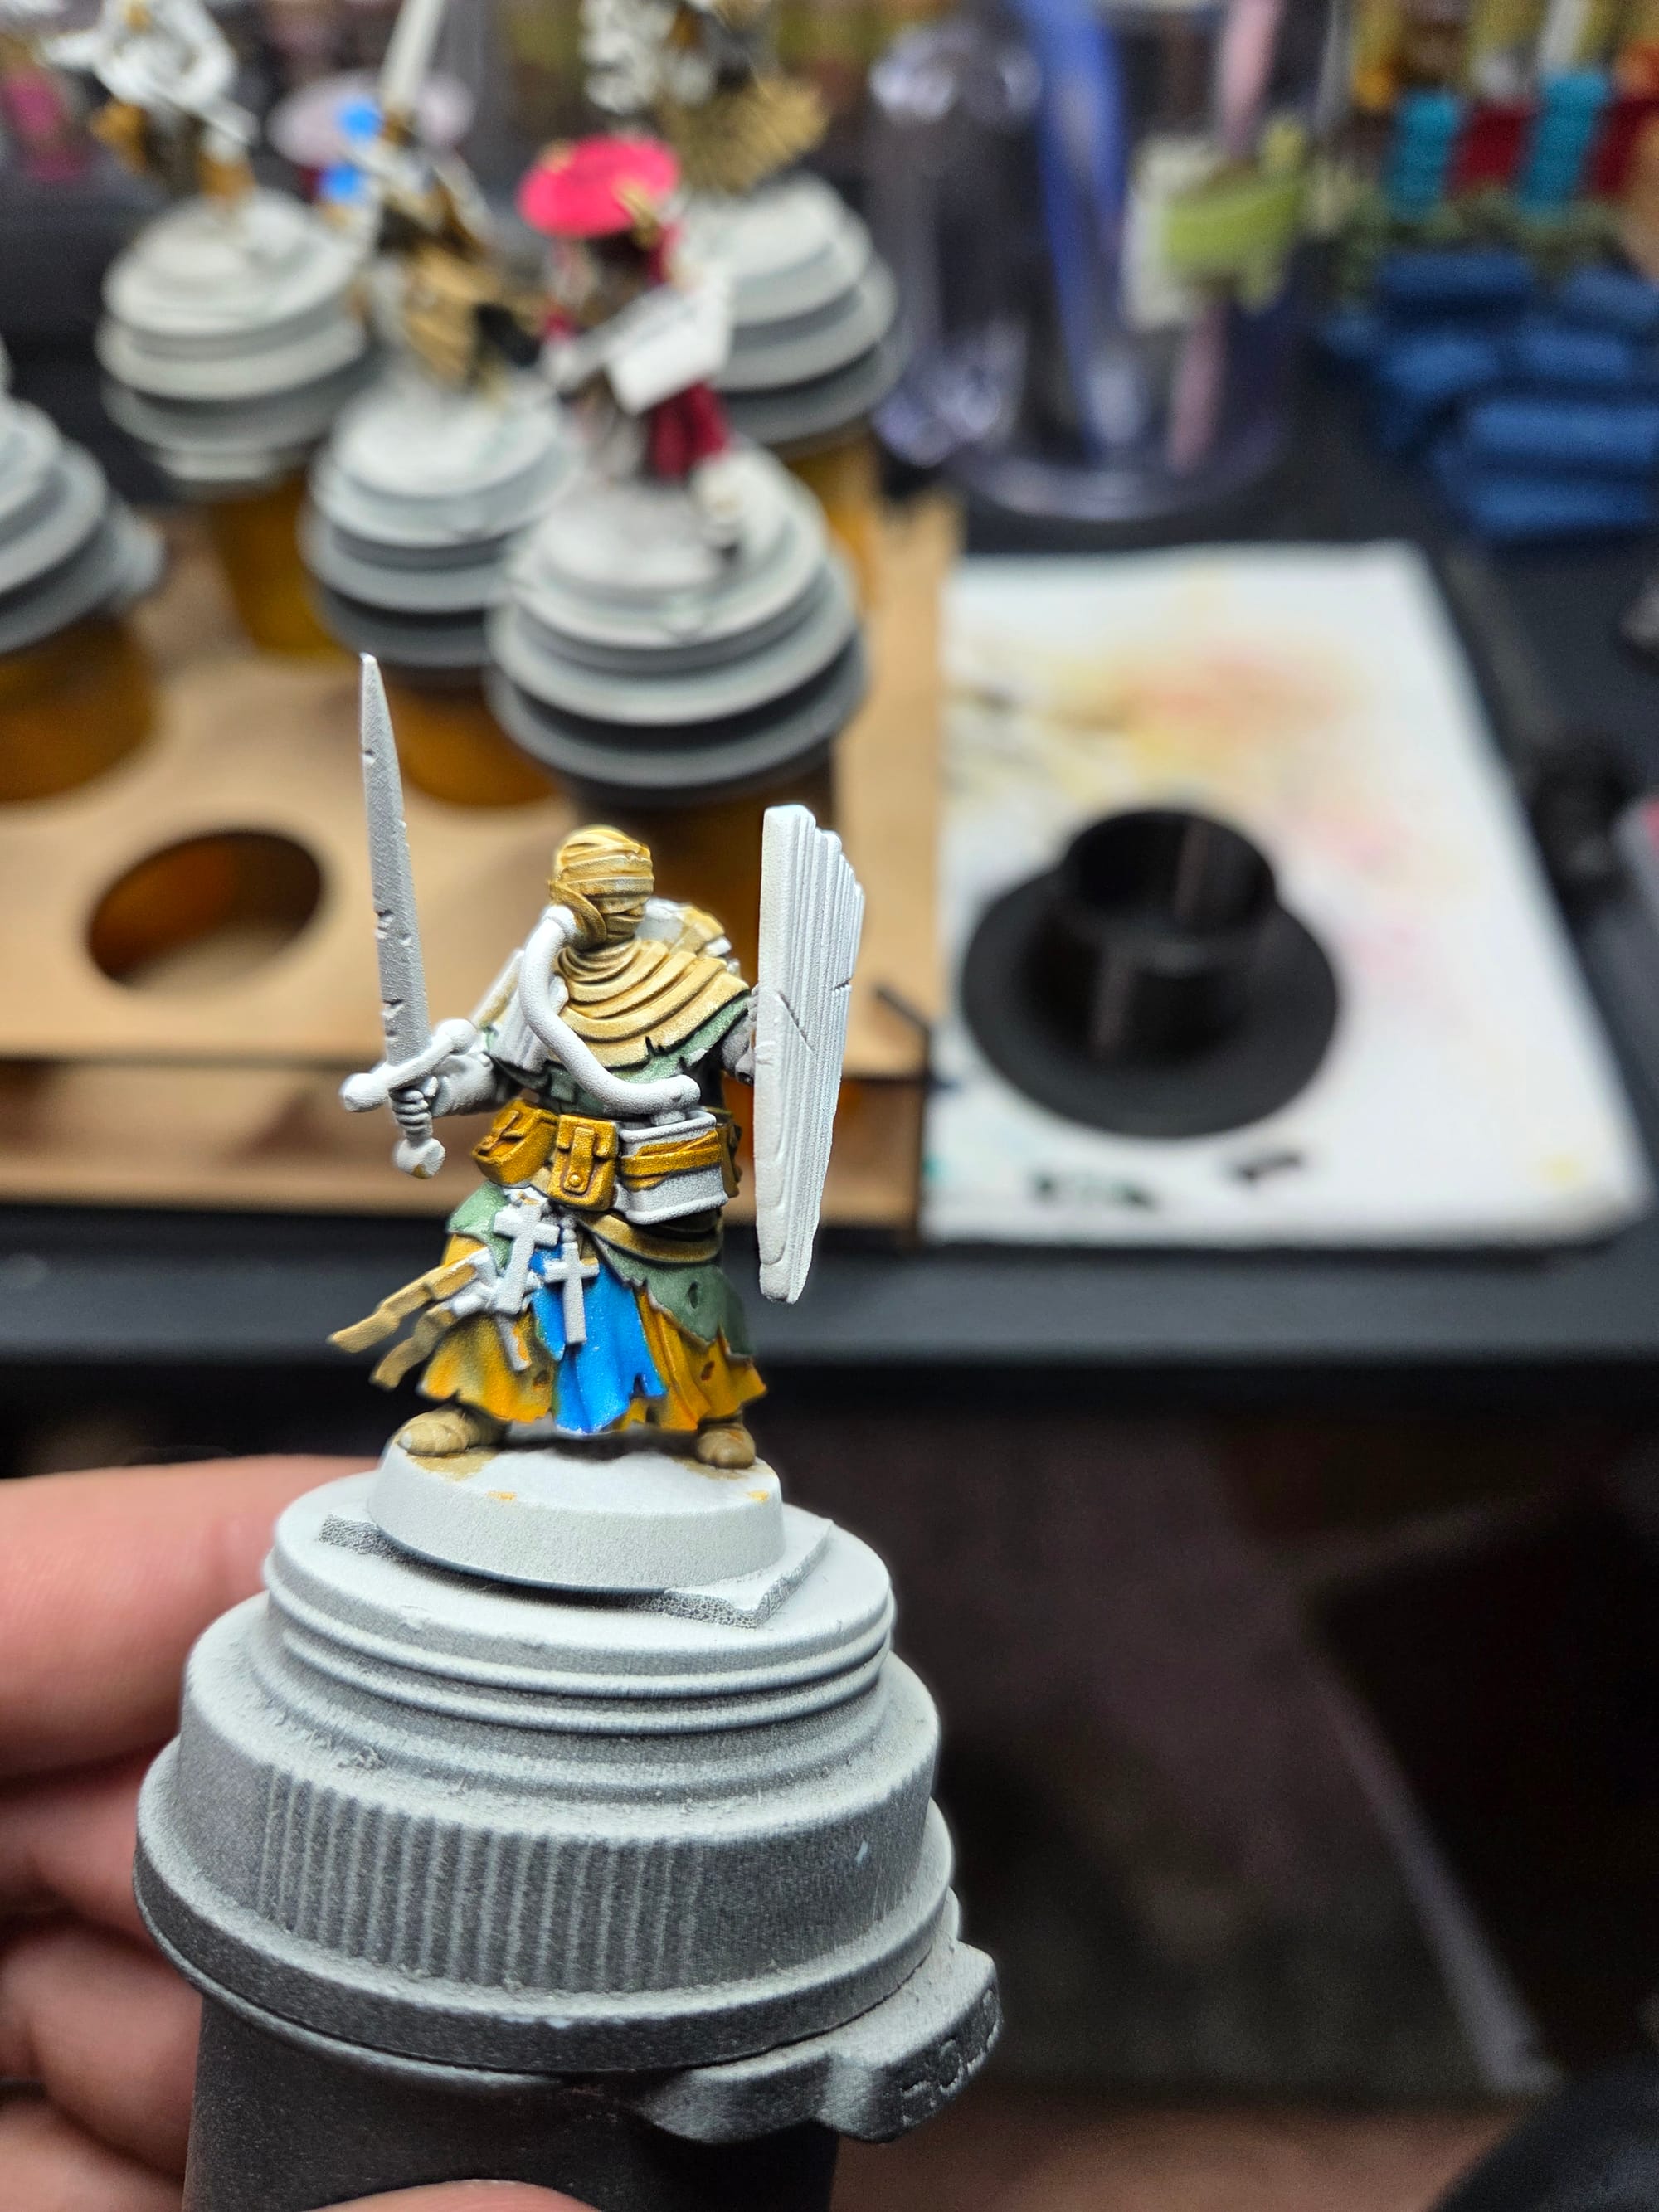
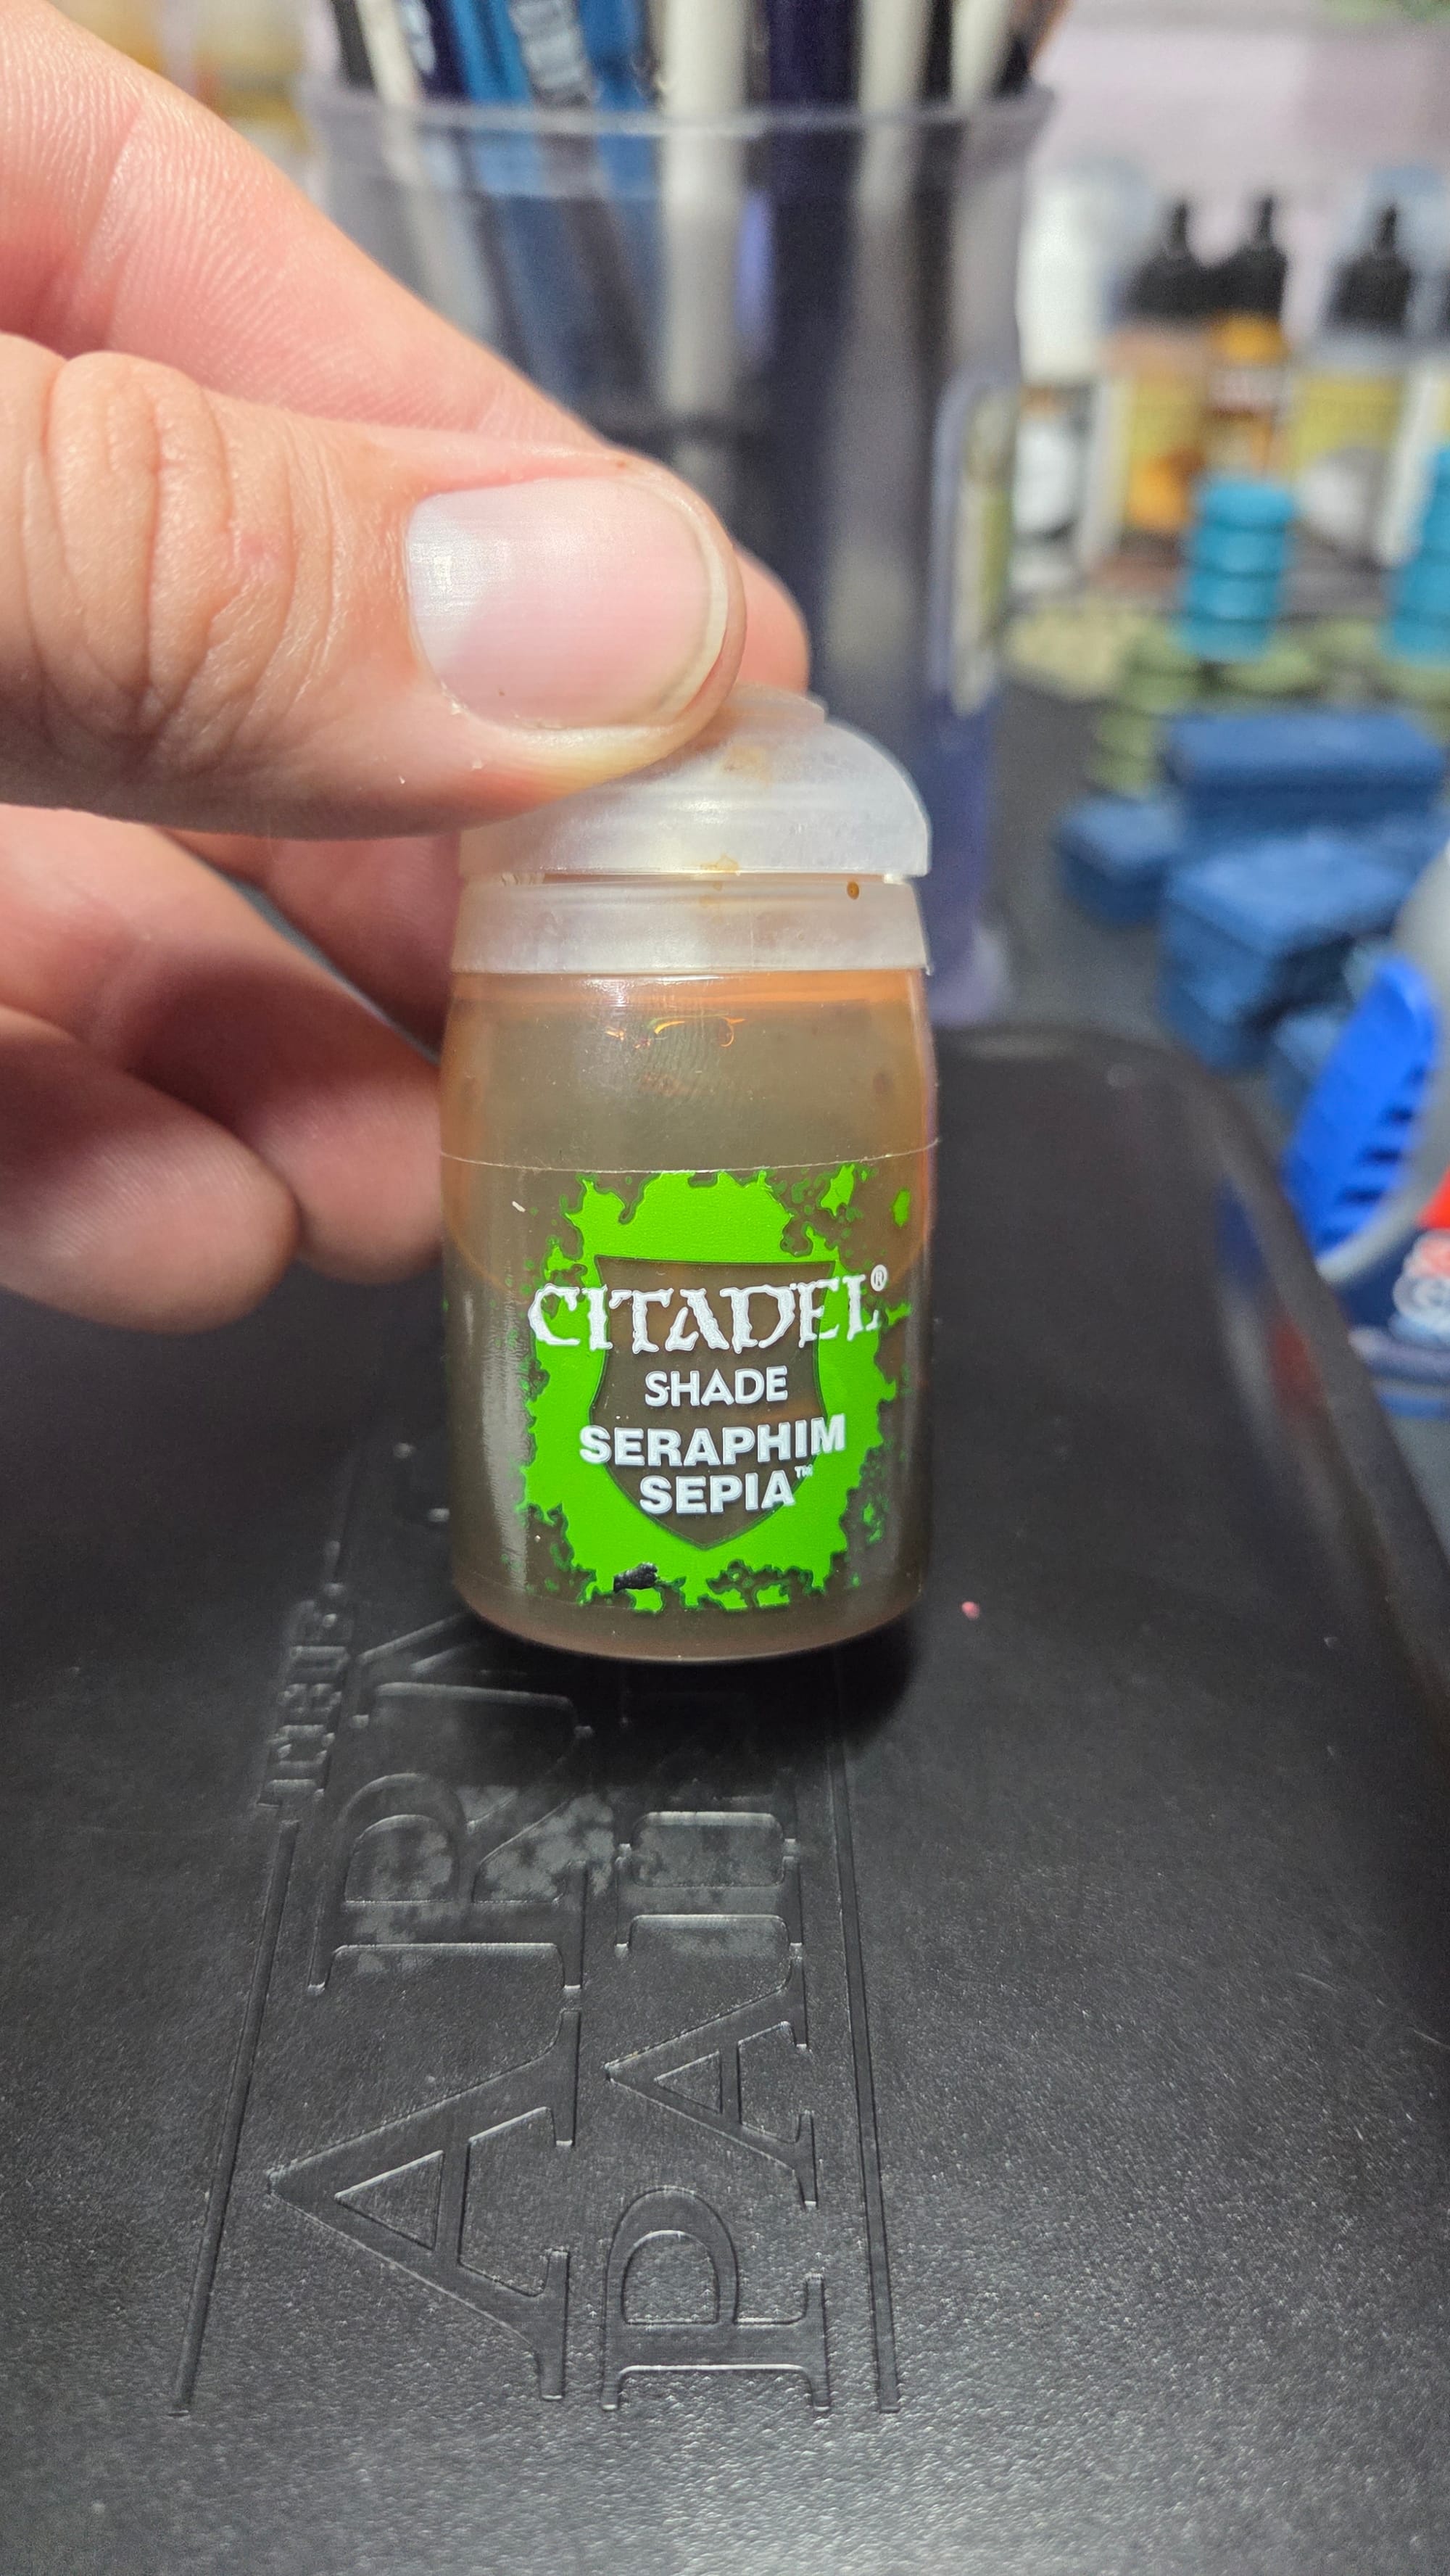
After I got the Speed Paints down, I hit every model with a layer of Seraphim Sepia wash to give them a bit of a more dirty look. To try and brighten them back up a little bit, I followed the wash up with a drybrushing of Tyrant Skull from the top down. I was very happy with how they looked at this point, so I tried to focus on a couple of the more stand out points on the flamethrower and the incense burner on the top of one of the Pilgrims and the copious amounts of Molotov Cocktails.
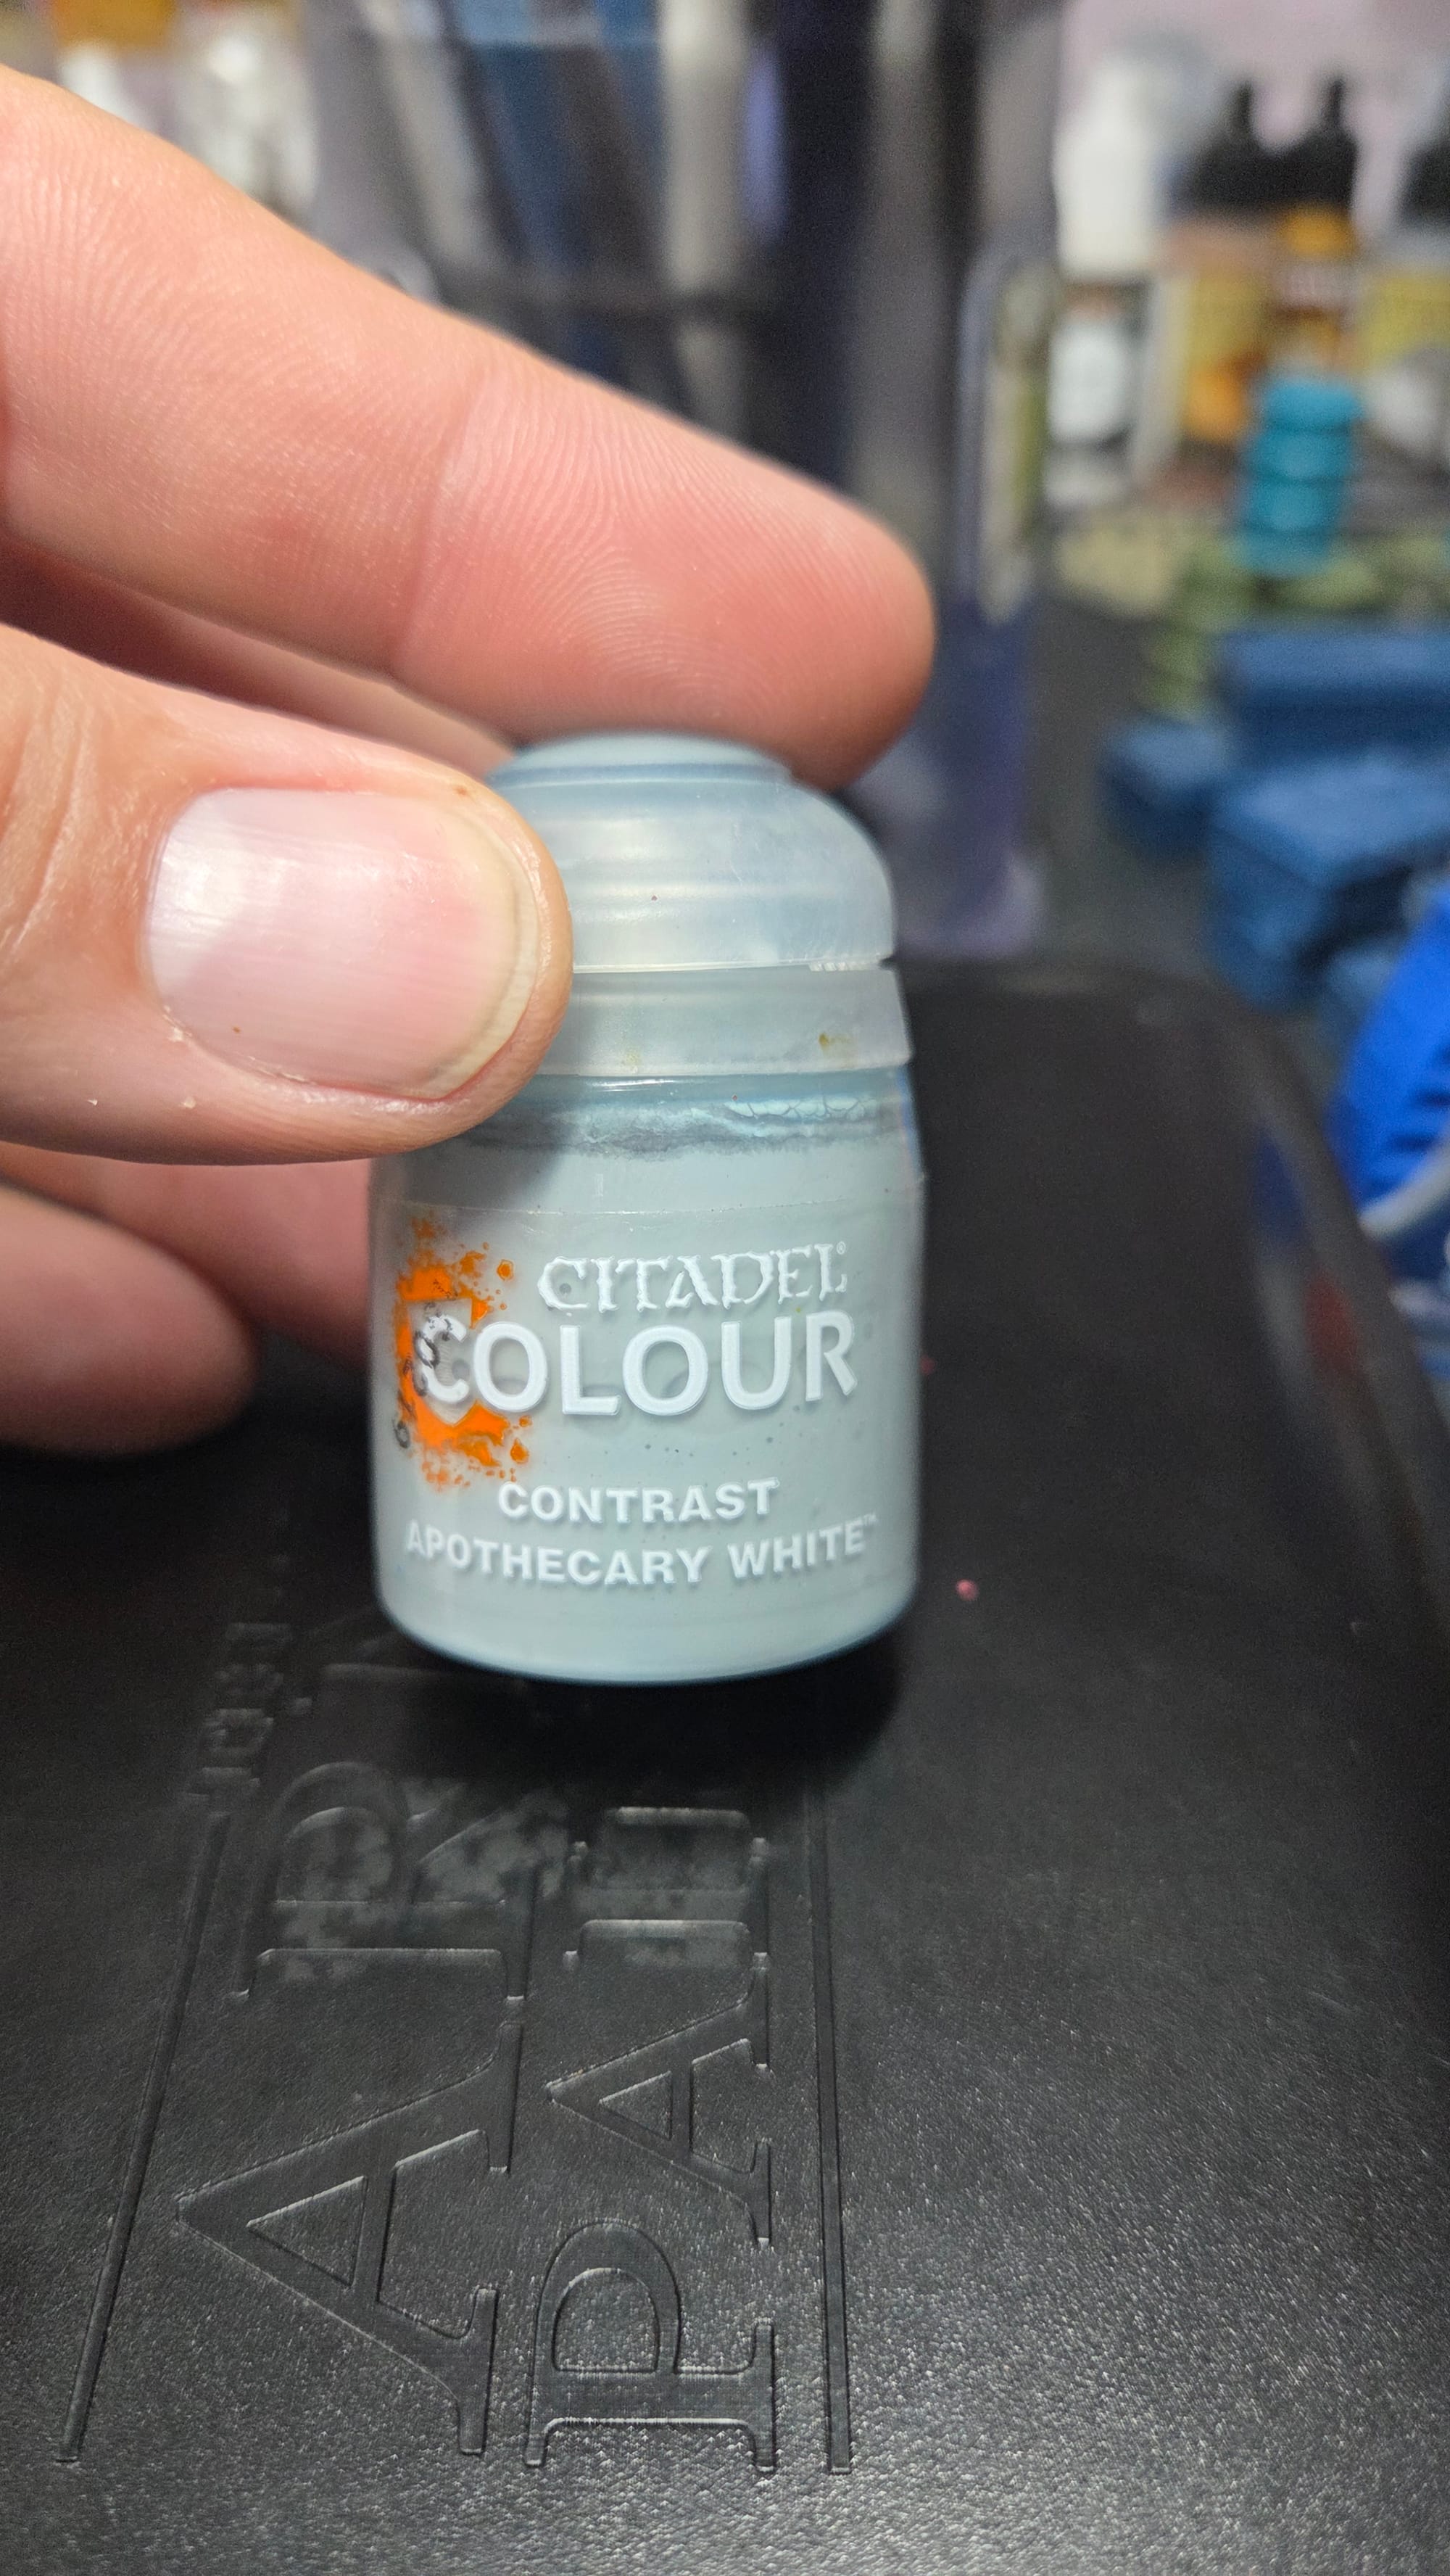
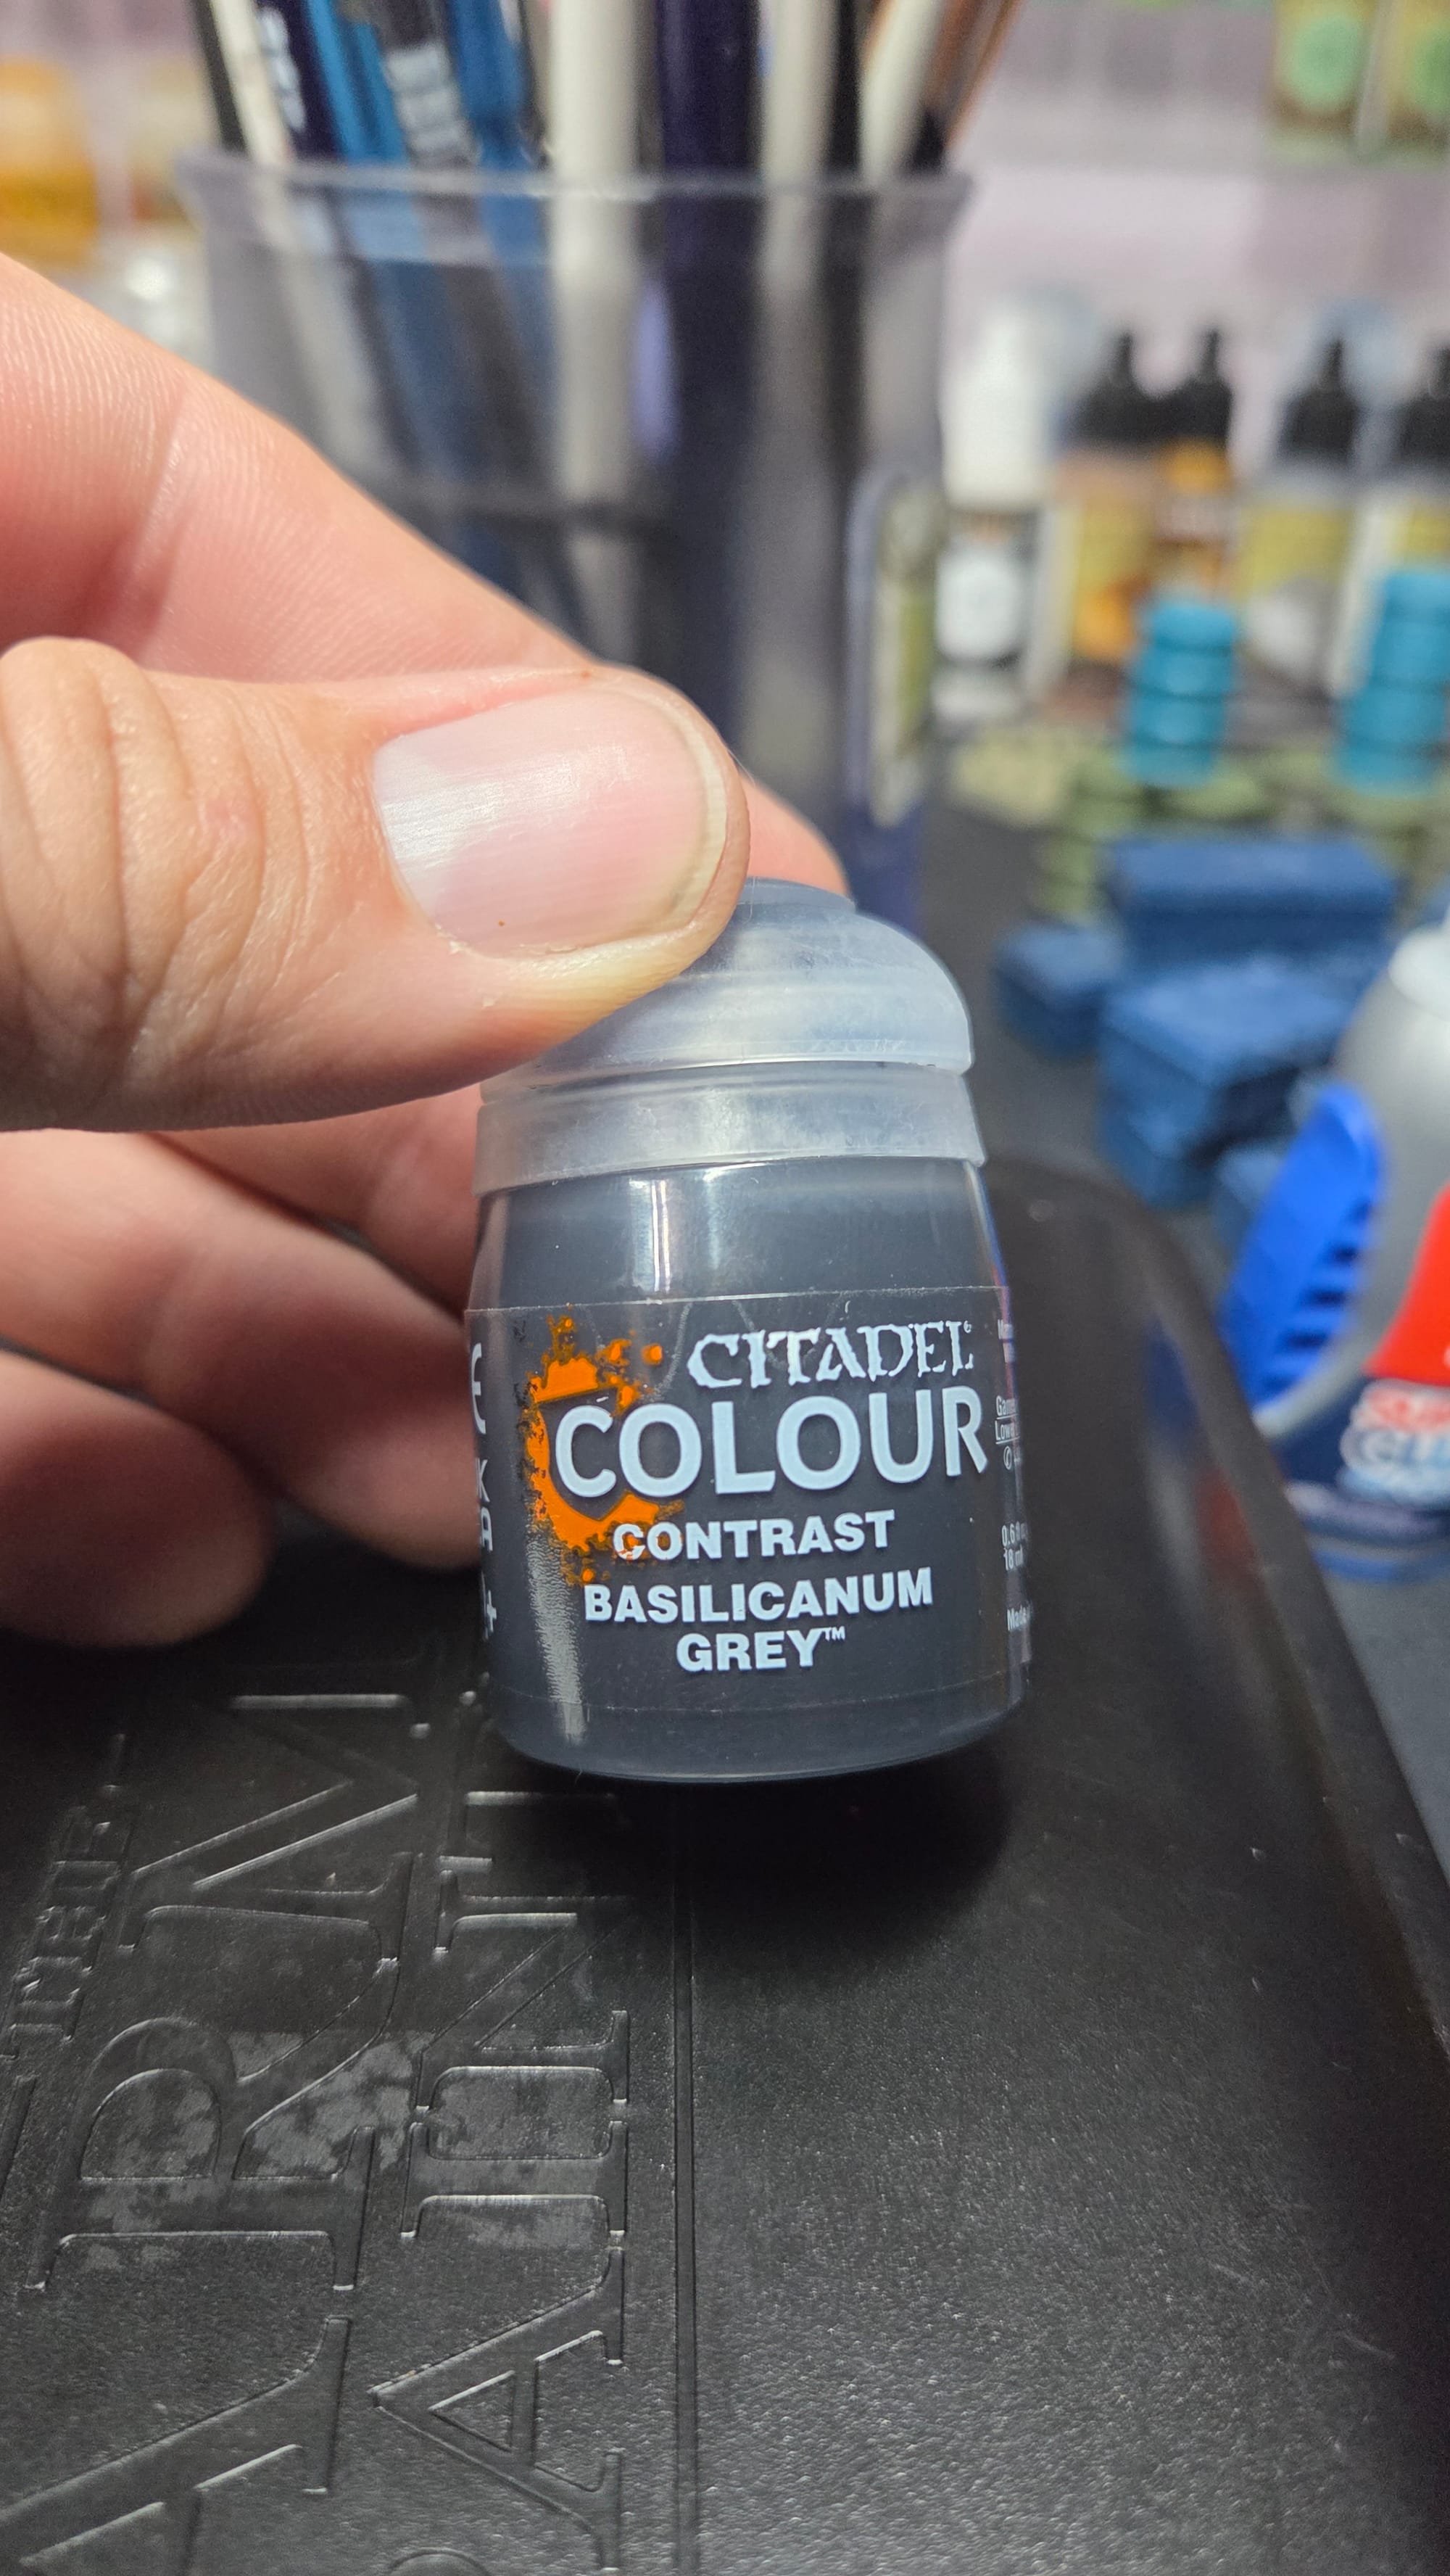
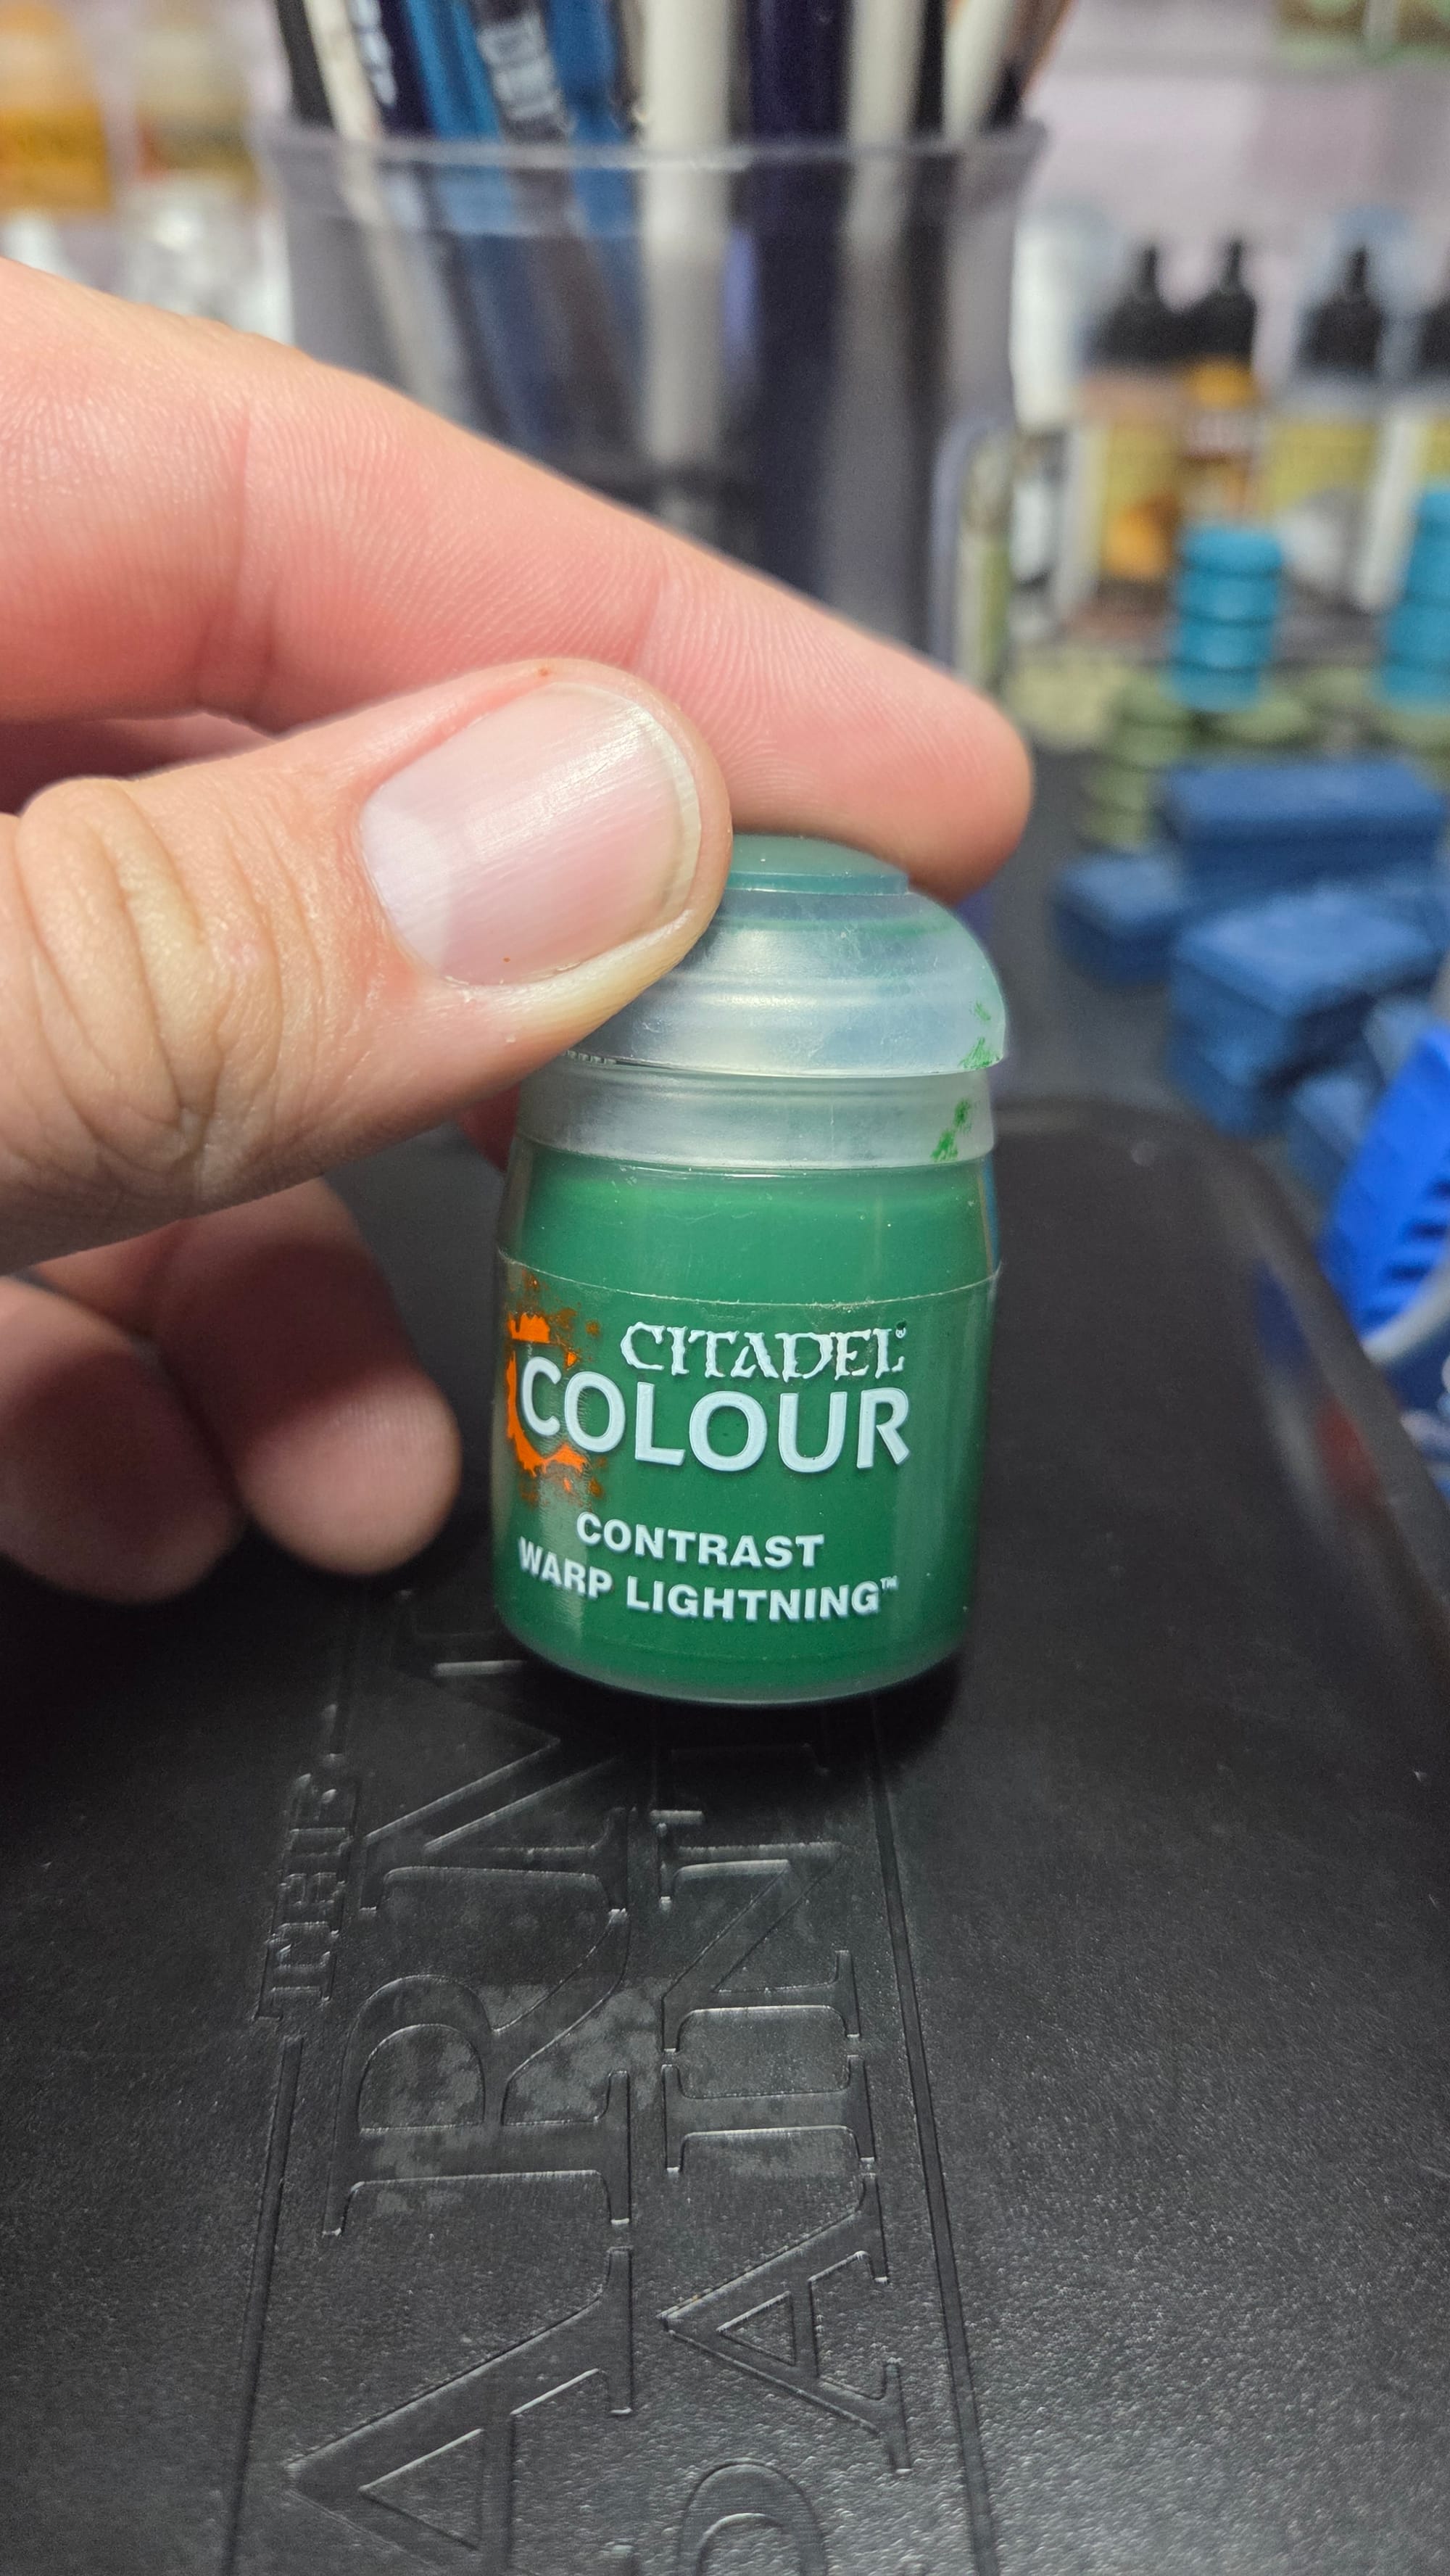
These were very easy and I think they came out great. I just did a full coverage of Apothecary White on the plumes of smoke, then with Basilicanum Grey I tried to blend them together to make the plume look as if it was wisping away, and I loved it. The bottles were very easy, it was just some Warp Lightning made for some good looking green alcohol bottles ready to be thrown at the nearest Heretic.
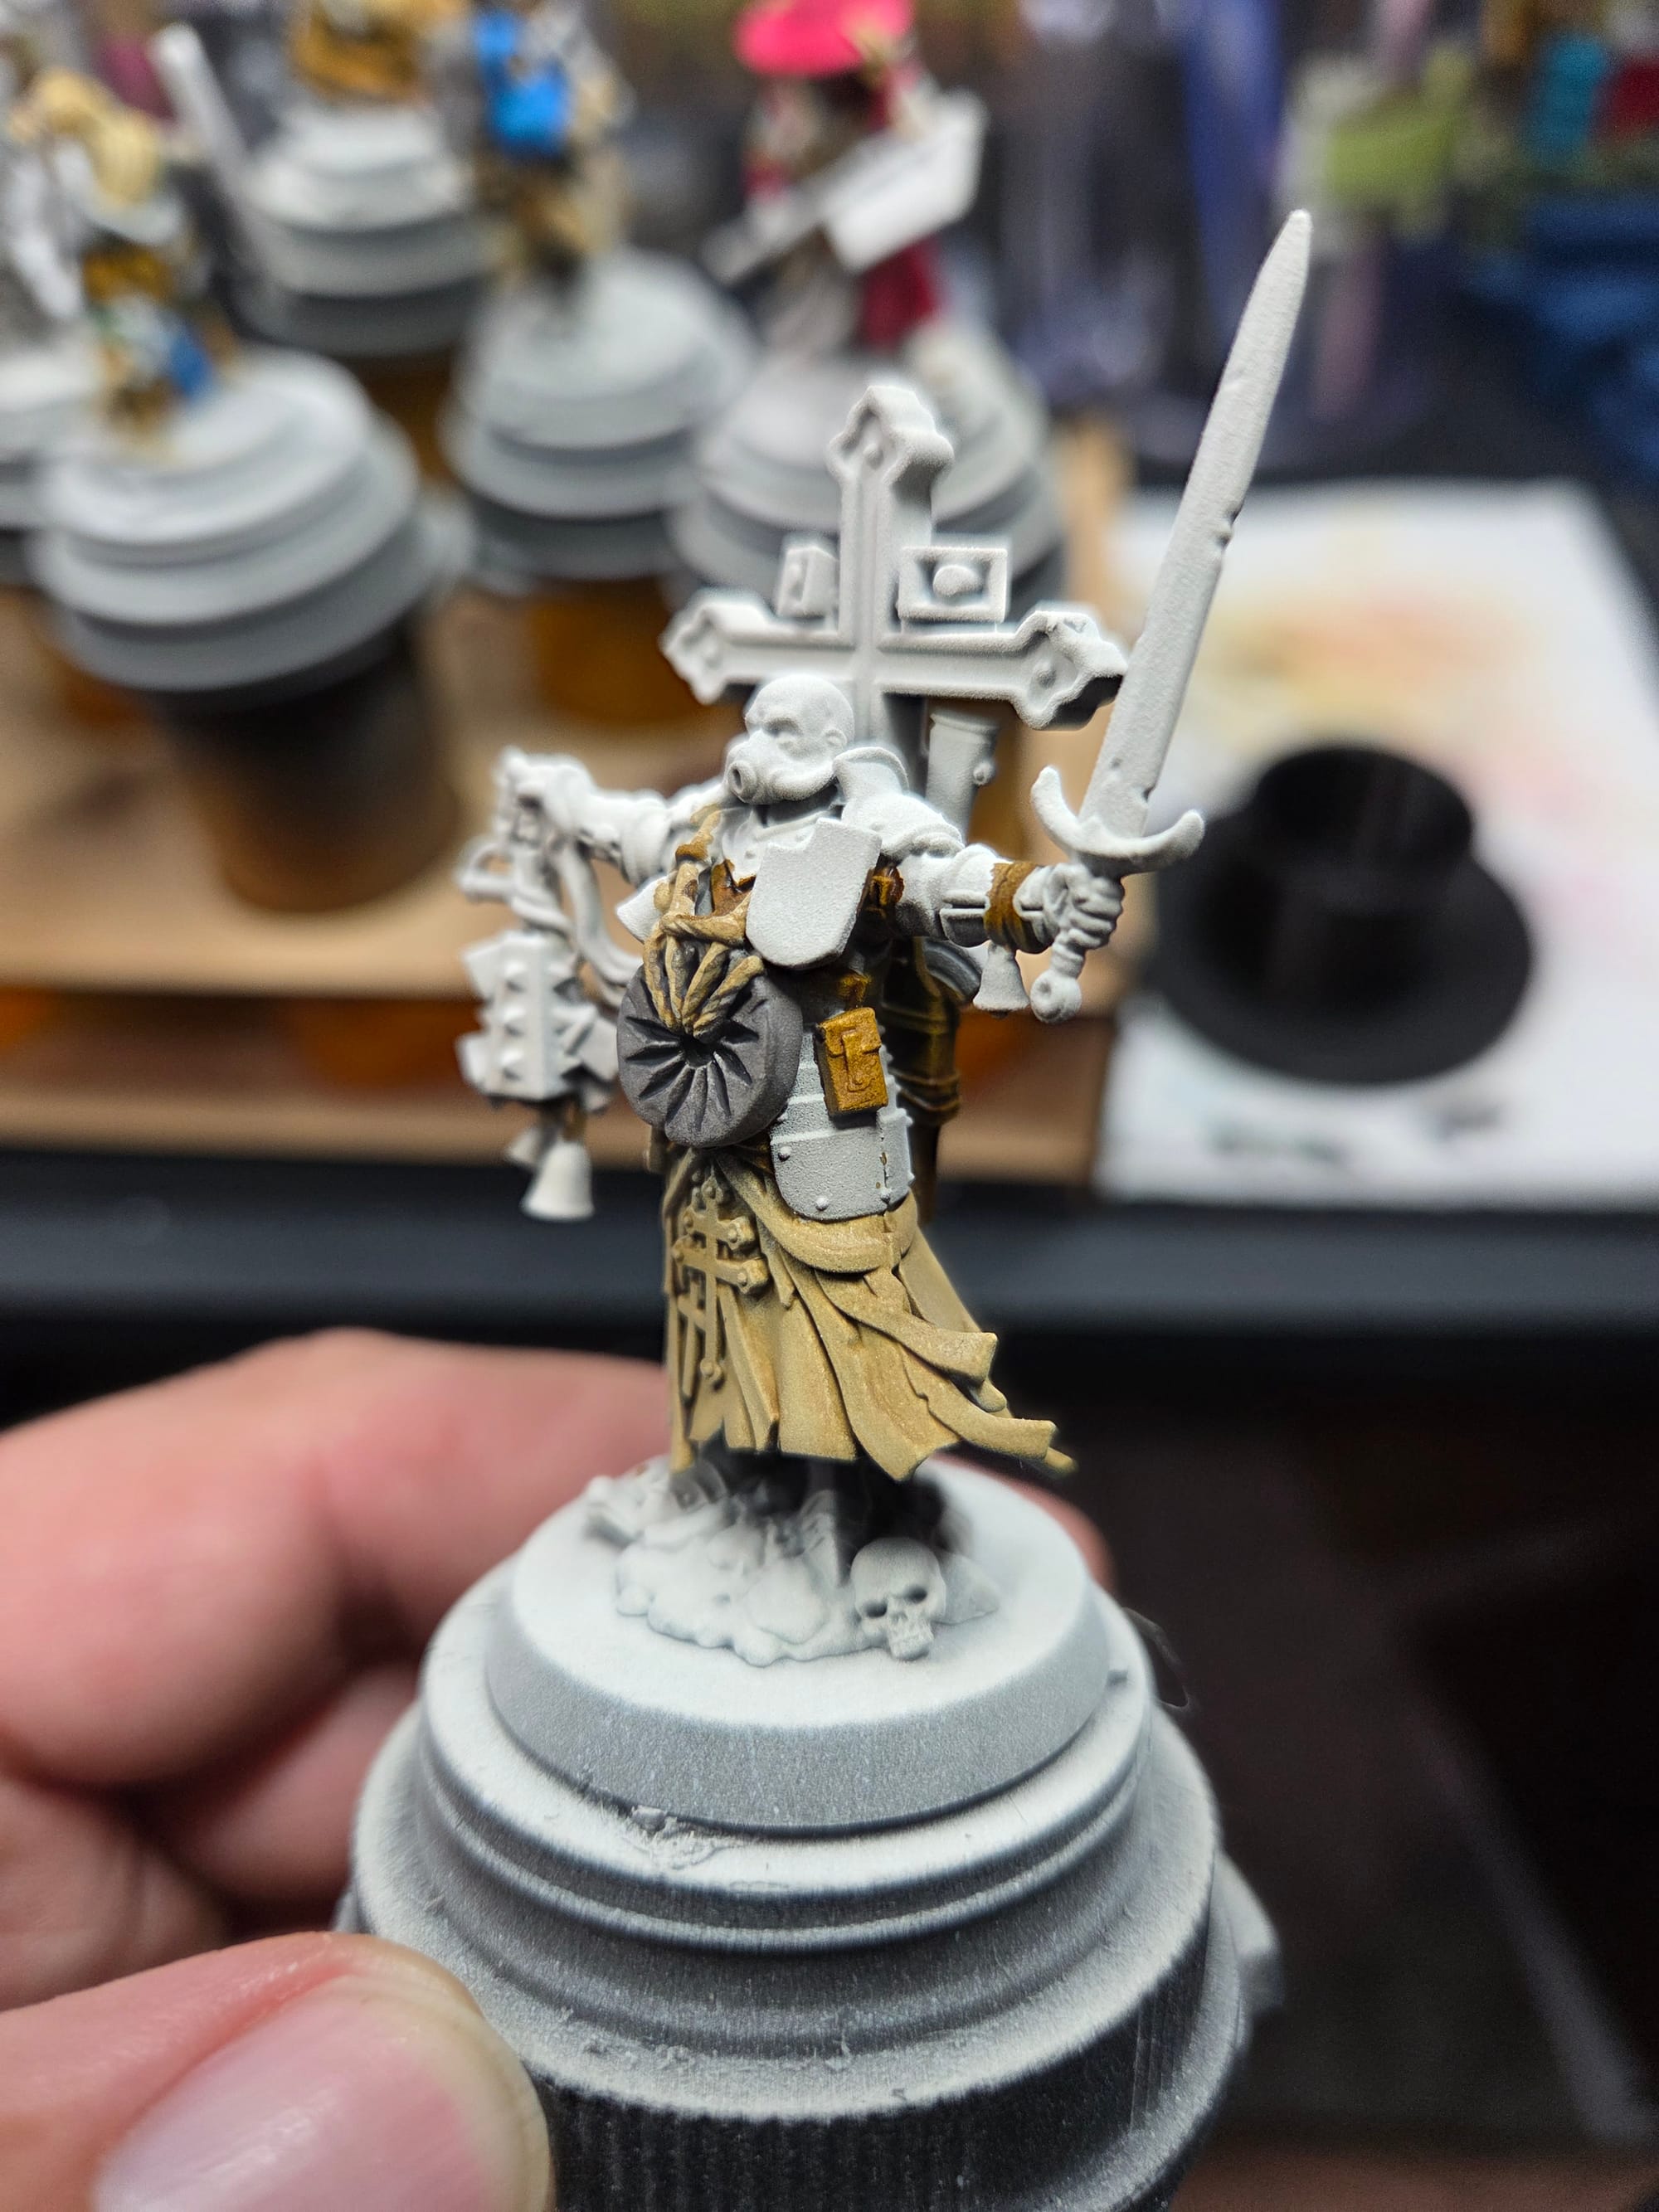
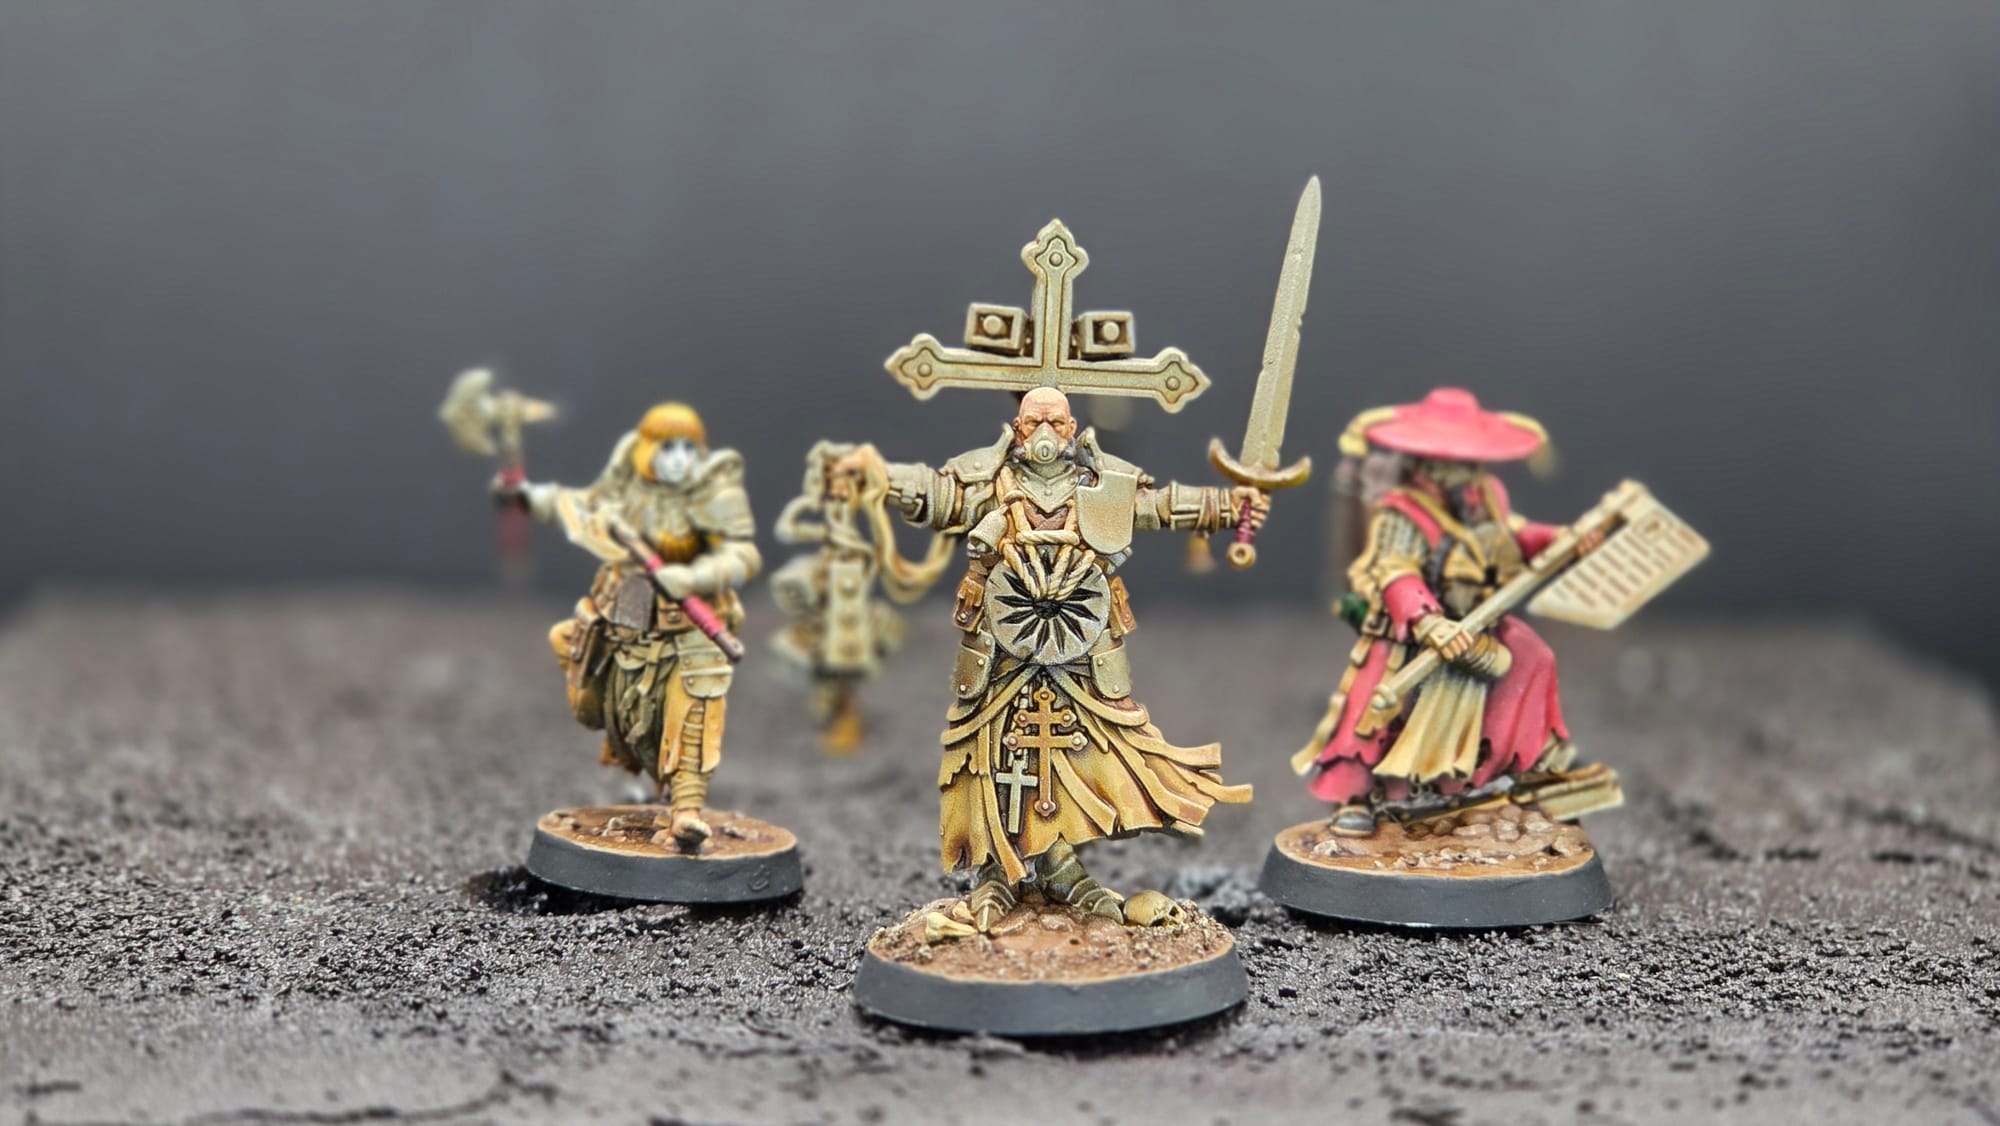
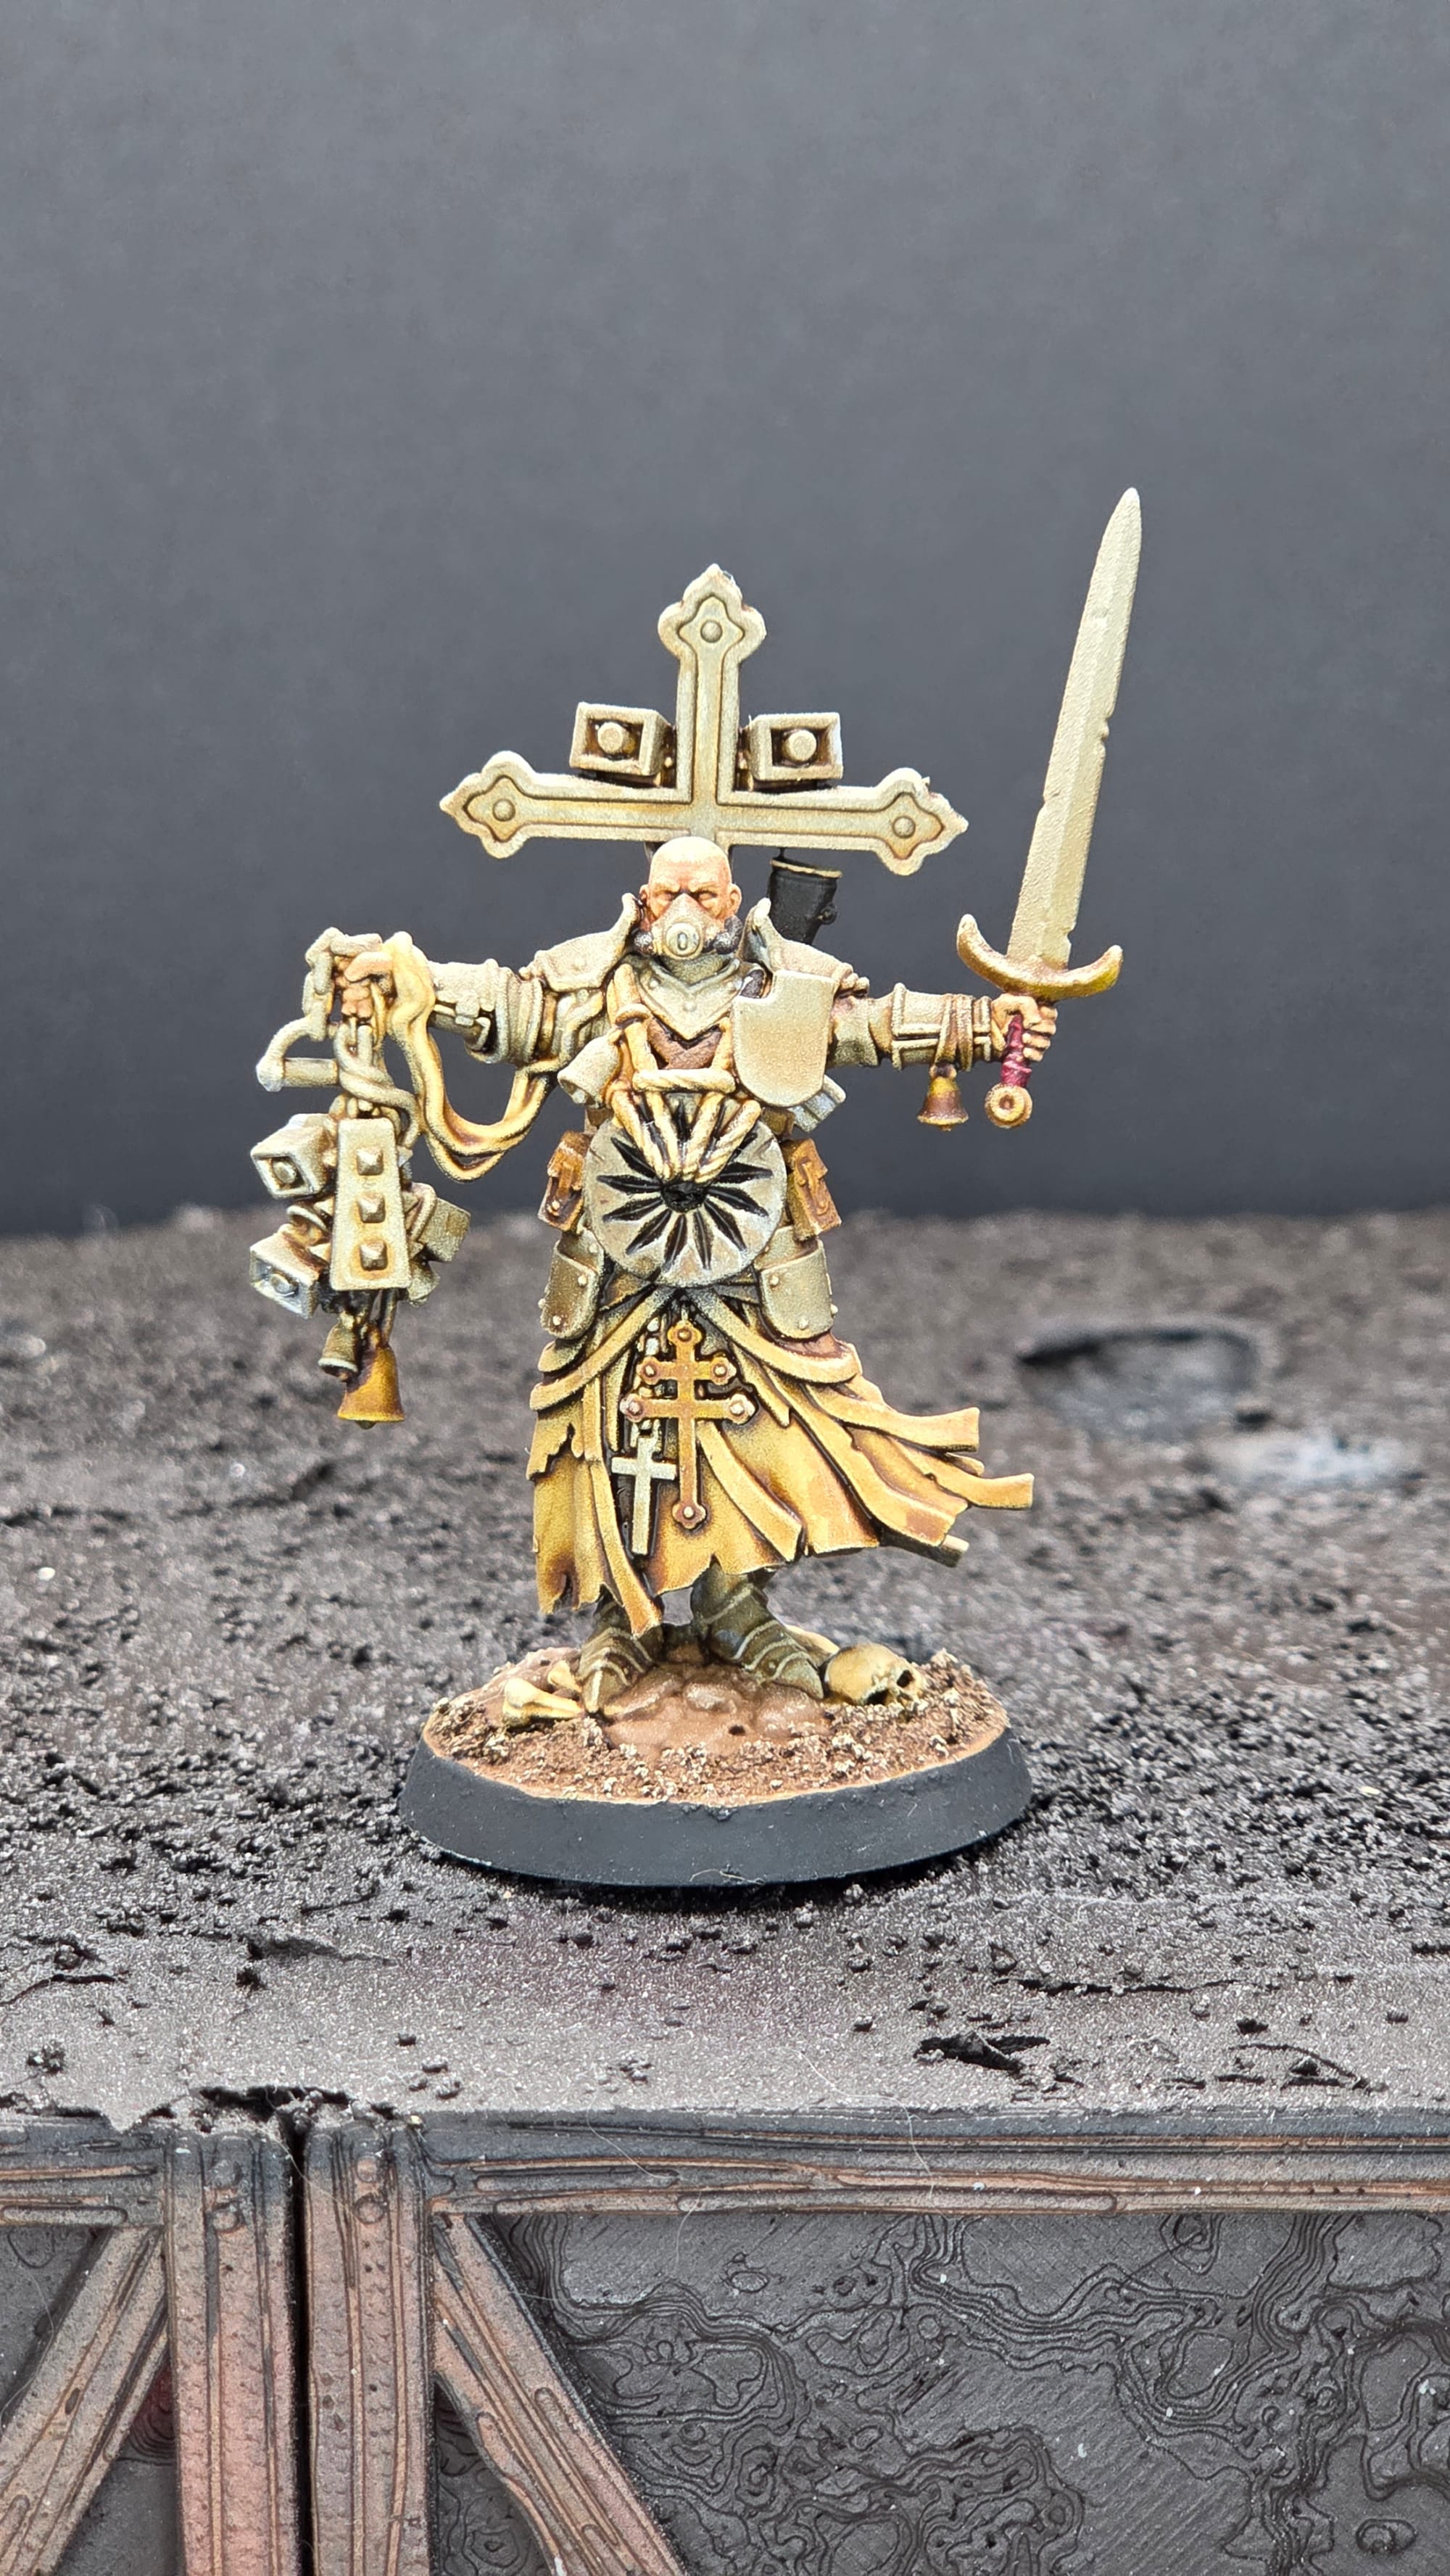
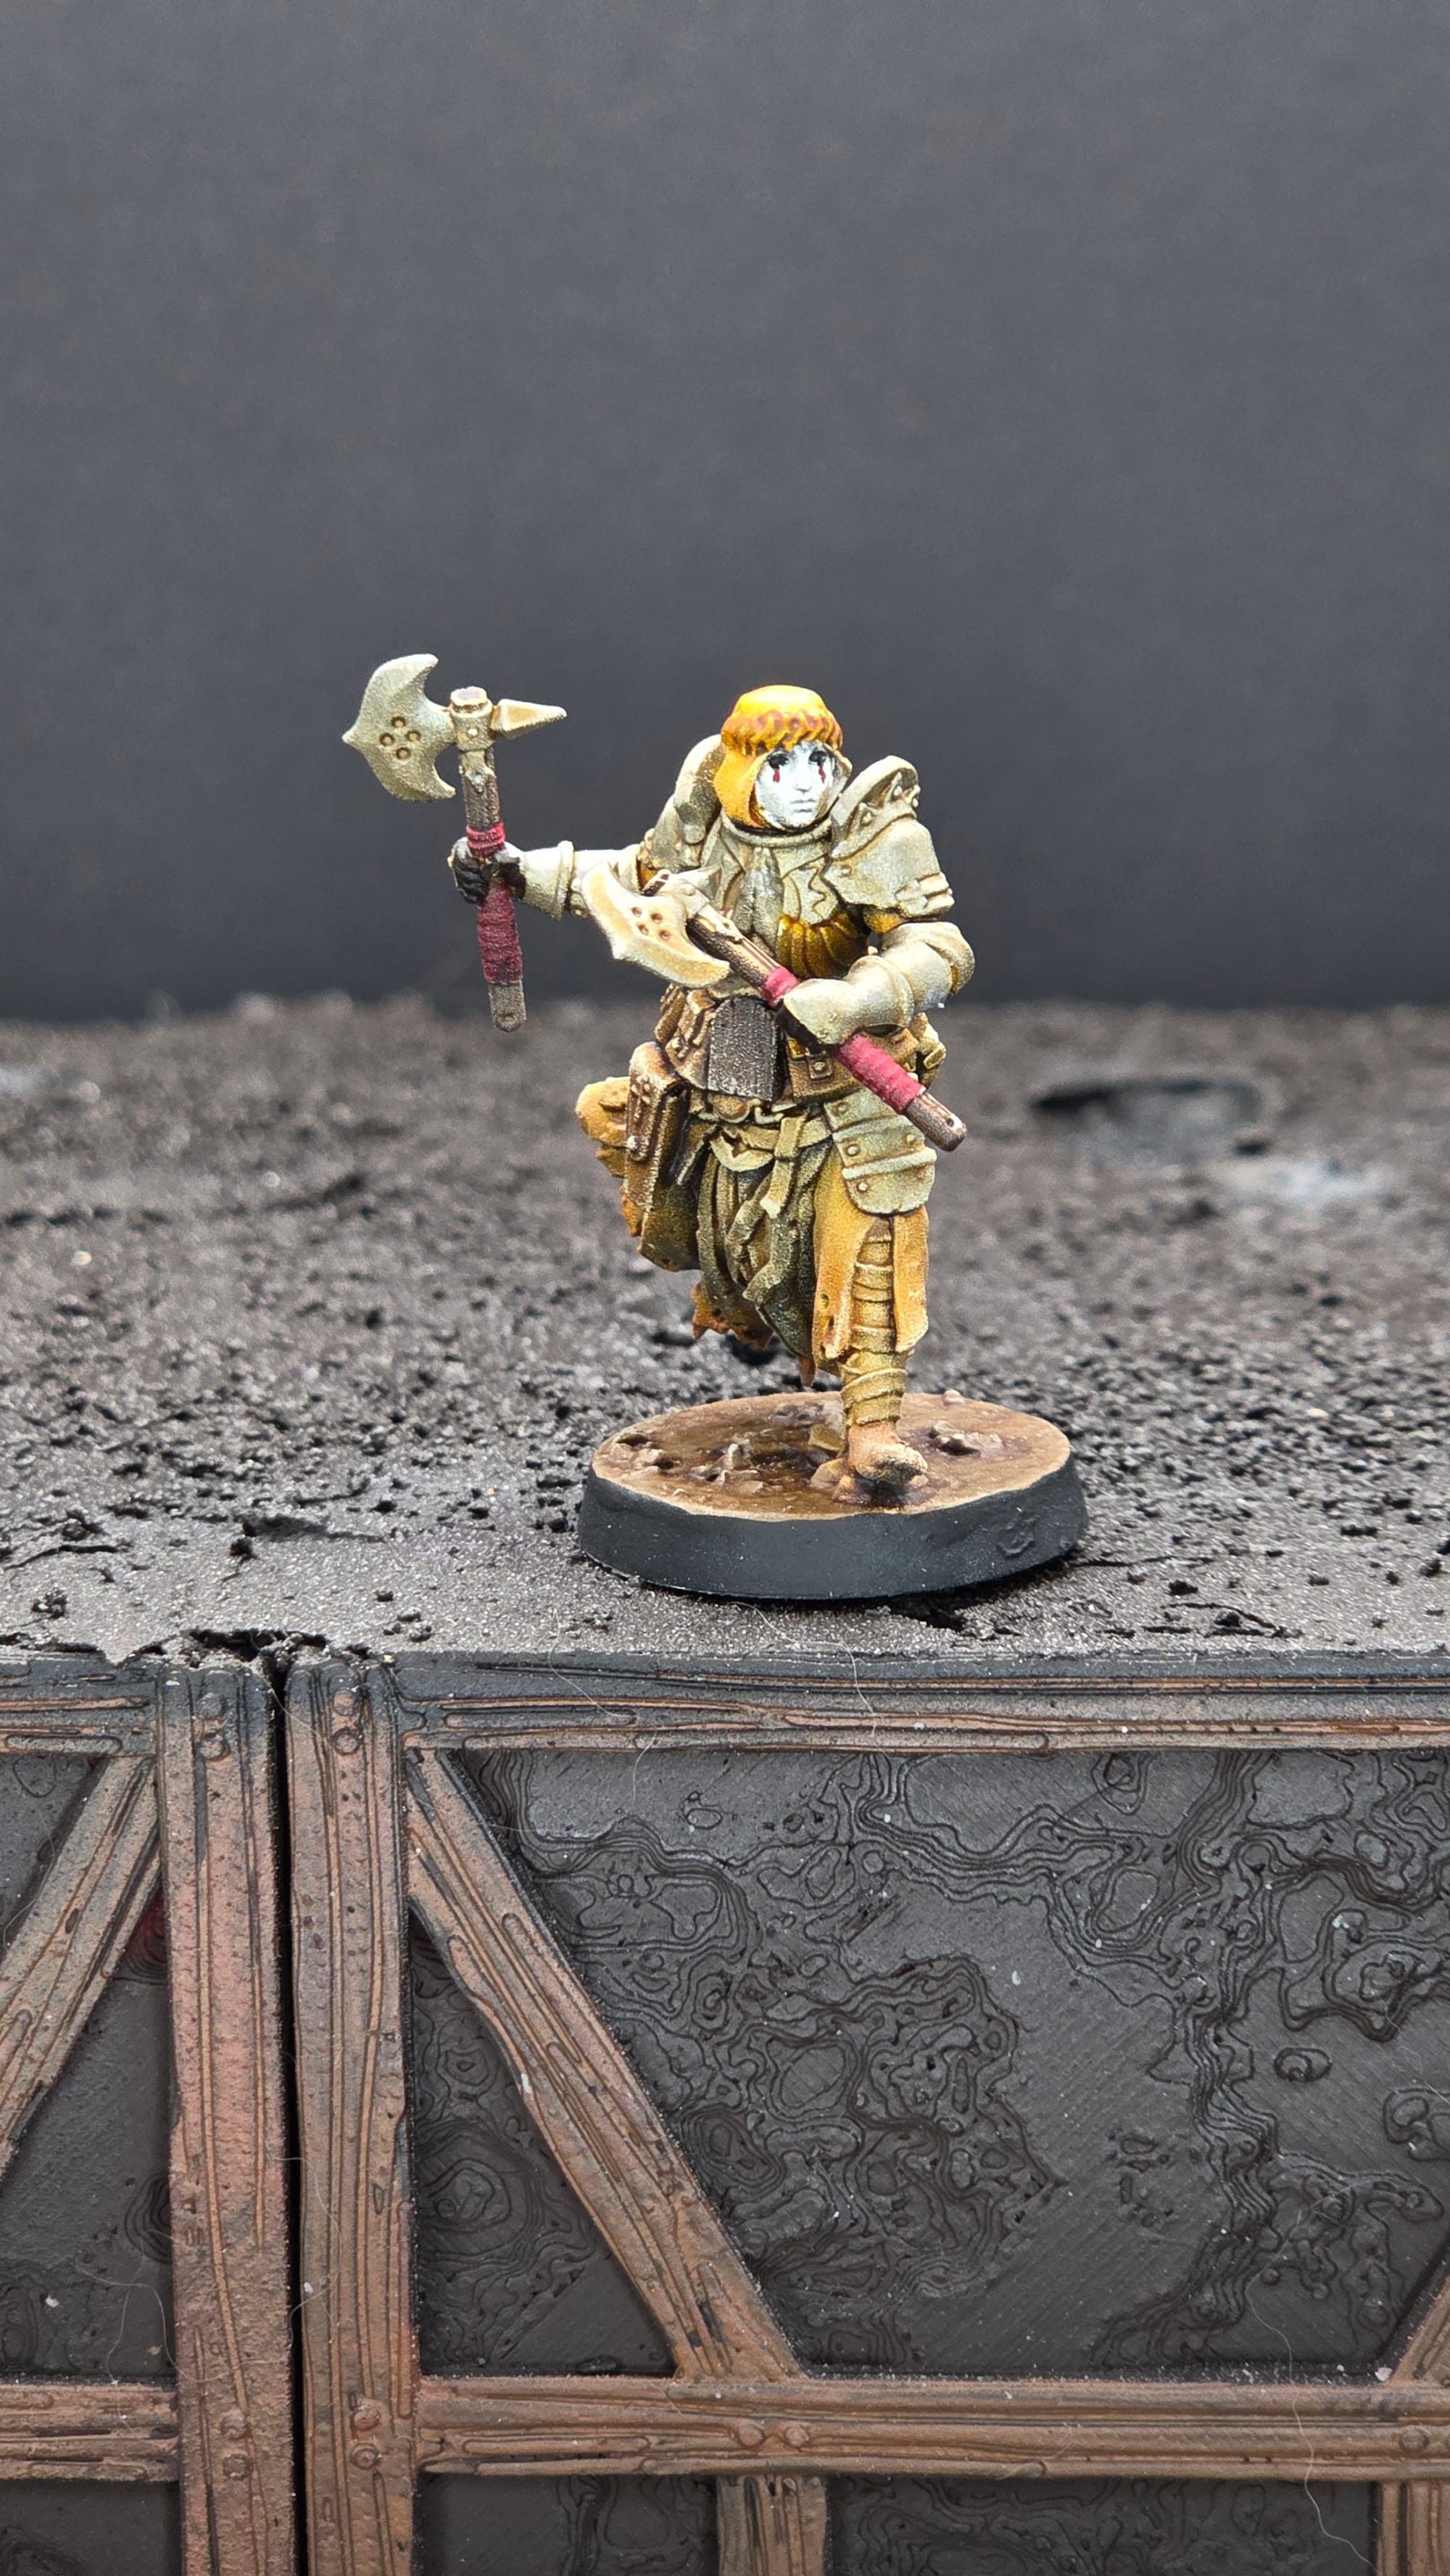
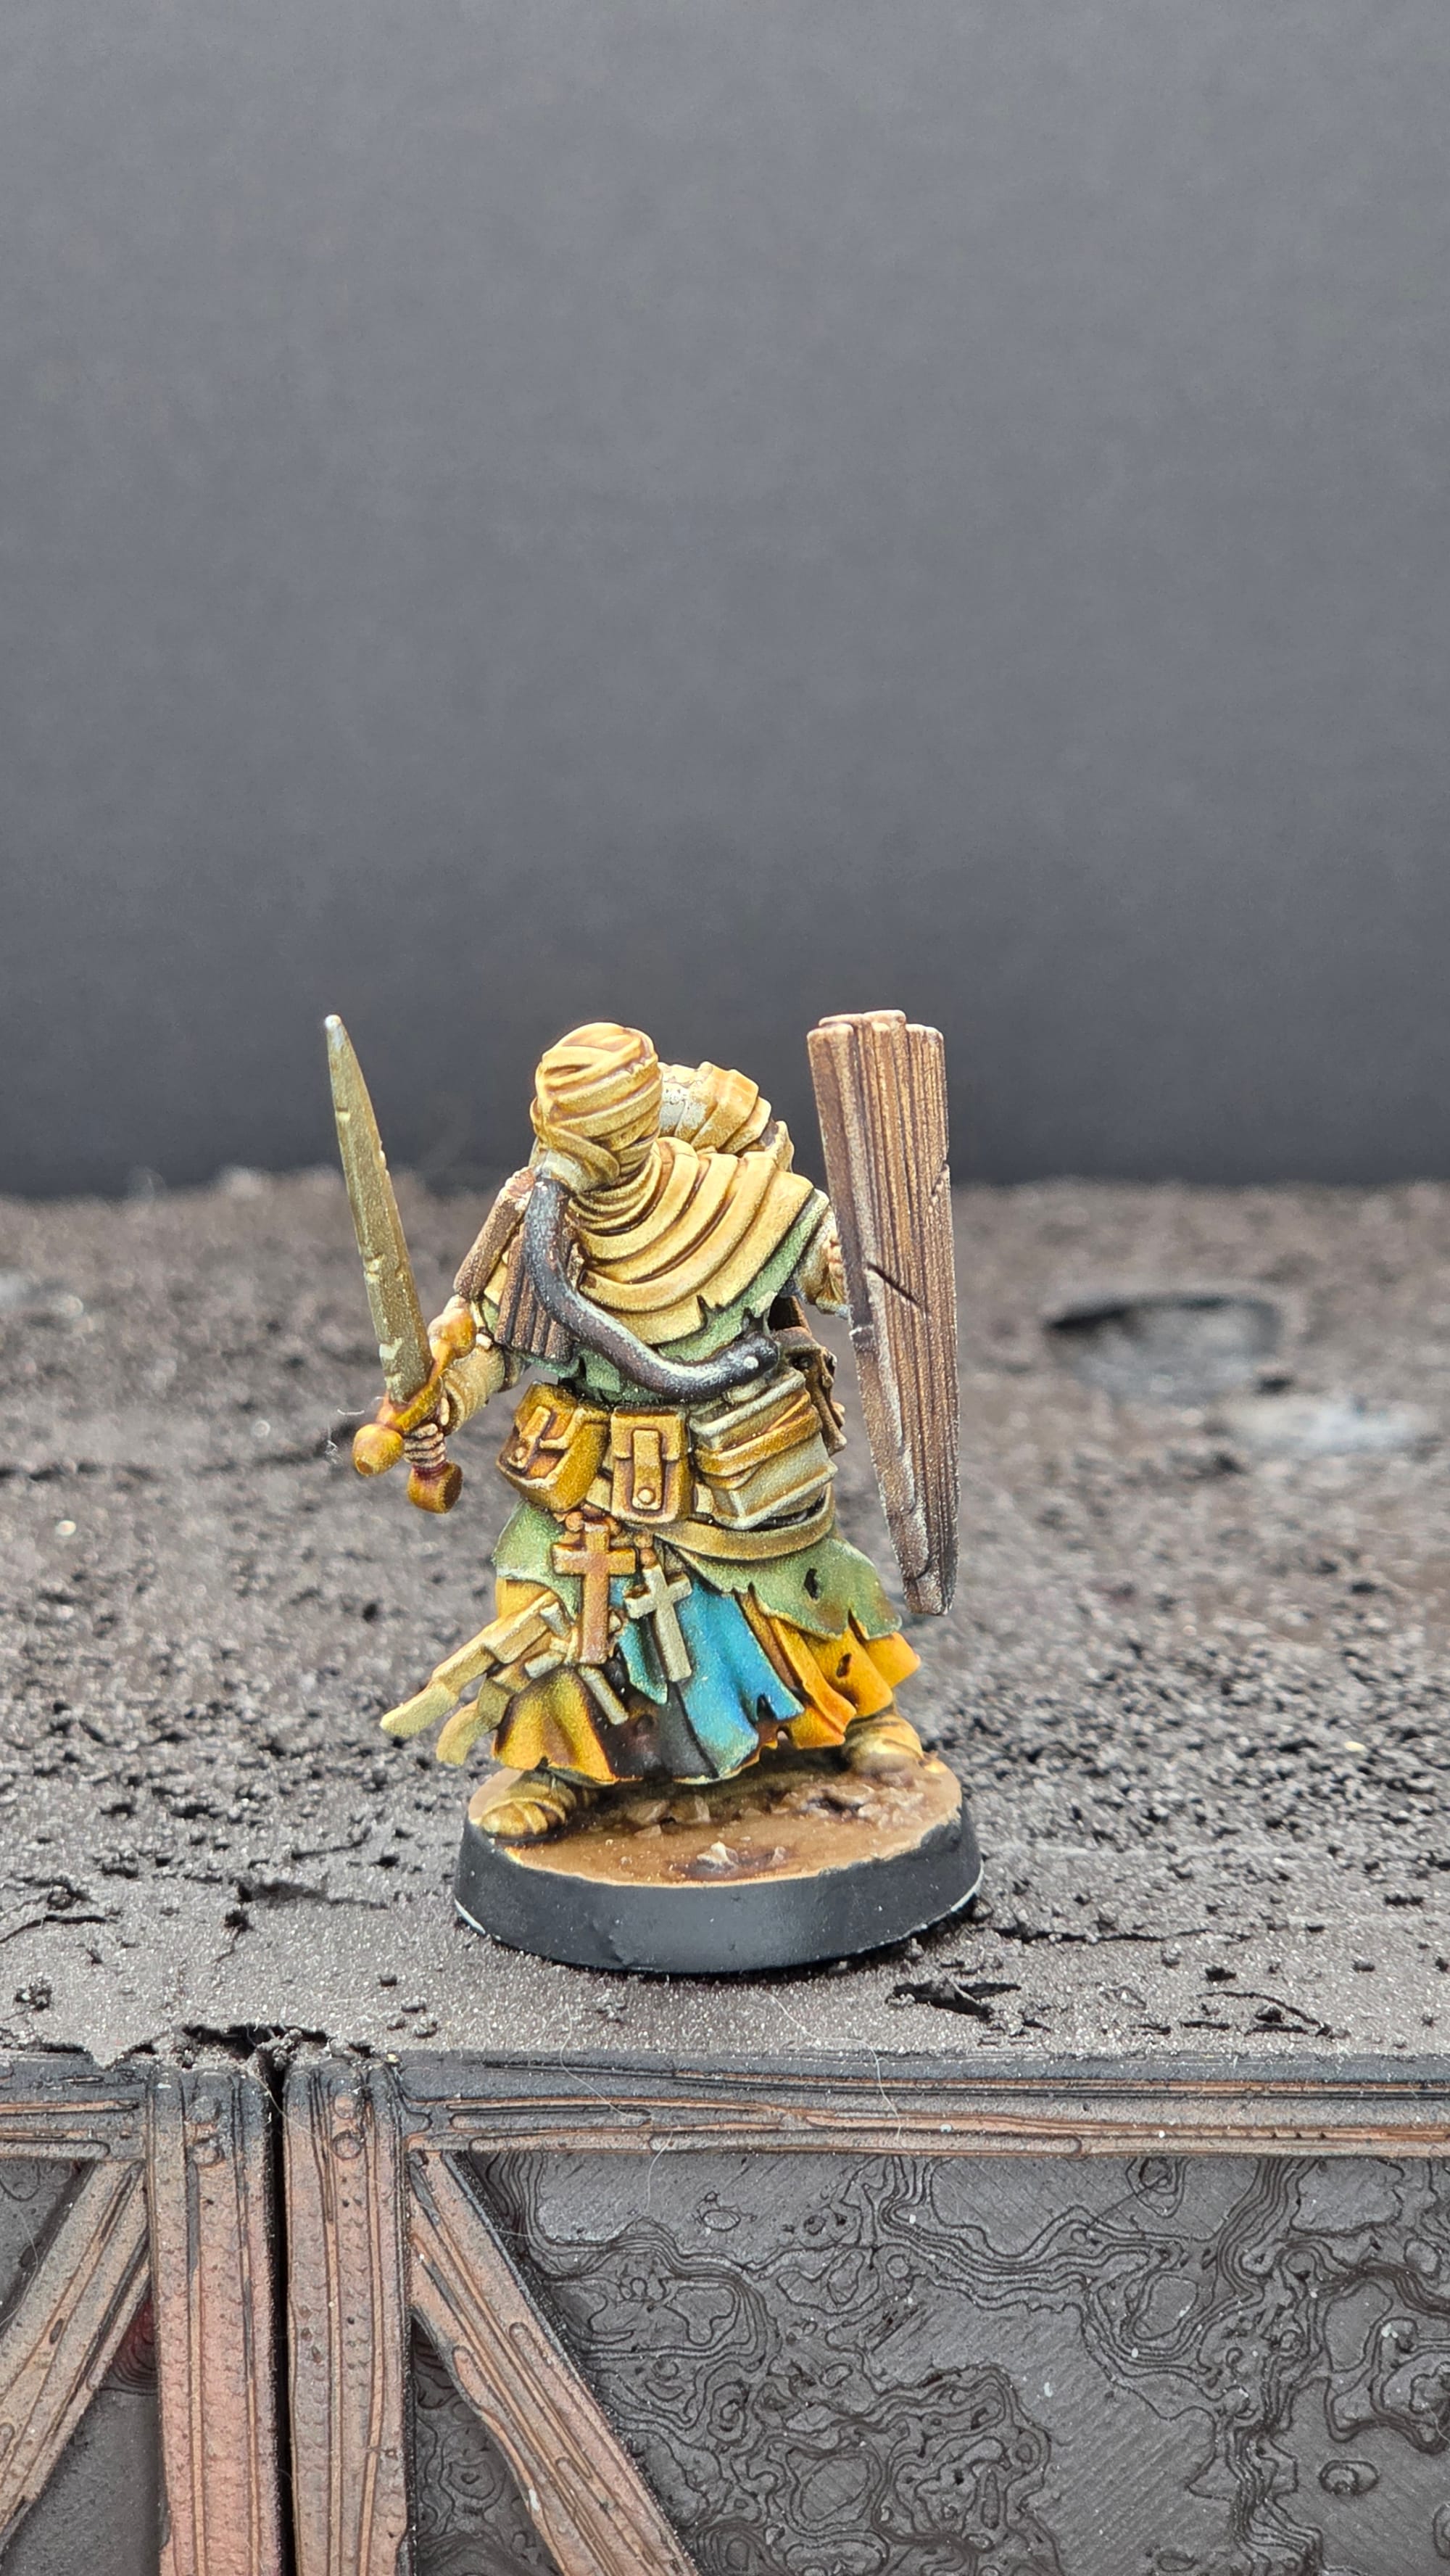
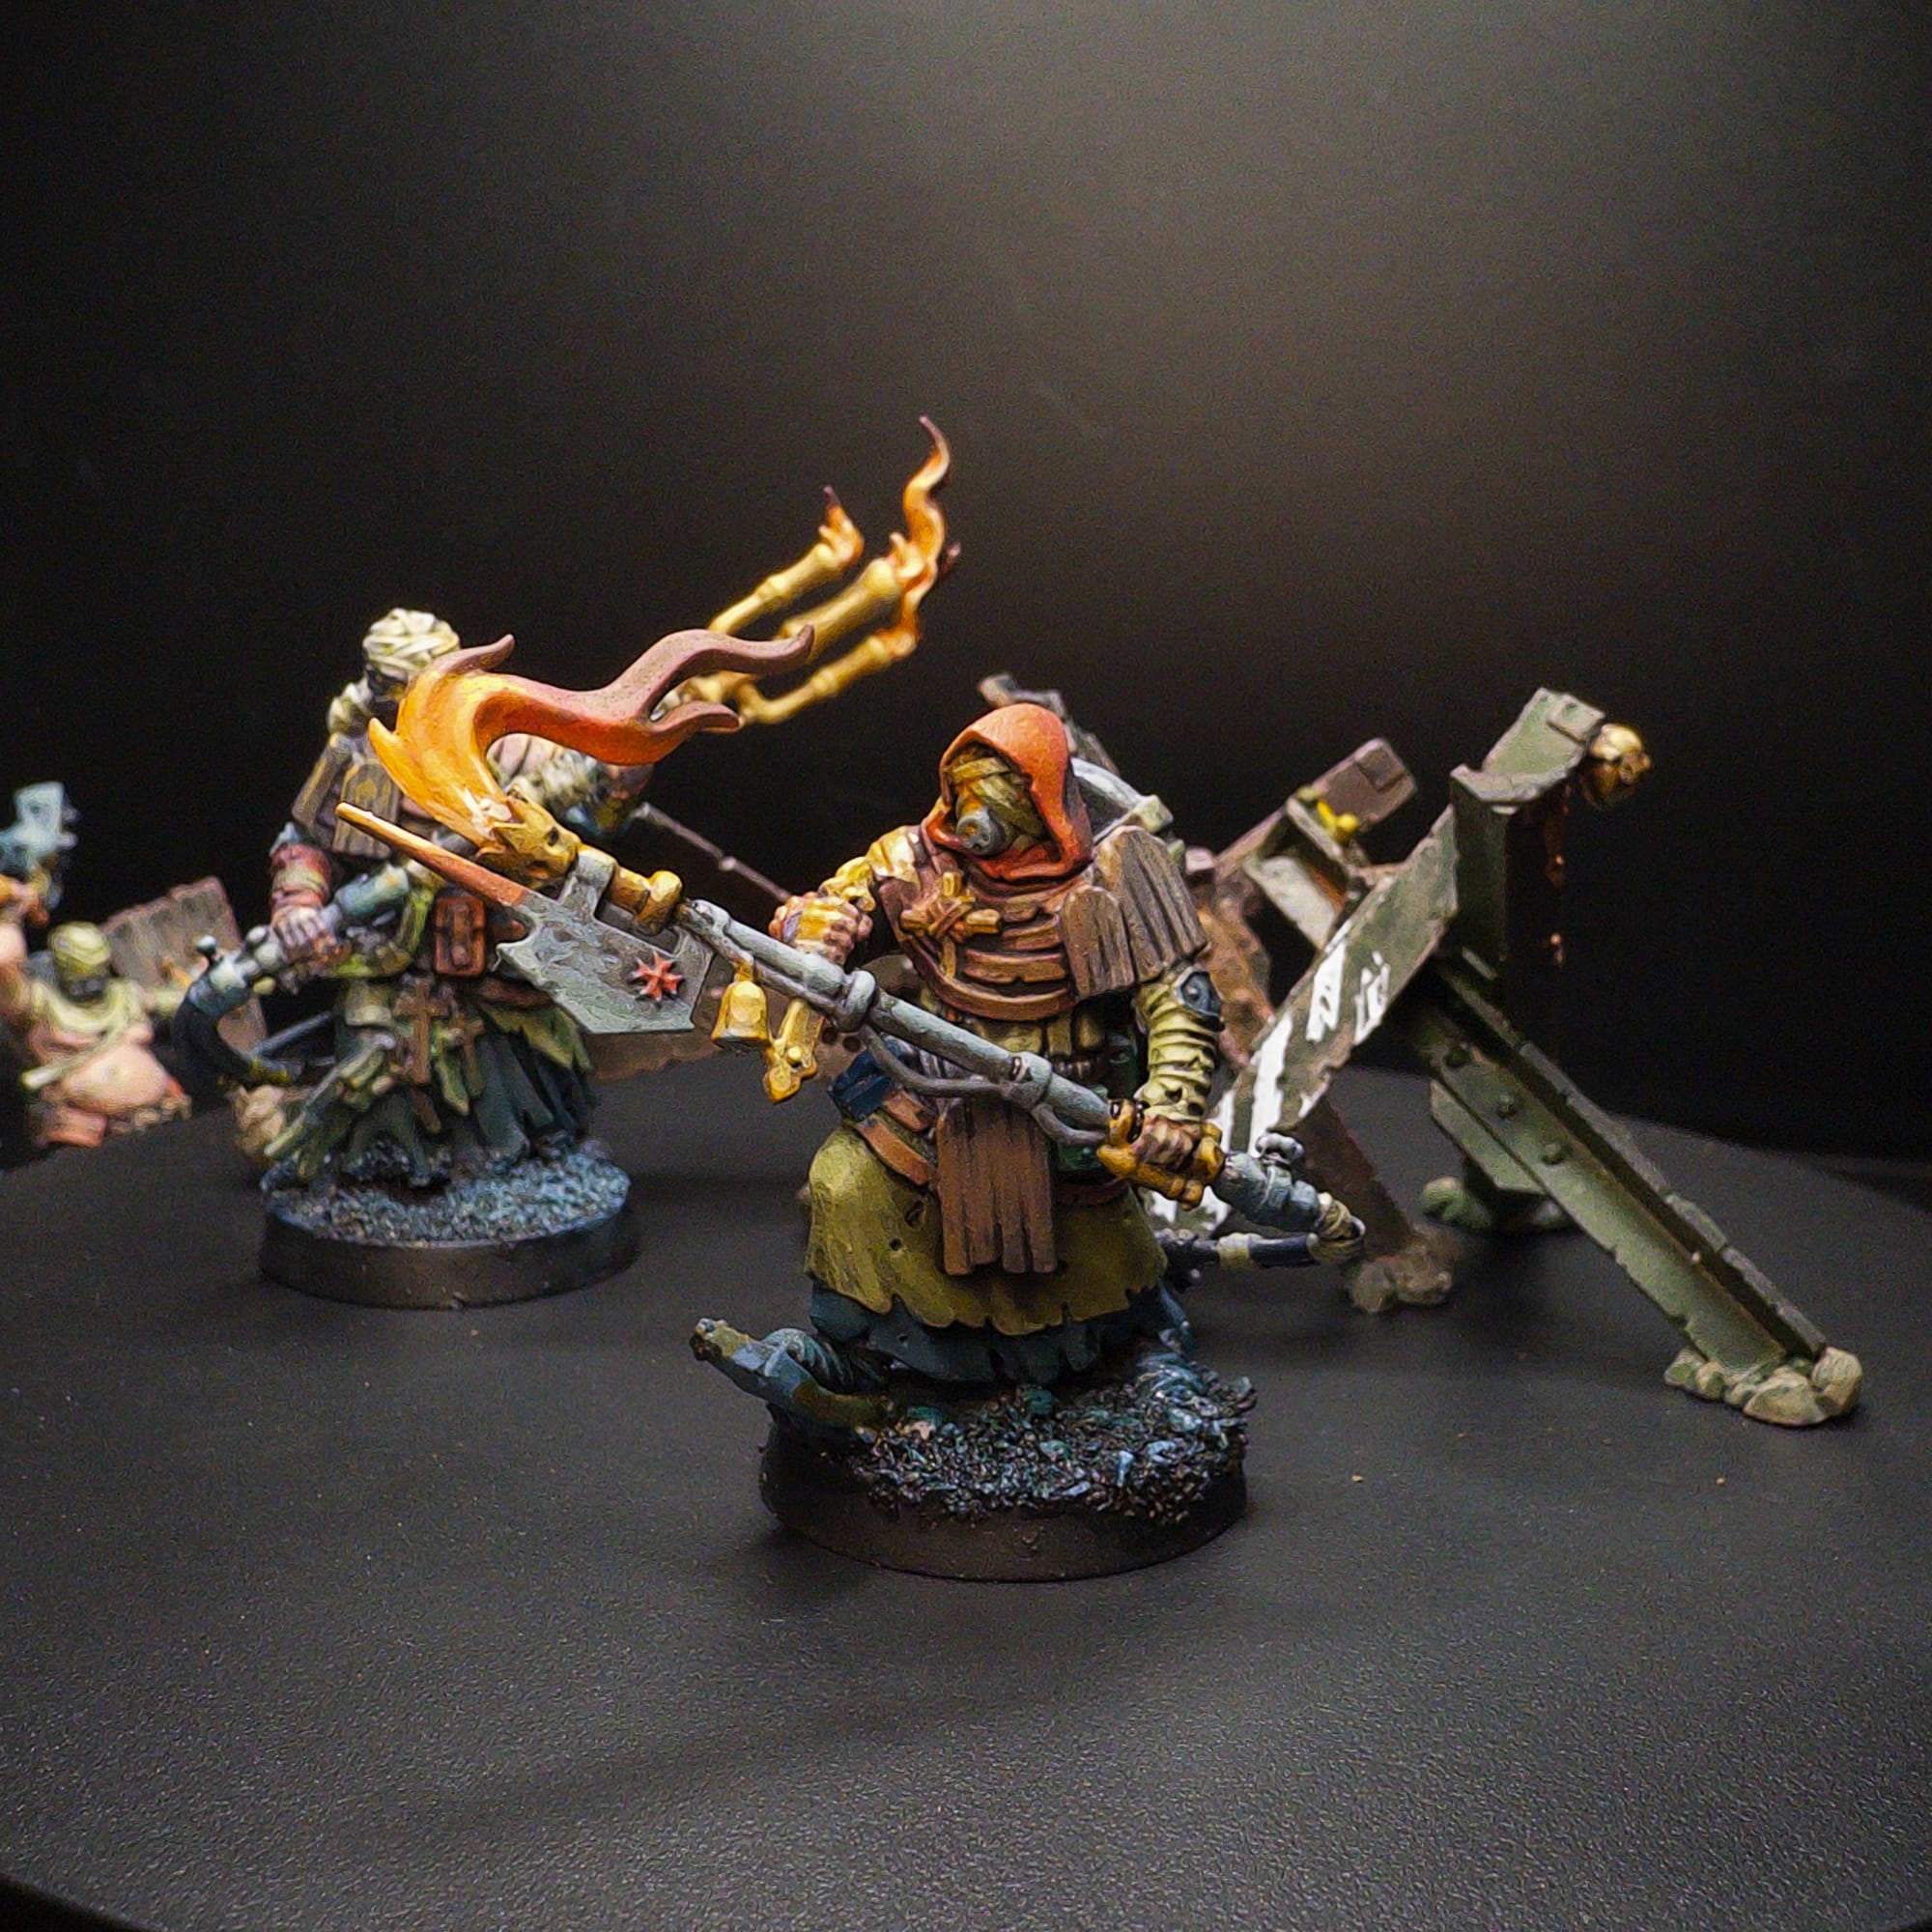
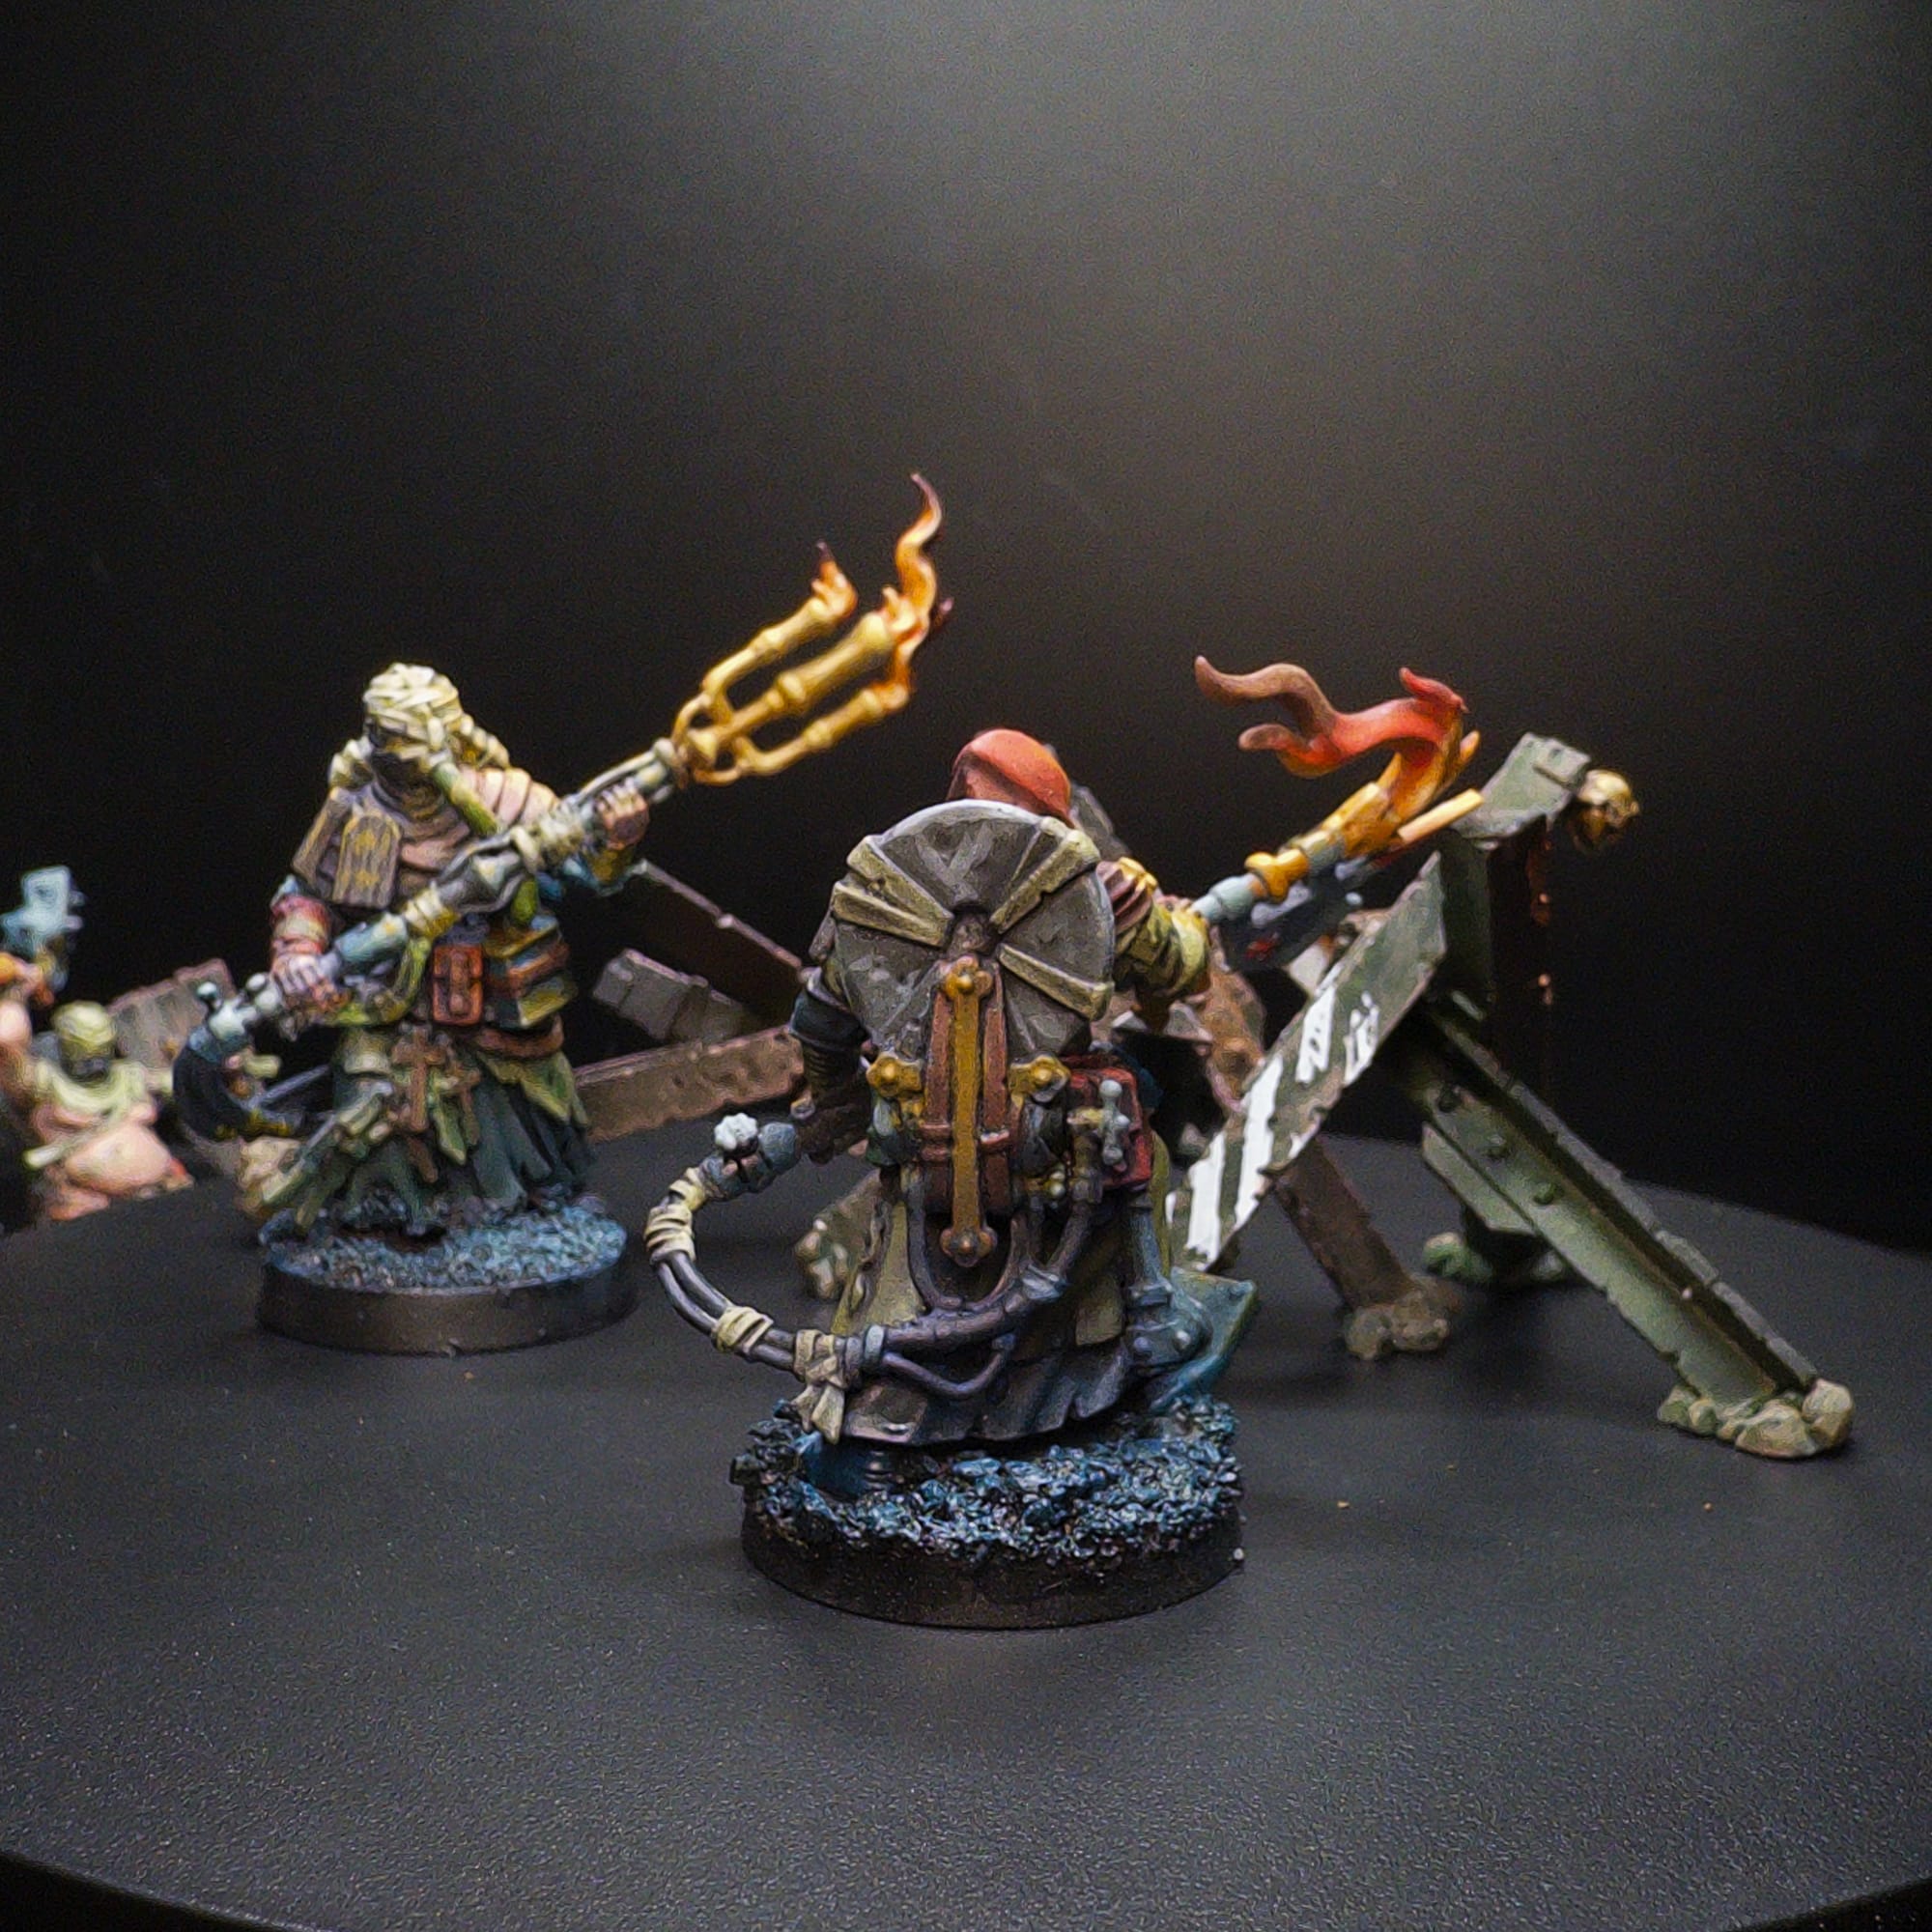
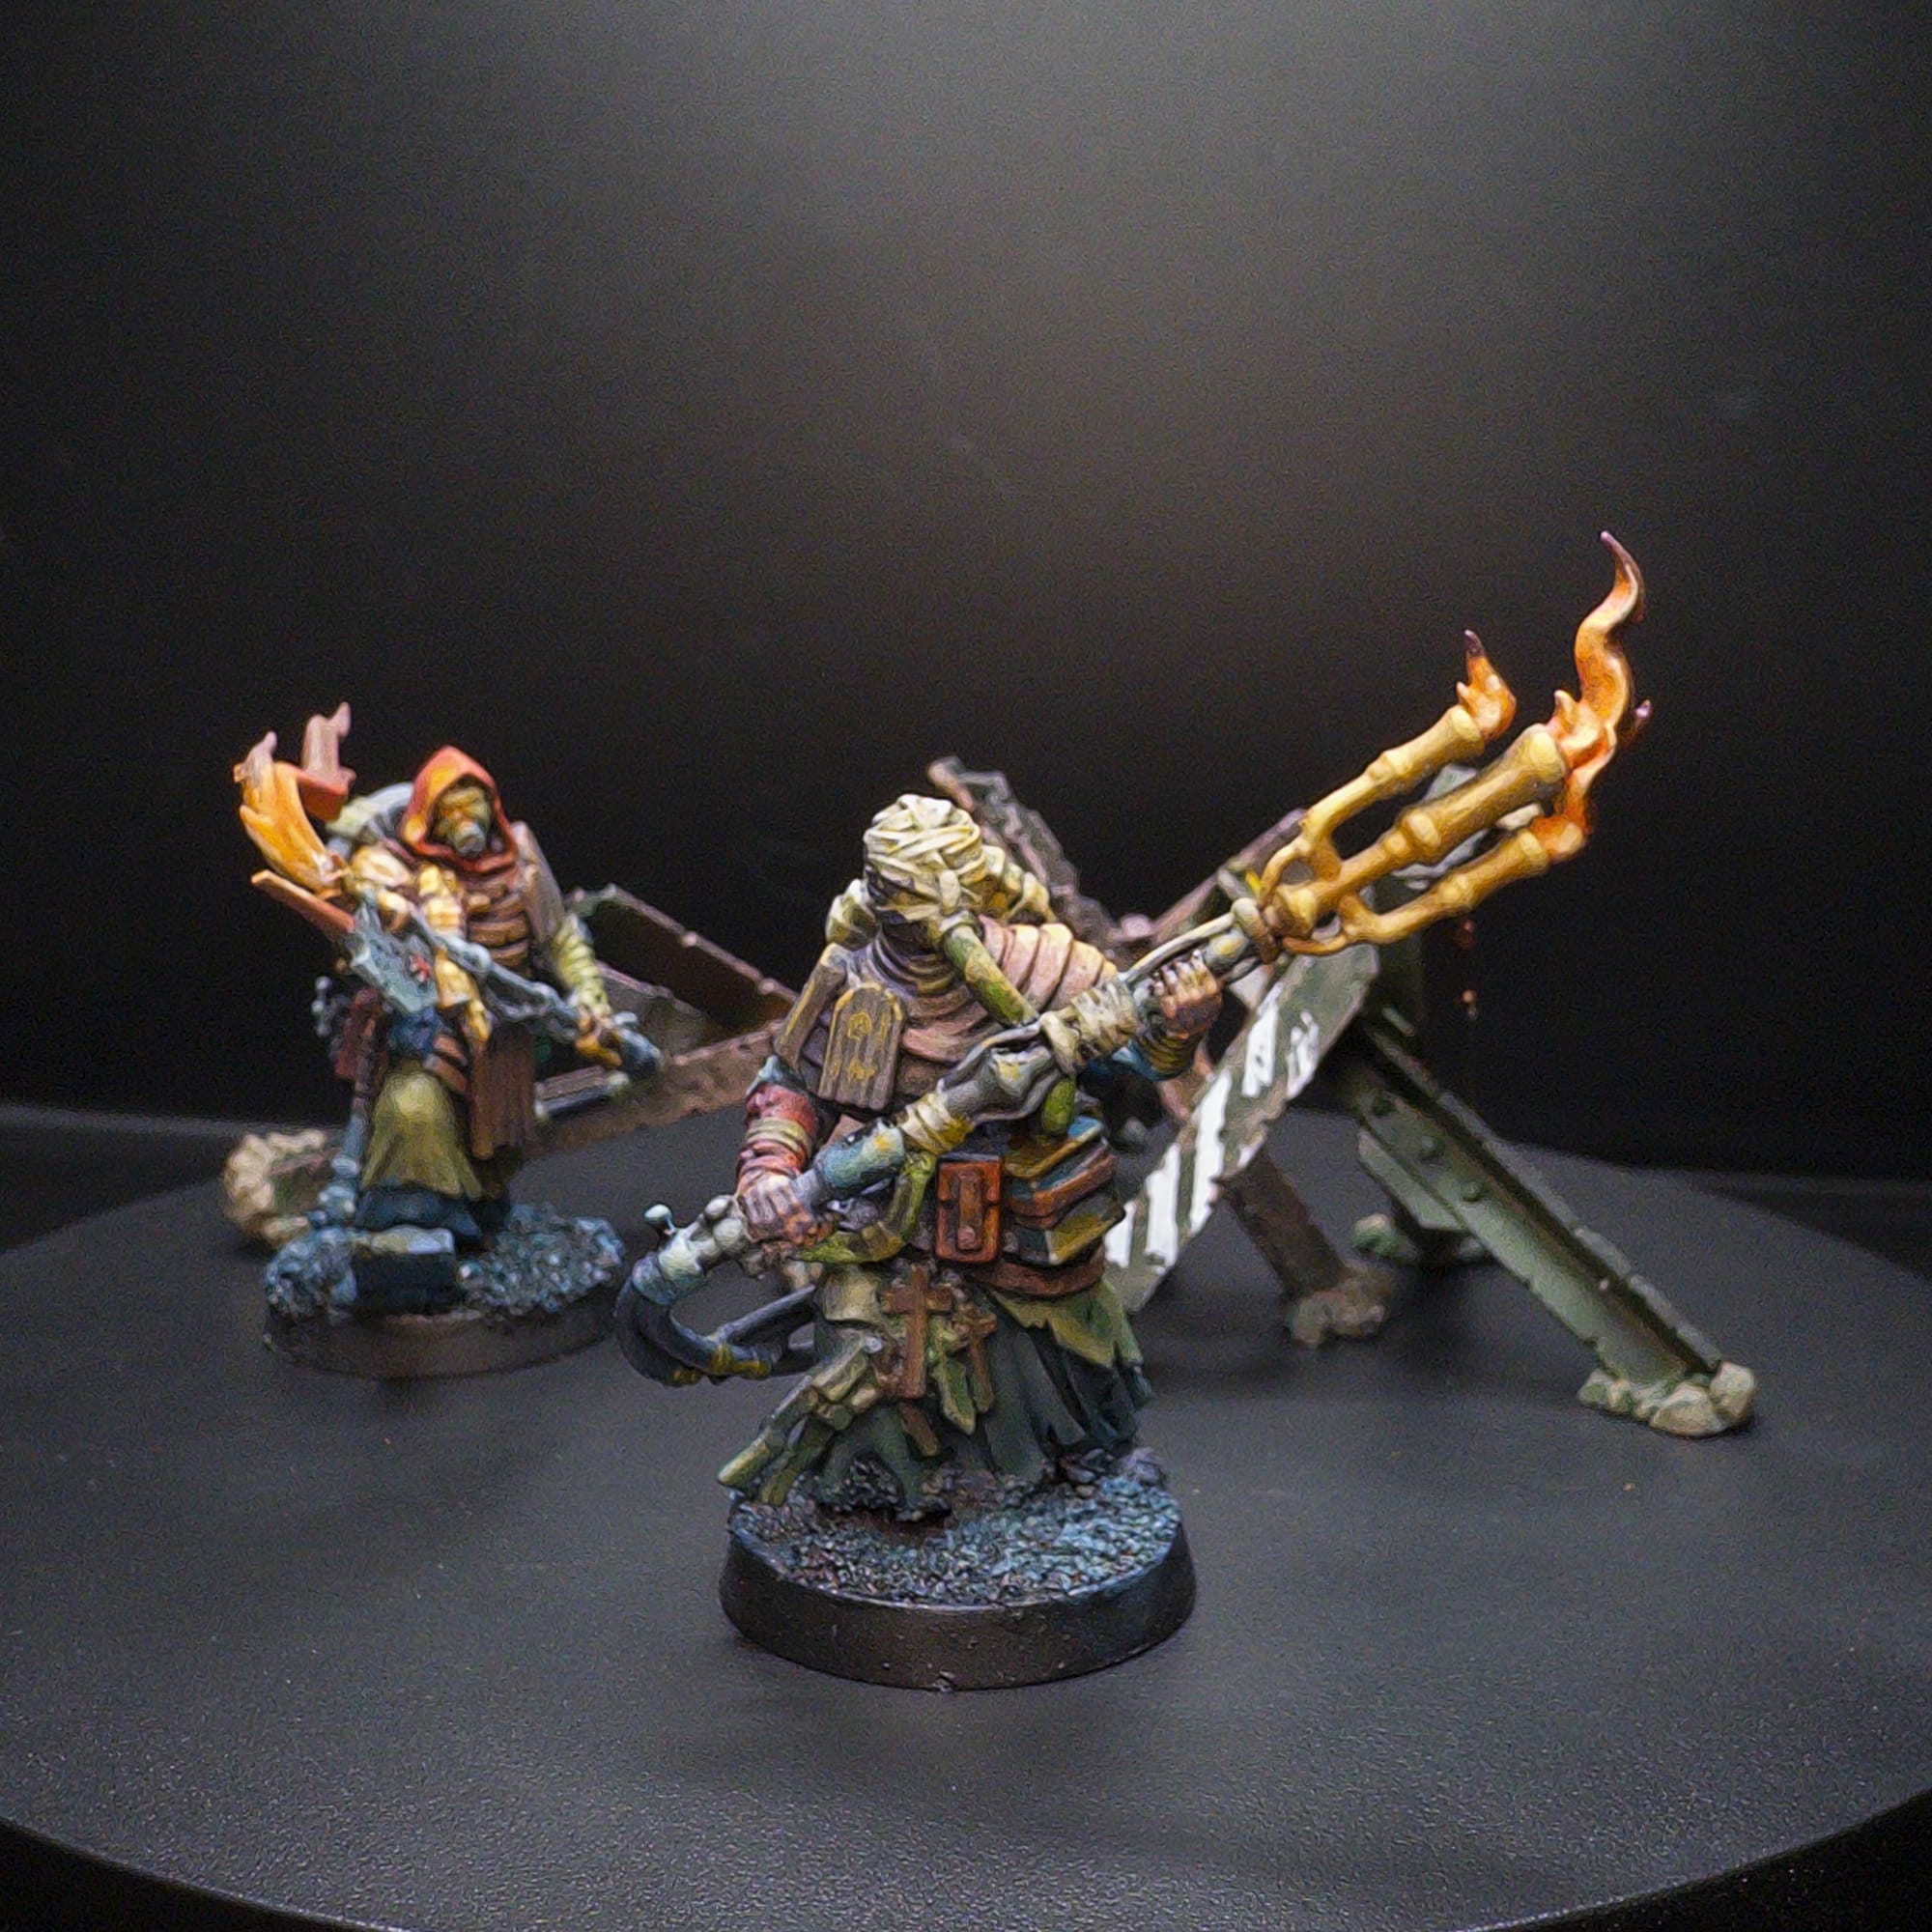
Randy: Like the other artists, I started with a zenithal prime, and since these are for the table, you want to make one or two obvious points to look at. At time of press, I painted up some Pilgrims and the Ecclesiastic Prisoner.
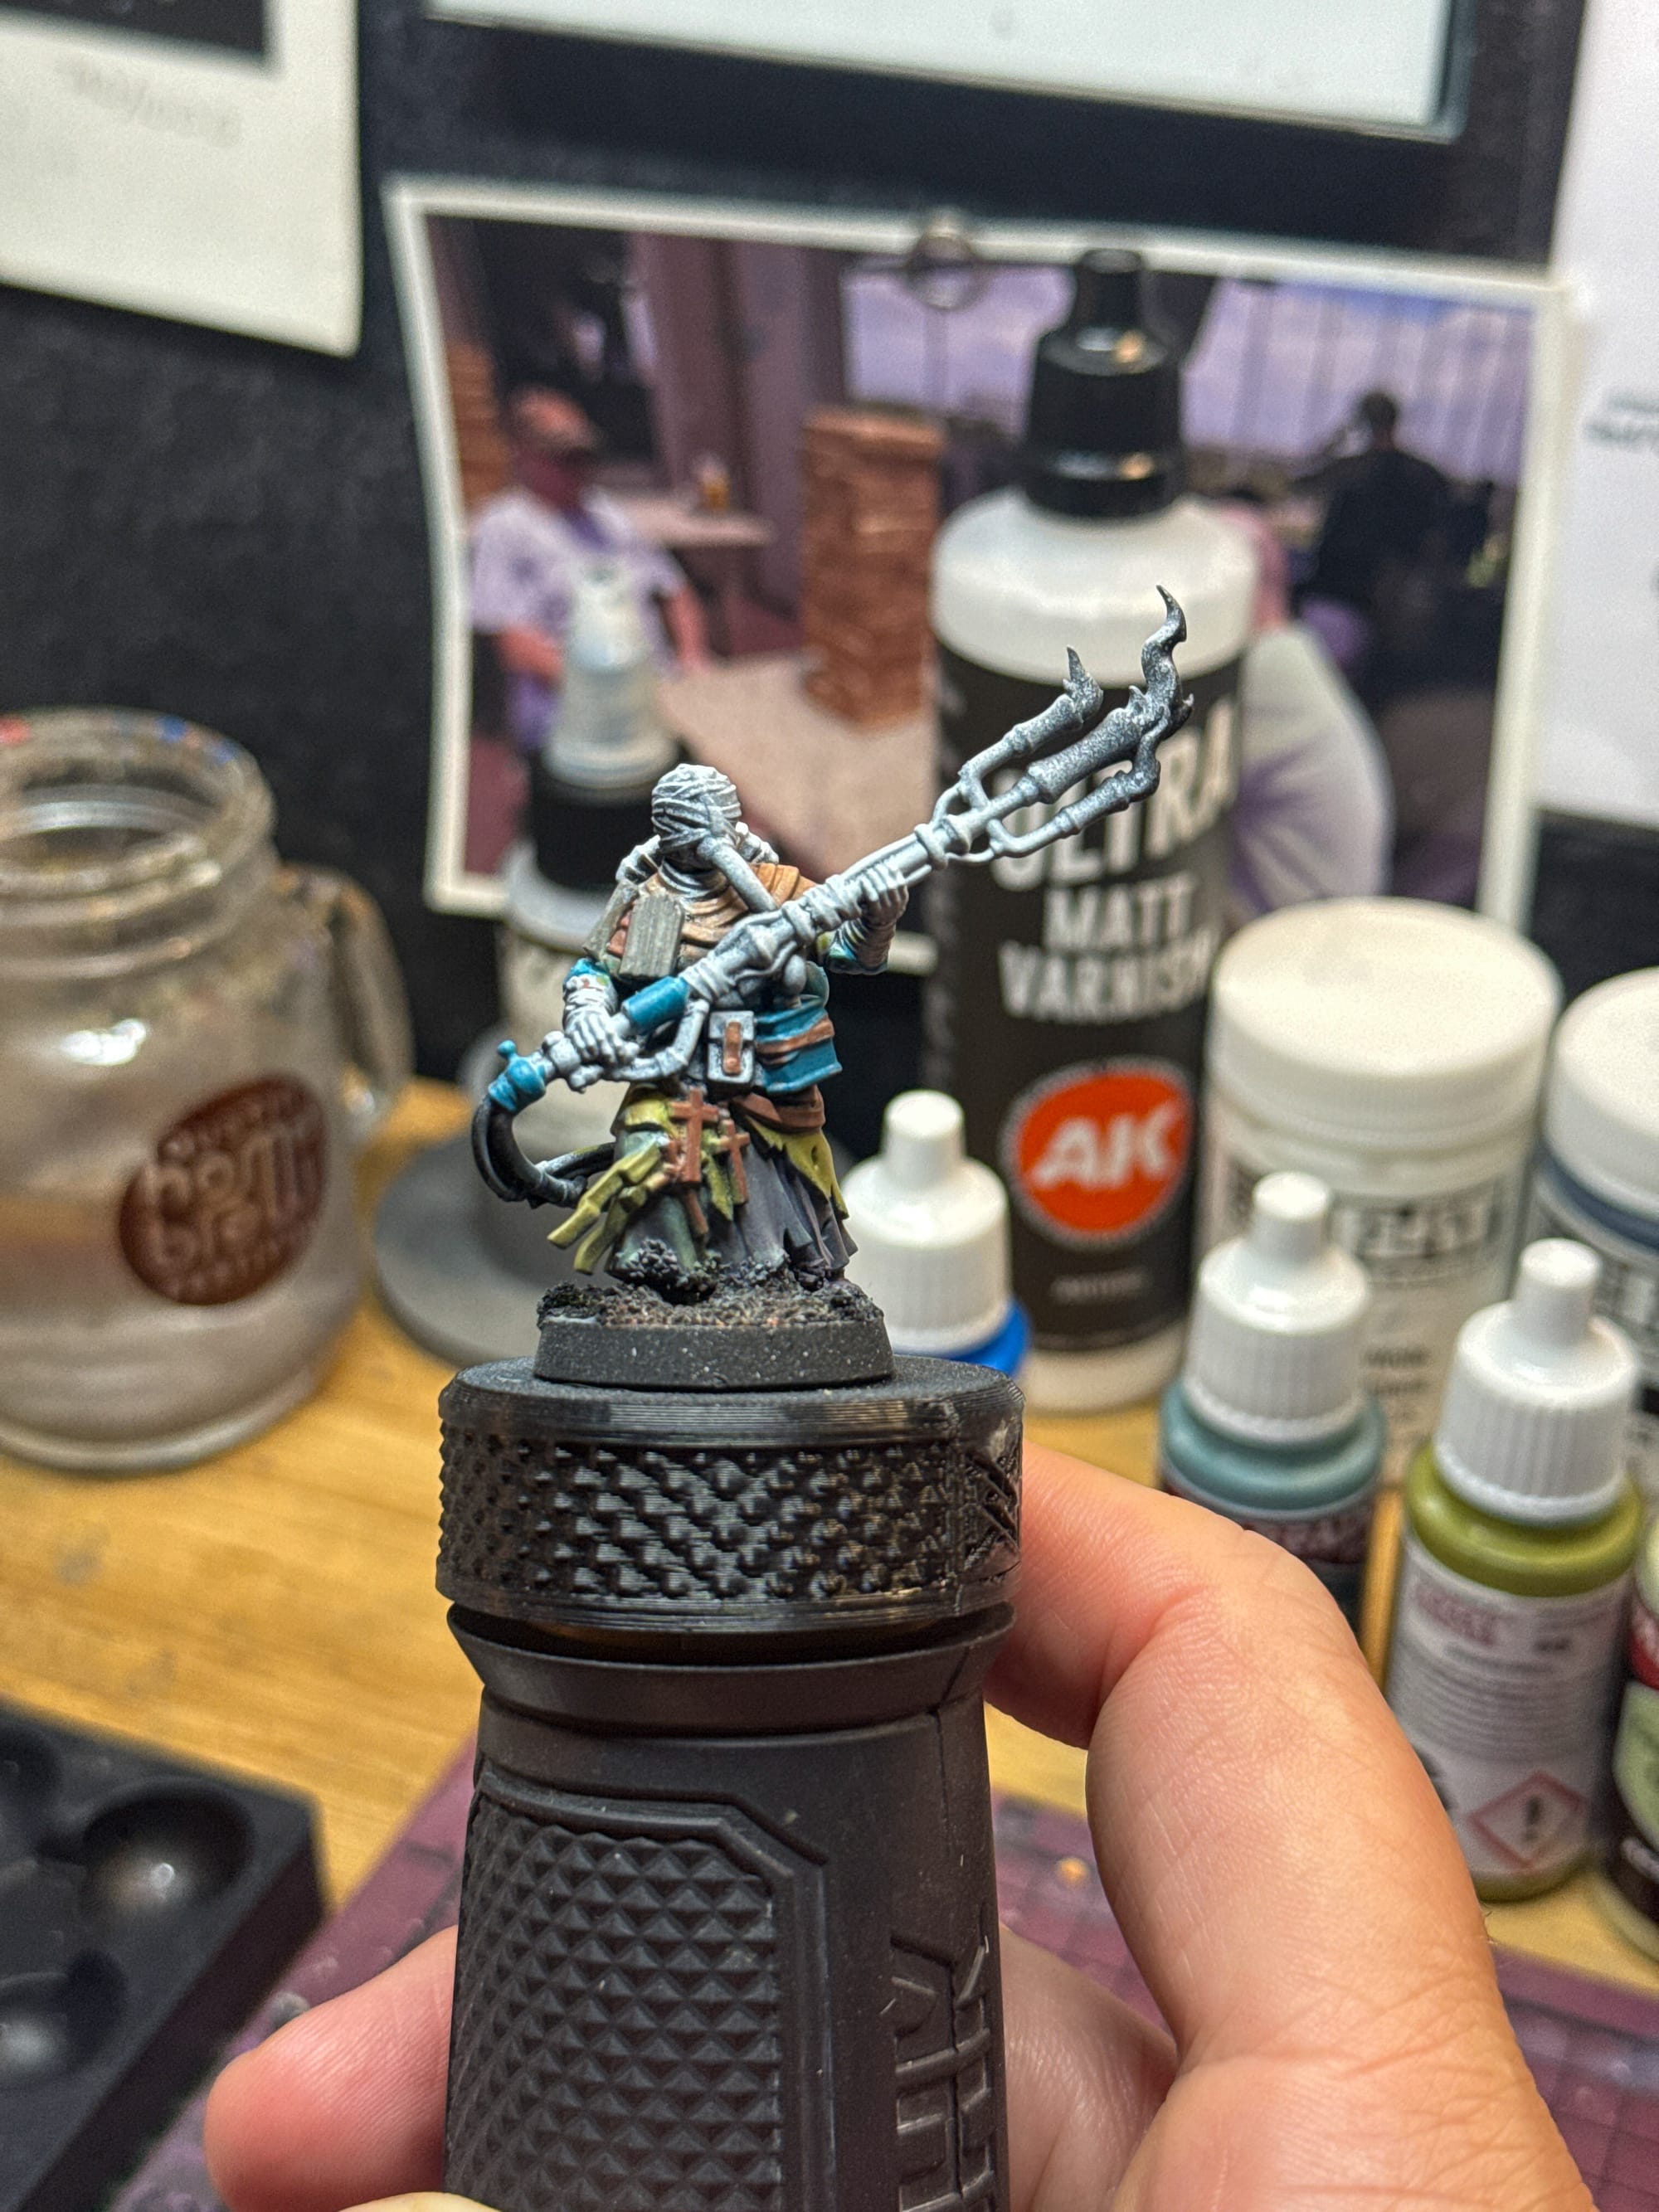
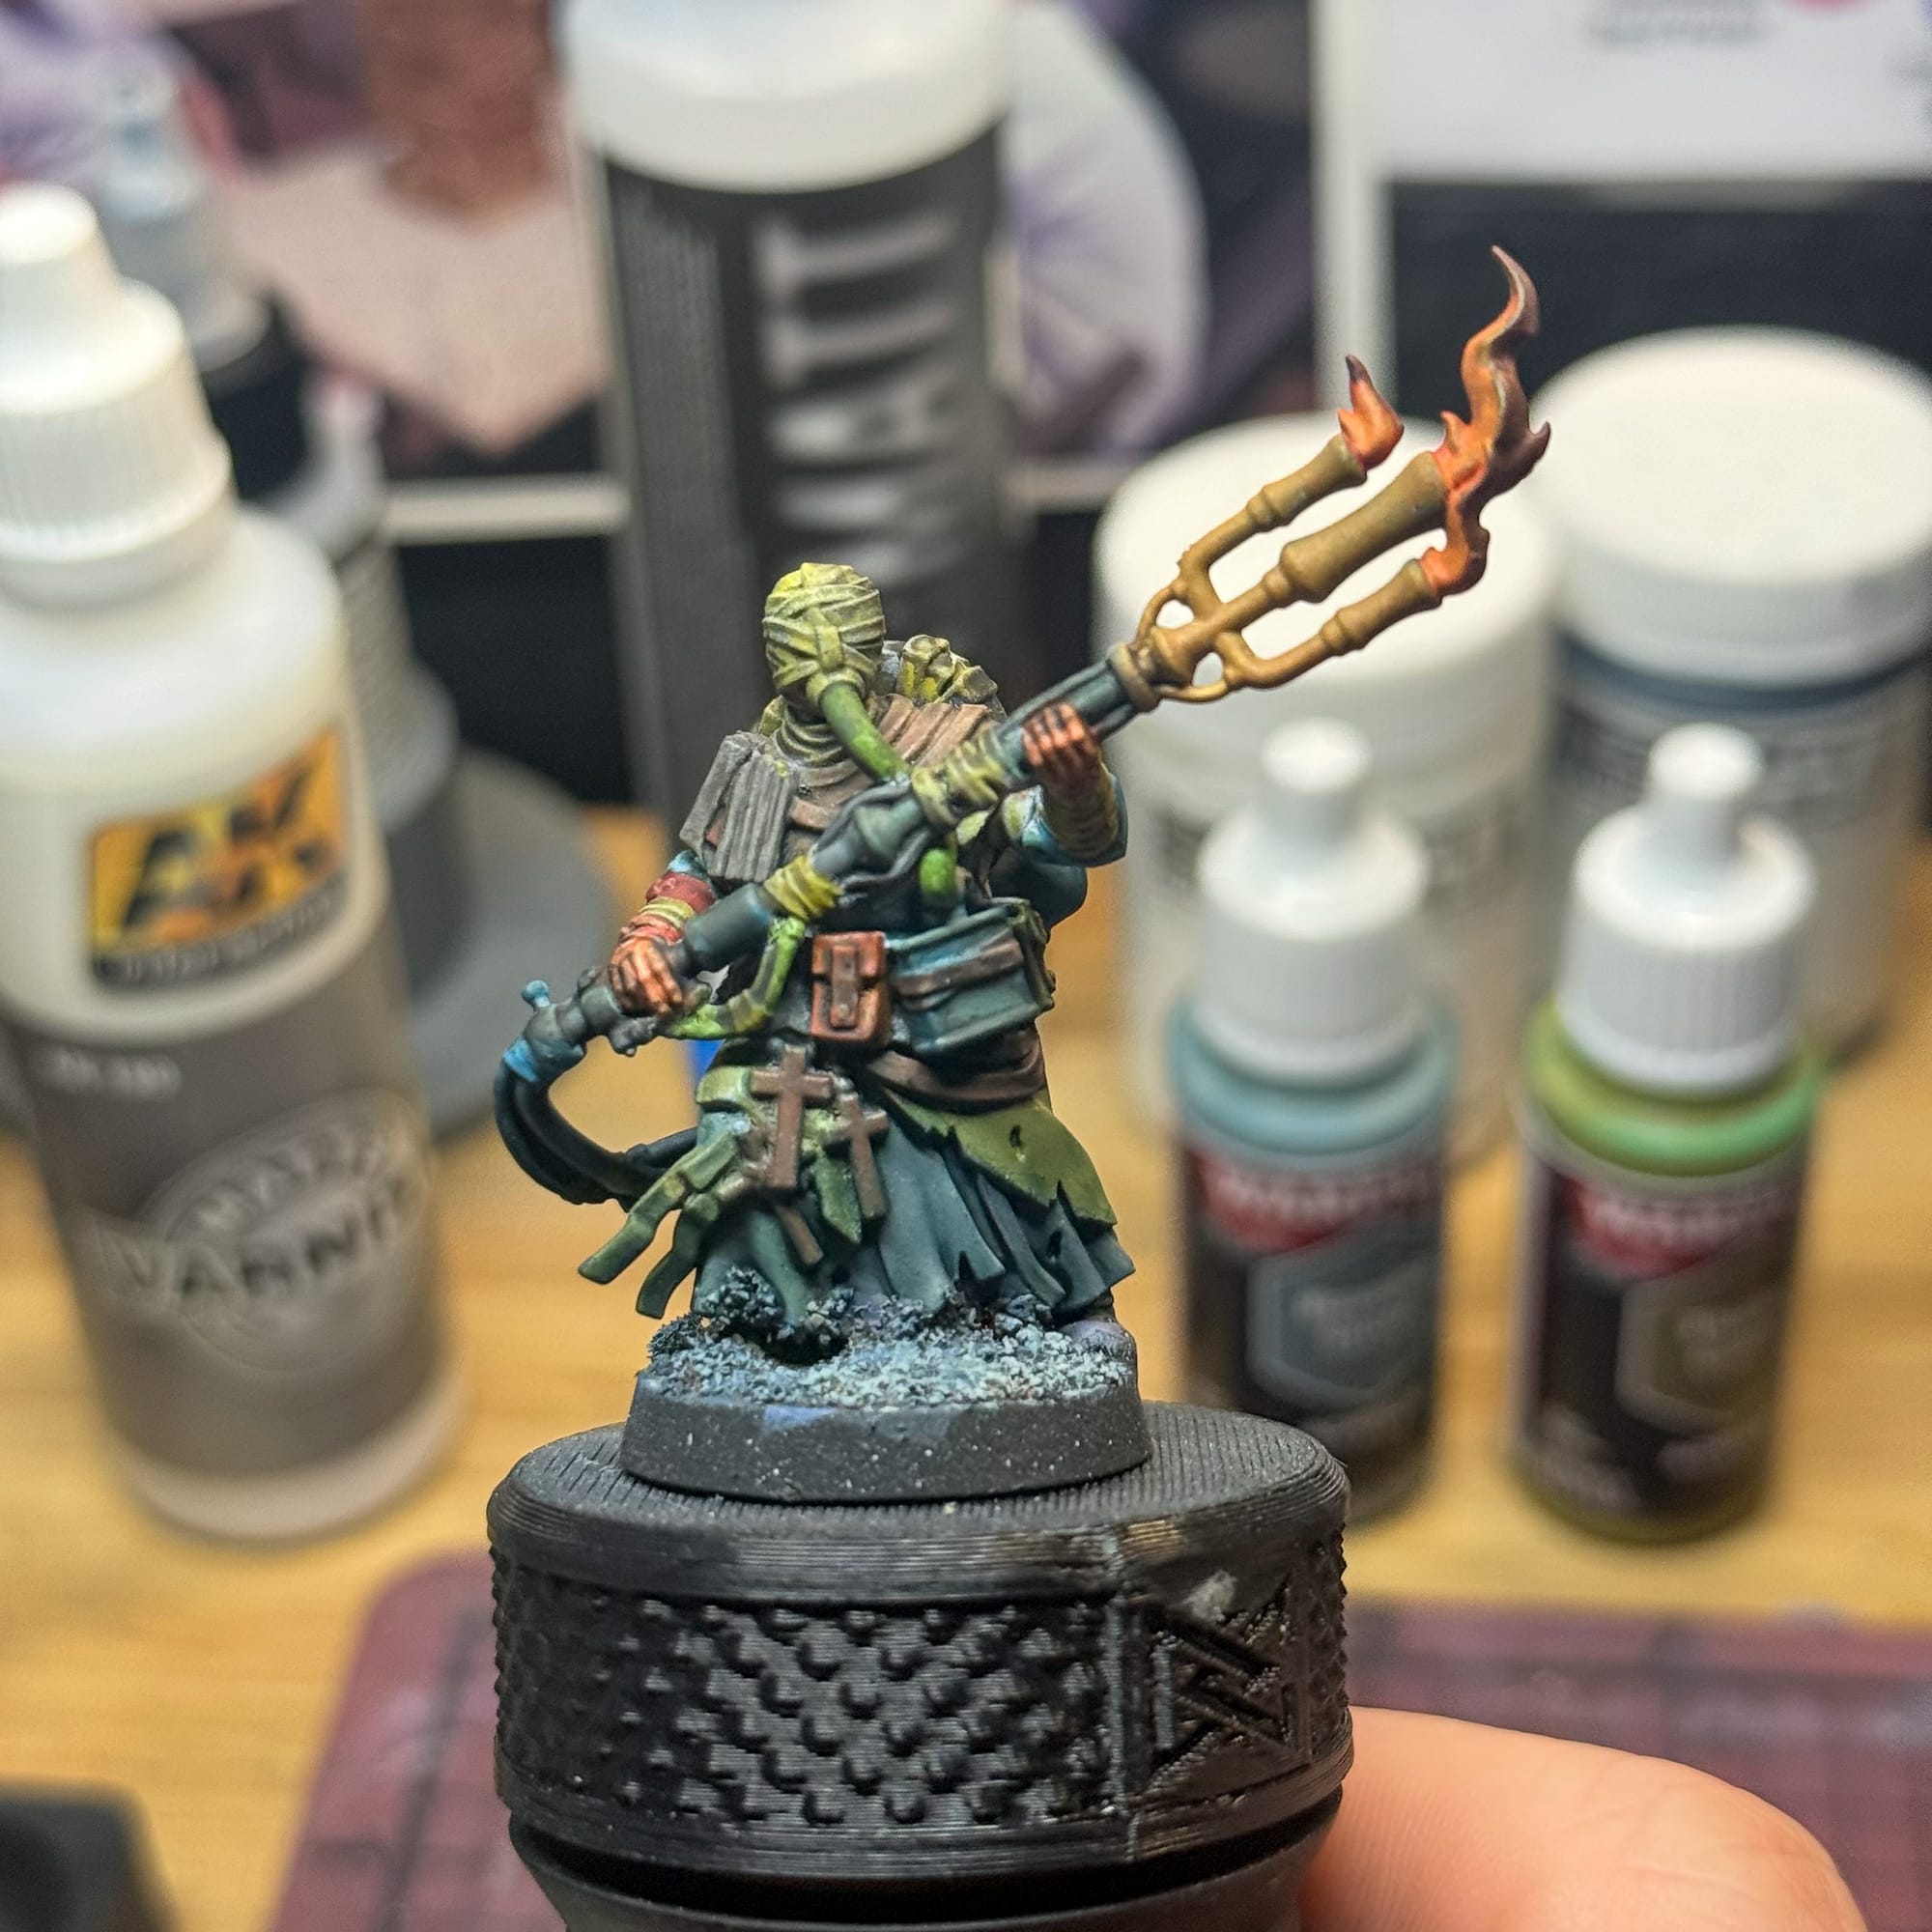
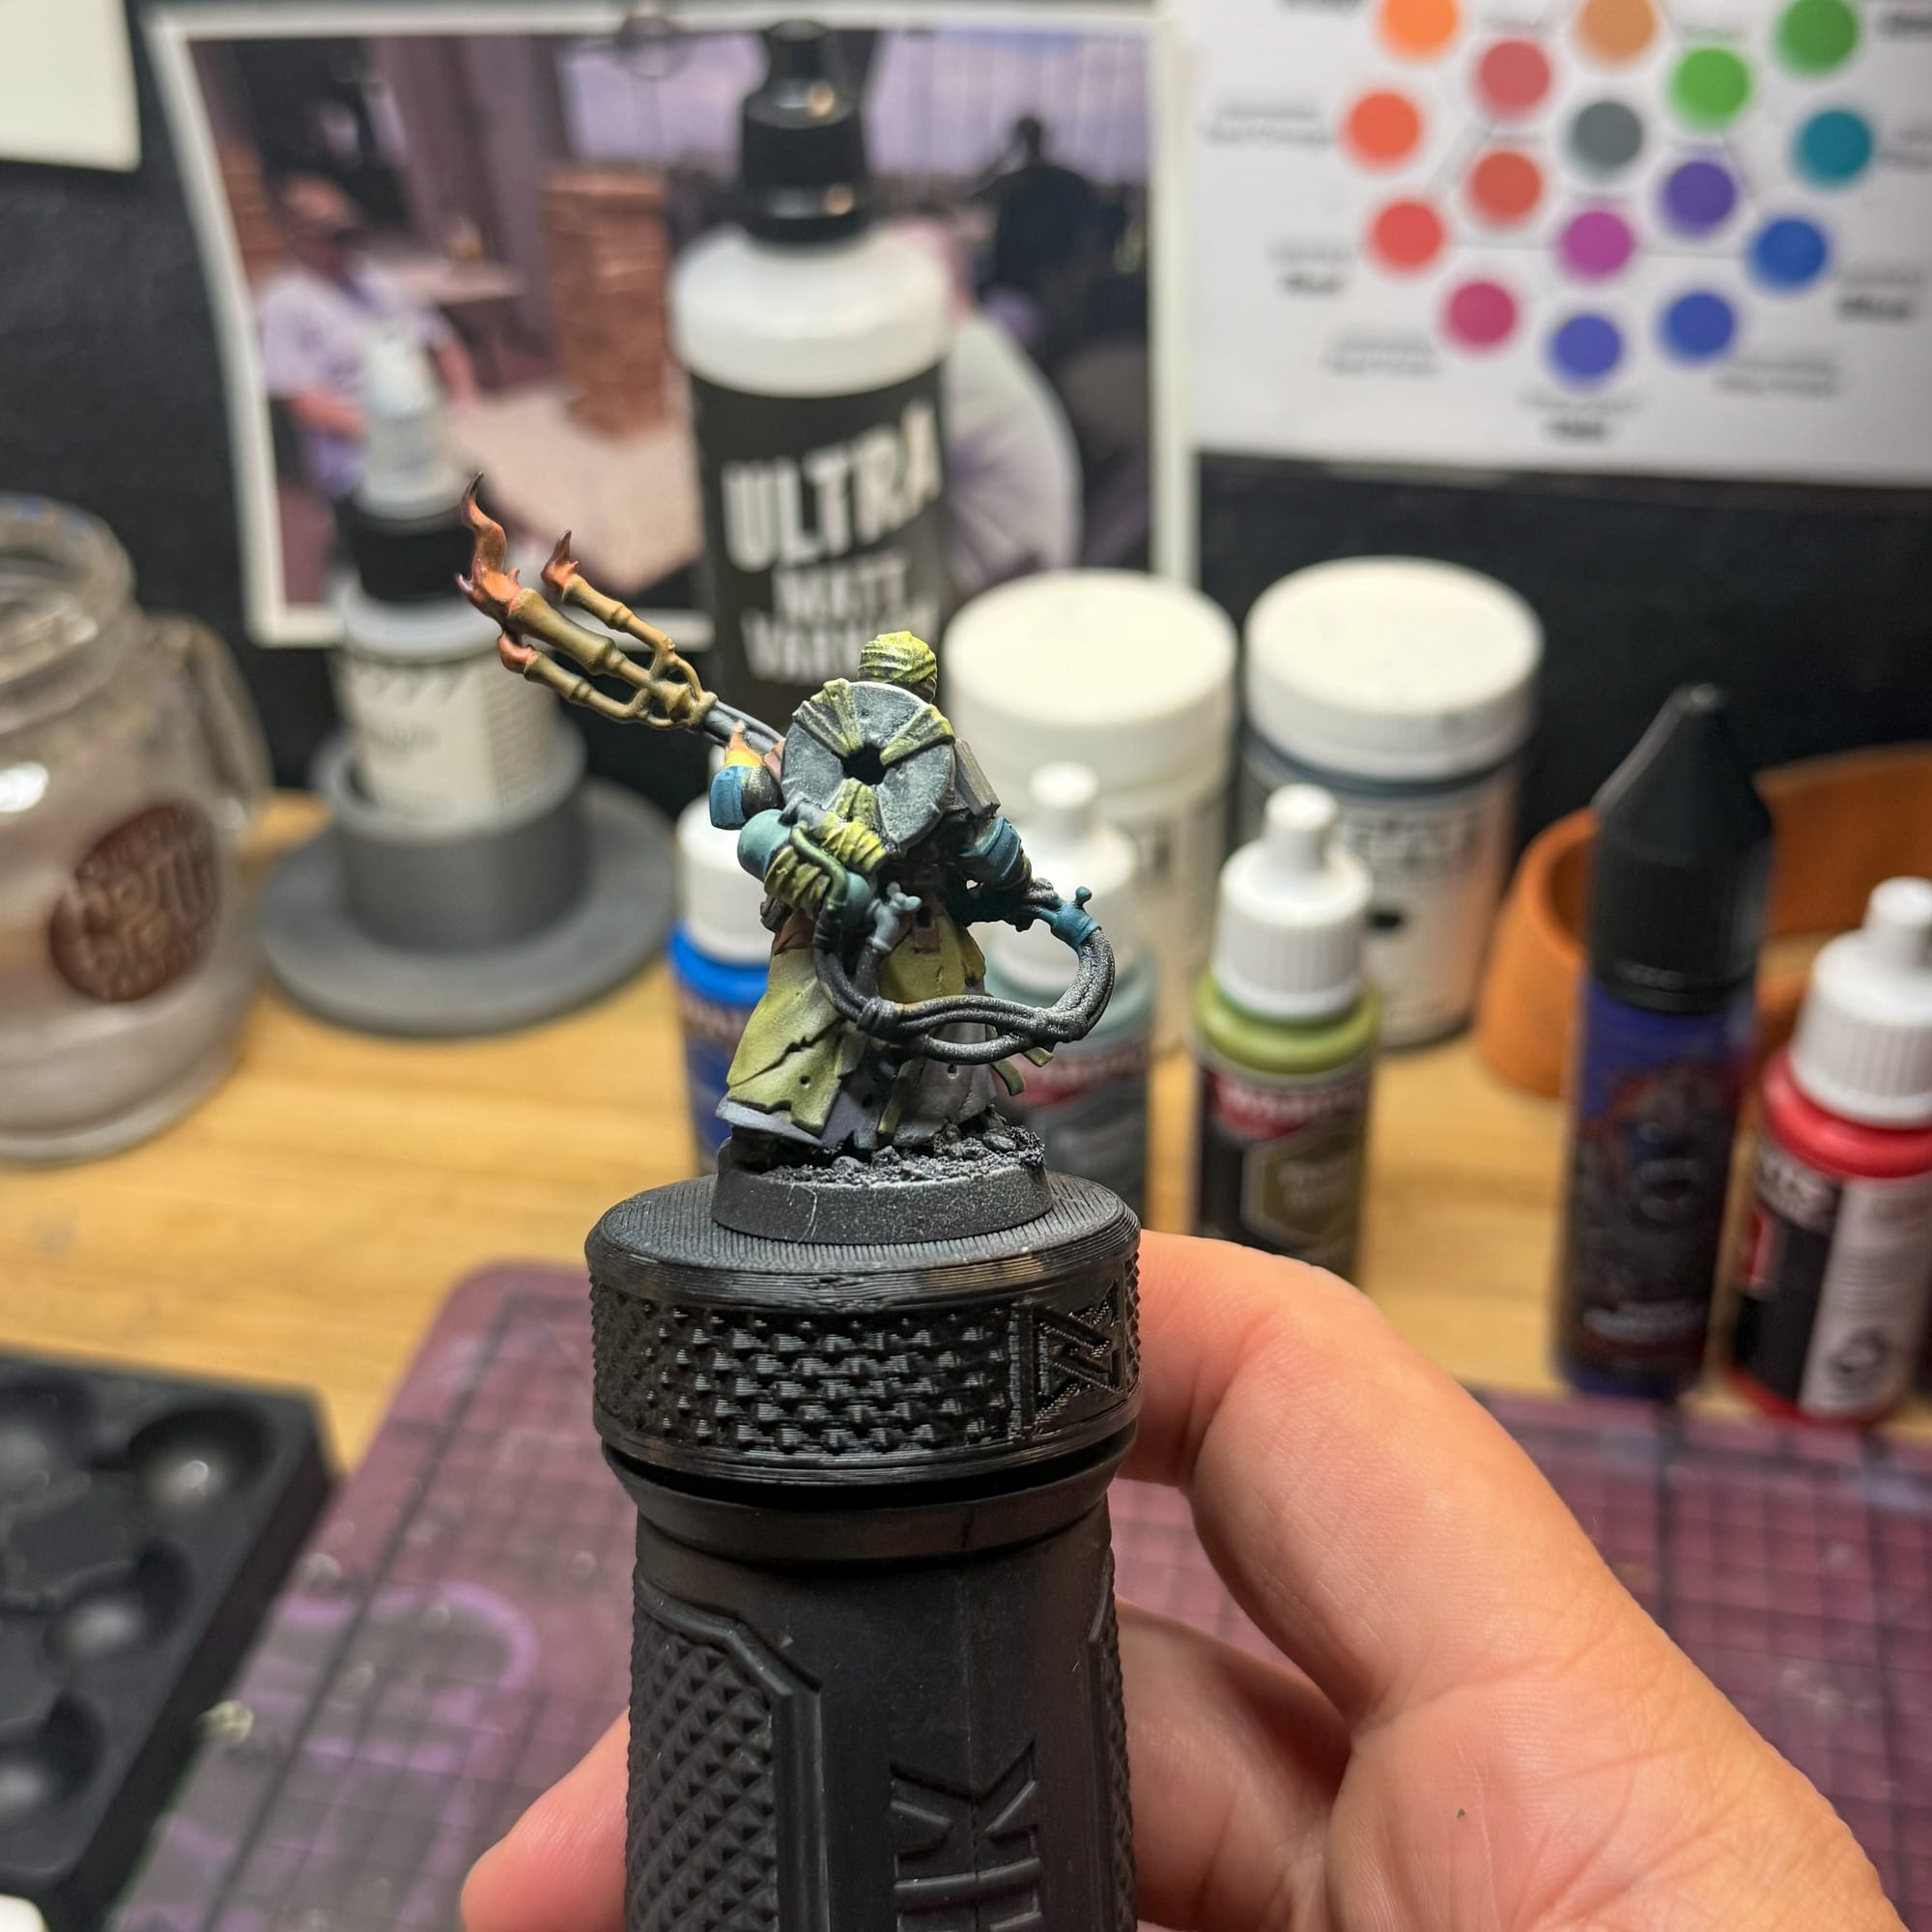
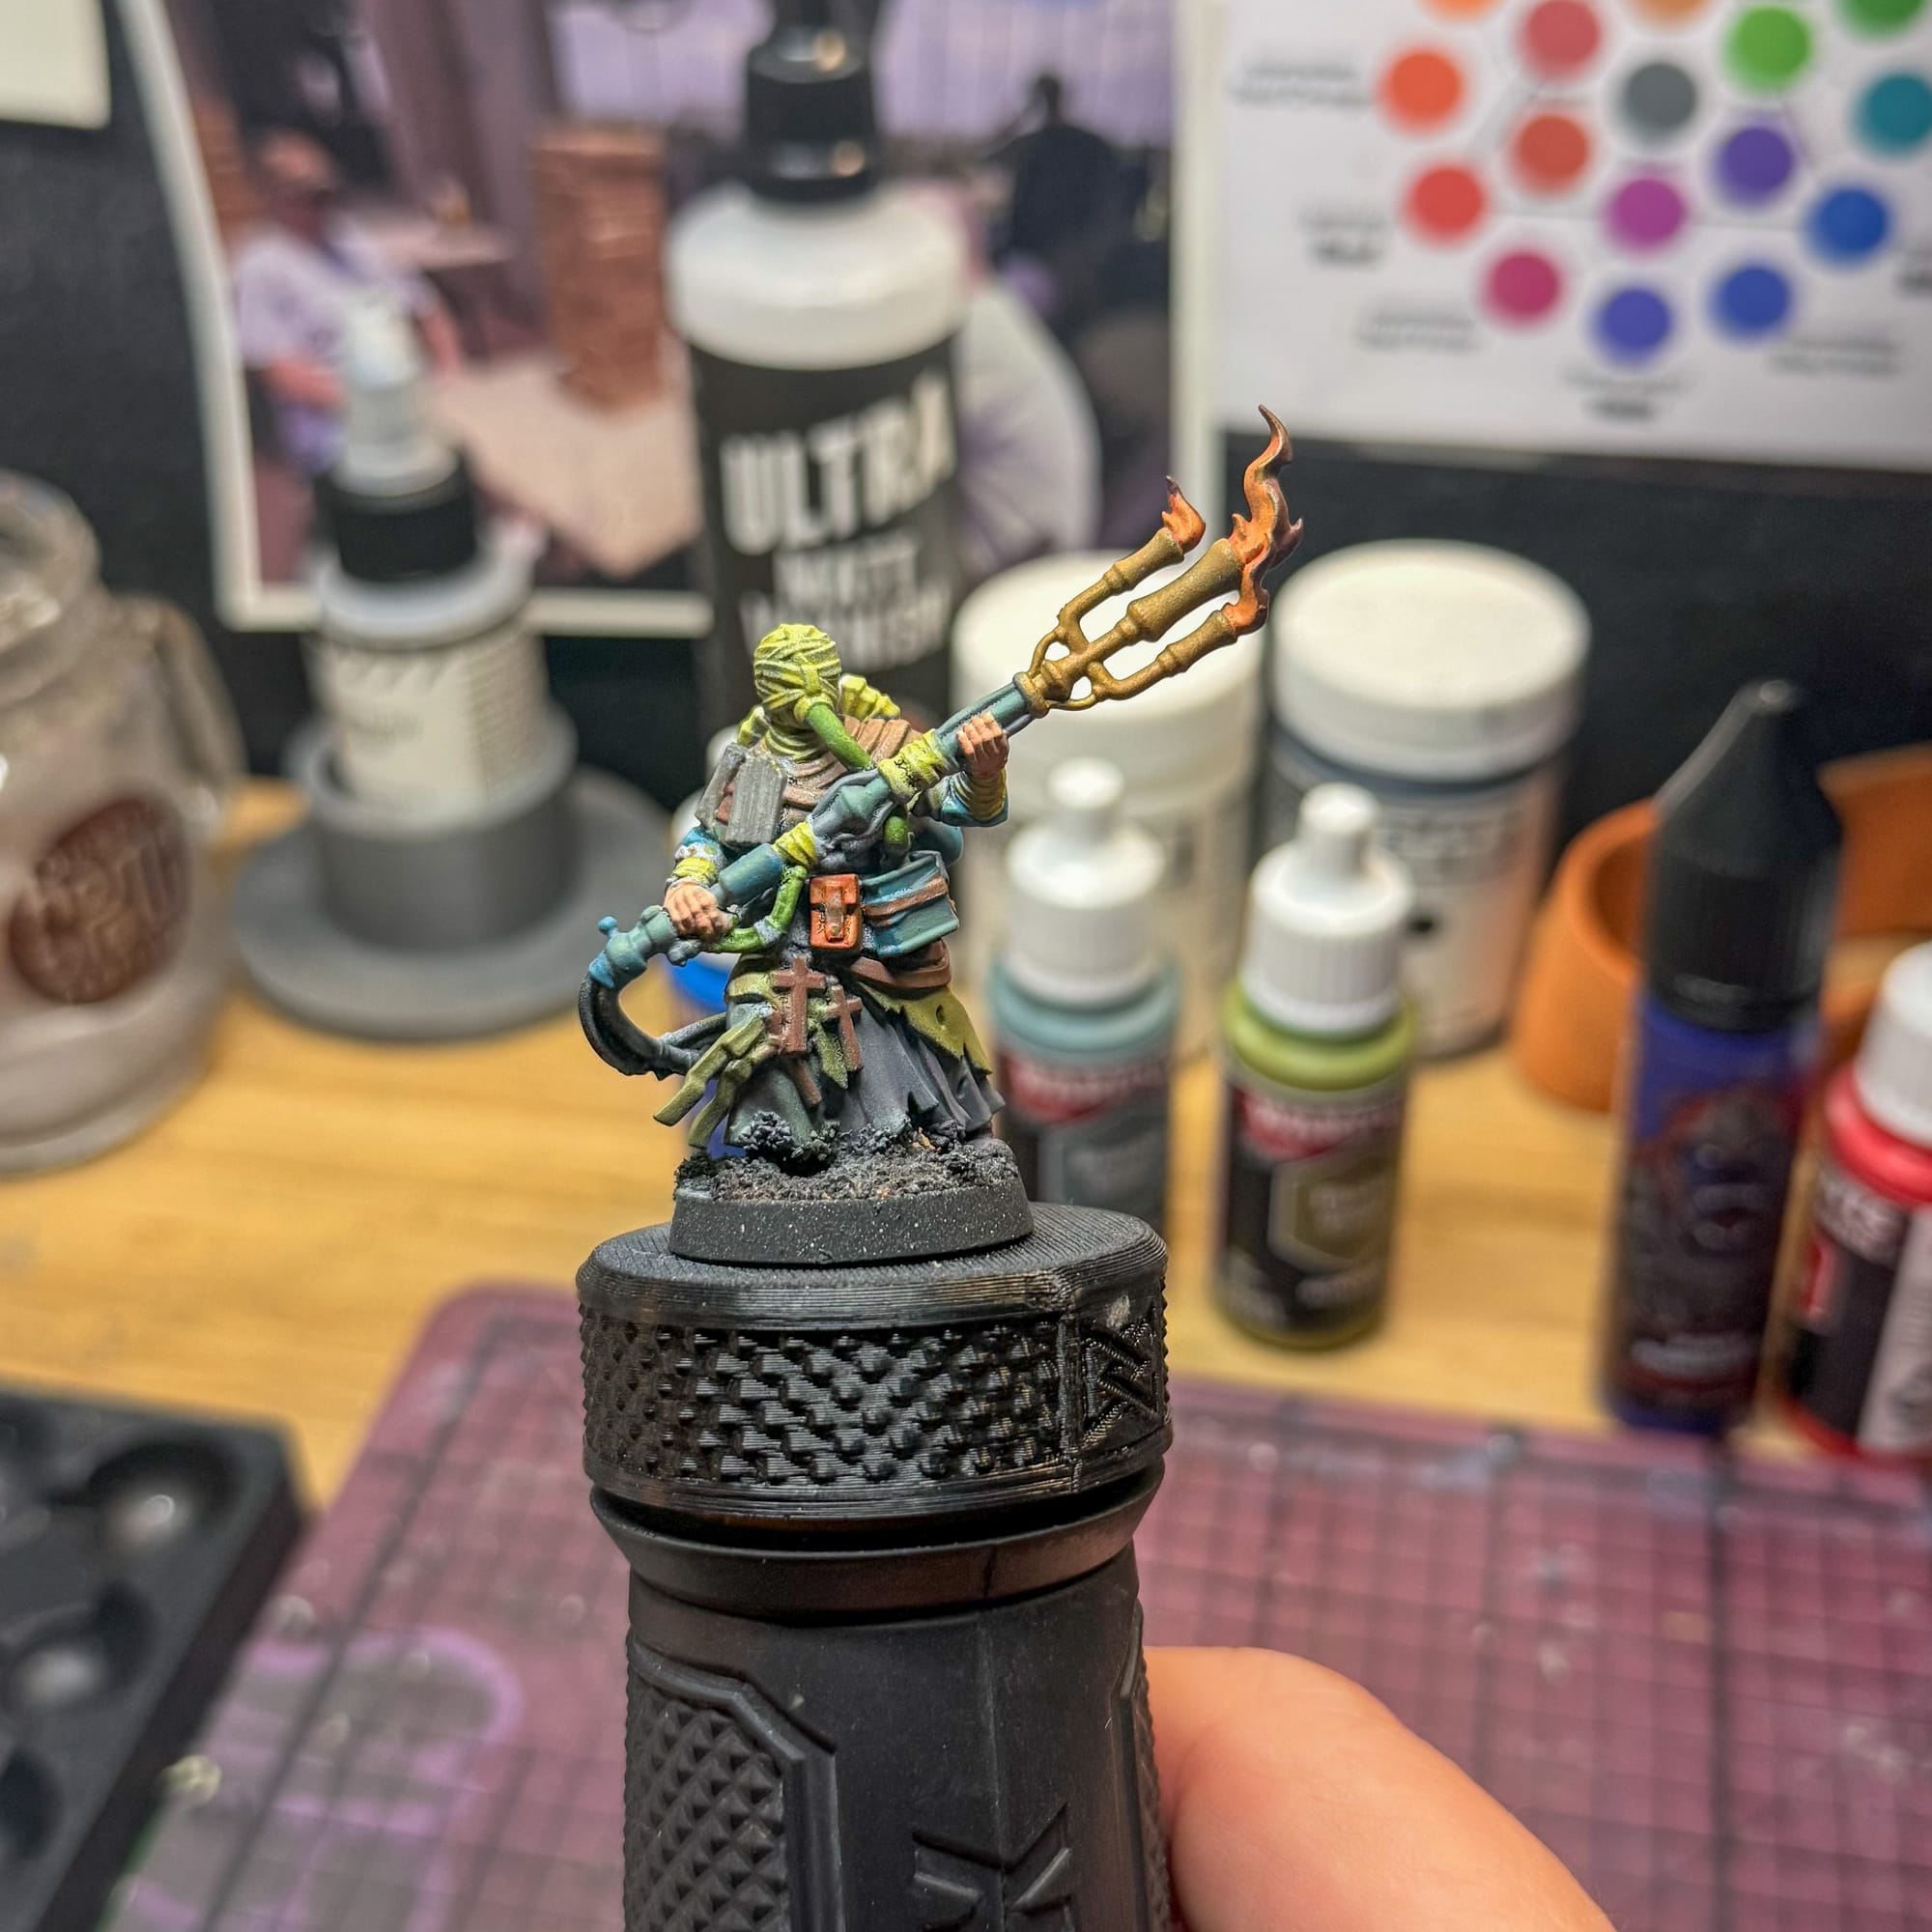
I chose one model to do a test of the entire scheme.
For paints, I grabbed a number of Army Painter favorites from the John Blanche collection, including Moonbeam Yellow, The Darkness, Thicket Grove, and Bramble Grove, just to name a few. I also added in Purple People Eater and Grey Goose from Bear Cavalry, and then both the black and white from Golden So Flat. The idea with all of these paints is choosing high pigment paints that I can stretch into highlights, shadows, and midtones. Since I’m going traditional, only two washes are needed. Coelia Greenshade, which presents as an aquatic green, and Nuln Oil (the old recipe).Since I was going for some uniformity in my color placement, I chose a specific color for specific parts. All of the wraps will be roughly the same color. All the wood that is like a shield will be grey/blue/brown, to represent waterlogged wood. Any armor will be deep blue to start with, and then move up a brilliant shine in some parts, but obscured by dirt in the shadows. The deepest robe or undergarment will be the darkest part of the model, slightly purple, slightly blue. Browns represent leathers or other wood. Greys and bronzes will represent other metals, like the fire weaponry on the Leper Pilgrims, and the locks on the Prisoner.
After all the planning, it’s just a matter of painting. Choose an area of the model where you want the eyes to go to, and that will help you plan your highlights. For highlighting, take the base color and add a pigment that will boost the saturation. For example, on this pilgrim holding a cadelarba-flamethrower, the fire will create an interesting point, so I applied hints of orange coming off of all of the surrounding parts of the model while brightening that specific area. The browns move up to a yellow/orange with white, the yellows reflect the orange, the bronze moves towards gold…and in the opposite end, I added more purples and deep blue greens, which I made a specific filter (this is thinner than a wash) for. This helps amplify my highlight but is still cool to look at.
And it can’t be Trench Crusade without some effects. Verdigris oil washes on the bronze, rust washes on the other metals, and a lot of dirt and grime coming up from the ground.
Painting Beach Landing Scatter Terrain
Alec: The scatter terrain is really simple to paint, meaning you can get really creative by being really sloppy and messy with rust, sand, and goop. I started by priming them Flat Black with a zenithal of Army Painter Gun Metal Primer (Leadbelcher is comparable). The texture from the shows through underneath the primer, giving a real nasty, rusted base texture to it - perfect!
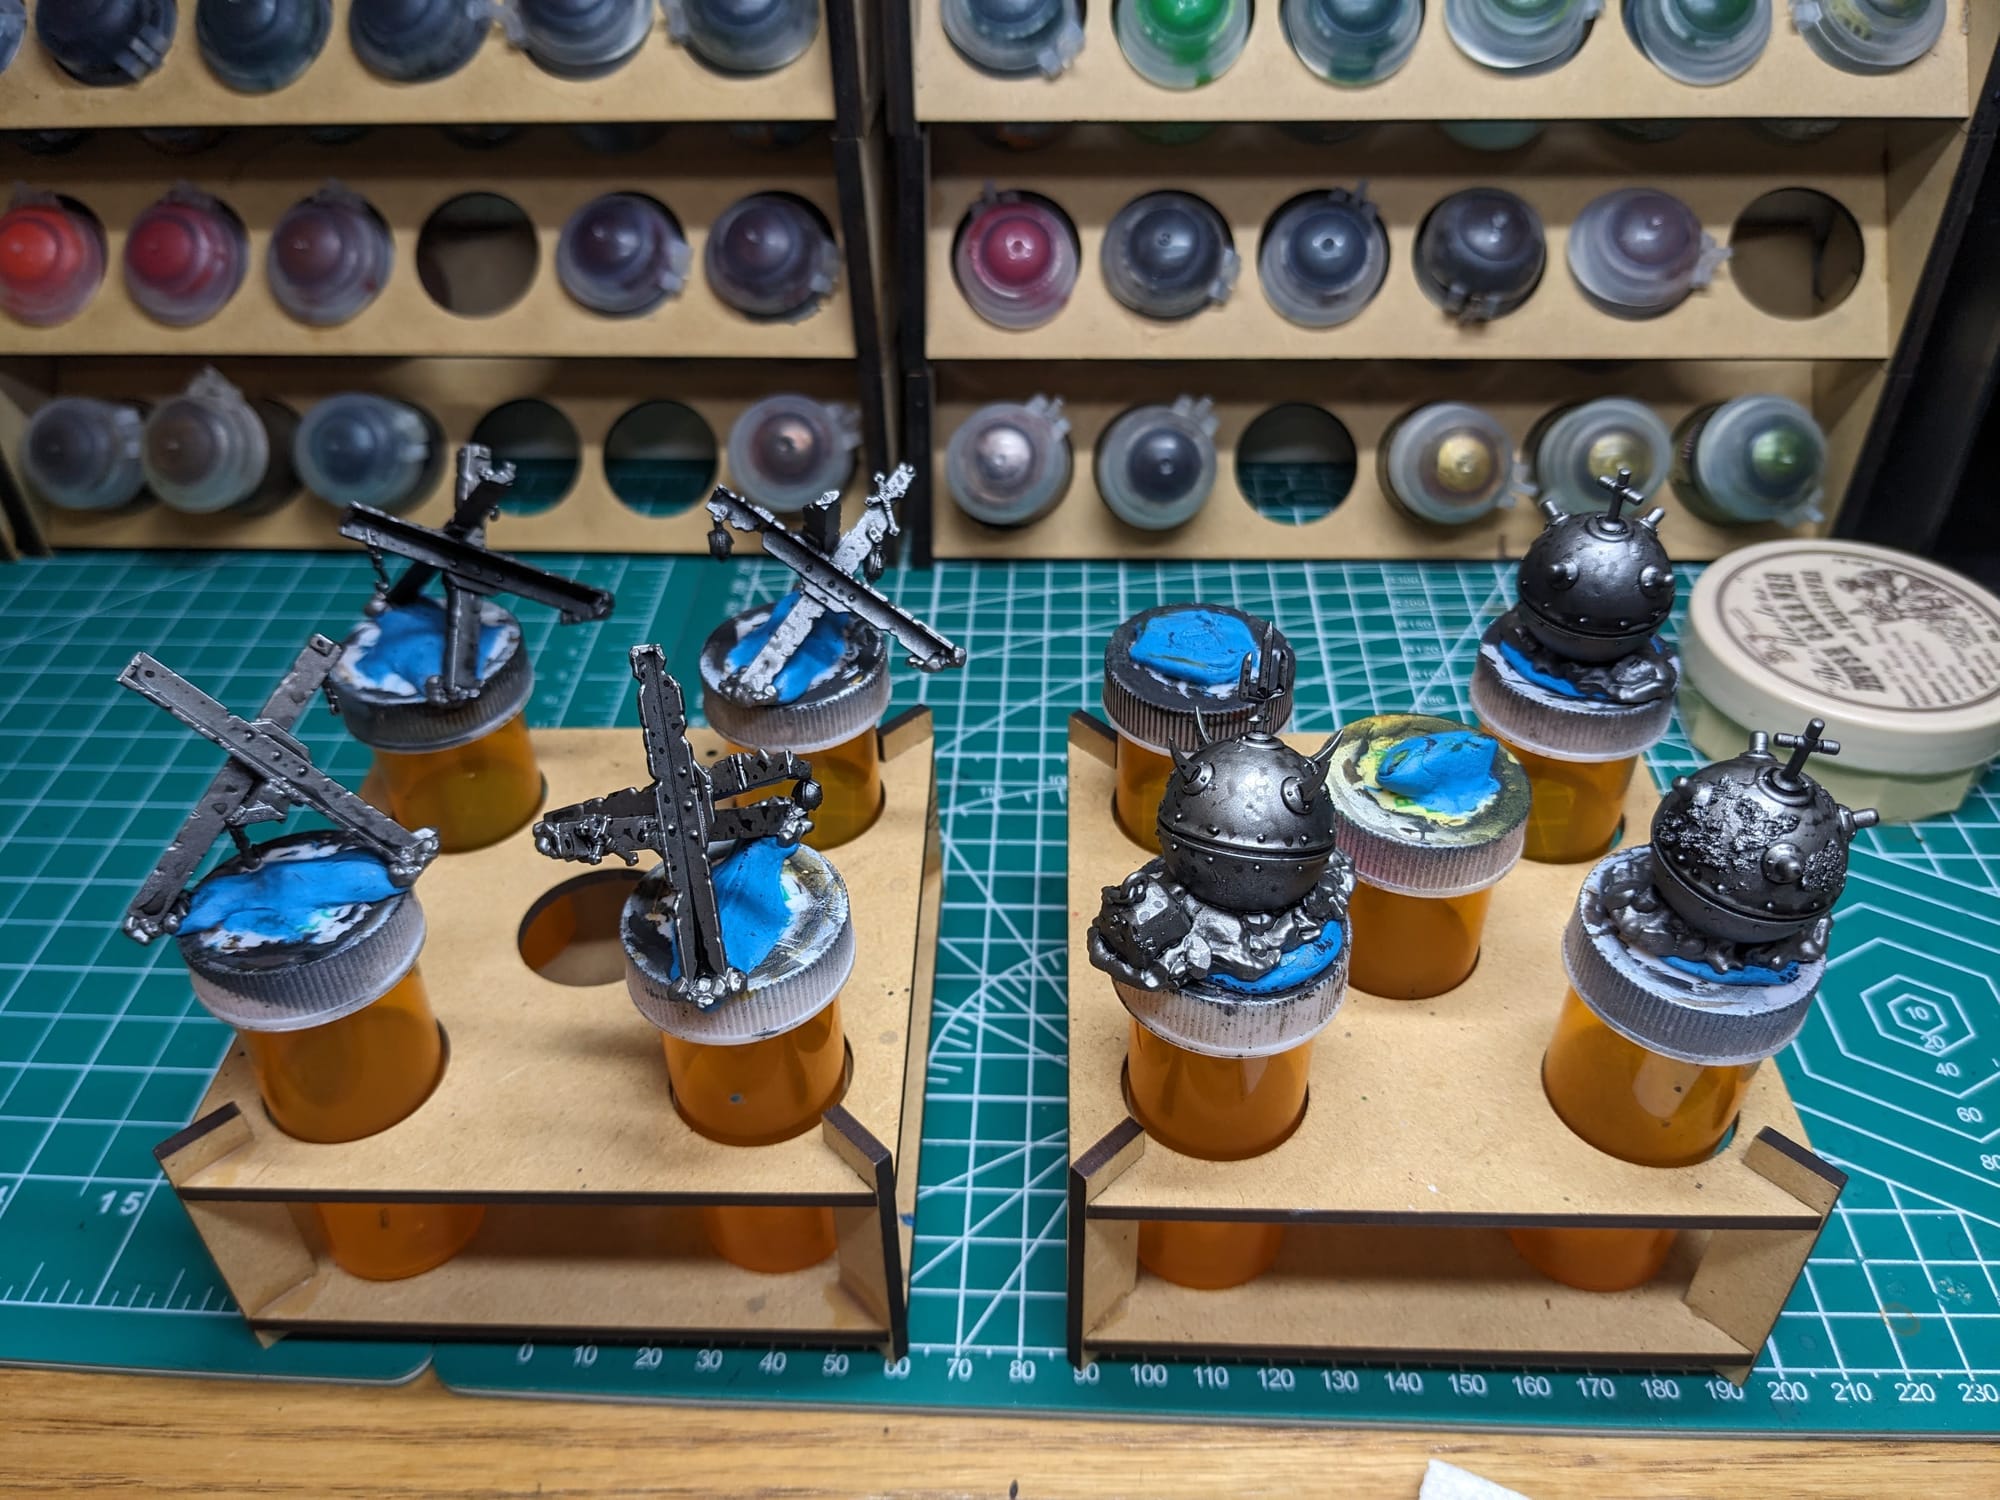
Since this is terrain, and will sit in the background, it really shouldn't stand out more than your minis. I started with applied a really uneven coat of Army Painter Dark Tone to give more contrast to the surfaces.
Like I did with the Heretic Naval Raiders, I applied rust over the metal, starting with the Pro Acryl Rust 1-Step paint, and then moving into the thinned & water-down Skrag Brown, which I applied to the joints and sections closest together.
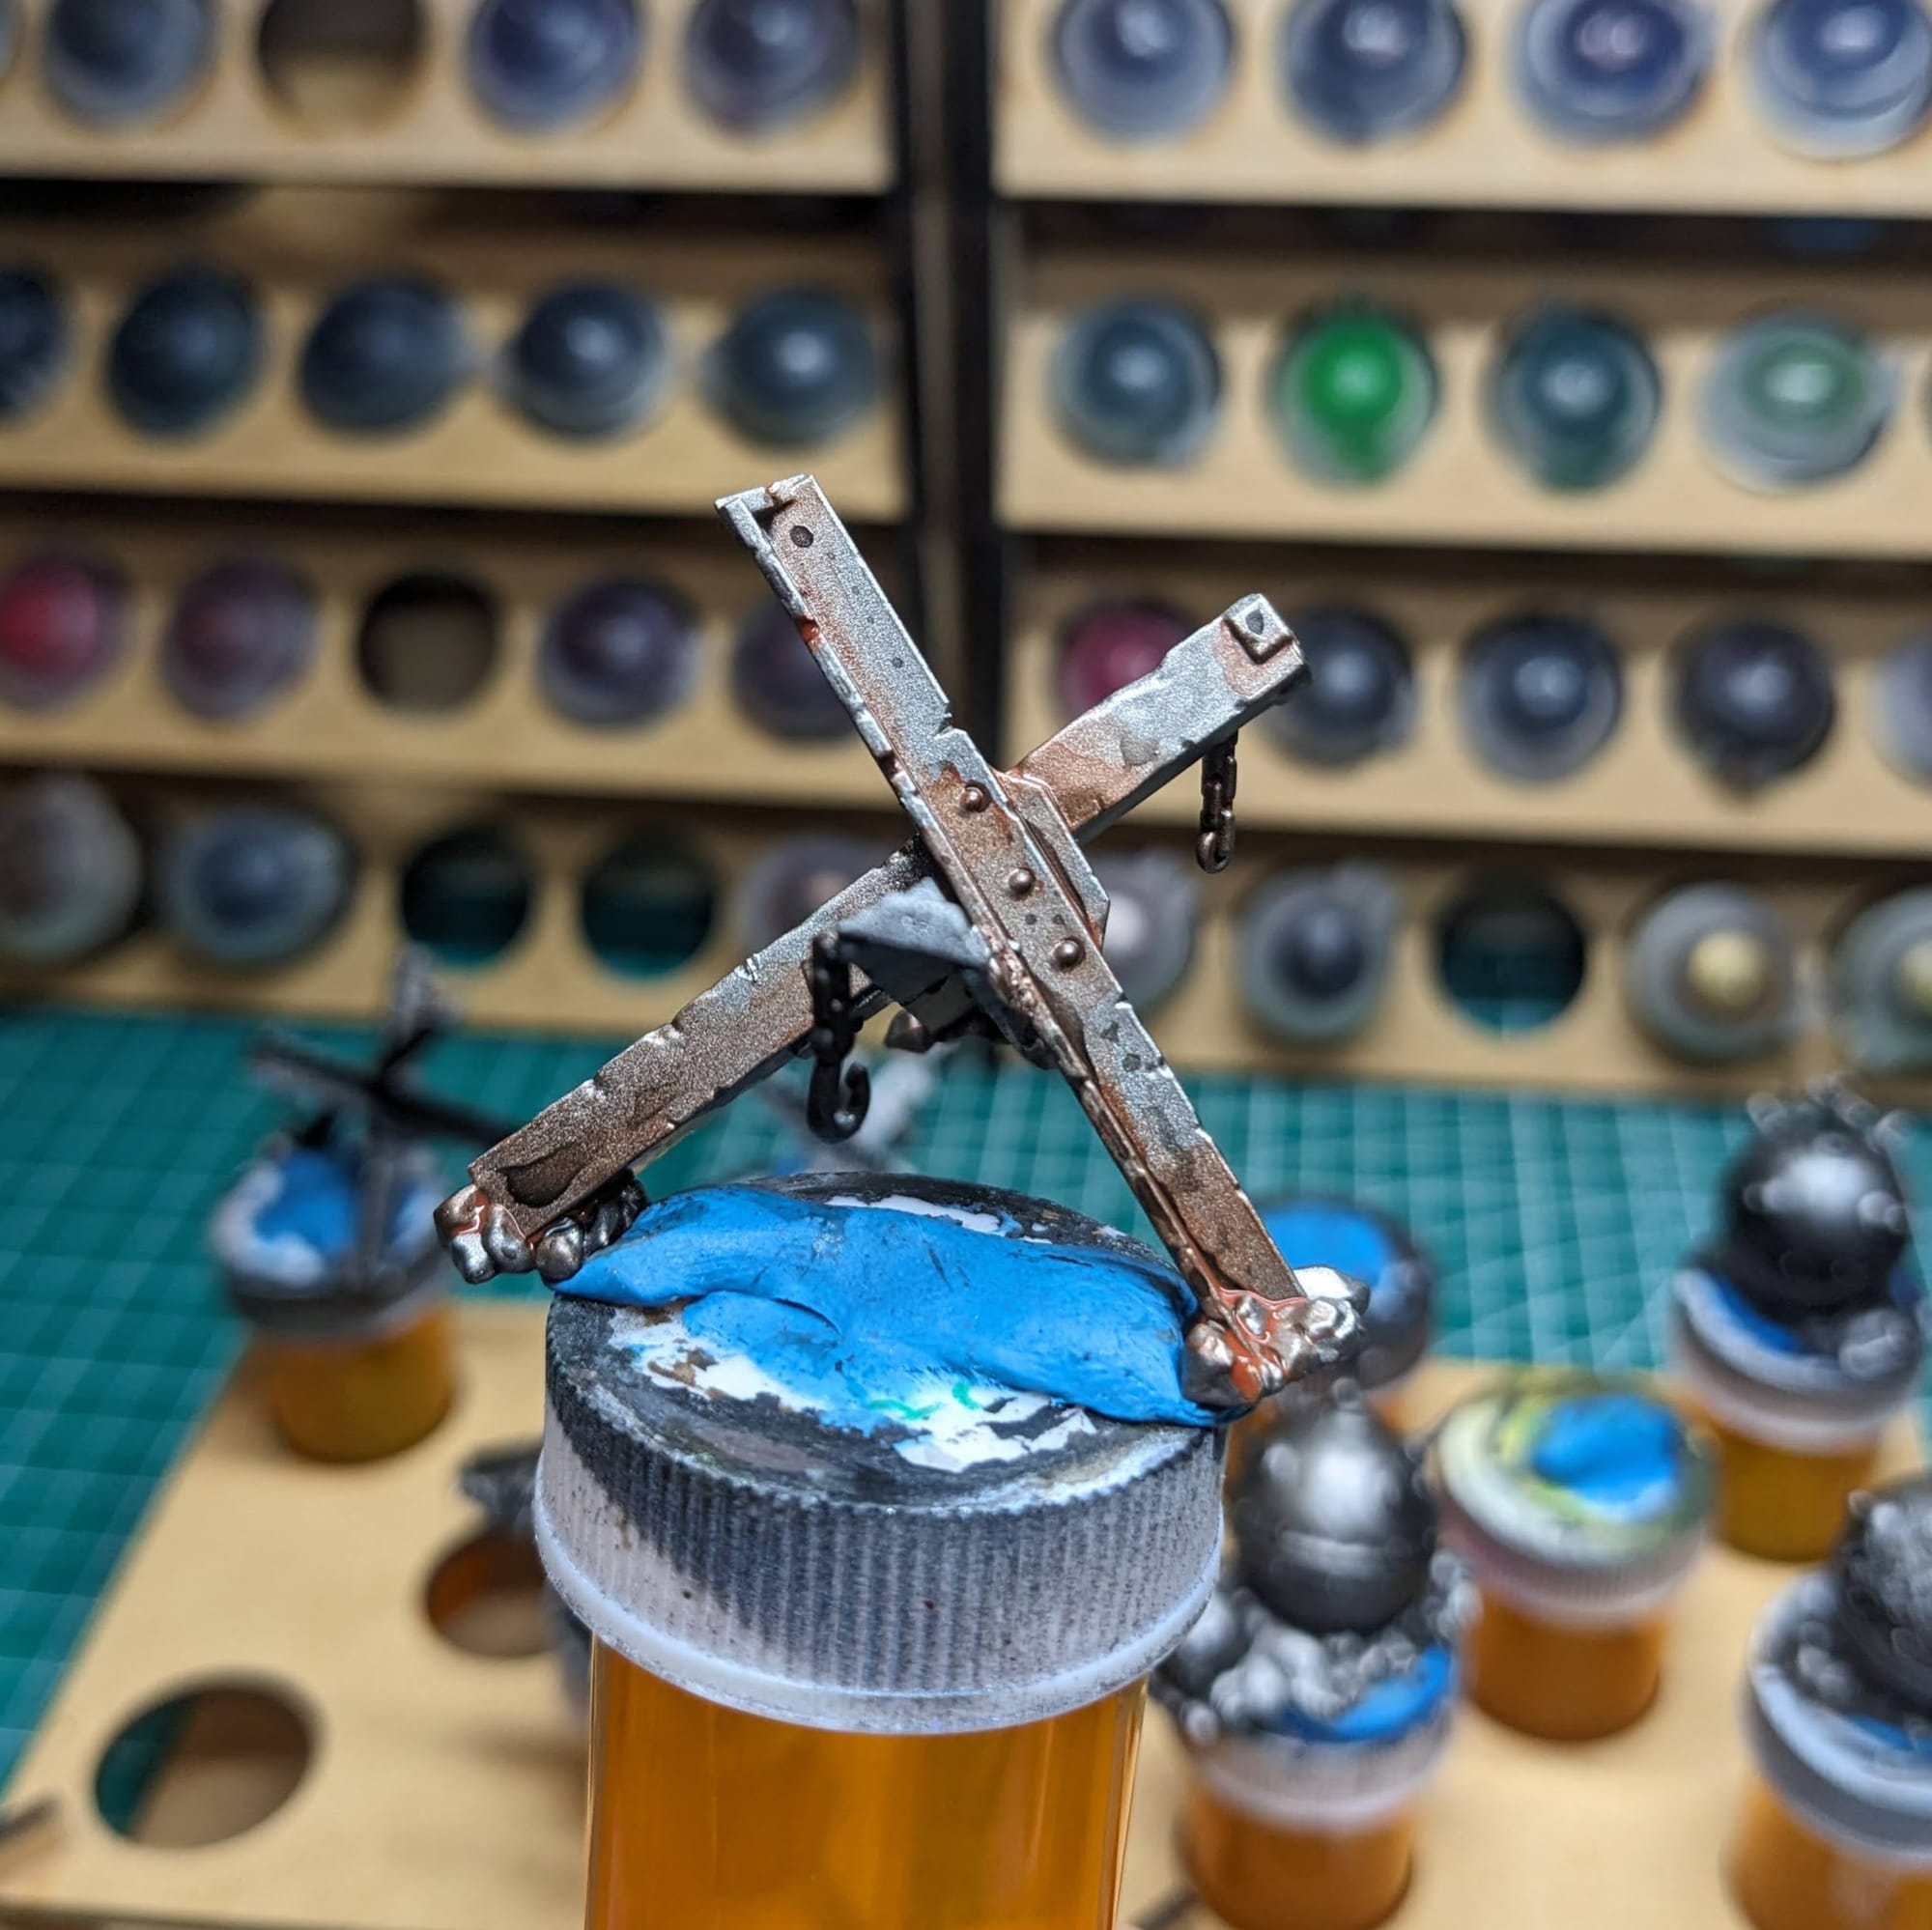
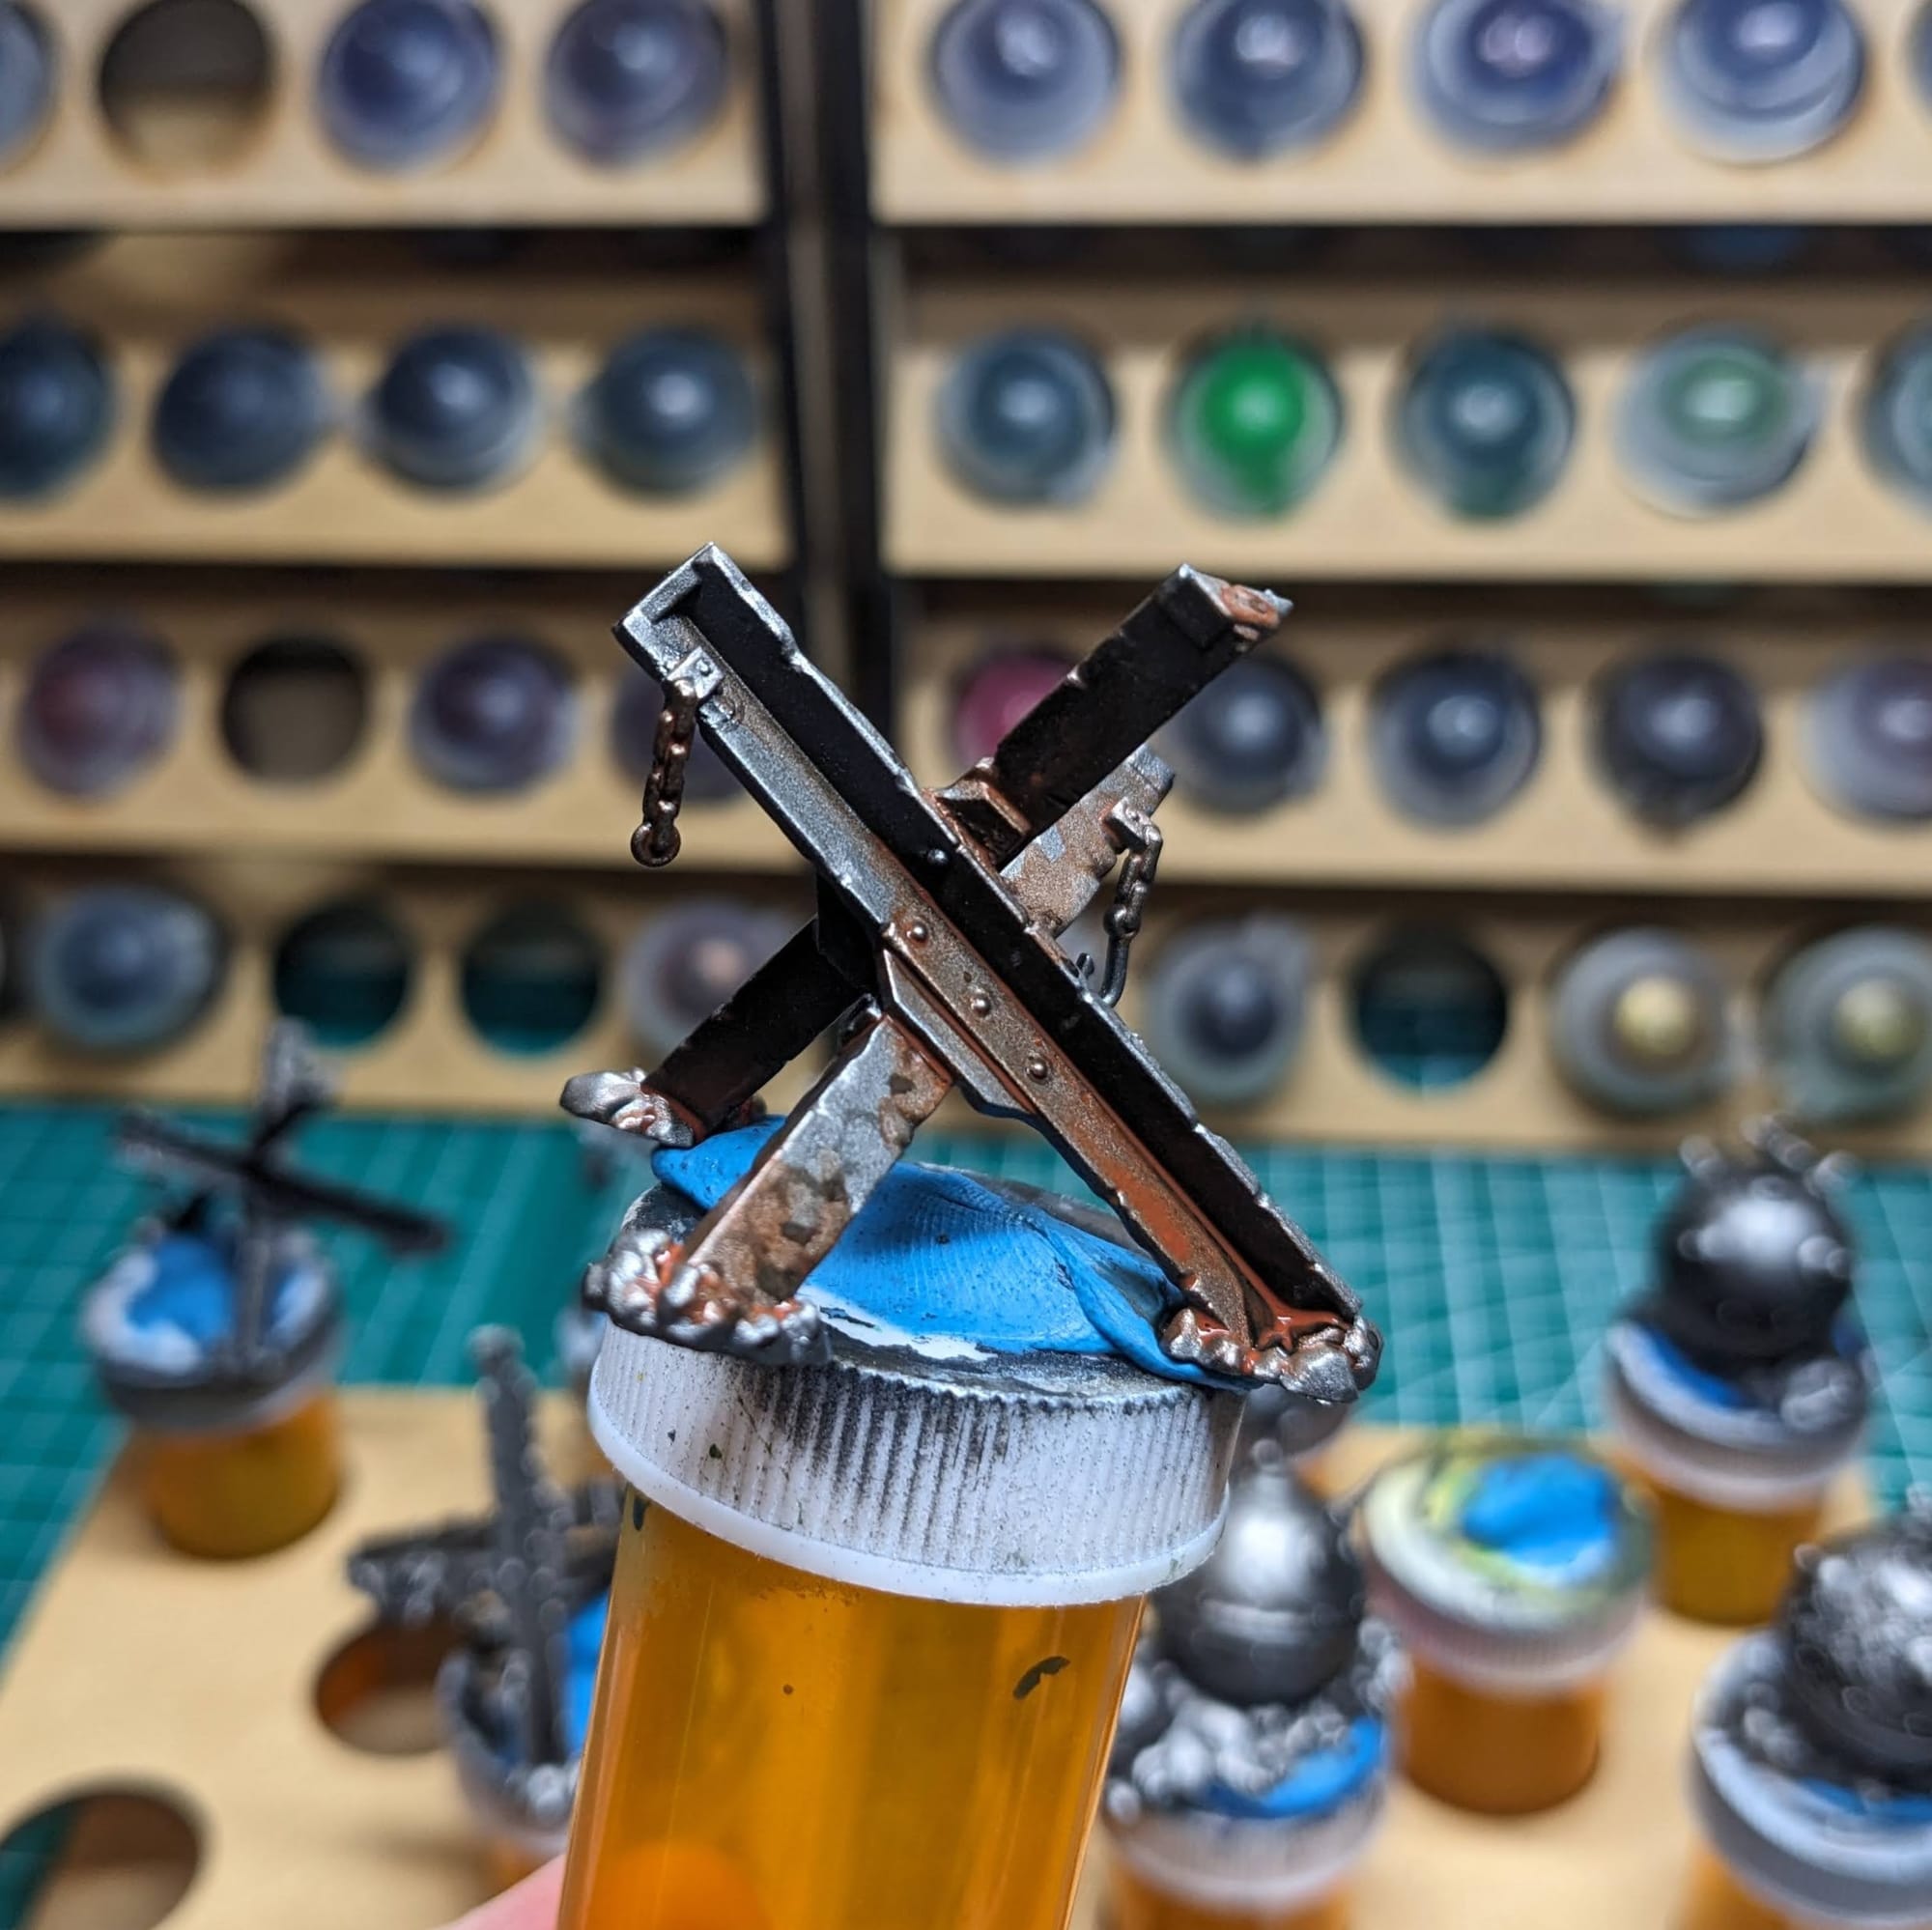
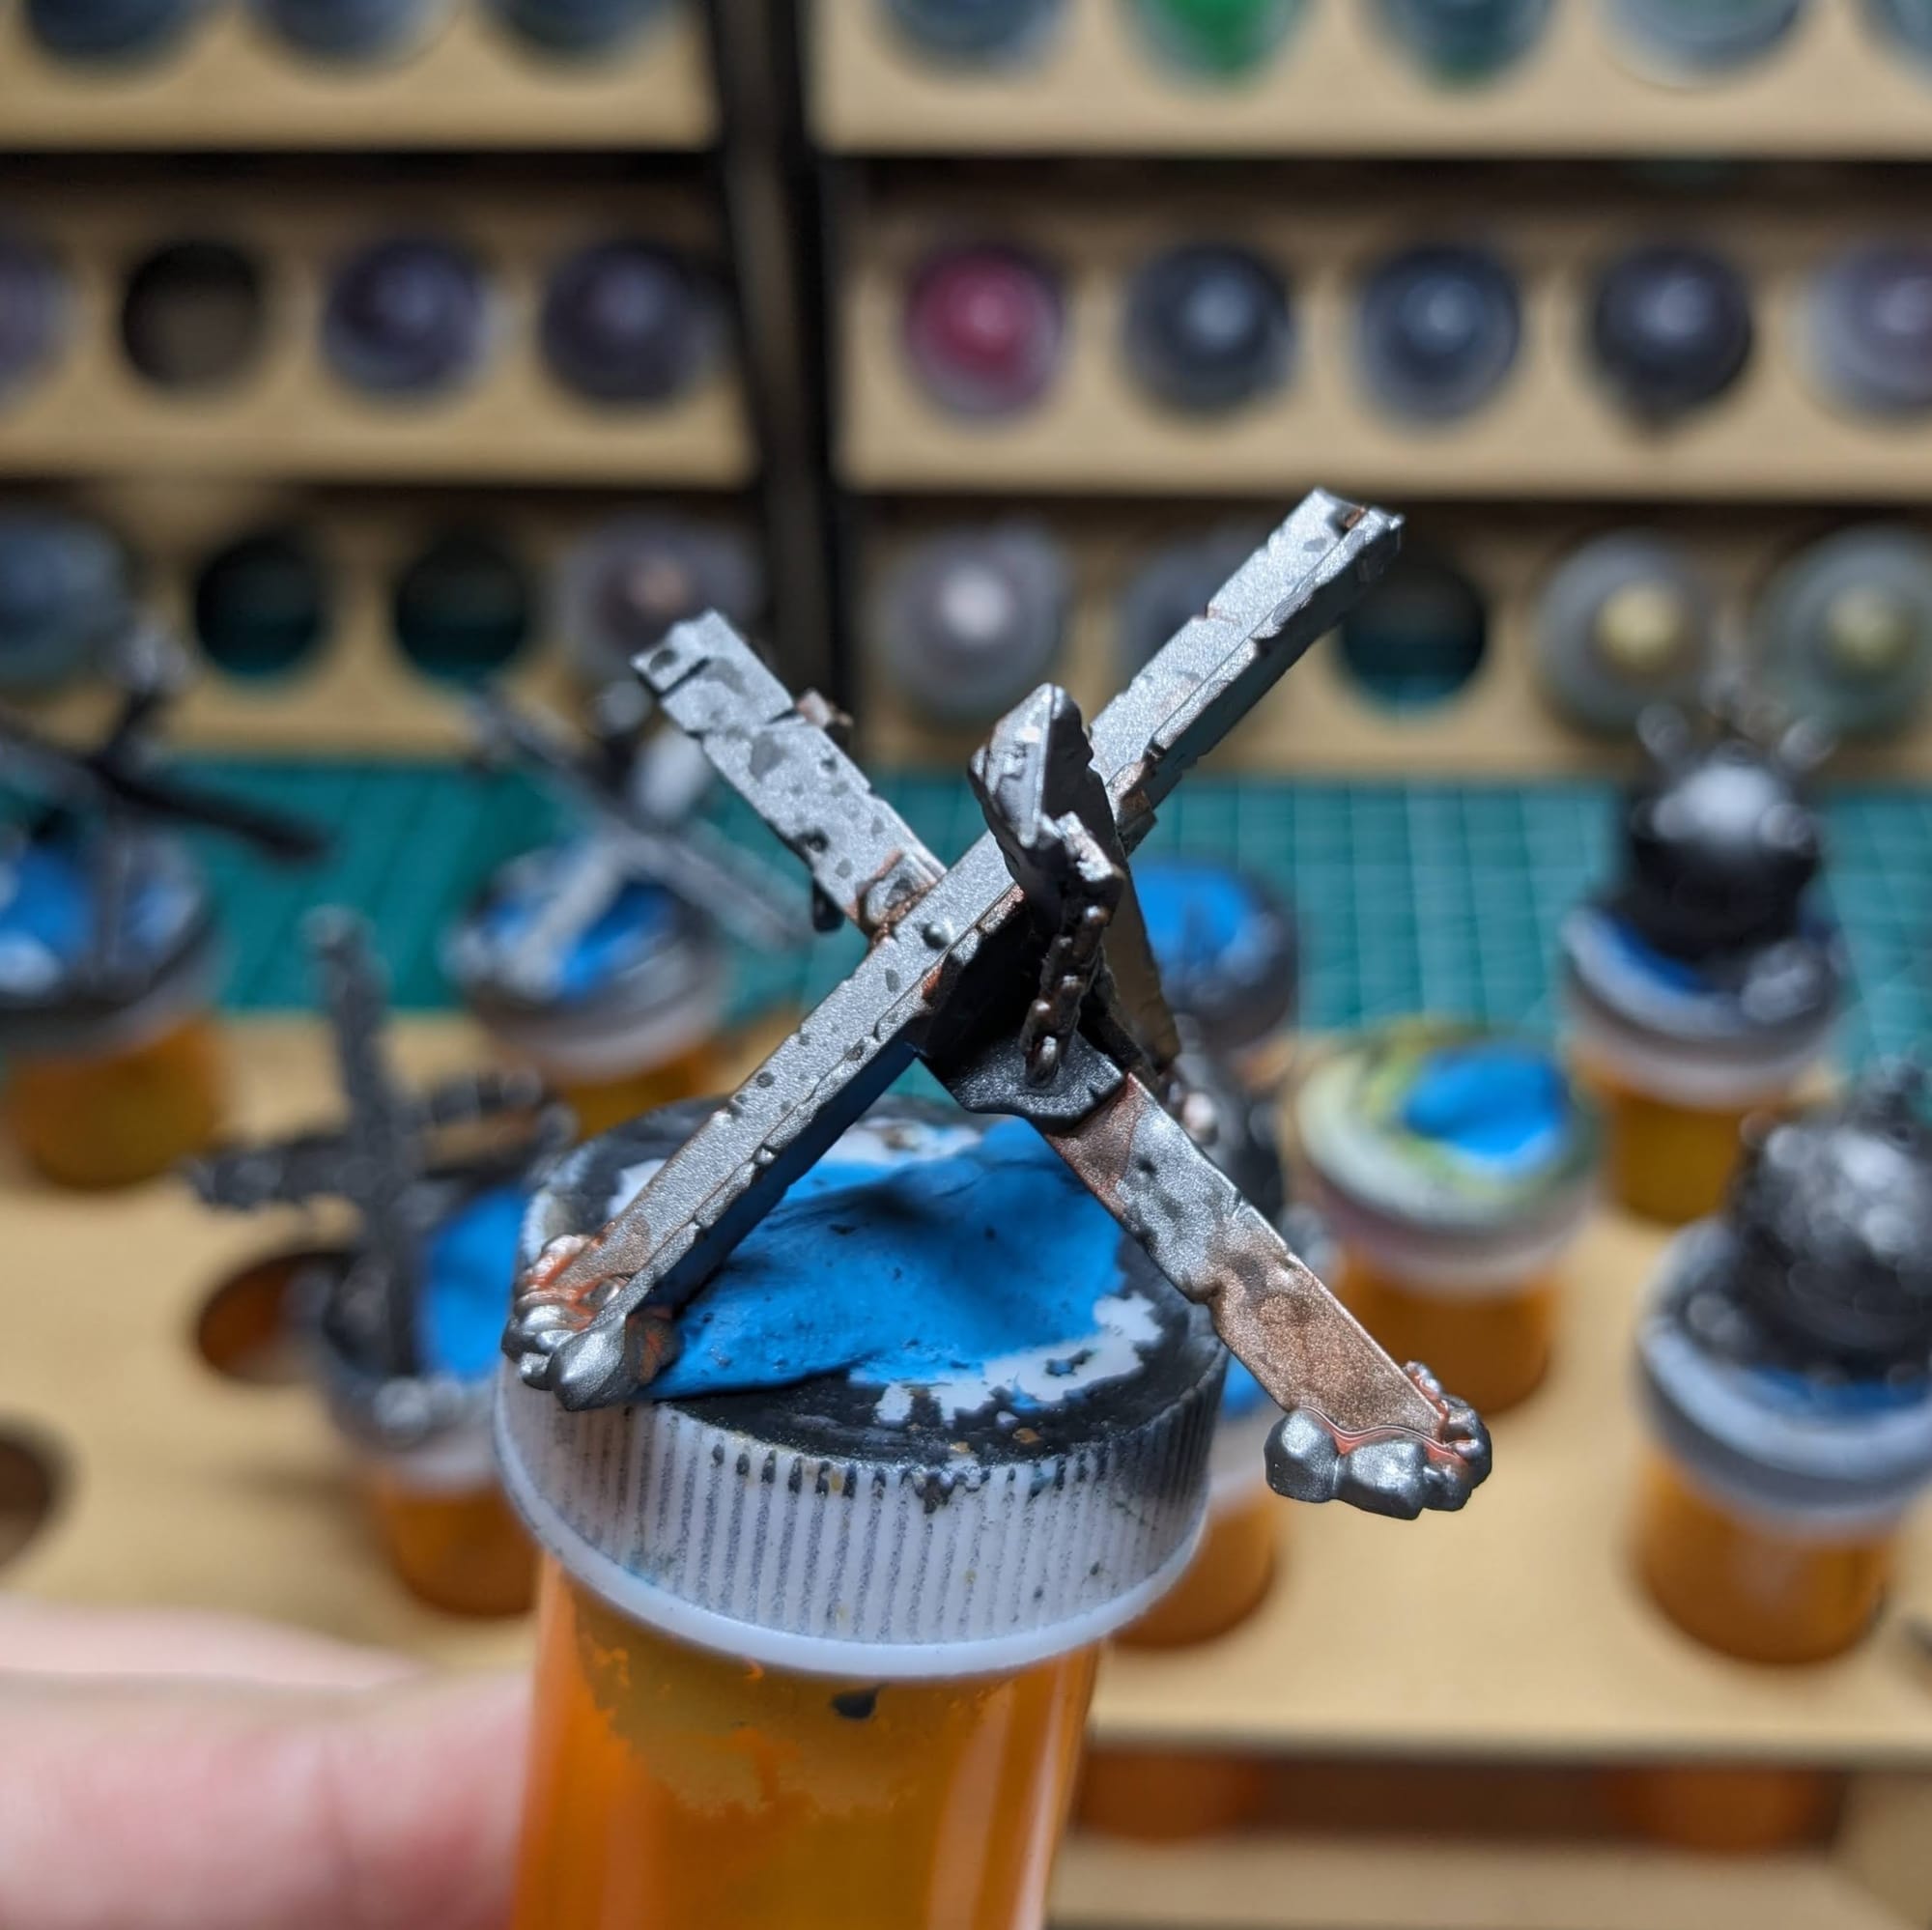
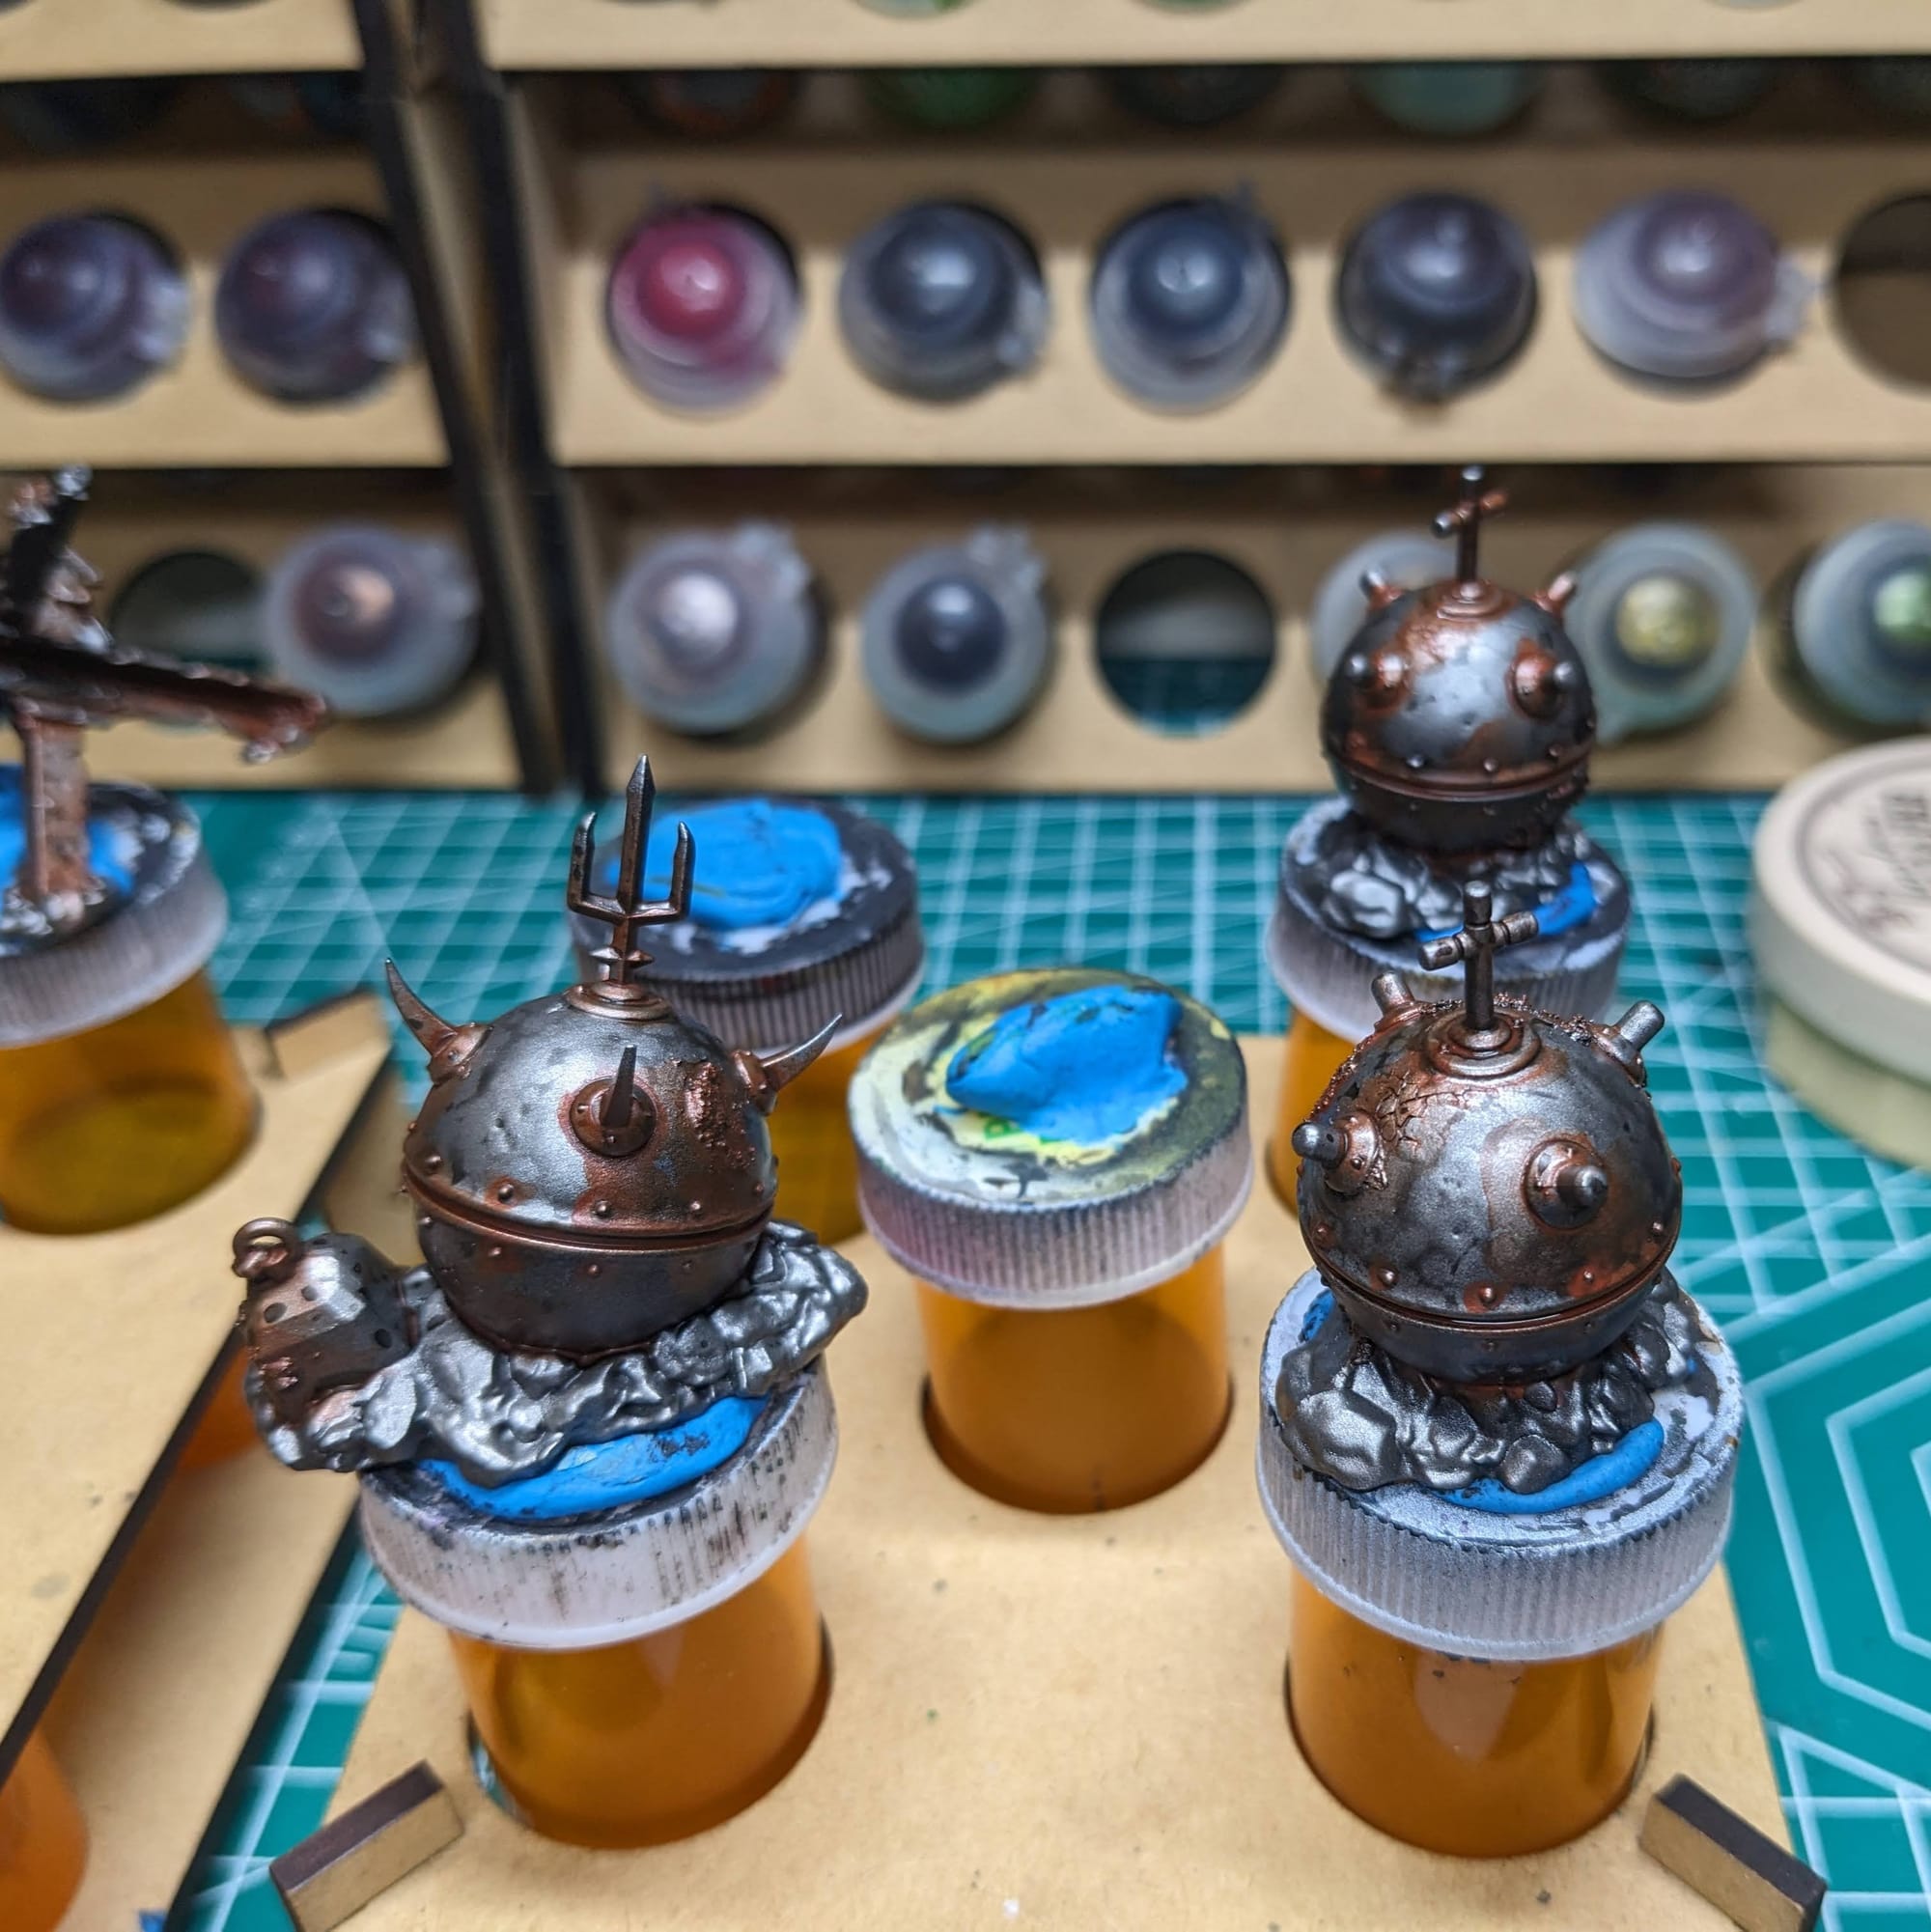
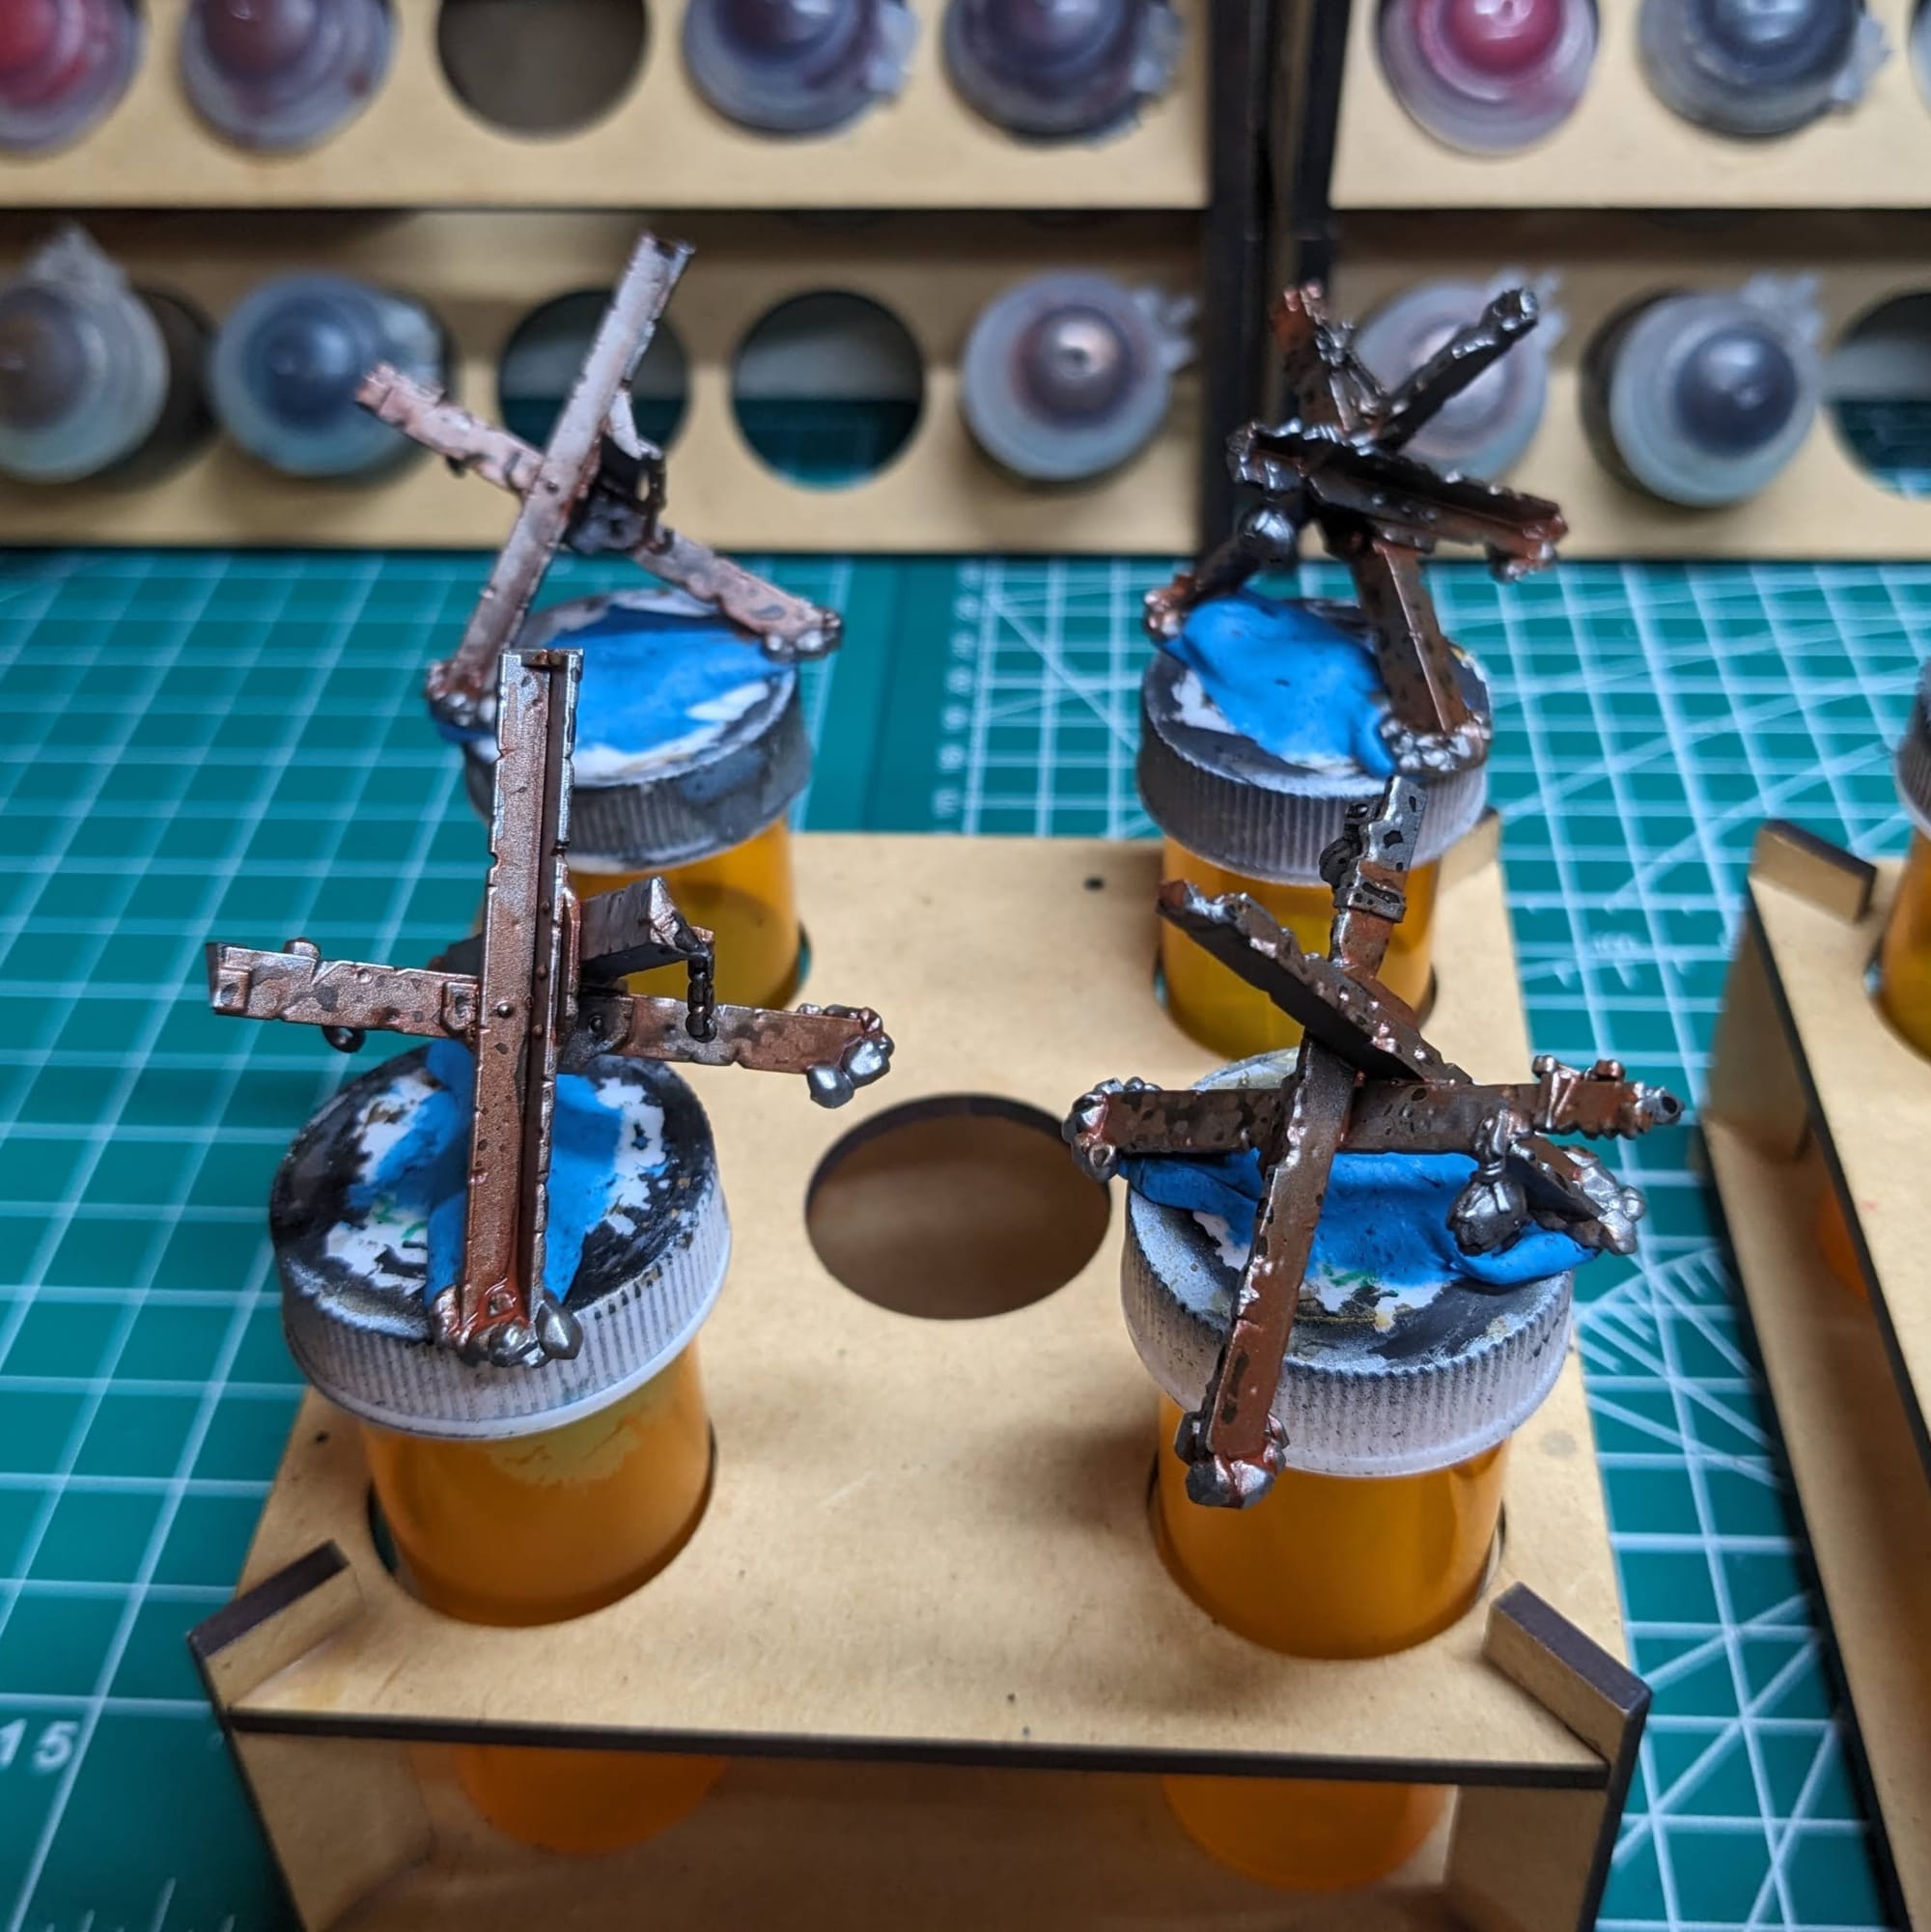
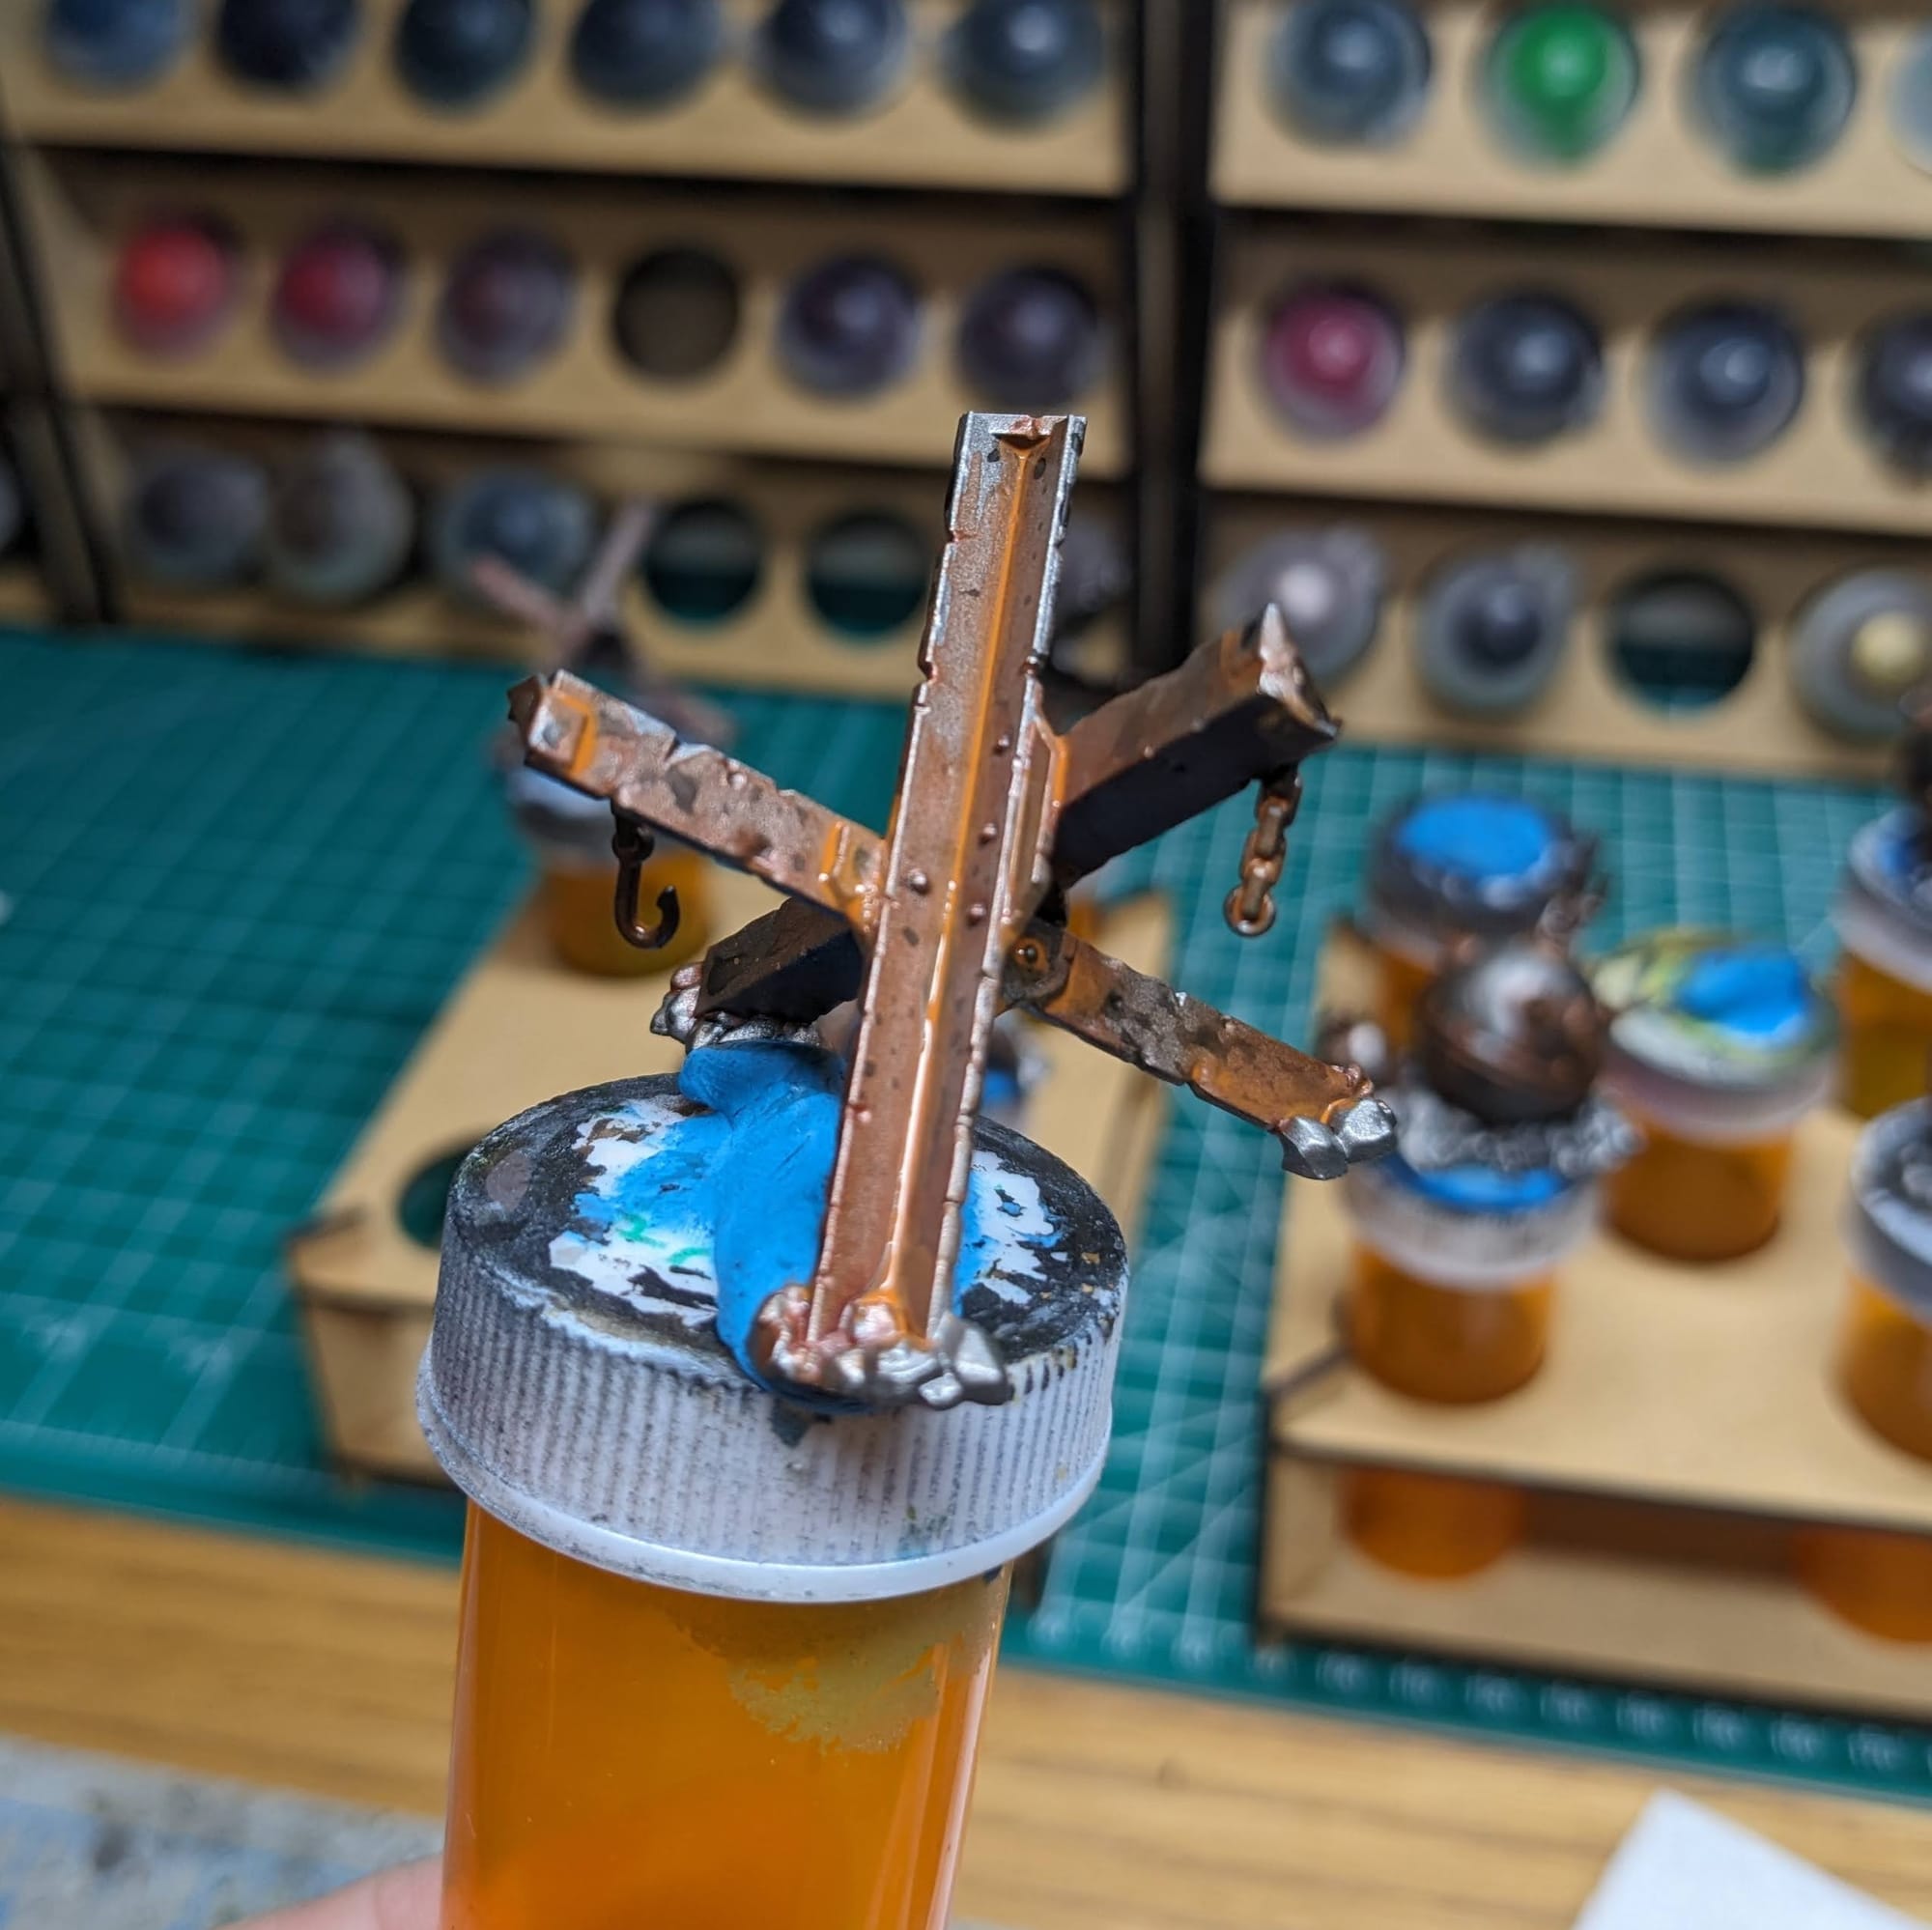
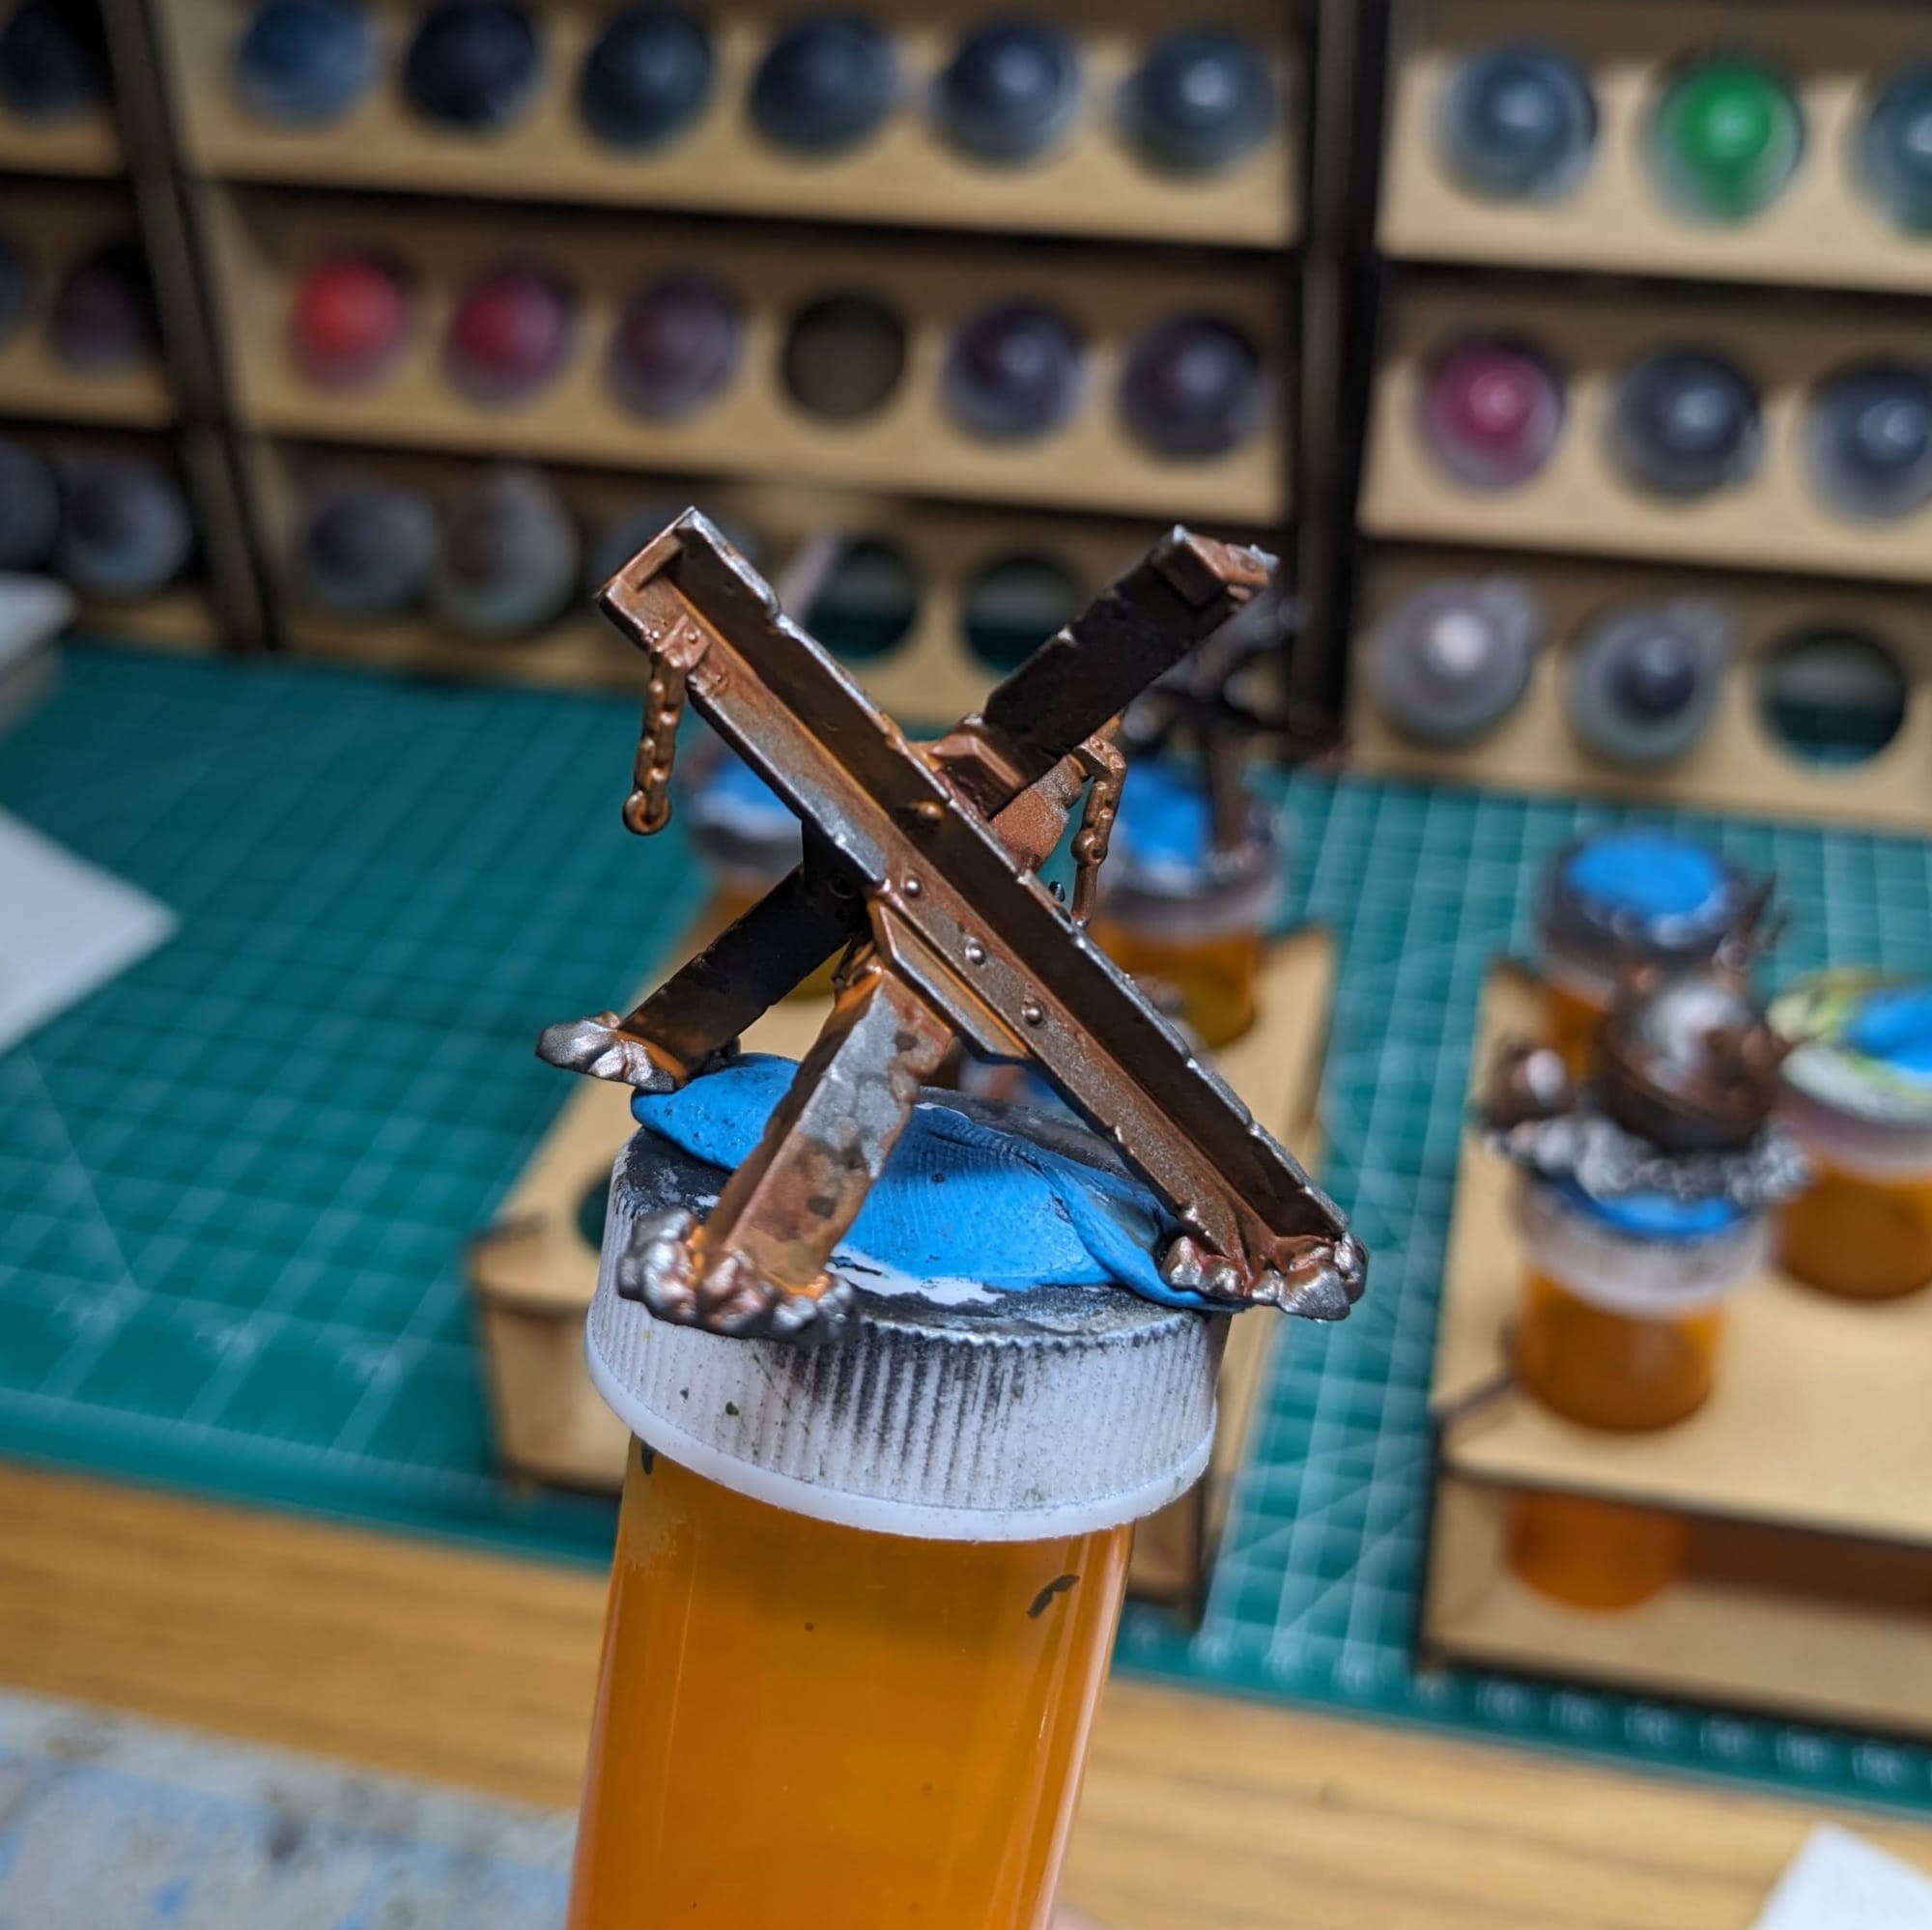
Once I was satisified with the rust, I moved on the painting the bases. Below I outline how I painted the bases of the Heretic Naval Raiders, and so the same process occurs here. Starting with the base rock colors, I used Pro Acryl Slate Grey, Citadel Mechanicus Grey, Citadel Elysian Green, and Citadel Dawnstone unevenly and throughout the basing to give the tide a depressing gray and green look to it.
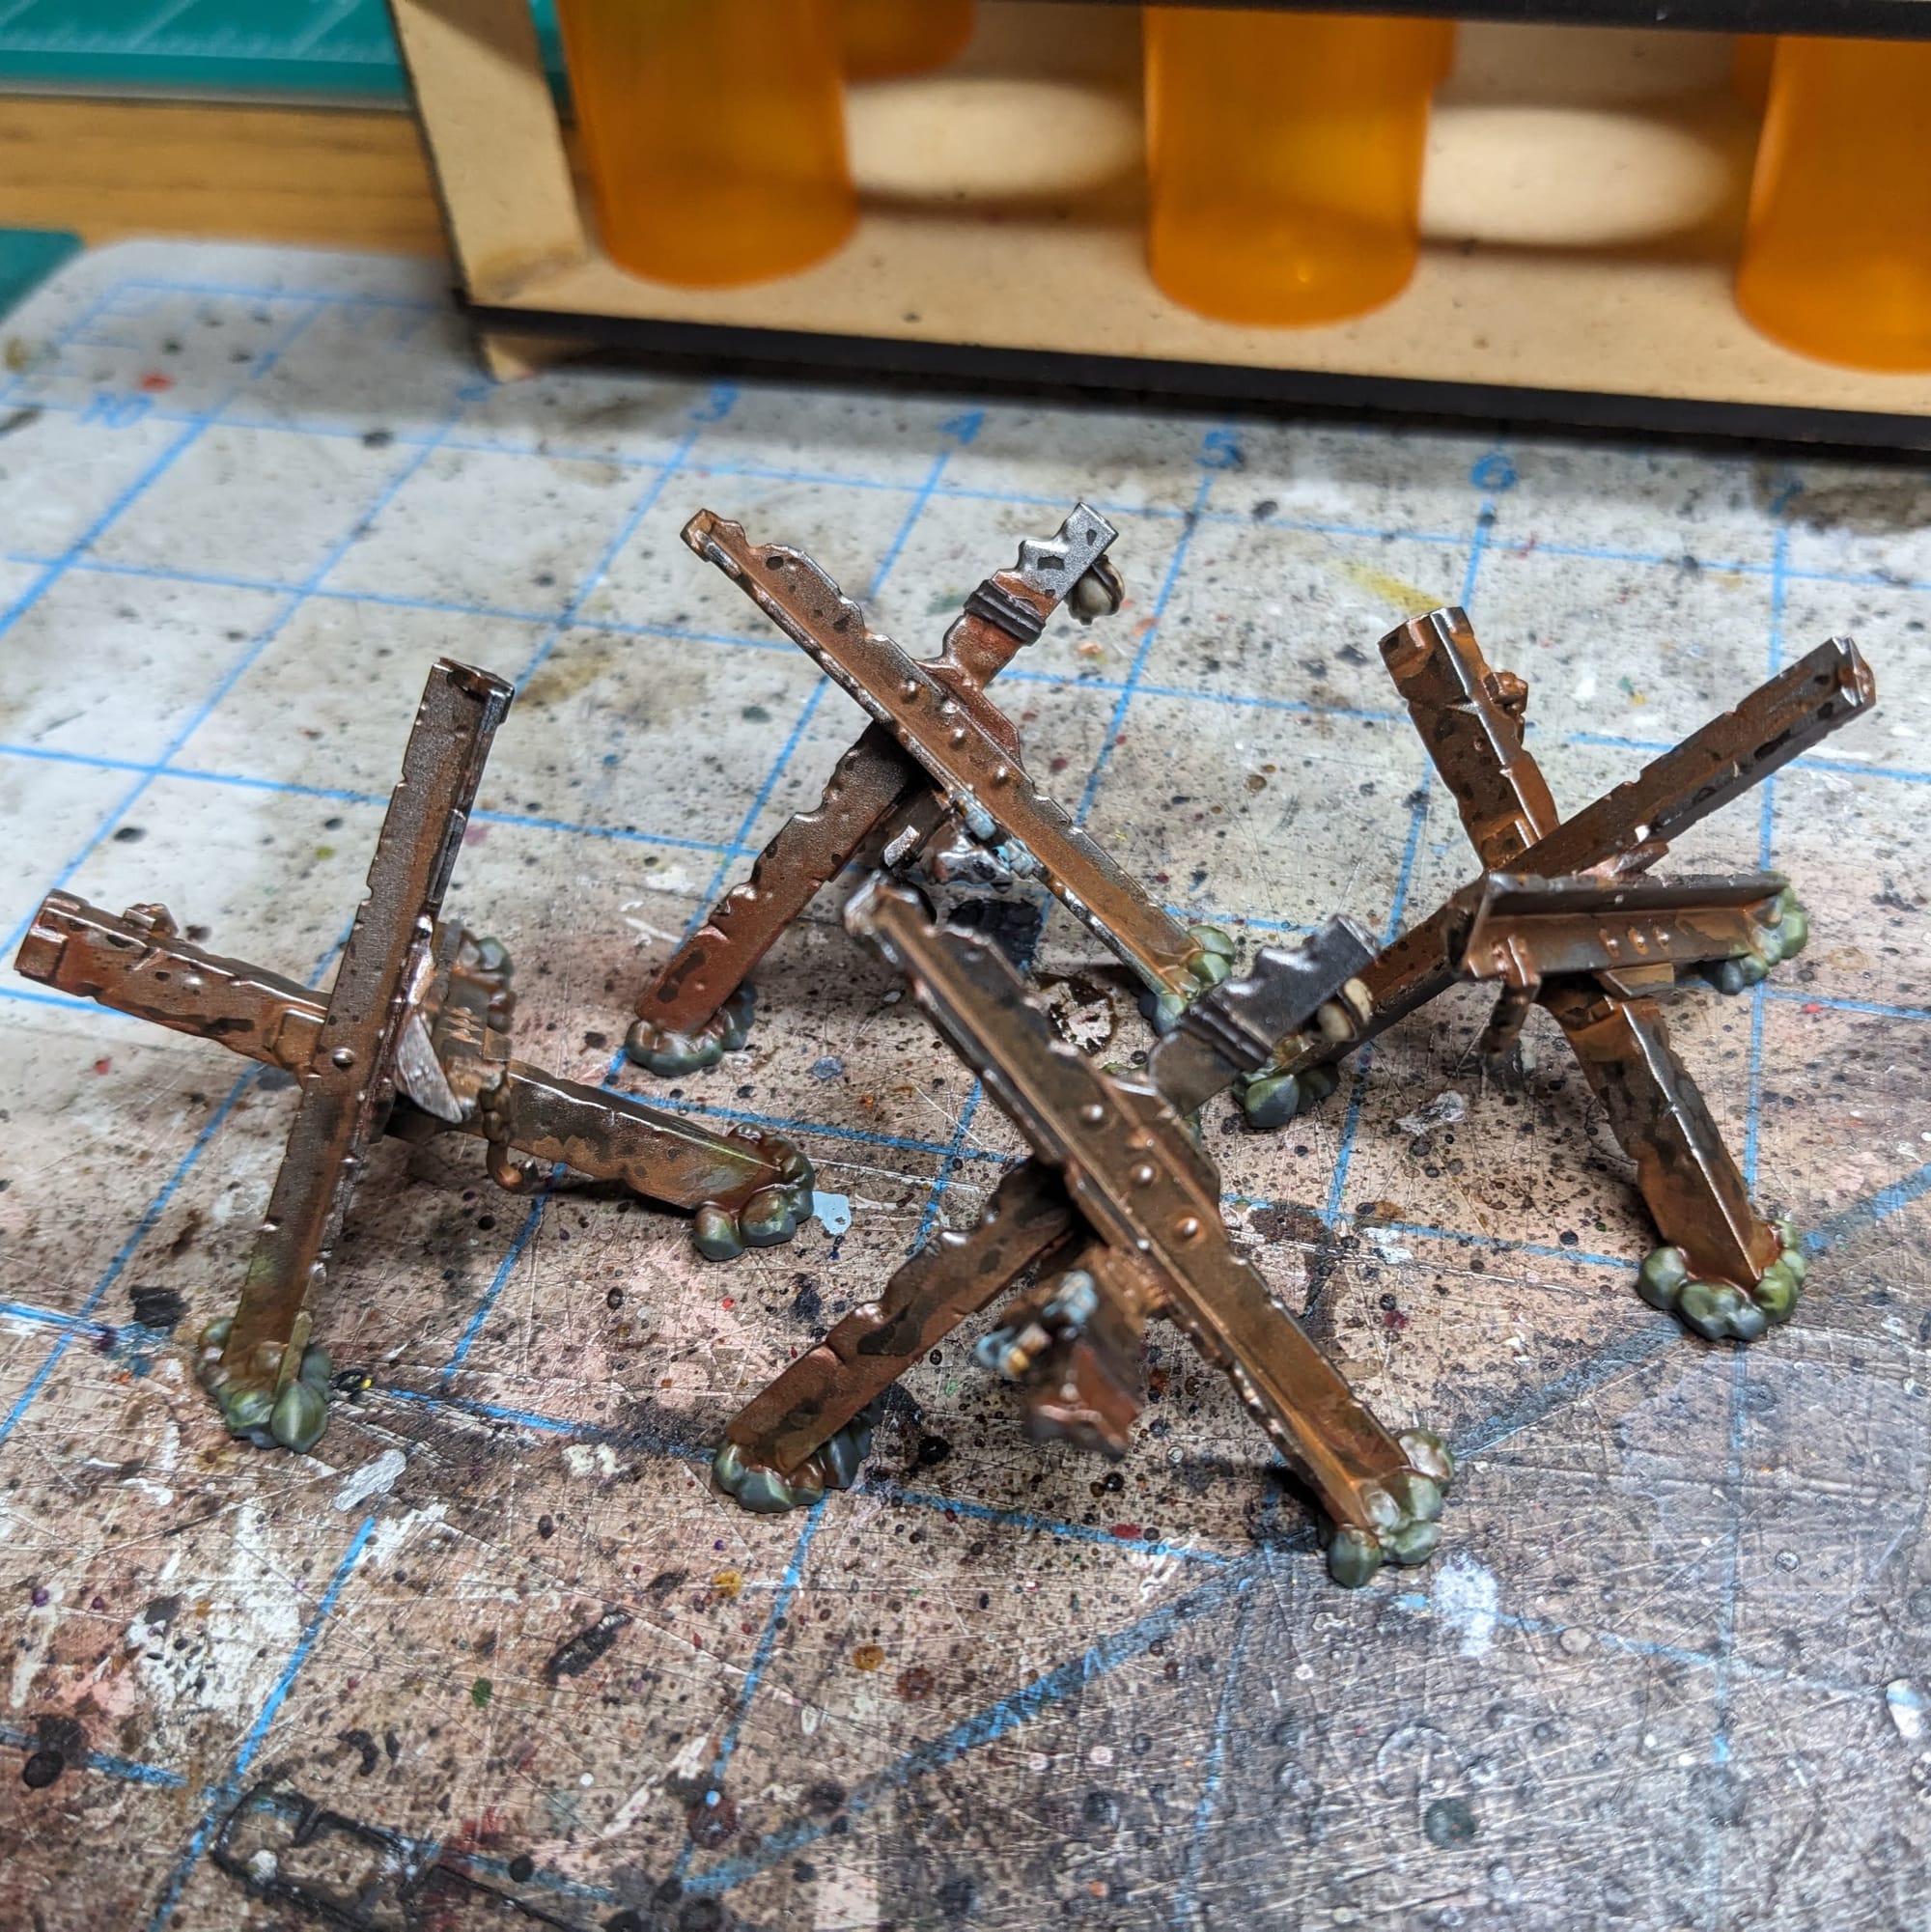
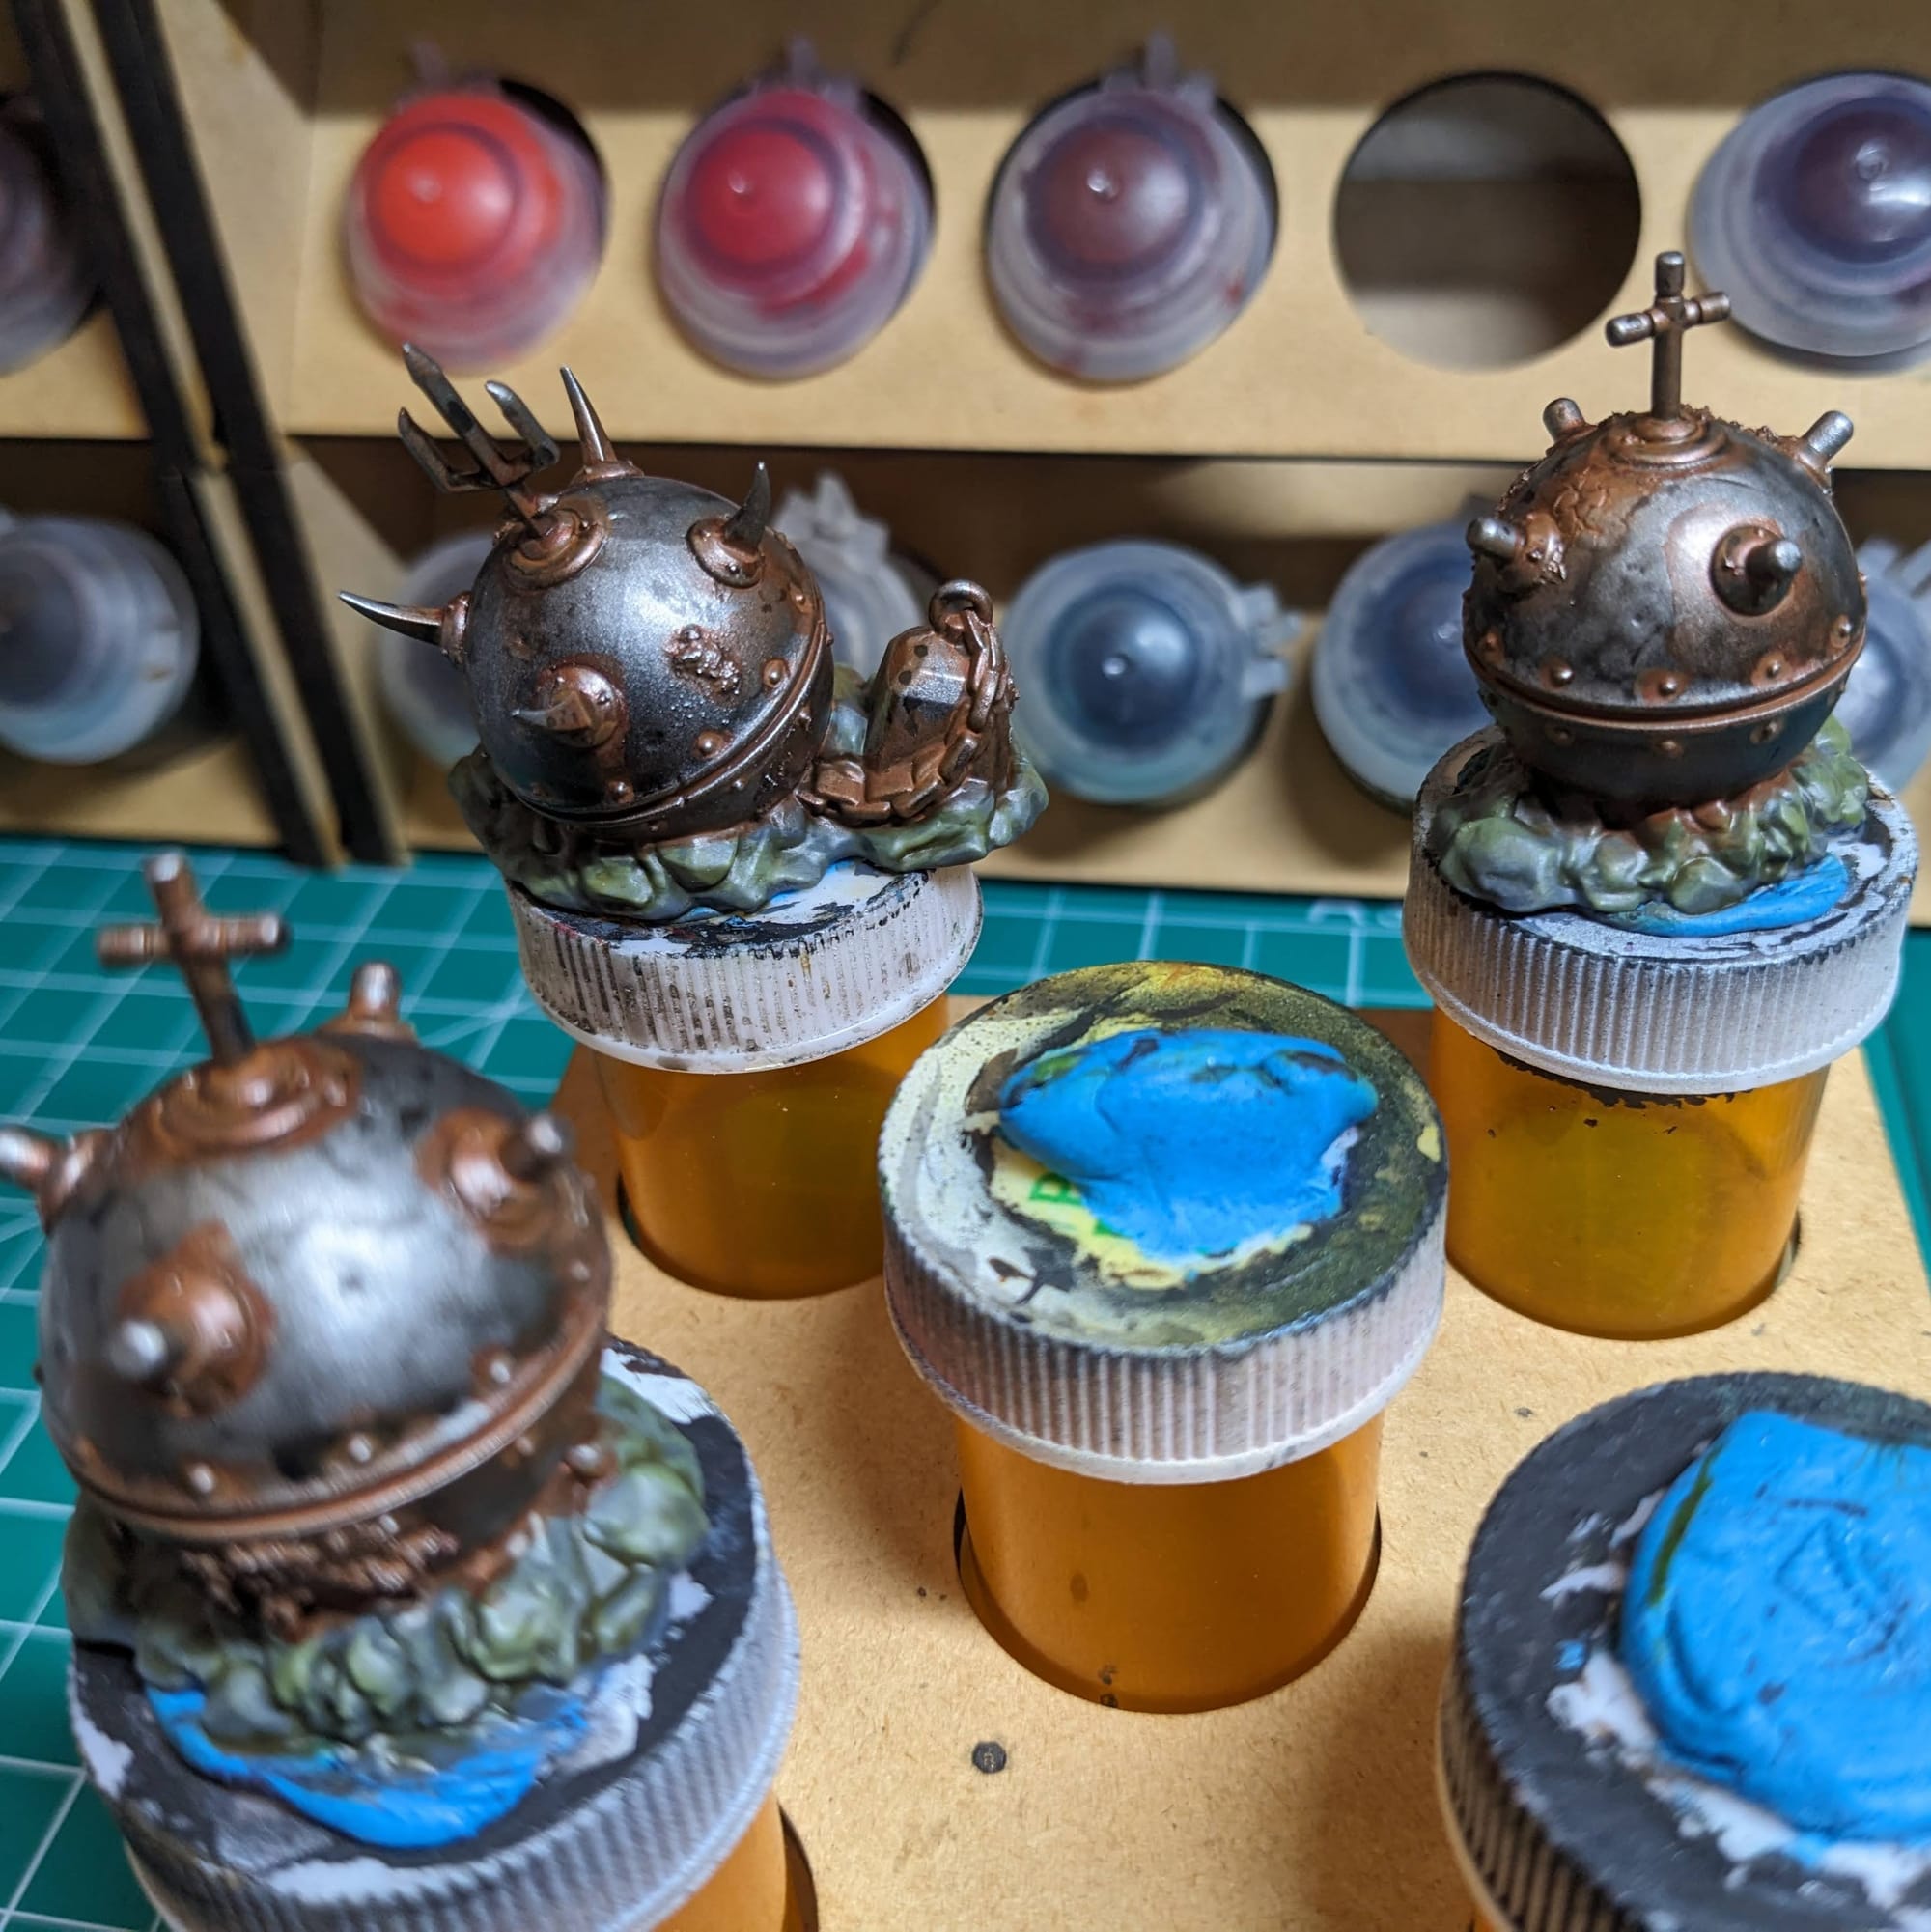
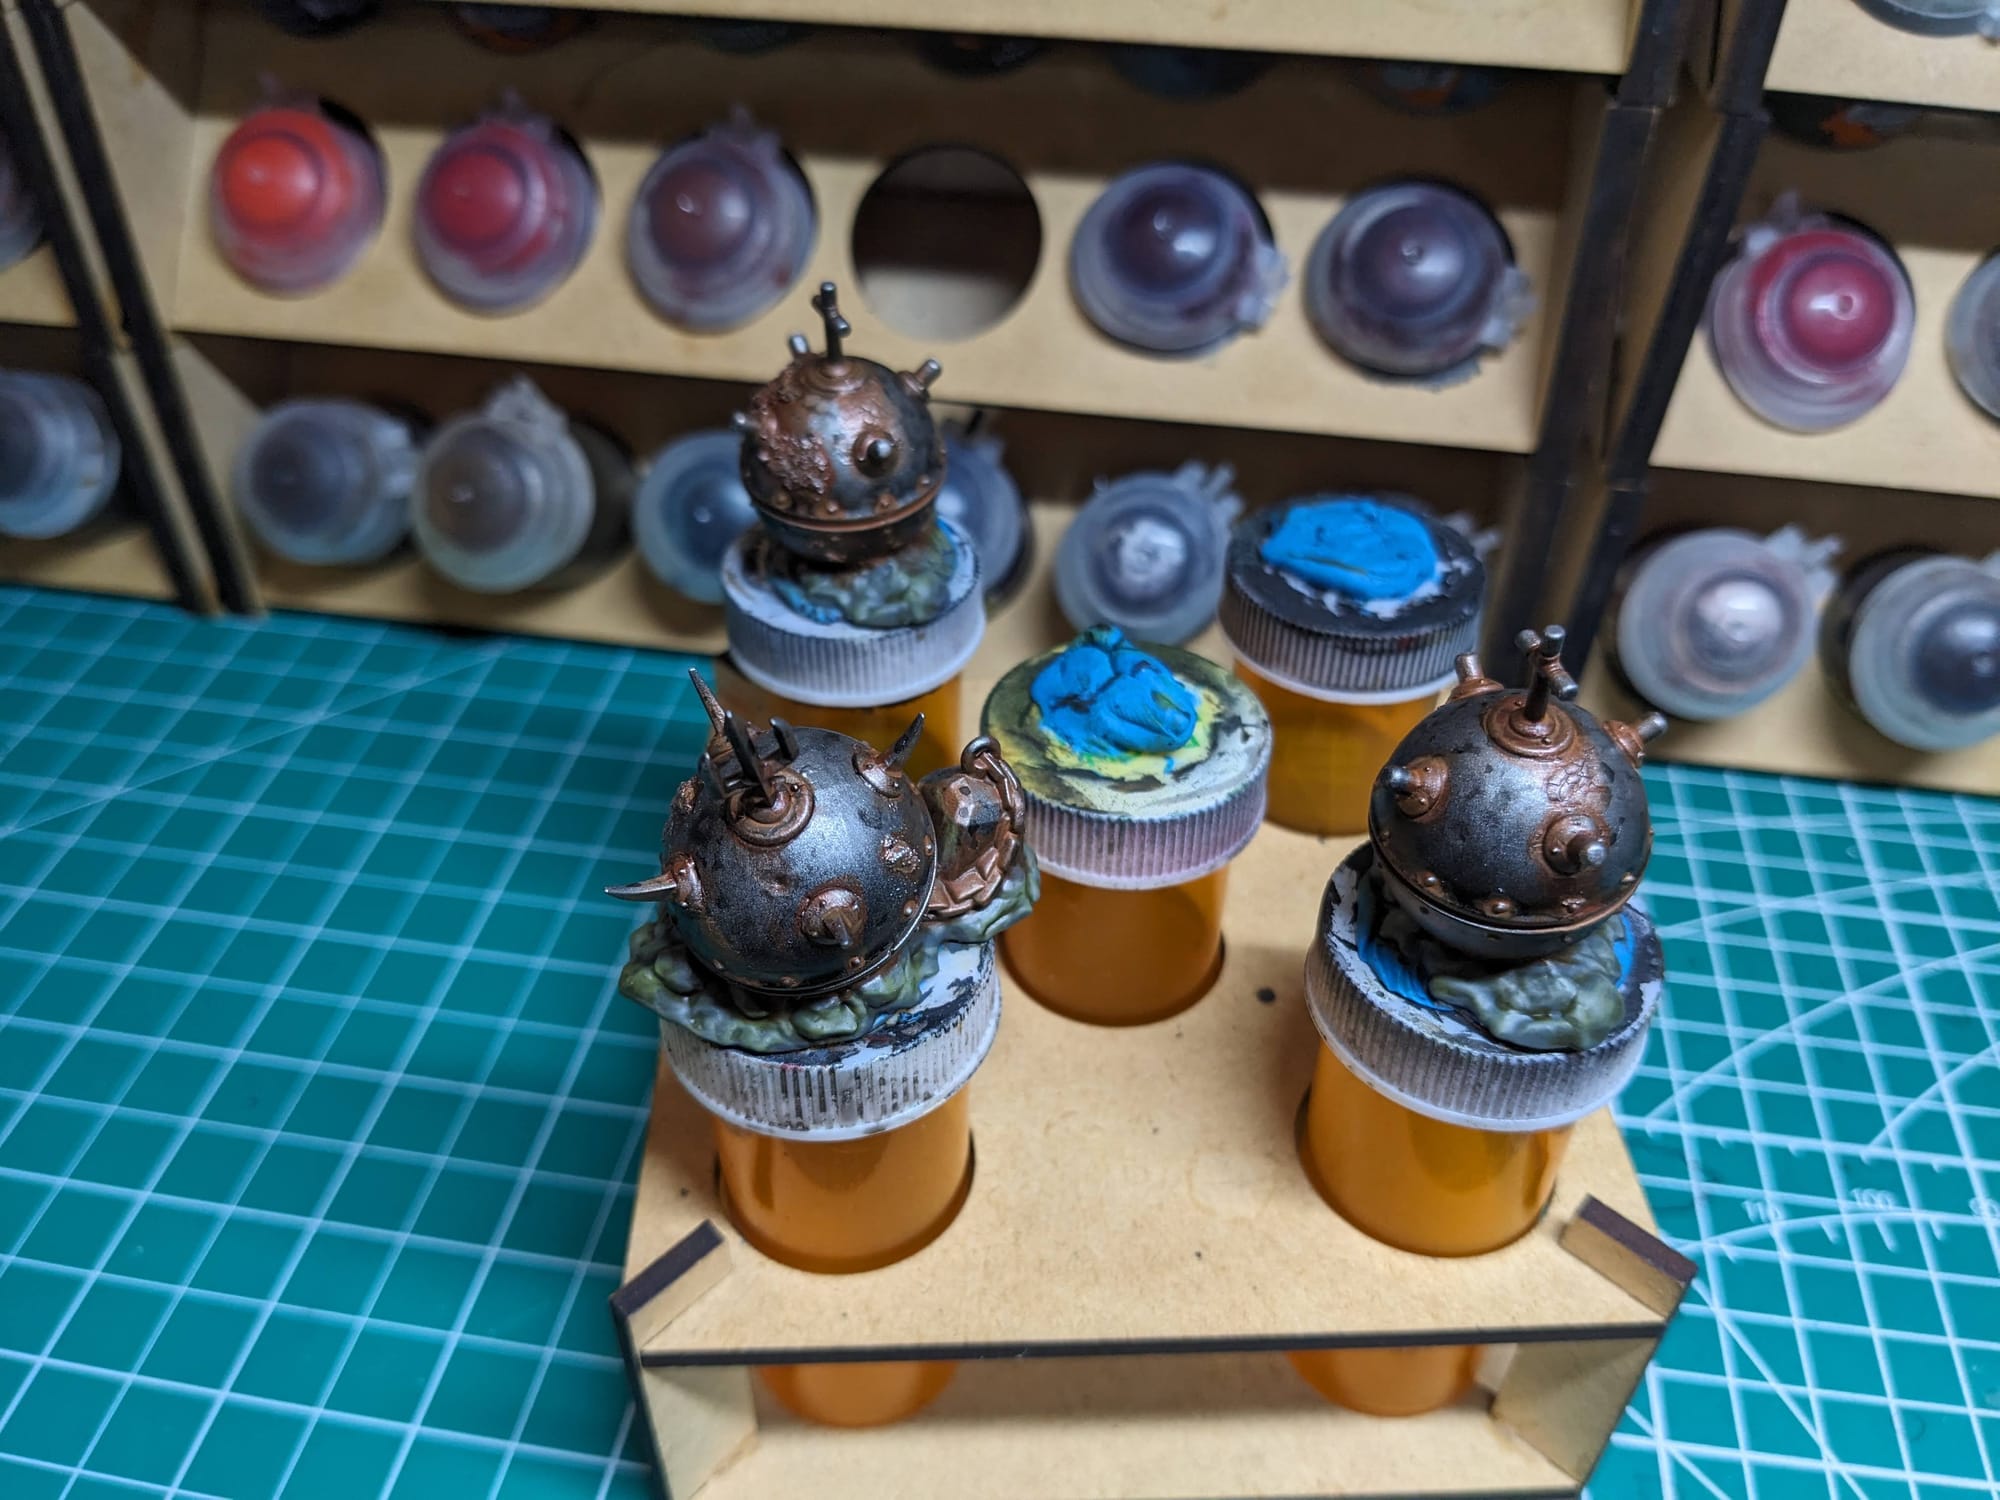
Randy: I covered painting the scatter in our review of the NuWorlds Paint, but I’ll recap here for ya. I wanted the scatter to be rusty metals, so prior to painting, I added a lot of grime and some specific Iron paint from AK Interactive that actually rusts because it just adds a whole other level of immersion to them.
 Randy Gregory II
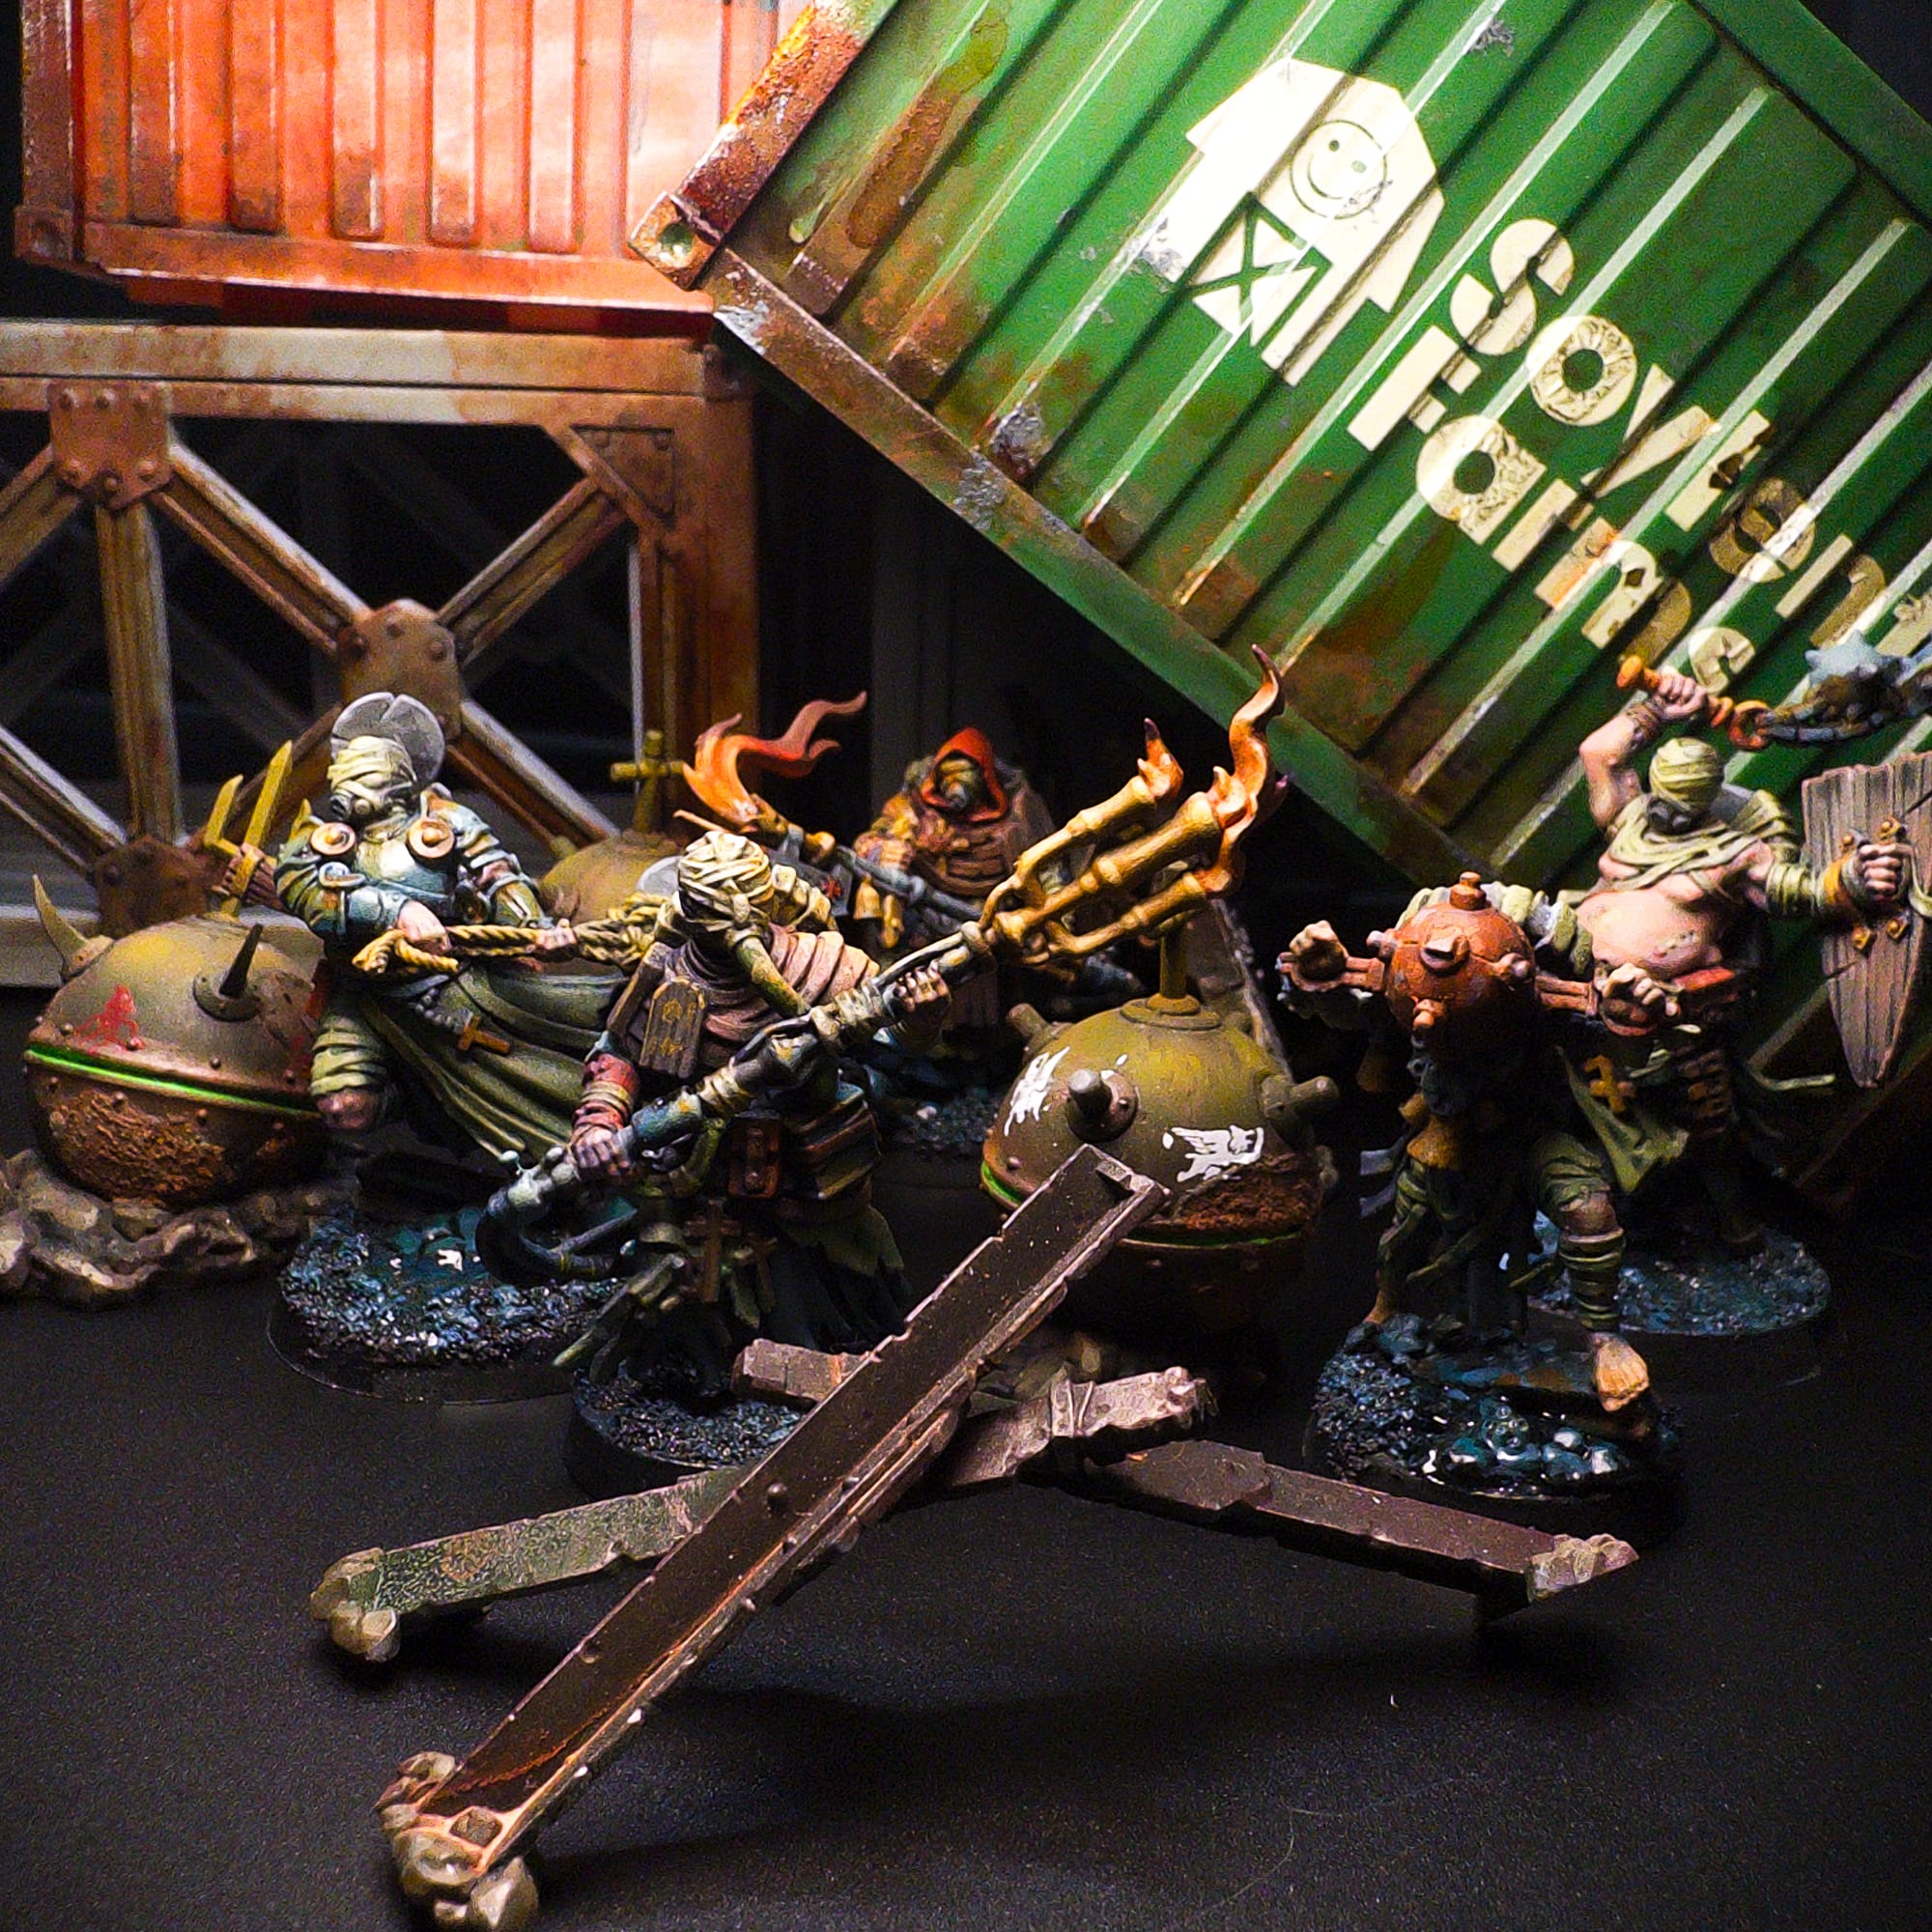
I then used the airbrush to paint them from a dark forest green up to bright yellow highlight for the mines, and then I coated them liberally in oil washes. Grime them up! In the middle of the mines, I used a bright glowing pigment to give the sense of some kind of heretic power on the inside. On the table, it looks great. For the anti-tank terrain, I drybrushed a bunch of metallics, keeping in the rage of an oxidized brown/red, and then hit with Army Painter rust effects.
Use the terrain to go wild with effects. You can do practically anything and they’ll look rad.
Basing
The Carcass Front provides some fun opportunities for basing. Whether you go with sandy-muddy trench muck, tidal pools, or the bloody fields... maybe with carcasses, you have a lot of creative freedom with storytelling with these warbands.
Previously, GamingTrend reviewed the Bear Cavalry Trench Crusade Basing Box, which has a wonderful selection of basing materials and accessories for your Trench Crusade warband. The box has recently been rereleased, so be sure to check out our upcoming review for it!
Heretic Naval Raiders
Alec: For my basing, I chose to go with rocky tide pools, replete with water, muck, and blood. Since several of the bases have metal bits, I wanted to show that these minis are moving through a beach at lower tide, akin to the D-Day landings of World War 2 (which, in this universe, have not occurred yet).
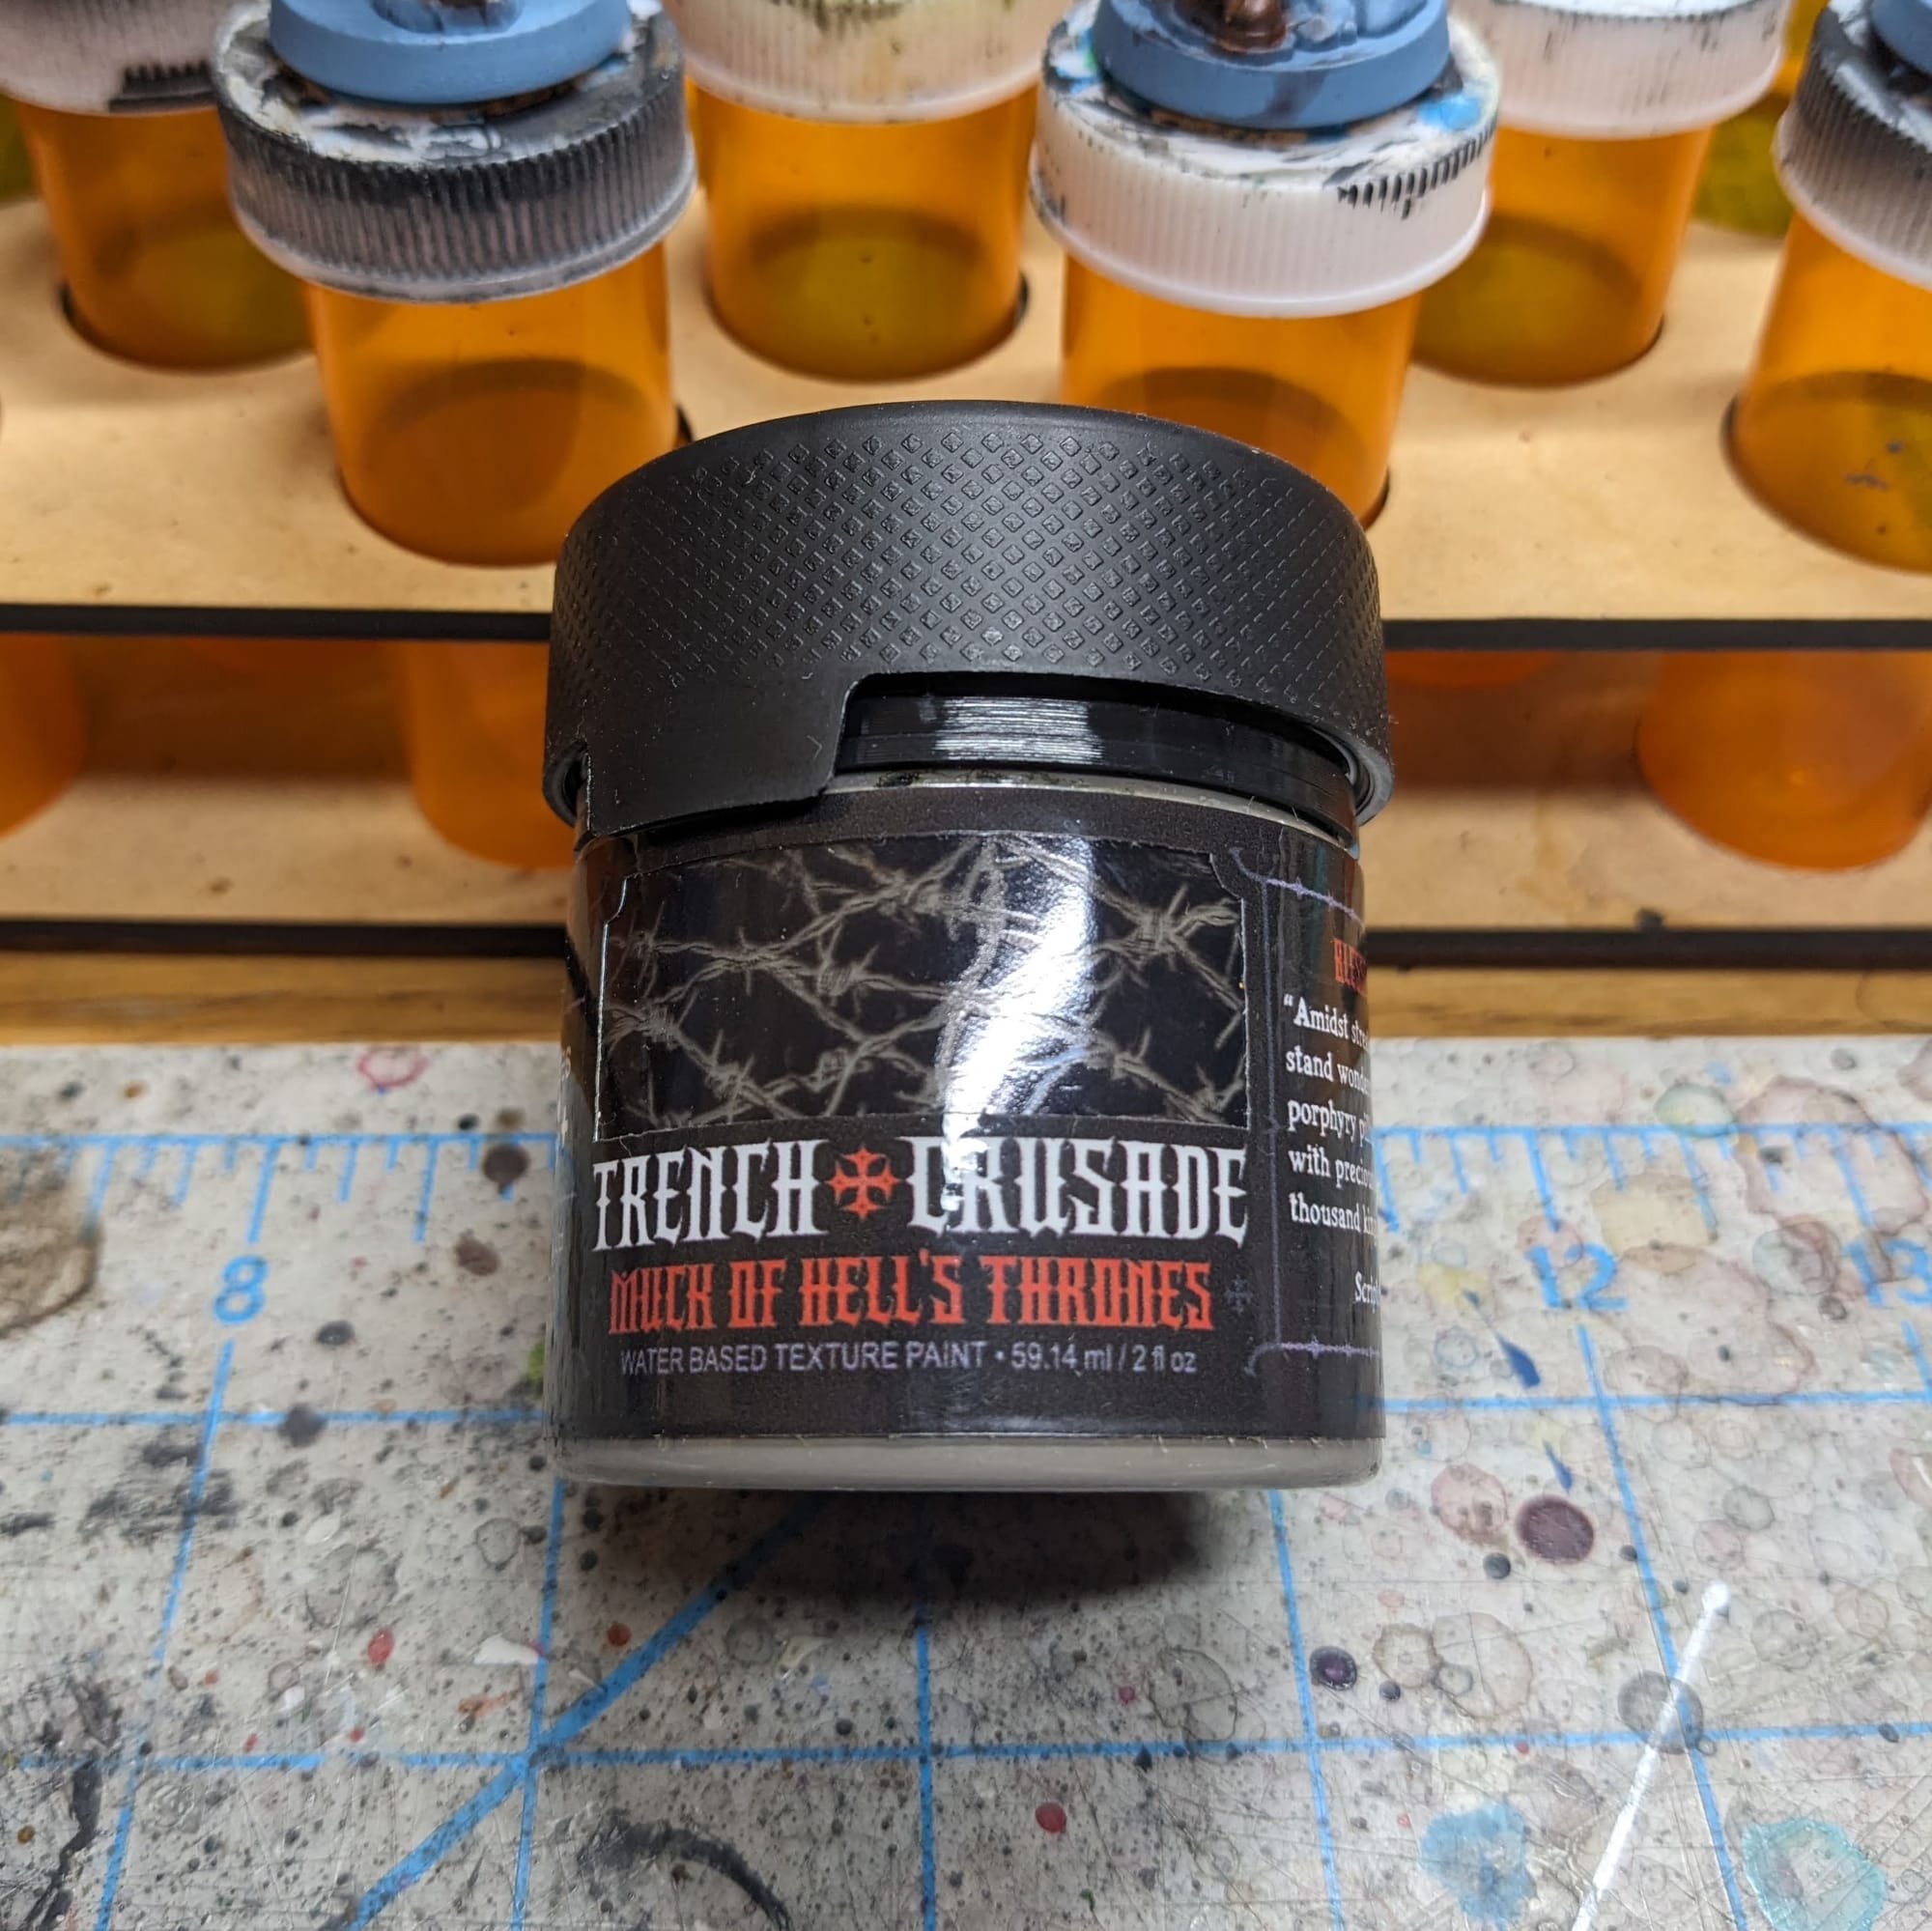
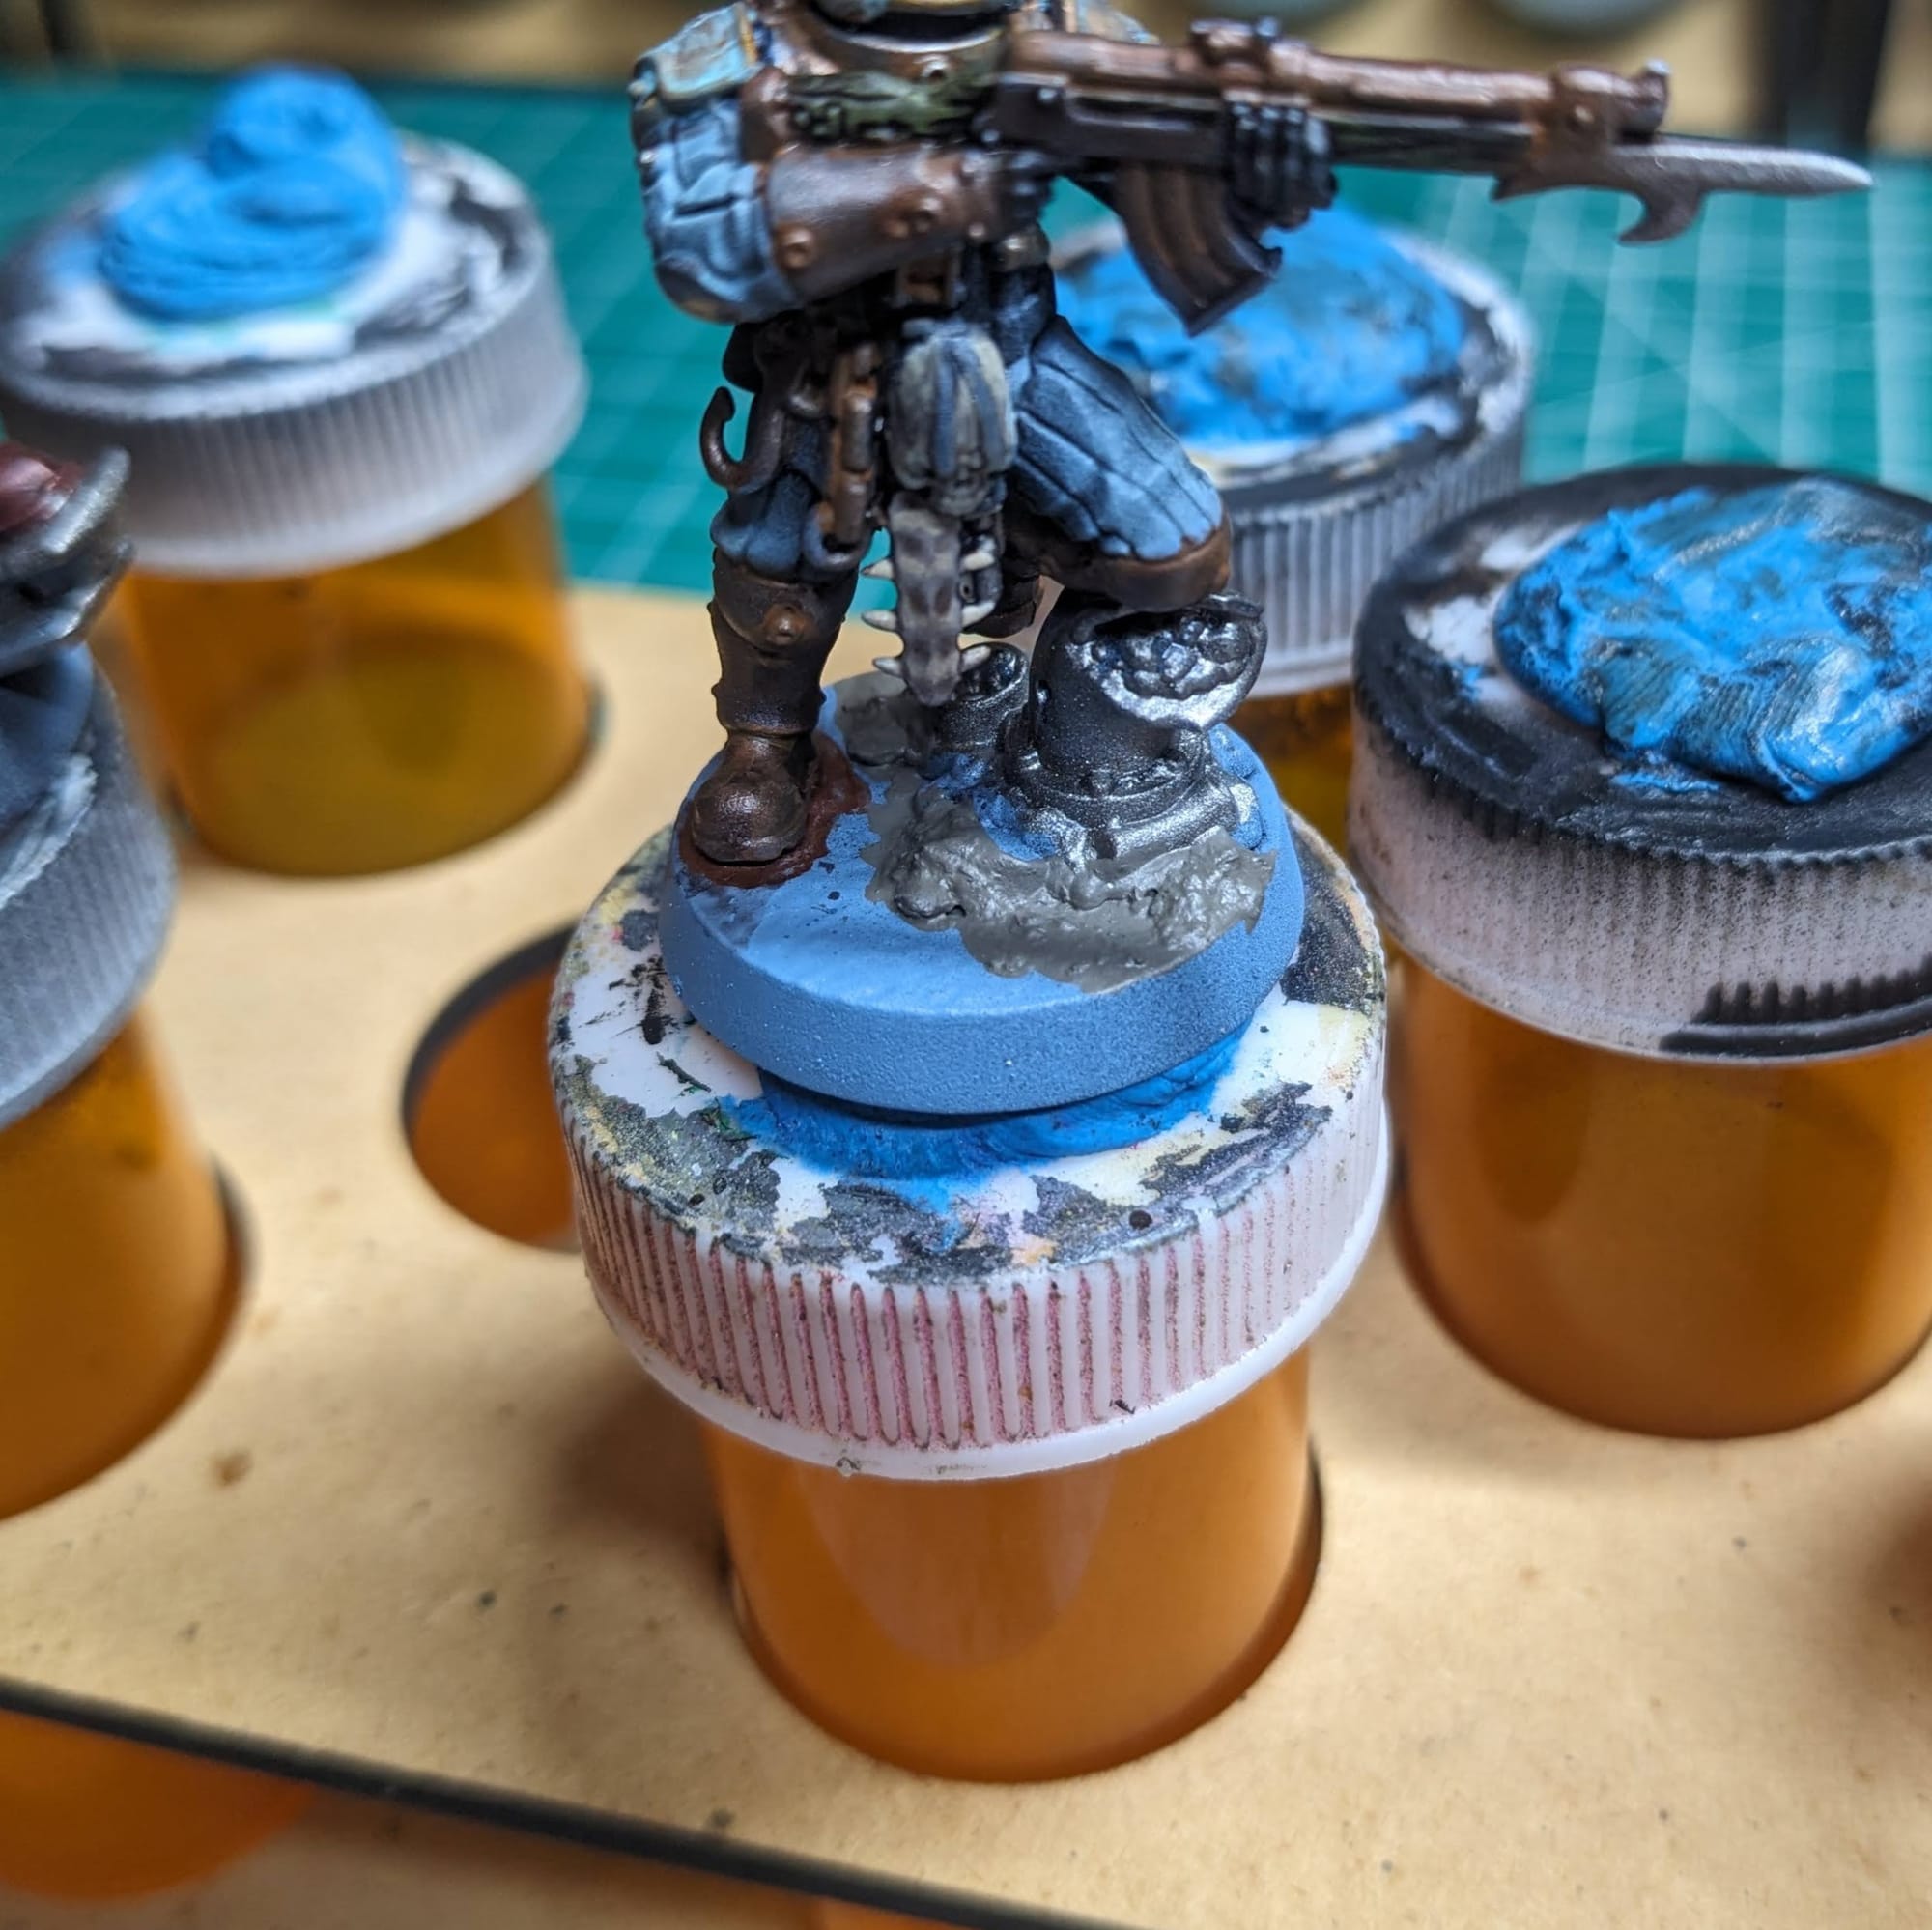
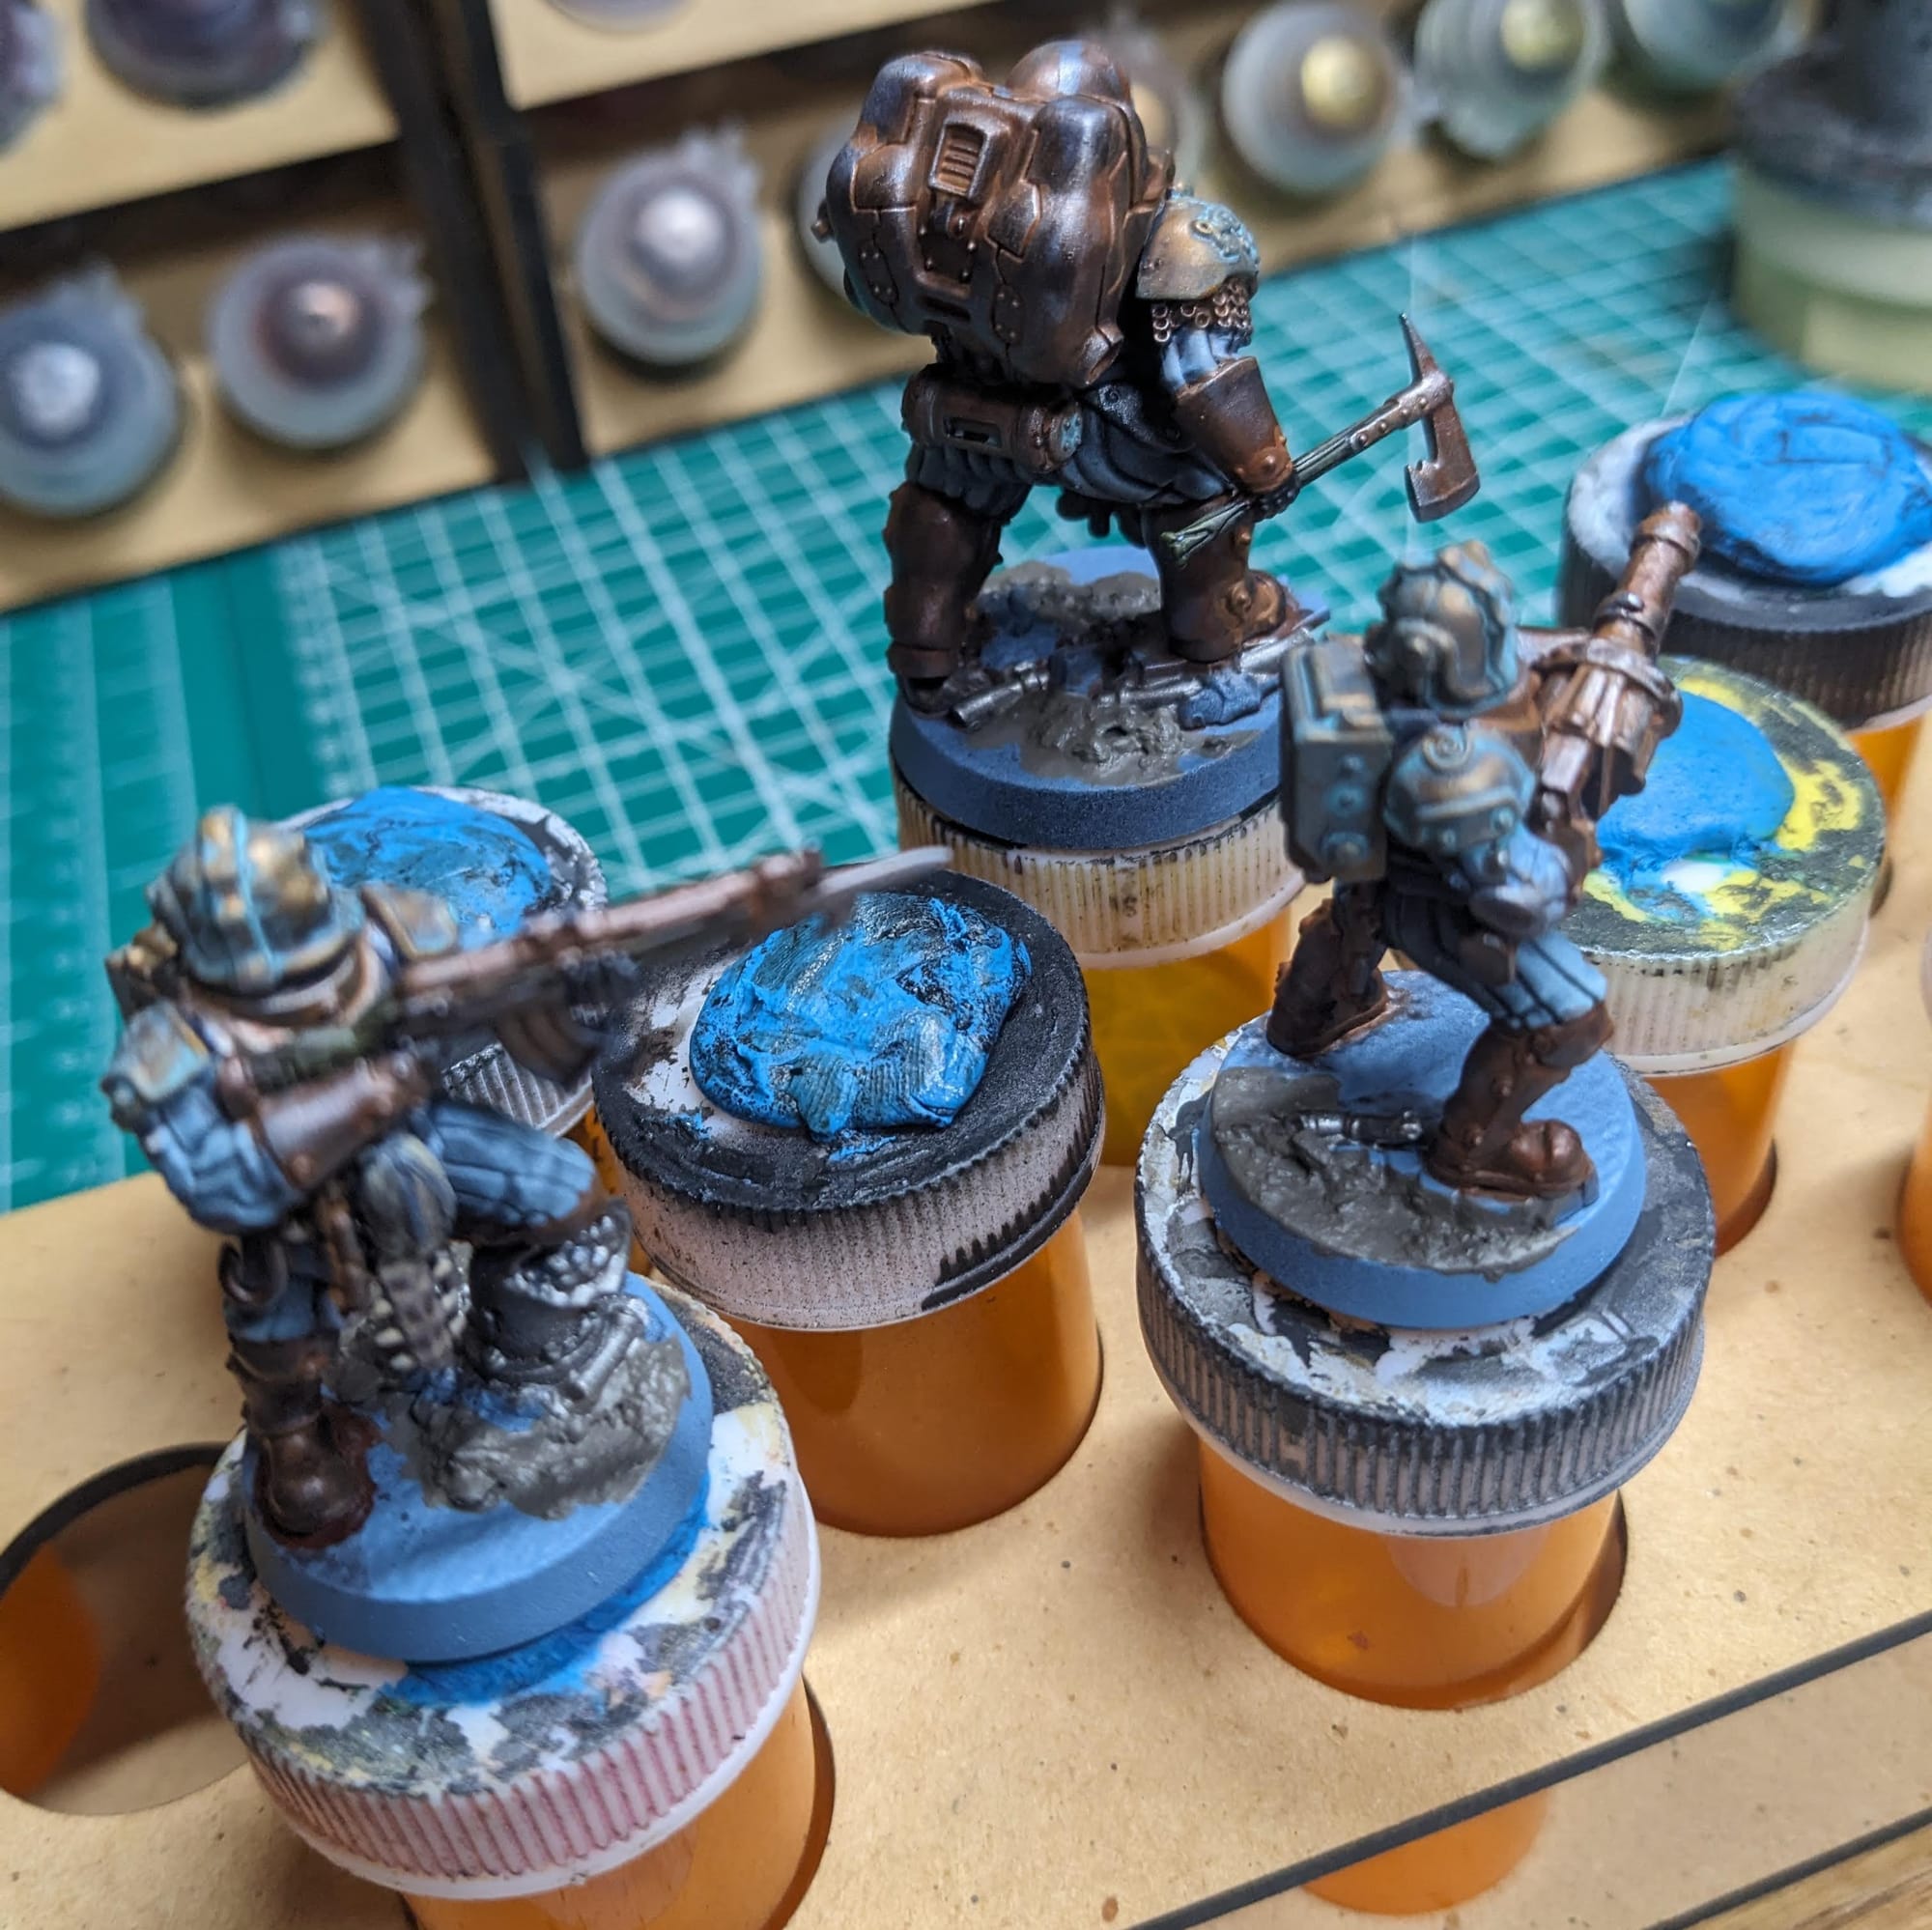
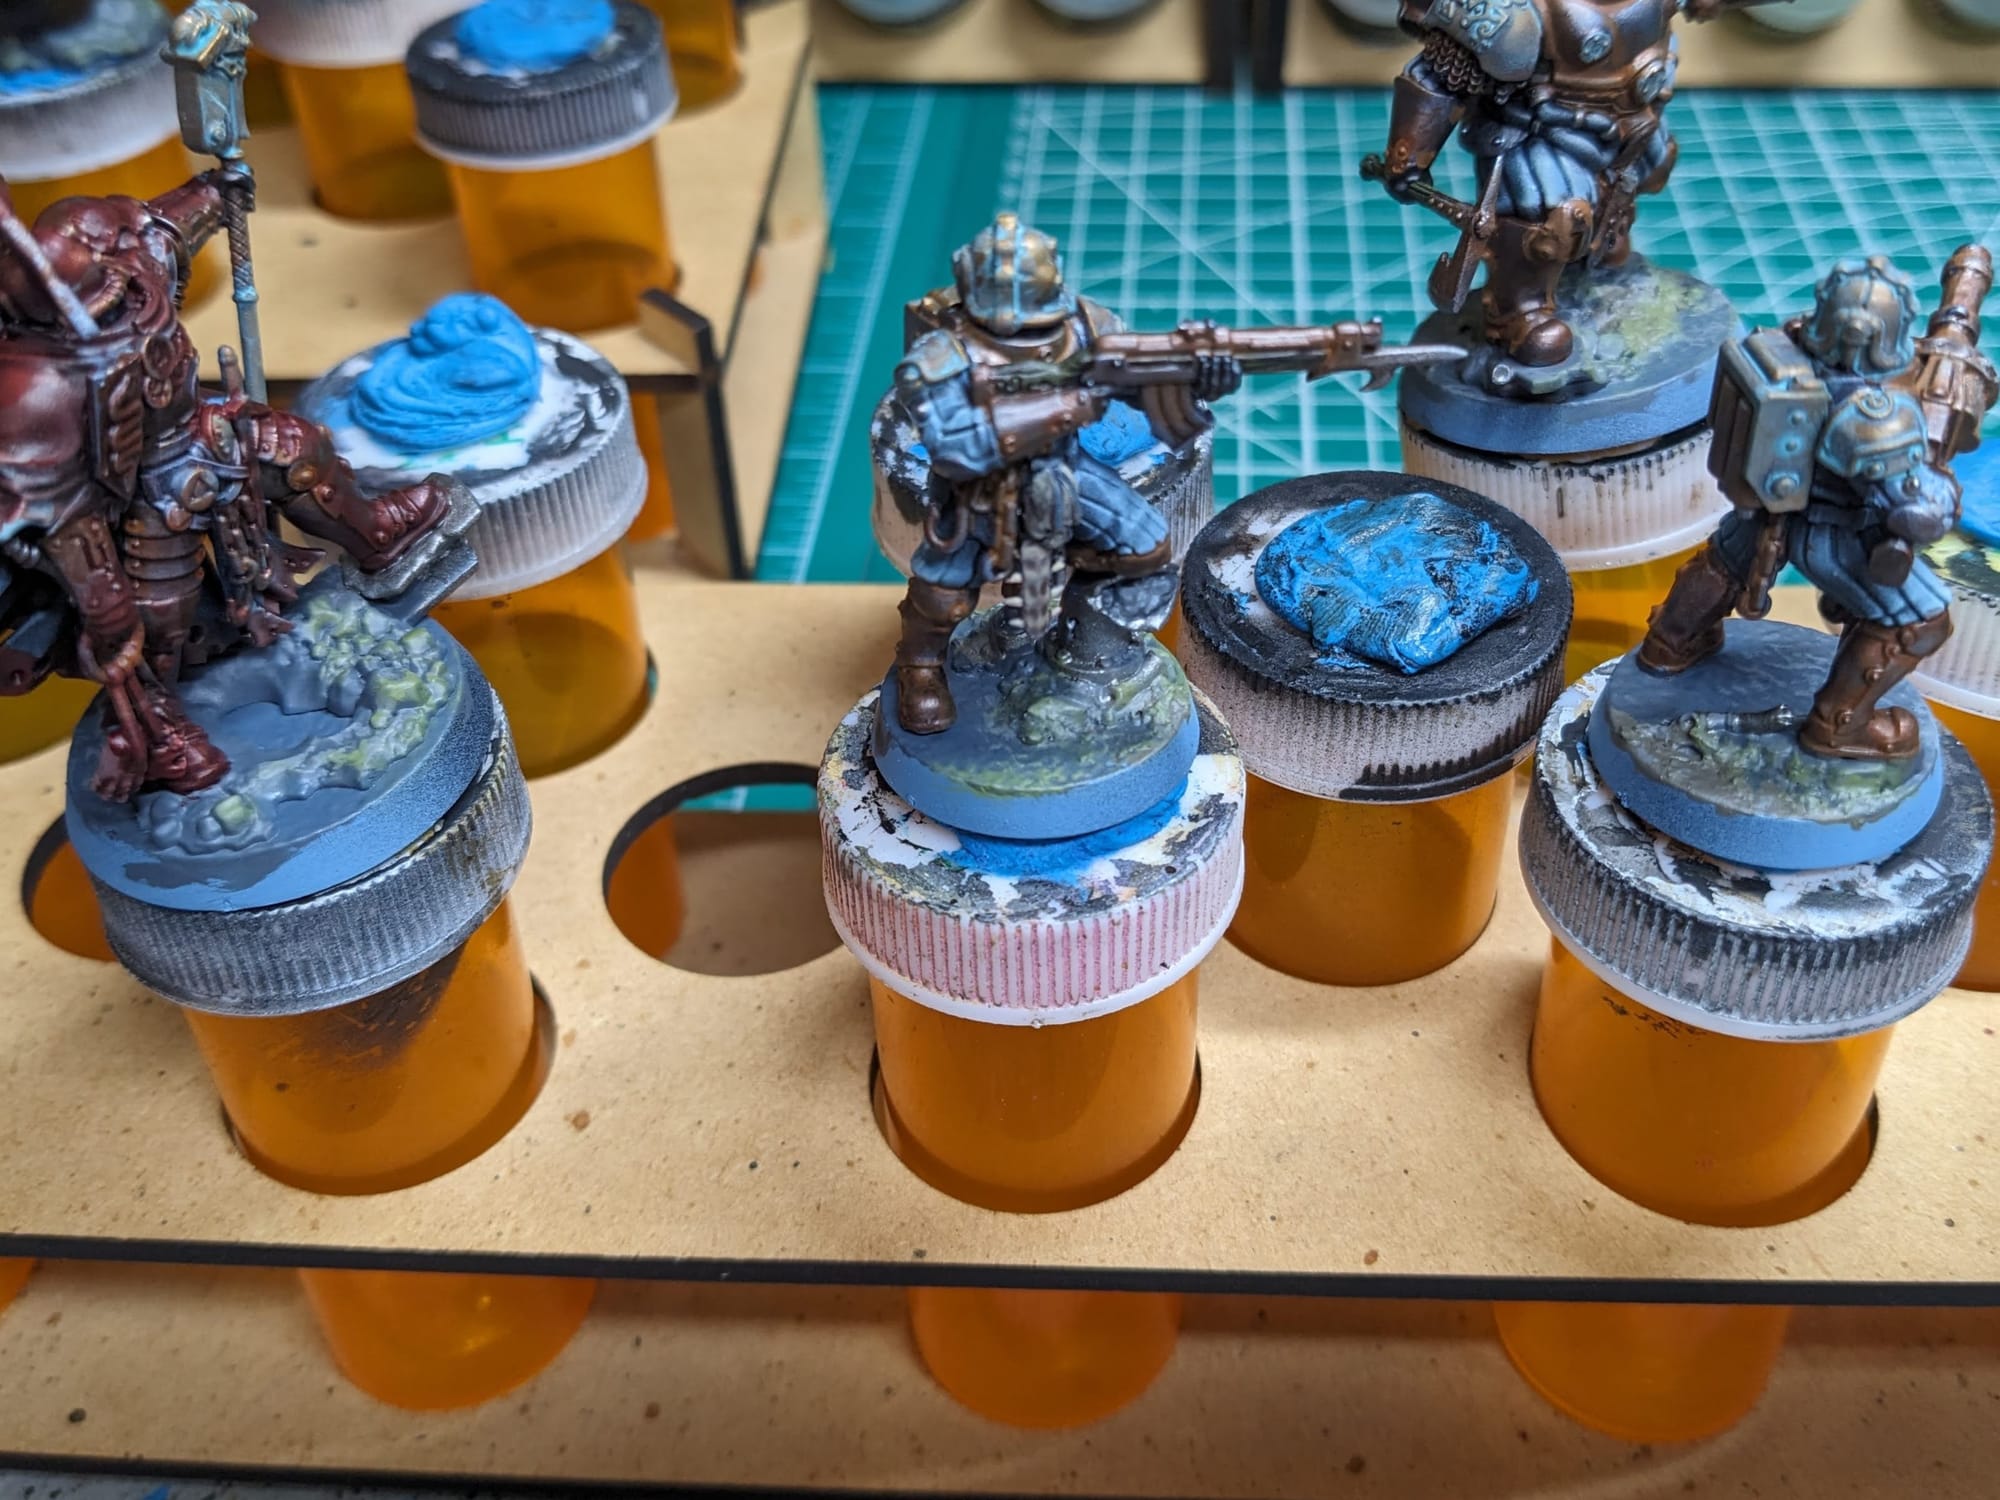
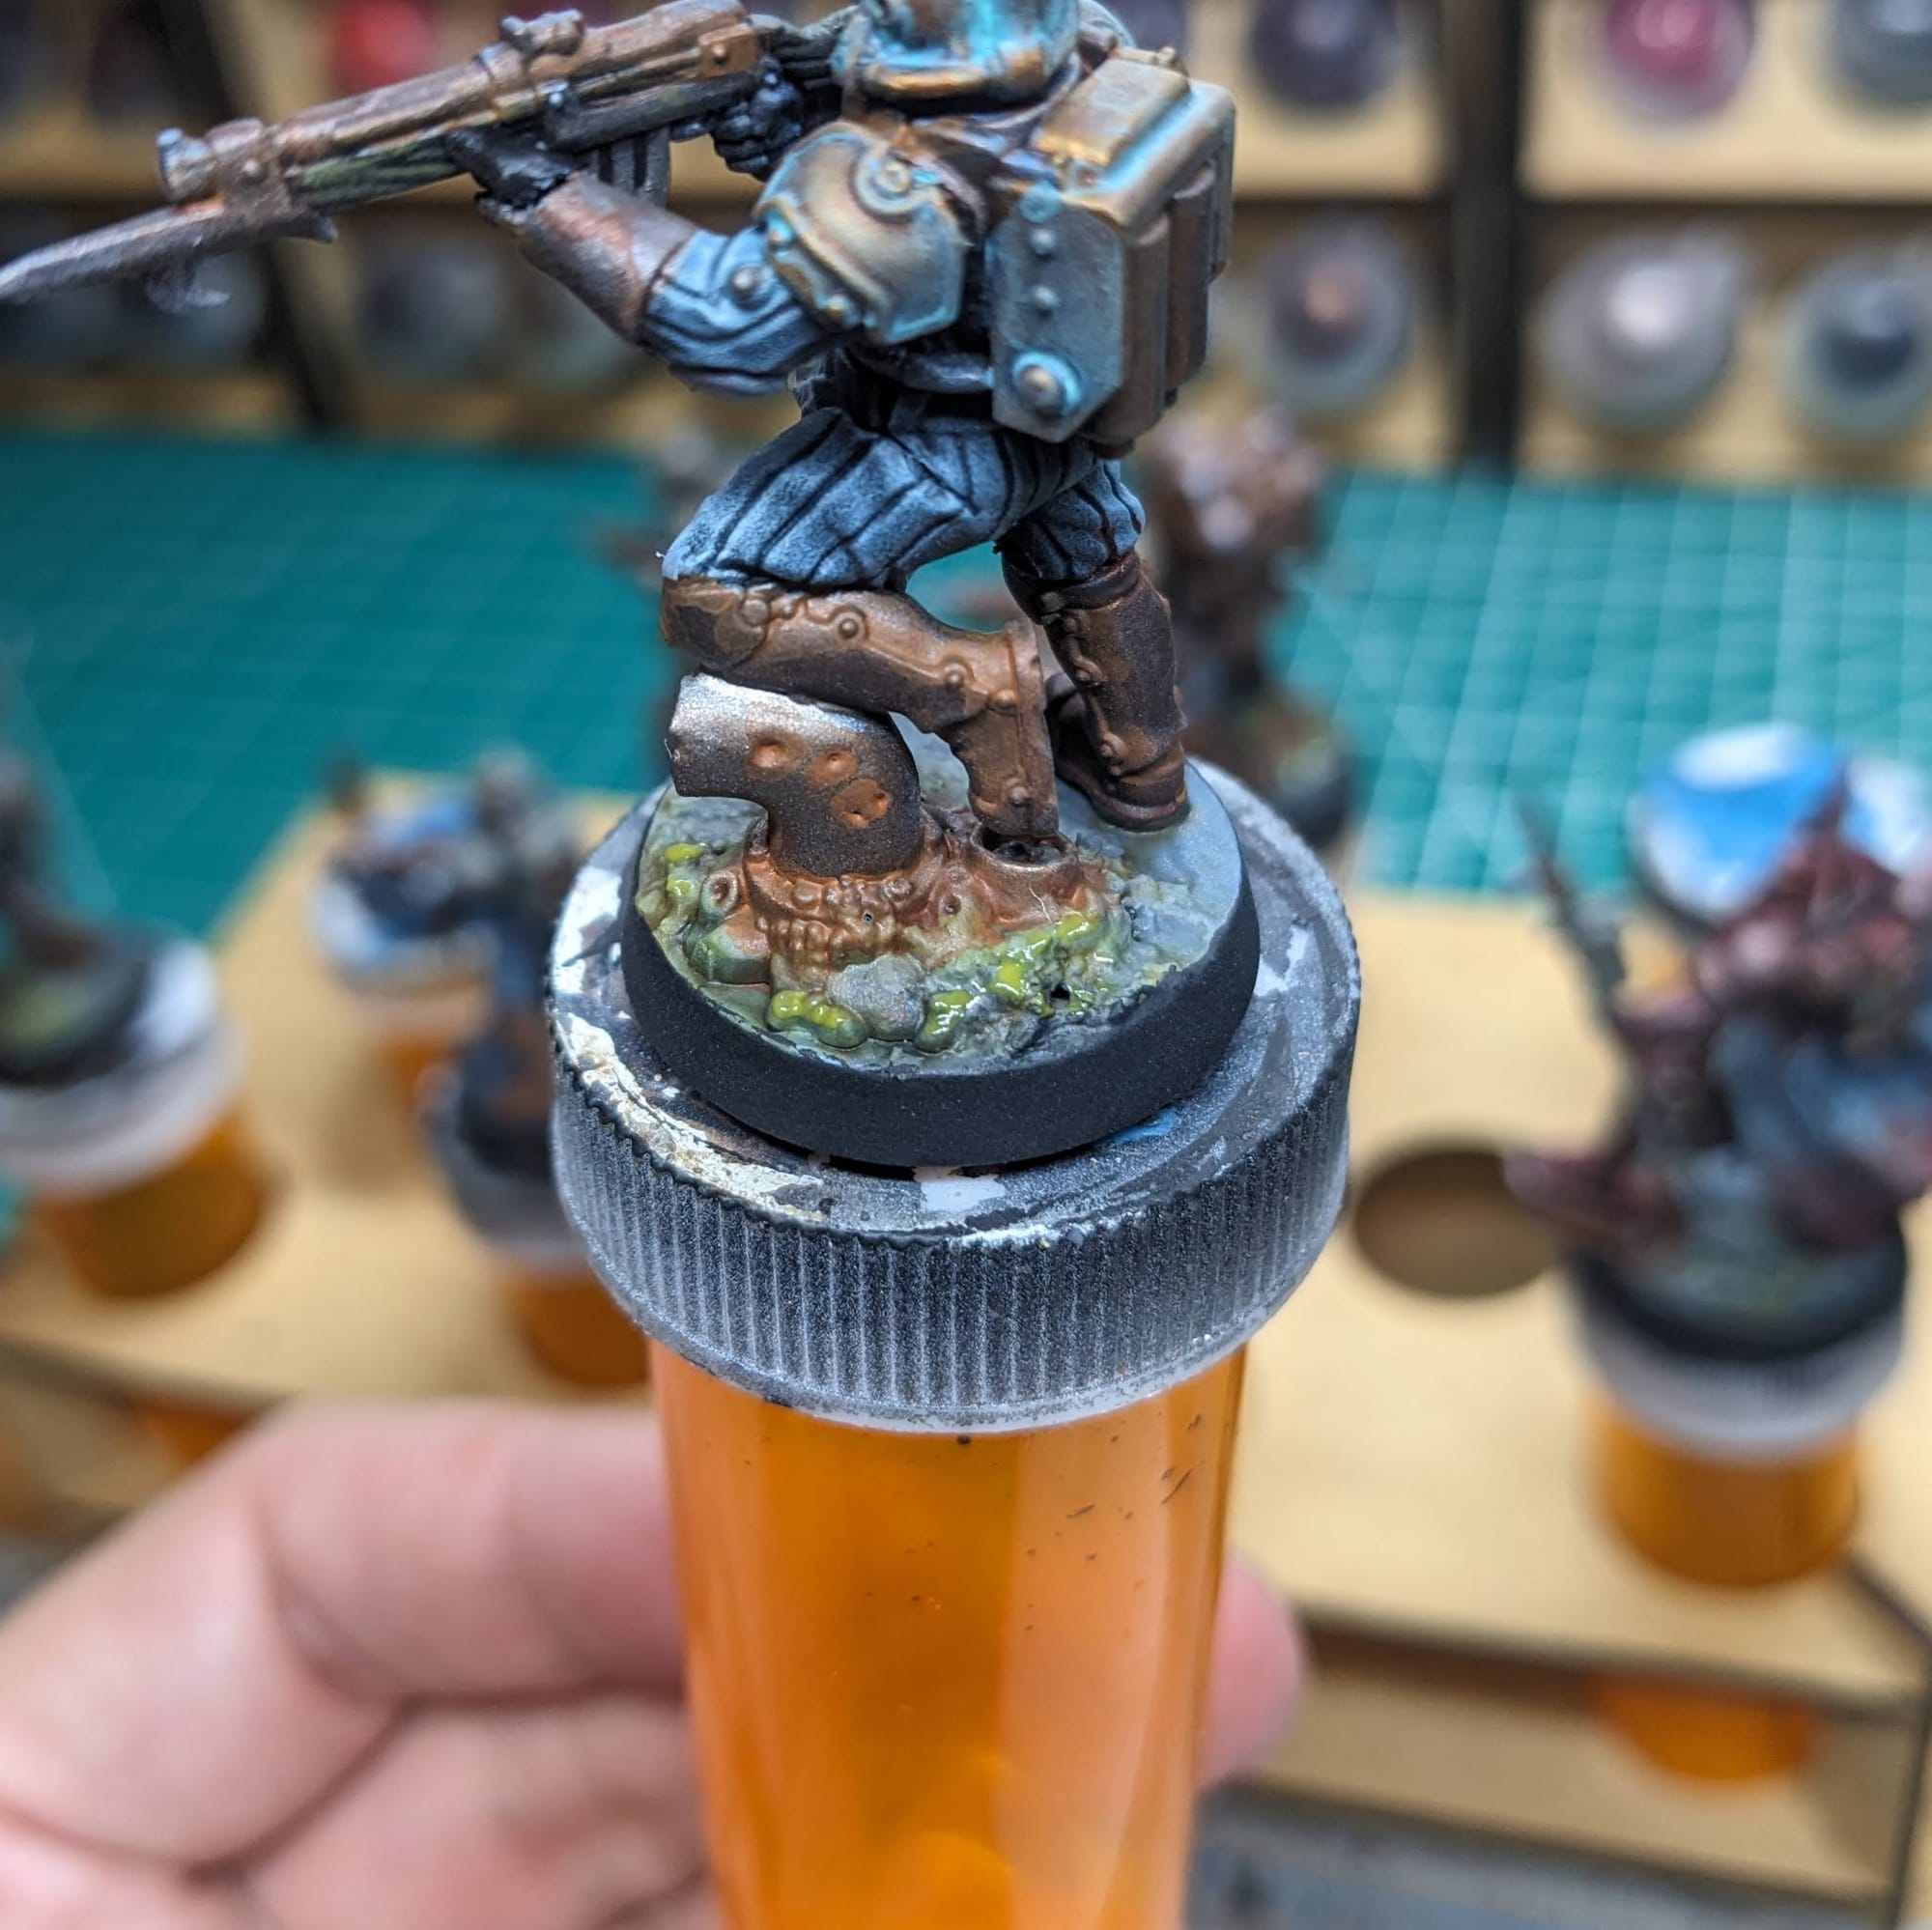
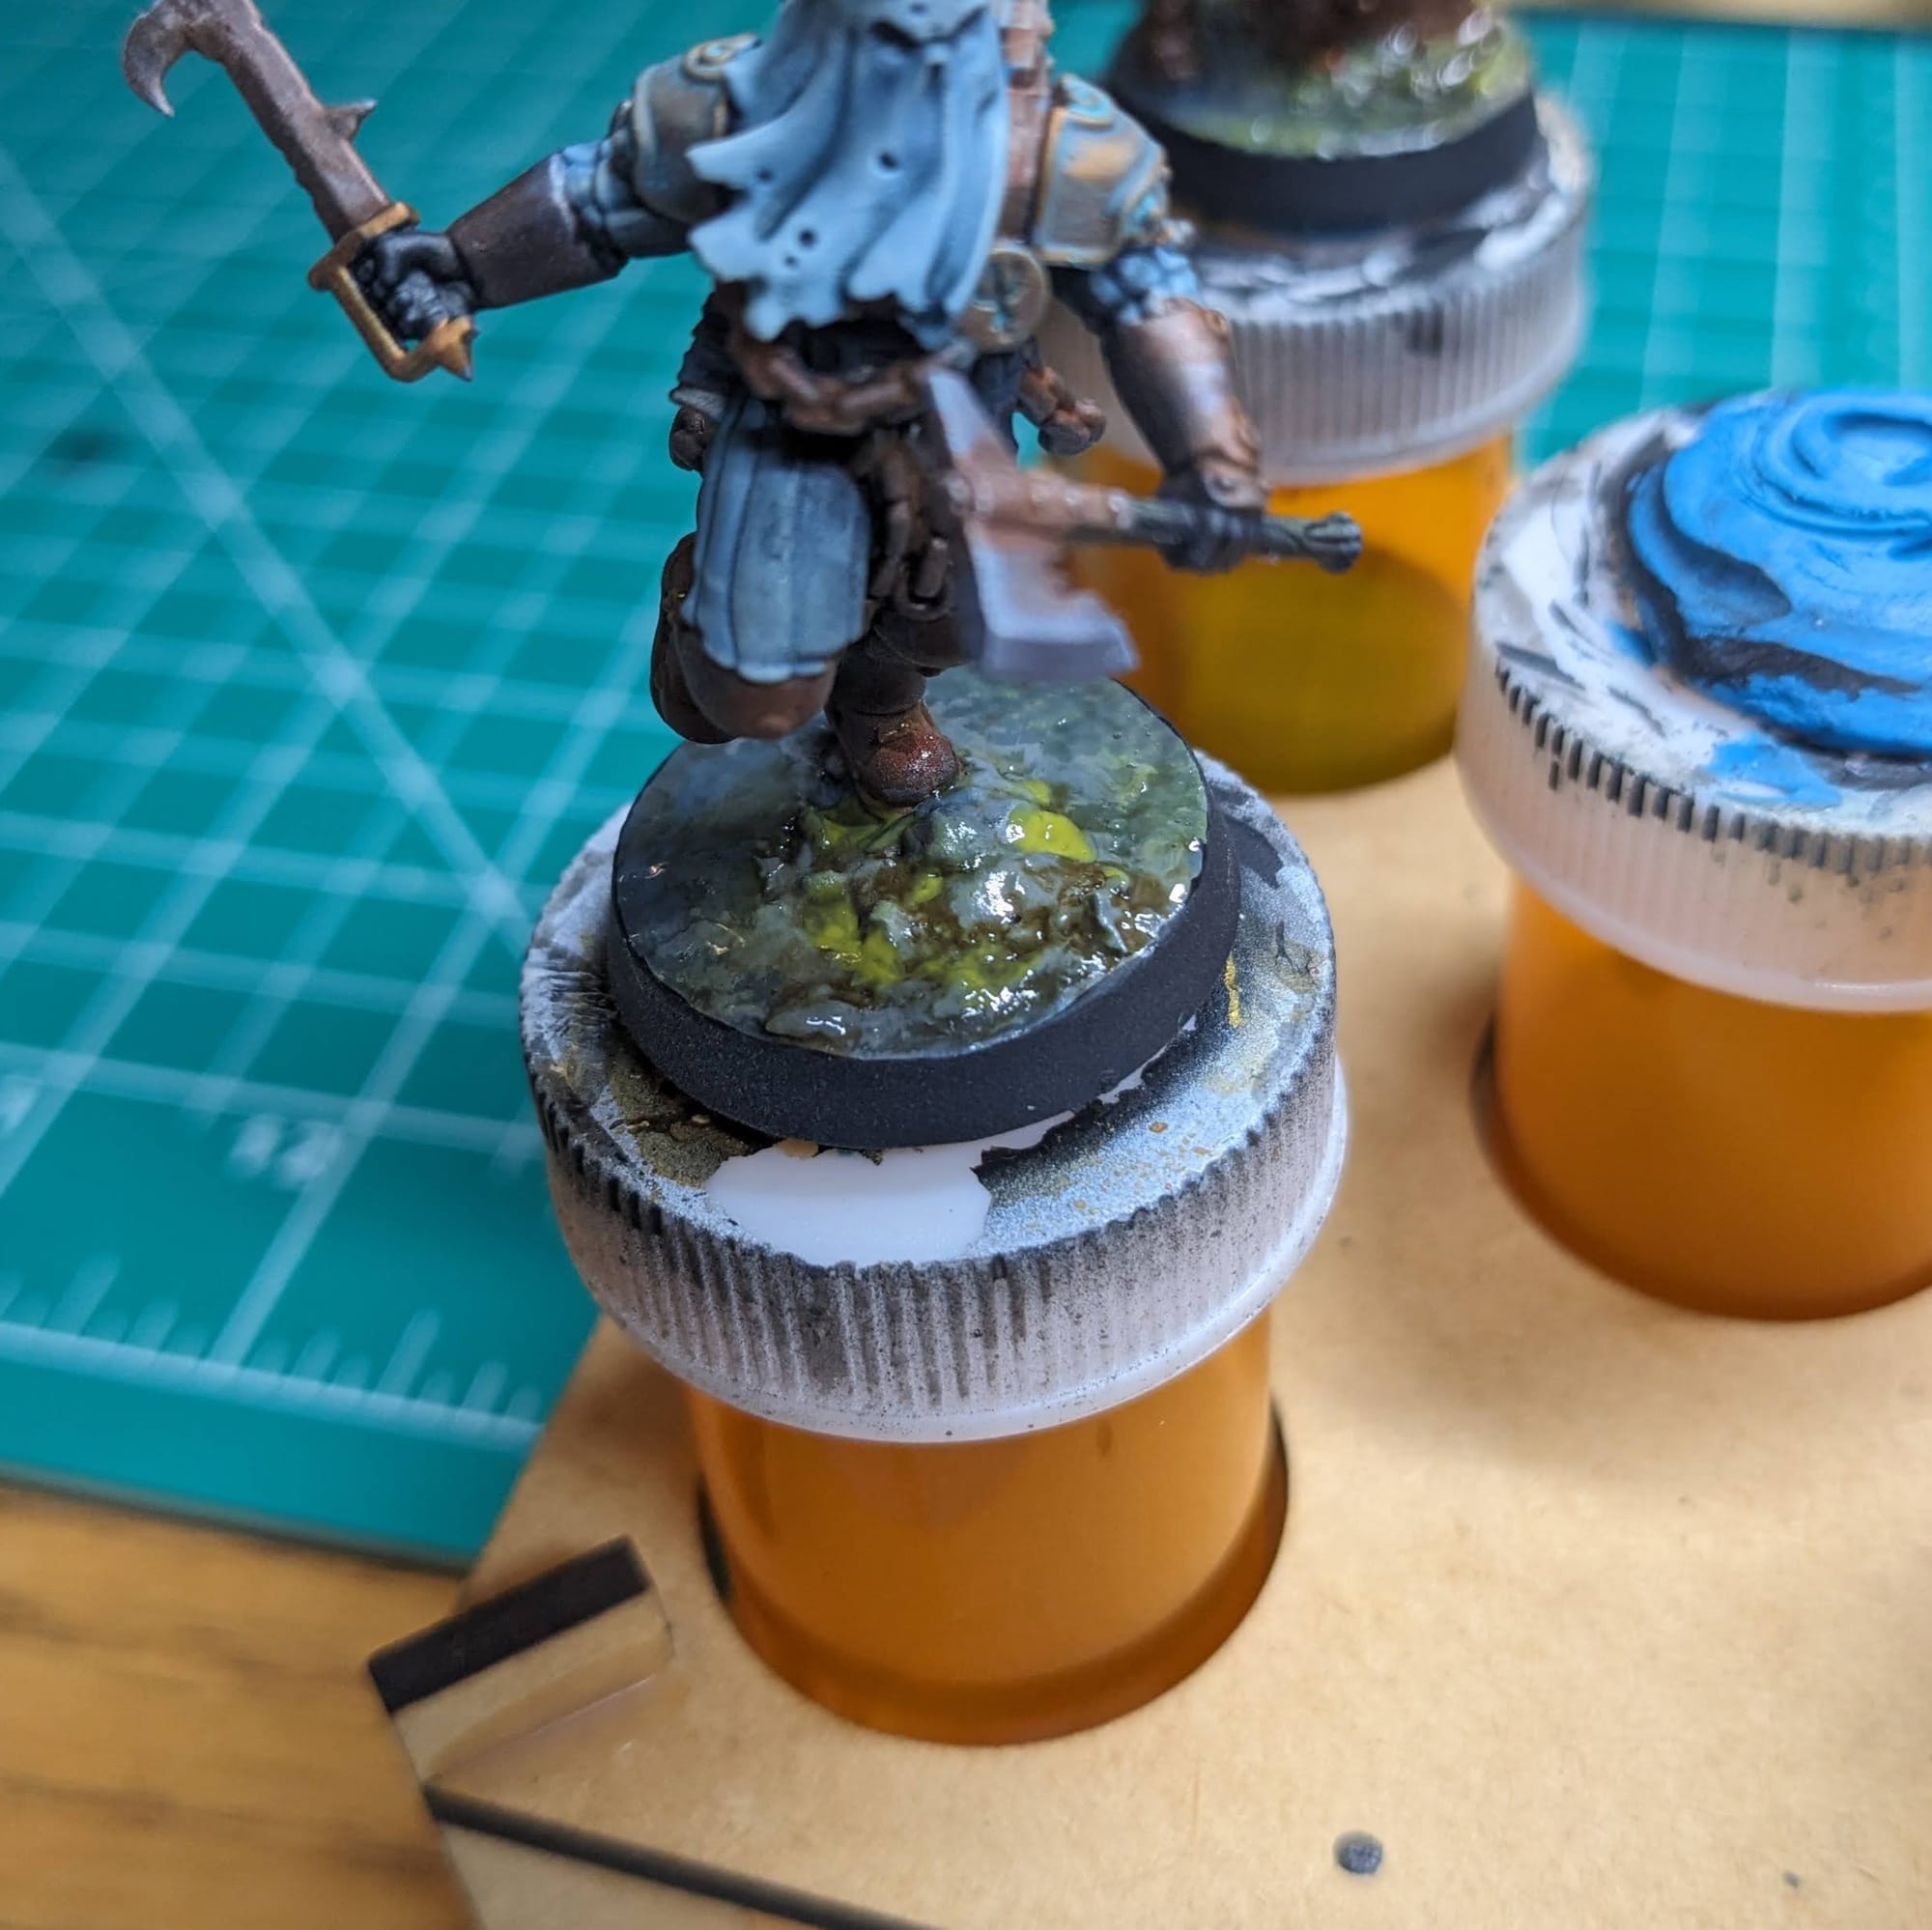
I started with Bear Cavalry’s Muck of Hell’s Thrones Texture Paints to add some texture to the base and help blend the sculpted shore to the flat base. Once that dried, I used Pro Acryl Slate Grey, Citadel Mechanicus Grey, Citadel Elysian Green, and Citadel Dawnstone unevenly and throughout the basing to give the tide a depressing gray and green look to it. This will appear underneath the water, so I don’t need to be super detailed with any of it. For the Captain, I used a combination of Citadel Flesh Tearer Contrast and Citadel Berserker Bloodshade. This will be underneath the Citadel Blood for the Blood God, and it actually does give it a dried blood look to it (meaning you go forego Blood for the Blood God, if you wanted).
The most important step here is that any water, blood, or goop effects I am doing after I seal the miniature (see section below). I don’t want to make my blood, guts, and water look matte with the sealer. So, I’m actually doing the sealing first and then the basing.
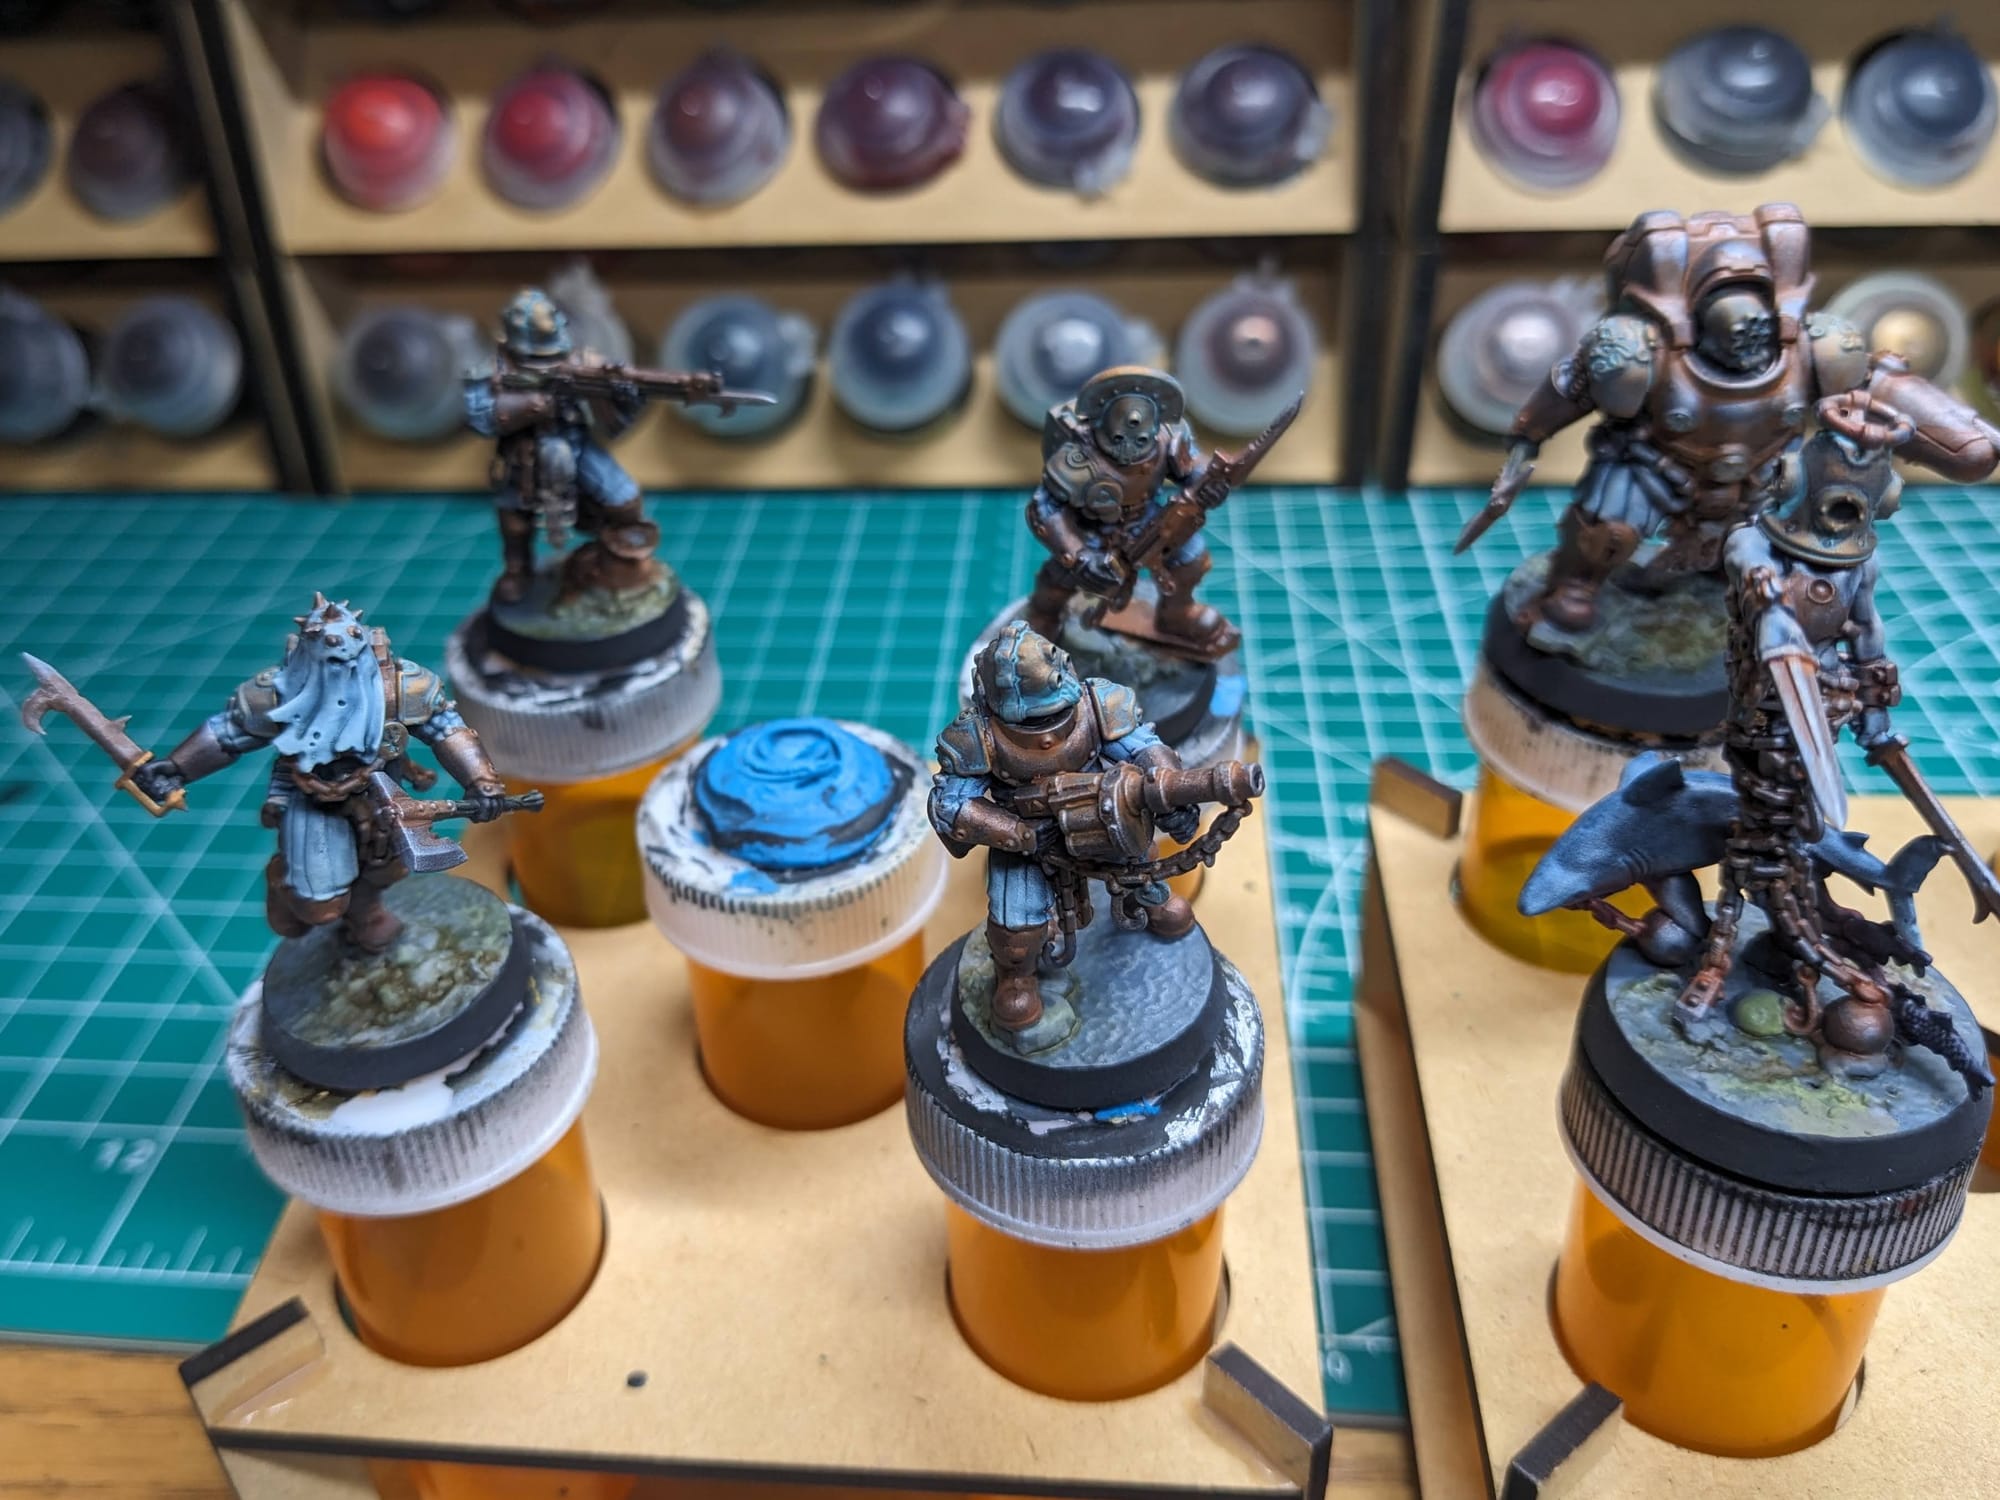
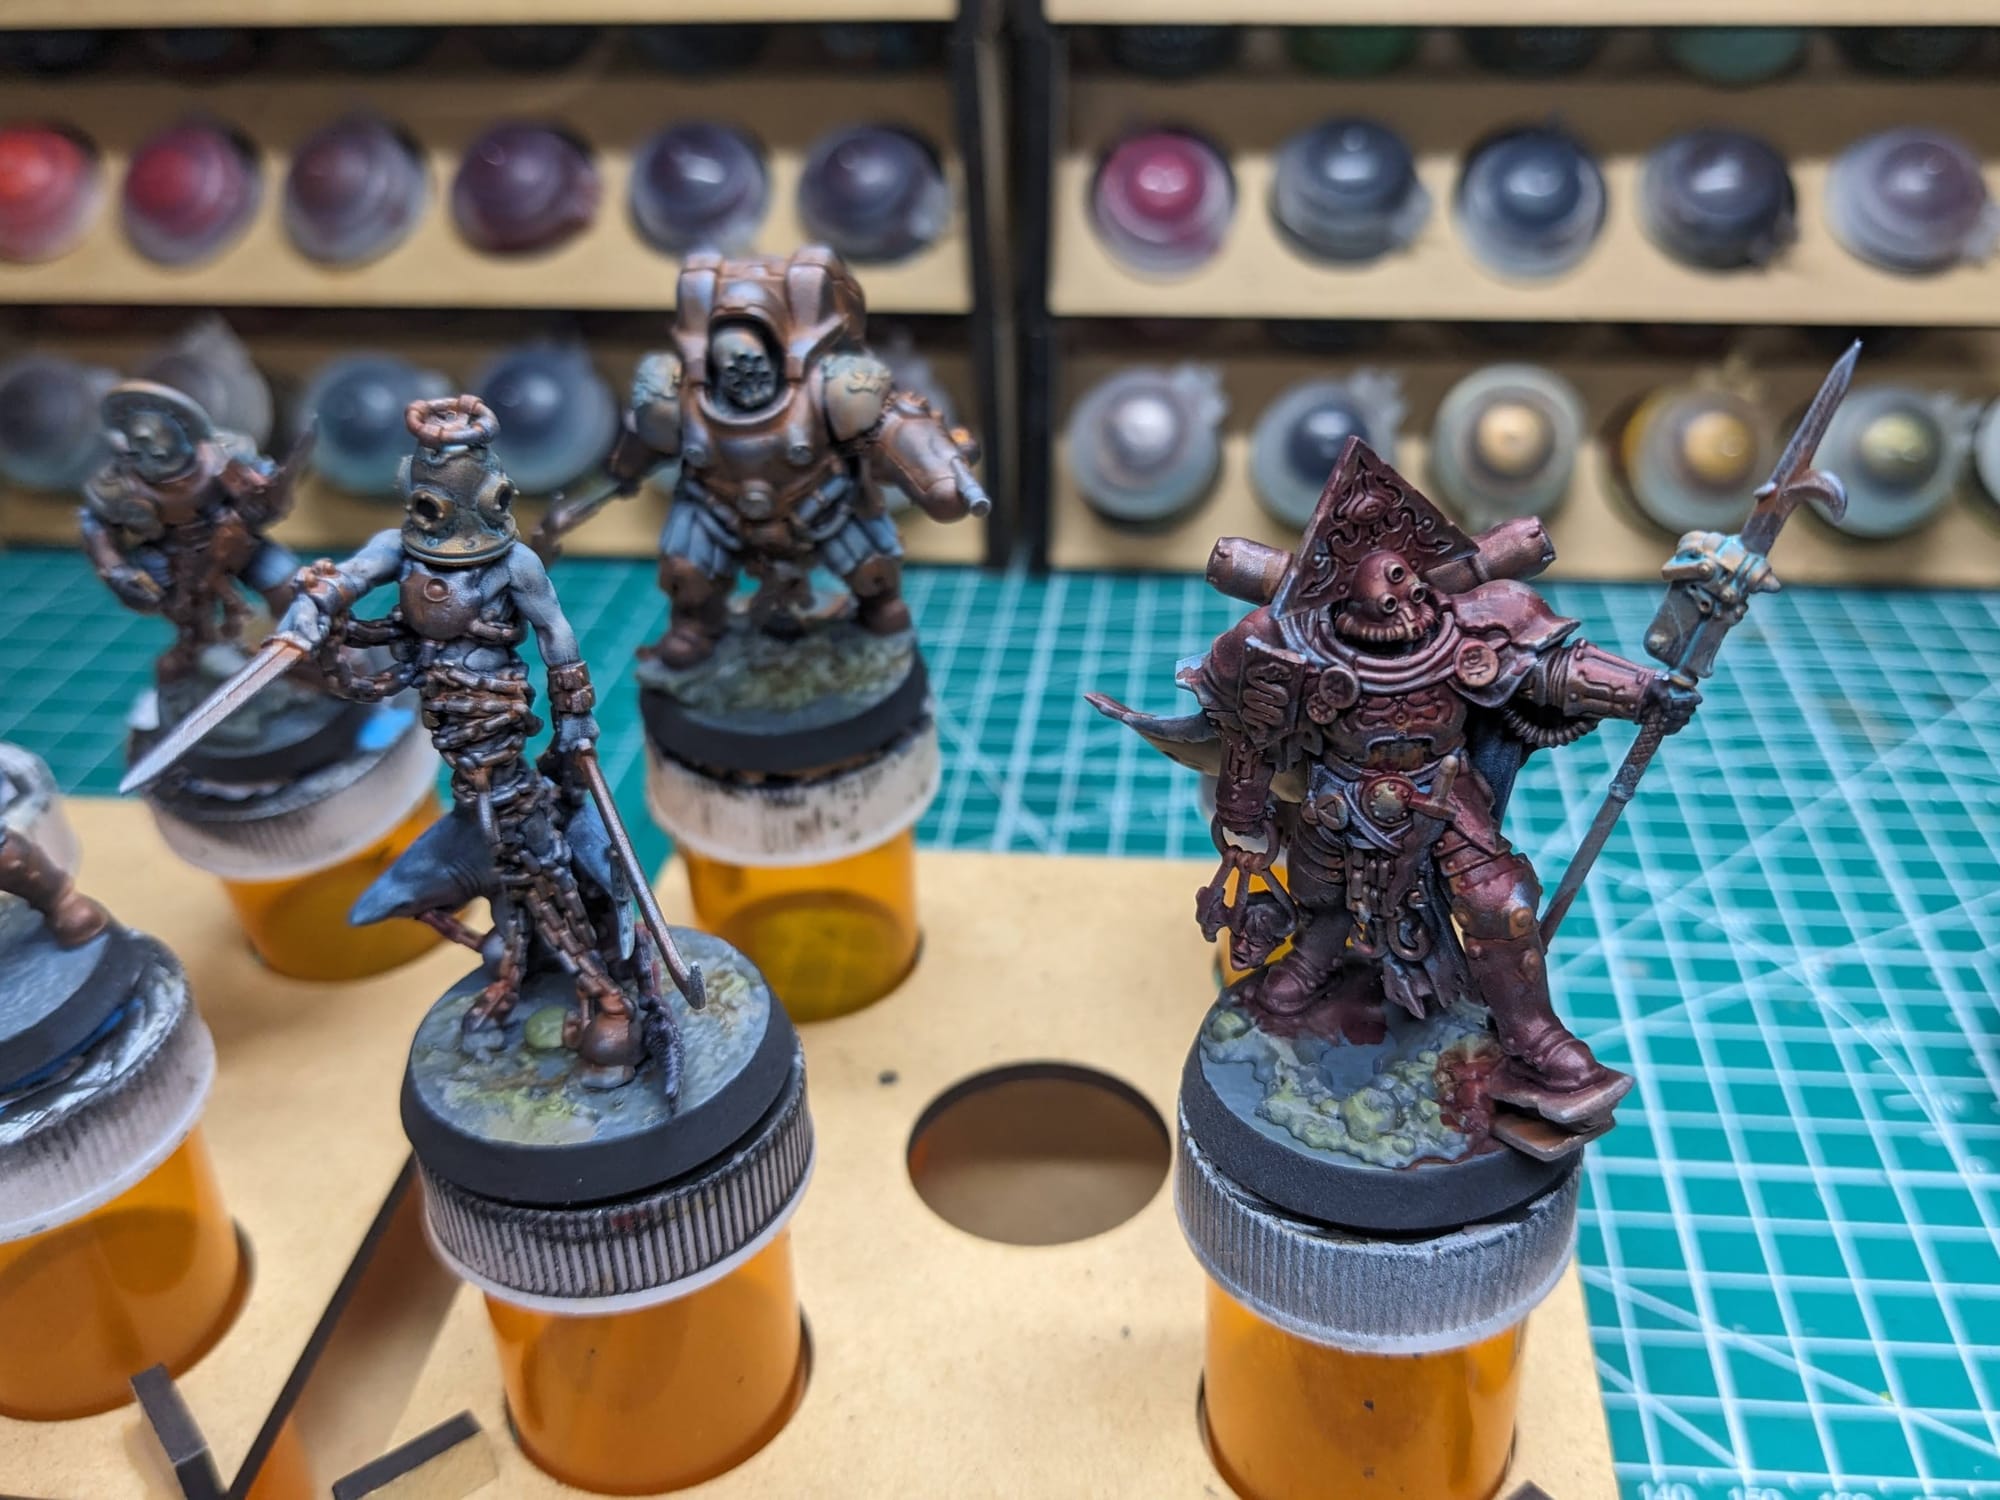
Heretic Naval Raiders sealed and ready for glossy, bloody, and goopy basing.
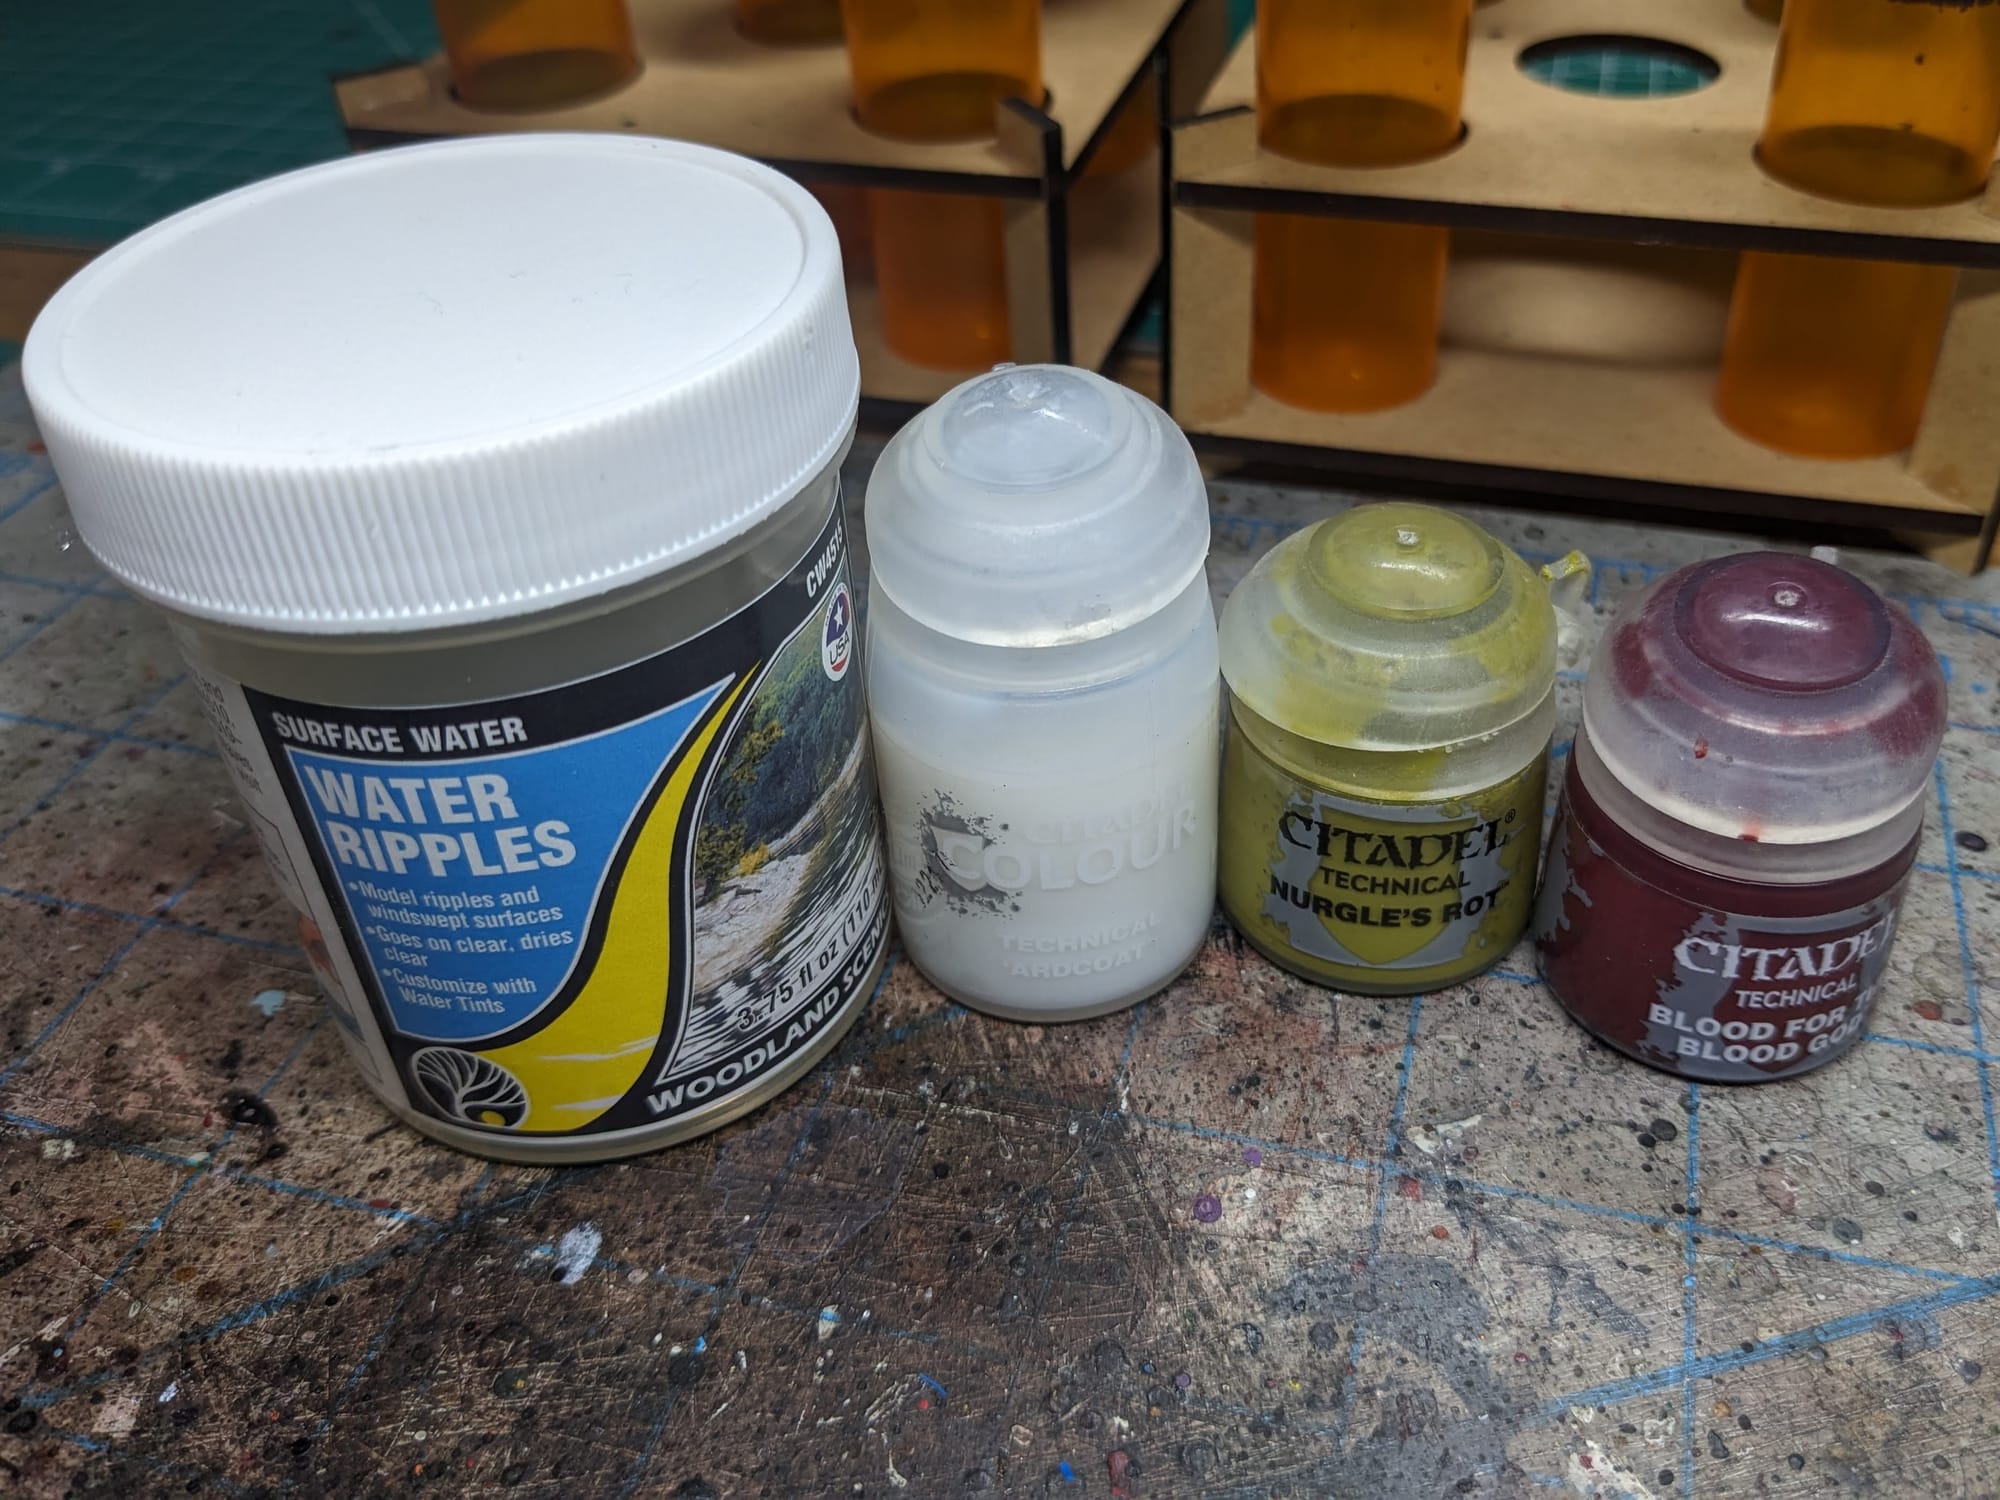
I used a combination of Woodland Scenics Water Ripples, Citadel ‘Ardcoat, Citadel Nurgle’s Rot, and the classic Citadel Blood for the Blood God for water, nasty goop, and blood for the Captain. I started with the Nurgle Rot and ‘Ardcoat, and then added the Water Ripples. Lastly, I applied the Blood for the Blood God.
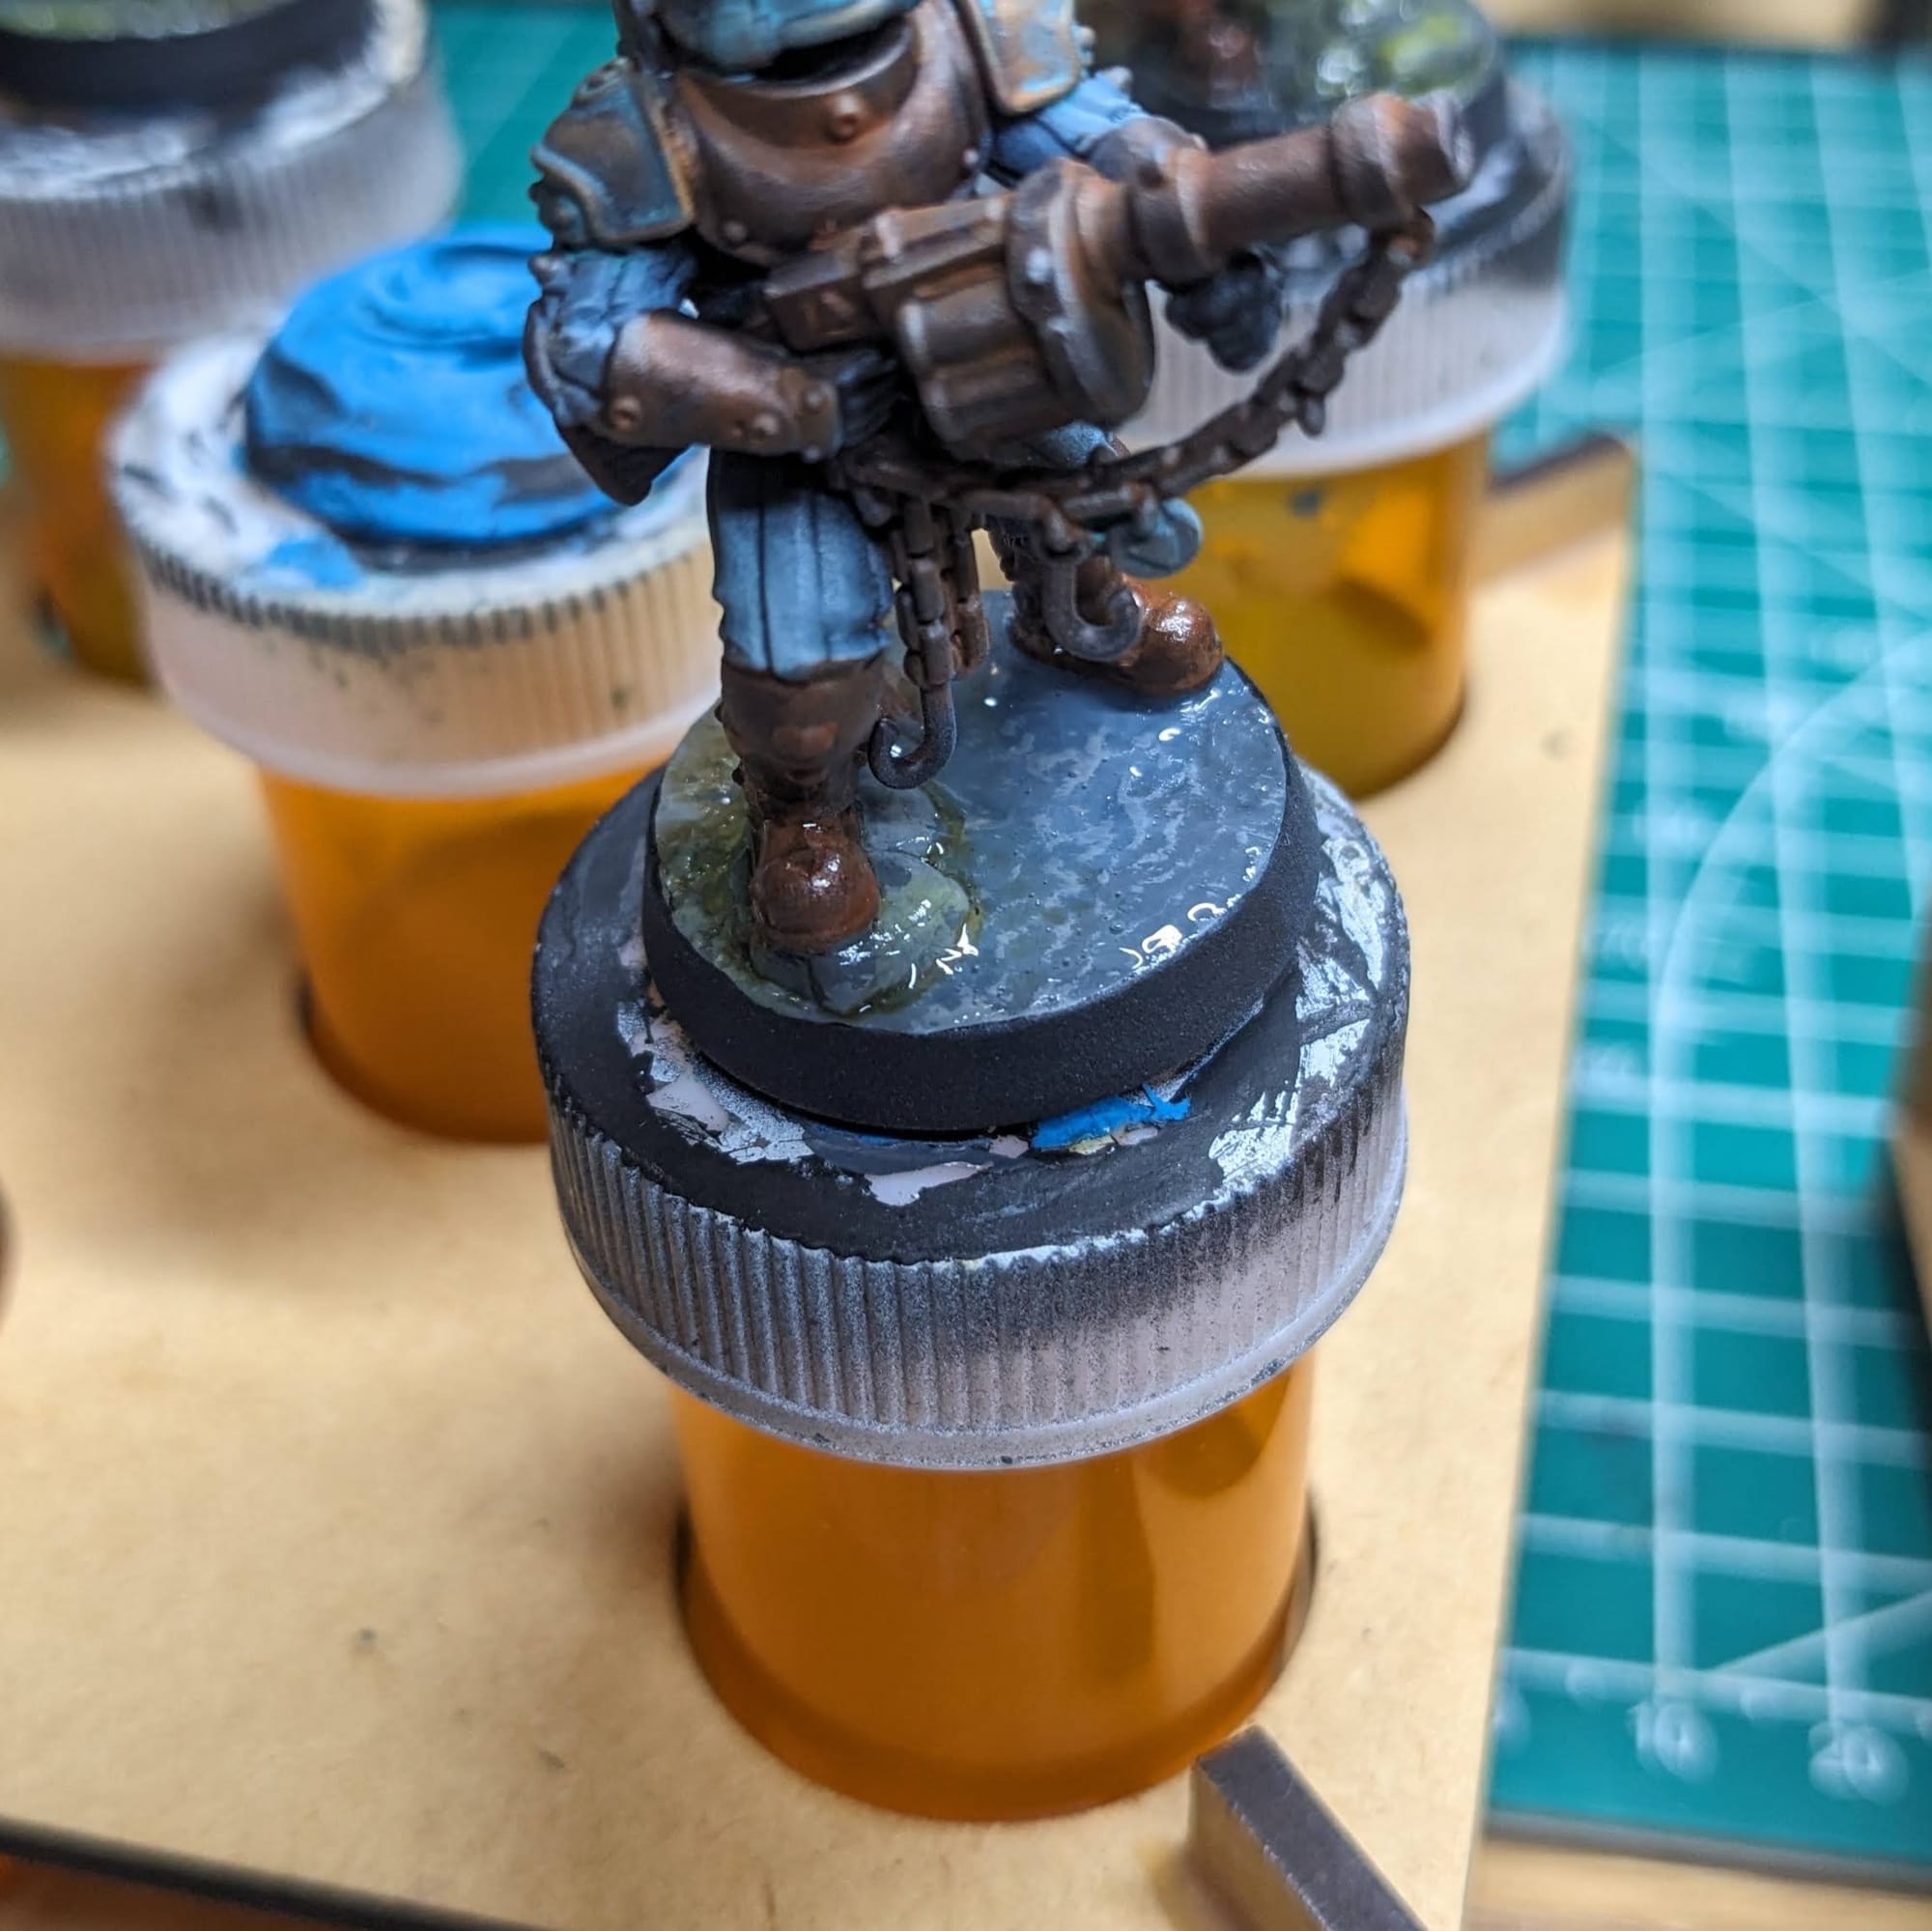
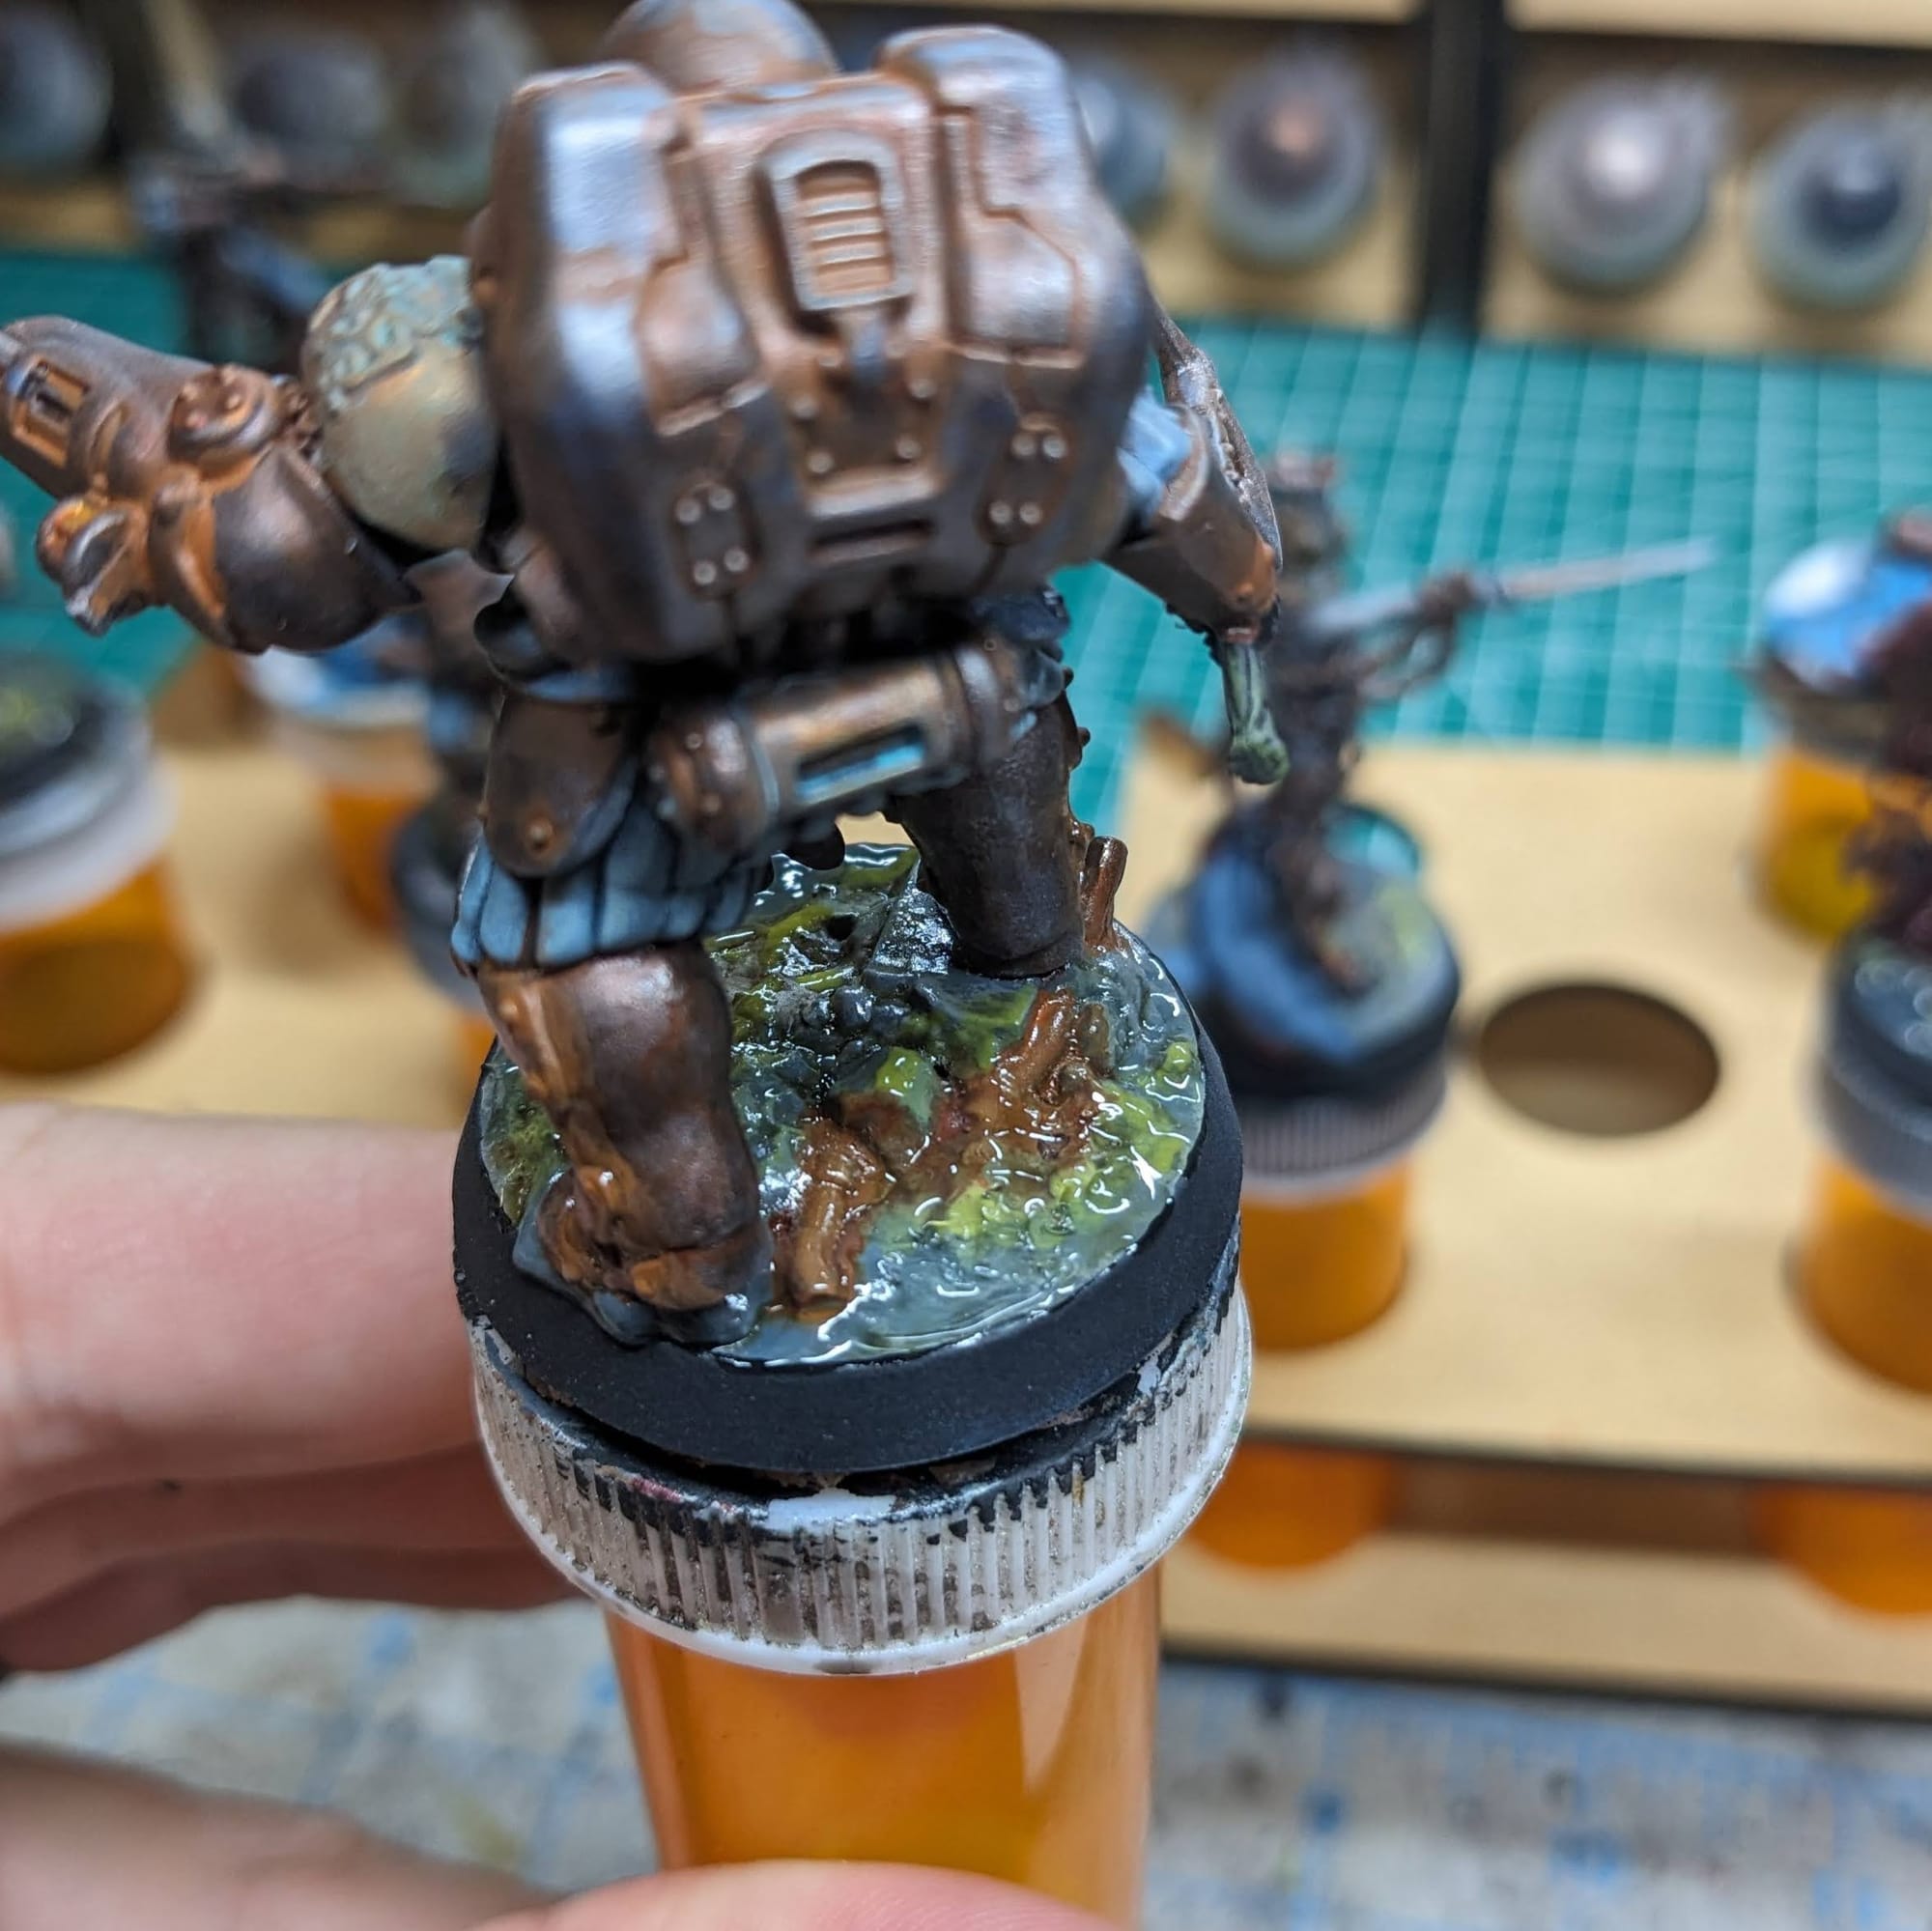
Ronn: I didn’t end up having to do much in the way of basing for these models, they had quite a bit of built in basing at the feet of each of the Pilgrims, so I just had to add a little bit of Bear Calvary’s mud basing, some drybrushing, black rims and they were good to go!
Randy: Hah! I went easy on these. I used a mixture of various dirts and some acrylic bones and skulls. I do love that these models come with their own fun bases, but I still kept within my chosen color ranges, so as to not distract the eyes. I drybrushed blues up to a brighter green/white, in order to give more of an aquatic feel.
Beach Landing Scatter Terrain - Dry Pigment
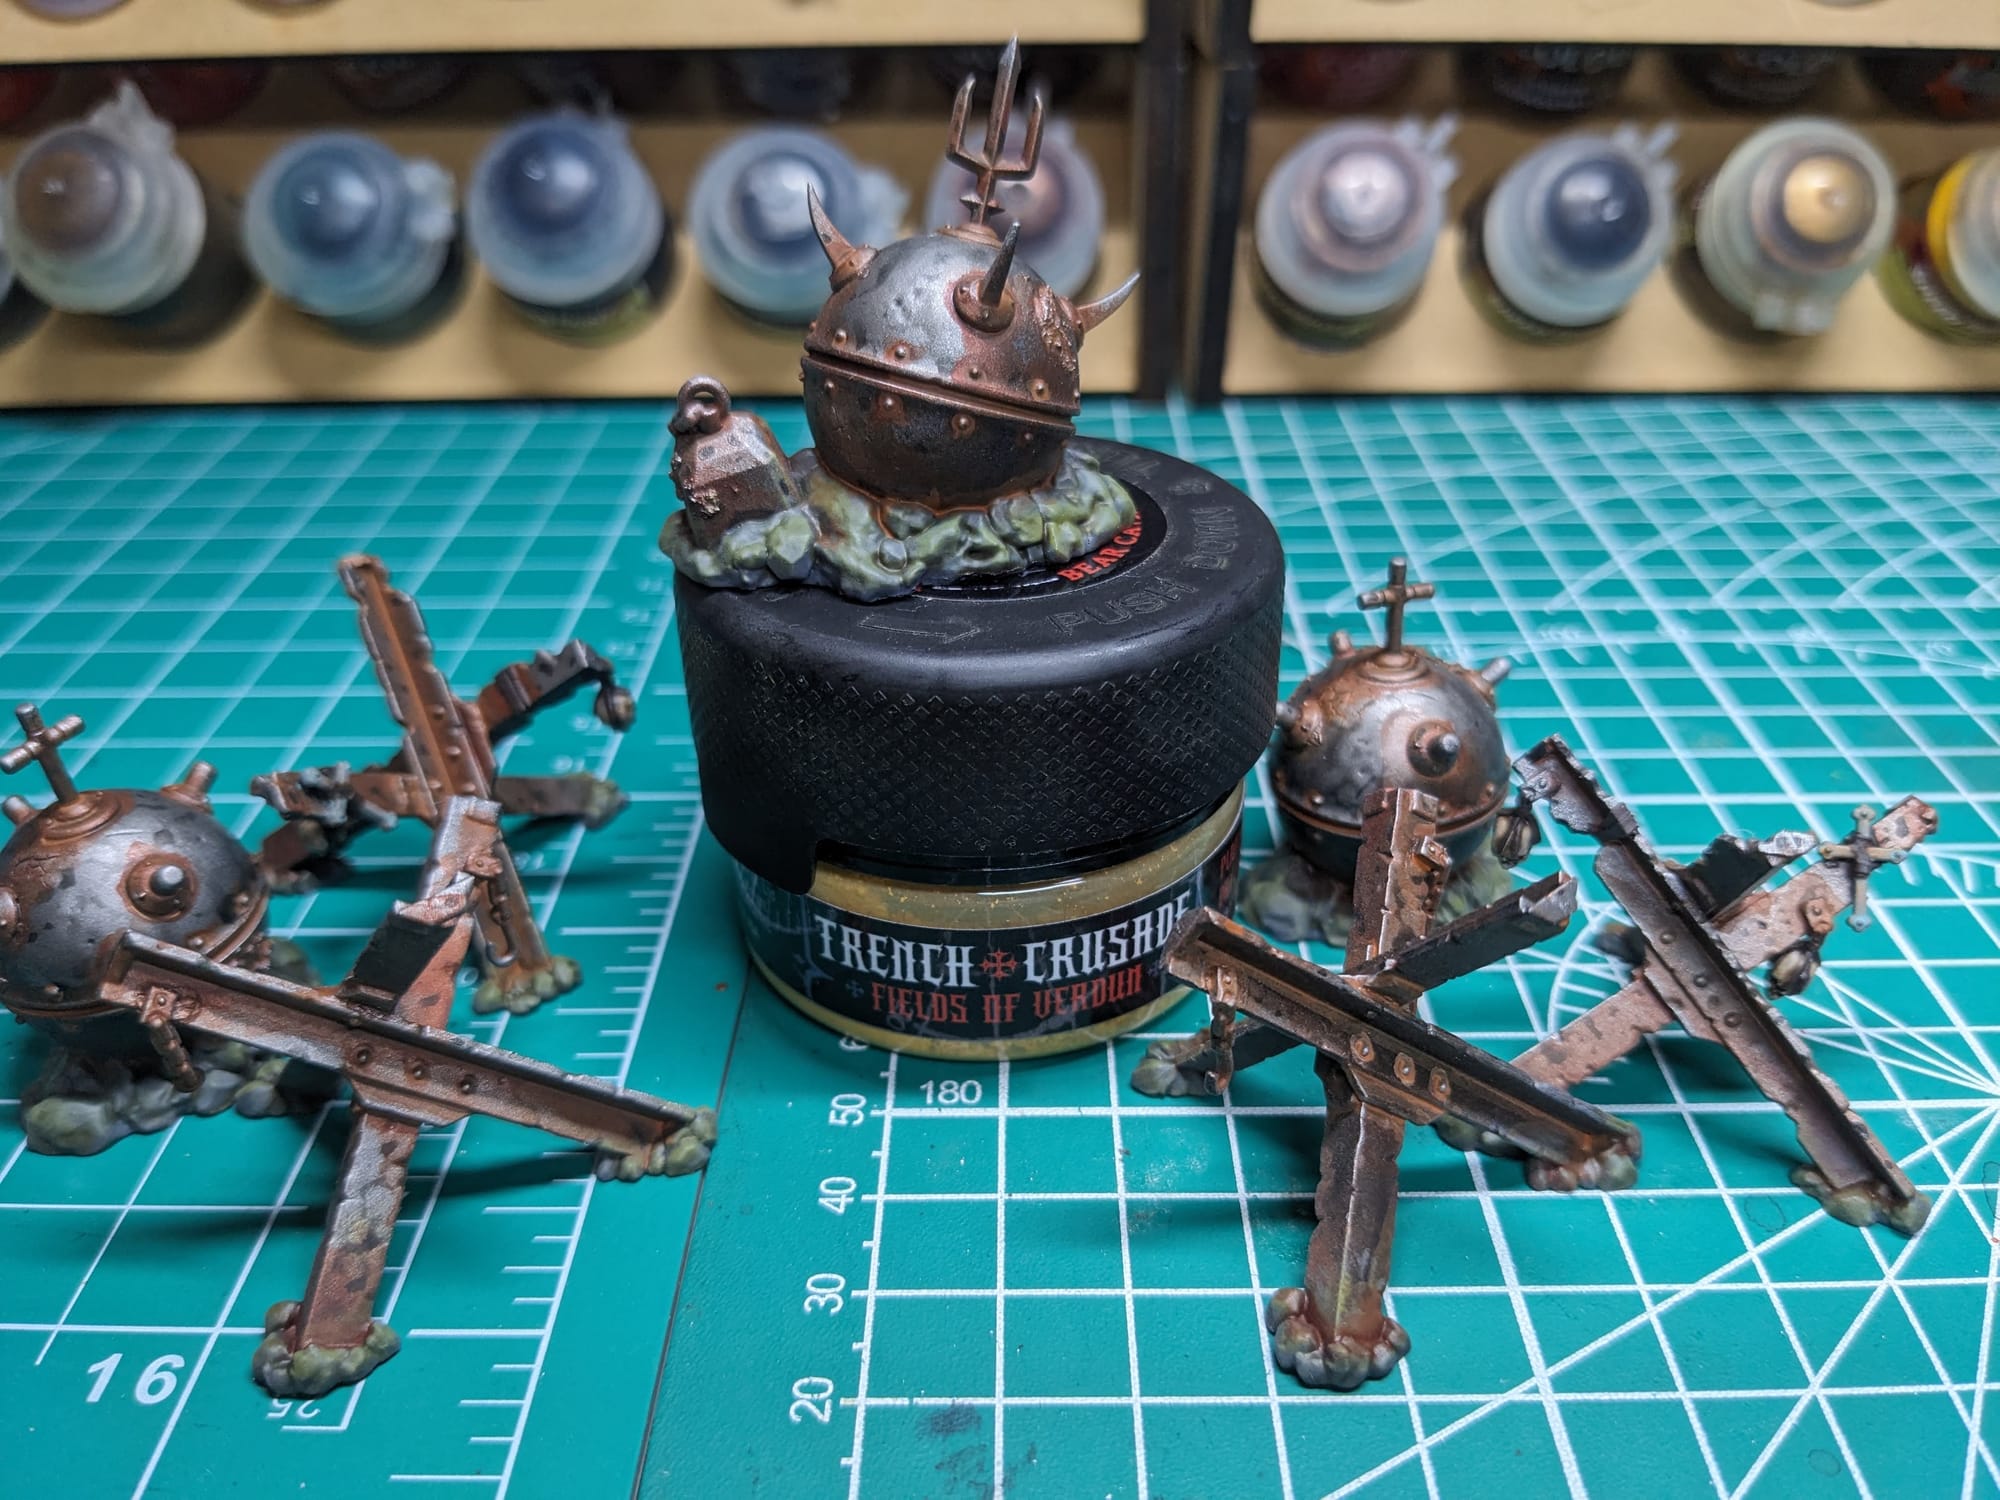
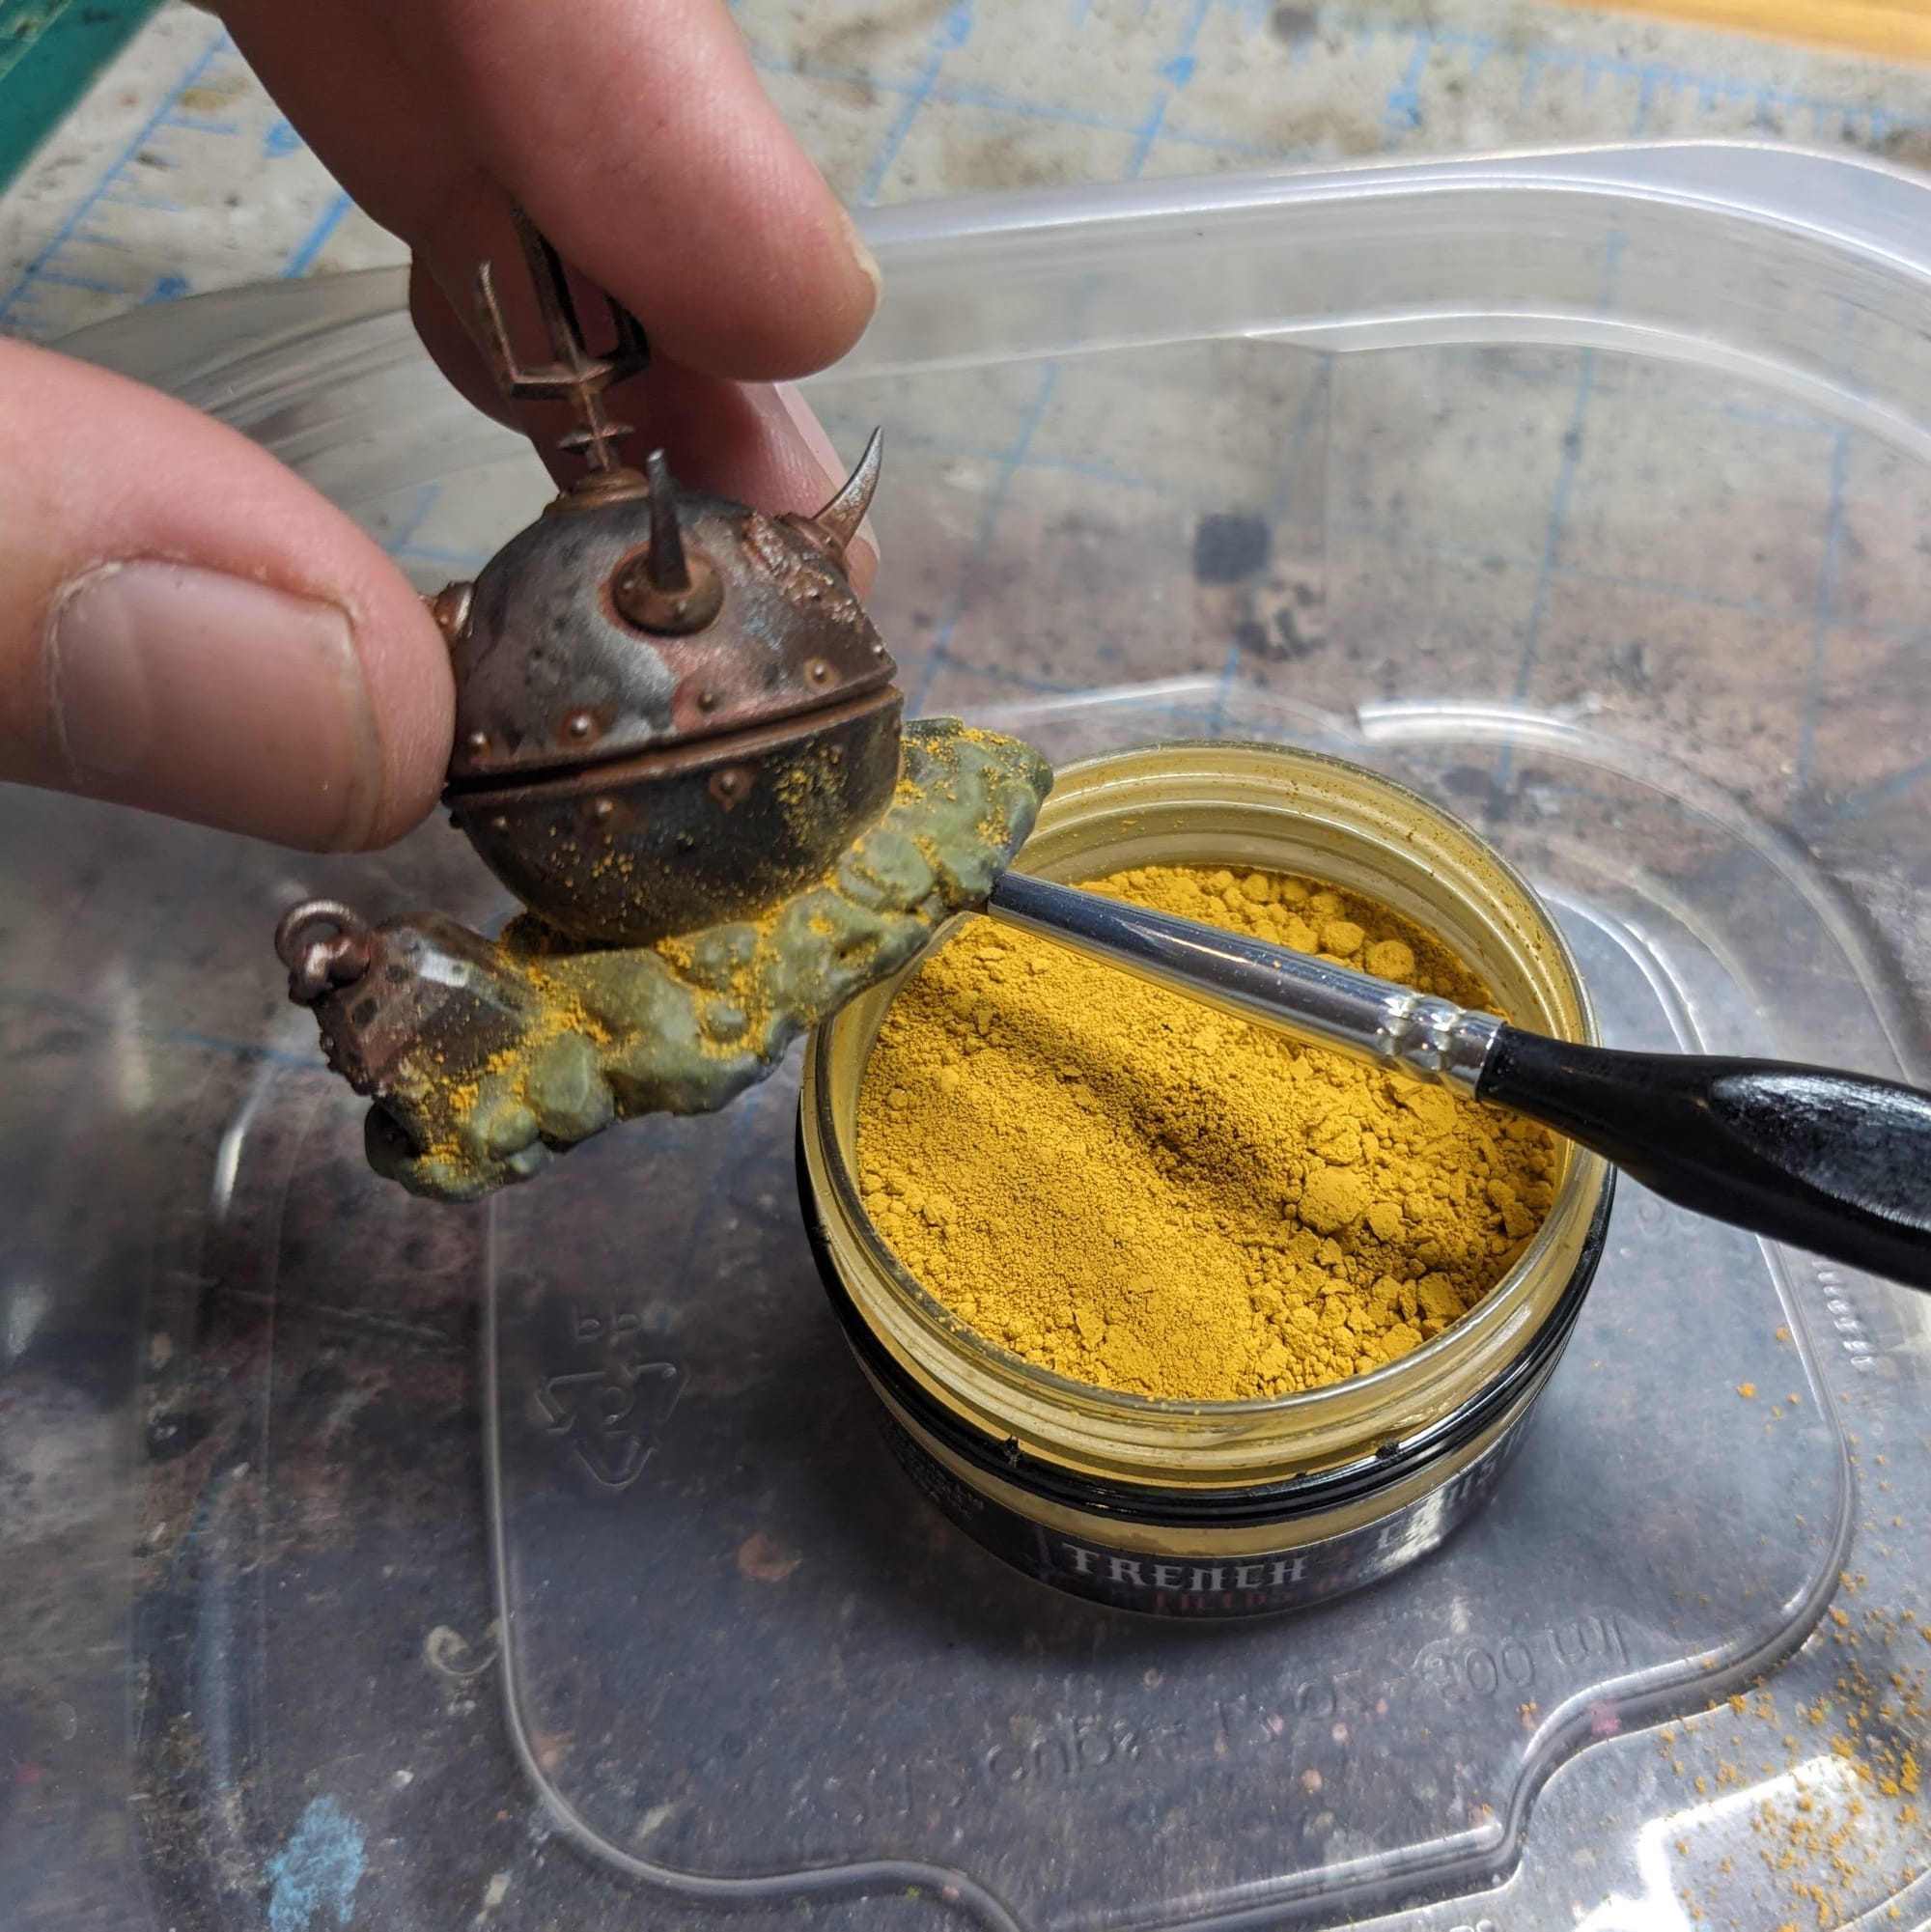
Alec: I wanted to do some experimenting with Bear Cavalry’s Fields of Verdun weathering pigment. Using a small plastic tray to collect the excess powder, I applied the sulfur-looking pigment in and around the bottom of each piece, closest to where the rocks met the metal. I brushed away the excess, leaving just the yellow along the piece.
Sealing
Alec: As I do with all of the models I paint that I also play, I applied a protective clear coating over the paint. This helps preserve the paint on the model and keeps oils from hands from rubbing off the paint as you continuously touch the models during games. There are many different kinds of clear varnishes to use, but I typically use matte or anti-shine varnishes, as satin, semi-gloss, and gloss tend to distort the colors of the models (not to mention that most models aren’t supposed to be shiny).
Brands that have been reliable for me are Krylon Matte Clear Spray, Rustoleum Matte Clear Coat, which is slightly glossy, and Testors Dullcote, although the latter can be expensive and difficult to find. For a coat with no shine that really enhances the colors, I use AK Interactive’s Ultra Matte Varnish, applied with an airbrush.
Painted and Ready for Play
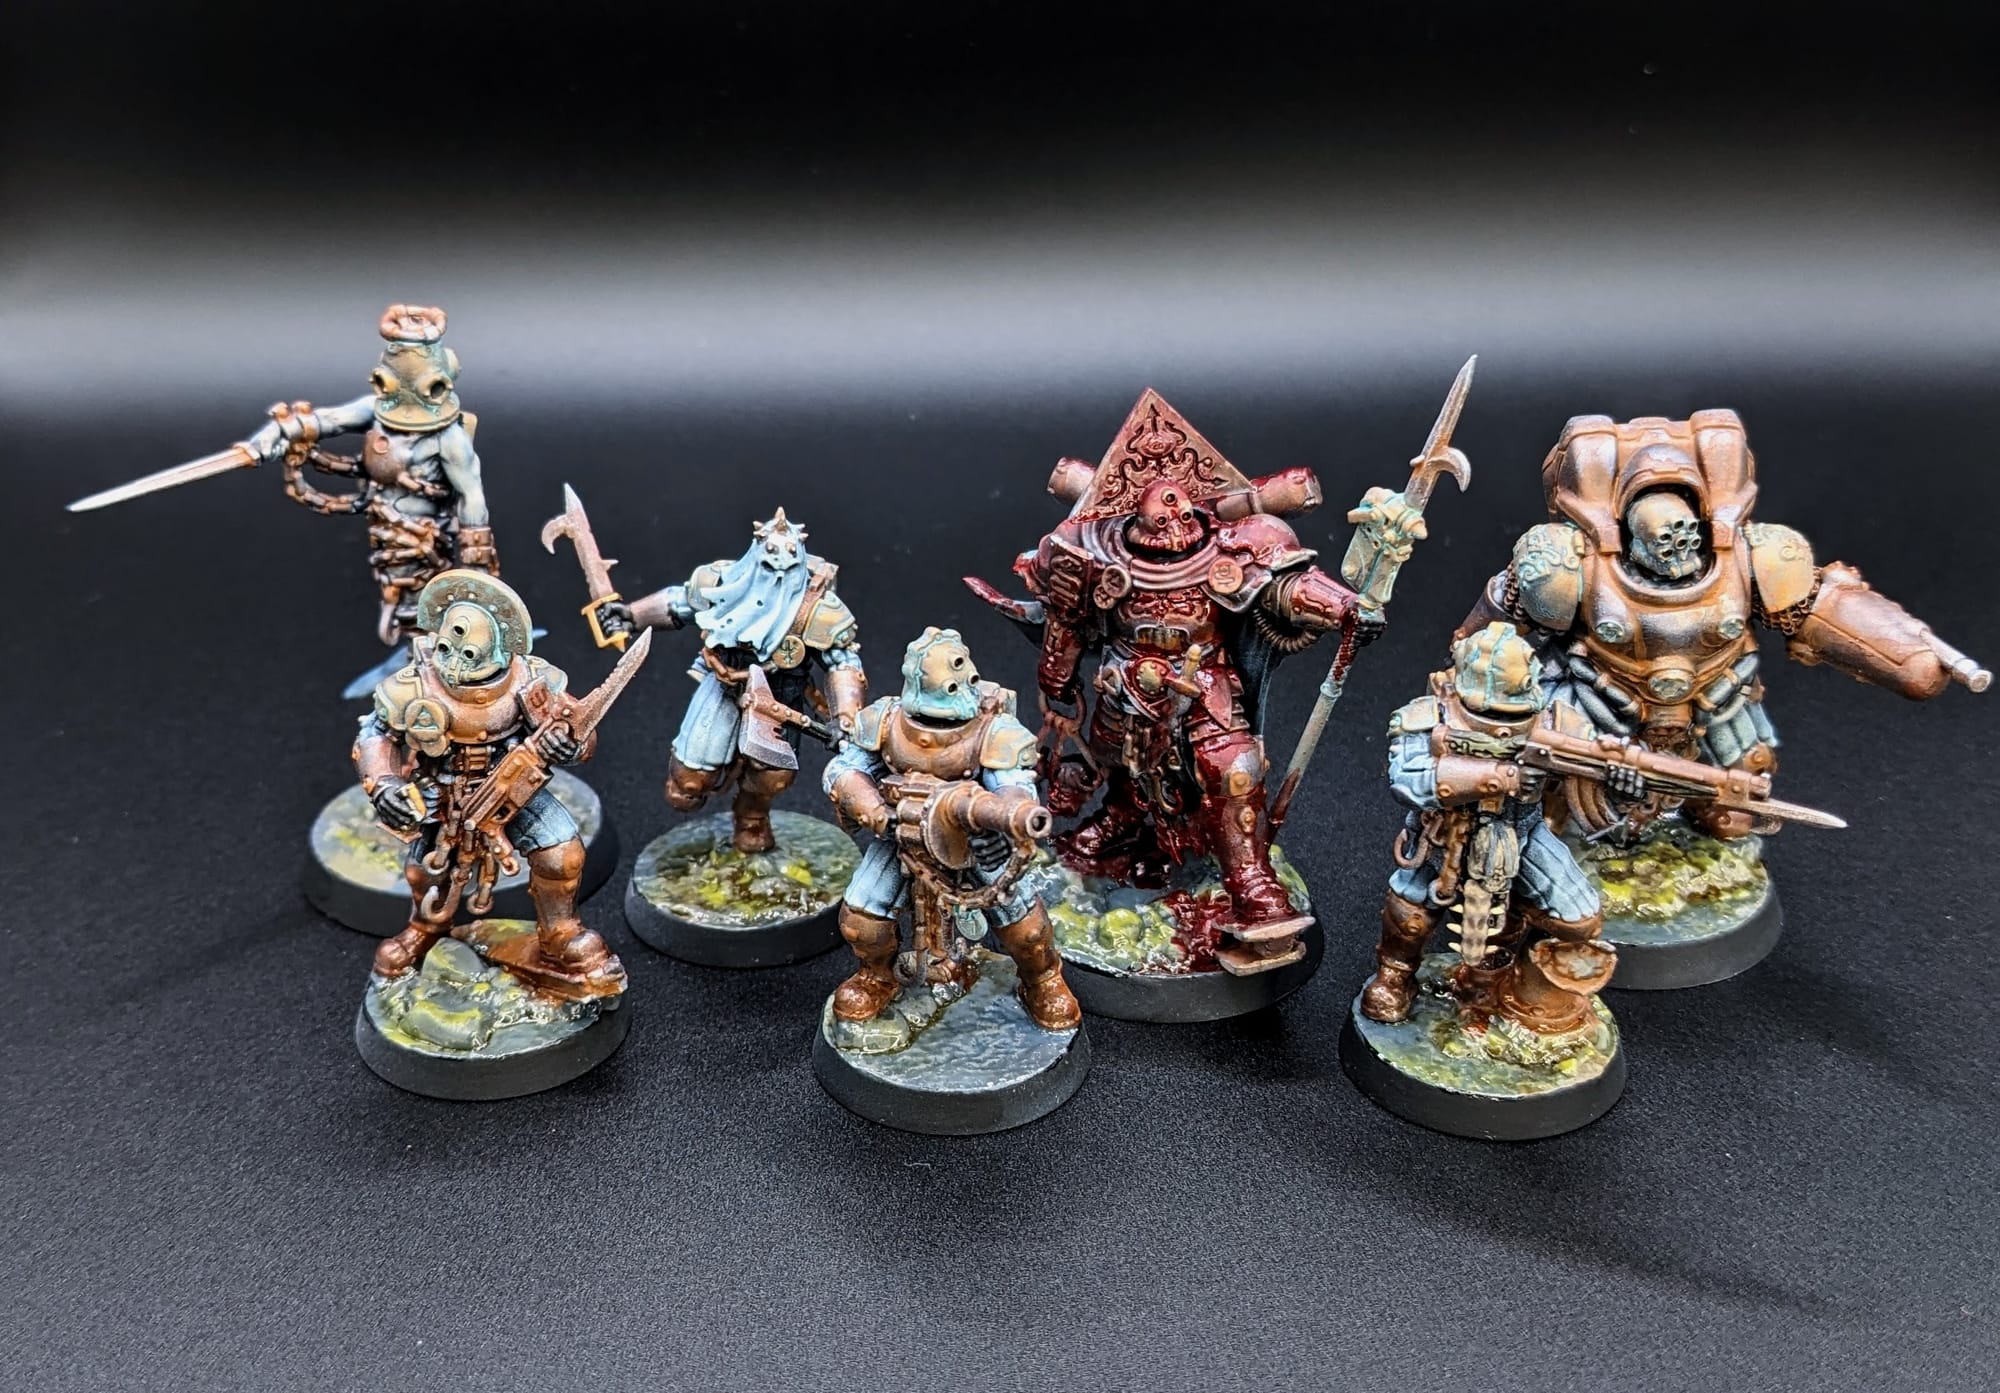
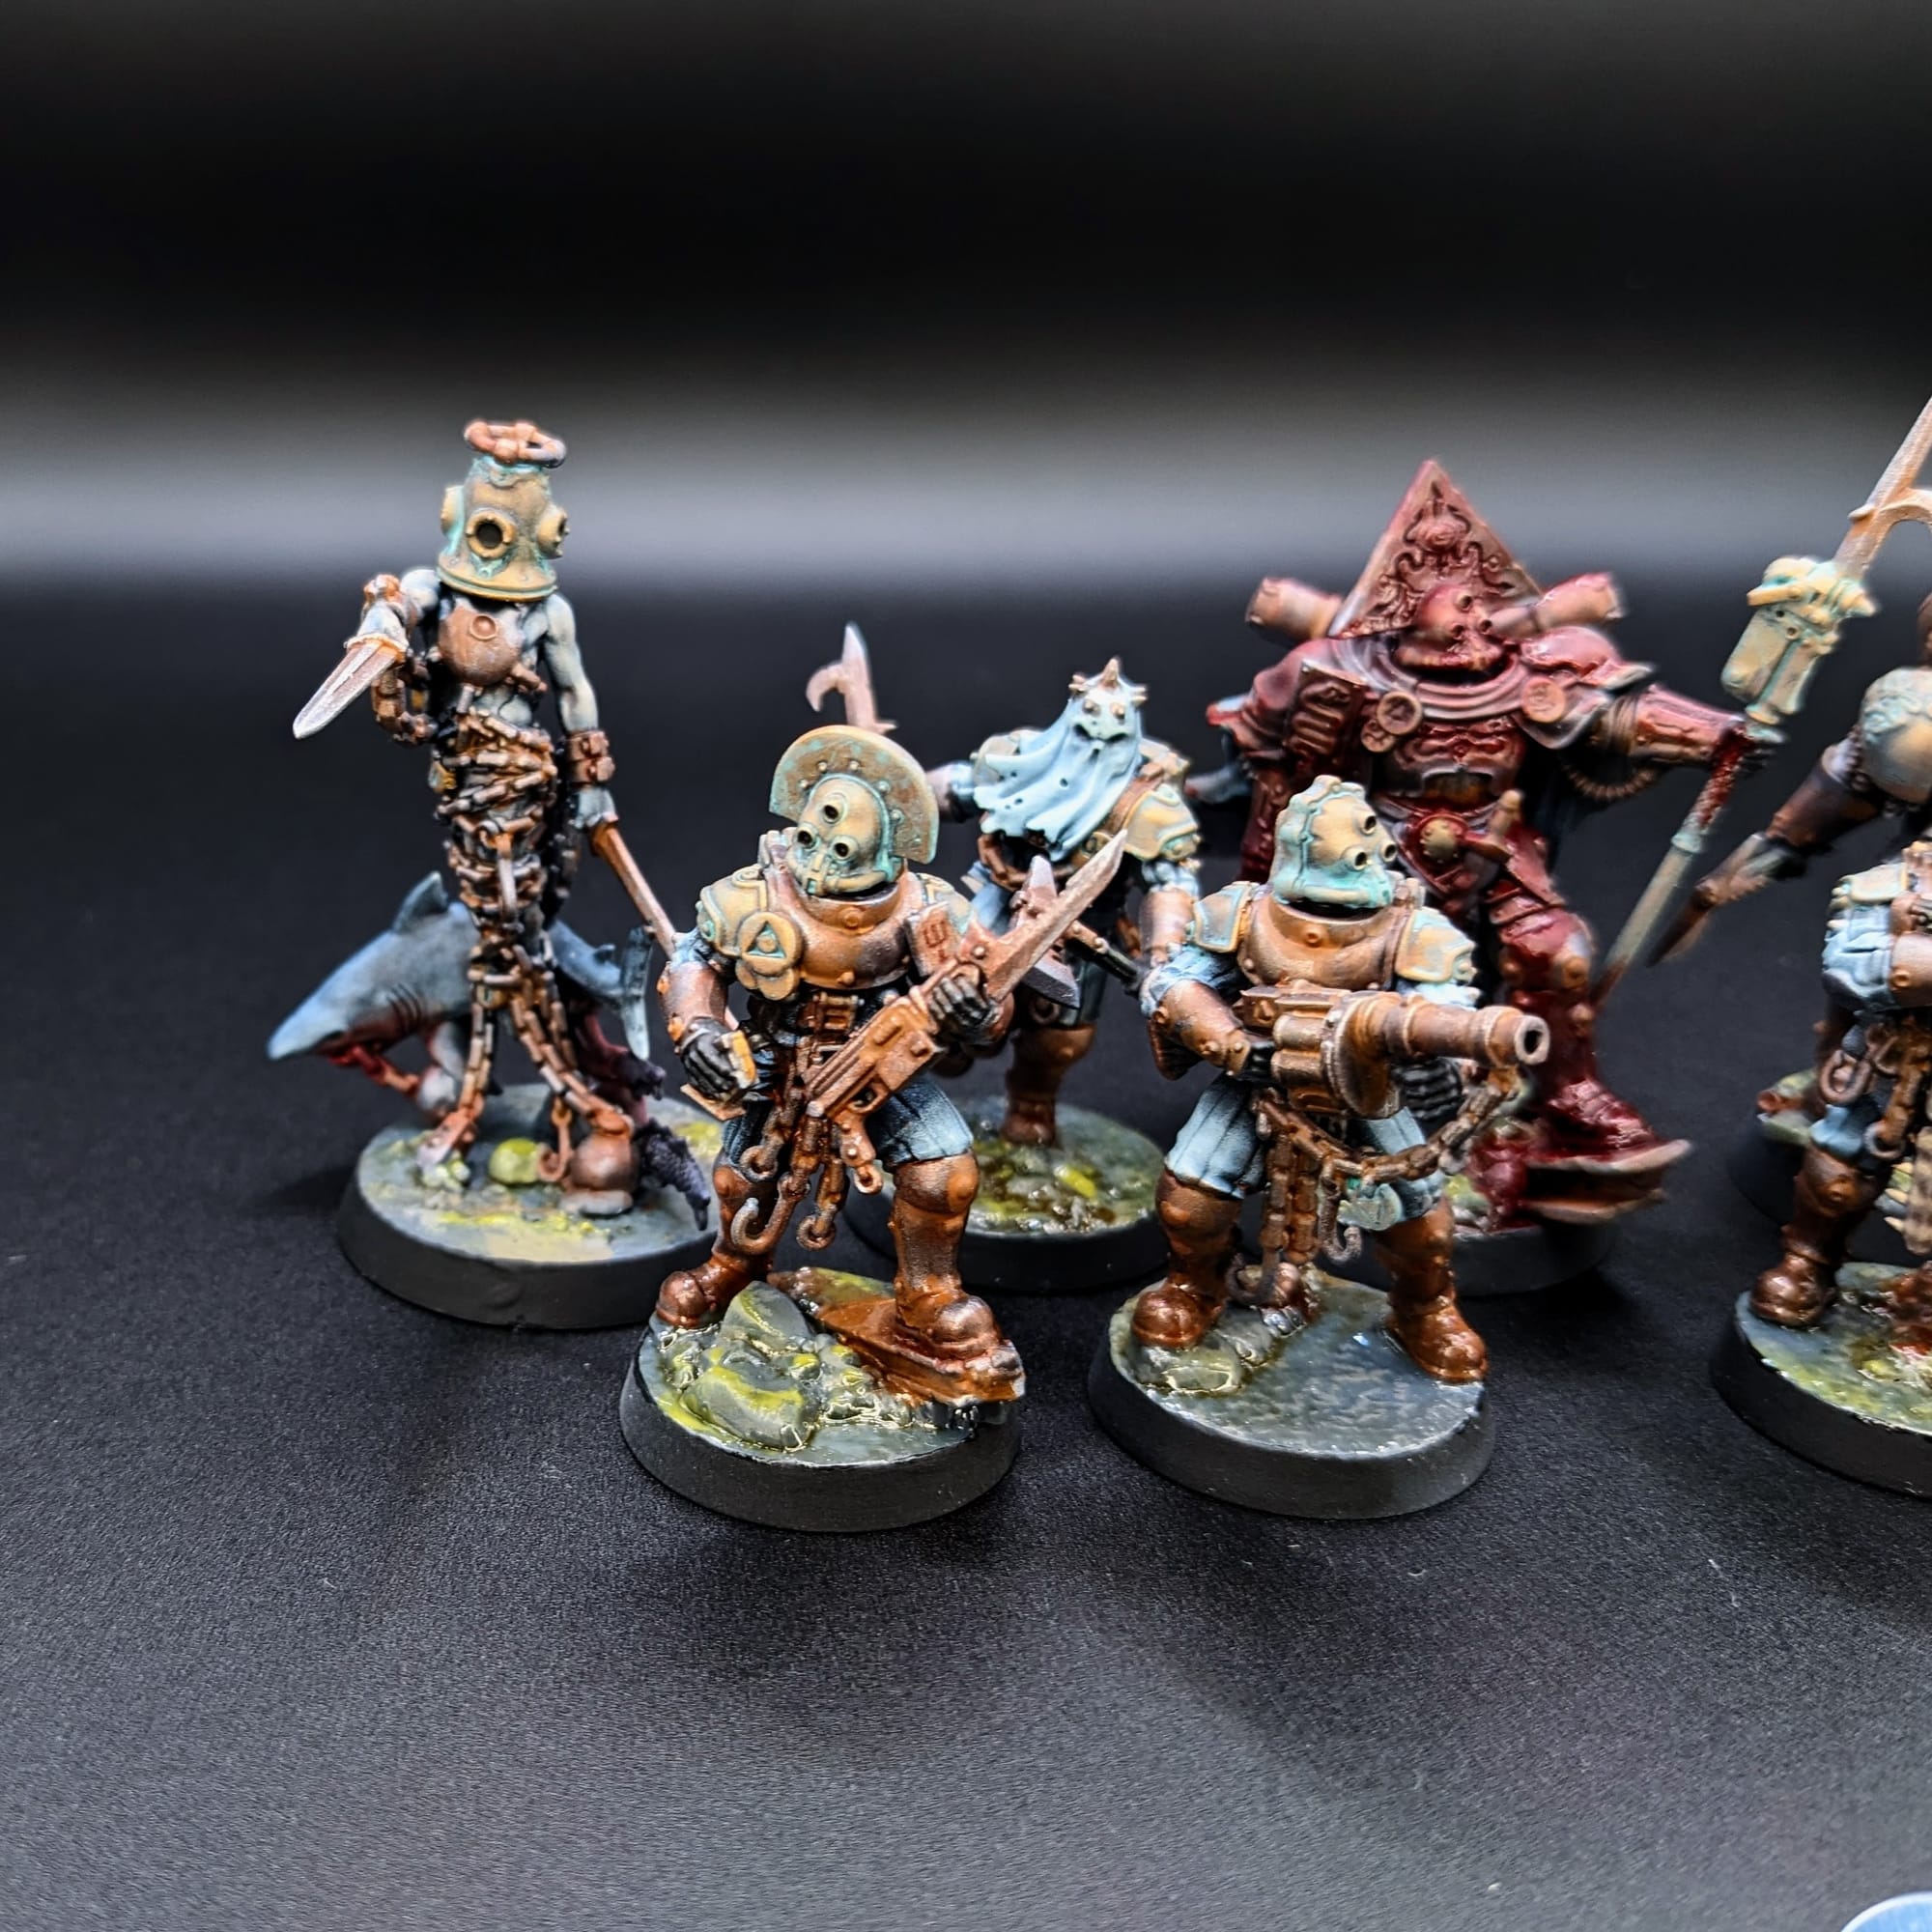
Painted Heretic Naval Raiders
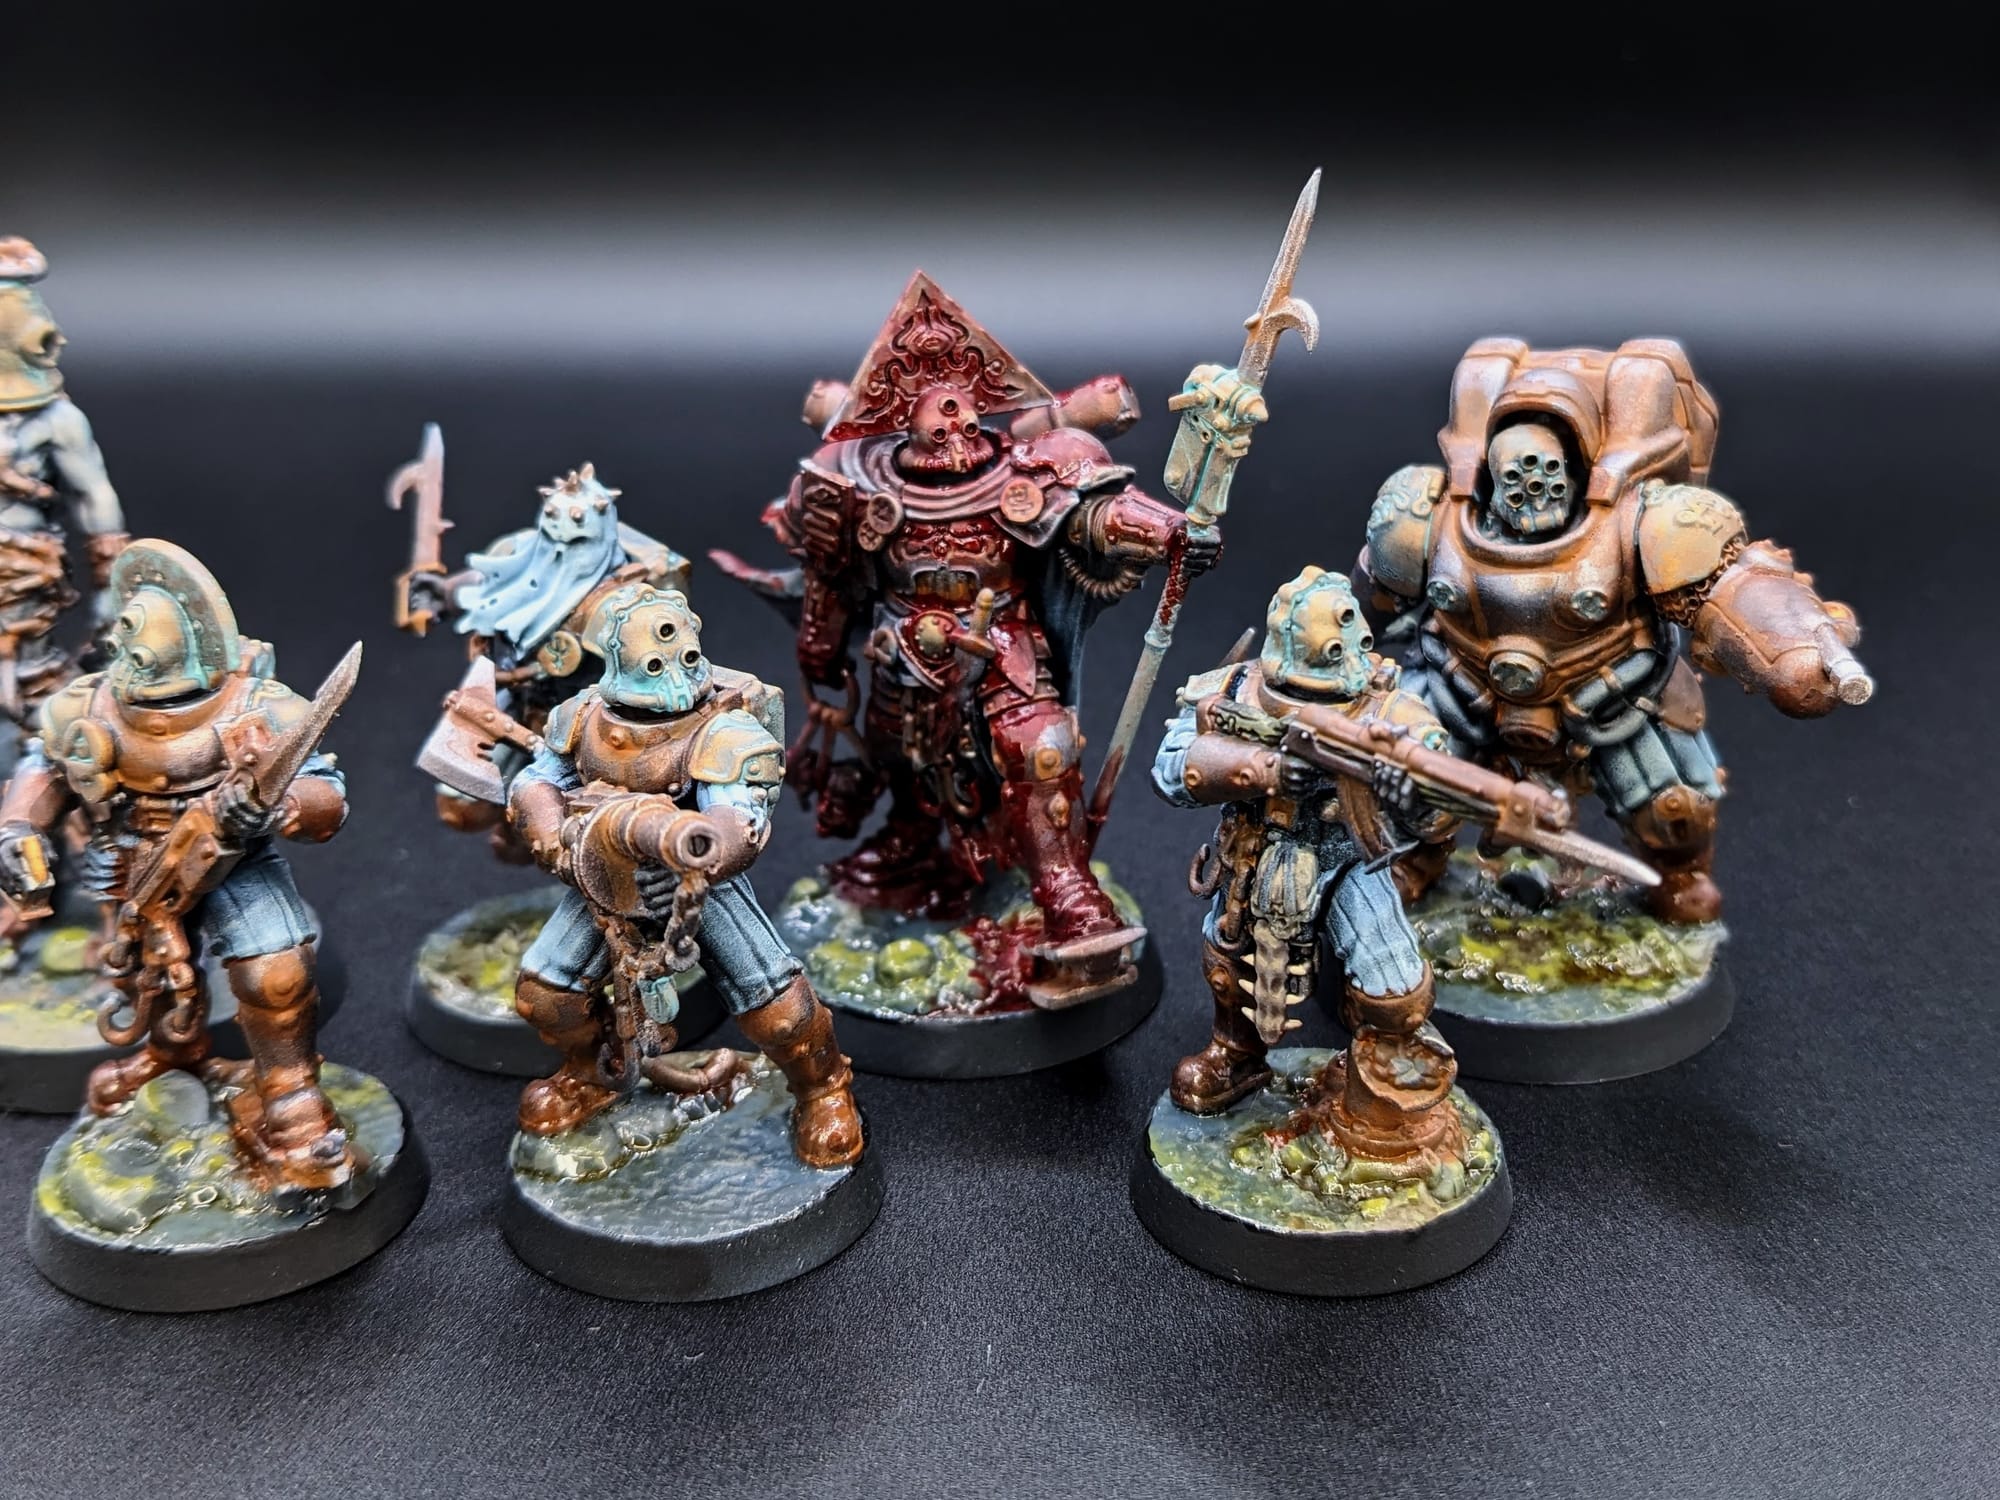
Painted Procession of the Sacred Affliction
Impressions
What We Liked
Alec: I really liked the designs of the Heretic Naval Raiders, specifically with the armor (diving suits?) and the Drowned Chorister. There is a ton of detail in each piece, so you could really spend a lot of time painting each of them. There is just a lot of character to the pieces, which helps them stand out on the table.
The scatter terrain is also super cool. It paints up very quickly, which really just makes me want more of this so I can have a table riddled with the Levant Hedgehogs and the mines.
Ronn: I loved the character these guys had. They were super fun to paint up and there was more than enough detail to make the speed paints look good. With the large amount of cloth and bandages to give creases and folds to really give the speed paints a foot hold to accentuate the details they added.
Randy: When I painted Star Wars: Legion, I found myself getting bored with repetitive clone trooper schemes. This is the exact opposite. Each model demands specific attention, and I love that. They really knocked it out of the park with the character designs and details.
What We Didn’t Like
Alec: The Drowned Chorister felt really overbuilt. It looks cool when finished, but there were just a lot of pieces to it. So, it made building it kind of unenjoyable. Painting it was fine, although maybe I would have painted it separate from the base, but I think that would be something I’d do if I was including it on a diorama or scenic base.
Ronn: Fortunately there wasn’t anything to complain about with these models. Putting them together was overall very easy, and with a lot of the basing sculpted to the models made life pretty easy.
Randy: At times, there’s just too much stuff on each model. I found myself just painting the bags all the same color because I was running out of options for my paint mixes. And like Alec, some of the models in the Heretic army are just very overbuilt. But I get it. Overabundance is a thing for Trench Crusade, love it or hate it!
What We Would Do Differently Next Time
Alec: A little blood goes a long way, and I may have overdone it a little on the Captain. I know he’s supposed to be full of blood, but I feel like too much of it takes away from the actual paint job.
If I was really wanting to go all out, especially if I was concerned with WYSIWYG, I would have done some magnetizing of weapons for the pieces. However, all of these extra bits means I can just go so some kitbashing and make even more Heretic Naval Raiders.
Ronn: I think if I were to do them again I would want to try and take the details further. I let the speed paints do a lot of the work, which is fine, but I could use that time saving to push up some of the other areas to a higher standard. I’m still very happy with how they look, and am super excited to get them on the table!
Randy: Underpainting! I totally forgot to underpaint the models, which would have given me a bit more speed and understanding of where to place which paint in which location.
Final Assessment of Painting The Carcass Front
Alec: These figures were an absolute blast to paint, and I can’t wait to get them onto the table. Some very simple painting techniques can really help these figures pop, and I was very happy with how the verdigris armor turned out. I feel like I’ll be able to quickly spot them on the table, amidst the chaos and hell of war.
Ronn: The whole experience was great! They are fantastic models, and they hold so much character and detail that they hold value for new painters and veterans alike.The whole box has so many missions and new rules that I can’t wait to get some games in.
Randy: 10 out of 10. I love these models and I’m excited to finish the rest of my warband. Also, I can’t wait to go and play, so I need to follow Alec’s tutorial on the Heretics!
Have you painted your Trench Crusade miniatures yet? Share your work with us!
Don’t forget to subscribe and follow us on Instagram, Bluesky, and YouTube for more Trench Crusade reviews and painting guides, as well as more hobby and tabletop news and reviews!