
Season 4 is right around the corner for Call of Duty: Modern Warfare II and Warzone, and it’s time to get ready for it. You already know the roadmap for content, and now the Call of Duty Blog has released some great tips for the upcoming maps. There are two in total, Showdown from COD4, and the Kunstenaar District. Check out the intel below!

SHOWDOWN
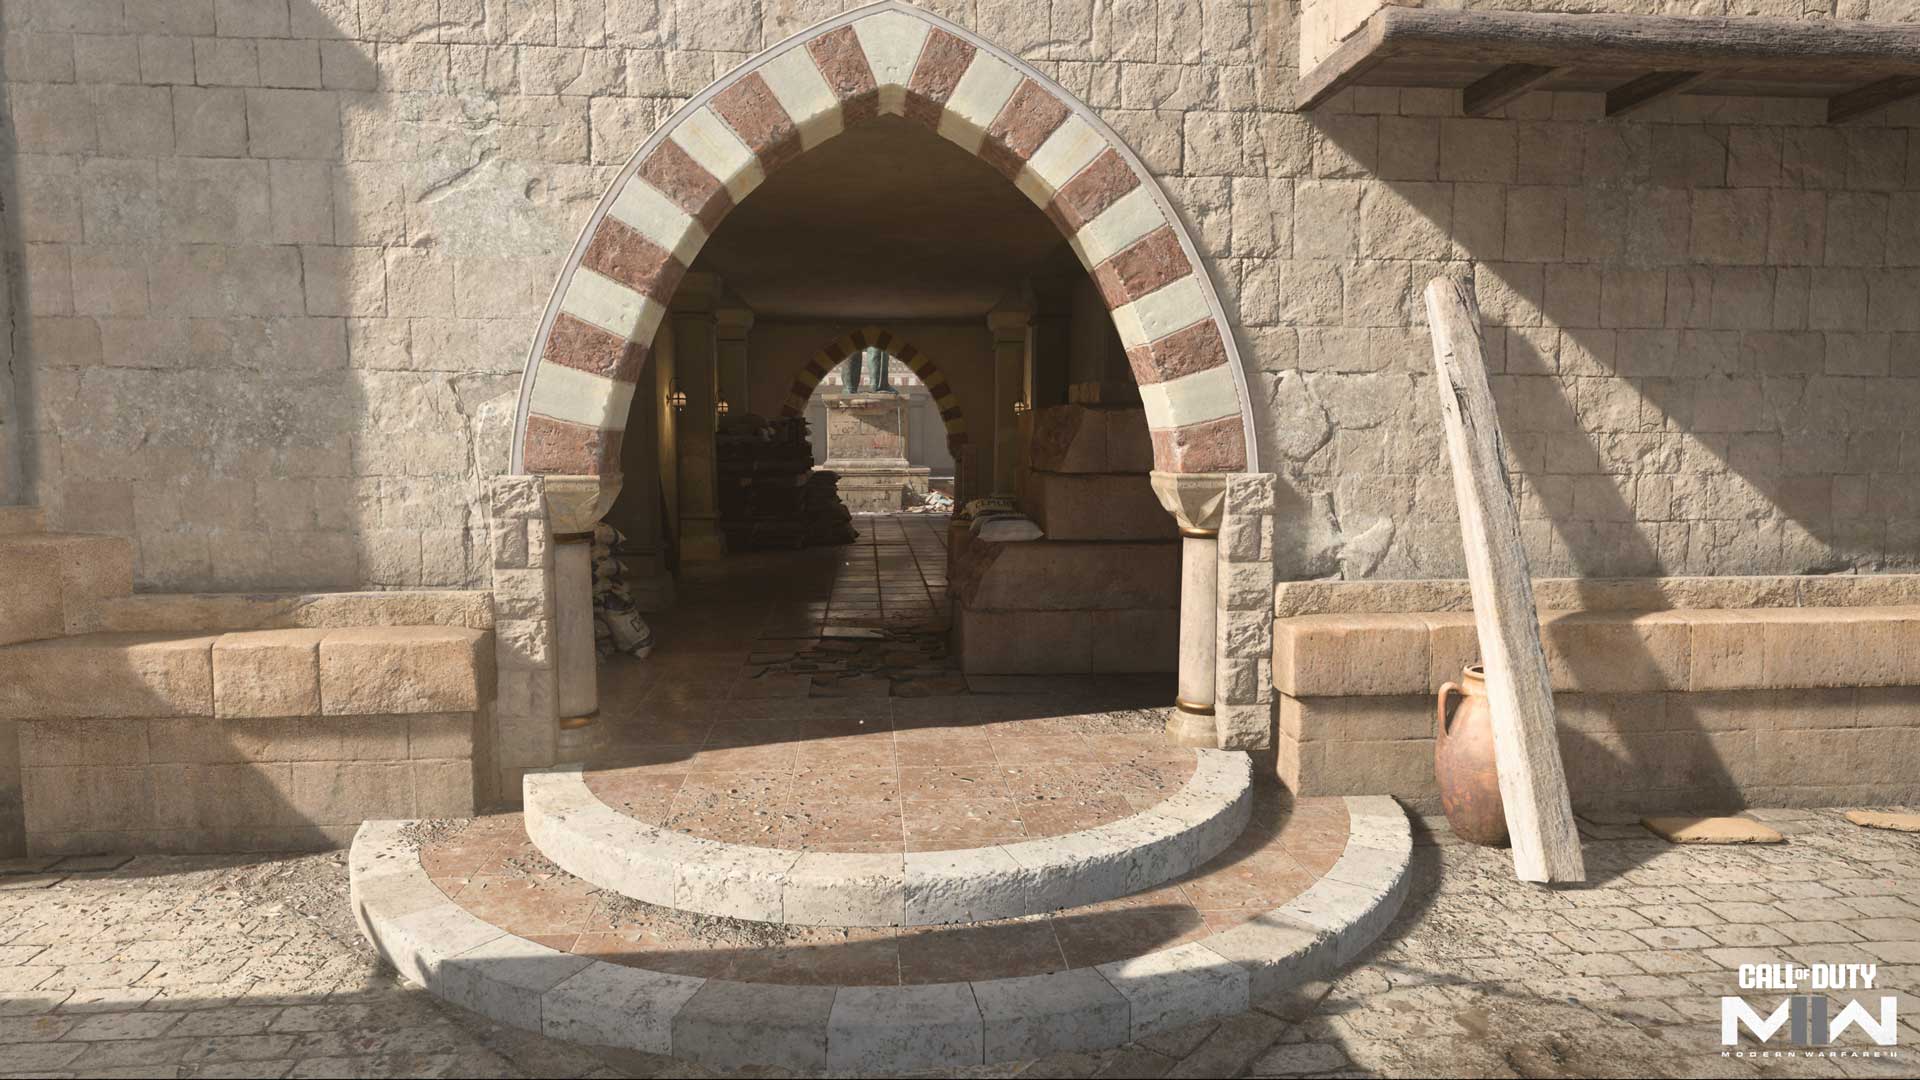
Positioned in Al Mazrah’s Akhdar Village, Showdown — first featured in 2007’s Call of Duty® 4: Modern Warfare® — is a medium-sized Core Multiplayer experience where action funnels in and around an iconic courtyard and its statue.
Only the bravest — or most foolhardy — Operators will attempt a crossing, with danger looming above and below. The perimeter offers its own challenges, funneling players into tense engagements in its narrow confines.
Here is what you need to know:
Spawn Point: KorTac
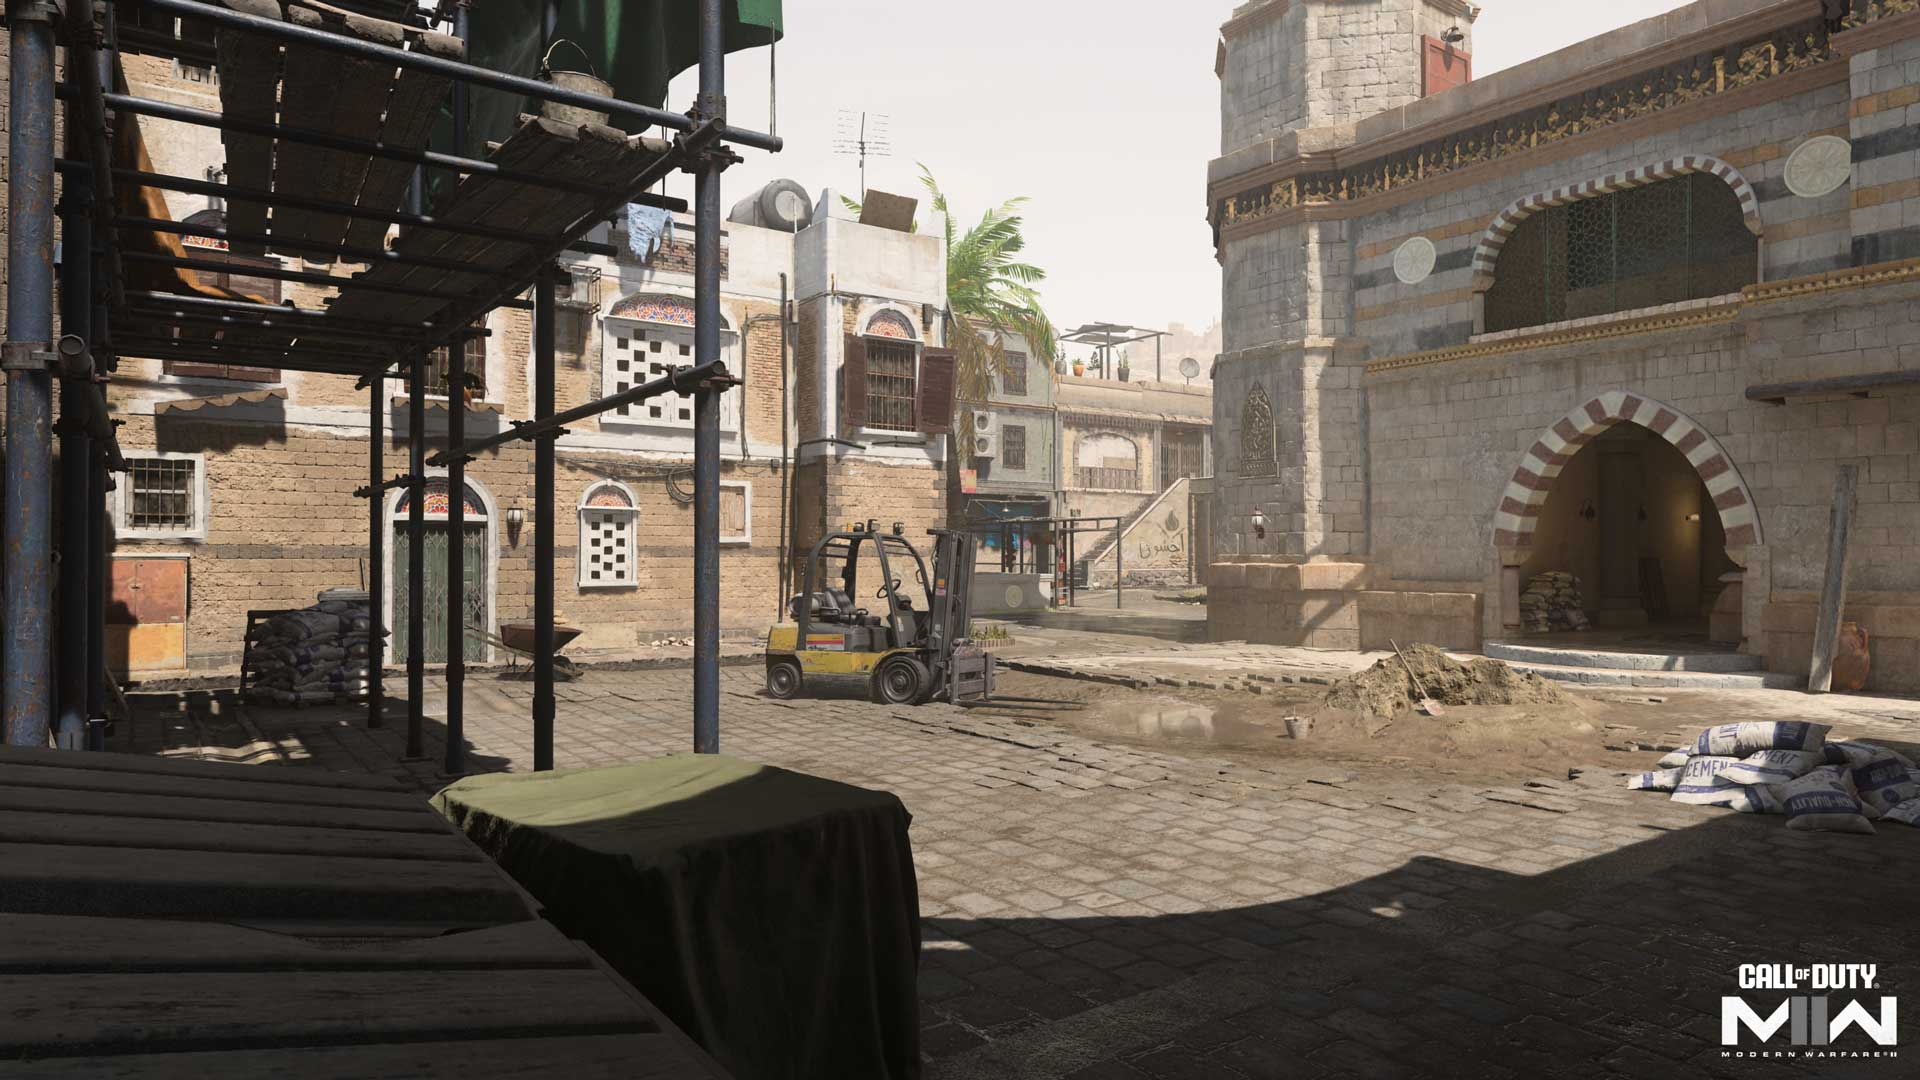
KorTac Spawn Zone (West) — Construction
KorTac forces start in Construction amid ongoing renovations. From here, there is a direct view through the West Tunnel toward the courtyard. Branching paths lead to the southern Chicken Coop and the northern Food Stalls. Heading straight towards the central Statue can be a death trap, though the stacked sandstone and wooden pallets in the West Tunnel may be useful as defensive positions against those situated at the other spawn.
On the perimeter, the Food Stalls offer a slightly safer route compared to the Chicken Coop route. The stairs here offer easy access up and over the closed metal gate. Where the Chicken Coop gets the advantage, however, is in its side entrance toward Statue, which can serve as a flank route against enemies in the courtyard.
Spawn Point: SpecGru
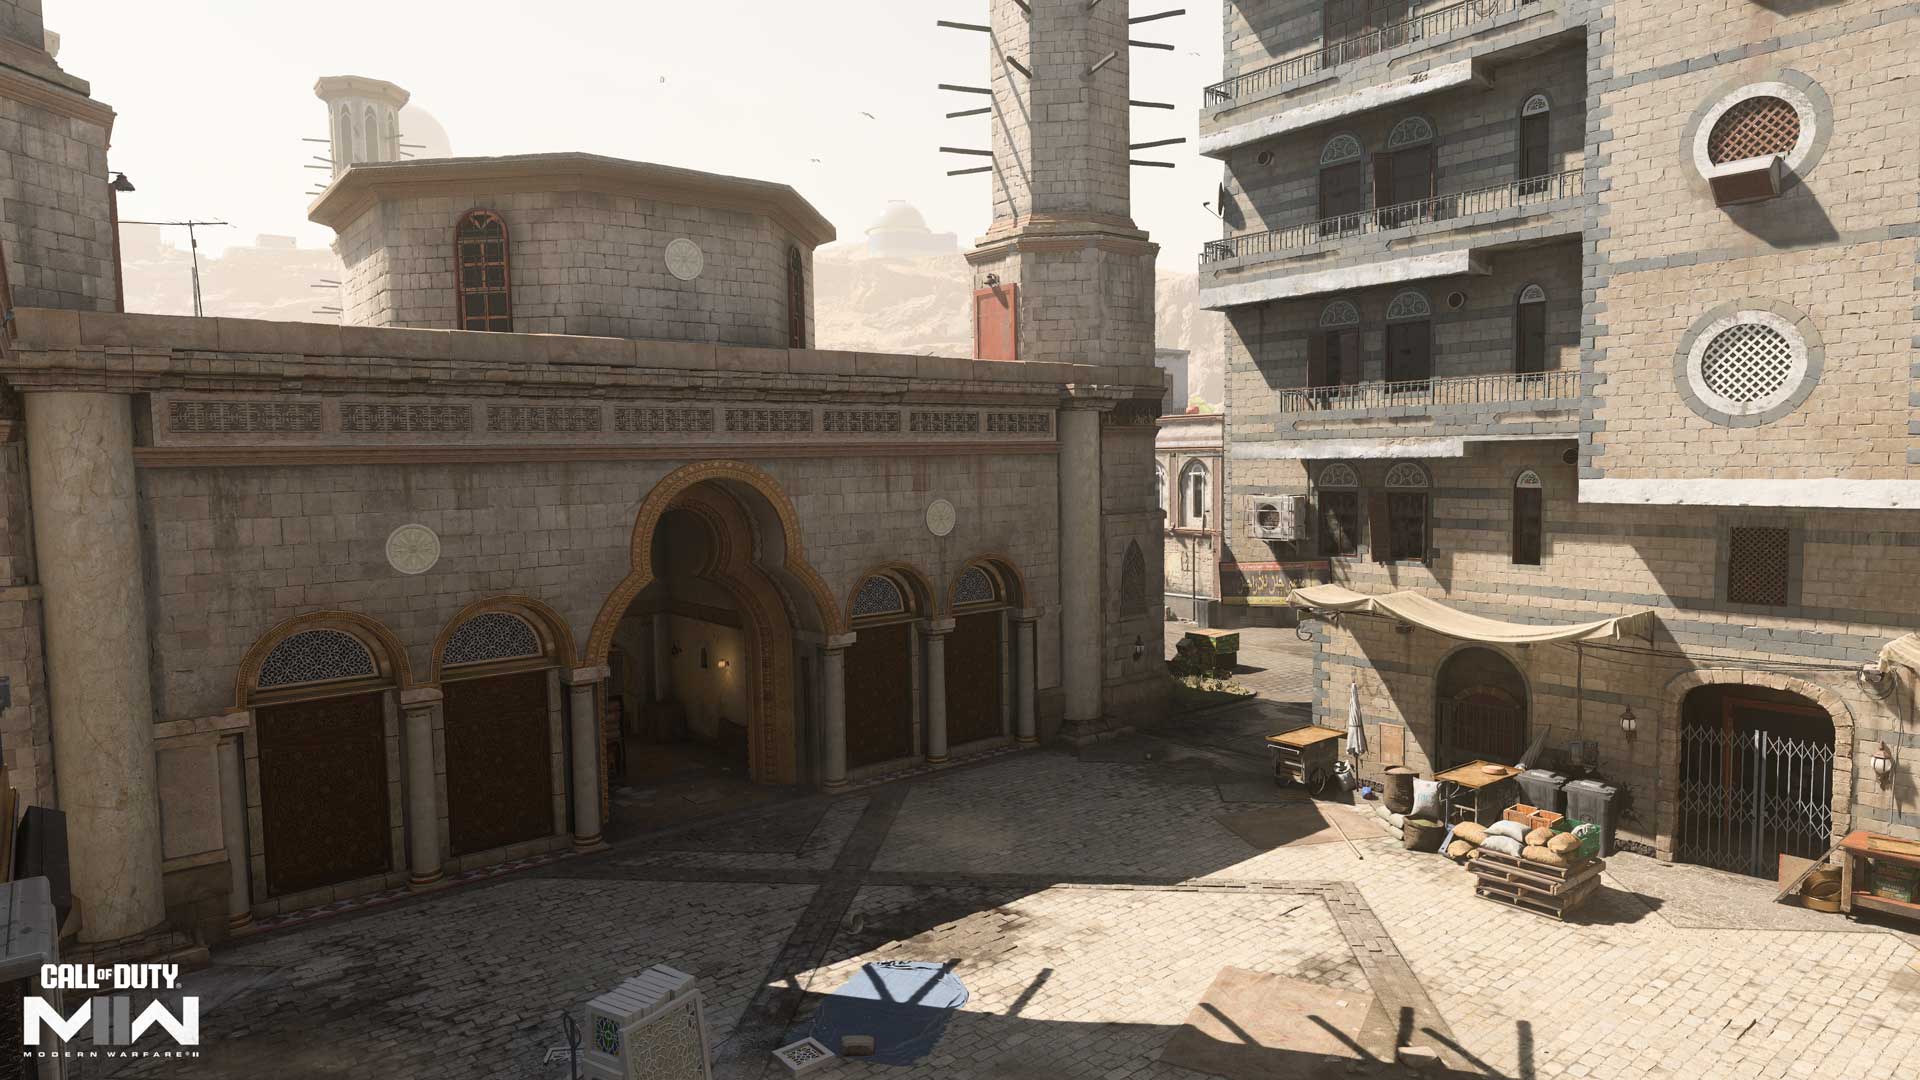
SpecGru Spawn Zone (East) — Main Entrance
SpecGru enters the match through the more pristine Main Entrance. They, too, can head straight toward the courtyard or flank around the perimeter. The East Tunnel features some large cover options that can be used for a more defensive approach toward Statue.
The northern Van route is exposed to sightlines past the metal gate, though it’s possible to climb atop the vehicle and mantle to the overhead ledge, where you’ll have a greater vantage point against enemies on the other side. There’s also an entrance to the covered walkway surrounding the courtyard. Break to the southern Glass shop for a less exposed approach to the gate. Nearby stairs offer rapid access to the courtyard’s second story.
Map Maneuvers: Route Planning
For the purposes of this guide, we’re dividing Showdown into five main sections:
– Construction
– North Path
– Main Entrance
– South Path
– Courtyard
Construction
Construction is nearly wide open, with only the forklift, cement bags, and the corner dumpster offering cover across its flat, square surface. The biggest challenge here is anticipating enemy attacks — will they arrive via the West Tunnel, Food Stalls, or Chicken Coop? Using the cover objects at hand, it’s possible to partly conceal yourself from one or two of these pathways, but you’re in turn reducing your own spatial awareness while doing so.
When holding the area for an objective, request support to cover the left and right flanks so you can focus on the central tunnel. If one of the flanks comes under fire, move up for additional support to better concentrate your defenses.
North Path
For this guide, the North Path includes, from east to west, Van, Blue Tarp, and Food Stalls. Van is mostly open, with some scattered cover objects for added defense. Your options expand near the eponymous vehicle, offering a quick means to get onto the ledge overhead. Run across the hanging boards to switch sides, or race for the upper path to move toward Food Stalls or into the upper levels of the courtyard. There’s also a ground-floor entrance into the courtyard from here, though getting to it exposes you to attacks from enemies on the other side of the gate.
In Food Stalls, the corner staircase and the low wall in front of the cafe provide great defensive positions when covering the area. When you’re covering the main path through the gate, consider setting up behind the white planter box with a sniper rifle or other long-ranged weapon in hand. For more aggressive play, race up the staircase to fire on enemies from above or to slink into the courtyard’s upper walkway.
Main Entrance
While not identical, the Main Entrance offers largely the same tactical choices as Construction, with a flat open square and some minor cover options throughout. Bring backup when defending the area to help you cover the three pathways in, and be ready to book it for the East Tunnel should any aerial streaks descend on your position.
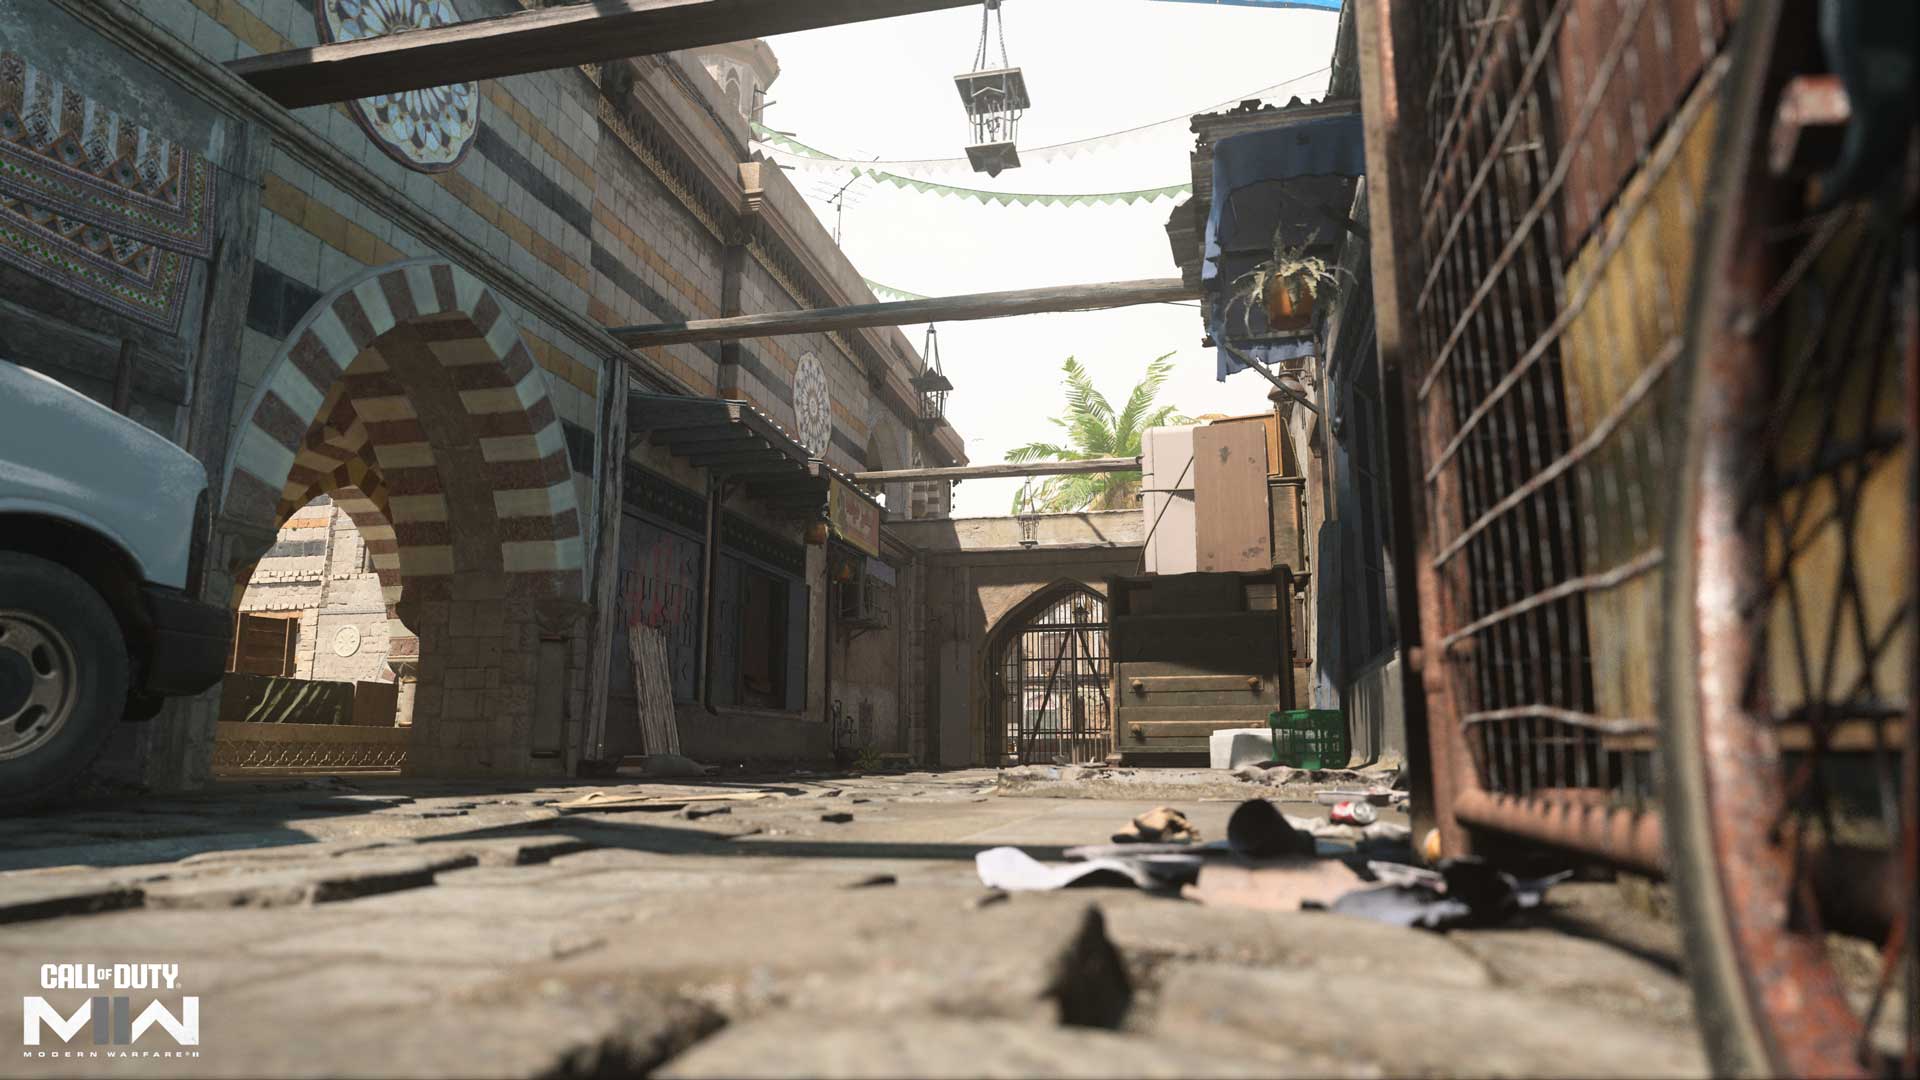
South Path
Consisting of Glass Shop, Slide, and Chicken Coop, the South Path offers the other means of crossing the map outside of the Courtyard. Though cover objects are sparse, the long planter box in Glass Shop offers a solid defense when engaging enemies here, while the corner scaffolding offers a height advantage but little cover. Note the wooden platform under the Courtyard’s southeast ledge — this is a solid position from which to ambush incoming enemies.
The stone staircase offers a straightforward route over to Slide. From here, you can jump down to ground level or head into the lower Courtyard. You can also hop onto the wooden awnings along the bottom map border to maintain verticality. The Slide offers a powerful vantage point over Chicken Coop.
Courtyard
At the dead center of the map, the Courtyard with its central Statue sees some of the most intense action in the match. The surrounding walkways present dangers at every turn, but when you need to cross the map fast, it’s tempting to take the risk. With a combination of intel-gathering through comms and UAV assistance, plus judicial use of the available cover, it’s possible to get through here alive, but your timing’s got to be flawless.
When it comes to the surrounding walkways, be prepared to fight for your position on the coveted upper level. With a vantage point over Statue, plus sights over the North and South Paths, it’s a powerful area. With four entry points leading to the upper level, however, you must always be on guard, prepared to take on enemies attempting to usurp your position.
Objective Routes and Rotations
Mode Intel: Domination
At the start, expect some serious action on the South Path as teams fight to get through the courtyard’s southern opening toward the B flag. The East and West Tunnels will likely see similar levels of action as well; consider taking the stairs to the upper walkway, which is a good — albeit slightly exposed — power position.
Though the A and C flags are on opposite ends, the map is small enough that one or two aggressive Operators can push to the other side while the rest of the team is engaged with the B flag by Statue. This helps take the pressure off the Courtyard as the enemy falls back to retake their lost flag. Once that happens, taking the B flag becomes more feasible.
Mode Intel: Search & Destroy
Search & Destroy changes up the dynamics on Showdown with both bomb sites positioned along the upper walkway to the north and south. With just one life per round, it’s important to master the four entrances to the upper floor: the staircases leading up from the ground floor in the southwest and northeast corners, as well as the two outer walkways over the metal gates leading straight to the top floor.
As the attacking team, consider aggressively pushing forward while sending a bomb carrier — and potentially a bodyguard to assist — upstairs to plant. Defenders will have to send at least one Operator upstairs to gather intel if they hope to counter this strategy, but no matter what, a midrange weapon with a 3.0–5.5x magnification scope can help take out the bomb carrier regardless of which site they go for.
Mode Intel: Hardpoint
Showdown has six Hardpoints, with each one positioned in a meaningful location outside of the central Courtyard. However, there will definitely be foot traffic here as players take the shortest route possible to the next objective.
It’s worth fighting for a position along the upper Courtyard walkway; because there are two Hardpoint locations here, as well as two Hardpoints by the metal gates, it is certainly a power area to lock down. Also, staying up here offers protection from aerial streaks and largely negates threats from below.
When it’s time to take the Hardpoints in Construction and the Main Entrance, however, head back to the ground floor to clean up hostile forces.
Top Tips

1. Explore the perimeter first. While dangers abound everywhere, the fight perimeter is generally more focused and predictable. Once you’re familiar with the layout, start moving into the central walkways and exploring the middle.
2. Careful with the aerial streaks. Though the skies are clear, the structure surrounding the courtyard offers thick overhead cover against incoming aerial streaks, so be mindful of your timing or you’ll have a hard time finding a target.
3. Downtime, what’s that? Showdown’s layout pairs long, narrow lanes with plentiful right angles, often requiring a sudden change between close- and long-range engagements. Remember that swapping to your pistol is always faster than reloading, and it provides dependable power when you need to make the switch.
4. Ledge hang trick shot. See those overhead boards set up along the northern Blue Tarp? With a precision jump, you can activate a ledge hang from them, catching incoming opponents off guard. You’re quite exposed in this position, so don’t overdo it.
5. Grenades to upper walkway. When you don’t have time to engage in a precision firefight with someone on the upper walkway, consider tossing a grenade up there instead — or using a Drill Charge to penetrate the walkway — for a quick engagement starter, if not a solid elimination.
6. The right tool for the job. Versatility goes a long way when holding the upper walkway over the Courtyard. The new Season 04 Tempus Razorback Assault Rifle, unlocked for free in the Battle Pass, is a great example of a weapon that can engage targets downrange but can also hold its own against nearby enemies.
7. Pincer attack. When approaching an objective within Construction or the Main Entrance, try to split your forces to come in from at least two different directions, thus dividing the enemy’s focus with an effective pincer attack.
8. Now try to find me. Smokes — Grenades and the Field Upgrade — can be helpful to conceal movements, especially in the Courtyard. Just be mindful of Thermal Sights or predictable movements that can counter this strategy.
9. If it ain’t broke, don’t fix it. This version of Showdown is very faithful to its original design, though on top of the massive graphical improvements since then, the updated movement mechanics add a new layer of strategy. Use your mantling abilities — especially around the perimeter — to get above your enemies fast and use slide to get behind cover when taking fire.
10. Take your skills to Call of Duty:Warzone. Starting to feel confident after several matches? Consider switching over to Warzone and heading to the Ahkdar Village POI in Al Mazrah. Use the skills you gained in Multiplayer to lock down the area as you fight to be the last squad standing.
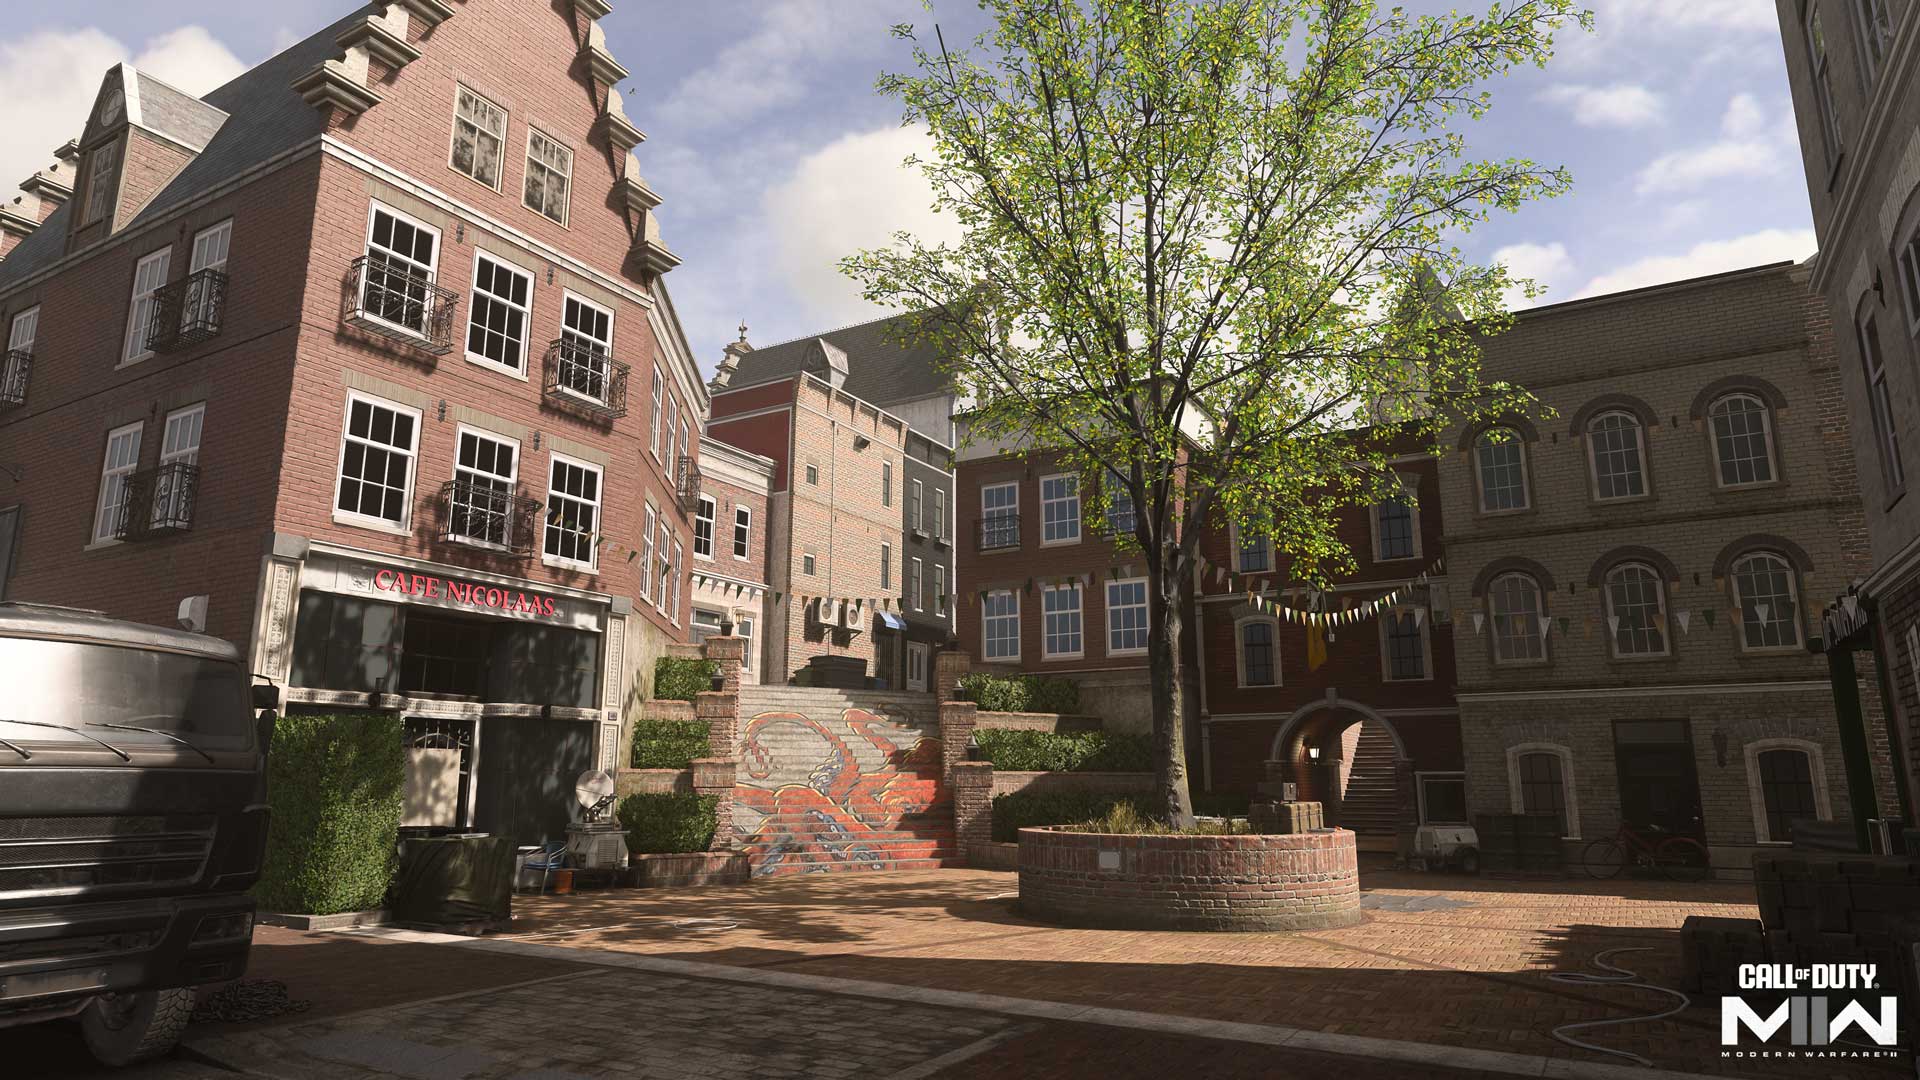
KUNSTENAAR DISTRICT
Welcome to the arts district of Vondel — the new Season 04 Call of Duty®: Warzone™ map — a Core 6v6 Multiplayer map positioned west of the Museum and across the water from the Stadium and Police Station.
This small- to midsized Multiplayer map features a variety of boutique shops and town houses along its classic three-lane layout, with a canal for underwater operations and street art adorning its buildings and central plaza. With a map punctuated by small interior locations, Operators have plentiful options for weaving in and out of its main roads, with opportunities for close-, mid-, and long-ranged combat alike.
Spawn Point: KorTac
KorTac Spawn Zone (South) — Back Alley
Starting in the Back Alley, KorTac forces have access to three forward routes: west through the Streetwear clothing store toward the Canal and Checkpoint, straight ahead to the Plaza, or to the east toward the Park Entrance and up through Vans.
Generally, taking the middle path presents the most danger, as the Plaza is at a disadvantage against enemies positioned at the top of Stairs. Therefore, you may have more luck moving up Vans in the east, or, when moving up the western path, taking a swim in the Canal until you get past sight of the Plaza and Stairs.
Spawn Point: SpecGru
SpecGru Spawn Zone (North) — Road
Entering from the northern Road, SpecGru forces are also presented with three routes forward, though the map’s asymmetrical design presents some different risks and opportunities.
Head straight through Connector to the top of Stairs for a strong vantage point against KorTac forces moving up through Plaza and the western Riverside. When taking the eastern path through Construction, be aware of the sudden drop in the road past the flatbed truck — this could potentially obscure your sight of enemies heading toward your position. Consider setting up by the south window of House, cutting them down as they reach your level. In the west, watch for snipers utilizing the long, straight path to engage from far out, and look for swimmers in the Canal trying to avoid attention from the central Stairs.
Map Maneuvers: Route Planning
For the purposes of this guide, we’re dividing Kunstenaar District into four main sections:
– Canal
– Residential
– Shops
– Park Side
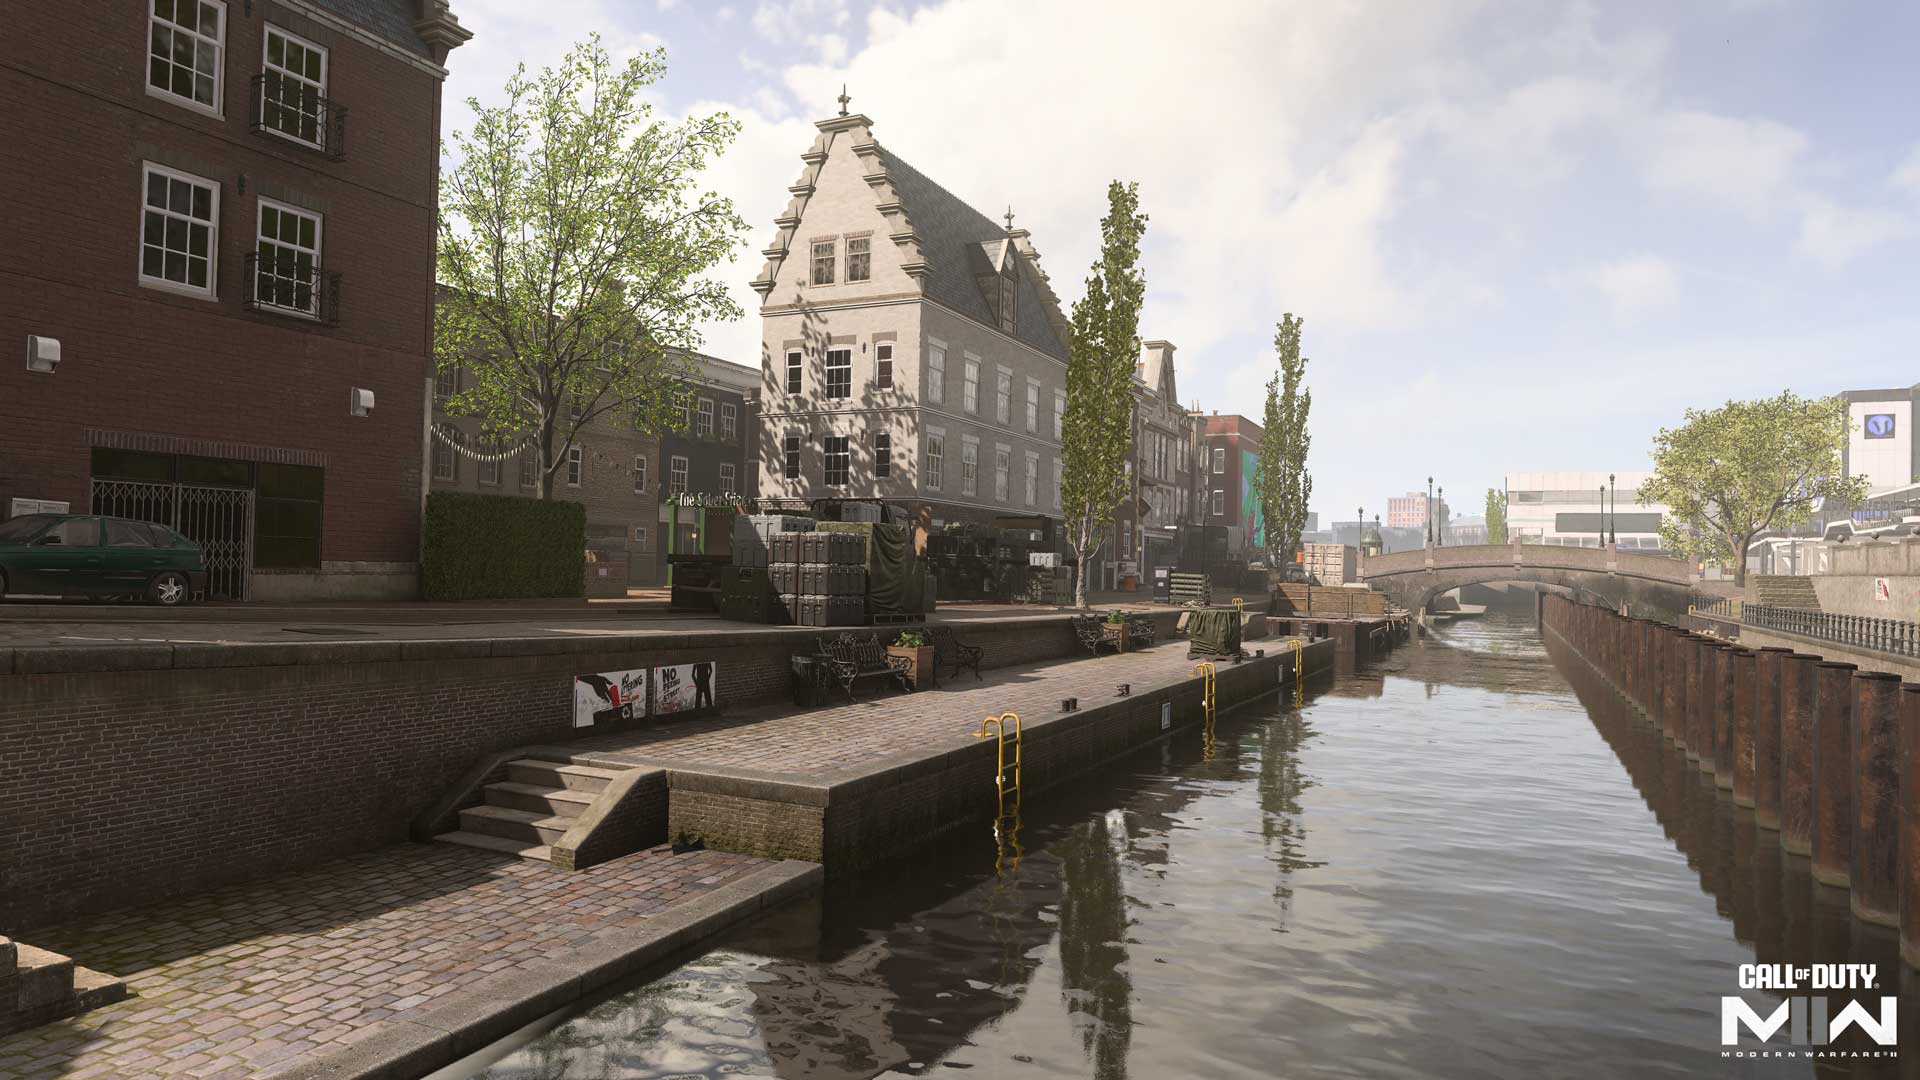
Canal
With the Canal and the western pathway running alongside it, this area is a hot spot of long-ranged activity as opposing sides take shots from either end of the map. For those looking to close the distance, several large vehicles offer substantial cover and a means to get up and over street level for a more commanding view. You don’t have to worry about them blowing up under fire, either; these trucks are sturdy.
To avoid getting hit from the side, be aware of the Stairs and Plaza when moving up through the middle. As mentioned earlier, swimming through the Canal will keep you out of sight, but it’ll also slow you down.
Residential
Comprising the northern half of the map, including the main Road behind it, the Residential area sits at a higher elevation compared to its southern counterpart. Midranged engagements rule the outside, favoring Assault Rifles along Road and SMGs as you approach the back of the House. Note the flatbed truck parked along the wall here; the barrels strapped to it provide good cover against enemies moving up from the Plaza.
Combat becomes much tighter in the interior spaces here: House, Bike Shop, and Connector. When aerial streaks come calling, expect these areas to become hot zones.
Finally, the power position afforded by the Stairs is certain to draw attention. Use them, then move on before becoming a high-value target. When attacking the position, consider coming in from the eastern Archway, a difficult position to cover from up top.
Shops
The southern shops area funnels Operators into narrow engagements through its exterior alleyways and the Streetwear and Laundry interior spaces. With fewer cover pieces around, fights here are more often determined by who has the quicker draw, so be aggressive.
Don’t neglect the usefulness of the Sober Friar Restaurant when attacking the central Plaza. Though it may feel exposed, it offers valuable partial cover against enemy Operators on the other side. When defending the area, Laundry and Streetwear become worthy paths as well; use them to quickly change your position between the middle and outer lanes.
Park Side
Though longshots are also a concern — and an opportunity — here, the road’s angled path makes it less of a concern compared to the long, flat road along Canal. Still, there’s plenty of danger to be found here, with several pathways leading abruptly into the area from the middle path, as well as consistently placed vehicles and other large cover objects to obscure the view of incoming enemies.
Use the Museum boundary here, which allows you to get above street level. While you’re more exposed this way, it also gives you a clearer sight down the road. At the path’s far north end, the stone staircase offers a great view over Road. When defending against enemies coming in through the middle, consider setting up in one of the flat grass areas, reducing your chances of getting spotted by enemies along the road.
Objective Routes and Rotations
Mode Intel: Domination
Kunstenaar District’s tight, three-lane layout presents danger at every turn in Domination matches. If your squad groups up too tightly, the risk of getting flanked runs high, so spread out when covering objectives to increase your awareness of incoming danger. If you encounter fierce resistance down one lane, shift to another, always prodding for an opening in the enemy’s defense.
With the A and C flags positioned near the east road, the action tends to be more intense on that end of the map in this mode, thought that heightened attention can be used to make a play at B from the west. Don’t be too rigid about which flags to focus on, however; any two will do, and on a small map like this, the objectives are likely to change hands often.
Mode Intel: Search & Destroy
Slow it down in Search & Destroy and remain especially wary of enemy snipers utilizing the map’s long sight lines to get an early elimination in the match. Subterfuge can be deadly here — open fire, throw grenades, or otherwise get the enemy team’s attention while setting up a flank to eliminate them as they respond to the targeted location.
The bomb site positions focus the fight on the outer roads, and their proximity to the central Plaza makes it tempting to cross the open area. Be wary of this highly exposed move and eliminate hasty enemies who do. If you notice any open doors or broken windows when passing an interior location, toss a grenade inside just in case, and take advantage of the many large vehicles by mantling on top of them for a greater view.
Mode Intel: Hardpoint
The opening Hardpoint spells chaos right from the start, sending both teams careening toward the volatile central Plaza. Try approaching the objective from multiple angles to split the enemy’s attention. Once the Hardpoint is yours, remember that you only need one Operator inside to accumulate points; the rest of the team can then spread out to better cover the multiple pathways leading toward the objective.
Get moving to the next objective location before the current Hardpoint runs out, especially between the second and third Hardpoints and the fourth and fifth, each requiring a greater distance of travel between them. Carry a Launcher — or be willing to switch to a Loadout that has one — to respond to enemy aerial streaks, particularly UAVs. Executing pincer attacks or attempting a stealth movement through the Canal won’t be of much help if they can see you coming.
Top Tips
1. Fight horizontally. Kunstenaar District’s layout tends to funnel the battle along its three primary vertical lanes of engagement, though you can catch the enemy off guard by focusing on a more horizontal playstyle, moving between the three lanes to keep the enemy at bay.
2. Browse a little. You might think that the crammed interior spaces are mostly useful for passing through, but don’t be in such a rush to get to the other side. Use the available windows and doors to seek out and eliminate any nearby Operators; then move on once the coast is clear.
3. Go fishing. Suspect there’s an enemy Operator swimming in the water but don’t have time to wait for them to come up for air? Fire some shots along the water’s path to see if you get a hitmarker. The Canal is narrow enough that you’ve got a decent chance of connecting if someone’s there.
4. Watch your feet. The constricted pathways here are prime locations for ground-based attacks, whether in the form of Claymores, Proximity Mines, or Suppression Mines. Scan the floor when racing through or equip the Spotter Bonus Perk to avoid an untimely elimination.
5. Broken connection. Due to the popularity of the Stairs, you can bet there will be a lot of movement through the tiny Connector room just north of it. If the enemy is holding fast to this position, fight your way into the room and greet incoming Operators with a Shotgun blast.
6. Cover to cover. To better avoid long-range threats while traveling the road alongside the Canal, use the available cover objects to keep out of view until you can get into a better position at close range.
7. Greet them at the door. With only a few scattered interior locations, the shops and House can get crowded fast when aerial streaks force Operators indoors. Be prepared to fight for the overhead cover in these situations, whether you’re the one running from the streaks or expecting enemies to race in to escape yours.
8. Wheelson coming through. The Wheelson-HS is a formidable streak here, considering the ease of moving through the district’s exterior roads. The parked vehicles additionally help keep the machine obstructed while approaching enemy positions.
9. Enjoy the artwork. Even in a heated battle, there are inevitably quiet moments, offering the perfect opportunity to appreciate the surrounding street art. See the octopus over the Stairs, the dog in the Plaza, and a variety of others throughout the entire district.
10. Deploy to Vondel. The Kunstenaar District provides just a taste of the greater Vondel map launching in Season 04 of Warzone. Grab your squad and head into the match to view the Museum grounds next door as well as the many other points of interest making up this new field of battle.


Stay tuned to Gaming Trend for more Call of Duty: Modern Warfare II and Warzone news and info!


