The great philosopher Socrates once said “Man must rise above the Earth—to the top of the atmosphere and beyond—for only thus will he fully understand the world in which he lives.” and it’s as true today as it was in his time. We are no more the master of our universe than a bird is the master of the sky. That said, through better technologies we can embrace and better understand our world, and few worlds are as mysterious as the vast and enormous universe that extends beyond the boundaries of our imagination. Reaching out and touching the sky can still be a cumbersome process as telescopes are often complicated to use for a beginner. Celestron is looking to change that. While we may all be stuck indoors for a while, I’ve recently picked up a Celestron Explorer DX 130AZ telescope. I’ve always been fascinated with astronomy. Could this be the device to finally make it possible to explore the night sky?
What drew me to the DX 130AZ is the interface. I’ve tried to use telescopes in the past and found them to be extraordinarily complex to sight in, making it too challenging to enjoy. Watching YouTube videos, Celestron showed what looked to be a simple game-like experience of getting the device calibrated, and by using your phone as a side-car for processing power, the ability to be looking at distant objects in the night sky in a matter of minutes. That’s exactly what I needed.
With the DX 130AZ unpacked, it was time to assemble the device. The telescope sits on top of a sturdy but lightweight aluminum frame with a slight black powder coat to hold off any scratches and for better grip for moving the device. The frame itself has two braces for each arm, with a single spike that extends down to hold steady on uneven ground. Sitting atop the tripod arms is a heavy-duty integrated mount that’ll hold the telescope itself, as well as handling the finer control arms for adjusting the device in small increments. A triangular tray is placed in the middle of the tripod to hold all of your accessories, lenses, and anything else you’ll want to keep an eye on.
Placing the telescope into the tripod mount assembly is as simple as unscrewing a hand-tightened hold bolt, sliding it into position, and then locking it down. With the main telescope body securely in place, you’ll then drop in the eye piece, red-dot finder eyepiece, and phone mount. In less time than it takes to pop a bag of popcorn, you’ll be ready to start alignment. Check out this video below to see the unboxing and assembly of the Celestron Explorer DX 130AZ Telescope:
![Celestron Explorer DX 130AZ - Unboxing [Gaming Trend]](https://gamingtrend.com/content/images/2025/02/lytecache-php-origthumburl-https-3a-2f-2fi-ytimg-com-2fvi-2feebgrl_70da-2f0.jpg)
On top of the telescope is the red-dot finder eyepiece I mentioned a moment ago. Training the laser onto a distant object (roughly 100 meters), and then using the adjusting screws to get it dead center in the finder eyepiece ensures that everything is in alignment for what comes next.
The biggest allure of the Explorer DX 130AZ is the StarSense Explorer interface. This app is used to help you quickly locate objects in the night sky. Removing a small cover over a mirror, you’ll place your phone’s camera directly over the top of it. The cradle adjusts to accommodate your phone’s camera placement, since that is certainly non-standard amongst manufacturers. With the phone centered, and the ~250mb download of the StarSense Explorer app complete, it was time to get things aligned. The StarSense app uses something called “Plate Solving” to simplify the otherwise complex process of aligning with a body in the night sky. It does this by having your phone take a picture of the night sky, uses the phone’s power to process the image, and then runs it through the application to find that the particular cluster of stars your phone sees lines up.

As you can see, using the red-dot to spot a distant object, and then dragging the image reticule over the target, lines up the telescope. At this point, you are ready to find your first constellation. Pointing your telescope into the open sky, the app will take 2-3 seconds to orient and then give you an overlay of what your scope is currently seeing.
The StarSense App has a number of options to get you pointed in the right direction. Sliding your finger on the phone rotates the planetarium-esque view. You’ll see the names of constellations, planets, moons, nebulae, and other objects of interest that you can tap to select. Selecting an object sets the app in motion, creating a reticule that instantly reminded me of the 3 minute mark in this Stargate video:
![Stargate movie first activation [HQ]](https://gamingtrend.com/content/images/2025/02/lytecache-php-origthumburl-https-3a-2f-2fi-ytimg-com-2fvi-2fn3ihwxpl5ea-2f0.jpg)
Moving the telescope close to position, and then using the fine control arms to adjust the azimuth (the horizontal plane) and altitude (the vertical plane), the app will “lock in” and turn green. This means you should be able to see the object you’ve selected, or you’ll be extraordinarily close and can again use the fine controls to dial it in.
Next to the StarSense logo is a star icon. This icon reveals a list of items (“Tonight’s Best Objects”) that are best viewed from your position on the globe, and a wealth of additional information you’d normally have to spend time online to figure out. For example, I can tell you that the moon is 370,044 km away, rises at 3:00pm, sets at 3:48am, will be a full moon on May 7th, and a new moon on May 22nd. Clicking on it reveals an extensive amount of information about its history, phases, eclipses that have happened in the past, features like the Lunar Alps and the crater Plato, and even a bit about the moon landing of Apollo 11. Tapping the “Audio Tour” button gives a museum-style audio clip about the heavenly body, and hitting the speech bubble will pronounce the name. Obviously “The Moon” isn’t rocket science, but “Dschubba” might warrant a tap. My only real complaint here is that the audio cuts off if you leave this tab, so there’s no way to start the audio and then start to navigate to it with the “locate” button.
Sliding over on the screen there are two additional tabs — Observing Tips and Data. Observing Tips provides a bulleted list of information that a beginner like me might never have thought about, such as not observing over the tops of roofs as the heat rising from the building will cause disturbances in the atmospheric seeing conditions. Data lets you really get into the weeds about the selected object. The celestial coordinates, the apparent motion and how fast that object moves in the night sky, and in the case of the moon, when each of the lunar phases will be visible. Admittedly, as a novice I have no idea what “Perlapse” is, or why the moon’s values are 0.002427 AU and 363,104 km, but this seems like critical data for more seasoned veterans than I.
There are two eyepieces included with the DX 130AZ — 25mm and 10mm. A 25mm lens will give you 26x magnification power, and 10mm will push that out to 65x magnification. The telescope itself is a 650mm focal length. Celebrated camera manufacturer Nikon gives a fantastic explanation using something they call the “red barn sequence”. As you can see below, the larger the focal length, the further that telescope can see. Again quoting Nikon — “Lens focal length tells us the angle of view—how much of the scene will be captured—and the magnification—how large individual elements will be. The longer the focal length, the narrower the angle of view and the higher the magnification. The shorter the focal length, the wider the angle of view and the lower the magnification.”
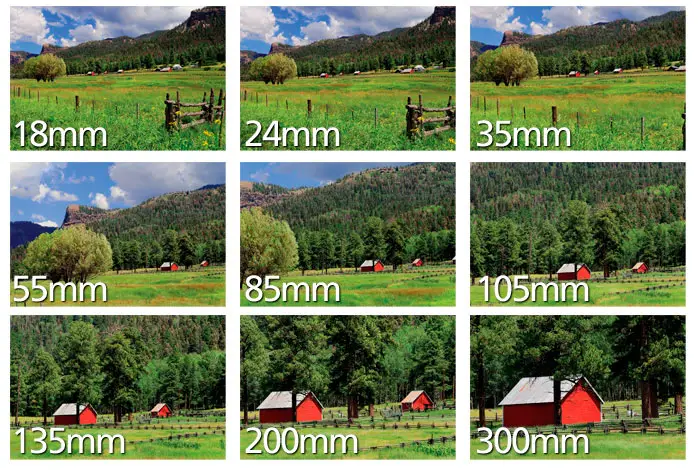
Credit: Nikon USA
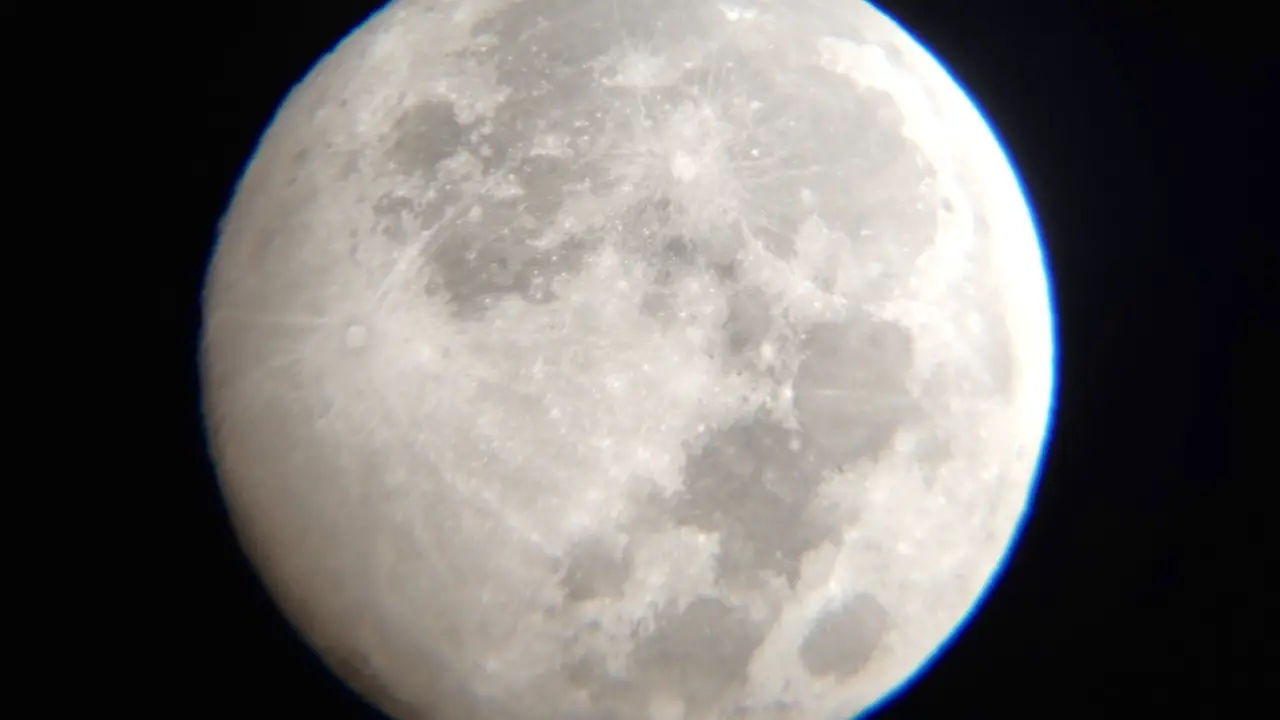
With the 10mm eyepiece loaded and a quick tap on the moon in StarSense, the device told me where to point the telescope to get the best possible image. Using the videogame-like interface, I swung the tube into place and locked on. The moon was just a sliver during this time of the month, but what I could see was magnificent. You’ll have to excuse the quality as I’ve shot this through my phone via the eyepiece (the telescope comes with a T-ring for a DSLR camera like a Canon Rebel, but I needed a specific adapter for my camera and didn’t have it at this point). That said, shaky as it was thanks to the Texas winds, what I saw was absolutely magical.
![The Moon - Celestron Explorer DX 130AZ [Gaming Trend]](https://gamingtrend.com/content/images/2025/02/lytecache-php-origthumburl-https-3a-2f-2fi-ytimg-com-2fvi-2fo97mvz6sc8s-2f0.jpg)
As you can see, even through the lens of my phone the pocked and cratered surface of the moon is clearly visible. Things I had only seen in movies and in books were not only visible, but clear. While a great many stars in the heavens are simply pinholes in the backlit canopy of the sky, the moon is not only visible, but also very clear to see. I couldn’t wait for the 7th to see what a full moon would look like.
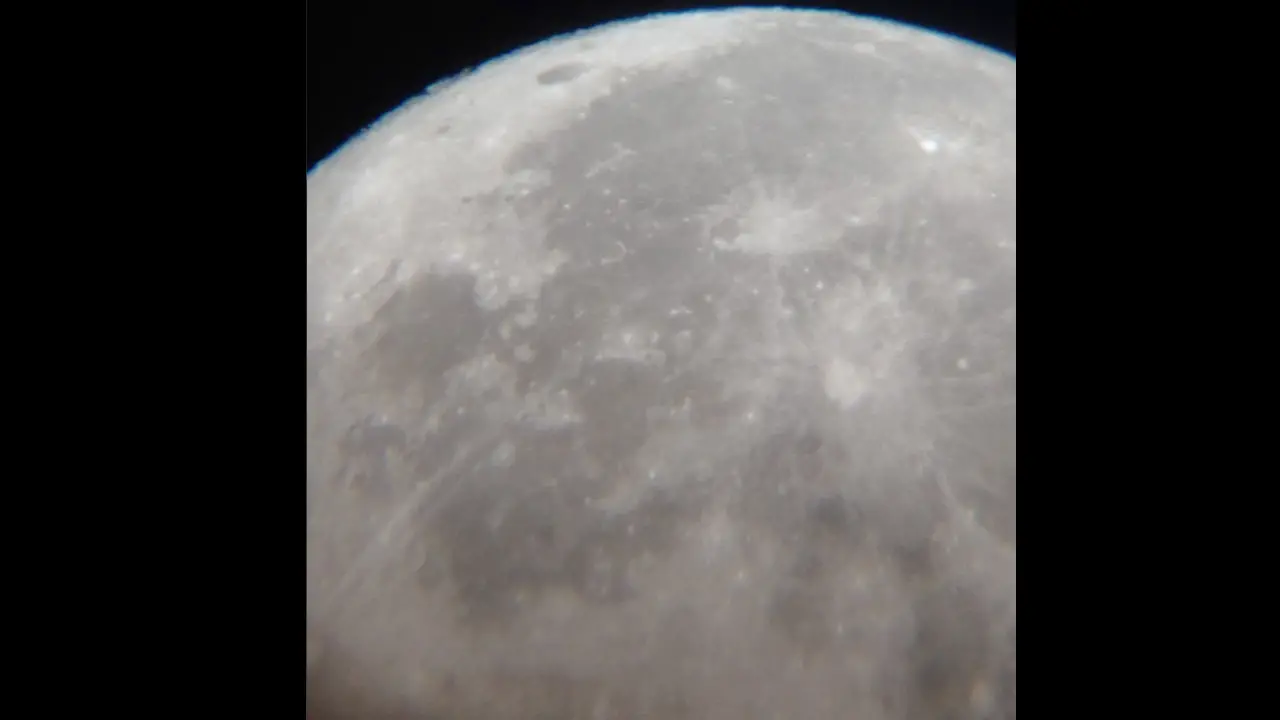
The 7th of May is not only a full moon, but also a “supermoon”, meaning that it is the closest the moon comes to the Earth in its elliptical orbit. It also means that it looms large in the night sky, making it easier to see the moon’s surface with the most detail observable. I could describe it, but it’s something you really need to see for yourself.
To say that I’ve fallen in love with astronomy is an understatement.
Moving the DX 130AZ is a piece of cake. The tripod weighs 9.2 lbs, and with the optical tube adding another 8.8 lbs, meaning it is just heavy enough to not get tossed around with the wind, but not so heavy that my wife couldn’t easily pick it up and move it quickly. The StarSense app takes less than 5 seconds to reorient once the device is moved, and all with no human intervention, meaning you can easily relocate if a nearby street light infringes on your good time.
If you really want to get the best view of the heavens, you’ll want to get away from the city and its light pollution. As StarSense is a phone app, how does it operate without a data plan or a WiFi signal? Turns out it operates flawlessly. The StarSense app is a self-contained planetarium in your pocket, useful when you are out in the sticks, or just taking in the stars from the street in front of your house.
Tempering expectations, there is something to note about the Celestron Explorer DX 130AZ telescope. At $399, this telescope is actually remarkably reasonable in price, but the included 10mm and 25mm eyepieces are just a gateway drug into the wider world of astronomy. Accessory kits like this one containing filters and more lens varieties will set you back another $100 or so, but it won’t take long before you find yourself buying daytime viewing refractors, Barlow lenses, and more. In the time between when I saw the image above and the full moon I had already purchased both of the aforementioned accessories, and I was already dreaming of what I might see with more advanced scopes.