I’ve been spending more time thinking about security lately. There’s a direct correlation between economic downturn and an uptick in residential property theft. Various agencies have drawn drastically different conclusions on the data, with some saying it’s just a 2% uptick, while others cite upwards of 40% increase in property crime, but one thing they all agree on is that a recession does cause a bump in crime. One such property crime is people stealing packages from your front step. The thief stops their vehicle, jumps out and snags your deliveries, and then pops back in their vehicle to speed off. Even if you are home, the window to catch someone doing this is short. Worse, even the Ring doorbell camera often fails to activate in that window. I know – I have one. I wanted something that would provide better resolution, a wider angle, and faster activation.
If you’ve seen some of my more recent reviews, you know that I’ve been doing a bit of crowdsourcing for my security, wanting to move away from the bigger companies like Ring (owned by Amazon), Nest (owned by Google), or megacorps like ADT. Instead, I want to harden where it makes sense, restrict and monitor the chokepoints, and ensure all of the data is properly backed up and secured. One of the most important aspects is ensuring that you have visibility where the highest probability of theft can occur – in my case, my front porch, and the two sides of the house. This will keep an eye on where packages are delivered, and monitor the two approaches that lead into my backyard where my pets are, and with the largest windows without visibility.

I had a short checklist of attributes for a camera system. First, I wanted something that would be easy to mount, wireless, and with the longest possible battery life between having to pull it down to charge. Second, I wanted something with at least a 1080p image, preferably even higher resolution than that, and with a wide FOV. Third, I wanted something that would connect with the cloud for storage, but also had local storage for when connectivity might be disrupted. I also wanted something with an integrated spotlight as my current Ring solution used a pair of bulky lights – I wanted something that would blend into the background a bit more. Finally, I naturally wanted all of the latest features including AI-based person detection, motion detection, and two-way audio. The last ask was probably the most difficult – I wanted it all to be reasonably priced, and preferably somewhat commodity in nature. I was shocked to see that Noorio actually checked all of these boxes and more. To that end, I snapped up a B310, B210, and a pair of B200 cameras, with the intention of grabbing solar panels if these ended up being a permanent fixture.
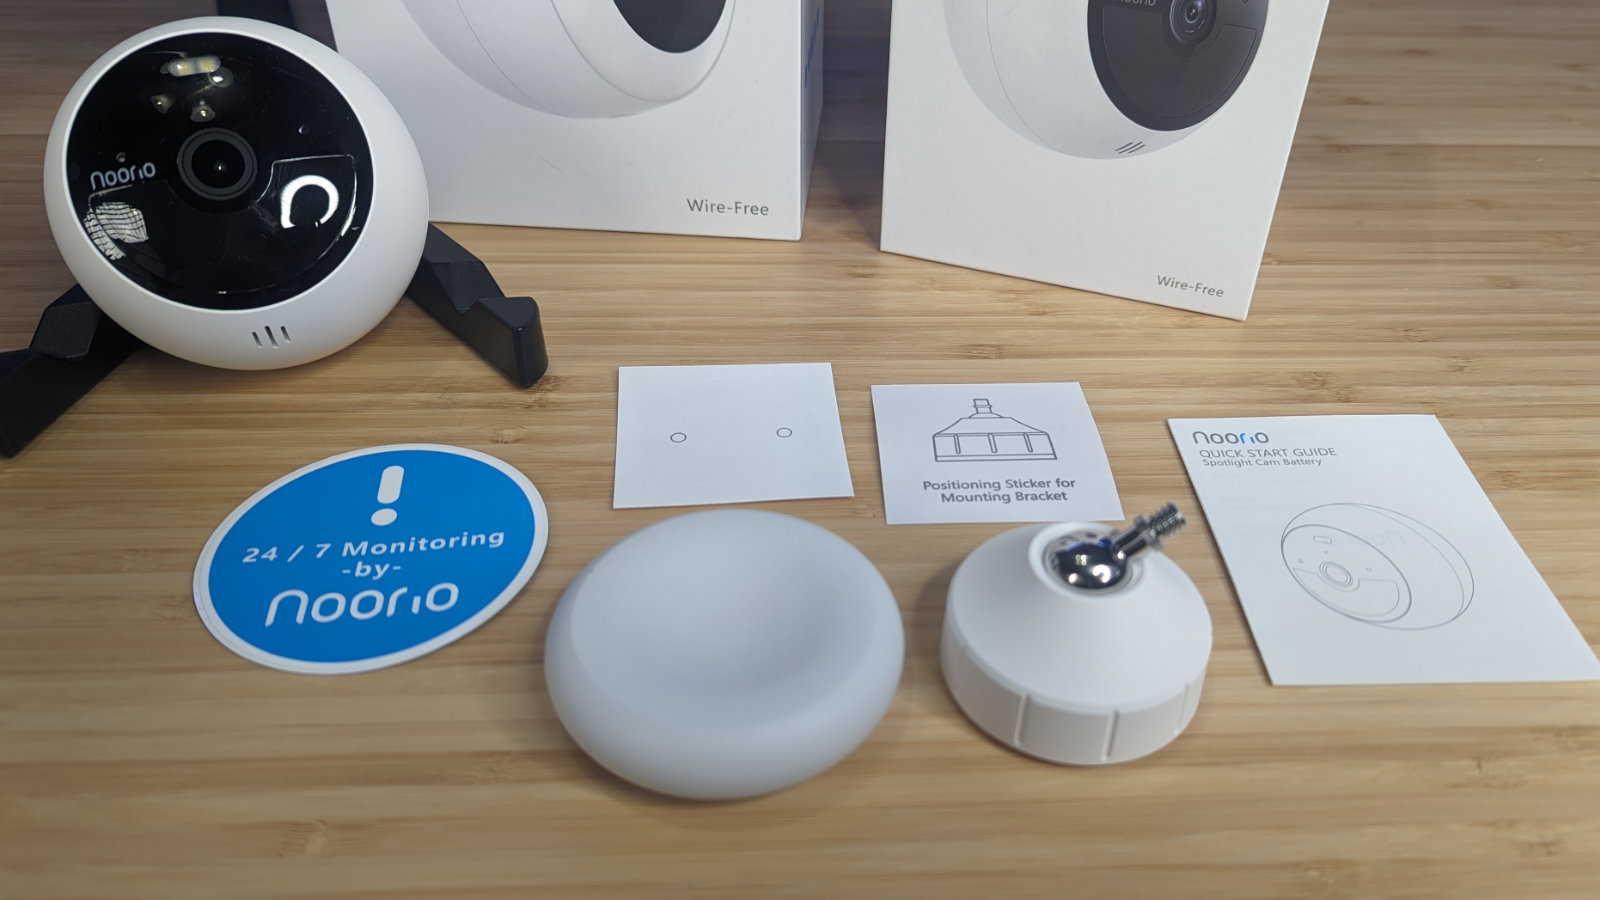
First up, obviously, is configuration. Like most devices, it’s set up with a combination of Bluetooth and a mobile device like a tablet or phone. On the Google Play store or the Apple App store you’ll find the Noorio App – I’ve linked them there for your convenience. Opening the app you’ll click “Set up a Device” – no surprises here. On the back of the packaging, or on the back of the devices themselves is a QR code. Using the app to scan it, you’ll hear a loud beep and a video will play to help you get through the rest. The video is surprisingly helpful, including telling you about the voice instructions that you’re about to hear. You’ll create a new location, which is to say, giving a name to your home. Next, you’ll give your camera a name, such as backyard, front door, side door, porch, shed, or a custom one of your choosing. With that settled, you’ll connect it to the 2.4 Ghz band of your network device. The setup instructions will provide you with detailed information about how to press the Sync button to finish pairing the device – you should see it blink a blue light several times, as well as the aforementioned voice instructions to let you know it’s been accomplished successfully.

Just like setting up an Alexa, Google device, or other connected object, you’ll next connect to its internal network – “Noorio_c663” for example. Doing so will kick off the “Setting up Device” – you may need to shut down your LTE to do this, but the app will even warn you of this, should there be an issue. Once complete you’ll get a festive little message that says “Added successfully. Your device is ready to use”. With the software configured, it’ll then offer to help you with opening the mounting guide to finish that process.
I was surprised at the ease of setup with these cameras. I’ve struggled with setting up my Alexa devices, the Ring, the Nest – all of them had some quirk or another that forced me to make multiple attempts before it finally joined my network and settled in. The Noorio cameras all joined the first try, immediately ready for use. I know Noorio is a newcomer to the space, but it’s very clear that they’ve strived hard to make the most user friendly application possible – they’ve succeeded.

The B210 would act as my primary camera. At 2K resolution and a 140° FOV, this camera would be covering the front door of my home. It has 16GB of local storage and a whopping 600-lumen spotlight with adjustable brightness – the latter being very important as I’d like the folks approaching my door to not be blind for having done so. It’s also unobtrusive enough to be tucked out of the way, but obvious enough to let folks know that they are being recorded.
The B310 is Noorio’s floodlight camera, but surprisingly the B210 isn’t far off the mark. The primary difference is that 600 lumen forward-facing floodlight on the 310, compared to the 100 lumen version on the 210, and the 310 has 32GB of local storage. I could describe how bright the difference is, but this is something you’ll have to see for yourself:

As you can see, 600 lumens is enough to very clearly see absolutely everything in shocking detail. Put simply, it changes night into day. That said, the 100 lumen brightness isn’t bad, though the light falls off quickly the further out you go. Beyond the larger spotlight, the only other difference is that the 310’s additional weight means it can’t use the magnetic mount system. This is unfortunate but the great news is that there is a mount arm already included. If that’s insufficient, here’s a protip –the threads are the same as the mount for a Gen 1 Nest camera, meaning there are plenty of mounting solutions, arms, and various other ways to put the 310 on your wall. There’s also The MSRP on the B310 is $134 at the time of writing, though there’s also a 311 for just $15 more already – technology is always in motion like that!
The B210’s smaller light is provided via two LEDs in the top of the camera eye, rather than the circular diffuser of its larger brother. Beyond that, they share the same resolution, local storage, FOV, night vision, and everything else the 310 can do, just in a slightly smaller package. As I mentioned earlier, it’s also able to use a magnetic mount, which is thankfully included in the box, making this very easy to pull down for your bi-annual charge. The B210’s MSRP is $120 – easily half of what you’d spend versus a Ring doorbell.
The B200 is a bit of an oddity when compared to its bigger brothers. Almost indistinguishable from the B210 from the outside, the B200 has all of the same features, but two of them slimmed slightly. The resolution has been slimmed to 1080p from 1440p, and it has 8GB of local storage versus 16GB. What sets it apart is the price – it’s just $69.99. The intention, beyond the lower price, is that this could be used in lower traffic areas as they won’t need to store nearly as much. That said, they also support cloud storage so even that won’t technically “run out”.

There are a handful of features across all three devices that make it stand out against all other cameras I’ve seen. First and foremost, these are designed for extended outdoor use. To that end, Noorio went the extra mile and opted for IP66 water proofing. That’s a bit of a misnomer as IP66 actually means it is fully sealed against dust and dirt, and able to withstand a direct assault of water. How much? Try 100 kPa at a distance of 3m for at least 3 minutes. That’s equivalent to the main water cannon on a fire engine! So, yes – it’s water proof, and pretty much everything else proof as well. As our temperatures in Texas hit 115 degrees Fahrenheit, it’s also good to know that these will also withstand from -4 degrees to 122 degrees. While Texas feels like the surface of the sun lately, these should be fine in the shade of my porch area or on the side of my house.
The other big feature is a big surprise and represents the latest in night vision technology – full color night vision. Rather than looking like military drone strike footage, the captured images and video is shown in full color, providing a far cleaner resulting image than it would be in black and white. Again, this is something you need to see for yourself:


Every motion event is stored locally on the device, as well as any interaction you might have. Naturally you are welcome to keep those on the internal storage, but it’s a far safer option to store them in the cloud. There are two plans at the time of writing, both of which can be purchased on a weekly or annual basis. The basic plan covers a single device and is either $3.99 a month, or $39.99 when billed annually. The more sensible option is the Plus Plan at $9.99 a month, or $99.99 a year, covering 10 devices. When you have three cameras, and intend to add a doorbell, window contacts, indoor cameras, and motion sensors, with whatever else Noorio comes up with next, you can see where that 10 device limit is going to get hit pretty quickly. As the portfolio grows, here’s hoping that we see more balance here. It’d be great to see Noorio head into other pieces of security technology, but please don’t nickel and dime me to death. $9.99 for a comprehensive plan is the correct all-in price point, and please don’t get greedy and start adding per-device for arbitrary things like window sensors! This is your chance to stand out – take advantage.

Mounting the device is simple. The included pair of drywall mollies and screws is all you need to secure these to just about any exterior wall. They’ve thankfully included both mount types, so you can use a permanent fixture with a ball head on a short post, or you can use the magnetic option as you see fit, keeping in mind that the B310 can’t use the magnet option. The exterior of my home is a brick facade over what I believe is thick concrete underneath. The included screws and mollies would be insufficient for that task, so I’d need both a very small drywall drill bit, and small enough screws that can go through the plate and nest inside the circular post holes. Well, after a trip to the store, twice, I found that these just don’t exist. Instead, I ended up using concrete adhesive. Pasting that on the flat surface until it came through the post holes, I left it for a day to lock in place. The next day it was as secure or more so than any drilling and screws could be, and ready to use.

The camera’s body is almost entirely magnetized, so you can mount it in just about any position, including upside down – something the app happily supports. The magnetic mount is extraordinarily strong, so these are absolutely staying put. Best of all, it’s not immediately obvious that it’s magnetized, though you’d have to be pretty brazen to try to snag a device that’s actively recording you the entire time and uploading the results to the cloud.

With all three devices in place, I dove back into the software. The Noorio app is simple to use and configure, as I saw during setup, so it’s no surprise that the UI is equally as simple. You’ll be greeted by a large view of your available devices – in my case, the three cameras. They show the labels I gave them, such as “Front Door”, “Back Porch”, and “Side View 1”. Tucked in the opposite corner is an easy view of your WiFi strength, how much power remains on the device, and a gear for dipping into the advanced features.
Inside the gear option are configuration settings for everything that camera can do. Let’s get into them:
- Smart Detection (we’ll get back to this one)
- Light settings (brightness)
- Video Settings (Auto HDR, video mode for full color or night vision, watermark, and 180 degree rotation if you mounted it upside down)
- Notification (whether to include a snapshot or not, do not disturb mode, alert tones for the app – though I wish there was a separate volume adjust here)
- Power management (source control, battery life, and which battery mode from saving to something more customized, not unlike power savings in Windows)
- Privacy & Security (whether the status light is on, if audio is recorded, and adjusting the overall recording zone)
- Network (WiFi Setup)
- Storage (local or cloud storage, and how to clear it)
- A helpful mounting guide and the firmware revision
The second tab lists all of your events. It will display them all together, or split them by device as you see fit. It lists the date, and what type of detection it is – motion, or person.
The third tab is “Security”, and it has some of the presets you might want to employ for home and away modes. In fact, those two modes, as well as a Sleep mode can change the devices behaviors as you see fit. Similarly, you can set schedules in this tab to have the cameras go into a particular mode based on time. If you set up a Geofence, you can also switch to the various modes based on where your phone is at present. This means, if you allow it, the Noorio cameras will set the entire home to “Away” mode when your phone leaves the reach of your geofence (i.e. the end of your driveway), setting all cameras to a specific mode.

Unfortunately, the utility of Geofencing and generally speaking, the modes, is a little lacking at present. The only options to toggle are whether videos are recorded, if push notifications are allowed, and if the camera will alarm if something goes wrong. This is set globally, so there’s a bit of granularity missing here. It’d be nice to say “notify if somebody walks up to the door, but alarm if any internal camera sees motion at all”, but if that configuration is here, I can’t find it. To create that, we’ll turn to a bit of automation – the final tab.
The automation tab allows you to create some if/then statements and turn them into rules. There is no programming required, just a simple “Trigger” followed by “Actions”. So, for example, I can say “If motion is detected at the front door camera” then “Record video” on another device. Unfortunately, there’s not enough flexibility here, quite yet. It’d be nice if additional triggers could be used, such as “If devices are put in away mode, then set cameras A, B, and C into simple alert mode, sending push notifications if they see motion” and then set a second action as “If any motion is detected on device D, sound an alarm and record all cameras for X minutes”. Additional trigger options like “If motion is detected on A, record until no motion is recorded for X seconds”. As it stands, it’s a pat and global choice of how long all recordings are. Even the default of “If front door detects any motion, record video on the back porch” doesn’t make sense – I get deliveries, and they don’t need to look at my back porch when that happens. Some additional smarts would go a long way here.

Speaking of smarts, I mentioned that we’d get back to the Smart Detection portion. Smart Detection is where you’ll set the overall Activity Zone, or Zones – you can set more than one, allowing you to, for example, omit any area that might spy into a neighbor’s home. Here you can set motion detection, which will catch movement, naturally. You can also set Person detection. This uses AI to determine if the thing moving around is a dog, or a person delivering a box. It doesn’t have the same smarts as some devices which can determine that a delivery has been made, but there’s nothing that can prevent that with simple updates. The last slider is the Motion Sensitivity, which is merely the feet at which the device can discern movement or people. Adjusting this can help with false positives.
The device comes with a two week cloud subscription to try out that service. It’d be nice if it was a full month like their competitors, but I’m glad that it’s included at all. This allowed me to take a closer look at the service.

Activating the cloud is as simple as…well, clicking the small cloud icon underneath the picture. Each device is added individually, so you can pick and choose which device is added to the overall plan. This caps out at 10, as we said earlier, so you’ll need to be mindful of the count. There’s really nothing to talk about beyond this as that’s essentially the end of that function. If you dig into an individual device and hit the storage tab, you can clear out the space and clips you’ve collected. Beyond that, there’s nothing to see here beyond the bill tab.
As always, the last stop on the tour is warranty. Noorio has a 1-year warranty for all devices they sell, where they will swap or replace them at no charge. They also have a 30 day return for a full refund, though you’ll be out the shipping costs, of course. I don’t see any way to extend this, but when combined with the lower prices and the speed of tech upgrades, perhaps that’s simply the upgrade cycle. I can’t help but bang the drum on the likes of Ring. Their similar product is $170 versus $120 for the B330 at the time of writing.
Ultimately, I was very impressed with Noorio’s camera systems, as well as their supporting software. The cameras are incredibly flexible, as are the included mounting options. With very little preparation I had the cameras ready for use and recording, and with almost no configuration, they were capturing video and sending it to the cloud. The fact that these cameras come with nearly the same software smarts as the top tier of the industry, and at a price usually less than half that of its competitors, it’s almost impossible to beat. I do hope that Noorio continues to embrace the security space – some small software improvements will force companies who’ve long since stopped caring to perk up and take notice.
Ron Burke is the Editor in Chief for Gaming Trend. Currently living in Fort Worth, Texas, Ron is an old-school gamer who enjoys CRPGs, action/adventure, platformers, music games, and has recently gotten into tabletop gaming.
Ron is also a fourth degree black belt, with a Master's rank in Matsumura Seito Shōrin-ryū, Moo Duk Kwan Tang Soo Do, Universal Tang Soo Do Alliance, and International Tang Soo Do Federation. He also holds ranks in several other styles in his search to be a well-rounded fighter.
Ron has been married to Gaming Trend Editor, Laura Burke, for 28 years. They have three dogs - Pazuzu (Irish Terrier), Atë, and Calliope (both Australian Kelpie/Pit Bull mixes), and an Axolotl named Dagon!

Flexible, smart, reasonably priced, easy to mount, and easy to use, Noorio’s suite of cameras is shaking up the security industry. A patch or two would knock the likes of Ring right off their perch.
PROS
- Highly reasonable pricing
- An impressive suite of software
- Both mount types are included
- Remarkably easy to set up and use
- Camera image quality and features are stellar
CONS
- Some granularity in software is missing
- AI to detect packages update, please
- Mount may be challenging in stone surfaces
- A full month of cloud to test, please?
See below for our list of partners and affiliates:

Buy Now

Buy Now

Buy Now

Buy Now

Buy Now

Buy Now

Buy Now

Buy Now

Buy Now