
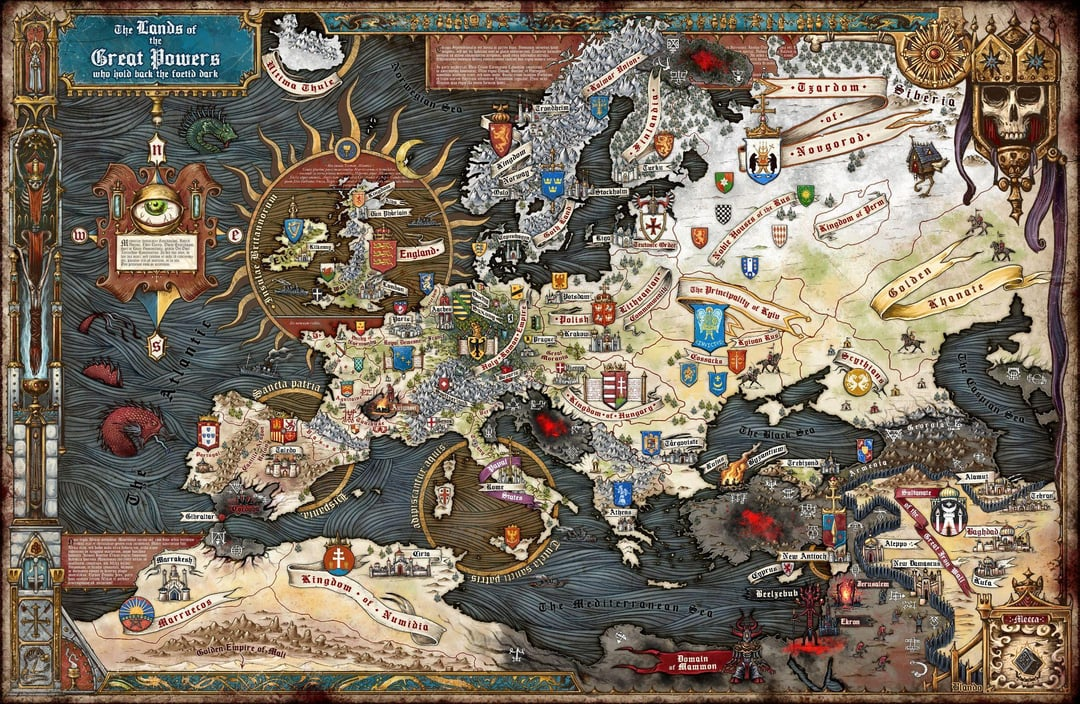
Trench Crusade is a skirmish-scale tabletop miniatures game set in a horrifying alternate timeline of World War 1. Europe, the Middle East, and Africa have fallen to demonic forces after demons were set loose during the First Crusade. The crusades have continued, and the landscape is devastated by a prolonged, trench-based war. Created by a collaboration of horror artist Mike Franchina, sculptor James Sherriff, and former Games Workshop designer Tuomas Pirinen, Trench Crusade is a miniatures-agnostic combat game that allows, and even encourages, players to use miniatures from their favorite 28mm-32mm scale miniature games (Like Warhammer, Warmachine, Bolt Action, or any other .stl file miniatures). The game itself uses a clever success and failure system using d6 dice, so no proprietary dice are needed.
If players and painters are wanting the official content, Factory Fortress, Inc. has released a series of .stl files for players to download and print themselves. Alternatively, you can purchase physical copies from Only-games.co, the only officially licensed reseller. Whether you’re using the official miniatures, or you’re painting up other ones, we’ve created this review and guide for you to get your warband ready to storm the trenches… of Hell!
The Sultanate of the Iron Will
First, a little alternate history lesson to get you in the right painting frame of mind.
Lore
During the First Crusade, near the end of the 11th century, the armies of the Church captured the Holy City and the Knights Templar discovered a secret vault containing an ancient demonic artifact. The Knights Templar betrayed the Church and began consorting with the demons, committing many atrocities and horrors. This is known as the First Heresy. The armies of the Church retreated and Jerusalem became a depraved pit where Hell and our mortal plane merged into one.
For more than 800 years, the Church has waged a new crusade to take back the Holy City from the forces of Hell. The regions have been utterly devastated by prolonged war, littered with tens of thousands of miles of mud, trenches and craters. Now, the crusade’s war is waged with armies wielding terrifying weaponry, with both sides conjuring up supernatural beings of nearly unstoppable and immeasurable power. With such unchecked escalation and increasing might, the armies at the start of the 20th century are at a stalemate.
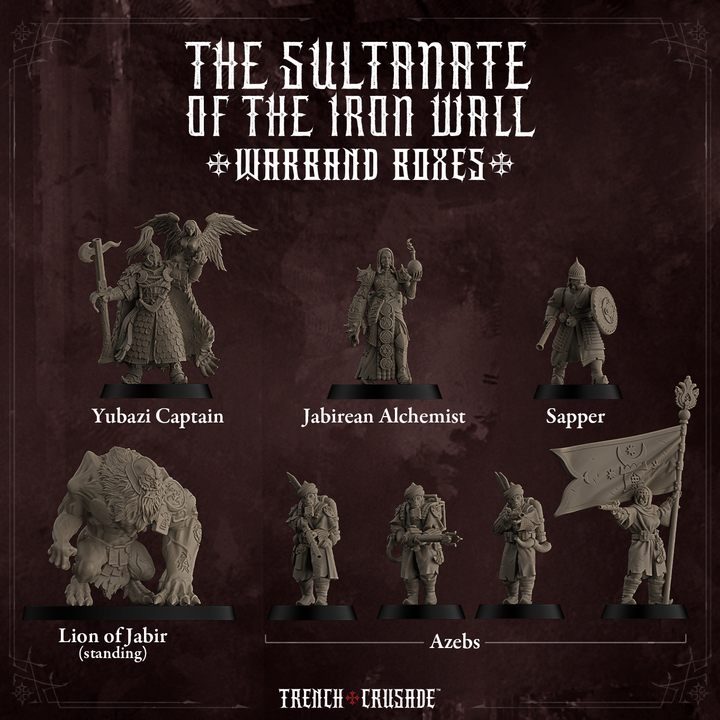
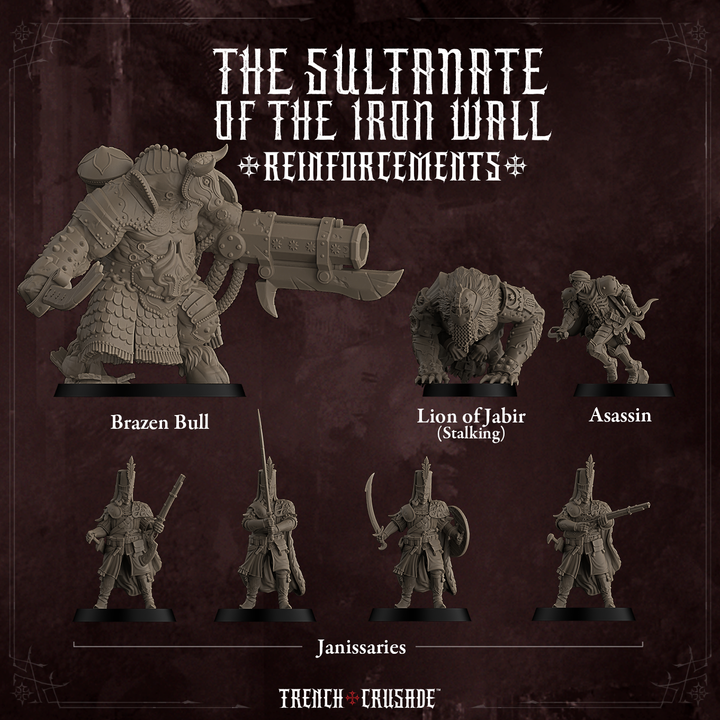
After the Infidels opened the gate and released Gog and Magog, The Creator of the Universe came to aid those in the Islamic lands ruled by the Sultan of Rûm. It was there that the great Iron Wall of Dhu al-Qarnayn manifested itself and within it the Sultanate of the Iron Wall became protected. The Iron Wall is the greatest defensive work in the world, protecting the Believers (of the Creator of the Universe) and keeping out the Heretics. Within the wall lost knowledge flourishes, and mosques of white marble and gold summon the Believers to pray for the Sultan’s army as it struggles to protect those living inside the wall as well those who travel along the vital trade routes. Though an understanding between the Church and the Sultanate exists, the leaders of those forces who travel beyond the Iron Wall will tolerate no interference and do not hesitate to crush those who would hinder their mission, especially against the Infidels who released Gog and Magog.
Trench Crusade Rules
Trench Crusade rules are free, and always will be. Just recently, the rules have moved out of playtest and the ‘1.0.0.’ edition, marking the first full ruleset and book layout since the Kickstarter launch. You can download the latest version of the rulebooks and warbands directly from their website here:
Trench Crusade is miniatures-agnostic game, meaning players can use (and are even encouraged to use) miniatures from their favorite tabletop war game, instead of being required to purchase and play with the official game miniatures. So, even though this guide is using the official .stl files for painting, these colors and techniques can be applied to any model you’re wanting to use for the game. The base size of the figure is the most important aspect, and each unit in the rulebook says what size base they’re on (25mm, 40mm, etc.). So, whether you’re building custom units or printing your own, make sure you choose the right bases.
Directly from the rulebook “We provide a full range of models for Trench Crusade, but we are also enthusiastic about our support for independent miniature manufacturers. We encourage players to use whichever miniatures bring your vision to life; the battlefield is yours to shape.”
In a standard game, each player fields a small, elite warband of anywhere from 7-12 miniatures, depending on the size of the game (or how many Ducats you can spend), and what upgrades you choose to give them. Players alternate turns activating one model at a time, resolving their Actions by rolling a number of six-sided dice, and combining the results of two of them. Typically you would start with a pool of just two dice, but abilities, equipment, and gameplay can increase or decrease the number you roll, where you then choose the two highest or lowest results. The outcomes, regardless of number of dice and abilities, are always the same: a result of 2-6 is a fail, 7-11 is a success and a 12+ is a critical success. So, rolling more dice increases the chances of getting a pair of dice to succeed.
3D PRINTING TRENCH CRUSADE
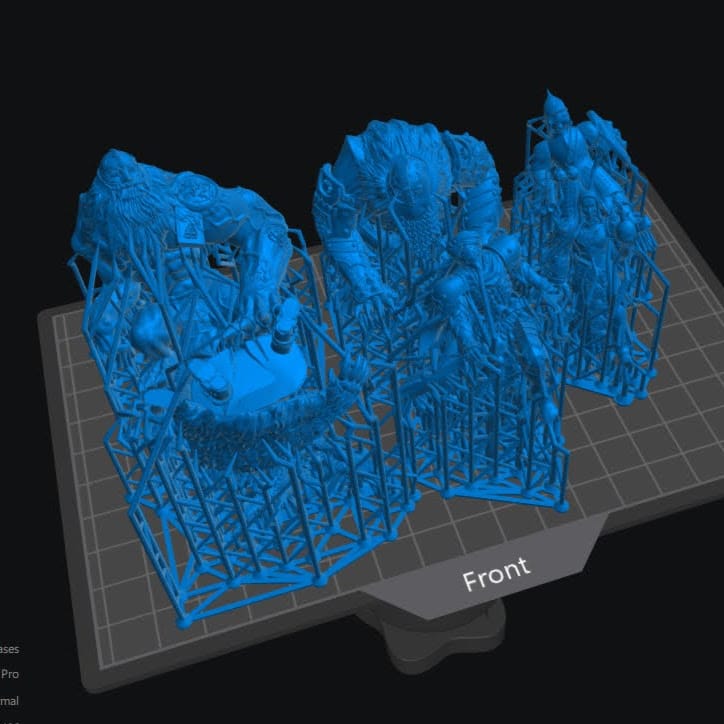
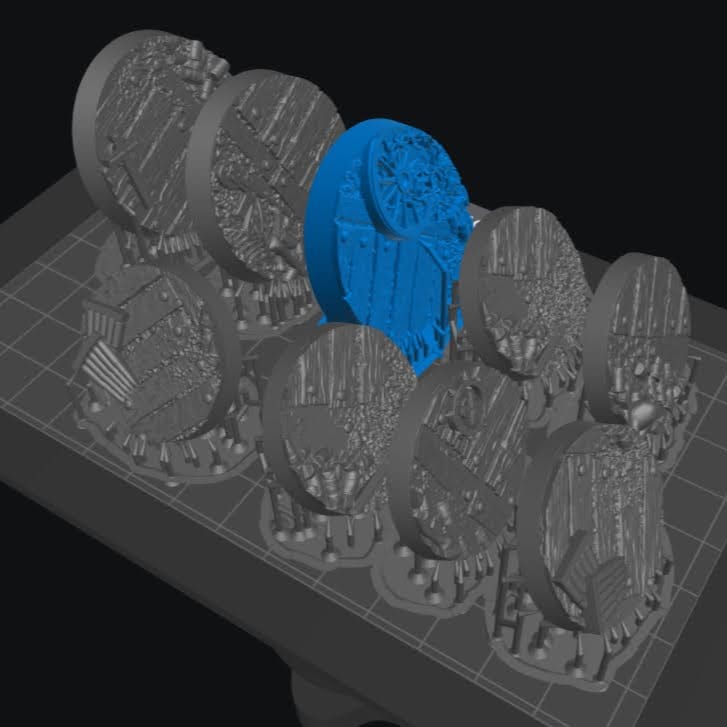
To help get the game off the ground and provide some official miniatures for the game, Fortress Factory, Inc. released a series of .stl files for each faction. These are digital files that are perfect for any 3D printing/tabletop wargaming enthusiast. Many of the models are multi-part, and the files come with unsupported and pre-supported options.
Trench Crusade .STL Catalogue
You can browse the entire Trench Crusade .stl range from Factory Fortress Inc. here:
If you’re not keen on 3D printing or know anyone that is, you can purchase the physical files from Only-Games.co the only officially licensed provider of the physical prints for the game.
Recently, Trench Crusade announced that they will be releasing plastic kits for their range, starting with the Prussian Stosstruppen. Future releases will be for all of the factions, released in Troop Boxes, Elite Boxes, and Hero Boxes. The Troop Boxes will be multi-part, with different loadout options depending on how you want to display your minis. Major future releases will not be in .stl or resin format - only plastic. You can read more about it here from their official post.
The Iron Sultanate .STL Download
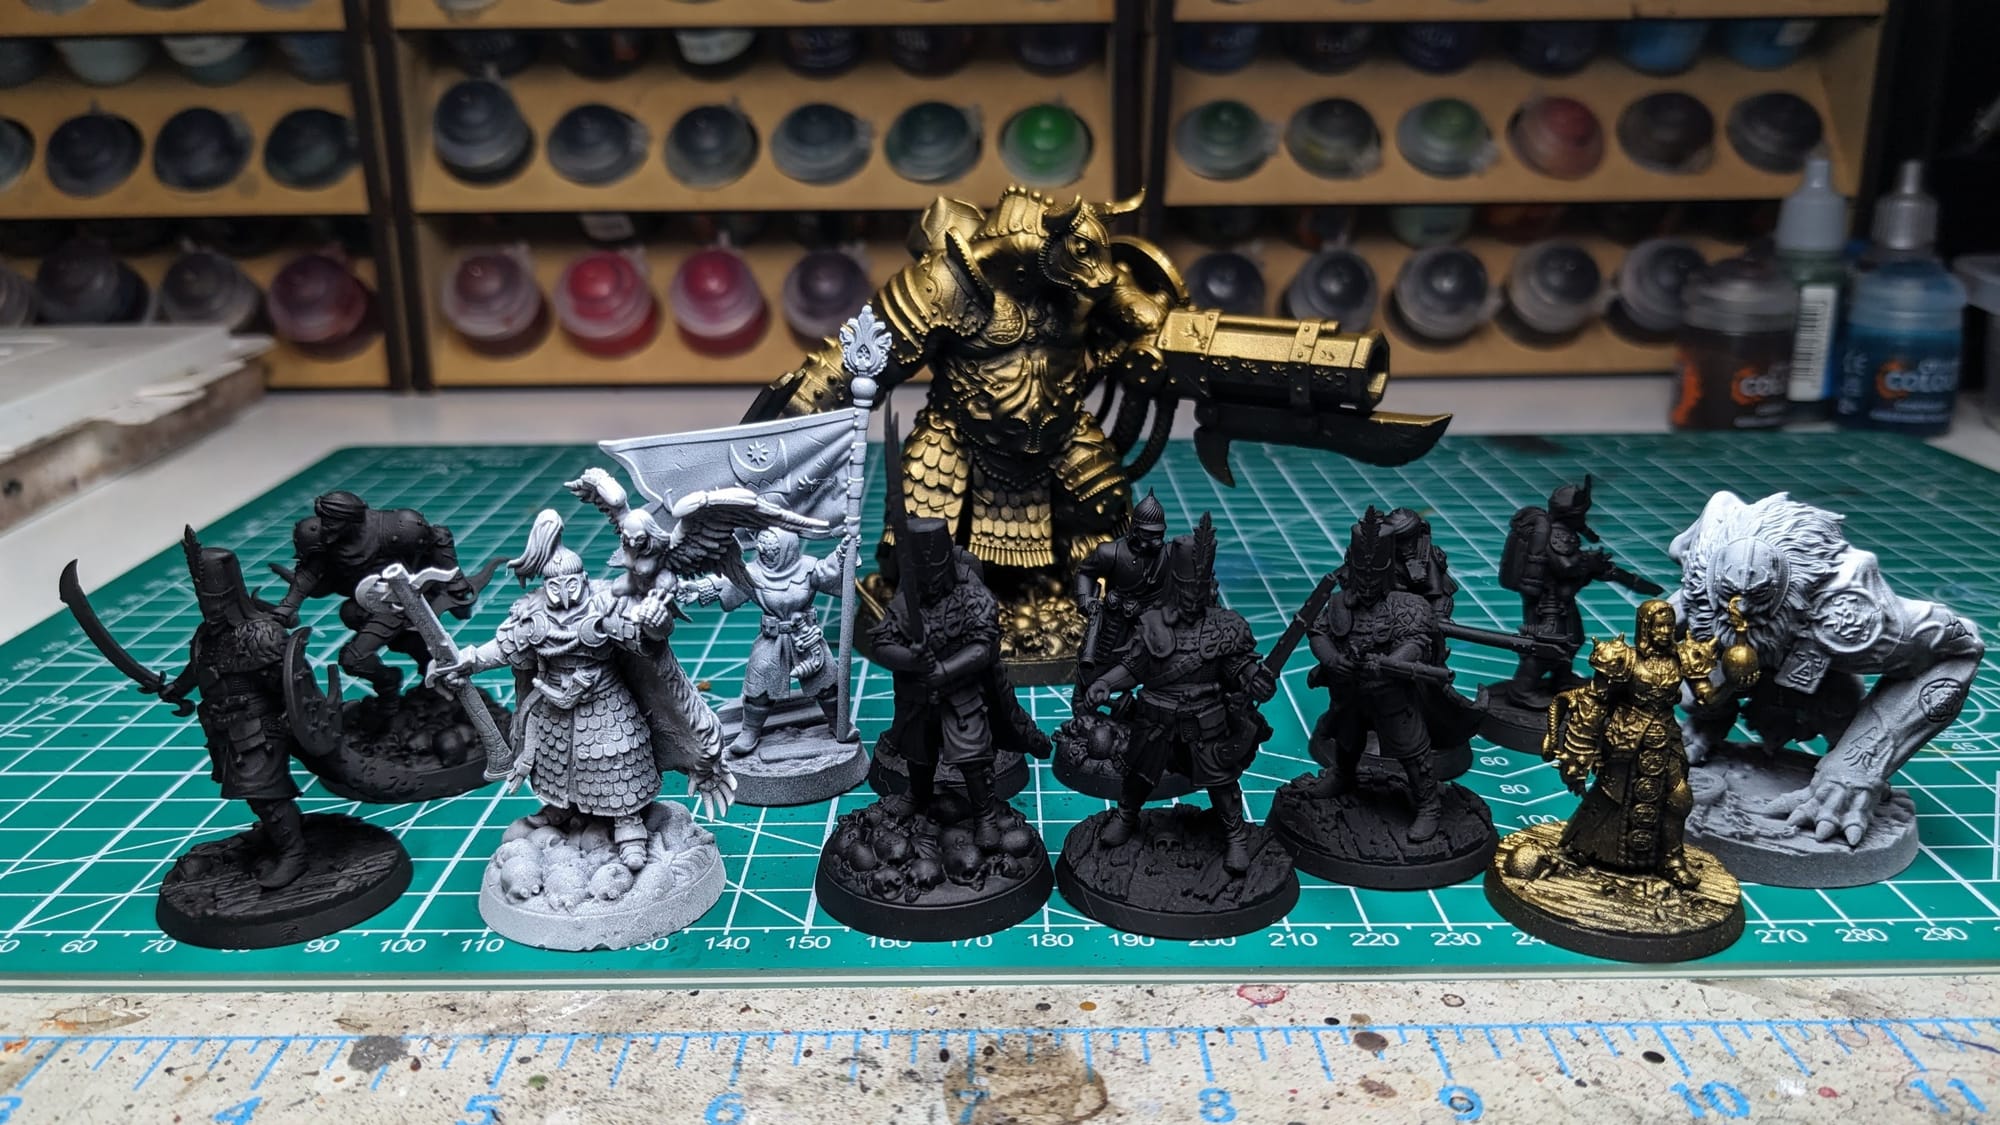
If you want to purchase the official warband miniatures, you can purchase them from Factory Fortress, Inc. on MyMinifactory. Trench Crusade was kind enough to provide me with the files to print for the warband.
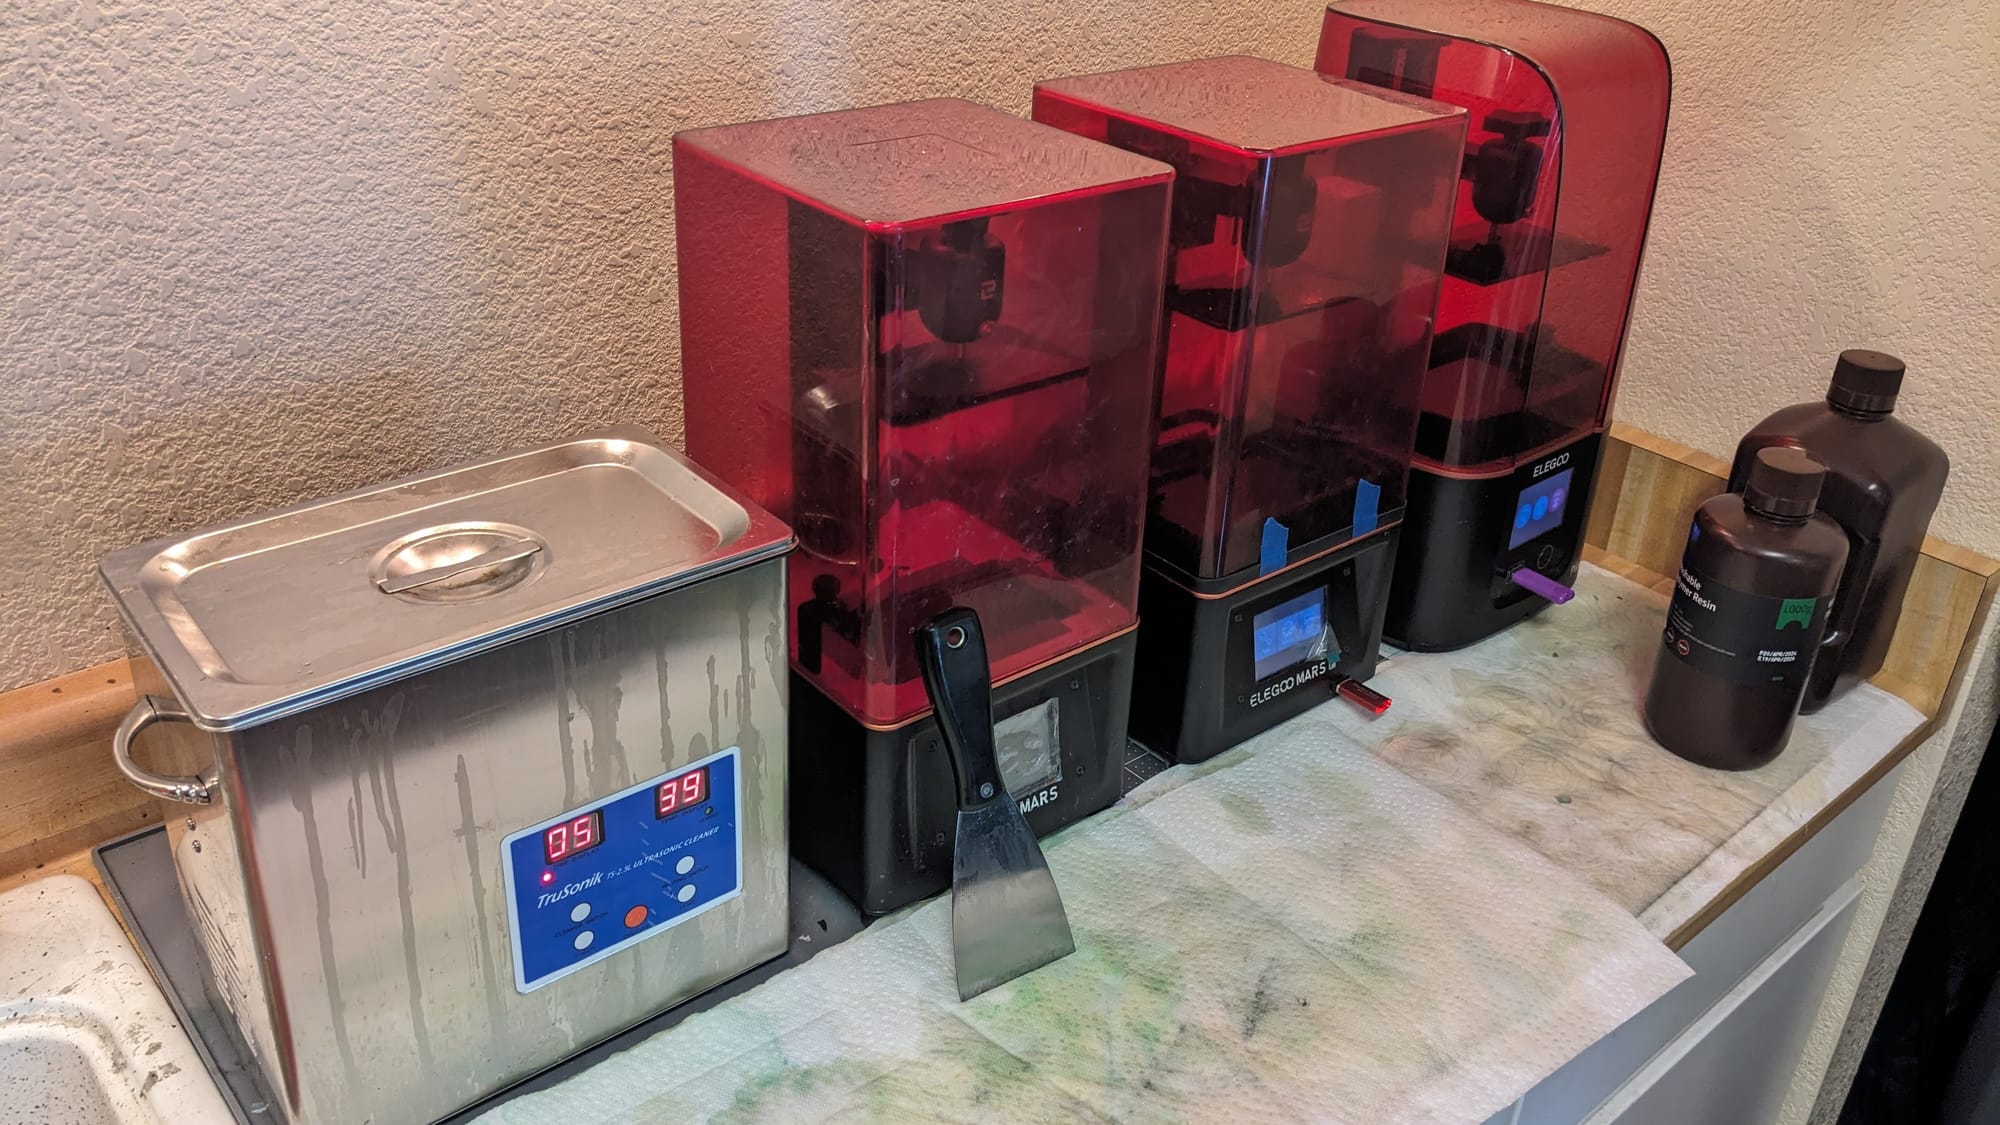
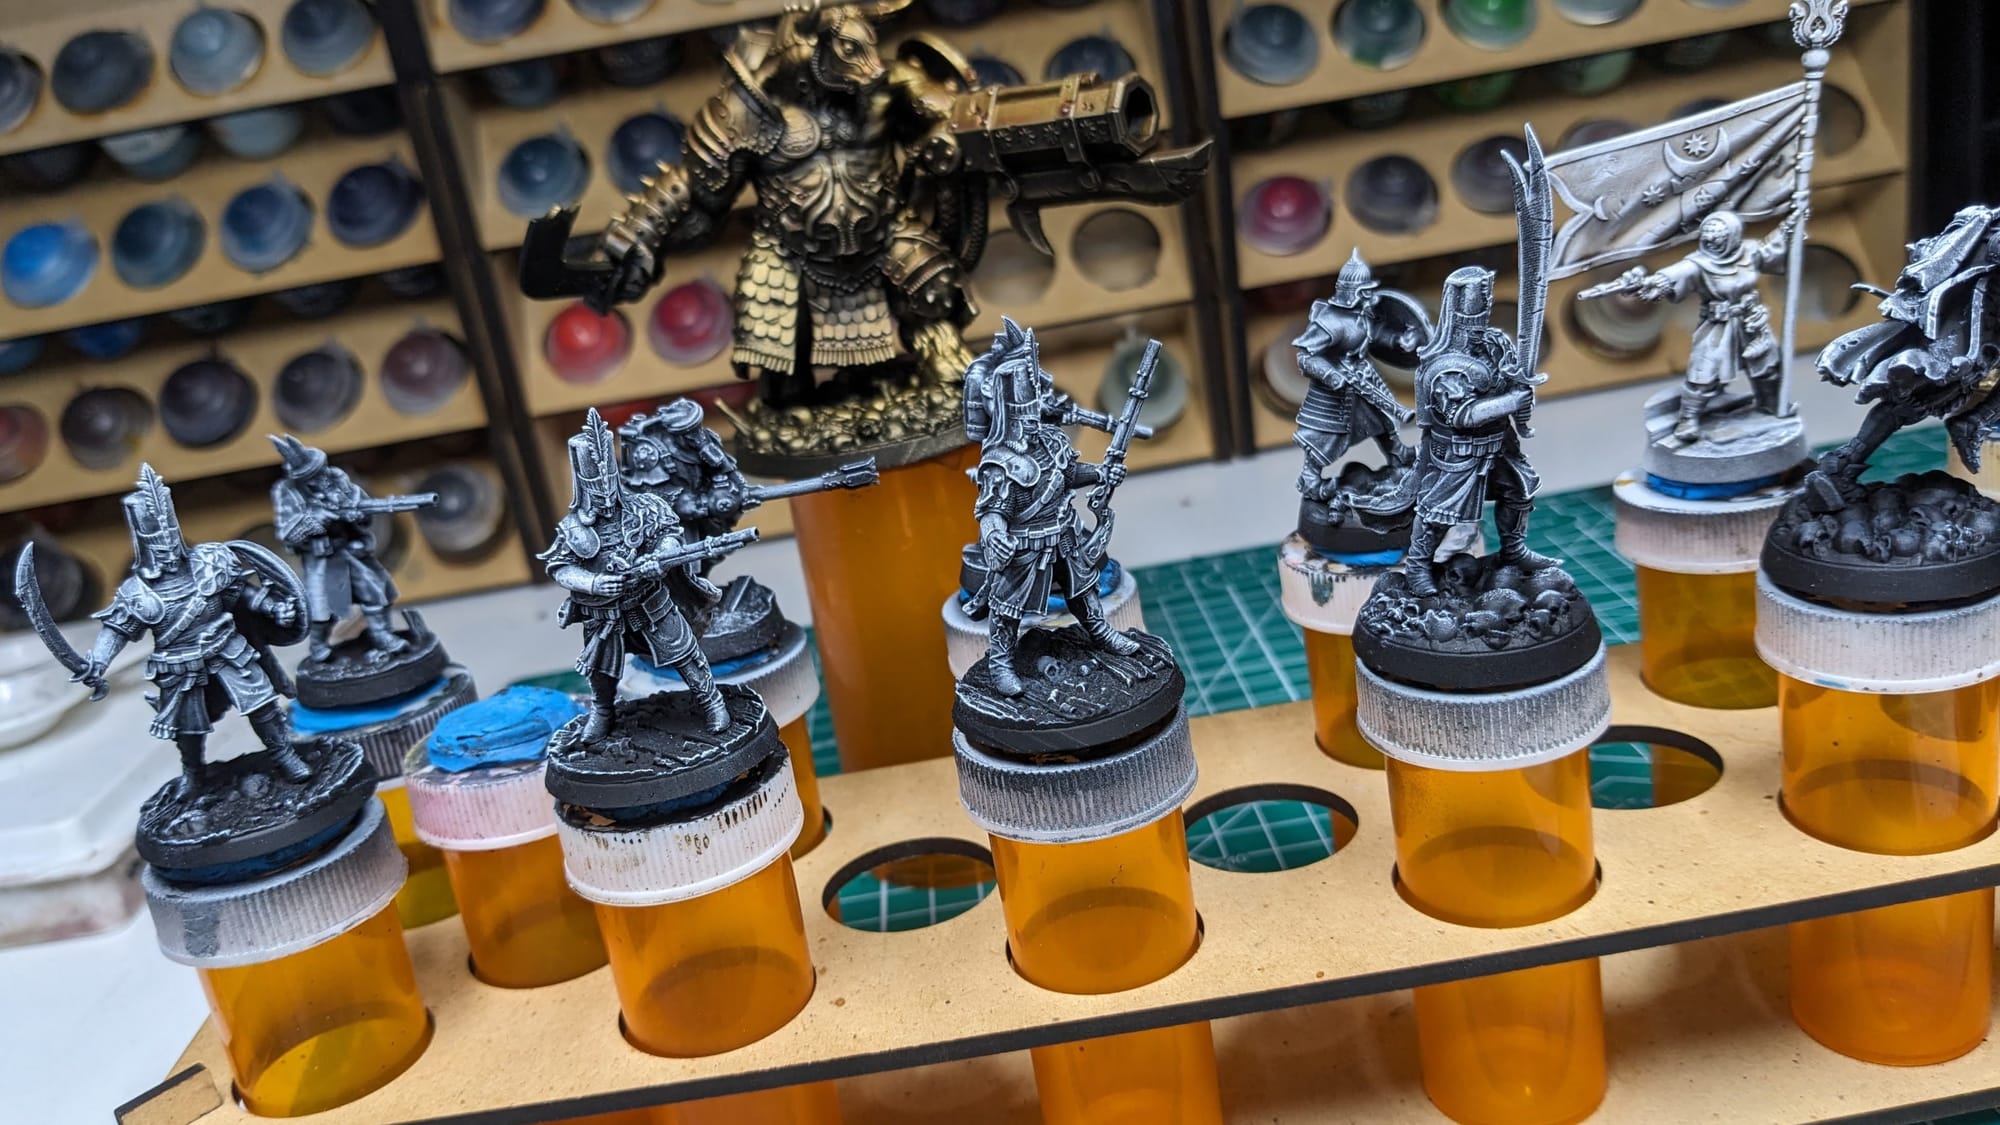
Printing & Prepping
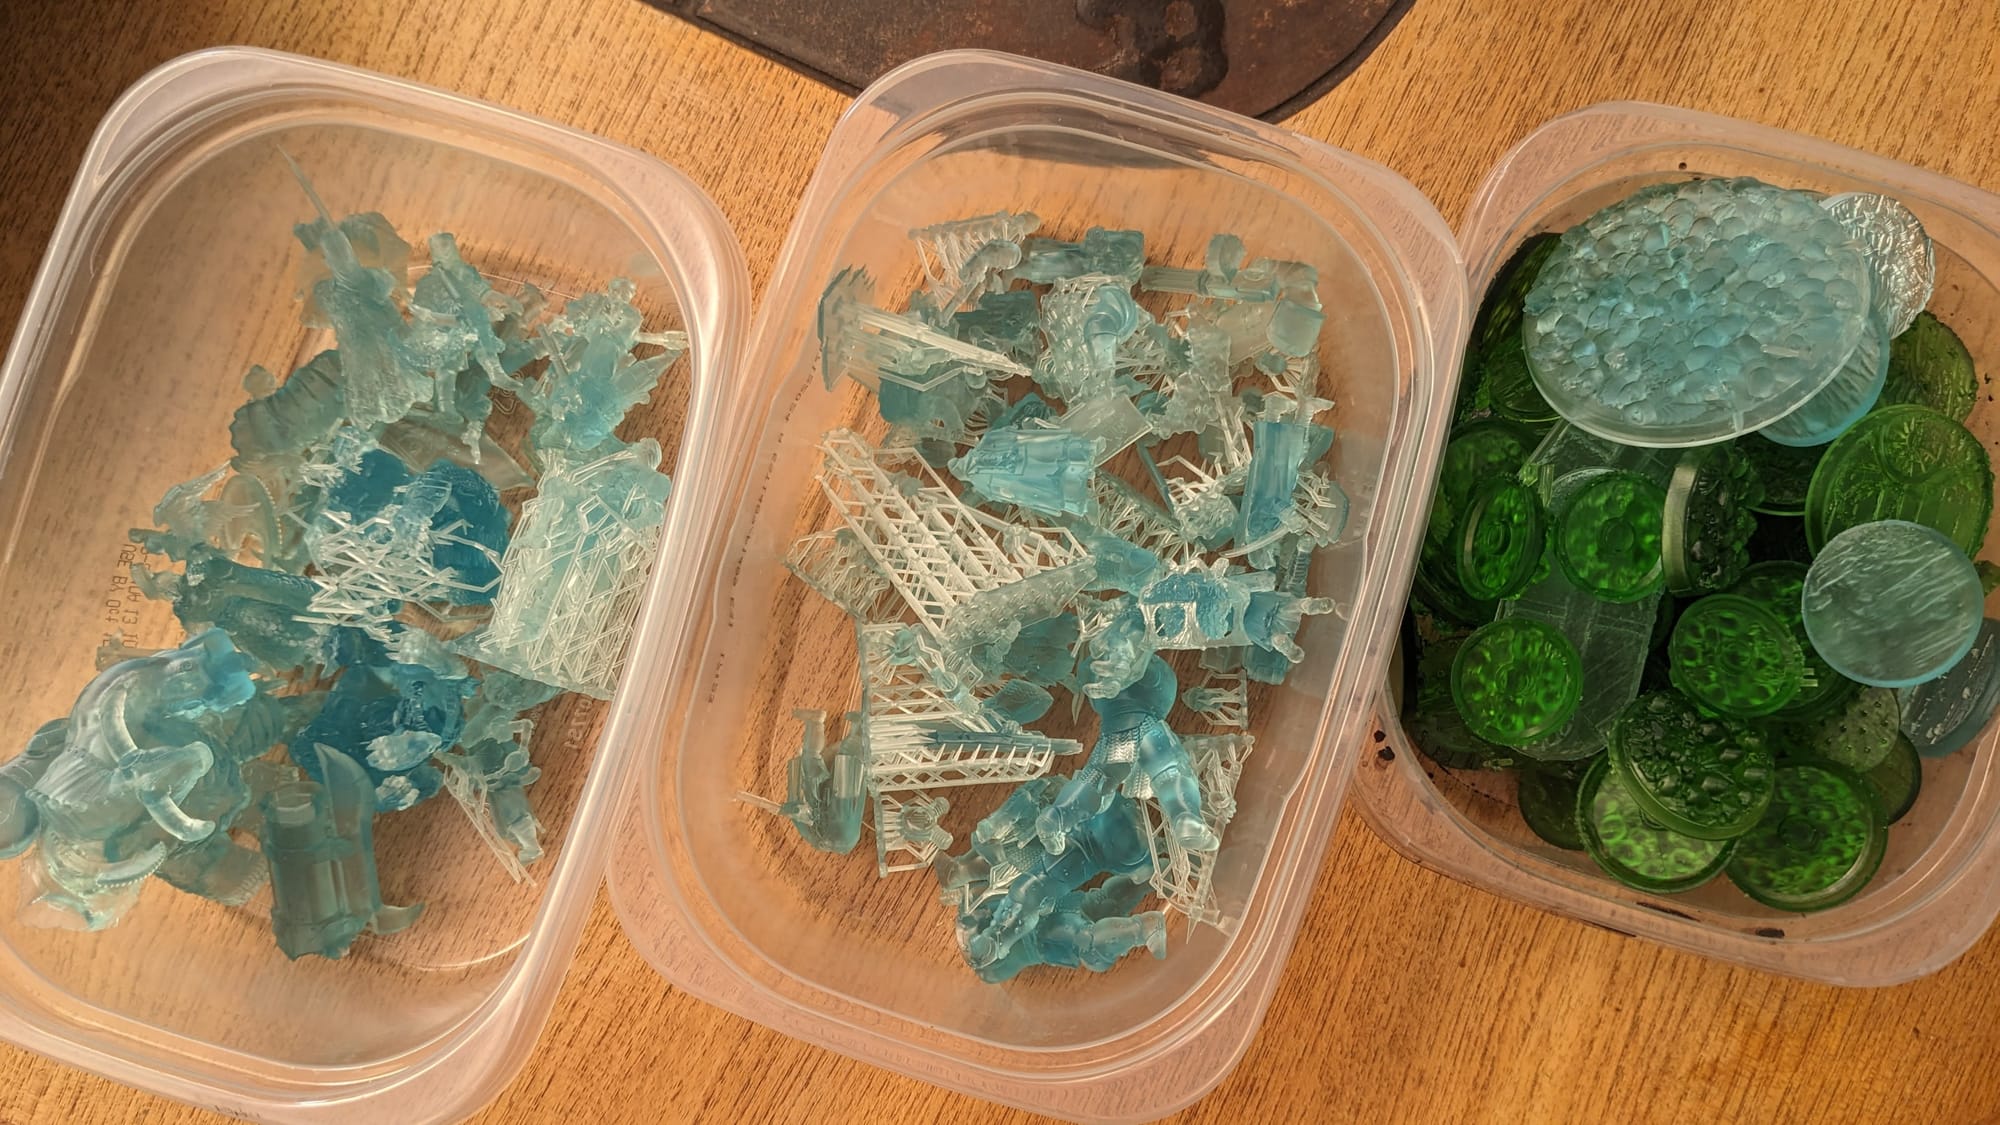
I have a handful of small SLA resin printers, and so I used my older Elegoo Mars Pro 3 to get the best quality prints for the models. I wanted to try printing the pre-supported units, as those are very hit-or-miss for their quality of pre-supports. I was very impressed with the outcome, and only had a few small issues that required some reprints (some of which I supported myself).
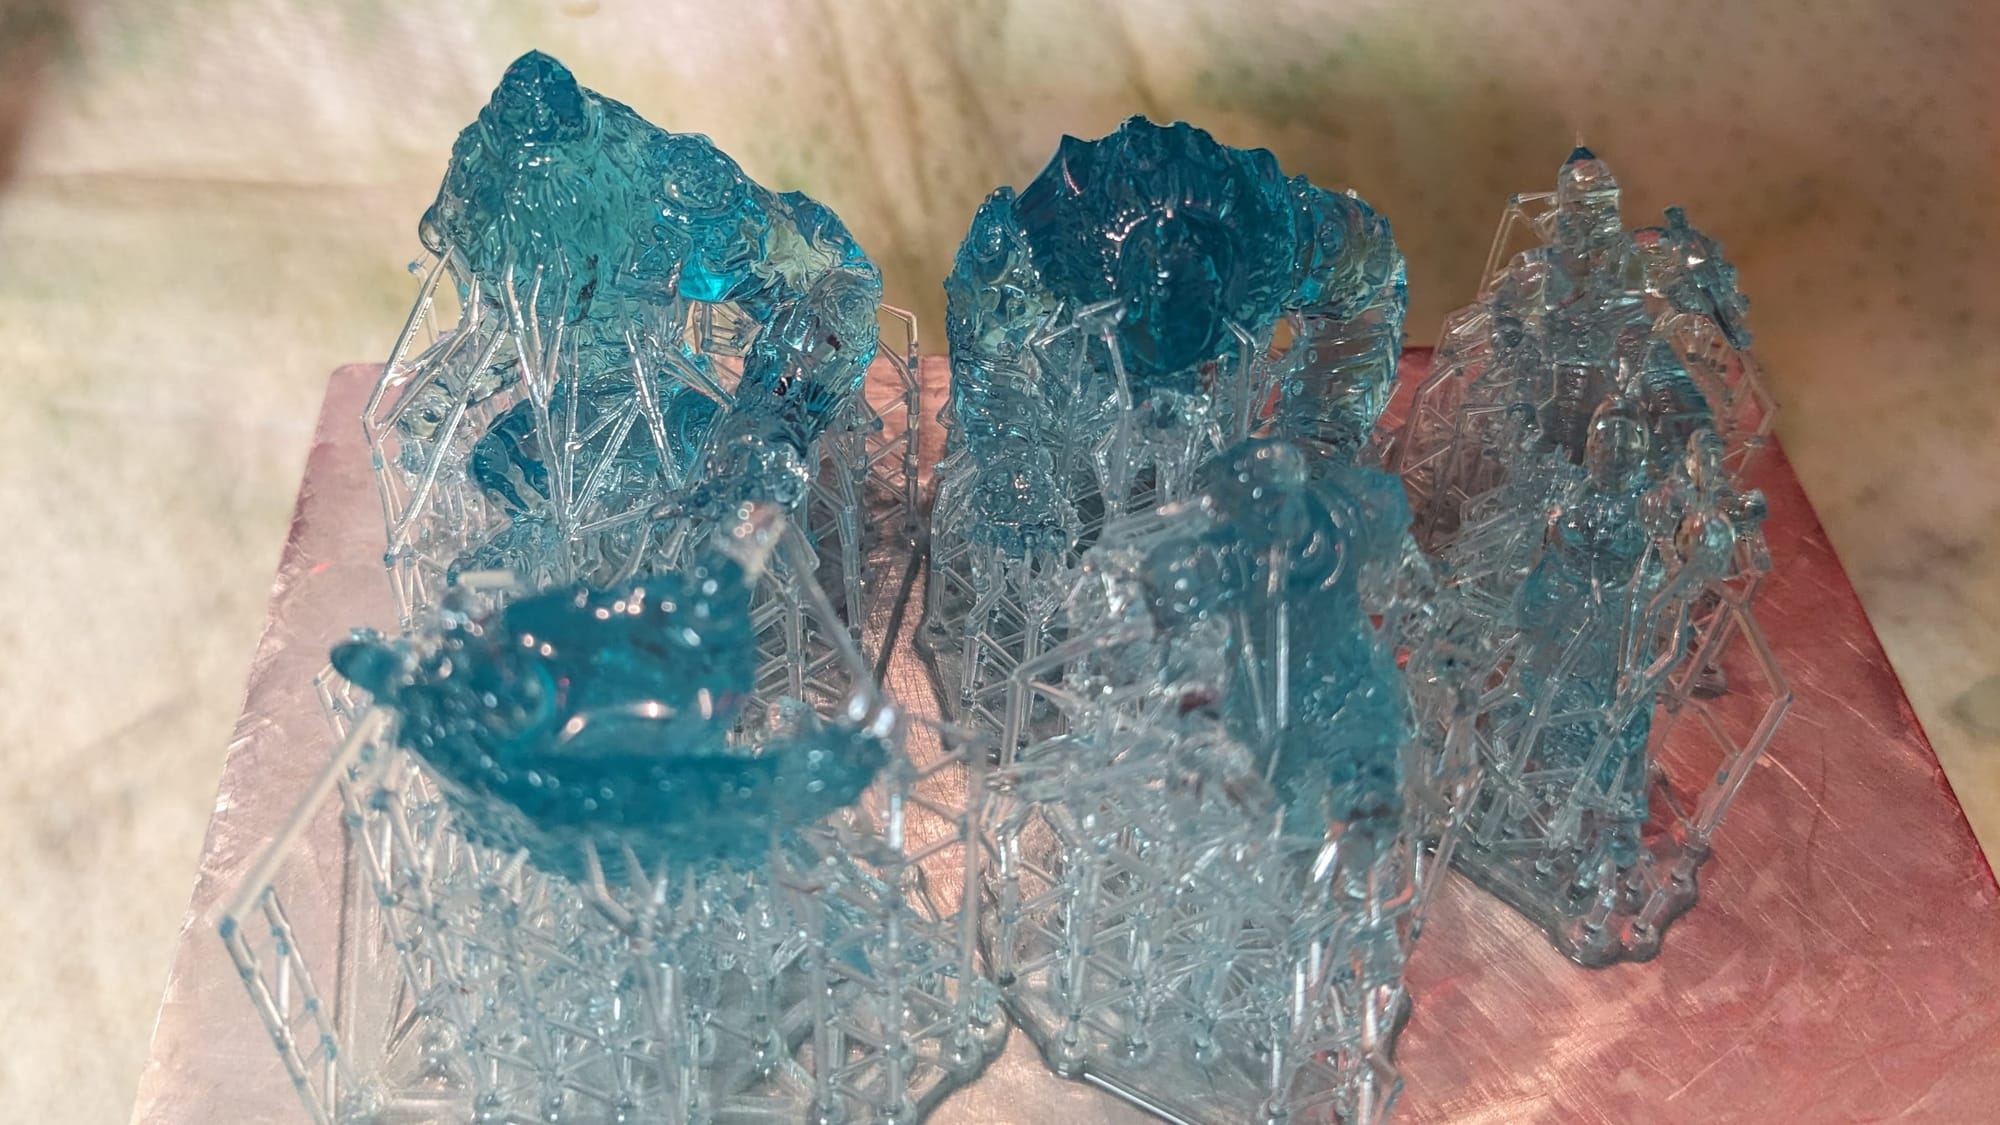
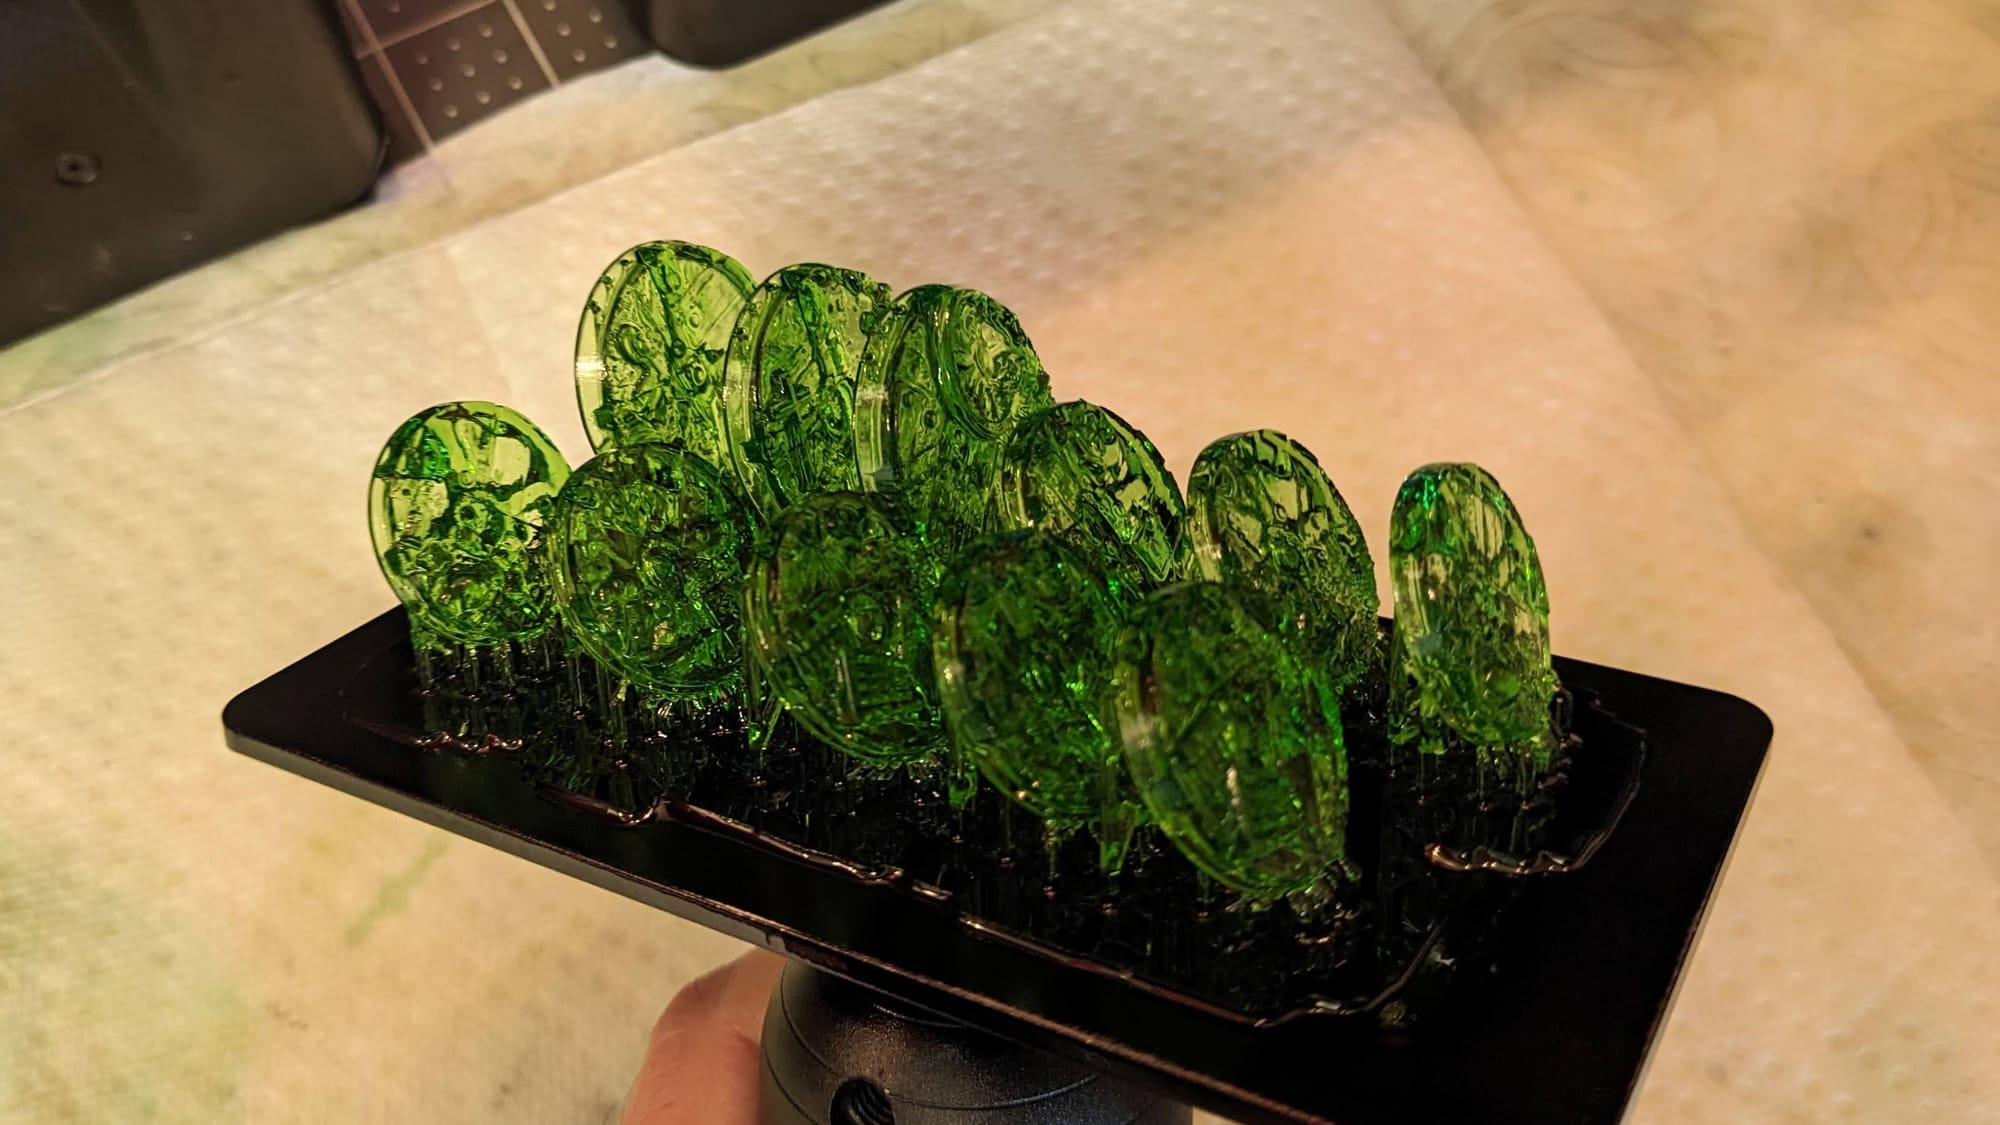
For printing, I use water-washable resin, which allows me to clean them in a sonic cleaner using the degreaser Simple Green. Sonic cleaners don’t do well with flammable solvents, like acetone, as they can catch on fire and/or explode. I’m not being flippant here - seriously, be mindful of what chemicals you use where. Anyway, a degreaser in a sonic cleaner really helps to shake loose the remaining resin, especially for the hollowed-out minis. Once that’s done, I give them a quick water rinse in a 5 gallon bucket of water, peel off the basing, and let them cure. The temperature from the sonic cleaner allows me to easily remove the small supports from the minis without running the risk of breaking the model itself. If there is a sword or rifle I’m worried about accidentally removing along with the supports, I just clip those.
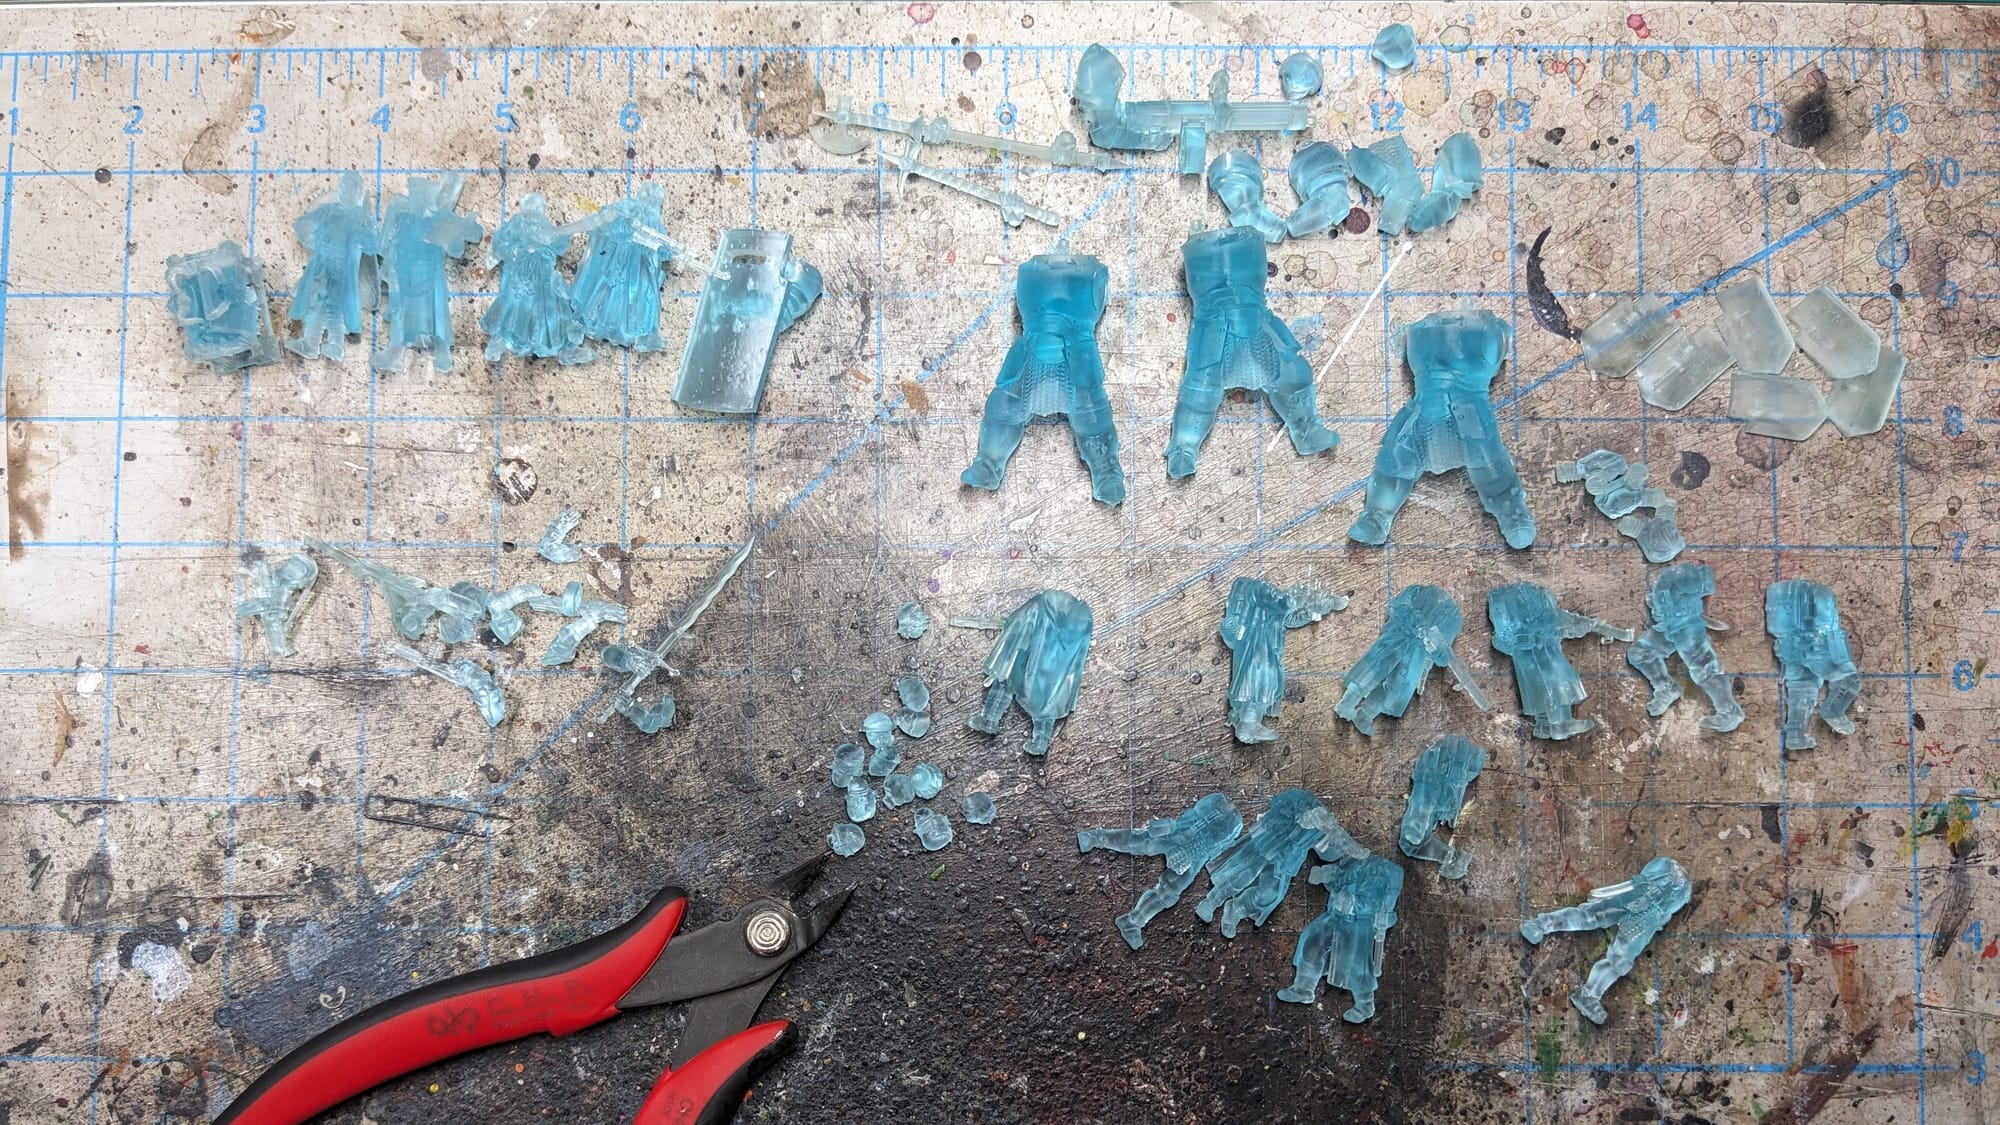
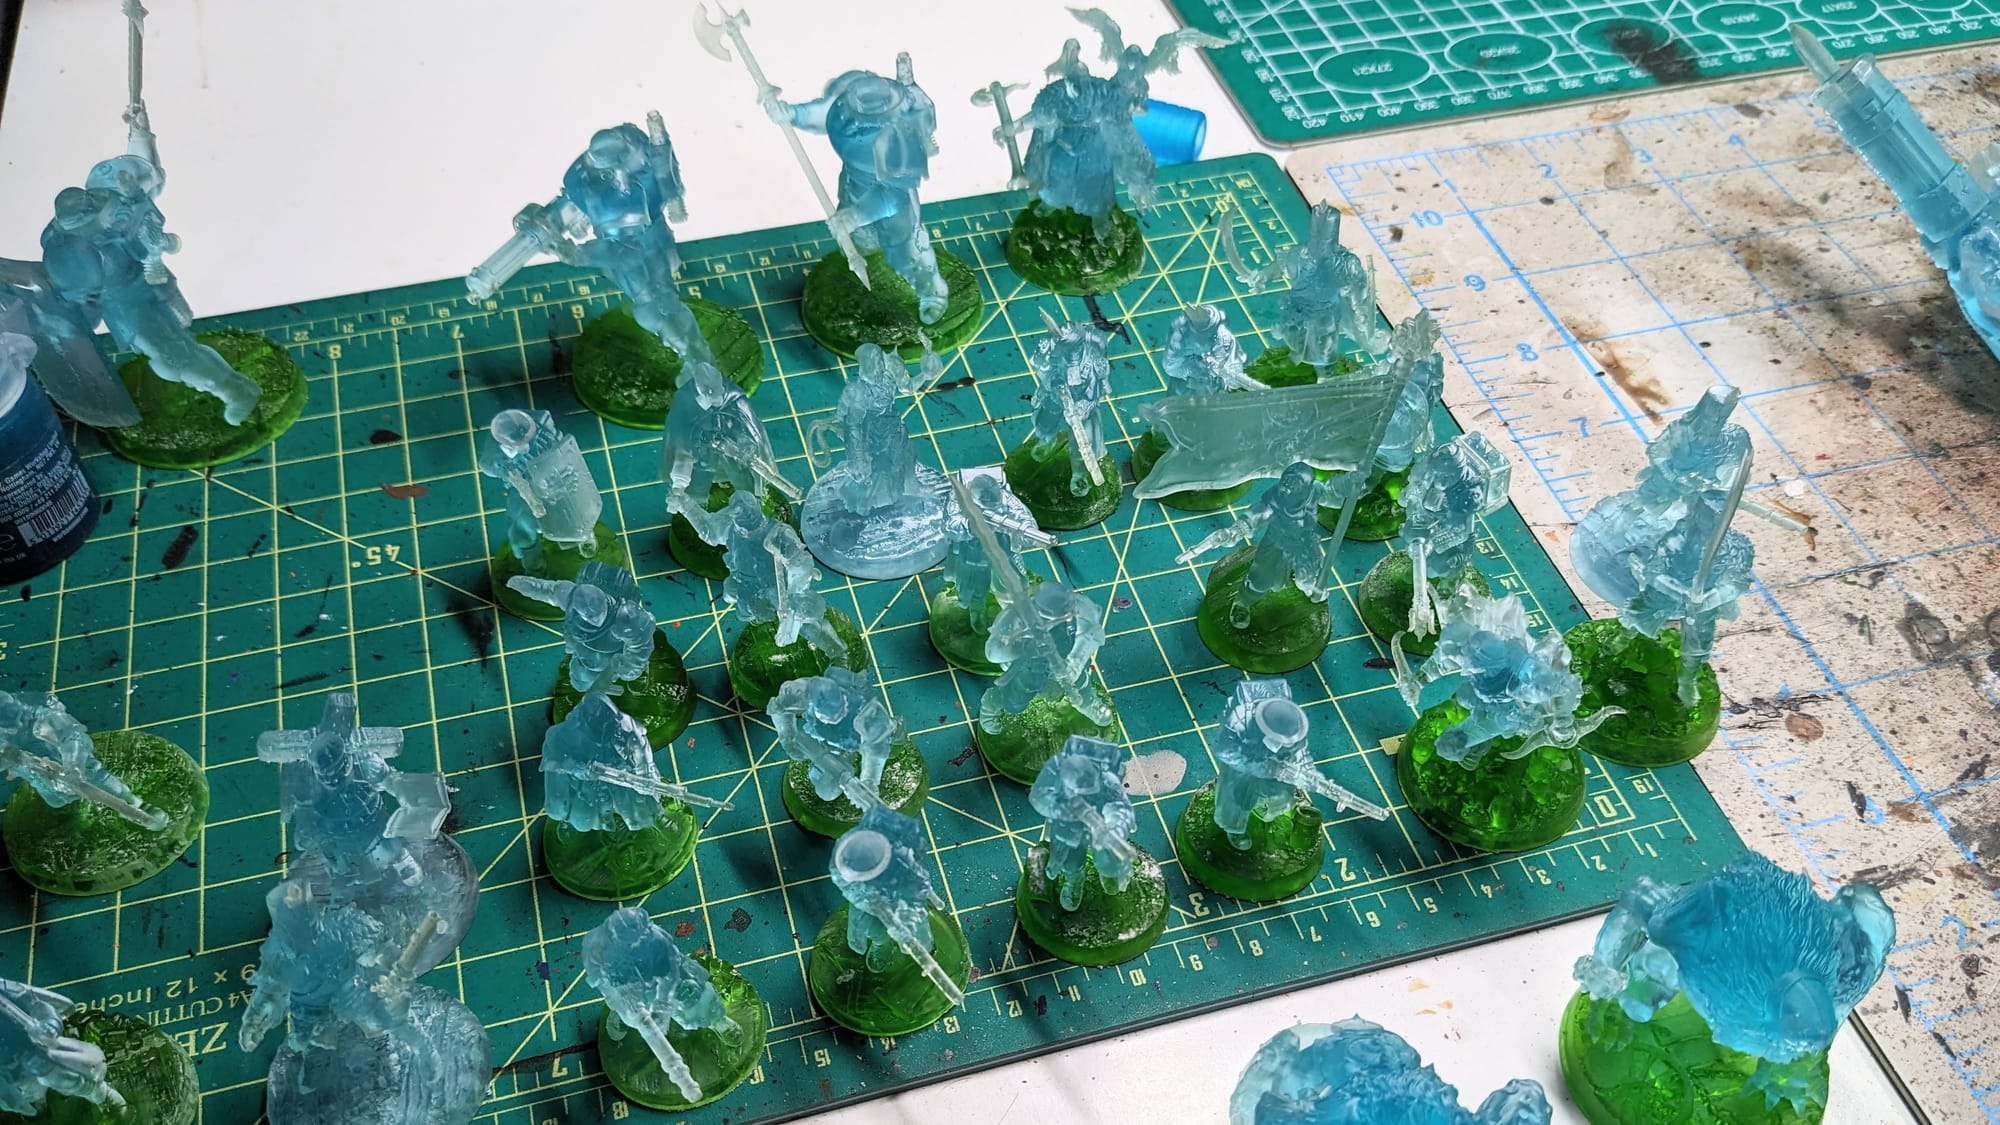
Once the minis are cured, they’re ready for priming!
PAINT & BRUSHES
Everyone’s paint collection is different, and there is no ‘right way’ to paint your models. I use a wide variety of paint lines, but the majority of what I use for painting is Monument Hobbies’ Pro Acryl, Games Workshop’s Citadel Paints, and Army Painter’s various paint lines. For Citadel and Army Painter paints, I also make sure to mix in Liquitex Flow-Aid Additive to the paint pots and dropper bottles so that the paints are a little thinner and ready to add right onto my wet pallet or paint tray.
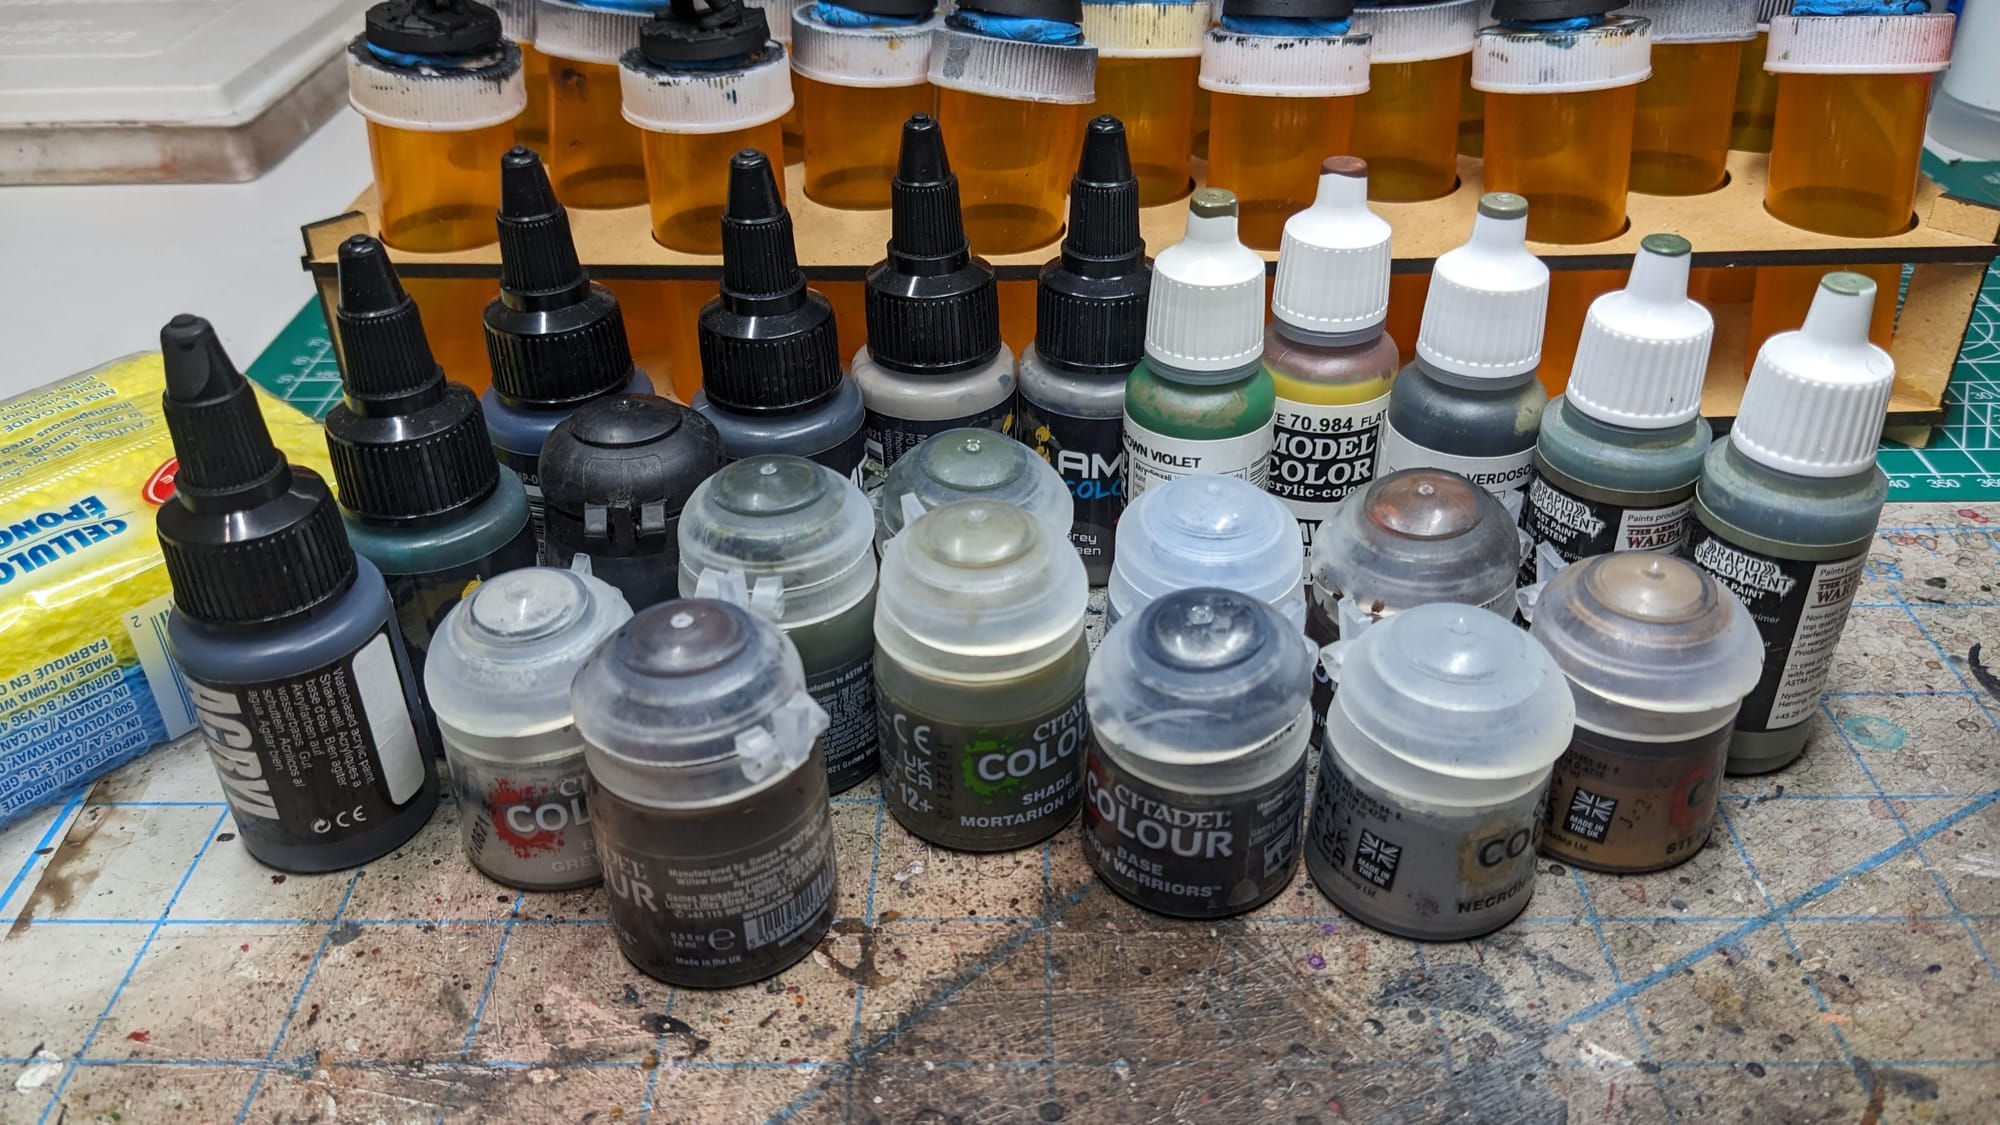
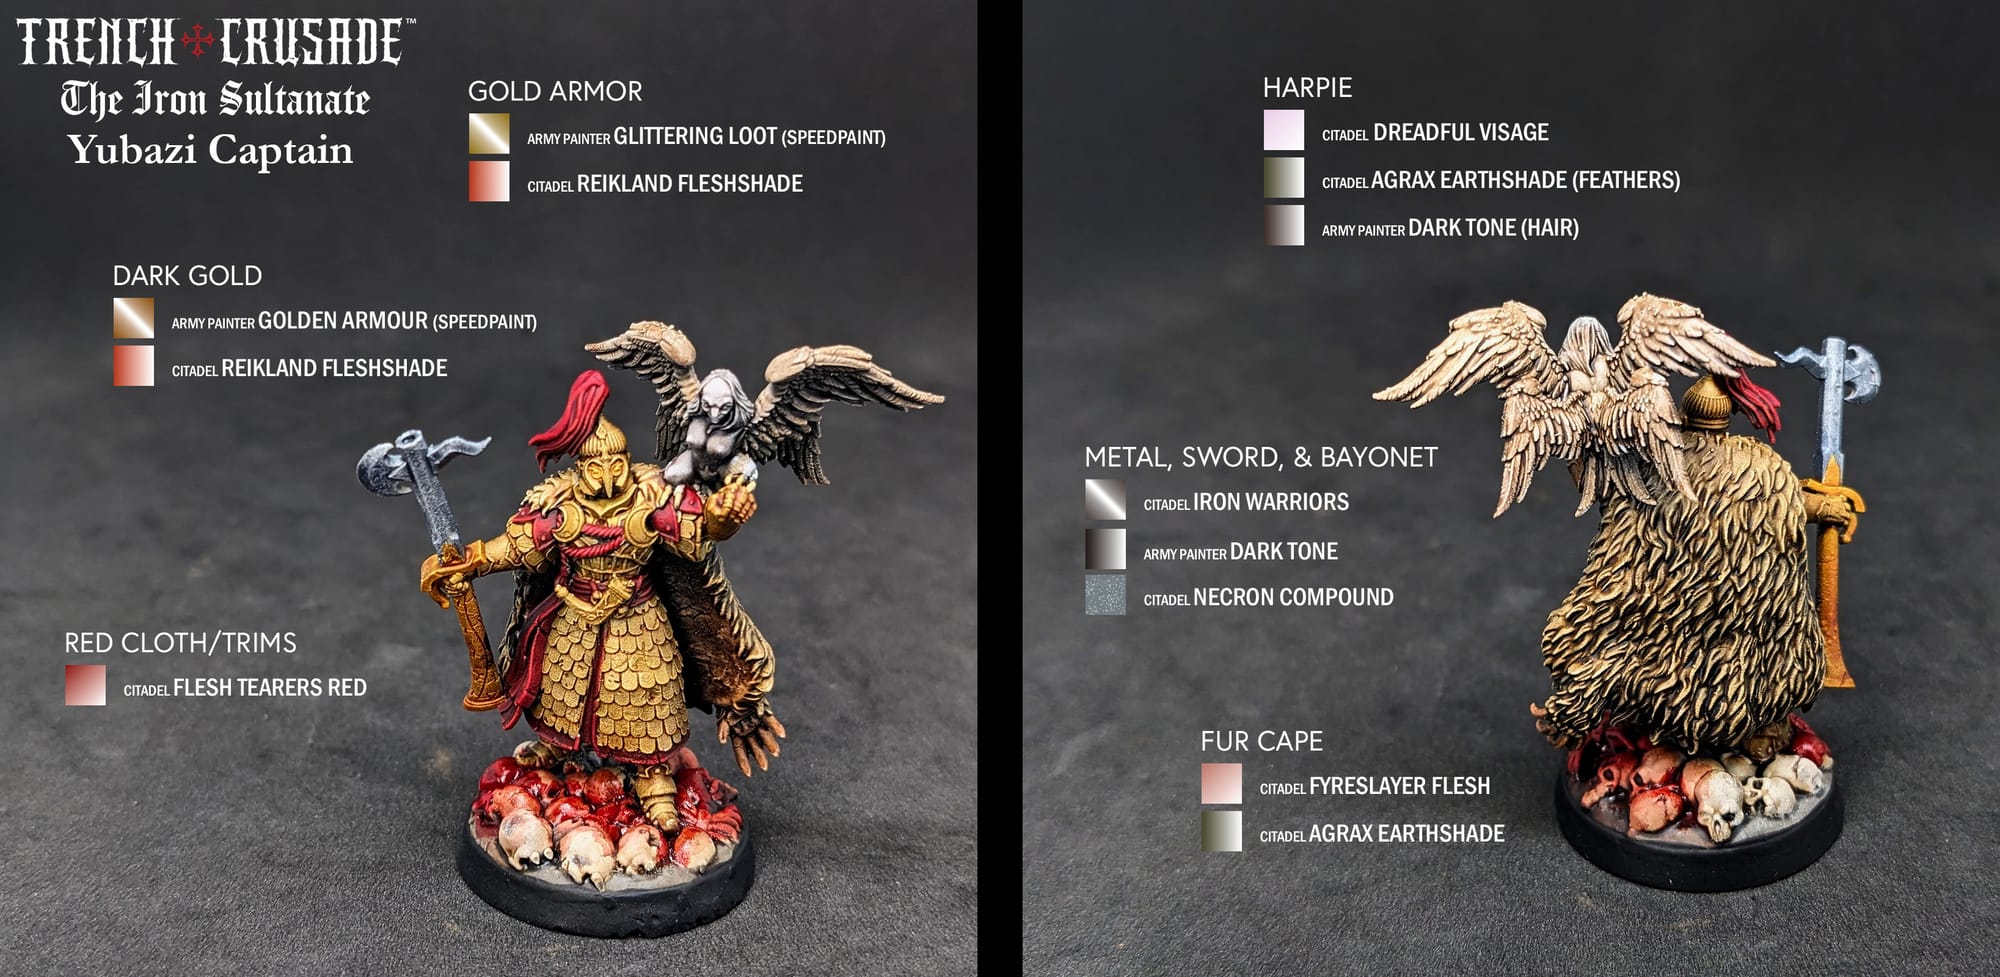
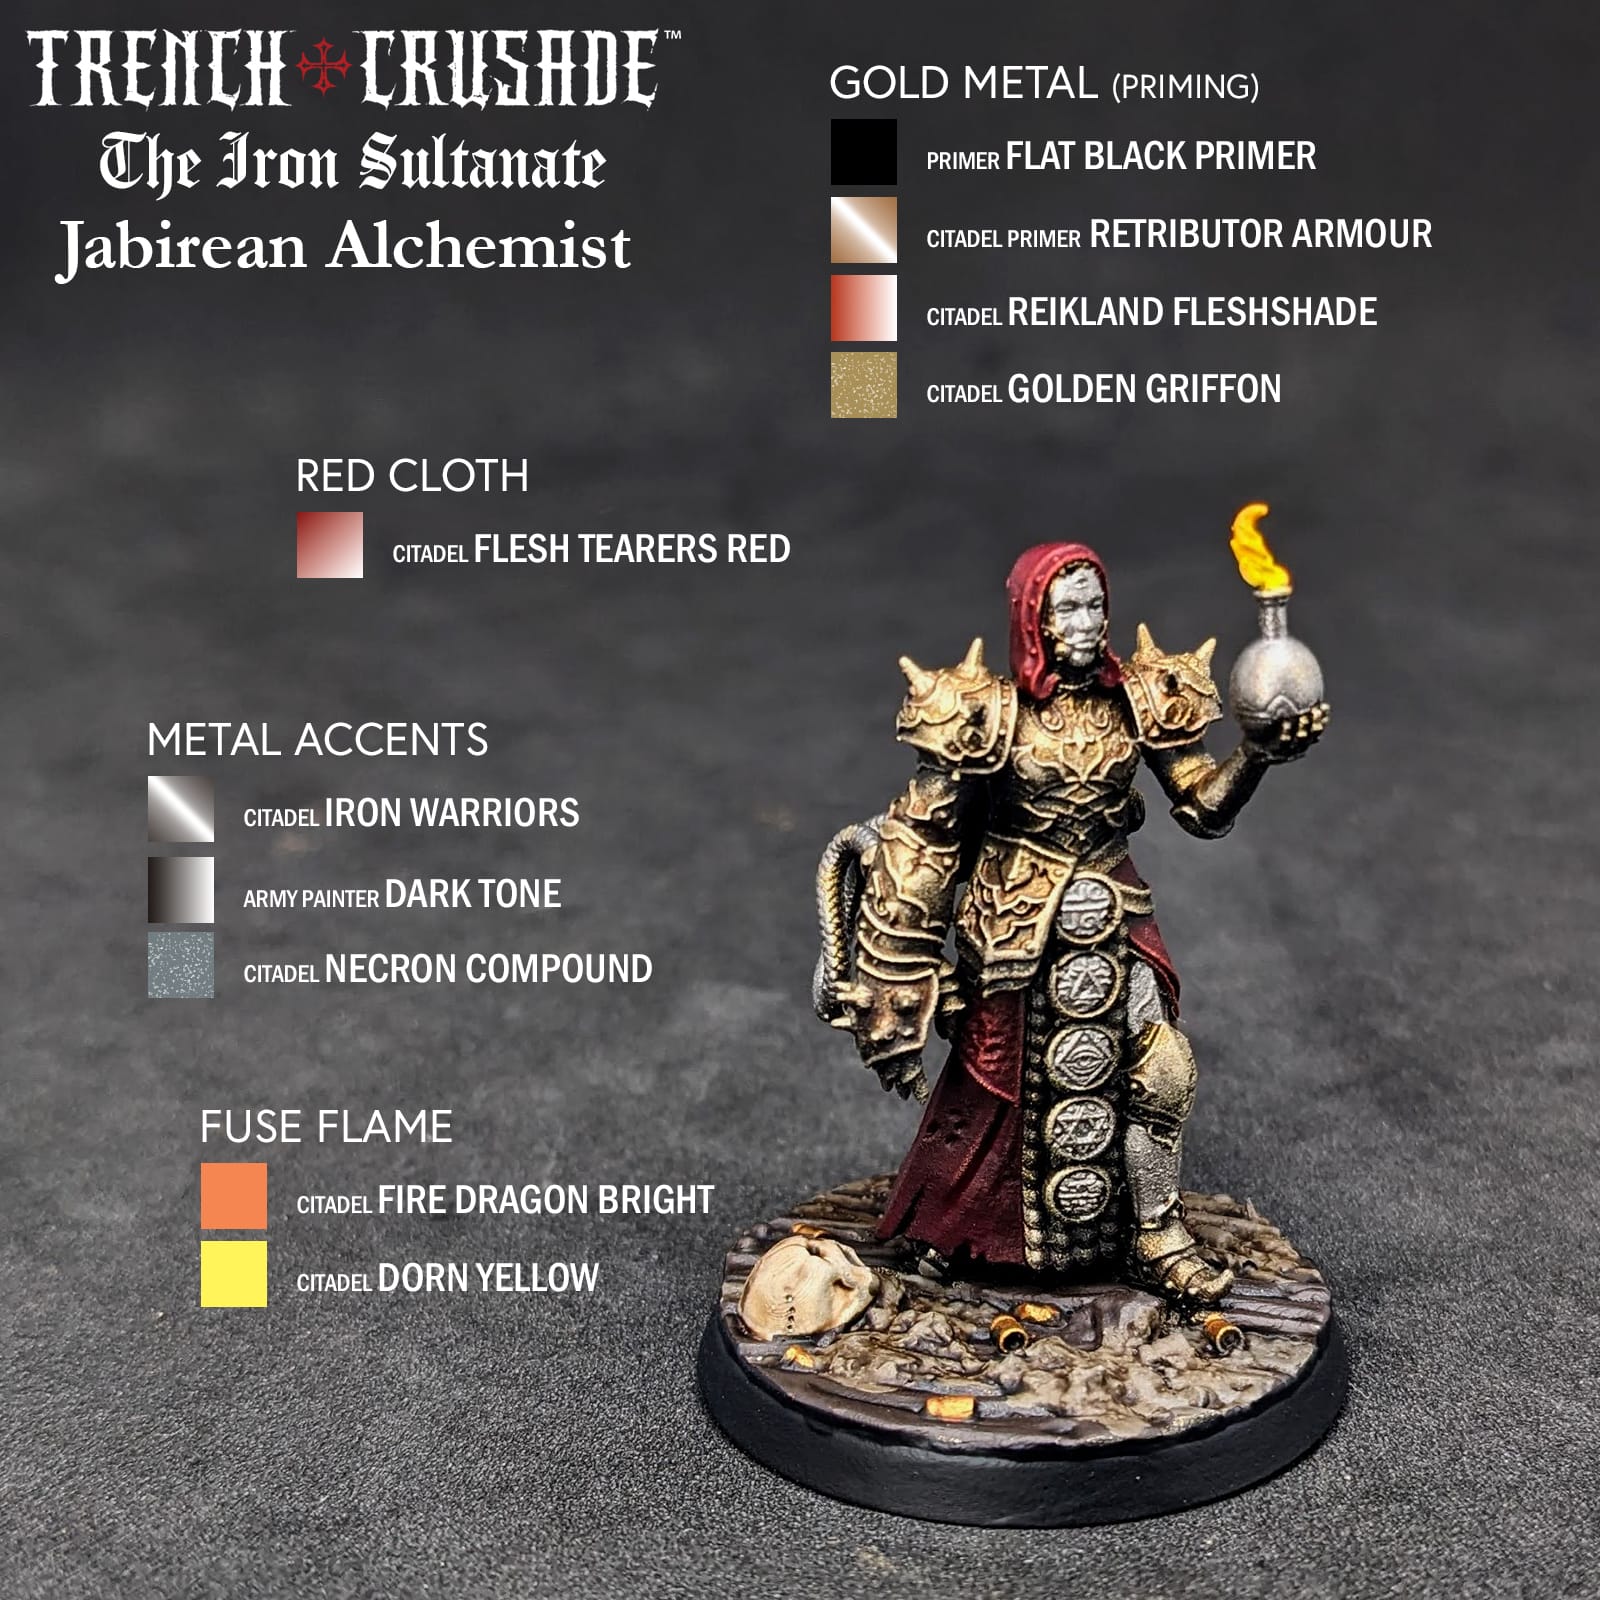
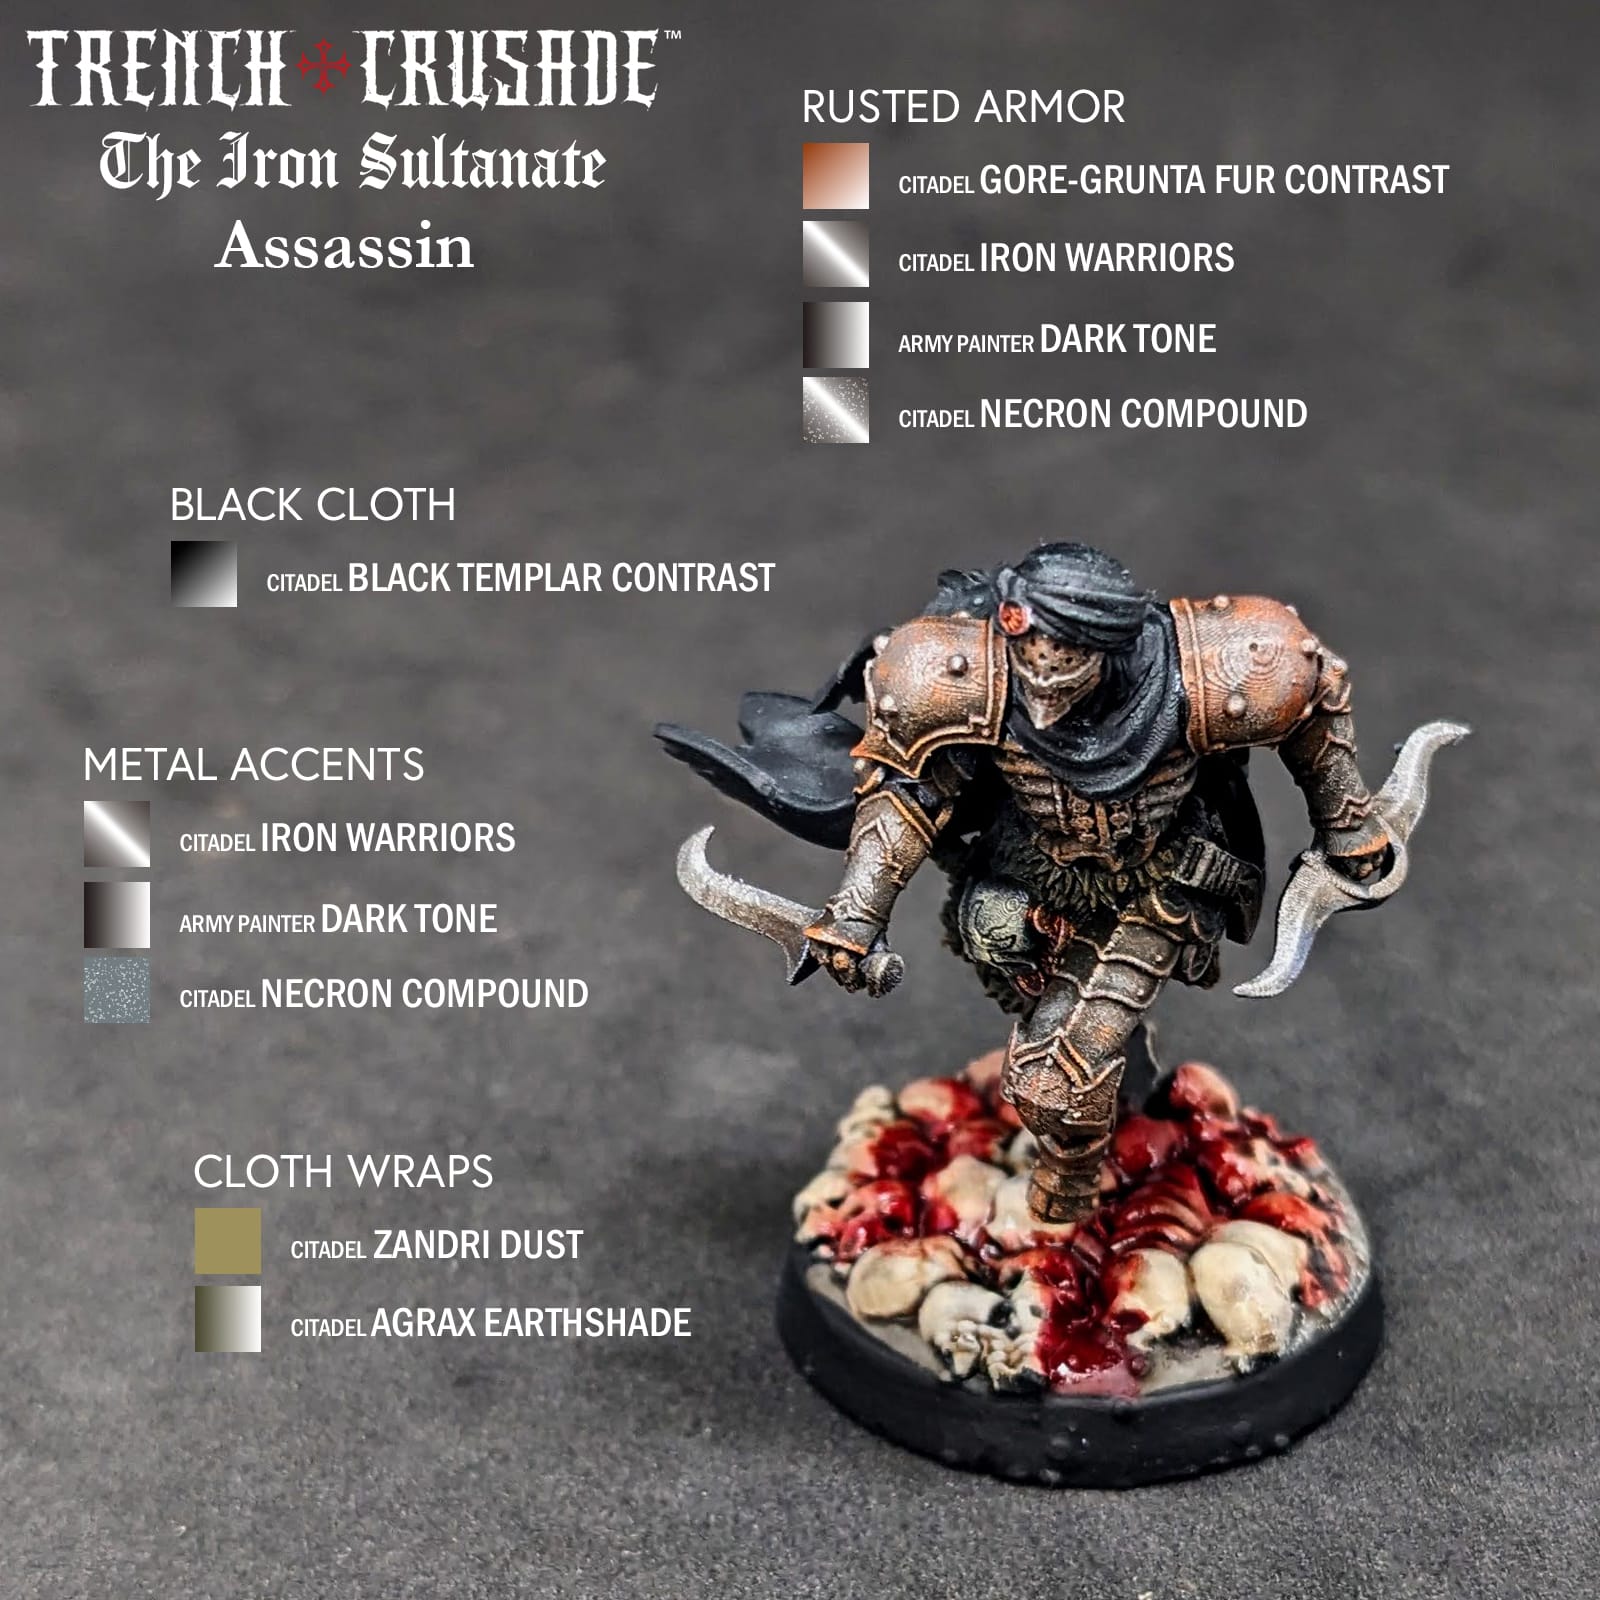
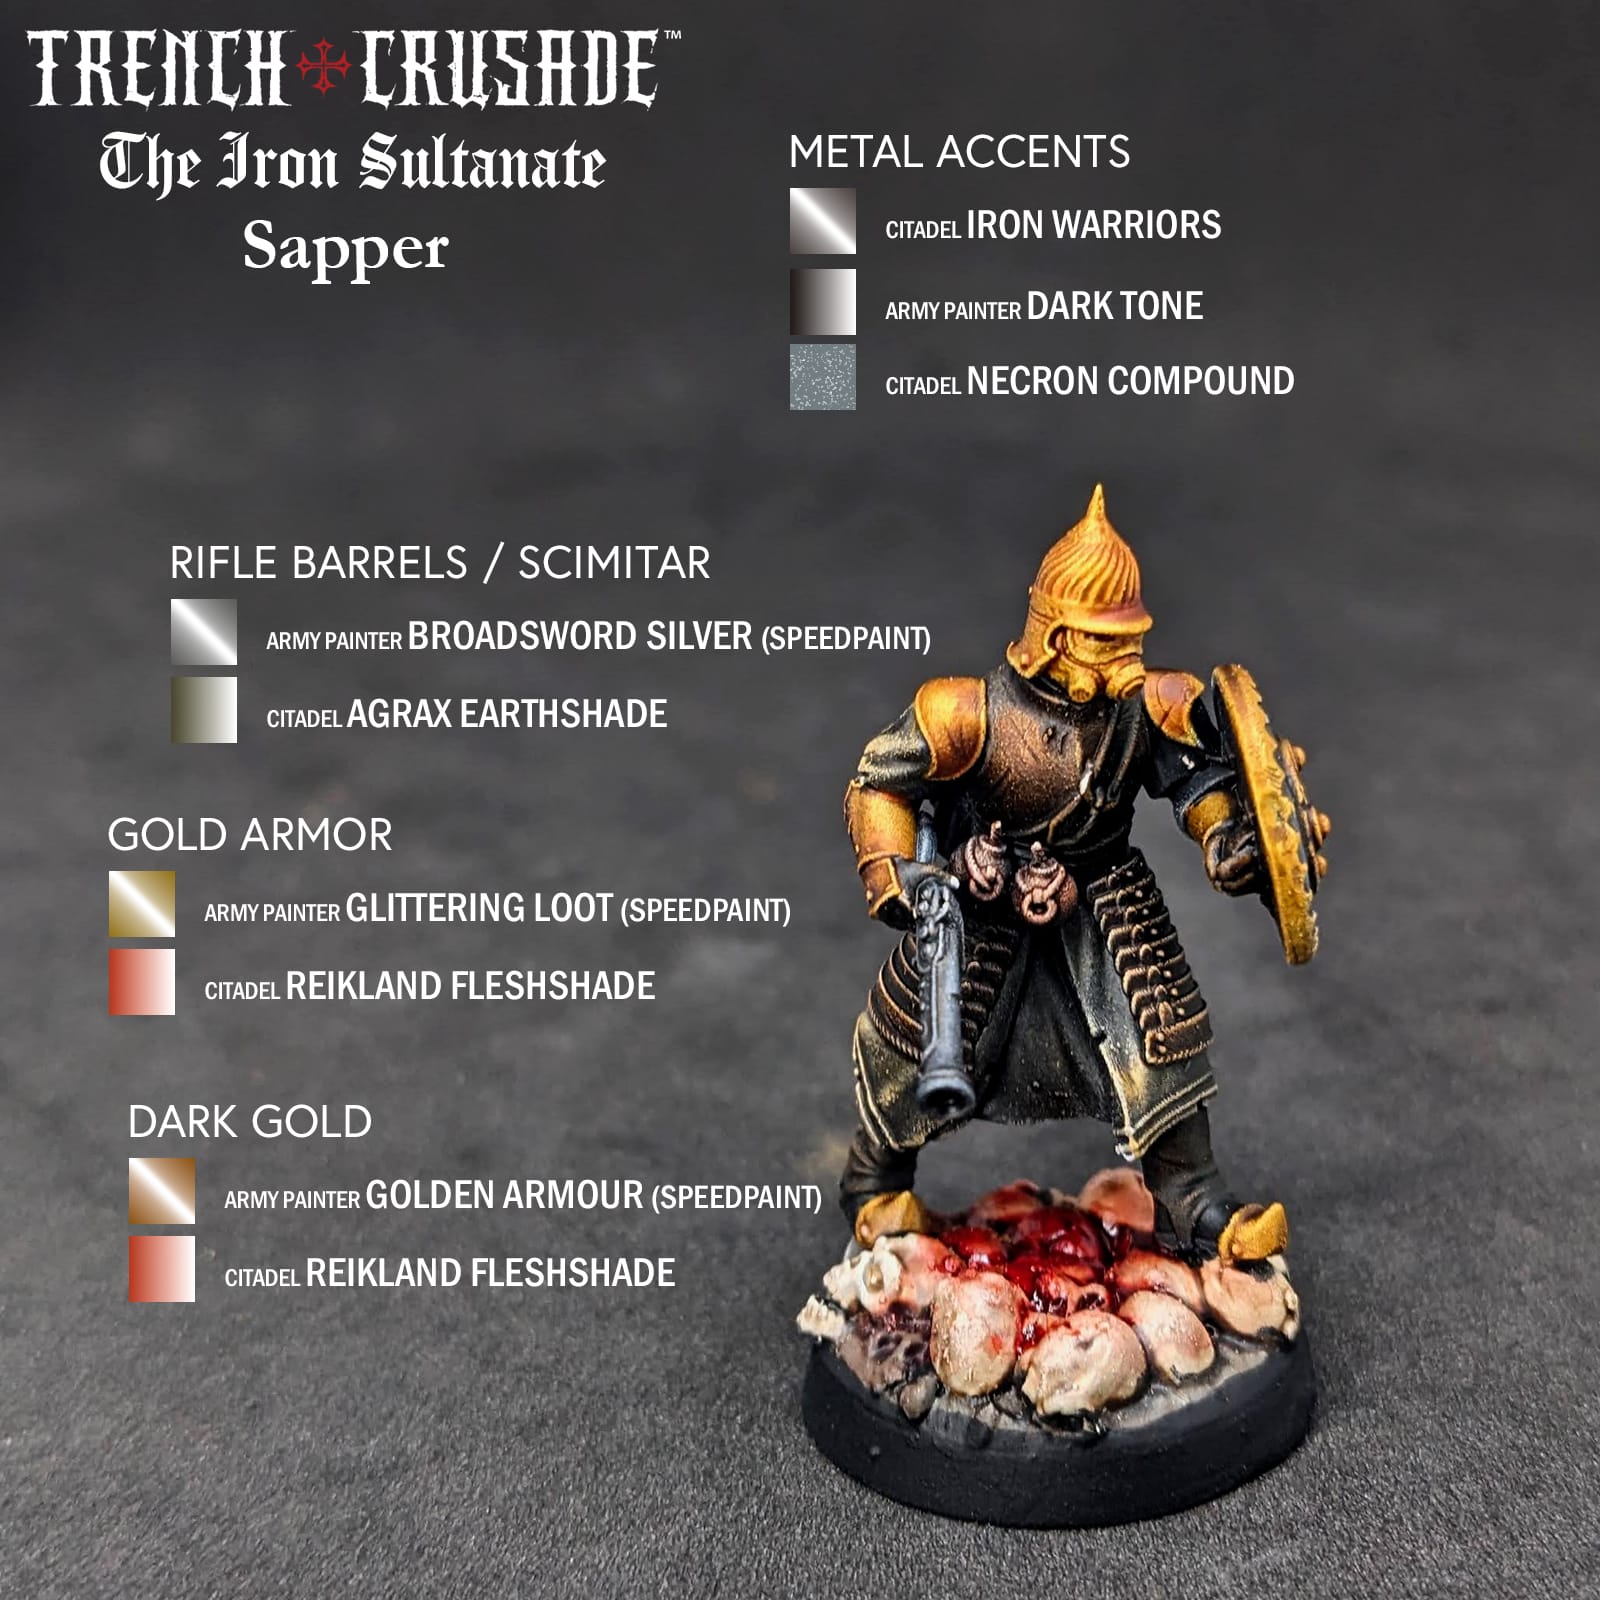
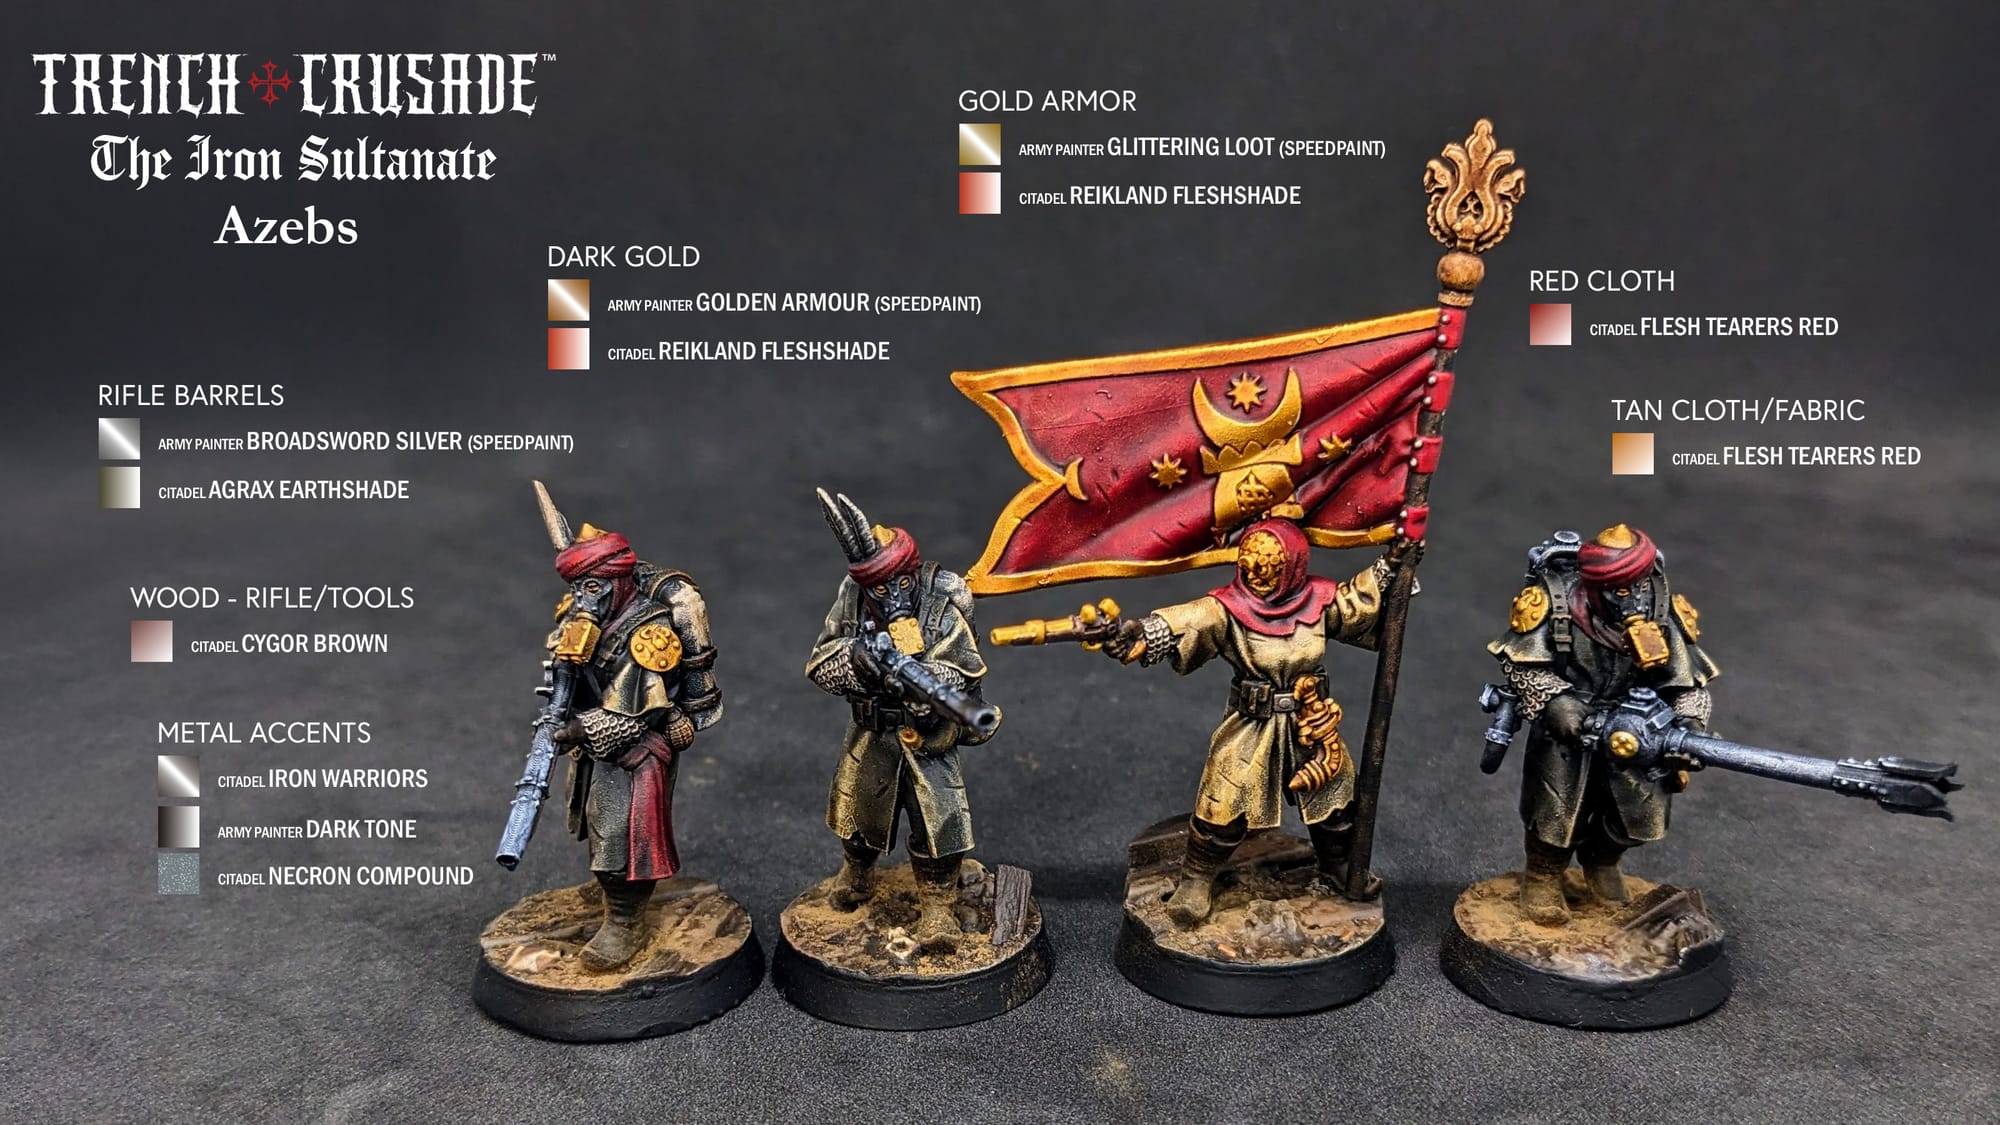
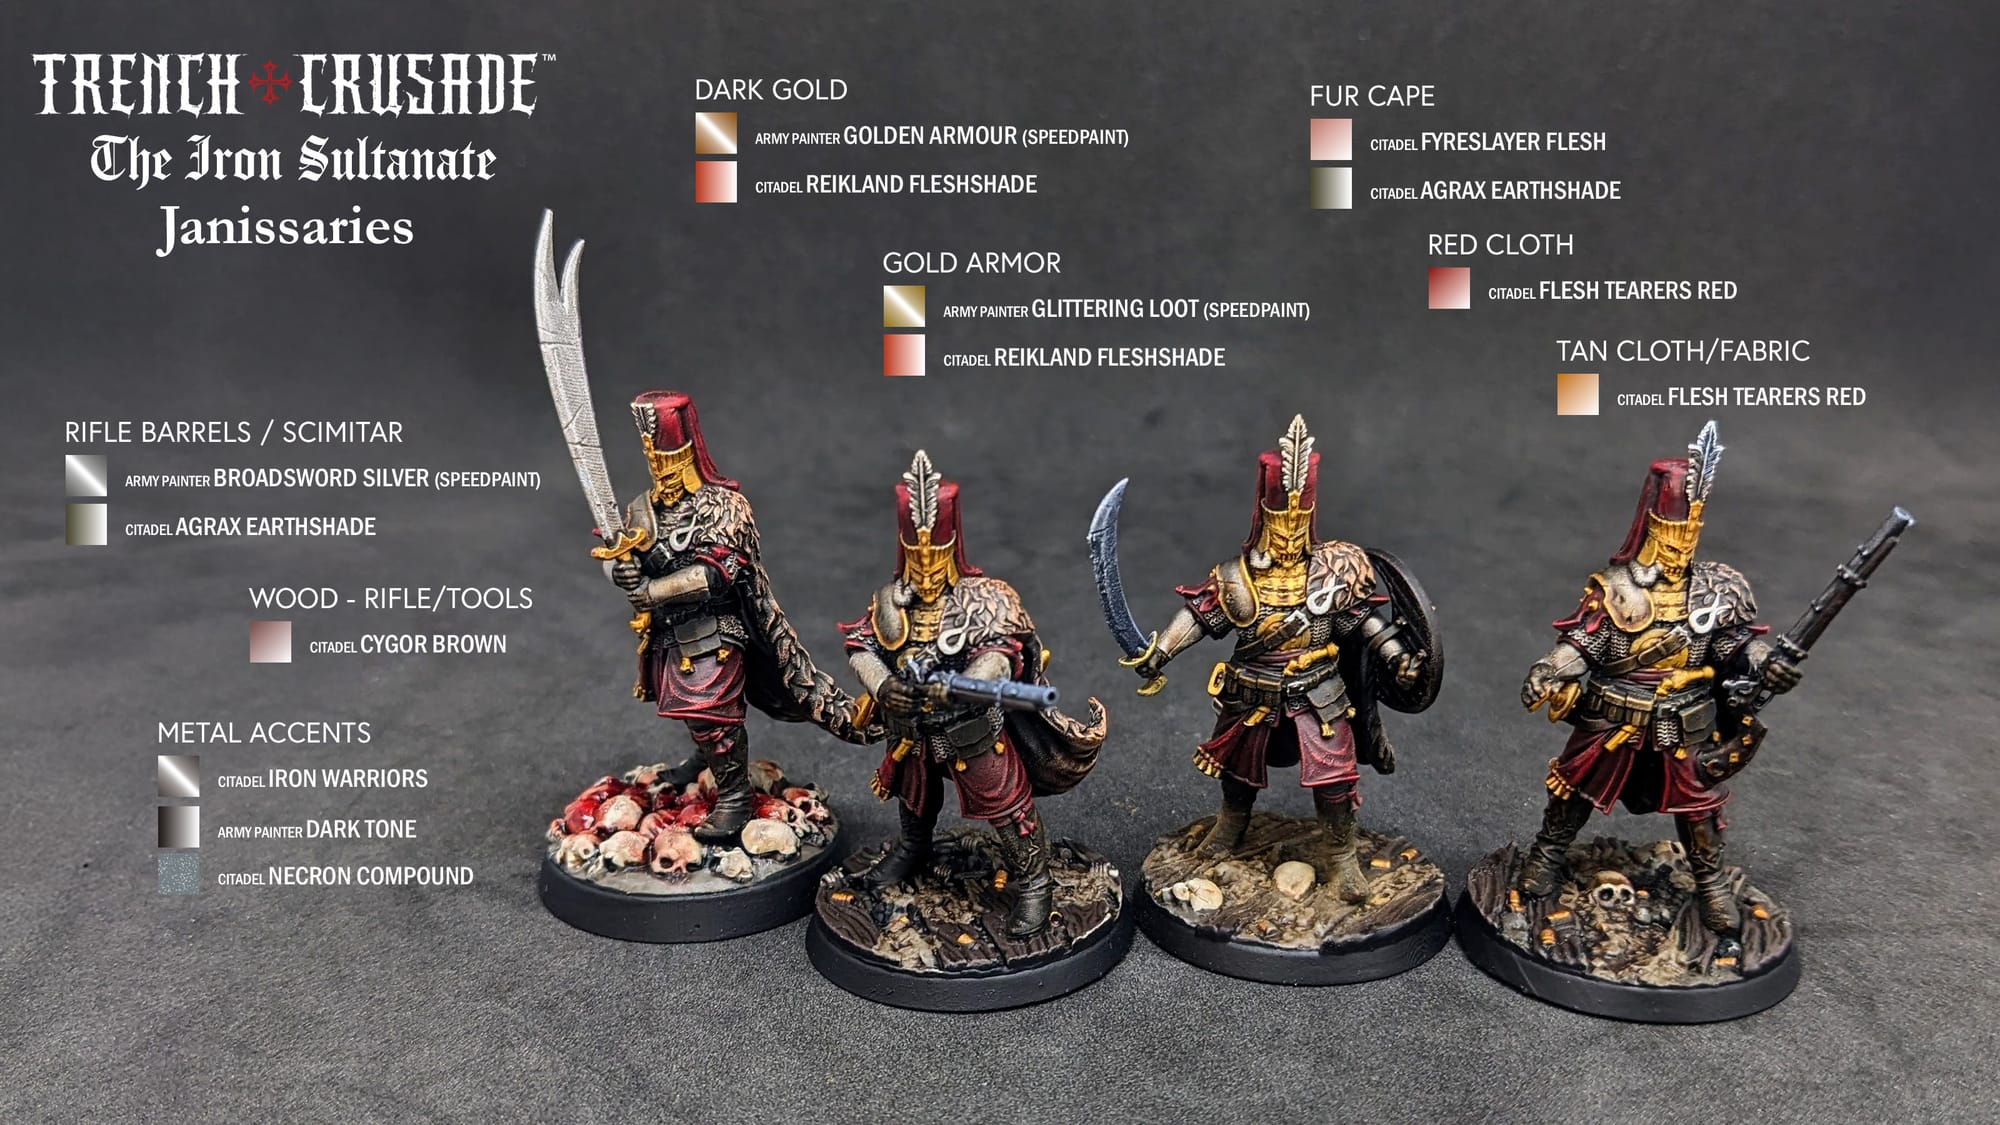
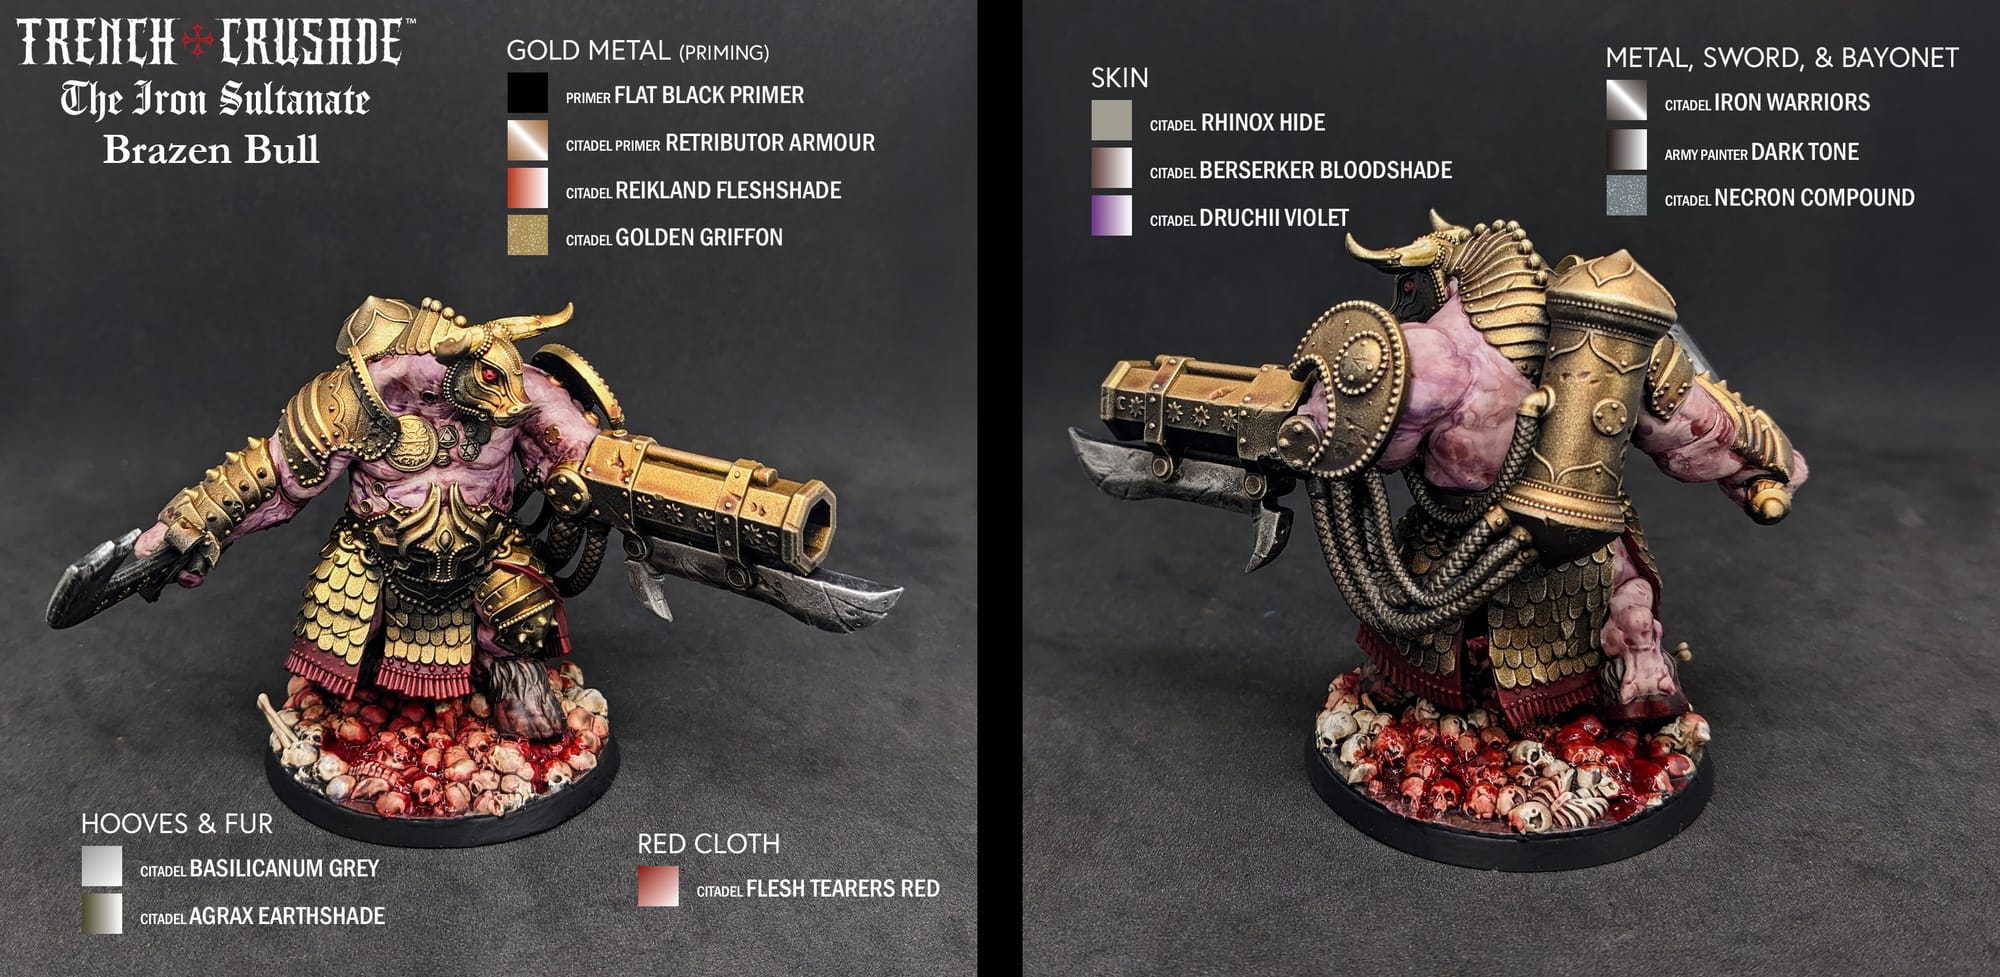
For this tutorial, I have included a visual guide of the paints I used for the miniatures so you have an easily-accessible list to refer to if you need to go shopping. The paints are noted on the picture. Many paints are used for multiple figures, so a single bottle will be more than enough.
Paint Rack App Links
As far as brushes go, any brush brand you’re comfortable painting with is totally fine. If this is your first time painting, I’d encourage you to get a starter model brush pack or a series of different brush sizes (5 being the largest, 00000 being the smallest) so you have different options depending on what you’re painting. You also don’t need the high-end, super expensive brands; most generic brands are absolutely fine to use.
For Trench Crusade, I used a lot of old brushes for dry brushing, washes, and grim effects. So, if you can squeeze a little more use out of those dull, tired, and worn-out brushes, this is a perfect project to do so. In the alternate history of Word War 1, no one should have clean, crisp uniforms or armor.
Priming
In general terms, getting the majority of a color for a model applied via a rattle can or airbrush saves a lot of time. Typically, I primed all of the figures with a zenithal prime on them, using a base coat of Rustoleum Flat Black and a top coat of Army Painter White Primer or one of the other color primers. However, sometimes I use just the black primer or use another color for the zenithal.
Here are the primers I used for the miniatures and terrain pieces.
- Rusteolum Flat Black Primer
- Army Painter White Primer
- Citadel Retributor Armour Spray
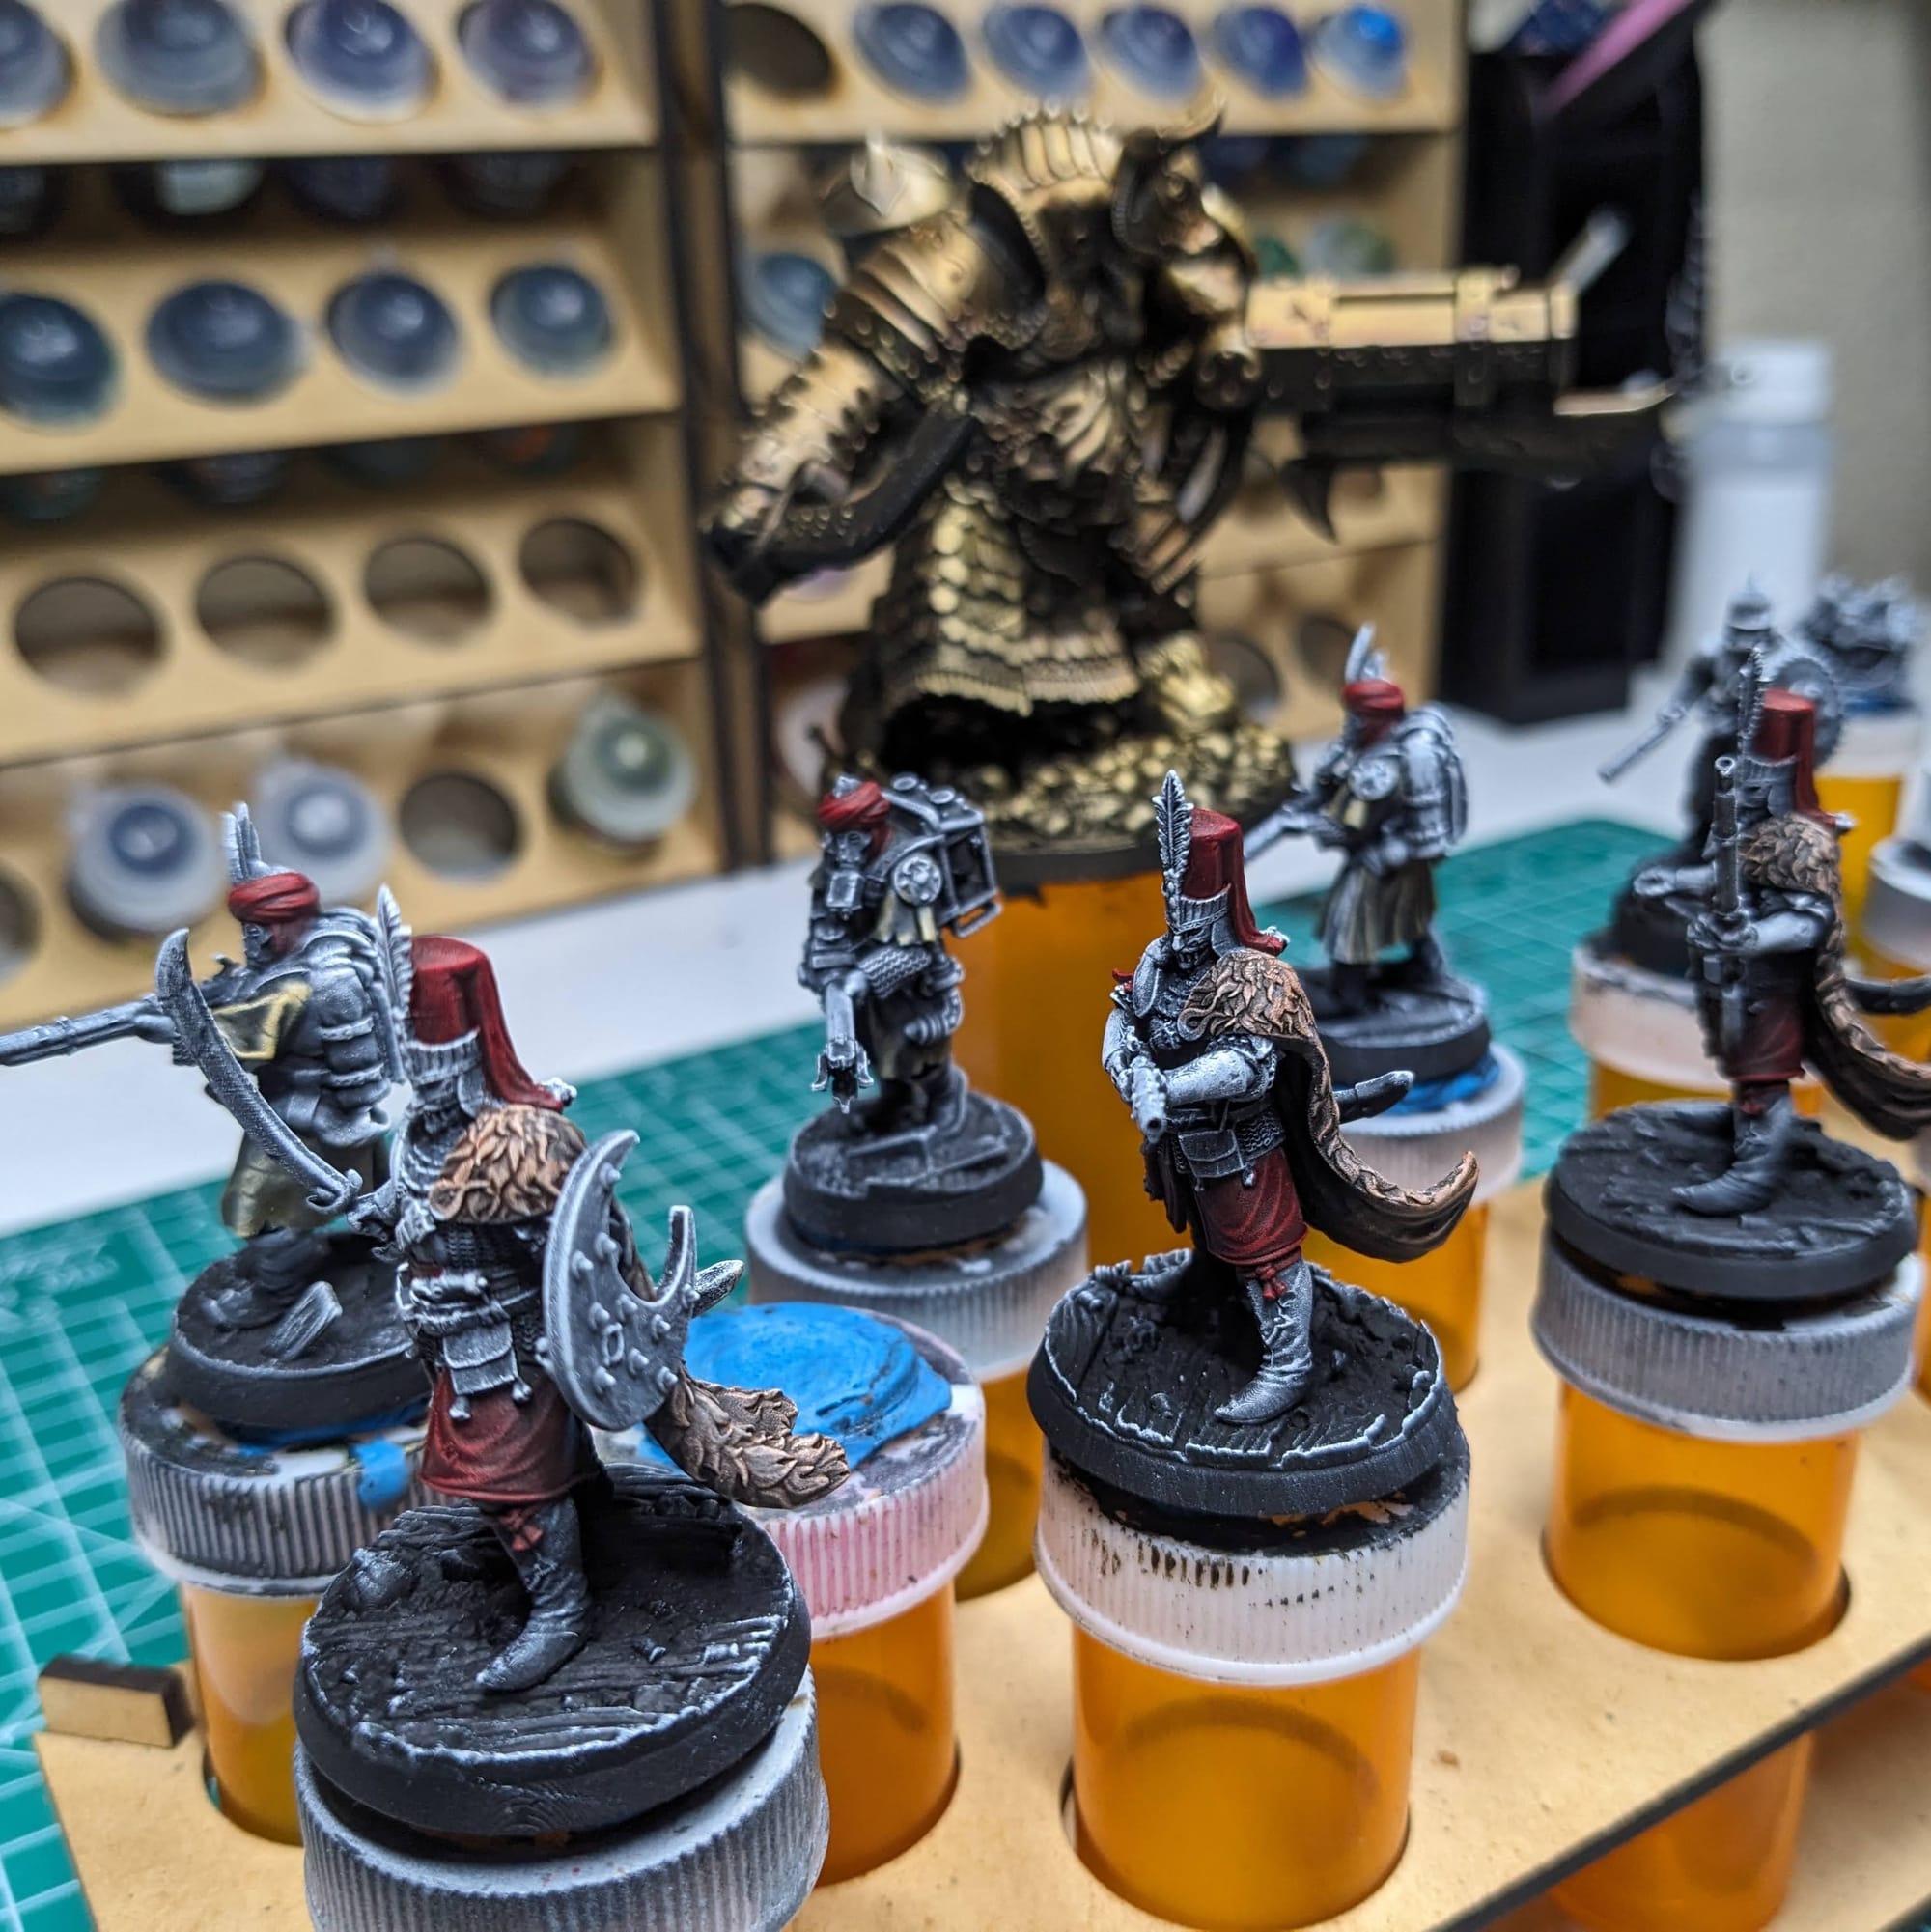
PAINTING THE MINIS
For pretty much every miniature paint project I do, I start with a plan. In advance of putting the primer and paint on a model, I find photo references of the paint schemes and details I am looking for. Most times, this means having a browser window up with different web pages and images next to my painting area, so I can quickly refer to them as I paint. I also come up with a paint plan, choosing what colors I am going to use and what order I apply them in.
In this case, I used the rulebook’s plethora of images to refer to when painting the minis. The art is absolutely fantastic, and gives you a true gritty and dark feel for the tone of trench Crusade.
SLAPCHOP METHOD
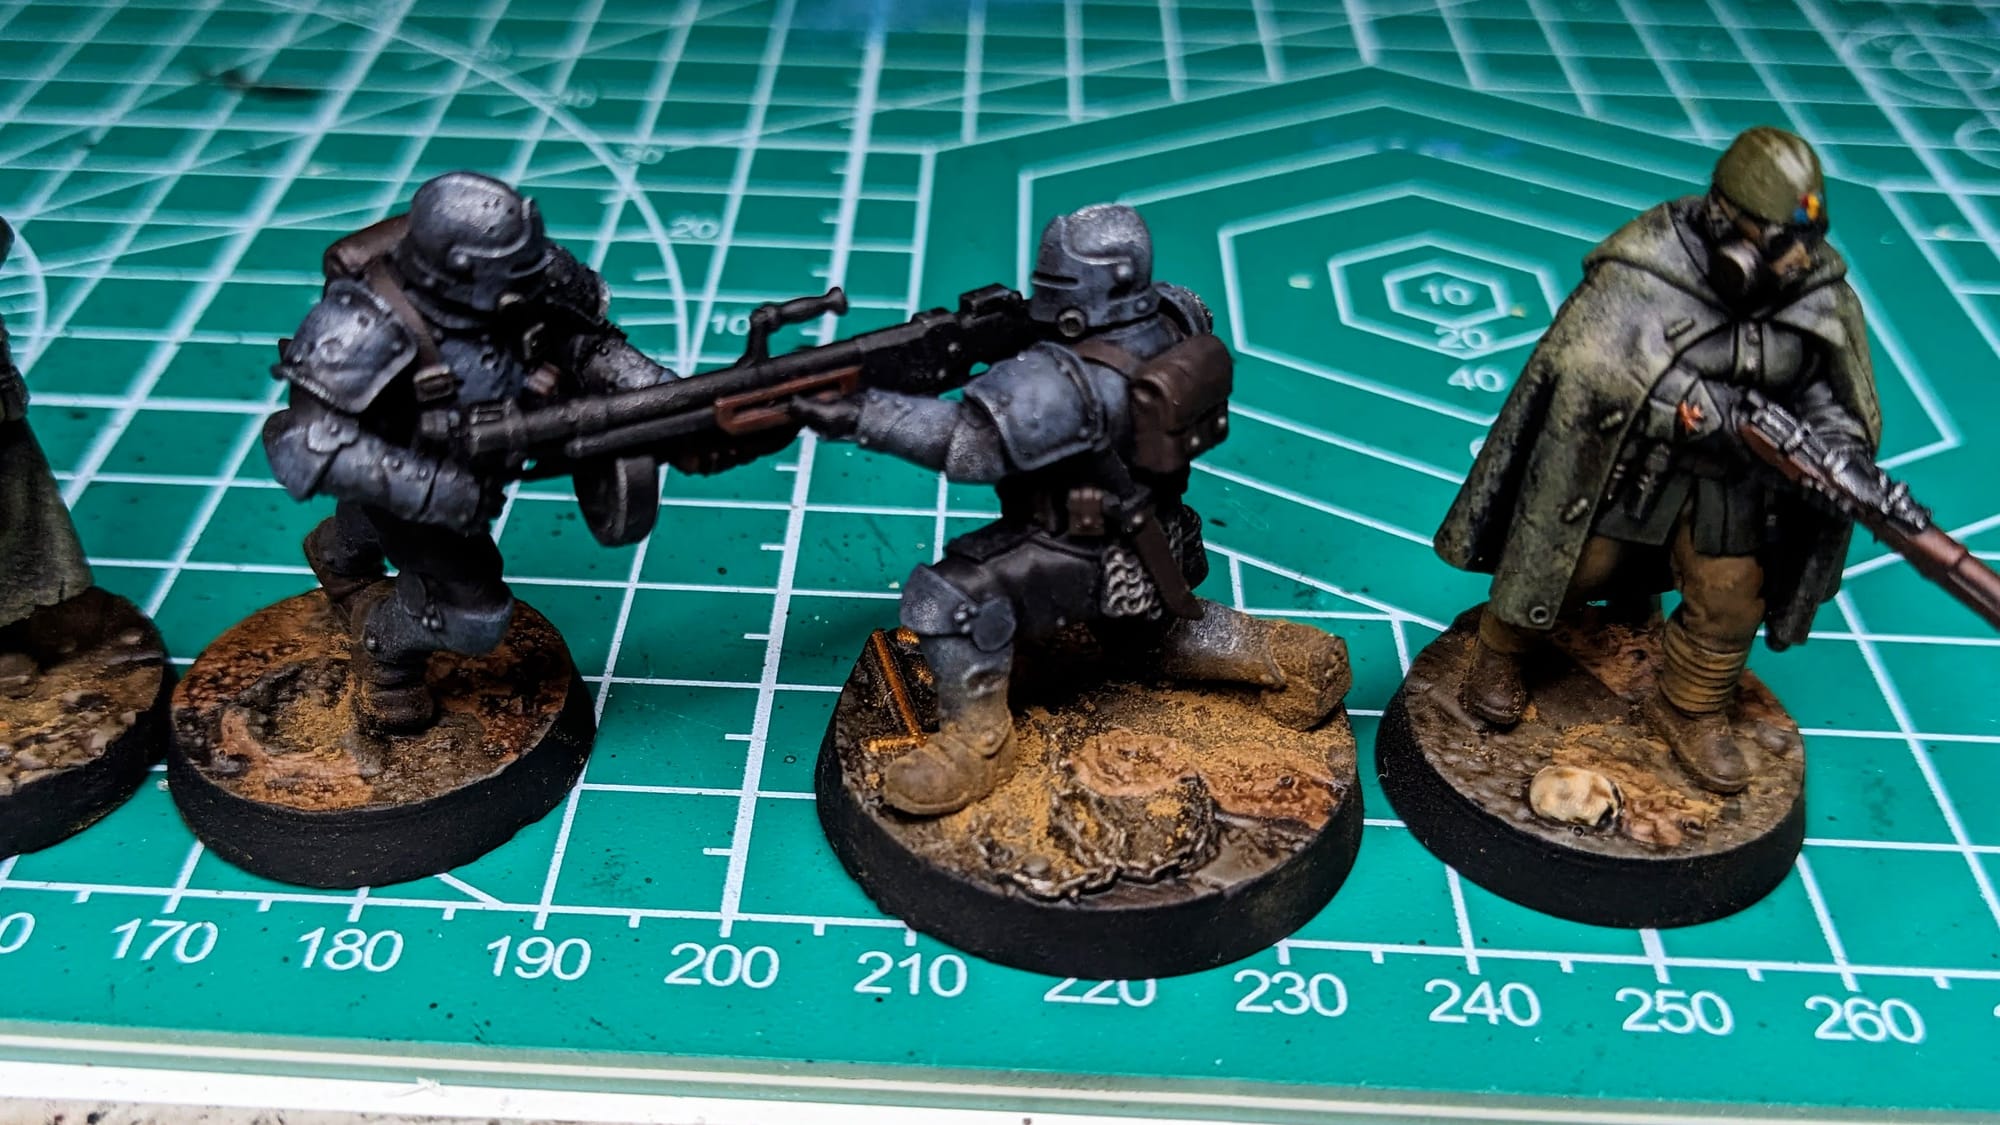
For these pieces, I chose to take a variation of the “slapchop” approach for them. Slapchop is a painting method where you accent the details of the models by dry brushing shades of grey and white. Then, using speed paints, contrast paints, and/or washes, you paint a single coat over the top of the model, creating shadows, mid-tones, and highlights in a single pass. This would be akin to using Multiply or Screen layers in Photoshop to establish color values on a gray underlayer. This is a very fast and efficient way to paint a lot of models that you don’t want to put a lot of detail into, and instead rely on the mold/details of the model to provide enough detail and contrast to make it stand out on the table.
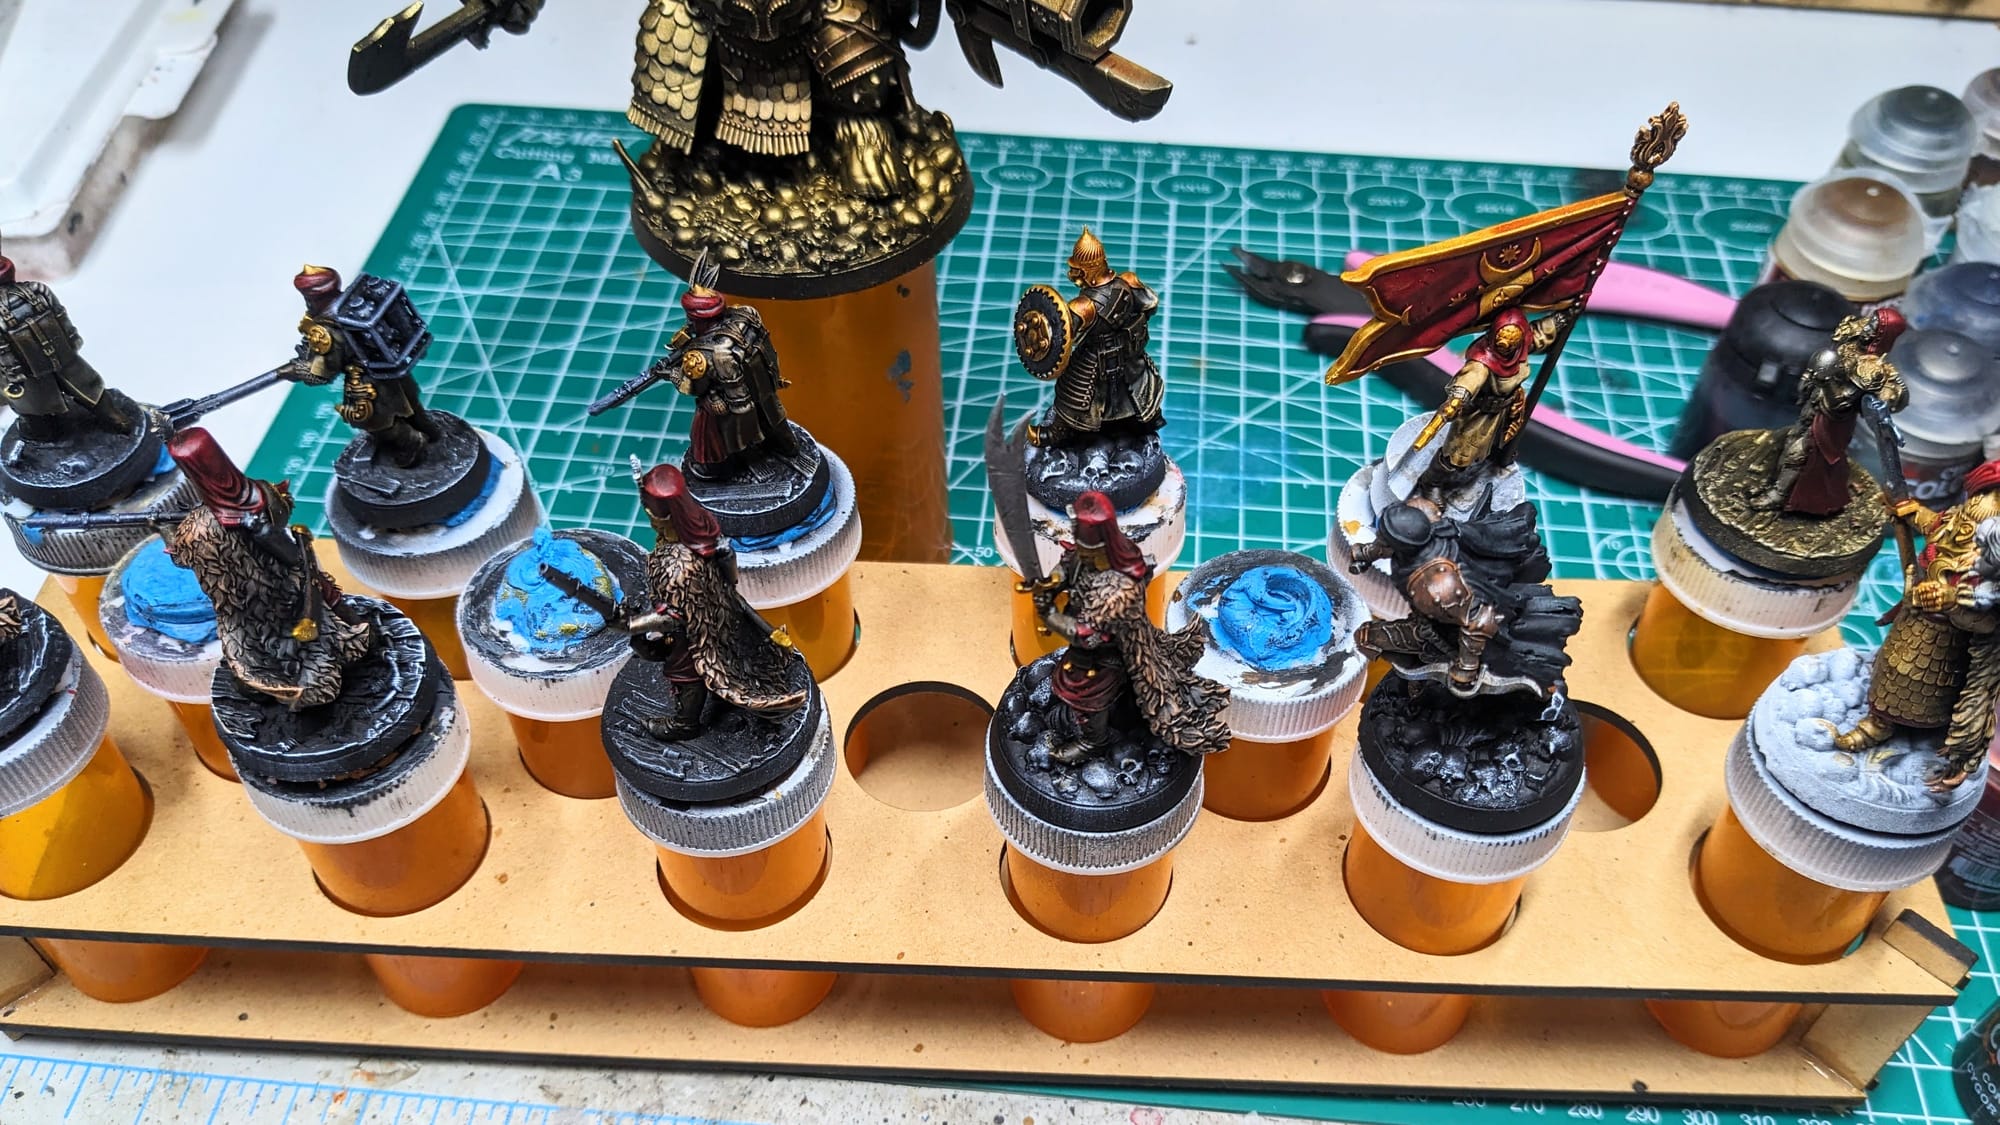
The noticeable recesses and highlights helps give a greater contrast when applying speedpaints
The most challenging part with painting muddy and grimy figures is relinquishing control and not worrying about “coloring between the lines” as much. This was really challenging for me because I wanted to make sure that the pouches, guns, capes, masks, etc. were perfect, but that goes against the style I am looking for.
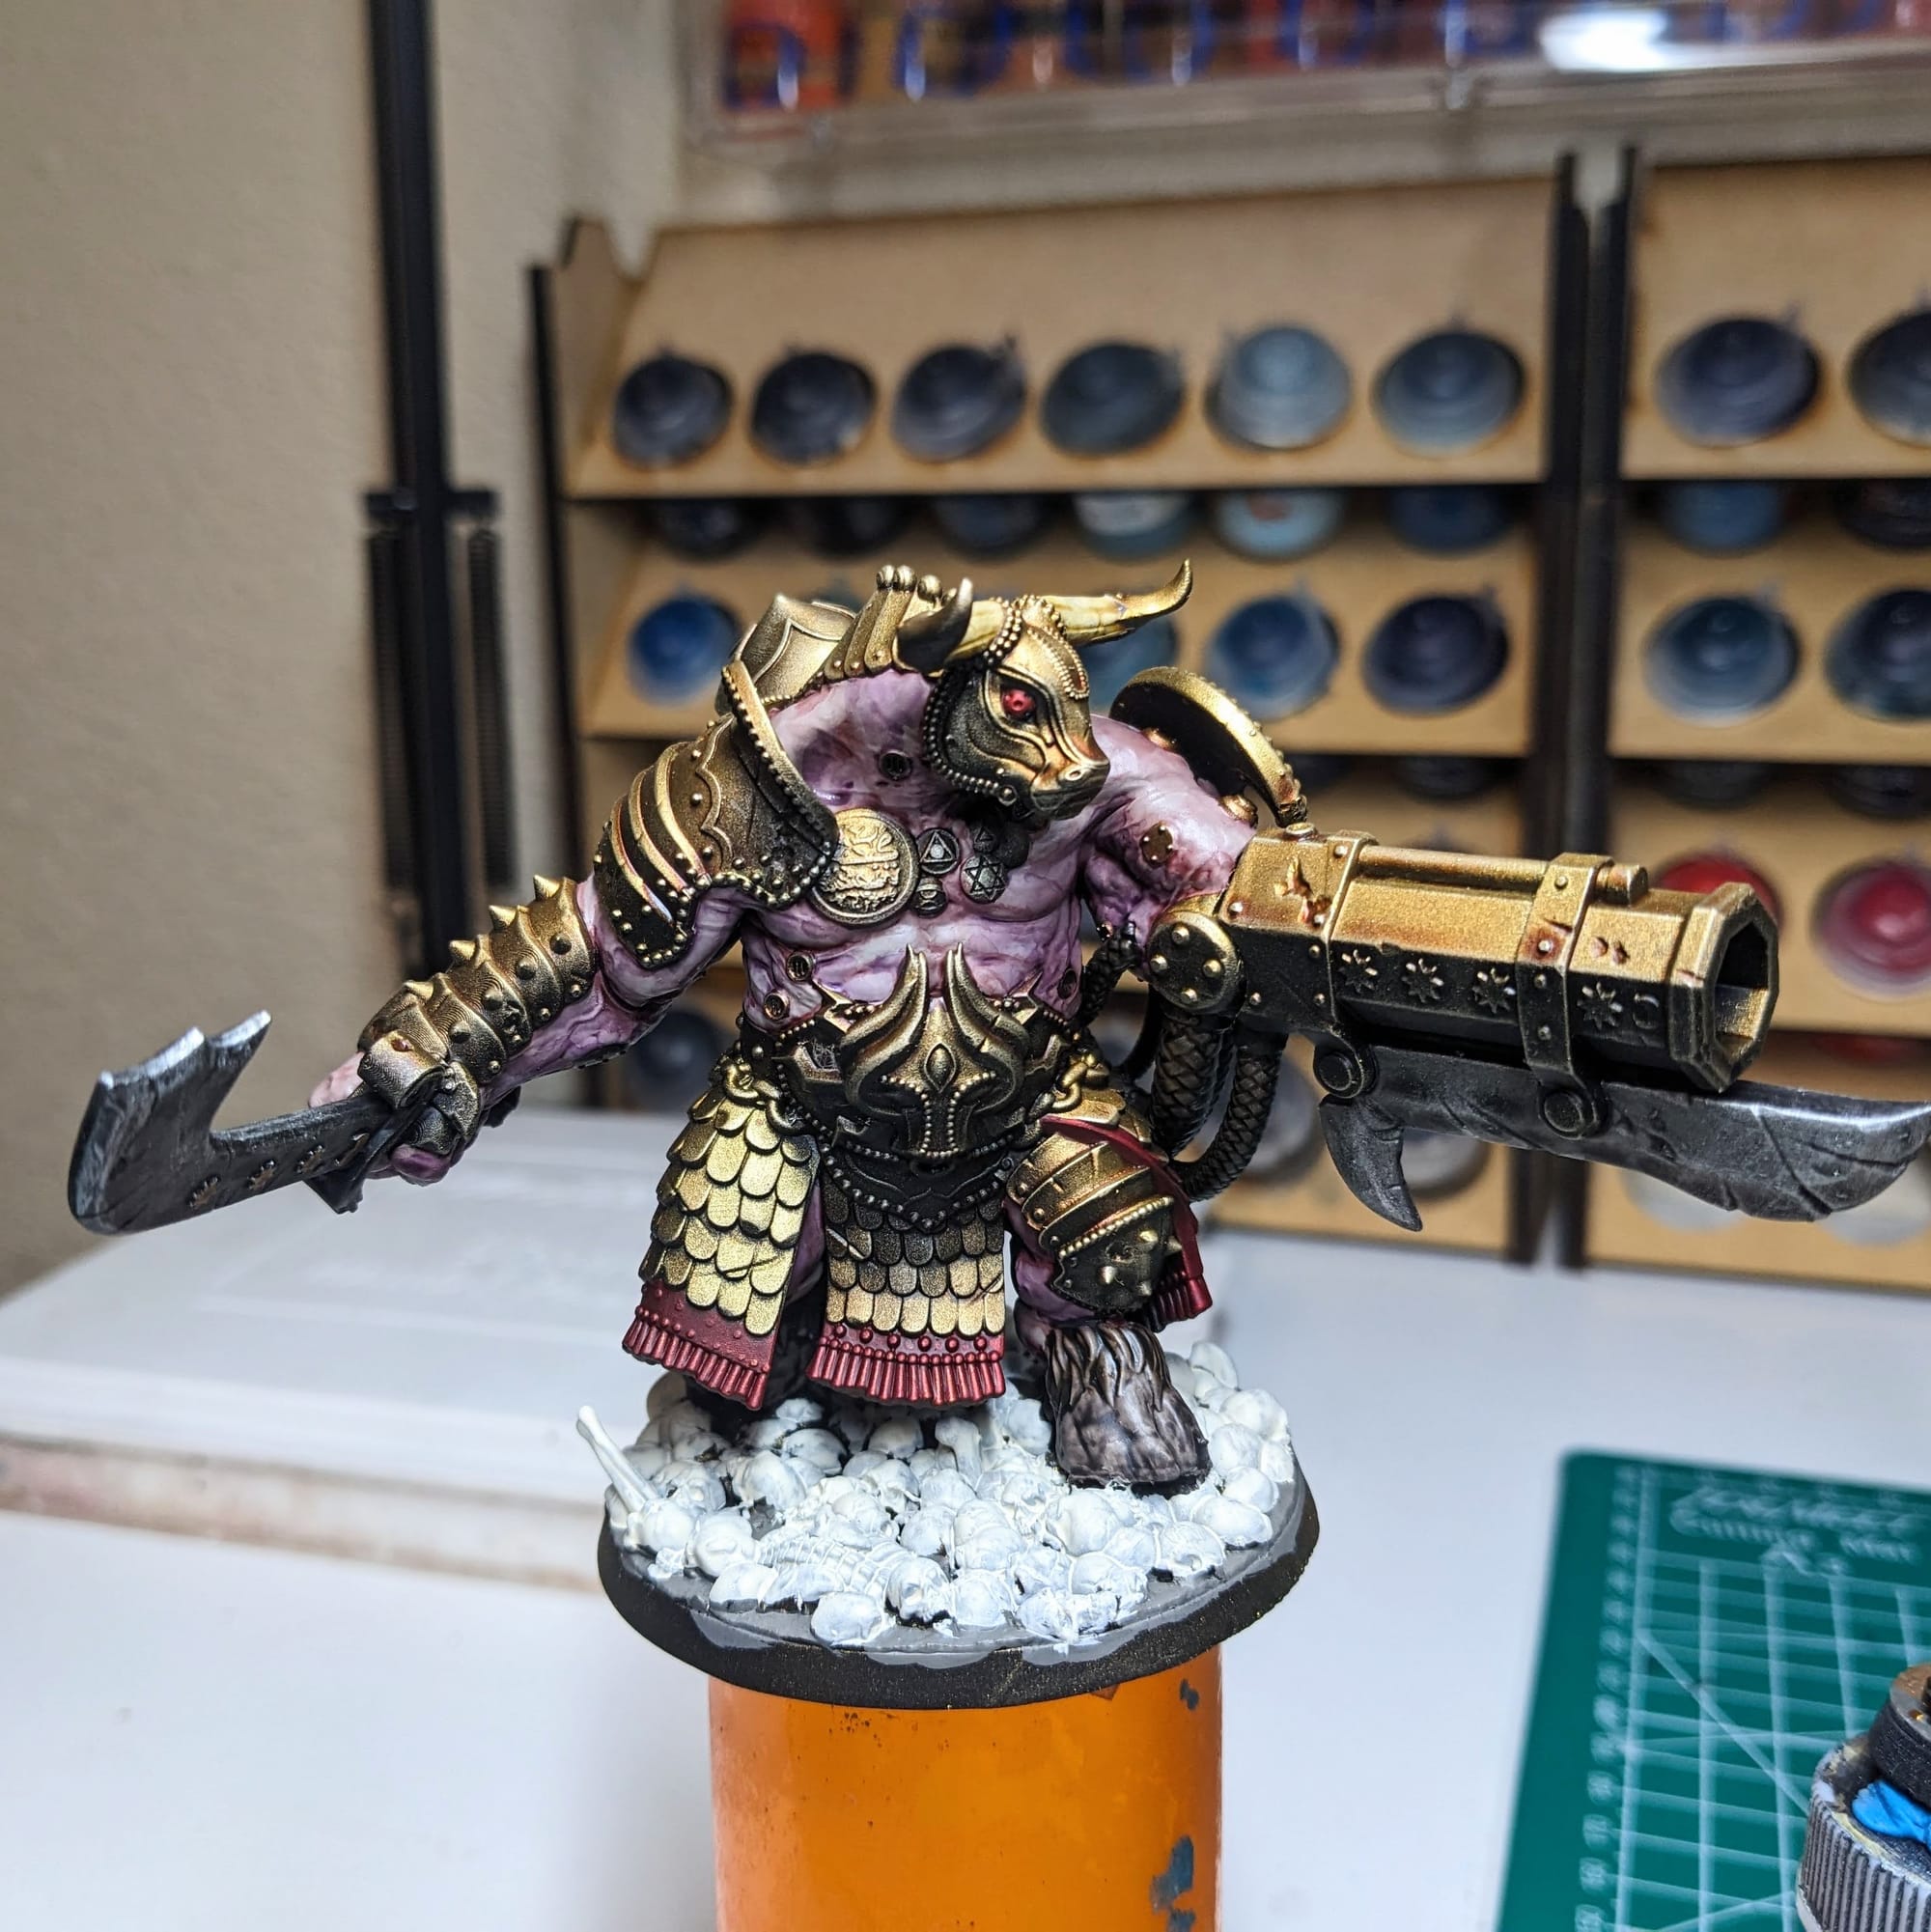
Specifically for this warband, I used Army Painter’s Metallic Speedpaints. After I was finished with all of the flat colors, I applied the metallics to the details (which were numerous). These made painting the gold, armor, and weapon bits go a lot faster than I was expecting. You can read our full coverage and review here for the Army Painter Metallic Speedpaints.
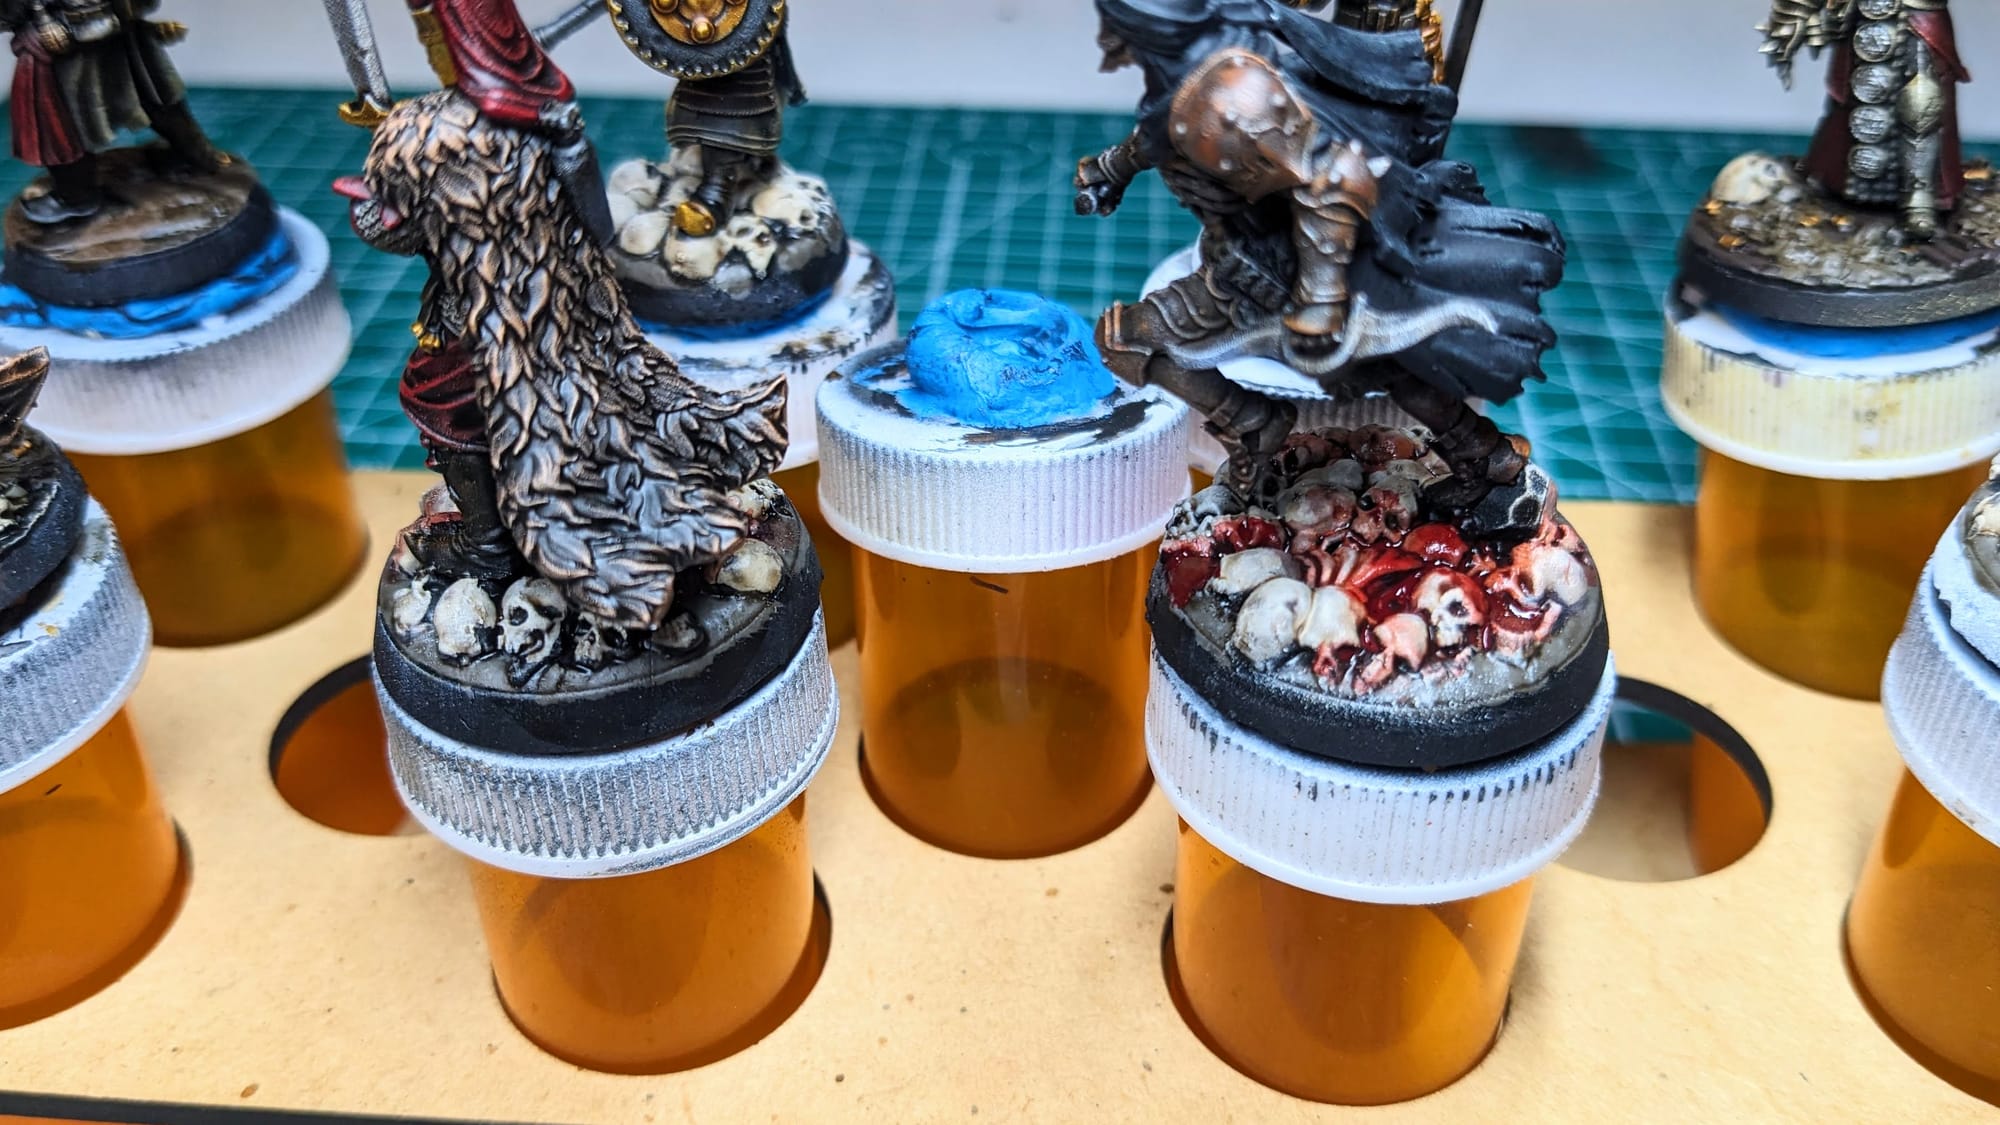
Once I finished painting the miniatures, I was ready to move onto the bases. I typically always paint the figures first before moving on the bases, especially when there are basing materials or mud being used - doesn’t make any sense to have that get onto the unpainted model, causing you to paint over or around it.
I’ve included the paints used for each unit in the final images below.
BASING
While the 3D printed bases provided lots of little grimdark details to paint, I really wanted to capture the muck and grime of trench warfare. Bear Cavalry & Elrik’s Hobbies Trench Crusade Basing Box is the perfect one-stop paint collection for this. In it, you get mud, weathering pigments, some excellent bases and debris.

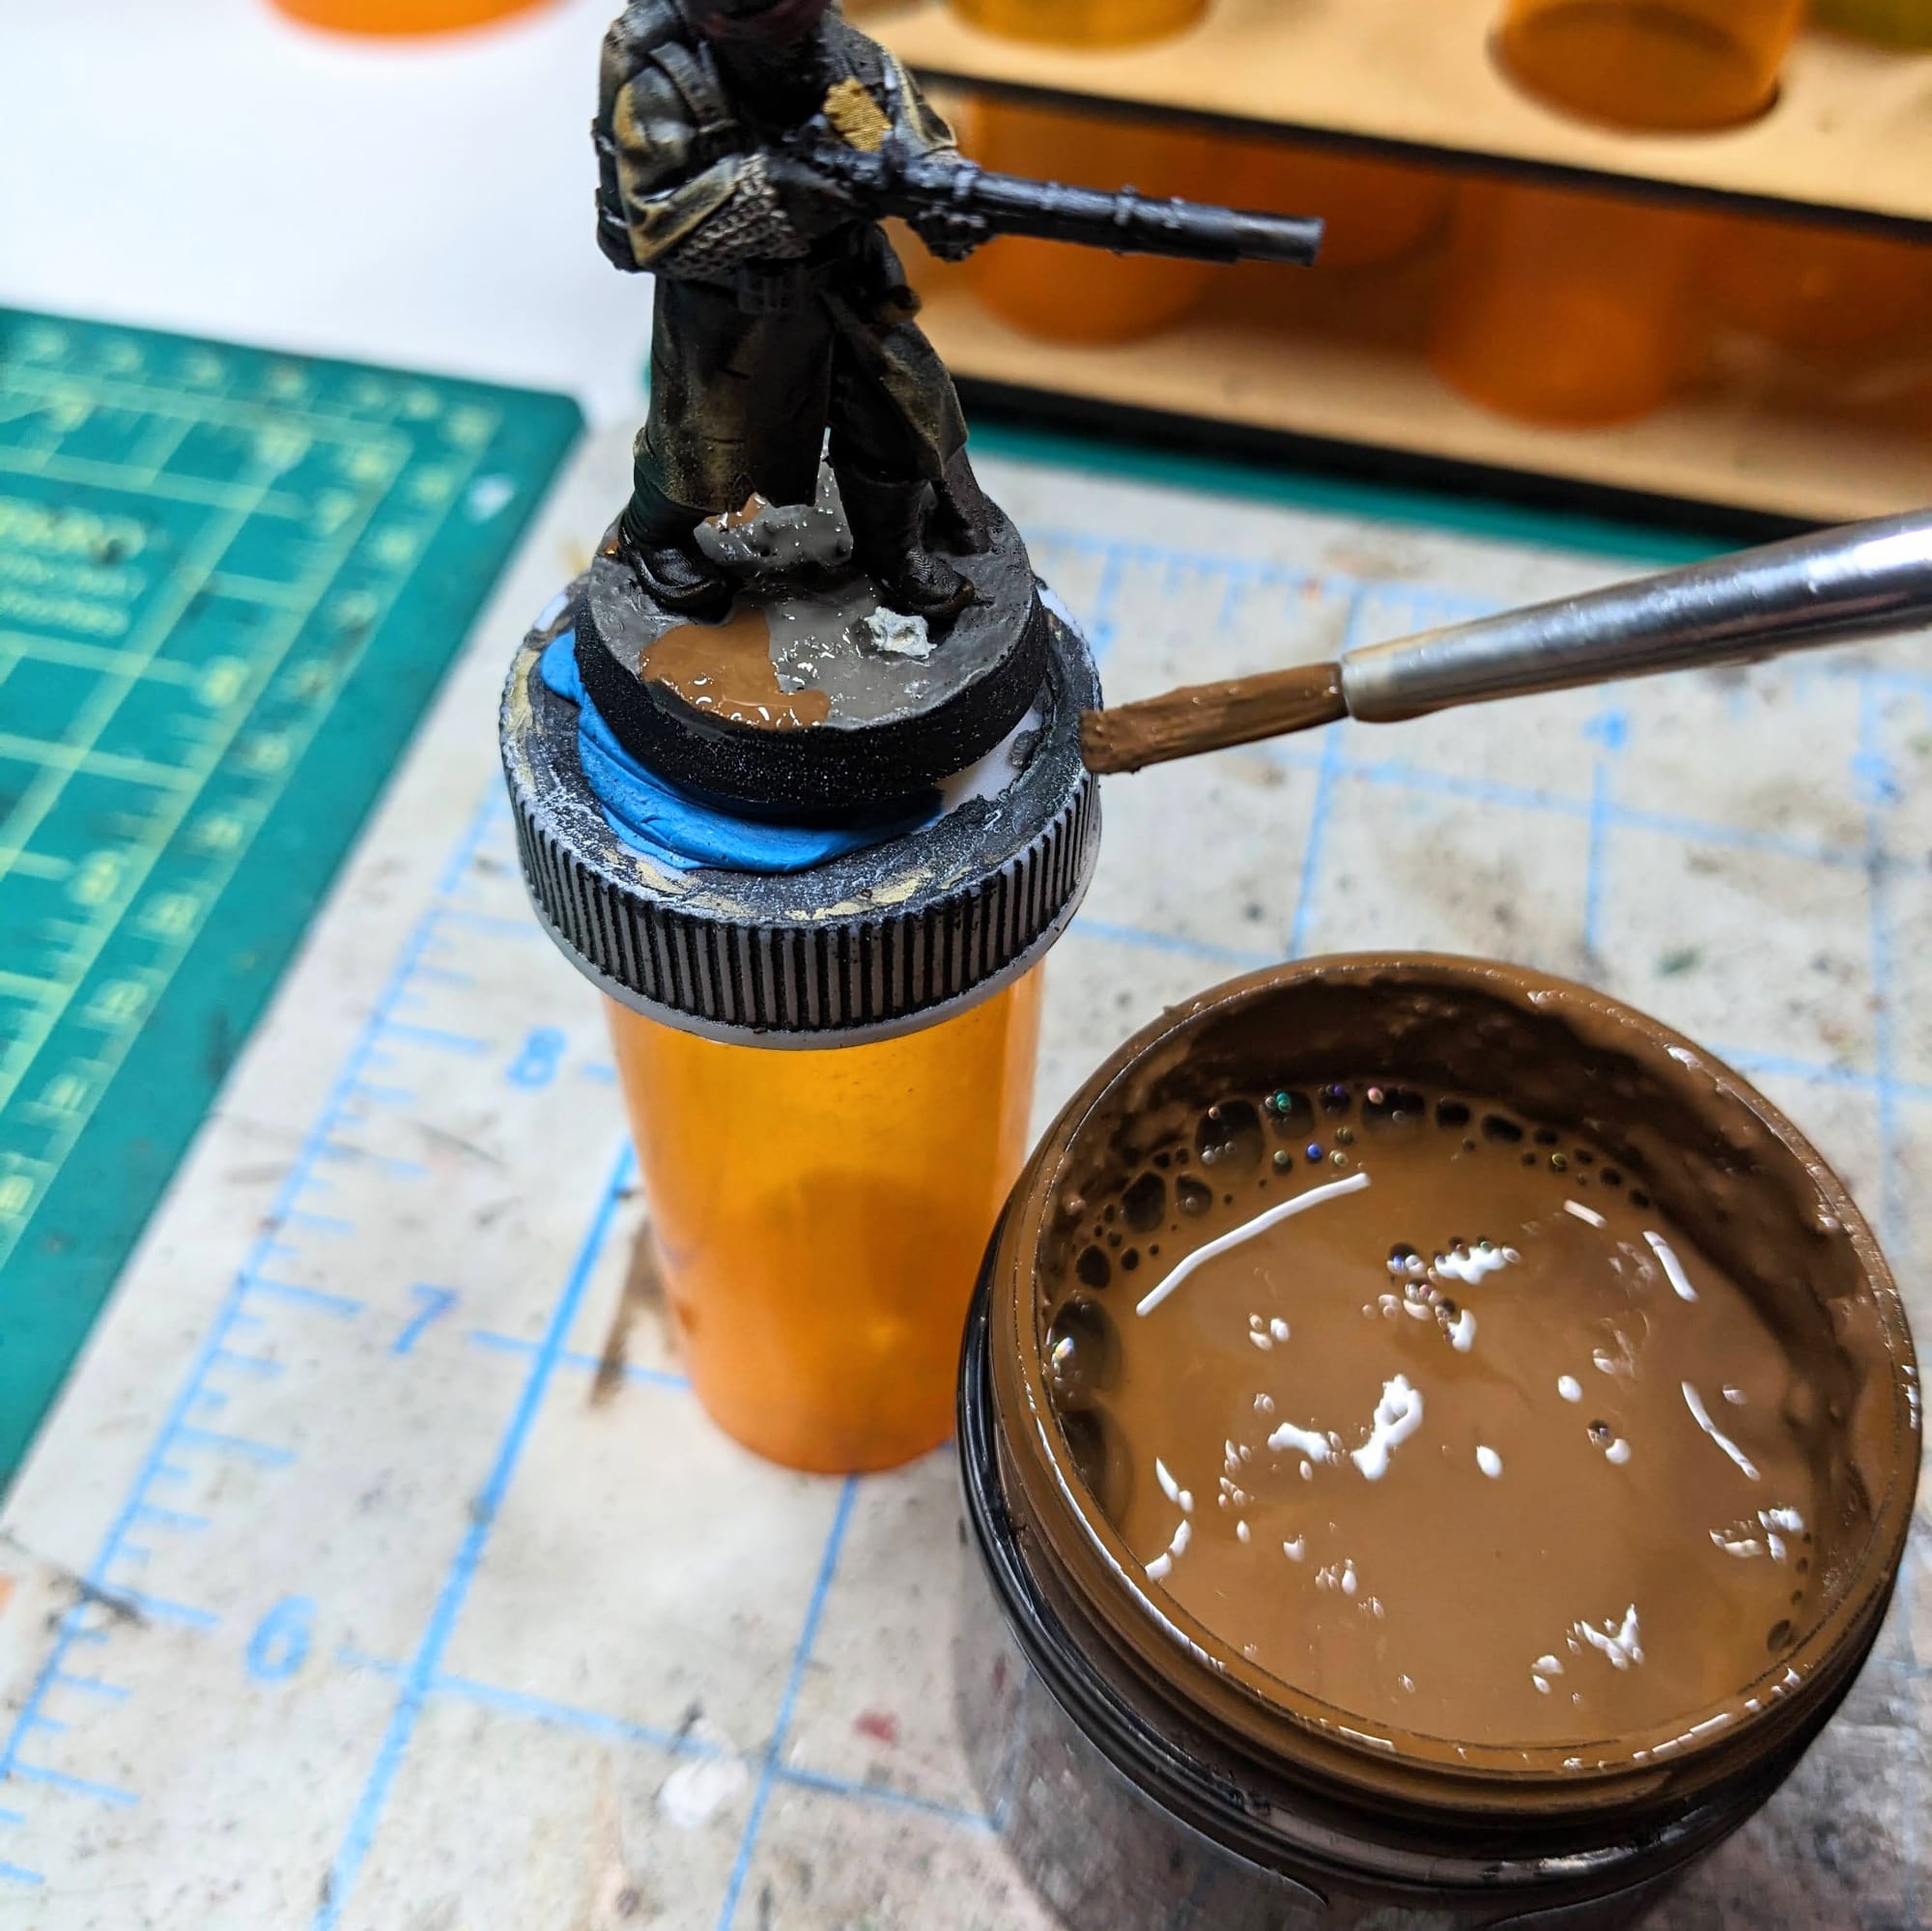
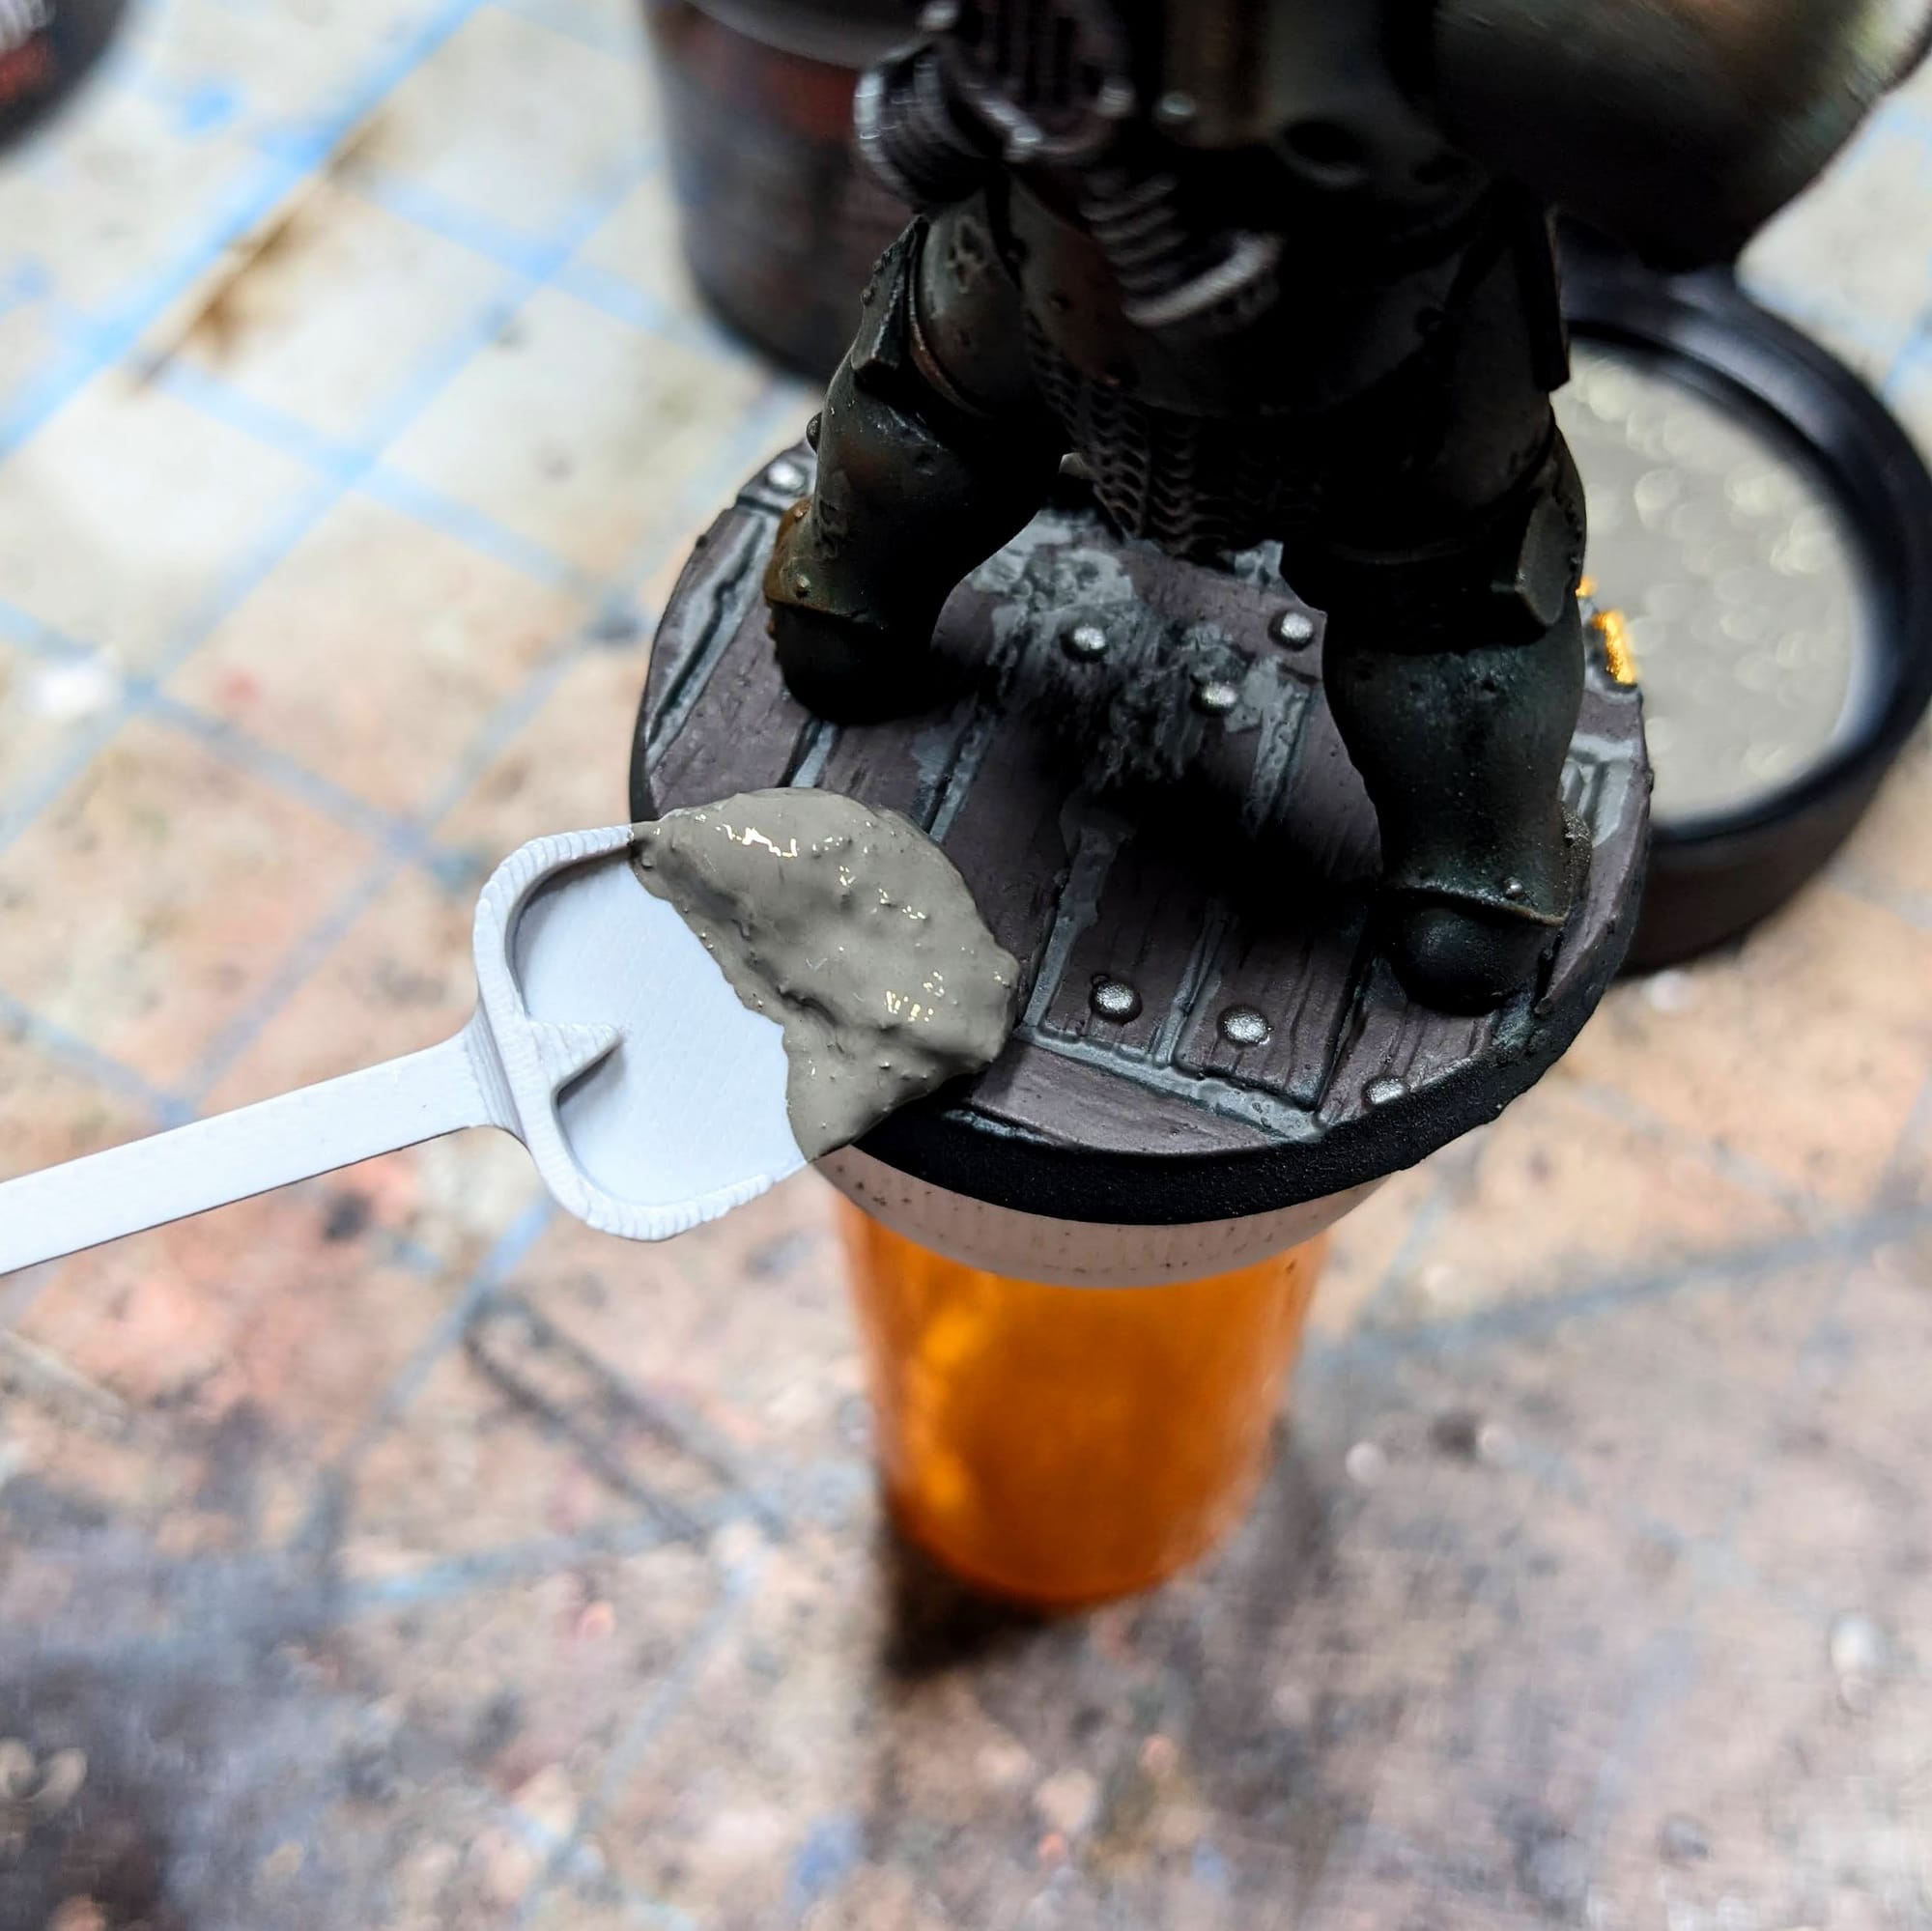
I didn’t want to cake my entire base in the mud, so I added some spots of it randomly on the bases. Some of it covered the boards, and some just spots built up against the printed battlefield debris. Once it dried, it left this nice, chunky mud that really captures that European muck nicely. I gave a little more depth to the mud using spots of Agrax Earthshade
Something of note with regards to the texture paint is that, unlike other companies that utilize sand or fine-grain particles in their texture paints, Bear Cavalry also adds in coffee grounds. Not only does this give a variety of chunks and bits within the paint, but it also is a recycled and environmentally sustainable alternative that works really well within the paint. So, I get to go to war against the unholy in Trench Crusade, causing mass death and destruction, but I get to save the environment while doing it, too.
If you want to learn more about the basing, GamingTrend reviewed the box and did a deep dive into the contents which you can check out here.
In addition to the muck and grime of No Man’s Land, I also used some bone tones for the skull bases. After painting the skulls, I applied a couple of coats of Citadel Agrax Earthshade to the base, and then a thin layer of Citadel Flesh Tearer Contrast Paint for the pools of blood. After I sealed the minis is when I added the classic Citadel Blood for the Blood God, so that the gloss from the blood wasn’t lost in the sealing.
Sealing Your Minis
As I do with all of the models I paint that I also play, I apply a protective clear coating over the paint. This helps preserve the paint on the model and keeps oils from the hands from rubbing off the paint as you continuously touch the models during games. There are many different kinds of clear varnishes to use, but I typically use any matte or anti-shine varnishes, as satin, semi-gloss, and gloss tend to distort the colors of the models (not to mention that most models aren’t supposed to be shiny).
Brands that have been reliable for me are Krylon Matte Clear Spray, Rustoleum Matte Clear Coat, which is slightly glossy, and Testors Dullcote, although the latter can be expensive and difficult to find. For a coat with no shine that really enhances the colors, I use AK Interactive’s Ultra Matte Varnish, applied with an airbrush.
Final
Impressions
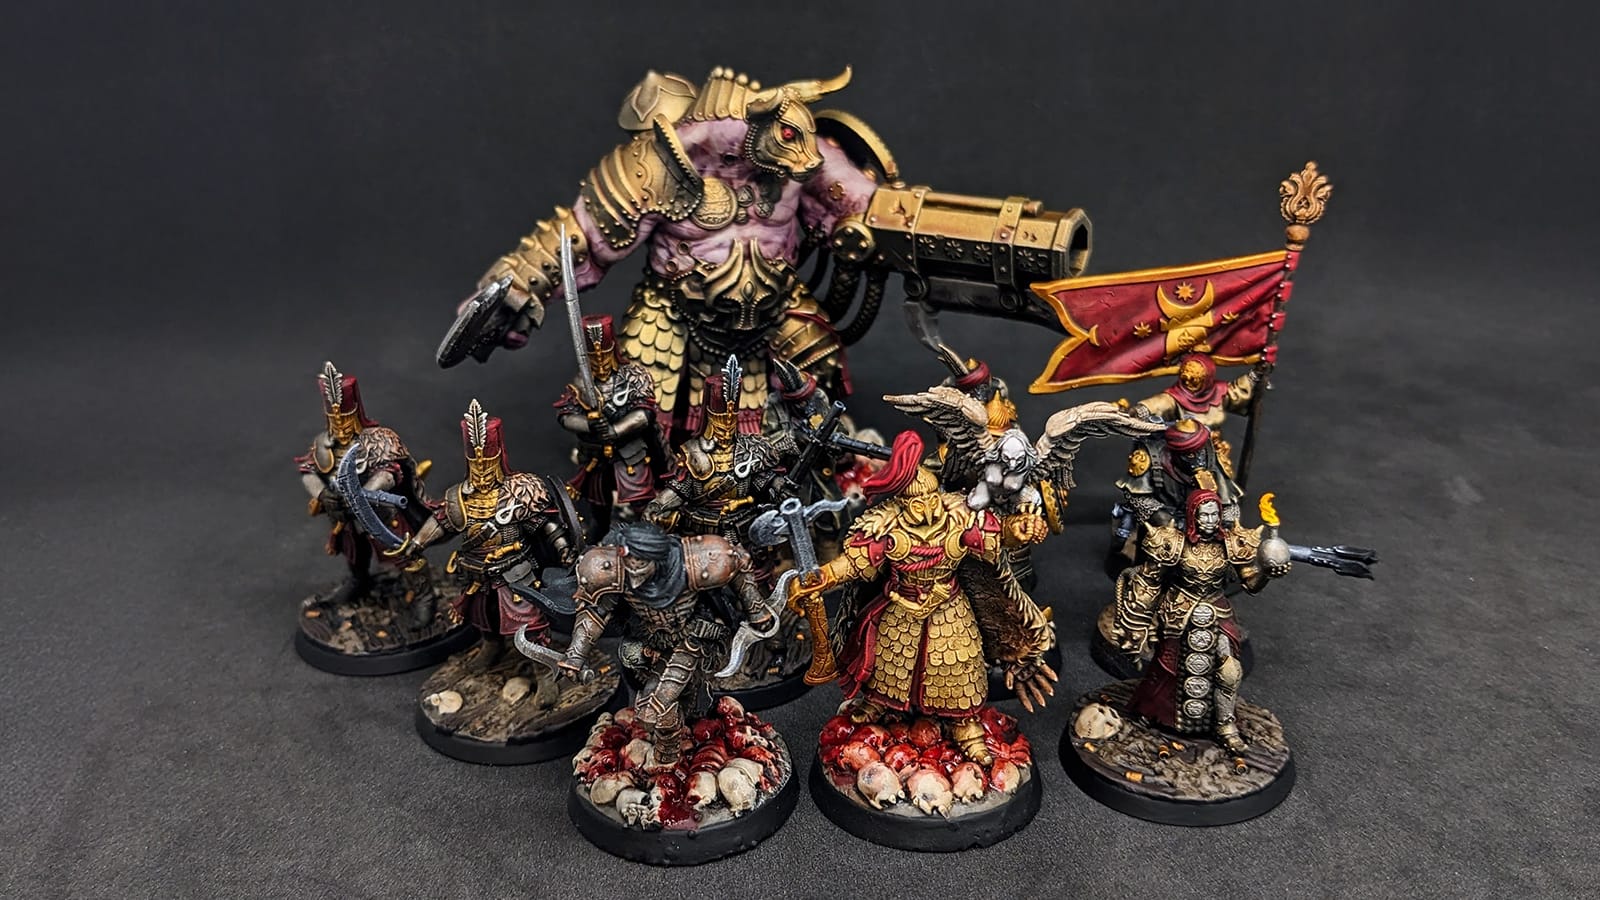
The colors and designs of the Iron Sultanate is a refreshing change of pace from grimdark Europe. The mixtures of whites, reds, and golds, really help capture the Middle-East aesthetic, and there are tons of details on all of the figures to be able to capture that. Even though I used an older SLA resin printer, the details are still very crisp and clear, and only minor print evidence remains after painting. If someone is wanting the official models, and has access to a resin printer, you are not going to be disappointed with the outcome.
I would like to state that I think the Bear Cavalry basing is what really helps these pieces shine (or, rather, be grimy) and ties the pieces together; individually to their bases and then together as a warband. A mix of bases, the skulls and the trench bits, with Bear Cavalry's basing helps achieve that; basing can make or break a paint job, and having the proper basing makes all the difference.
Overall, I am happy with the outcome of my warband. I always feel like I struggle with creating a paint scheme for a game or universe I’ve never painted before, but I think relinquishing control of the brush in favor of dry brushing, speedpaints, and washes helped bring the outcome I was envisioning. I would apply this same style and technique to any model I was painting for the trenches, whether it’s World War 1 or an alternate history of it. The more darkness, despair, and muck I can accent the Trench Crusade model with, the better it looks!
Have you painted your Trench Crusade Warband yet? Share your work with us! Don’t forget to follow us on Instagram and Blue Sky!


