Welcome to Pandora! Do you love the game and want your favorite Vault Hunter painted to stand out on the table when you play? Looking to get it done quickly so you can get back to playing the game?? We feel the same way and Gaming Trend, and so I painted up some Vault Hunters, Psychos, and terrain from Monster Fight Club’s Borderlands Mr. Torgue's Arena of Badassery Core Box and Box of Badasses.
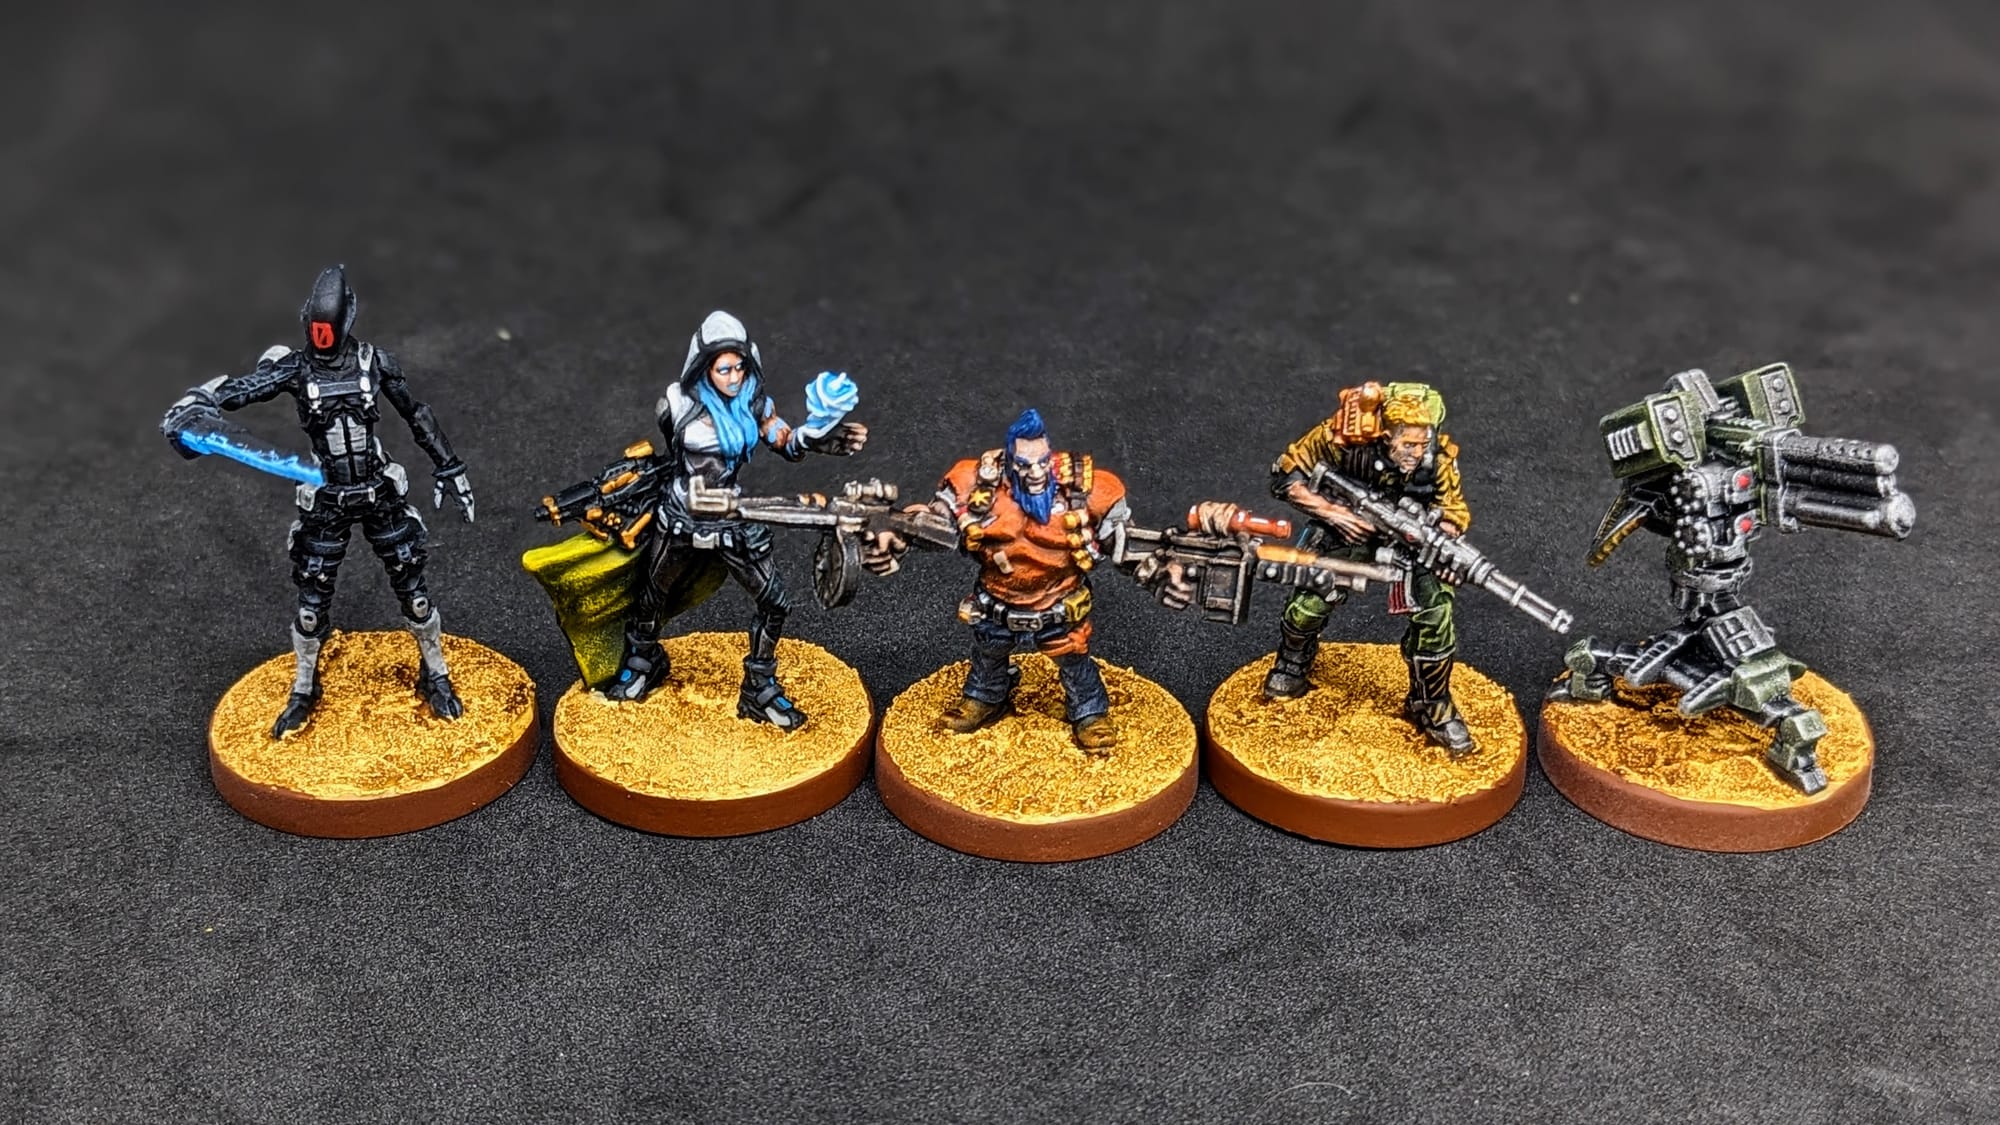
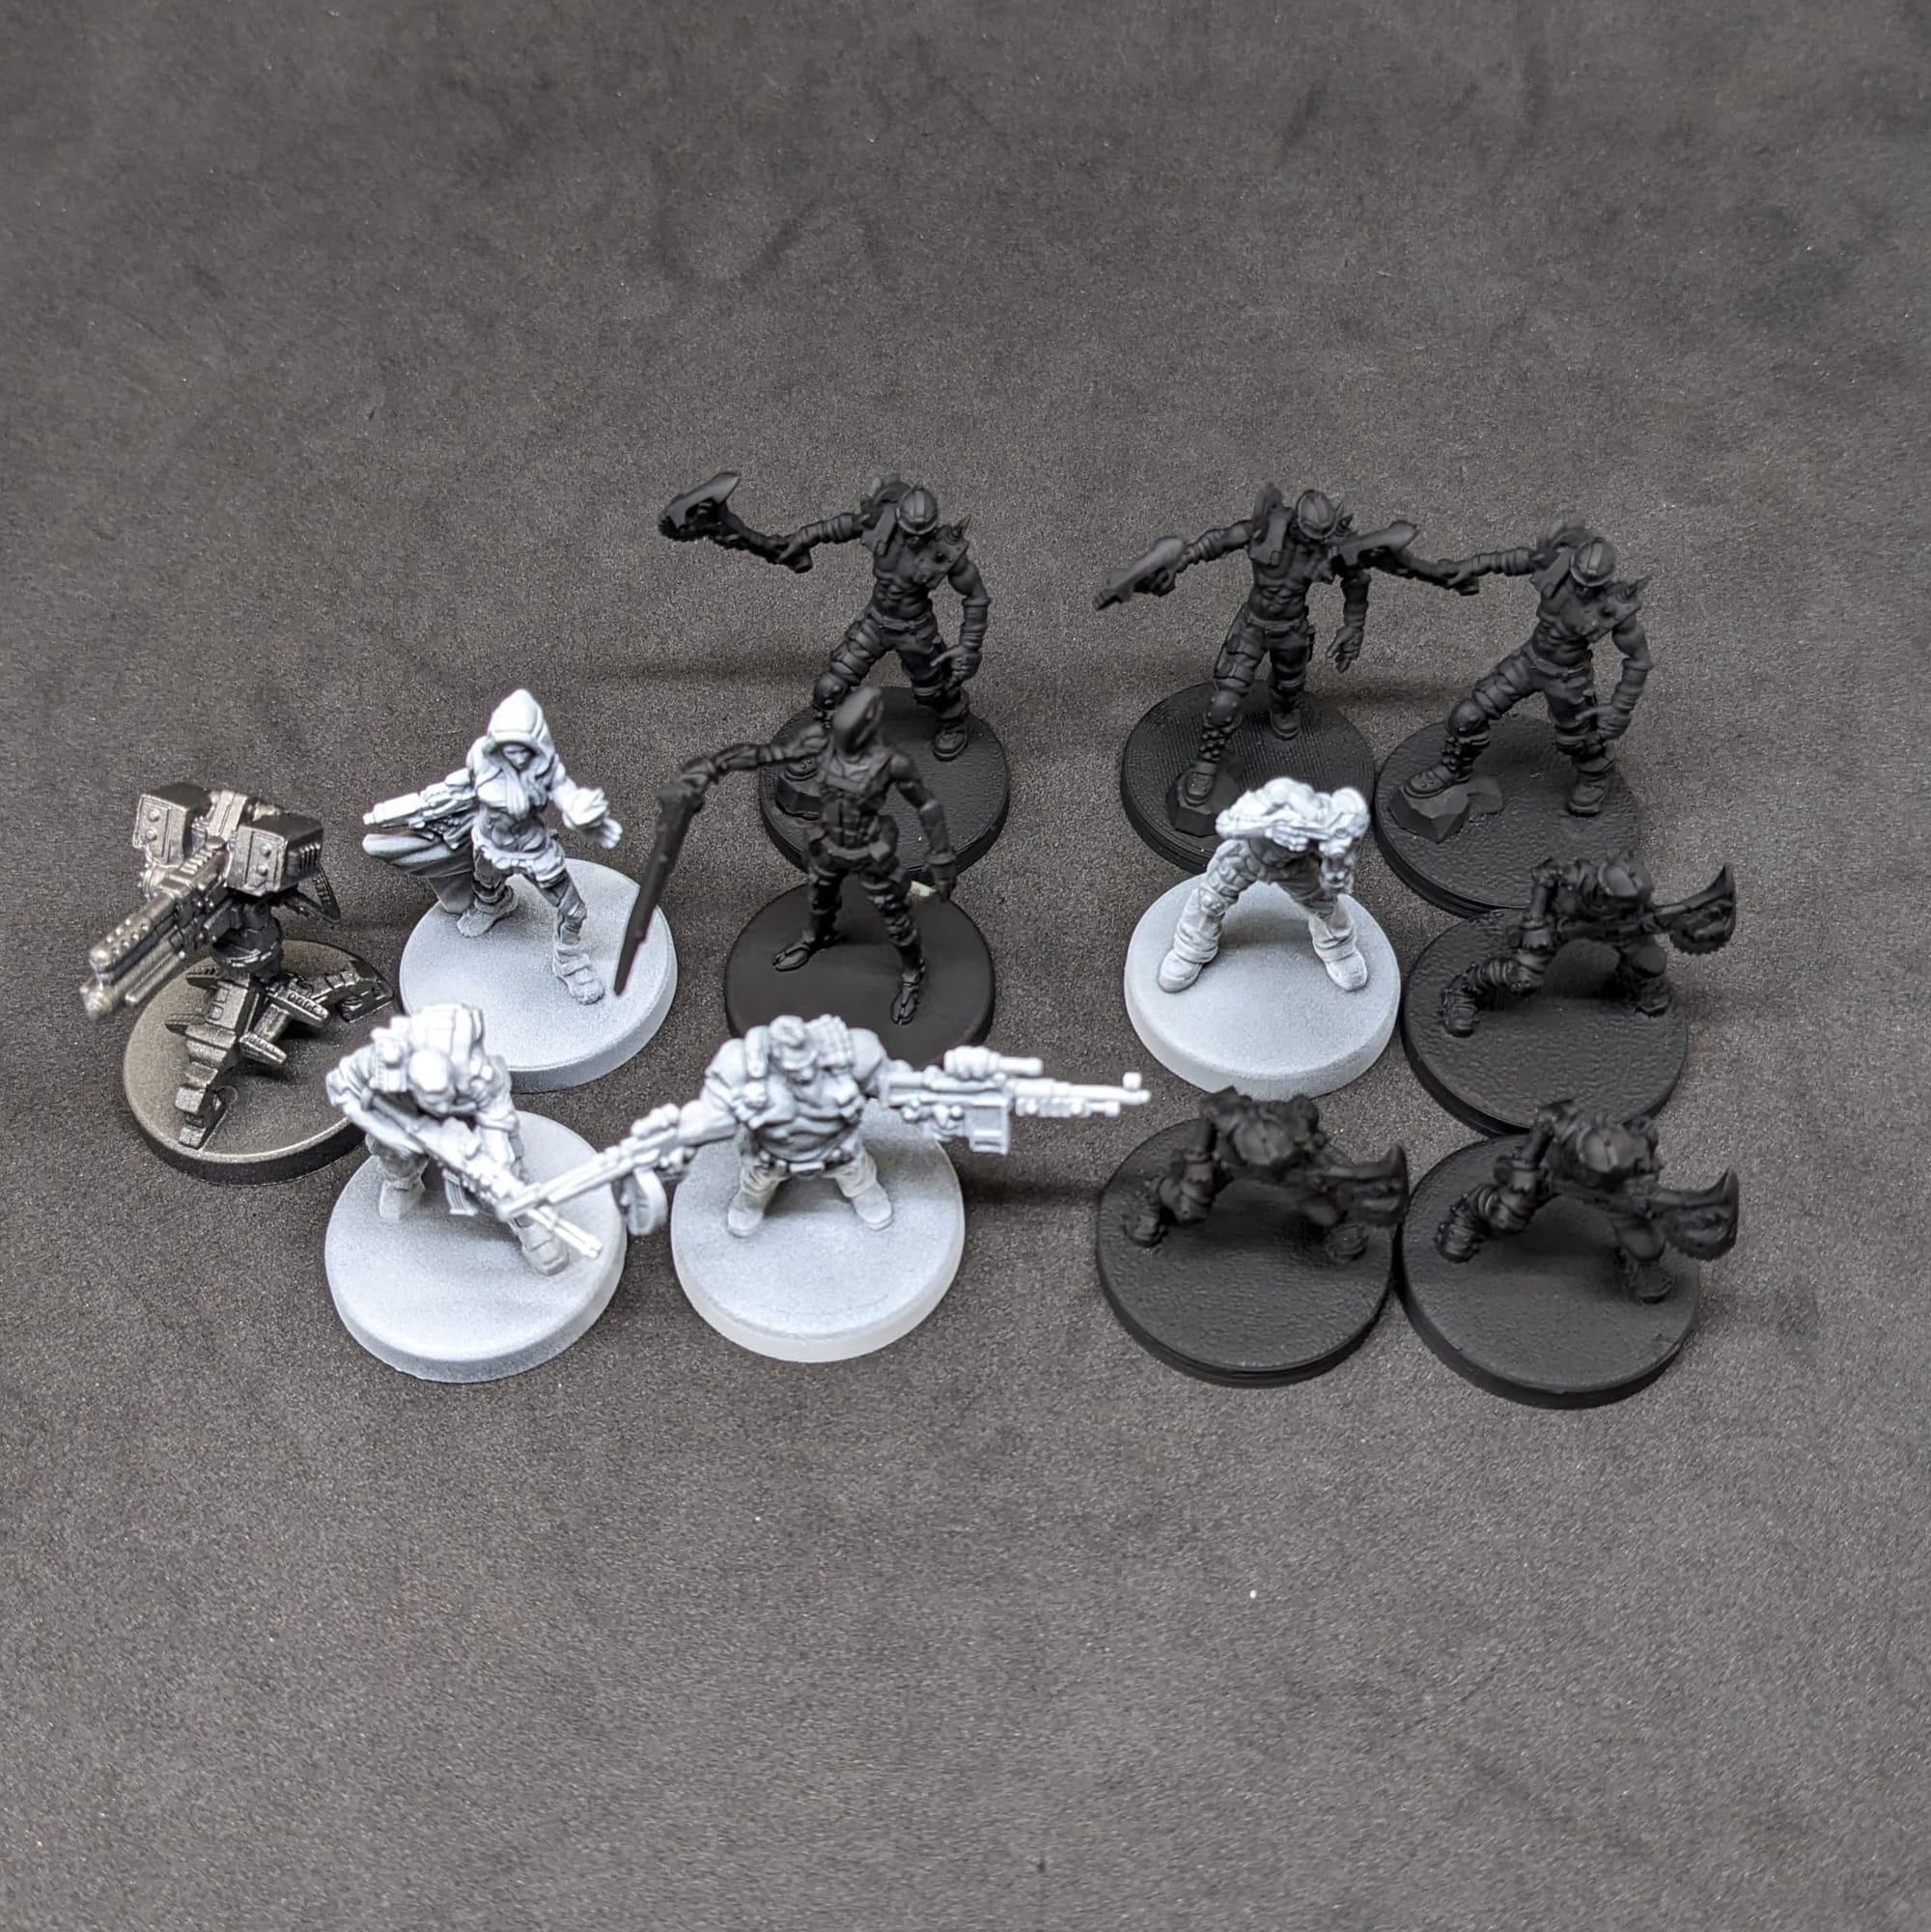
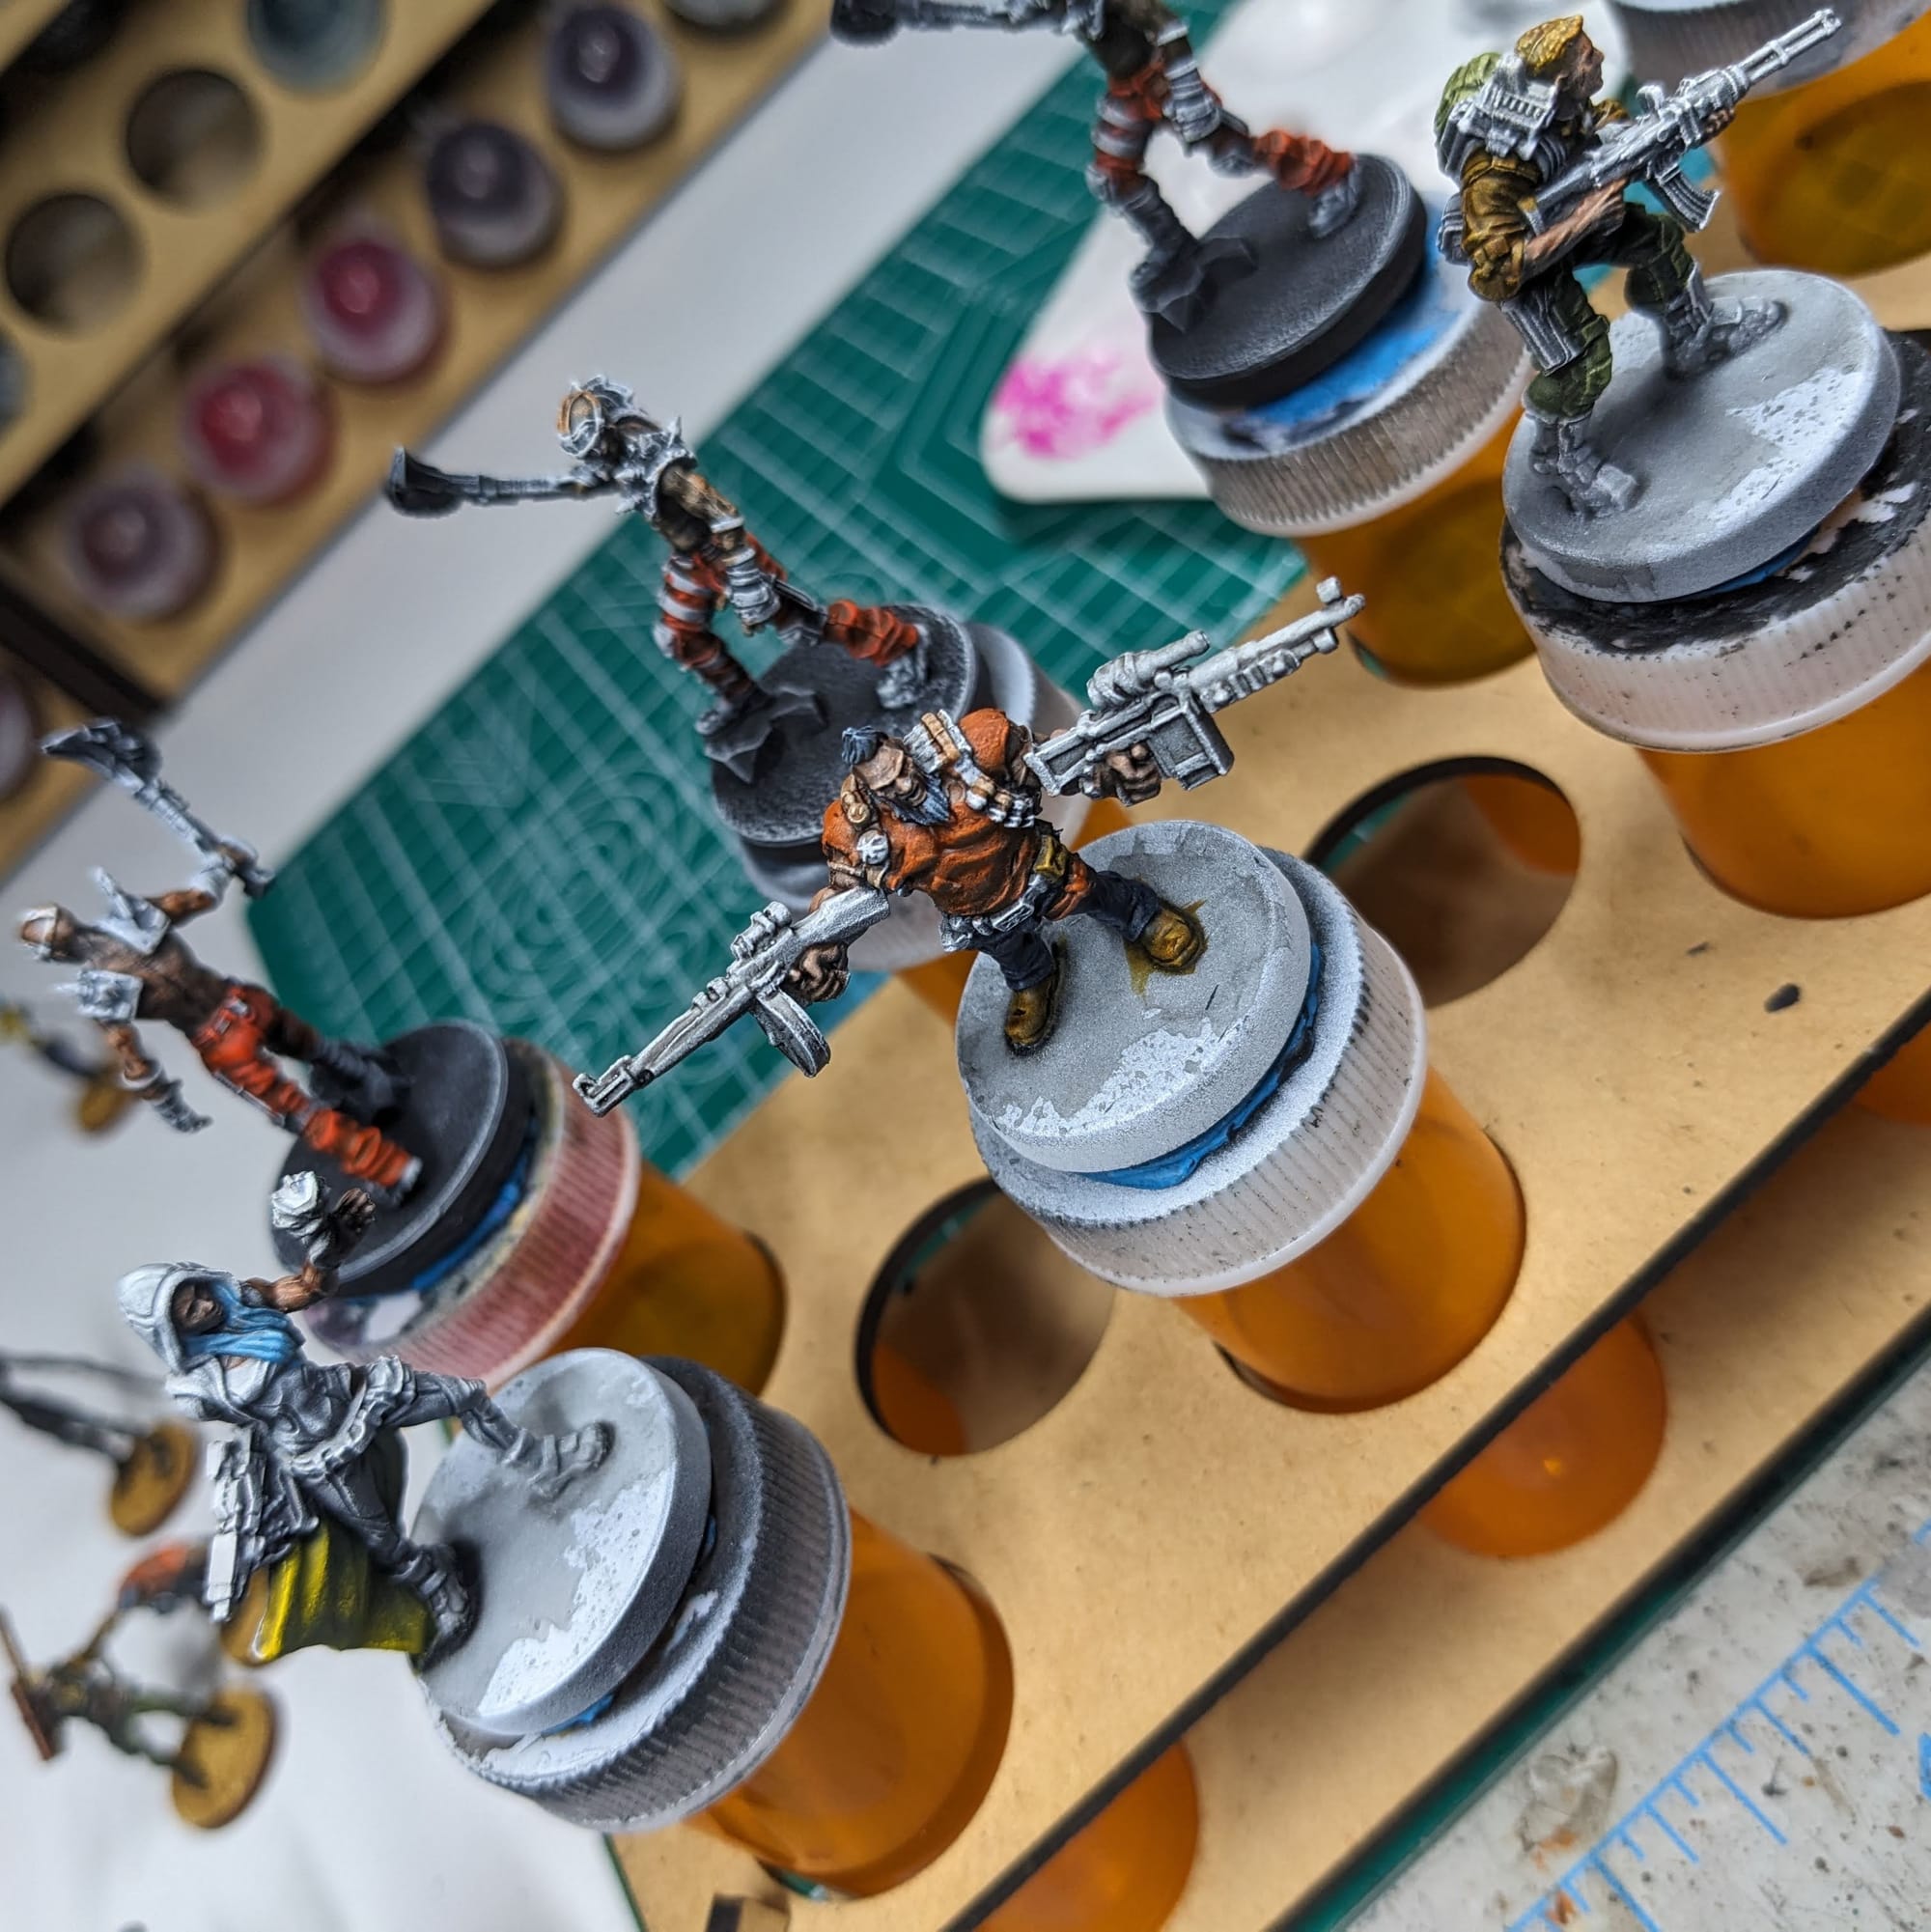
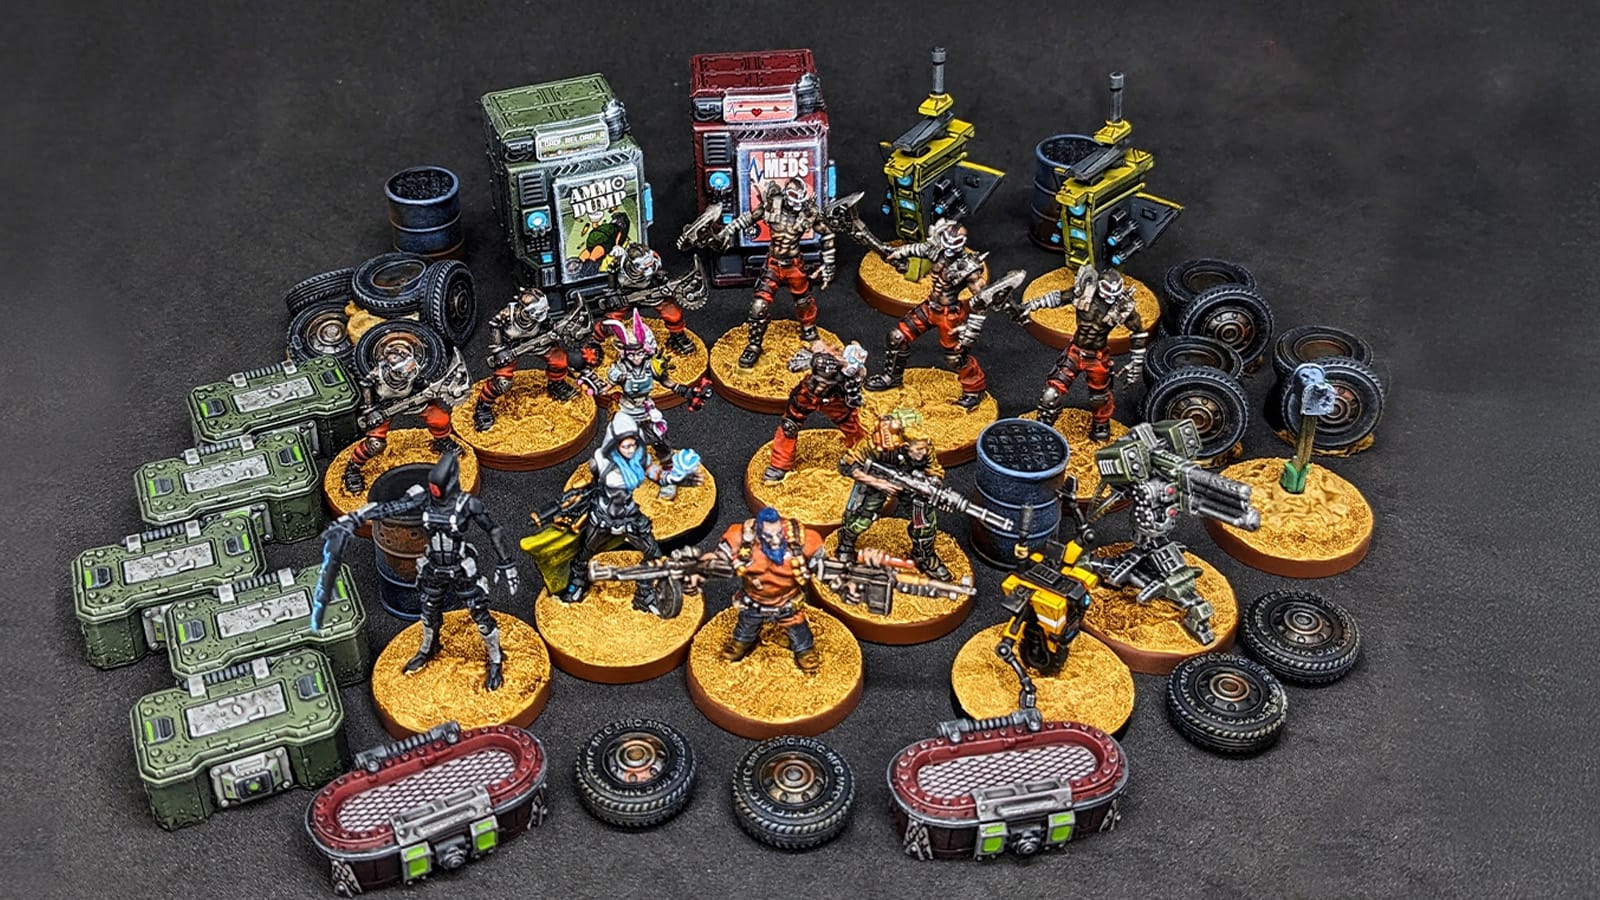
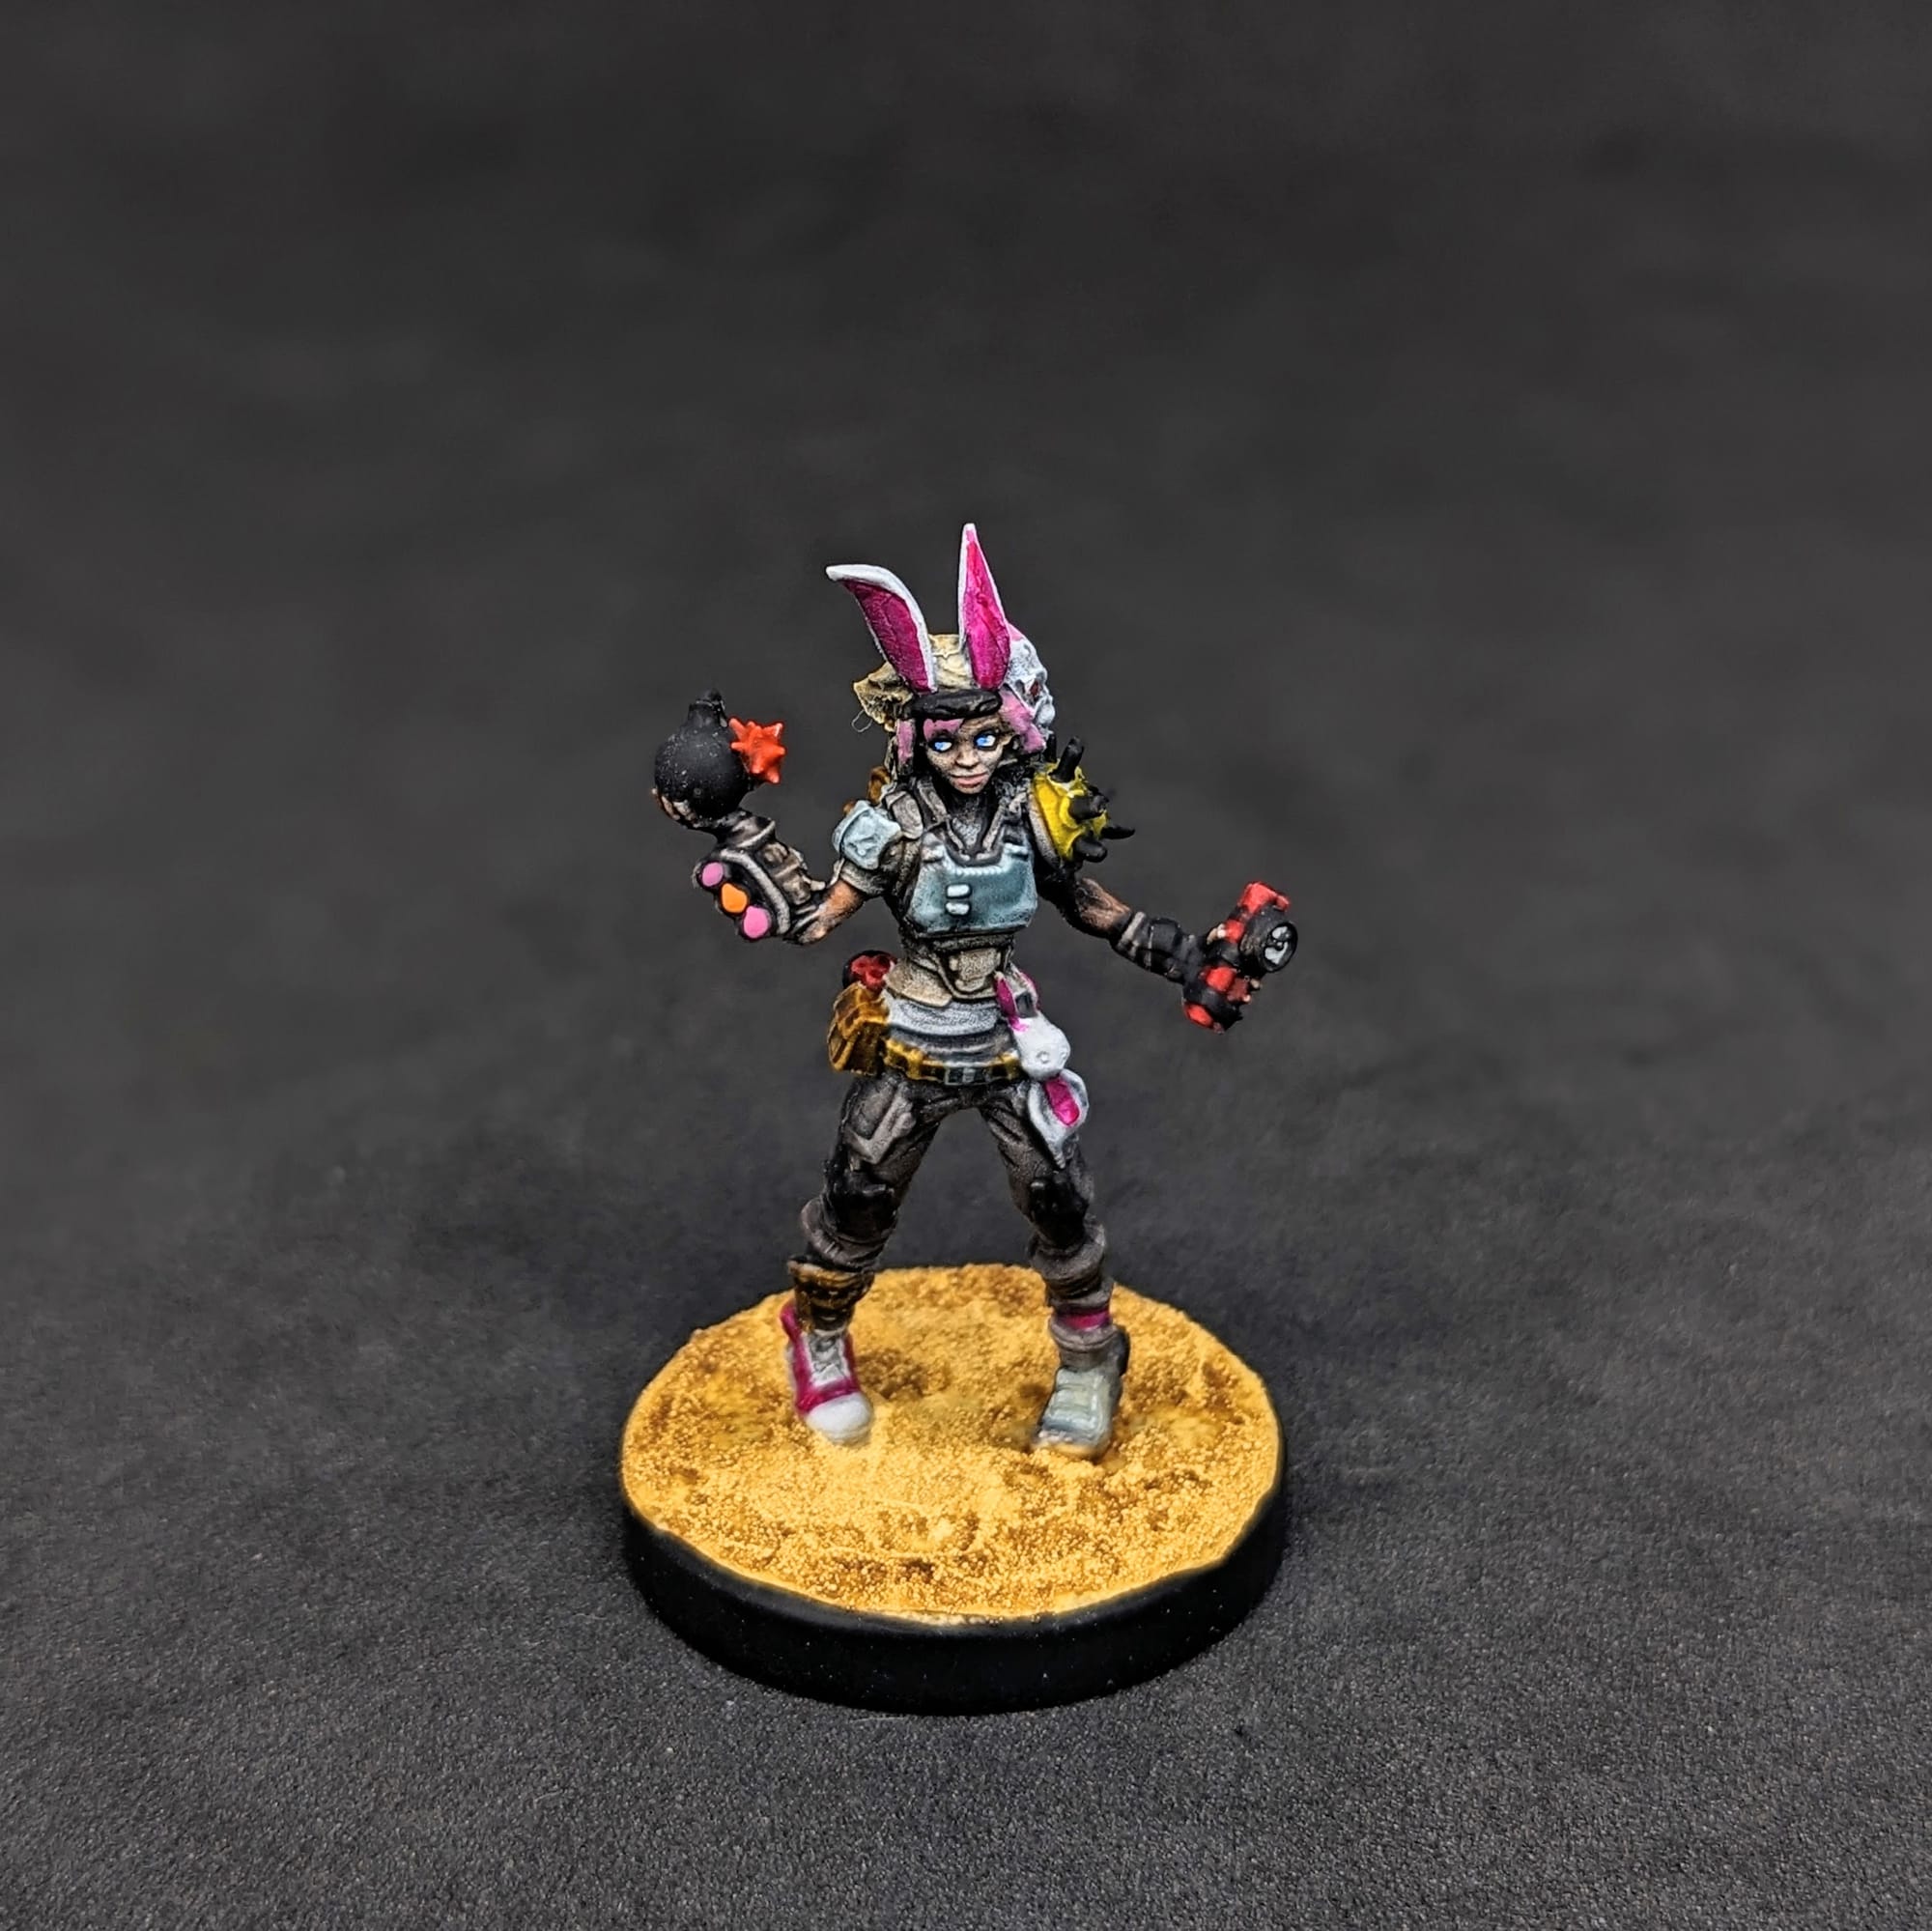
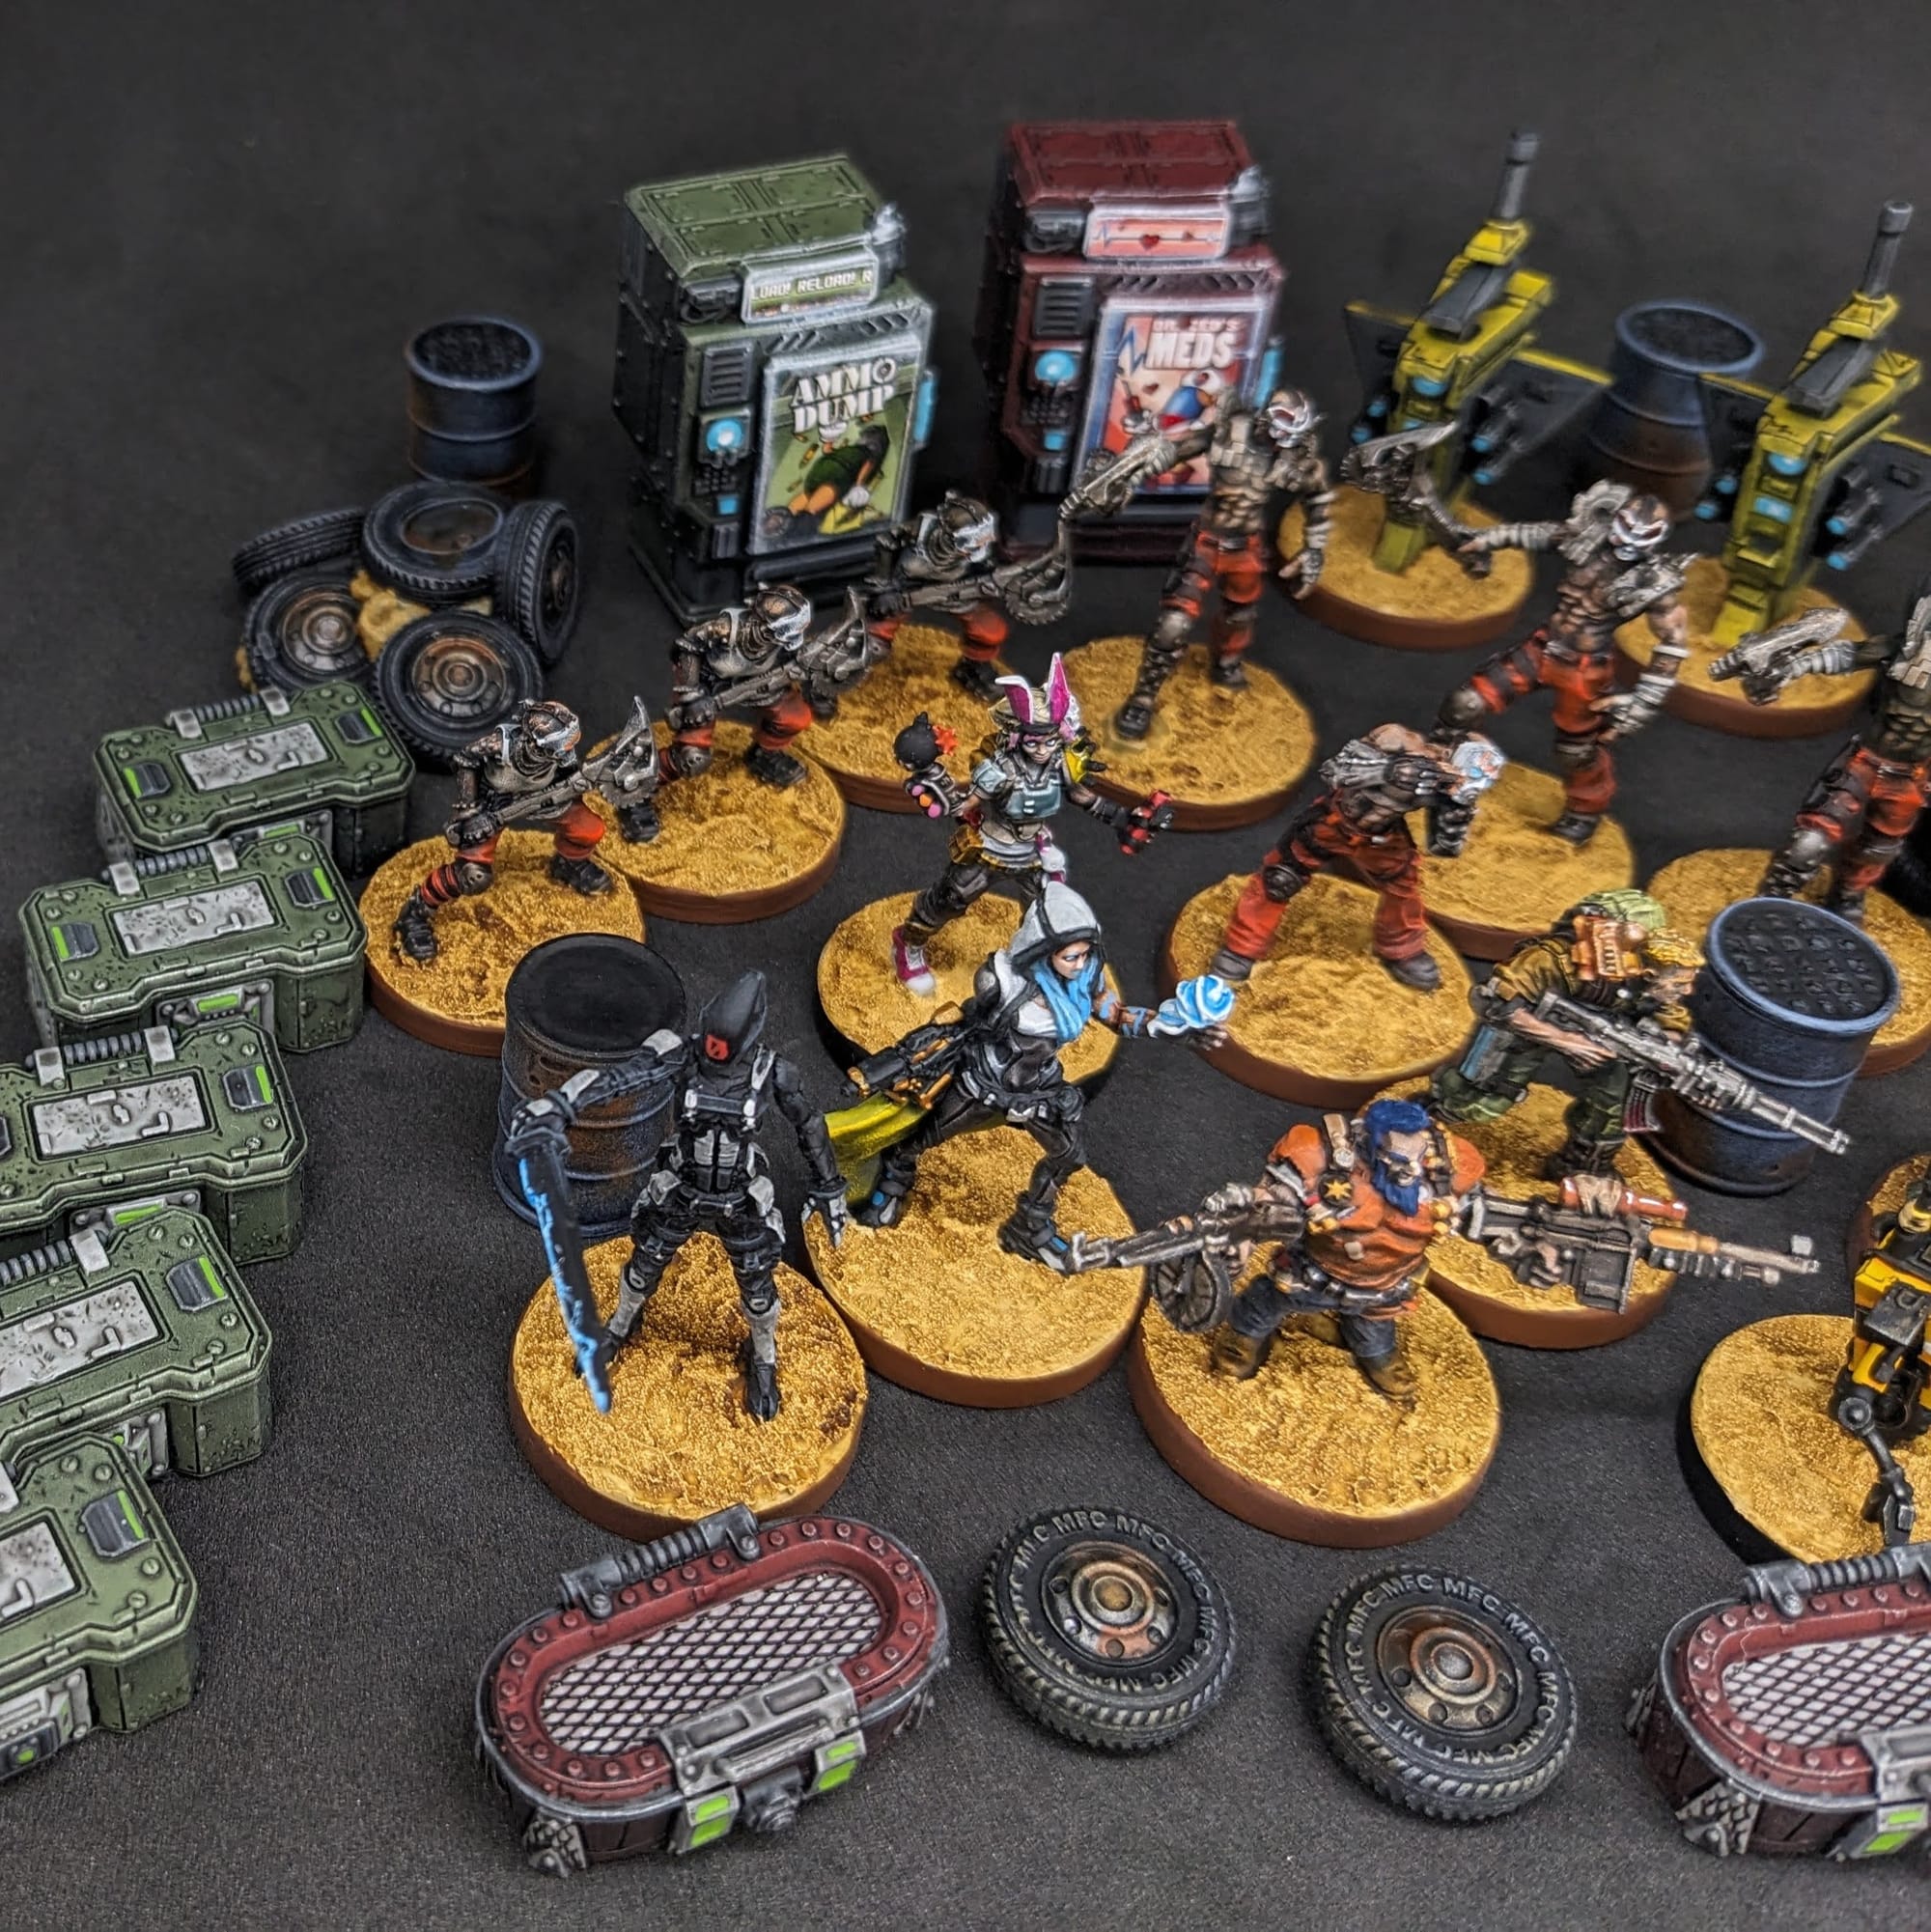
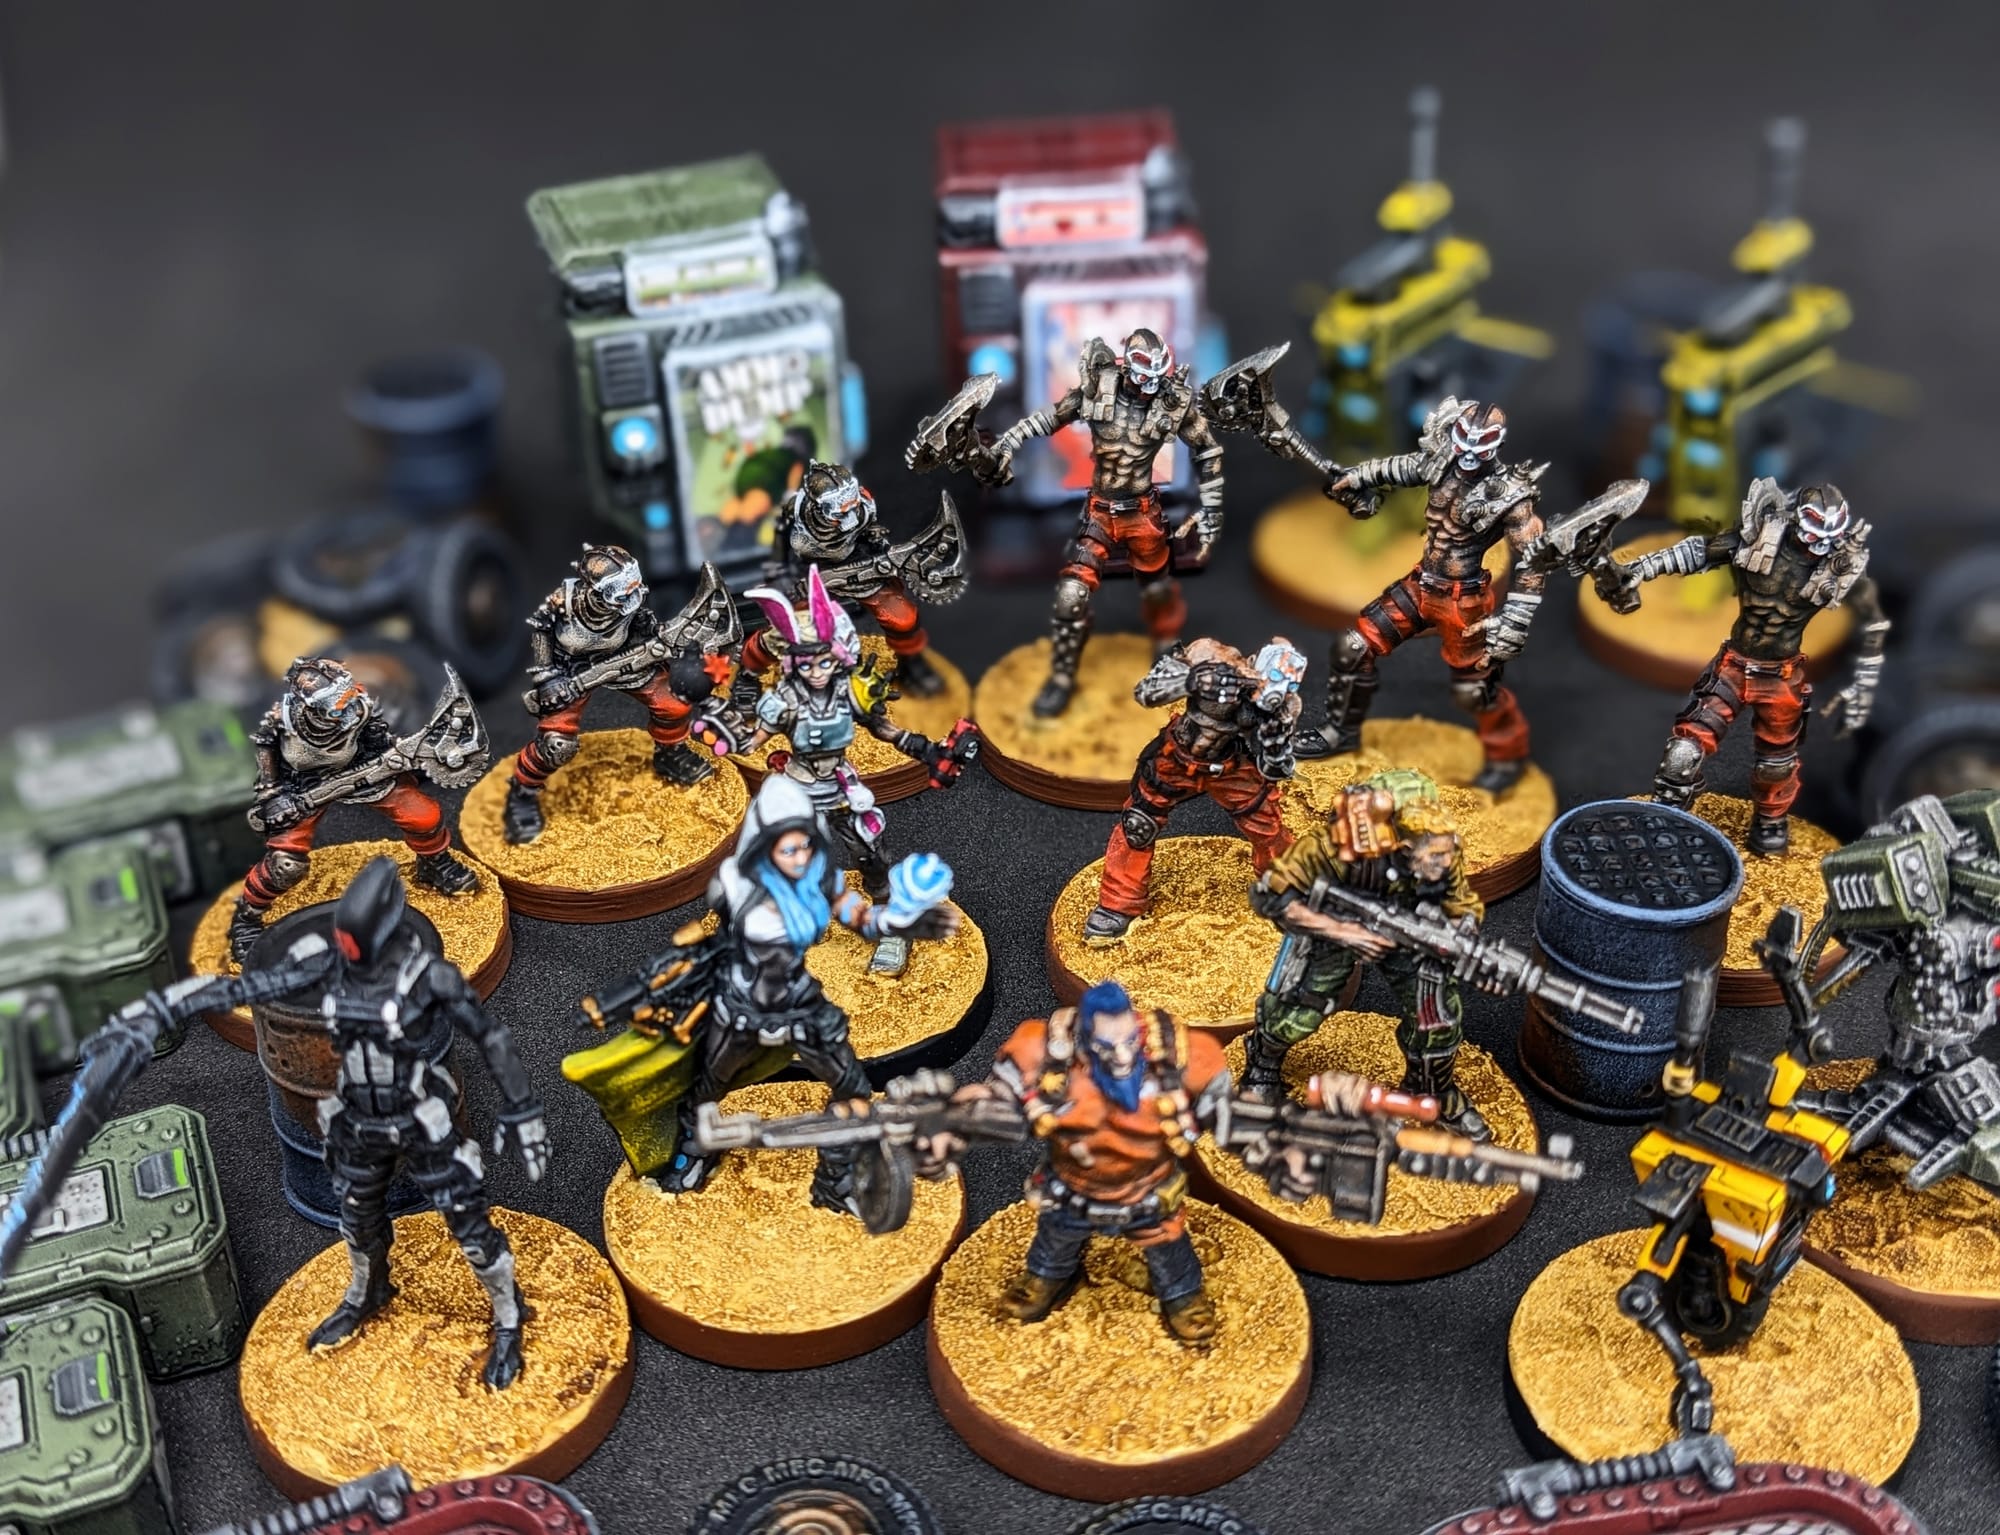
Having just finished playing through Borderlands 2, I chose to paint up the original four Vault Hunters from it, as well as the recently-released Maniacs pack along with some 3d objects to make the board pop more.
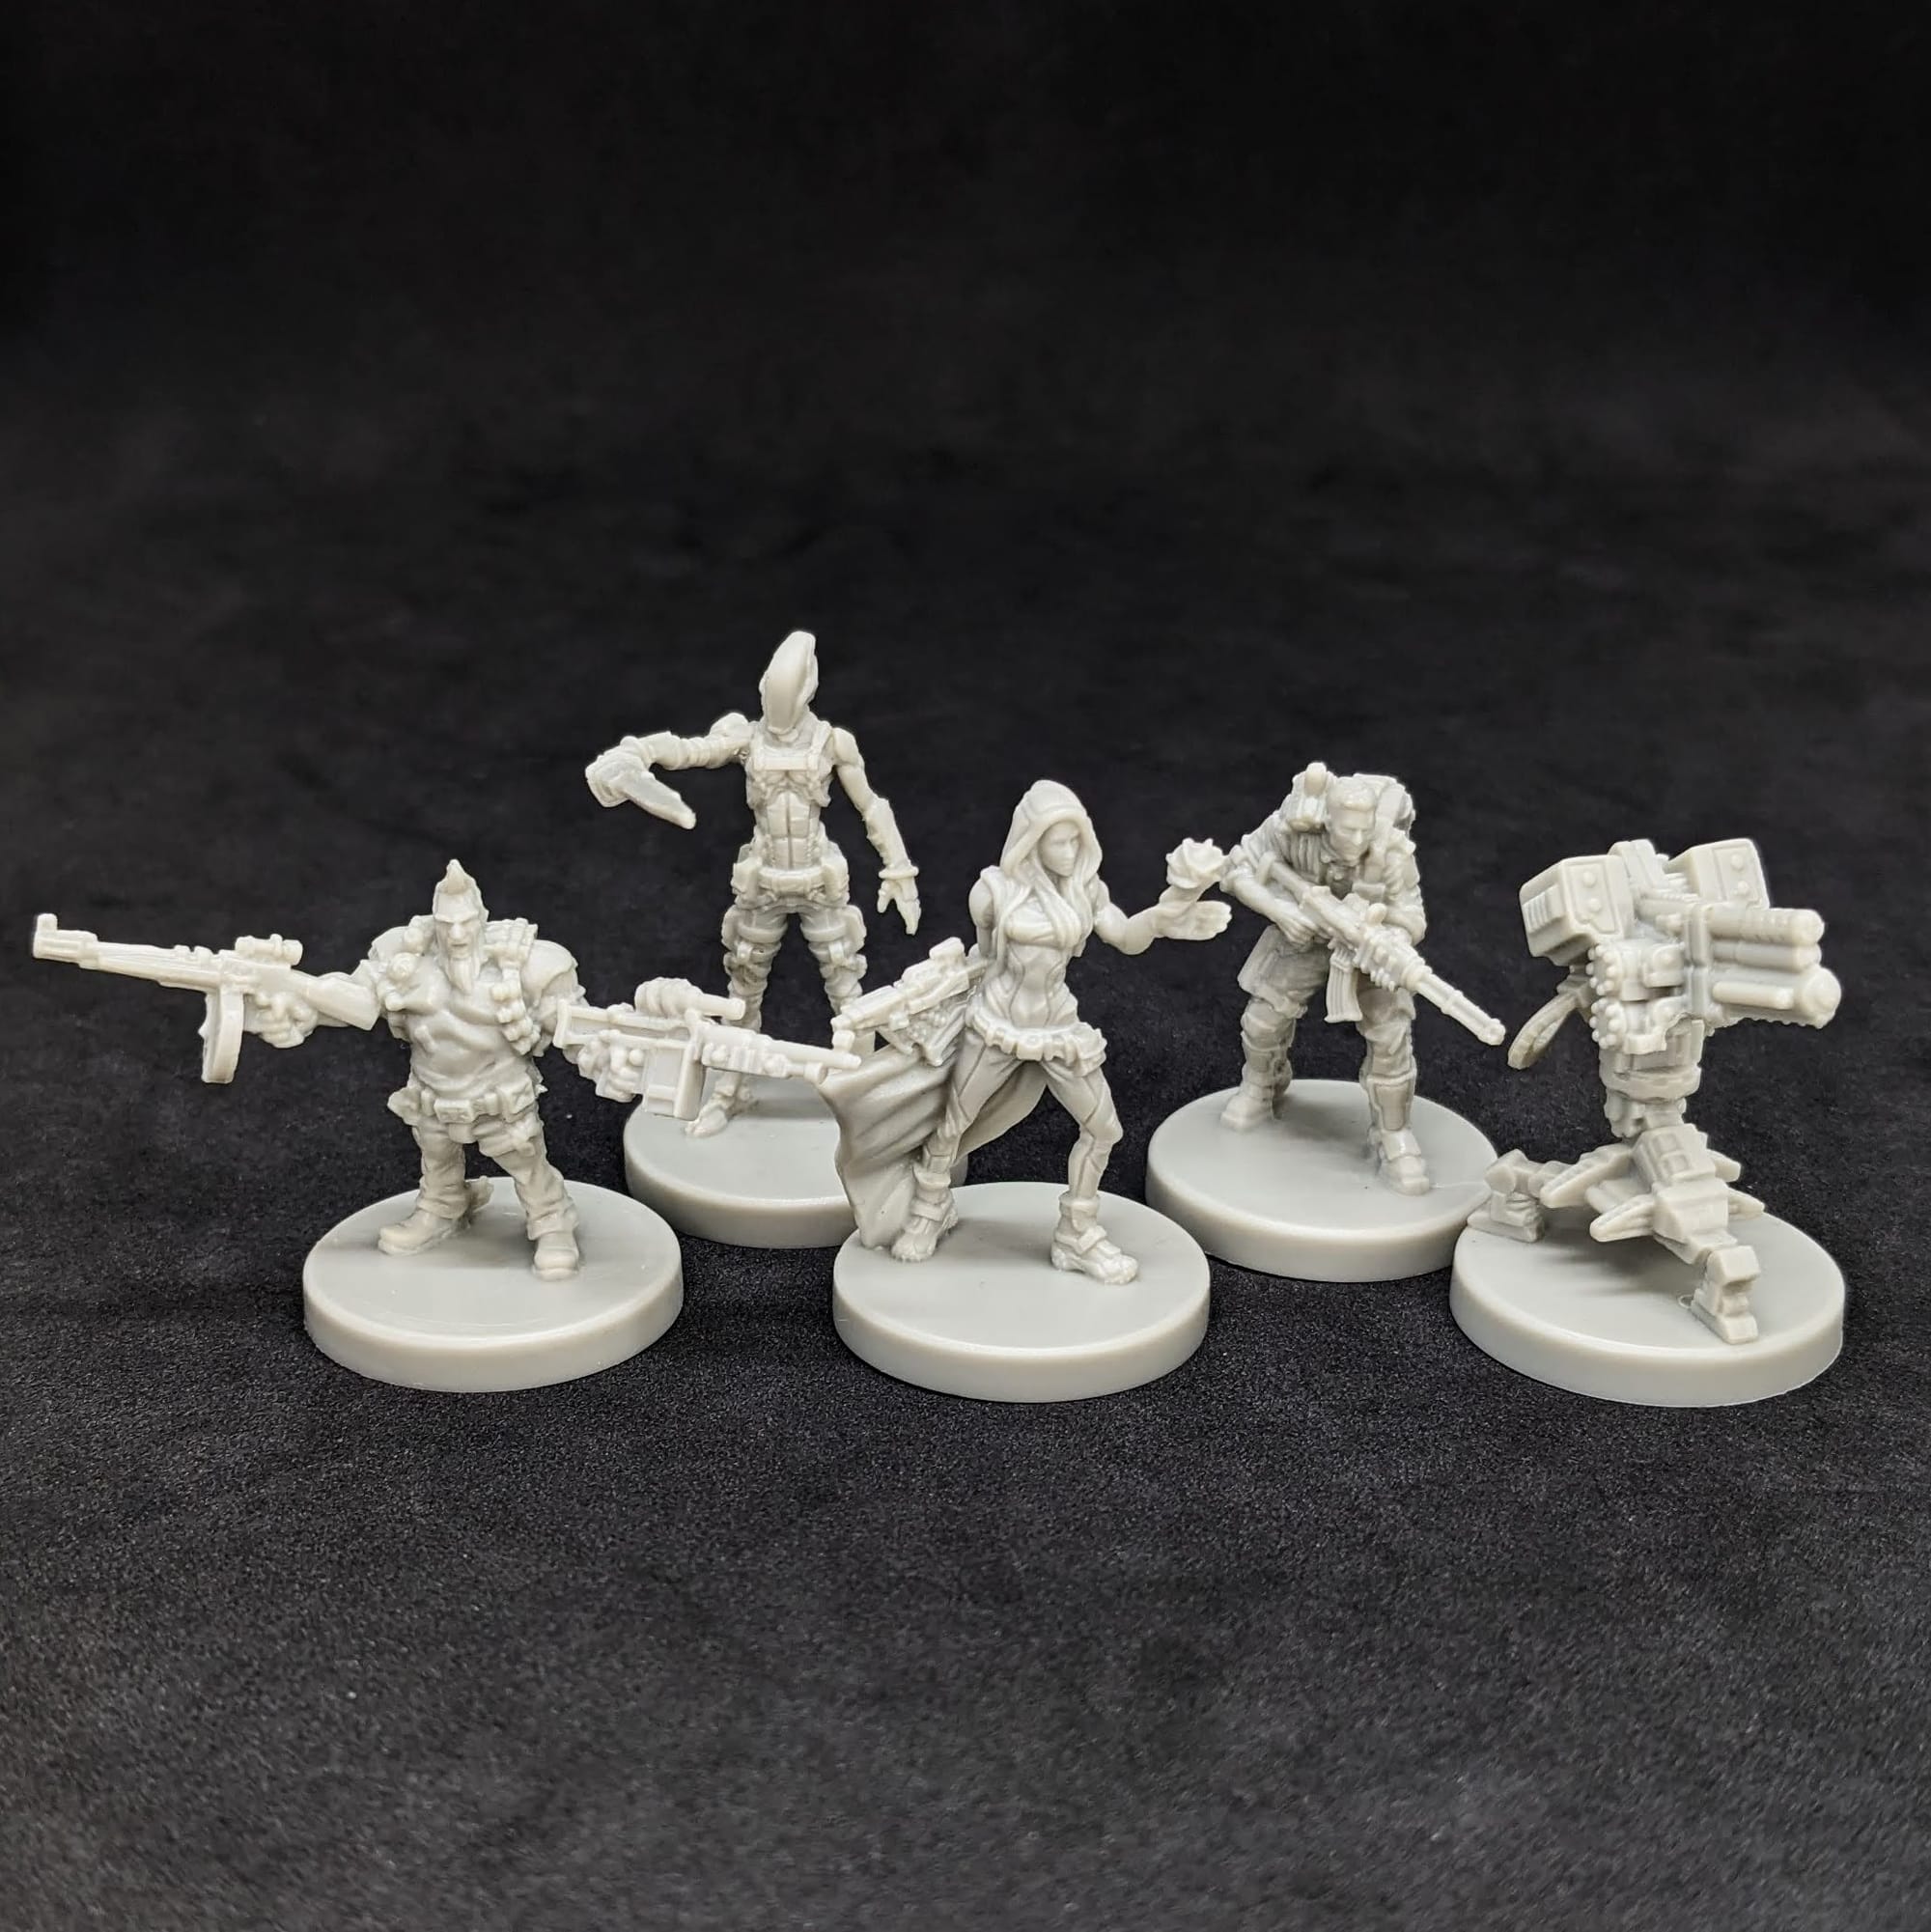
Borderlands 2 Vault Hunters, Maniacs, and Objects
To learn how to quickly paint your models and get them out of gray and ready for play, I will be going through the step-by-step process for these pieces. These tutorials are meant to get your miniatures painted and make them stand out on the table. This guide is meant to help you build confidence with miniature painting. We’re not going for gold medals on these models - this is simply a quick and simple way to get your pieces painted, regardless of your painting skill level.
PAINT, PRIMER, & BRUSHES
Everyone’s paint collection is different, and there is no ‘right way’ to paint your models. I use a wide variety of paint lines, but the majority of what I use for painting is Monument Hobbies’ Pro Acryl, Games Workshop’s Citadel Paints, and Army Painter’s various paint lines.
For this tutorial, I have included a visual guide of the paints I used for the miniatures so you have an easily-accessible list to refer to if you need to go shopping. The paints are noted on the picture, in the lists for the objects, and in the optional ‘Basing’ section. Many different paints are used for multiple figures, so a single bottle will be more than enough for this project.
As far as brushes go, any brush brand you’re comfortable painting with is totally fine. If this is your first time painting, I’d encourage you to get a starter brush pack or a series of different brush sizes (5 being the largest, 00000 being the smallest) so you have some different options to choose from depending on what you’re painting. You don’t need the high-end, super expensive brands; most generic brands are absolutely fine to use.
Especially for Citadel and Army Painter paints, I also make sure to mix in Liquitex Flow-Aid Additive to the paint pots and dropper bottles so that the paints are a little thinner and ready to add right onto my wet pallet.
PREPPING YOUR MODELS FOR PAINTING
The injection molding manufacturing process for most models and miniatures is a fast way for companies to produce minis. However, the process requires a release agent within the mold itself and, depending on the plastic, causes rapid heating and cooling leading to warping of the models during packaging. Fortunately, there are some really simple fixes for these issues, which you can do before you start painting.
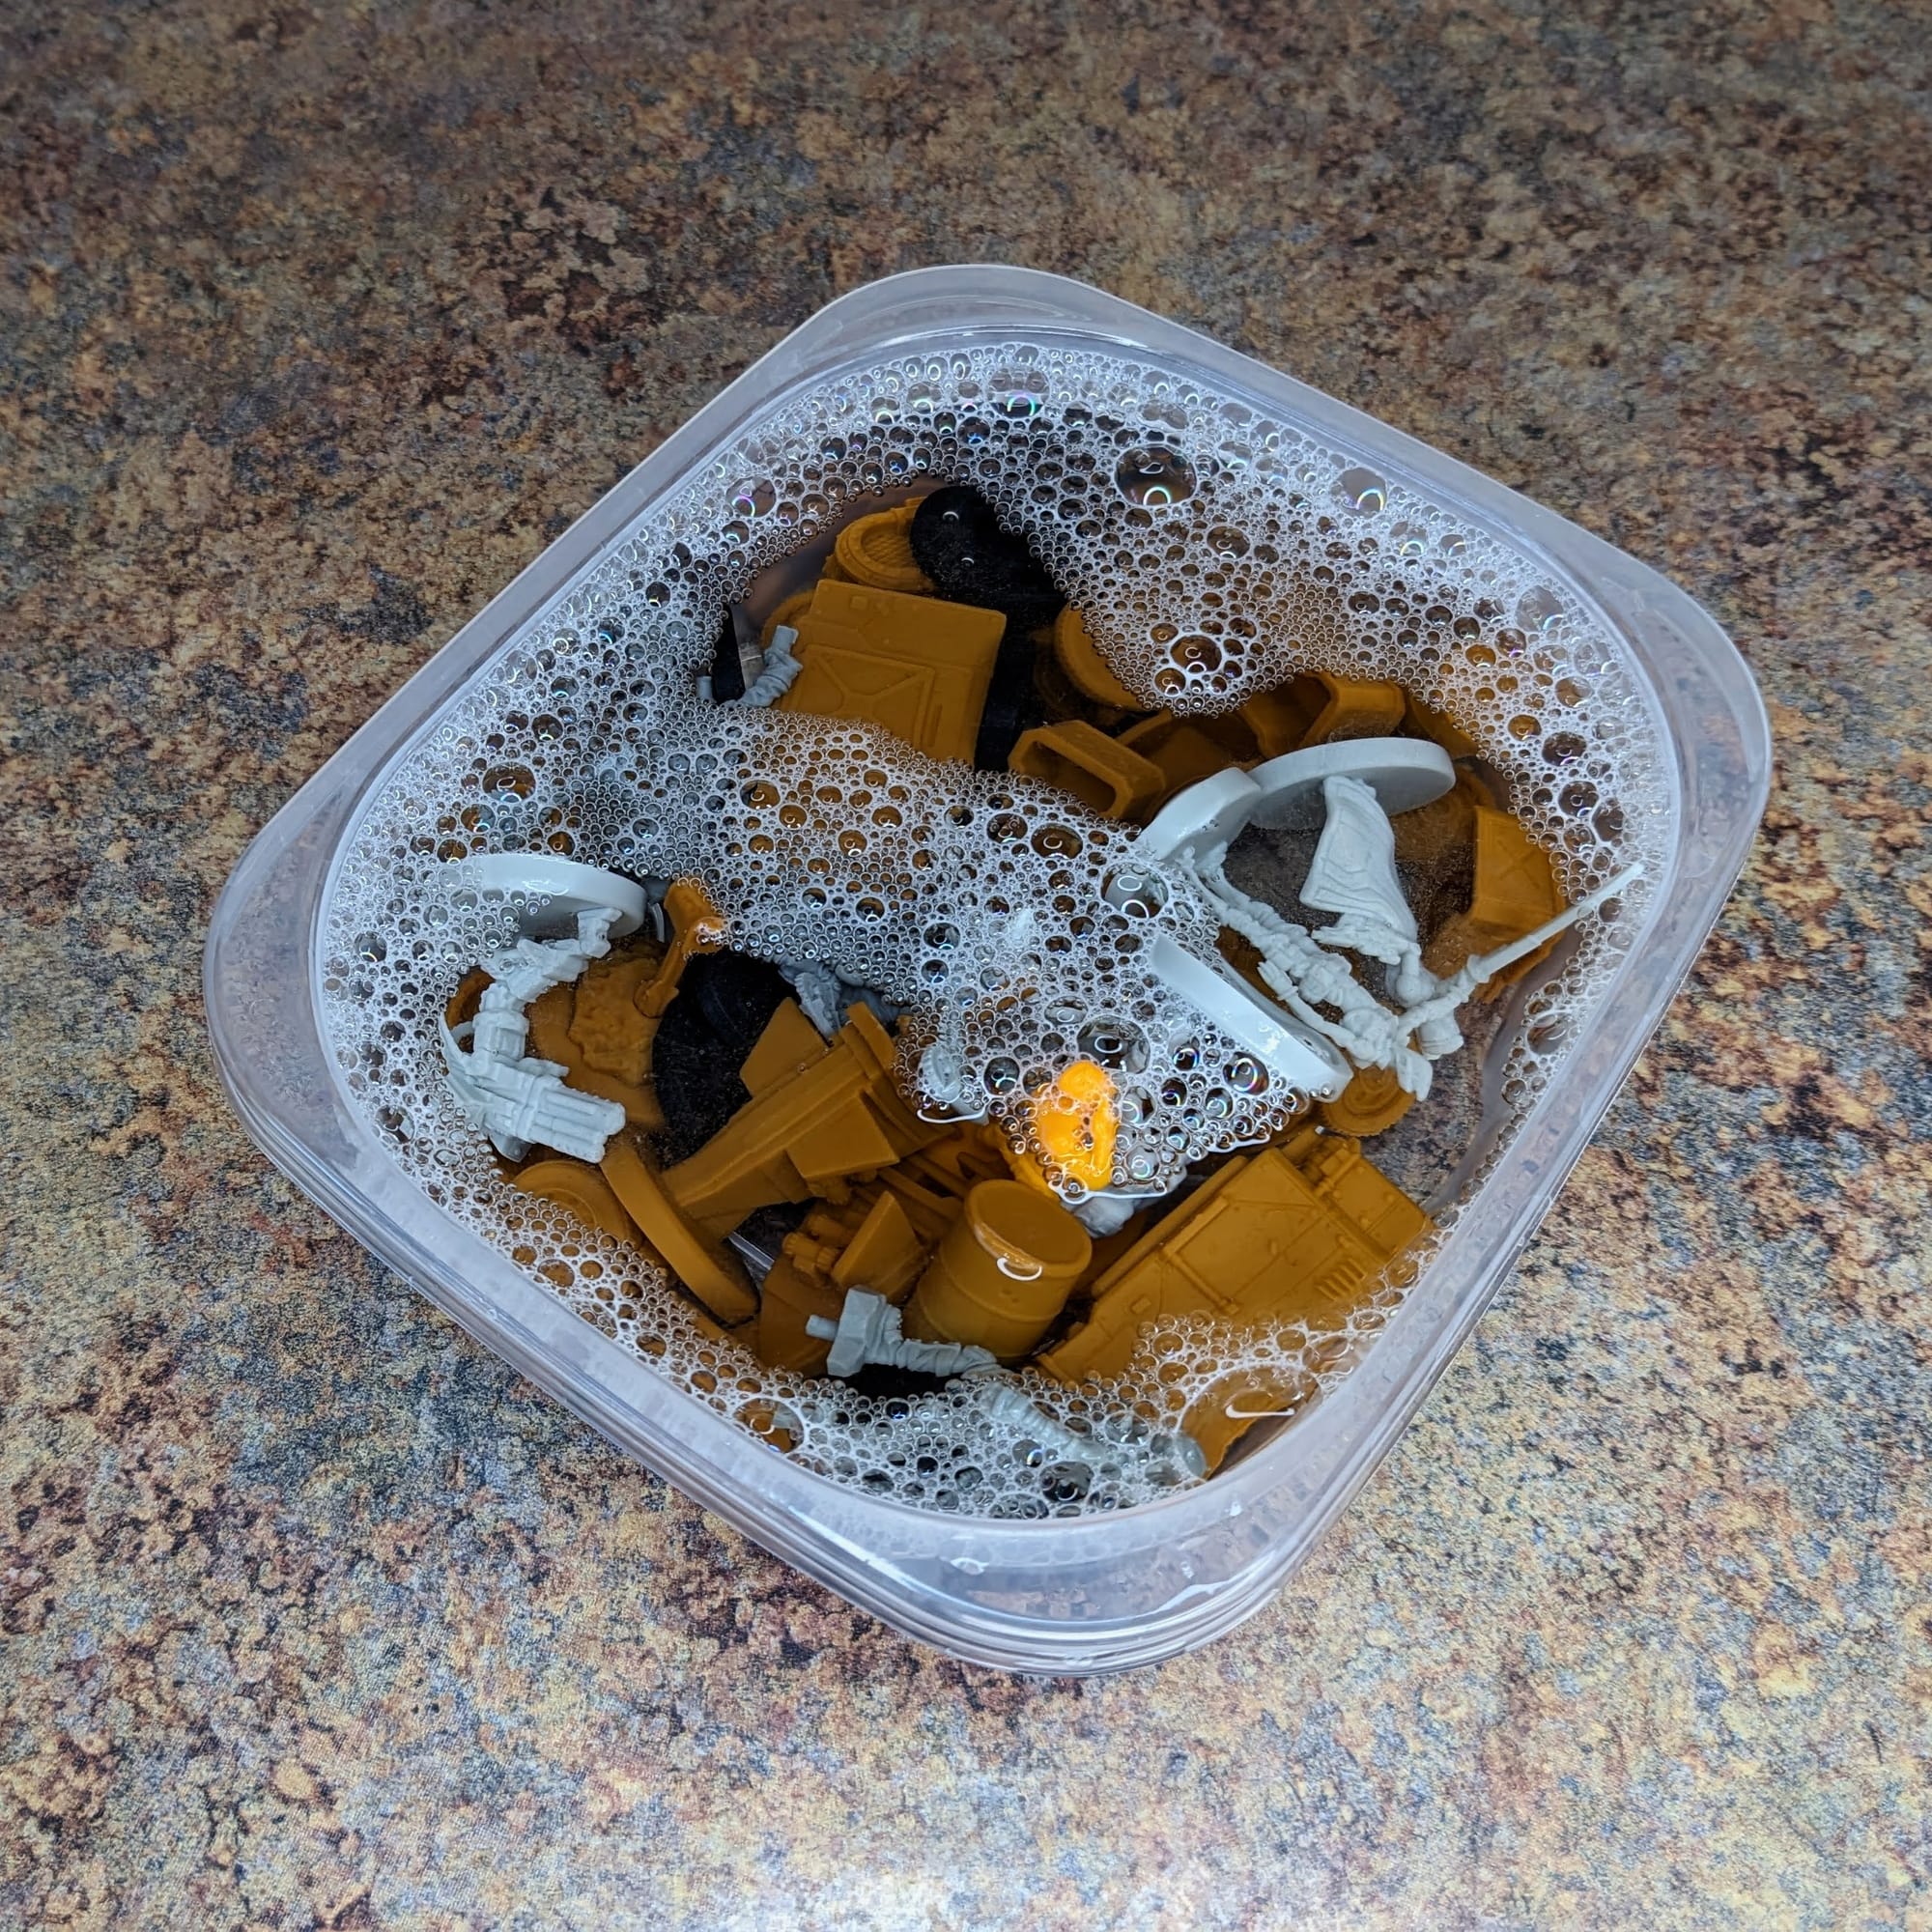
Washing Your Minis
Release agent chemicals can be easily removed by washing them thoroughly with dish soap and warm water. I have found that single-piece minis, like our Vault Hunters and Psychos, tend to have a greater amount of release agent to them. So, I just spent a little more time washing and scrubbing to get them clean.
Mold Lines
Soft plastic miniatures tend to have more pronounced mold lines than hard plastic ones. The mold lines are a result of the manufacturing process, where the two halves of the piece come together. These can be easily removed with an Xacto blade or mold line remover tool. Just be careful with the sharp blade, and be mindful of how hard you’re digging into the plastic; you don’t want to accidentally amputate your mini.
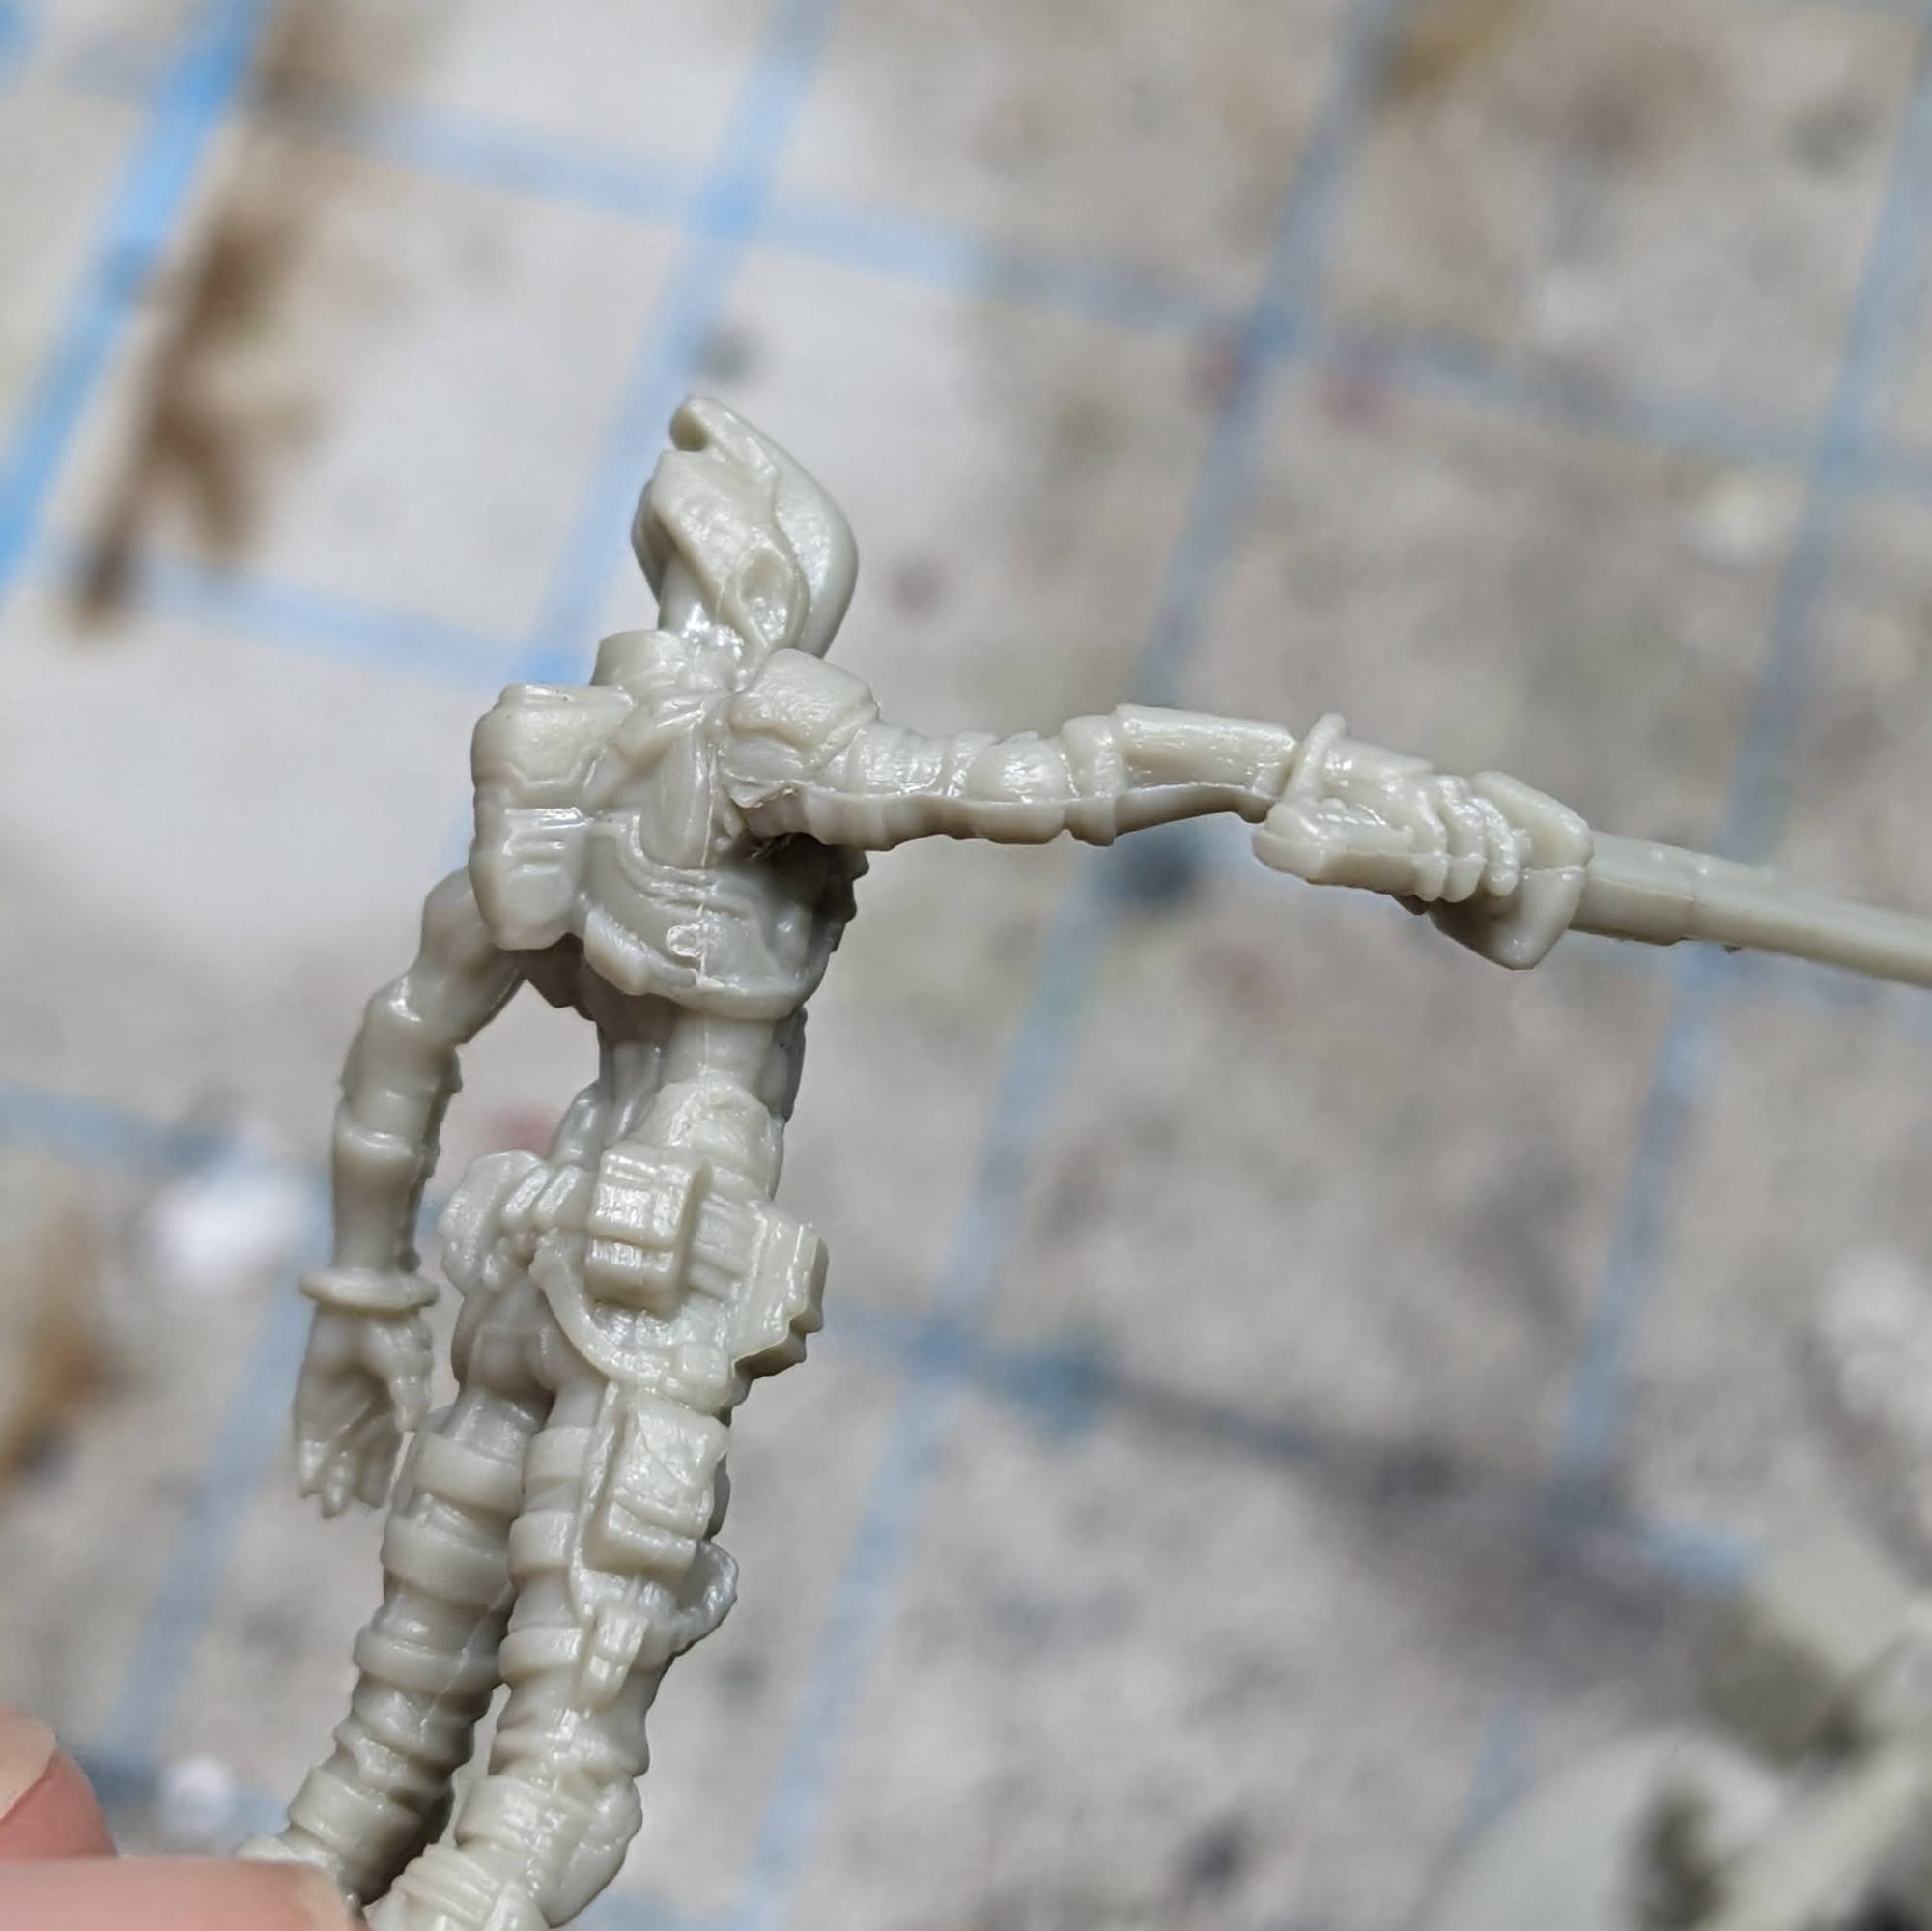


Warping Your Minis
The other common malady of single-piece miniatures is that the bases can arrive looking like potato chips. Guns, swords, arms, and other thin bits can also be warped. This is a really easy fix! Boil some water and pour it into a coffee cup. Using pliers or tweezers, submerge your model in the boiled water for 10-15 seconds. Take the model out and then push the model onto a flat surface, like a countertop. Once you’re satisfied with the shape of the plastic, submerge your model in a bowl of ice water for about 10-15 seconds, remove it, and place it on a towel to dry.
If you’re happy with the repositioning of the mini, then let it fully dry before your prime. If it still needs some tweaking, just repeat the process.
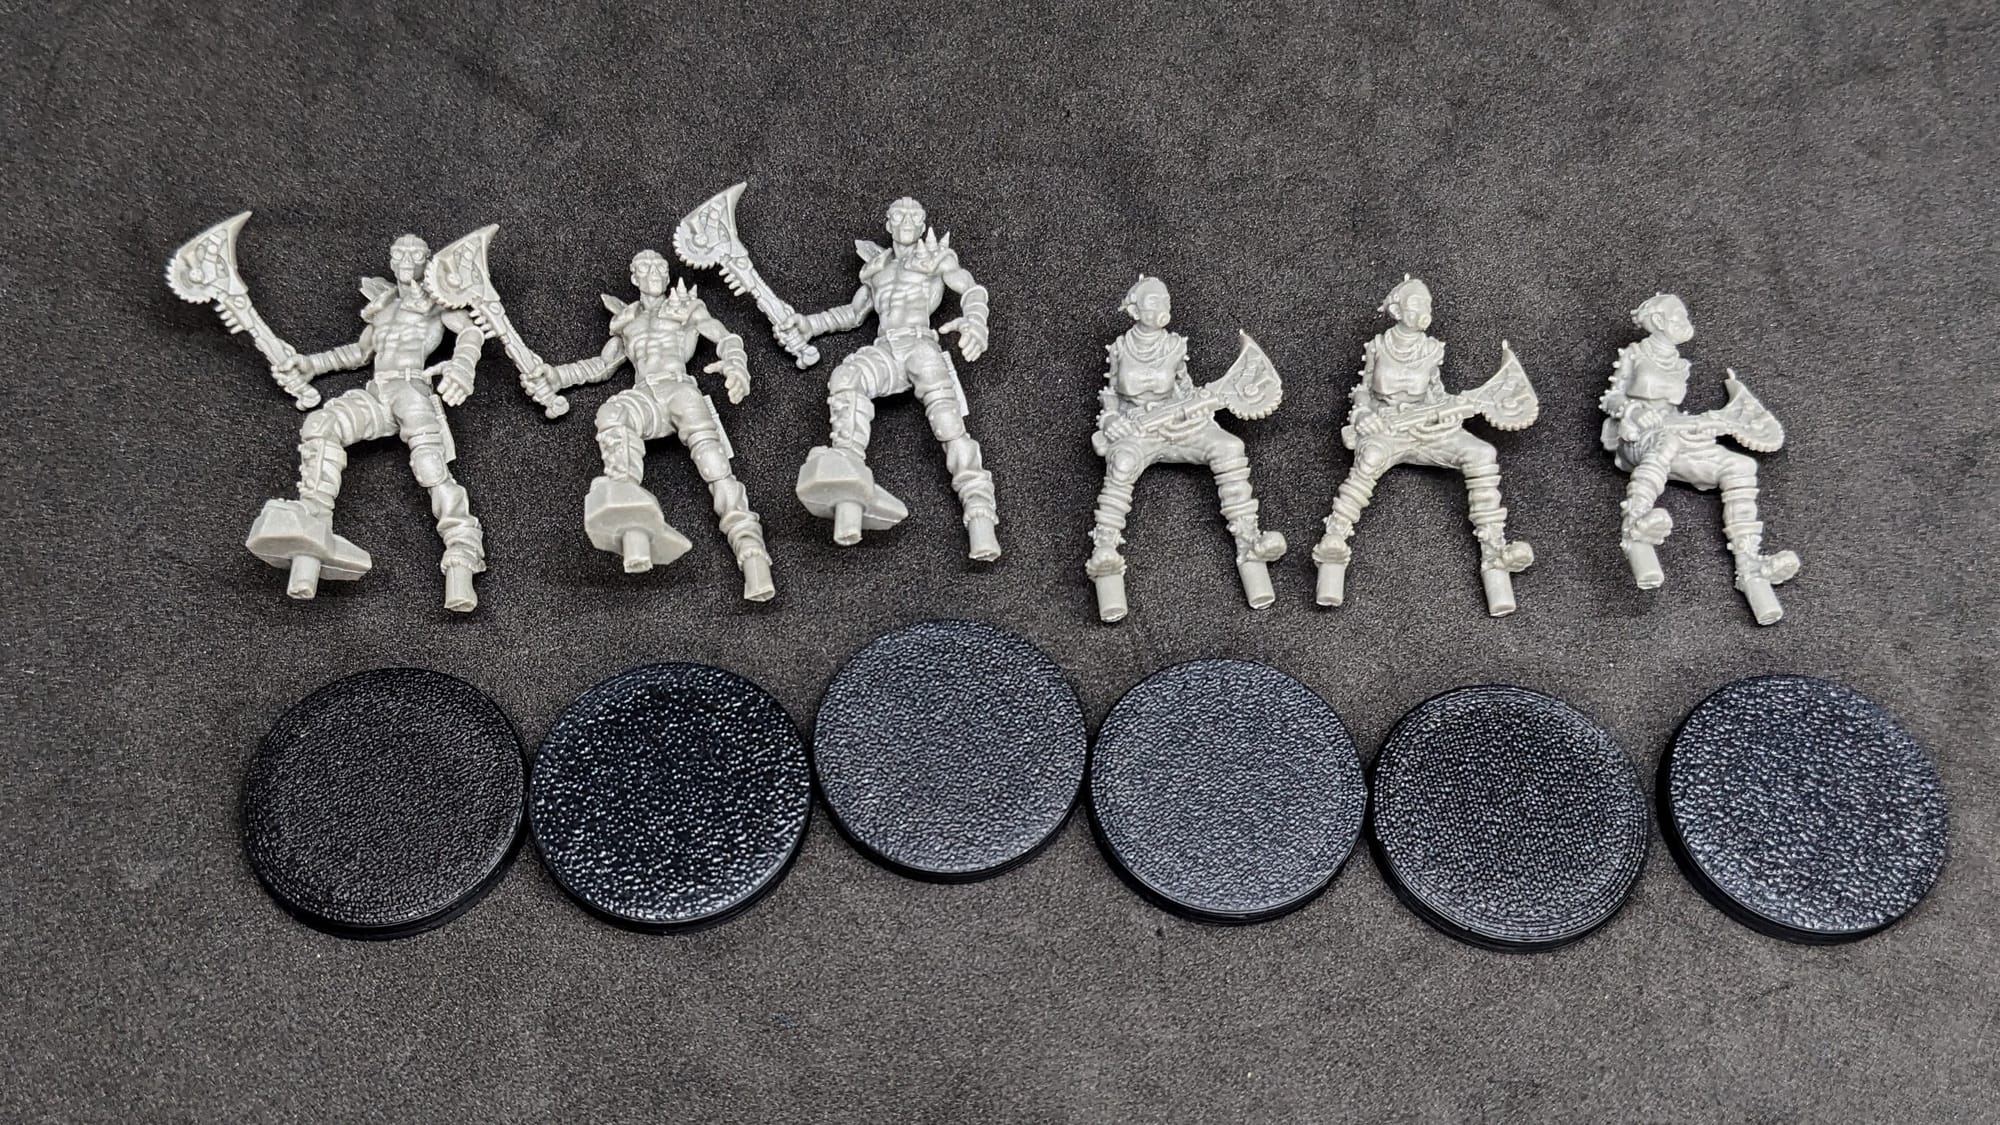
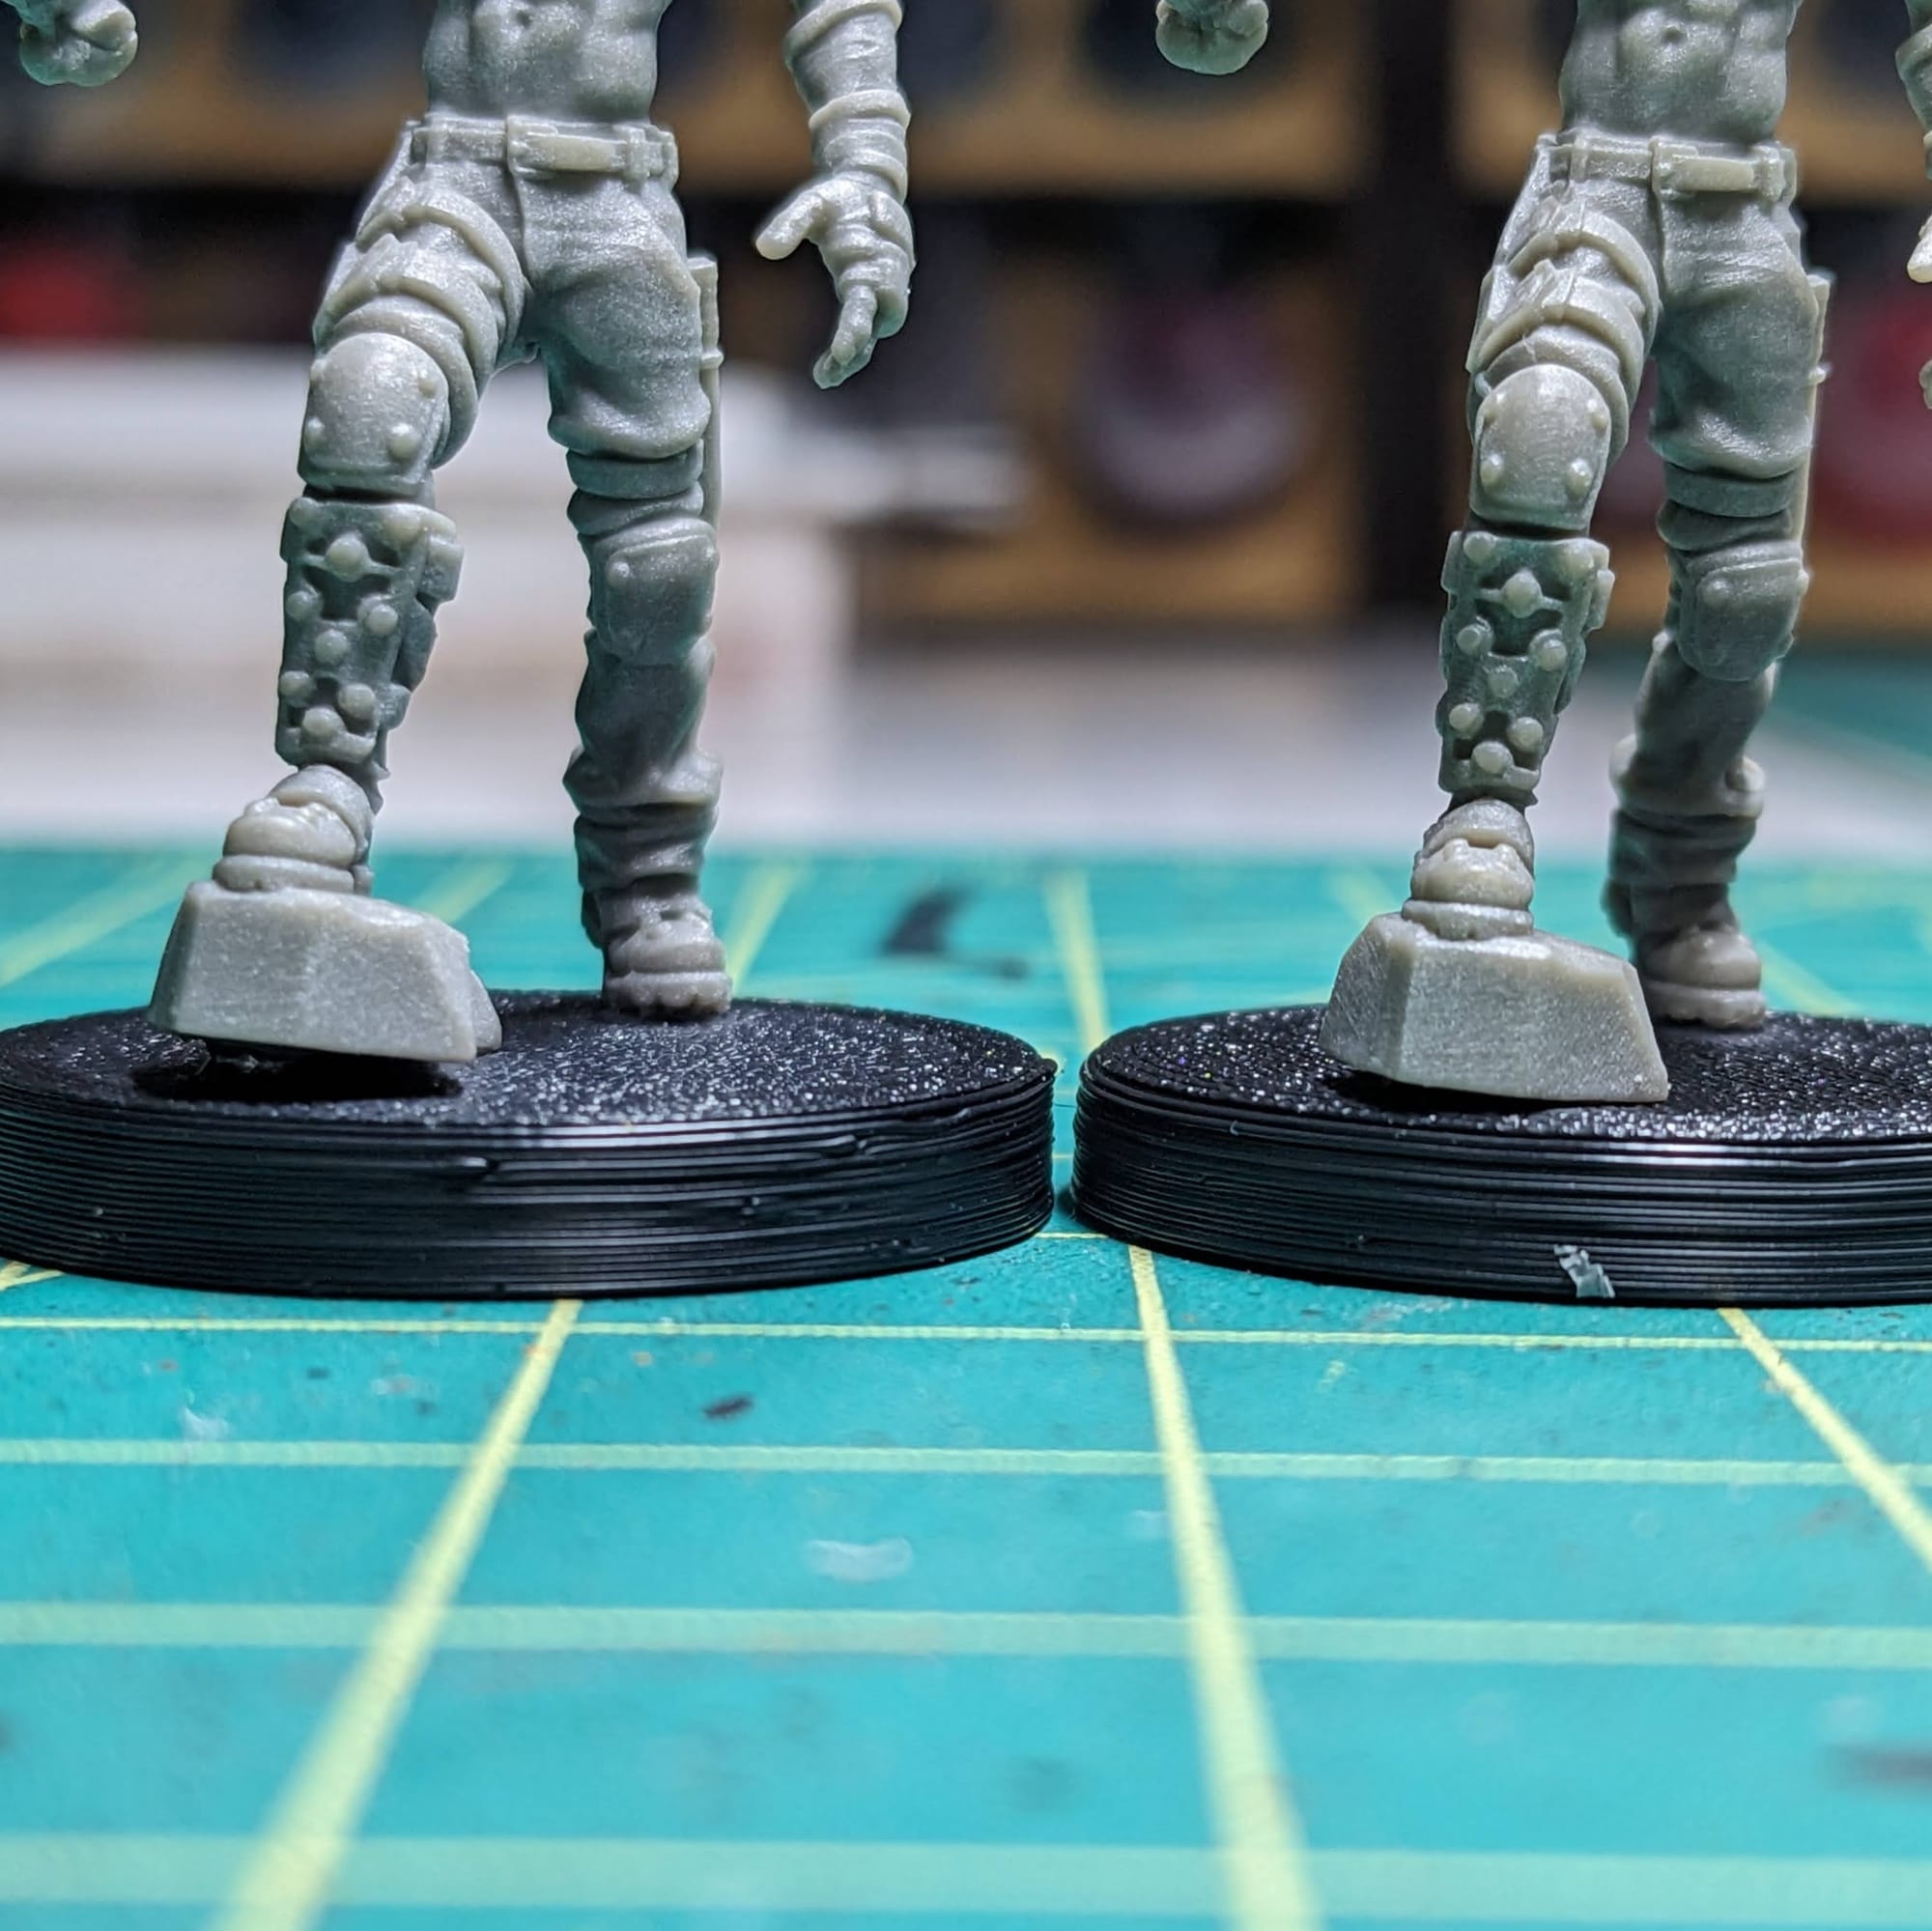
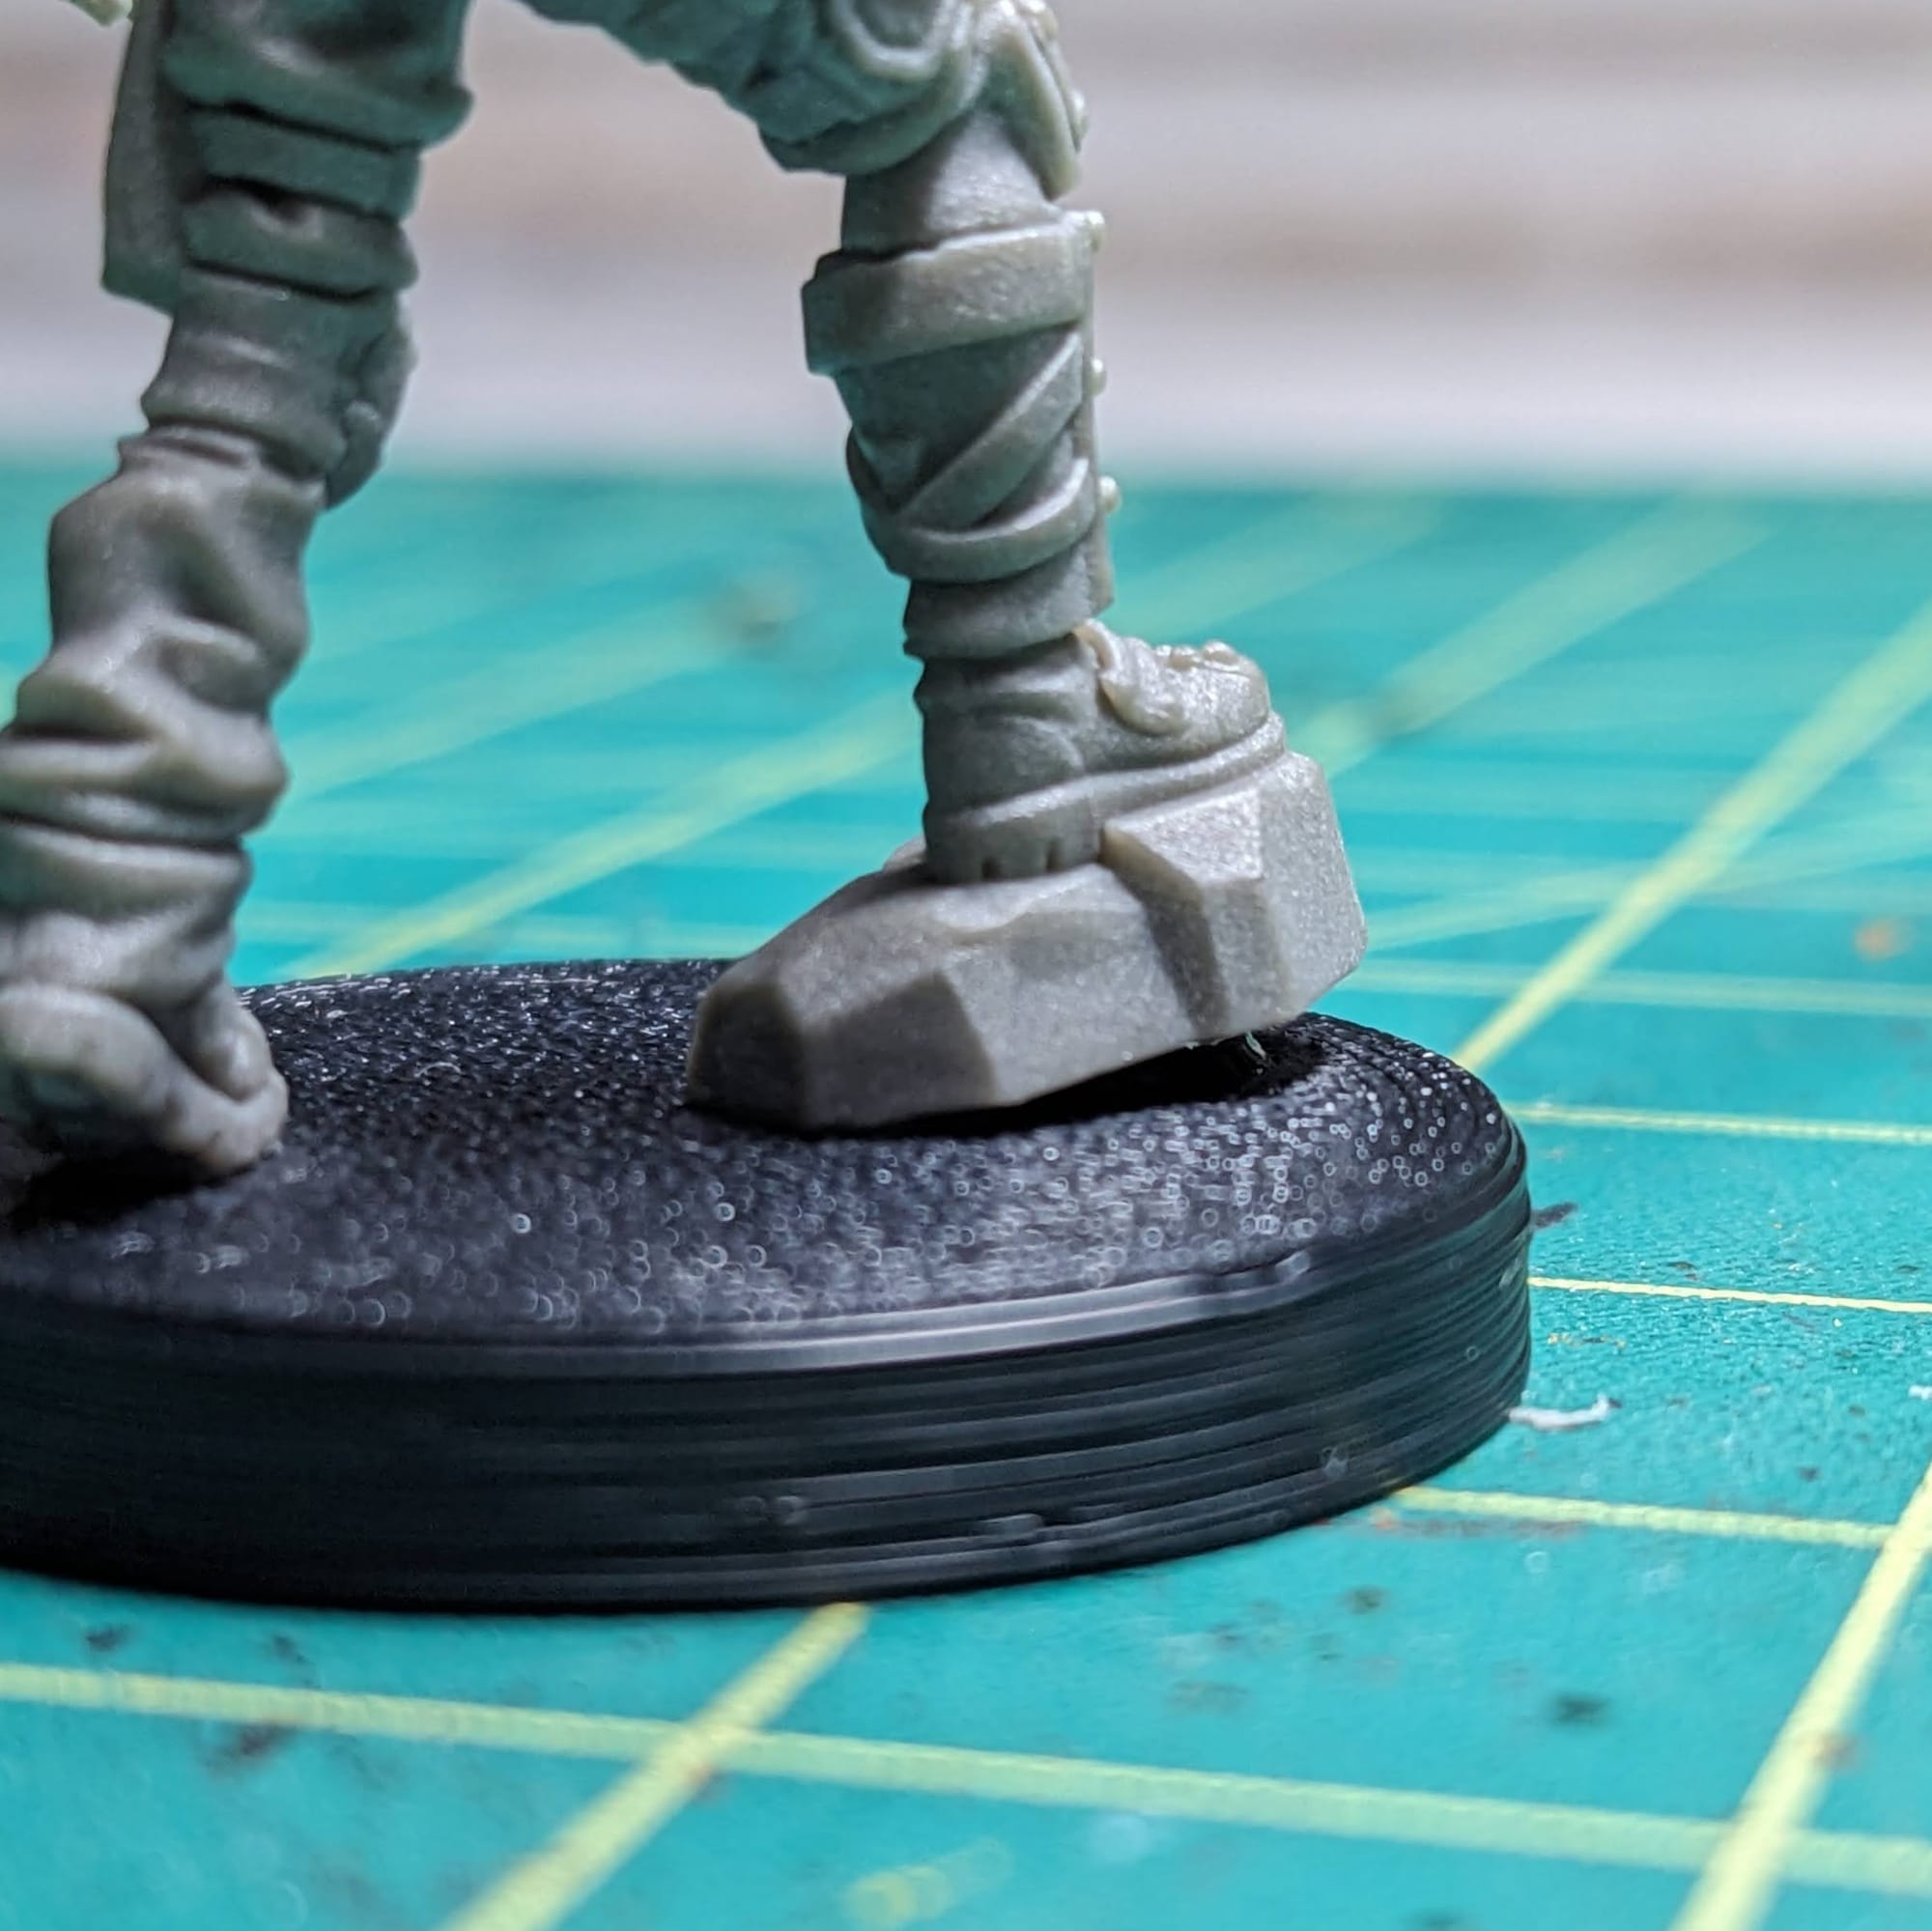
A Note about the Maniacs
After you trim the support pegs off, be mindful of where the feet sit on the base. A combination of the 3D printed bases and the plastic used for the maniacs caused some of the ‘tactical rocks’ to pull upwards and not sit level on the base. Normally, this would be a bummer, but I will be covering this up with the Pandora sand basing (which I cover below).
PRIMING
In general terms, getting the majority of a color for a model applied via a rattle can or airbrush saves a lot of time. Typically, I prime all of the figures with a zenithal prime, using a base coat of Rustoleum Flat Black and a top coat of Army Painter White Primer or one of the other color primers.
Here are the primers I used for the miniatures and terrain pieces.
- Army Painter Matte White Colour Primer -OR- Citadel White Scar Primer
- Army Painter Army Green Colour Primer
- Army Painter Daemonic Yellow Colour Primer
- Citadel Mephiston Red Primer
- Rusteolum Flat Black Primer
PAINTING THE MINIS
For pretty much every miniature paint project I do, I start with a plan. In advance of putting the primer and paint on a model, I find photo references of the paint schemes and details I am looking for. Most times, this means having a browser window up with different web pages and images next to my painting area, so I can quickly refer to them as I paint. I also come up with a paint plan, choosing what colors I am going to use and what order I apply them in.
I typically start with ‘color blocking’: a technique where I apply the colors I want to each section of the model, and then repeat the process for all models in a given batch. I do all of my color blocking for a given color before moving on to the next one. I start with the lightest tones first and then work down the range to the darkest tones. Lastly, I do the work for the bases, whether the figures are on them or separately.
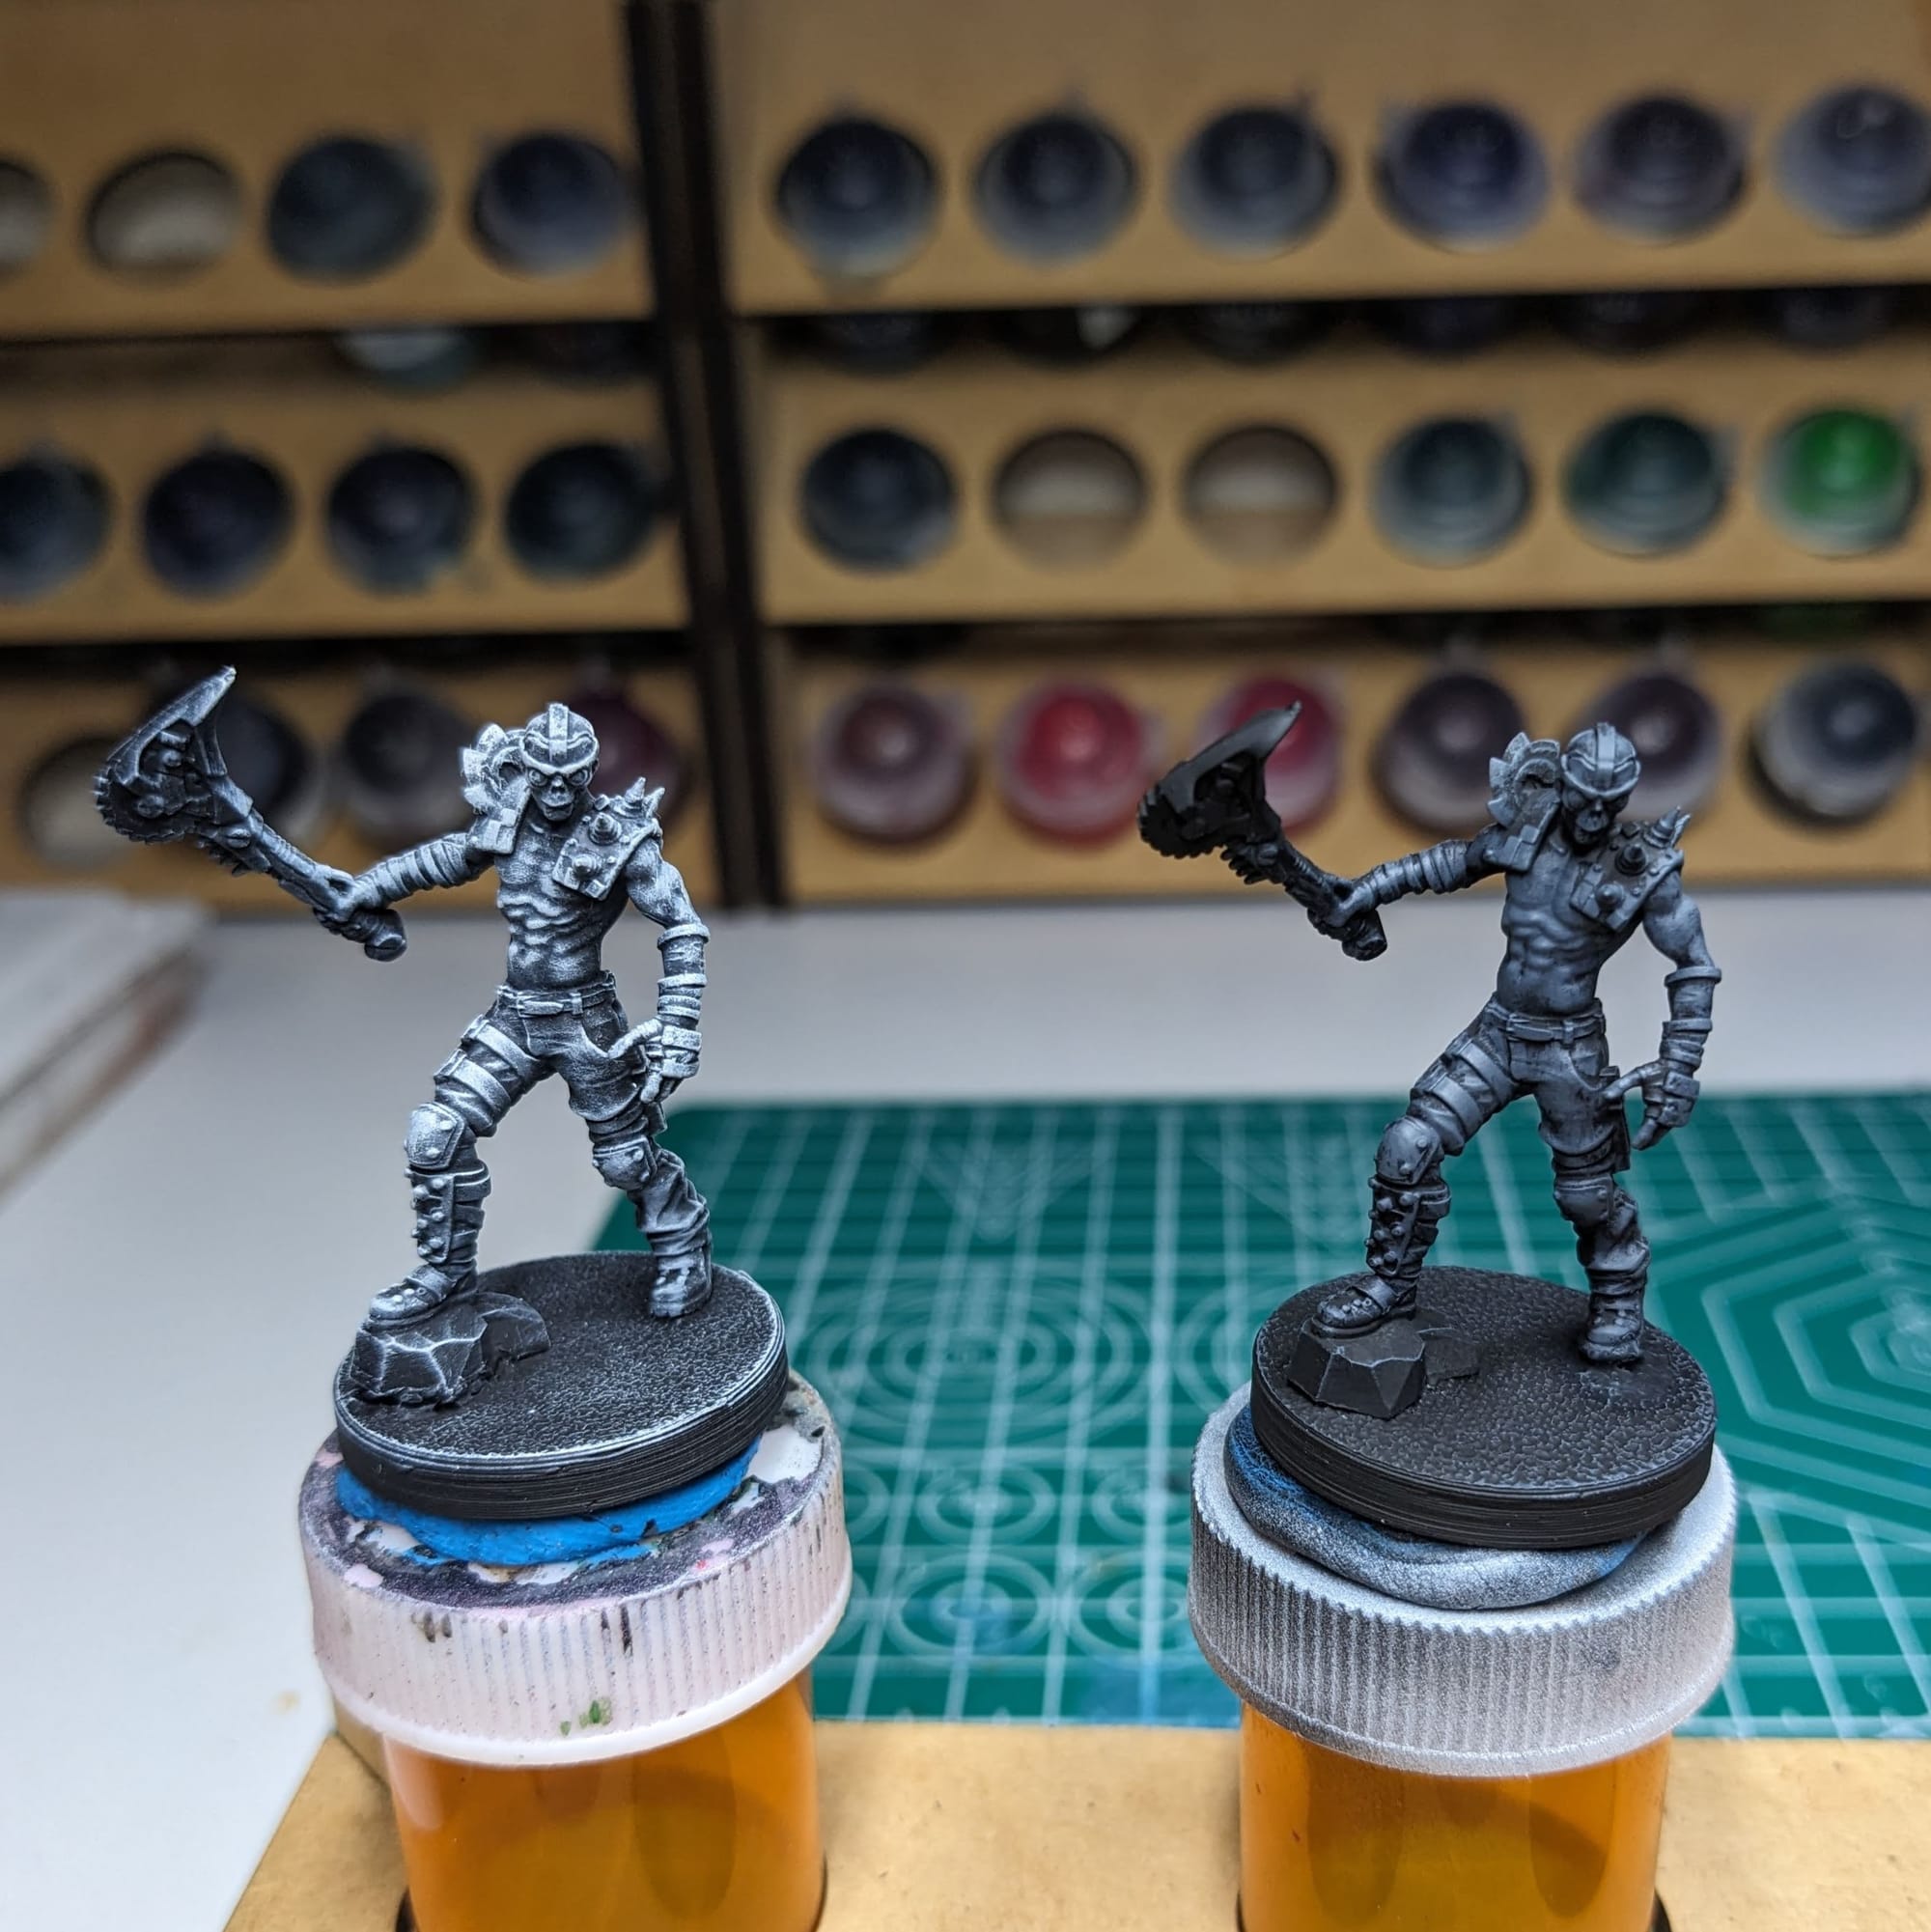
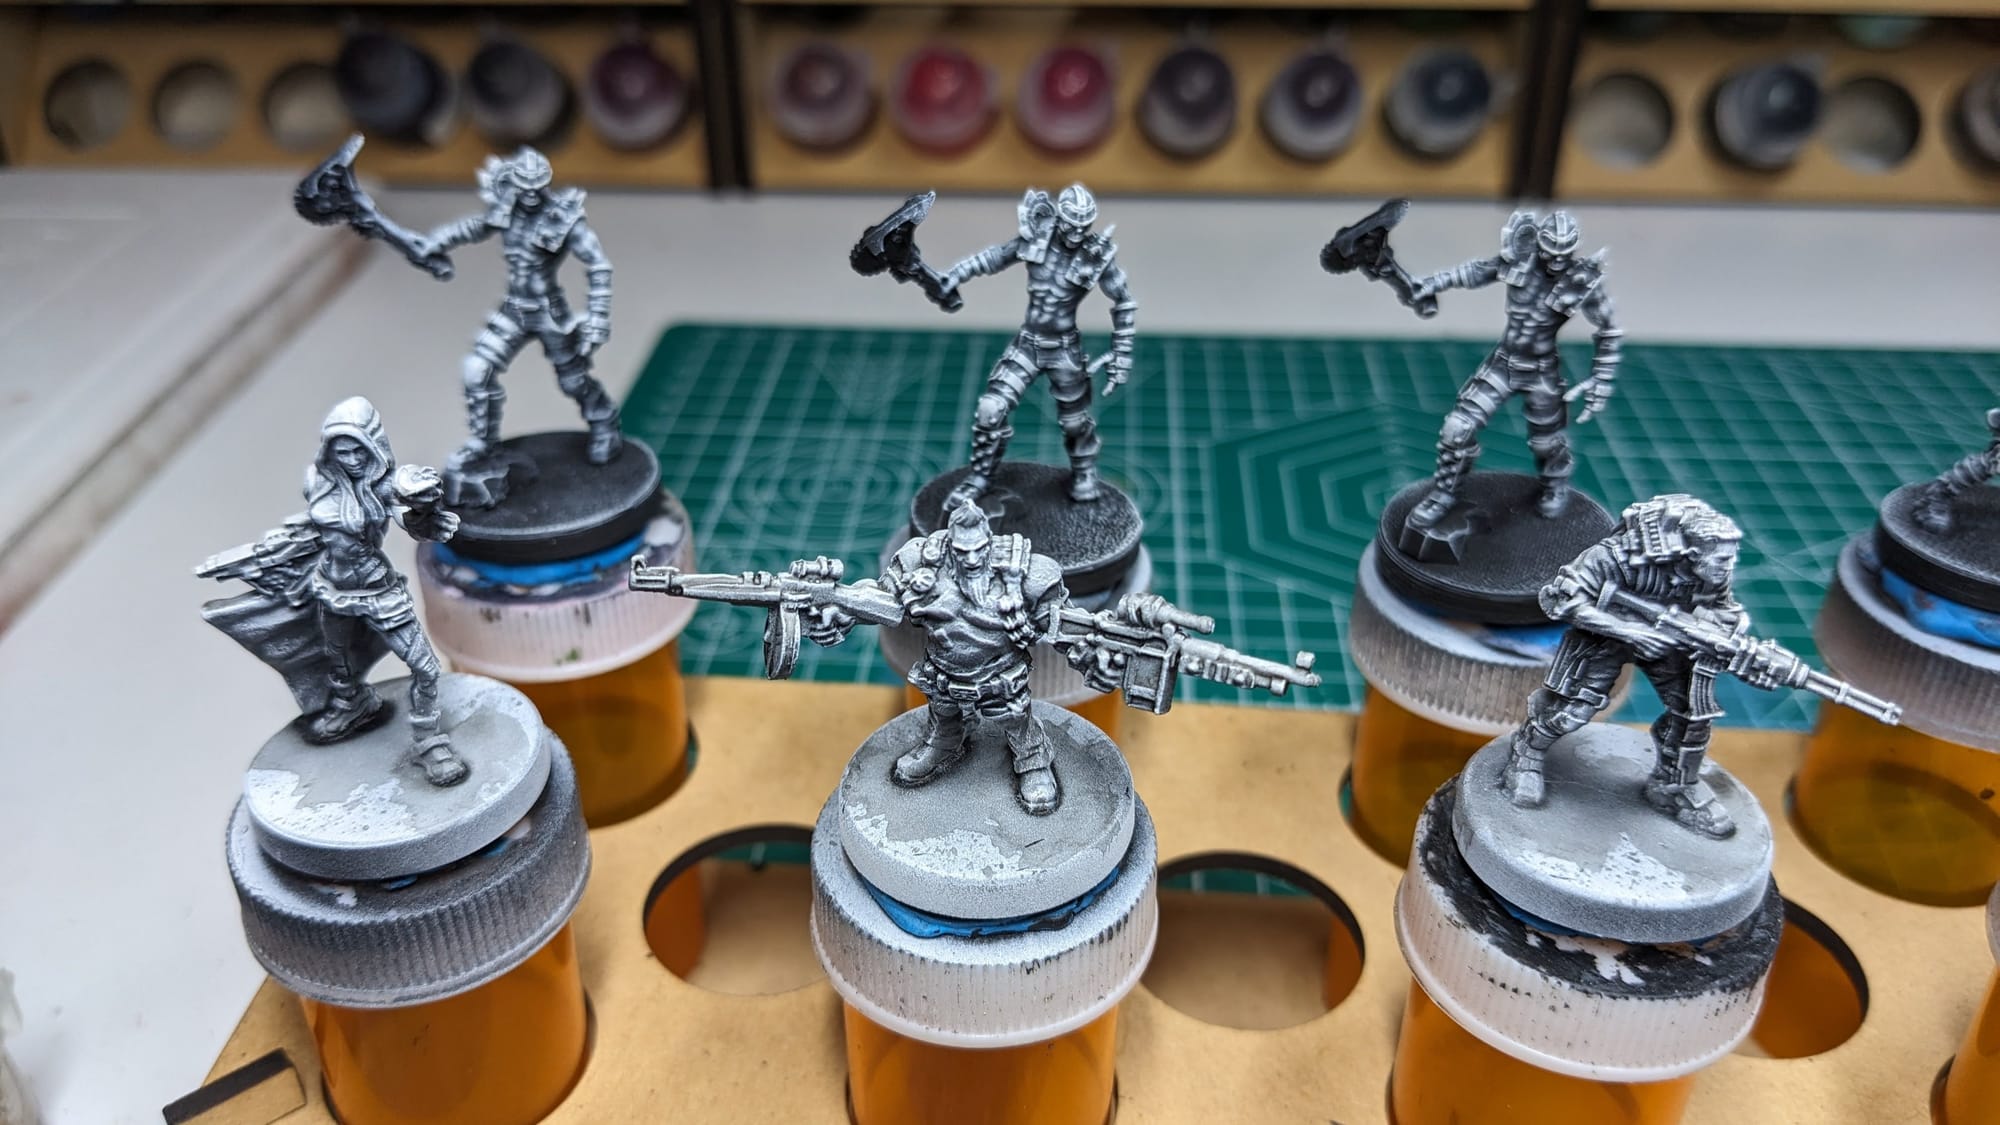
SLAPCHOP METHOD
For these pieces, I chose to use the “slapchop” painting technique. Slapchop is a painting method where you accent the details of the models by drybrushing shades of grey and white over a dark or black primer. Then, using speed paints, contrast paints, and/or washes, you paint a single coat over the top of the model, creating shadows, mid-tones, and highlights in a single pass. This would be akin to using multiply or screen layers in Photoshop to establish color values on a gray underlayer. This is a very fast and efficient way to paint a lot of models that you don’t want to put a lot of detail into, and instead rely on the mold/details of the model to provide enough detail and contrast to make it stand out on the table. This method is perfect for color blocking.
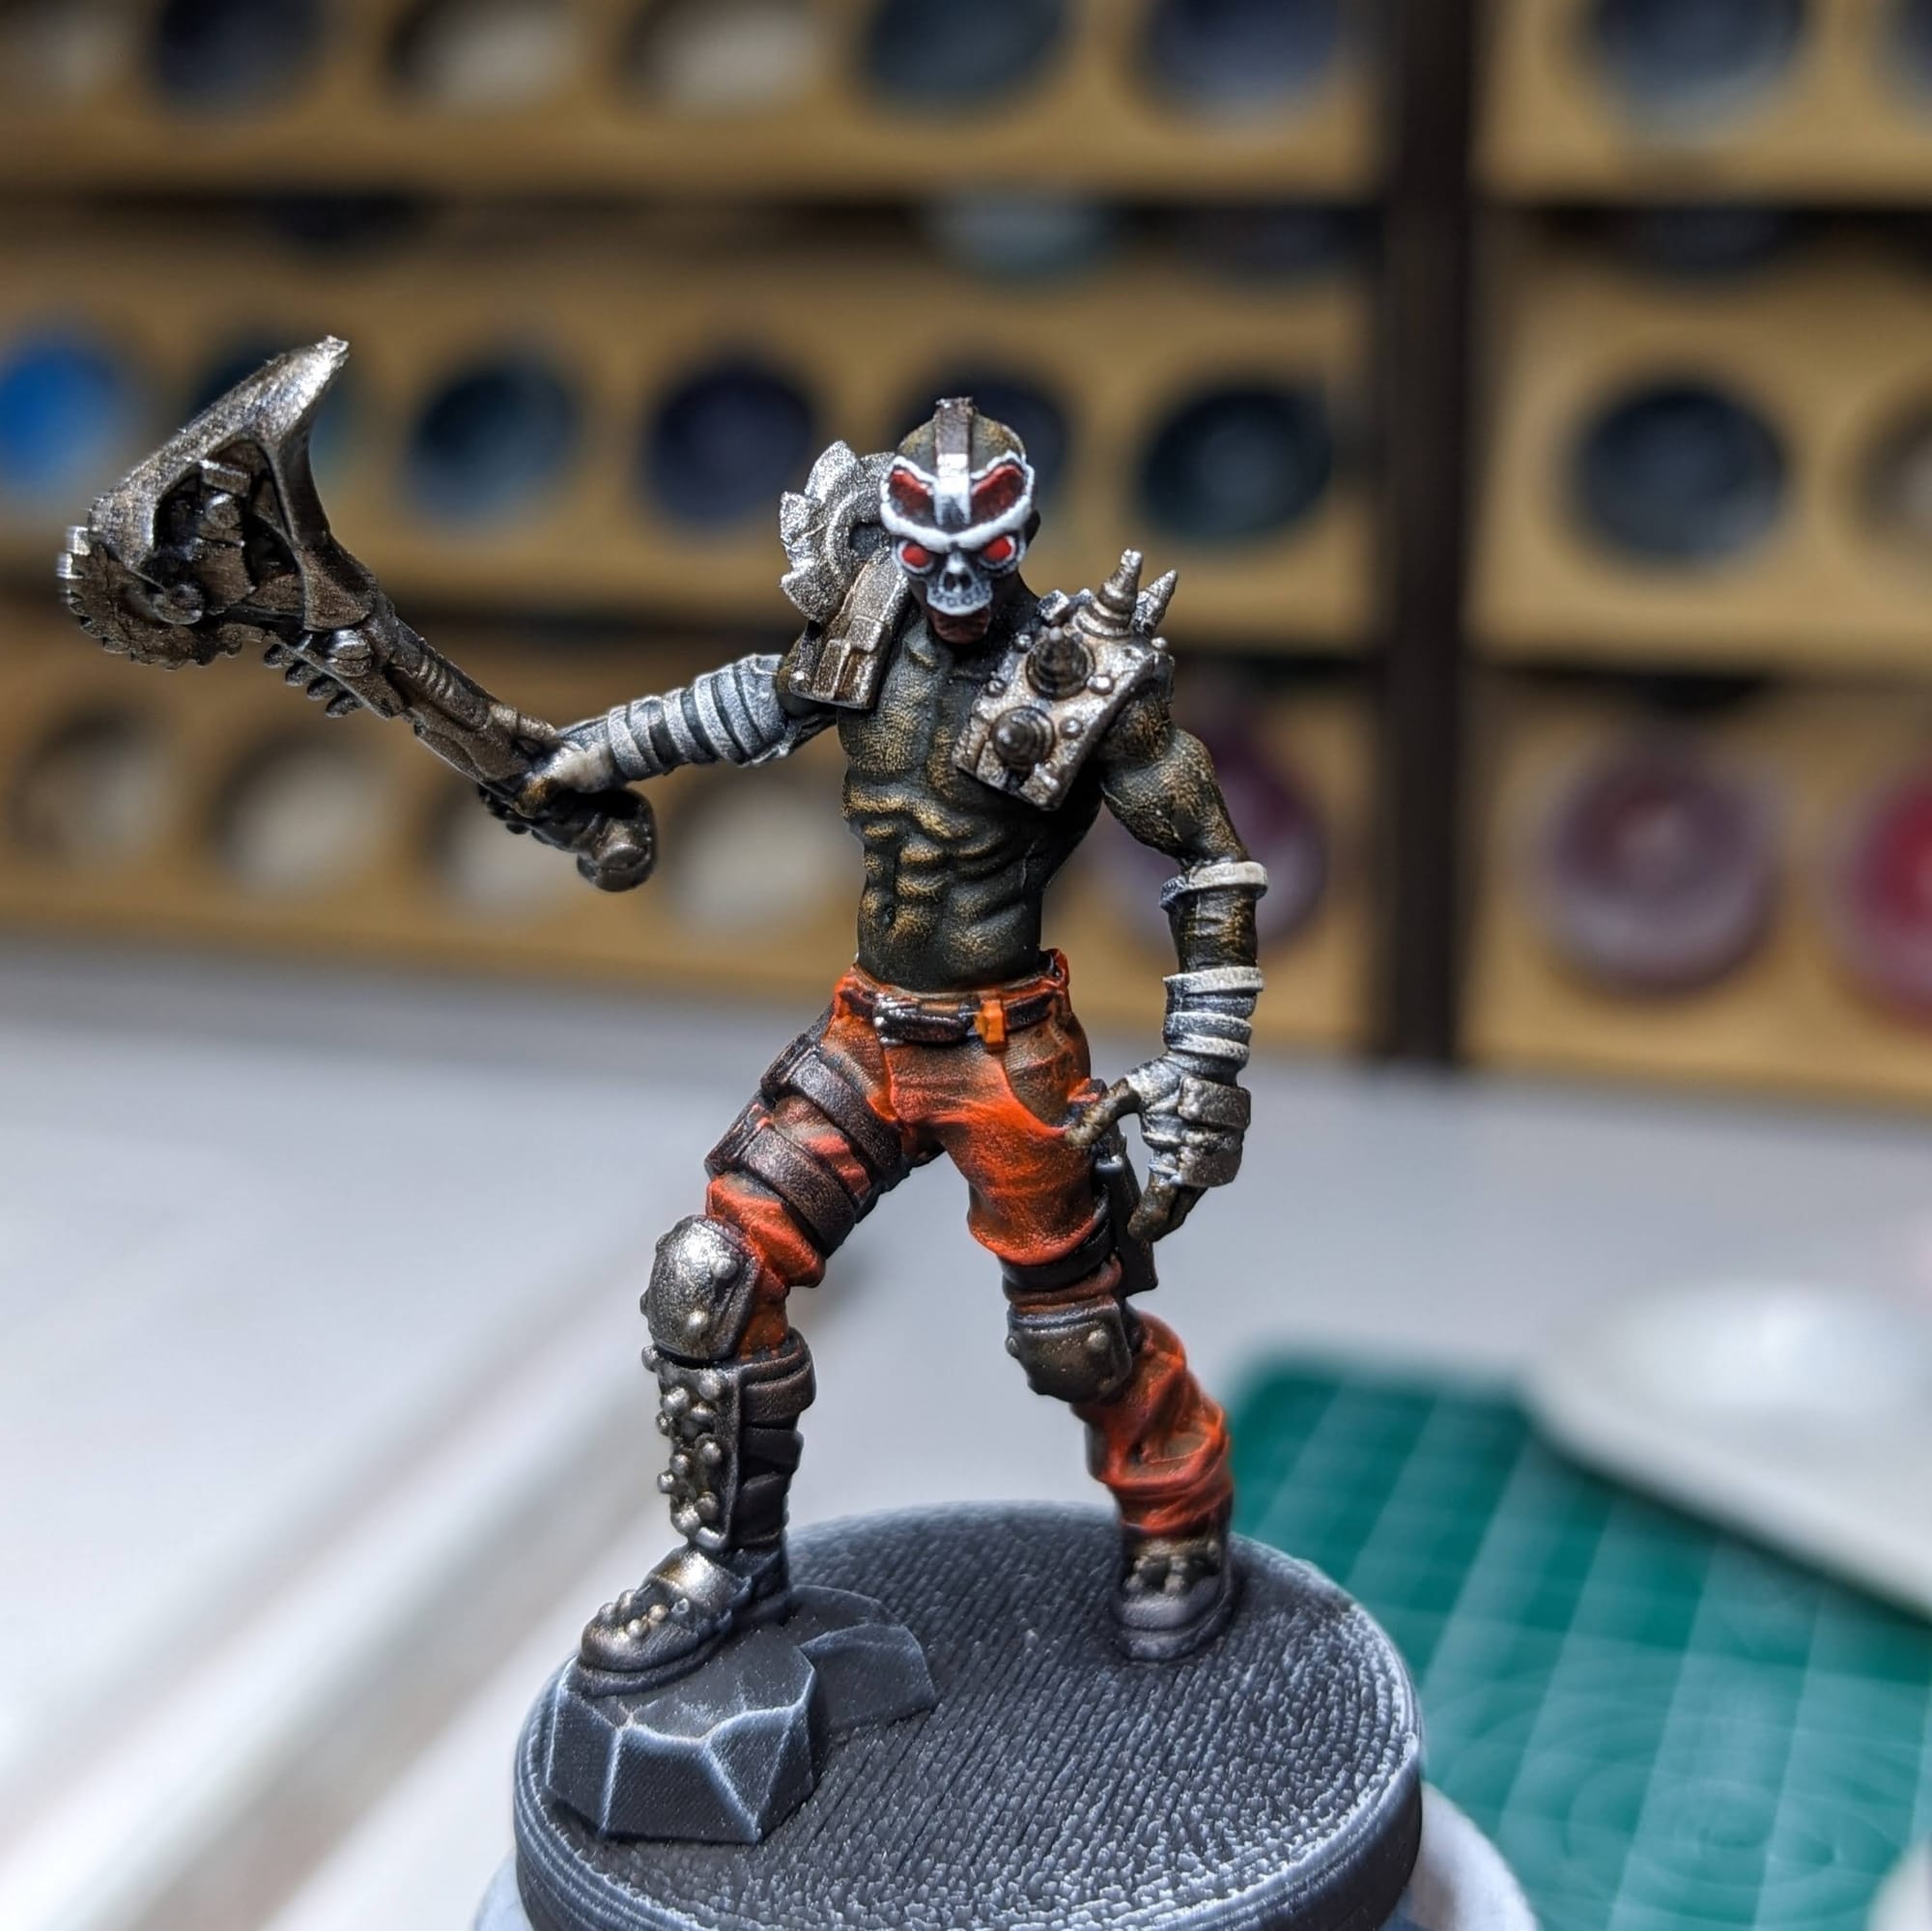
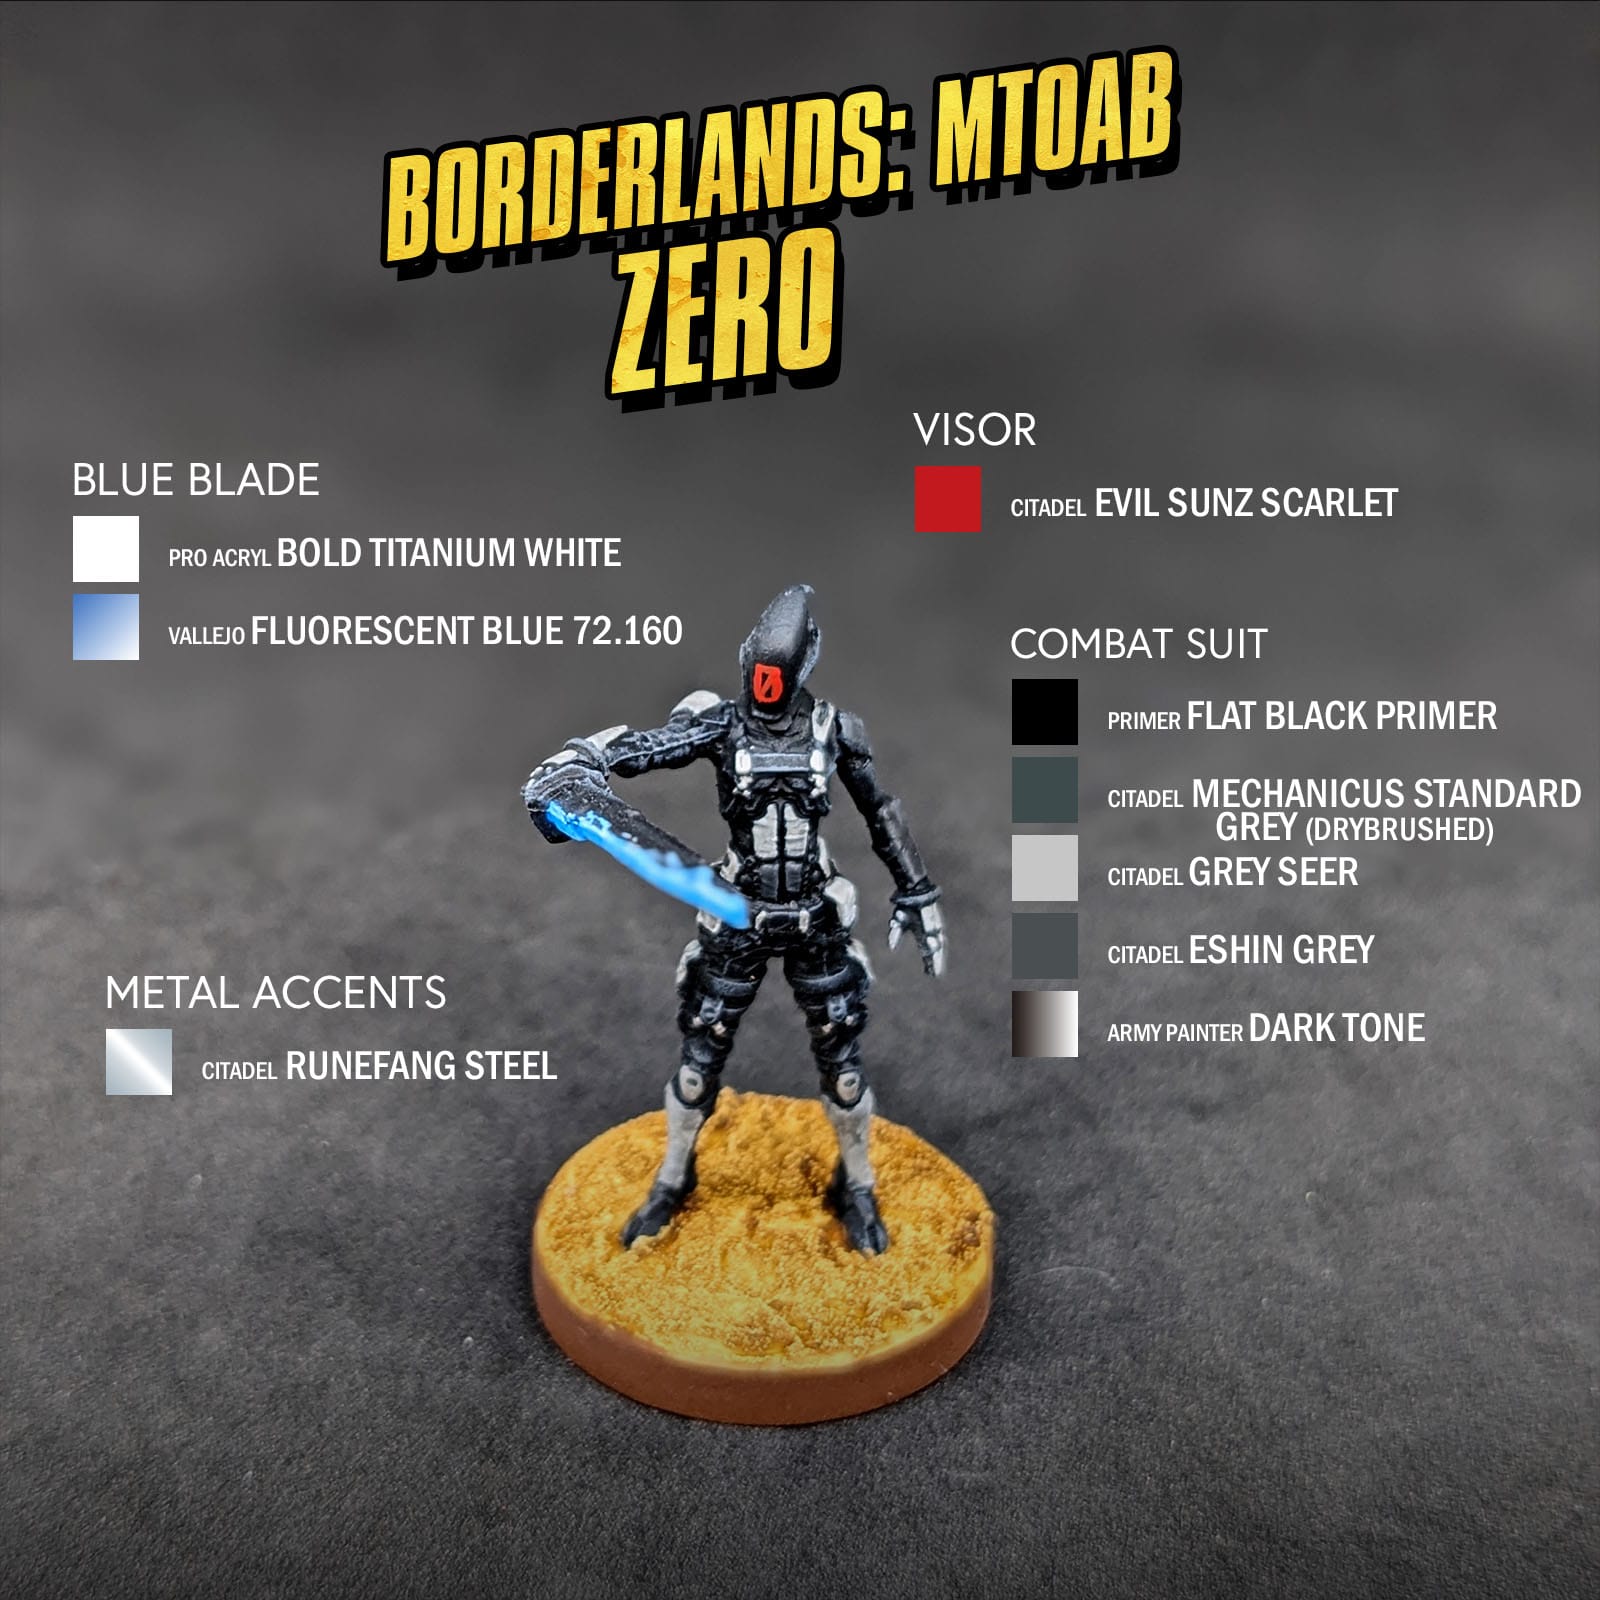
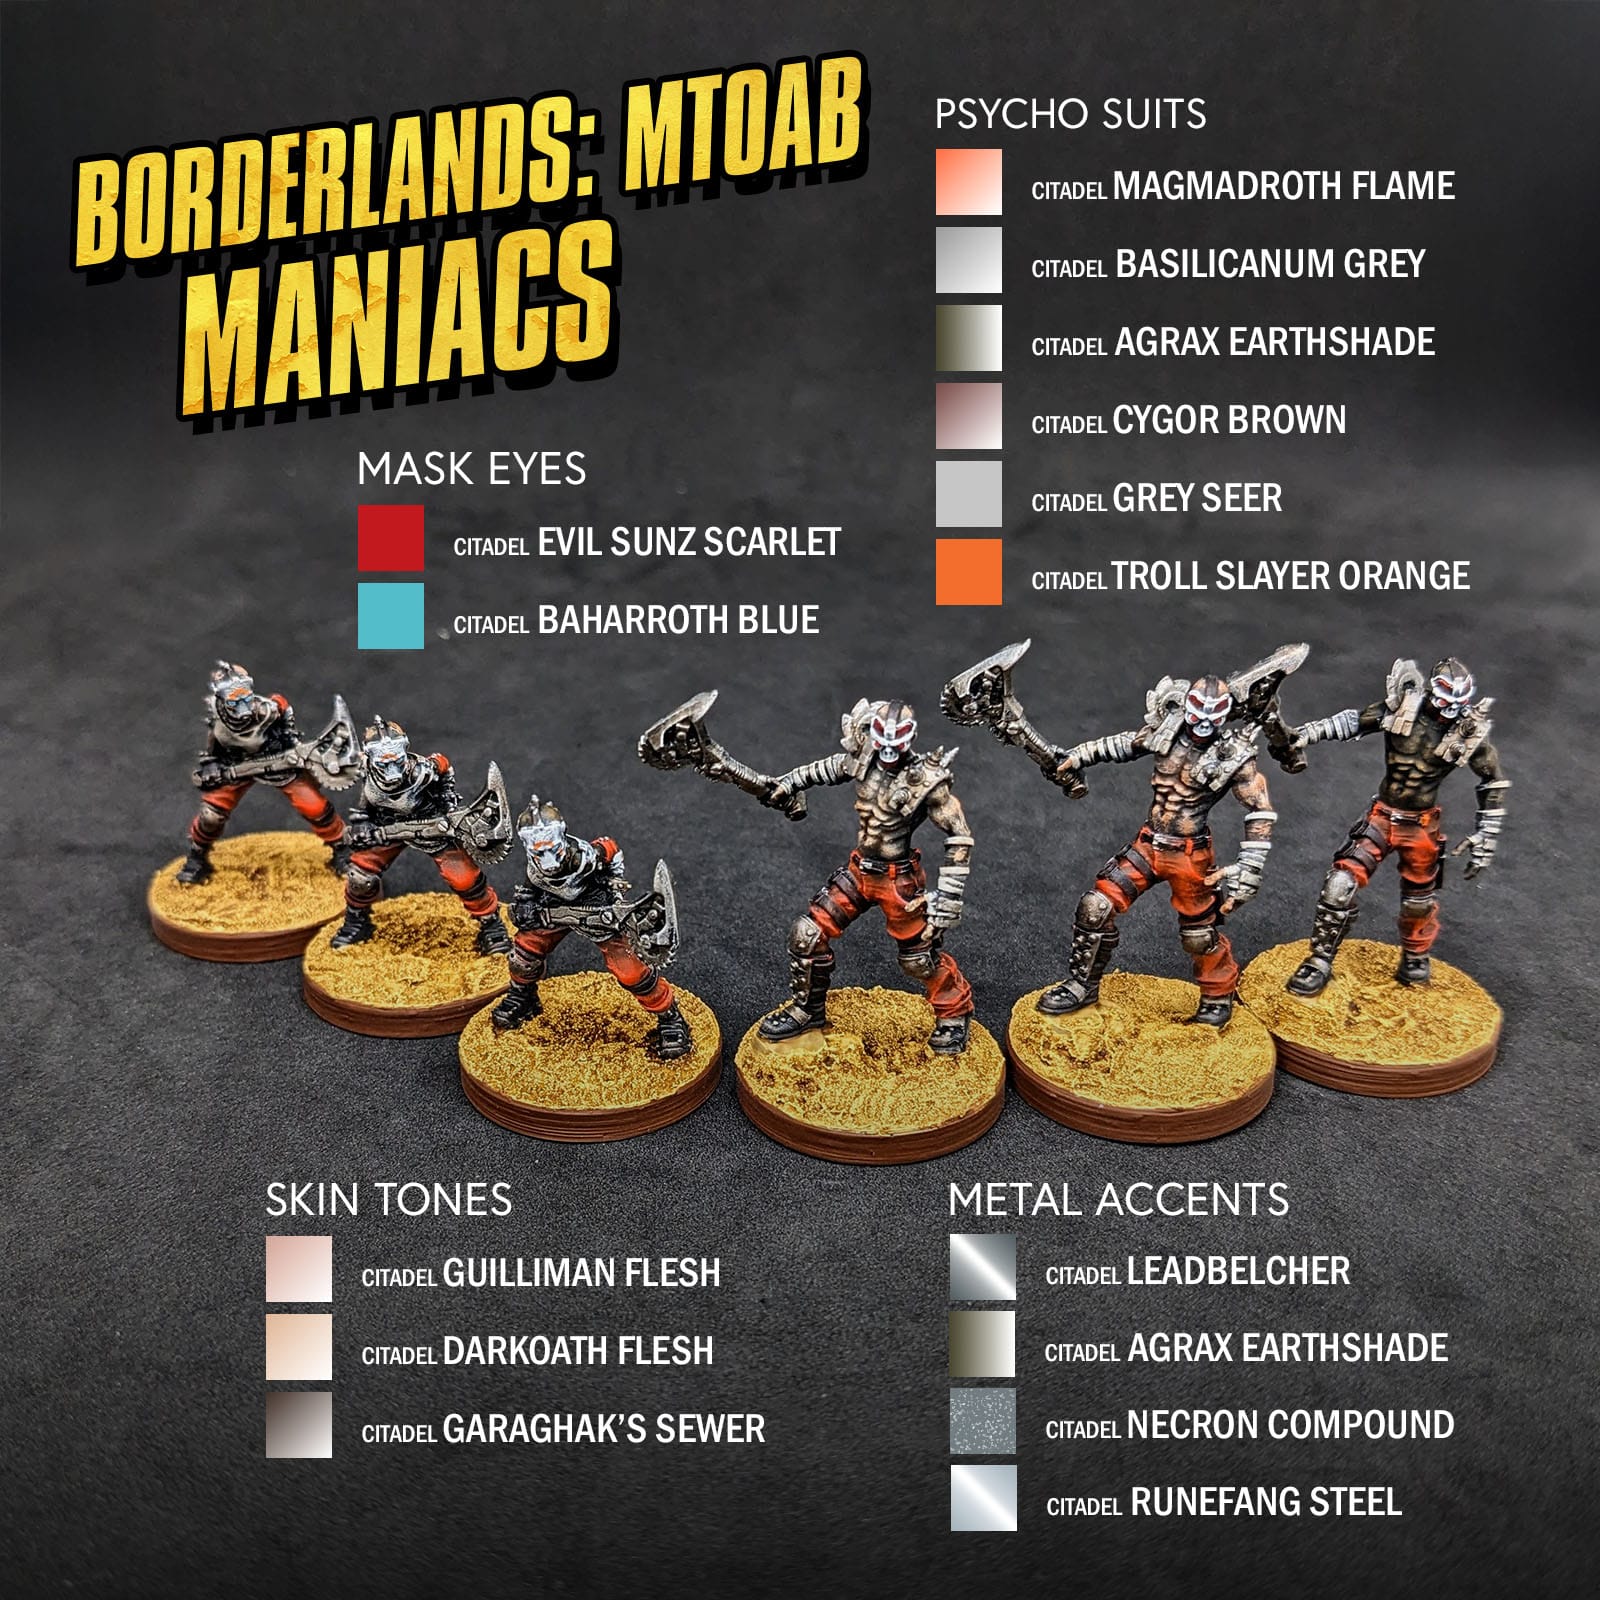
For the Vault Hunters, I primed them black, white, and a white zenithal, then applied a wash of Army Painter Dark Tone, and then a drybrush of white. For Zero, the Maniacs, and the psycho, I primed them black, then applied a heavy drybrush of gray, with a drybrush of white (maniacs only). The various objects and terrain pieces I approached differently for each, which I’ve outlined below.

BORDERLANDS: MISTER TORGUE'S ARENA OF BADASSERY MINIS
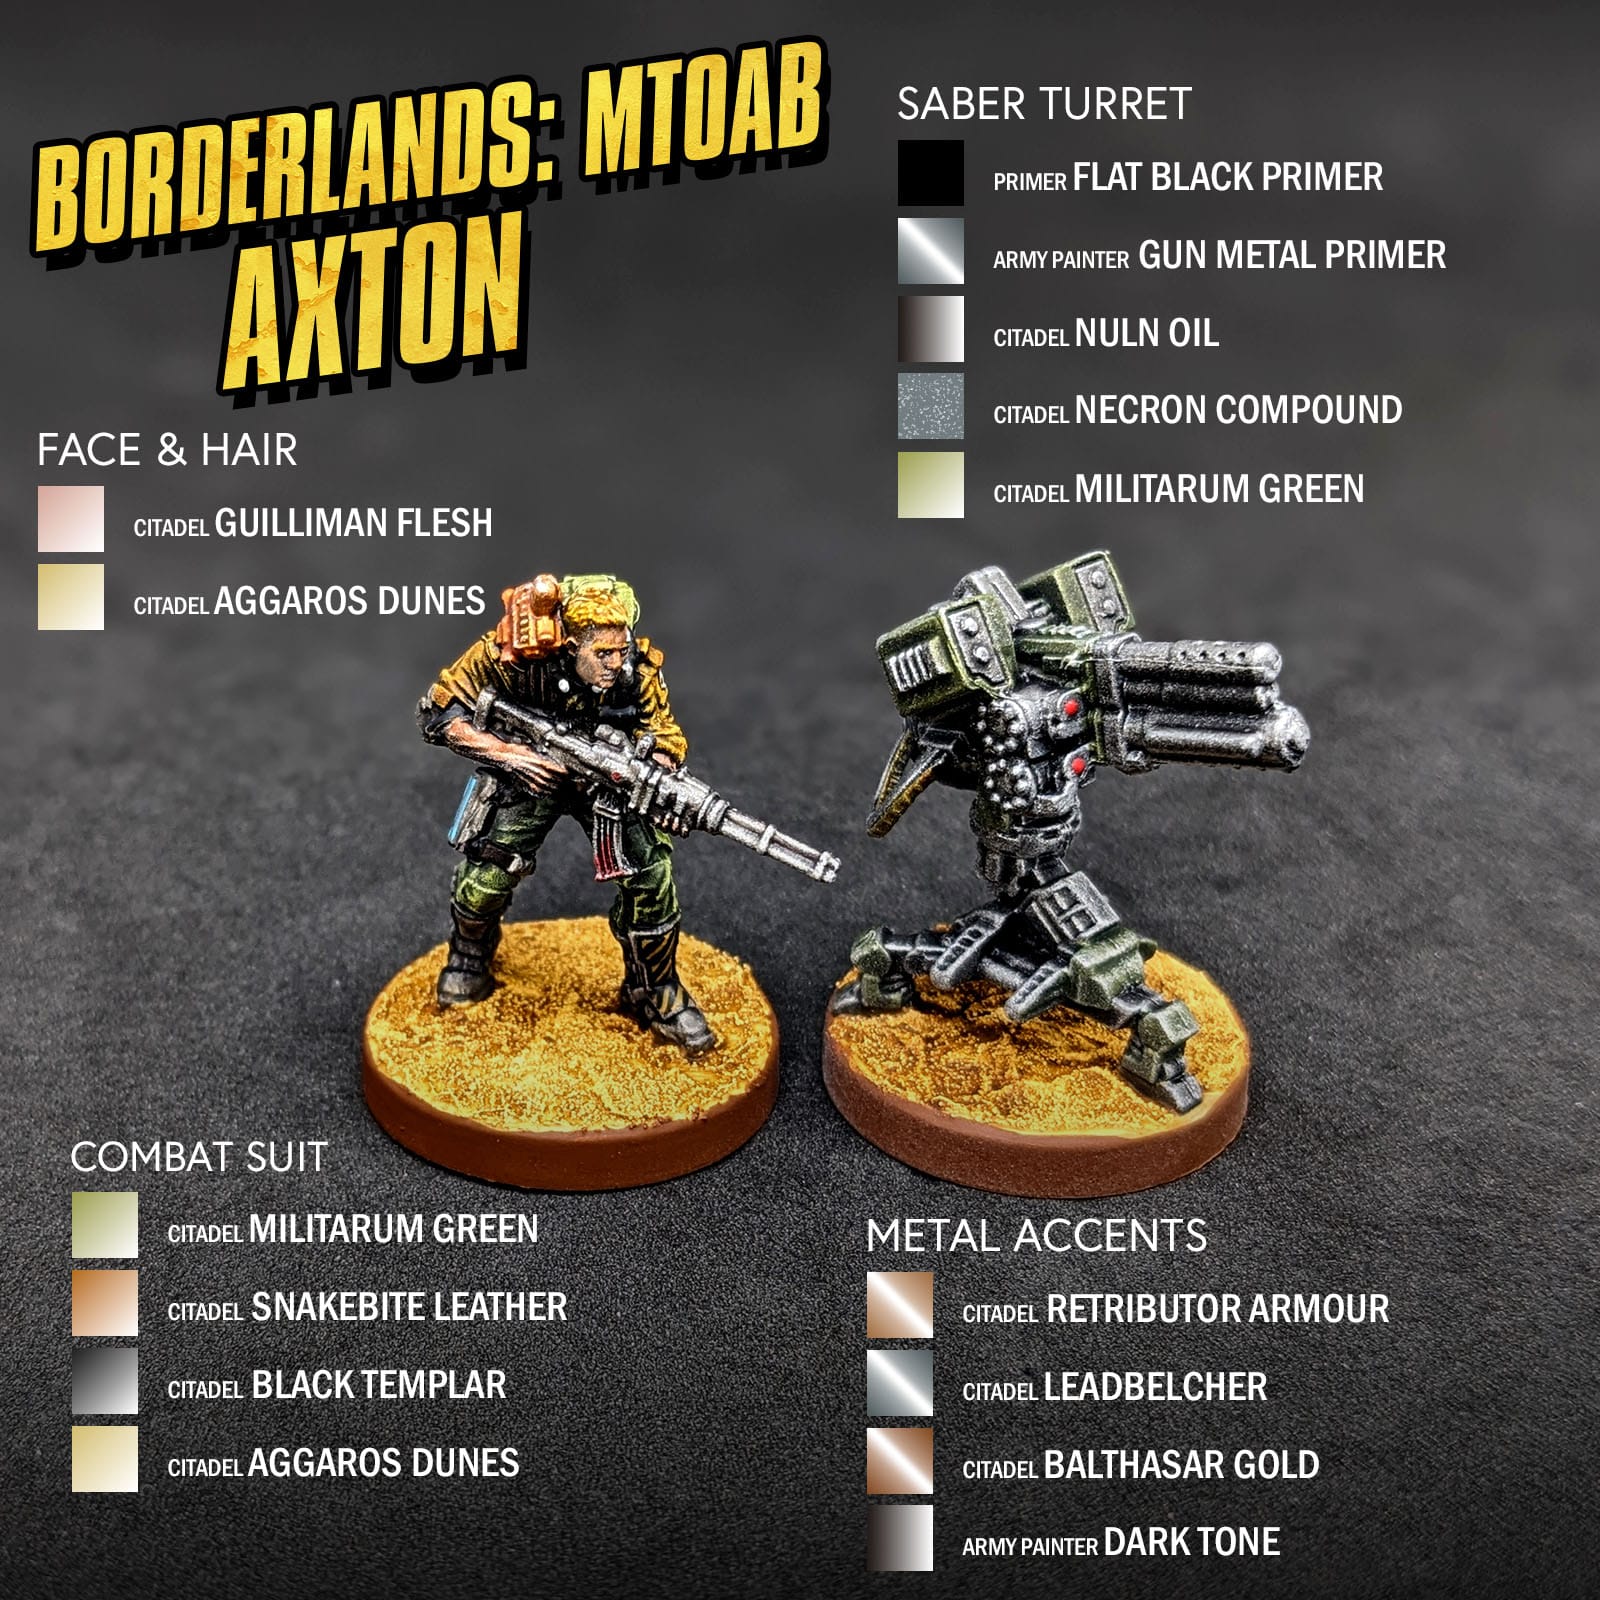
AXTON
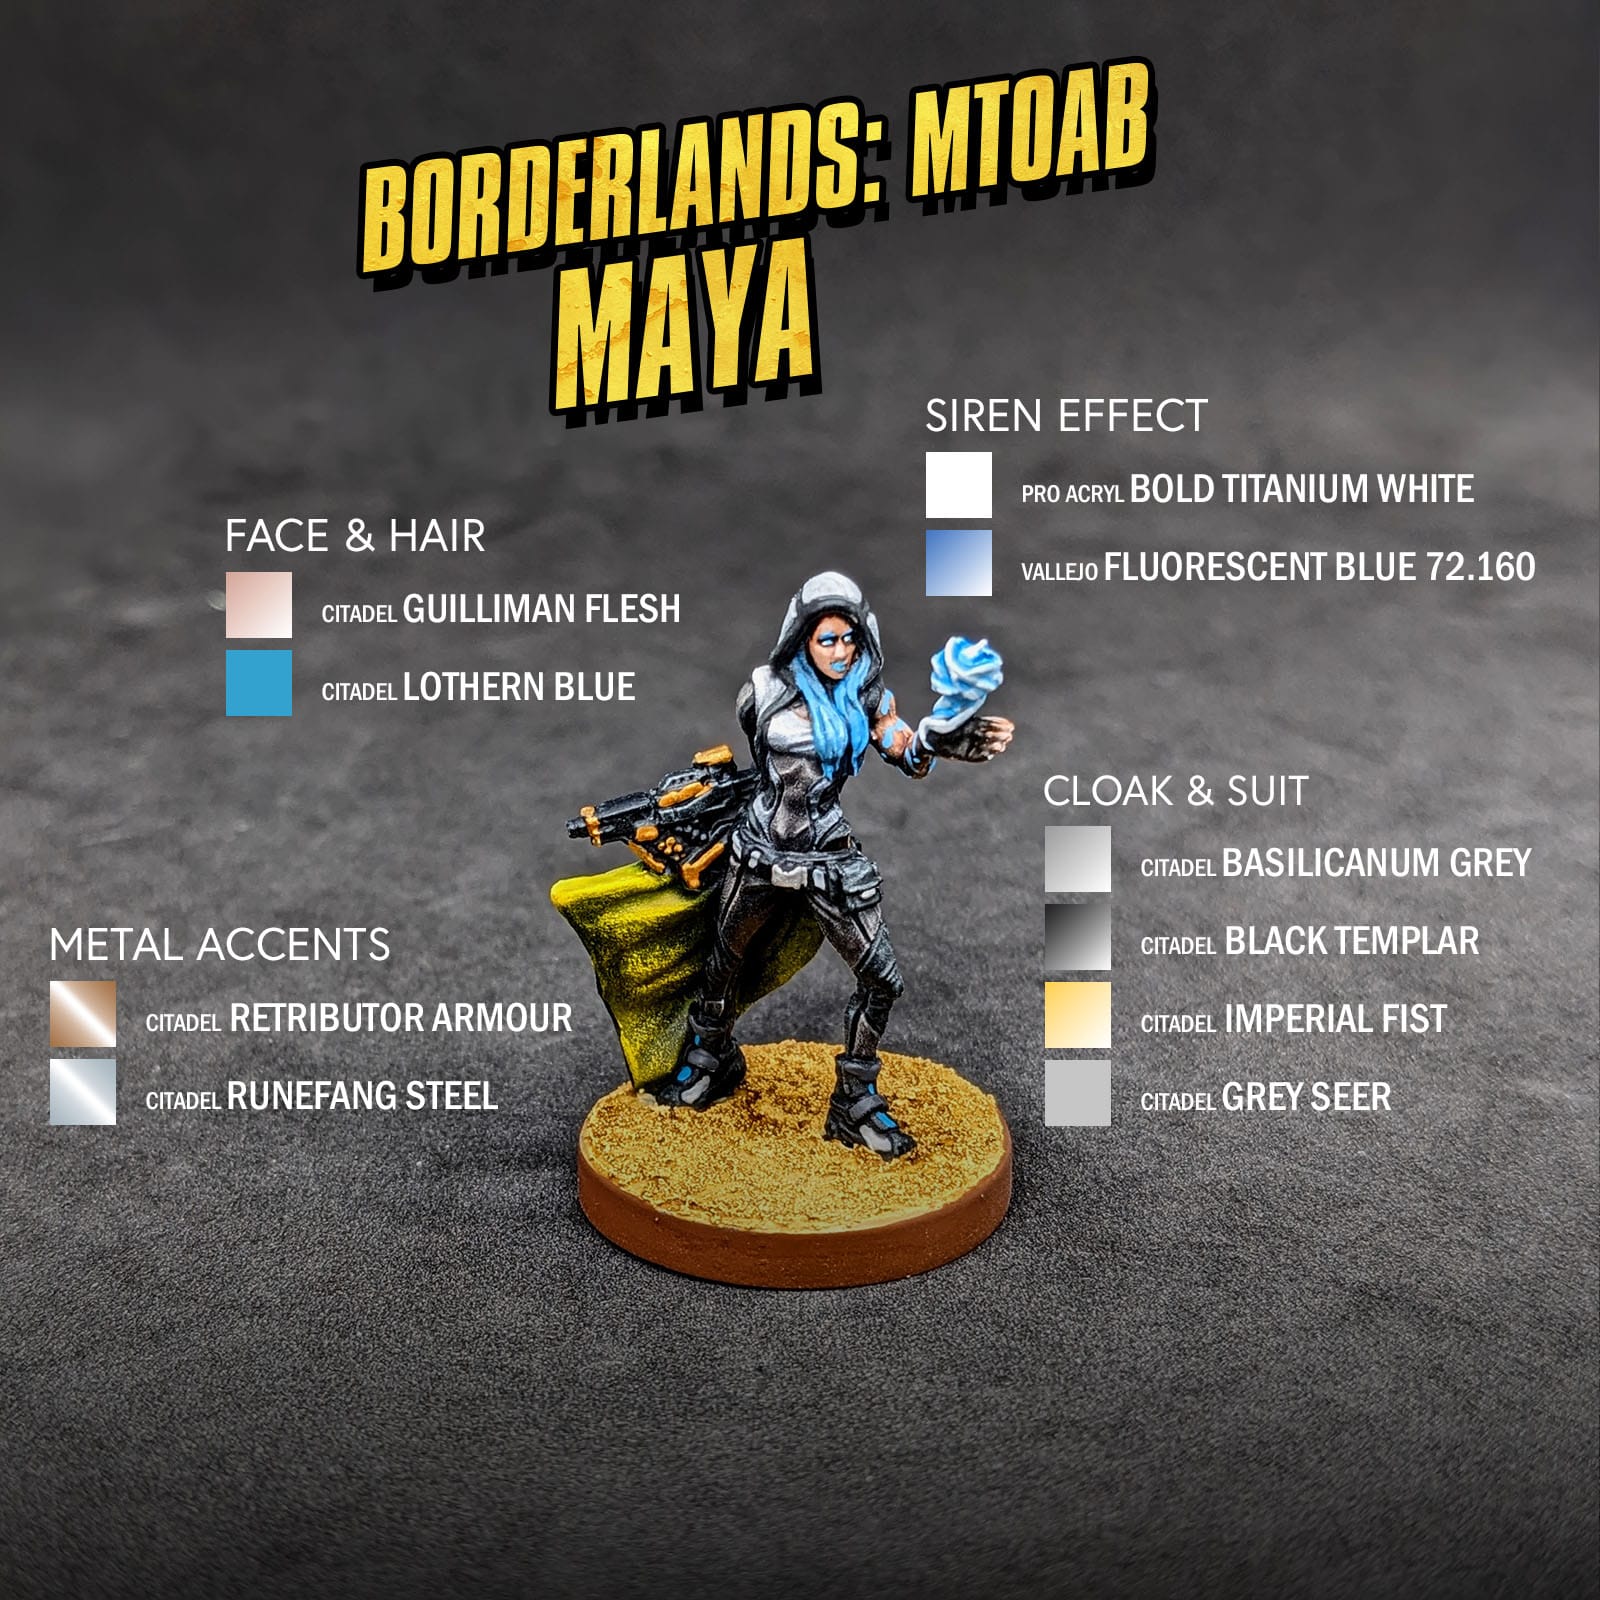
MAYA
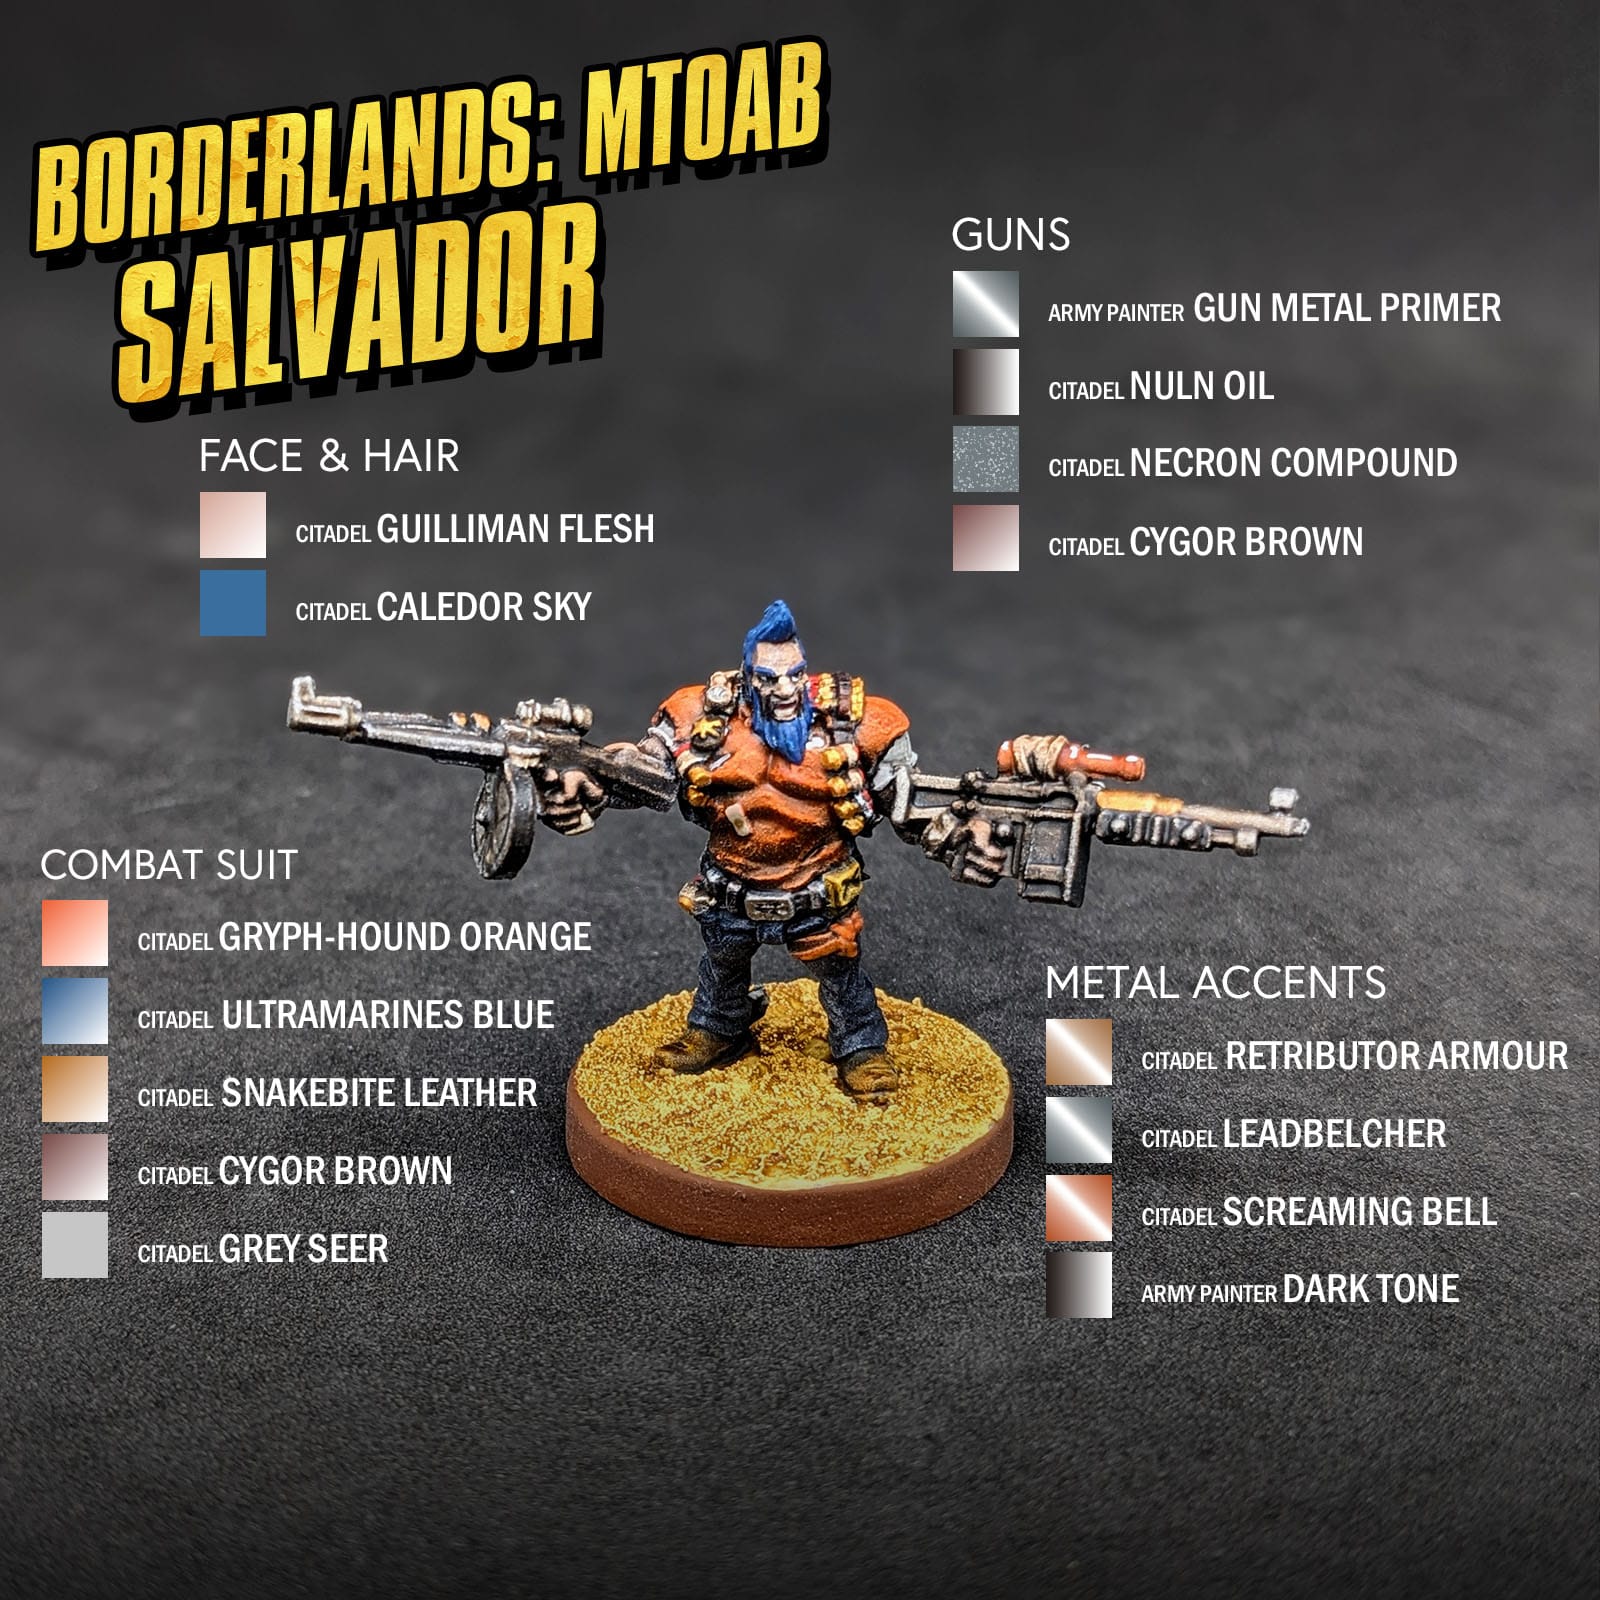
SALVADOR
ZERO
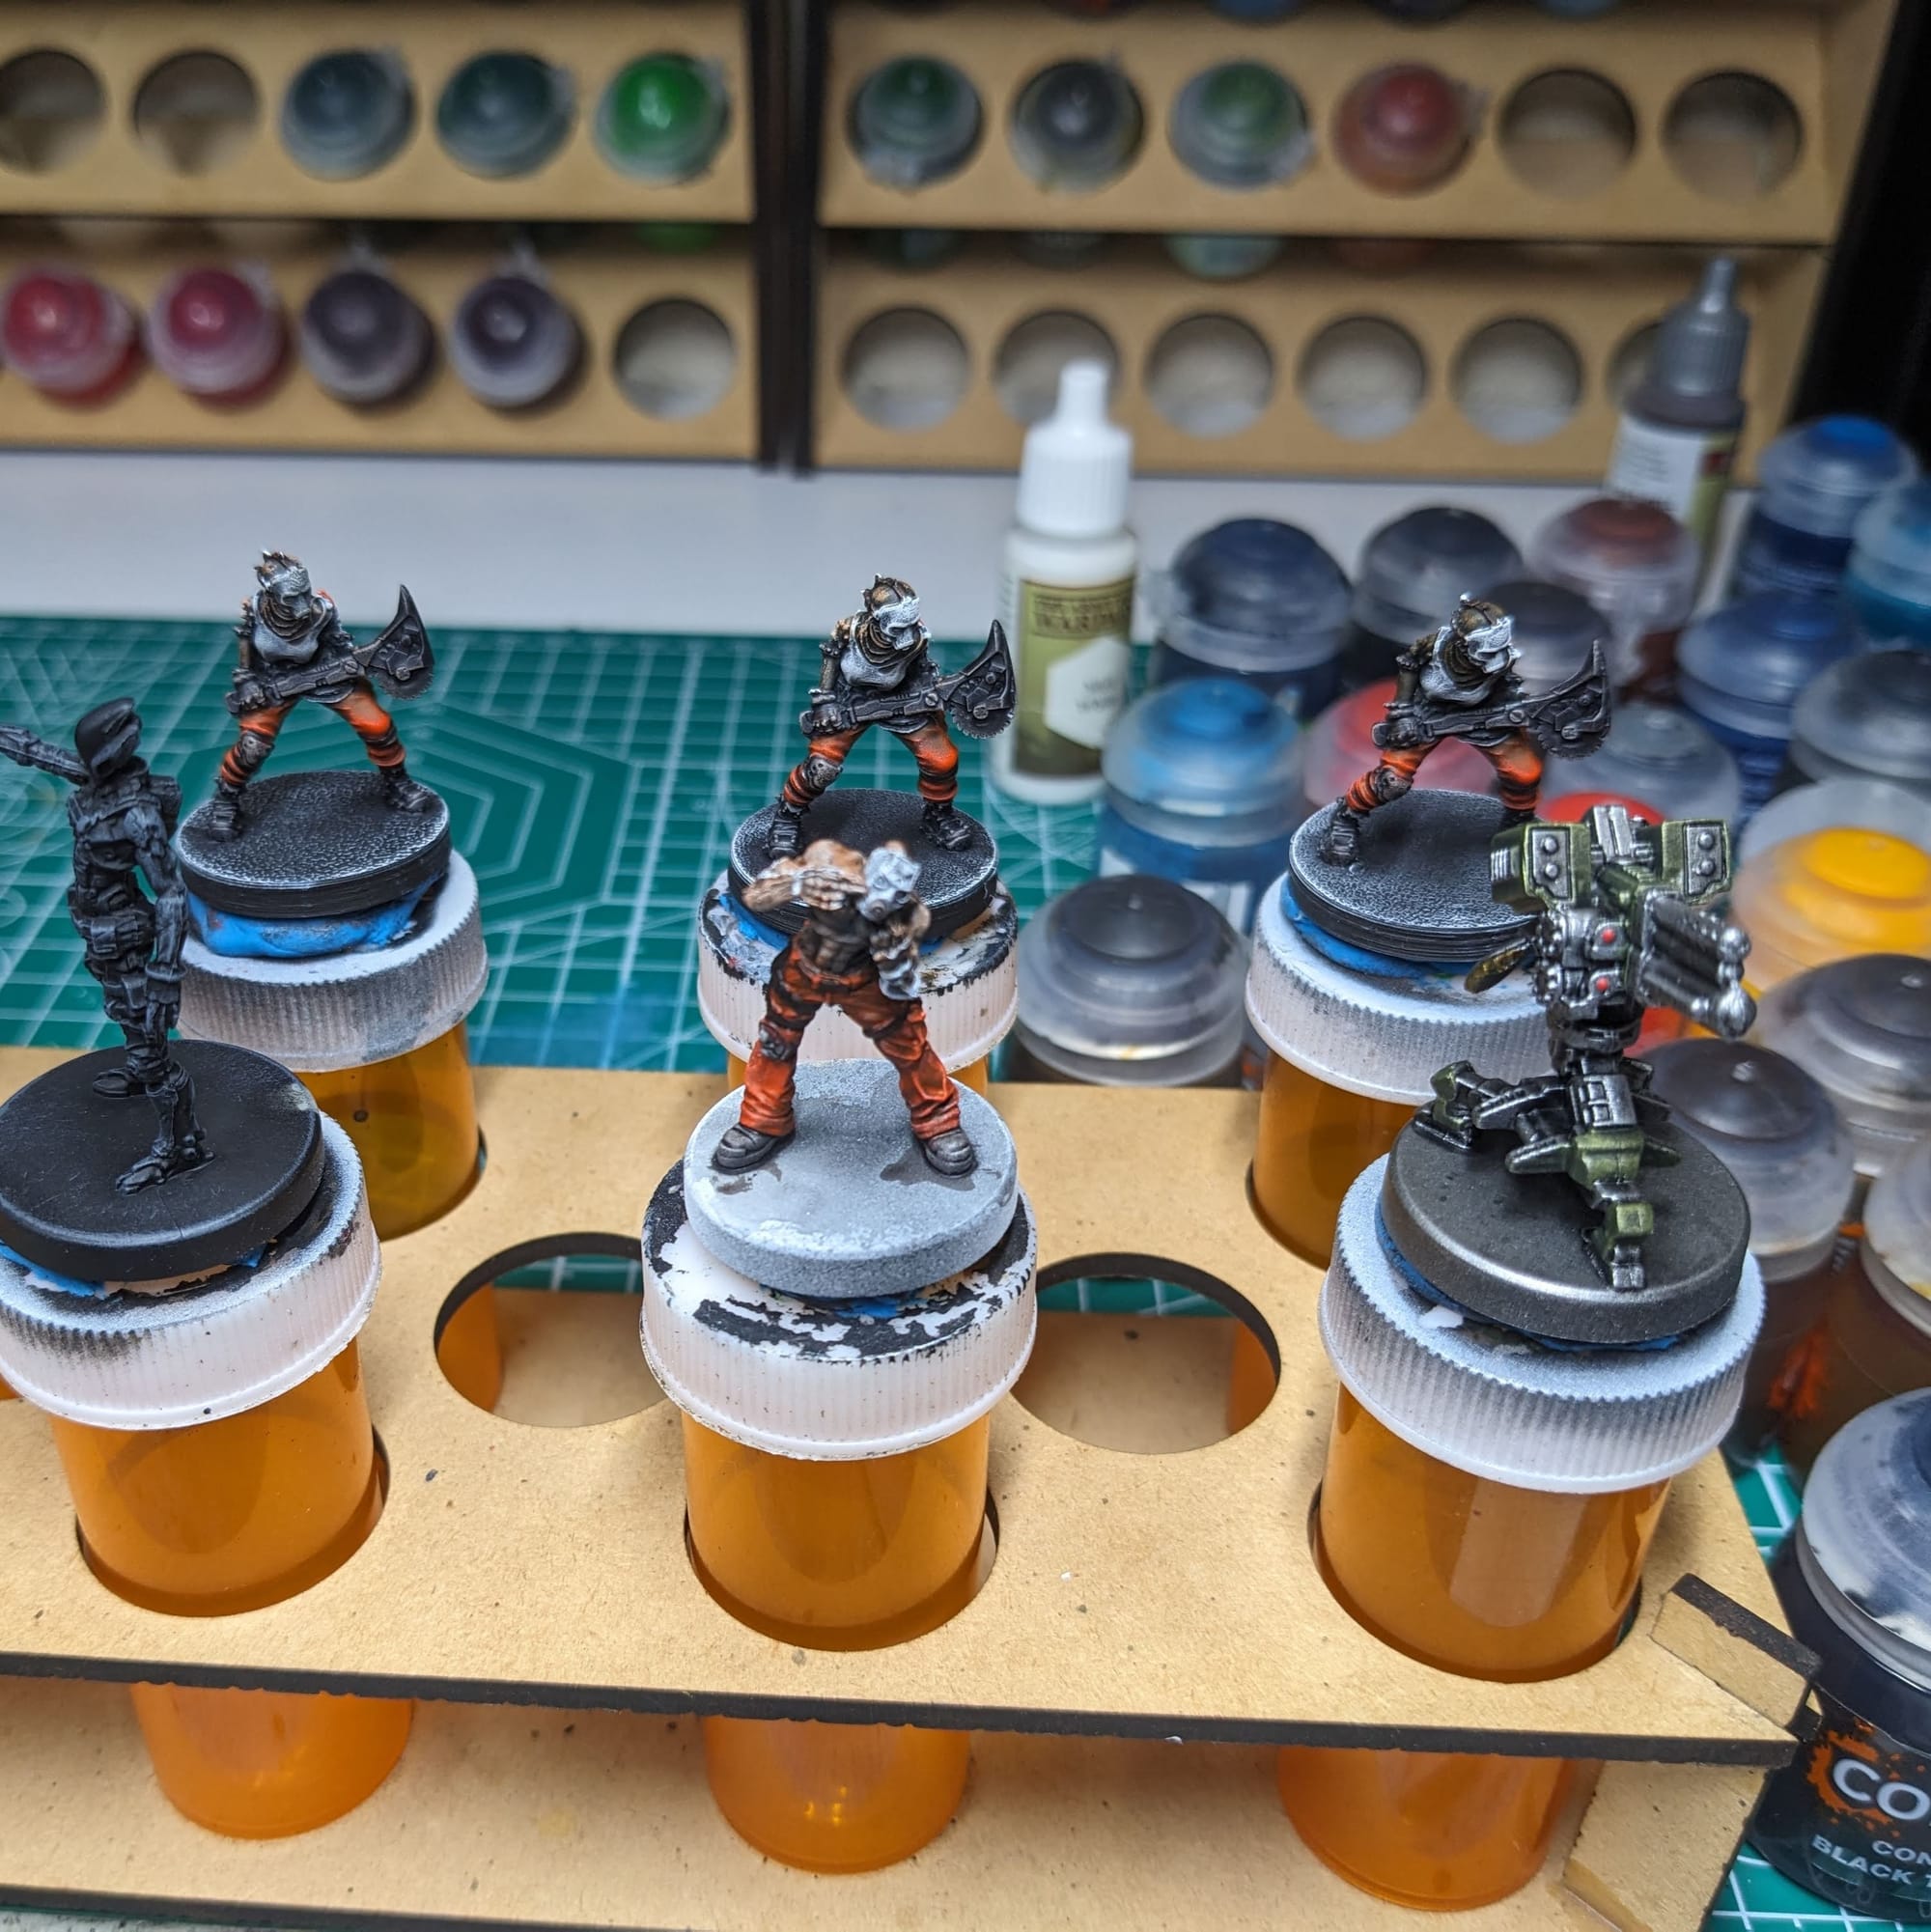
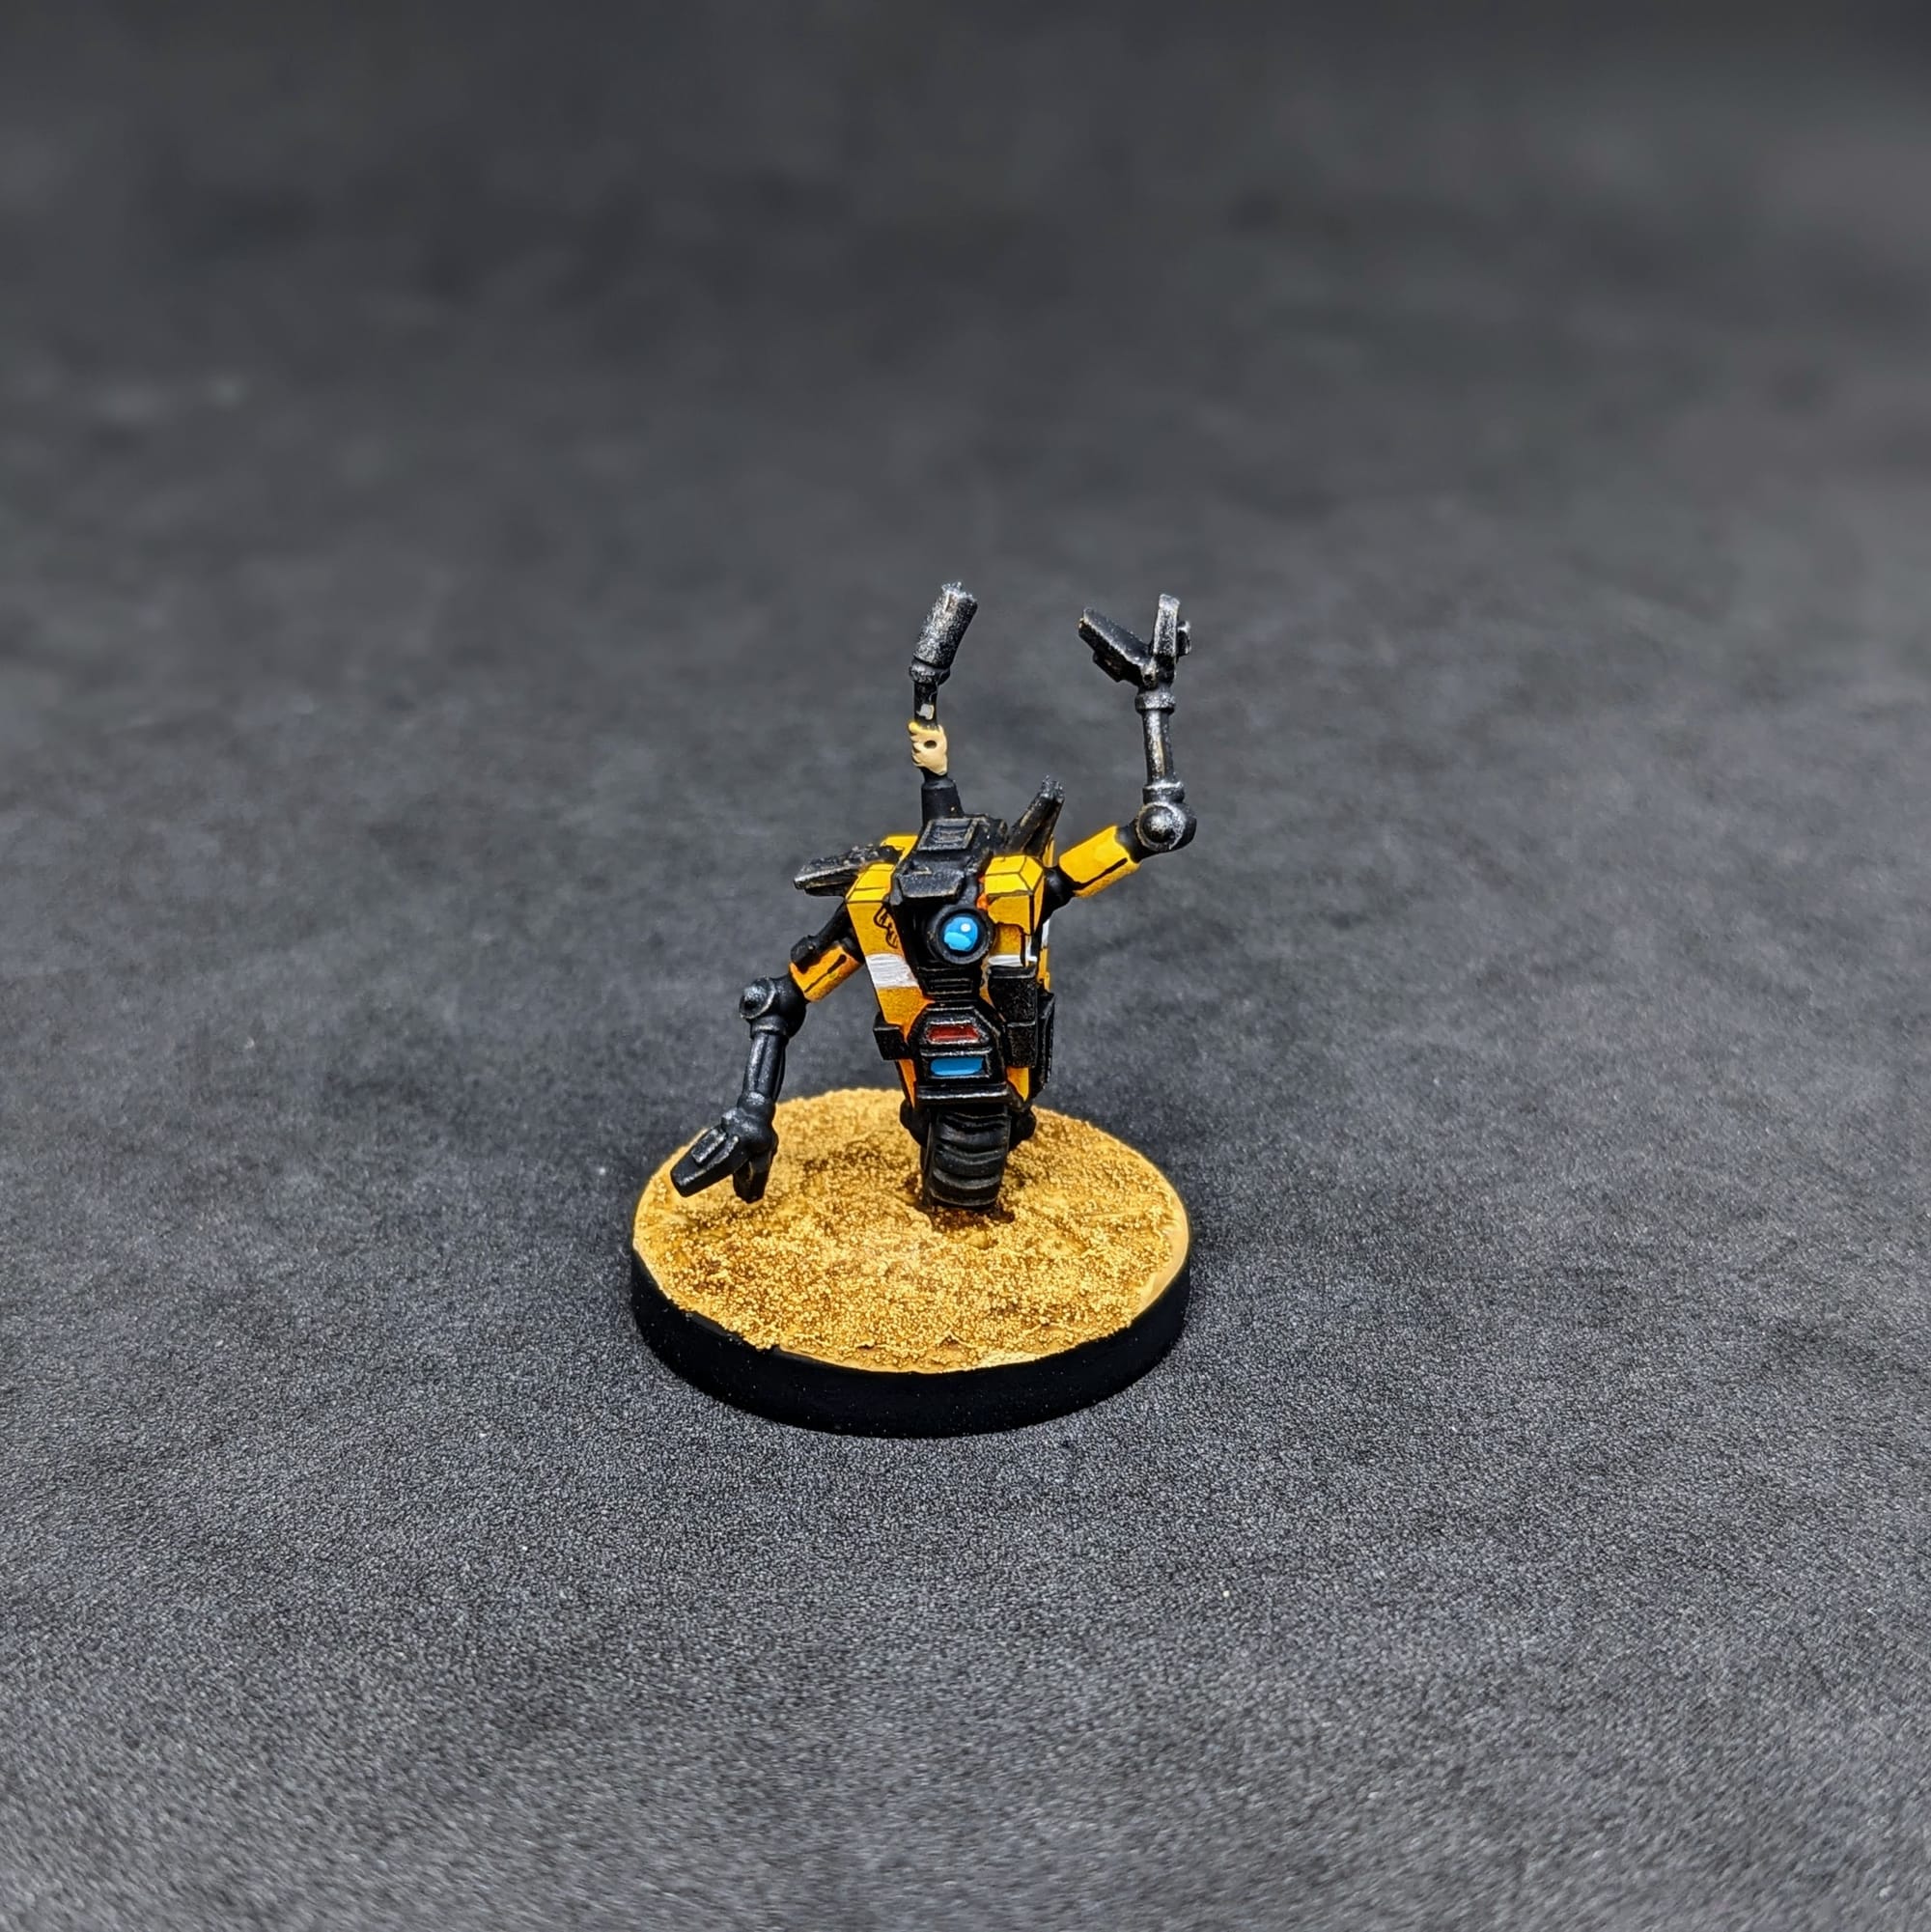
MANIACS
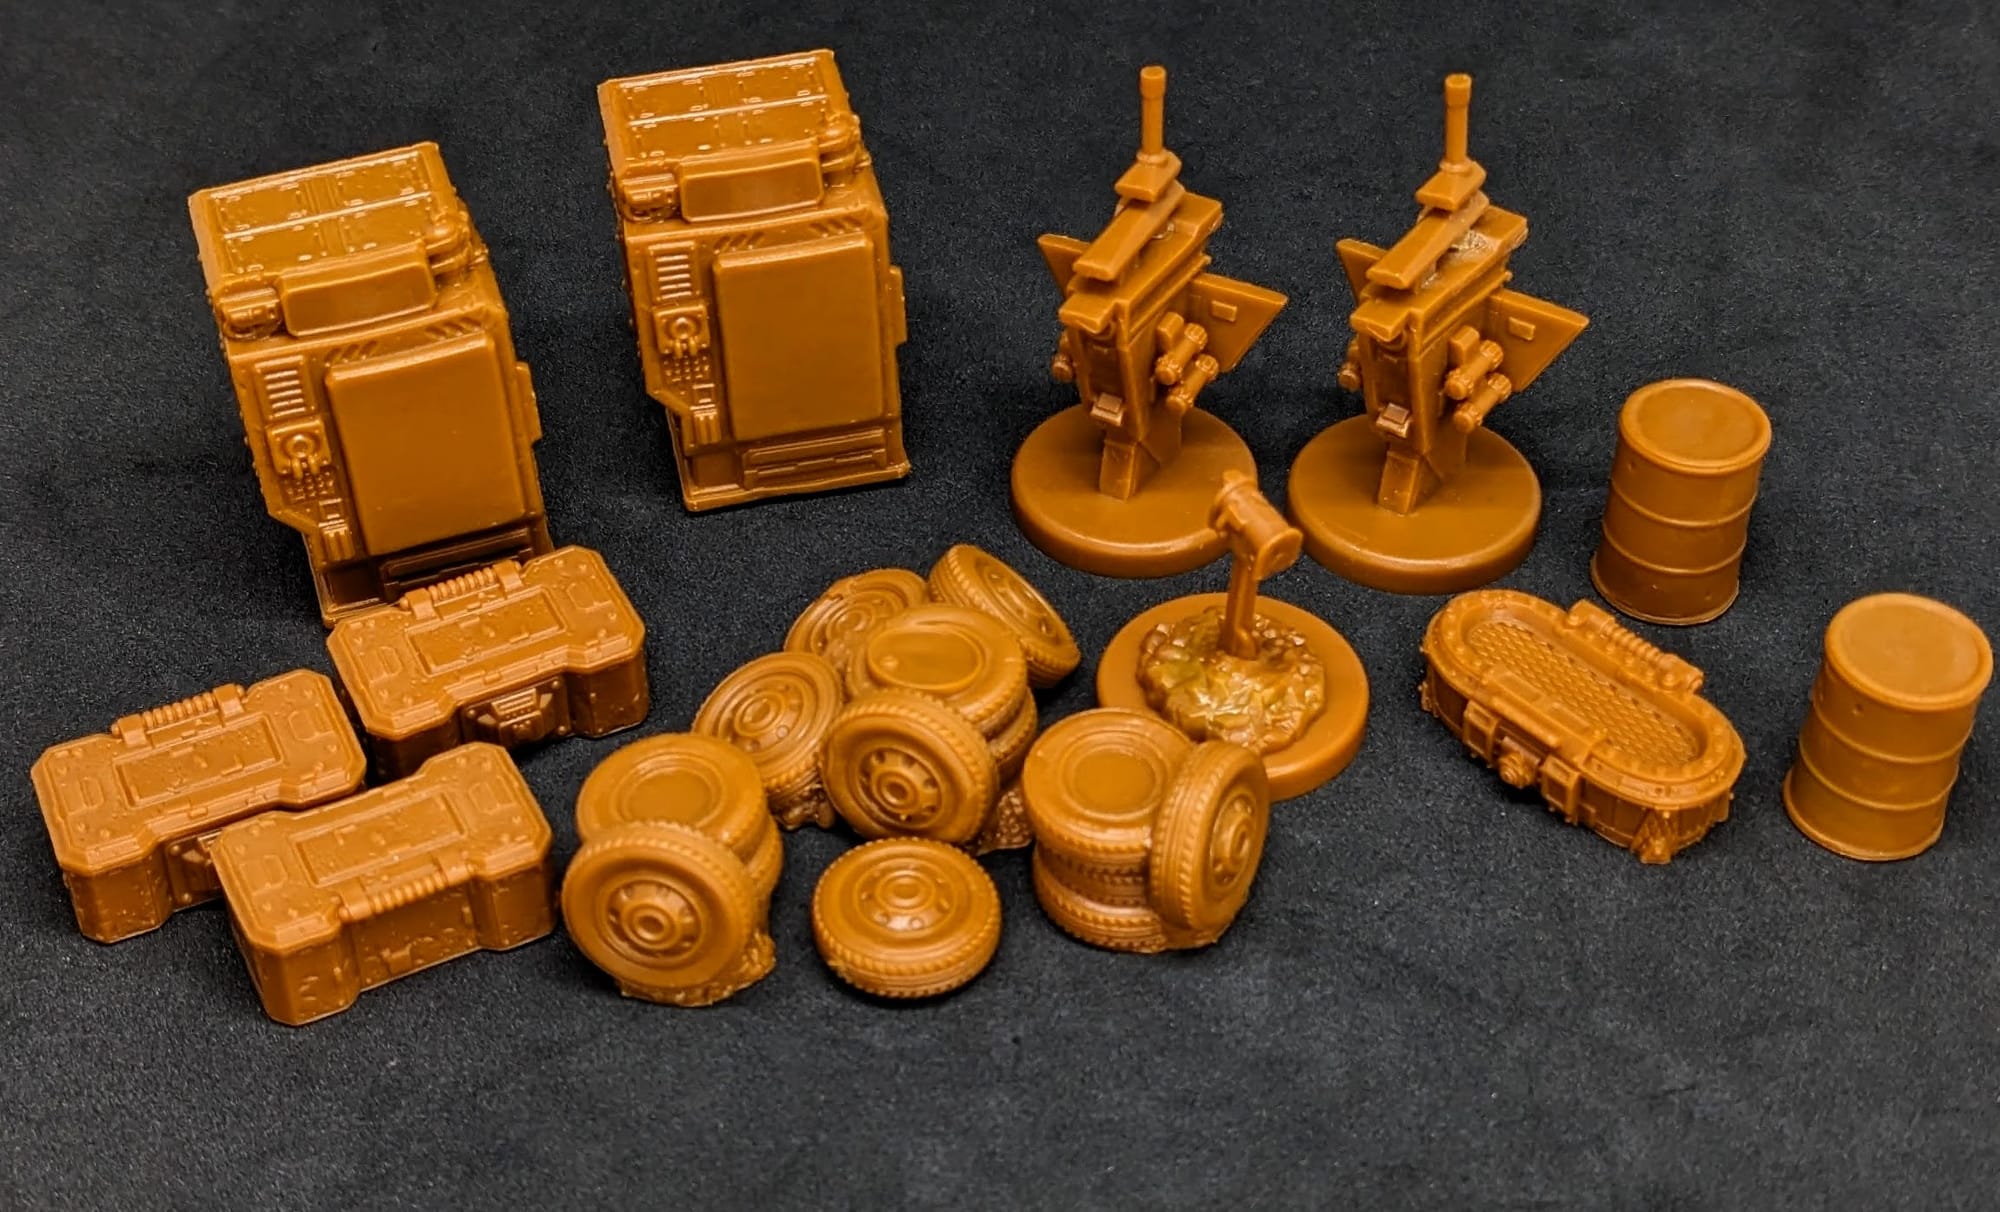
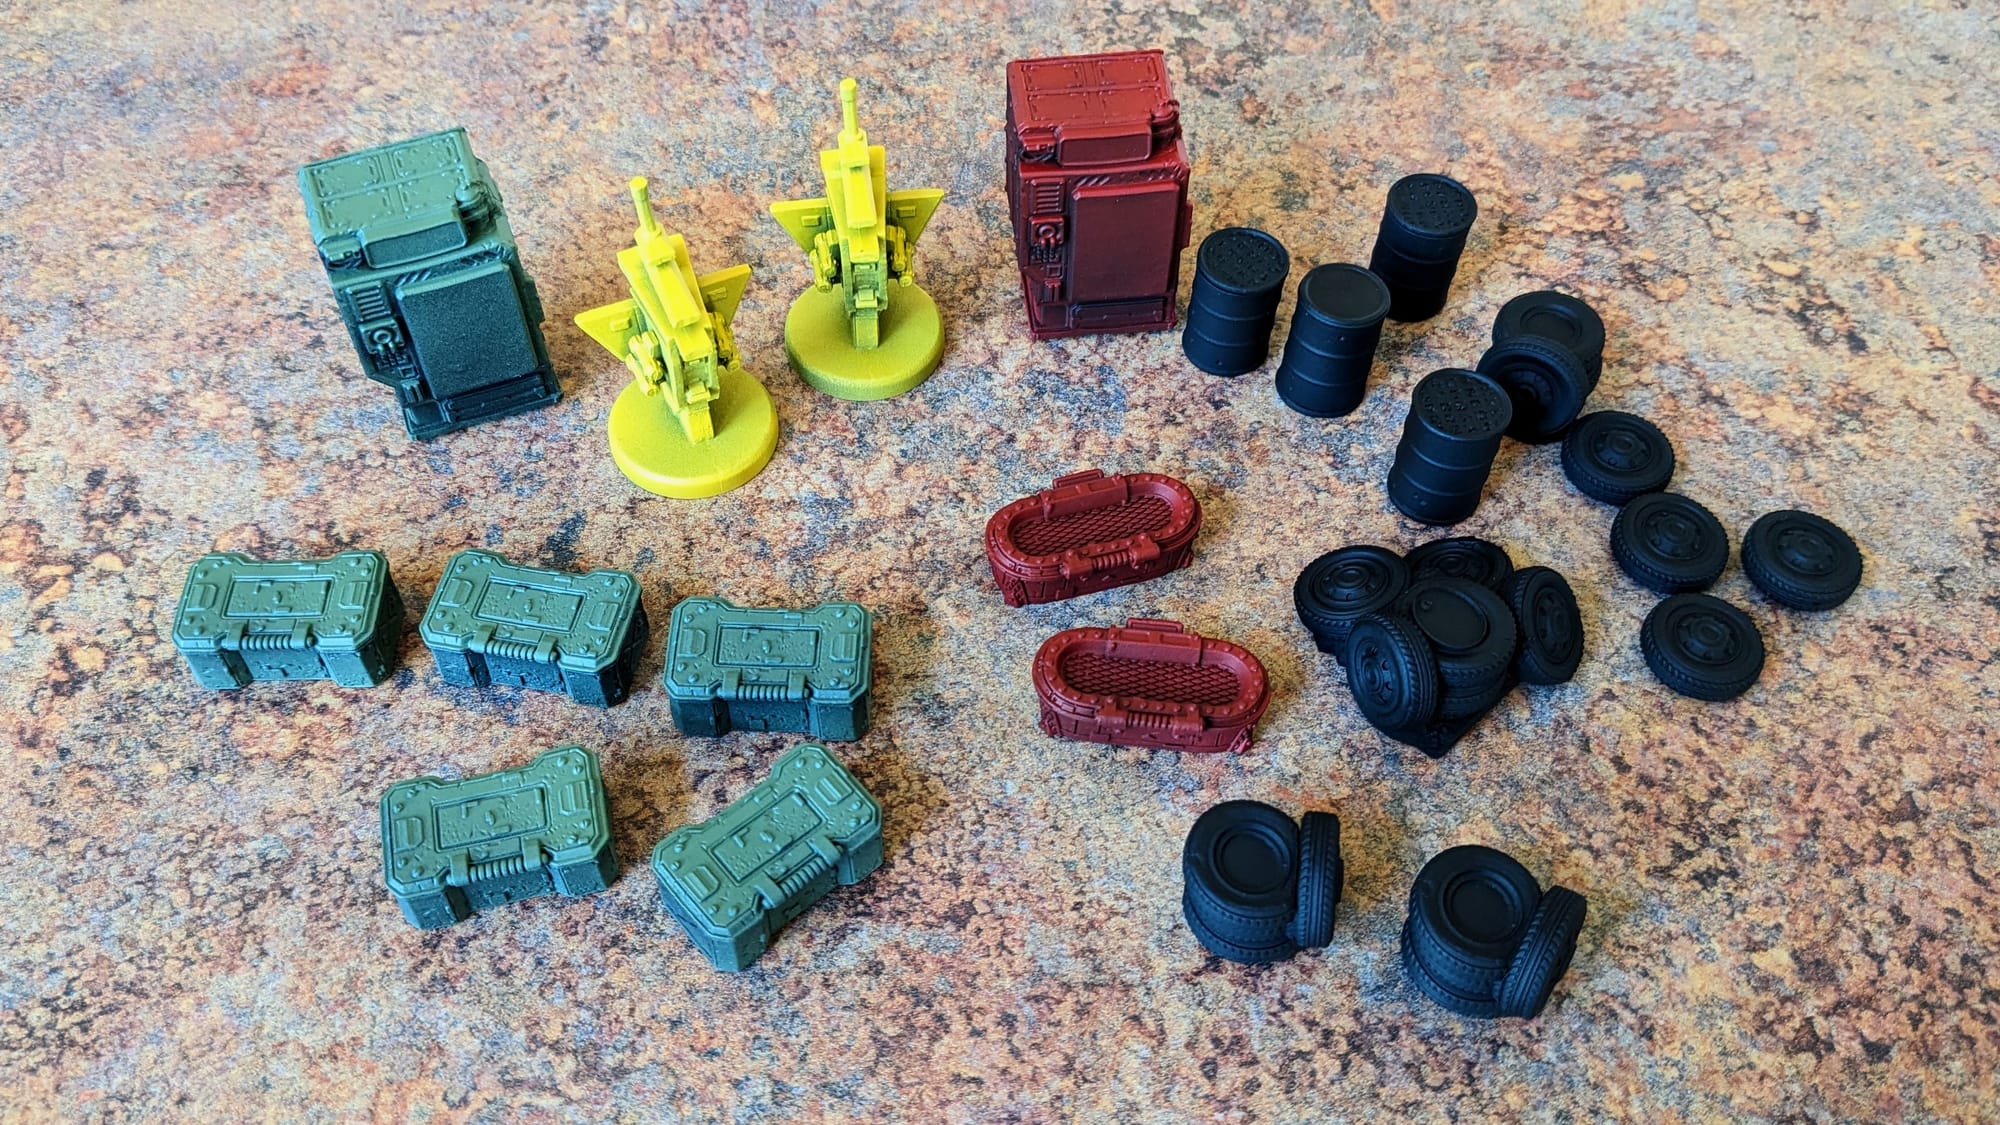
OBJECTS - CRATES, TIRES, VENDING MACHINES, and NEW-U STATIONS
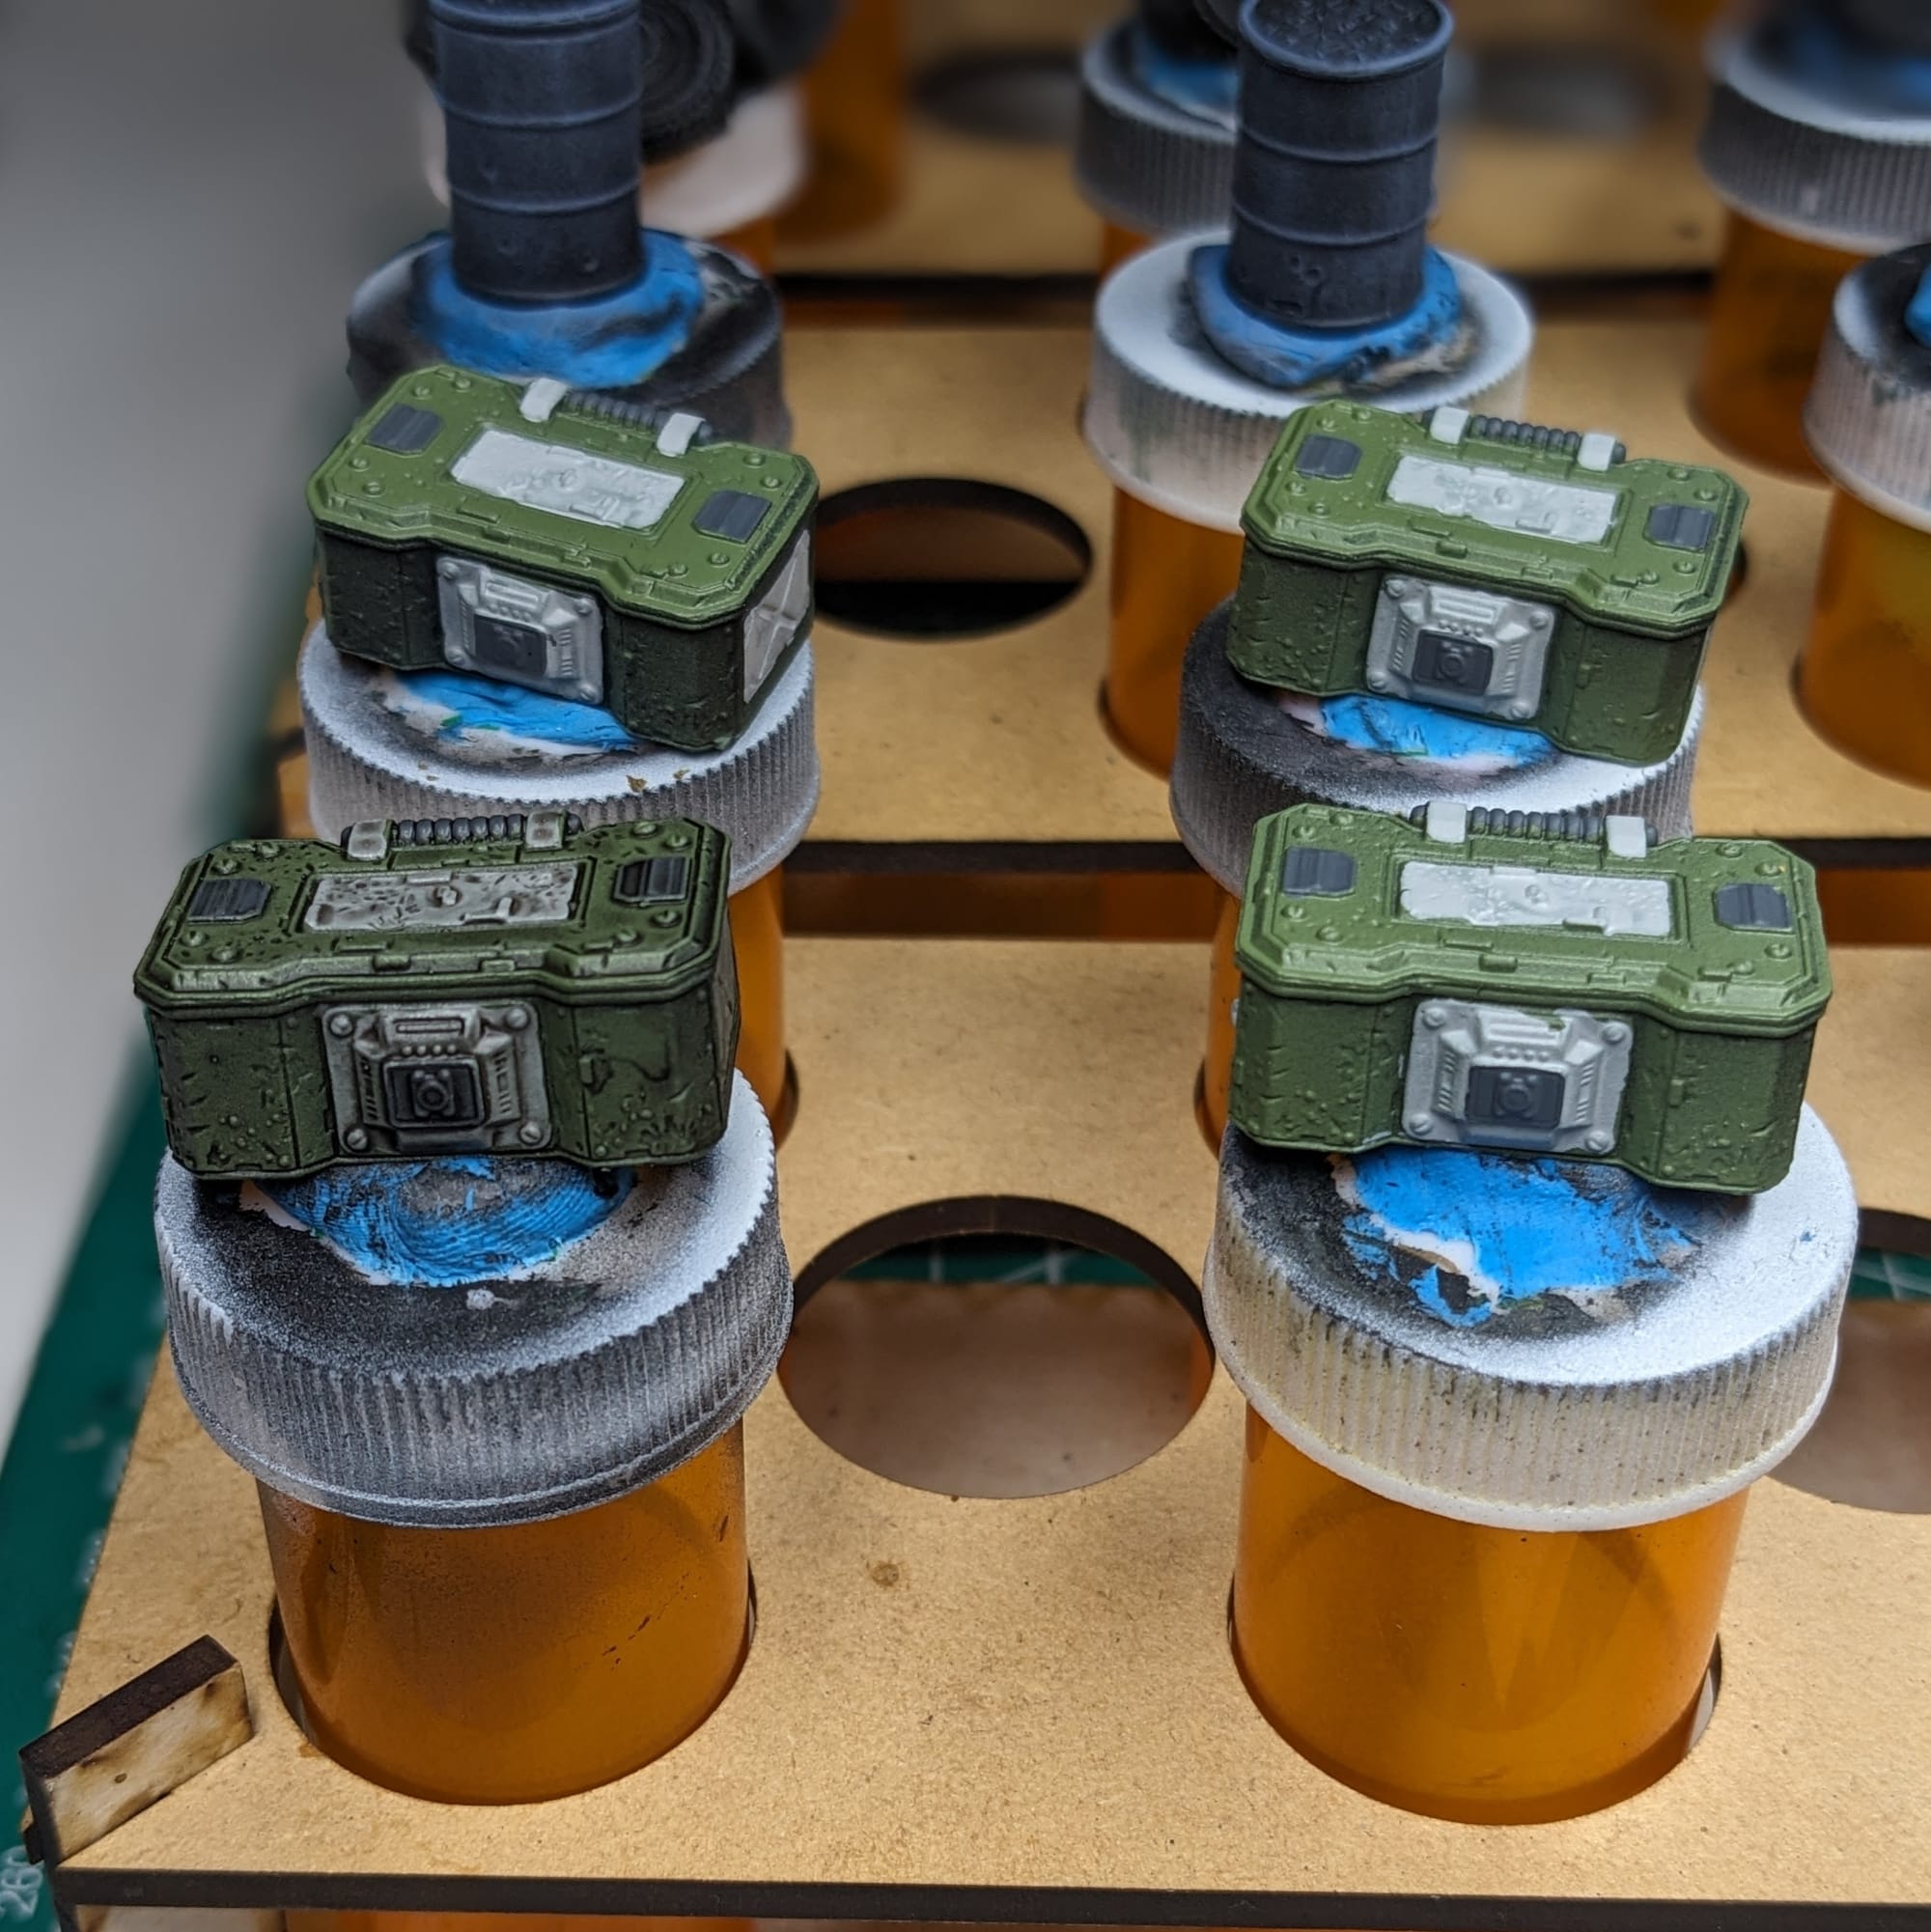
Ammo Crates & Loot Chests
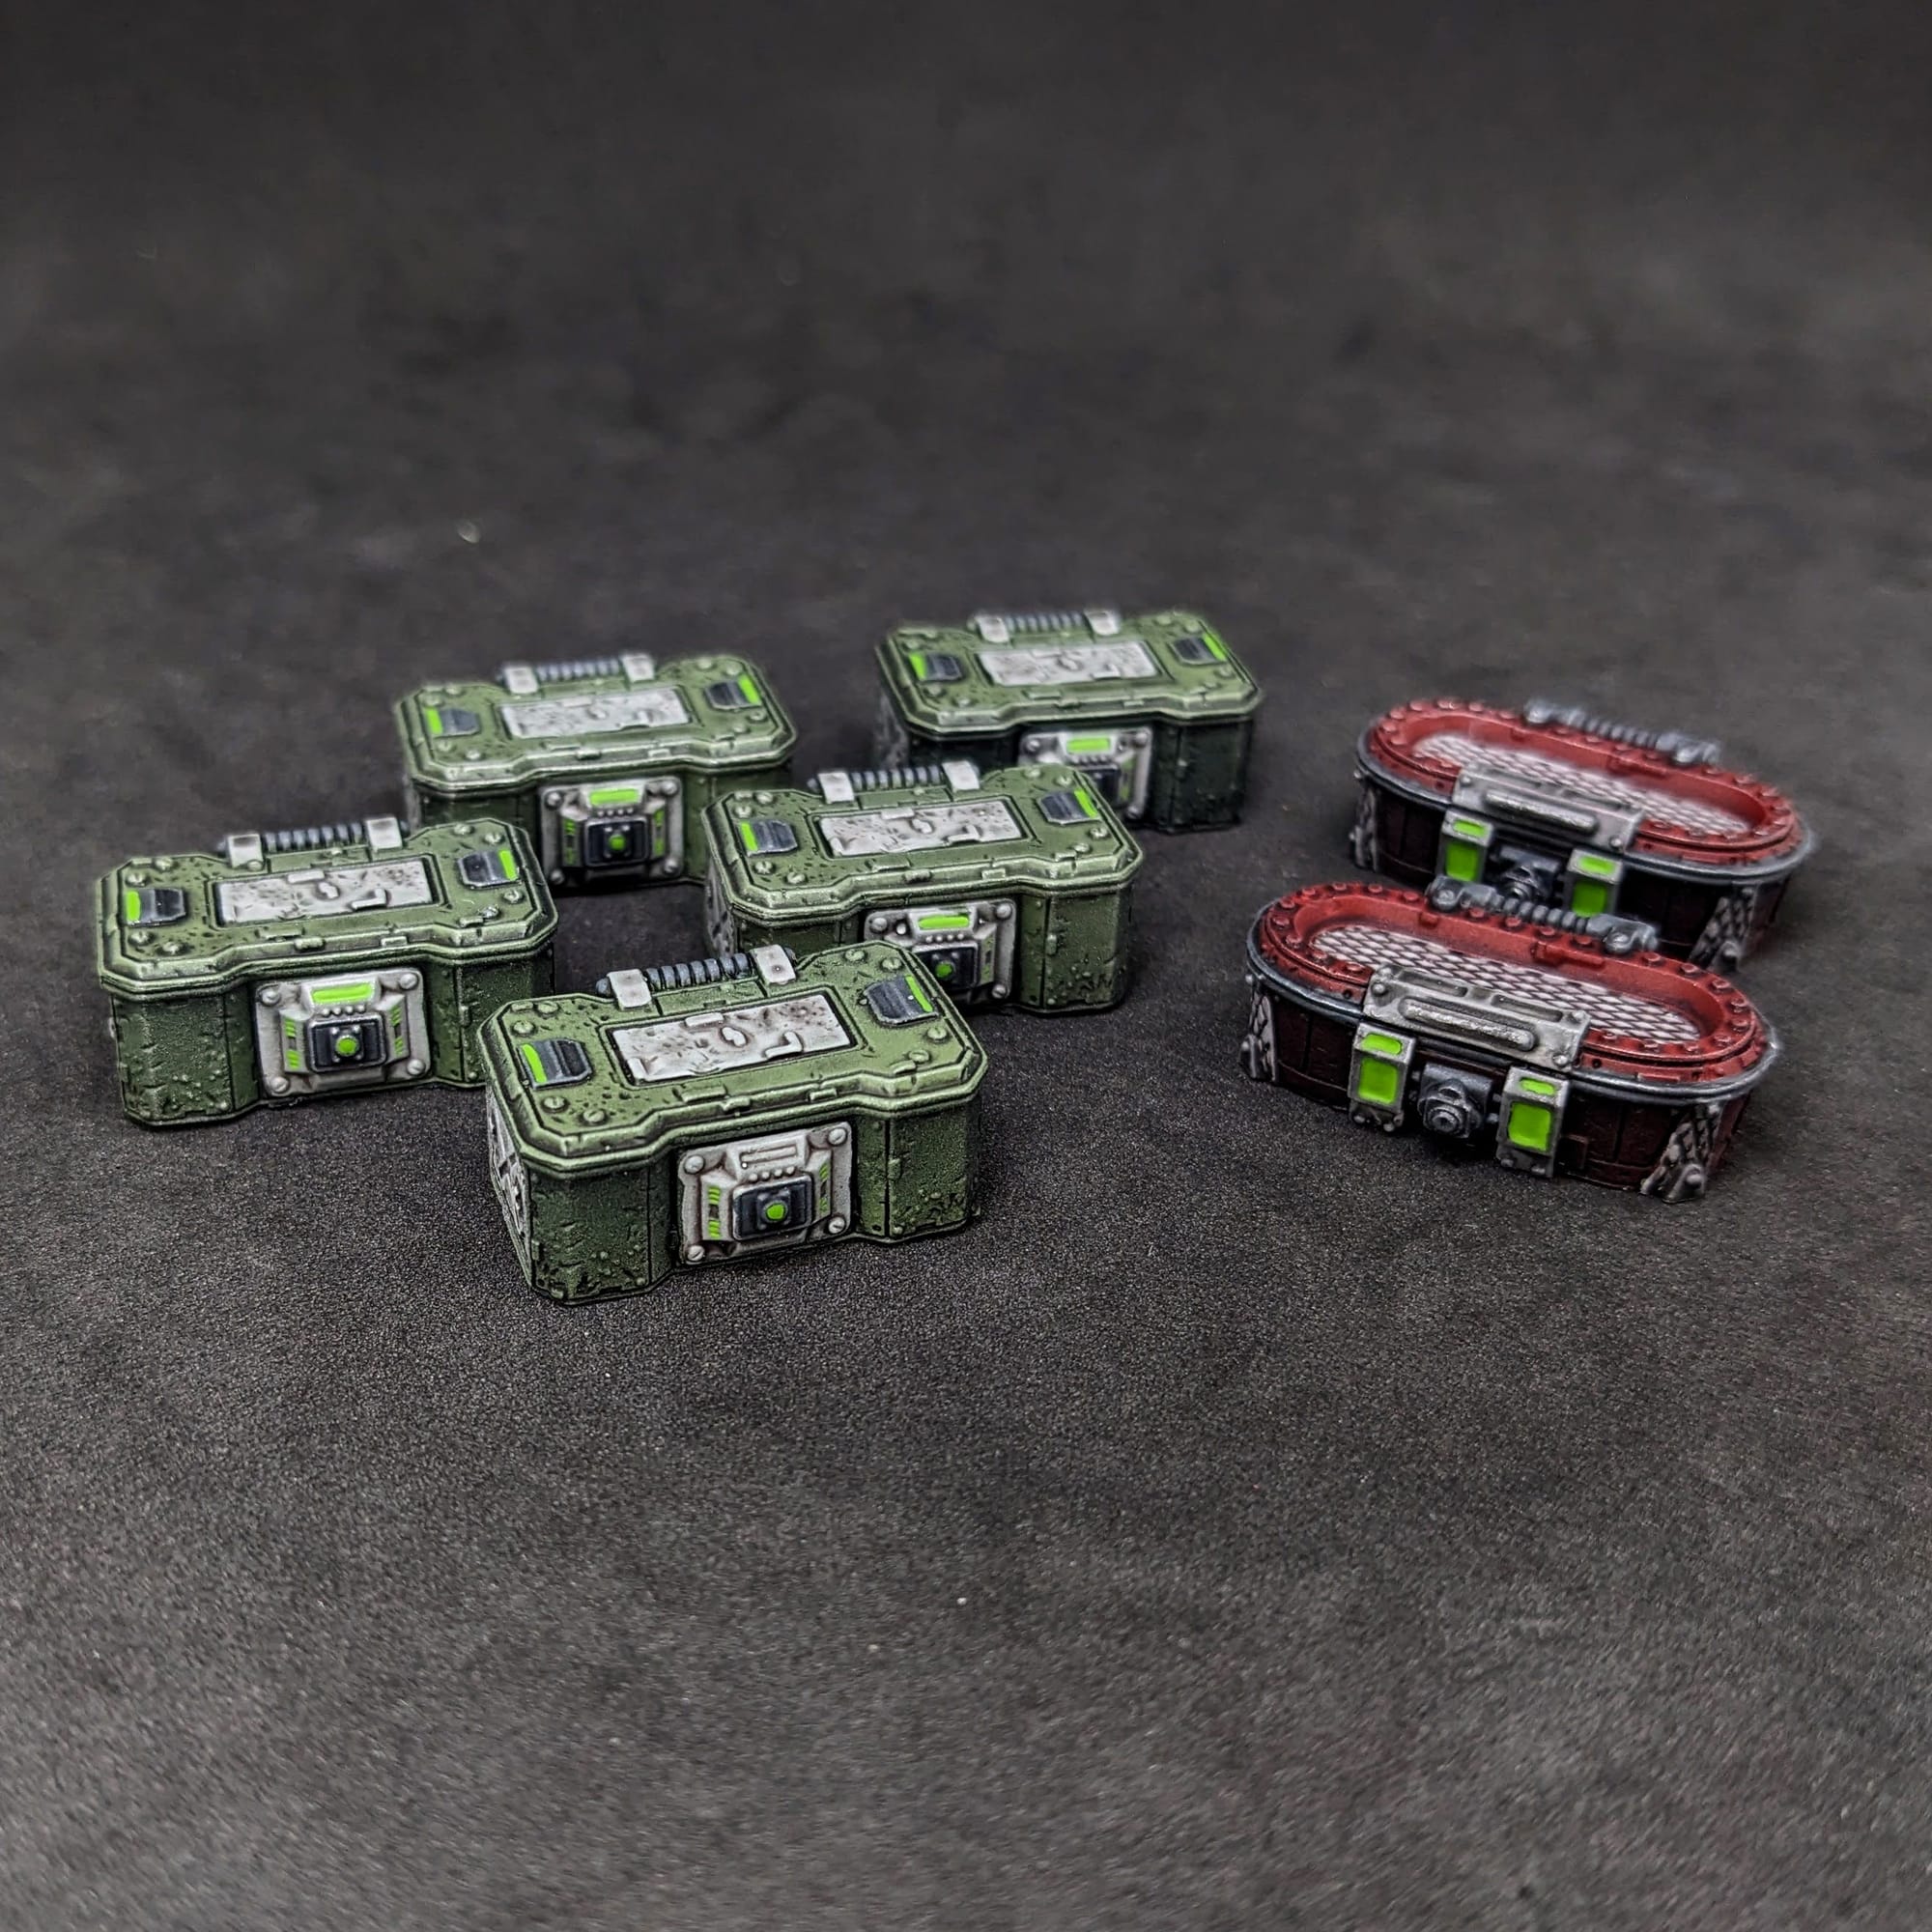
Ammo Crates Paint Recipe:
- Prime Black, with a zenithal of Army Painter Green
- Citadel Grey Seer for the light grey parts
- Citadel Mechanicus Standard Grey for the dark gray parts
- Unevenly apply Army Painter Dark Tone over the entire piece
- Drybrush a light silver over the entire piece
- Add Citadel Moot Green to the glowing lighted areas
Loot Chests Paint Recipe:
- Prime Black, with a zenithal of Citadel Mephiston Red
- Citadel Grey Seer for the light grey parts
- Citadel Dawnstone Grey for the midtone gray parts
- Citadel Mechanicus Standard Grey for the dark gray parts
- Unevenly apply Army Painter Dark Tone over the entire piece
- Drybrush a light silver over the entire piece
- Add Citadel Moot Green to the glowing lighted areas
Tires, Tire Piles, Barrels, and the Mailbox
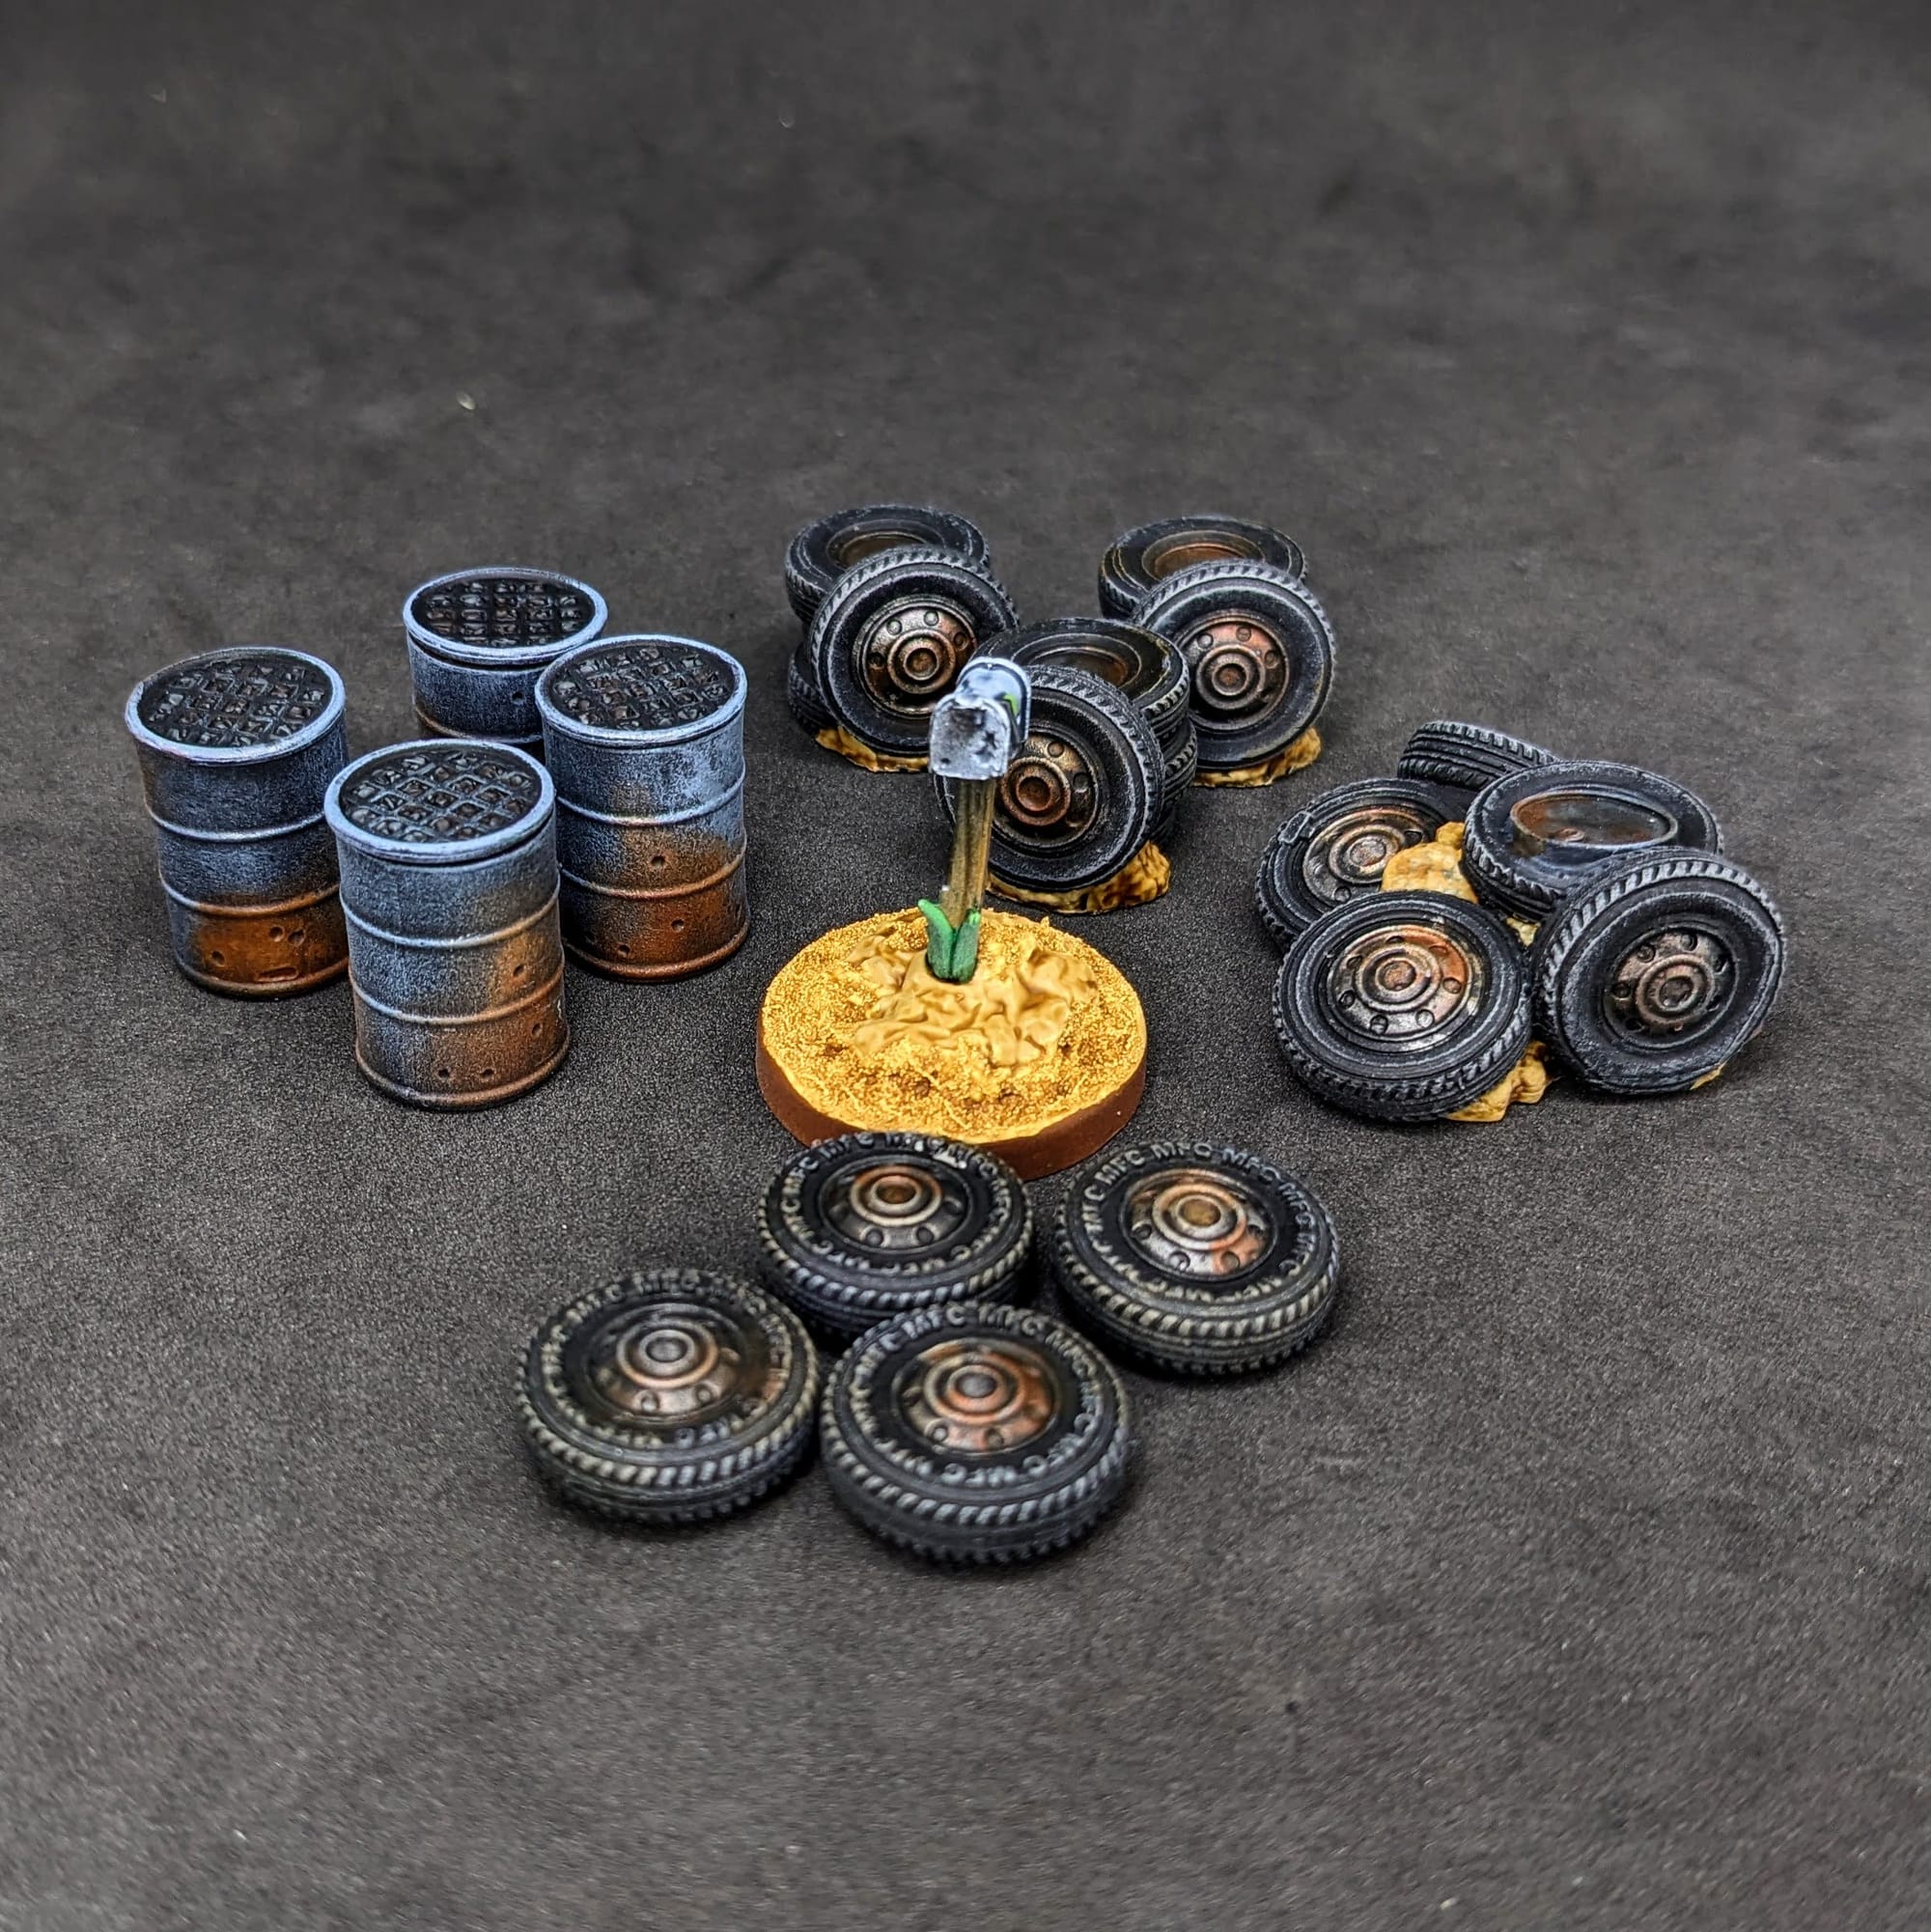
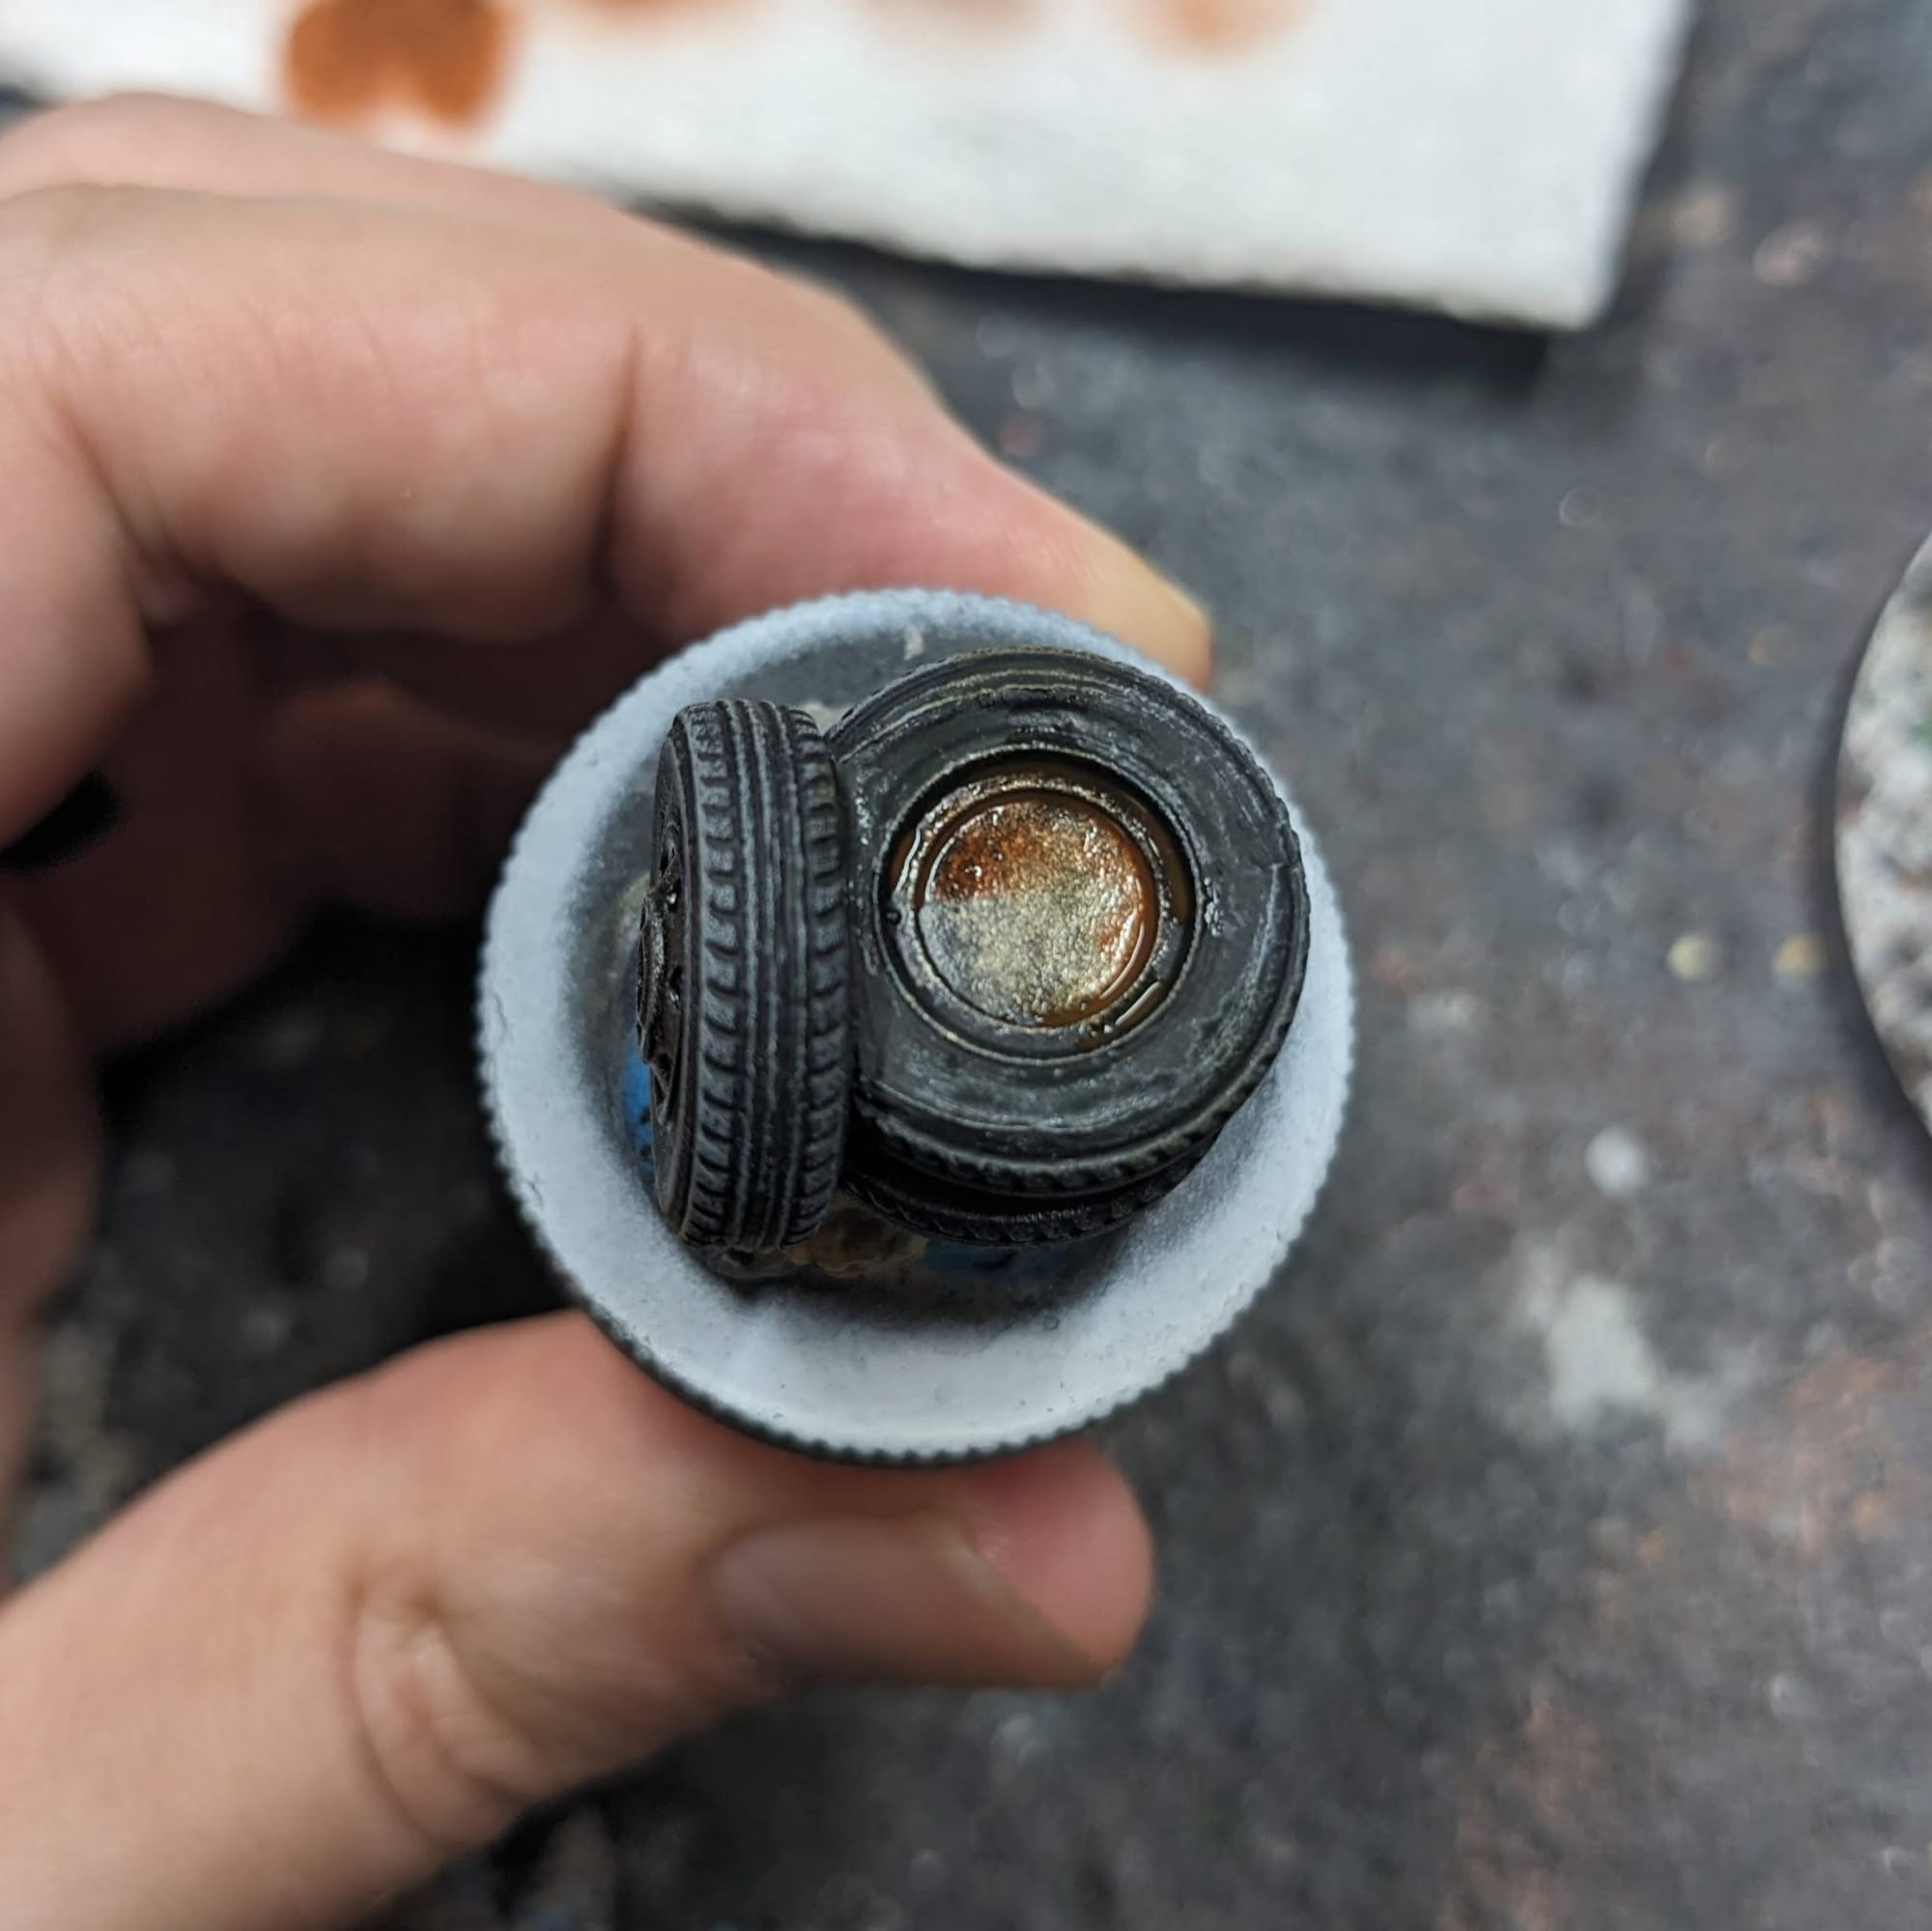
Tire Paint Recipe:
- Prime Black,
- Drybrush a medium gray over the tires
- Tire Pile: Apply Citadel Morghast Bone to the sand/rocks between the tires.
- Add Citadel Leadbelcher to the wheels
- Unevenly apply spots of Army Painter Sepia Tone
- Unevenly apply spots of Army Painter Dark Tone
- Apply thinned-down spots of Citadel Gryph-hound Orange for a mild rust effect.
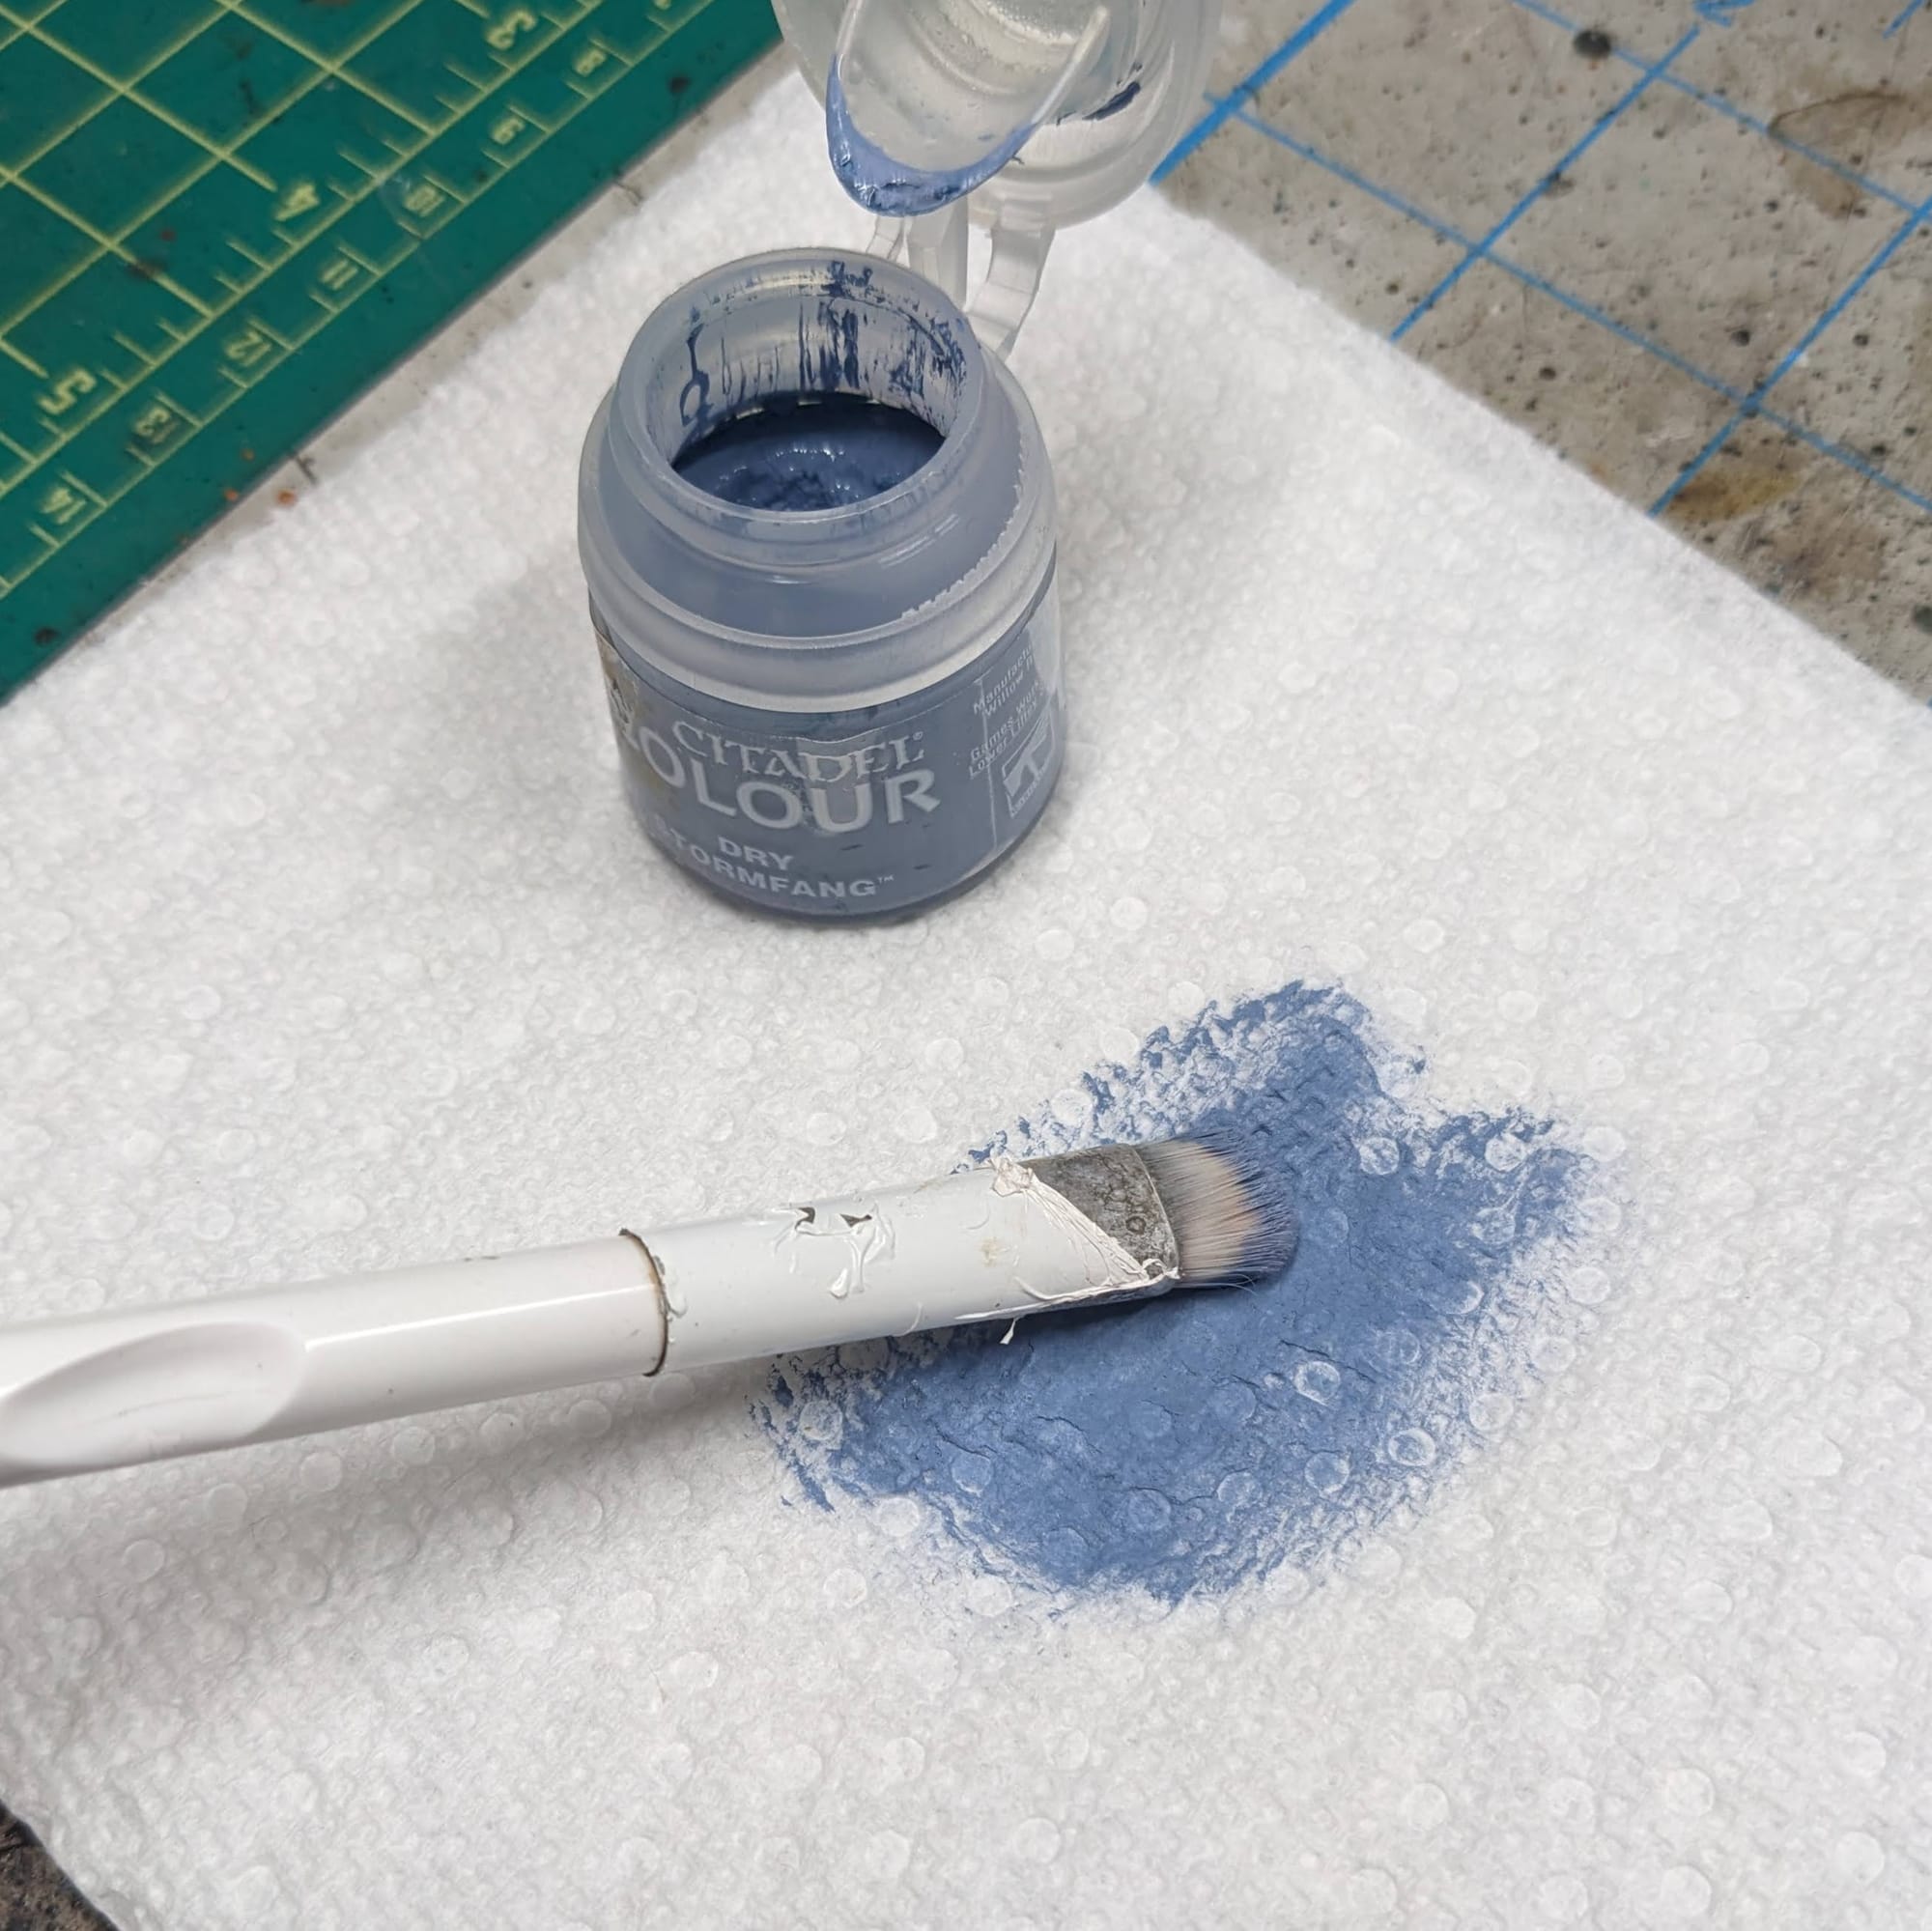
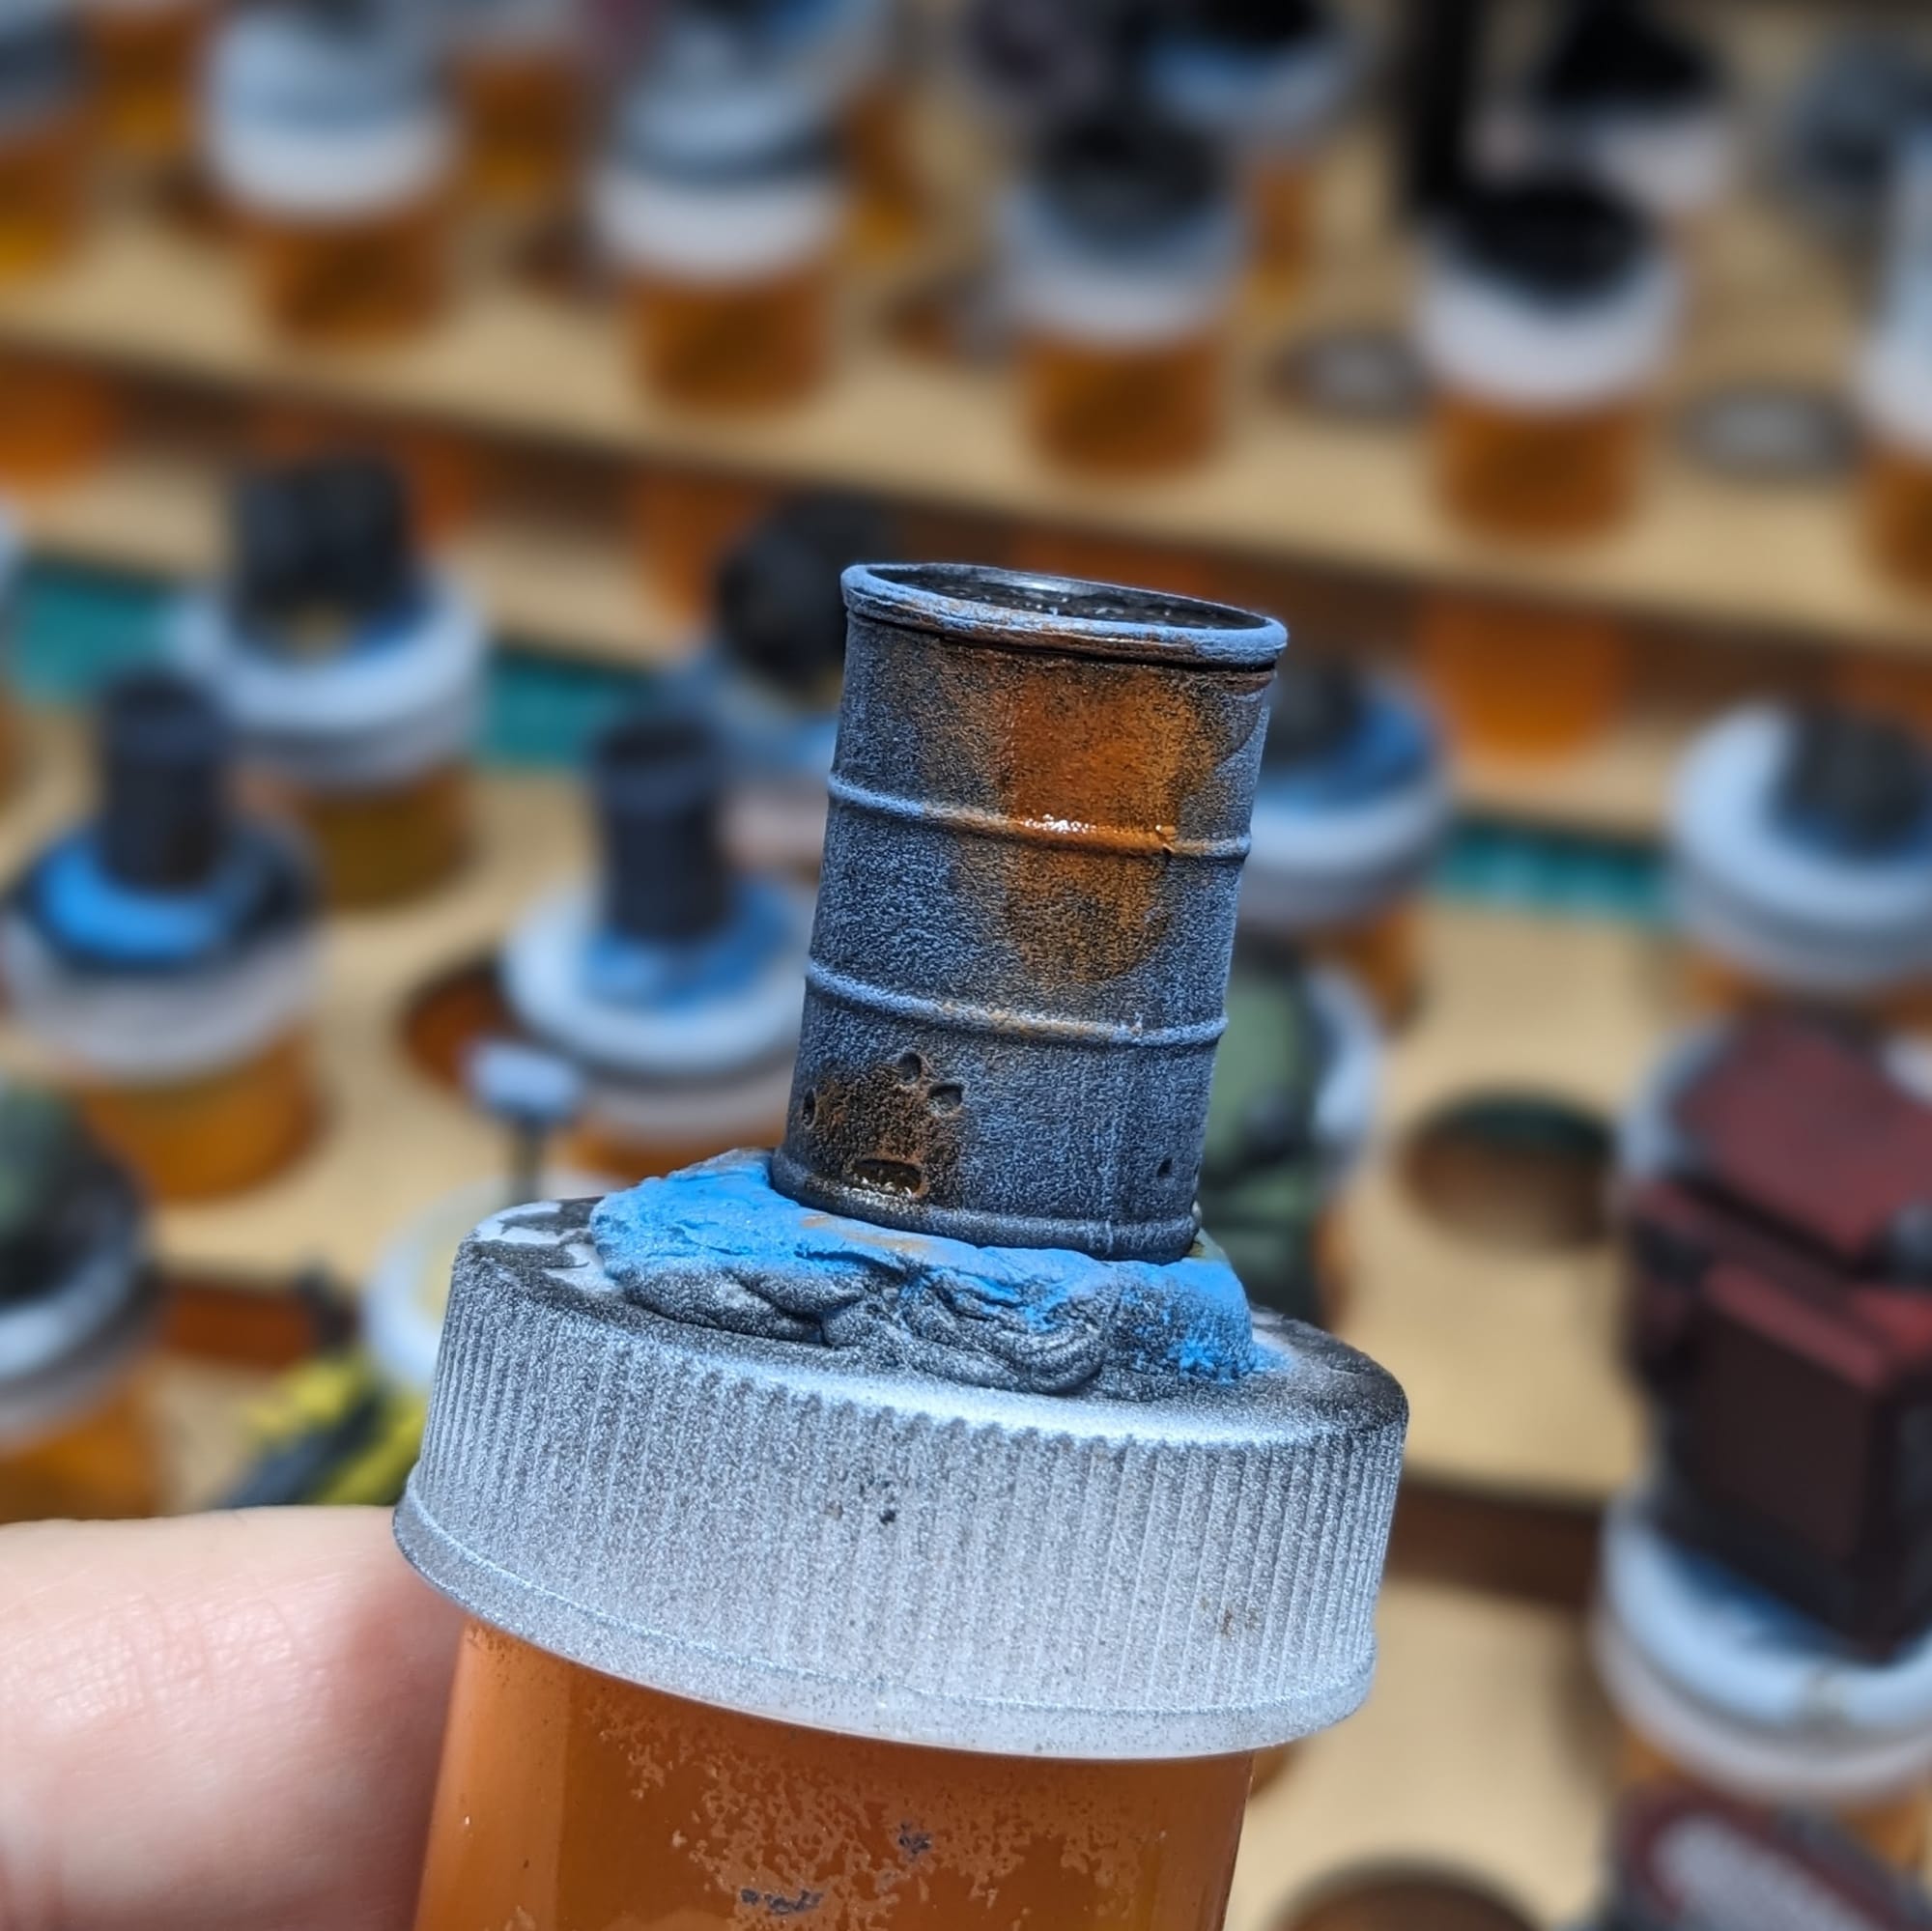
Barrel Paint Recipe:
- Prime Black
- Heavy drybrush (or multiple passes) of Citadel Stormfang Drybrush
- Trash - a mix of Citadel Mechanicus Standard Grey and Rhinox Hide
- Unevenly apply spots of Army Painter Sepia Tone
- Unevenly apply spots of Army Painter Dark Tone
- Drybrush a light silver over the entire piece

Mailbox Paint Recipe:
- Prime Black, with a zenithal of Army Painter Matte white
- Wood - Citadel Snakebite Leather
- Mailbox - Citadel Space Wolves Grey
- Grass Tufts - Citadel Ork Flesh
- Drybrush a light silver over the mailbox
- Add Citadel Moot Green to the mailbox flag
OPTIONAL: Rust Effects! Here is a very simple guide to add basic rust effects to any piece.
- Unevenly apply spots of Army Painter Sepia Tone
- Drybrush Citadel Mournfang Brown
- Drybrush Citadel Skrag Brown
- Apply thinned-down spots of Citadel Gryph-hound Orange over the brown areas, and then extend beyond into the non-rust areas.
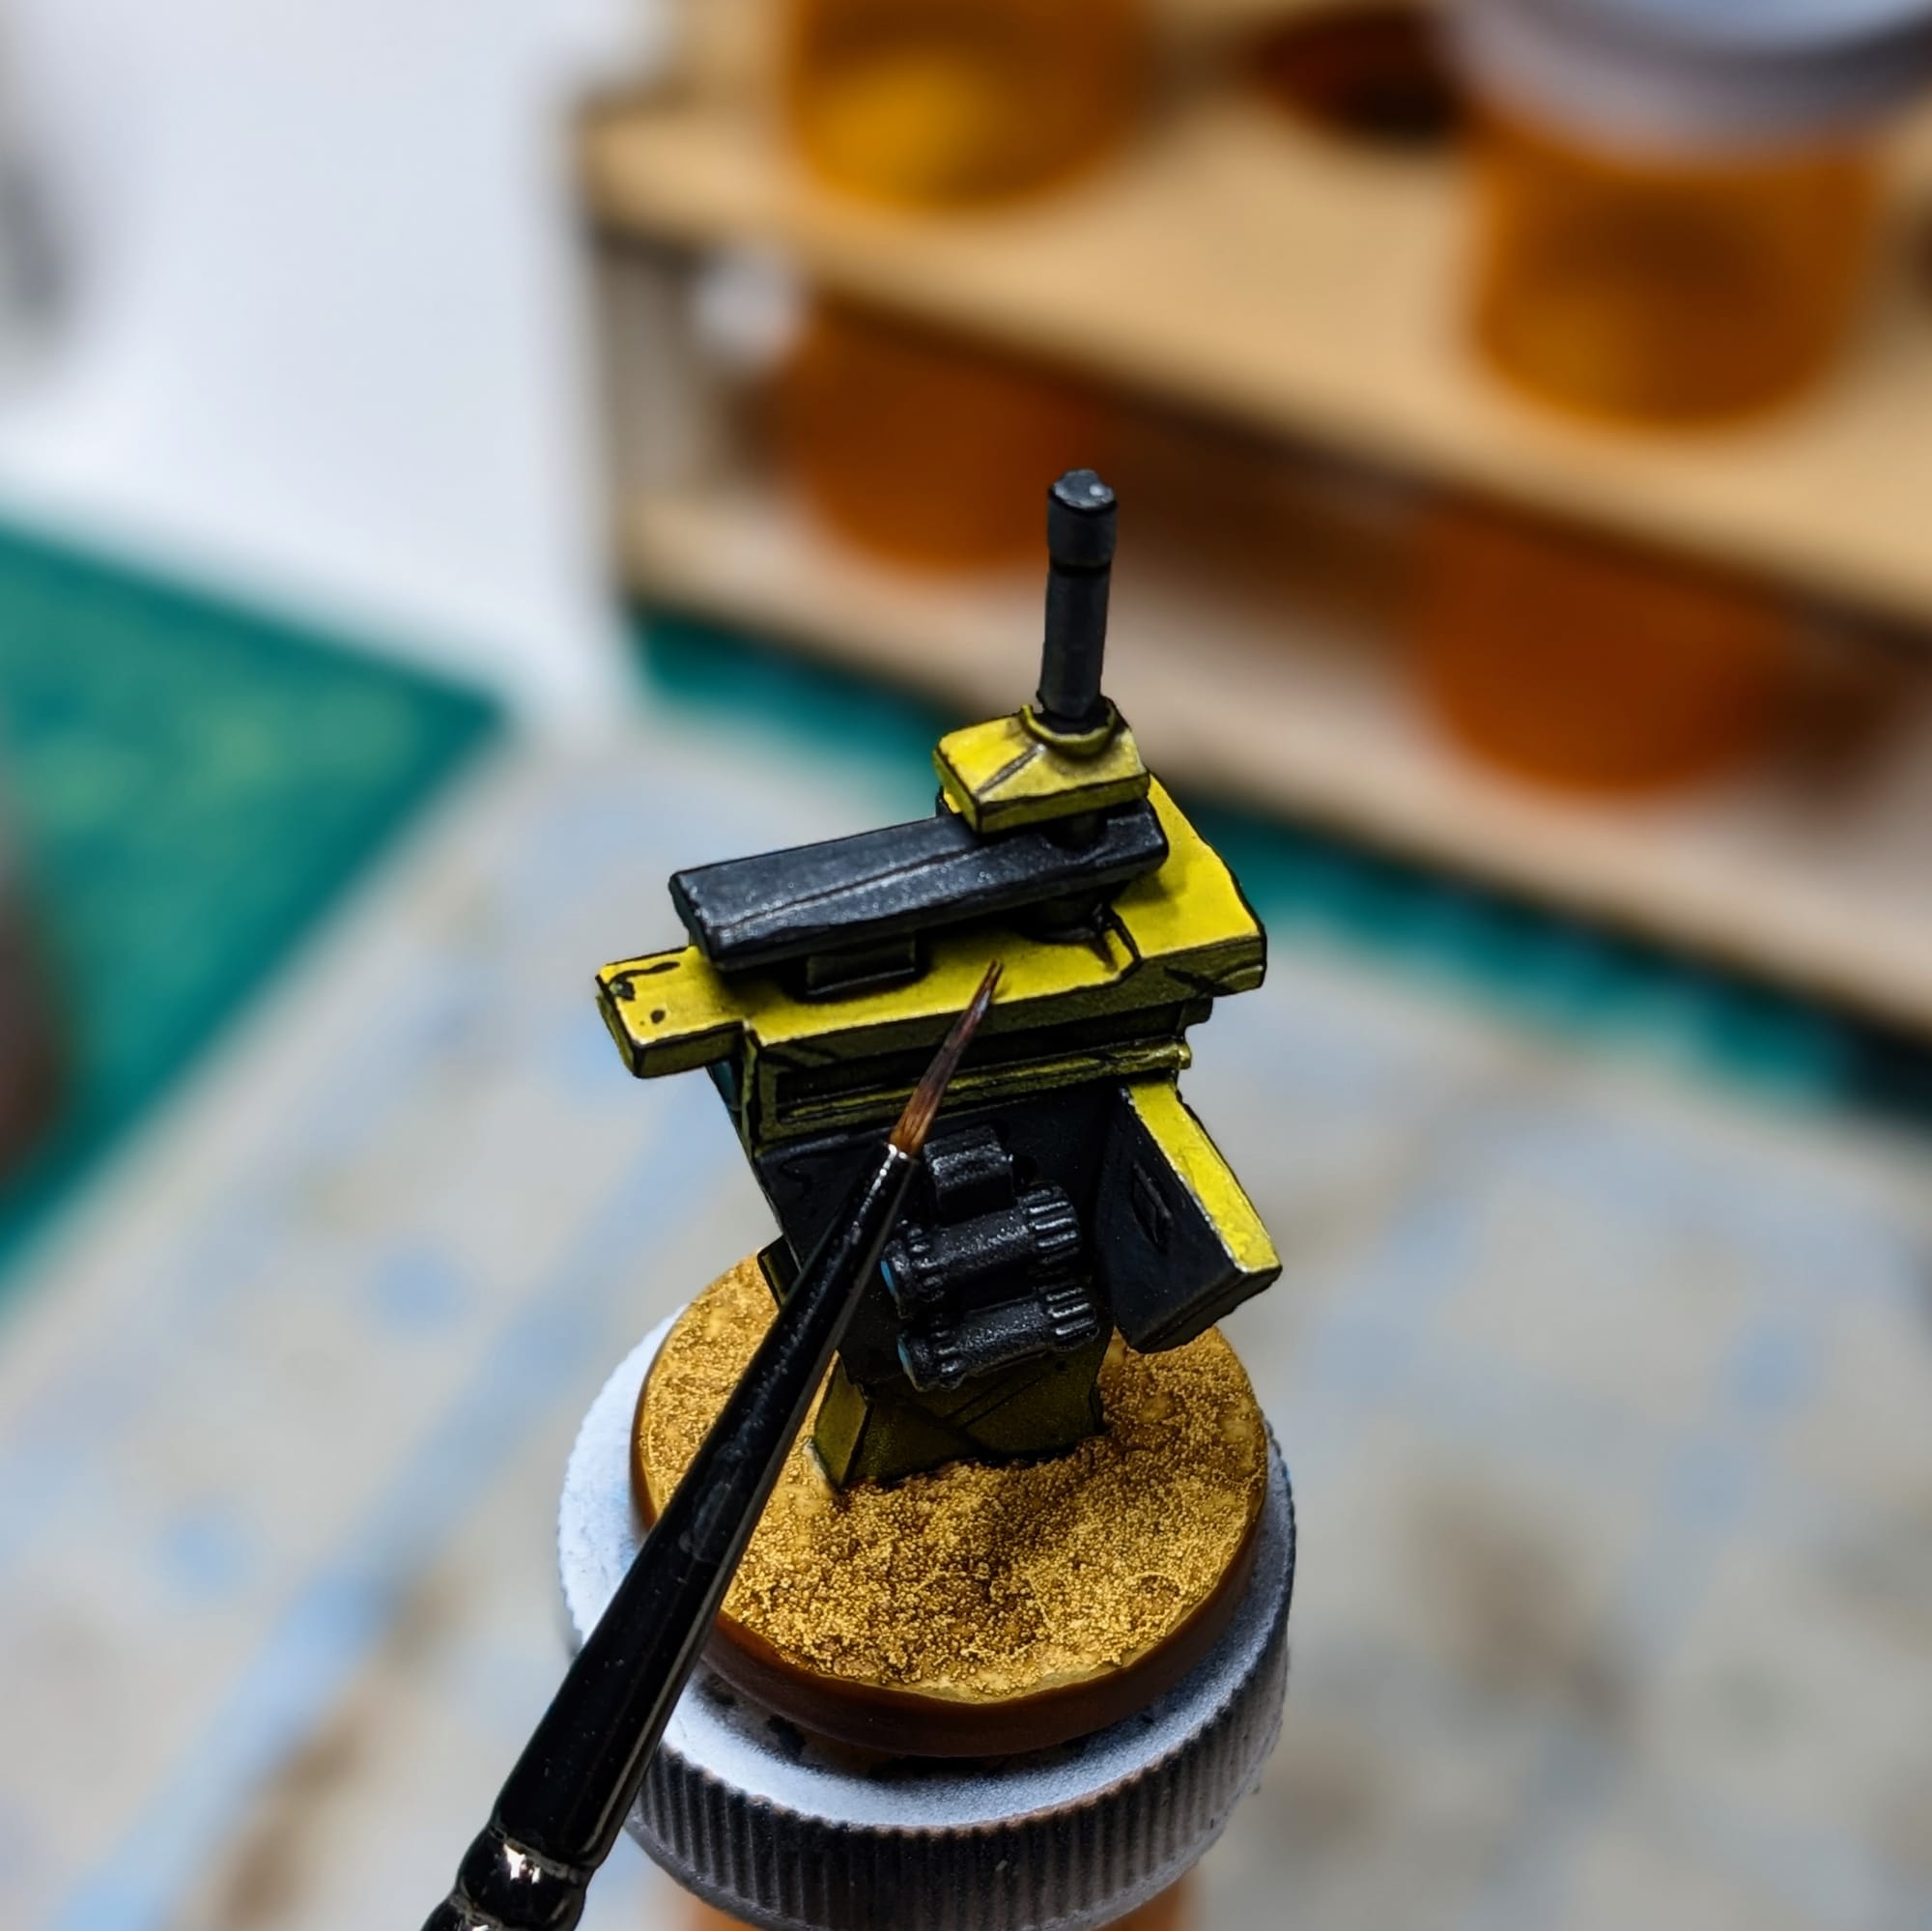
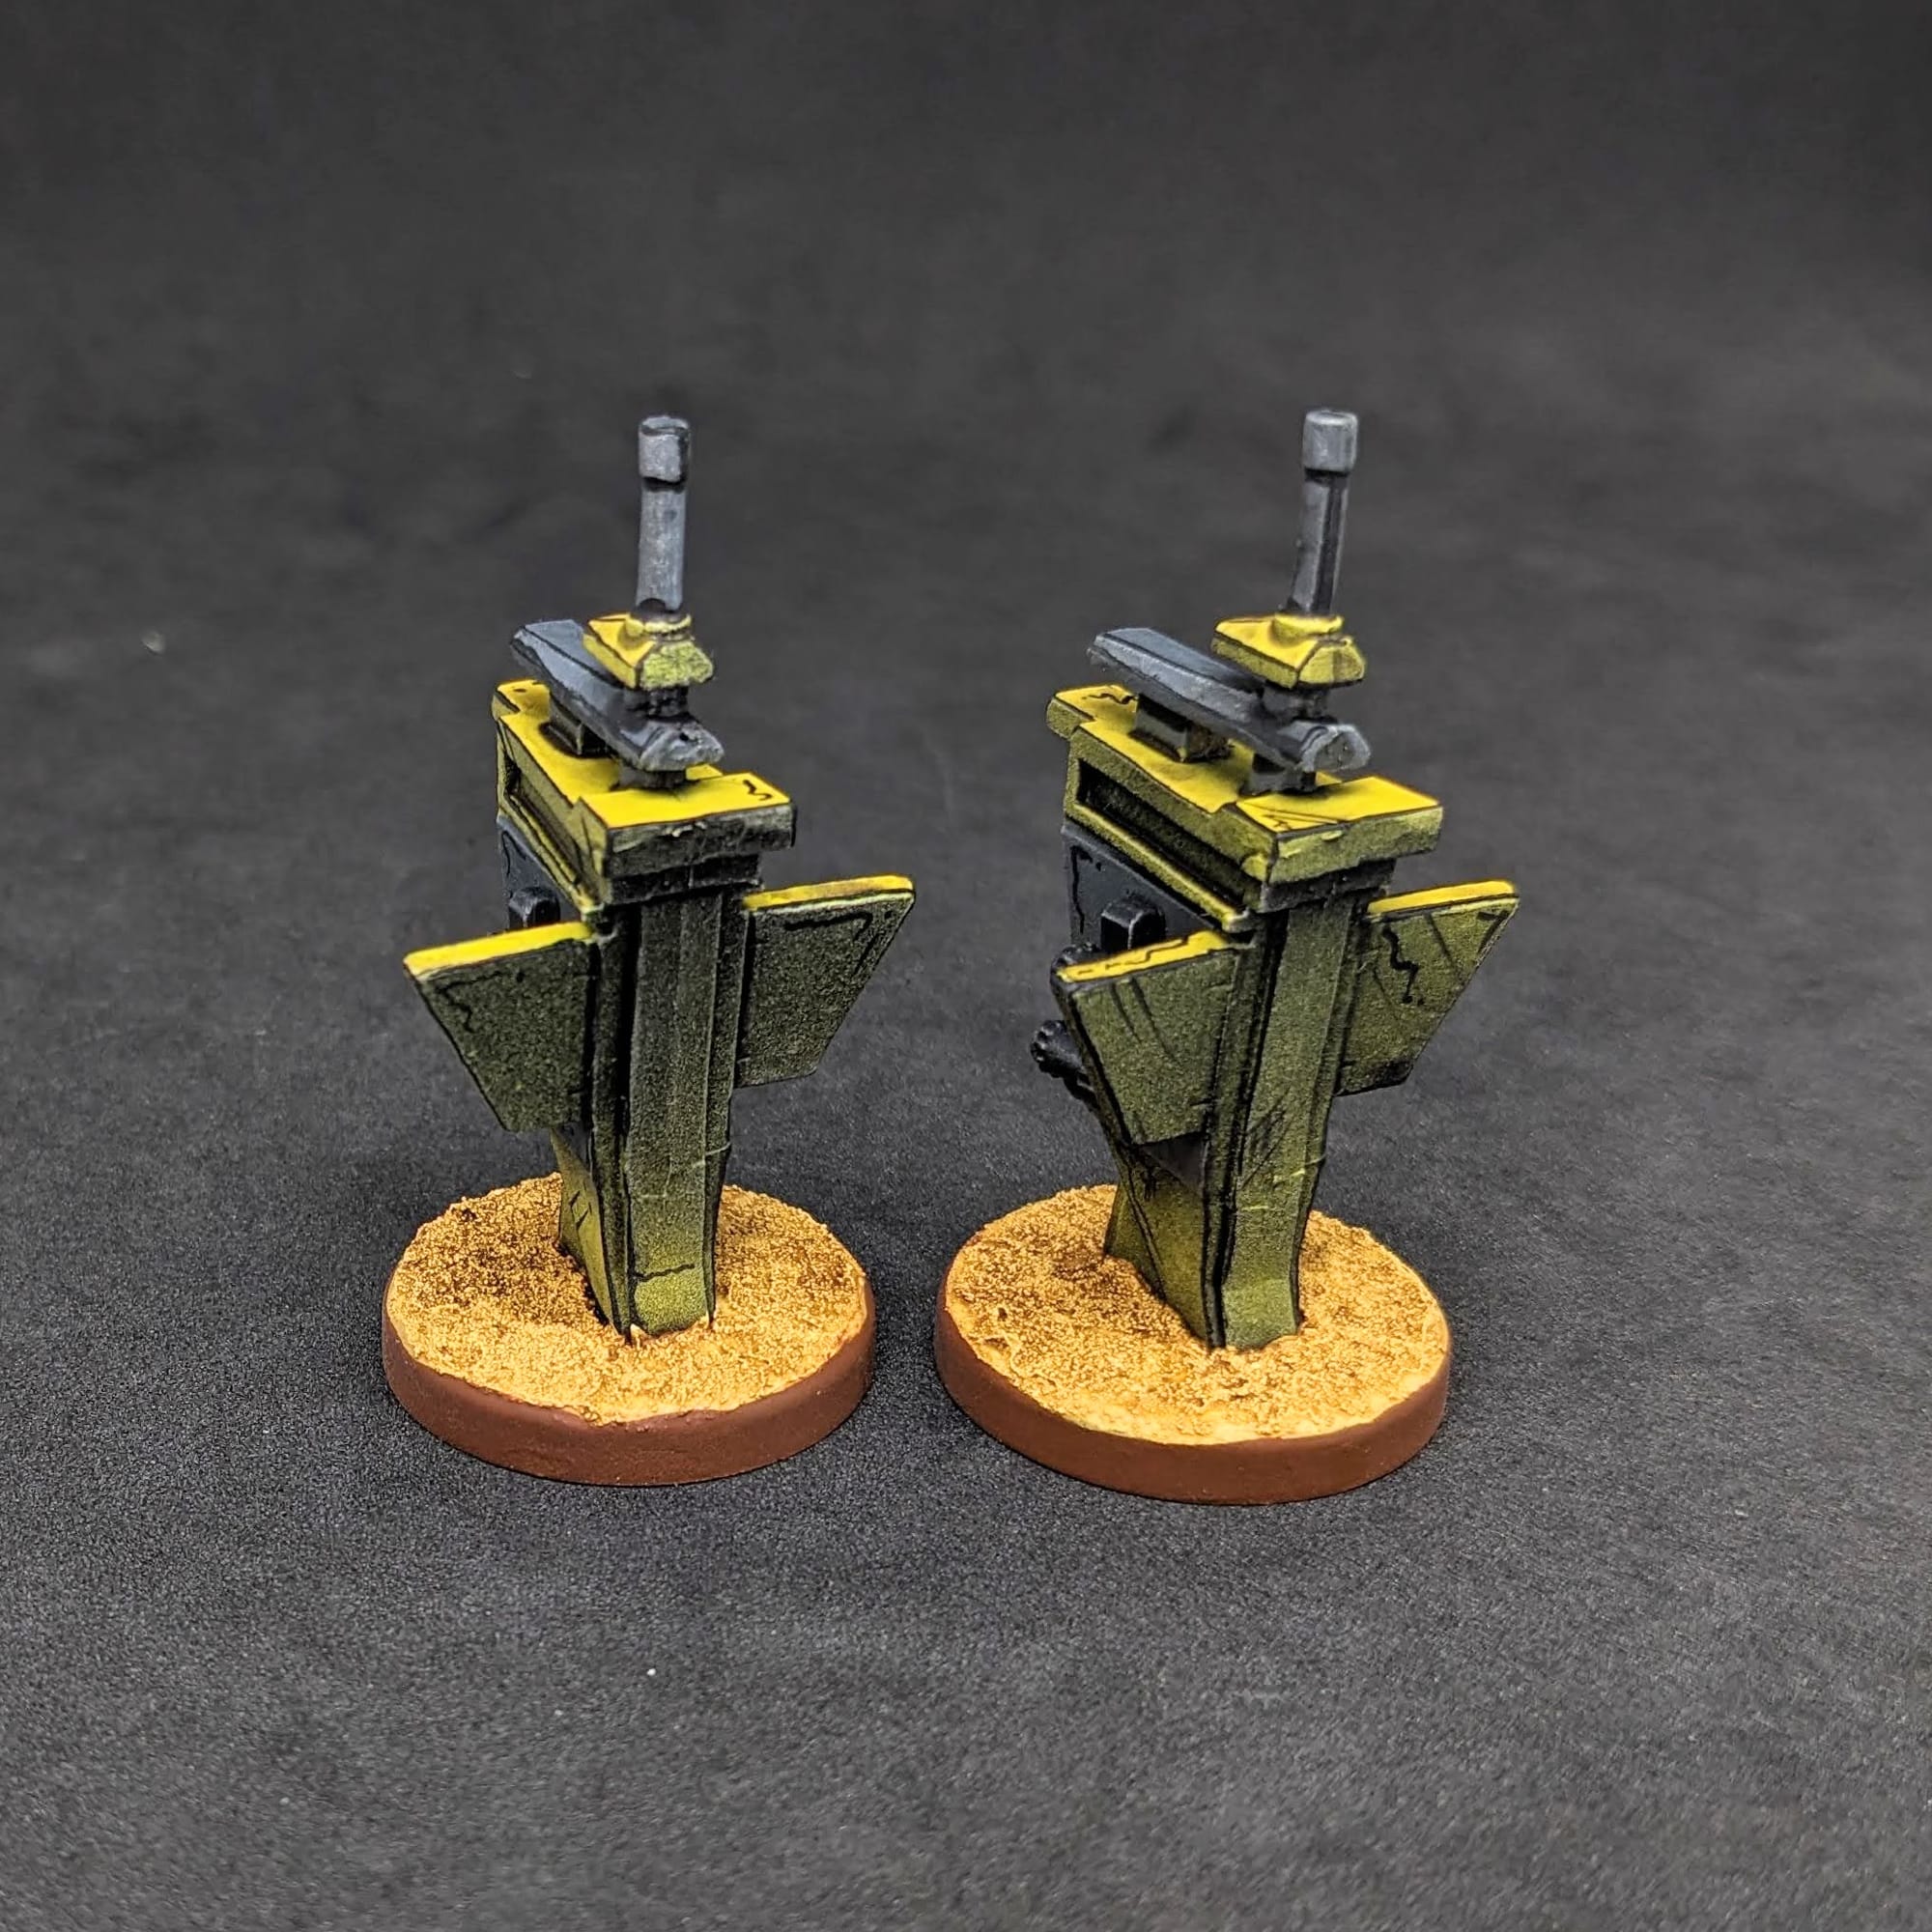
New-U Station
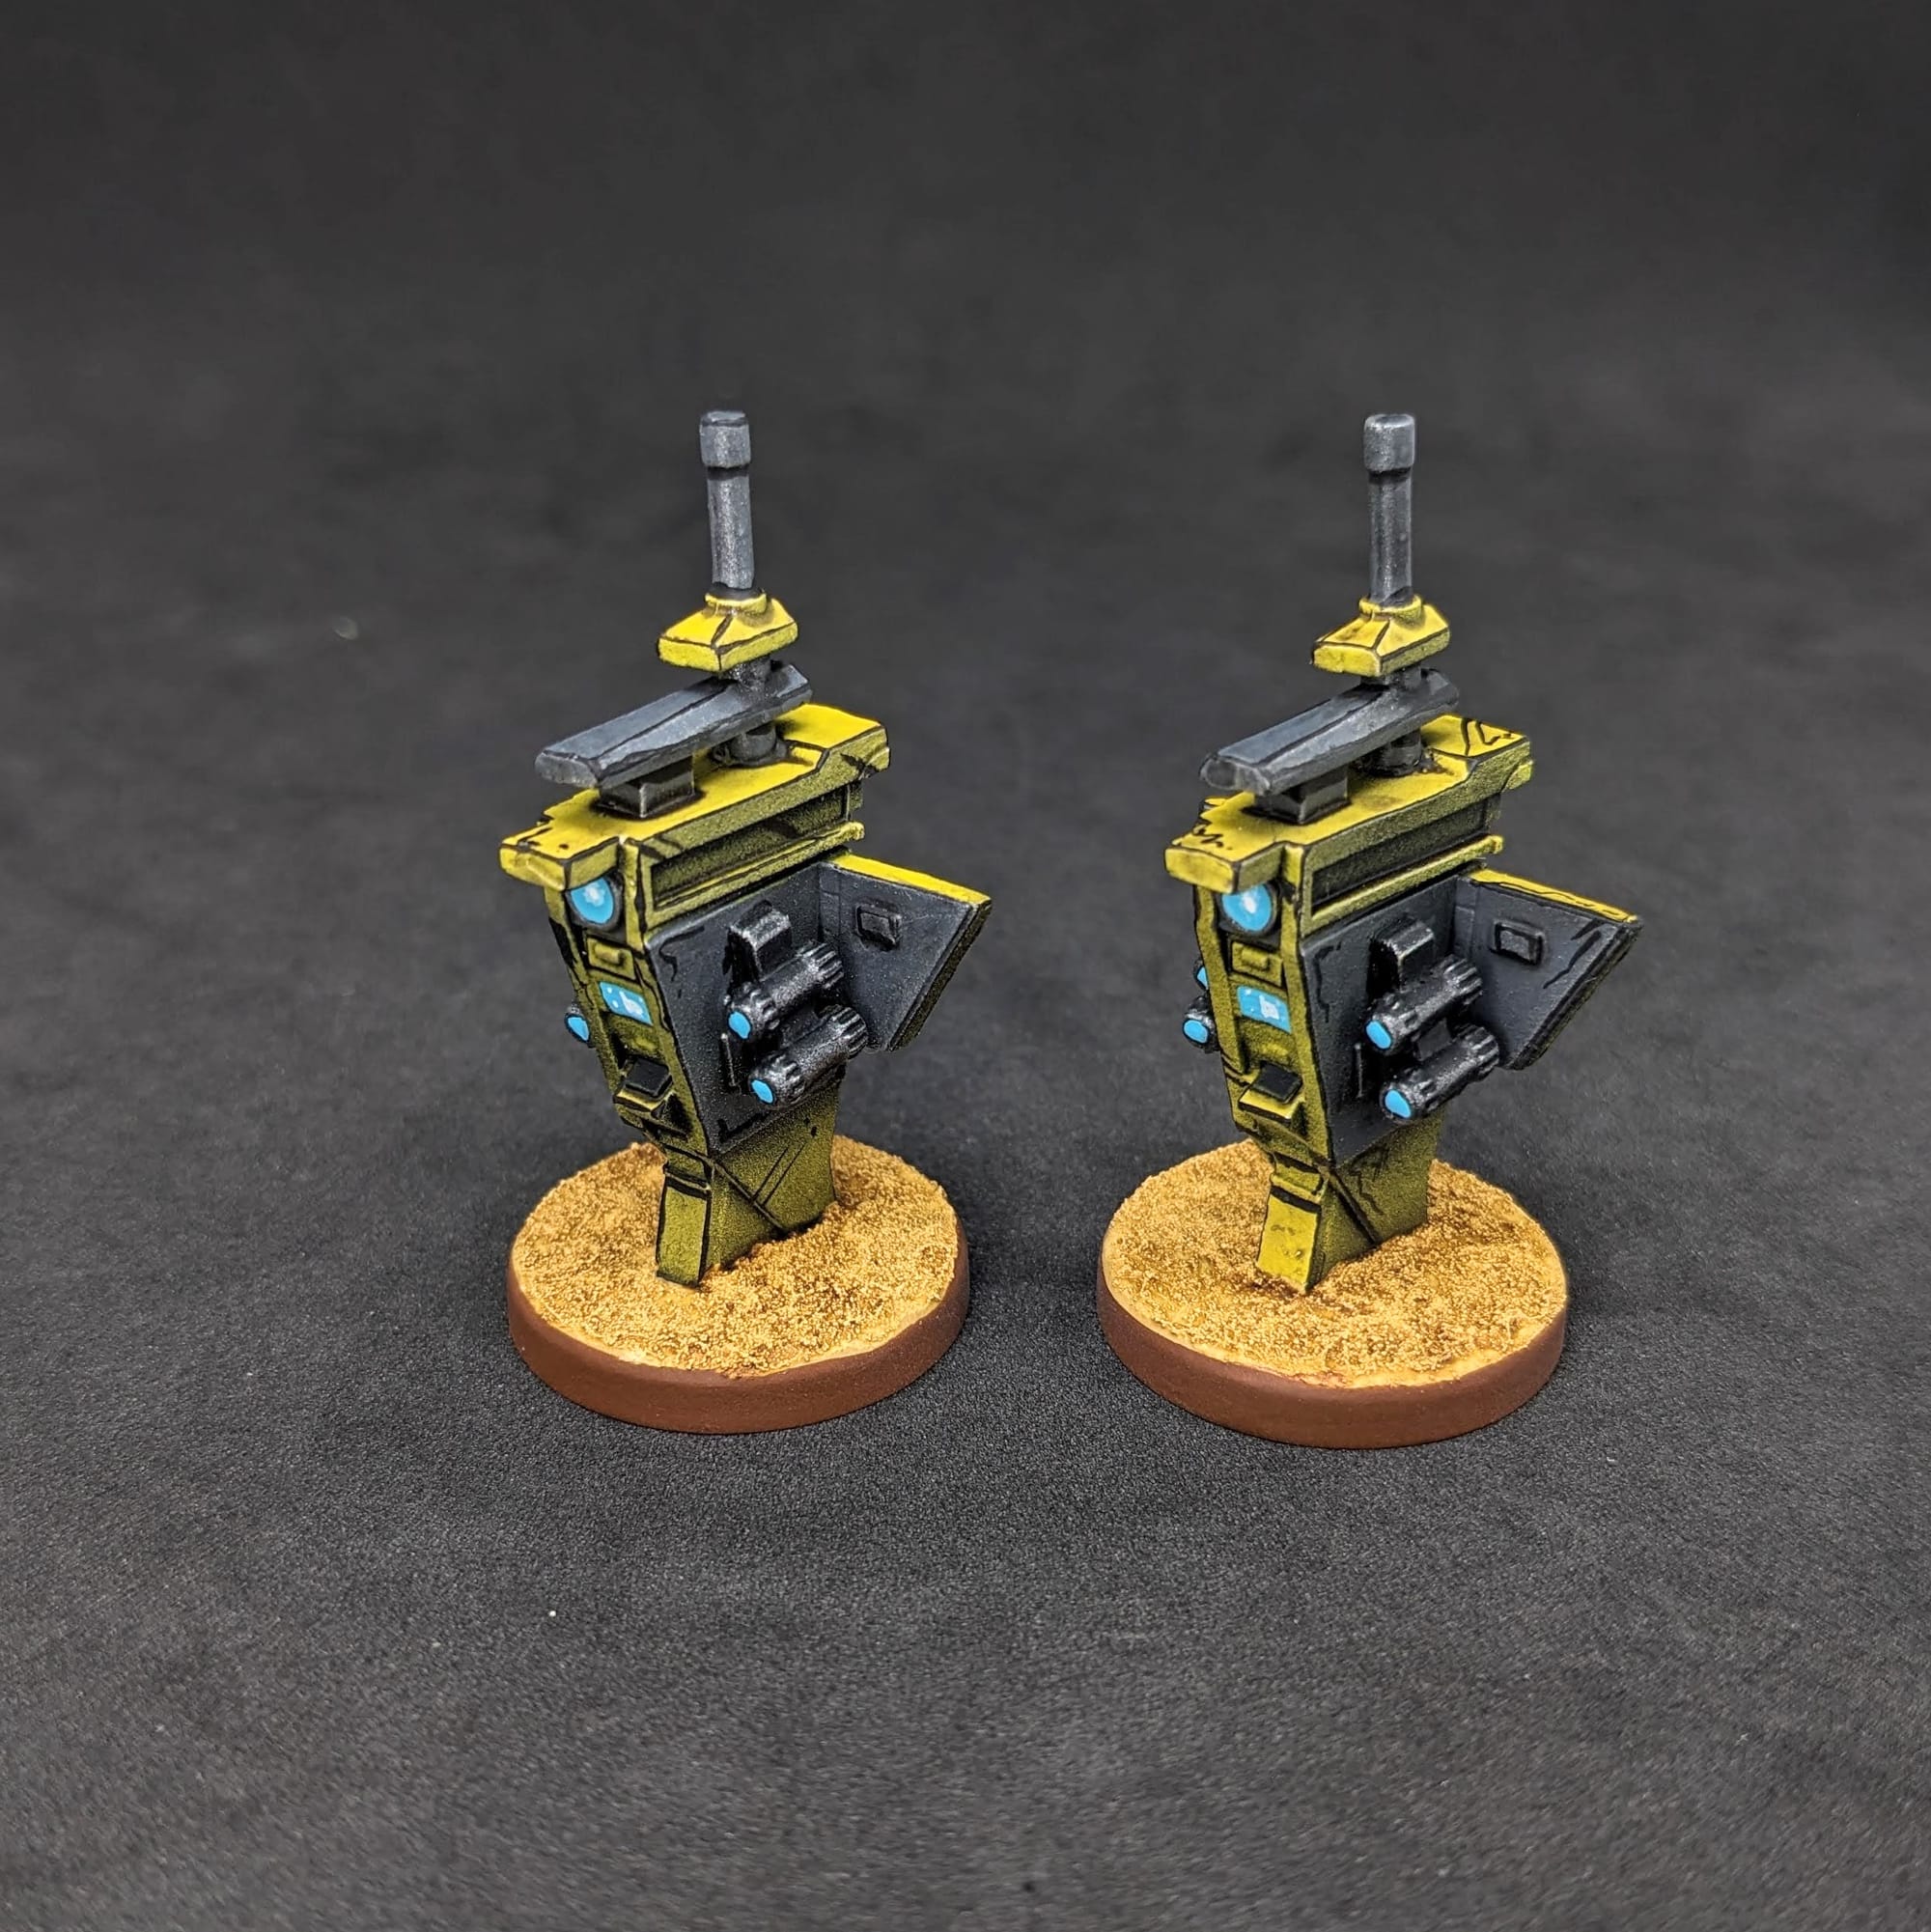
New-U Station Paint Recipe:
- Prime Black, with a zenithal of Army Painter Daemonic Yellow
- Citadel Mechanicus Standard Grey for the dark gray parts
- Pro Acryl Coal Black (or Citadel Abaddon Black) to the metal parts
- Unevenly apply Army Painter Dark Tone over the entire piece
- Drybrush a light silver over gray and black metal parts
- Add Citadel Baharroth Blue to the glowing lighted areas
OPTIONAL: To capture that Borderlands cell-shaded style, I added black lines to the edge of the station. I also applied some squiggly ‘desert effect’ lines to the flat panels to help break up the open space.
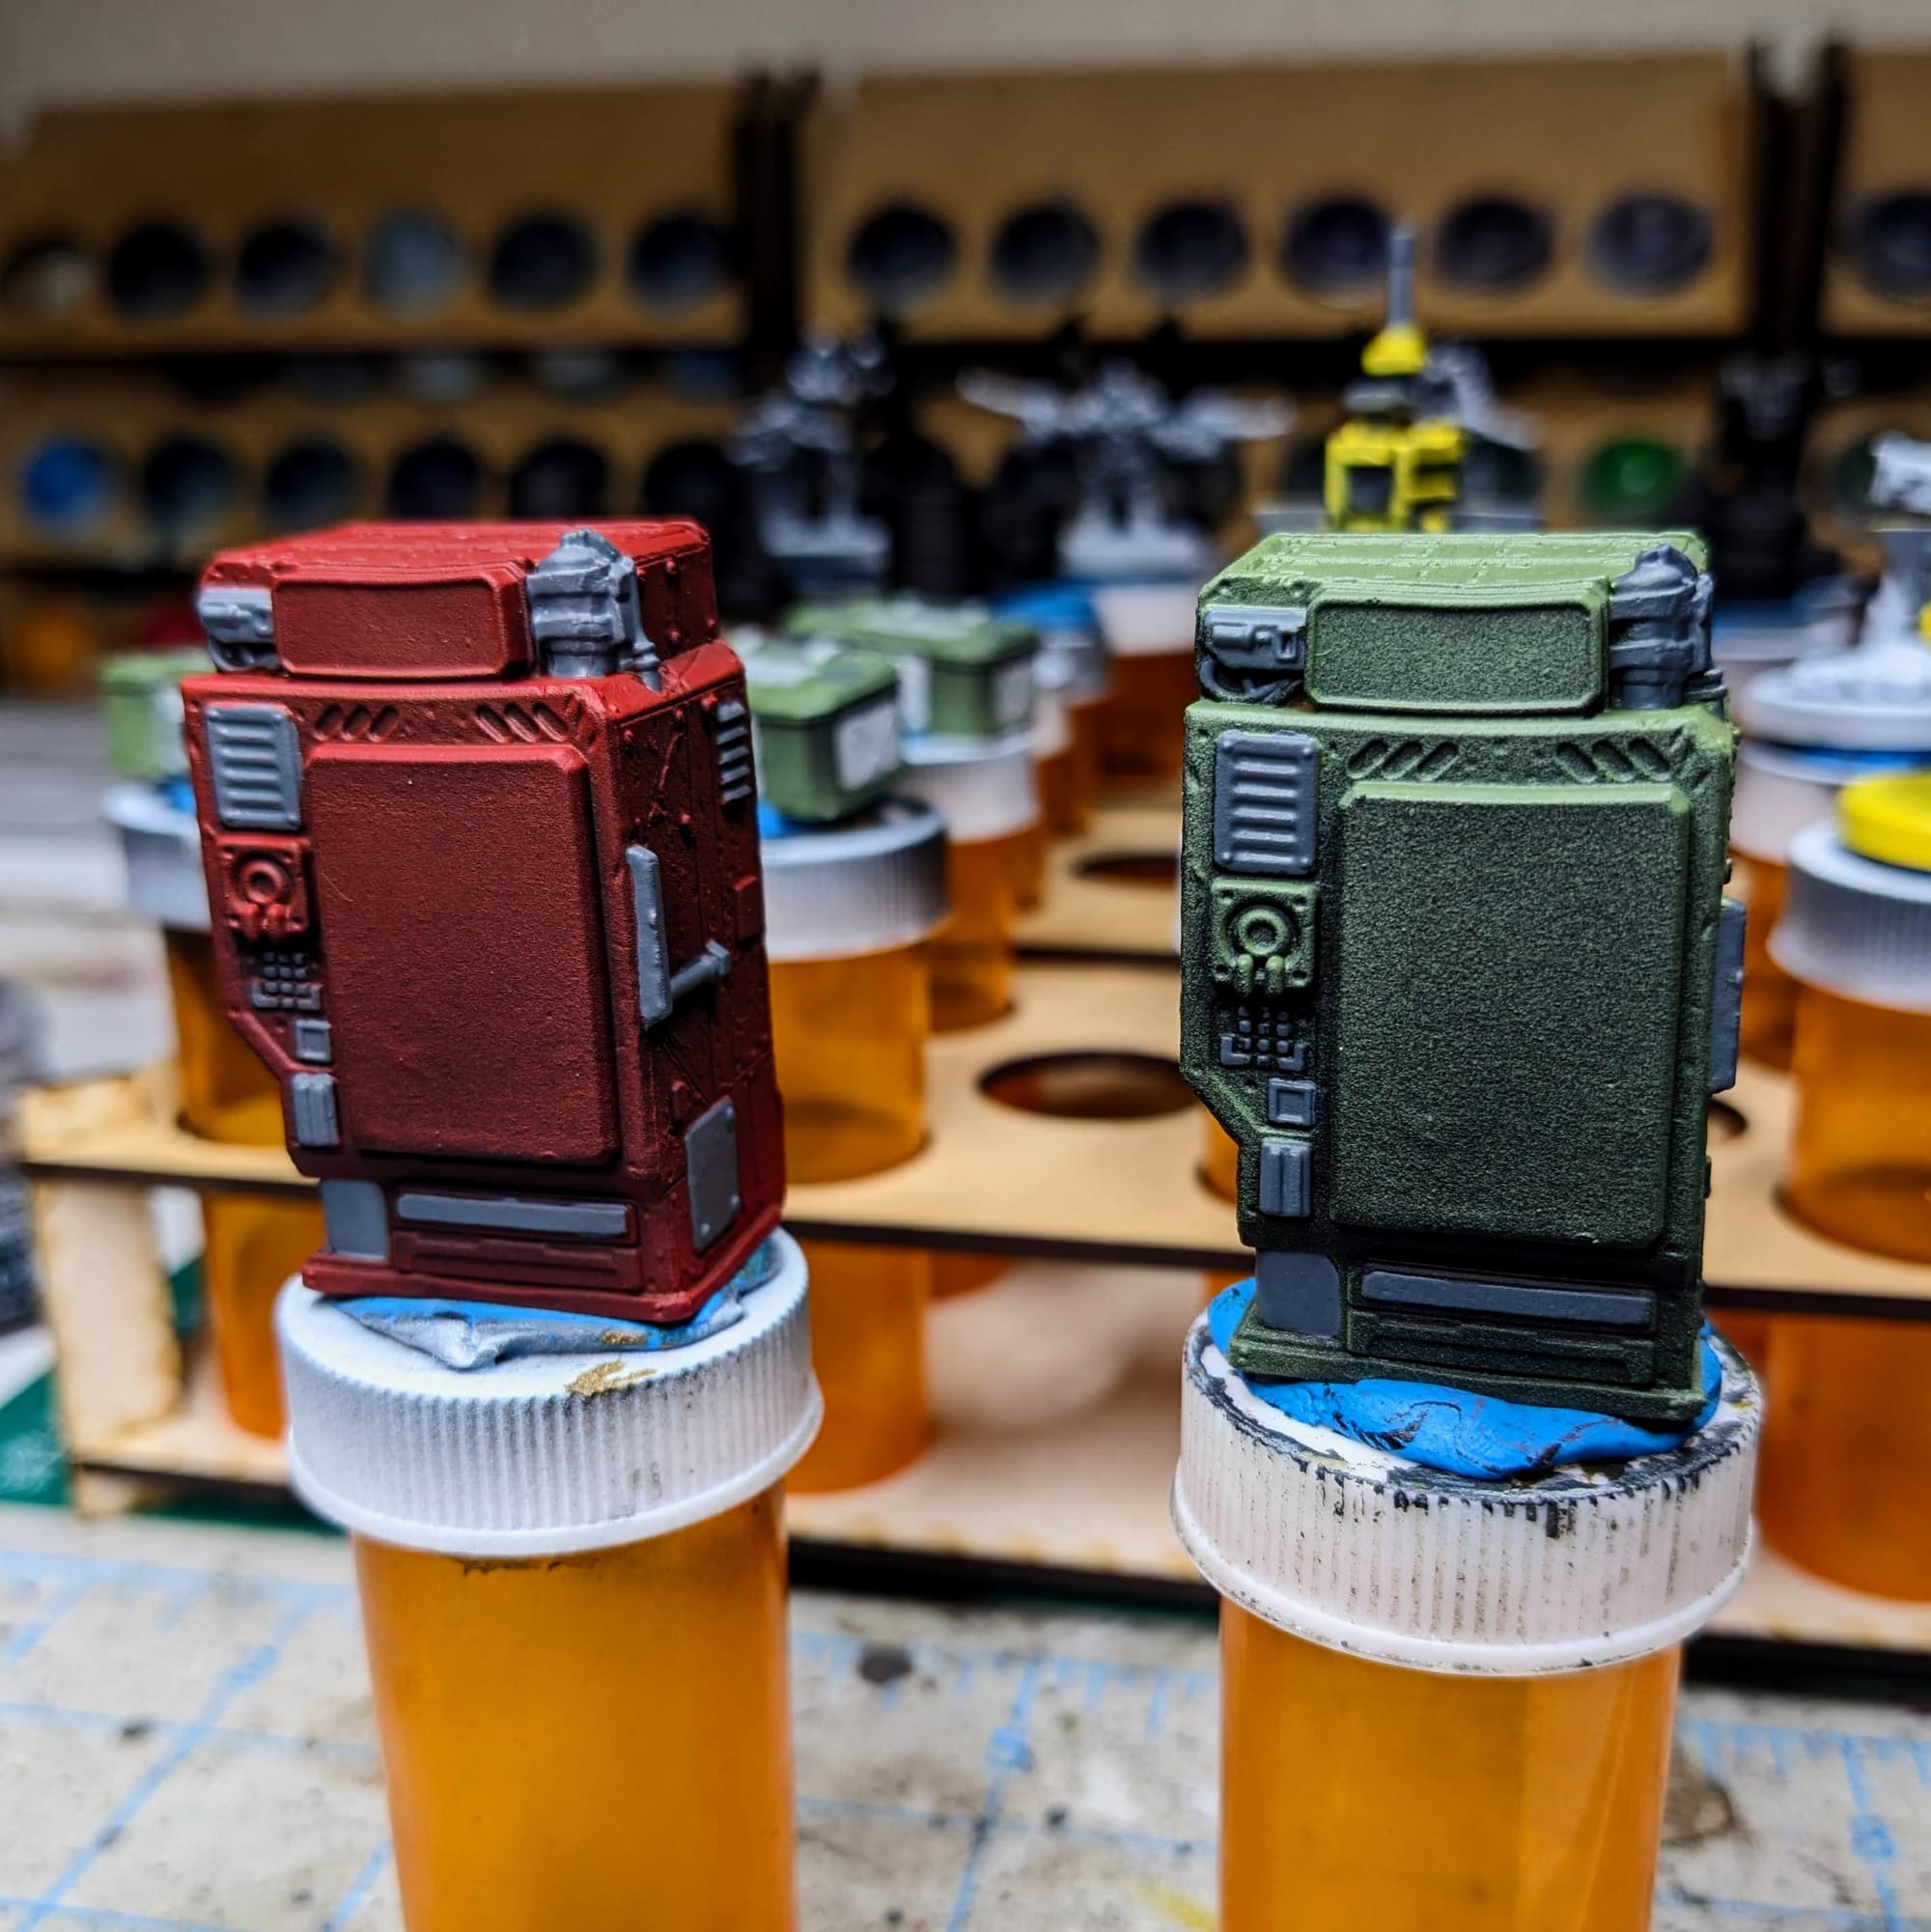
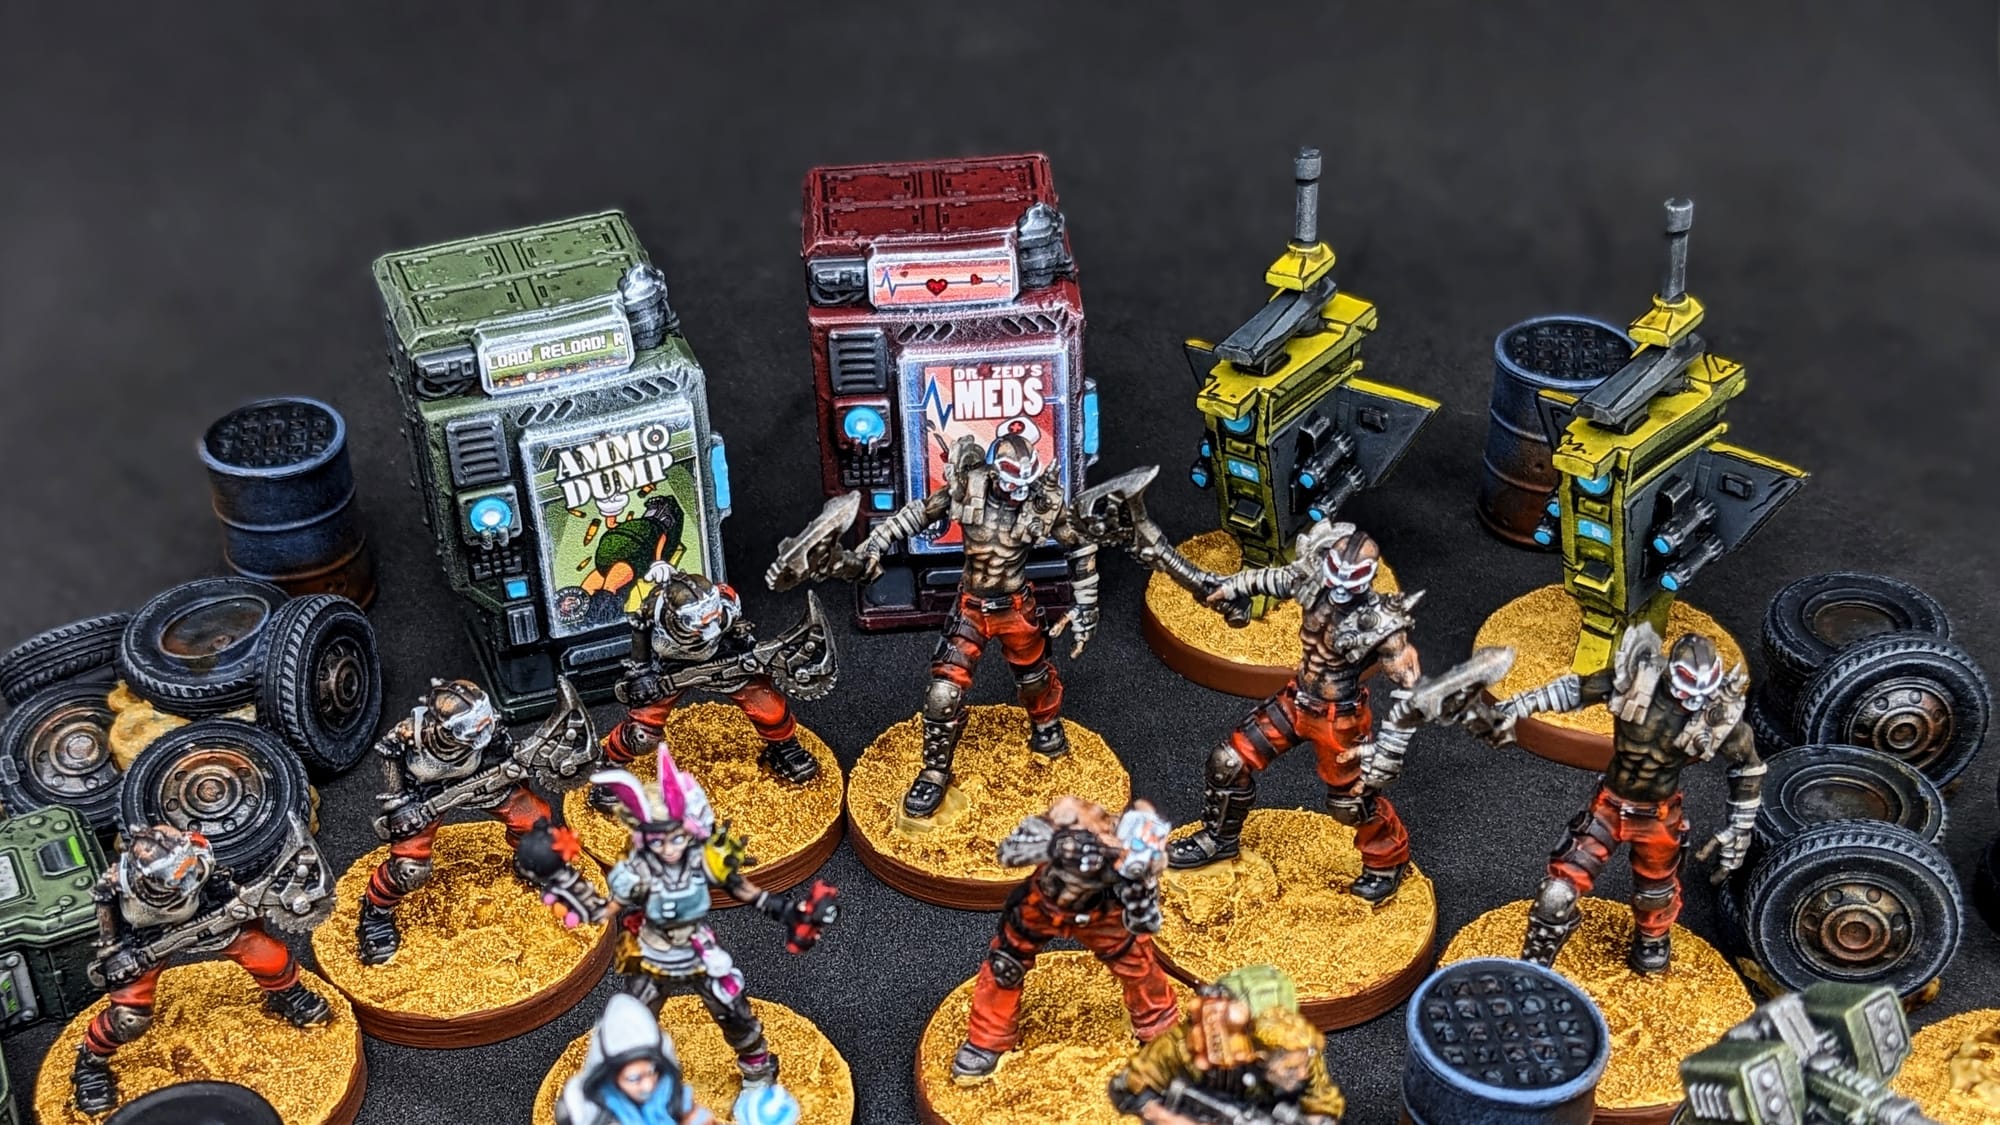
Med and Ammo Vending Machines
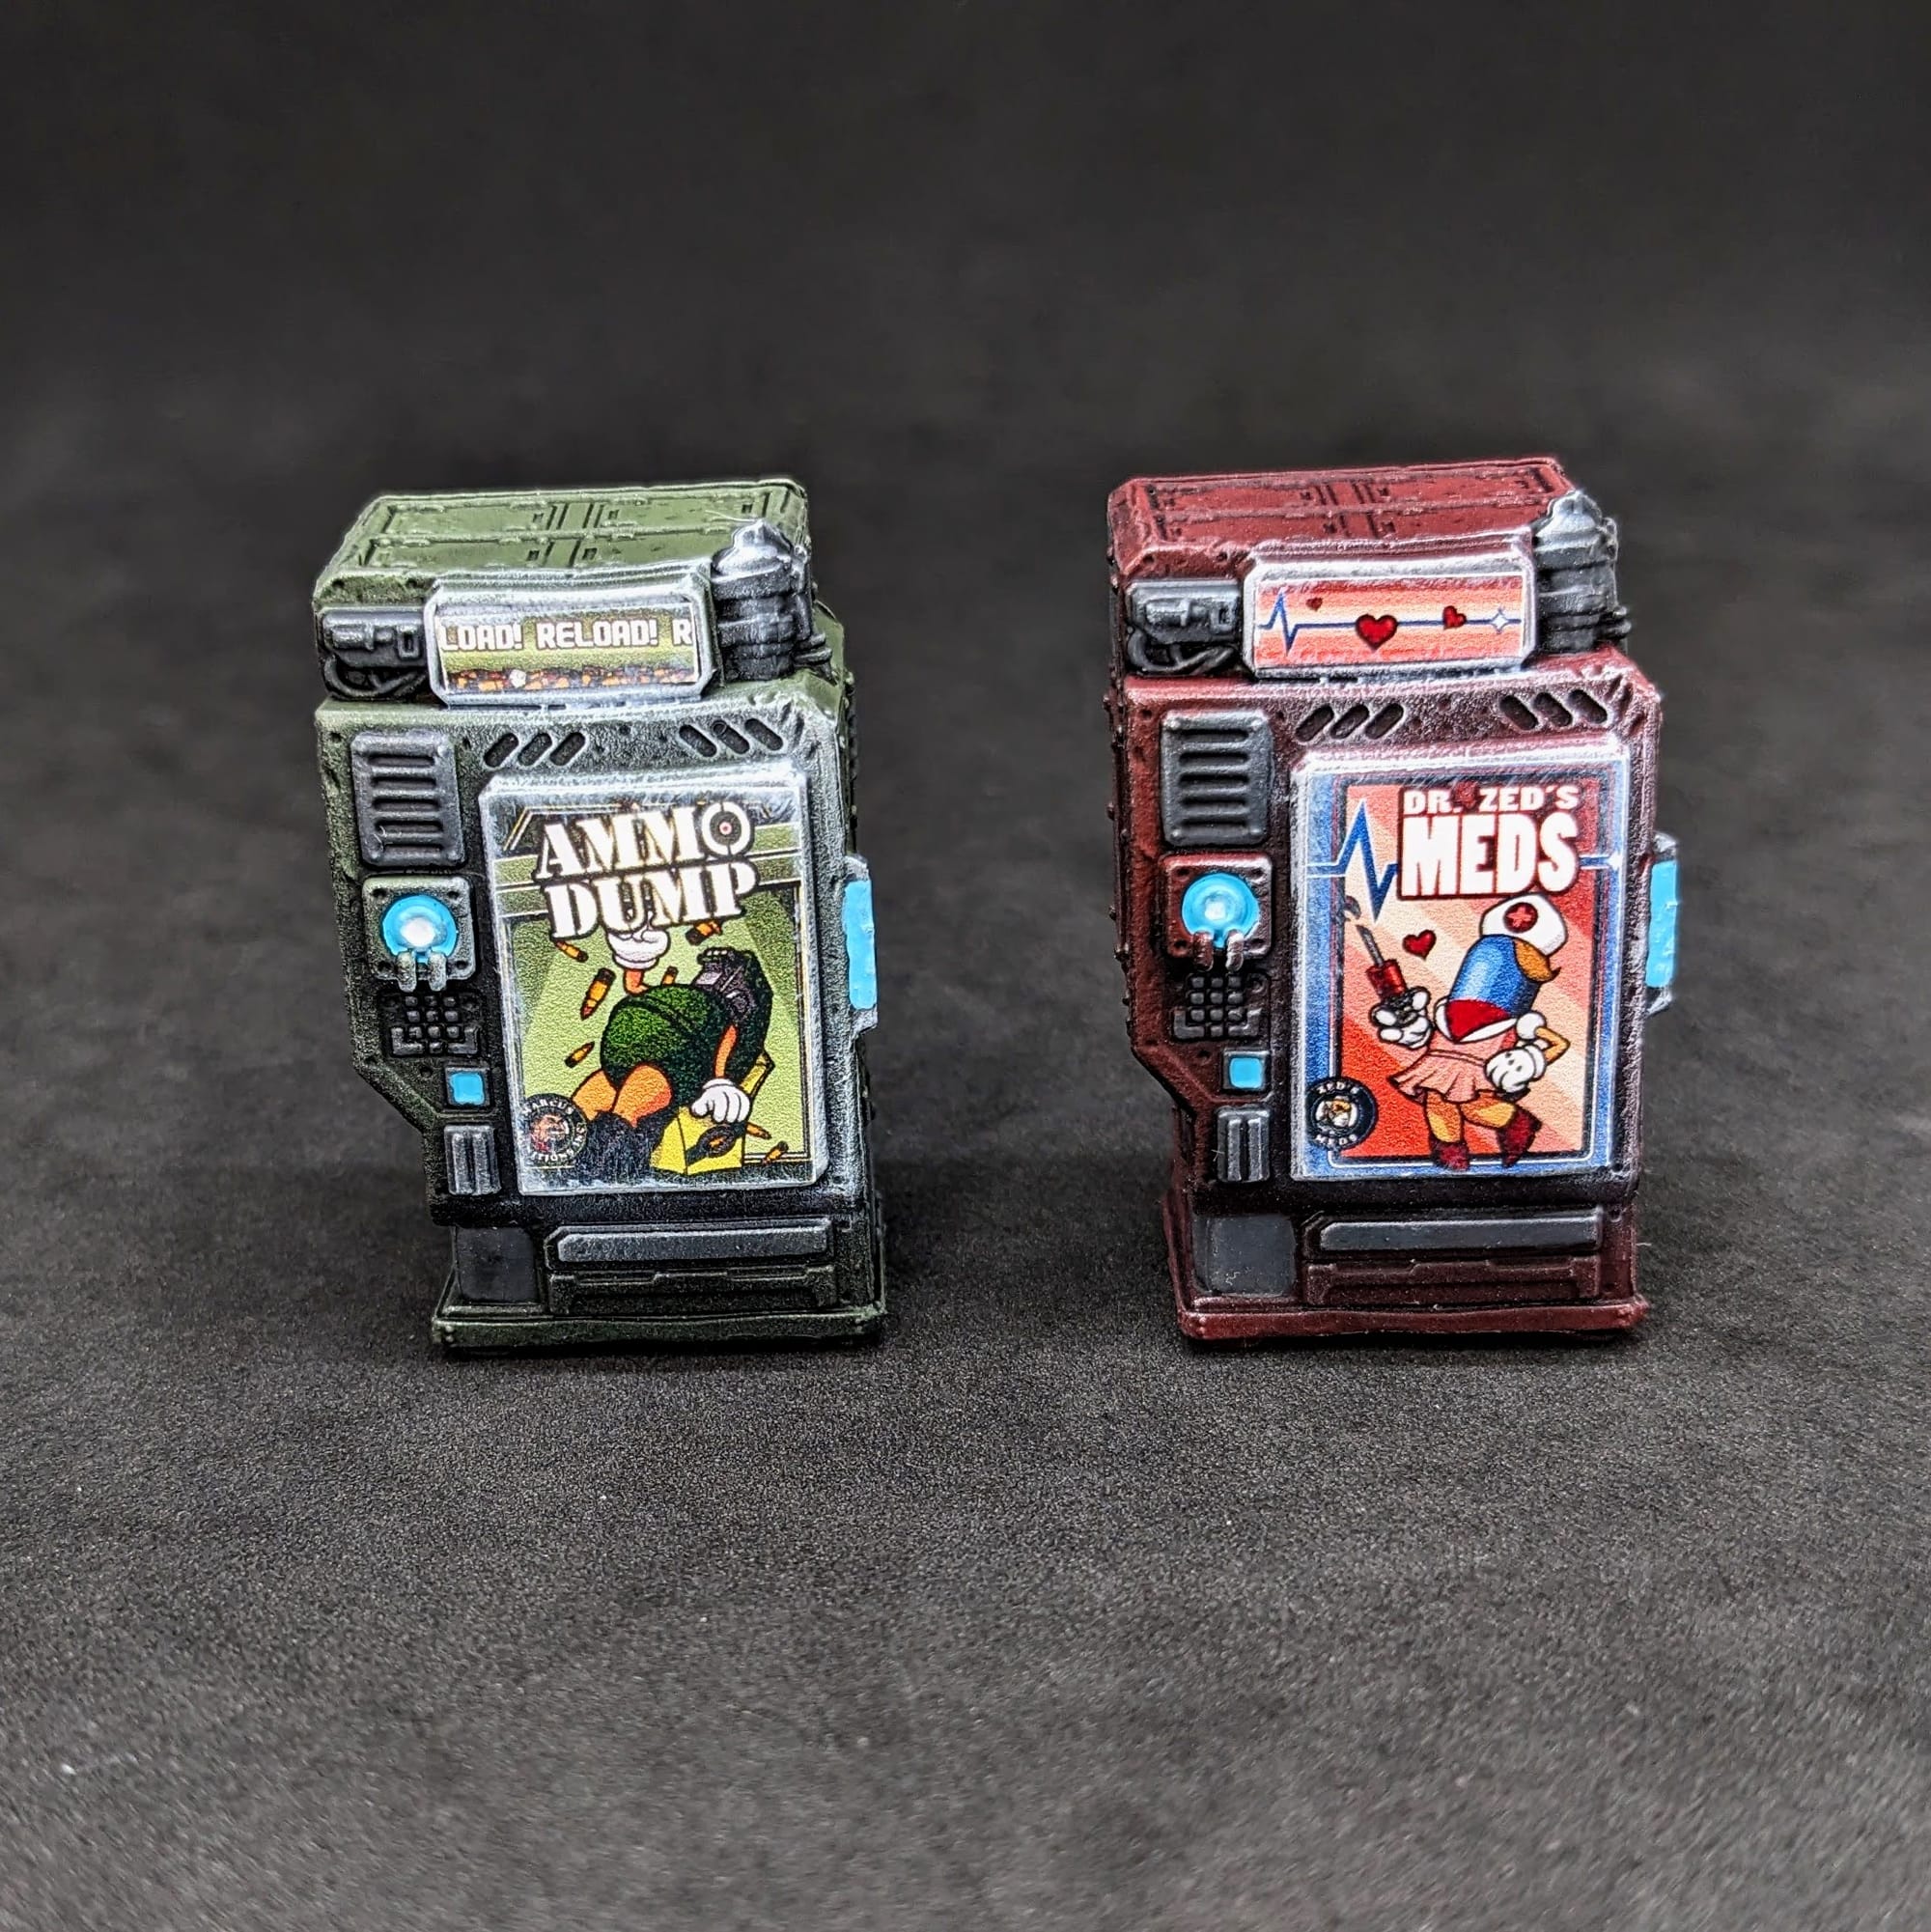
Vending Machines Paint Recipe:
- Prime Black, with a zenithal of Citadel Mephiston Red (Med) and Army Painter Army Green (Ammo)
- Citadel Mechanicus Standard Grey for the dark gray parts
- Evenly apply Army Painter Dark Tone over the entire piece
- Drybrush a light silver over gray and black metal parts
- Add Citadel Baharroth Blue to the glowing lighted areas
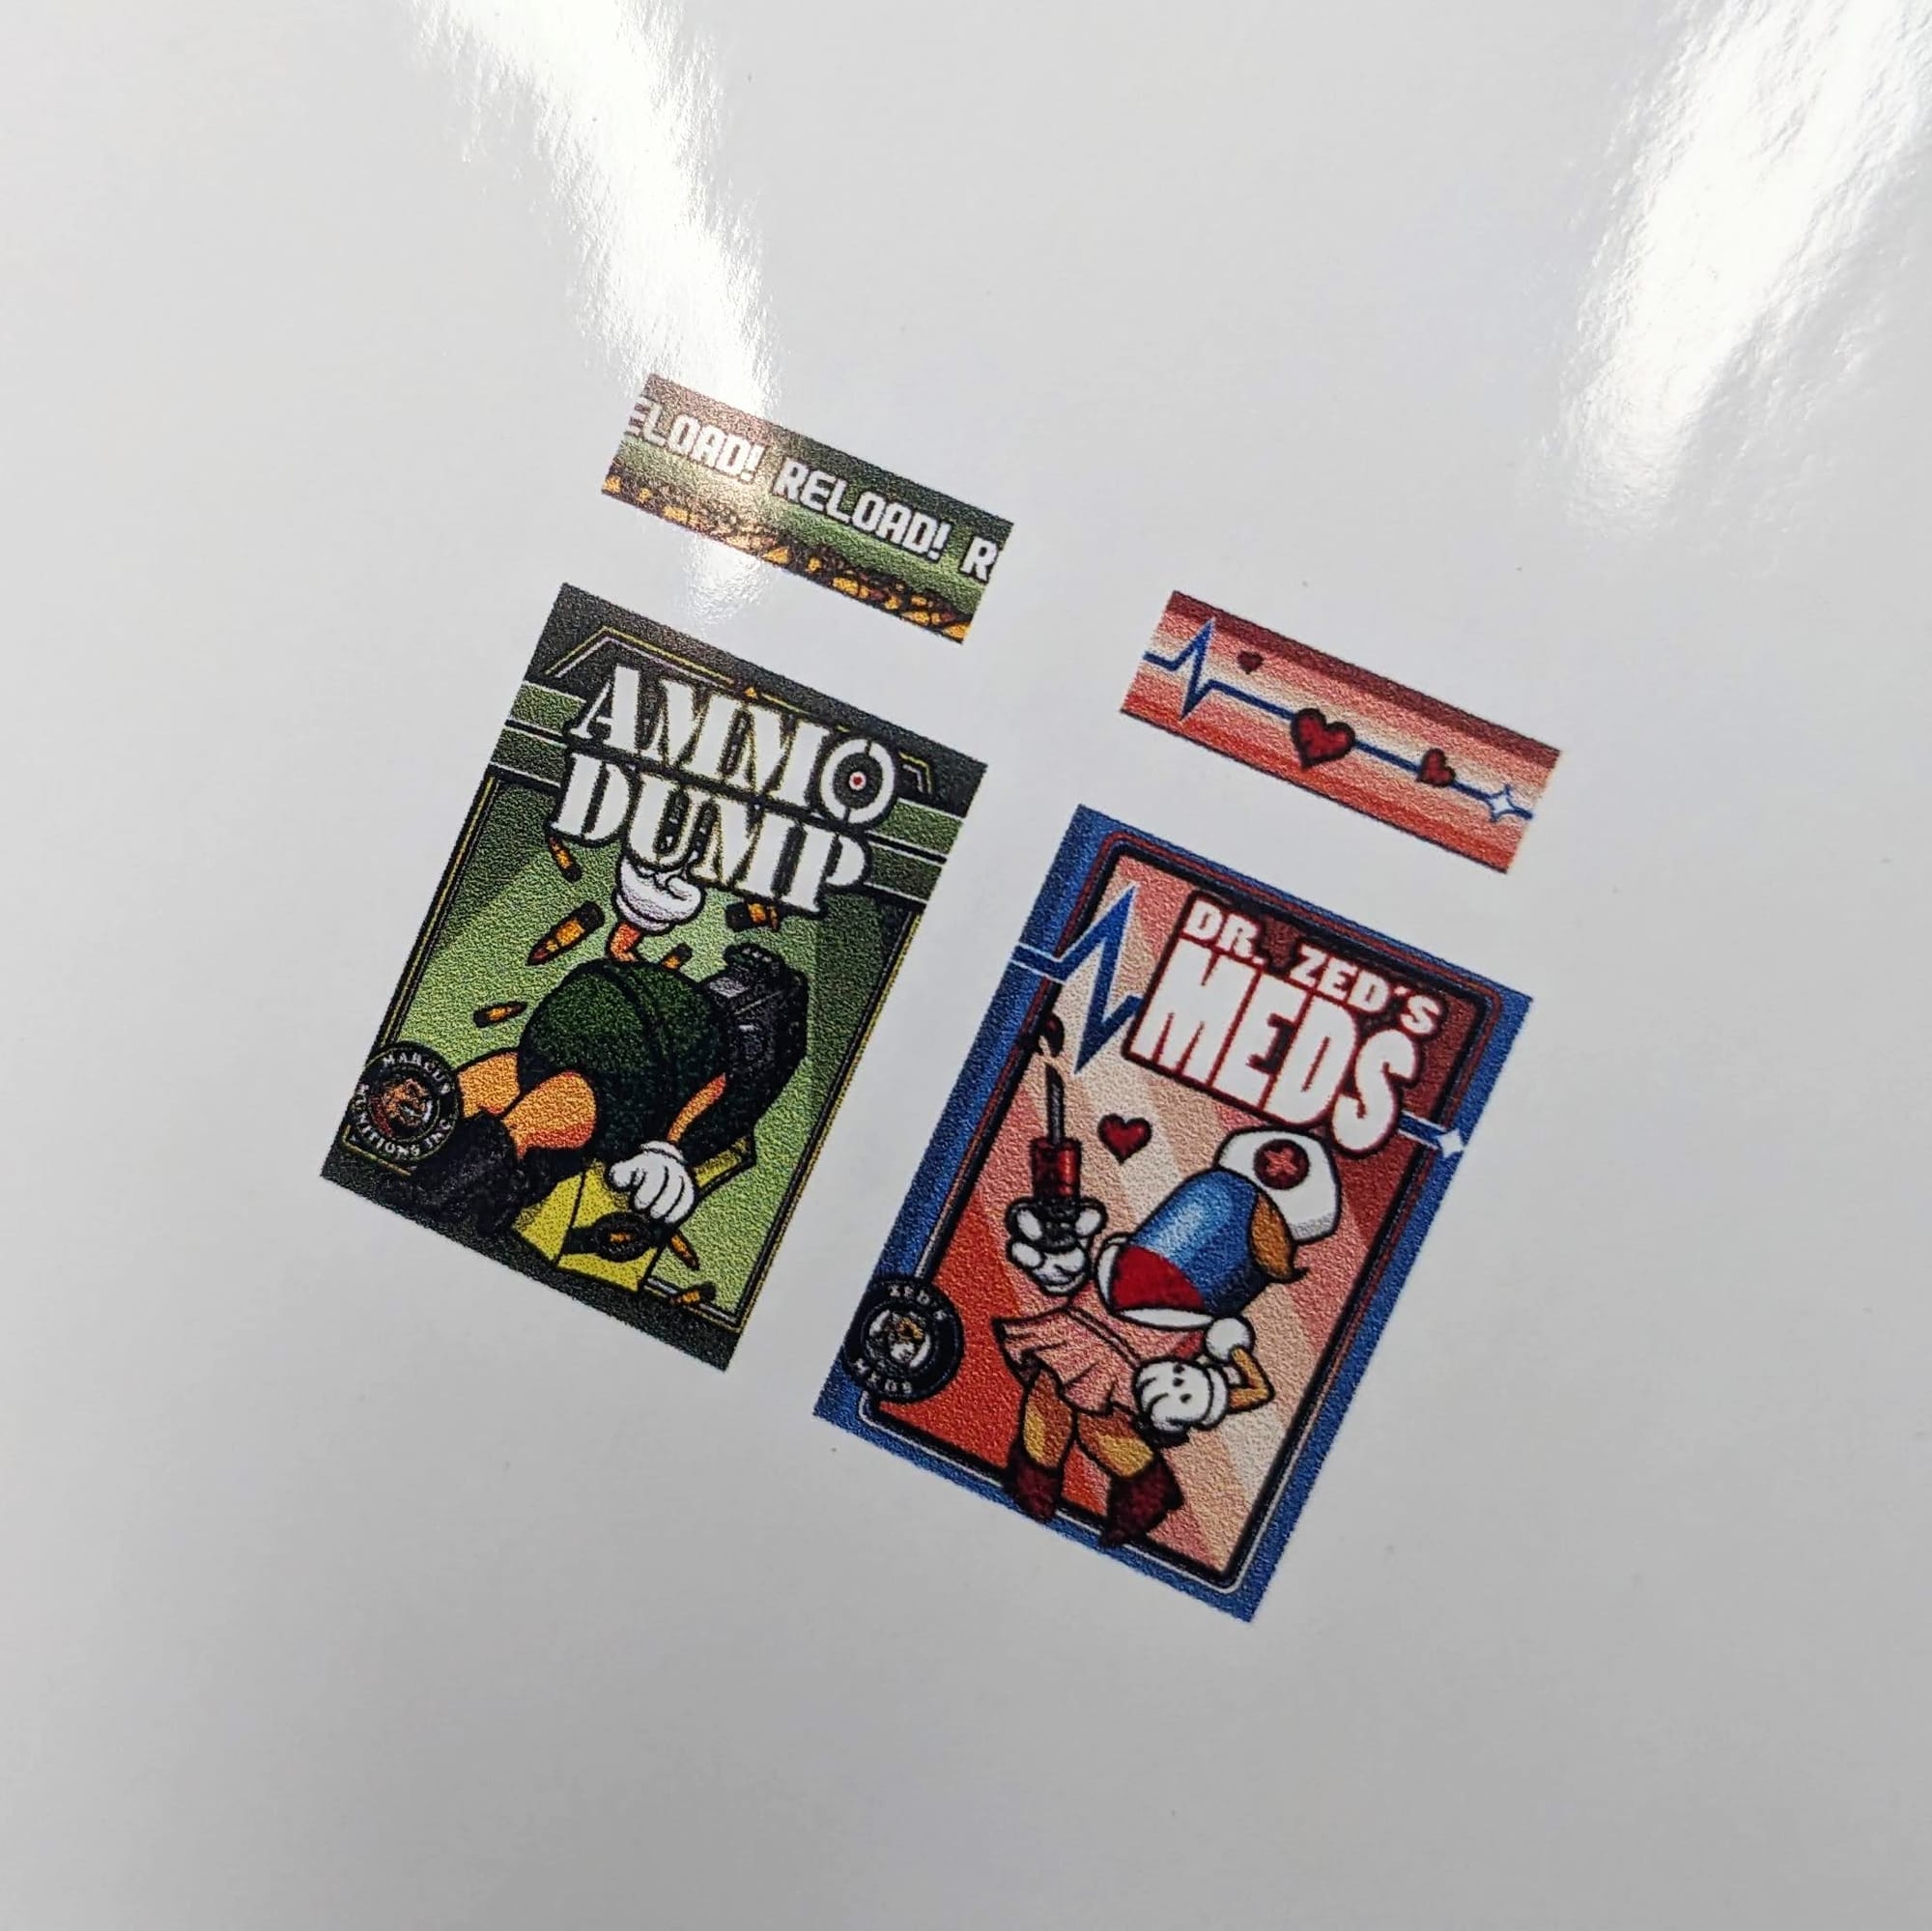
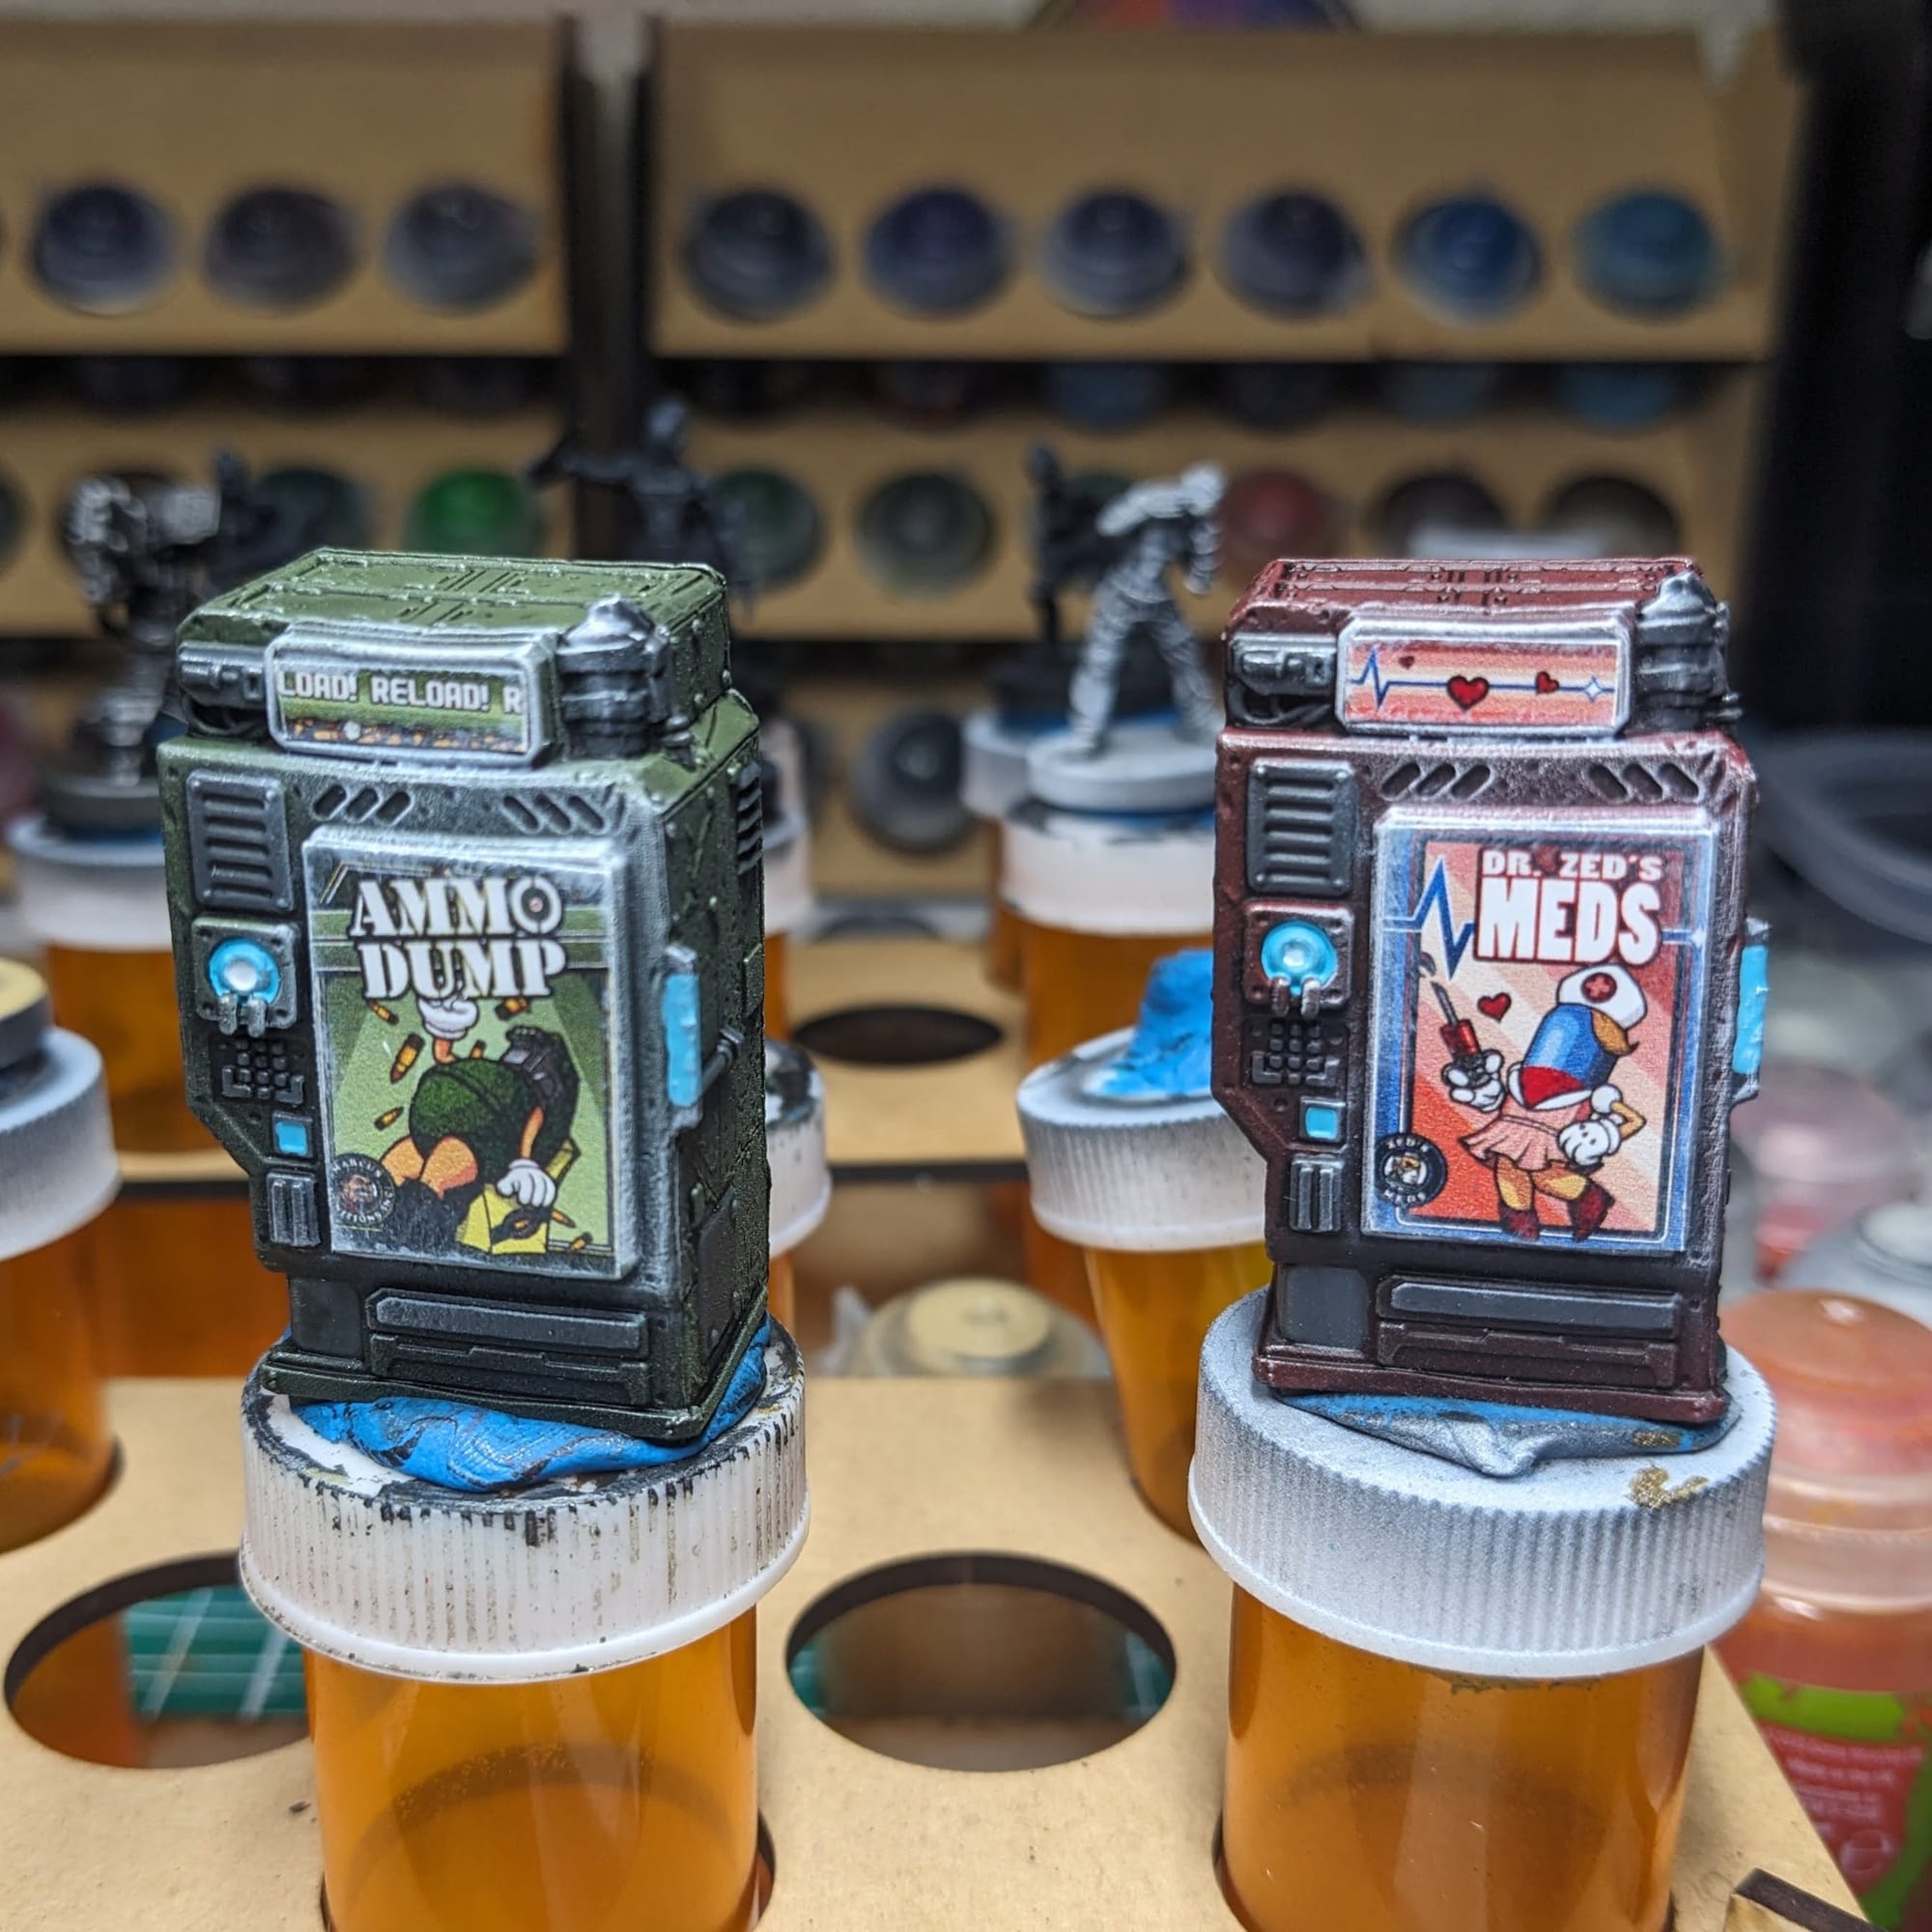
OPTIONAL: Vending Machine Faceplates
I wanted to make it super clear what vending did what, and since there is space to include some images, I decided to add in the faceplates. Fortunately, artist Max Davenport has already created the images, which you can download from his artstation. You can use Photoshop or GIMP to resize the images, which I’ve added here.
Dimensions for the Vending Machine Stickers:
- Top Bar - 13.3mm x 4.3mm
- Main Image - 15.7mm x 22.3mm
I printed them on photo sticker paper, which you can get on Amazon or at any office supply store. I applied just a little bit of glue to the surface and then let the stickers settle. To help blend them into the model, I applied some light white drybrushing to the edge of the stickers.
Basing Your Minis
Basing your minis can sometimes add to the story the piece is telling. If you feel like your minis are ready for the table, you can simply paint the bases a single solid color and call it good! For my minis, I wanted to add in the Borderlands Pandora aesthetic, and so here is my desert basing recipe. I always do my basing as the very last step in the painting process.
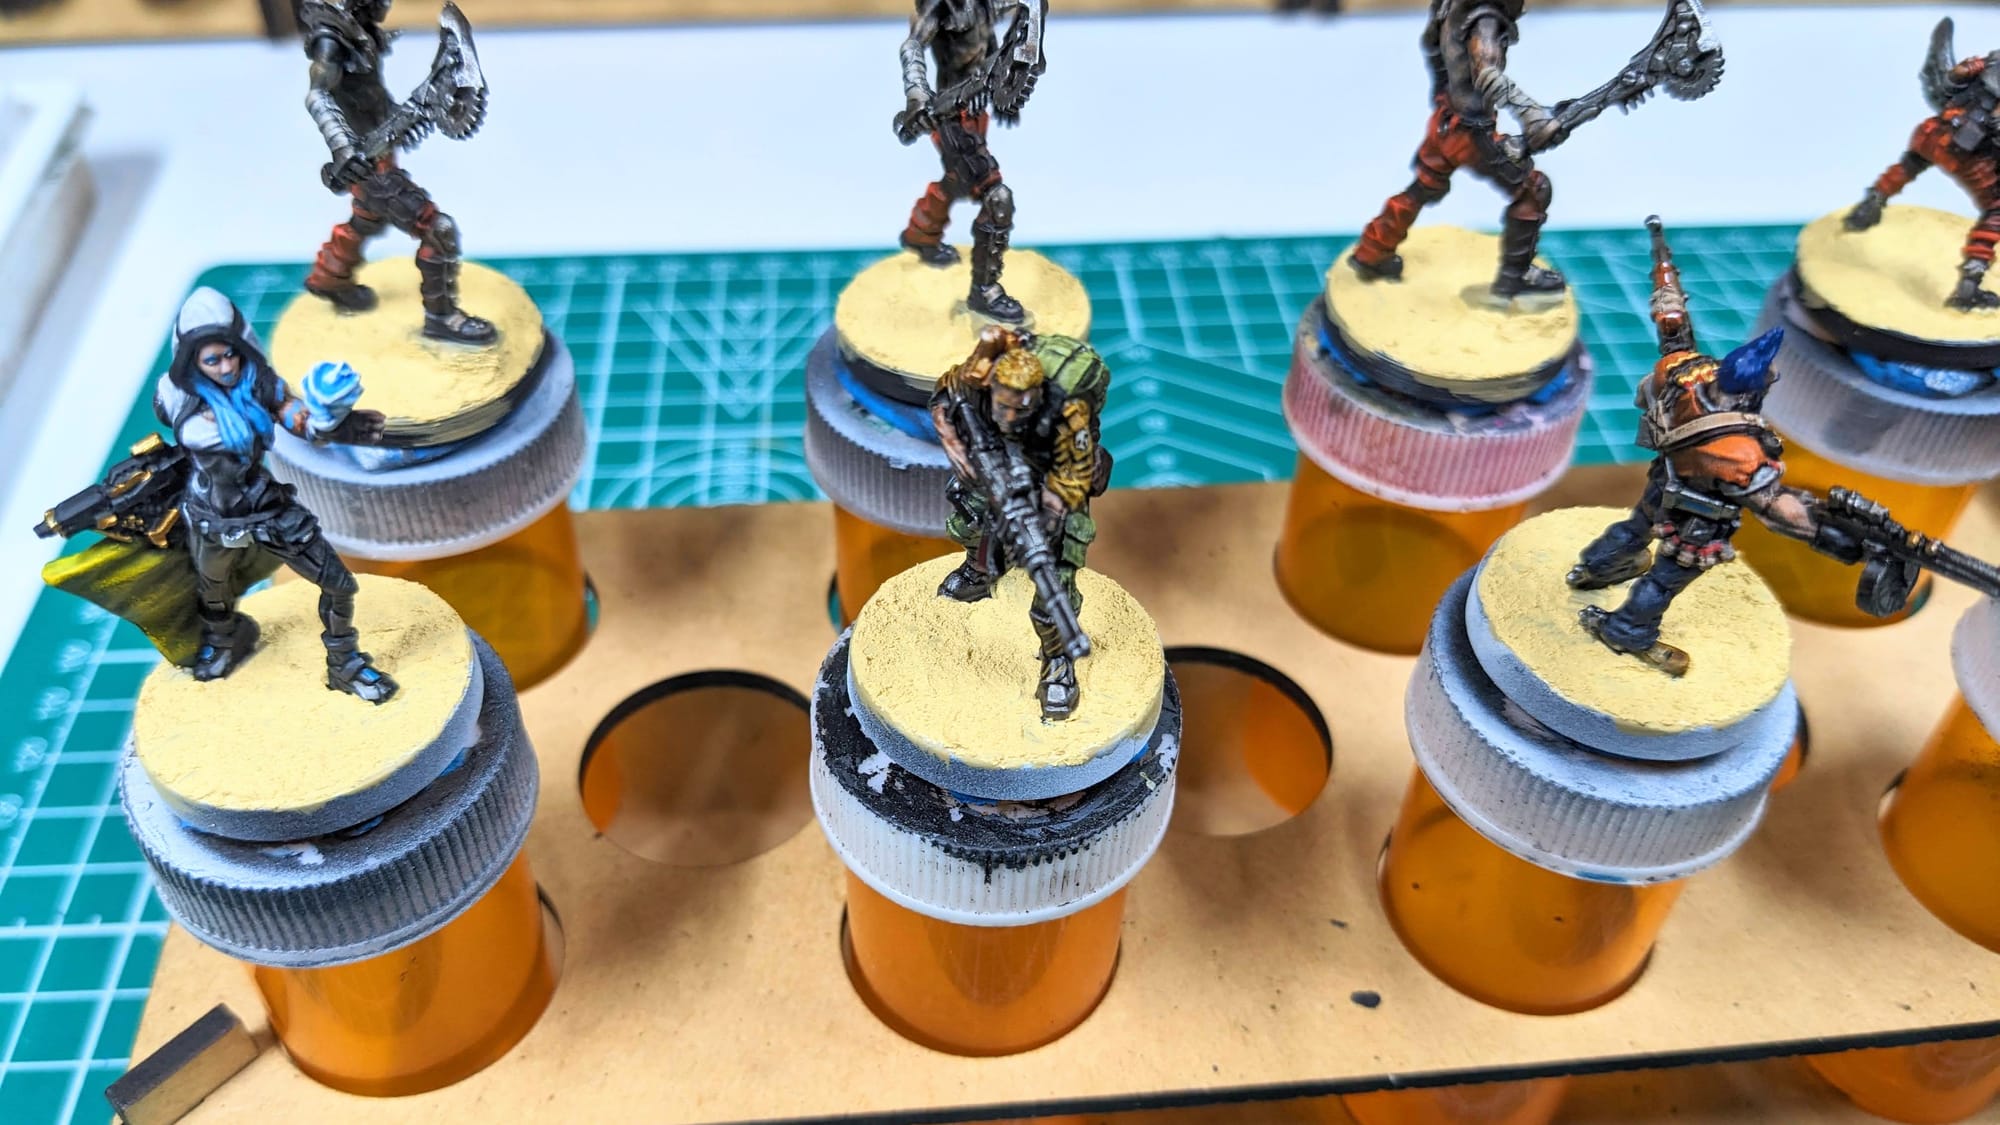

Pandora Desert Sand Recipe
- Paint the whole top part of the base in Citadel Morghast Bone. This helps provide an even base for when you apply the texture over the top.
- Vallejo Diorama FX Desert Sand Texture Paint 26.217. Let it fully dry!
- Add an even coat of Citadel Skeleton Horde Contrast Paint
- After the basing is fully dried, I painted the rim with Citadel Mournfang Brown.
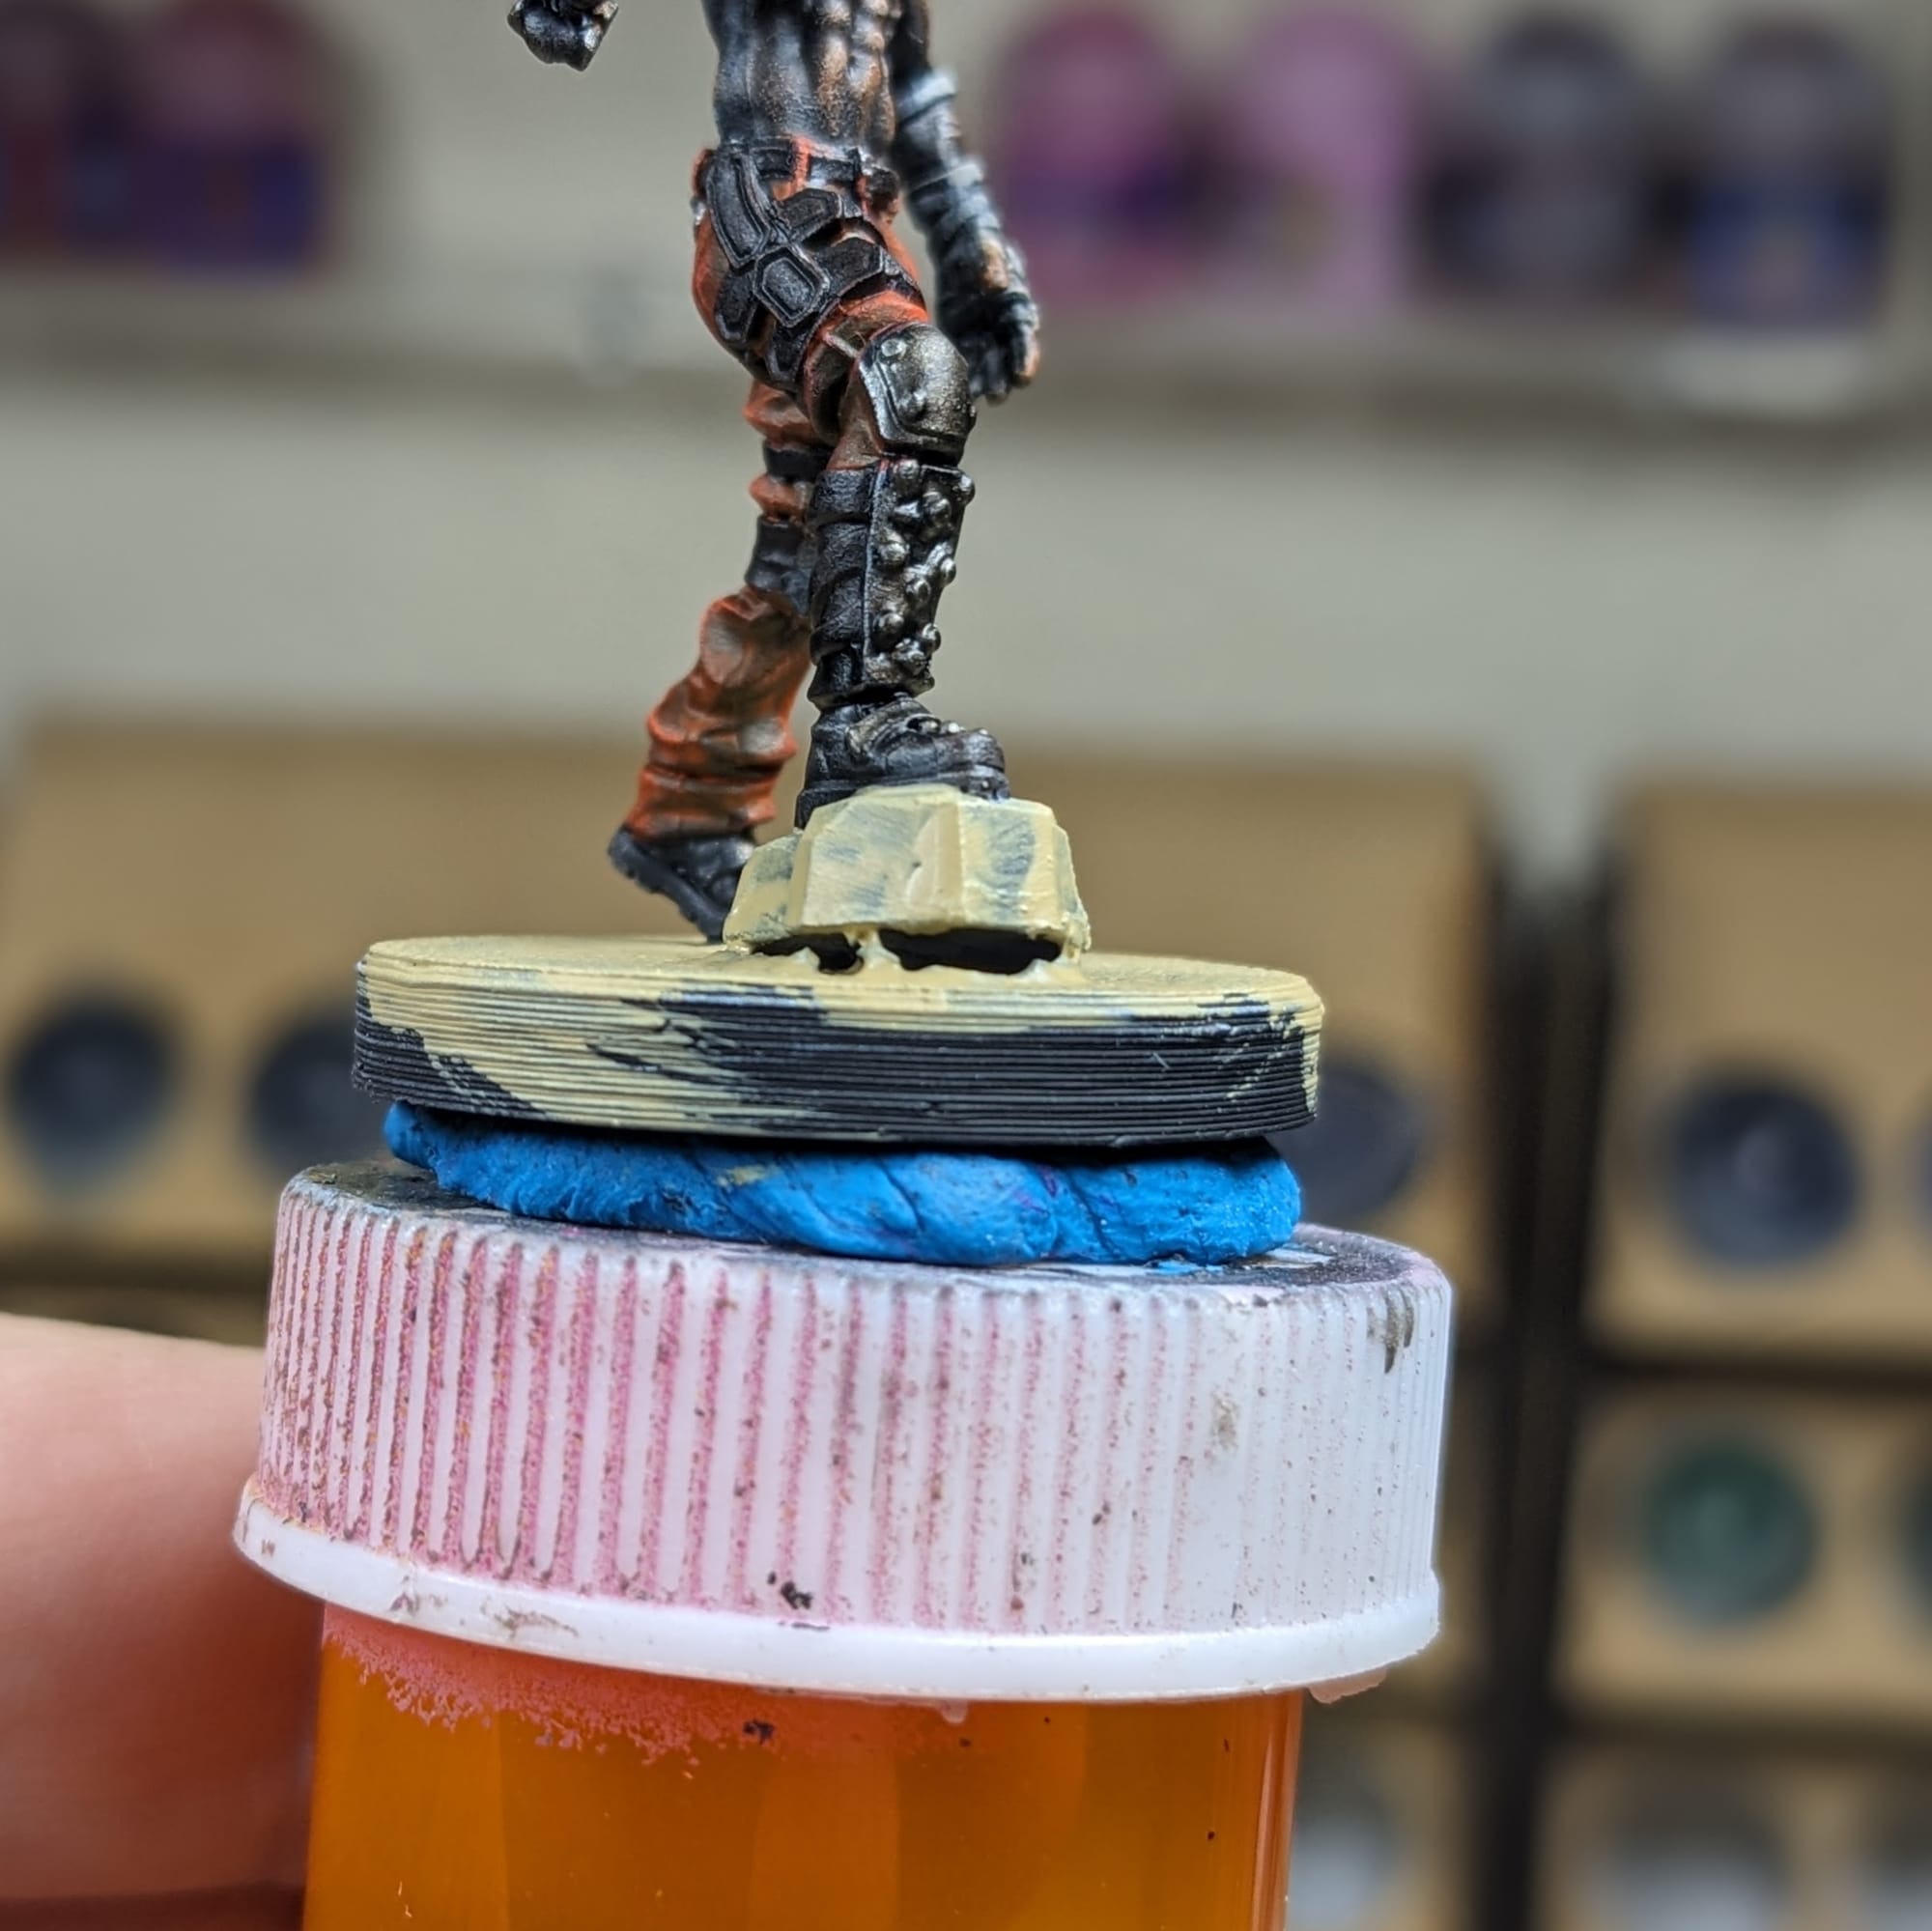
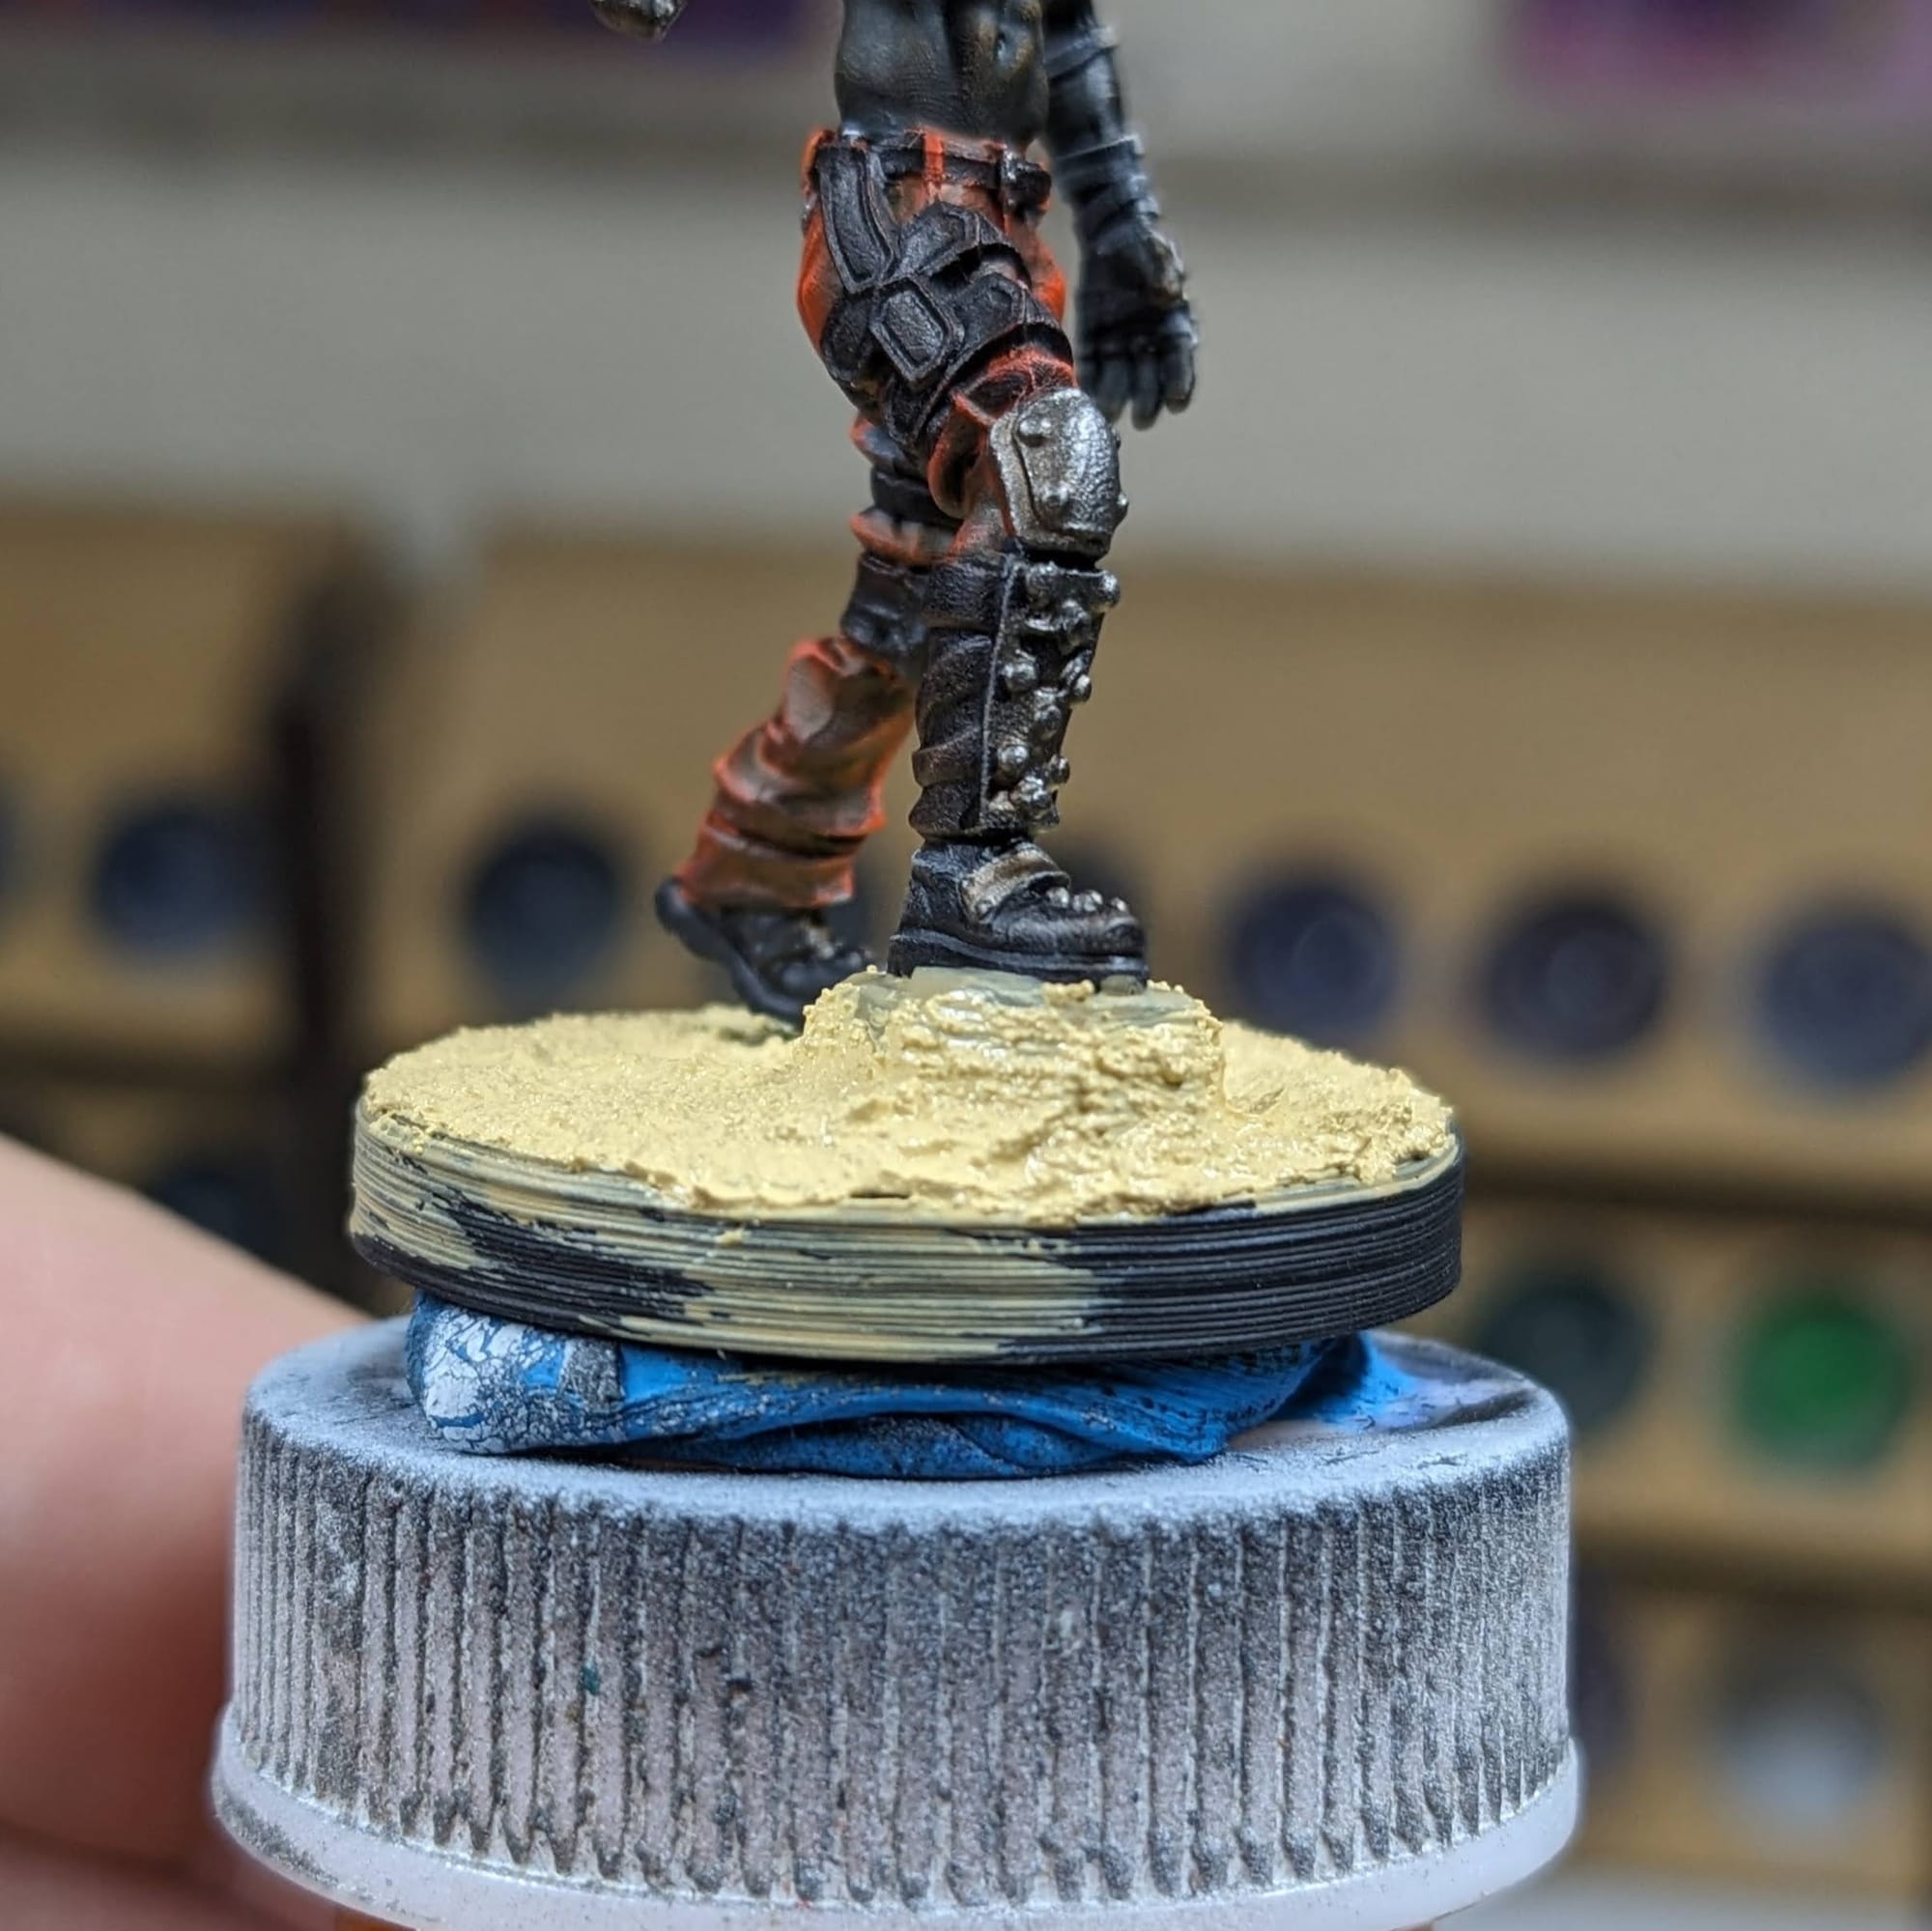
Maniac Gap Filling using Basing
It's pretty obvious there is a gap between the figure's tactical rock and the base, so to fix this problem, I just shoved a bunch of texture paint in the gap (two passes, actually), and then it was ready to go! No one is ever going to know. Well, except now you do, but that's hardly the point.
Sealing Your Minis
As I do with all of the models I paint that I also play, I apply a protective clear coating over the paint. This helps preserve the paint on the model and keeps oils from the hands from rubbing off the paint as you continuously touch the models during games. There are many different kinds of clear varnishes to use, but I typically use any matte or anti-shine varnishes, as satin, semi-gloss, and gloss tend to distort the colors of the models (not to mention that most models aren’t supposed to be shiny).
Brands that have been reliable for me are Krylon Matte Clear Spray, Rustoleum Matte Clear Coat, which is slightly glossy, and Testors Dullcote, although the latter can be expensive and difficult to find. For a coat with no shine that really enhances the colors, I use AK Interactive’s Ultra Matte Varnish, applied with an airbrush.
Ready to play Borderlands!
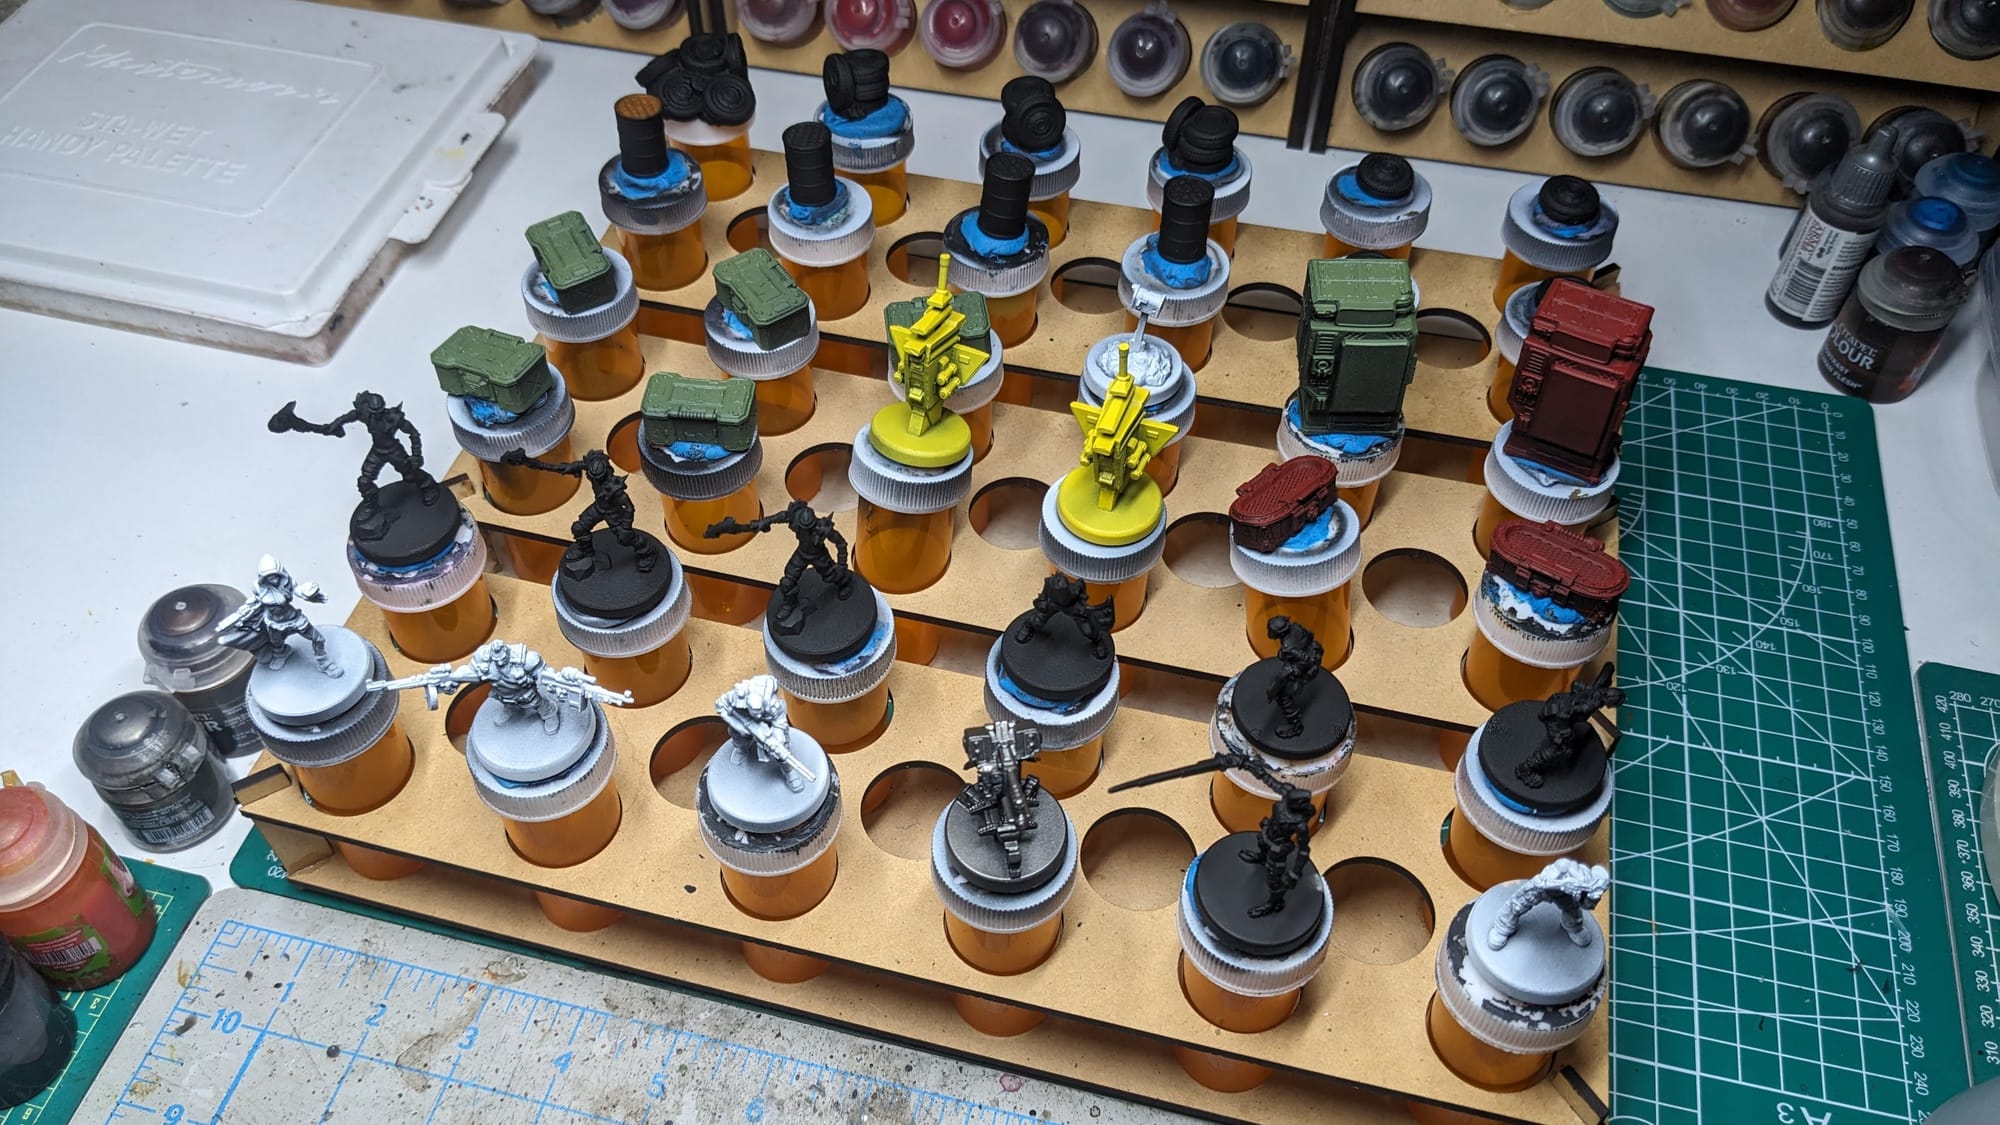
Both Borderlands Mr. Torgue's Arena of Badassery Core Box and Box of Badasses have a ton of minis to paint. It will take time to paint them all, and it’s easier on your eyes and sanity to paint them in small, manageable batches instead of trying to do them all at once. These pieces are perfect for the slapchop method, which gives you the freedom to experiment with different colors and washes and get them all painted pretty quickly.
The maniacs and terrain pieces were especially fun and surprisingly easy to paint, and so I think I may do some variations on the other versions since there are so many. There are a lot of great details in the models, capturing the essence of the pieces from their respective games. I am really looking forward to painting more of the Vault Hunters, as well. While working on this guide, I also had the chance to paint up Tiny Tina (BL3) and Claptrap Convention Exclusives, so they will be part of the action on the table!
Don’t be discouraged if the paint jobs don’t look quite the way you want or expect them, too. Each piece you paint is more experience gained in painting. If you’re really unhappy with the painting, you can always apply some sand or bloody wounds to the model (Blood for the Blood God!)
Total Paint Time (with priming and basing effects) - 10 hours for the entire batch
—--
Have you painted your Borderlands Mr. Torgue's Arena of Badassery miniatures yet? Which Vault Hunters will you start with? Let us know! Follow Gaming Trend for more Learn to Paint articles. We’d love to see how you painted up your models, so share your work with us in the comments!