There’s no doubt that 3D printers are reaching a level where you can unpack it, load material, and be printing inside of 15 minutes. Several resin printers I’ve reviewed recently have made and backed up that claim. Now we’re seeing that same claim from several filament extrusion printers, at least at the mid to high non-commercial end. Today we’re going to take a look at QIDI and their newest printer, the QIDI Plus4. With more than a few upgrades over the original launch, could the Plus4 be the high-end filament printer we’ve been waiting for? Let’s unbox it and find out.
As you can see in this video, the printer comes almost completely assembled. Other than slotting a filament guide tube and removing some stabilization items to ensure the device ships safely, it’s almost completely ready to print – something I’d be putting to test in short order. I was immediately impressed with the setup as the guide is effectively four steps to get the screen set up to take over. Once you do get the screen on and the device powered, it’ll walk you through every step of the process after that, with pictures to guide you through. Best of all, they’re not only clear, they’re comprehensive – I had the printer set up and ready to go inside of 10 minutes, as advertised.
The next thing to set up is the printing bed. If you’ve ever leveled a bed for filament printing it can be a very finicky process, as well as highly prone to error. Here, the printer has an option to self level, and it does so by touching the print nozzle tip to the bed in nearly two dozen places to measure and adjust.
Normal people usually print some sort of benchmarking item at this point – small print cards that talk about filament depths or a Benchy to get a finished product to check for shifts or stringing. Yeah…I’m not a normal person. I put a dozen chip clips into the QIDI Studio software (an offshoot of the latest (V0.12) Klipper, meaning I immediately knew how to use the slicer. I appreciate that QIDI is staying open-source), dropped some SUNLU high-speed cherry red filament onto the spool holder, and hit print.
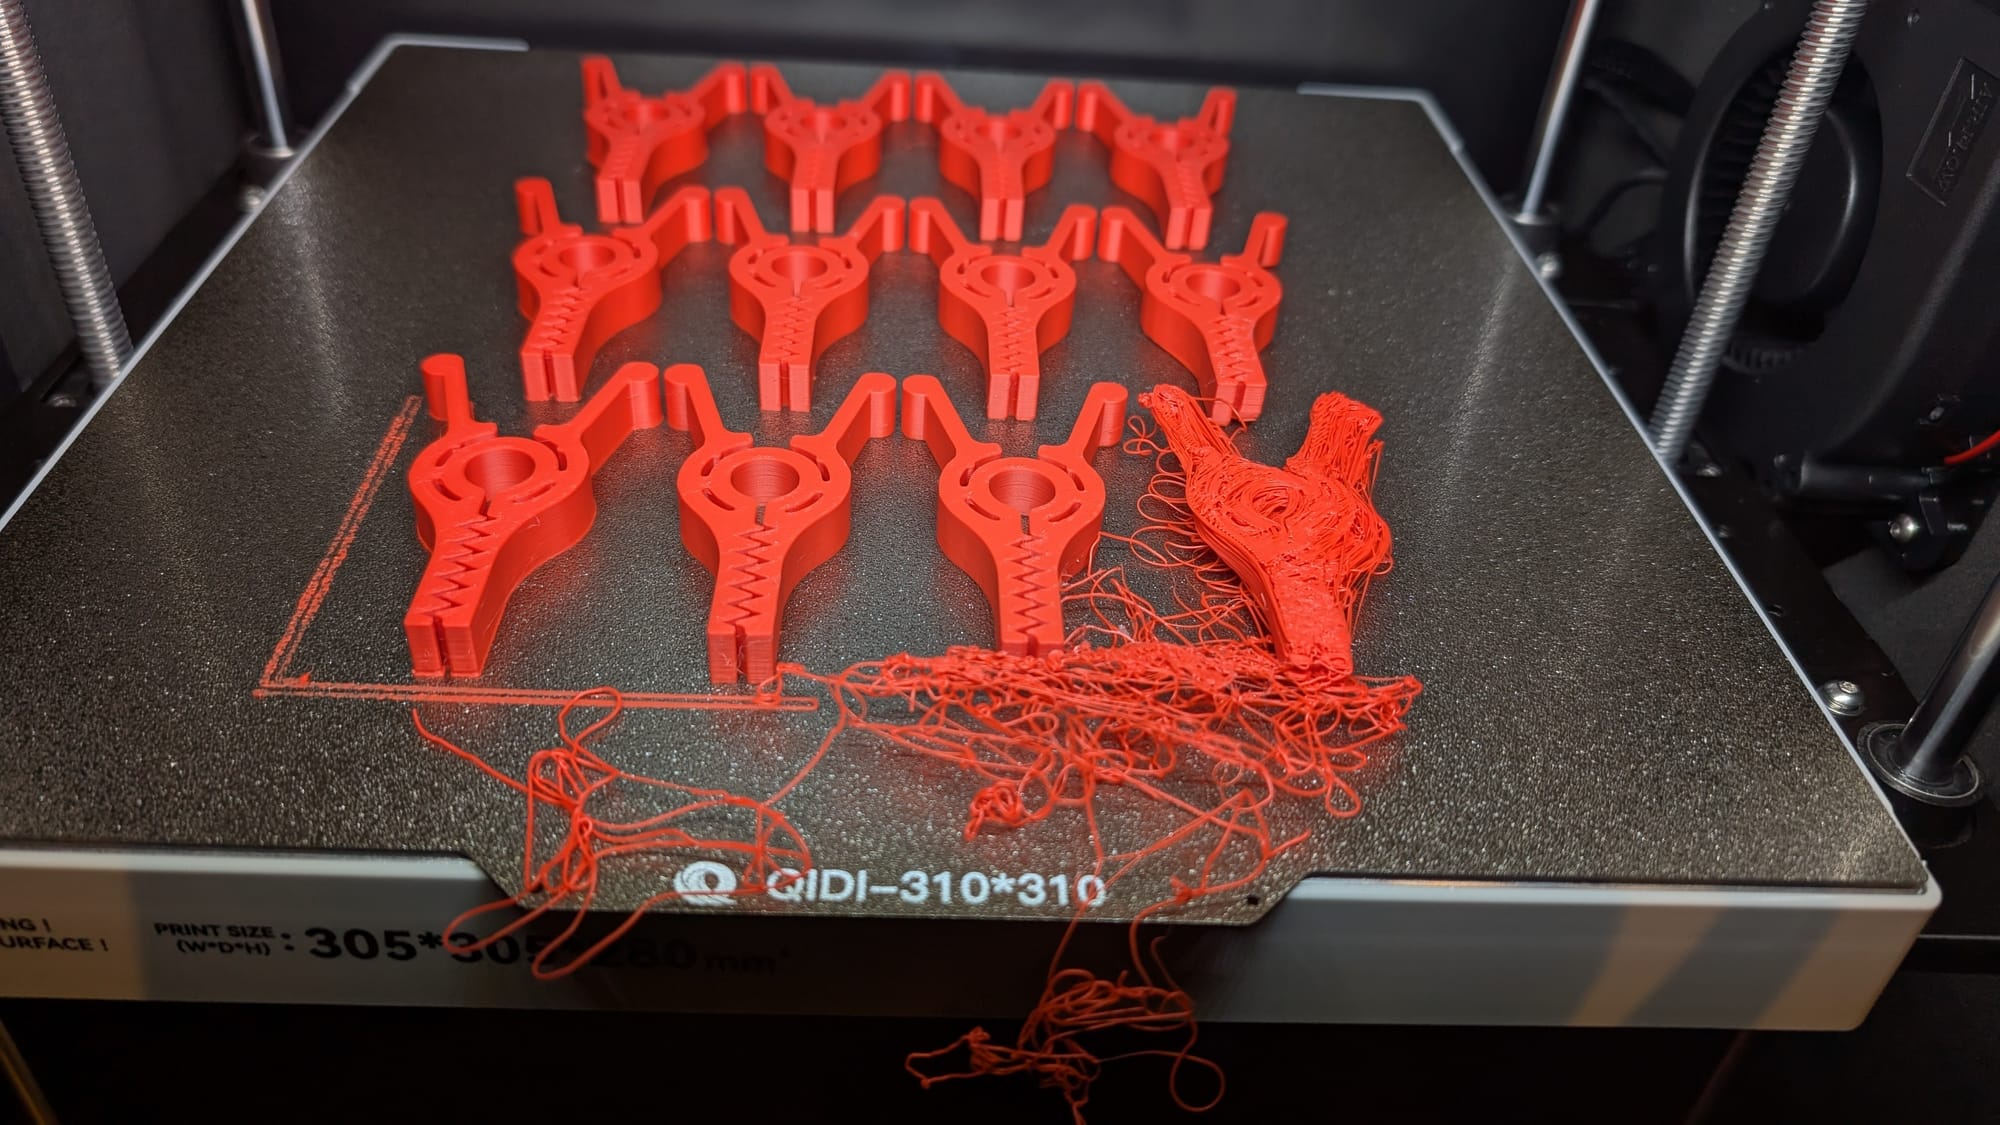
As you can see, the first clip was an unmitigated disaster. The filament was turned into spaghetti at every layer, resulting in a fuzzy mess. What happened next, however, was the flawless print of 11 clips. With no stringing, no layer shifts, and no layer oddities, I chalked the first failed clip print as “this is the first filament through this printer” and that it’d worked out the kinks by the time it reached the second one. I took a look at the settings, the cleanliness of the rest of the plate, and made a decision to answer a very, very big question next – could the QIDI Plus4 manage a full-sized helmet print in a single shot? I suppose I could have tried to tweak settings or run more tests, but again – I’m not normal people.

Loading up a Primaris Space Marine helmet up onto a plate, I angled it from corner to corner to ensure it’d be contained on the plate. It cut some of the organic tree supports in half at the edges, but I was pretty certain that they’d print just fine anyway. I had just printed this particular helmet split into roughly a dozen parts, with a massive seam in the center of the helmet dome – something that would be a pain to seal up. Additionally, all of the small bits will have to be adhered, with the edges cleaned up and closed. If this helmet printed in a single shot, I could primer and paint it without the need to glue the seams or deal with additional things like wood putty and resin adhesion. Better still, it also means I could sand it smooth without worrying about those same seams coming apart or becoming weak. Still – this would consume nearly every square inch of the build plate, representing a rather challenging and extended print. If this printer was going to fail a print, it’d probably be right here.
Despite those organic supports looking like a mangled mess as they printed at the edge of the plate, the helmet printed. I fully expected that there’d be some failed elements.
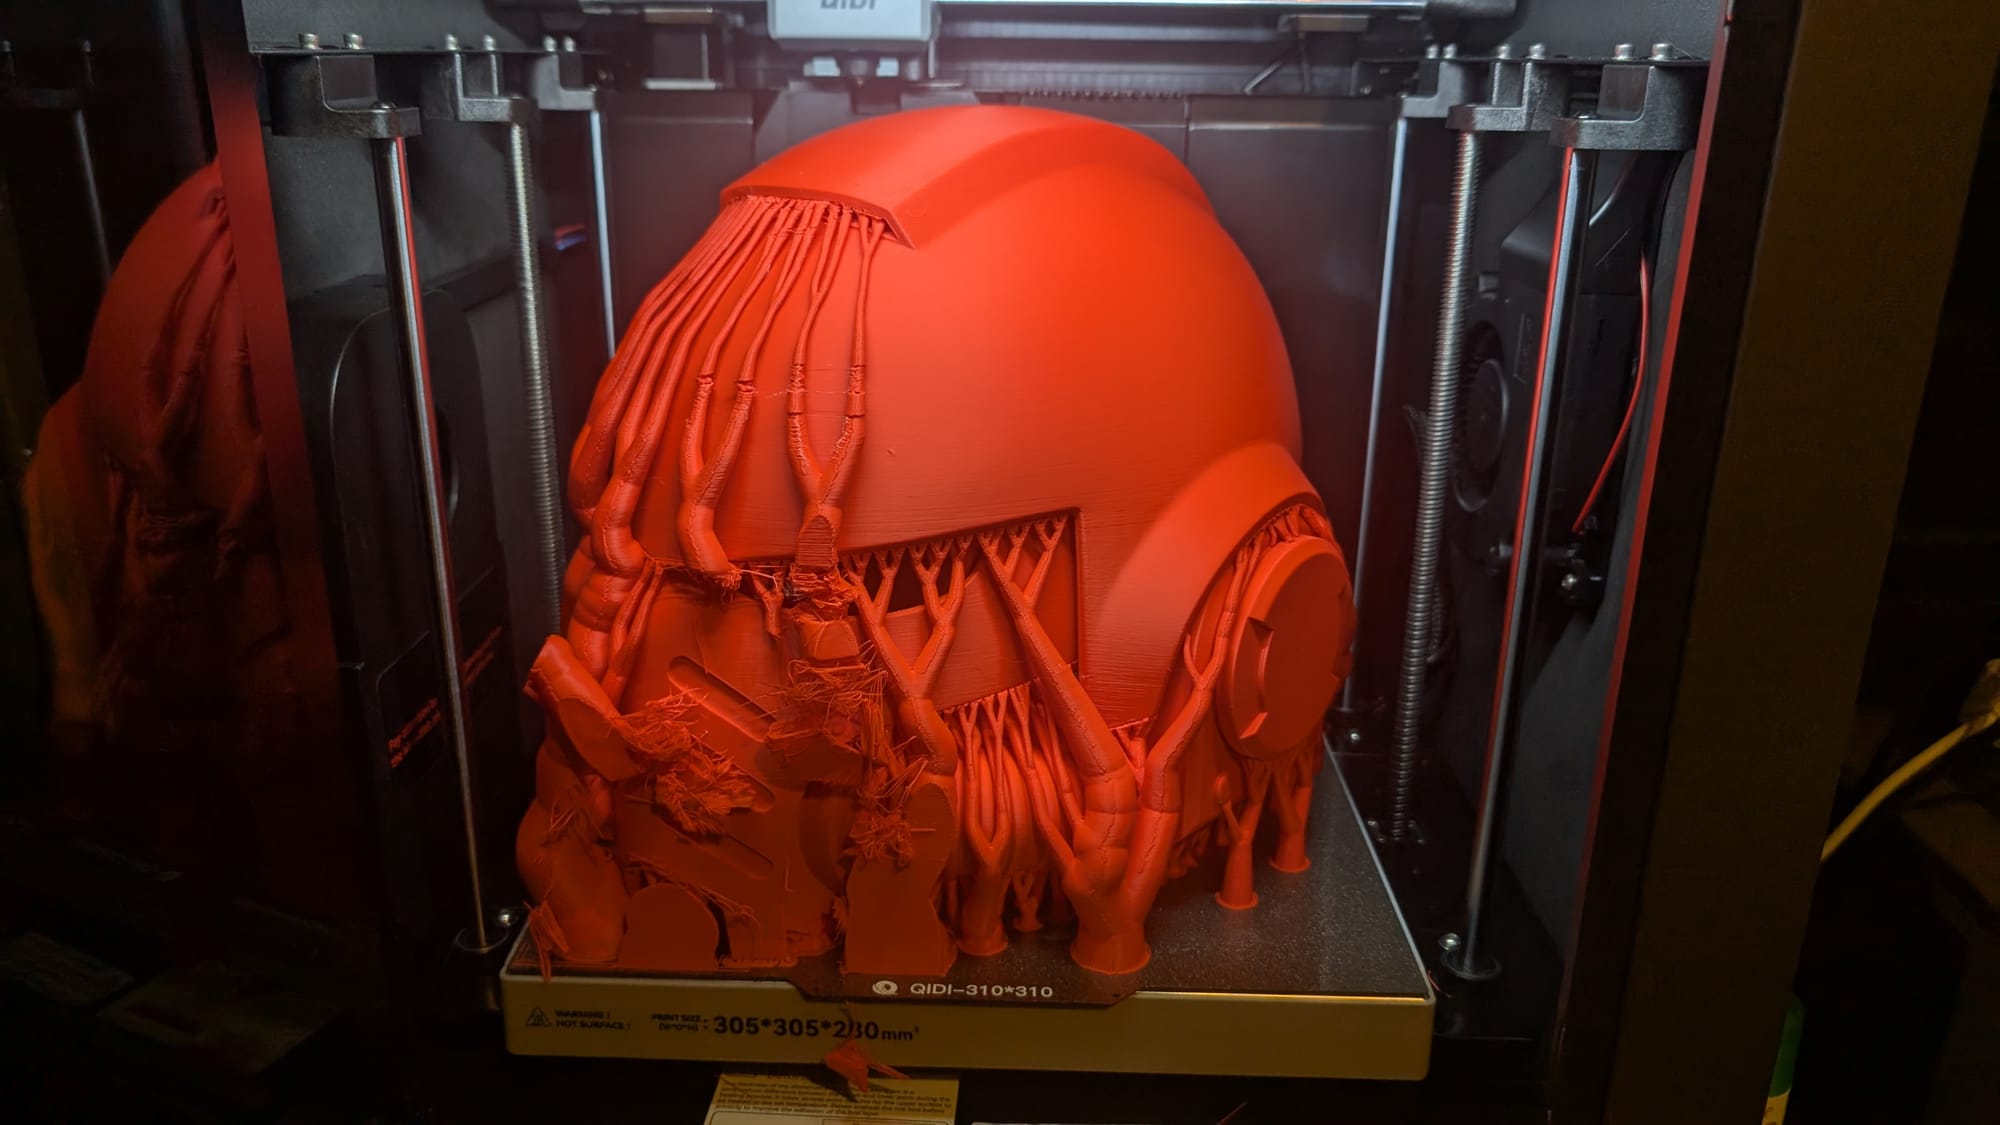
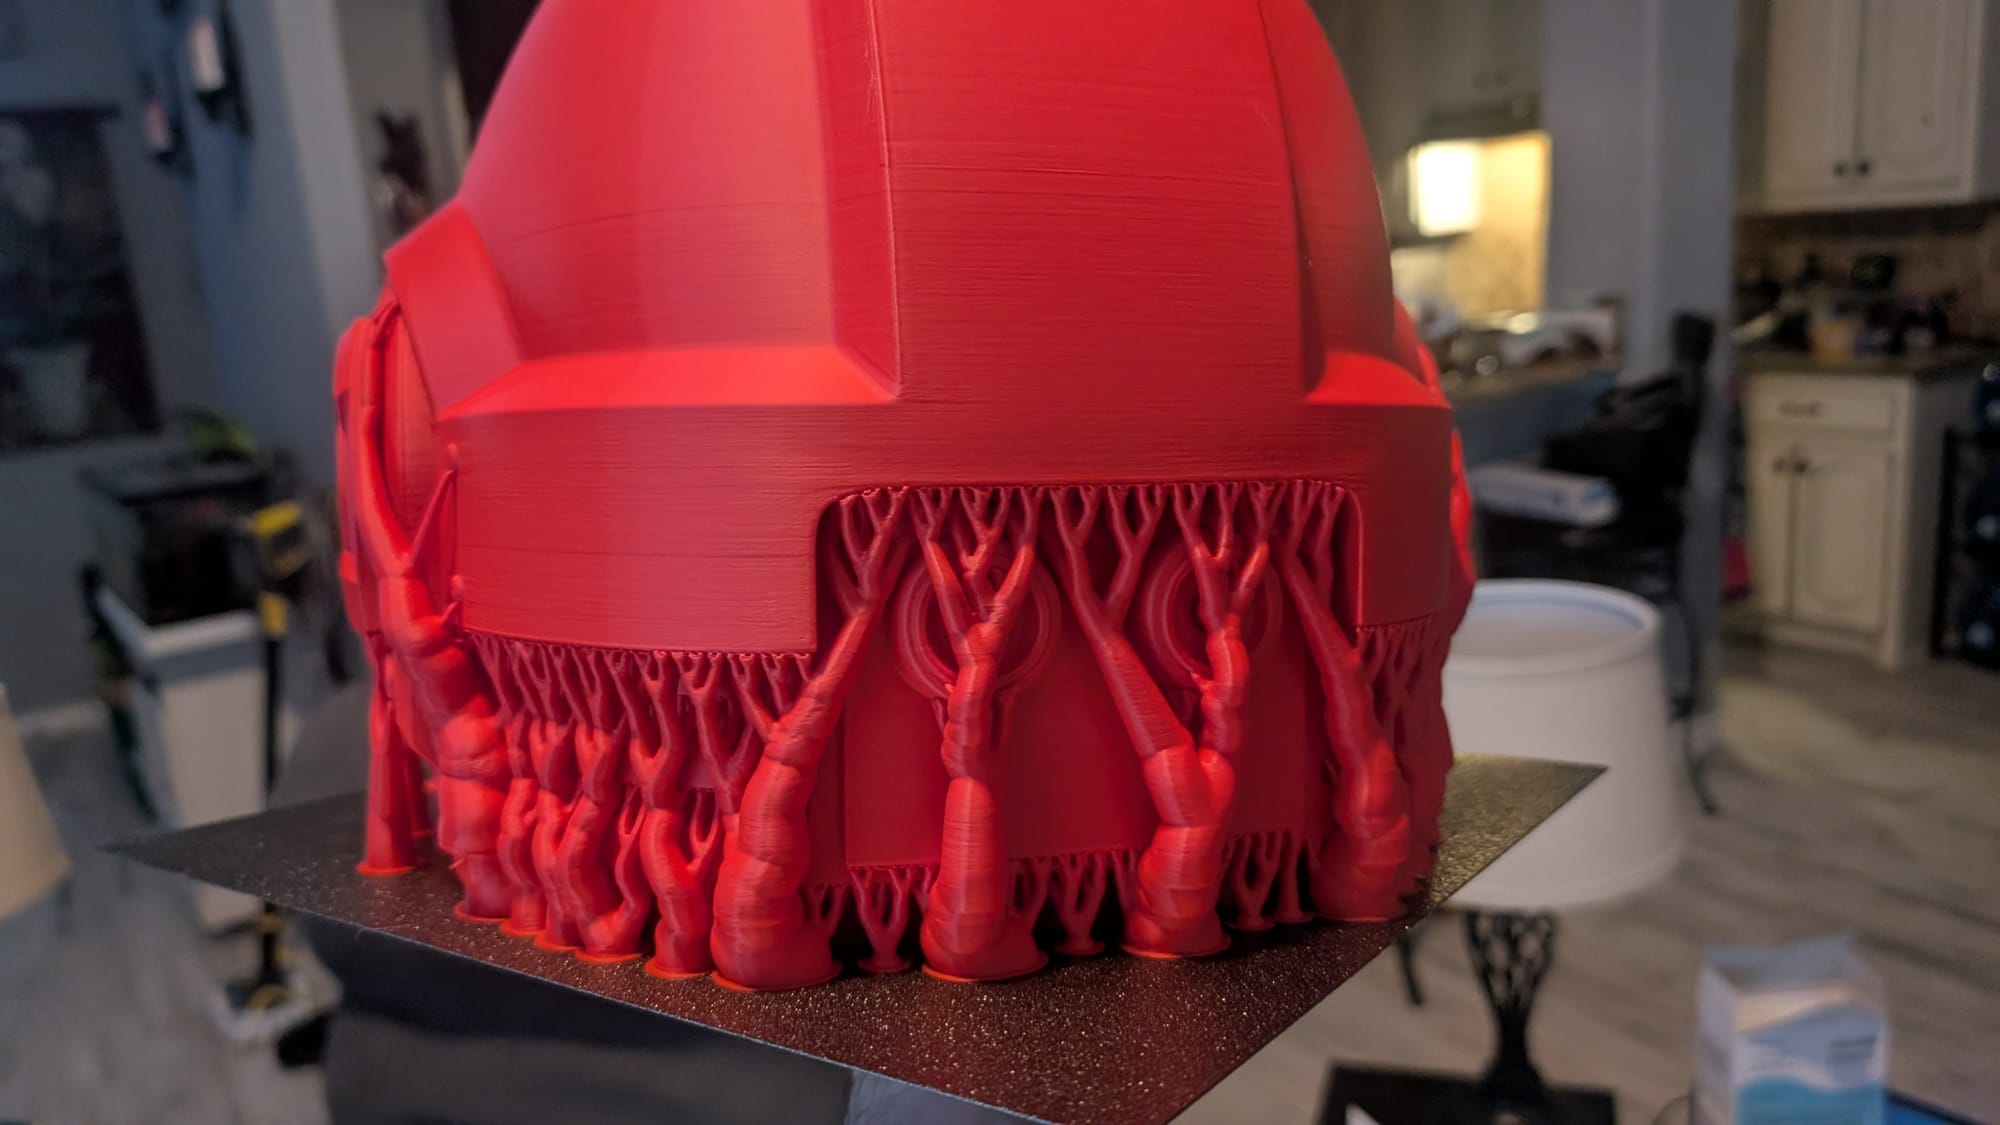
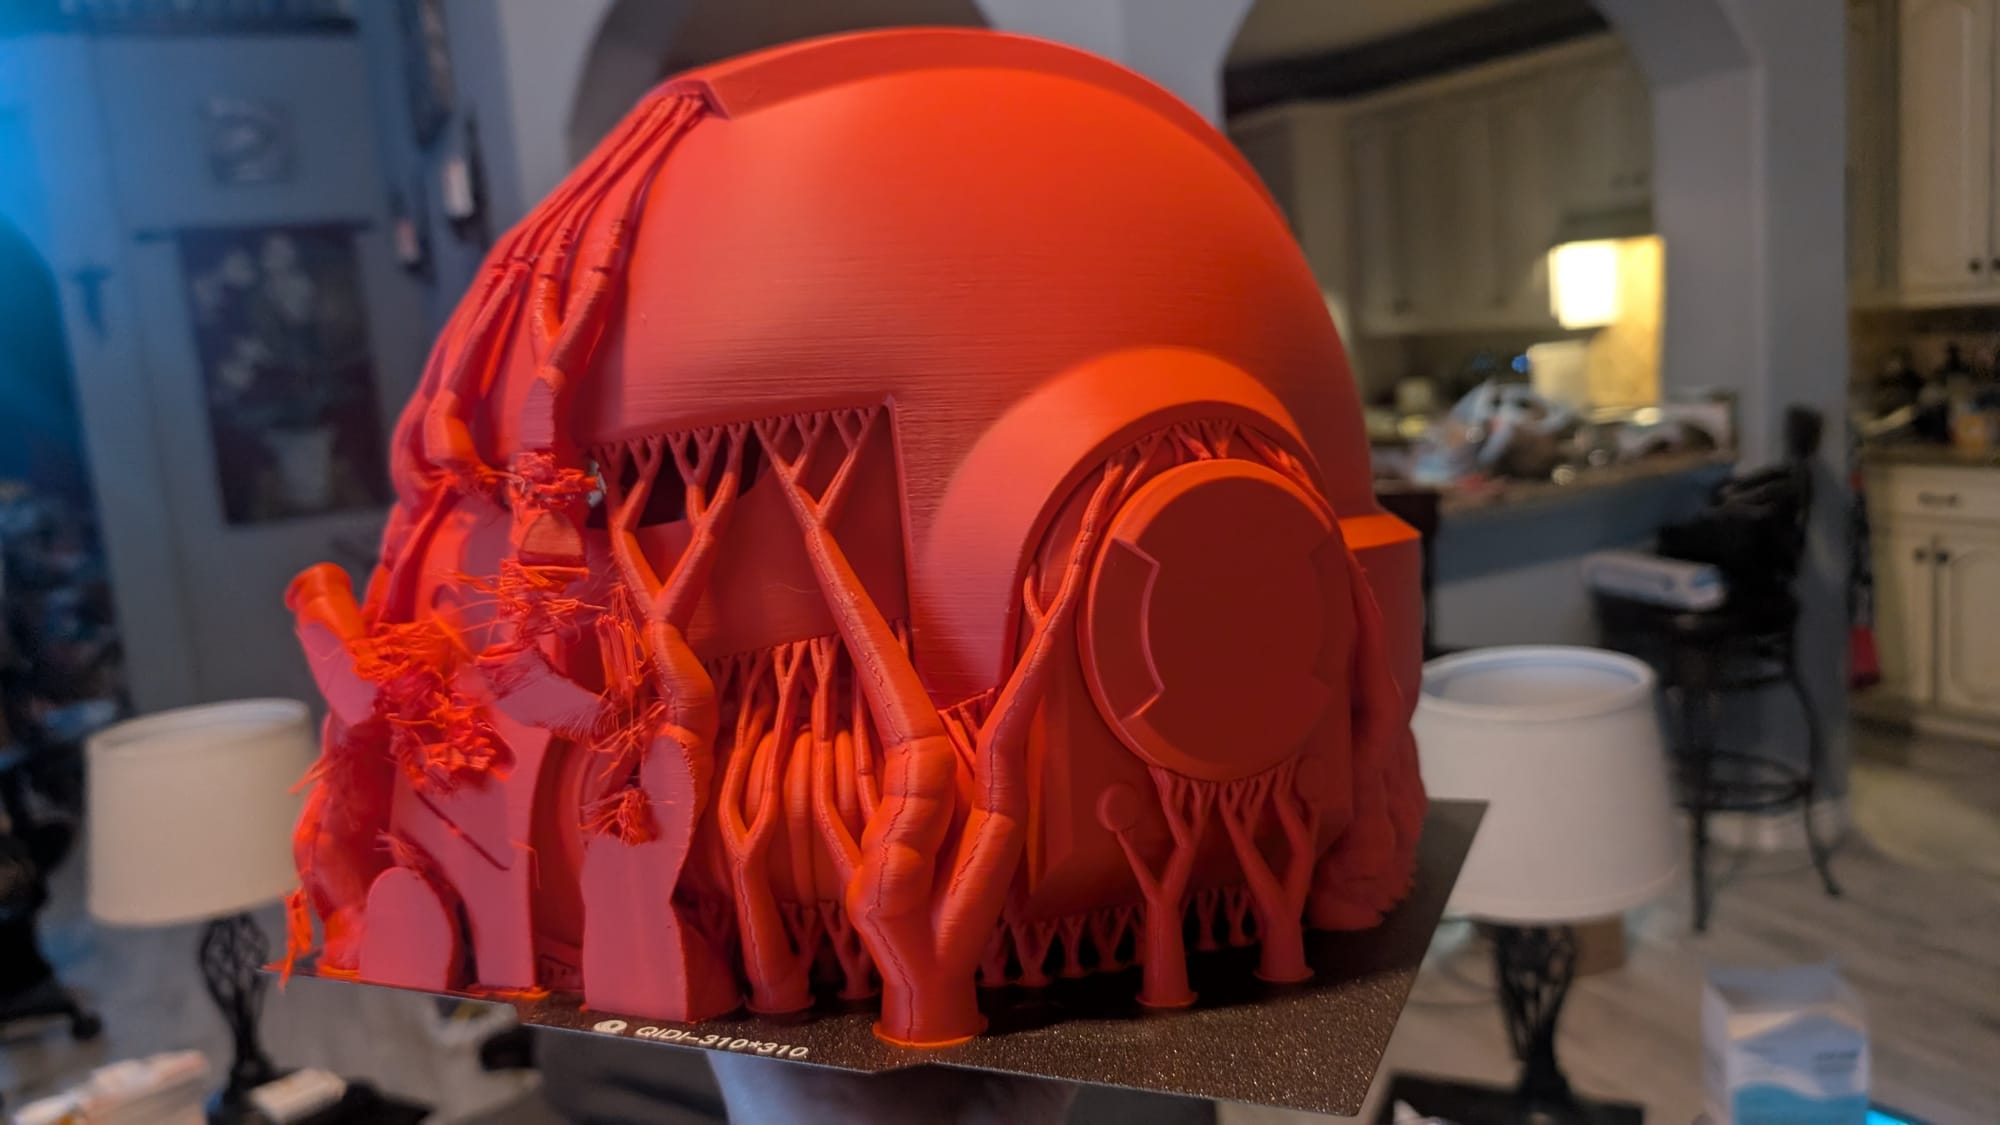
Surprisingly…this is a near flawless print for this helmet.

On one side there is a small slit on the right side that would require a bead of sealant to ensure it closes cleanly, but otherwise this helmet is nearly ready for secondary processing. As usual for filament printing, the top has some circles from the final few layers, but that’s nothing that some light wet sanding won’t fix. I now had a helmet printed as a single piece – something I expected was impossible without a lot of tuning, trial, and error.
I fully intend to build a Space Marine Primaris armor suit for Halloween and conventions. We have partnered up with SUNLU for other projects, so I approached them for an opportunity to to team up once again, and they agreed to help me bring my Warhammer 40K Space Marine armor and weapon cosplay set to life! I threw another layer of glue on the plate, and added the the first half of a Bolt Pistol to the slicer. And once again, with no calibration, adjustment, or preparation beyond throwing everything onto the plate in the QIDI Studio slicer, I hit print and let it go to work. Just like it did on the helmet, the QIDI Plus4 spun to life and got to work.
I was surprised to see that it printed in a single shot, just like the helmet, but with even cleaner results. The body of the Bolt Pistol came out flawlessly in a matter of hours. As before, I did no additional work to get it supported and ready – just auto settings on tree supports, and then hit print.

There simply isn’t a flaw on this receiver portion anywhere. The circles on the inside are perfectly round, and even inside the magazine well, every detail is flawlessly executed. The second plate would contain all of the detail items, and would require those same tight tolerances to ensure everything fits together perfectly.

Despite doing literally nothing beyond just throwing them on the plate, and having the slicer add any automatic supports needed, again we see the QIDI Plus4 just crank out another flawless plate. Every piece slid into position, with the bolter being ready for paint and processing without a single bit of additional work required.

This continued exactly this way for a plate with the left hand…

The left bicep…
Left upper and lower forearm…
And elbow.
As you can see from each one, they’re all massive prints, each with the potential for problems with large smooth surface areas and complex details. Here we stand at 134h 10m 59s of print time, and I don’t have a single failed print to show for it beyond that initial chip clip. With reliability well established at this point (which is a good thing – I’ve got a long way to go on this Space Marine armor), let’s take a second and look at what’s behind the scenes to bring it to life.
To be clear, we’re working on a second generation of QIDI’s Plus4 unit, with a number of upgrades on it. As such, there are areas where QIDI took community feedback and improved on their hardware. The first, and probably the most influential, is the XY Belt. As I unboxed the unit, I immediately noticed that this new 9mm 1.5GT timing belt. 9mm is the size, but 1.5GT means that it is a high-impact fiberglass that is actually stronger than a typical gear. The material of the belt has a bit of elasticity to it, and that is combined with a new VFA Avoiding Algorithm to help compensate with the resonance of the motor.If you’re unfamiliar, "VFA" stands for Vertical Fine Artifacts. These VFAs manifest as ripples appearing in the longer unbroken surfaces of a print. Sometimes you can fix these with adjustments to the slicer, but more effectively it is best compensated with quality hardware. This belt and gear improvement is one step, but being able to maintain it with small cutouts in the case for easy access is even better. Other printers I have require practically disassembling the entire unit to adjust the belts, so being able to do it in a matter of seconds is a huge improvement. More teeth in contact with the finger belt means better control over the velocity. The only drawback to using a smaller pitch belt / pull diameter is that you end up slightly slower than the larger stepper motors and bigger teeth, but with companies like Bambu’s A1 and A1 mini already using this technology, it’s tried and true. That said, the 600mm/s top speed is no slouch – a good balance between speed and quality of the outcome.
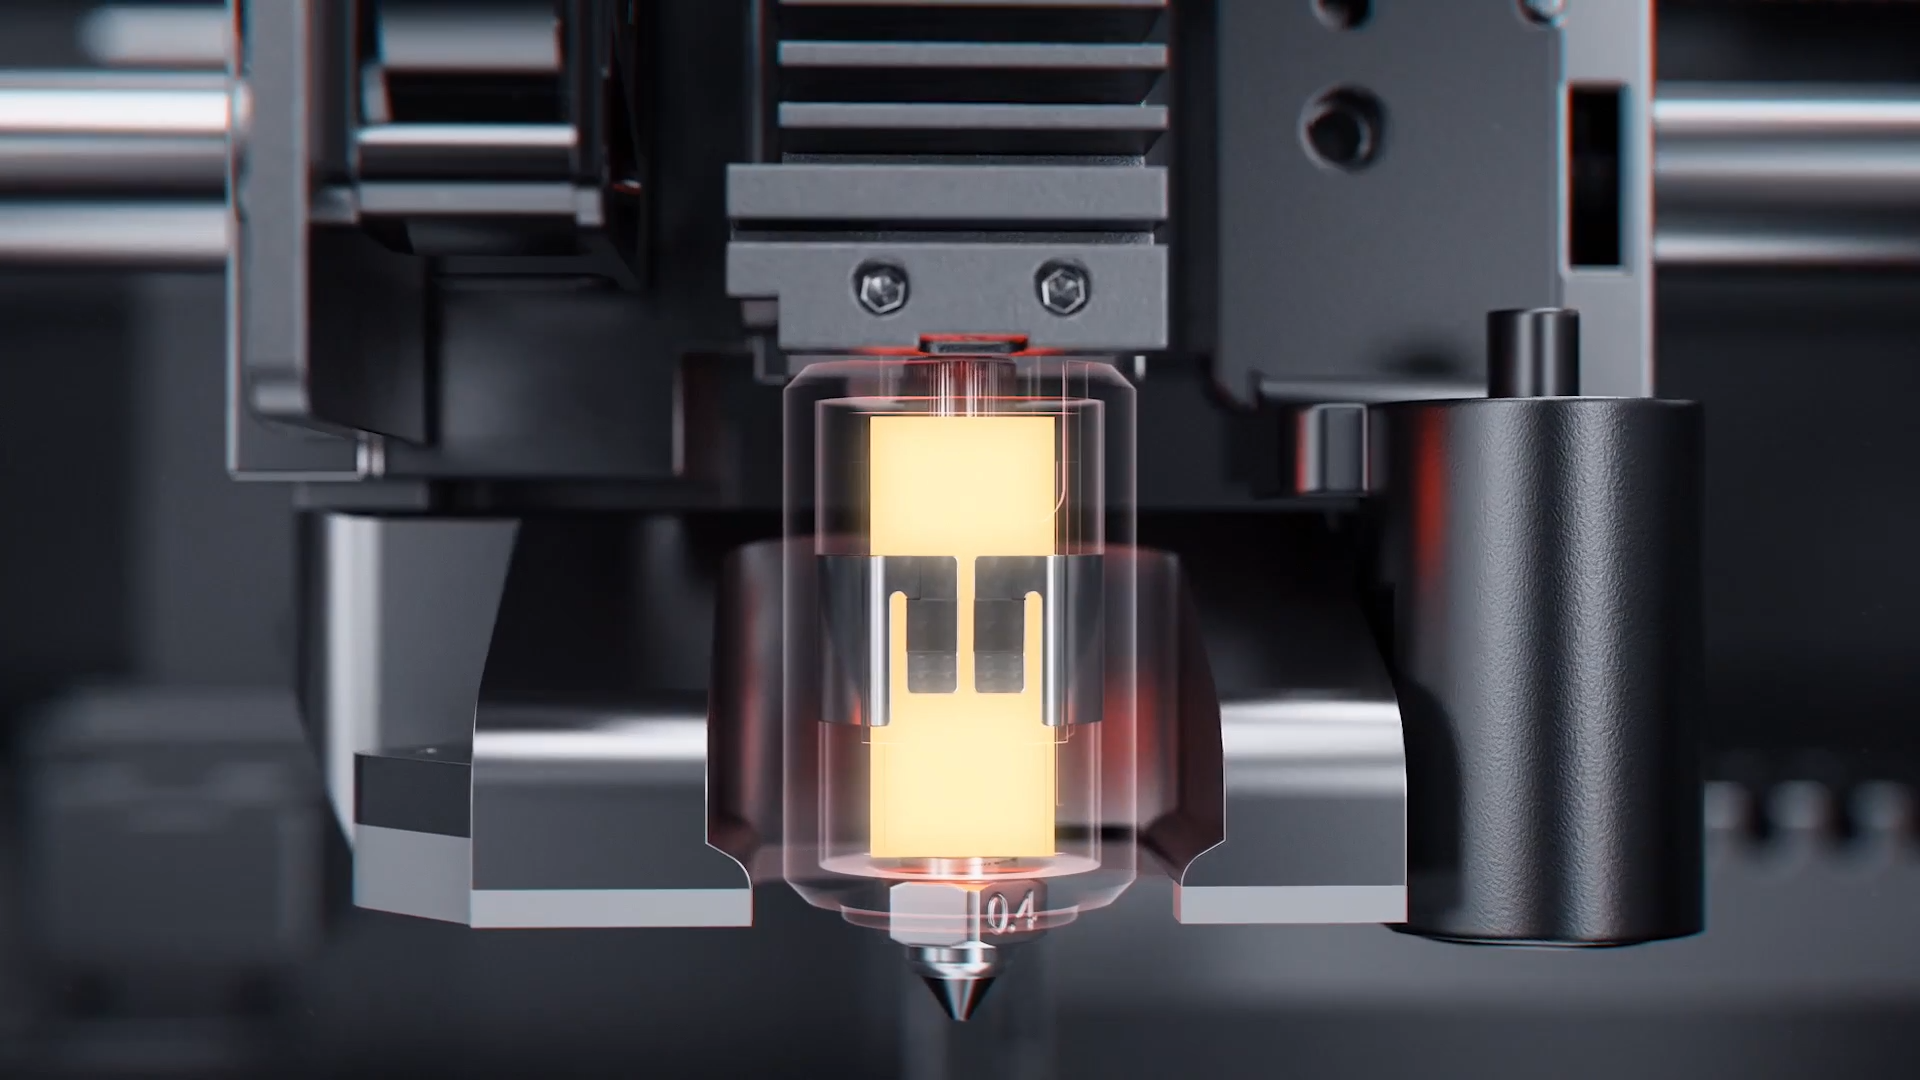
The toolhead has received several upgrades that can improve the quality of prints. The toolhead has been improved with a second-gen 80W bimetal hotend that can heat up to 370 degrees centigrade. That means you can use PETG, ABS/ABS-CF, ASA, PC, PANT-CF and PET-CF which require a heat range from 69C at the low end to 205 C at the high end. The fact that there’s so much more headroom above that means you shouldn’t see burnt or malformed nozzle tips, both of which can cause clogs – an issue with the previous generation of the Plus4.
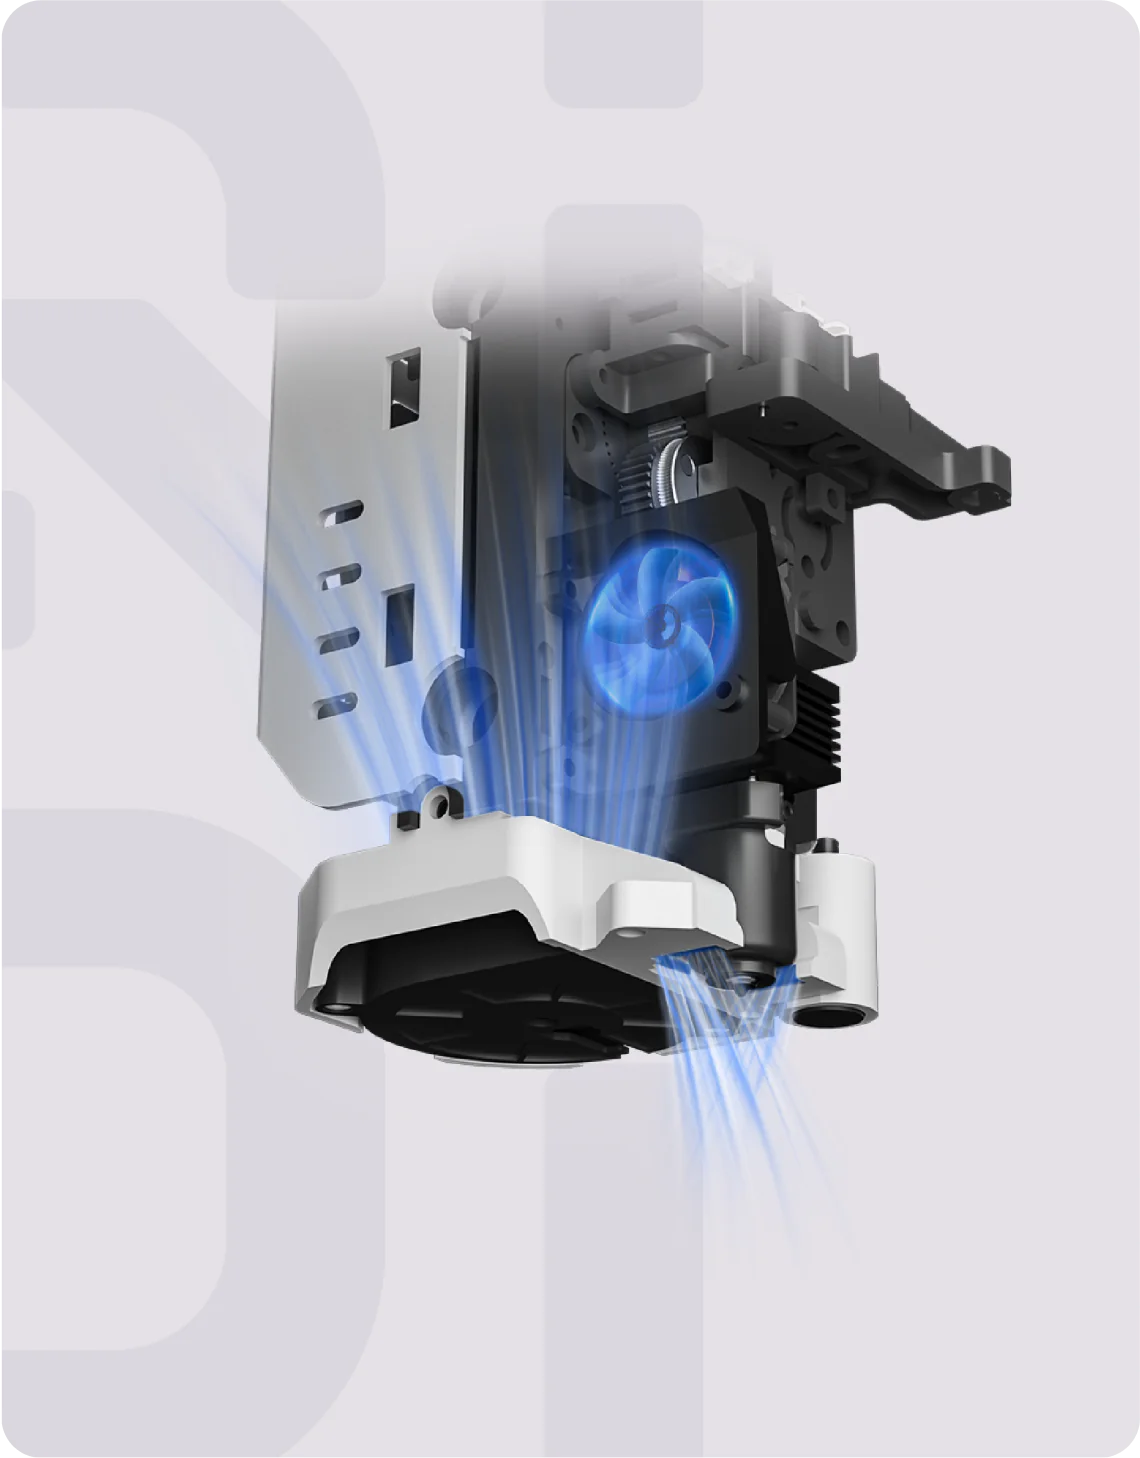
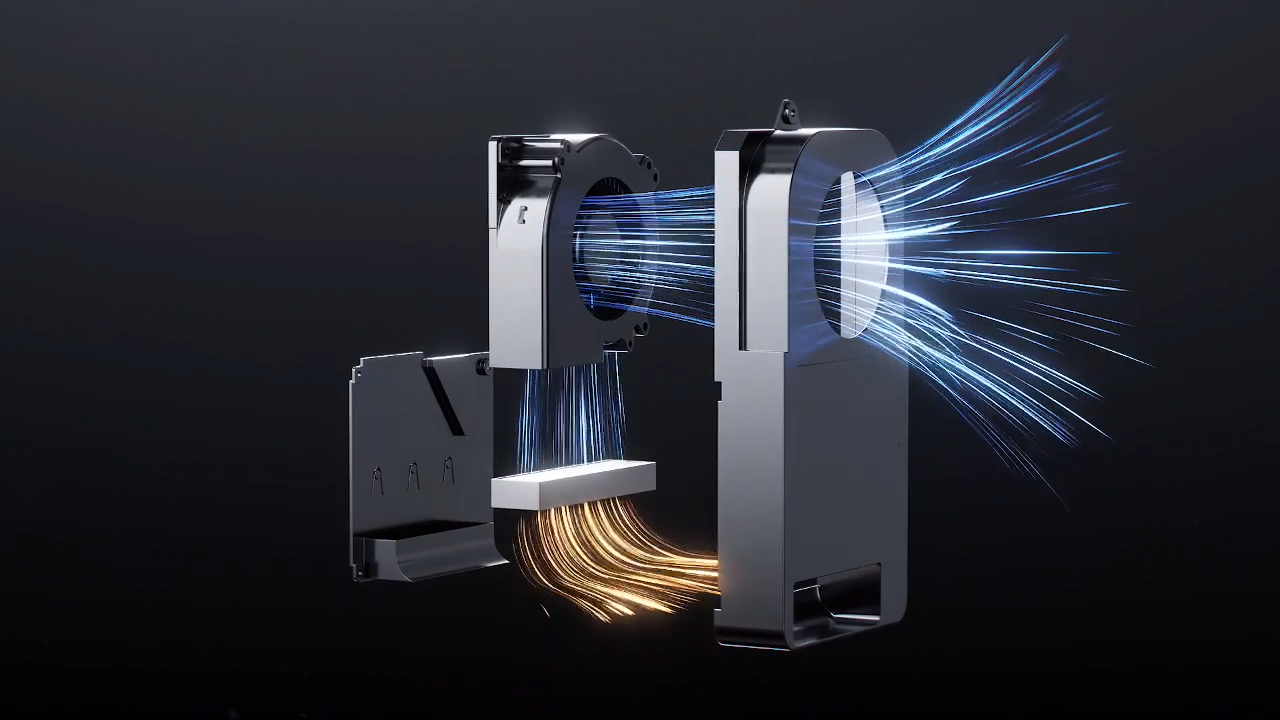
On the flip side of that, the toolhead is equipped with a larger independent hotend fan with an air duct design to rapidly cool the head for consistent prints. If you can’t cool the hotend effectively and regulate the temperatures, it can cause over-feeding as the filament can be too liquid.
One of the reasons to buy an enclosed printer is that you can control the temperature of the printer. The QIDI Plus4 has active chamber heating, courtesy of a 400W heater with an air circulation system and a turbo fan for forced air induction. From my own testing, it seems to work well, with all of the chamber heating quickly and staying there at around 65 degrees C. That said, every time you use it the system throws a warning that keeping the enclosure sealed while printing can lead to improper prints. If you’re unfamiliar with when you’d use a heated enclosure, it’s primarily for ABS, ASA, PC, and PA material types. Those require a lot more heating, and are prone to both delimitation and warping. By heating the chamber, it keeps the print results at a stable temperature, which reduces shrinking and warping. This also helps with adhesion and keeps your filament dried, which is better to stave off stringing. If you don’t work with those materials, you probably won’t use it, but it’s fantastic that the option exists. The enclosure top is made of tempered glass, with cutouts for the pop-out handles, maintaining the look and feel of the rest of the device.
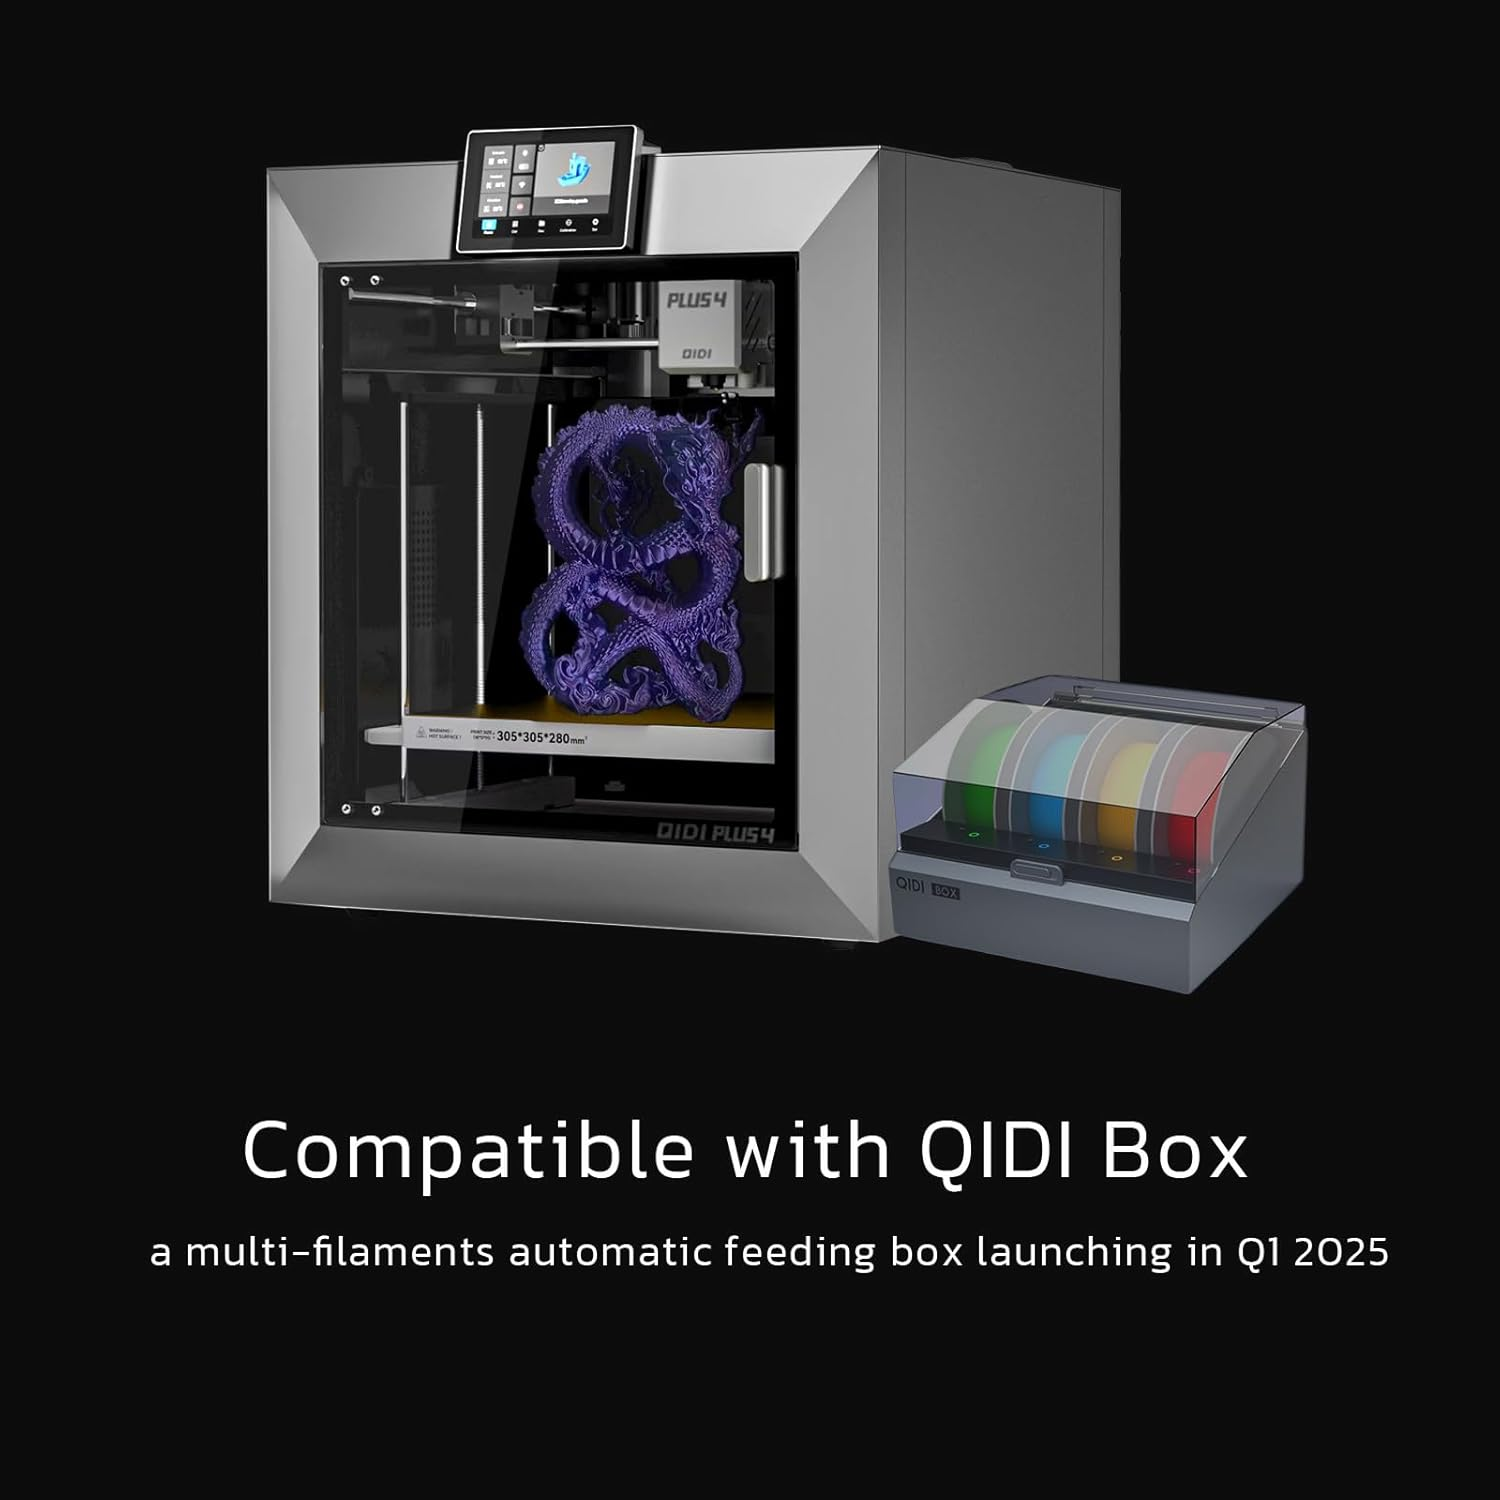
Heading down to the bed, there are a number of improvements here as well. The bed now heats up to 100 degrees C, which again contributes to a consistent print. On both sides of the bed are a pair of 10mm dual screw shafts connected to independent motors. This bed is now bigger than its predecessor as well. The previous model, the X-Plus3, was 280*280*270. The QIDI Plus4 bumps this up to 305*305*280 which enables a world of new printing options, including what we've done here -- a full-sized helmet printed without needing to slice it up.
I’m no electrician, so I invited a friend who is. There were complaints about the previous version with overheating issues on the heated bed or the heating chamber. He spent a great deal of time with a Fluke meter and a FLIR camera watching the bed and chamber heat up, cool down, move around, and do it all over again multiple times. He didn’t detect any overvoltage issues, overheating, or any aberrant behavior “outside of range”, as he said. You should always have a fire extinguisher nearby with anything that heats anything to melt it, but I'd prefer not to have to use it.
Rounding out the rest of the features, the QIDI Plus 4 has a 1080p camera tucked in the upper corner, with an automatic filament runout detector / tangle detection sensor on the opposite one where filament enters the printer. You can judge for yourself how well those are working from the videos throughout this review, as well as the results of the prints – clean across the board. Some printers from other manufacturers have begun to integrate AI to accomplish the work of those latter two printers, but speaking from a lot of personal experience, I prefer the sensors since they actually work – something I can’t say about AI thus far.
While they’ve not shipped it yet, so I can’t speak to how well it works, QIDI is shipping a multi-filament feeder they’re calling “QIDI Box” in a few months. Recently delayed, this device should allow us to accomplish the same sort of multi-color printing we see on other devices in this price range. We’ll revisit once that device ships, but it is worth noting that the QIDI Plus4 is compatible with it.
I did run into one issue with the QIDI Plus4 – inconsistent wireless speed. I have excellent wireless coverage throughout my home, with full coverage in the printing space, but sometimes the Qidi Plus4’s speed to send back some of these timelapse videos were measured in kb/s when my connectivity is measured in gigs per second. Throwing an Ethernet cable into it solved this problem instantly, but it is an indicator that the wireless radio is tucked in the back against the wall.
The last stop on any hardware review is always price and warranty. The QIDI Plus4 is priced at $799, but it does only have a single year warranty. Sadly, that’s become the norm in the industry, so I can’t fault QIDI for it too much, but it’s something to know going in – after a year, you might be replacing pieces on your own.
I’ve got a ridiculous amount of work to do to complete this Space Marine armor but based on the first 150 hours of printing on the QIDI Plus4, it’s going to be an easy run. I never imagined I’d have a printer large enough that is high enough quality to print cosplay items, but we’ve finally reached the point where it just works right out of the box. While I recommend you learn your printer, how to handle things like Z-offsets, or how to level things when the automatic parts don’t work as planned, the QIDI Plus4 is the top-tier printer of my dreams. Simple to use, clean prints every time, and completely automatic. What’s not to like? Now, if you’ll excuse me, I’ve got a whole lot of armor to print!
QIDI Plus4 3D Printer
Excellent
With an incredible build volume, and a number of upgrades over its predecessors as well as the earlier version, the QIDI Plus4 is the best balance of large-format FDM with the highest ease-of-use we’ve seen. The proof is in the product, and one look at the armor I’ve printed tells me this is going to be a great printer.
Pros
- The best automatic printing I’ve ever seen
- Clean prints every single time
- Full size helmet prints!
- VFA works, large surfaces are smooth
- Very reasonably priced
Cons
- Weaker Wi-Fi radio
This review is based on a retail hardware provided by the manufacturer.