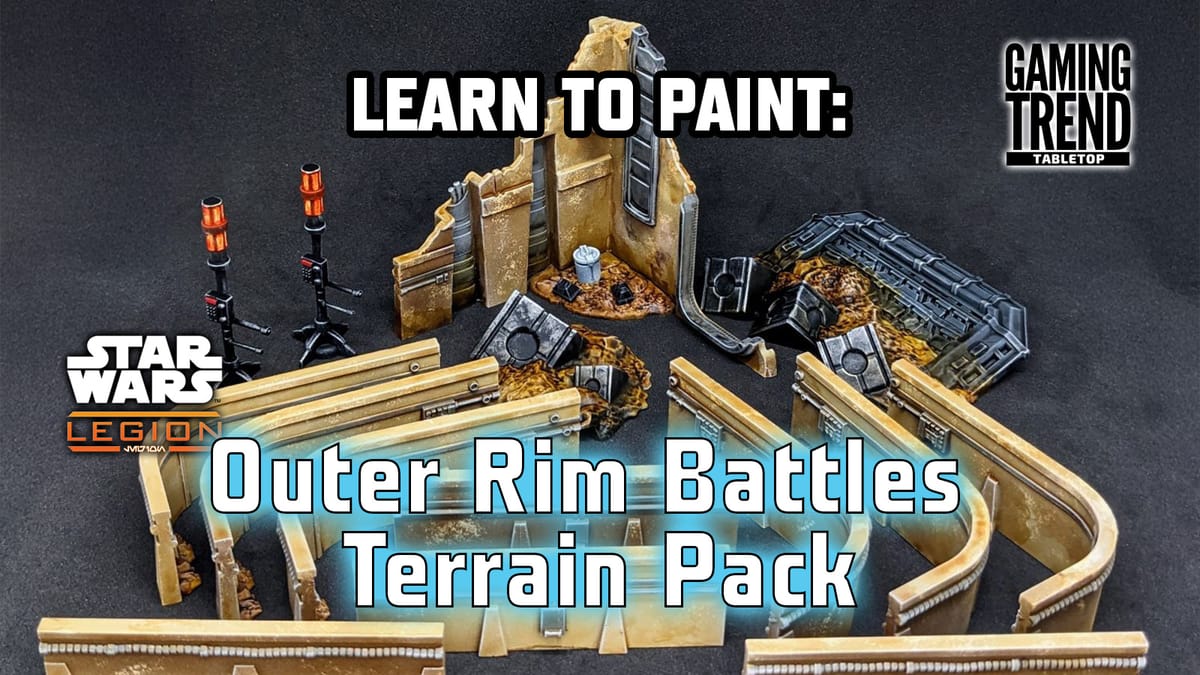
Learn to Paint: Outer Rim Battles Terrain Pack for Star Wars Legion
Decorate your battlefield with a little beautiful destruction.

Decorate your battlefield with a little beautiful destruction.
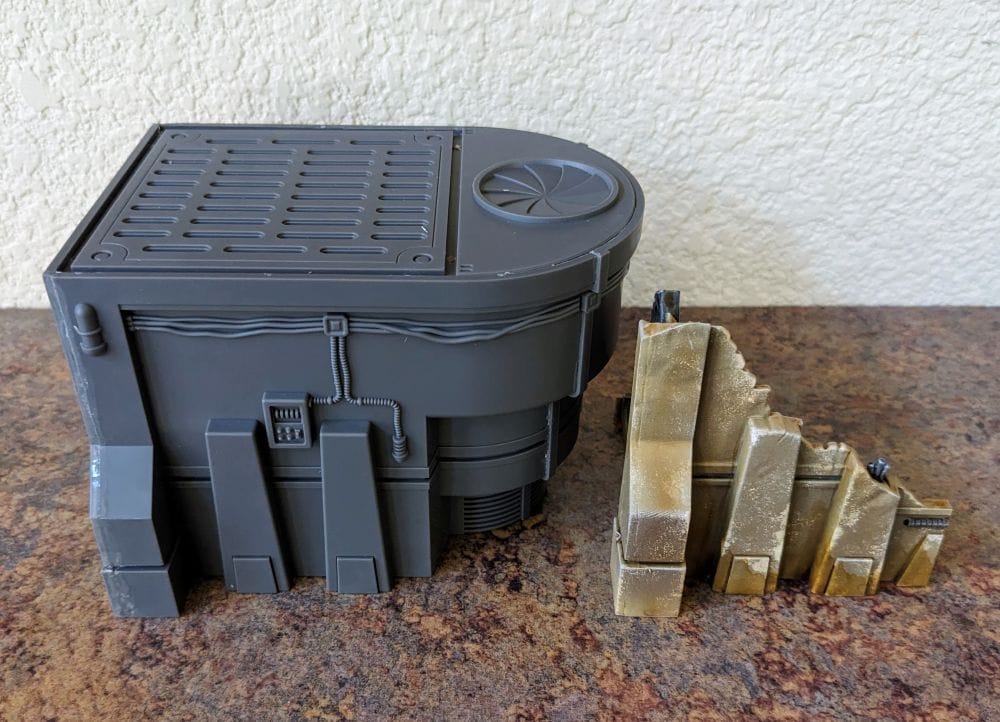
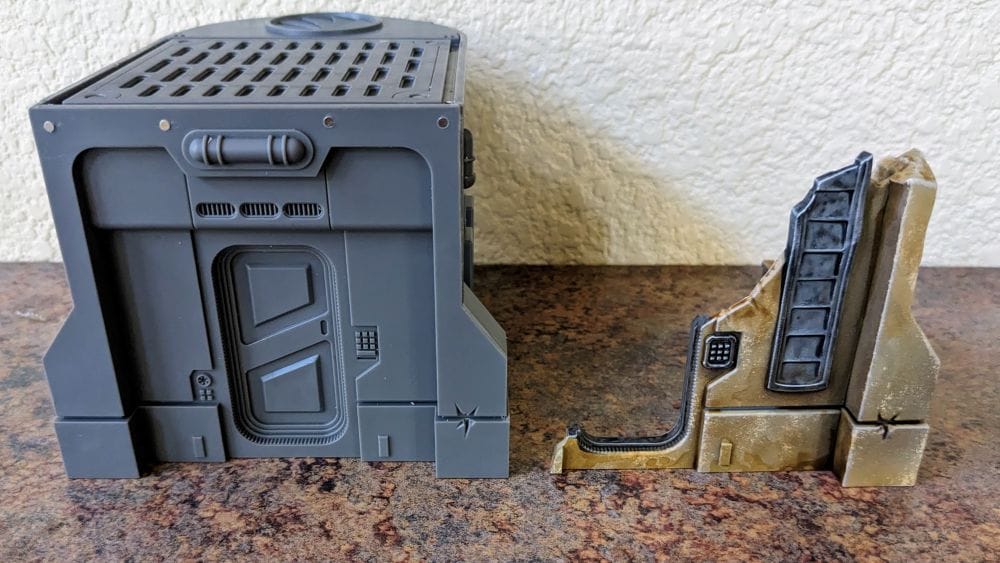
For Part 2 of our coverage of the Star Wars: Legion Outer Rim Battles Terrain Pack, I will be going through the step-by-step process to get them out of gray and ready for play. These tutorials are meant to quickly get your terrain pieces painted and make them stand out on the table - we’re not going for awards. Remember: done is better than perfect.
If you would like to see the unboxing and review, check out our Part 1 article here. I also go more into prepping these pieces for painting, which, generally speaking, makes priming and painting go so much faster.
I use a wide variety of paint lines, but the majority of what I use for quick painting is Games Workshop’s Citadel Paints and Army Painter. For this terrain, I also use generic Apple Barrel Craft paint, which you can find at Walmart or a local arts and crafts store. For this tutorial, I have included a list here of all the paints and primers I used so you have an easily-accessible list to refer to if you need to go shopping.
Tools - A cheap, large sponge that you can cut and tear up to get different shapes and angles
NOTE: You don’t need to use these exact paints, and can substitute with the paints and colors you have from other paint lines. Most of these colors are fairly generic, and I use them for multiple projects. I only recommend going out and buying a new paint or color if you think you’re going to use it for multiple projects in the future.
In general terms, getting the majority of a color for a model applied via a rattle can or airbrush saves a lot of time. Since this terrain is pretty much all of the same color, I wanted to use that to my advantage for painting. I chose to go with the box art on this terrain, which is Tatooine, but you could choose any planet you want and then choose appropriate colors to match.
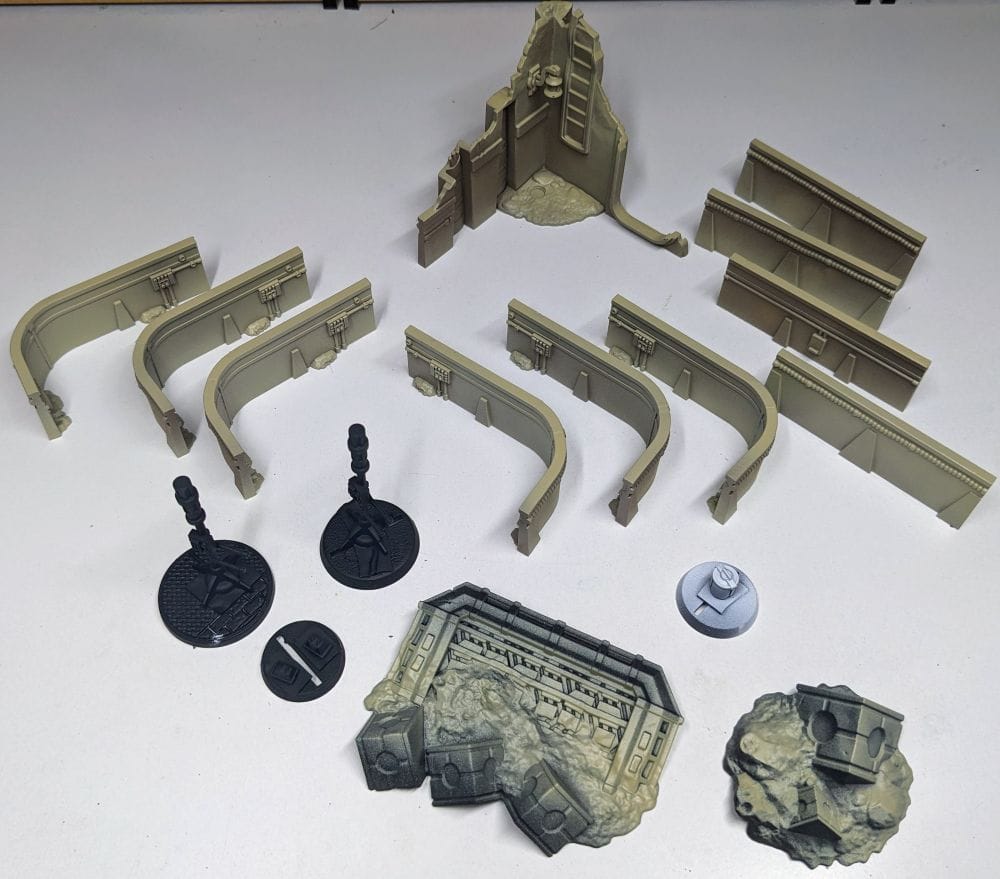
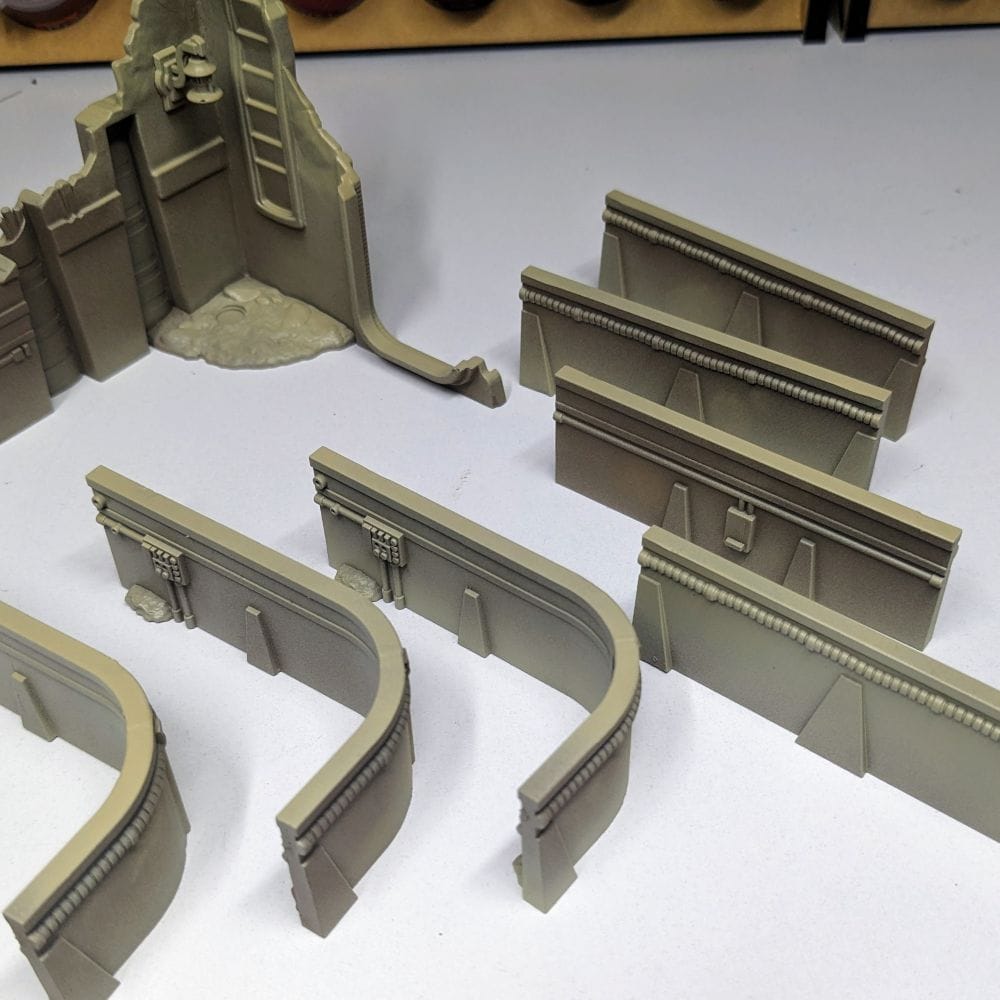
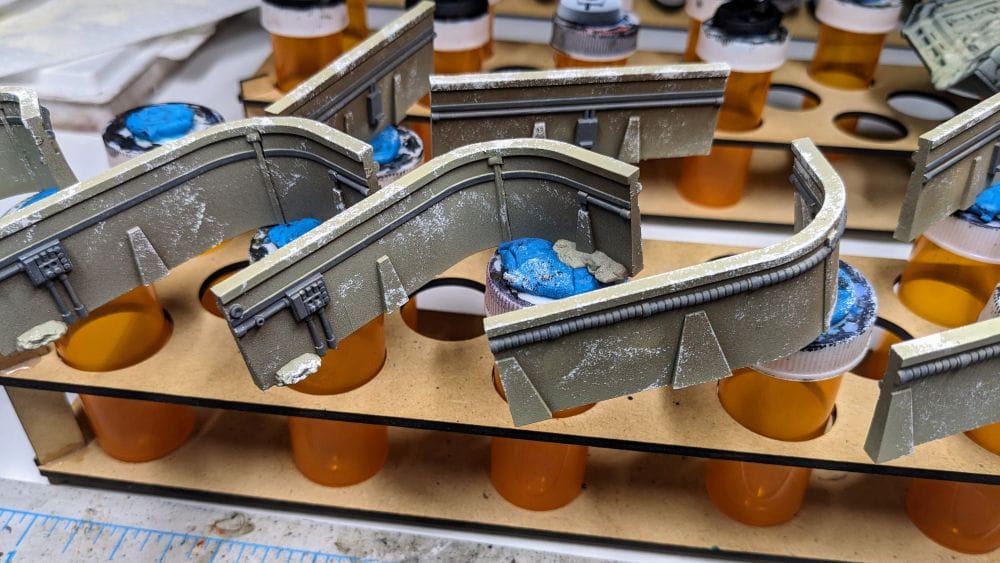
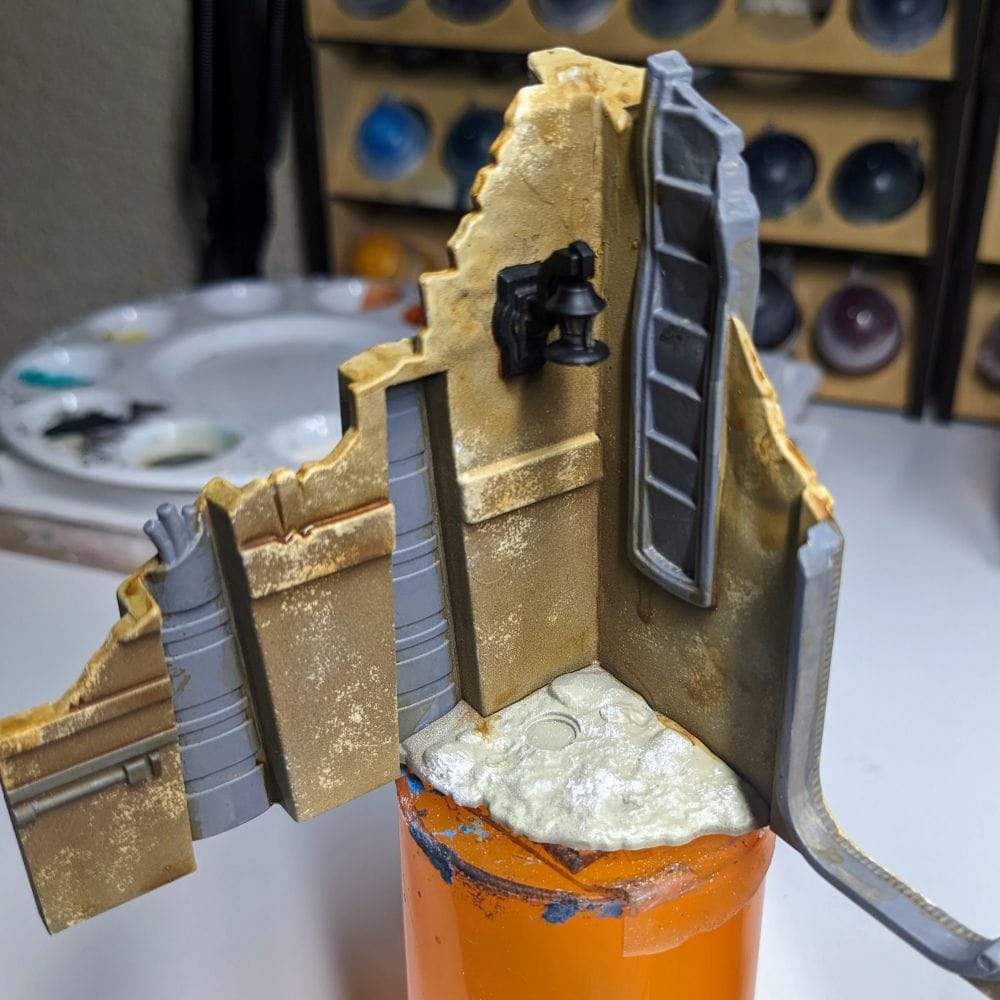
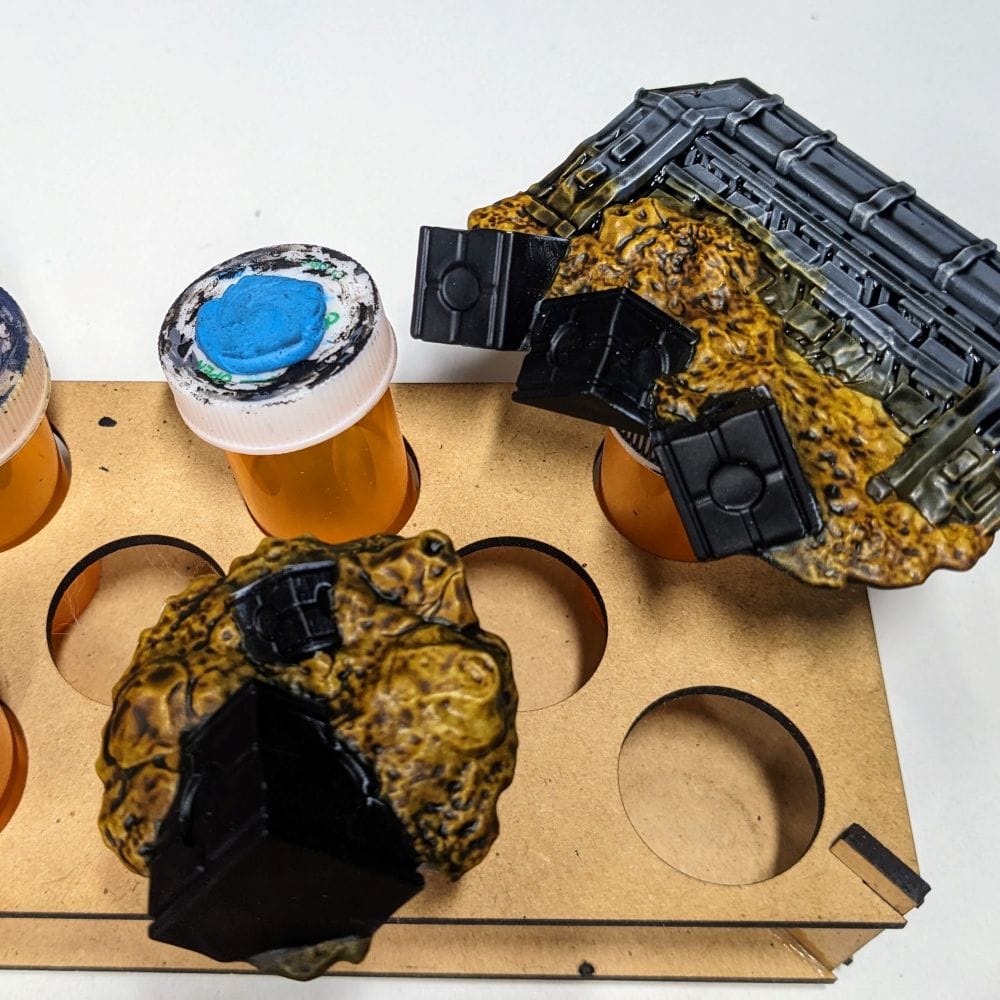
To start, I grouped the pieces by how I wanted to prime them. For the walls and corner piece, I did a zenithal prime on them; I used a bottom coat of Army Painter Leather Brown and an extreme top-down coat of the Army Painter Skeleton Bone. This helped give a little more dimension to the flat surface of the walls, much like you see in the box art. The power/light poles and mouse droids I primed just black. The camtono (space ice-cream maker!) I primed white. The boxes/rocks/metal I primed black, and then lightly primed Skeleton Bone in the general area of the sand/dirt.

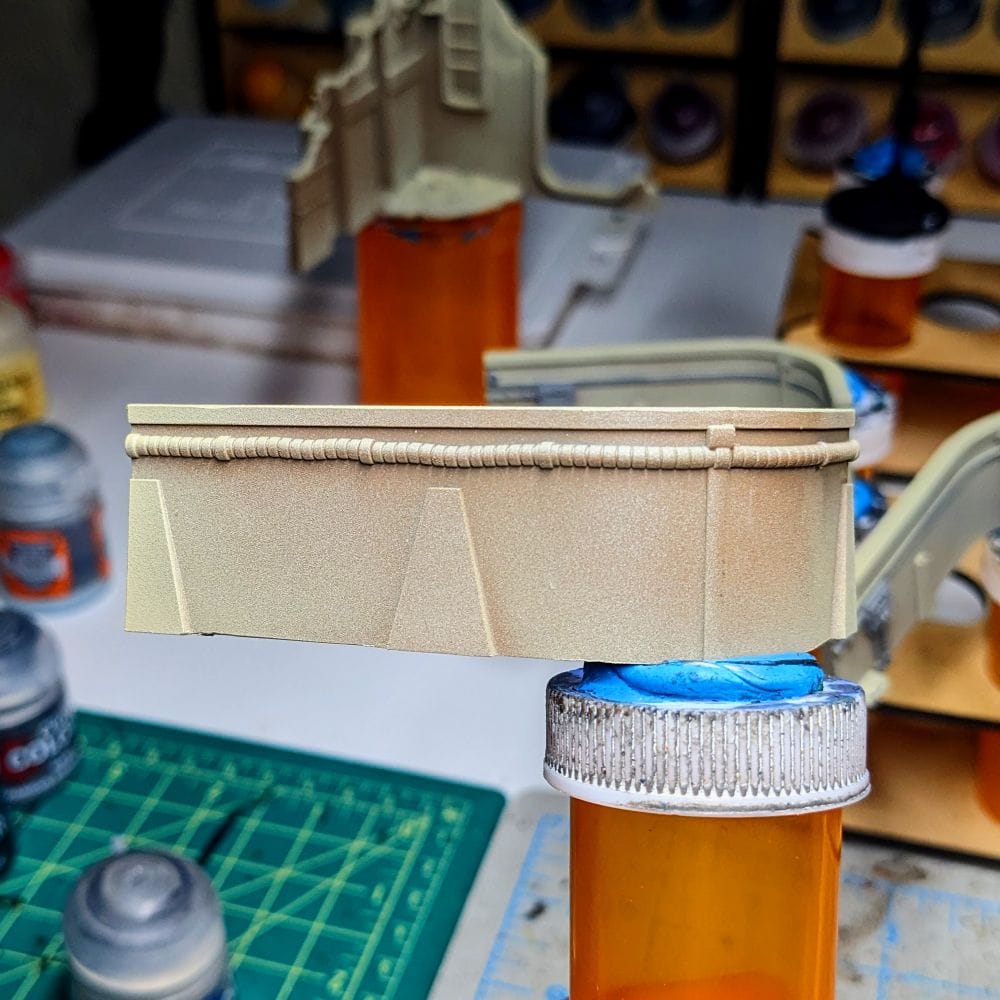
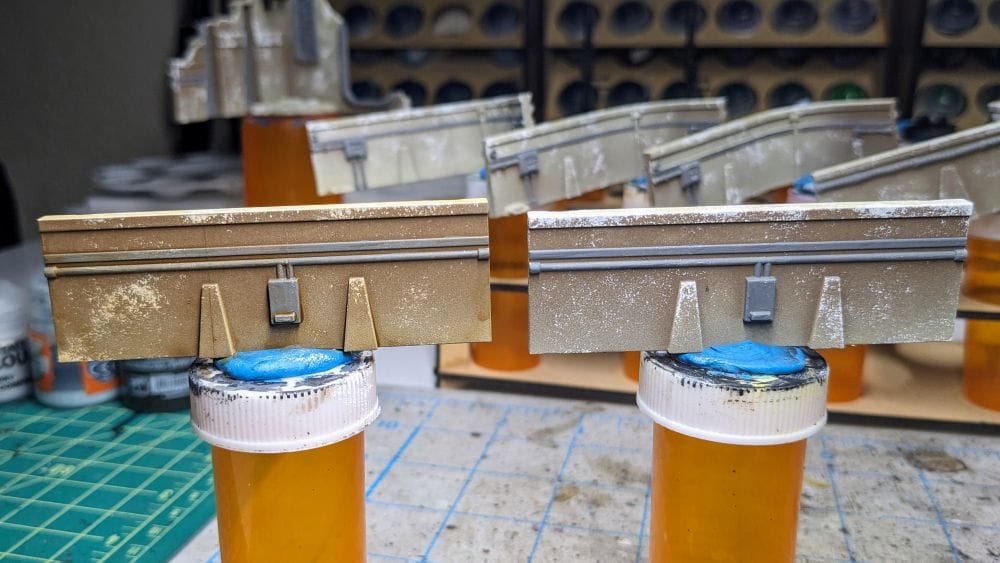
PAINTING TIP: Once I finish priming models, I affix them to some large medicine tubes with some double-sided tape or poster tack. There are official miniature holders and handles out there, but I just use these since they’re cheap, and sometimes I need multiples for batch painting. These or any holder allow me to easily hold the models without cramping my hands as well as turn the models freely to get a good angle to paint certain parts or areas.
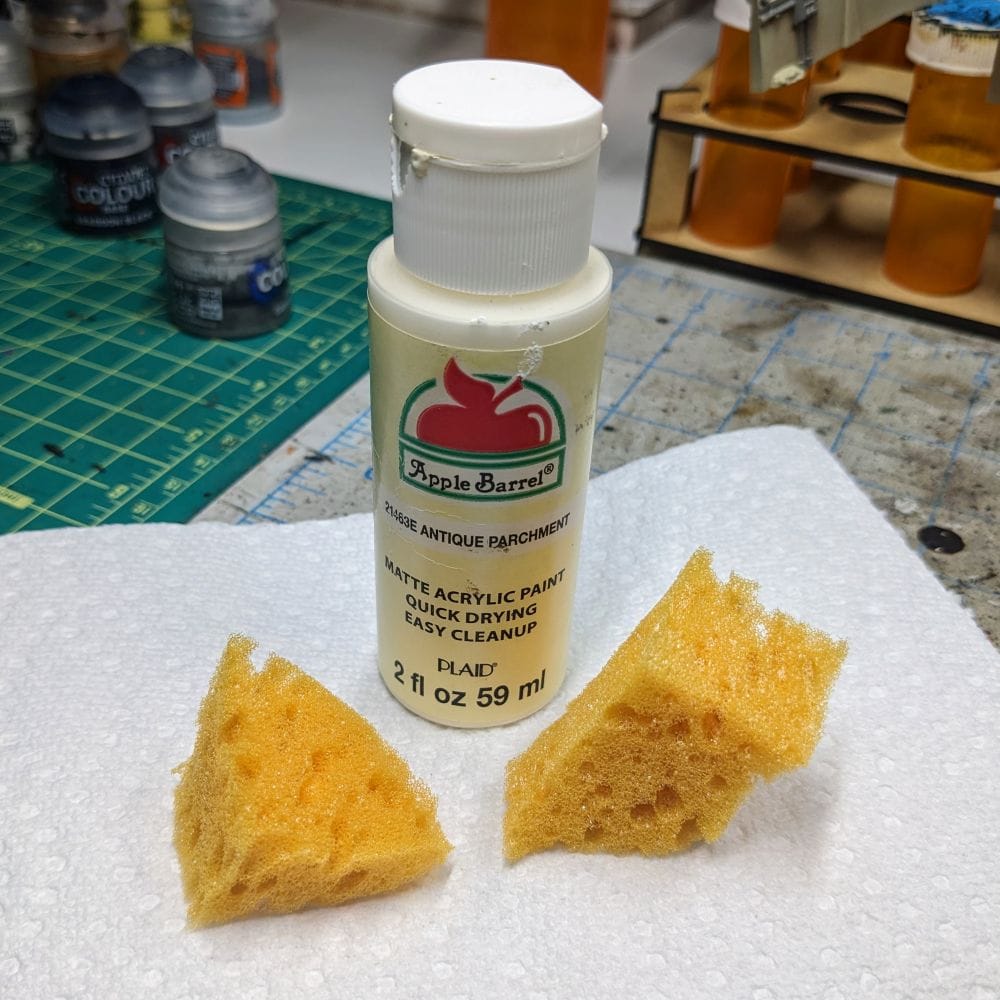
This can go quickly by using a light stamping technique with an irregularly shaped sponge. You can cut up a large, cheap sponge and then tear the corners to give the cut pieces different surfaces to apply paint from. Using the Apple Barrel Parchment White and the sponge pieces, I lightly coated the sponge with the paint and then ‘stamped’ my way around each wall piece. I rotated the sponge and used some different pieces to give a variety of designs and textures on the walls, adding a little more to the top of the walls.
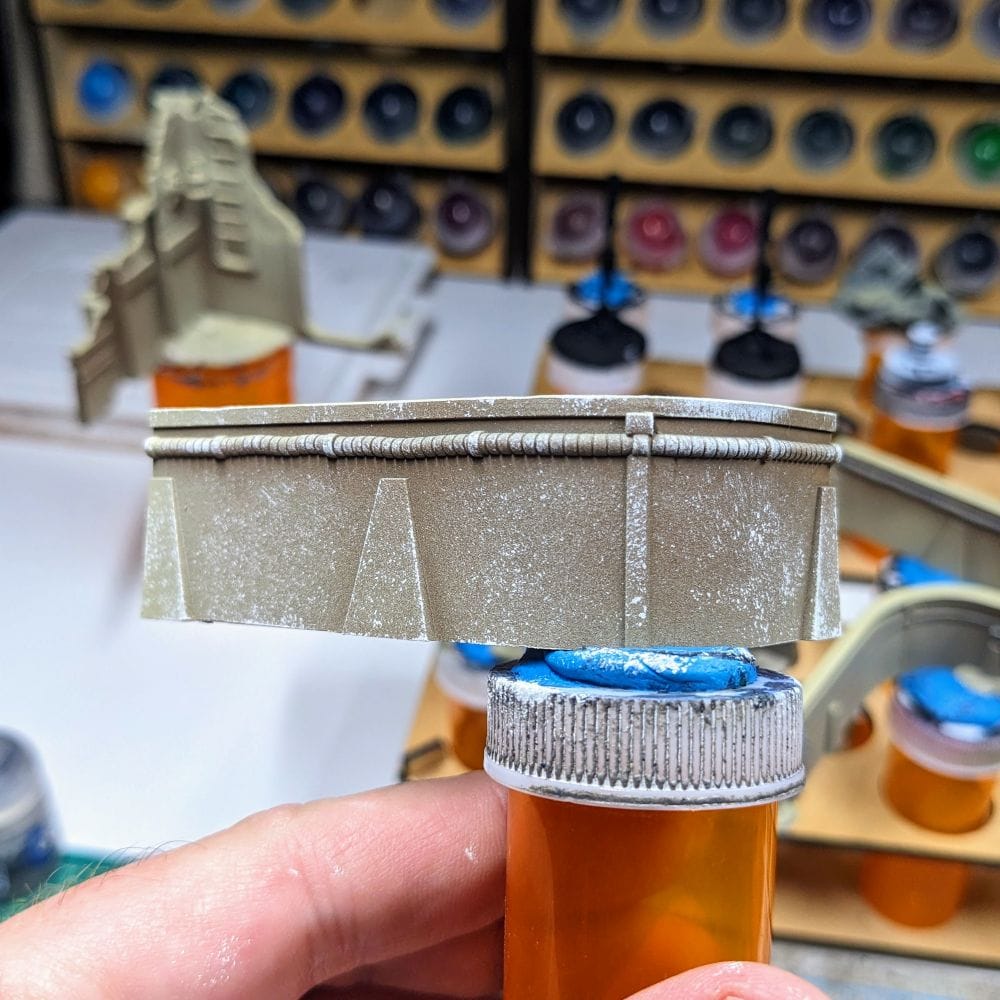
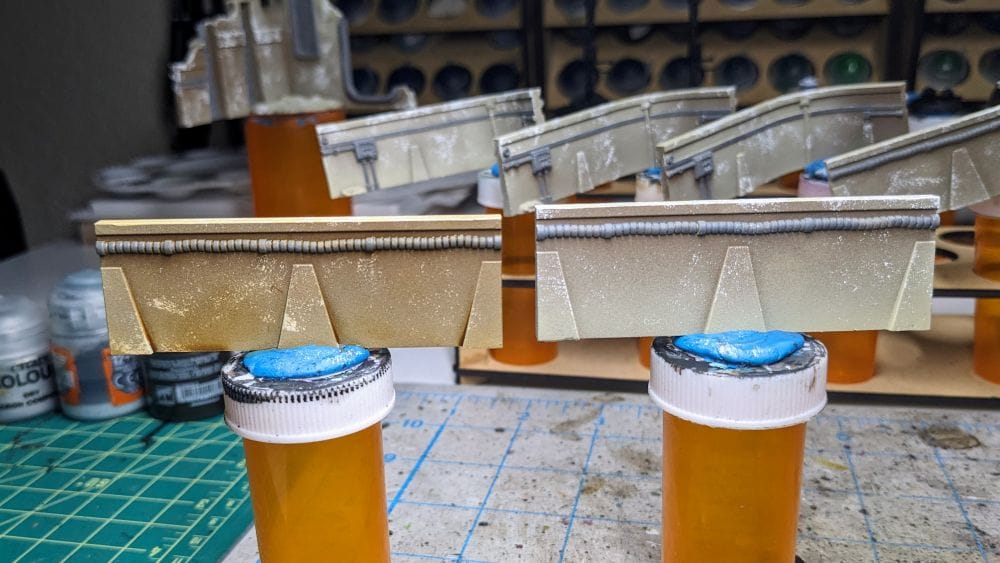
Before and After using the sponging technique to add texture
Once I was satisfied with the style, I went back through and painted each pipe and electrical box using Dawnstone. Since this is terrain, I didn’t stress about making sure it was perfect and just did my best to cover where I needed to.
To add a little more depth, I used Seraphim Sepia to add a little shade to the walls, making sure I wiped excess away from the top as I drew the brush down the wall. When possible, I try to make my terrain just a little darker than my miniatures to help make my miniatures stand out on the table next to the terrain.
The shade adds just a little more depth to an otherwise flat surface.
Once the shading was done, I applied Snakebite leather to the little rock outcroppings on the base of the corner wall pieces. Lastly, drybrushed some Terminatus Stone to the top of the rocks and the electrical cables/boxes.
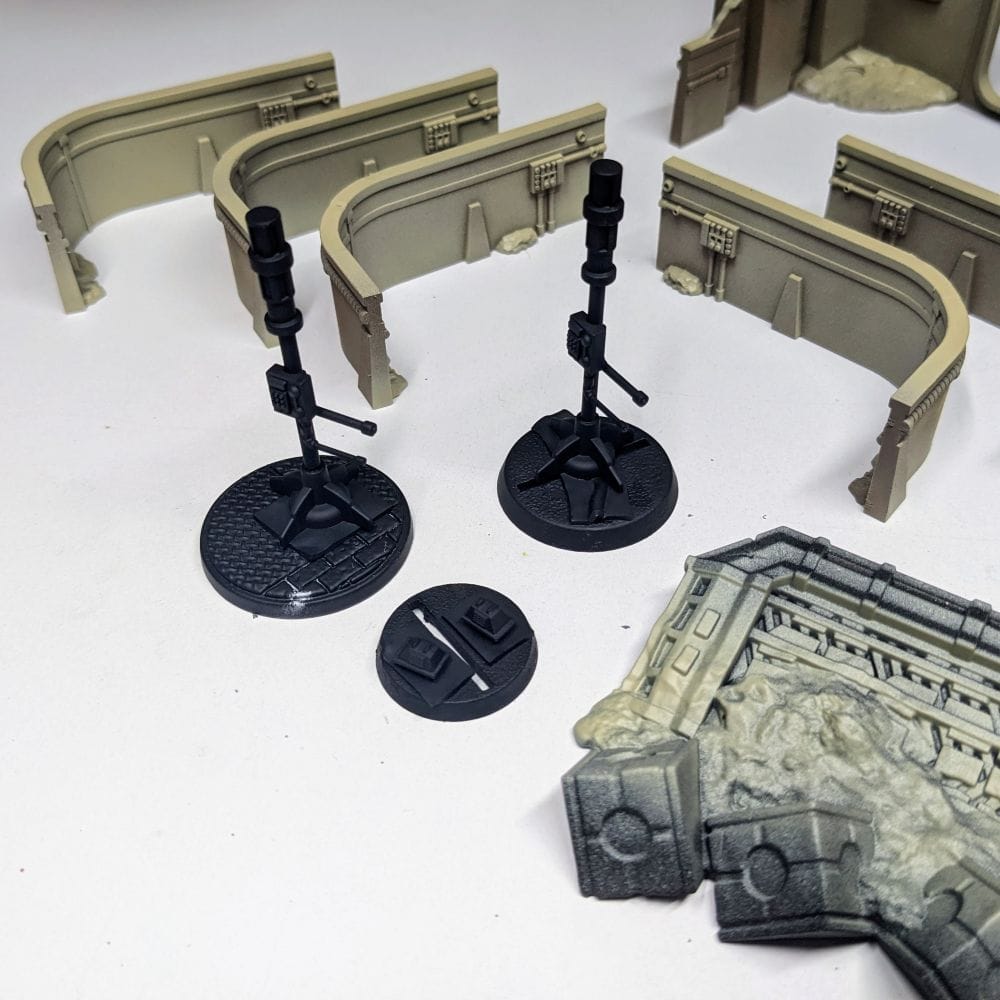
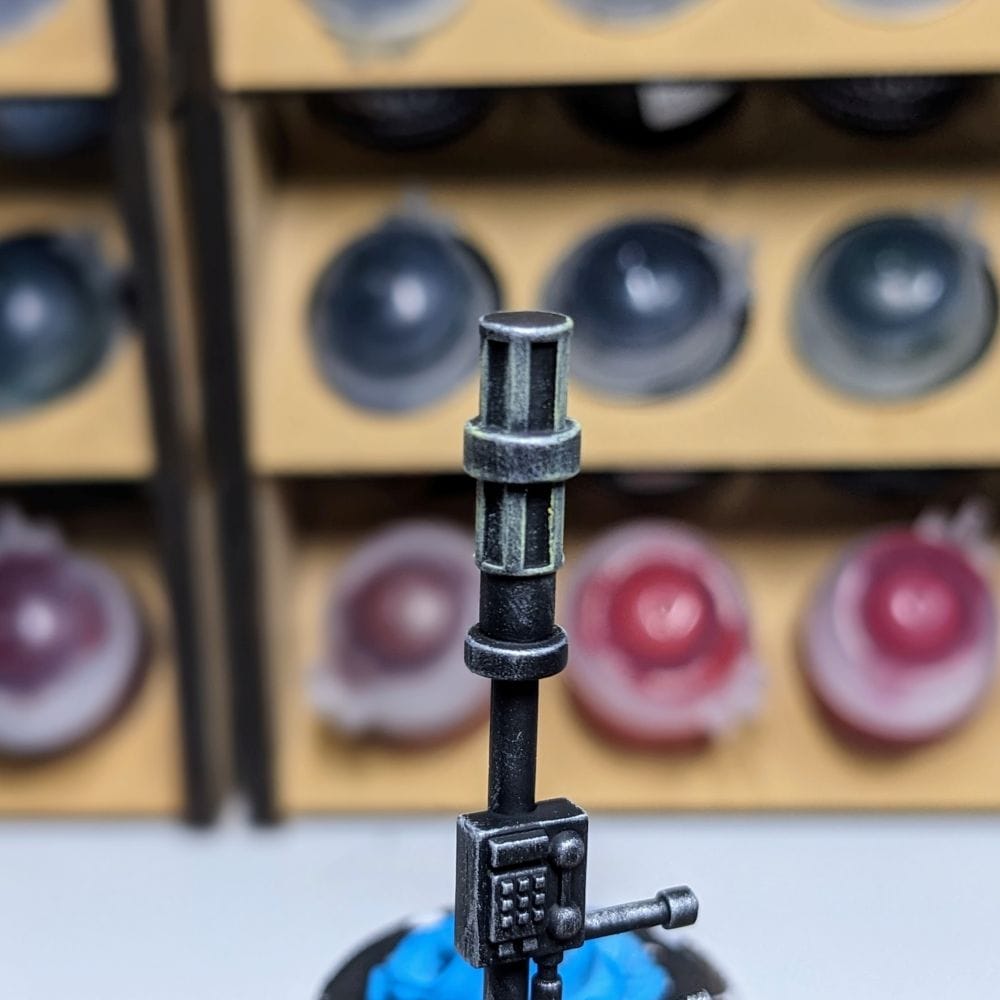
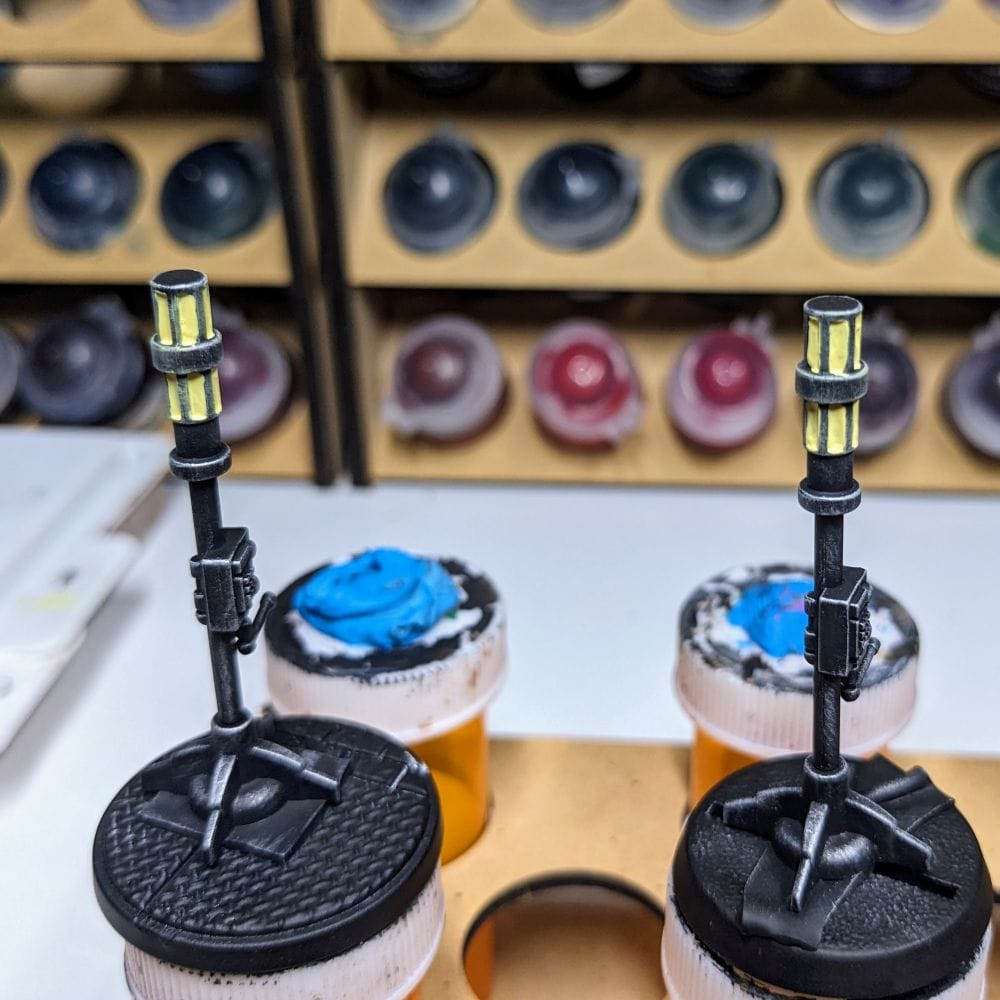
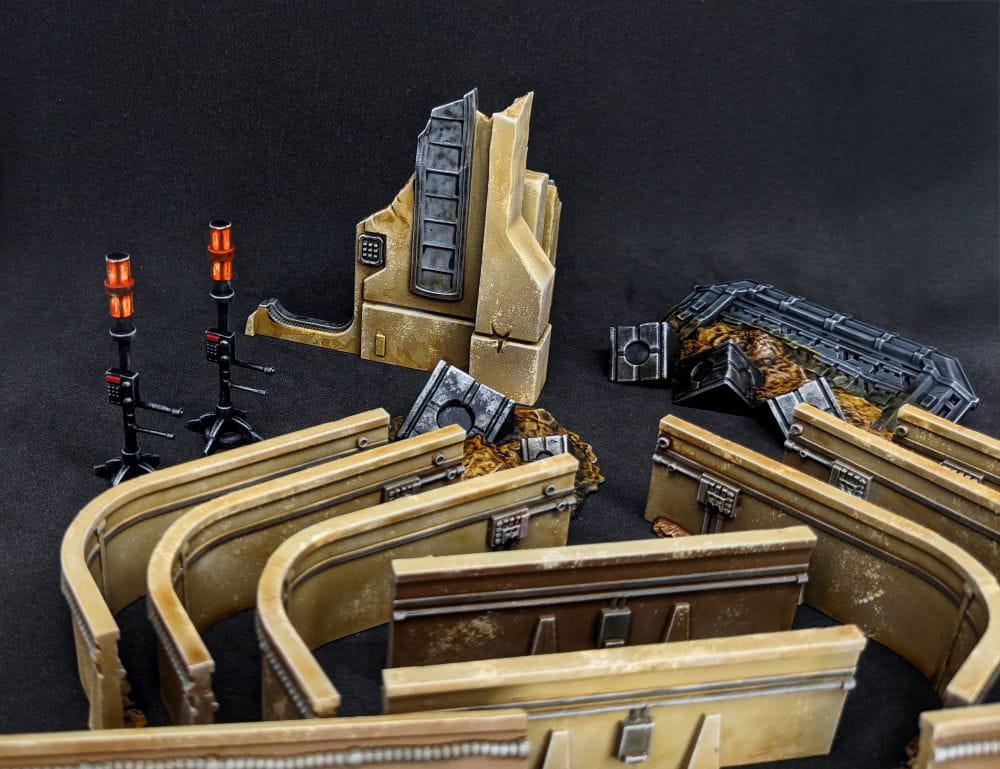
To make things very easy, I chose to make the power poles a black metal. Simply, I primed black, I drybrushed Necron Compound over the top.

ORANGE GLOW OSL (object source lighting)
To show that these poles are still active, I wanted to show the lights at the top being on using a technique called object source lighting. I lightly drybrushed Hexos Palesun around where the light would be coming from. Then, I applied some uneven, thin coats of Dorn Yellow to the part of the pole that has the glass on it. I used some thinned-down Magmadroth Flame over the yellow and wiped some of it away (using a brush) from the center to help bring out the yellow. I intentionally let the Magmadroth get onto the metal parts with Hexos Palesun to help create an orange glow from the light, leaving the brightest part of the light at the center of the lights.
It’s by no means pretty, but it does give a simple indication that these poles are powered.
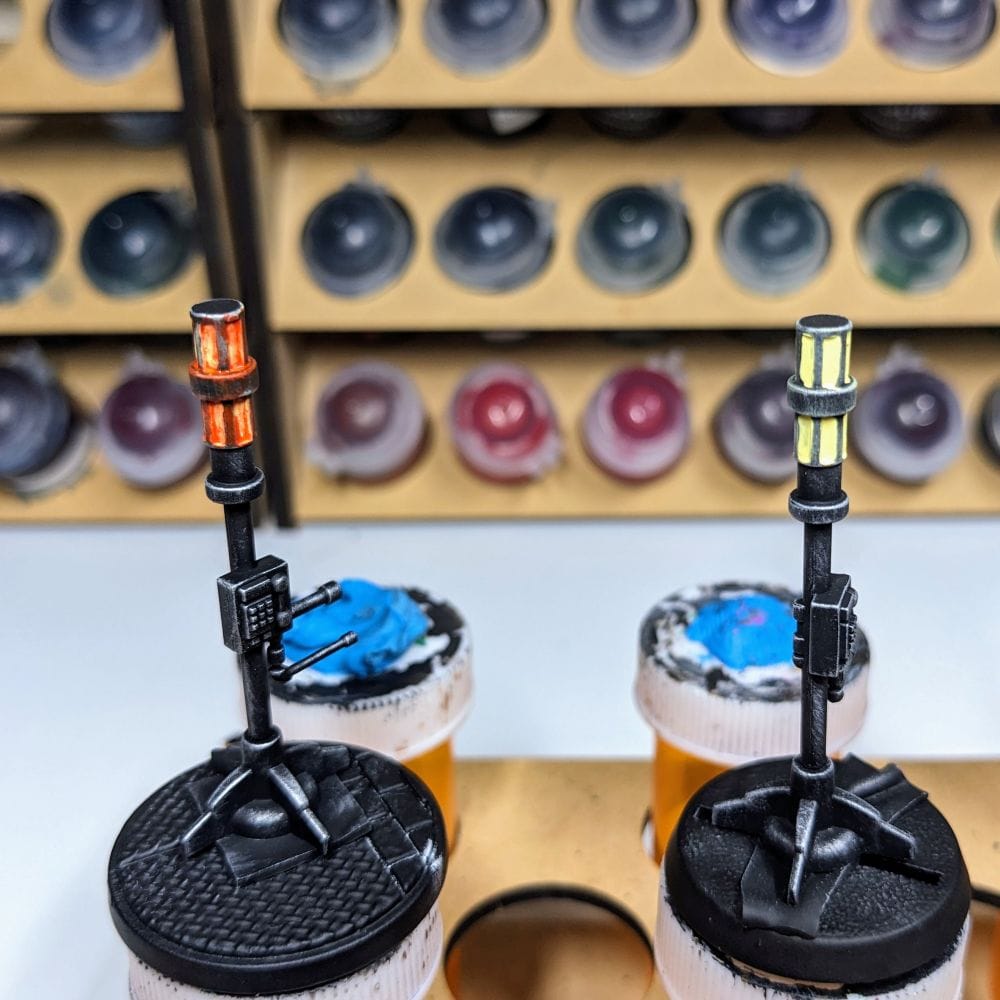
Drybrush, then solid color, then orange. It looks better from far away, which is the goal.
BONUS: I added Evil Sunz Scarlet to the control panel to help break up the design of the black/silver of the pole.
Camtono - Since it was primed white, I used a little Nuln Oil in the recesses to give it a little more depth.
Mouse Droids - Like the power poles, I drybrushed silver over the top of them.
Both of these will get glued to the corner once that’s been painted.
Like the walls, I started by sponging the Parchment White. I chose some points on the wall (door frame, door keypad, window shades, and internal metal supports) to paint in Dawnstone, applying two thin coats. I then used Seraphim Sepia to darken up just the tan portions, and used Nuln Oil to darken the metal bits.
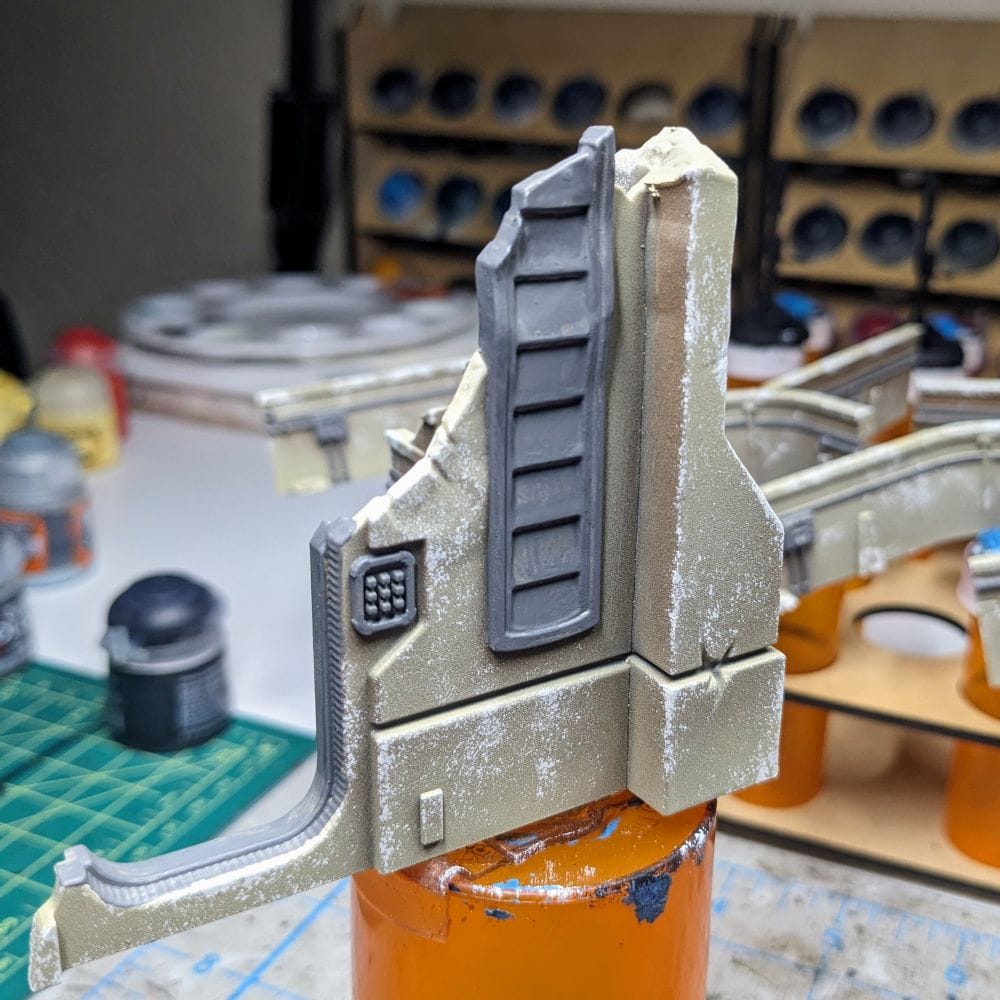

NOTE: I was not being very precise in coverage of the shade for two reasons: it’s destroyed terrain so it shouldn’t be clean, and also the two different shades blend together to help make the walls and metal bits seem more cohesive.
With the Terminatus Stone, I drybrushed over the whole piece, tan and gray, to give the shapes a little more dimension. Additionally, a demolished building isn’t supposed to have different shades of dust to it, so it’s ok that everything is highlighted with the same color.
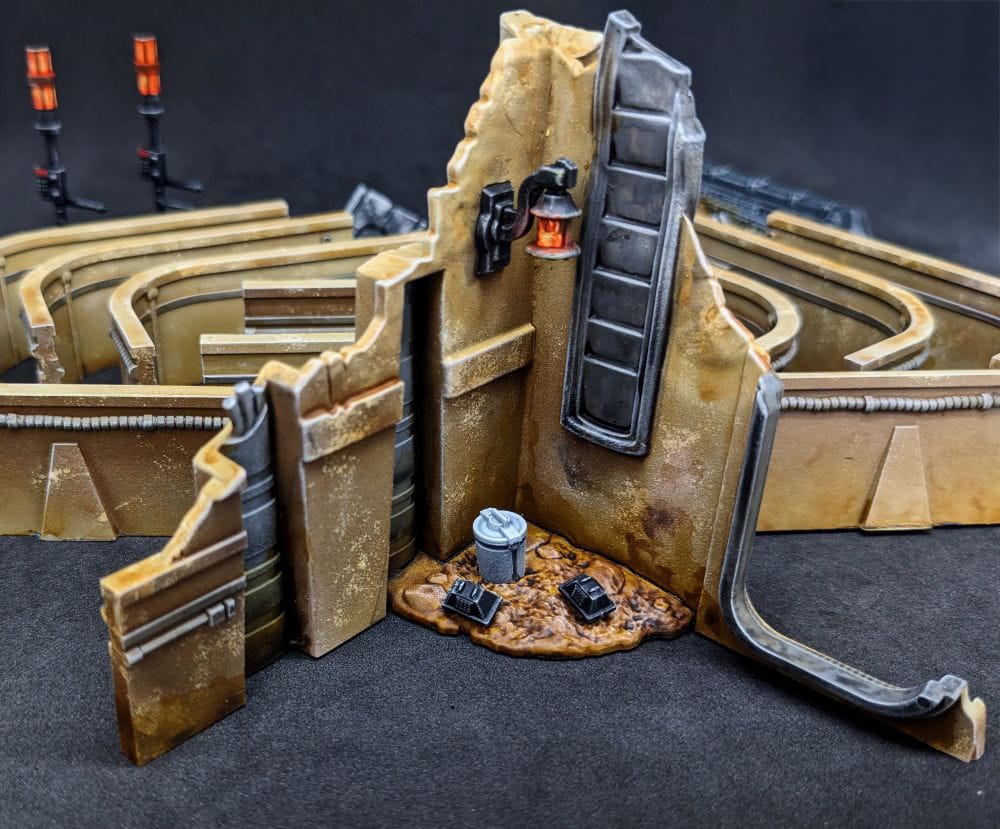
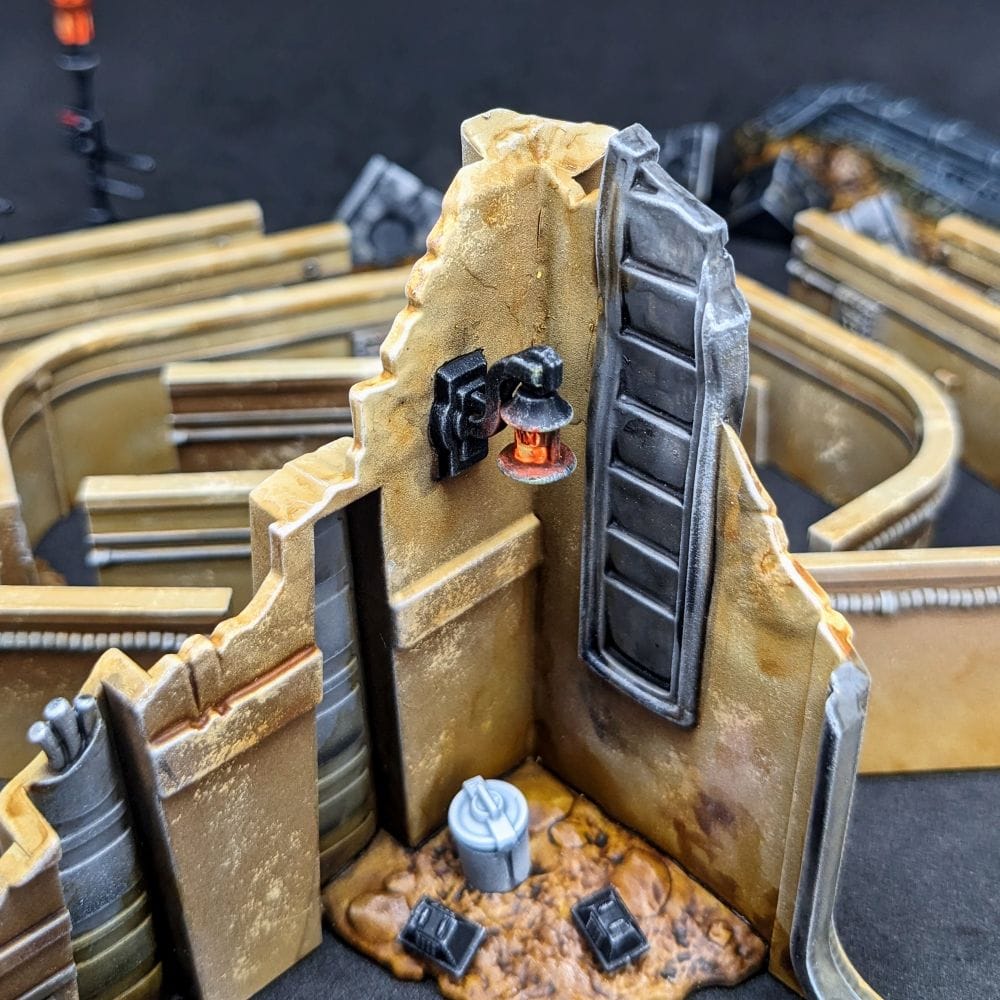
I wanted to show that there was still a little power left in the lantern, so I started by painting it and the fixture using Black Templar to give it an uneven appearance. I applied a light drybrushing of Necron Compound, as that will be “underneath” the OSL (object source lighting) glow of the lantern.
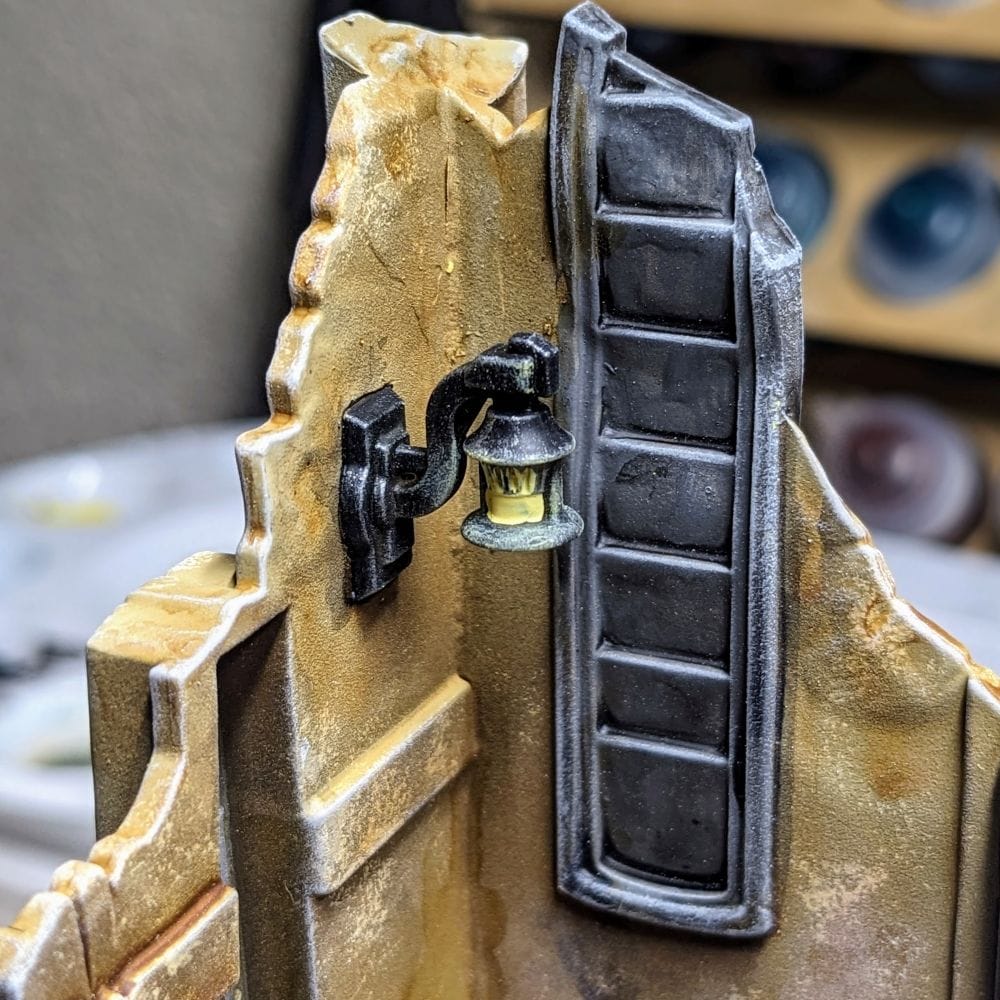
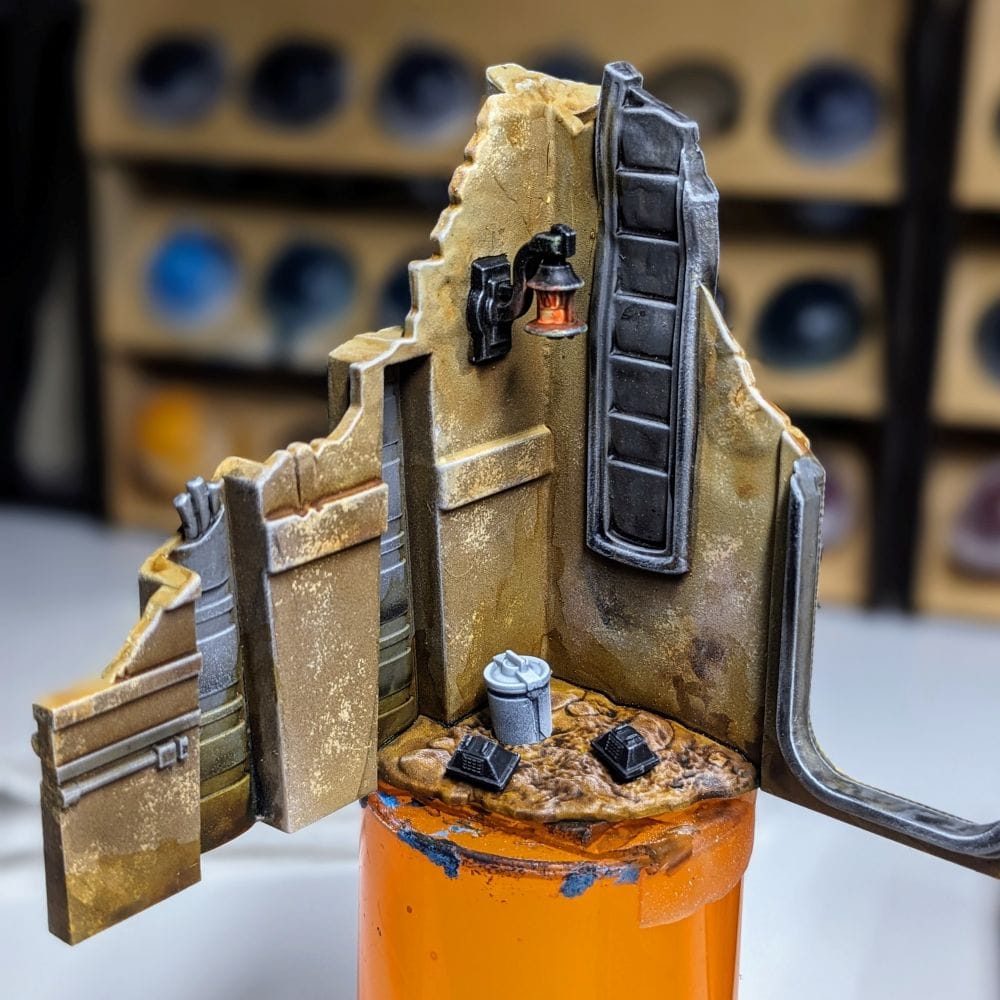
Like the power poles, I applied the Orange Glow OSL to the lantern in the corner, giving the impression that there is still a little power left in this demolished corner.
At the base, I covered the rocks in Snakebite Leather and a light drybrushing of Terminatus Stone. When it was all done, I glued in the camtono as well as the mouse droids, because those little robotic rodents would get absolutely lost on the battlefield if they weren’t attached to something.
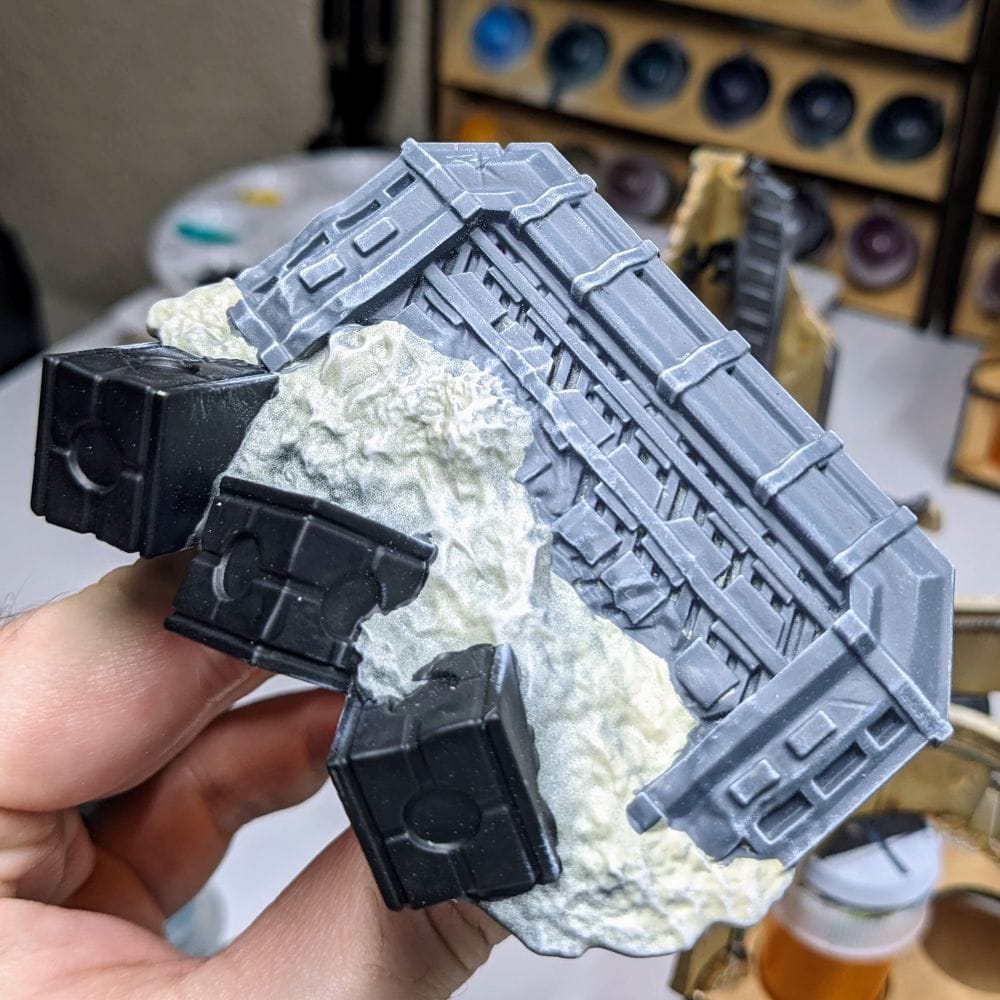
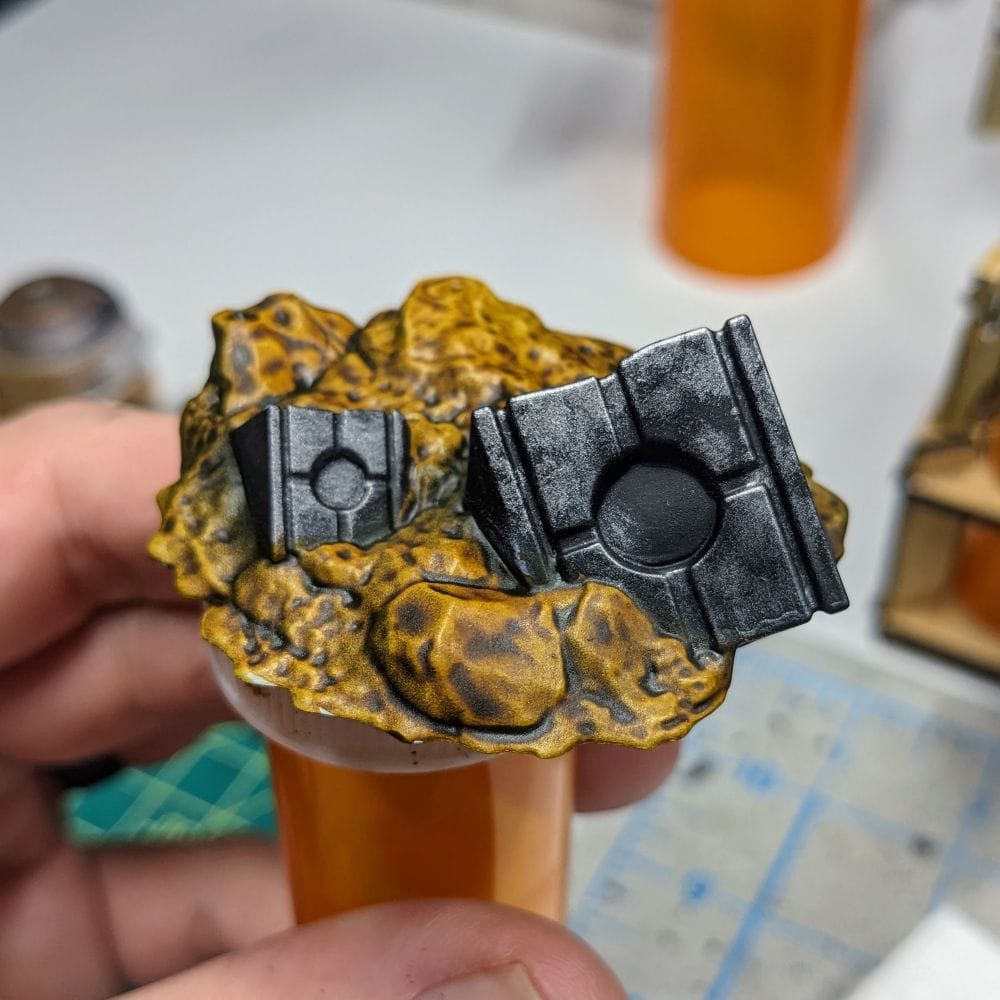
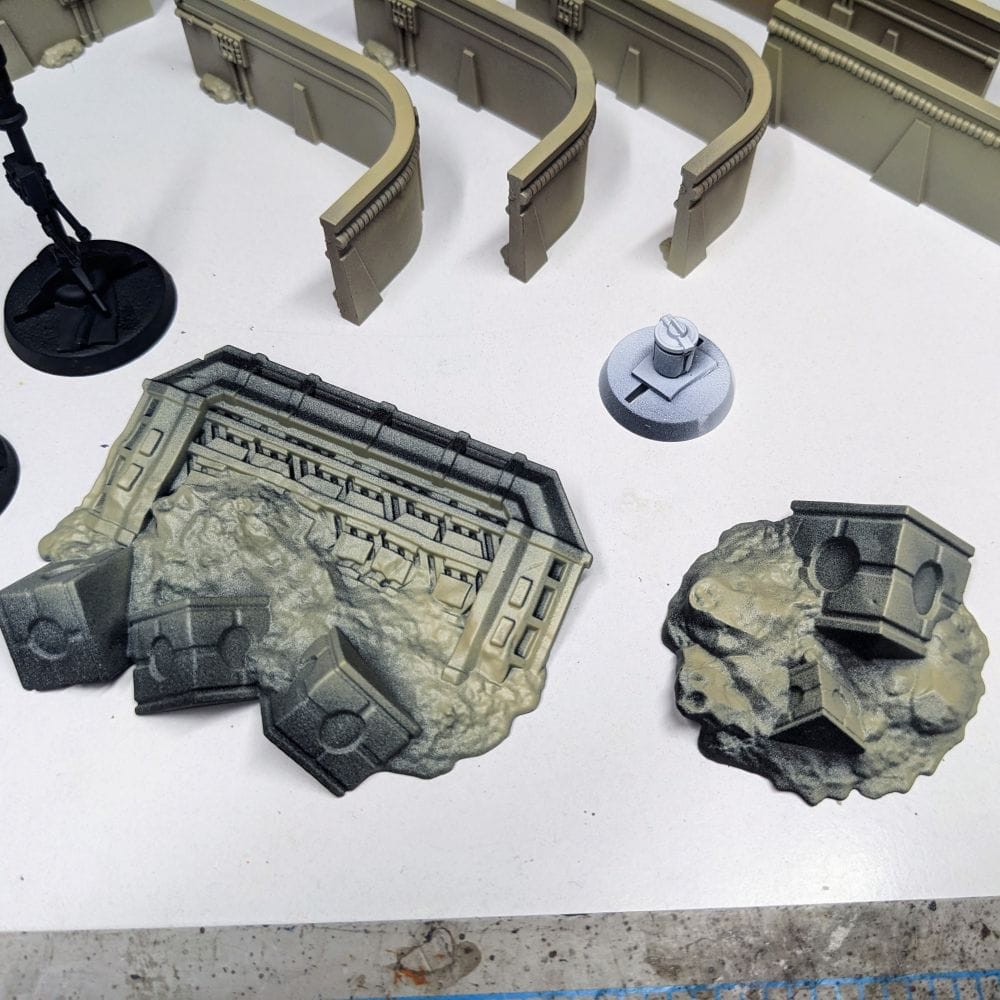
Lastly, I painted up the debris bits. Since these were unevenly primed, I blocked out the colors of each element in the debris: Abaddon Black for the Boxes and Mechanicus Standard Grey for the buried metal piece. I drybrushed a little Necron Compound on the door before using Nuln Oil to heavily paint the submerged metal.
Continuing with the theme of black metal, I loosely and unevenly brushed Iron Warriors over the boxes, and also applied it to the metal door to help give it a metal feel over the gray. I then drybrushed Necron Compound on the corners/edges of the boxes and walls to give them a few more highlights.
Using Snakebite Leather, like I did with the walls and corners, I painted the sandy parts of the debris, drybrushing Terminatus Stone over the top. I went a step further and dragged some of the Snakebite Leather up onto the submerged metal to show it had some sand. After all, a buried piece of metal isn’t going to be clean.
As I do with all of the models I paint that I also play, I apply a protective clear coating over the paint. This helps preserve the paint on the model and keeps oils from the hands from rubbing off the paint as you continuously touch the models during games. There are many different kinds of clear varnishes to use, but I typically use any matte or anti-shine varnishes, as satin, semi-gloss, and gloss tend to distort the colors of the models (not to mention that most models aren’t supposed to be shiny).
Brands that have been reliable for me are Krylon Matte Clear Spray, Rustoleum Matte Clear Coat, which is slightly glossy, and Testors Dullcote, although the latter can be expensive and difficult to find. For a coat with no shine that really enhances the colors, I use the AK Interactive’s Ultra Matte Varnish, applied with an airbrush.
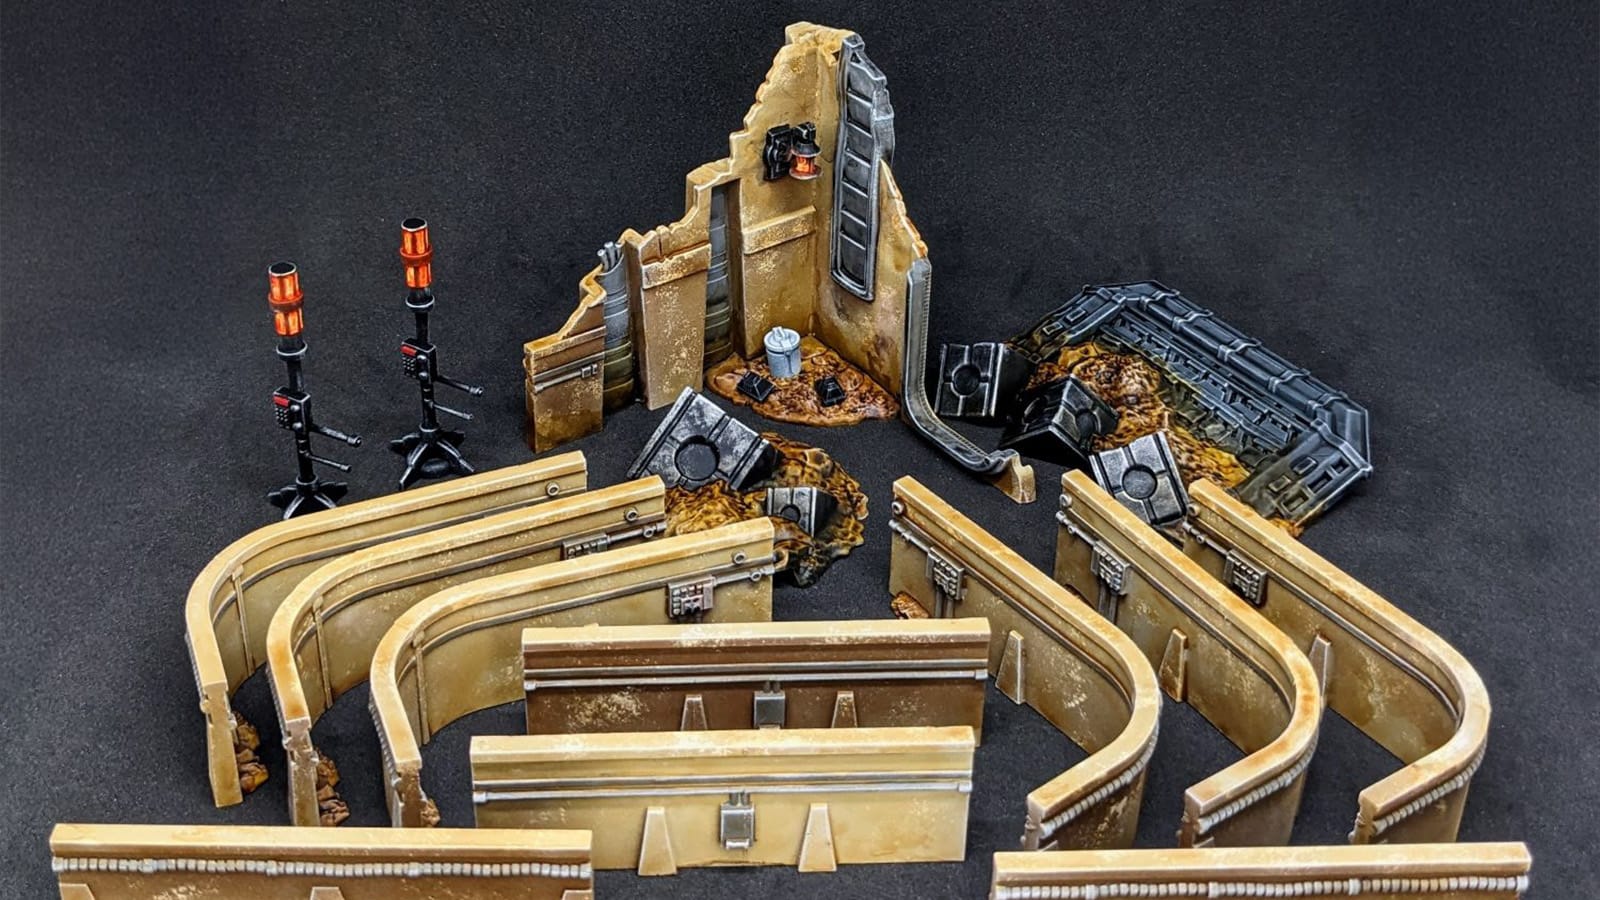
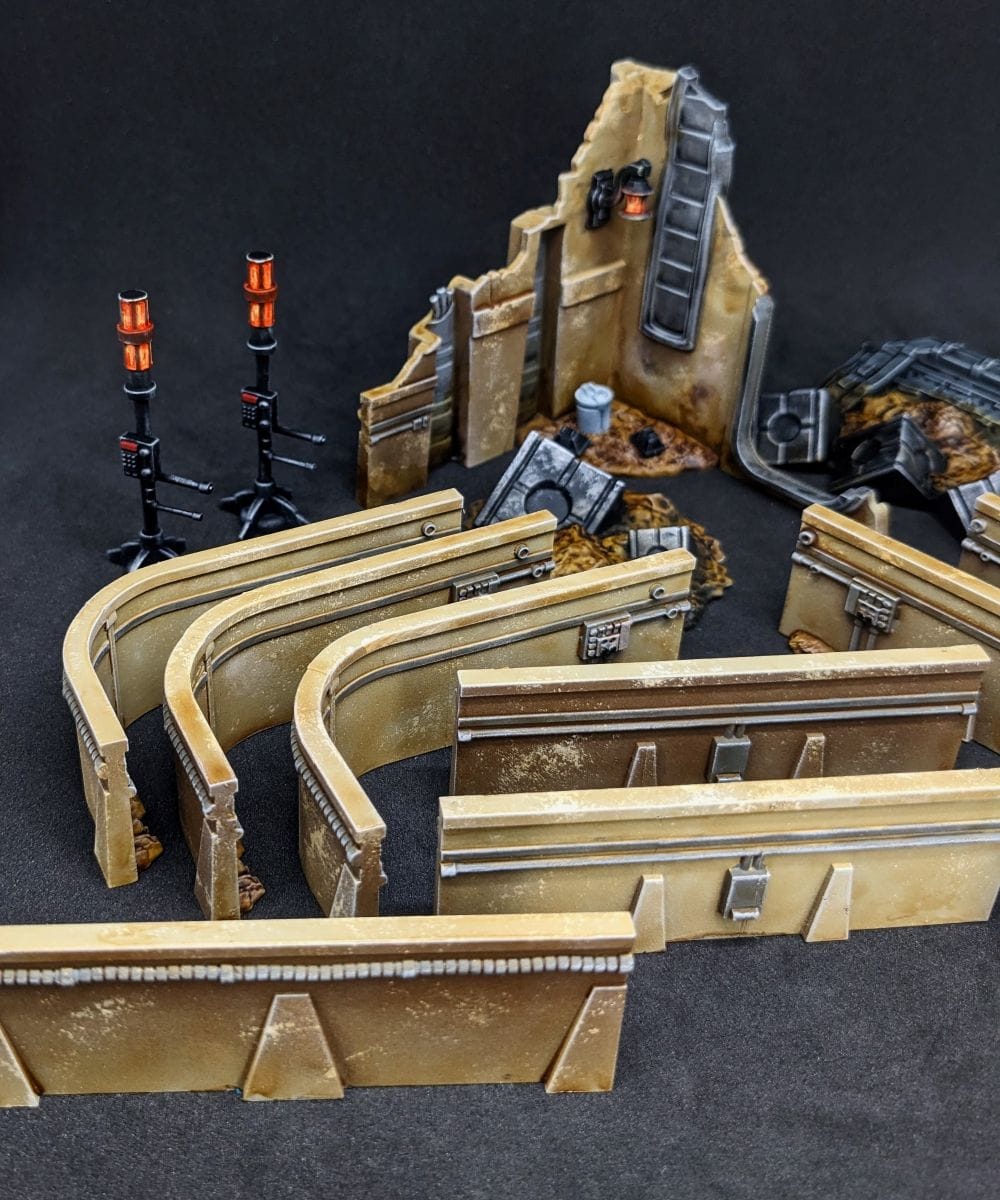
Quick, simple, and dirty, this terrain was very easy to paint. Drybrushing and washes make painting terrain like this go very quickly. Due to the hard plastic, the edges were very easy to discern, which made painting the gray paint very easy. As with all terrain, this Outer Rim should not be super detailed or take you a long time. I've added the OSL to make it pop a little more, but leaving it a metal color is more than fine.
These Crab Droids were a lot of fun to paint, simply because it takes so little effort to make them look good and ready for the tabletop. I think I spent more time on water for washes, contrasts, and water effects to dry than I spent painting the model. I was very happy with how the basing came out, and am excited to see them in battle!
Total Paint Time (with priming) - 2-3 hours
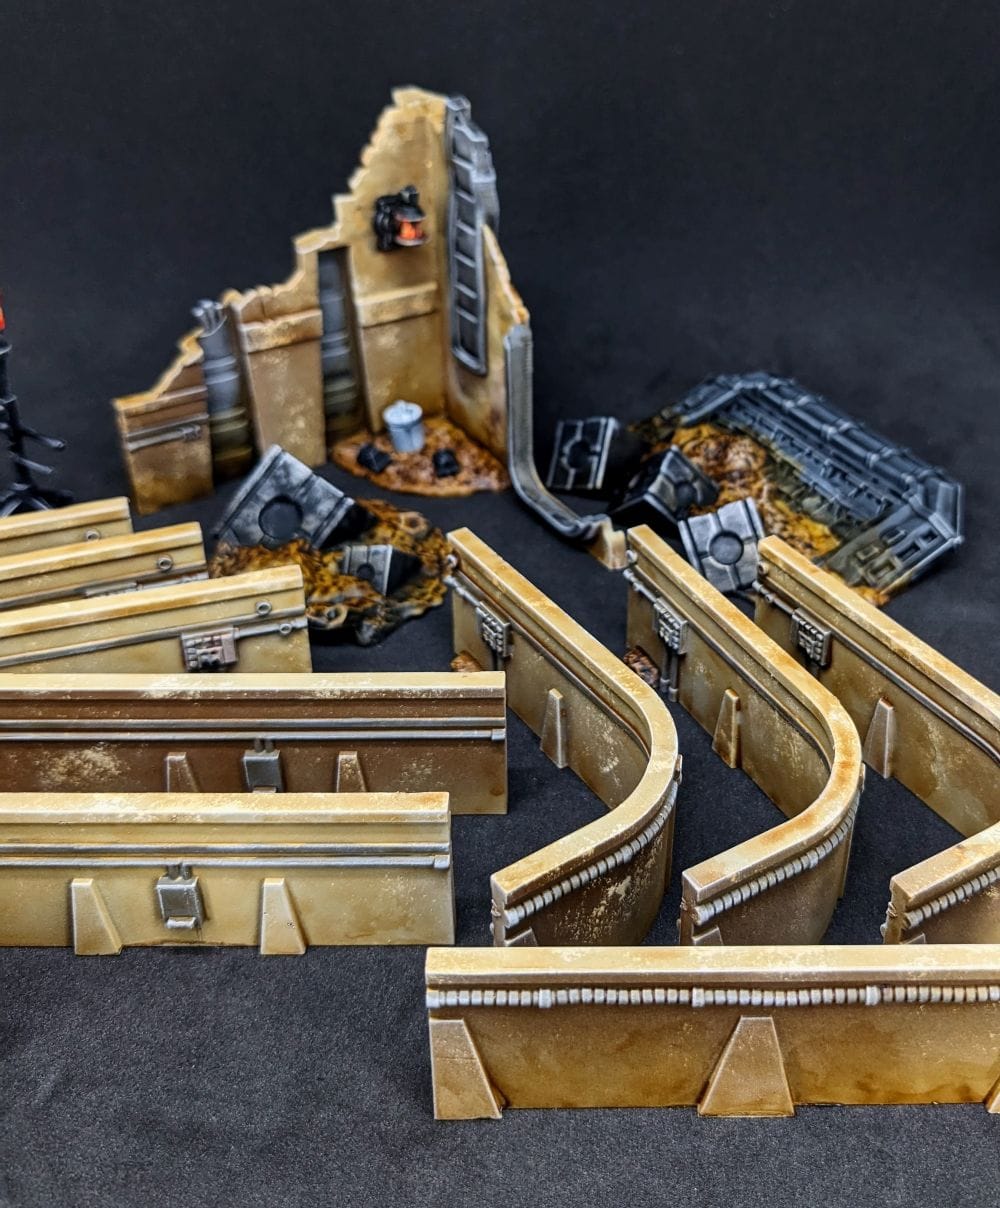
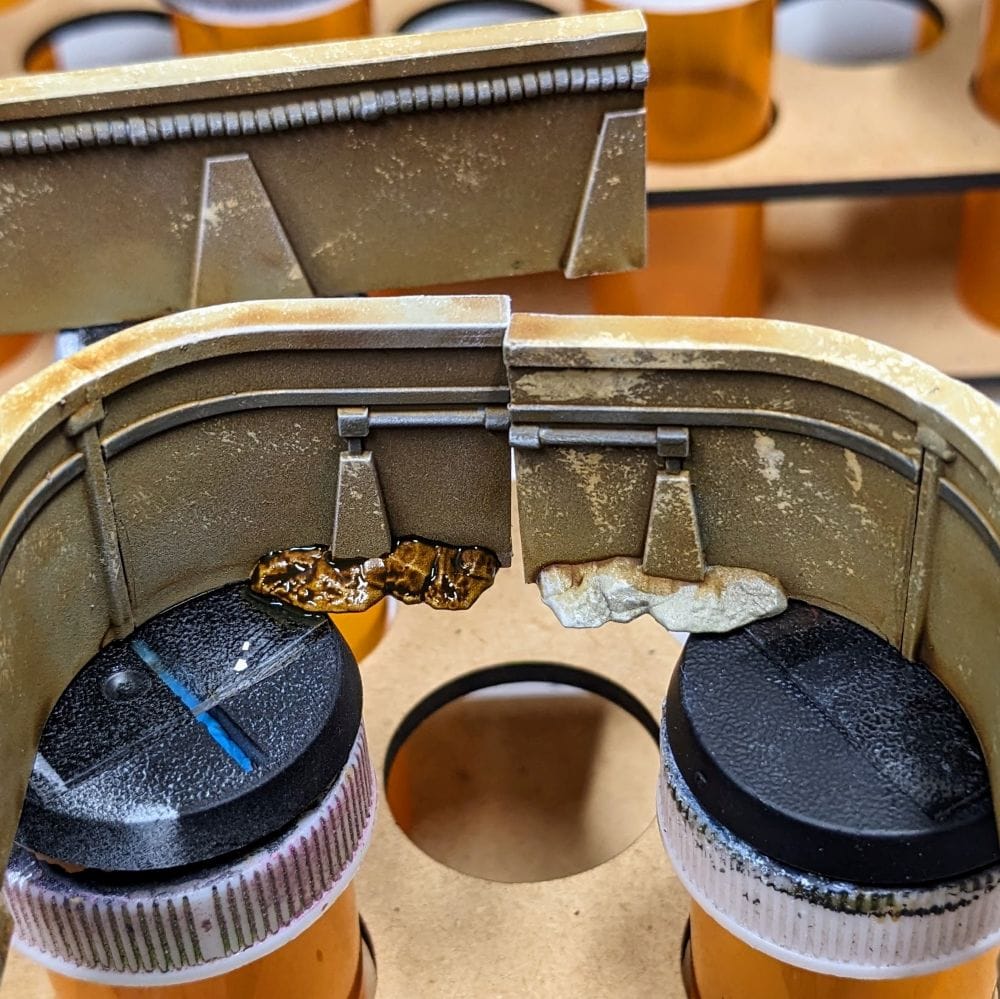
DISCLAIMER: After several frustrating attempts to get good photos of everything, I decided to glue the standing walls together after everything was painted and sealed. Unlike the corners, there is no sand or rock debris and the base of the wall to give it any kind of support. They would easily get knocked over during a game, either by a slight bump of the table or by a piece hitting it. So, I glued the four straight segments to two of each of the turns.
Coincidence?
EDITOR’S NOTE: While working on my Star Wars: Shatterpoint - Take Cover Terrain Pack, I noticed a remarkable similarity between the destroyed corner and one of the buildings. Scale-wise, they are identical, so the Outer Rim terrain could really be used for either game.
Or… could Shatterpoint terrain be used for either game?
Don't forget to follow Gaming Trend for more Learn to Paint and Star Wars: Legion articles. We’d love to see how you painted up your models so share your work with us in the comments!