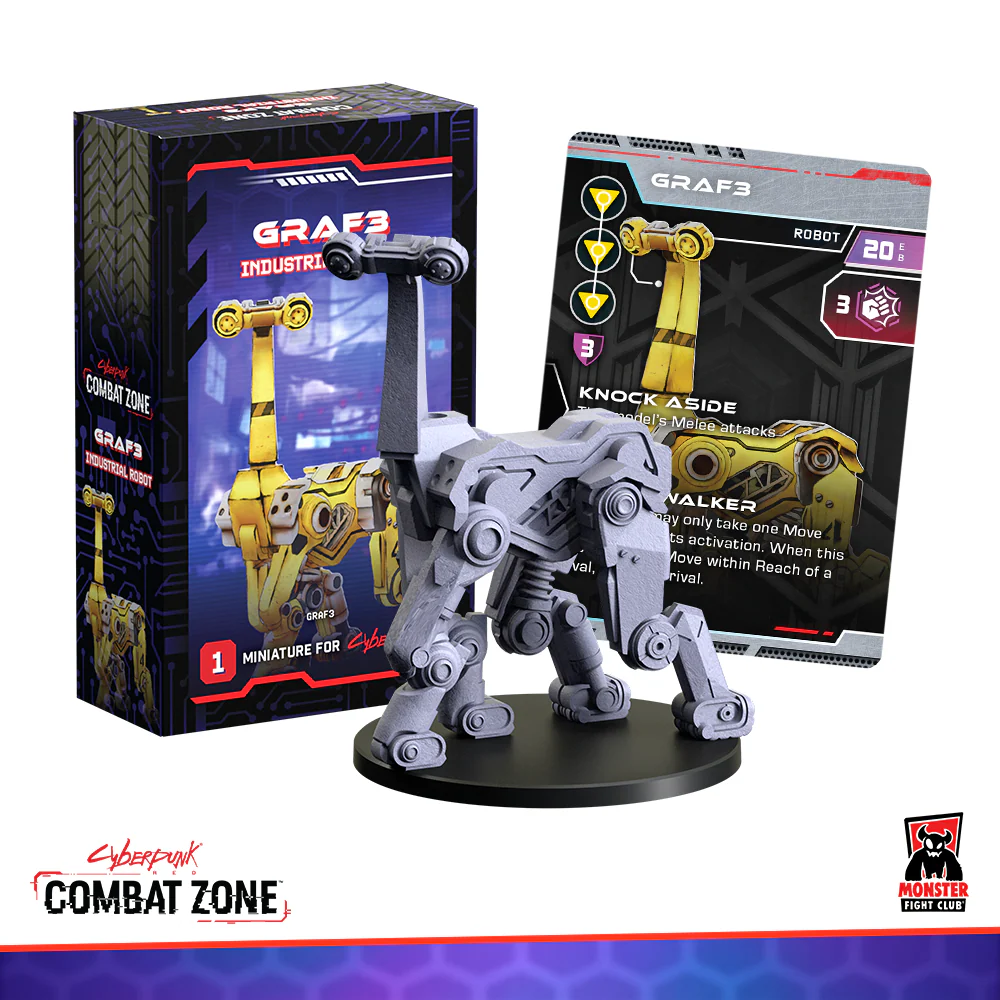
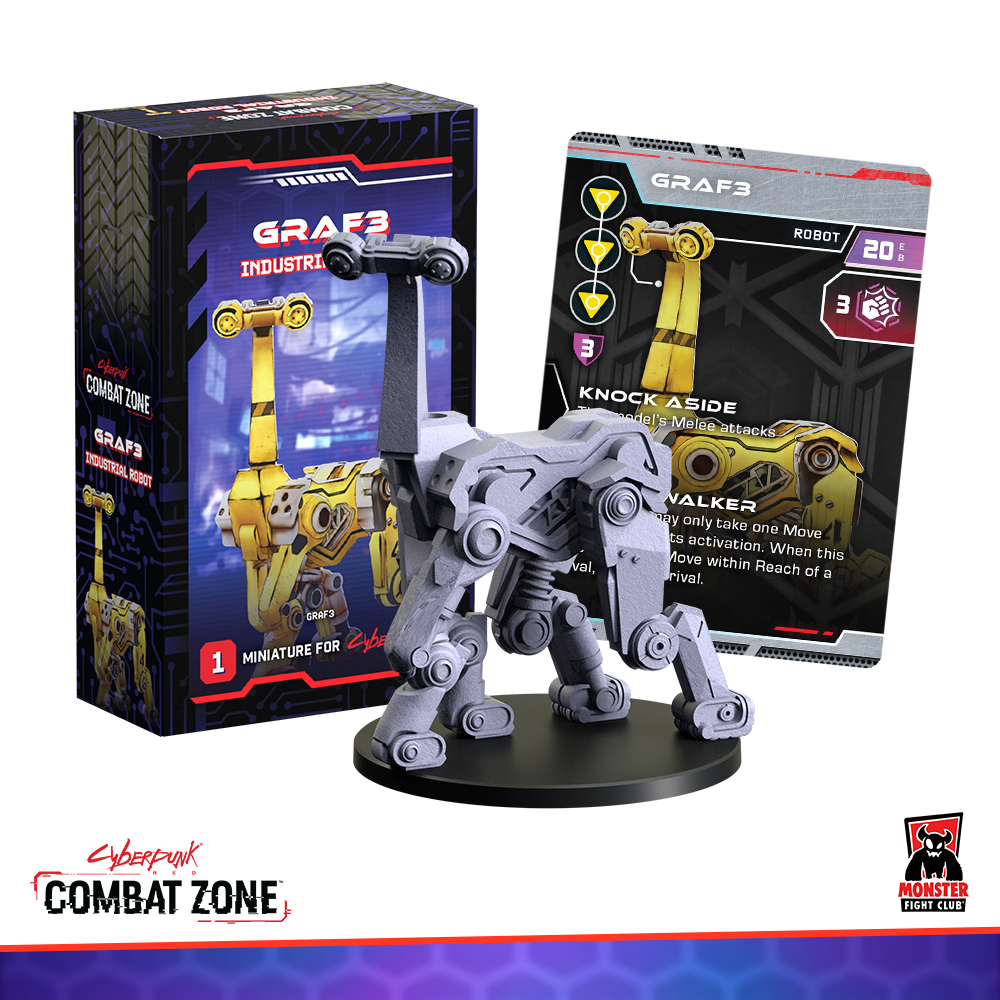
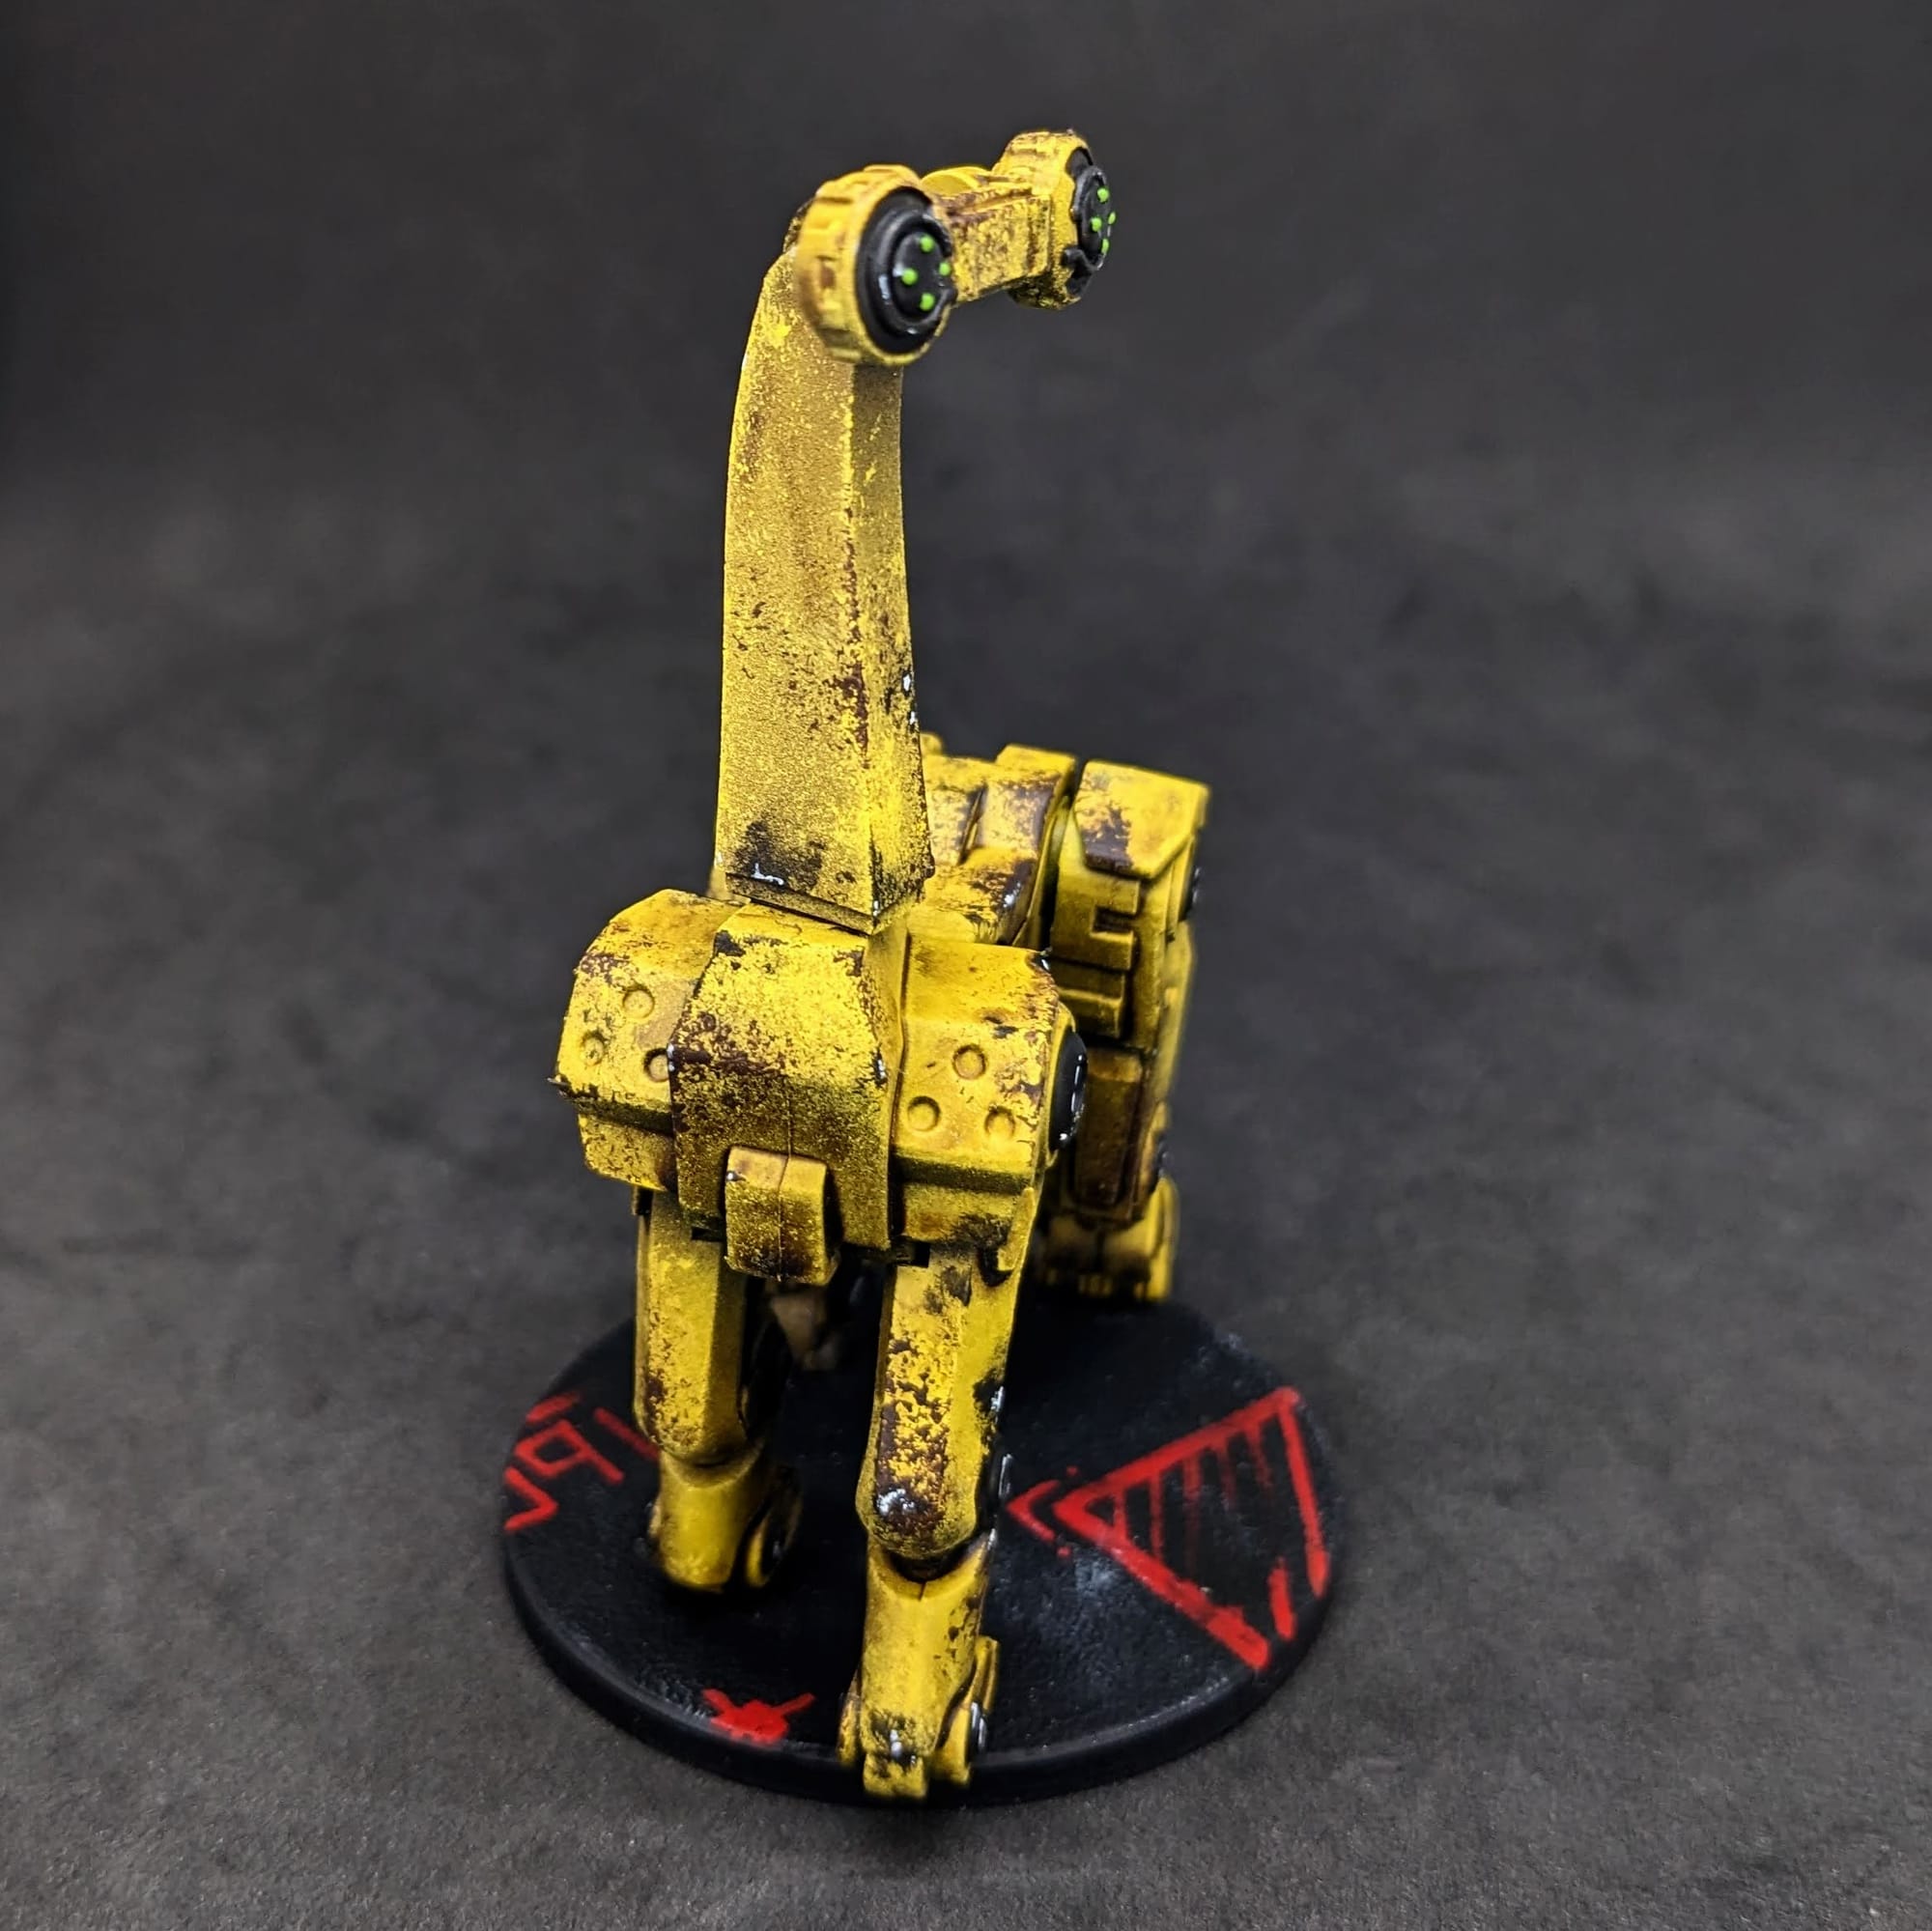
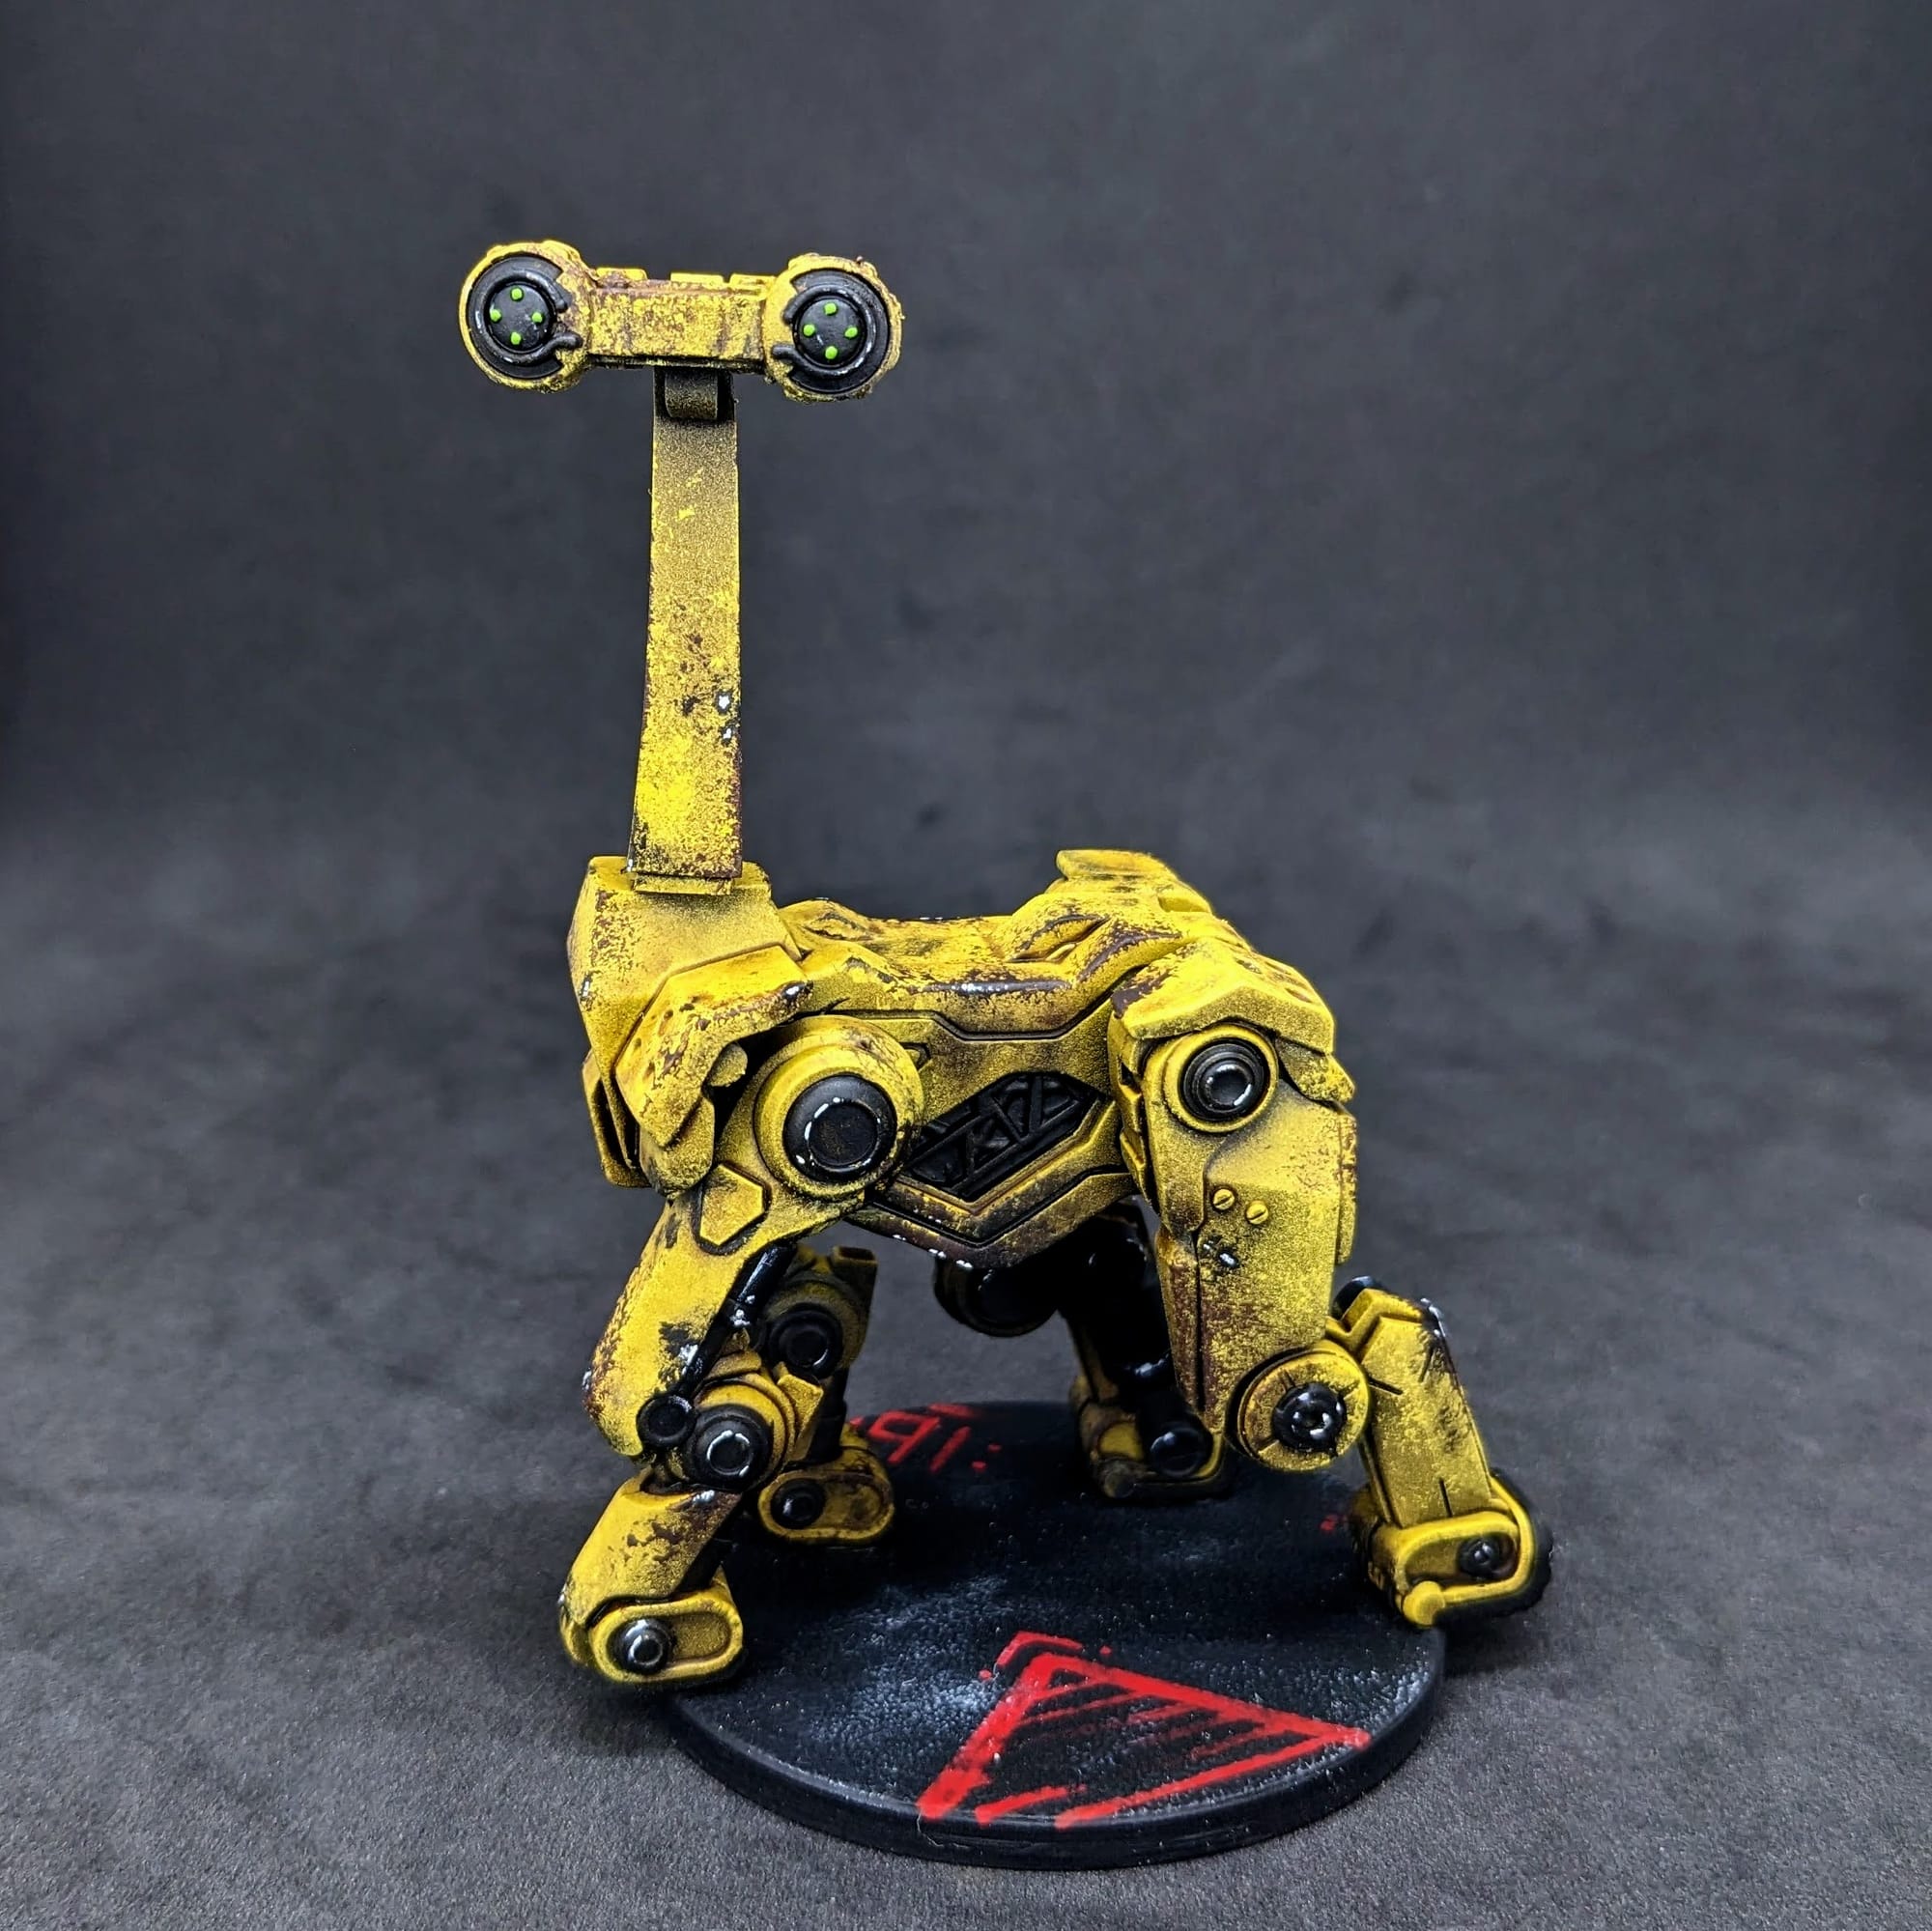
The Zhirafa GRAF3 industrial drone joins the Cyberpunk Red: Combat Zone miniatures game! A giant mini by comparison, the GRAF3 is no pushover. Using the Robot Rules for play, it's meant to emulate the autonomous crane from Cyberpunk Red; sometimes that means scrap or working in hazardous conditions. Durable and strong, it can also defend itself if needed. This multi-part mini was easy to build, easy to paint, and we'll show you how!
Cyberpunk Red: Combat Zone is a fast-paced, miniature skirmish game from Monster Fight Club. Set in the high-tech dystopia of the Cyberpunk RPG universe created by Mike Pondsmith, Cyberpunk Red: Combat Zone opens up a new way for players to create stories and combat in the universe. Crafted by veteran tabletop game creators, Combat Zone uses the [RE]action Dice System for organic, free-flowing gameplay interactions; no rounds, no turns—the game just goes!
Unboxing
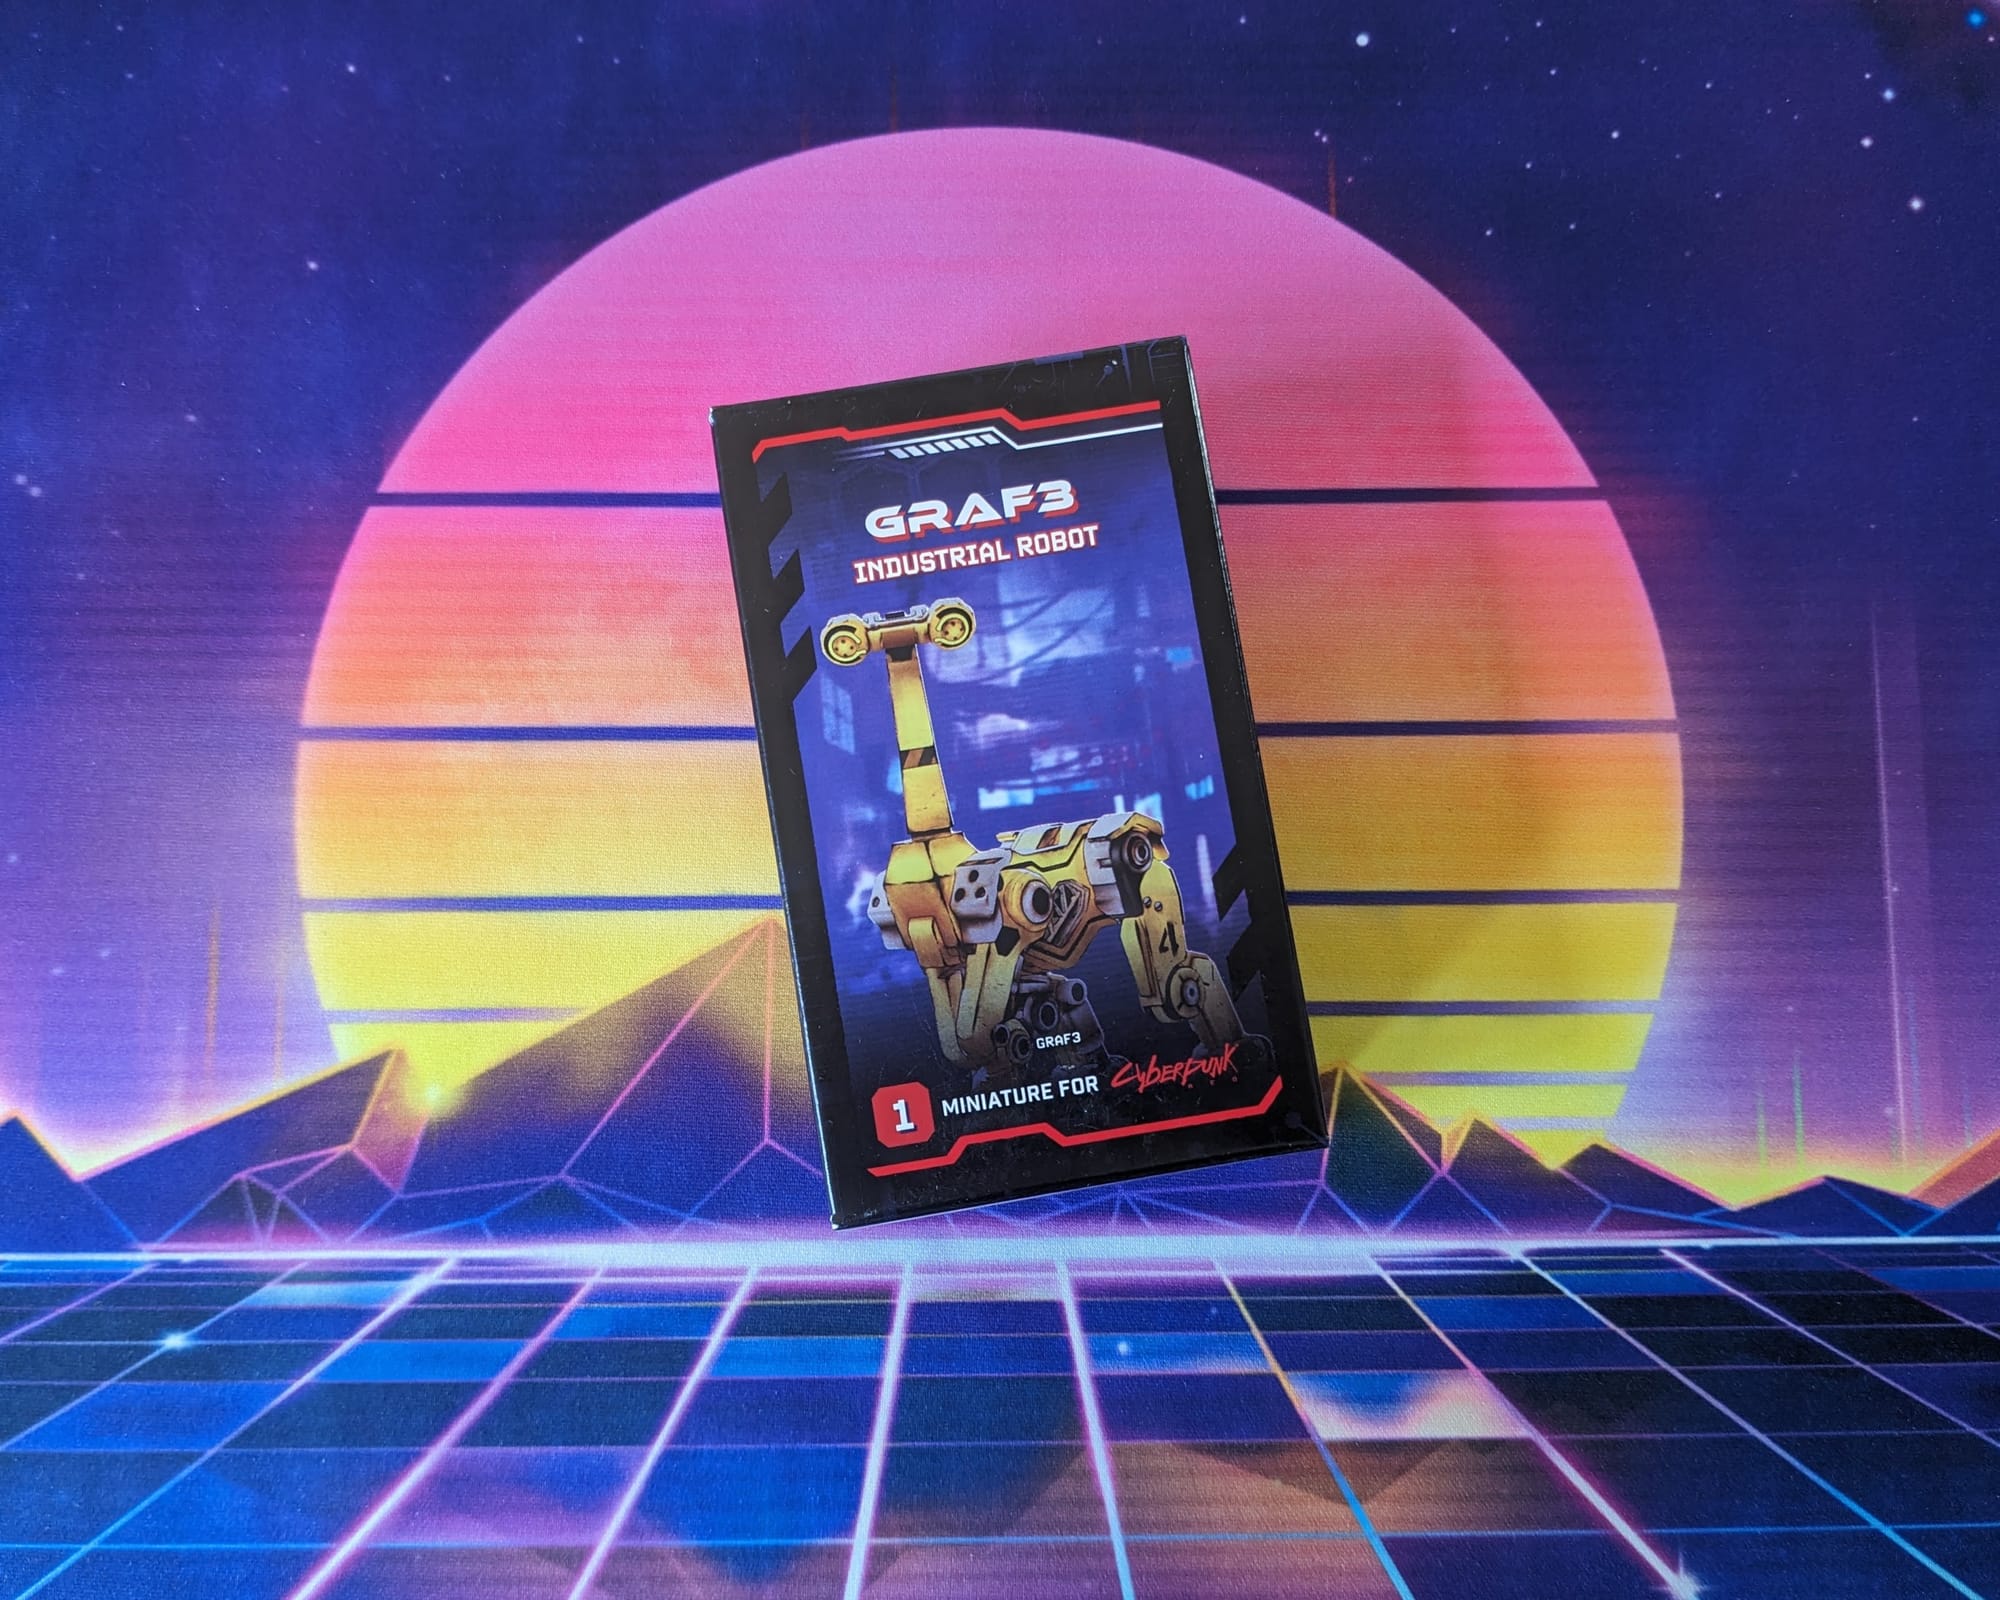
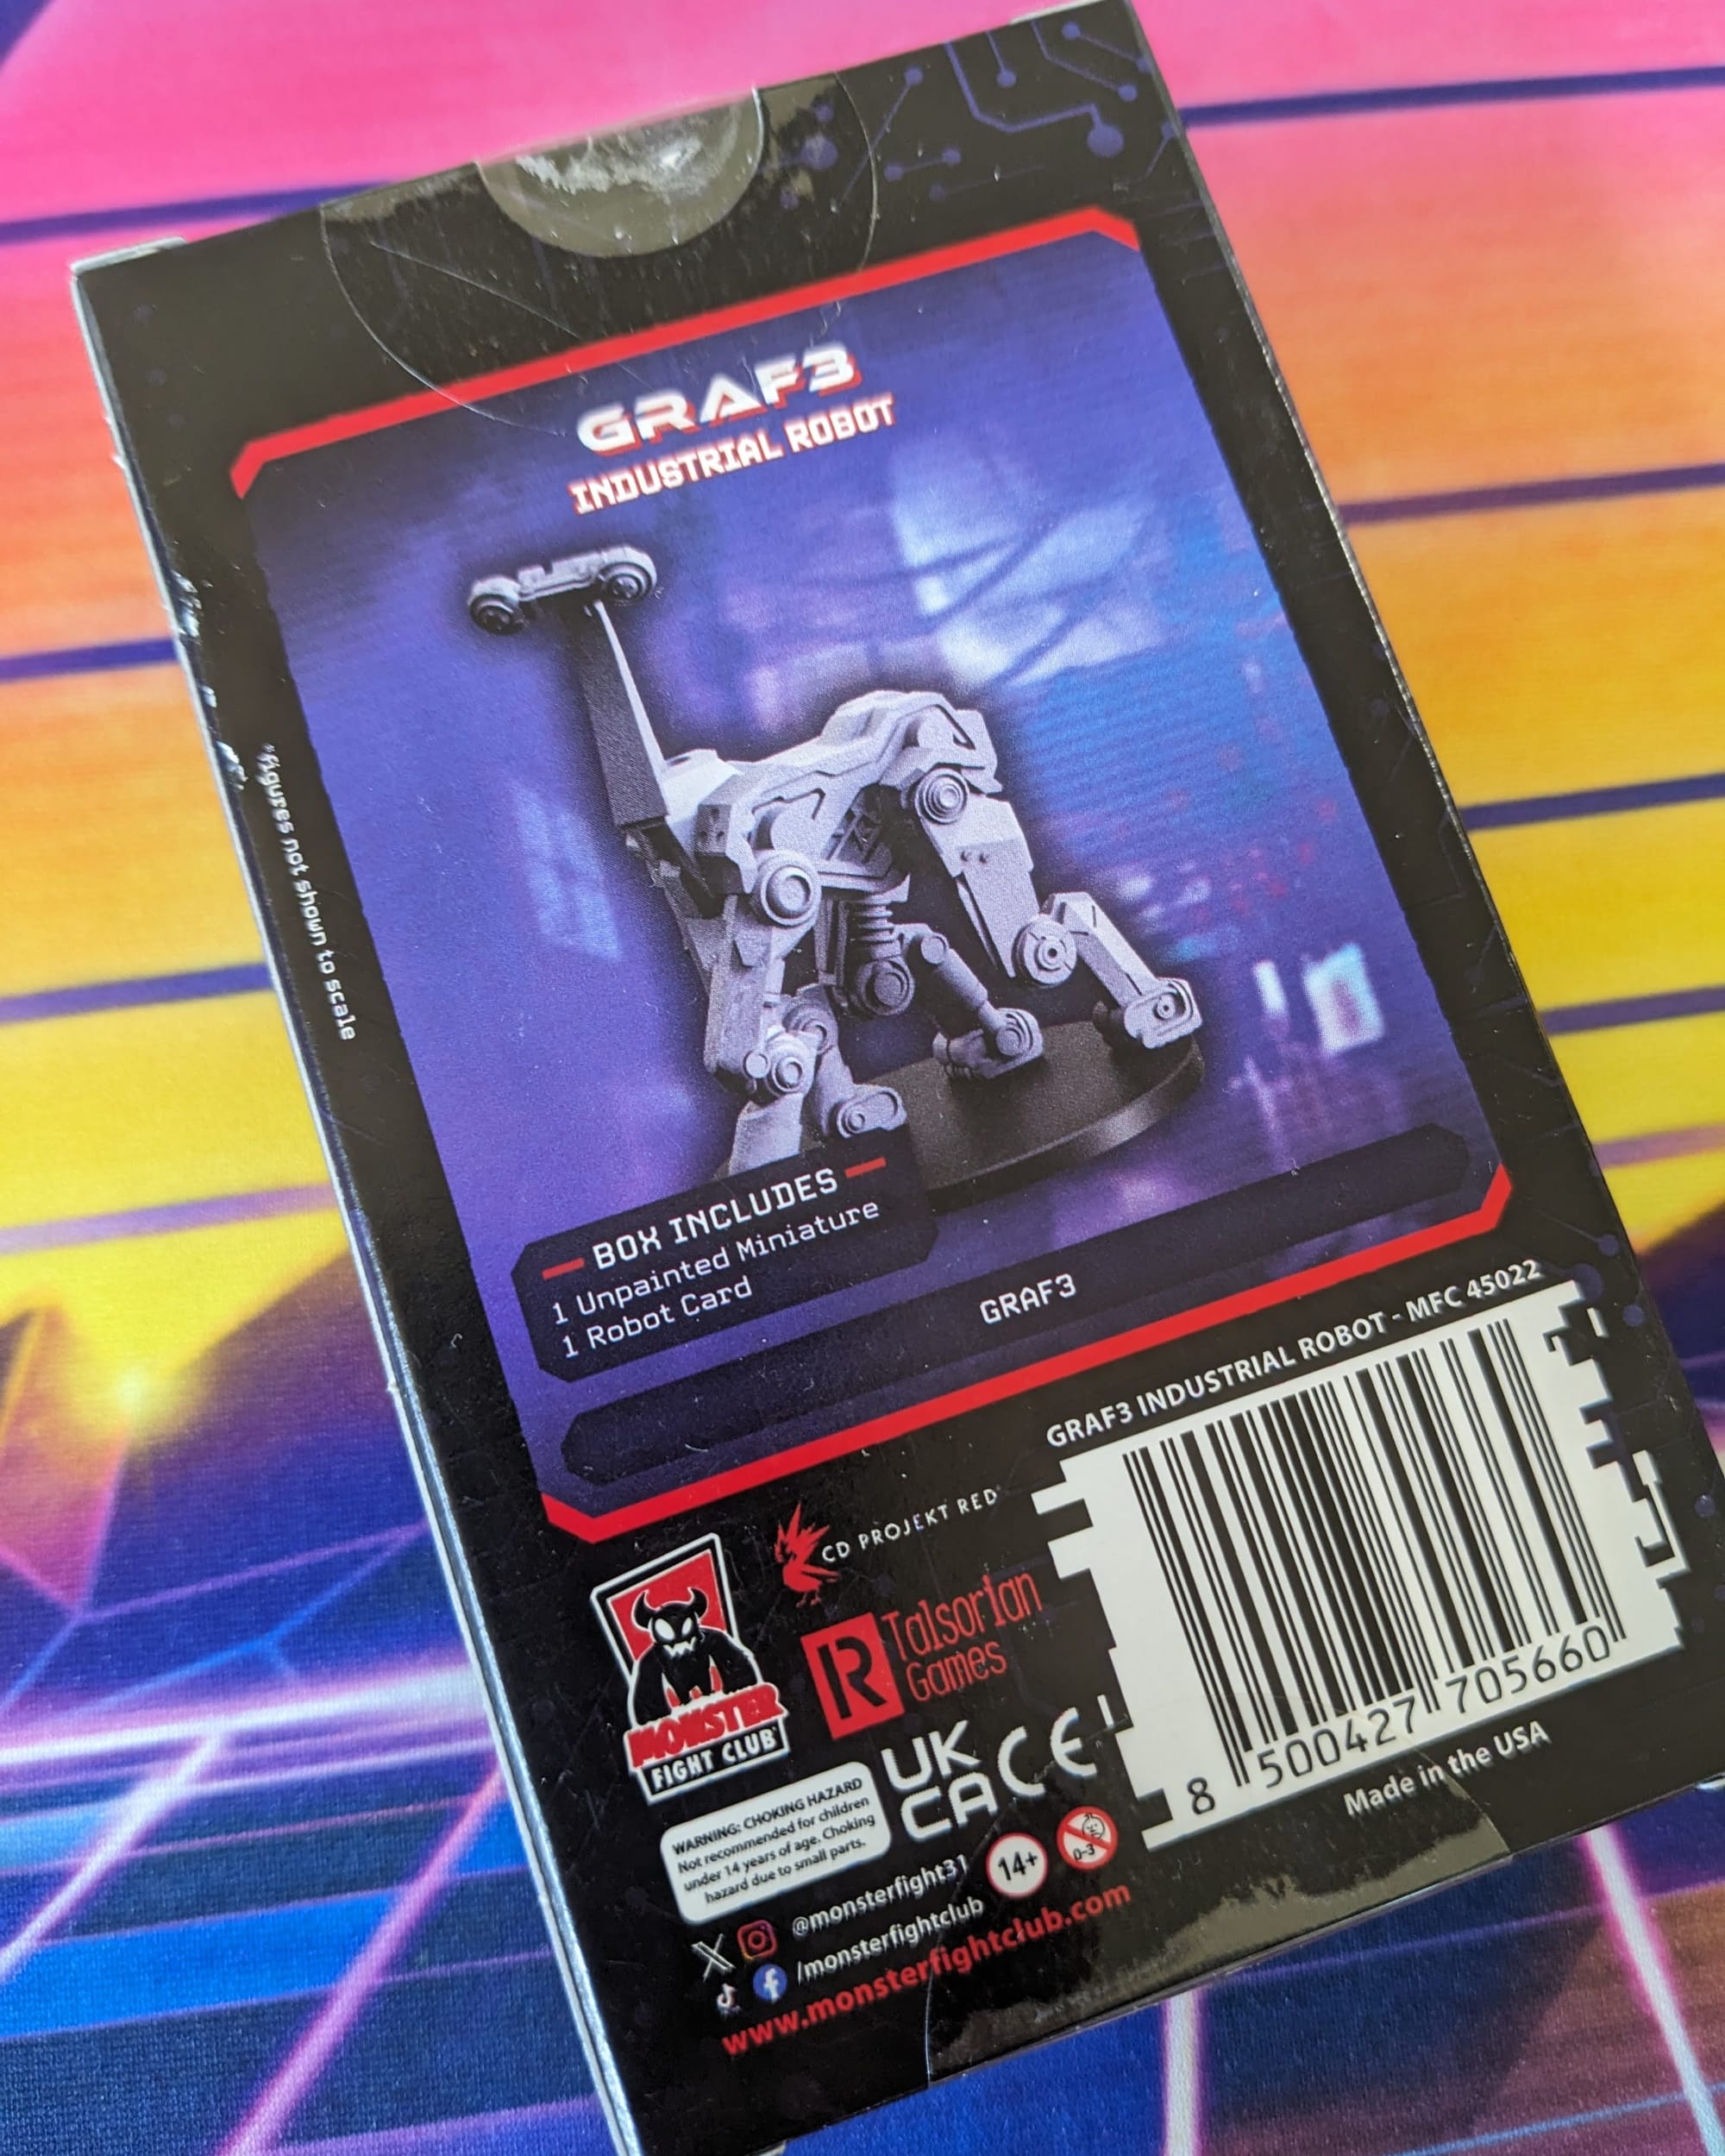
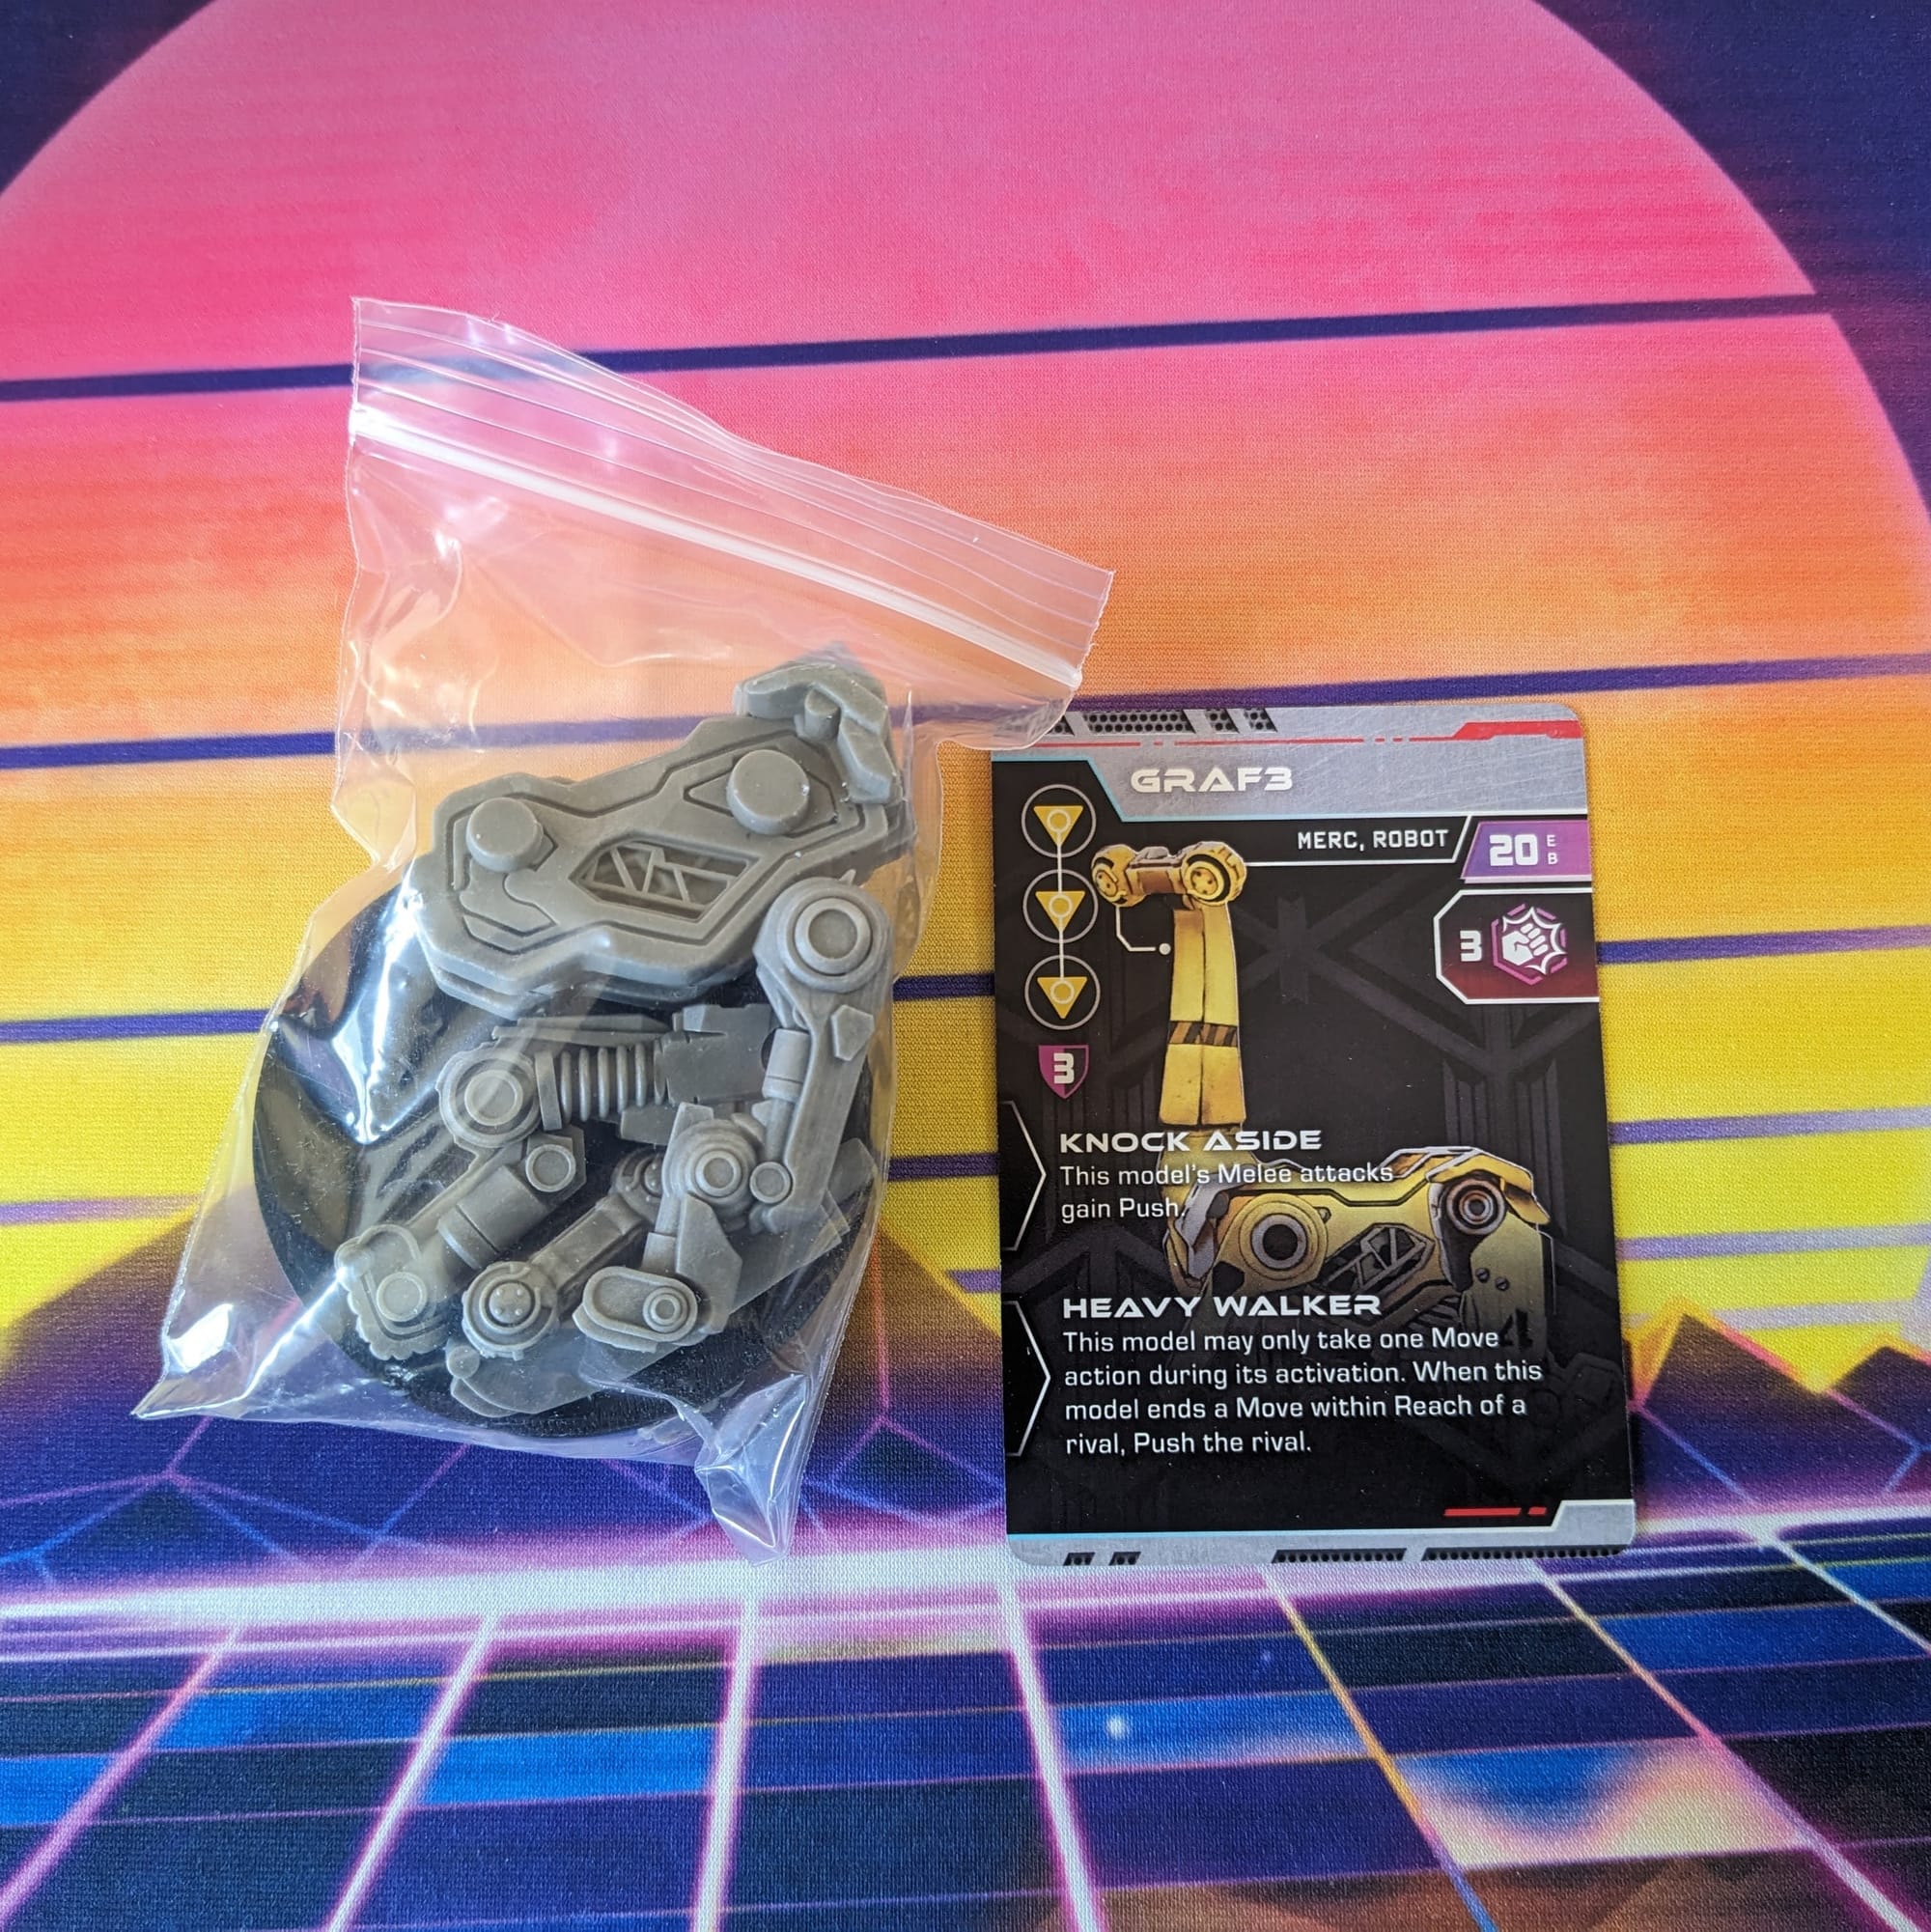
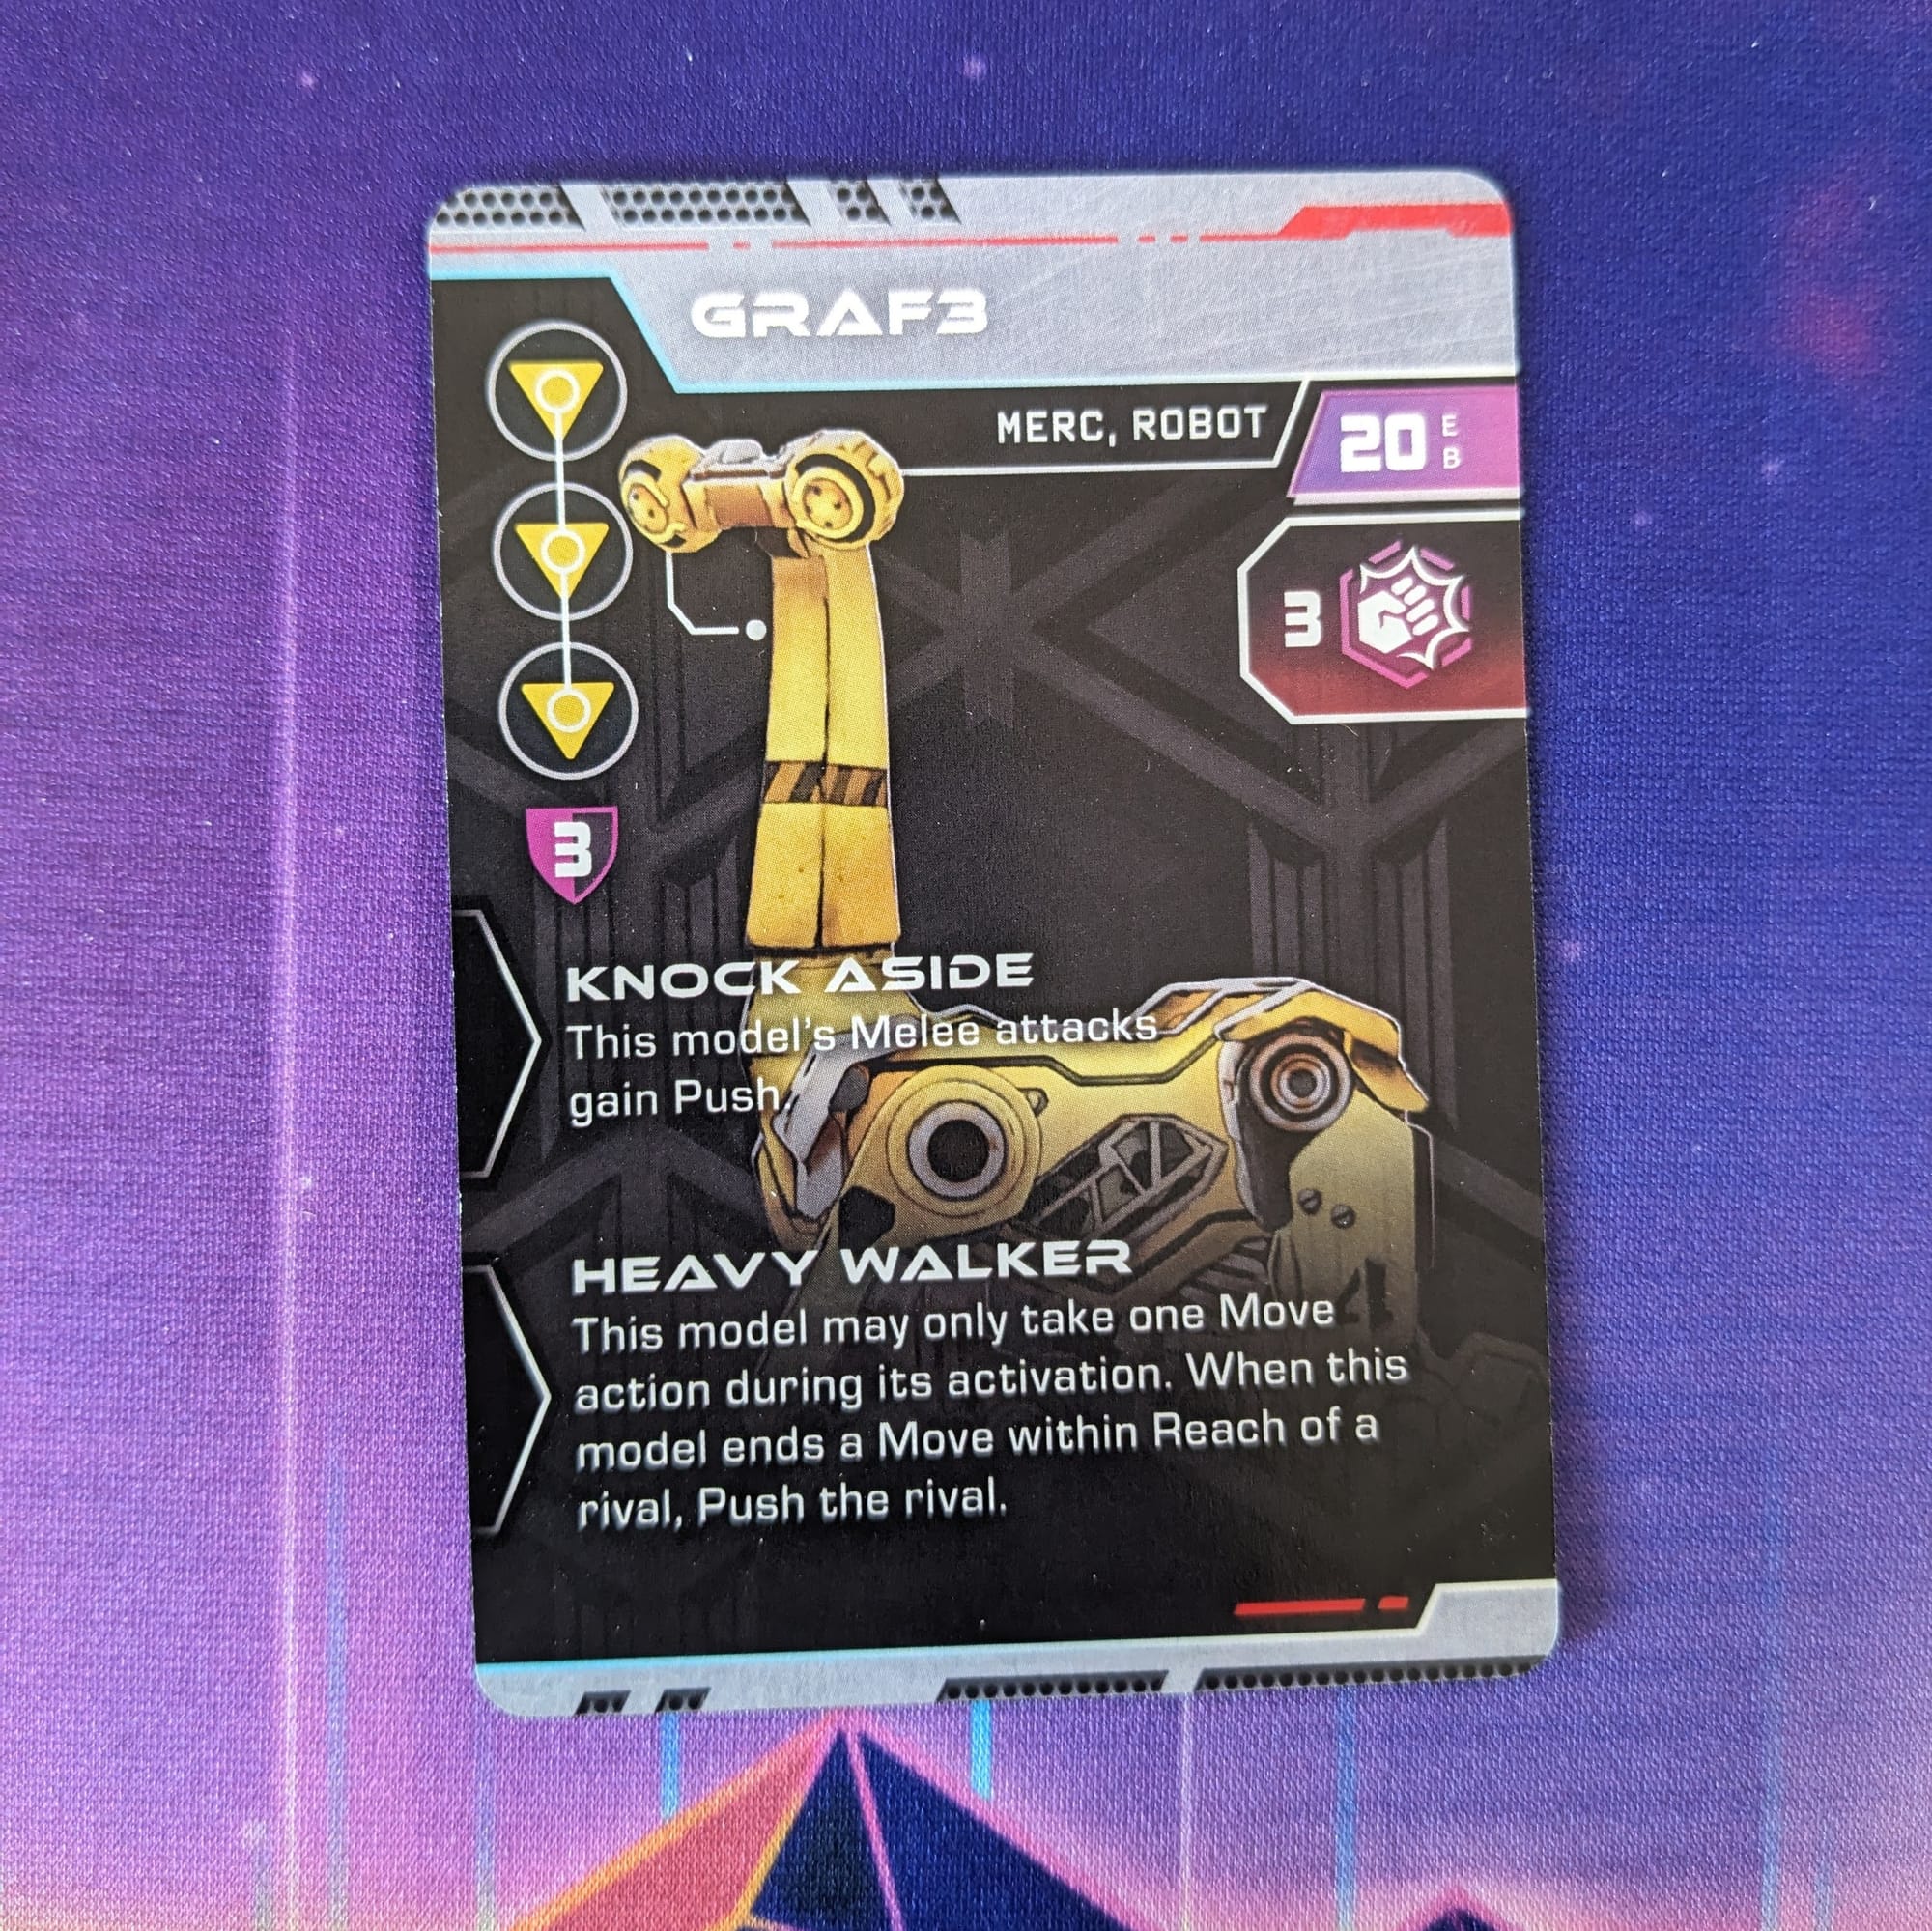
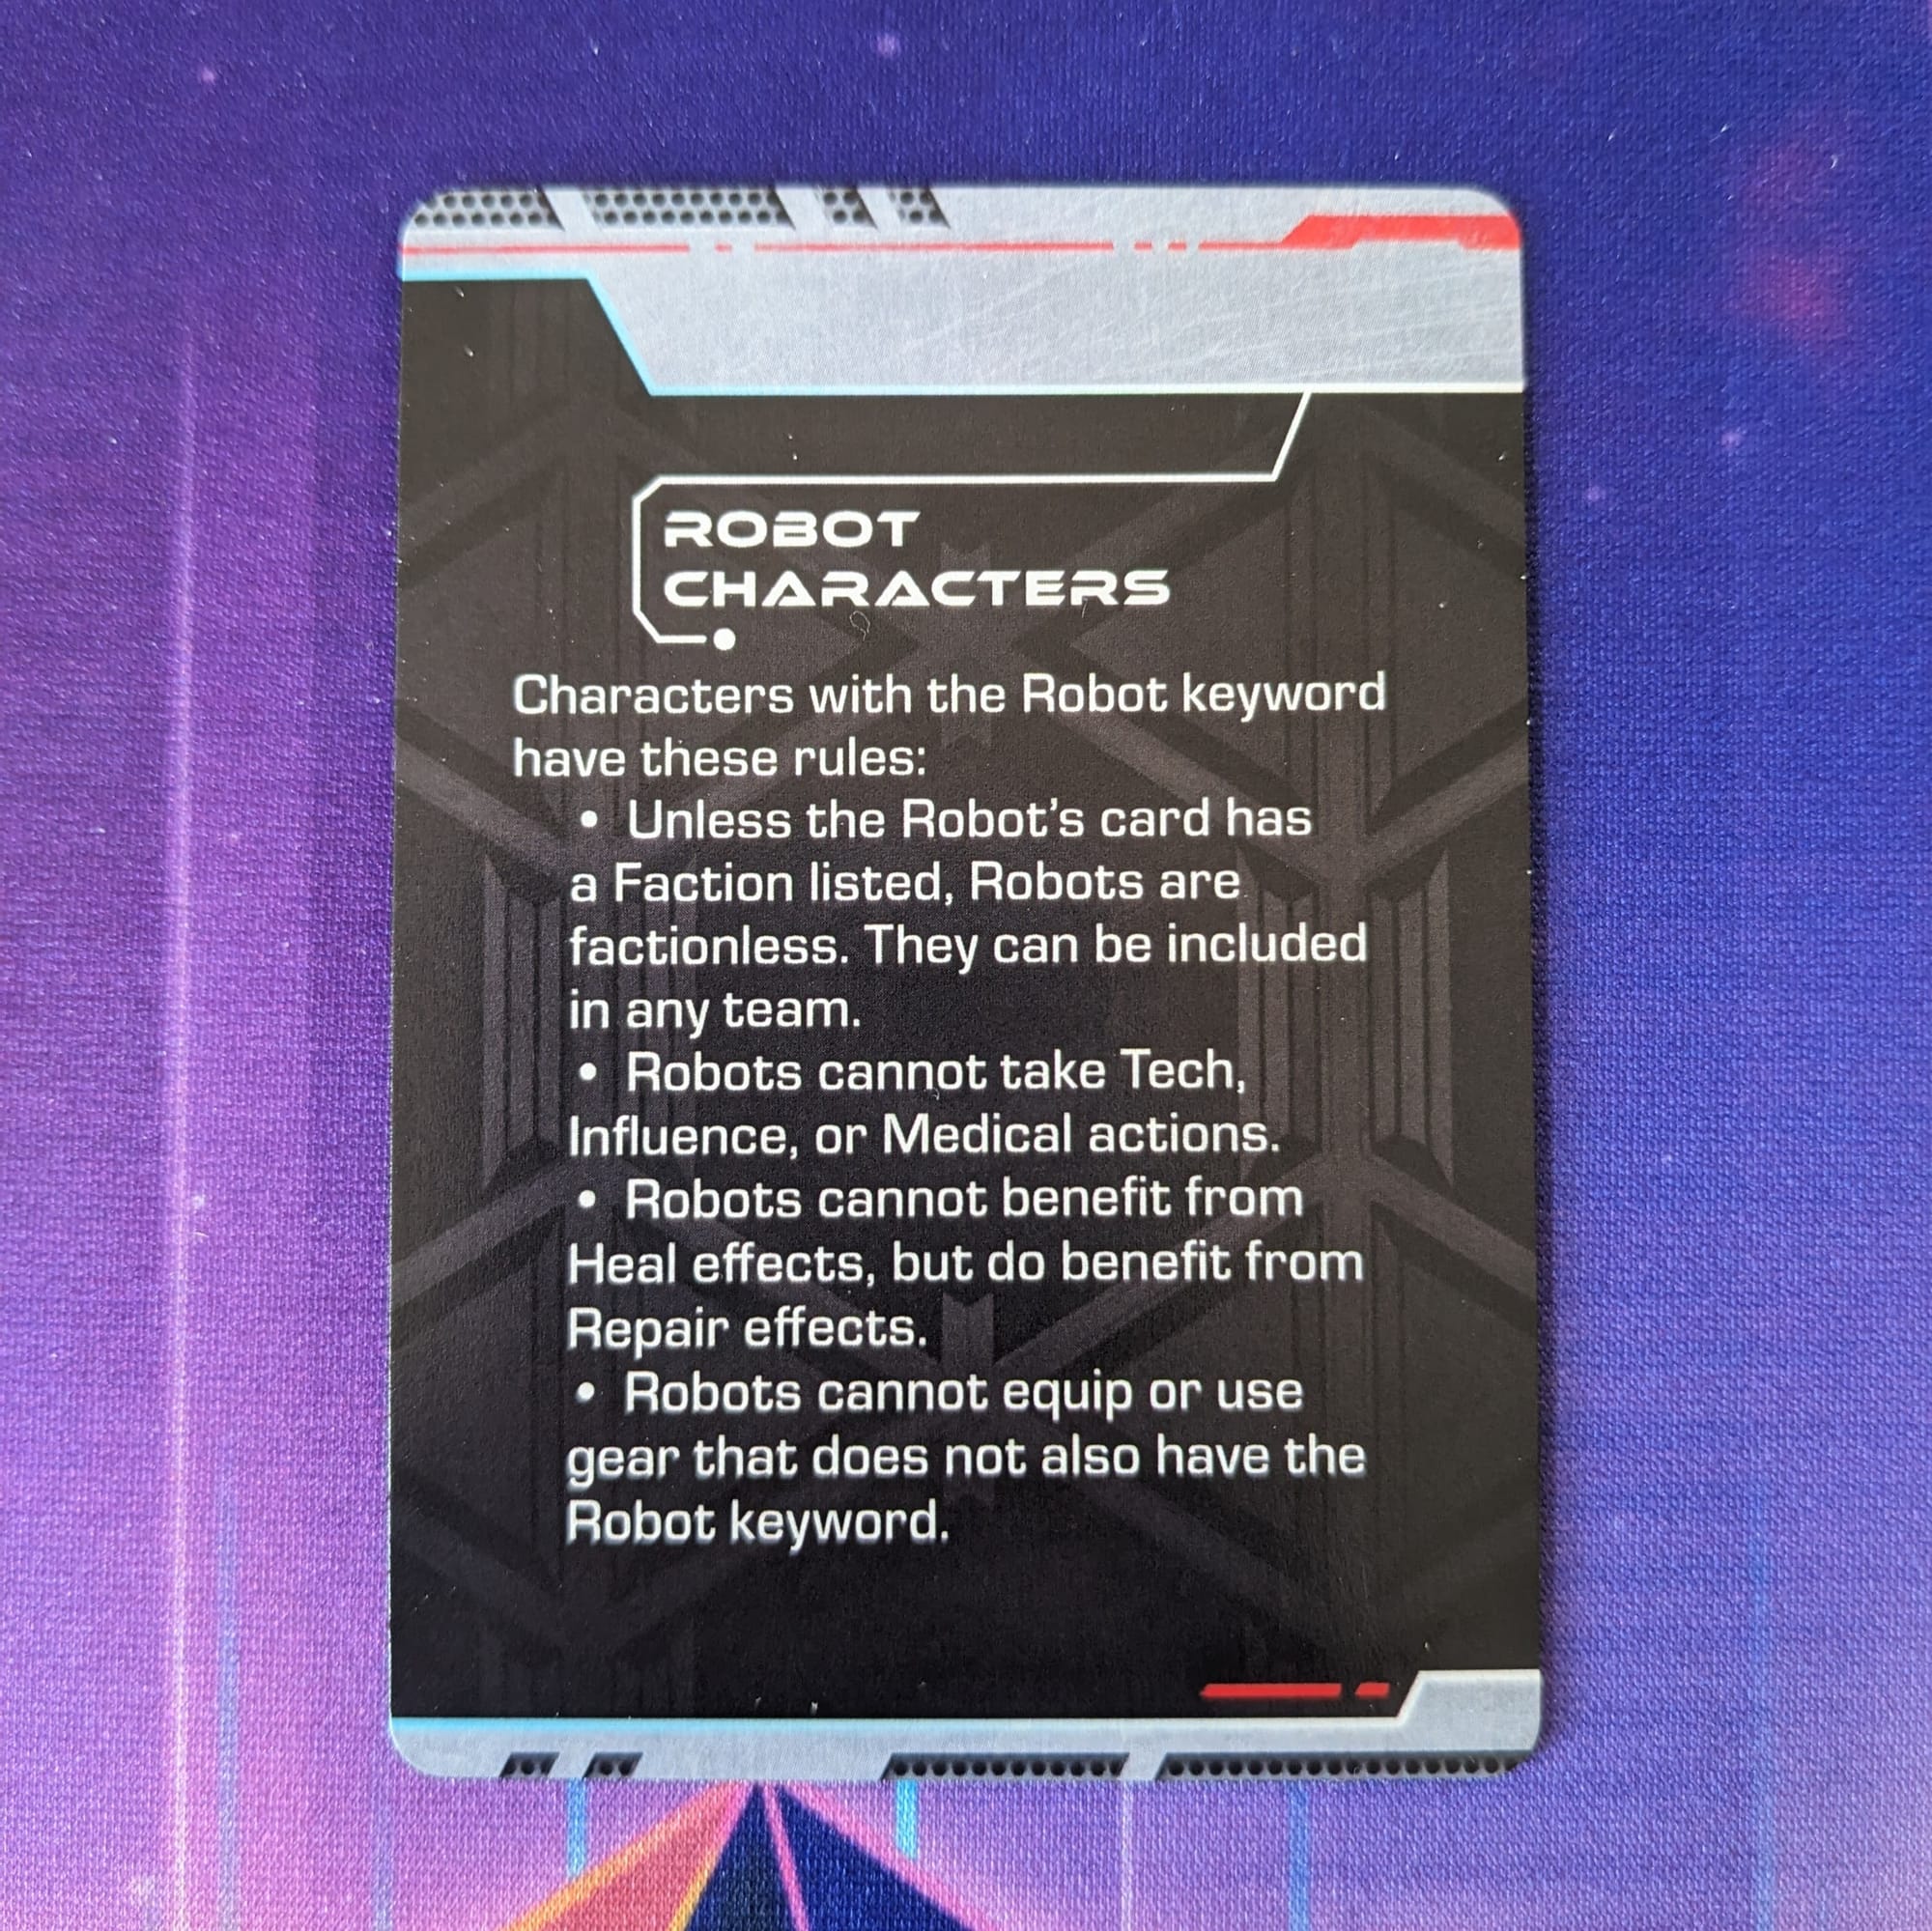
The box includes the parts for the figure, base, and unit card. Rules for playing Robots can be downloaded here for free:
Assembling Your Models
PREPPING YOUR MODELS
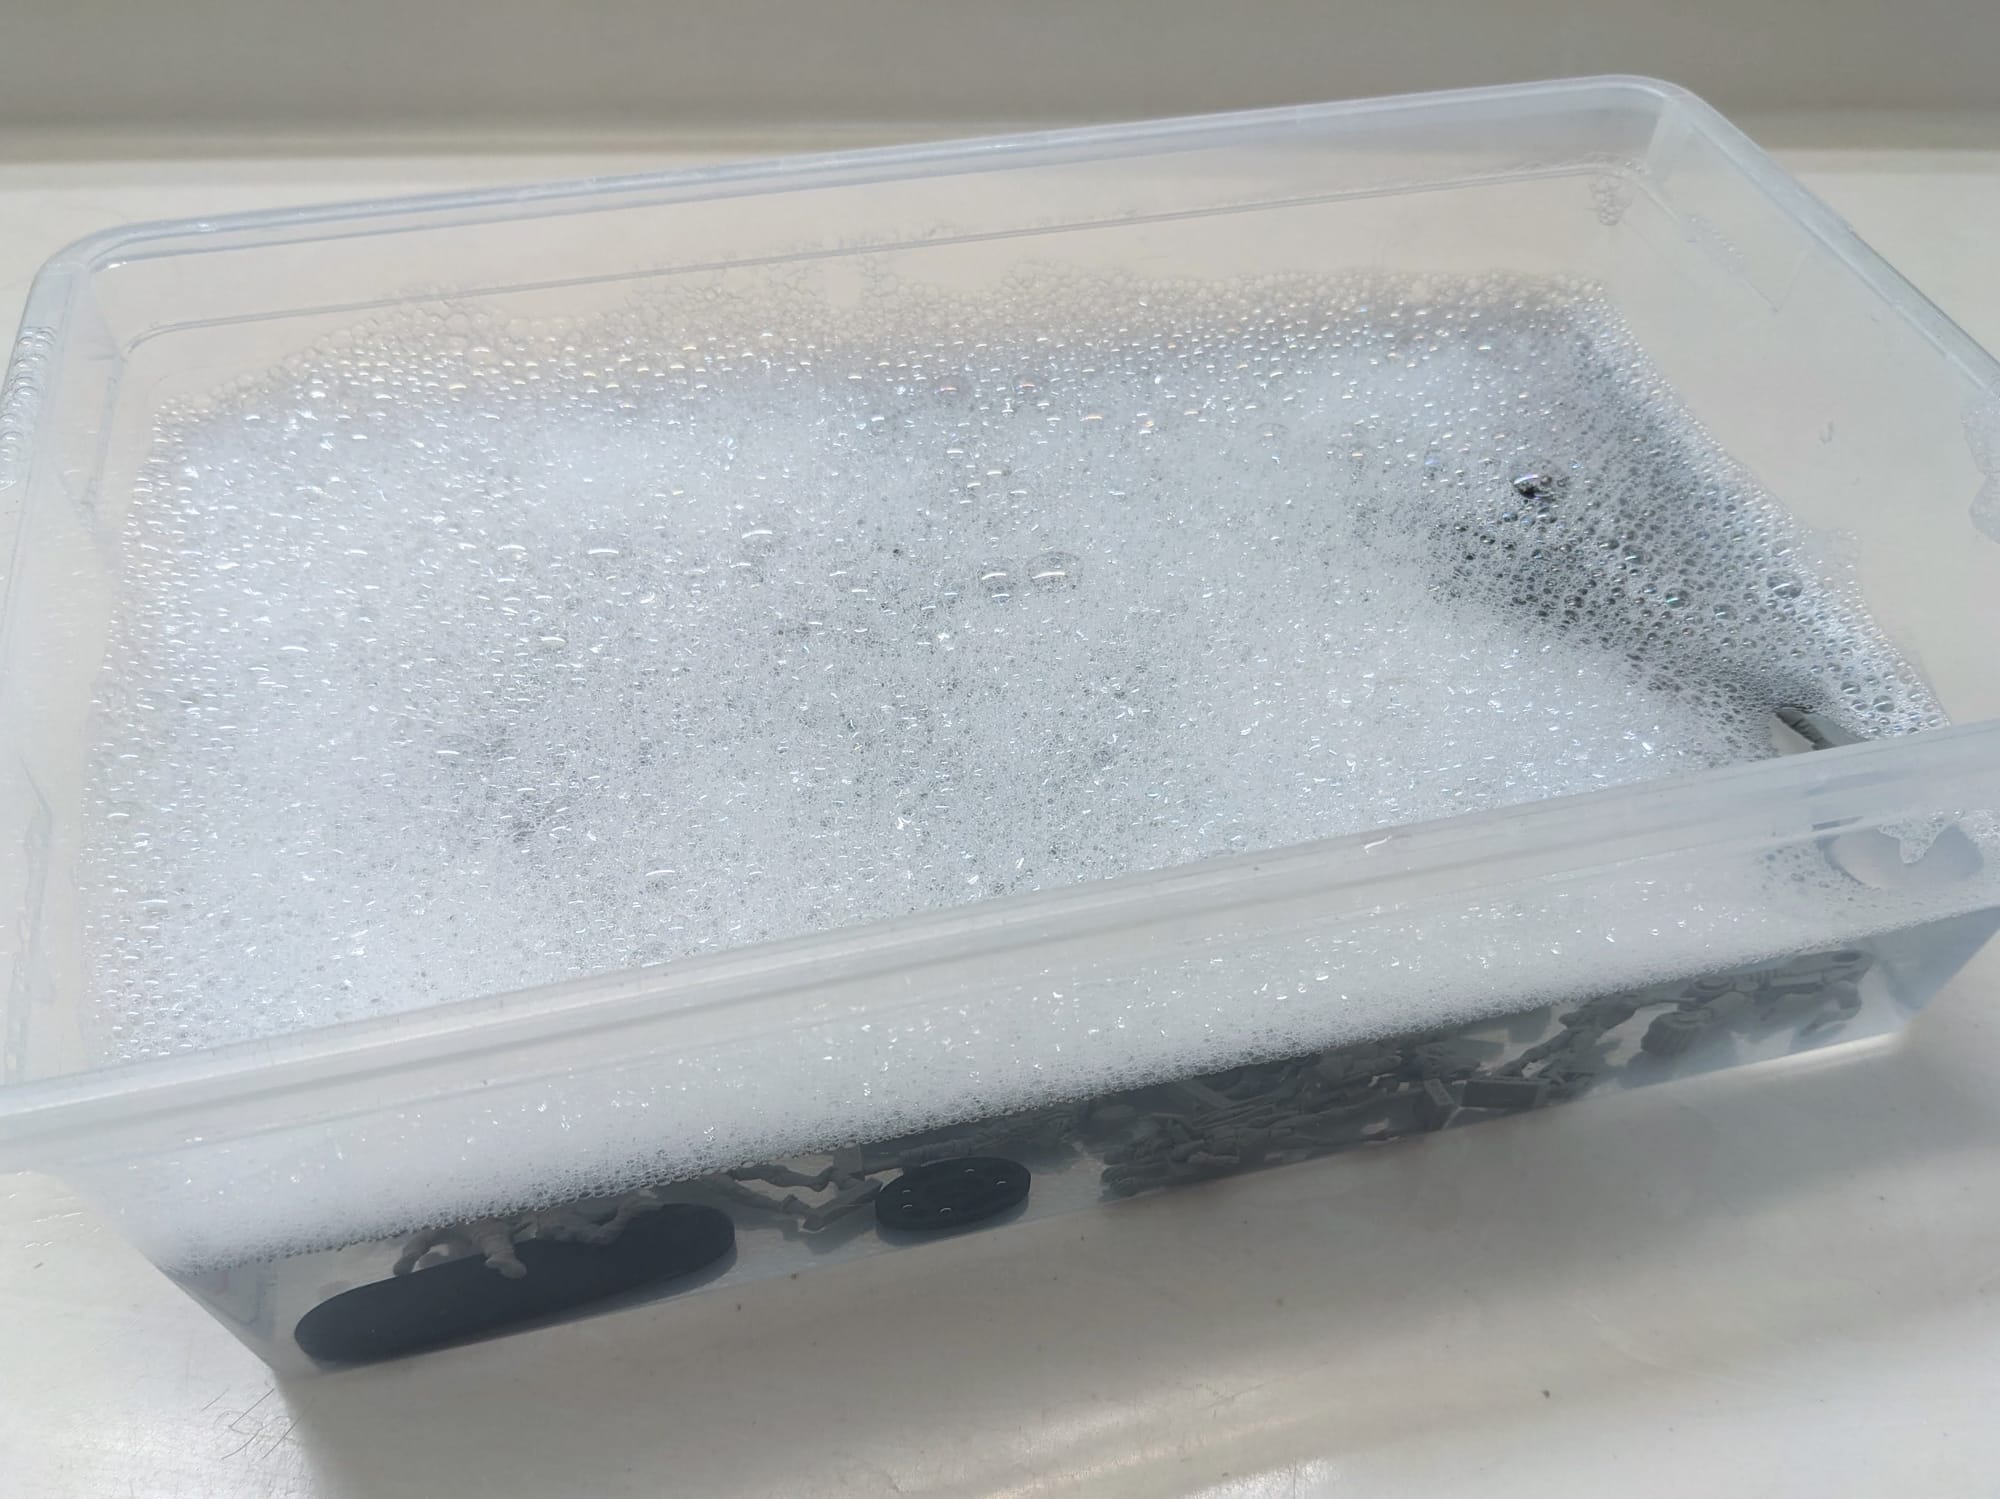
Before you get to painting your models, there are a few small steps you can take to help make your painting go smooth and fast. In general, the manufacturing process for most models and miniatures allows companies to produce minis quickly to meet demand. However, the process sometimes includes a release agent within the mold. Depending on the type of plastic used, models may warp due to rapid heating and cooling. Mold lines are always going to be present if they were manufactured with injection molding, so be mindful of that as well.
Washing Your Minis
Release agent chemicals and other manufacturing residue can be easily removed by washing them thoroughly with dish soap and warm water. I have found that single-piece minis or large parts tend to have a greater amount of release agent to them, so I just spent a little more time washing to get them clean.
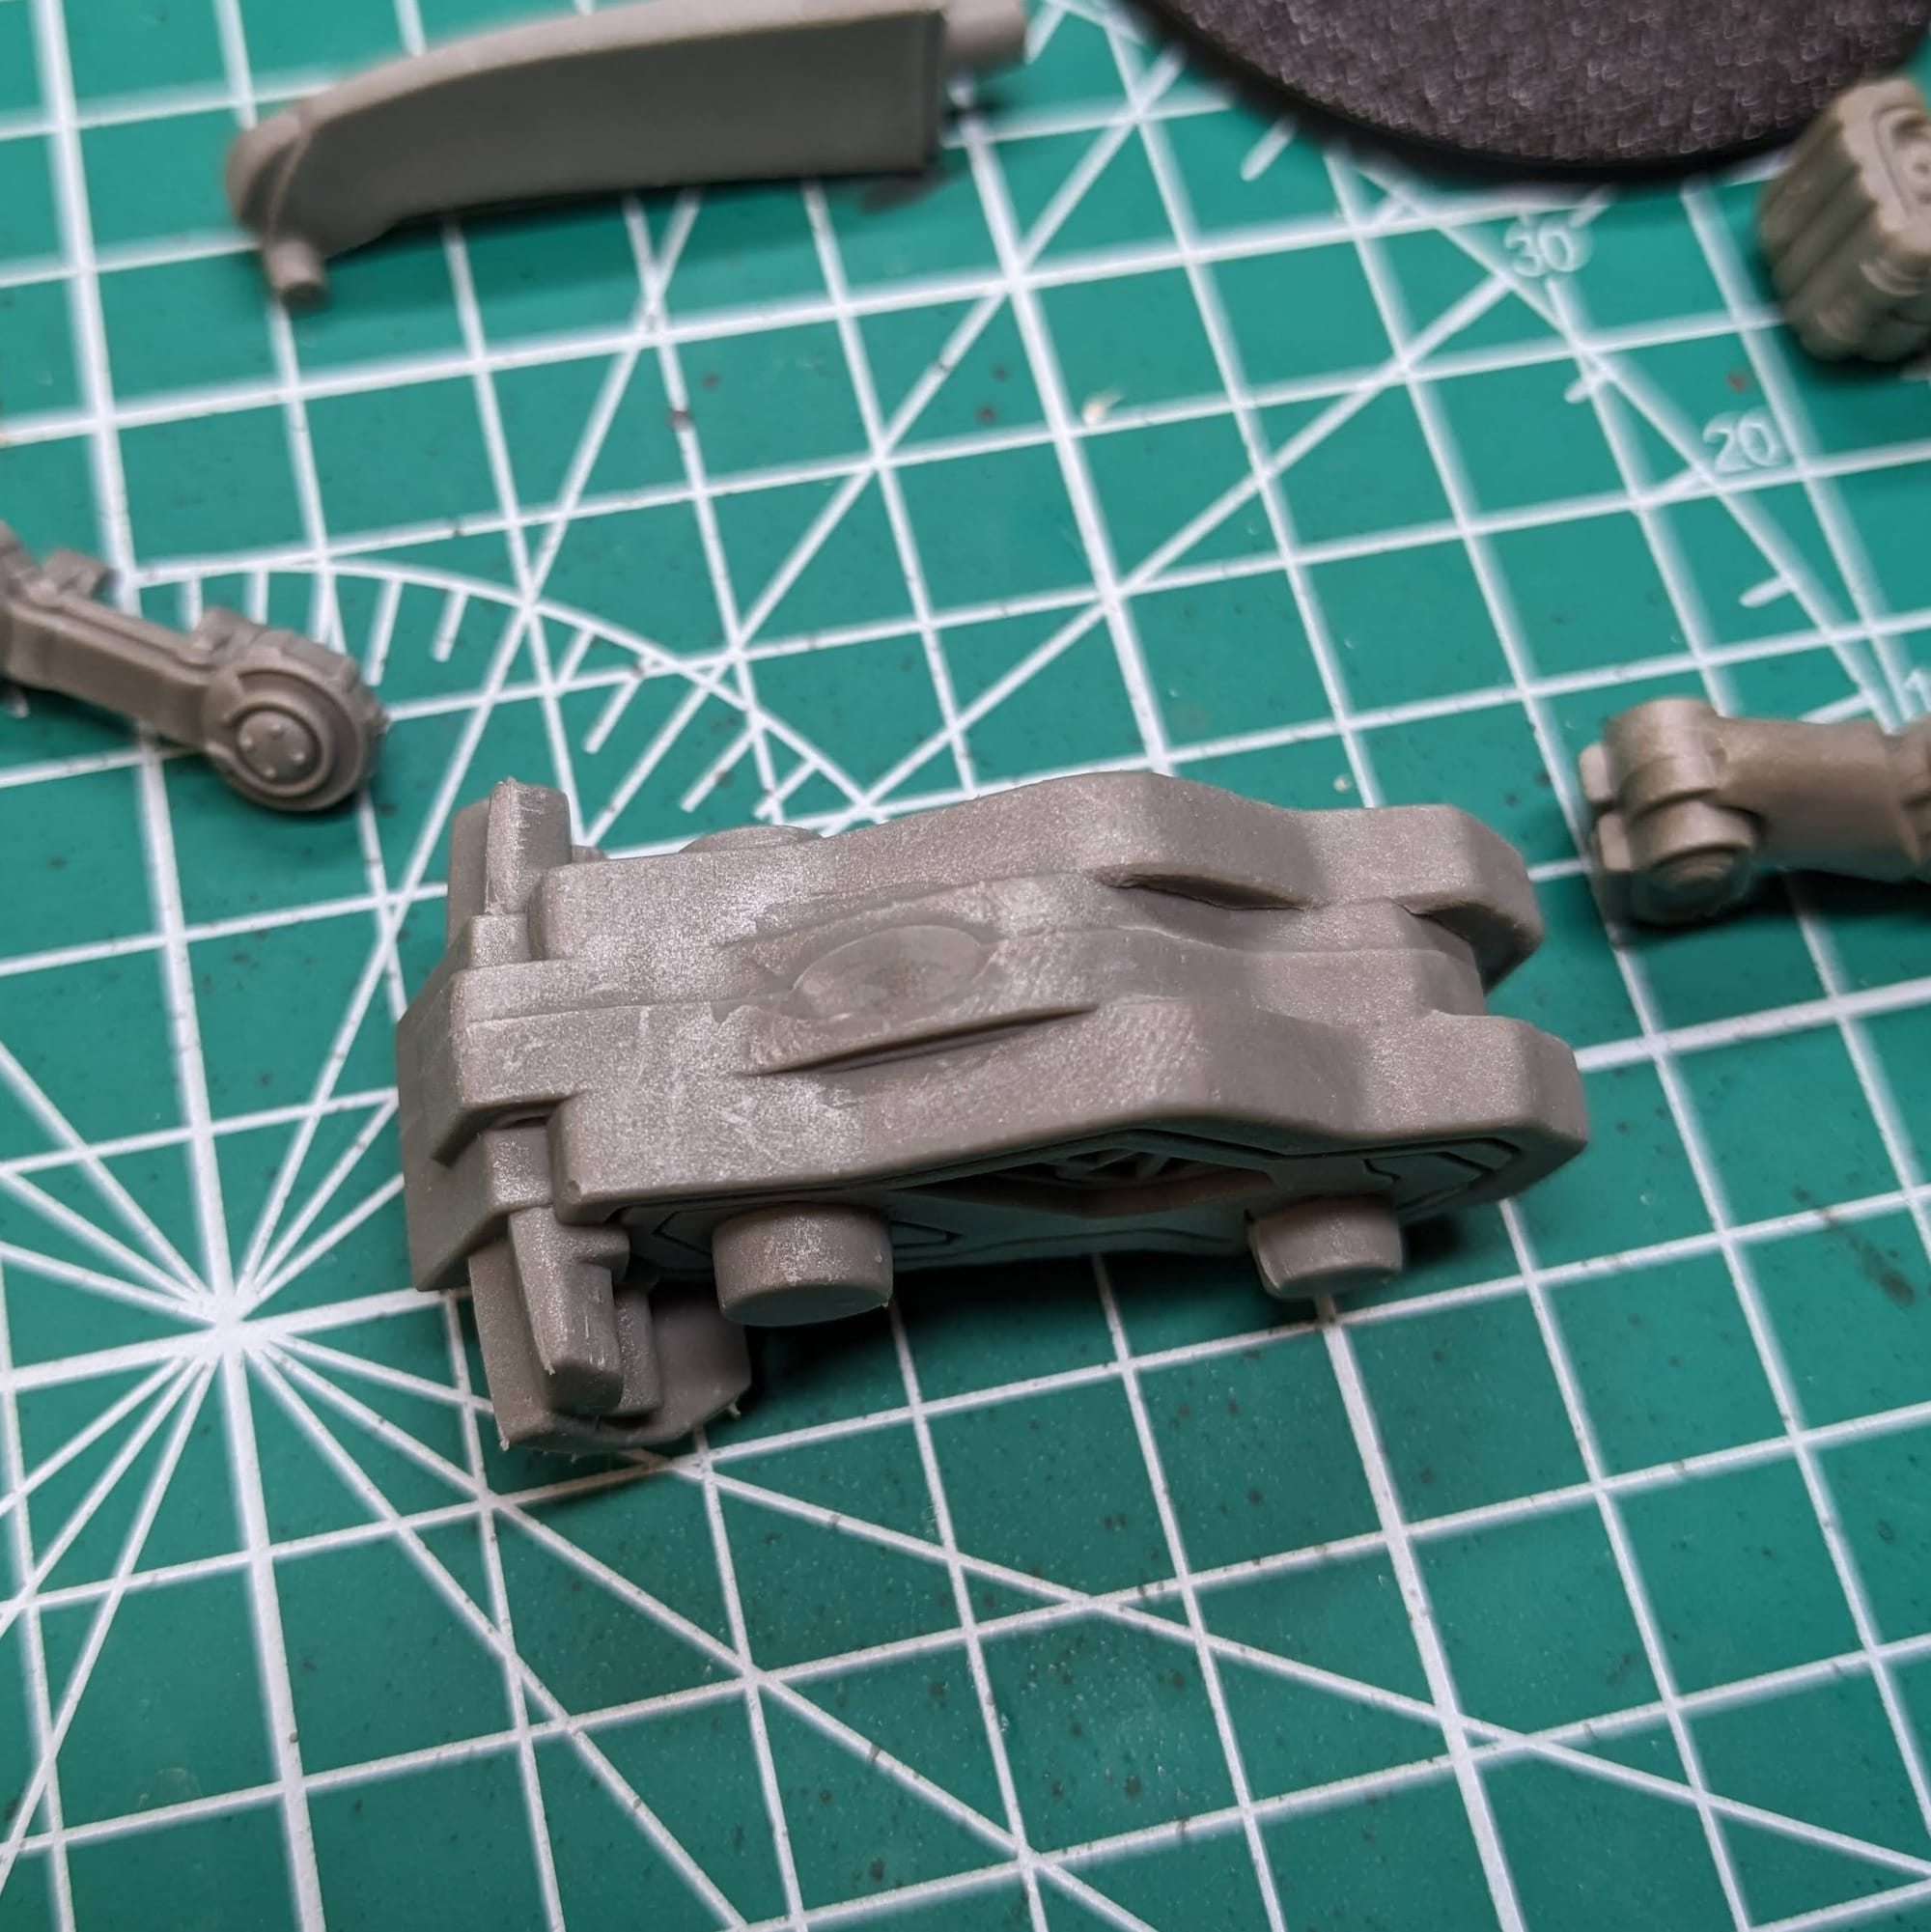
Remove Mold Lines
Soft plastic miniatures tend to have more pronounced mold lines than hard plastic ones. The mold lines are a result of the manufacturing process, where the two halves of the piece come together. These can be easily removed with an X-Acto blade or mold line remover tool. Just be careful with the sharp blade and be mindful of how hard you’re digging into the plastic; you don’t want to amputate your mini accidentally.
Fixing Your Warped Minis
The other common malady of single-piece miniatures is that the swords or poles or bases can arrive looking like potato chips and swords can look like whips. Fortunately, this is an effortless fix! Boil some water and pour it into a coffee cup. Using pliers or tweezers, submerge your model in the boiled water for 10-15 seconds. Take the model out and then push the model onto a flat surface, like a countertop. Once you’re satisfied with the shape of the plastic, submerge your model in a bowl of ice water for about 10-15 seconds, remove it, and place it on a towel to dry.
If you’re satisfied with the mini, then let it fully dry before you prime. If it still needs some tweaking, just repeat the process.
Gluing Your Miniatures
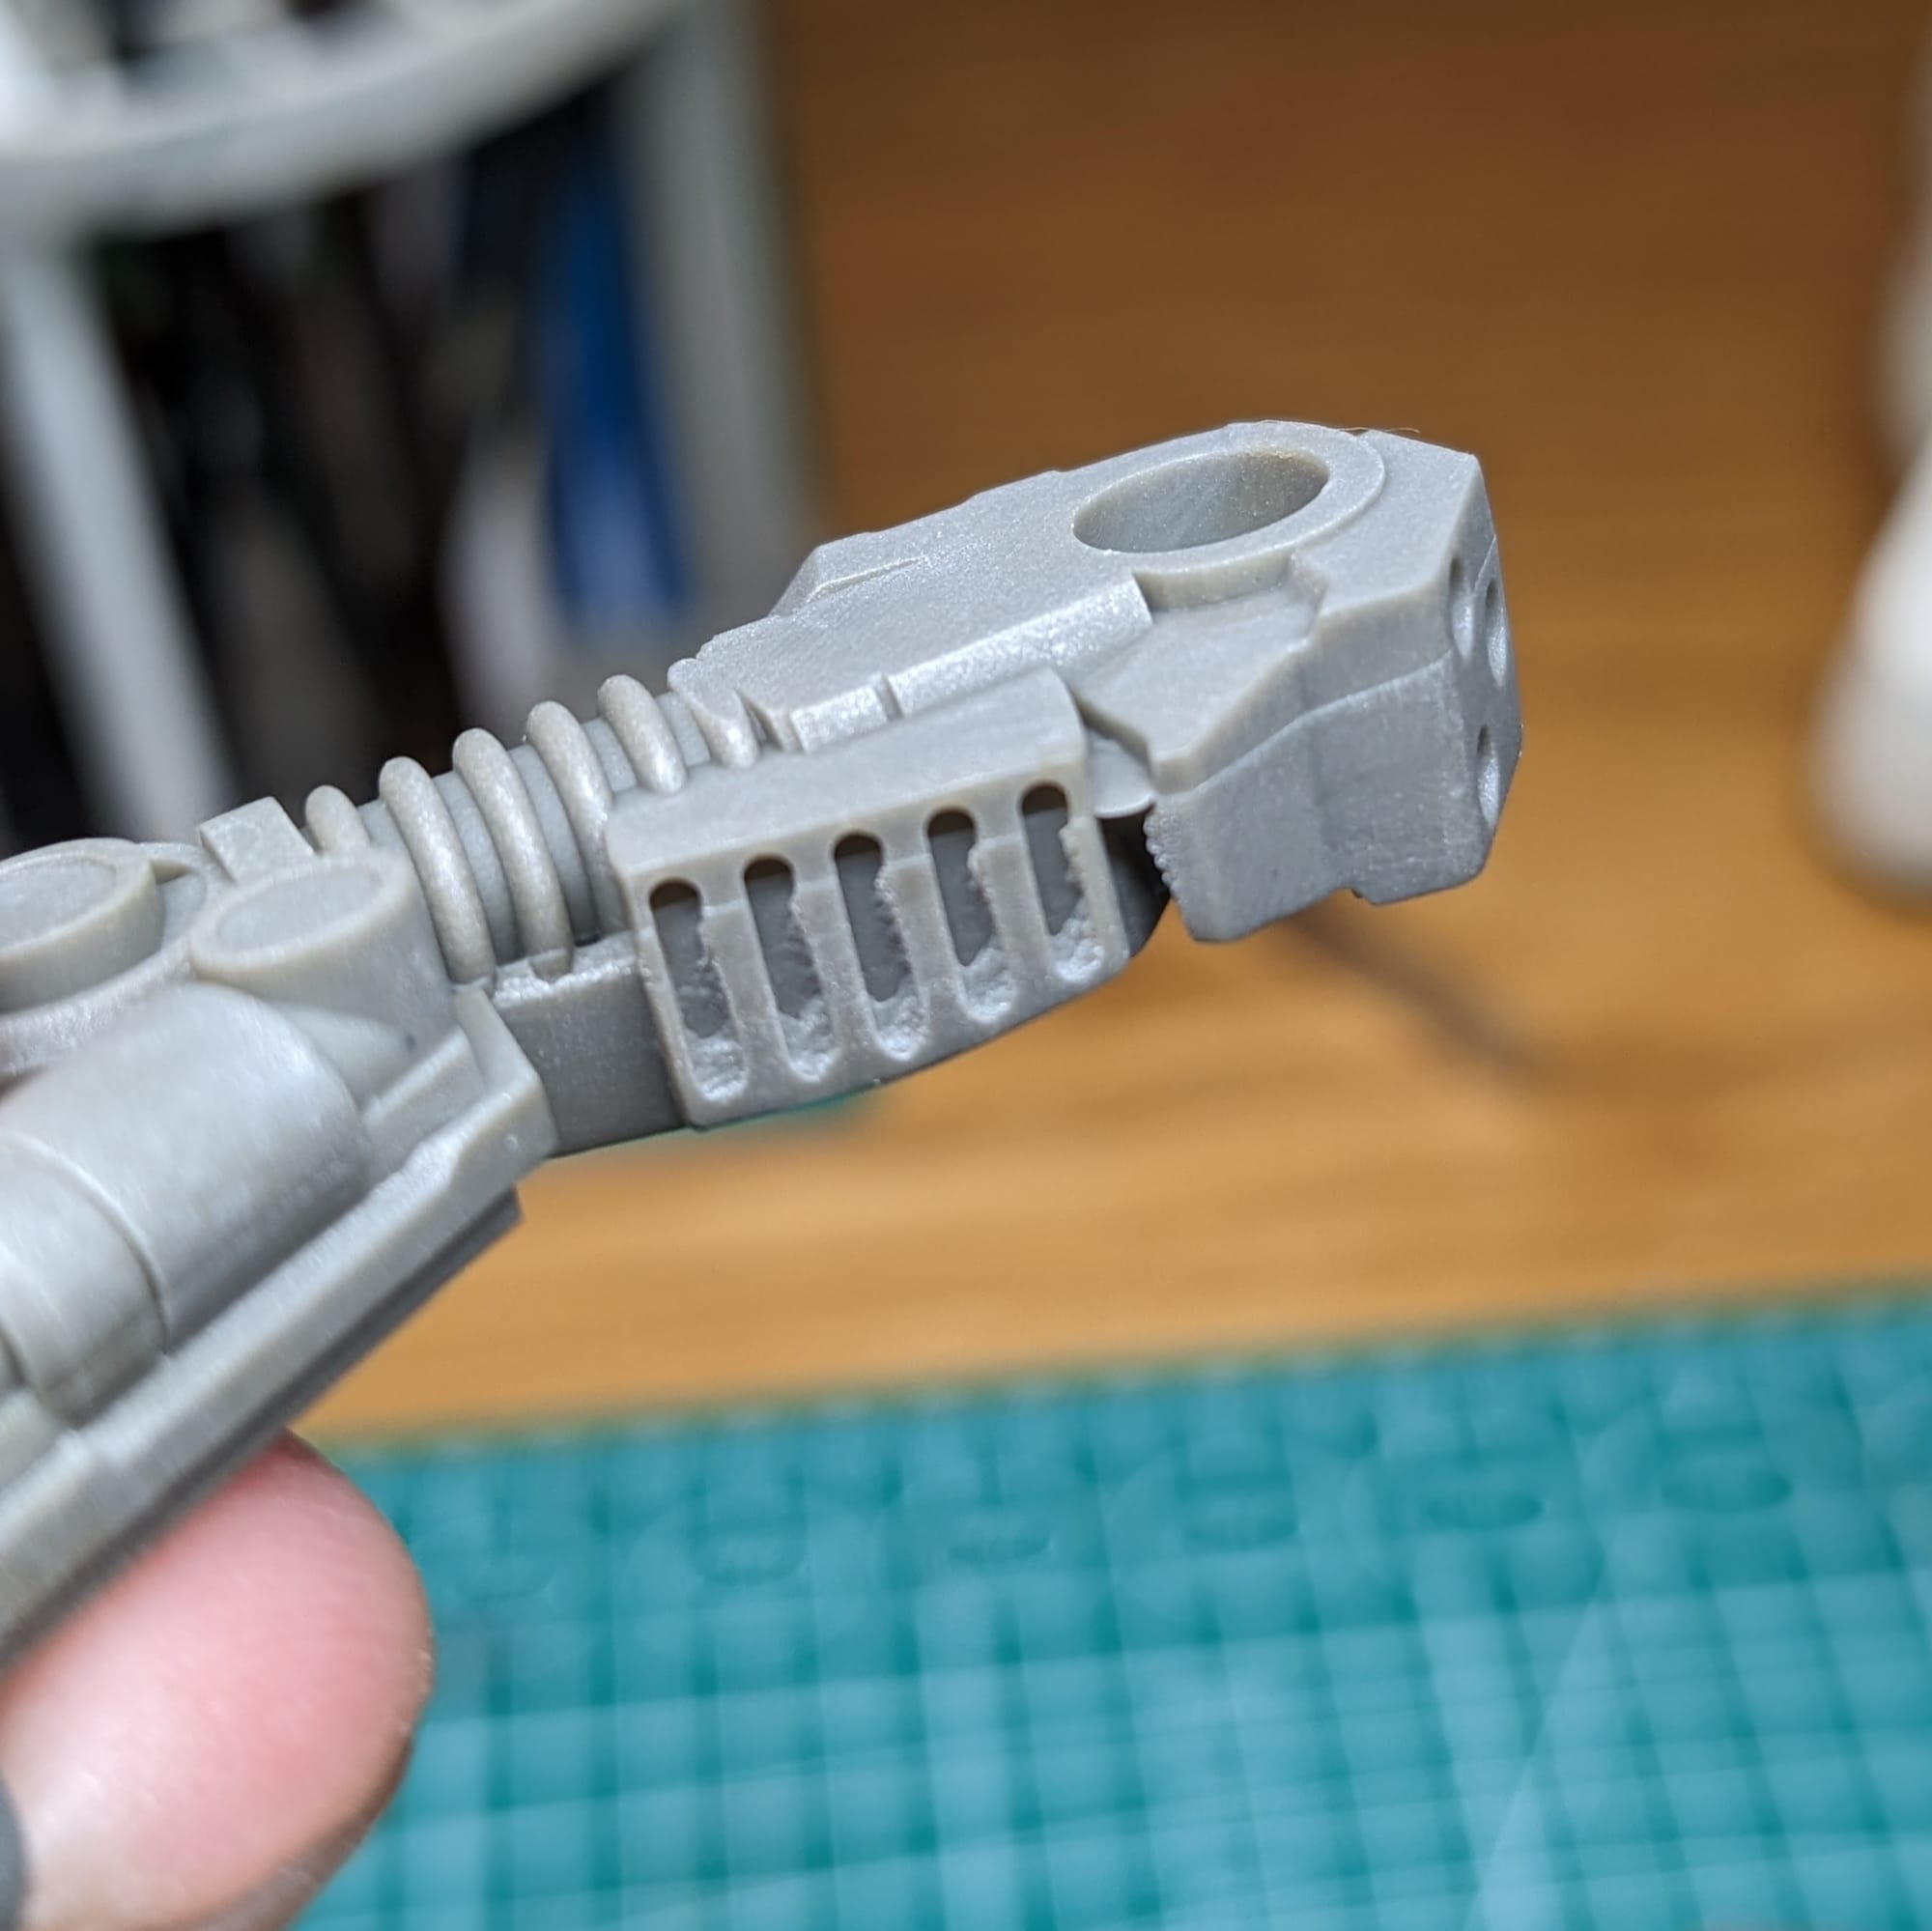
Assembly is straightforward, and you can use the box as the guide. The plastic is soft, so you don't have to worry about snapping anything as you rotate the legs to get them level on the base. I chose to rotate the head slightly to give it a little more personality as it's walking. I used basic Loctite Super Glue (Gel Control) and let it dry fully before priming.
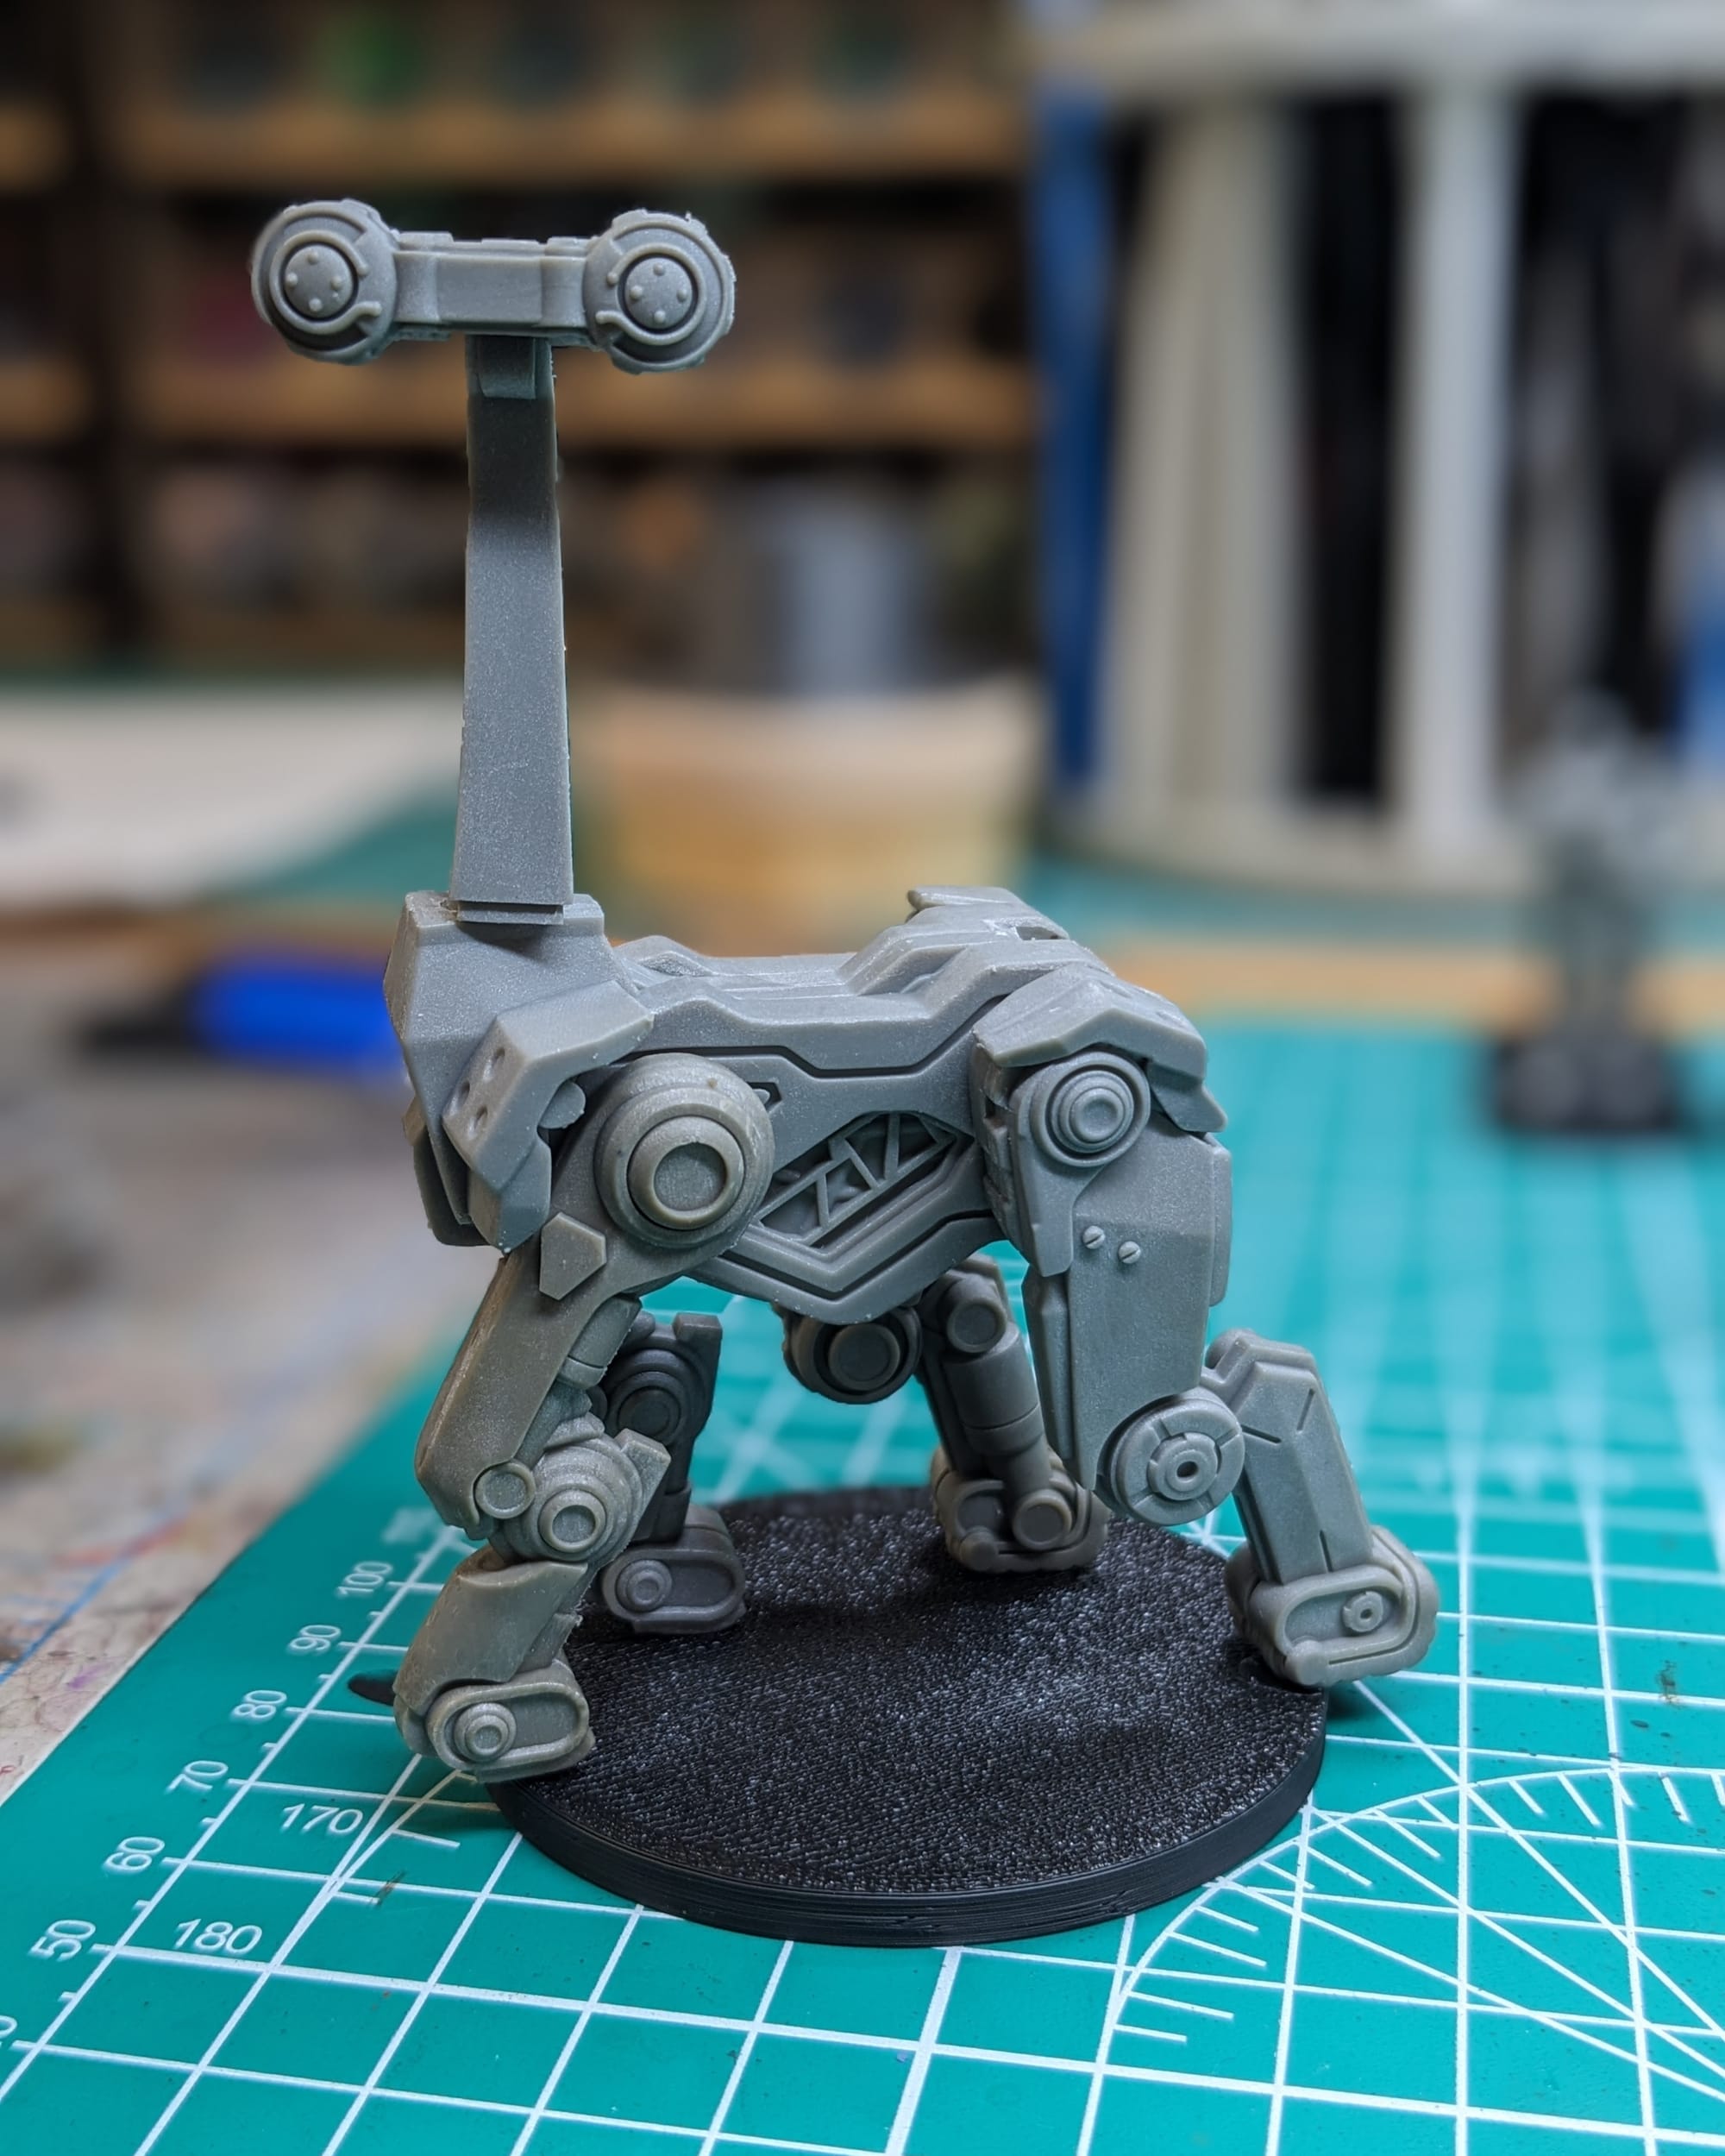
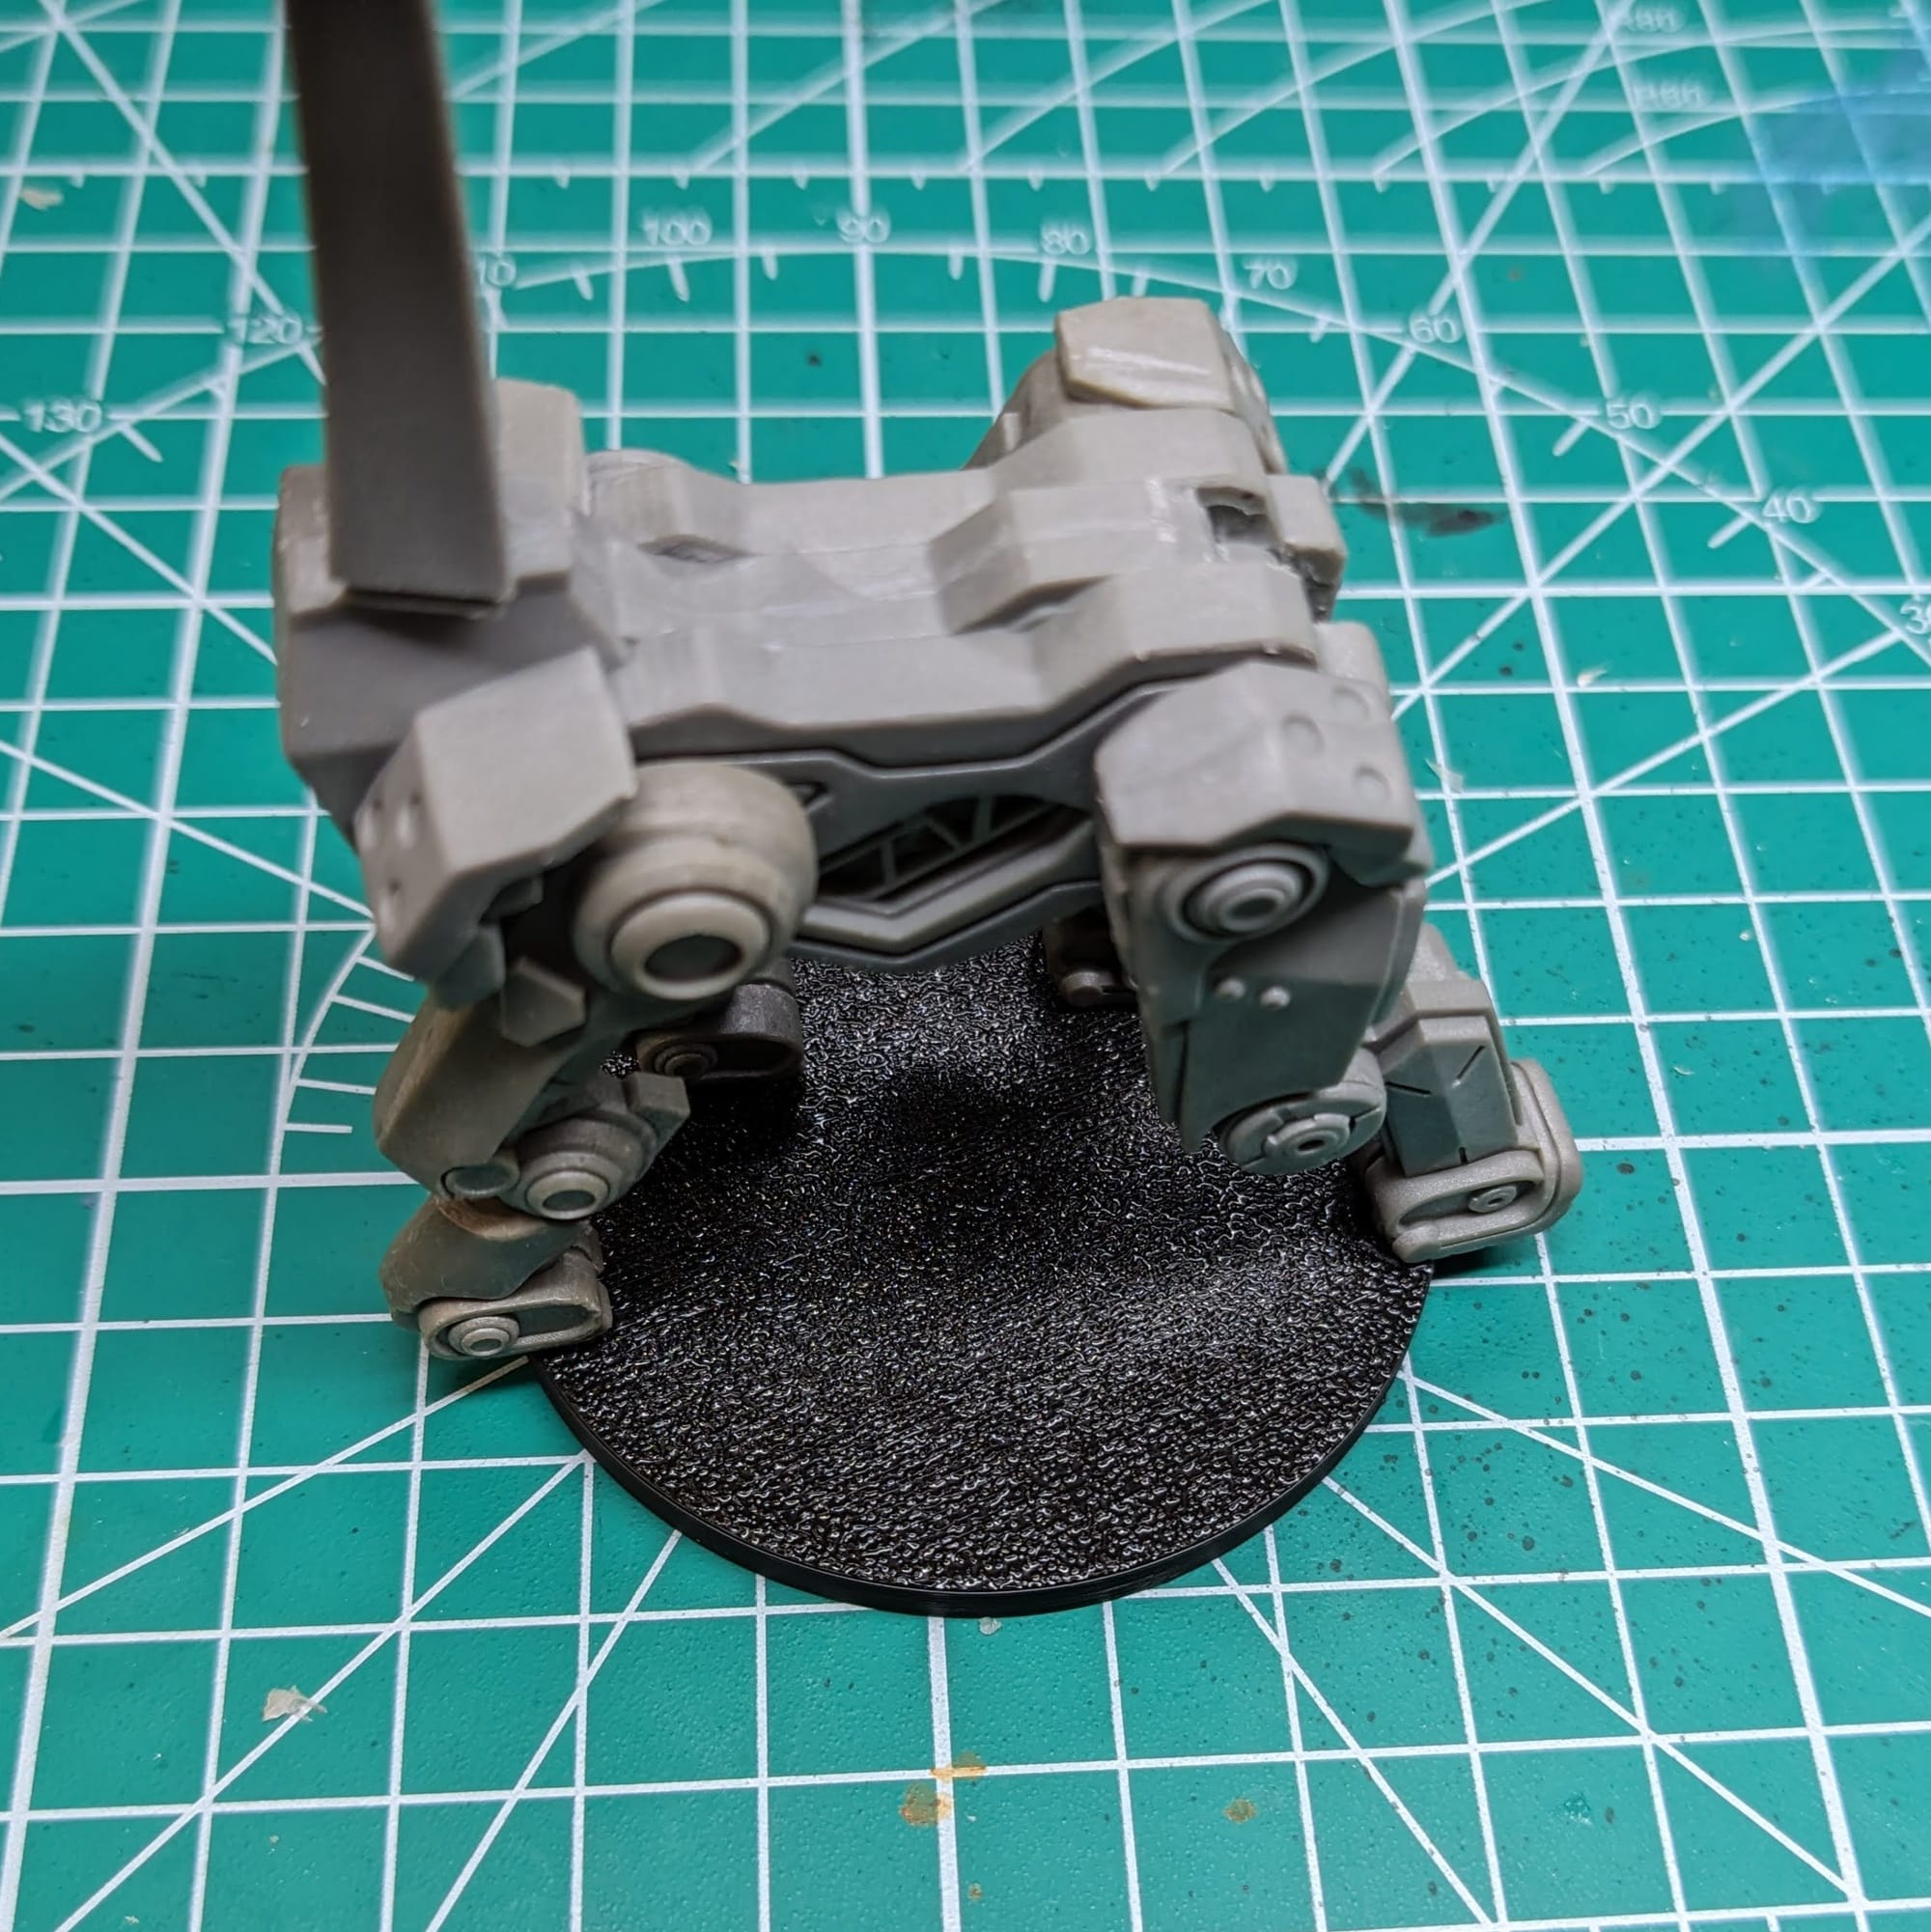
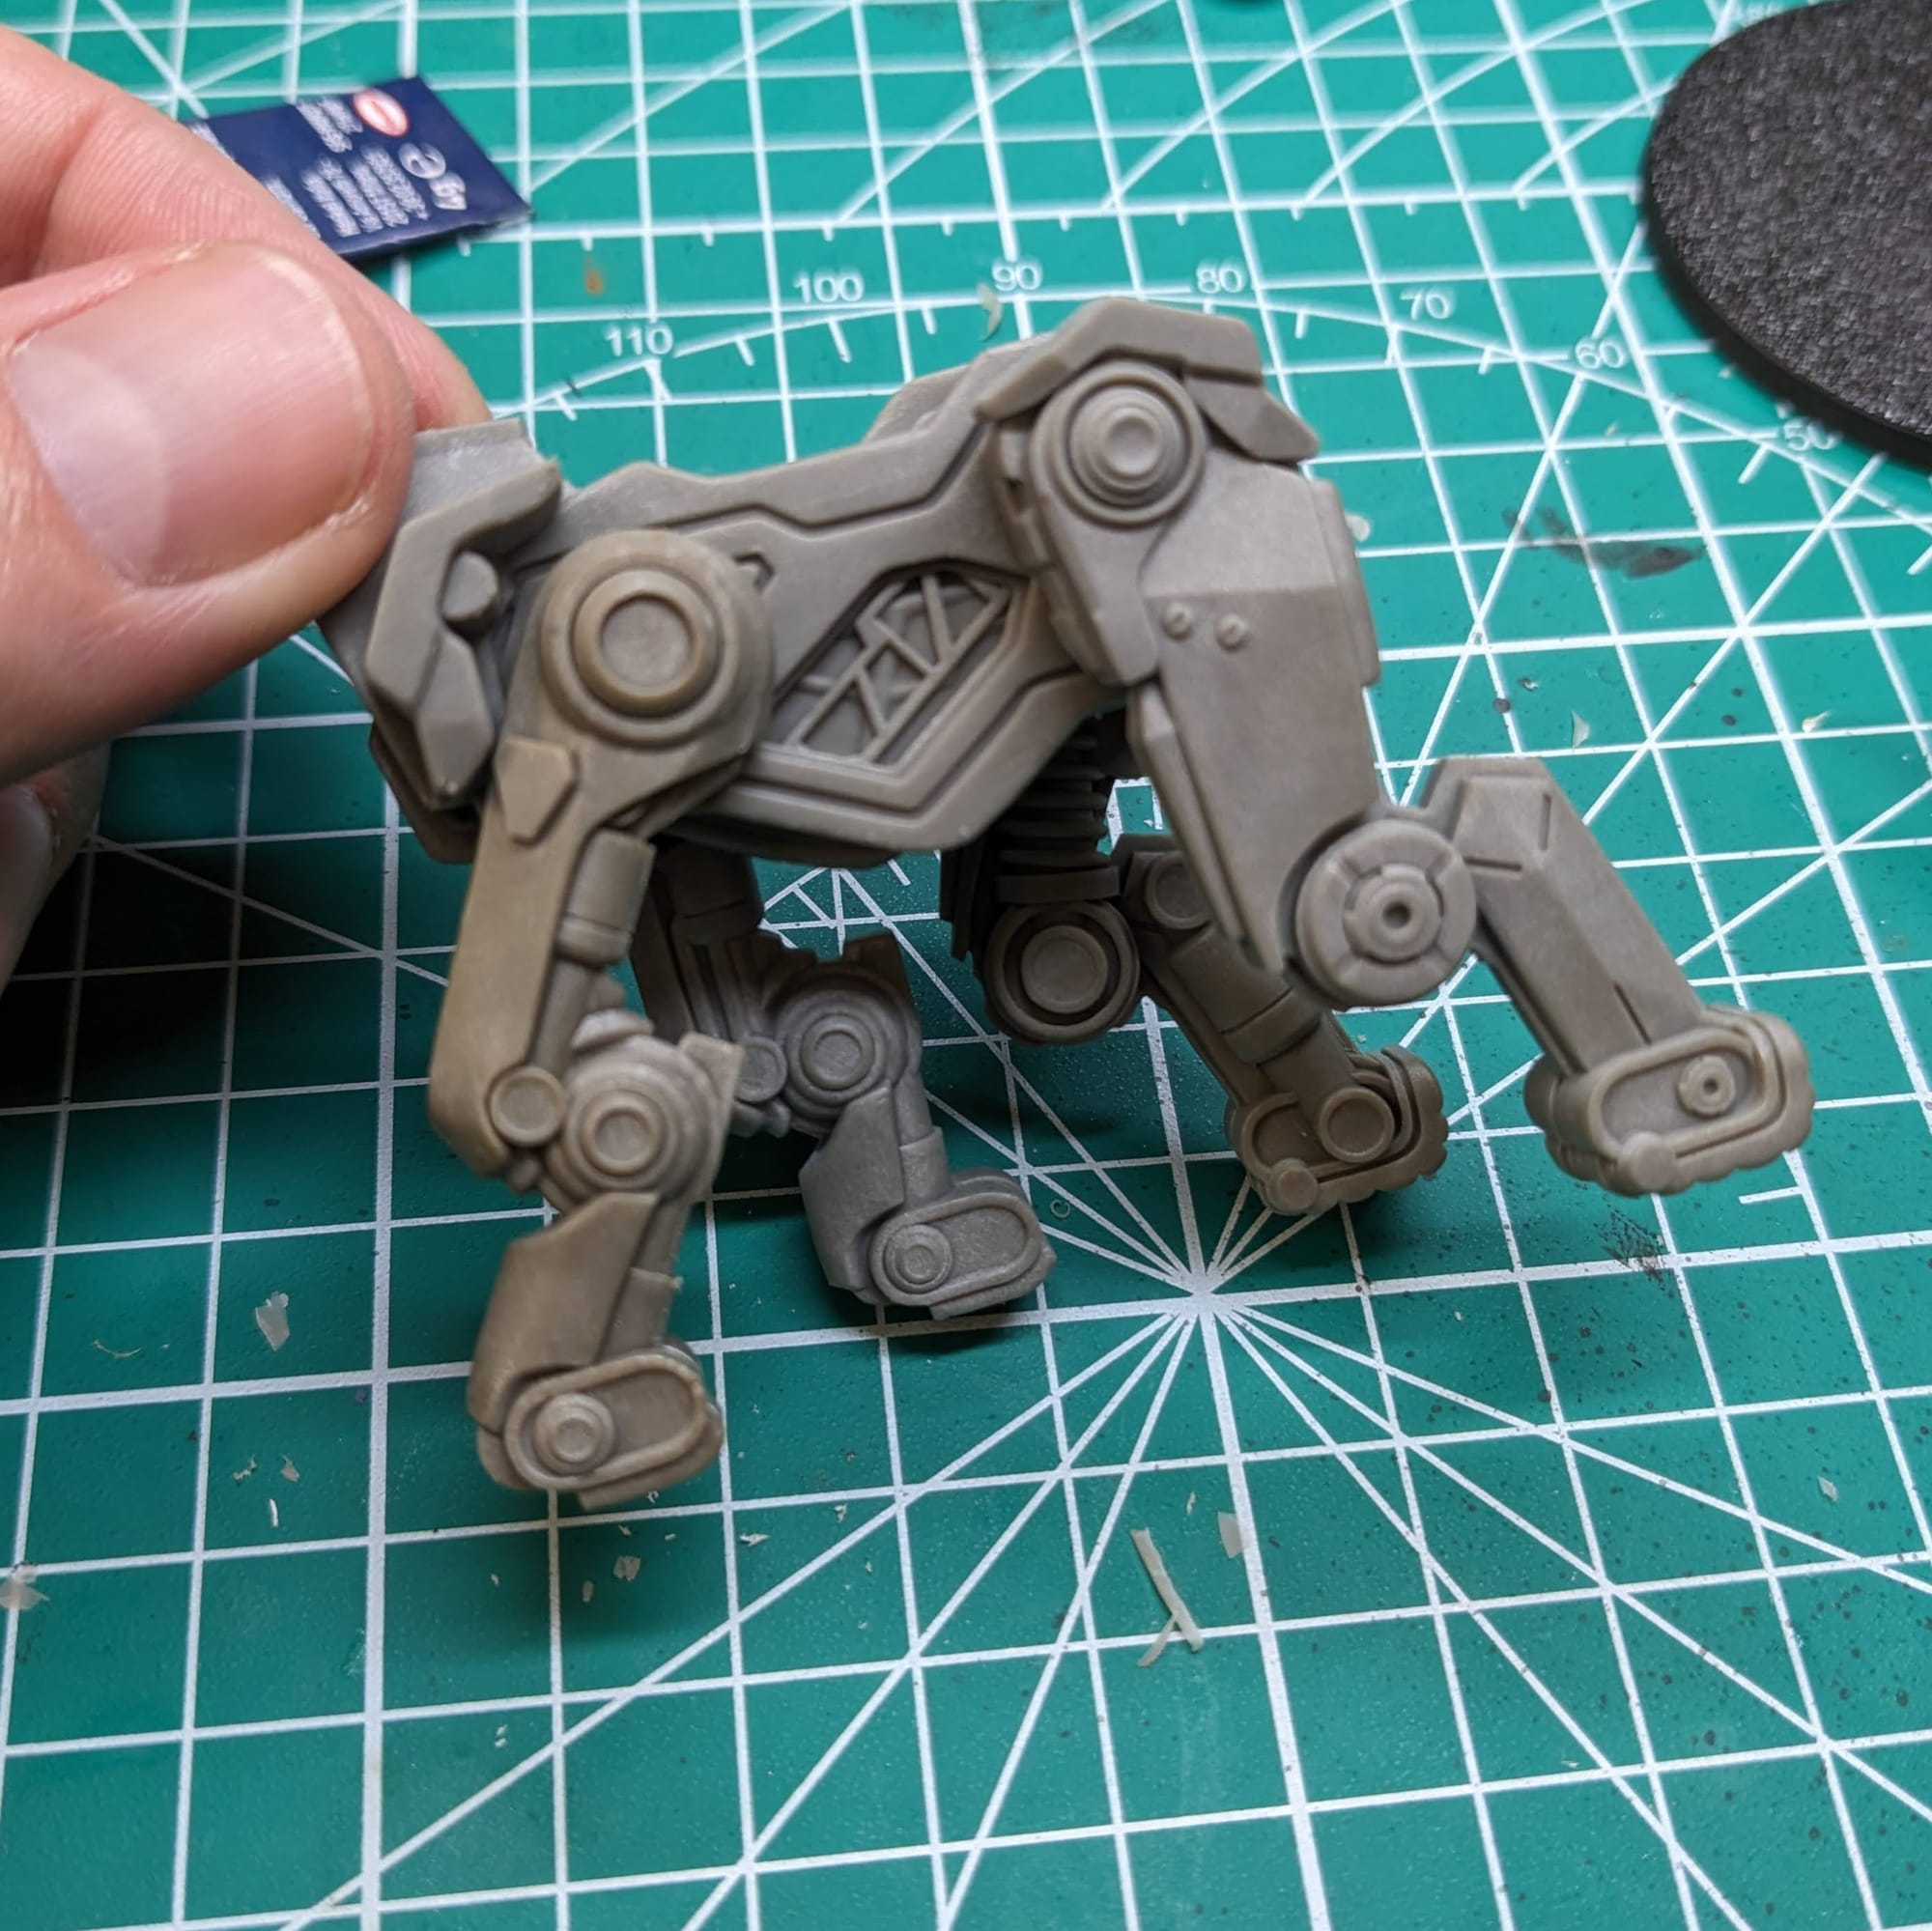
Be mindful of the positioning of the legs and make sure they're flush and level with the base.
Affixing Your Minis to the Bases
Depending on the miniatures, I sometimes prime and paint the figures separately from the bases. I use double-sided tape and affix them to extra bases. This allows me to quickly and freely paint the bases separately, assembling the model to the base once both are done.
Brushes & Painting Tools
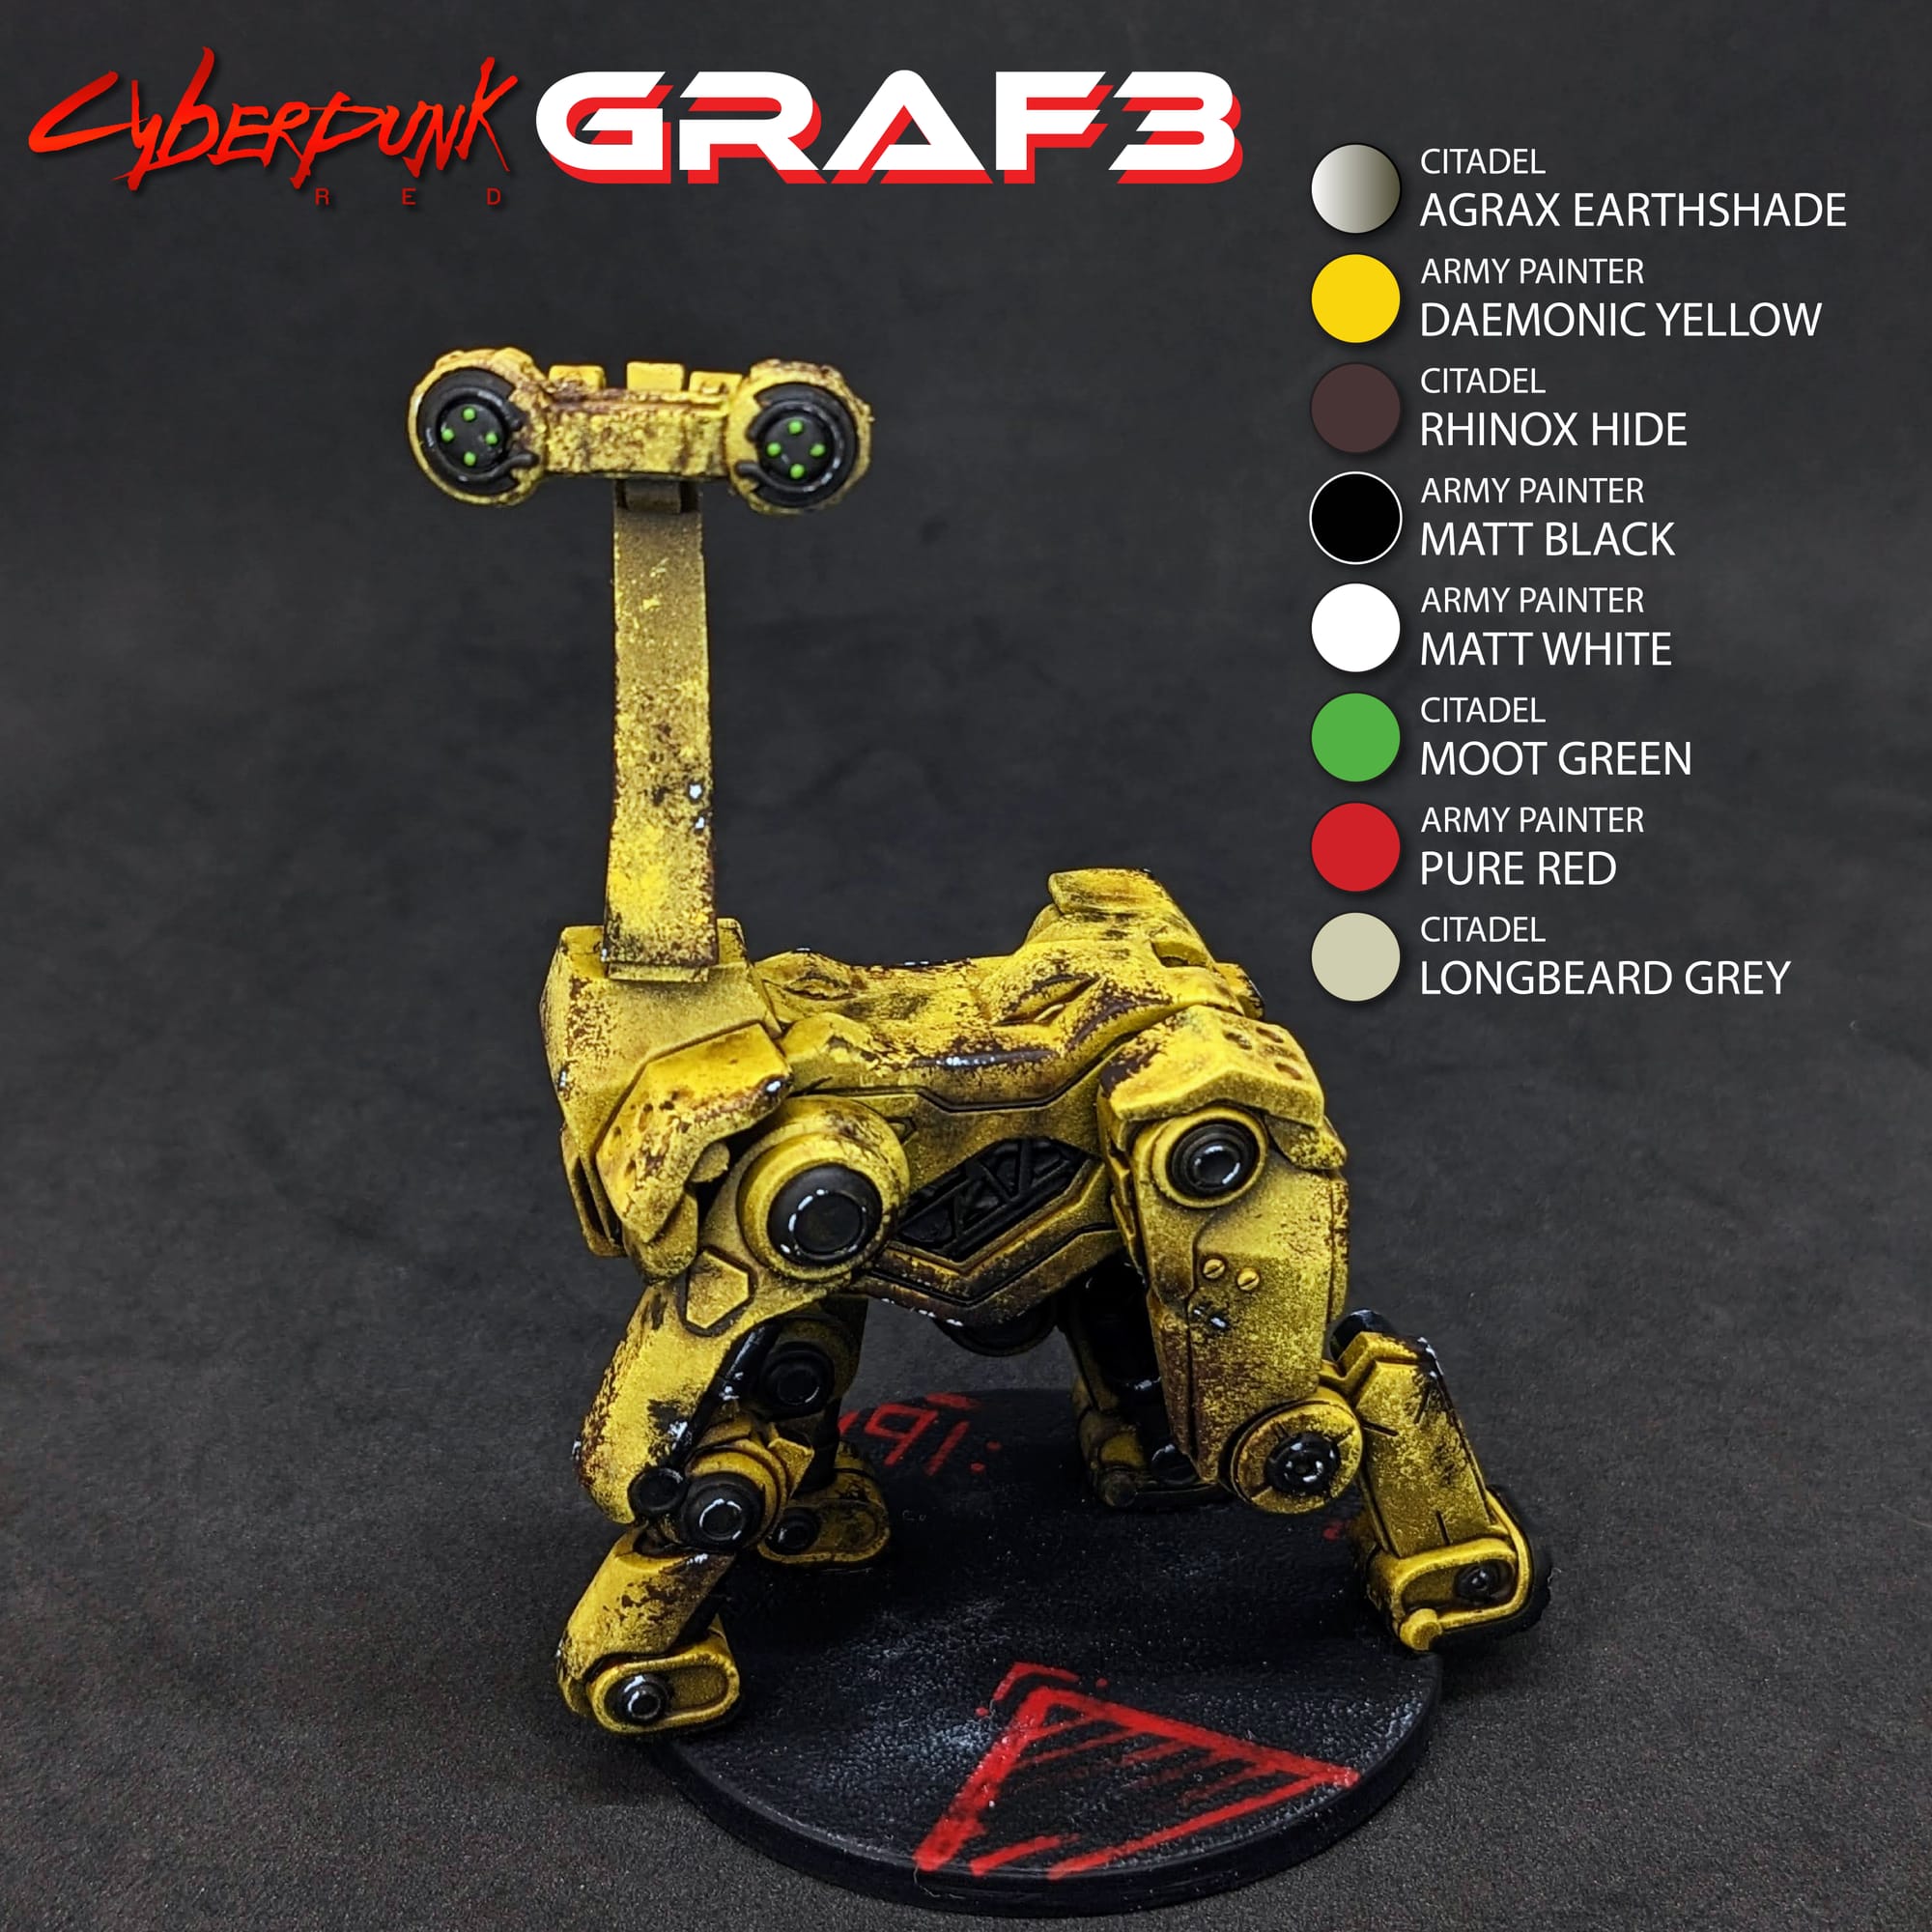
Everyone’s paint collection is different, and there is no ‘right way’ to paint your models. I use a wide variety of paint lines, but the majority of what I use for painting is Monument Hobbies’ Pro Acryl, Games Workshop’s Citadel Paints, and Army Painter’s various paint lines. For Citadel and Army Painter paints, I also make sure to mix in Liquitex Flow-Aid Additive to the paint pots and dropper bottles so that the paints are a little thinner and ready to add right onto my wet pallet or paint tray.
For this tutorial, I have included a visual guide (below) of the paints I used for the miniatures so you have an easily-accessible list to refer to if you need to go shopping. The paints are noted on the picture. Many paints are used for multiple figures, so a single bottle will be more than enough.
Matching Paints & Colors
You don’t need to use the exact paints listed in the pictures, and can substitute with the paints and colors you already own from other paint lines. Most of these colors are fairly generic, and I use them for multiple projects. I only recommend going out and buying a new paint or color if you think you’re going to use it for multiple projects in the future. You can use the PaintRack App for color comparisons across the different paint brands out there.
PaintRack App Links
Paint Brushes
As far as brushes go, any brush brand you’re comfortable painting with is totally fine. If this is your first time painting, I’d encourage you to get a starter model brush pack or a series of different brush sizes (5 being the largest, 00000 being the smallest) so you have different options depending on what you’re painting. You also don’t need the high-end, super expensive brands; most generic brands are absolutely fine to use.
Model Holders
After I finish priming models, I affix them to some large medicine tubes with some double-sided tape or poster tack. There are official miniature holders and handles out there, but I just use these since they’re cheap, and sometimes I need multiple holders for batch painting. Paint holders allow me to easily handle the models so I can turn the models freely to get a good angle to paint certain parts or areas, as well as prevent hand cramping.
Painting Your Miniatures
The Paint Plan
For pretty much every miniature painting project I do, I start with a plan. Even before putting the primer and paint on a model, I find photo references of the paint schemes and details I am looking for. Most times, this means having a browser window up with different web pages and images next to my painting area, so I can quickly refer to them as I paint. I also come up with a paint plan, choosing what colors I am going to use and what order I apply them in.
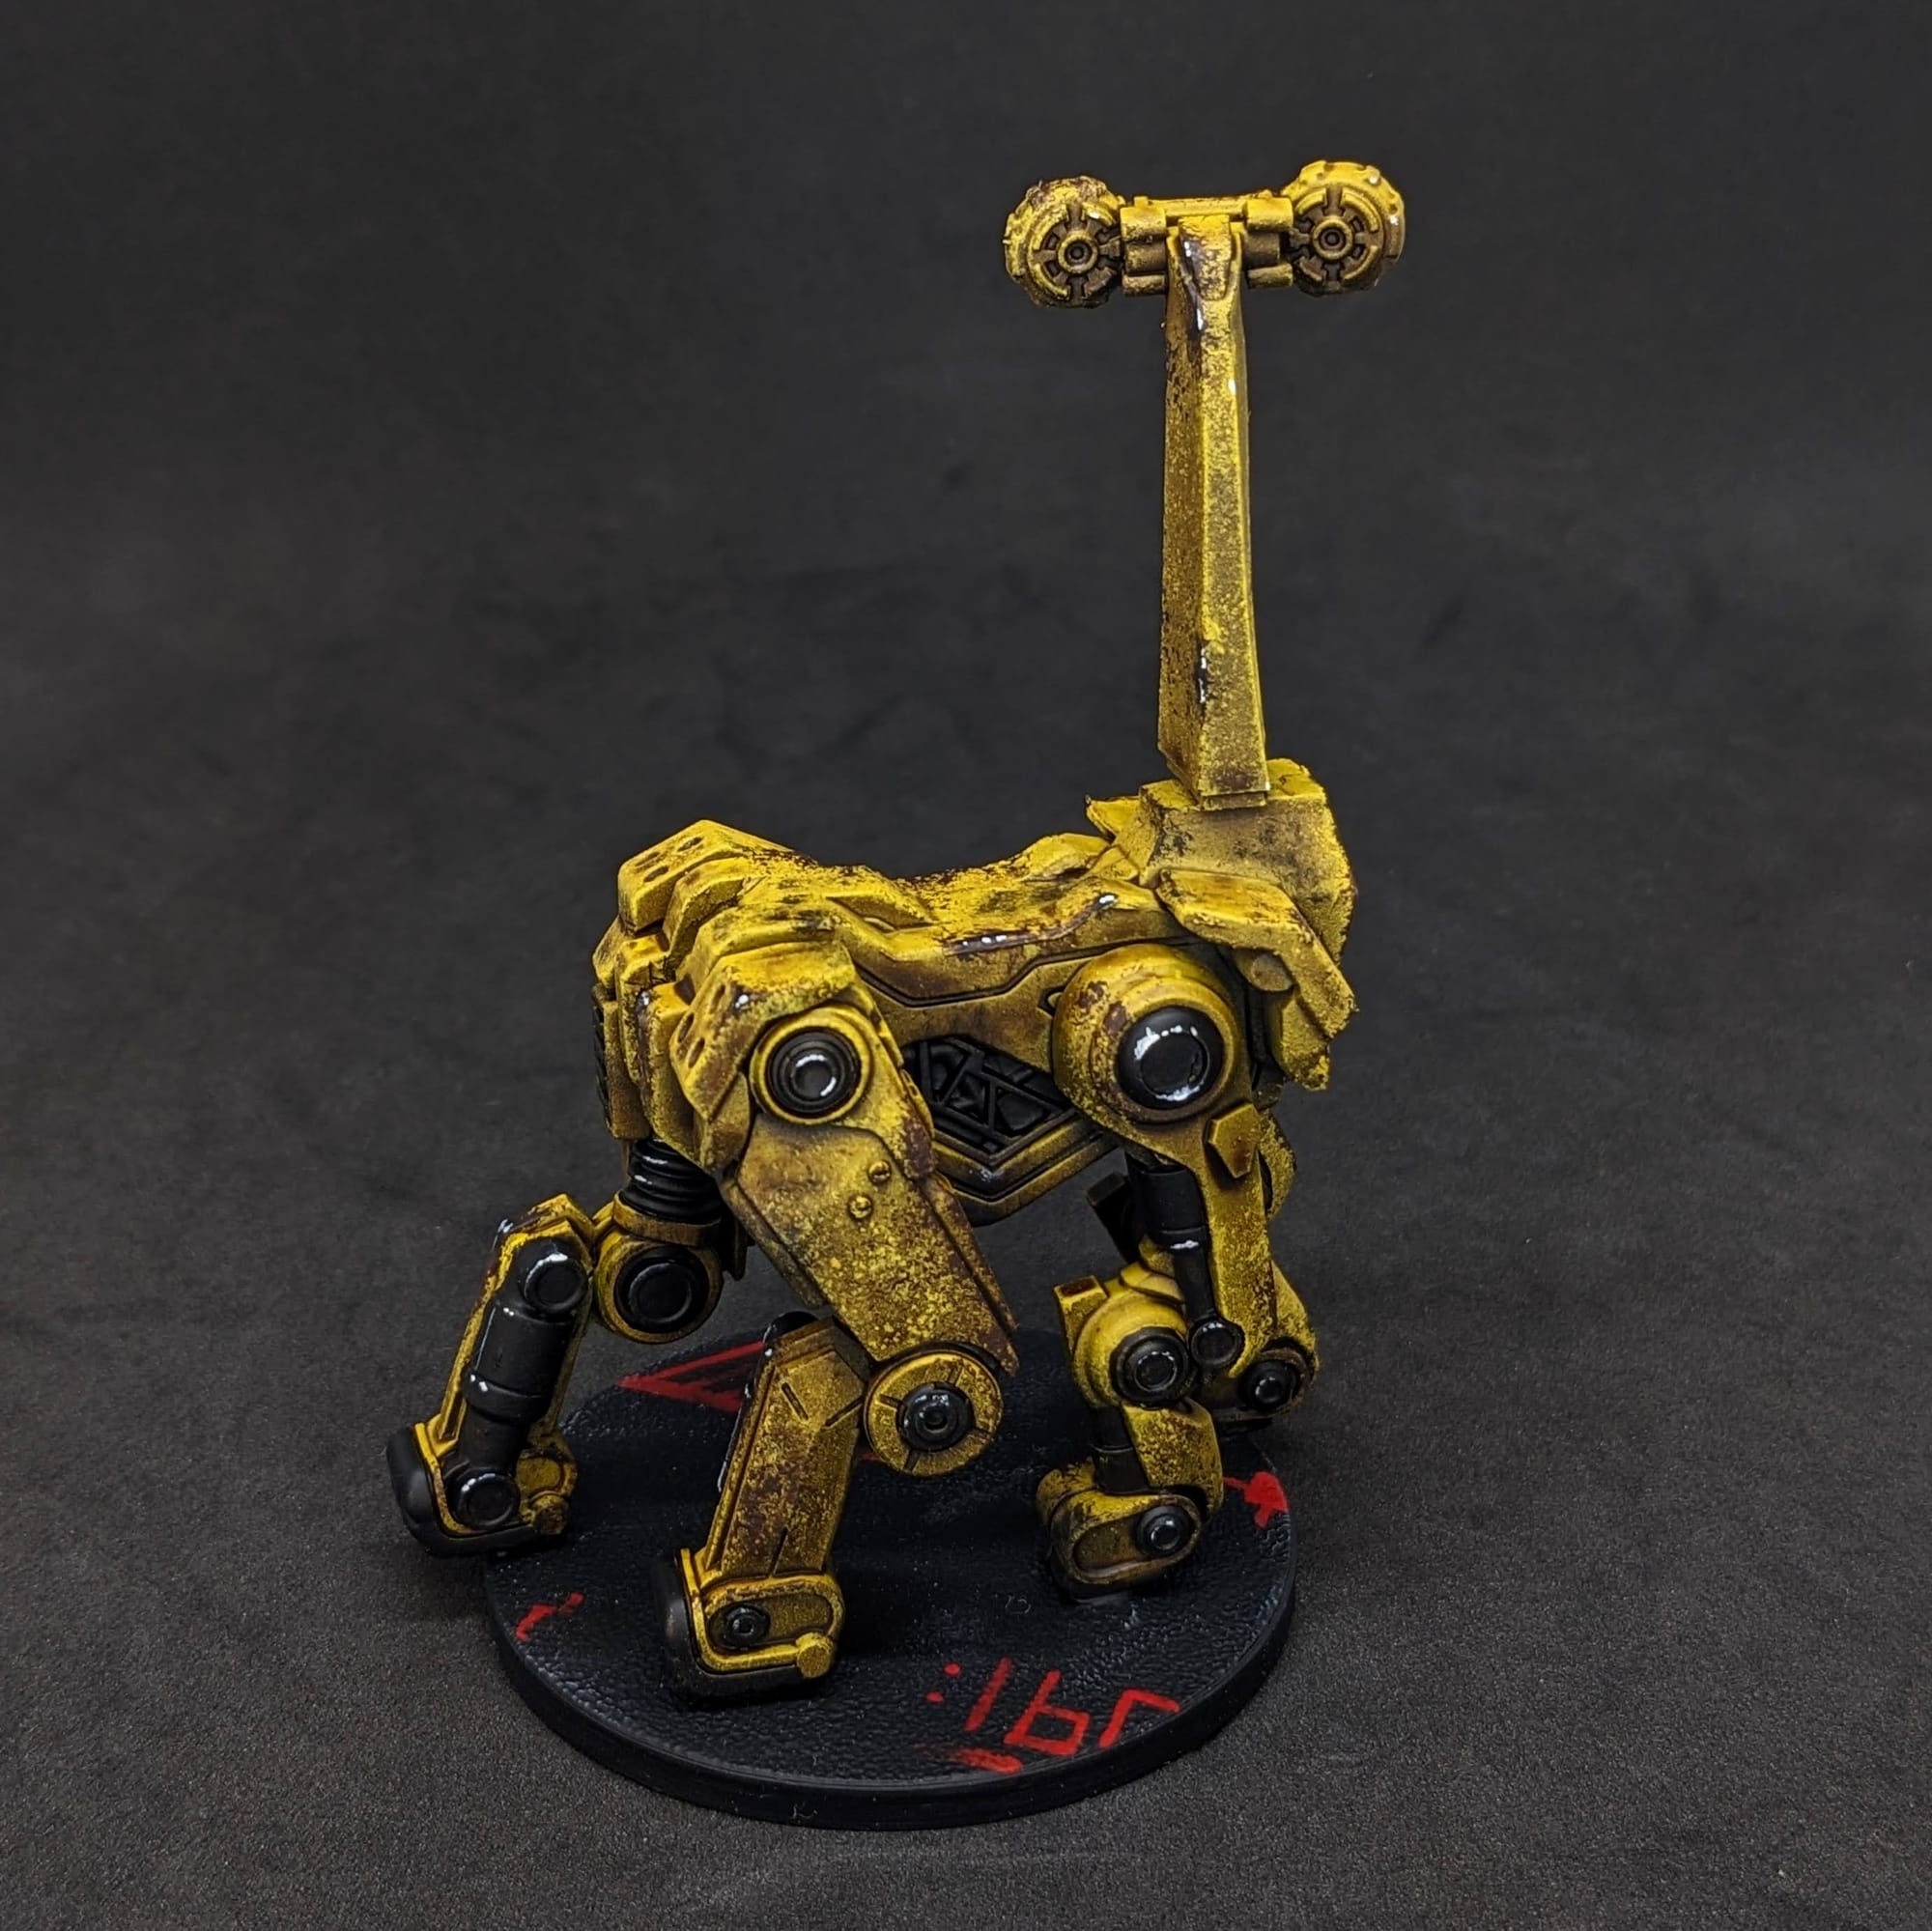
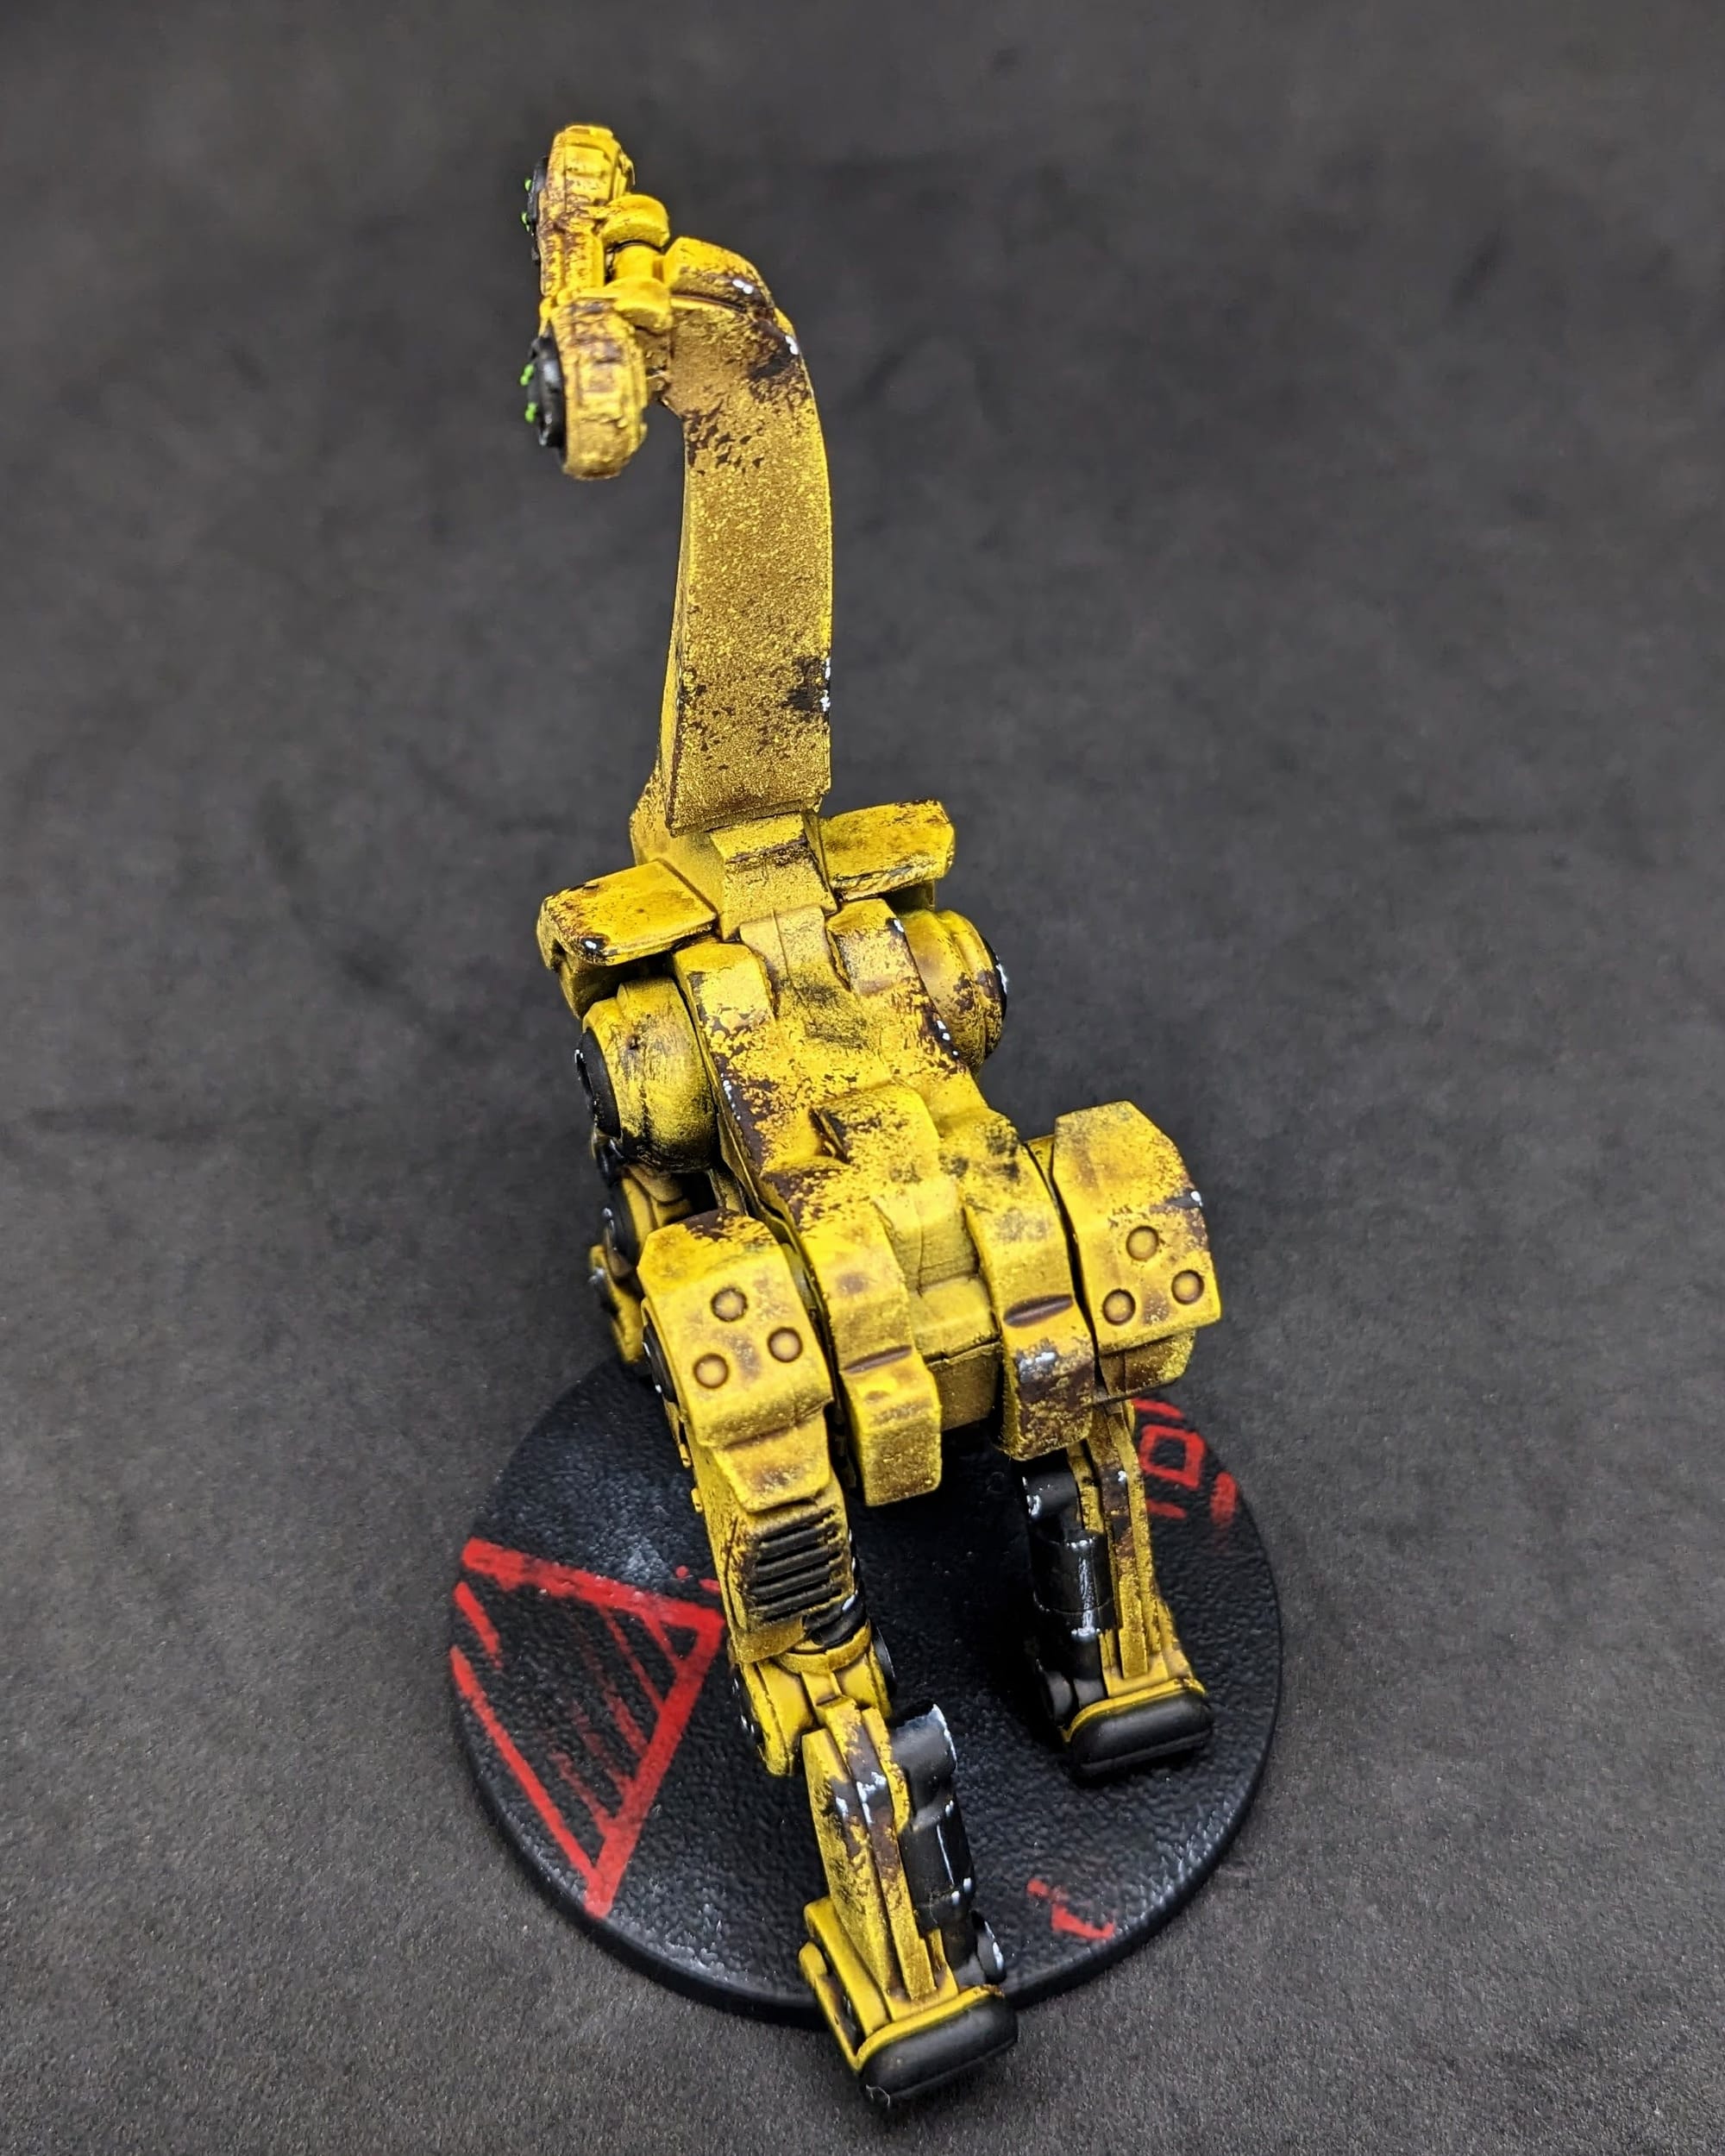
For this GRAF3, my goal was to paint a robot Giraffe (I mean, c'mon, look at the name and model). With a base coat of yellow, I wanted to simulate a Giraffe's spots with splotches of brown and black. Because this thing isn't walking off the assembly line, I wanted to add some dings and paint chips as well to give it a sense that it's been in operation for quite some time.
Remember that done is better than perfect!
Priming
In general terms, getting the majority of a color for a model applied via a rattle can or airbrush saves a lot of time. Typically, I primed all of the figures with a Zenithal prime on them, using a base coat of Rustoleum Flat Black and a top coat of Army Painter White Primer or one of the other color primers. However, sometimes I use just the black primer or use another color for the Zenithal.
Here are the primers I used for the miniatures and terrain pieces.
- Army Painter Leather Brown
- Army Painter Daemonic Yellow
Step-by-Step Painting Guide
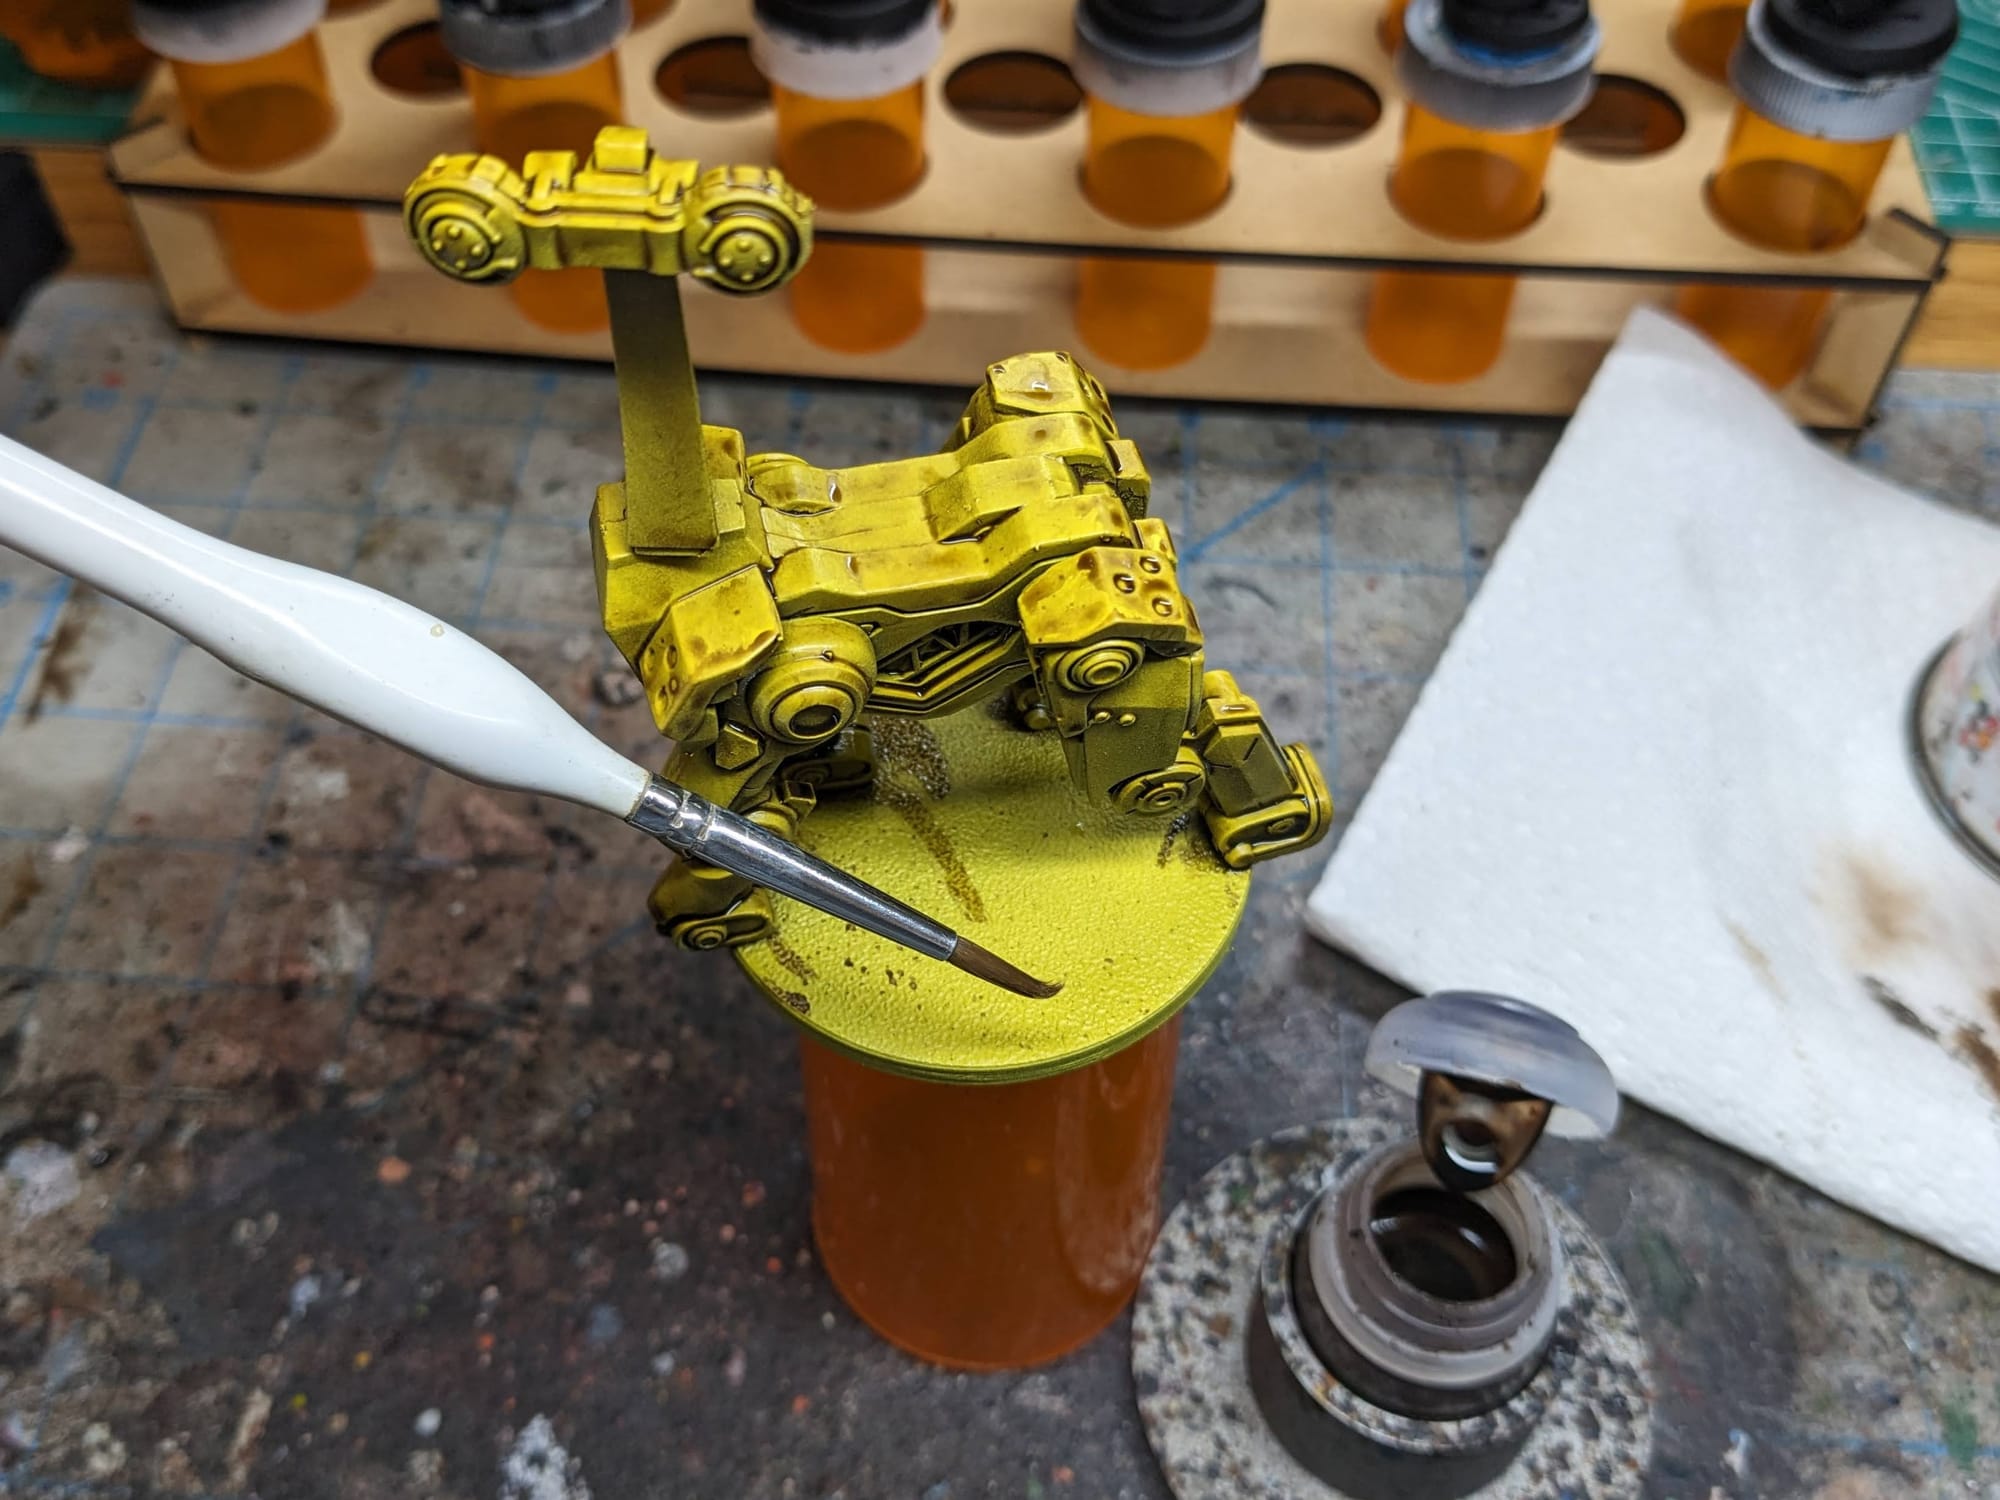
After priming, I applied Agrax Earthshade to the entire model. While Nuln Oil or a Dark Tone would work here, too I wanted to give it a slightly warmer color with with the brown. It'll pair nicely with the brown spots later, too.
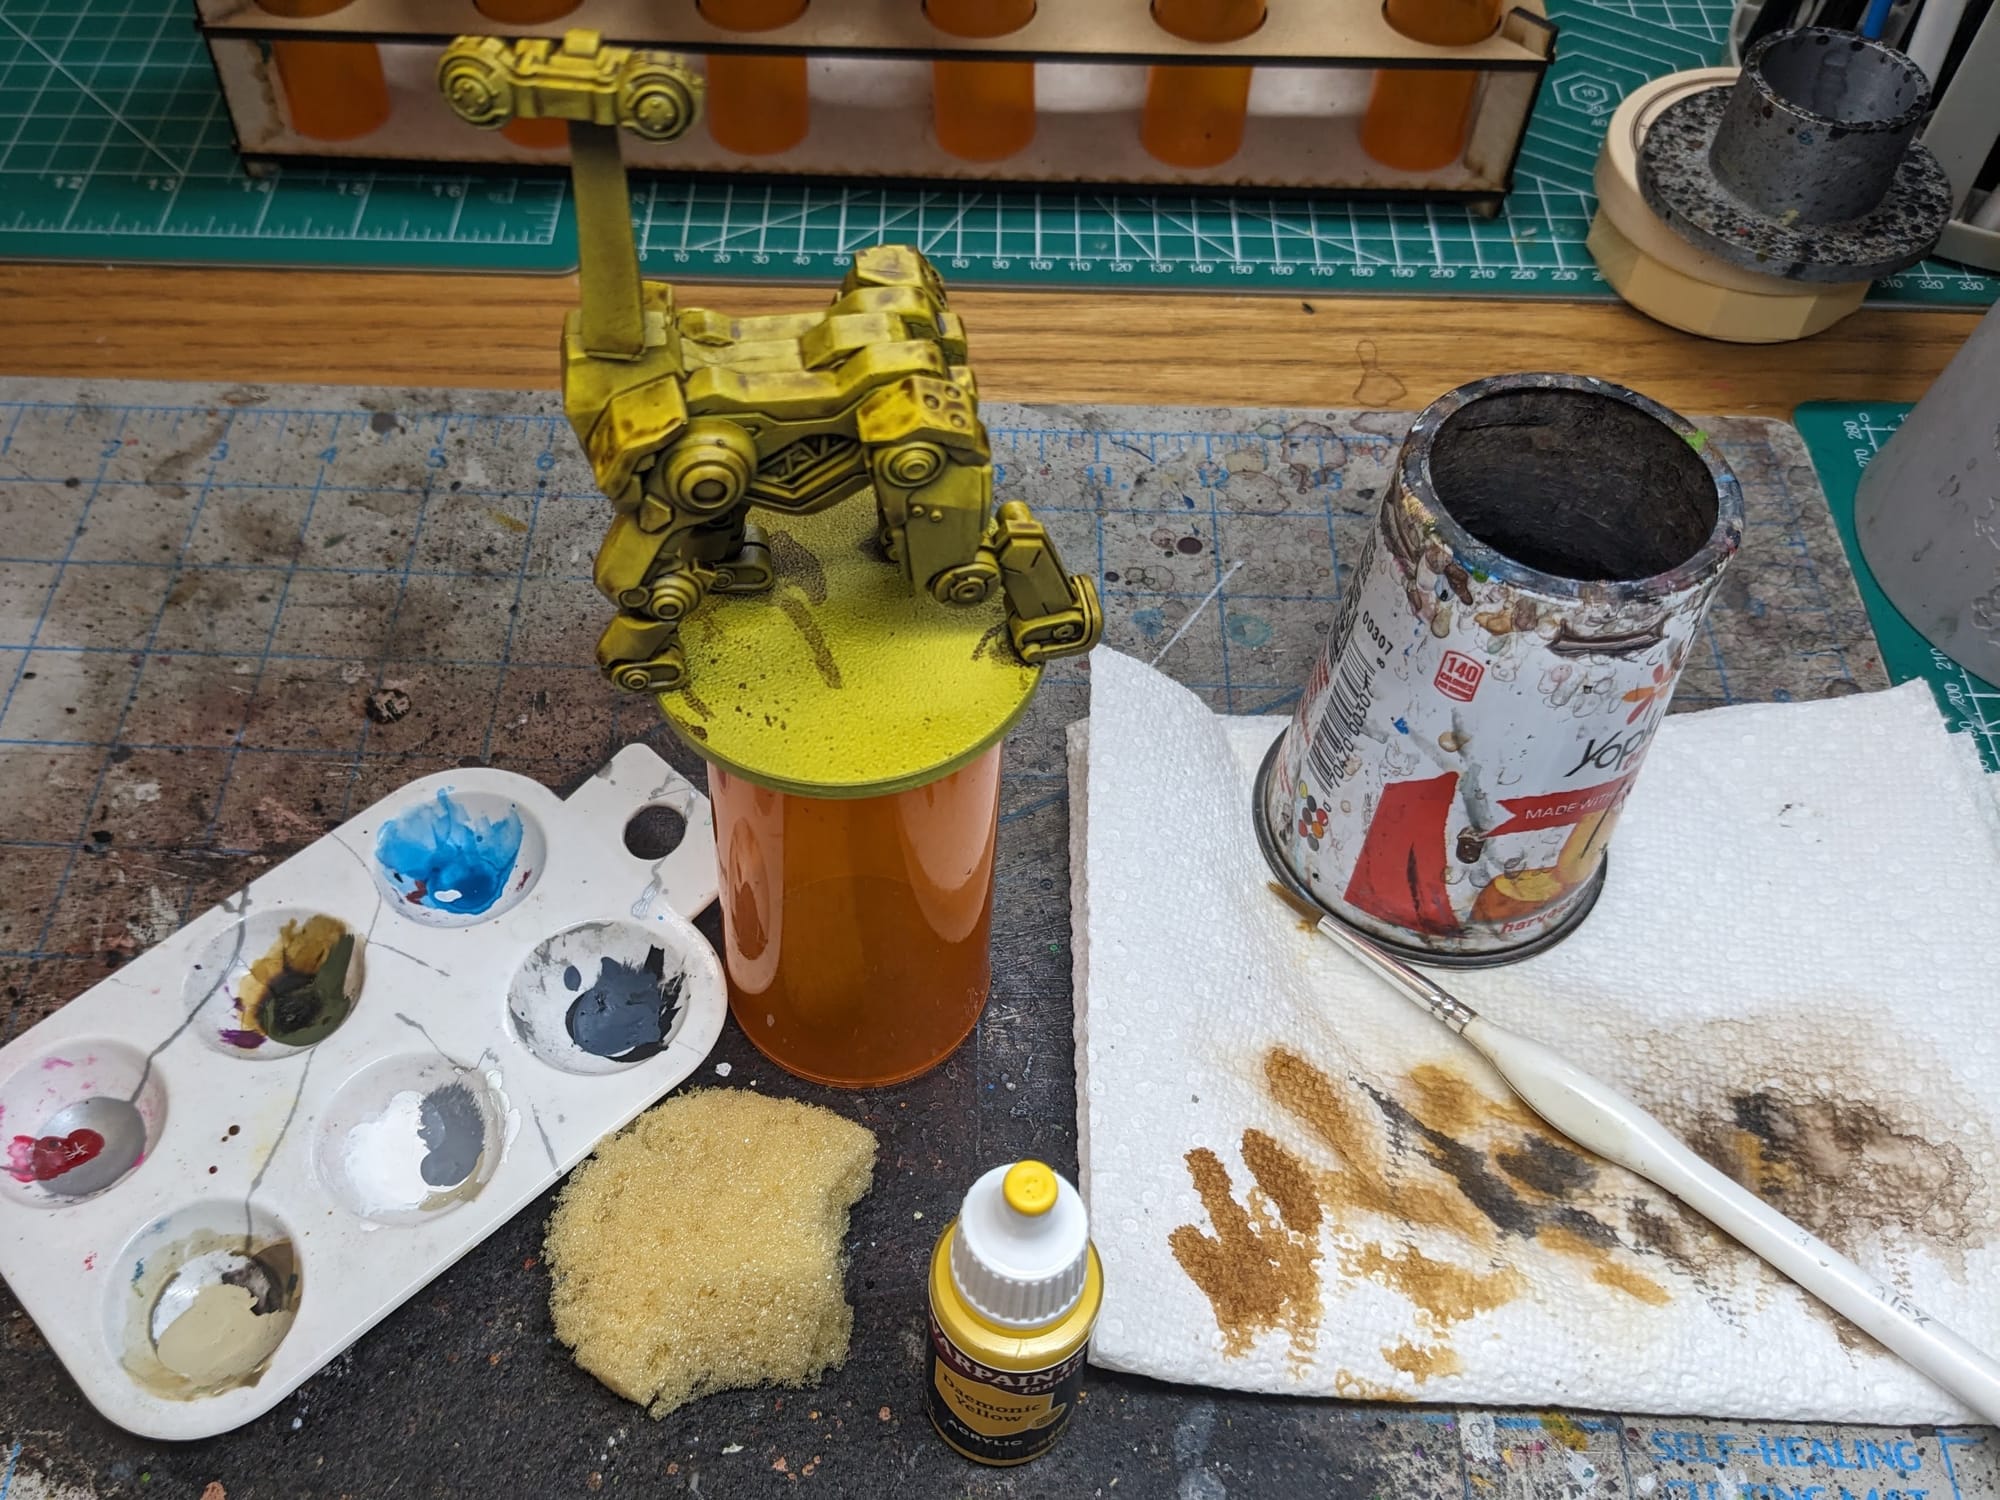
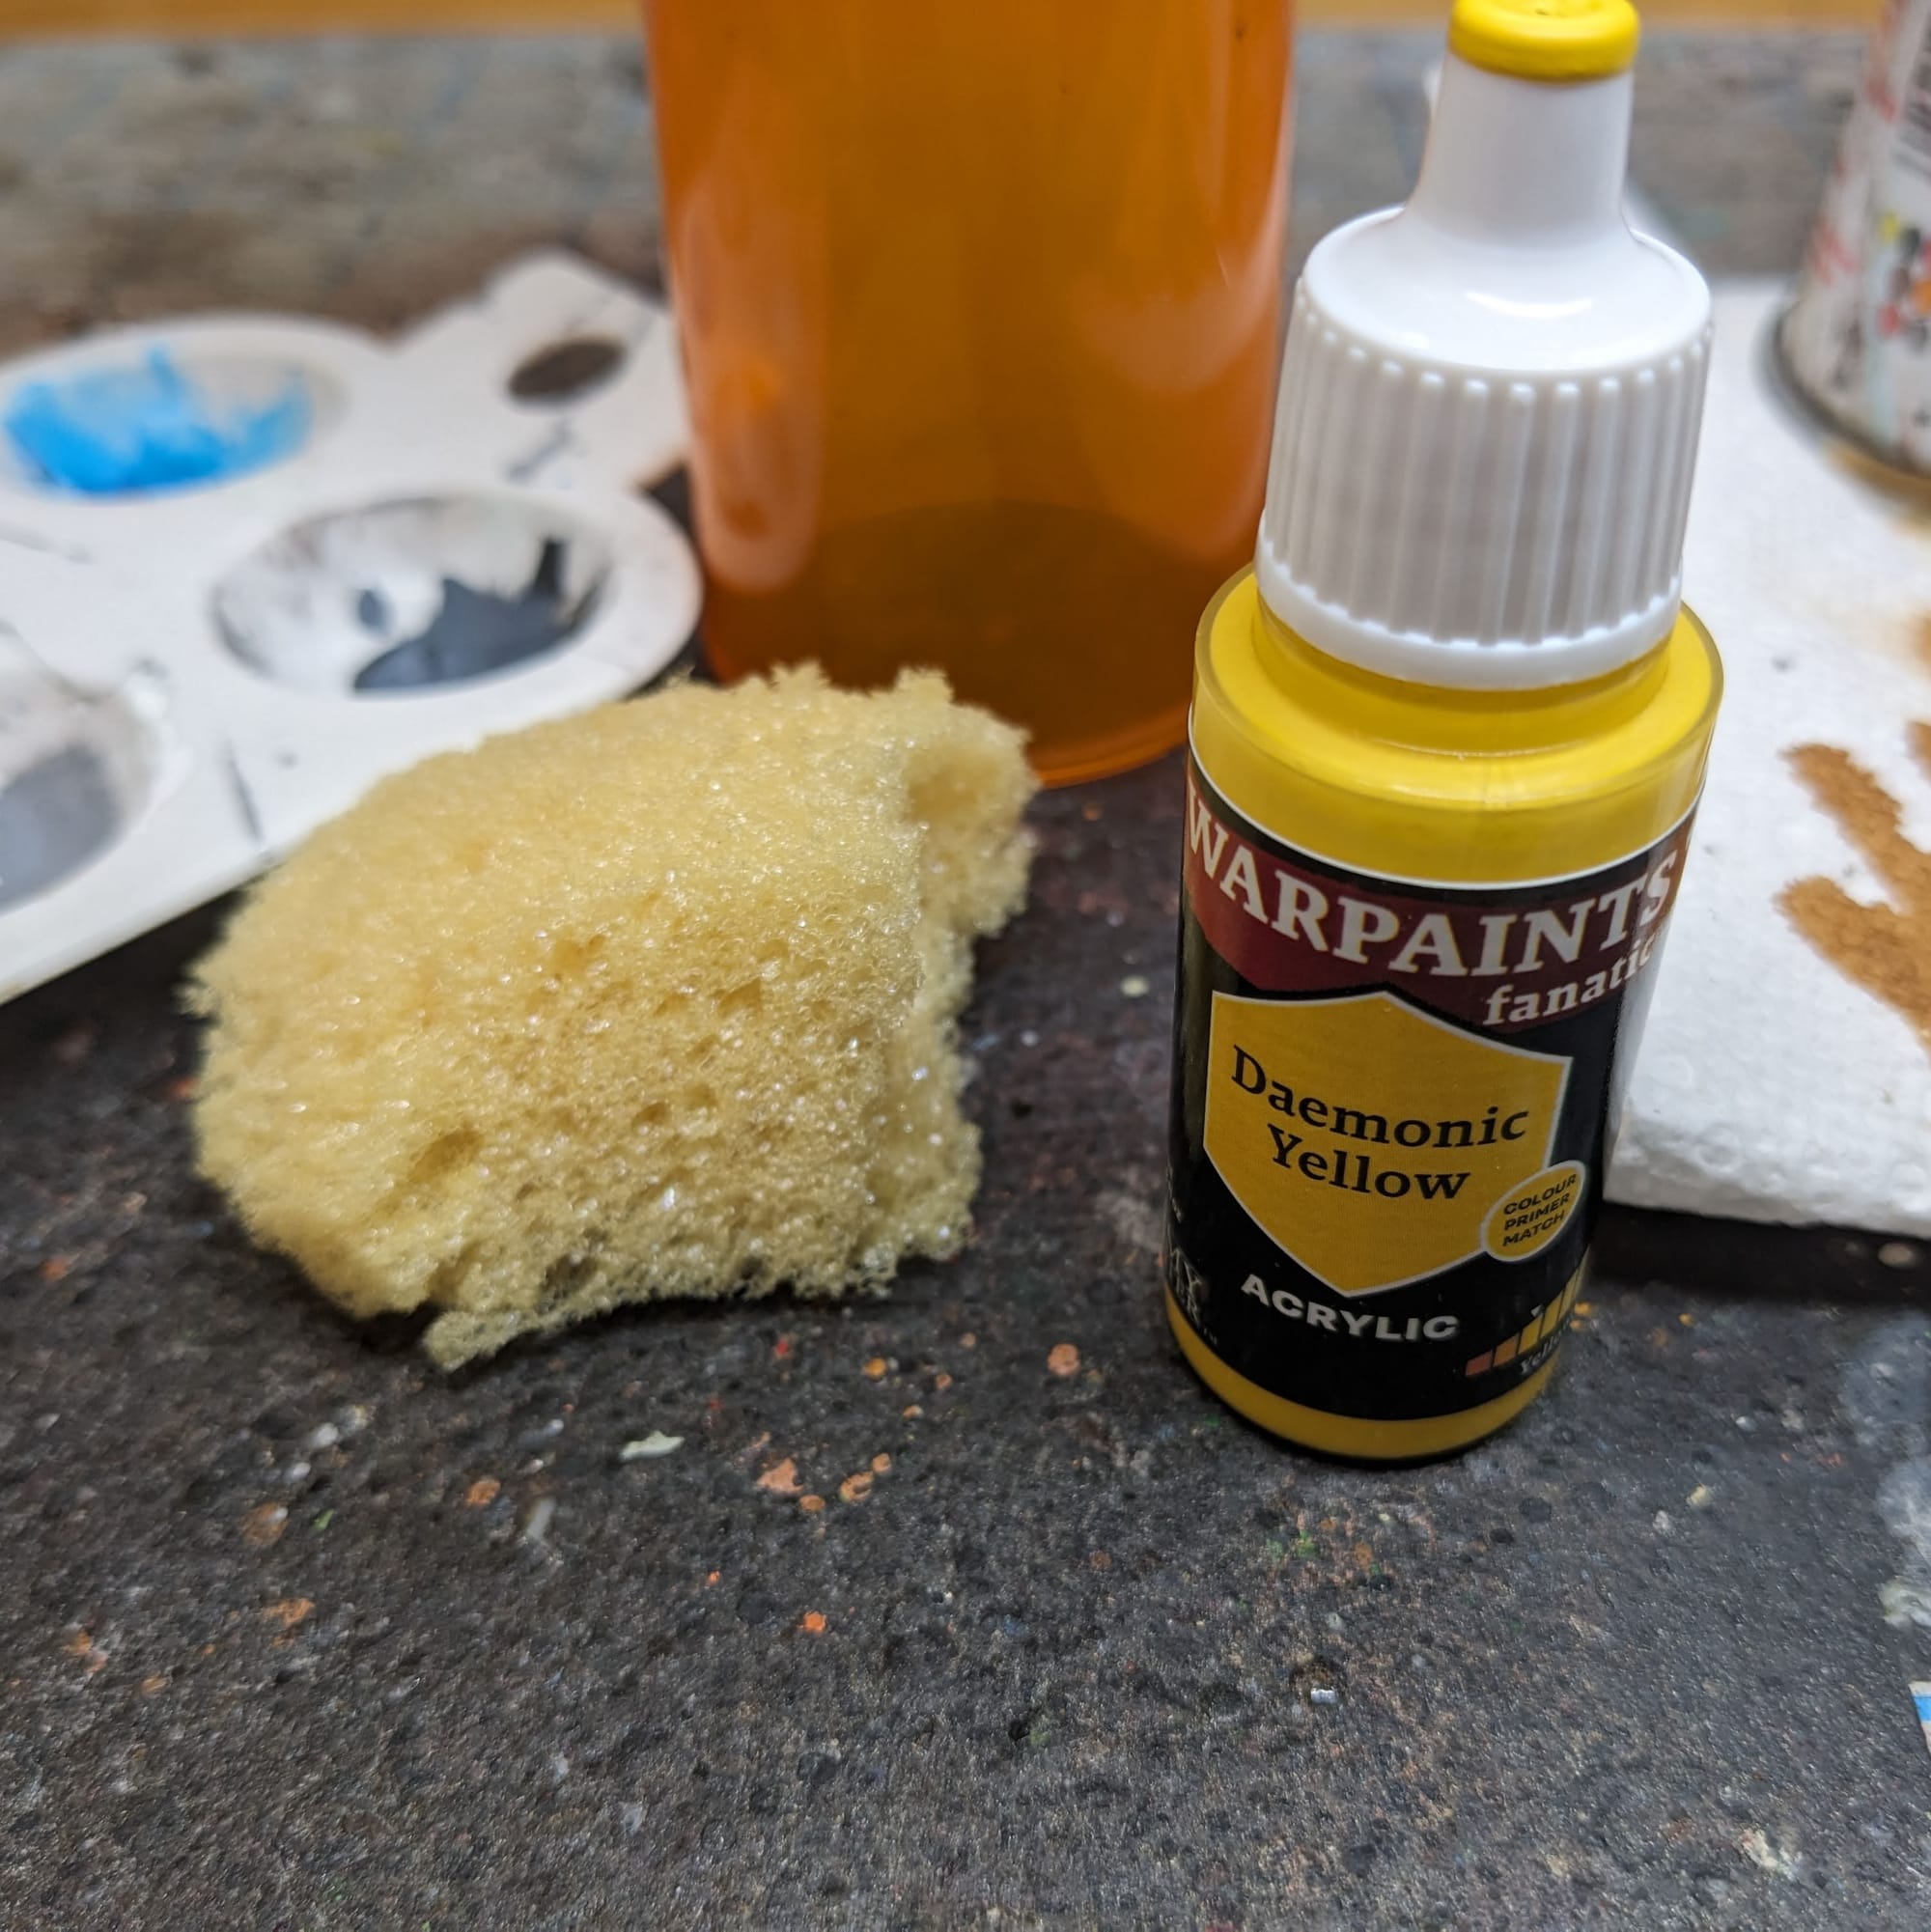
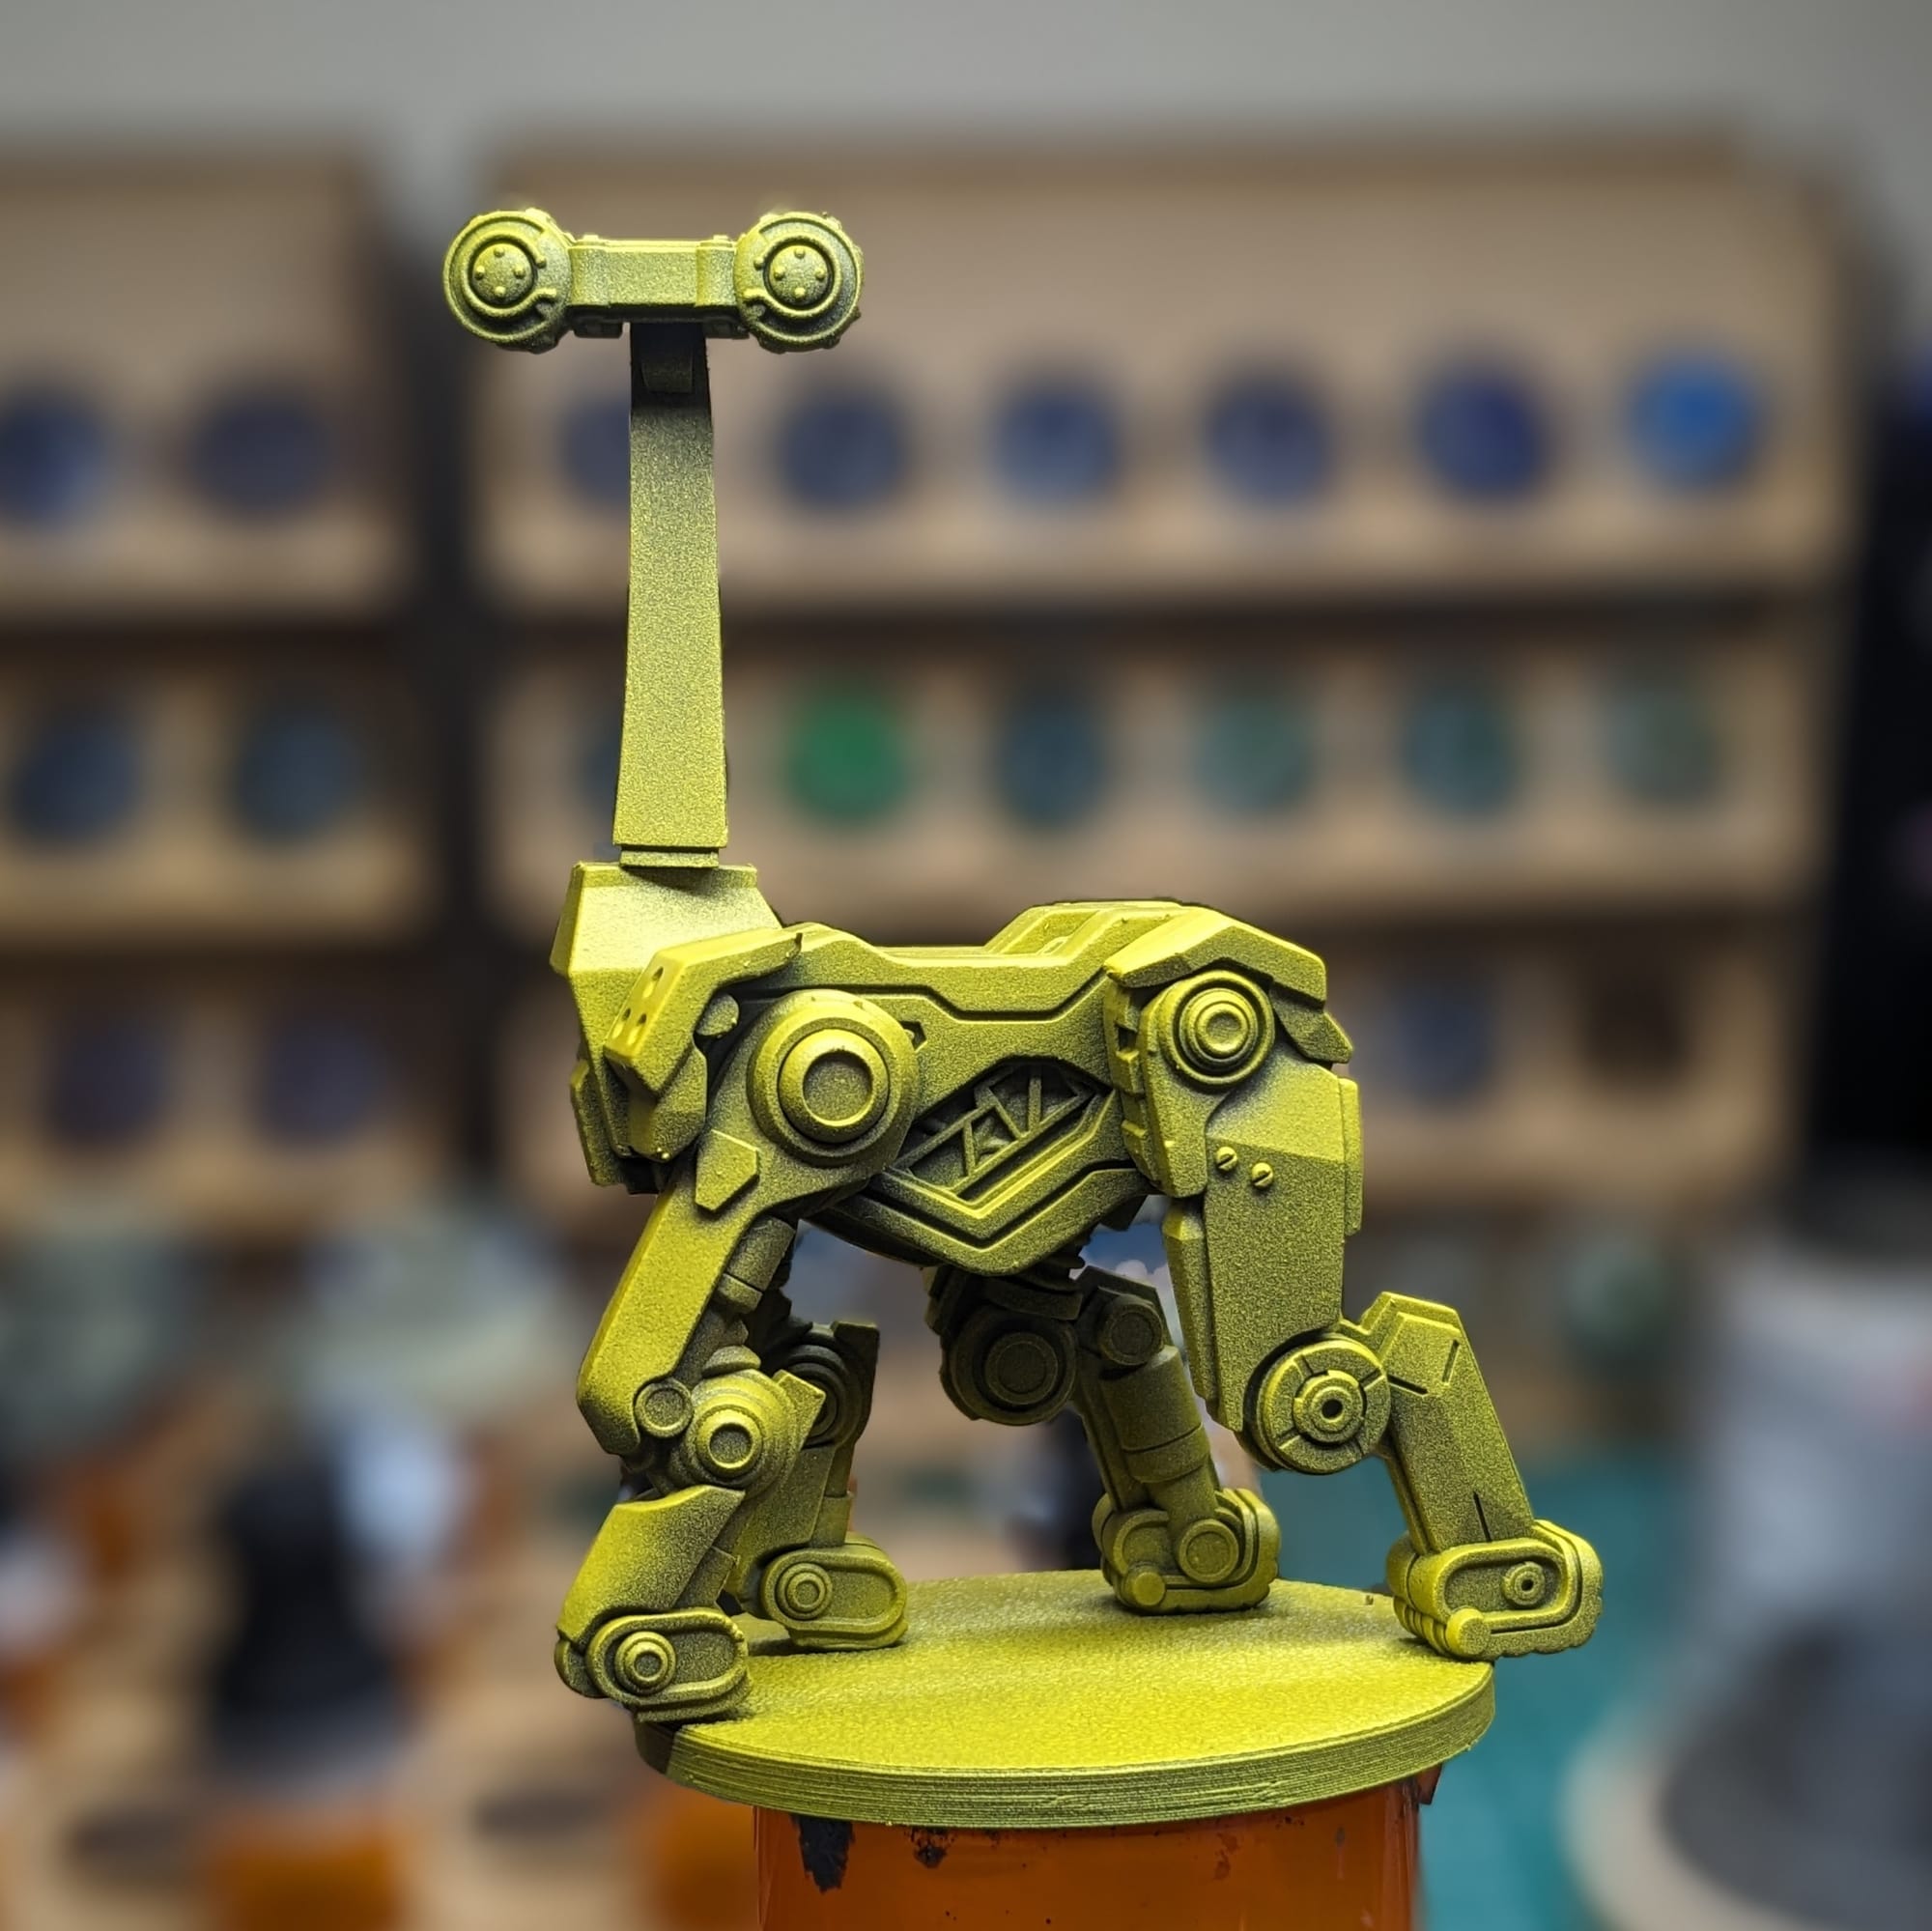
Since the entire pieces is darker, I can sponge yellow to bring back the yellow midtone of Daemonic Yellow. Using a cheap dollar store sponge, I tore off an uneven chunk and sponged spots around it, adding more to the top parts.
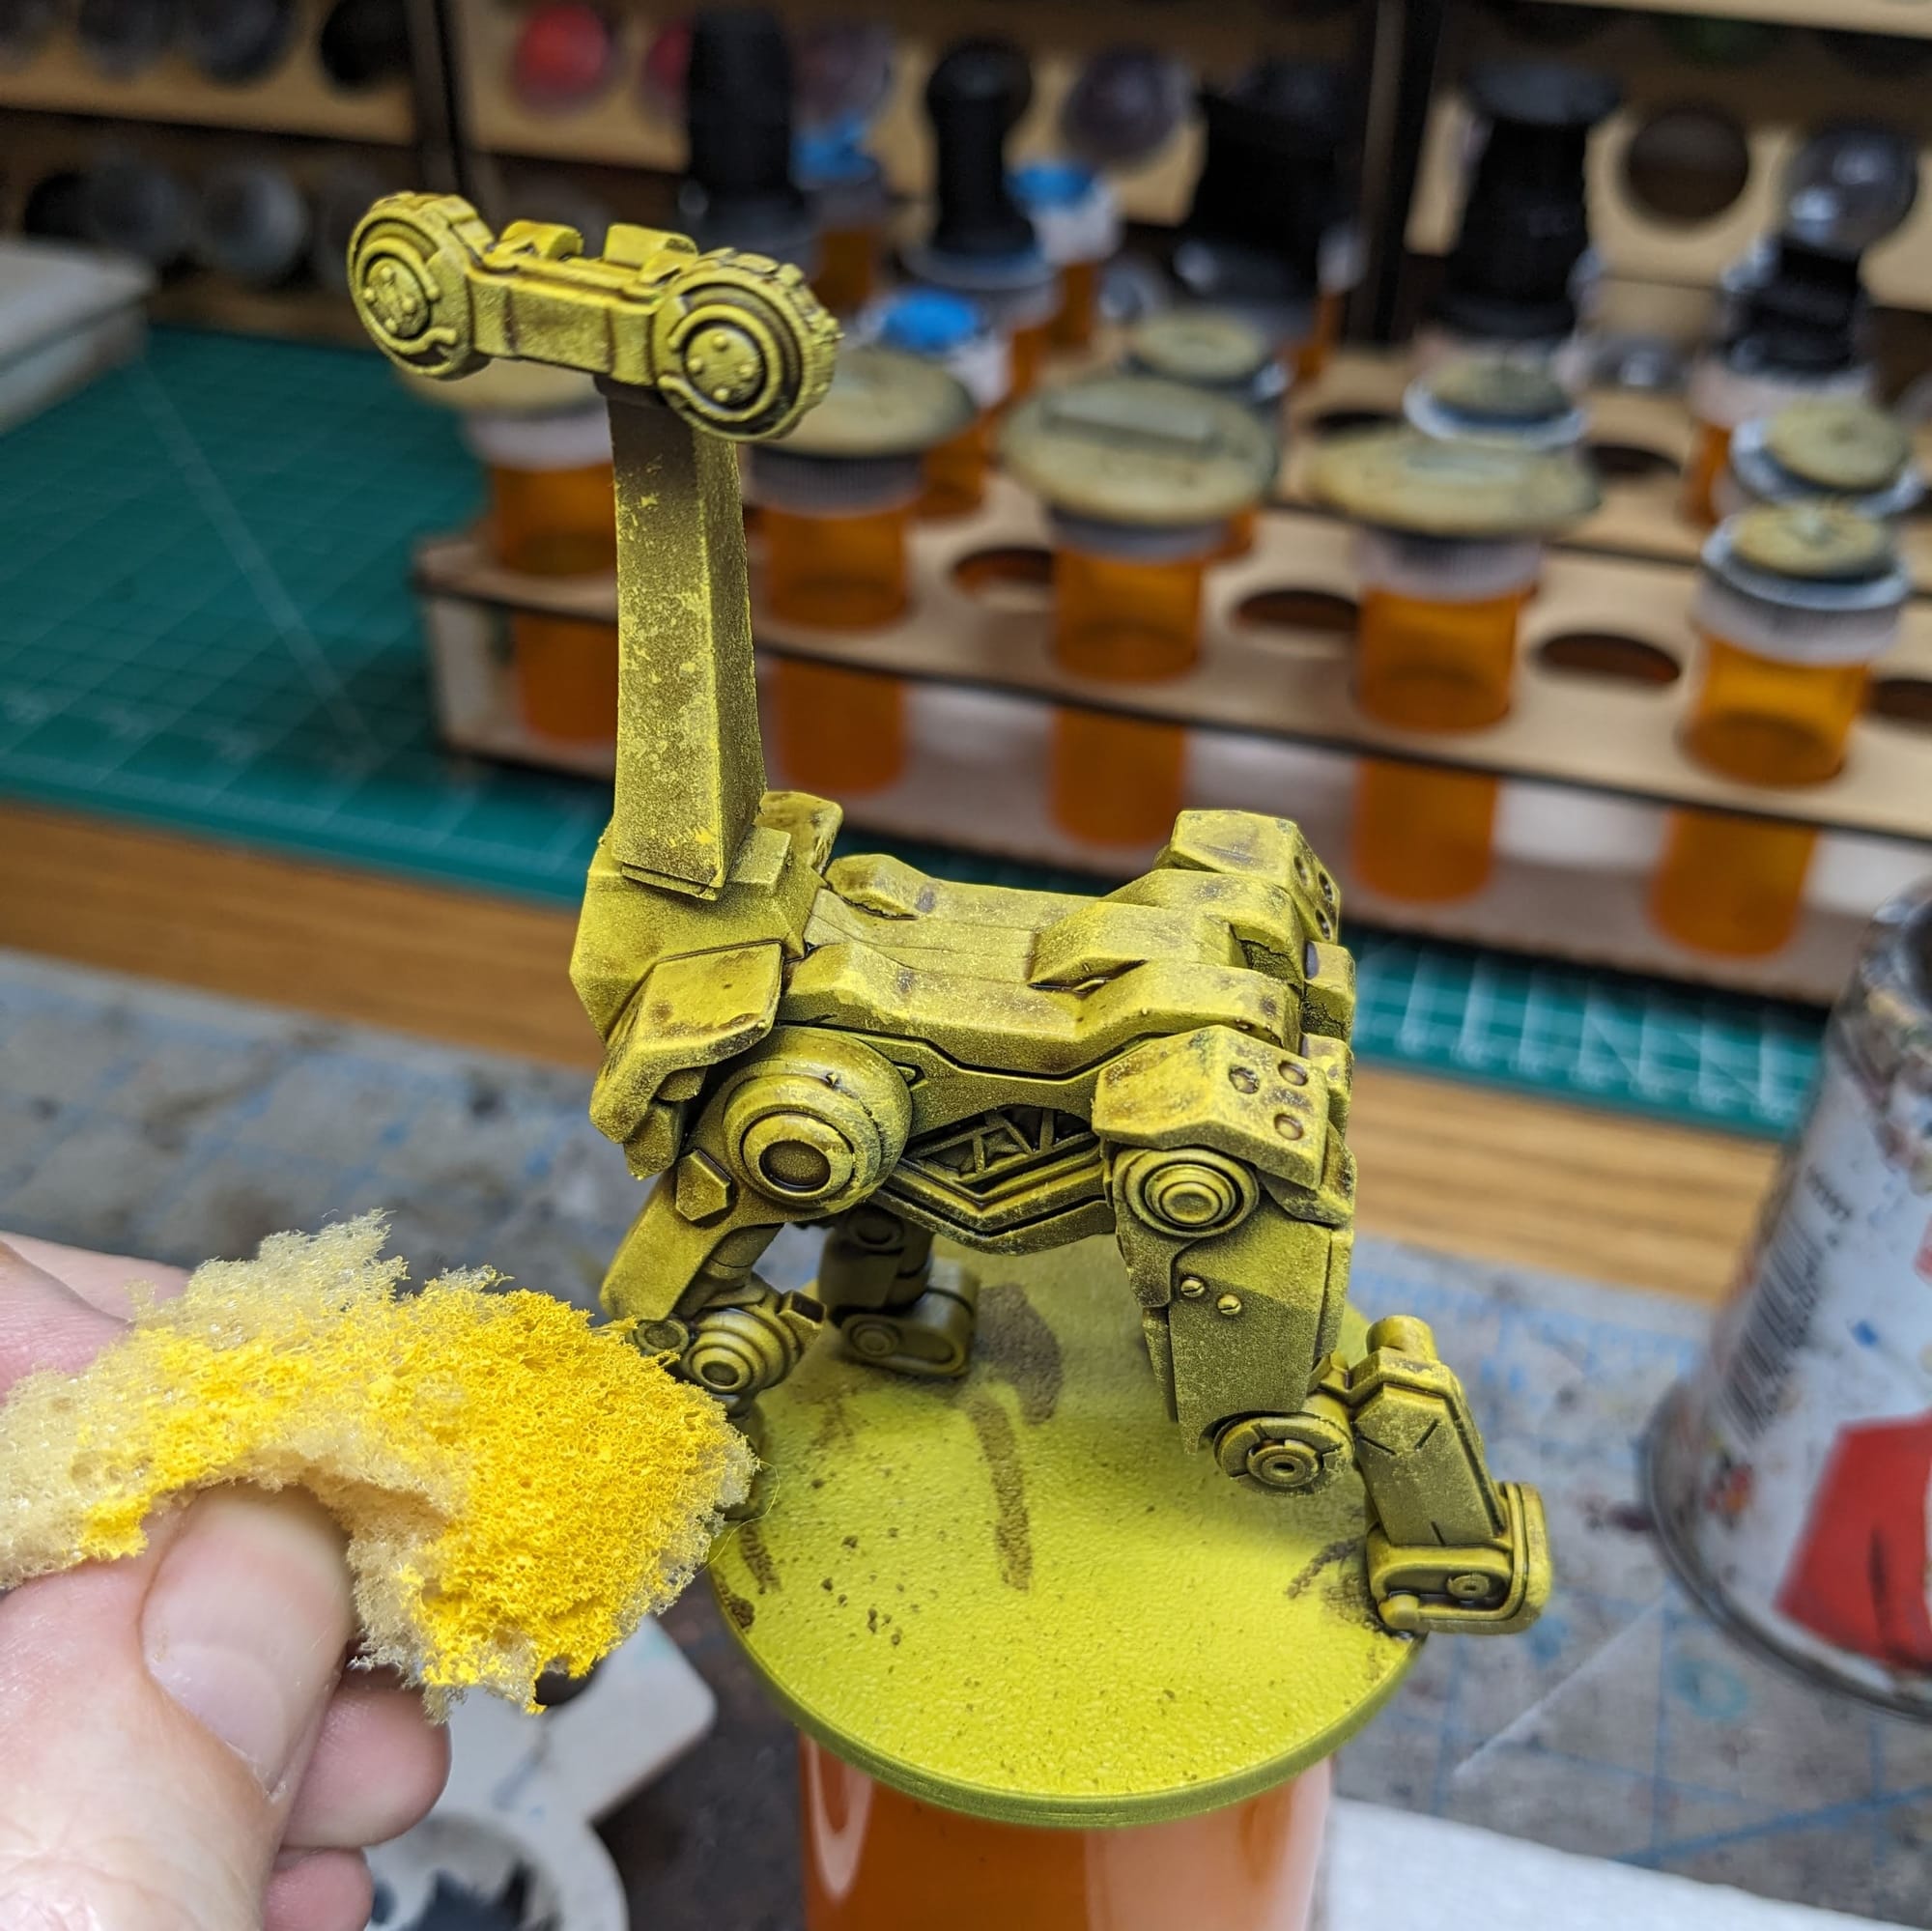
Using Rhinox Hide and a fresh sponge part, I dab "spots" around the model to give it that grunge look to it (grease stains, mud, etc. etc.) and to give it some giraffe-like spots.
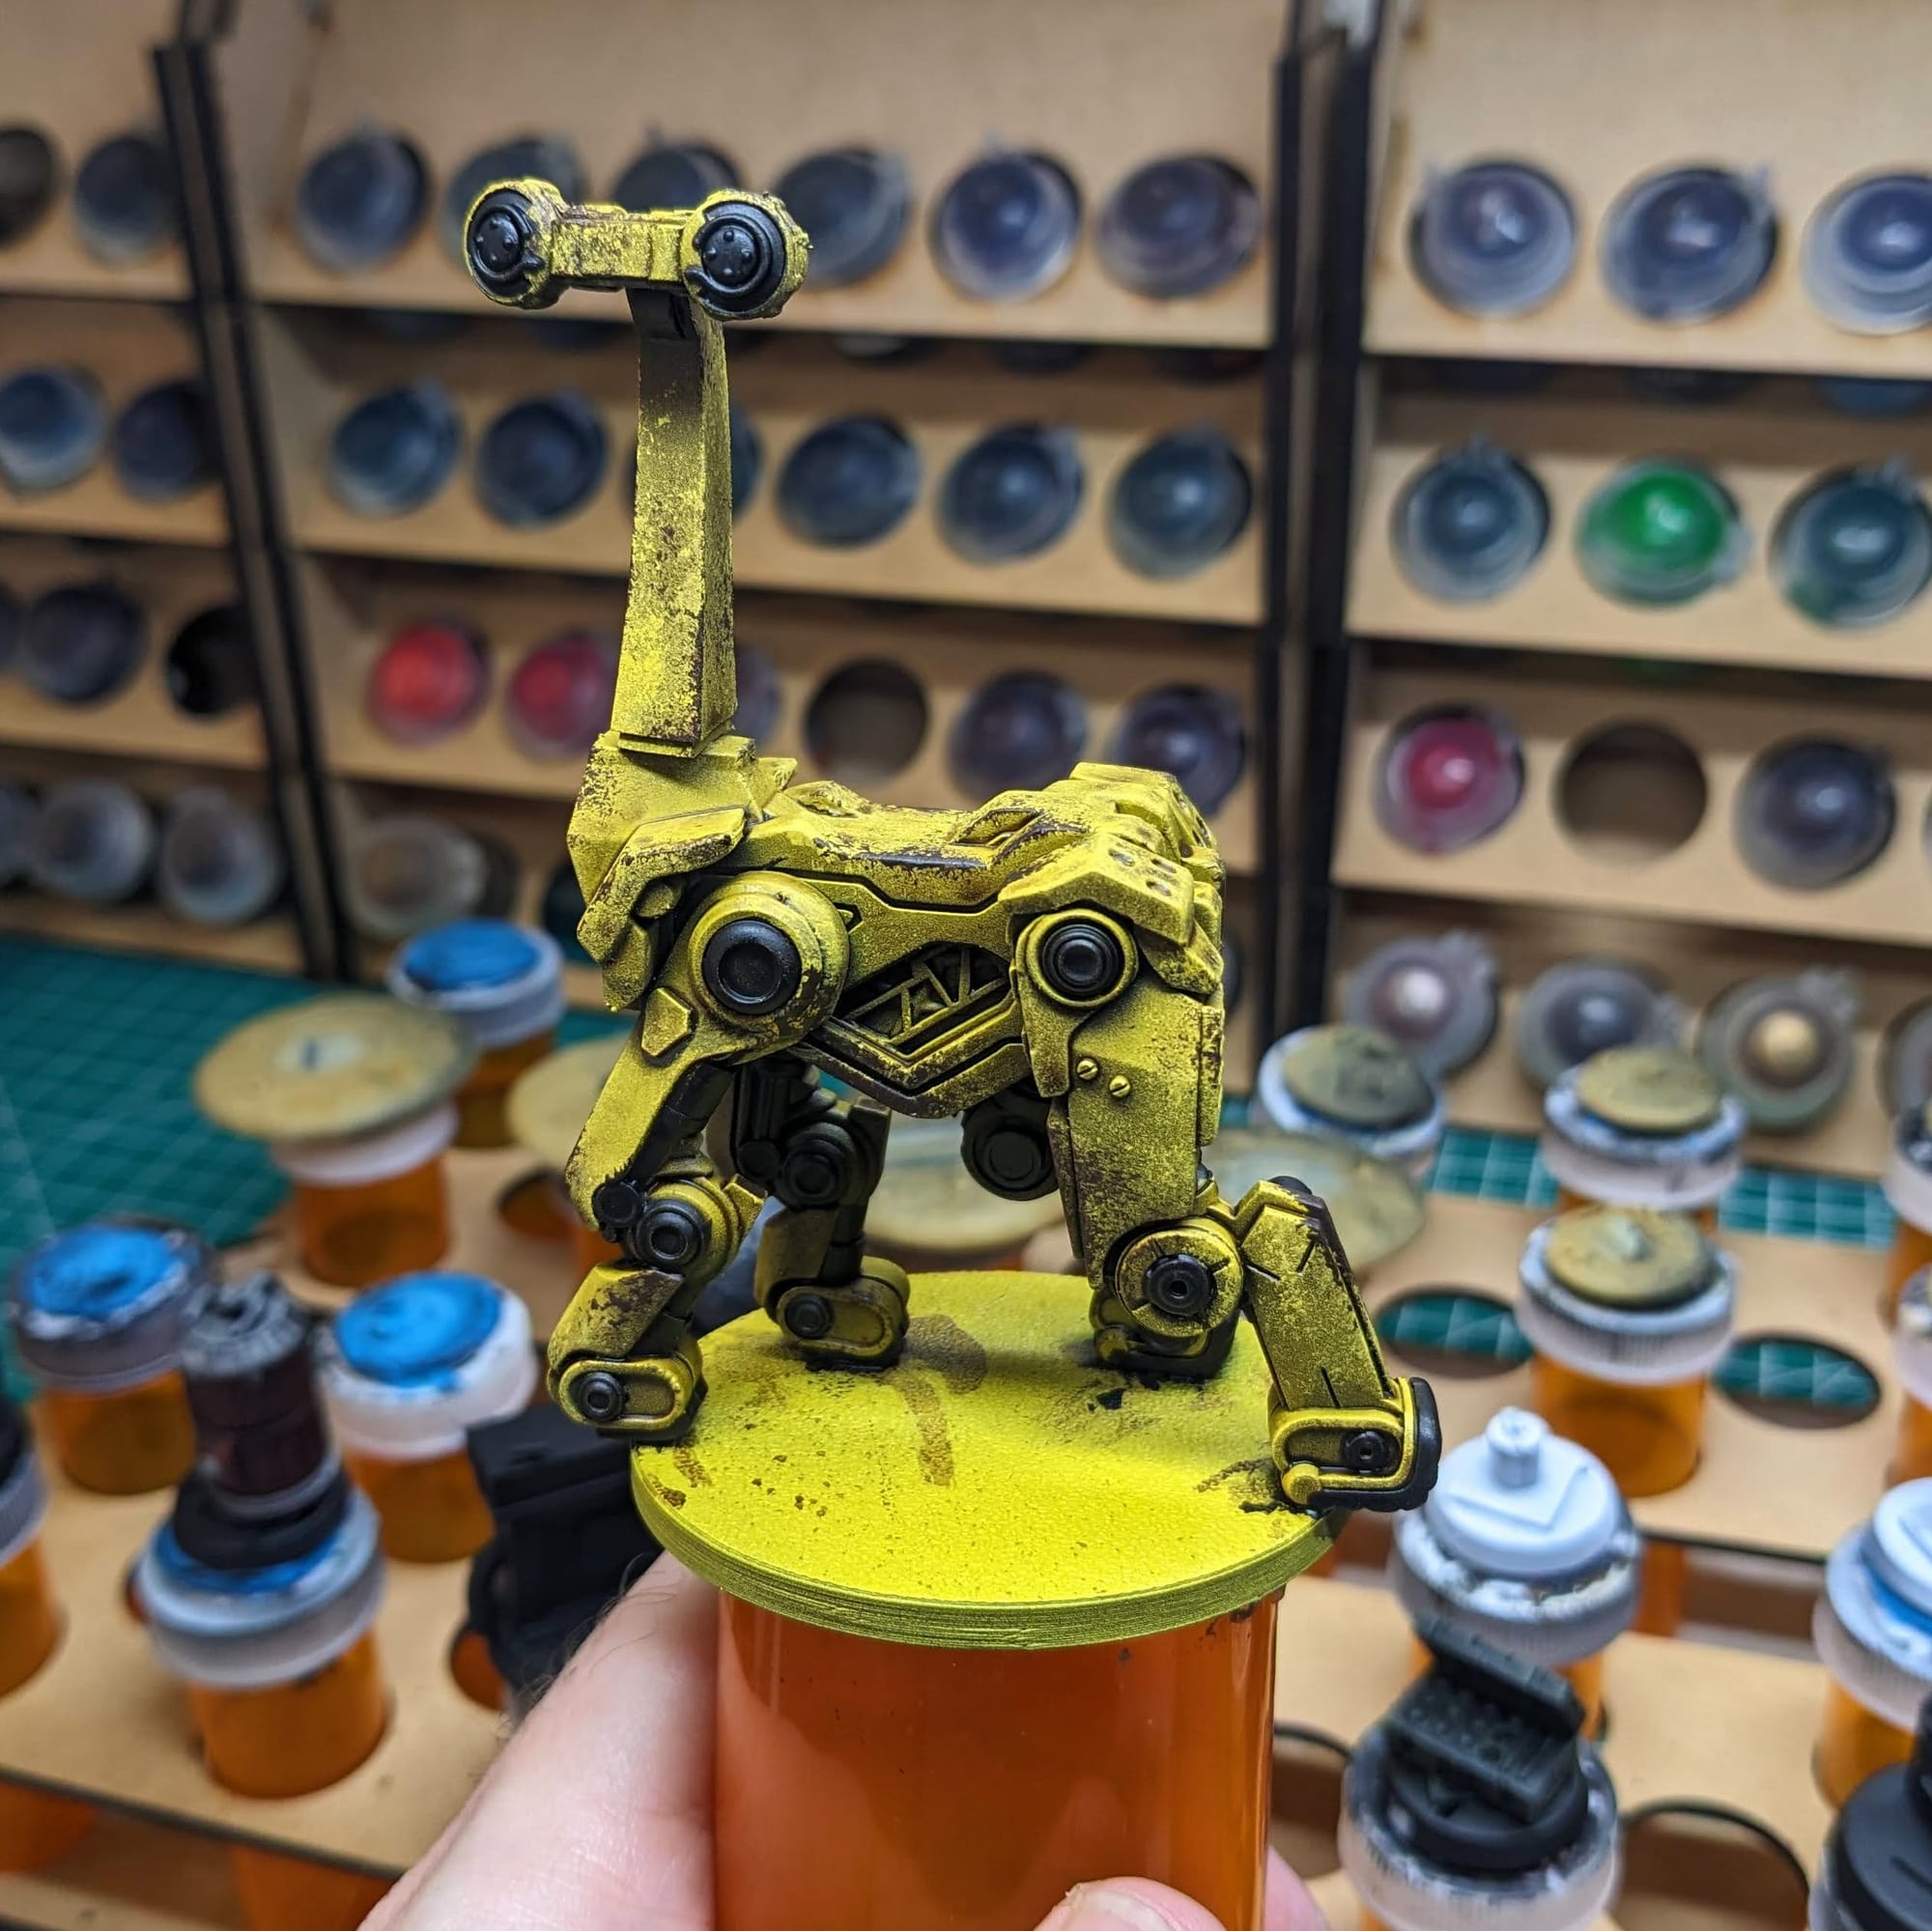
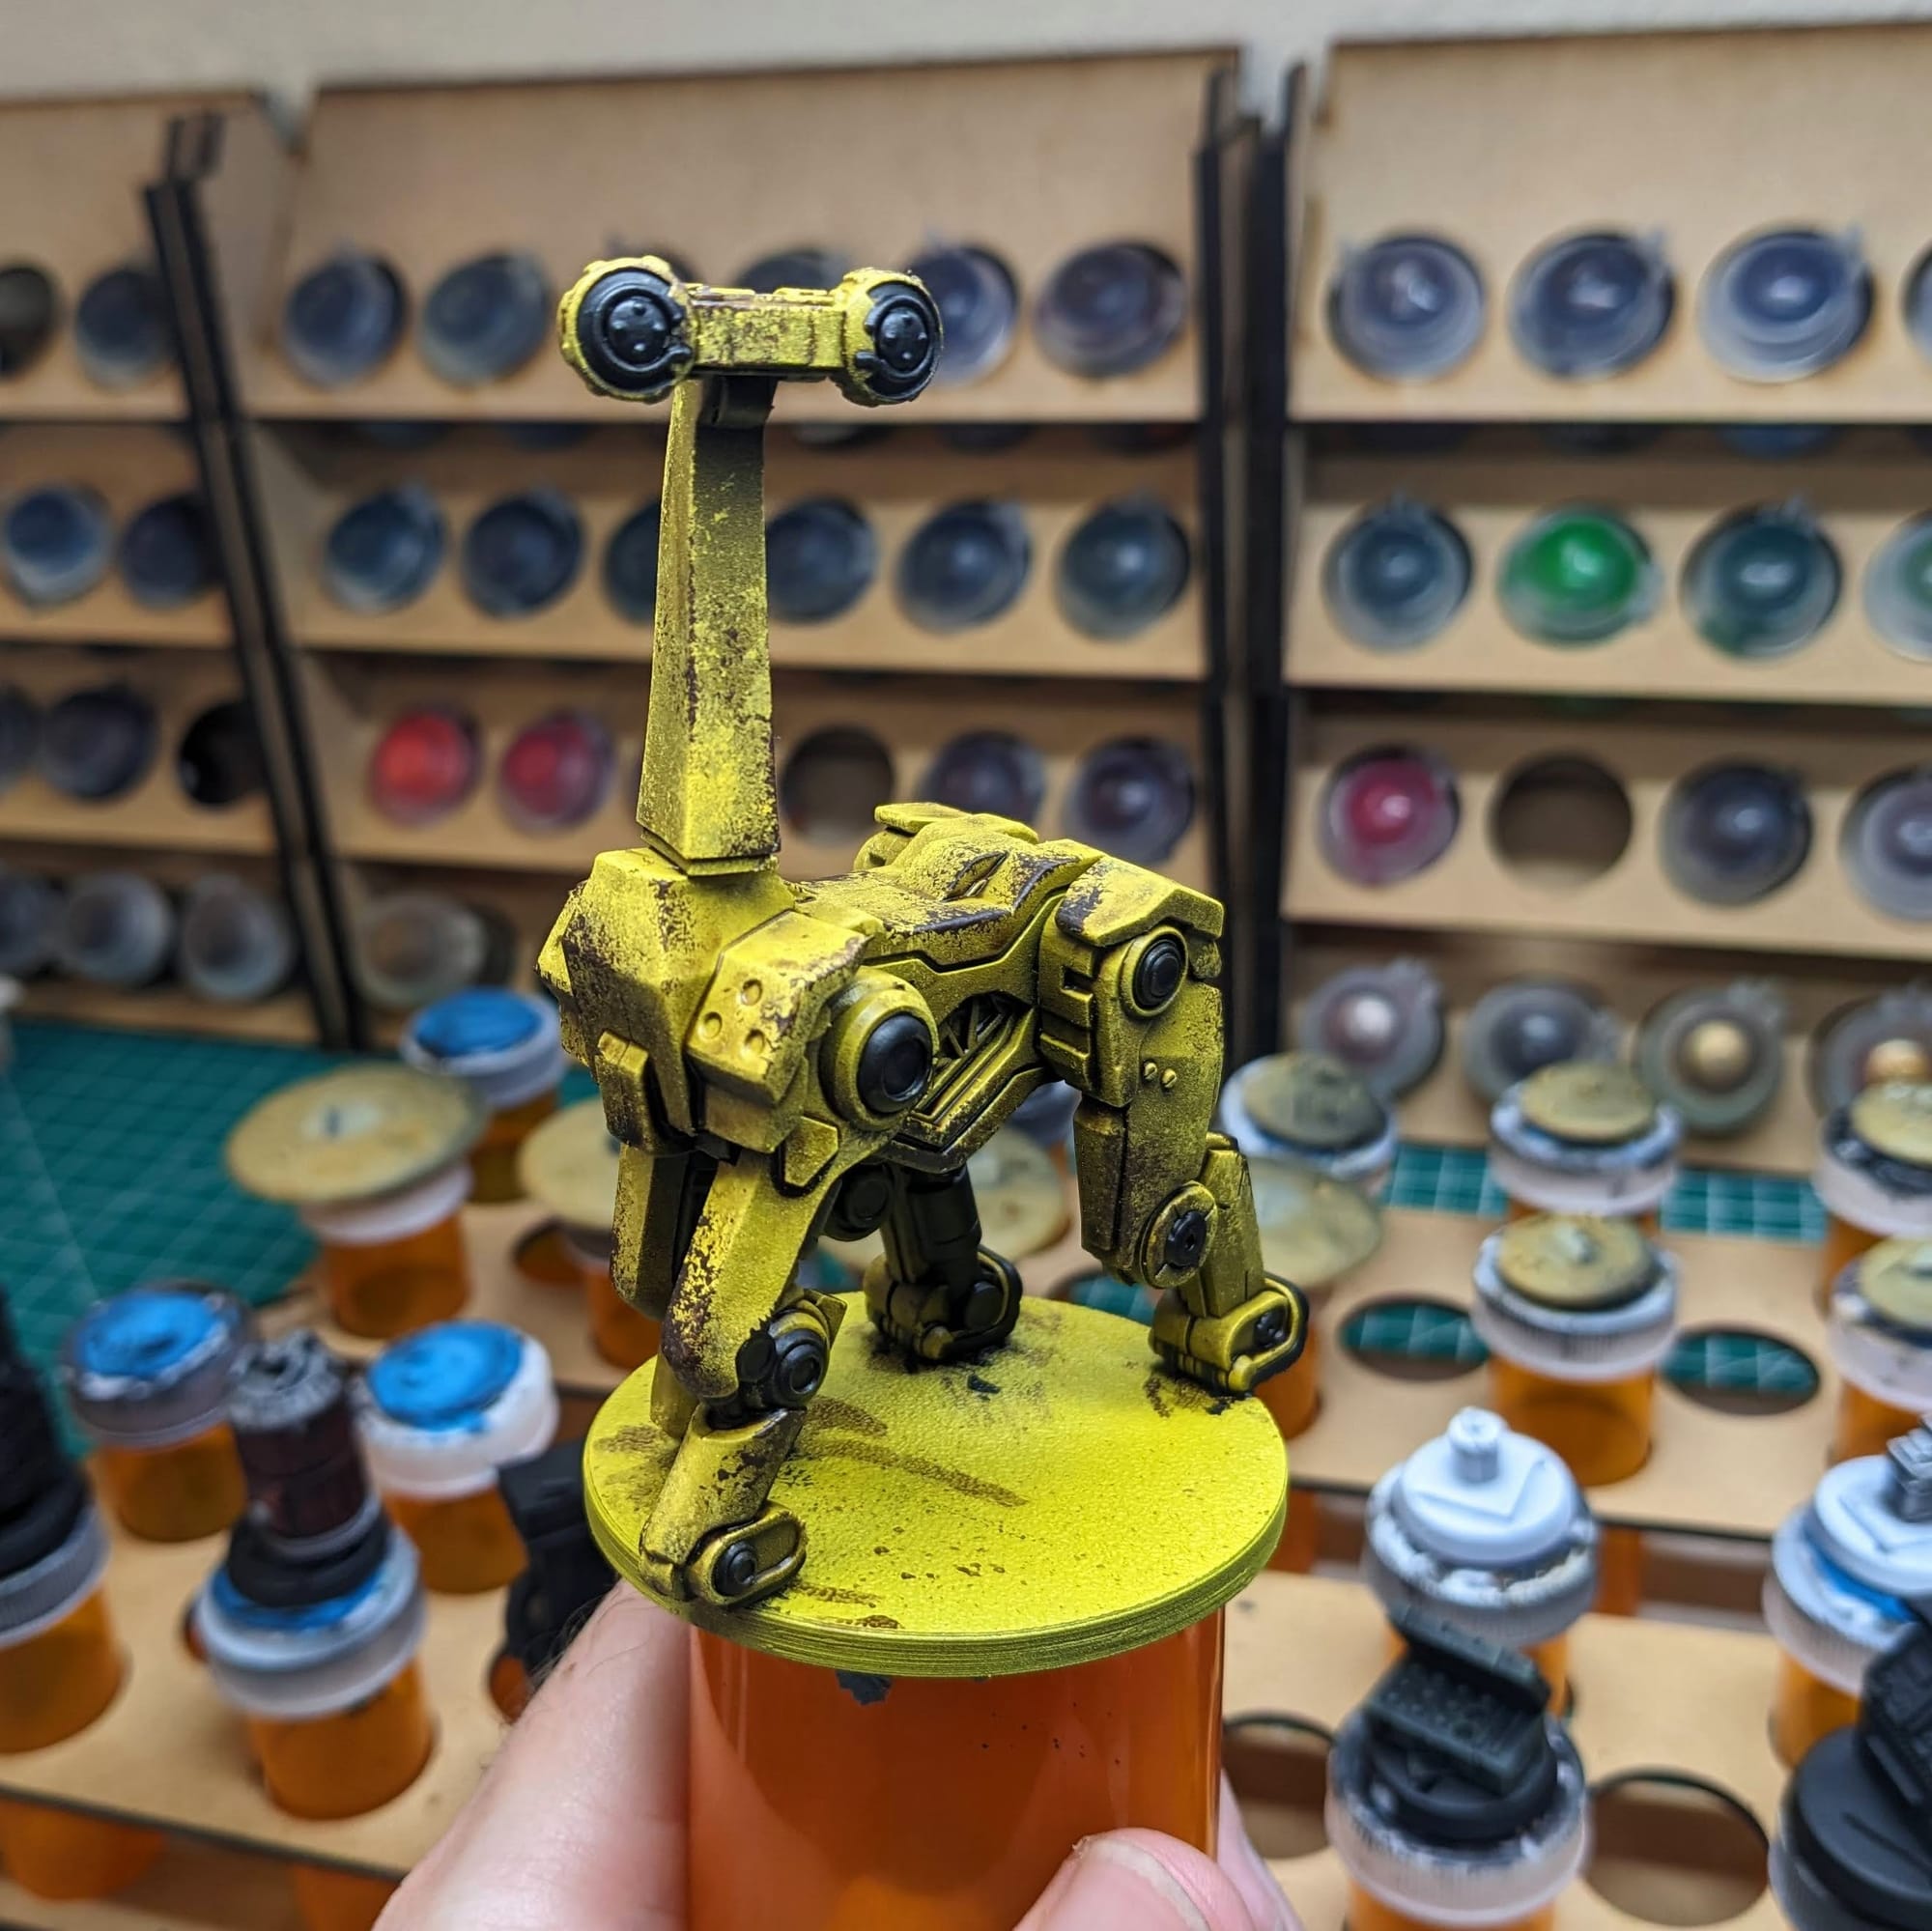
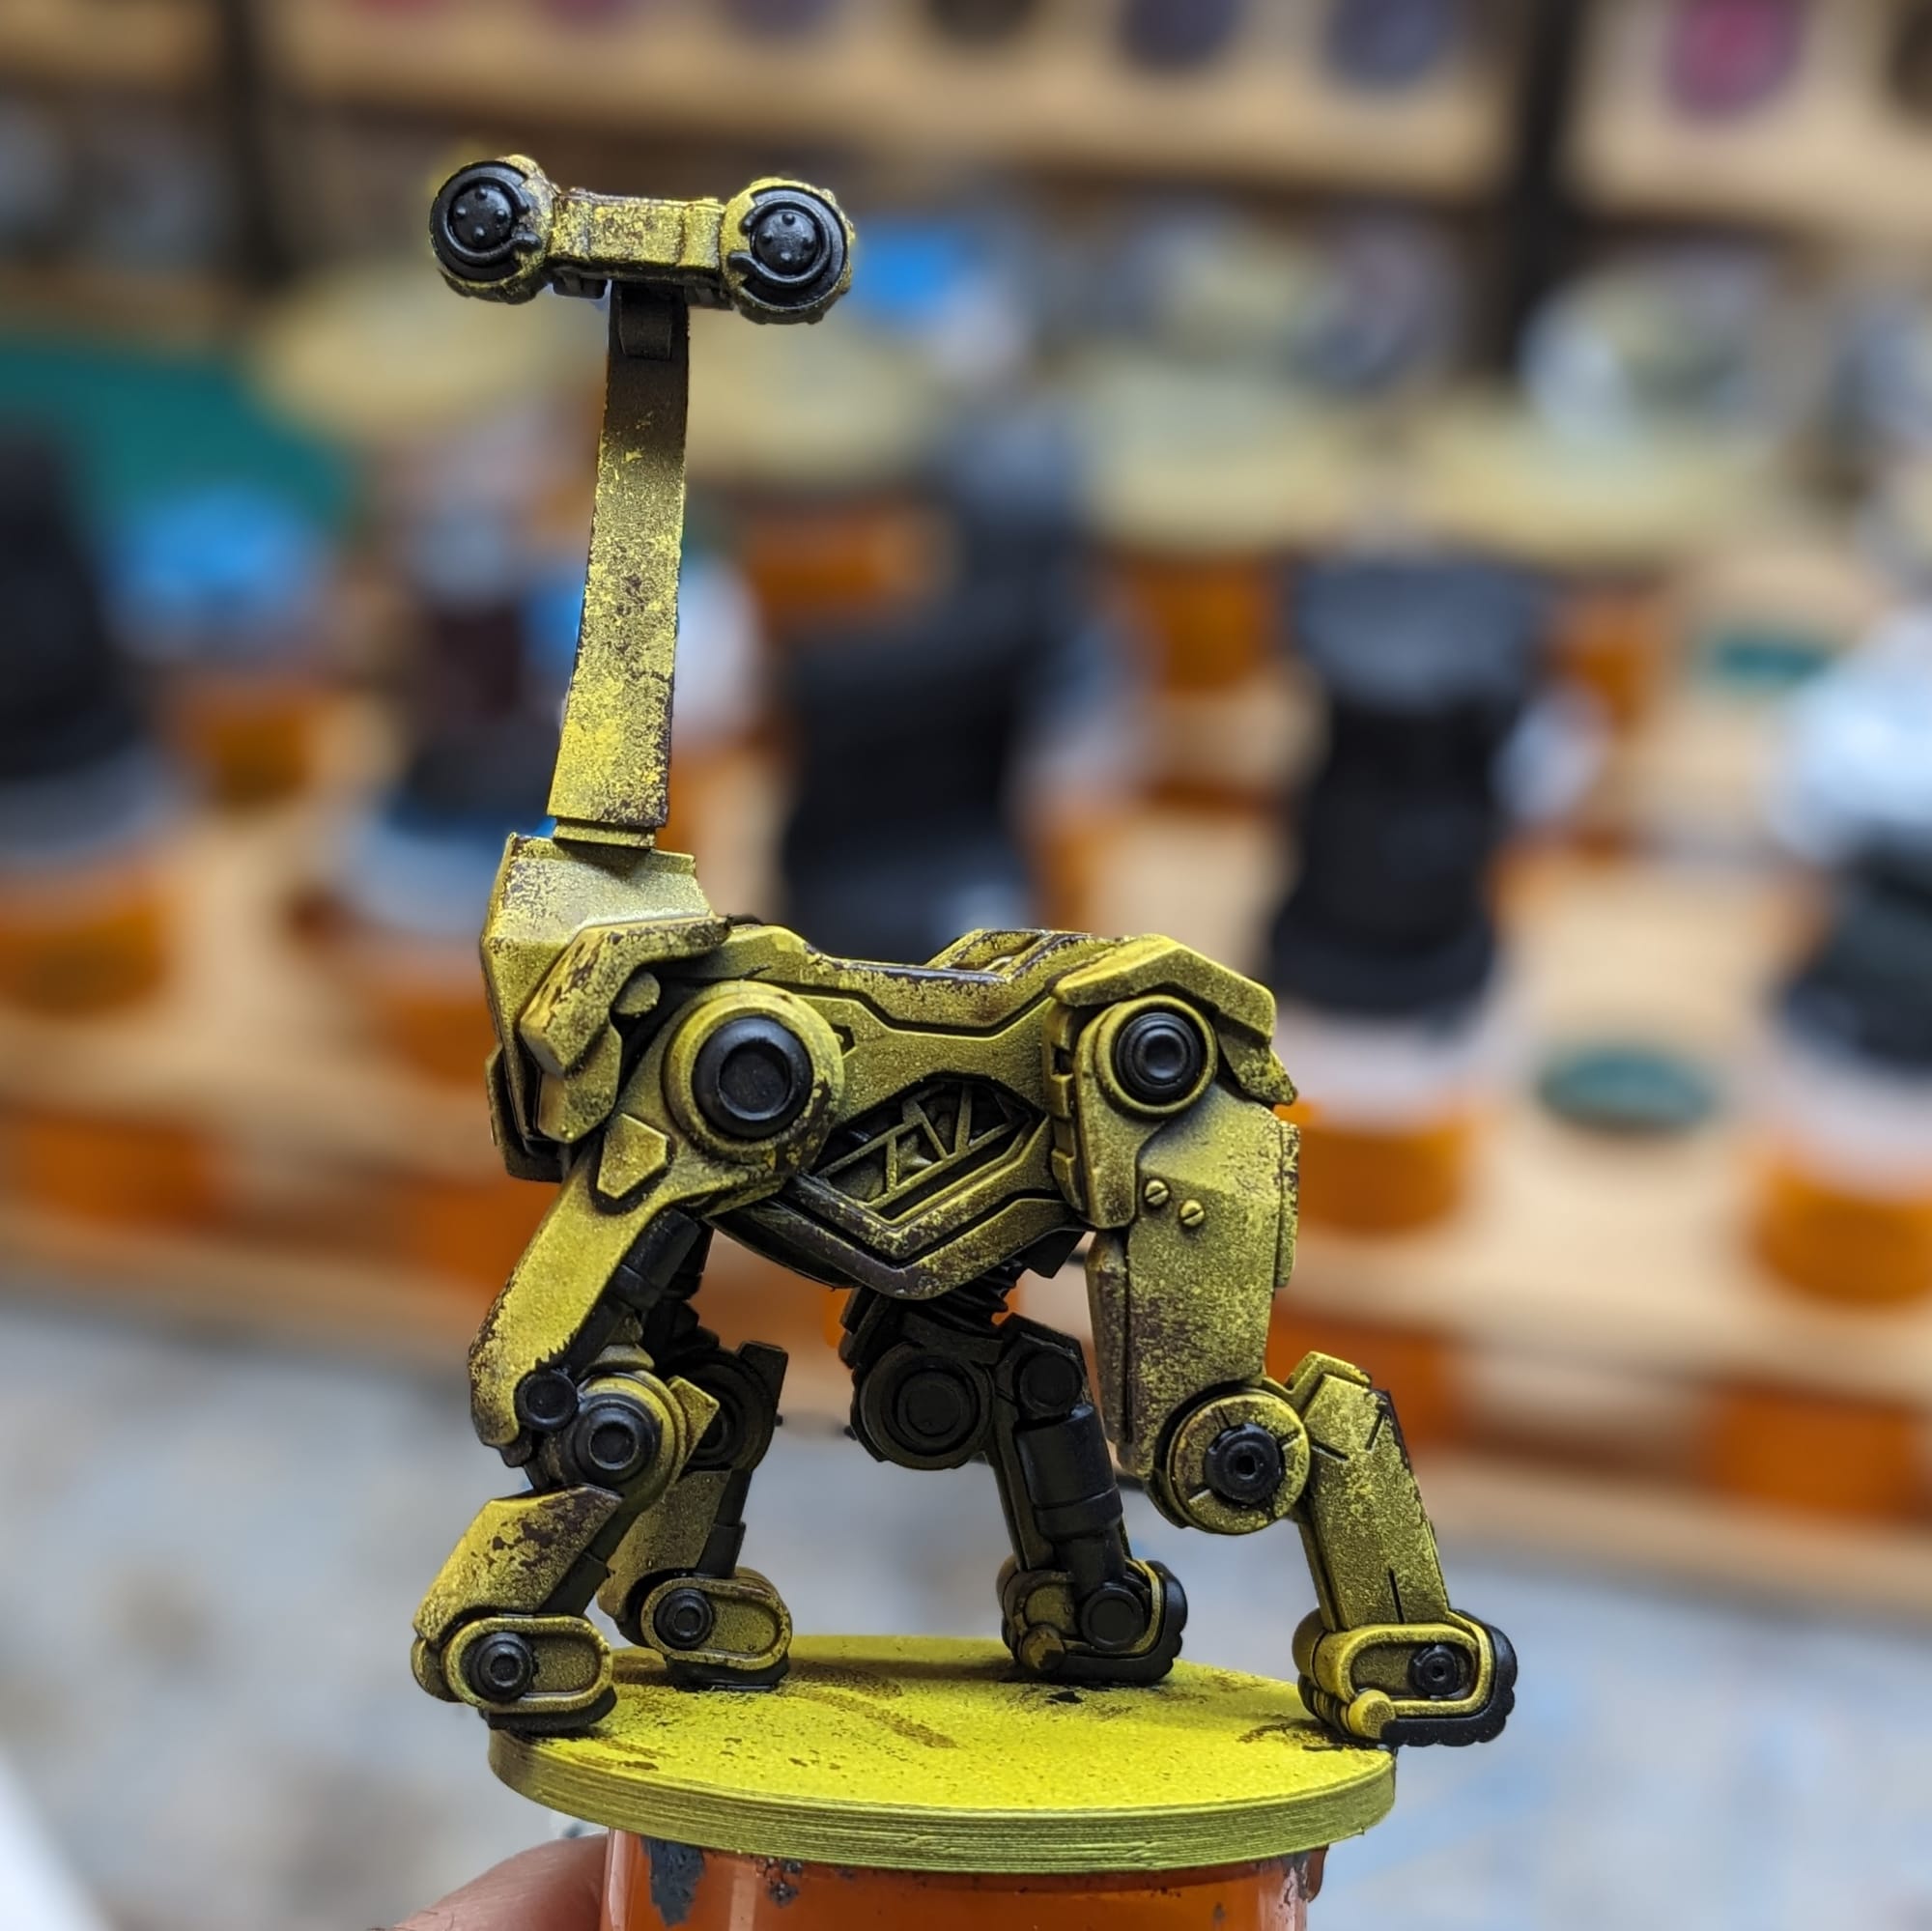
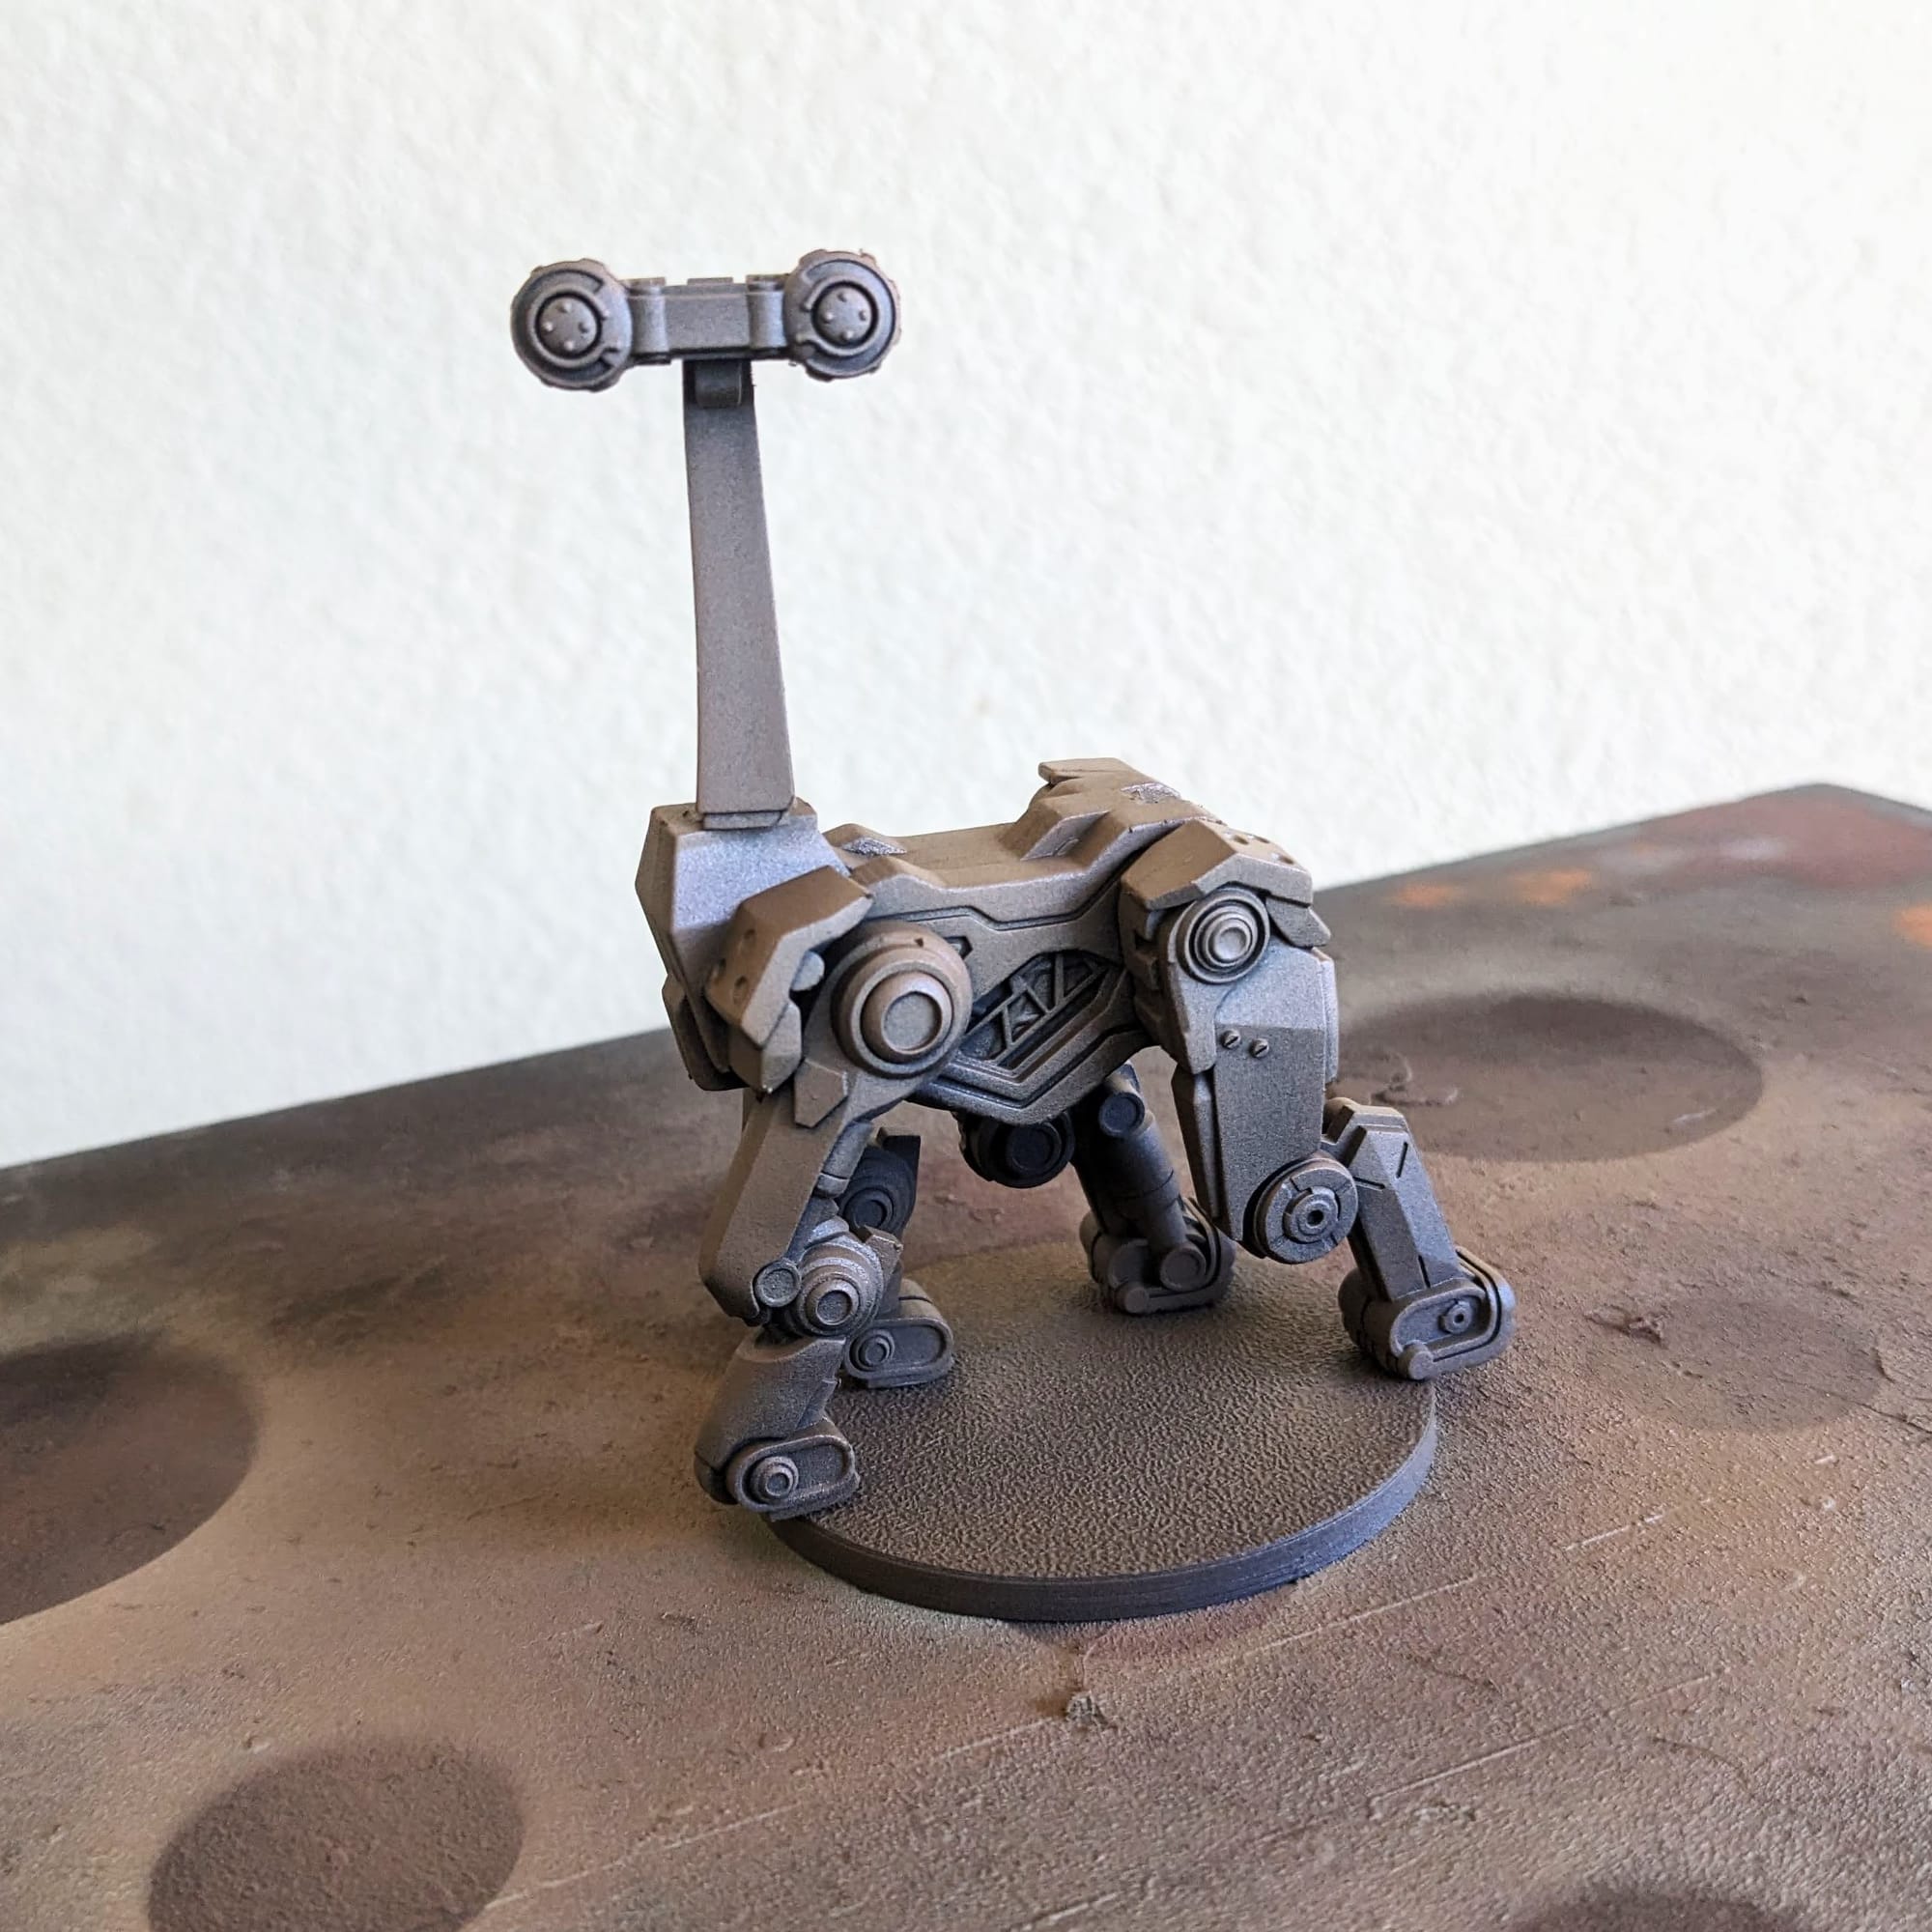
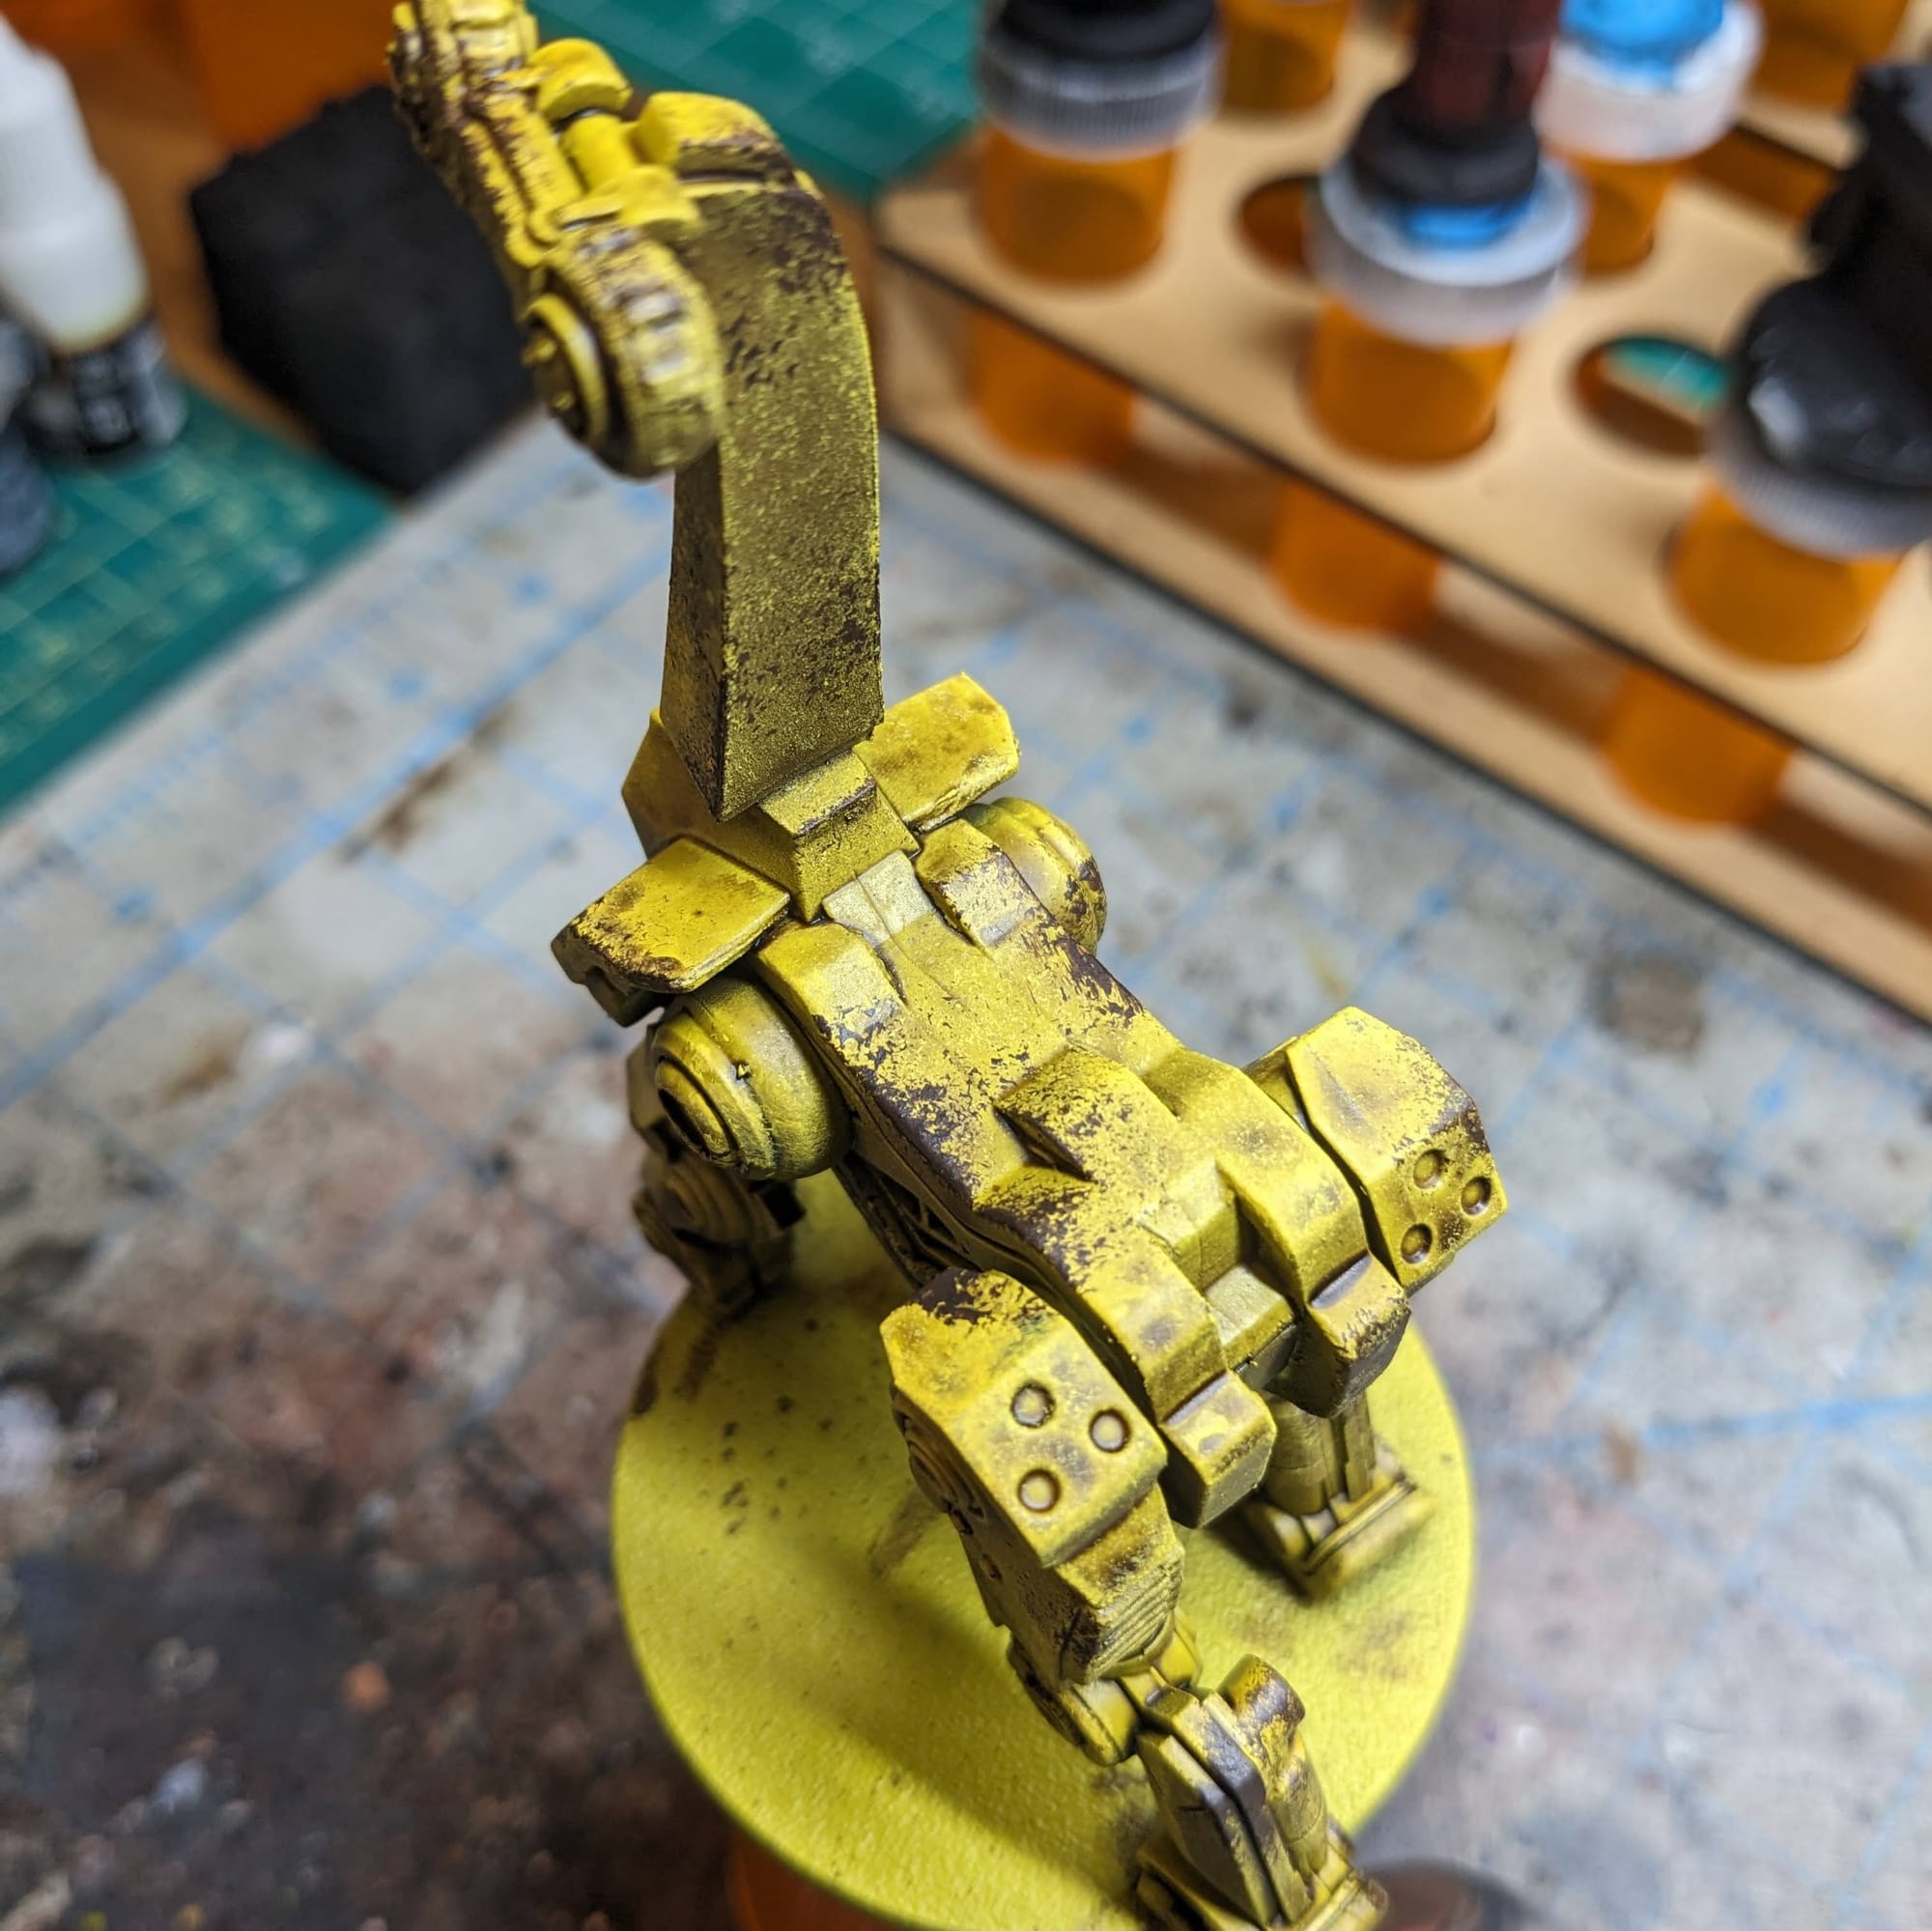
To help break up the large yellow areas, I used Matt Black on the rivets, springs, and feet (I also added some to the rib cage area later, too). I want the glowing eyes to stand out, so I added black to the head/eye sockets as well to add more contrast there.
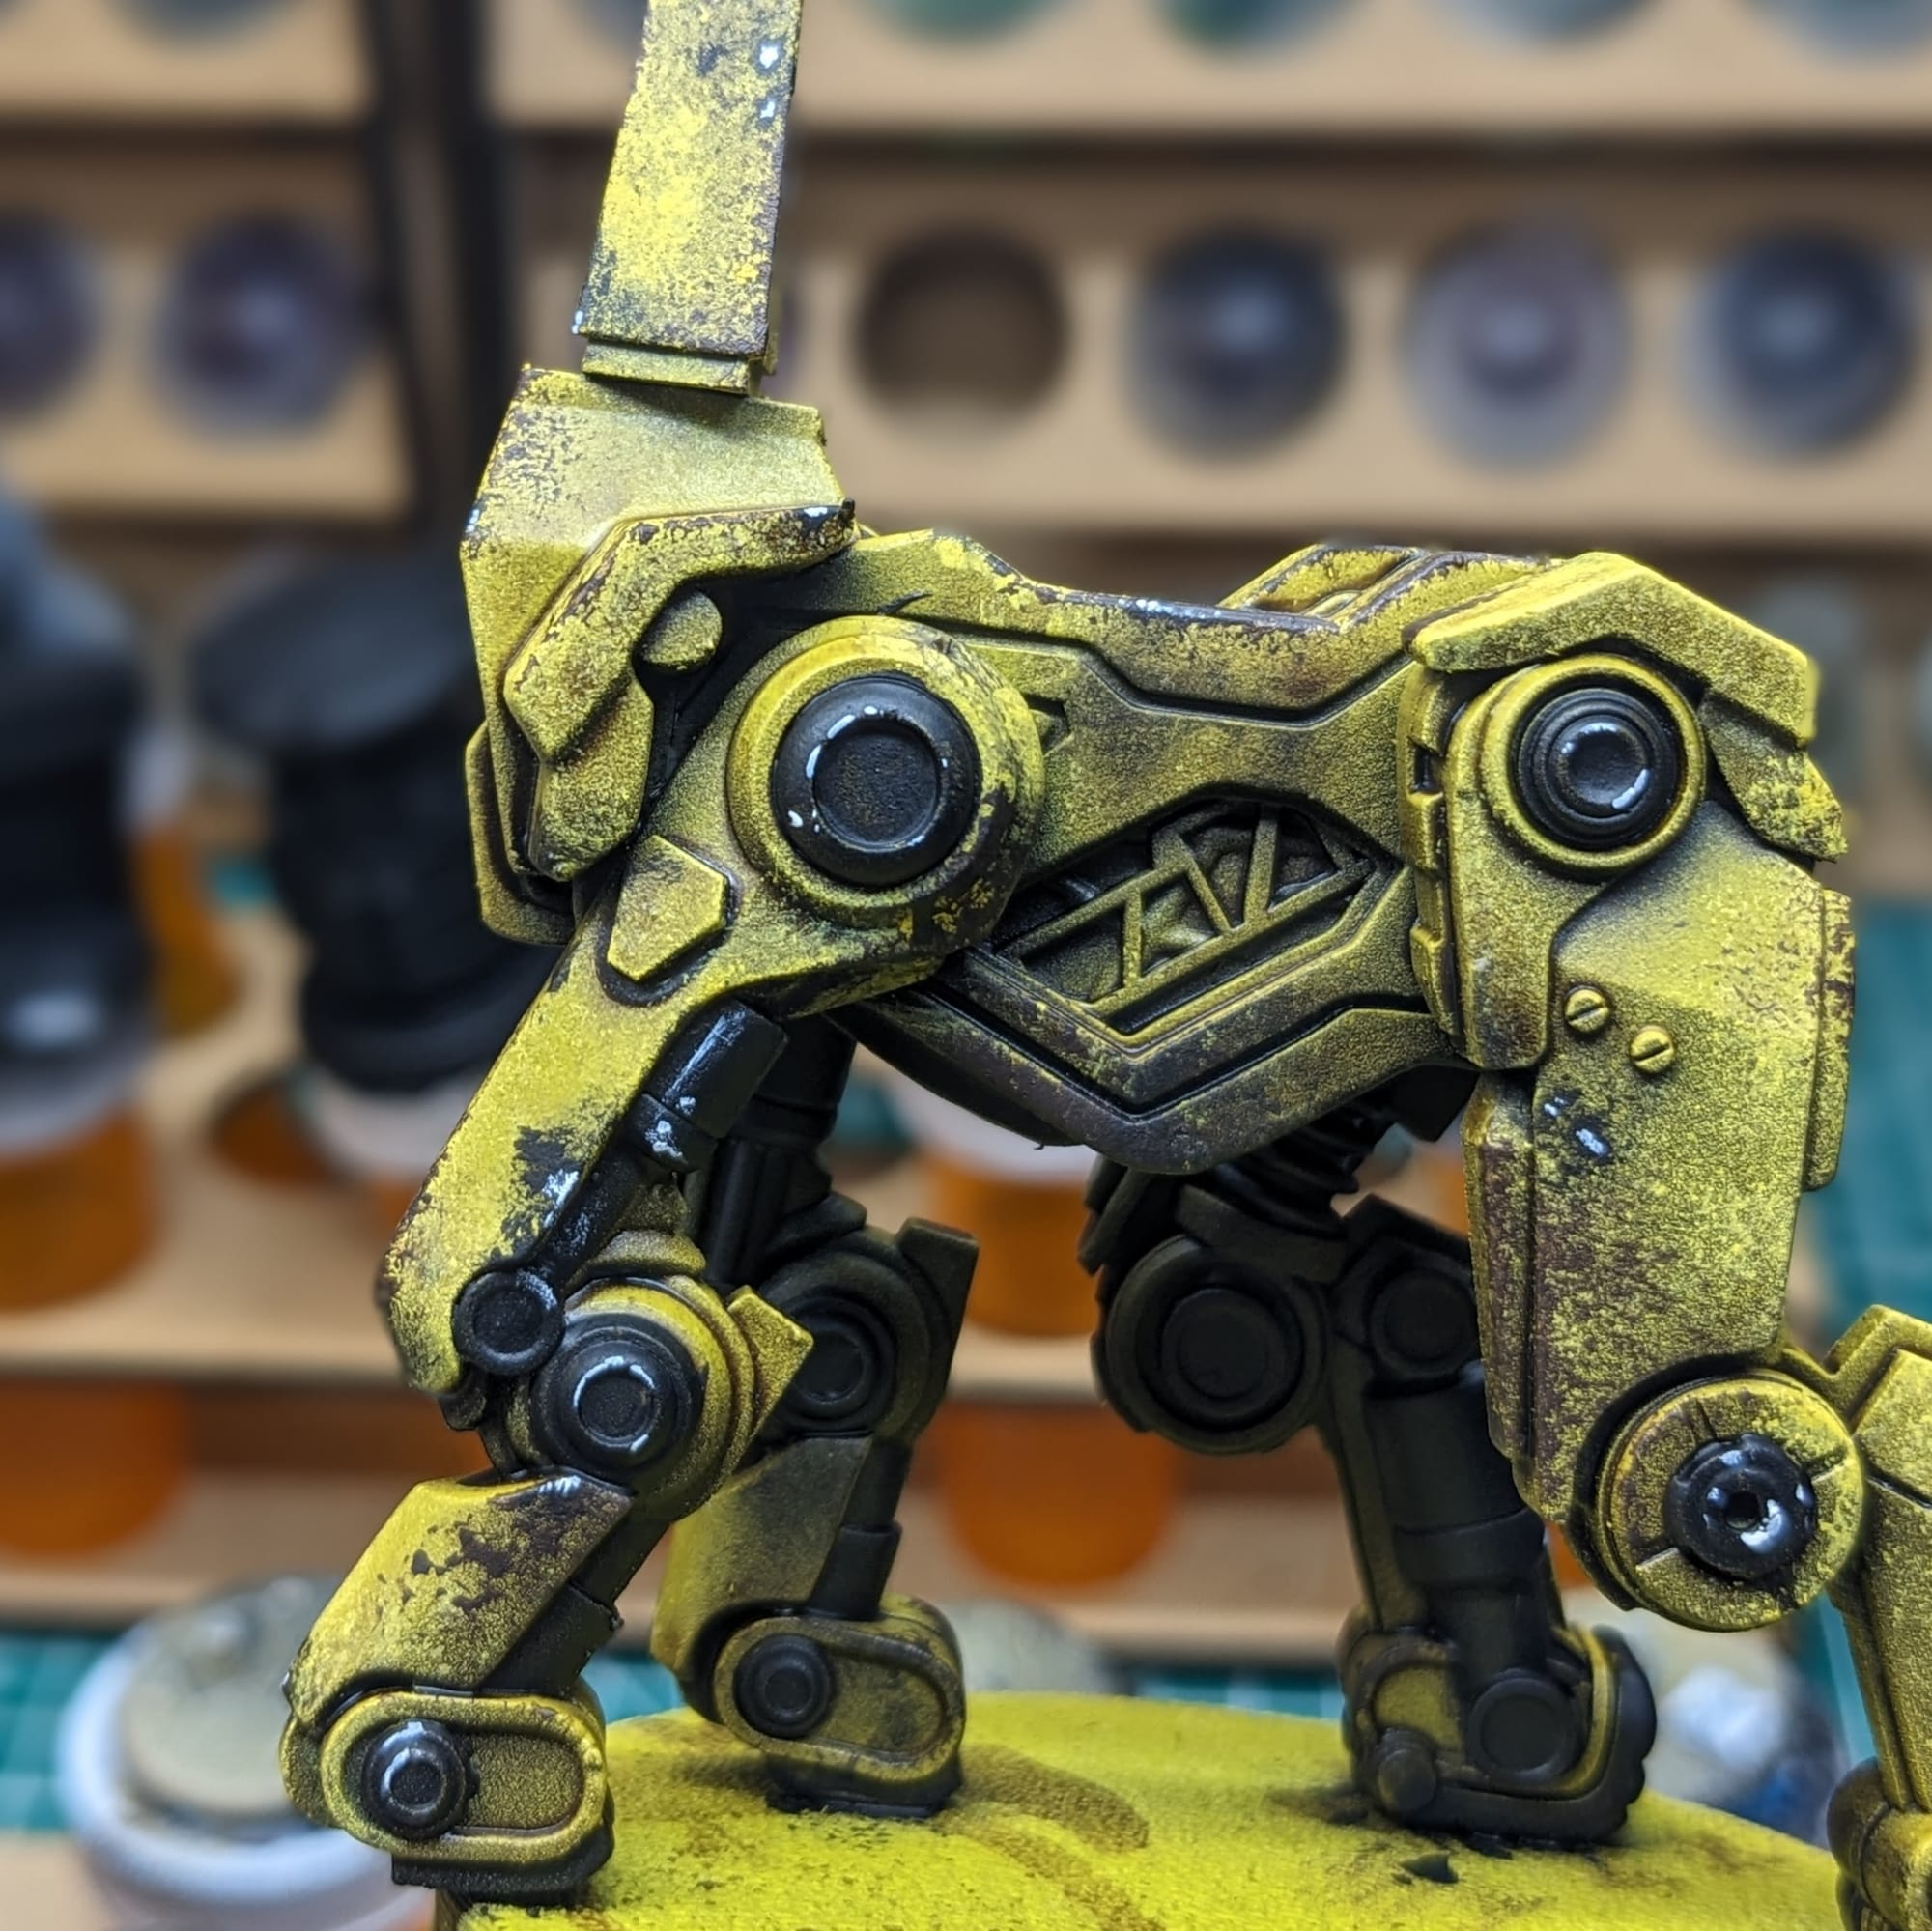
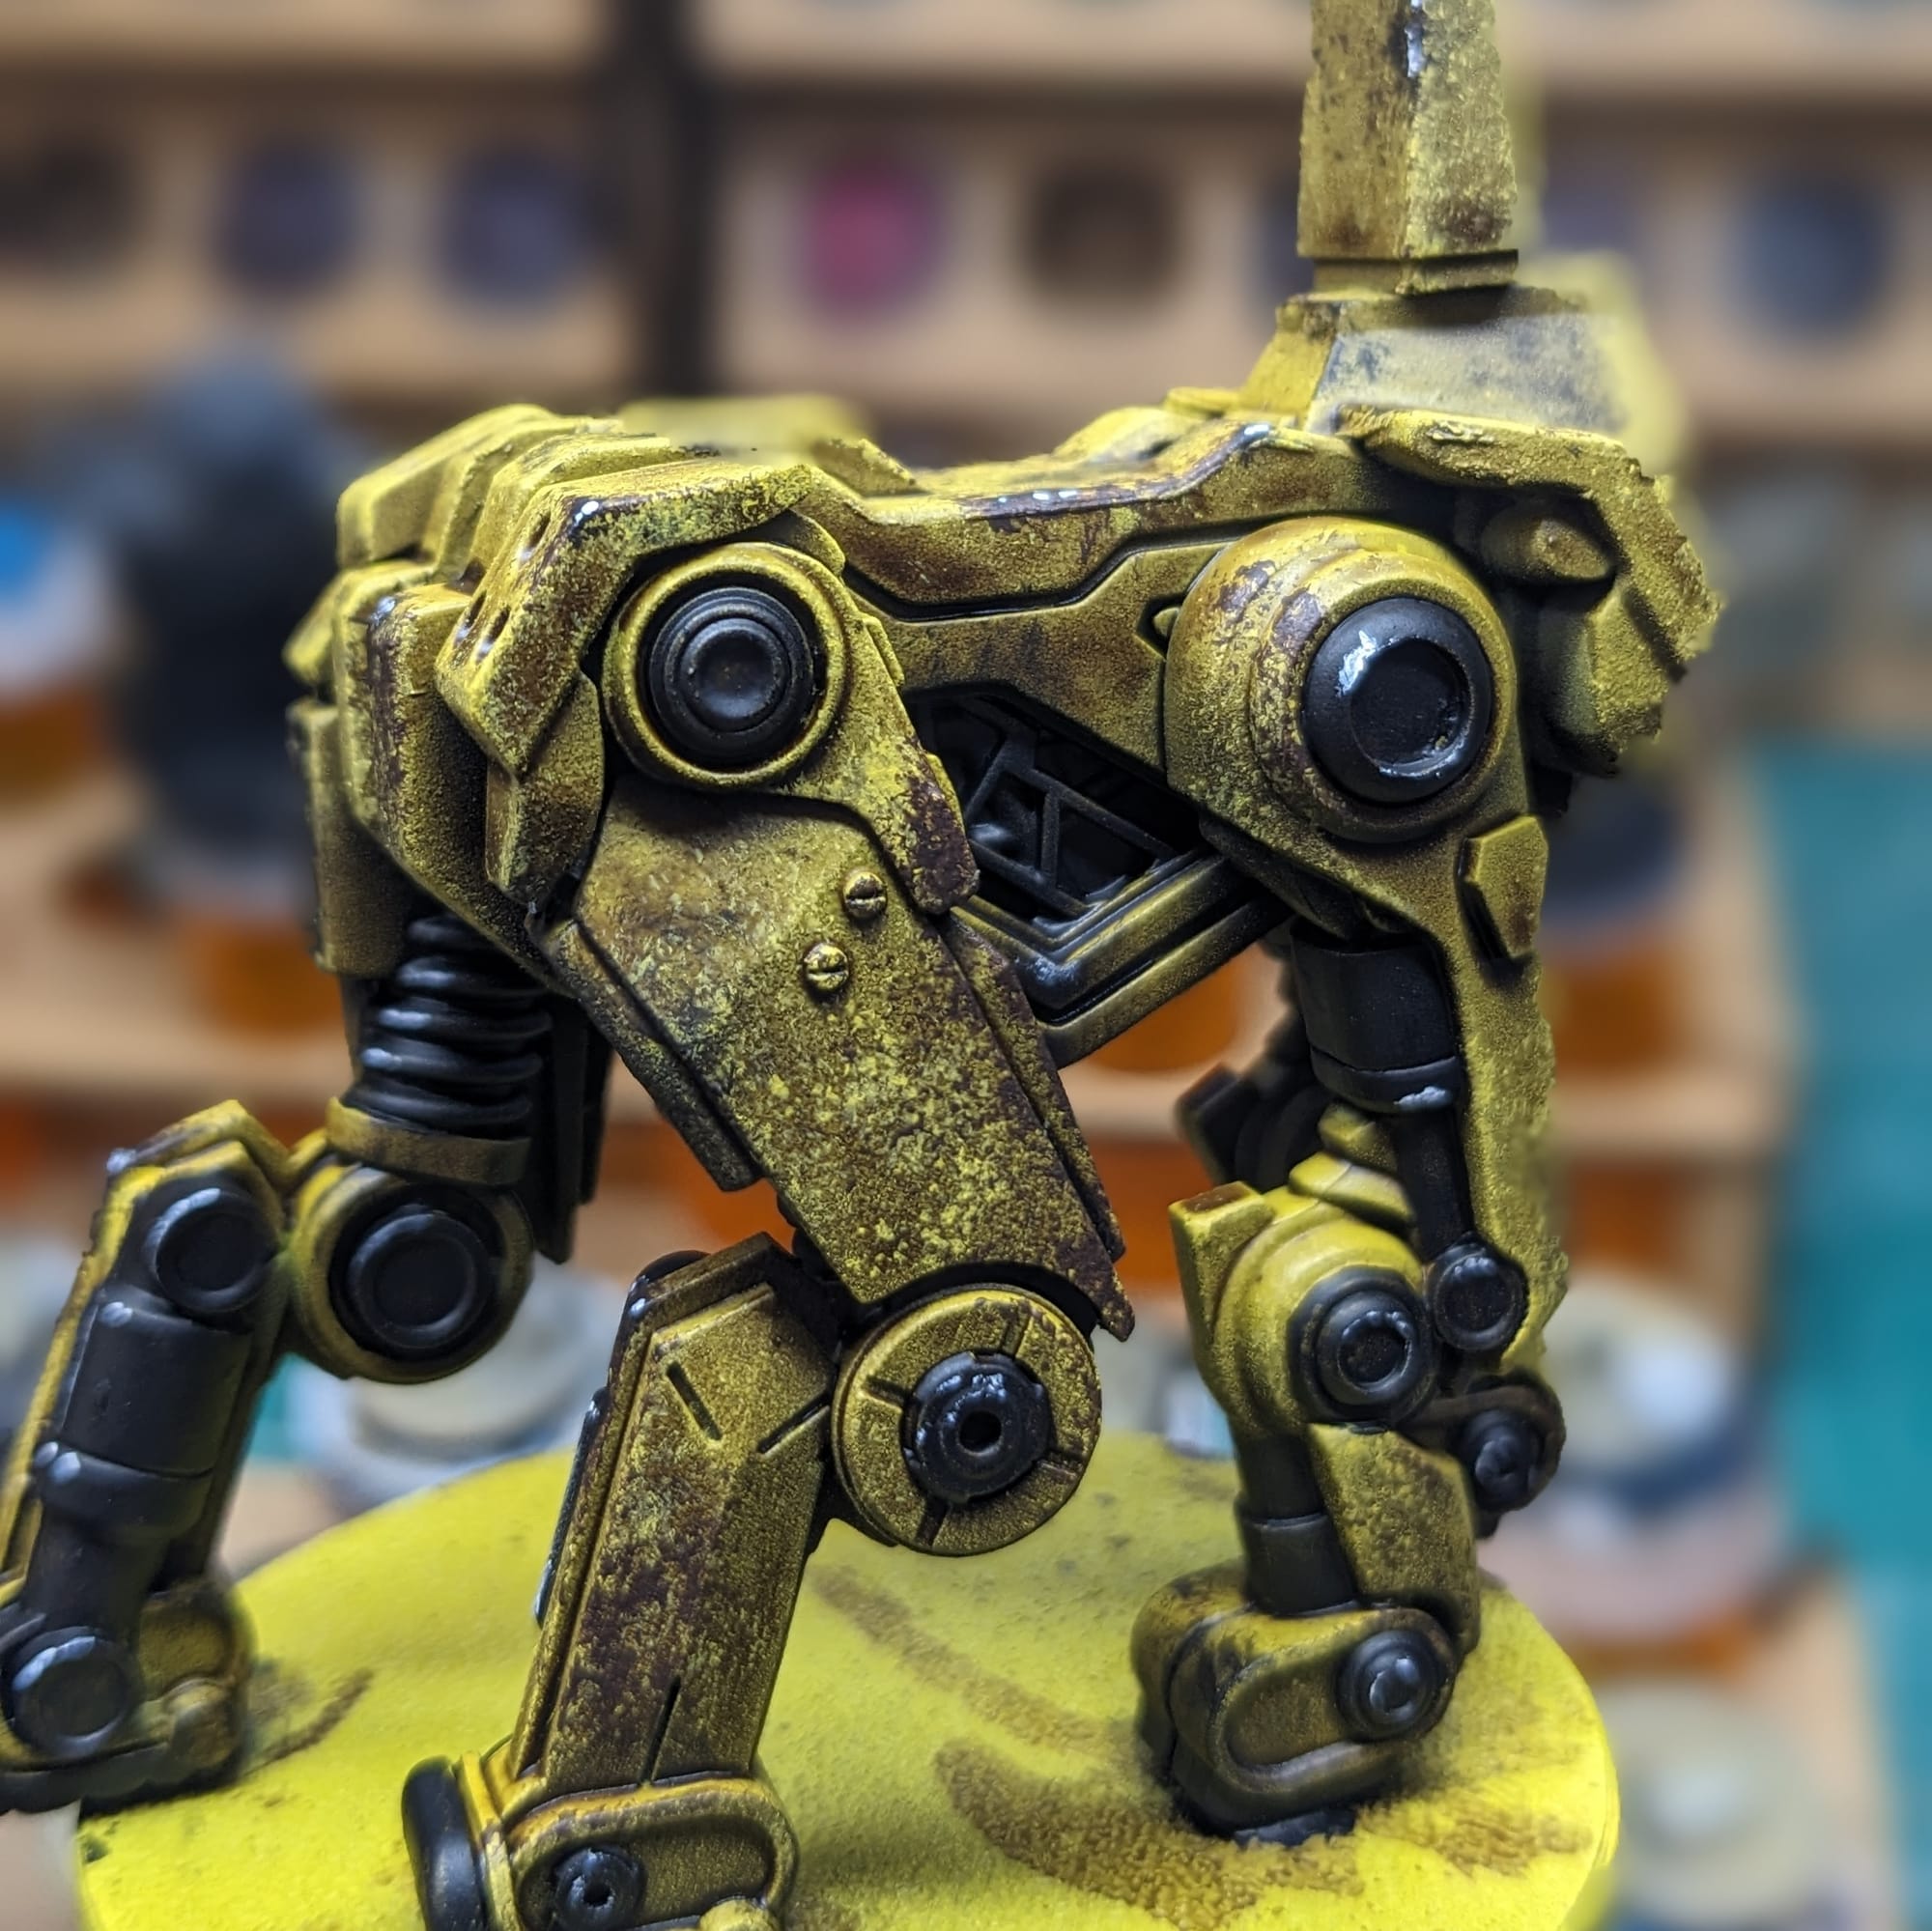
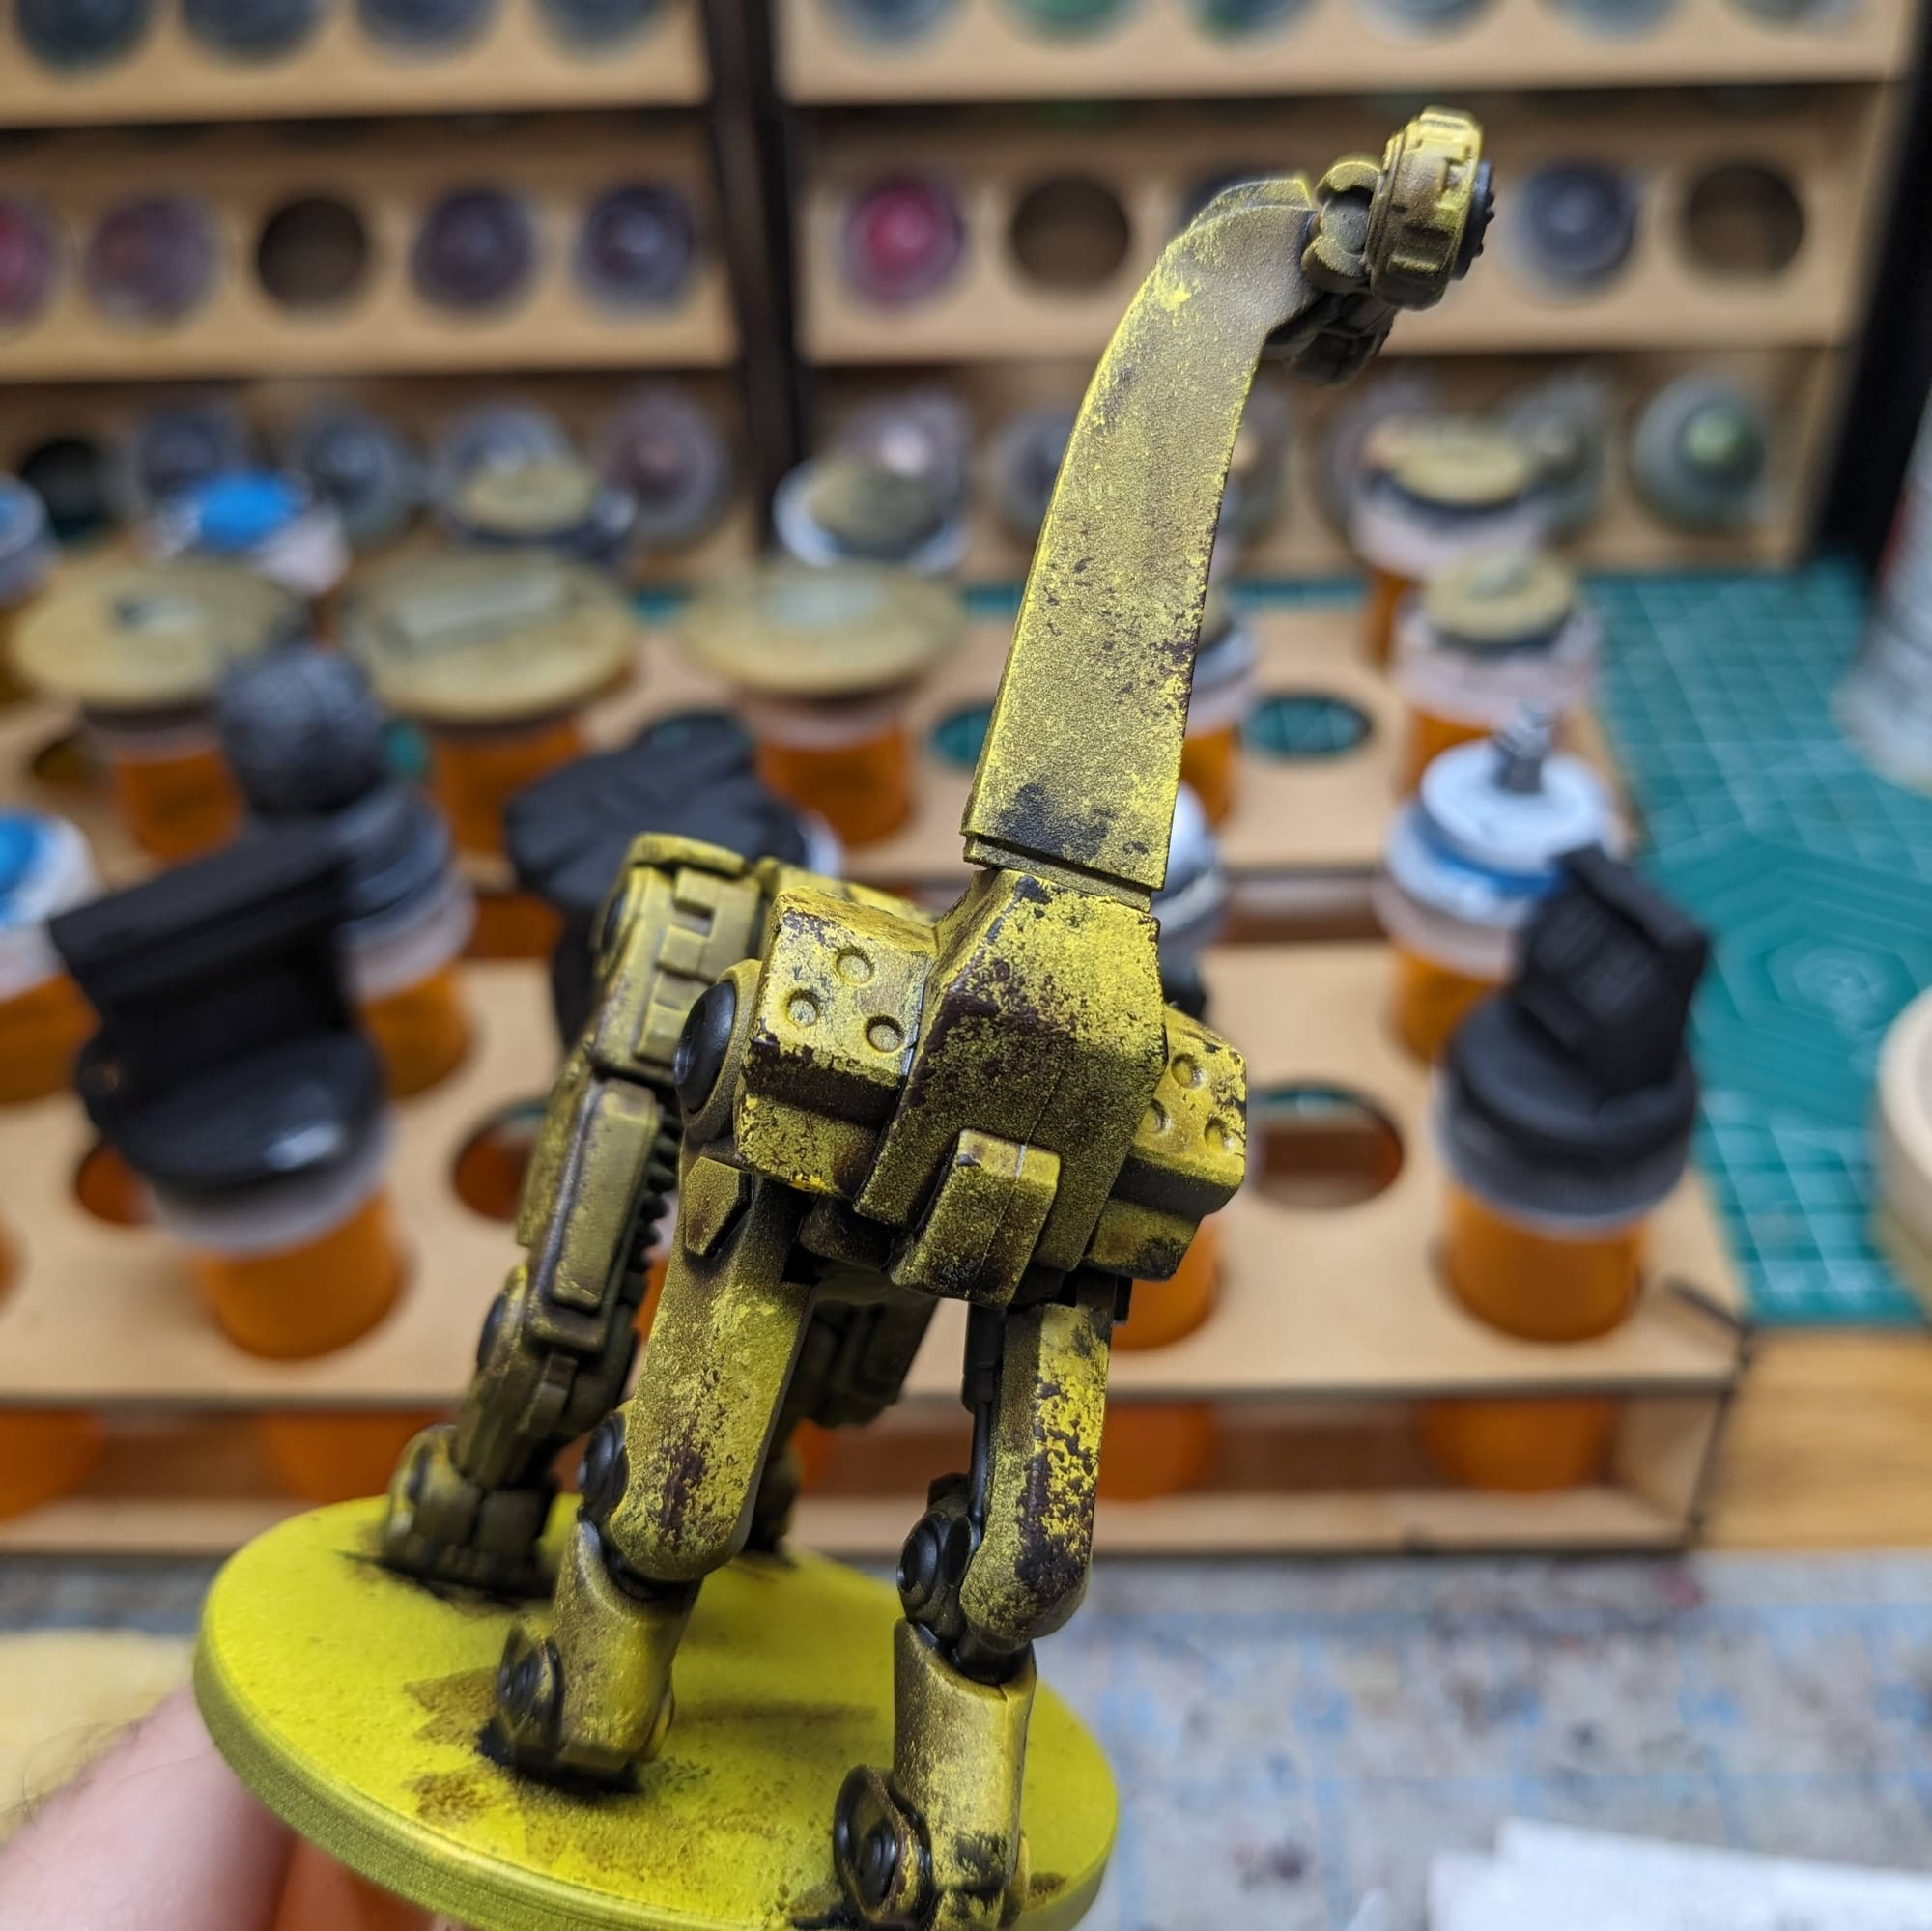
With the GRAF3 working in typical unsafe environments, it's pretty reasonable to assume that it would get a lot of dings, scuffs, and scratches. Using the Matt Black, I added some smudges and scrapes throughout, focusing on the areas that are out away from the body more or would be subject to collision (like the shoulder guards and hips). Using just the tiniest bit of white, I added small dings marks to show that the paint had fully chipped away, revealing the pure metal beneath. Less is definitely more, so don't add too much white!
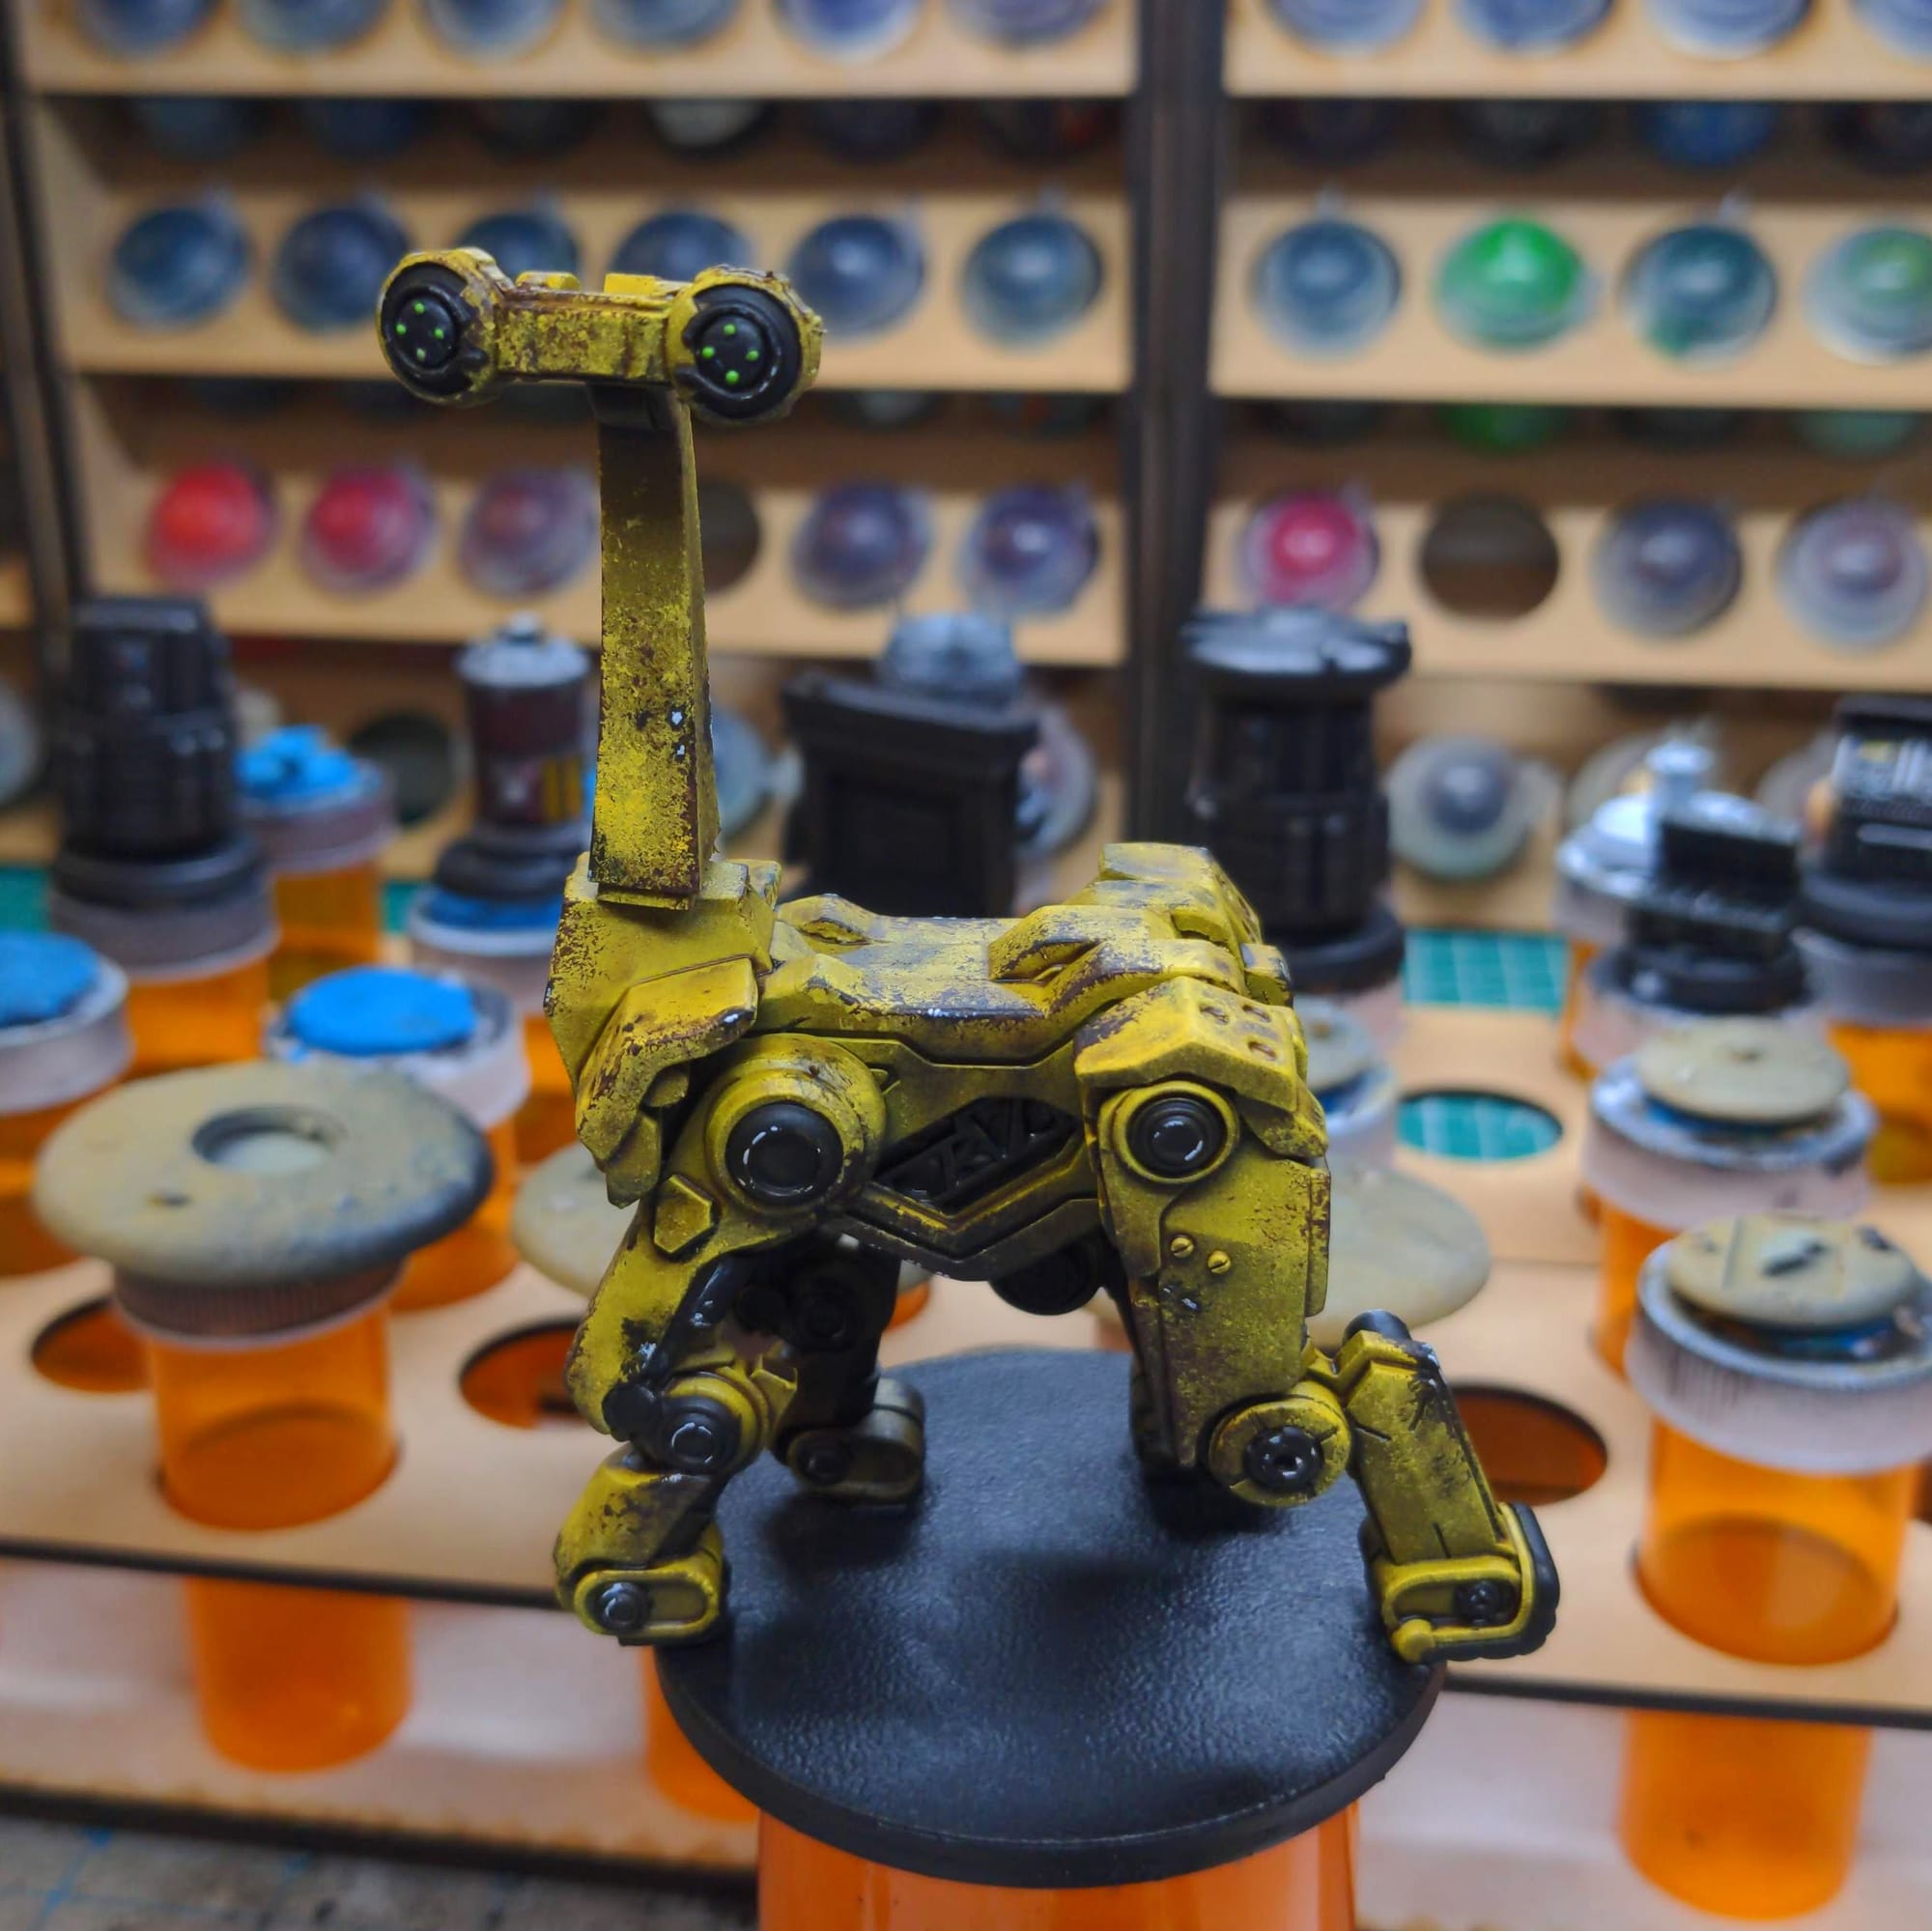
After adding in a few green dots of Moot Green for the eyes, it's tabletop-ready. Now, on to the basing!
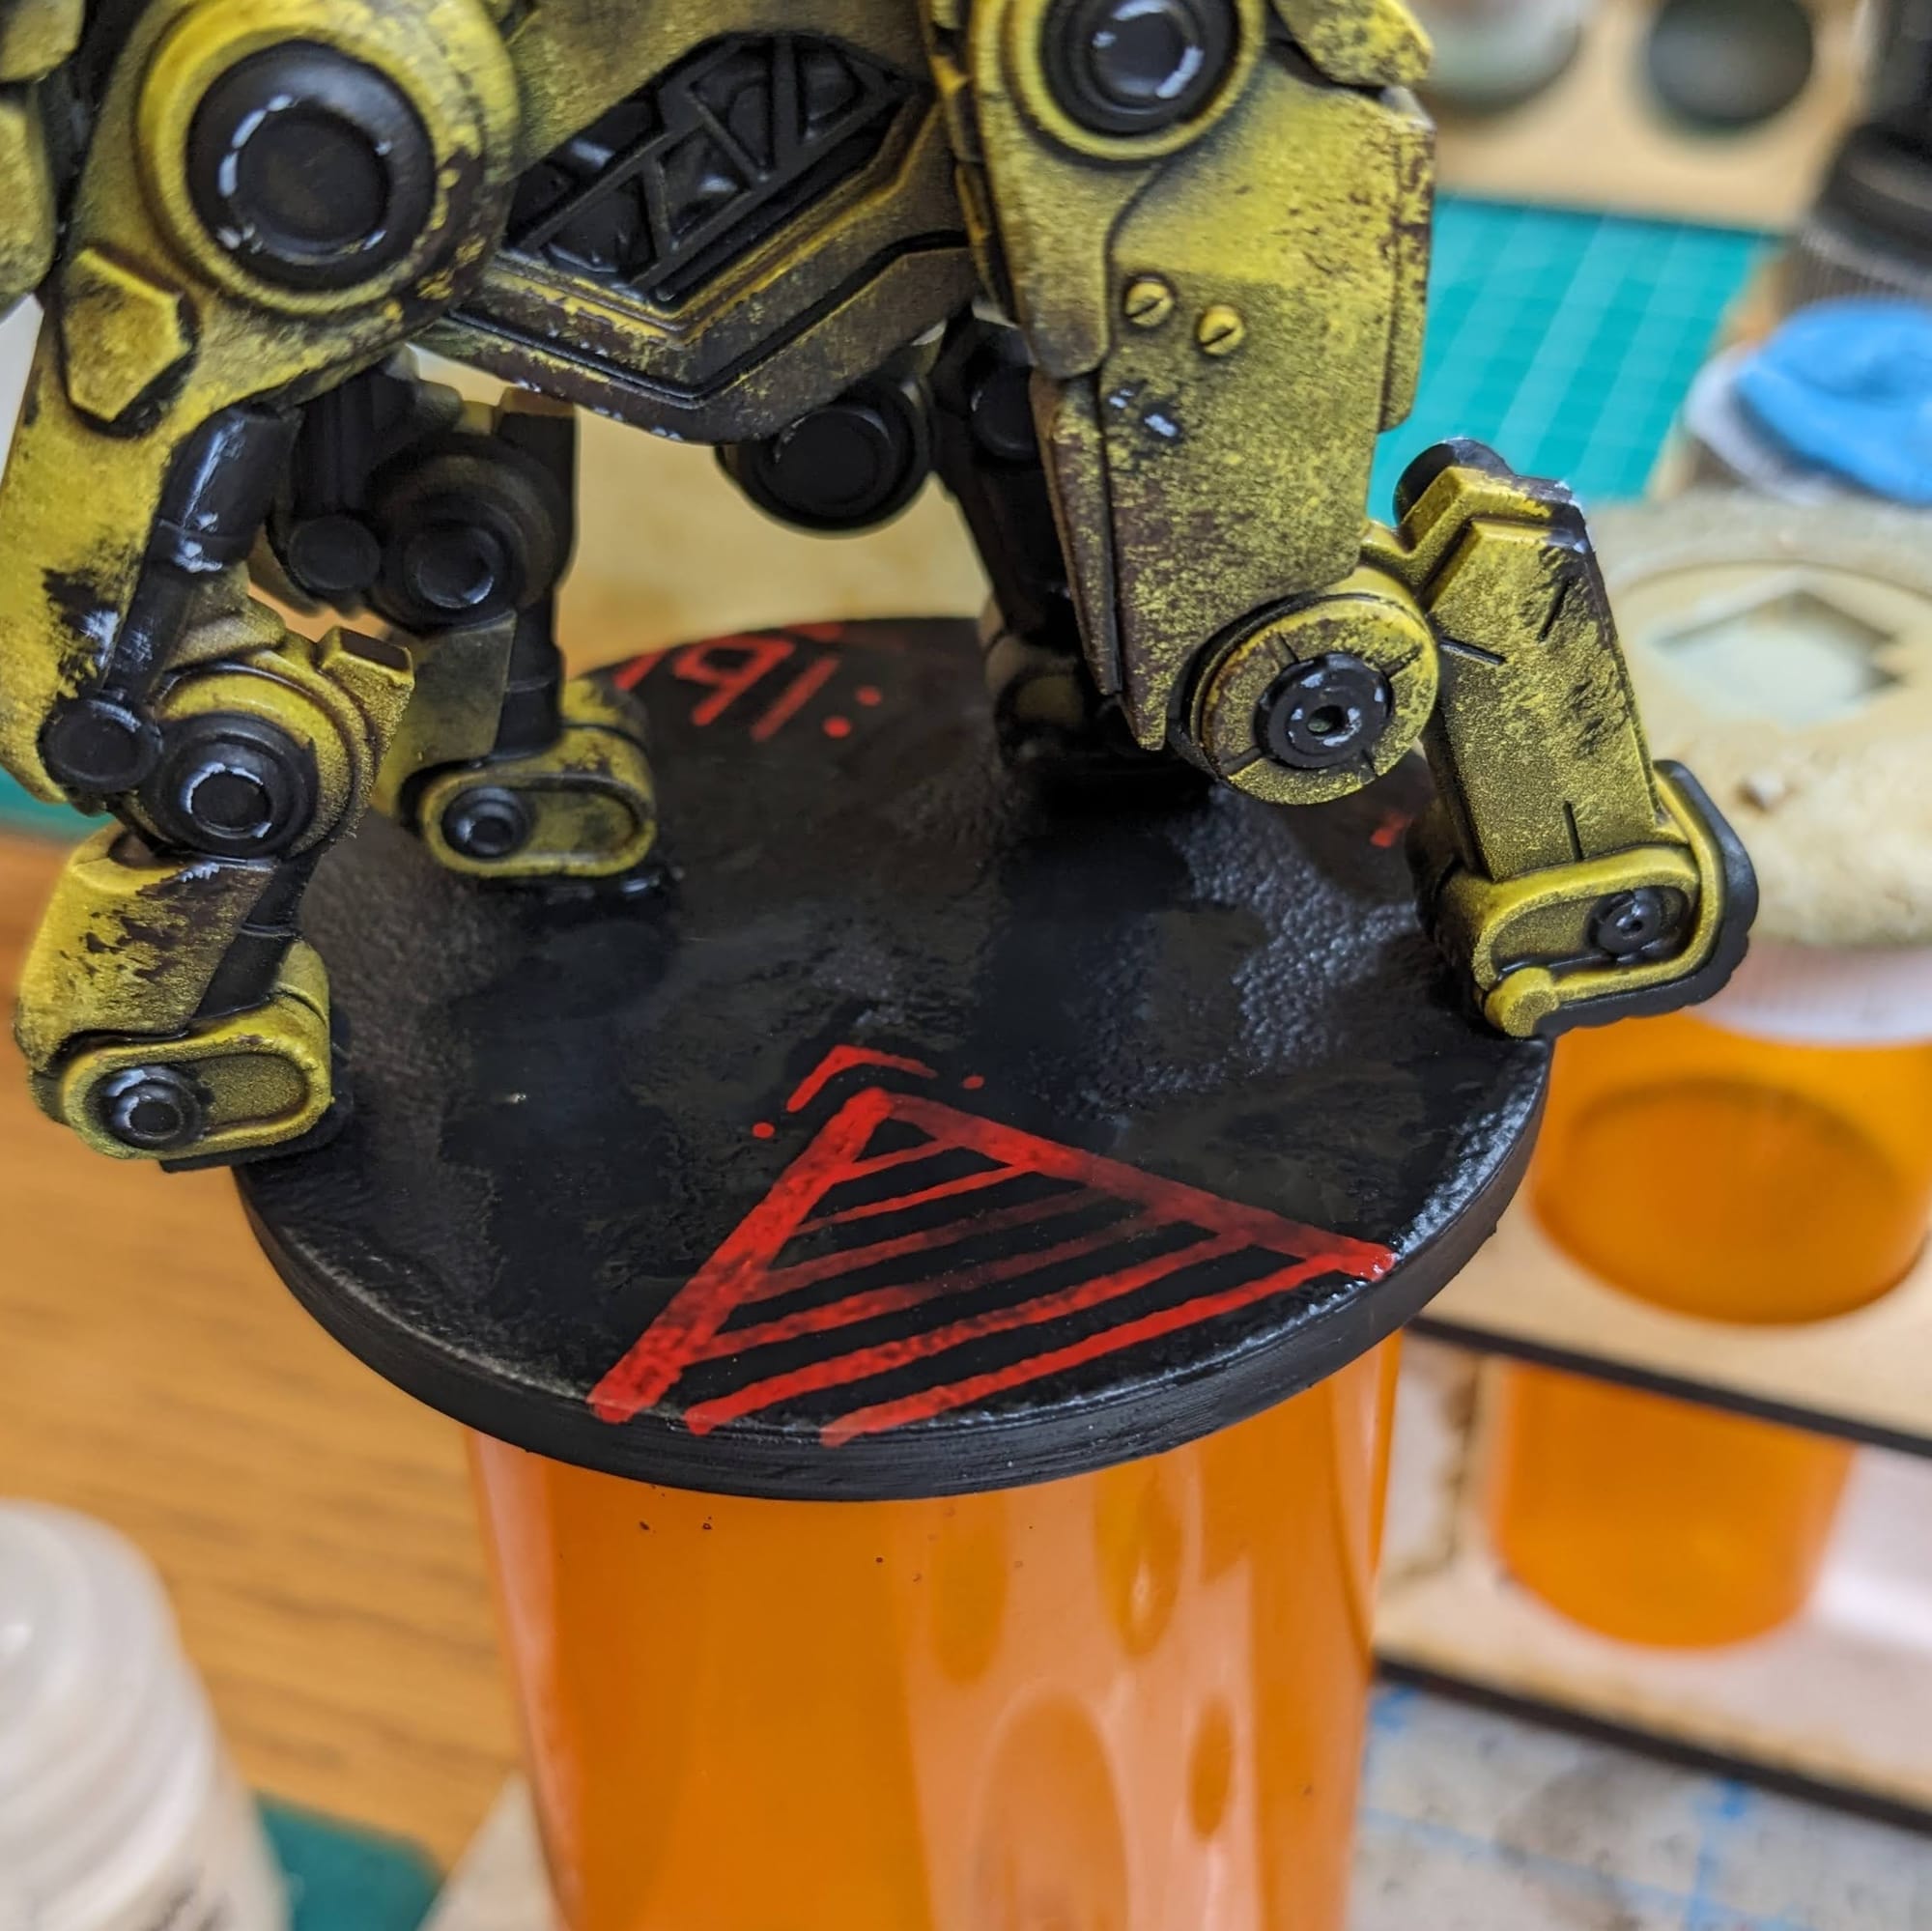
Basing
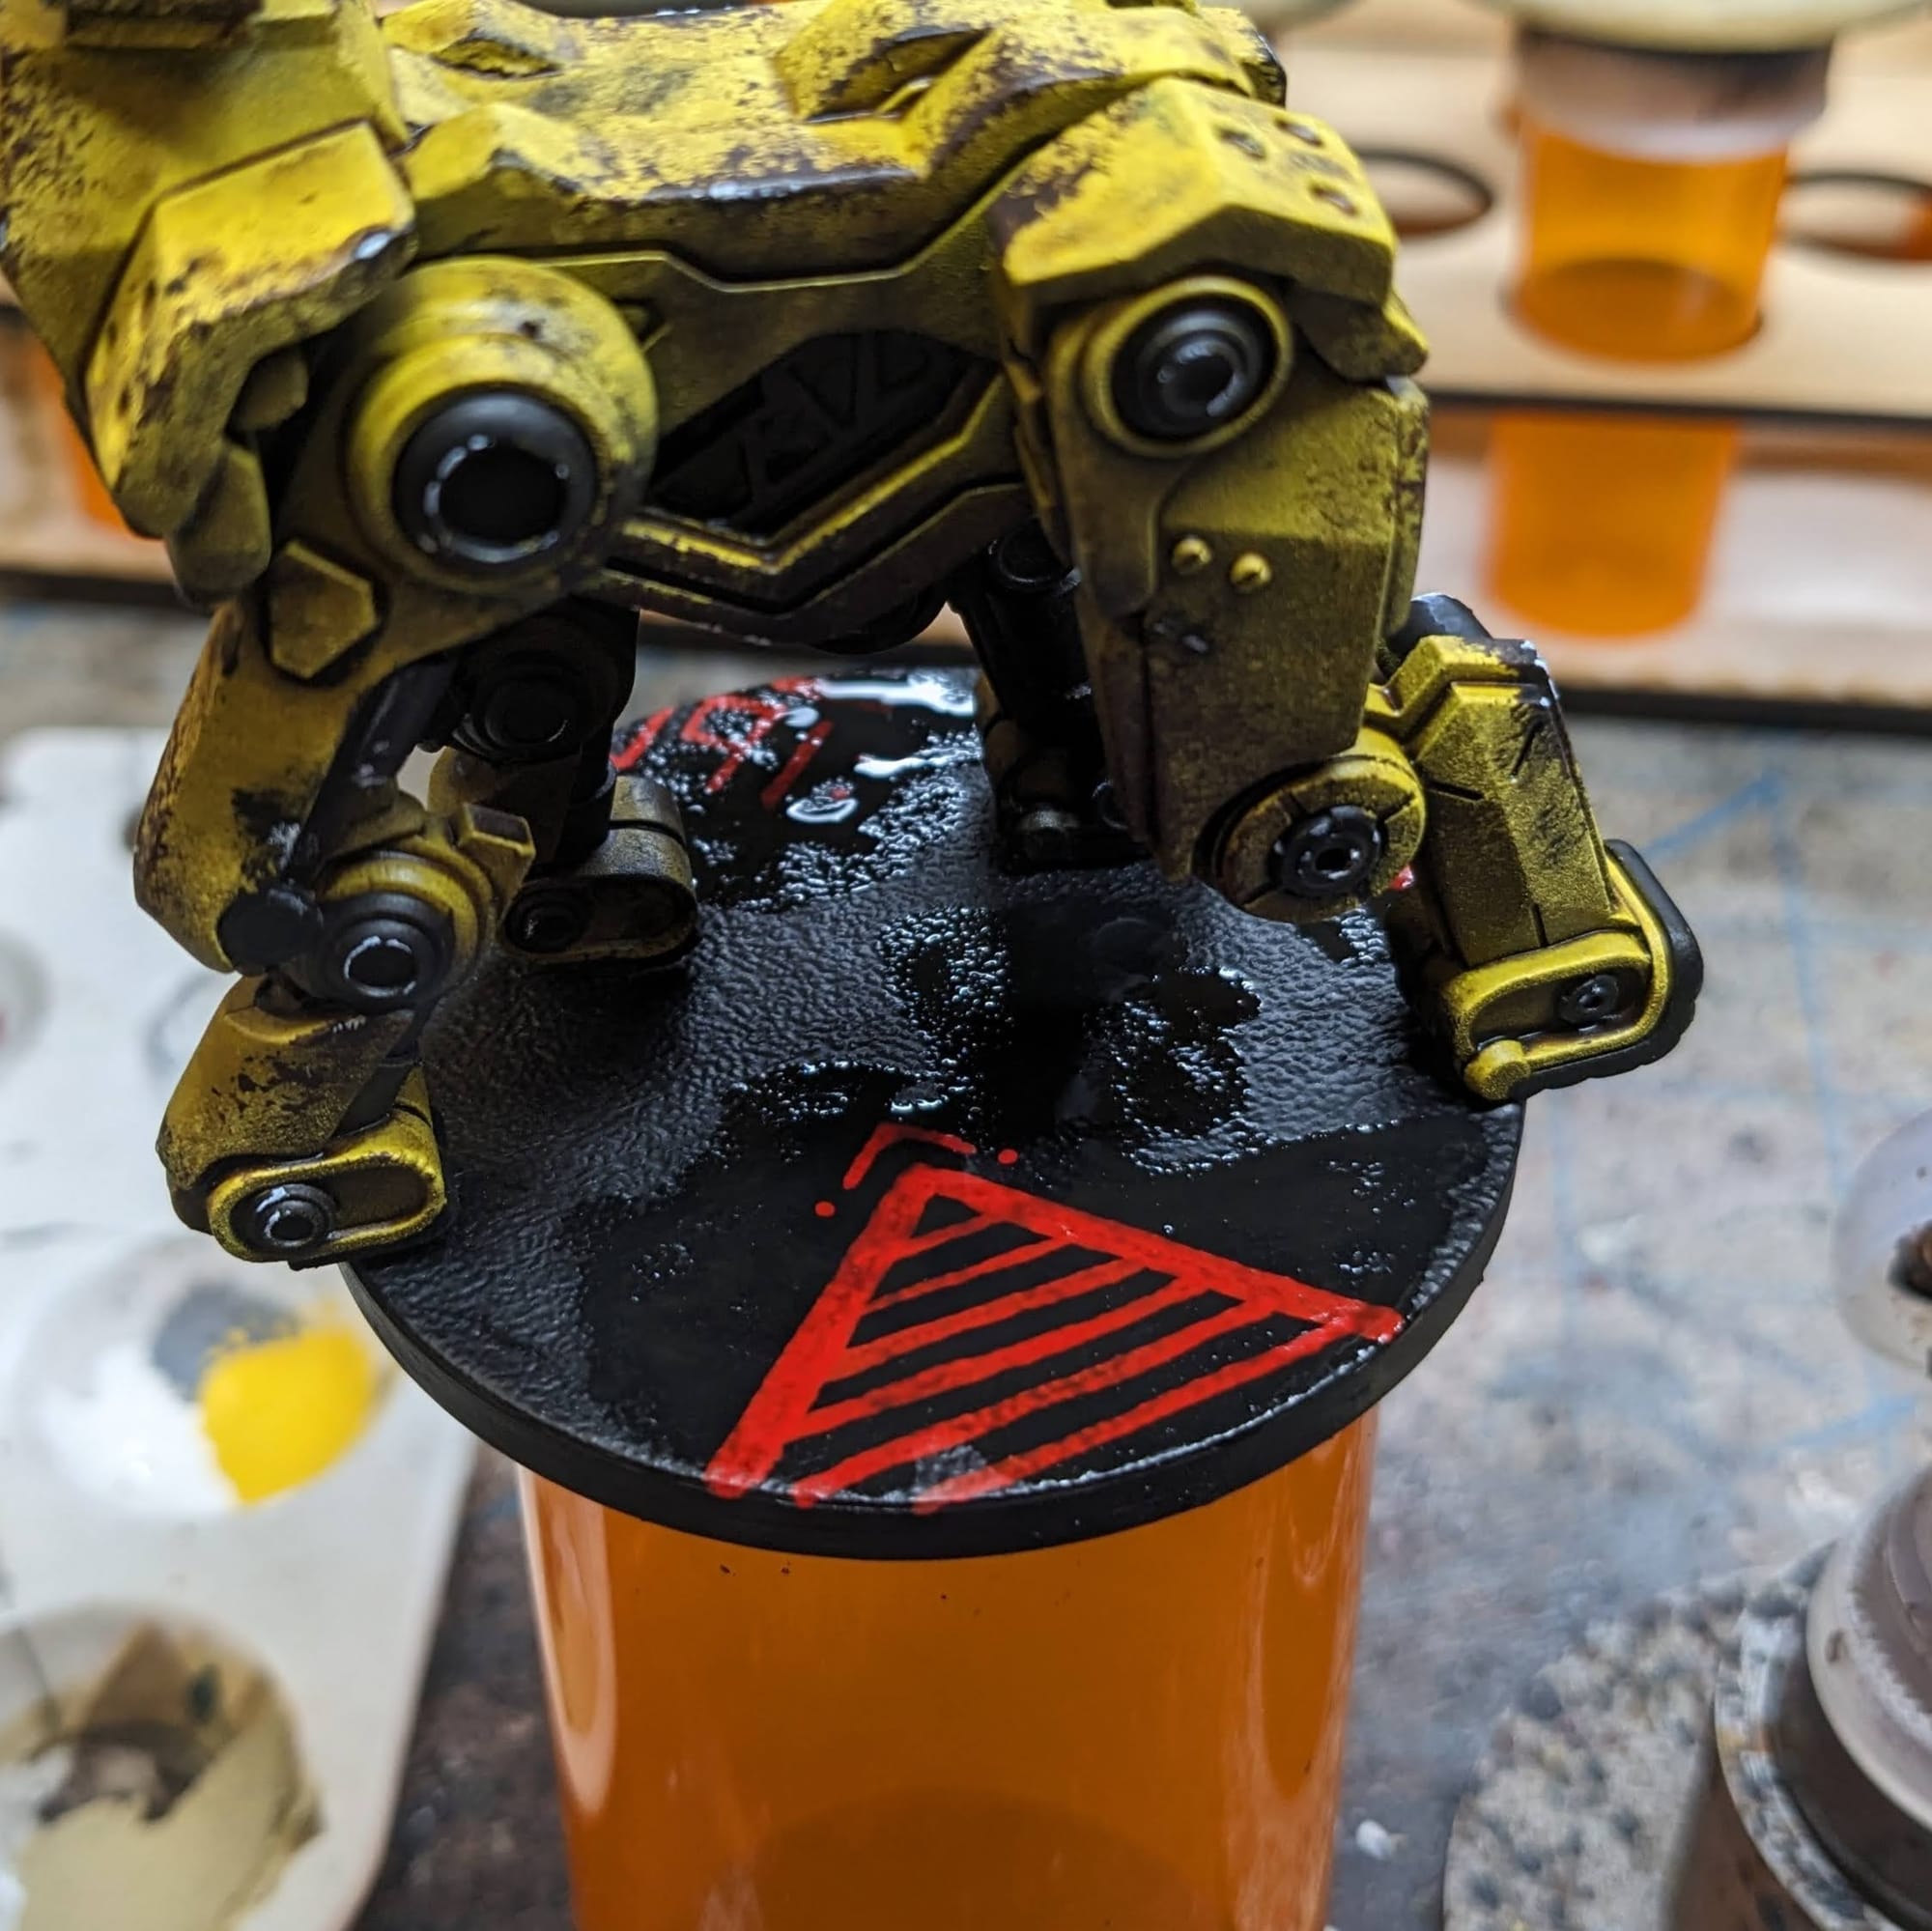
For the Cyberpunk theme, I wanted to keep the basing basic. The 3D printed texture on the base is pretty close to asphalt or grimy concrete, so I just did a little bit of dry-brushing of Longbeard Grey. Additionally, I imagined that it was working in a warehouse or loading zone, so I added some lines and markings using Pure Red directly onto the base for a little extra detail. I applied more Agrax Earthshade over the top over everything to add in some grease stains and give variation to the red lines.
Sealing
As I do with all of the models I paint that I also play, I apply a protective clear coating over the paint. This helps preserve the paint on the model and keeps oils from hands from rubbing off the paint as you continuously touch the models during games. There are many different kinds of clear varnishes to use, but I typically use any matte or anti-shine varnishes, as satin, semi-gloss, and gloss tend to distort the colors of the models (not to mention that most models aren’t supposed to be shiny).
Brands that have been reliable for me are Krylon Matte Clear Spray, Rustoleum Matte Clear Coat, which is slightly glossy, and Testors Dullcote, although the latter can be expensive and difficult to find. For a coat with no shine that really enhances the colors, I use AK Interactive’s Ultra Matte Varnish, applied with an airbrush.
Painted and Ready for Play
Cyberpunk red: Combat Zone GRAF3
Review
In a world of tech, bright lights, and geometric shapes, nature is completely gone. When technology tries to emulate natural things, like plants and animals, the end result is goofy, awkward, and a reminder that nothing creates nature better than nature. The GRAF3 is a perfect representation of this kind of scenario in Cyberpunk and therefore really just stands out on the table (literally and figuratively). With some simple painting techniques, you can easily paint up this worker robot whose new savanna is the grimy underbelly of Night City.
Cyberpunk Red: Combat Zone: GRAF3 Industrial Robot Expansion Pack
Great
An easy-to-build and quick-to-paint model that can be added to your Cyberpunk Red: Combat Zone gameplay. Needing only a little cleaning and prep work, this is a great model to expand your collection!
Pros
- Easy to build, easy to paint
- Faction-less, robots can join any team
- It's a cute, cyberpunk-themed Giraffe
Cons
- Some difficult mold lines to remove
- Tricky to ensure the legs are fully flush with the base before gluing
This review is based on a retail copy provided by the publisher.
Have you painted Cyberpunk Red: Combat Zone miniatures yet? Share your work with us!
Don’t forget to subscribe and follow us on Instagram, Bluesky, and YouTube for more Cyberpunk Red: Combat Zone reviews and painting guides, as well as more hobby and tabletop news and reviews!