In my experience, trading/negotiation games past a certain complexity (i.e., not Pit and debatably Bohnanza) typically fall into one of two categories: Games with mechanics that exist purely to support the negotiations (Quo or Zoo Vadis, Mistborn: House War) or games where negotiation is simply one of many tools a player can utilize to give themselves an edge (Twilight Imperium, Dune). There’s a lot going on in Brink, and while negotiating and deal-making certainly empower players to engage with their goals, it isn’t completely center-stage, placing Brink into the second category. That being said, I enjoyed all the wheeling and dealing and would definitely encourage others to check out this hybrid game.
Rules & Components
The rules of Brink are pretty easy to understand, and the rulebook itself does such a fine job of explaining them that when I first played the game, I had no issues teaching it despite forgetting the rules at home. This was also thanks to the reference cards and the information printed on the board, which were a great help. I especially like that any time one of the resources or factions is mentioned in the rules, the word is colored to match the respective element and followed by the matching icon. This was invaluable when learning the difference between Komek and Mangomi Power, or Henko Influence vs Henko Power. Even if you don’t care about the actual names of these factions—everything is color-coded on the board/cards, so the names don’t affect gameplay—it still helps train the reader on the iconography of the game without requiring them to memorize a legend.

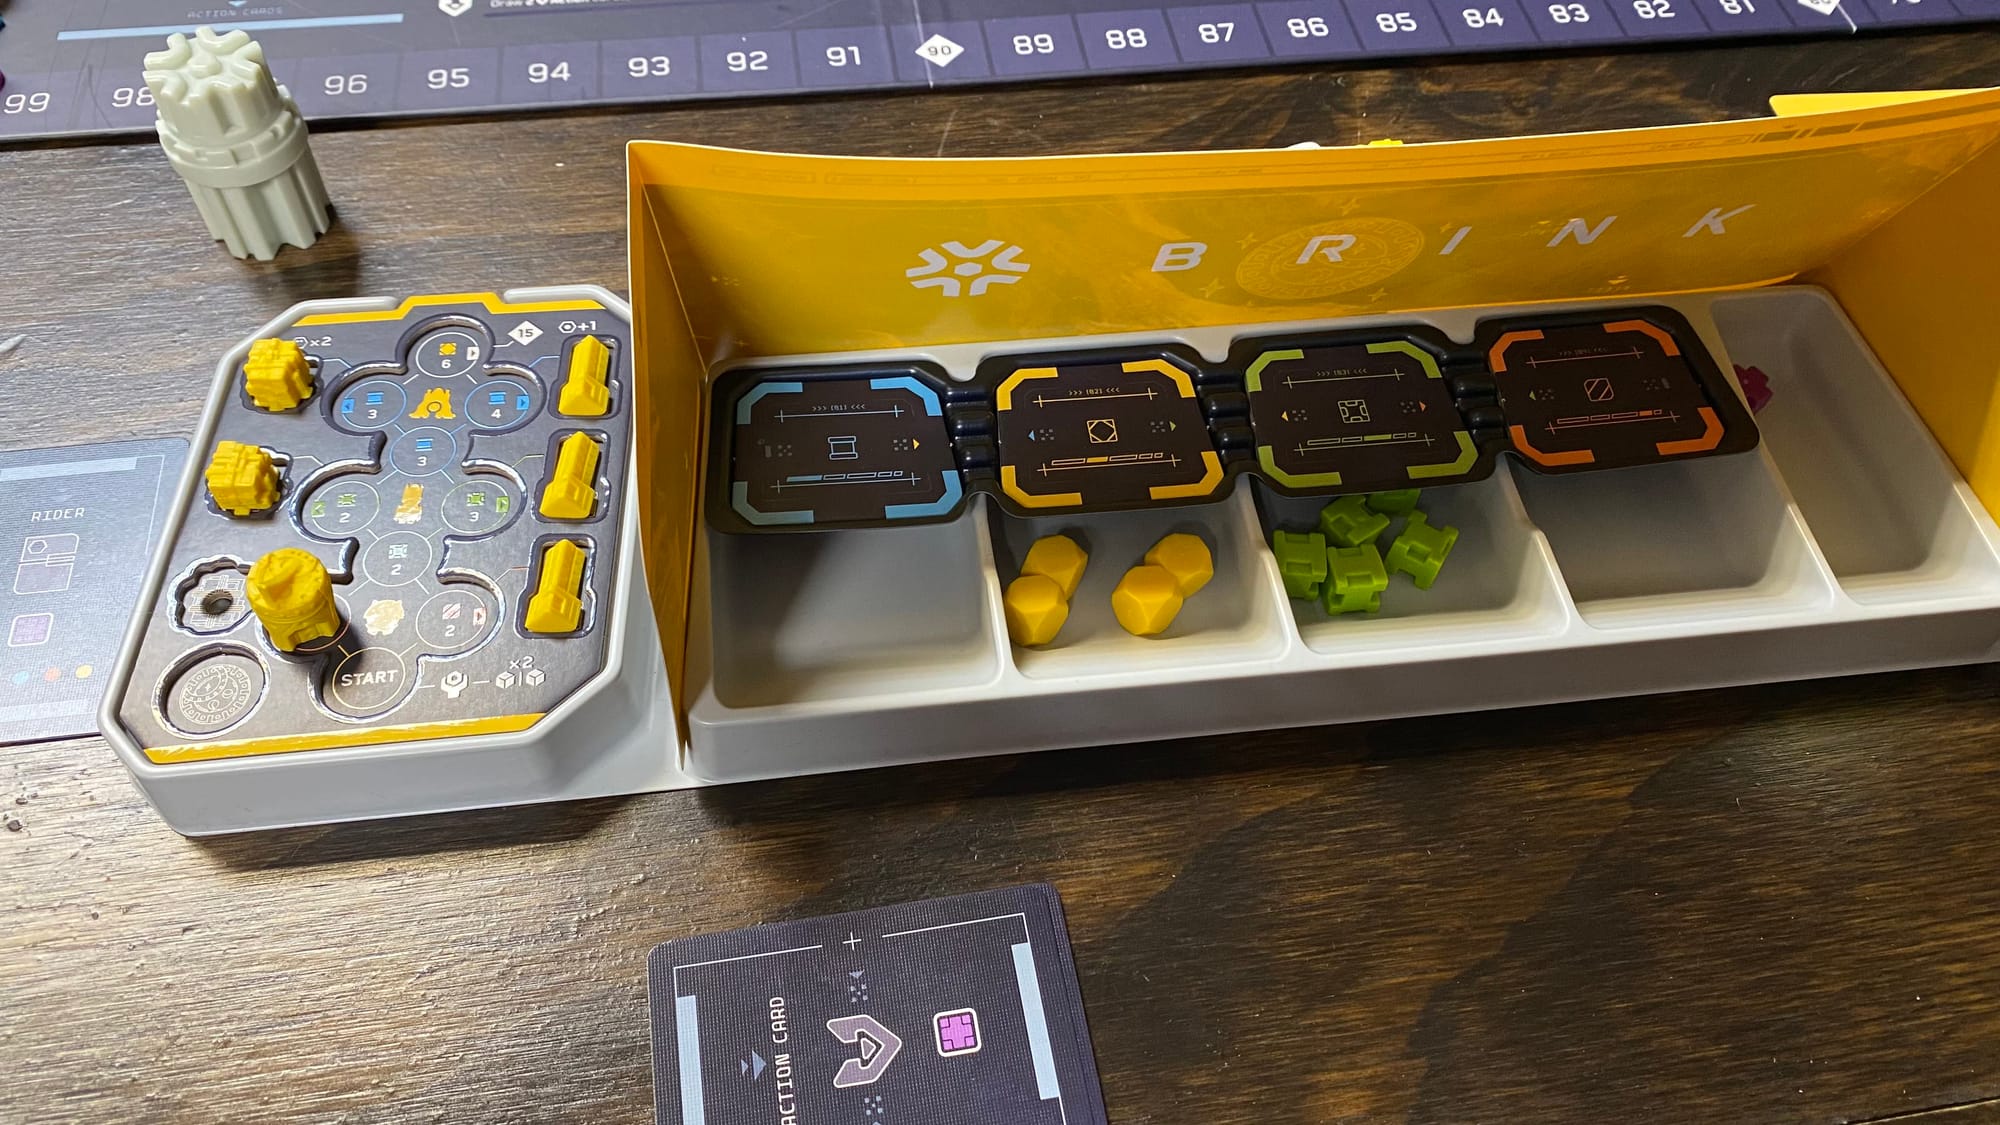
The components in this game, as with all IV Studios games I’ve played, are top-notch. Every player has a plastic tray that neatly organizes all their components, both during play and when the game is packed up. The cards are all nice and sturdy, and each deck has a tray that makes setup and teardown a breeze—the mini cards’ trays are even divided to keep the discard piles neat as well. Both the ship upgrade boards and the main board have spot UV in droves, with everything not a part of the dark background popping out. Brink looks great on the table every time I bring it out.
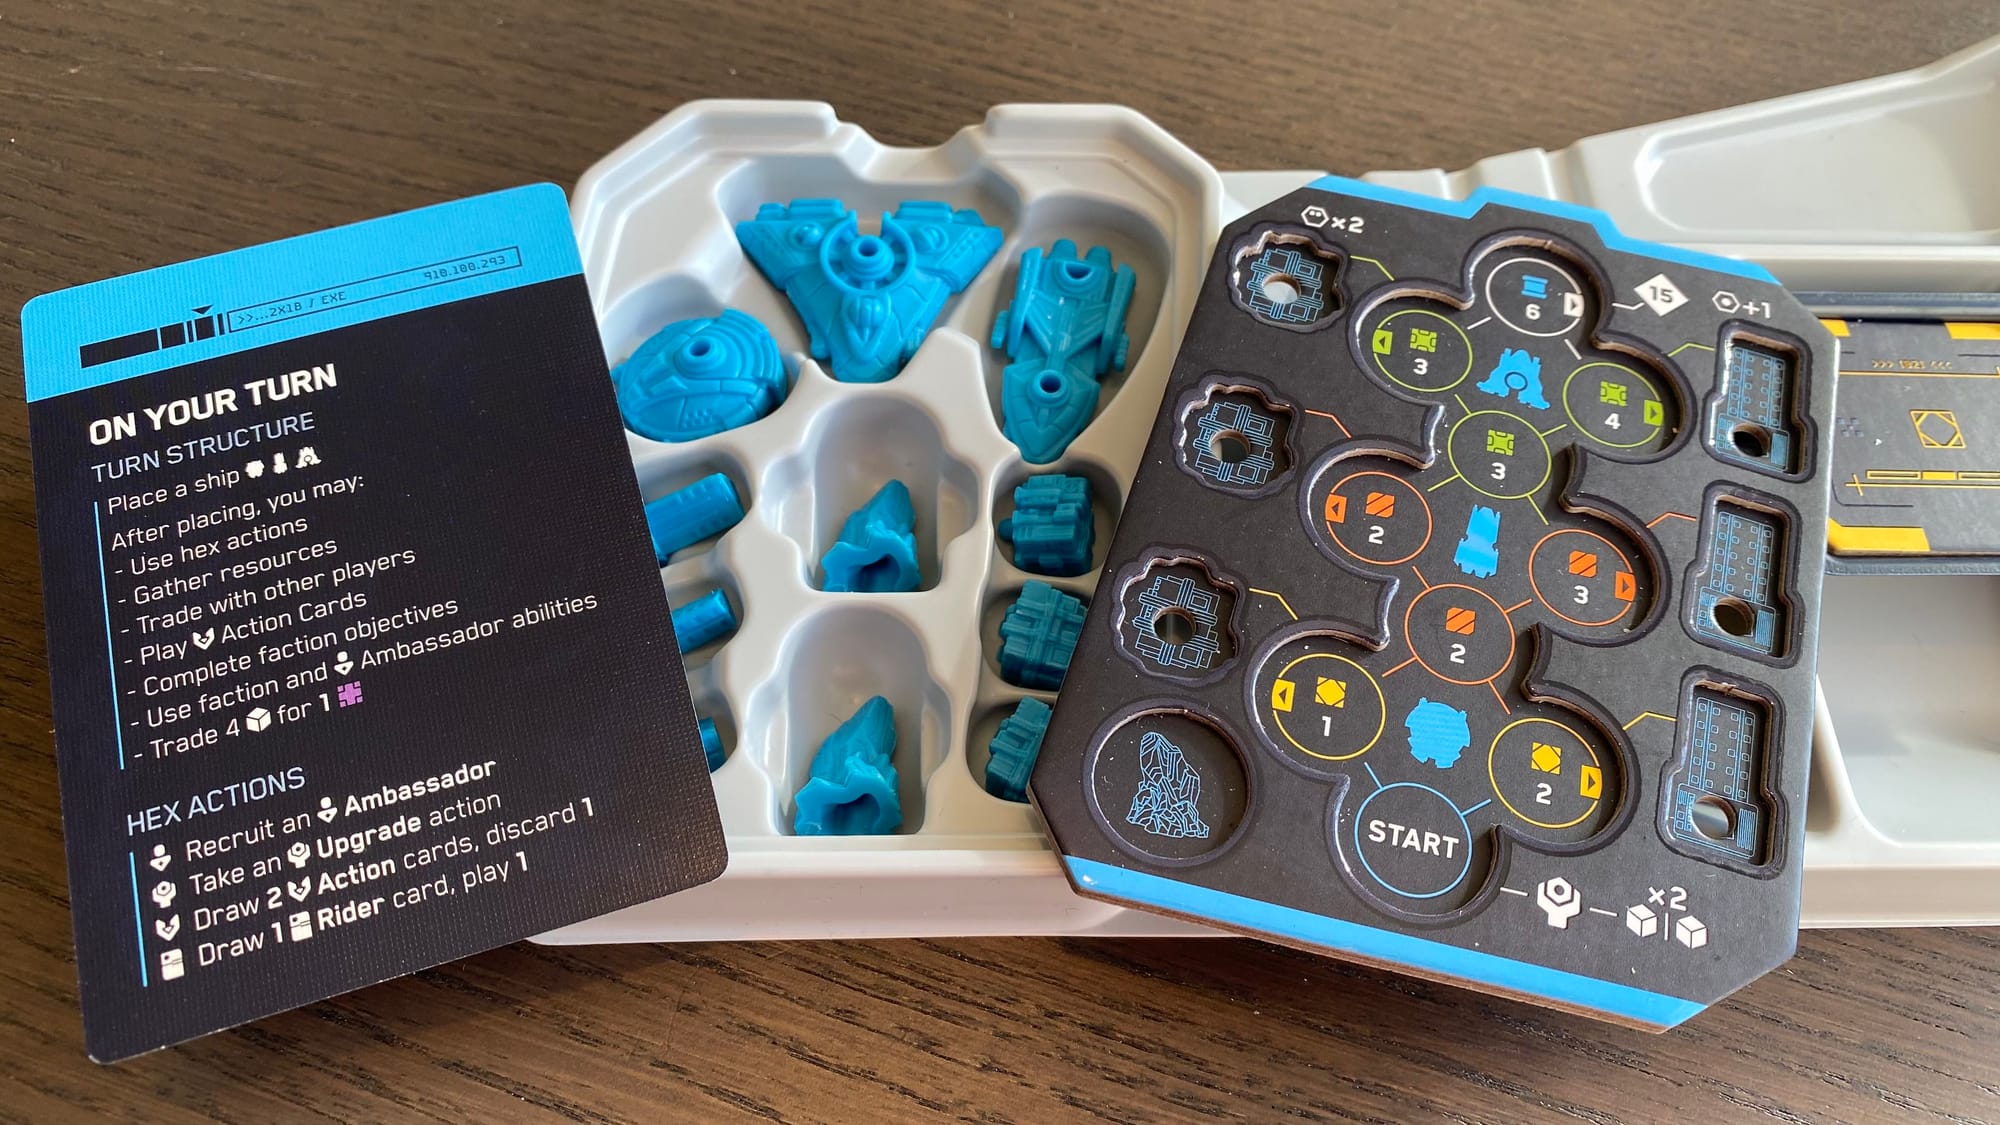
My only complaint about the game is more of a nitpick, but the player screens feel like wasted space. The outside has some art and indicates the different zones around the player tray, but the inside is simply monochrome with the game’s name printed on it. While there are also player reference cards, that information could have been printed on the screens instead, or in addition to. Or even a bit of lore about the factions, just something instead of a solid color.
Gameplay
Brink gives players three rounds to score as many points as possible by collecting sets of different colored Ambassadors, gaining certain Action cards, or having leftover Influence (provided certain conditions are met), but primarily through the Council Votes at the end of each round. During Council Votes, players use their Influence to determine which two factions’ Power will be worth points, and most of each player’s actions in a round build up to this moment. All the deals made, promises broken, and both Power and Influence gained are to affect the outcome of this bid. But I’ll need to take a step back to explain how it all works.

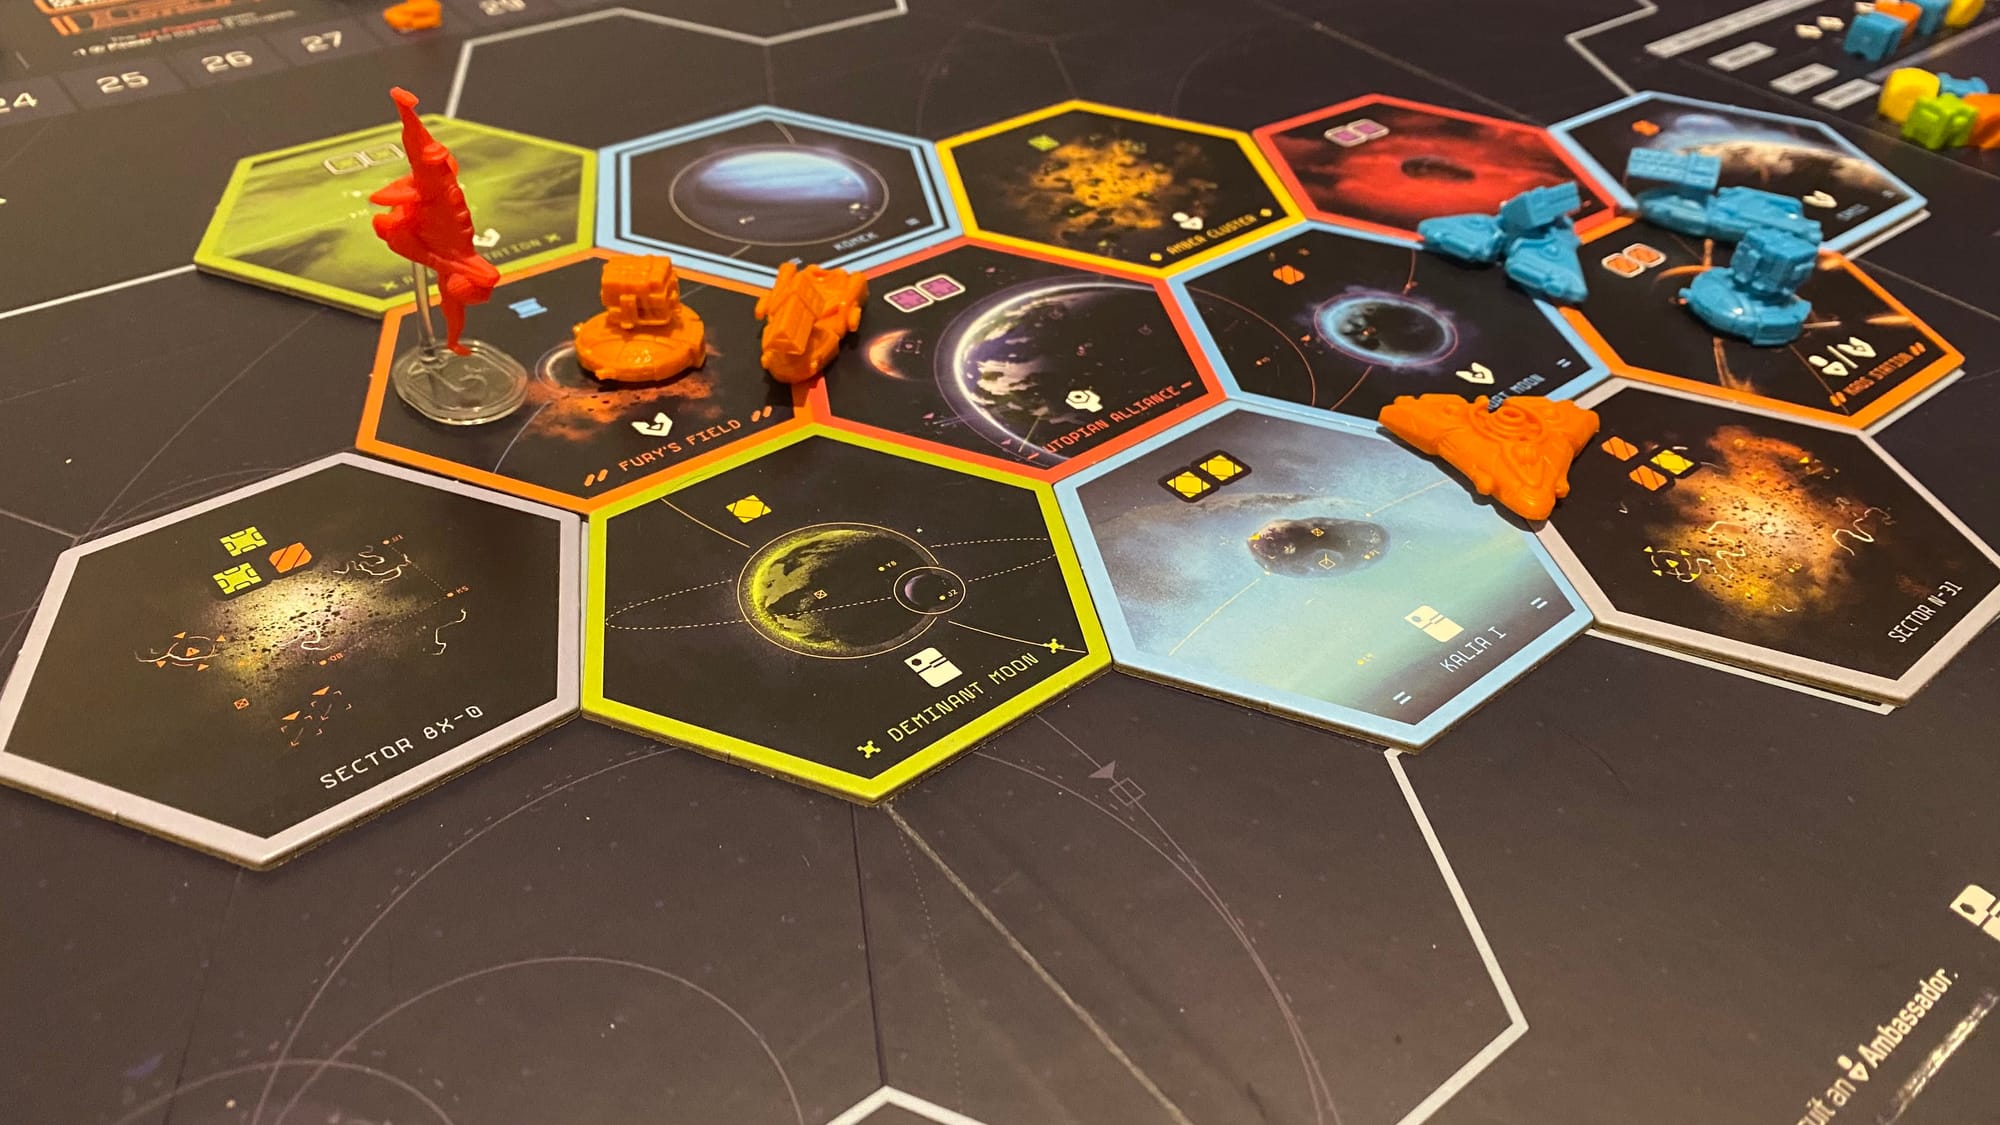
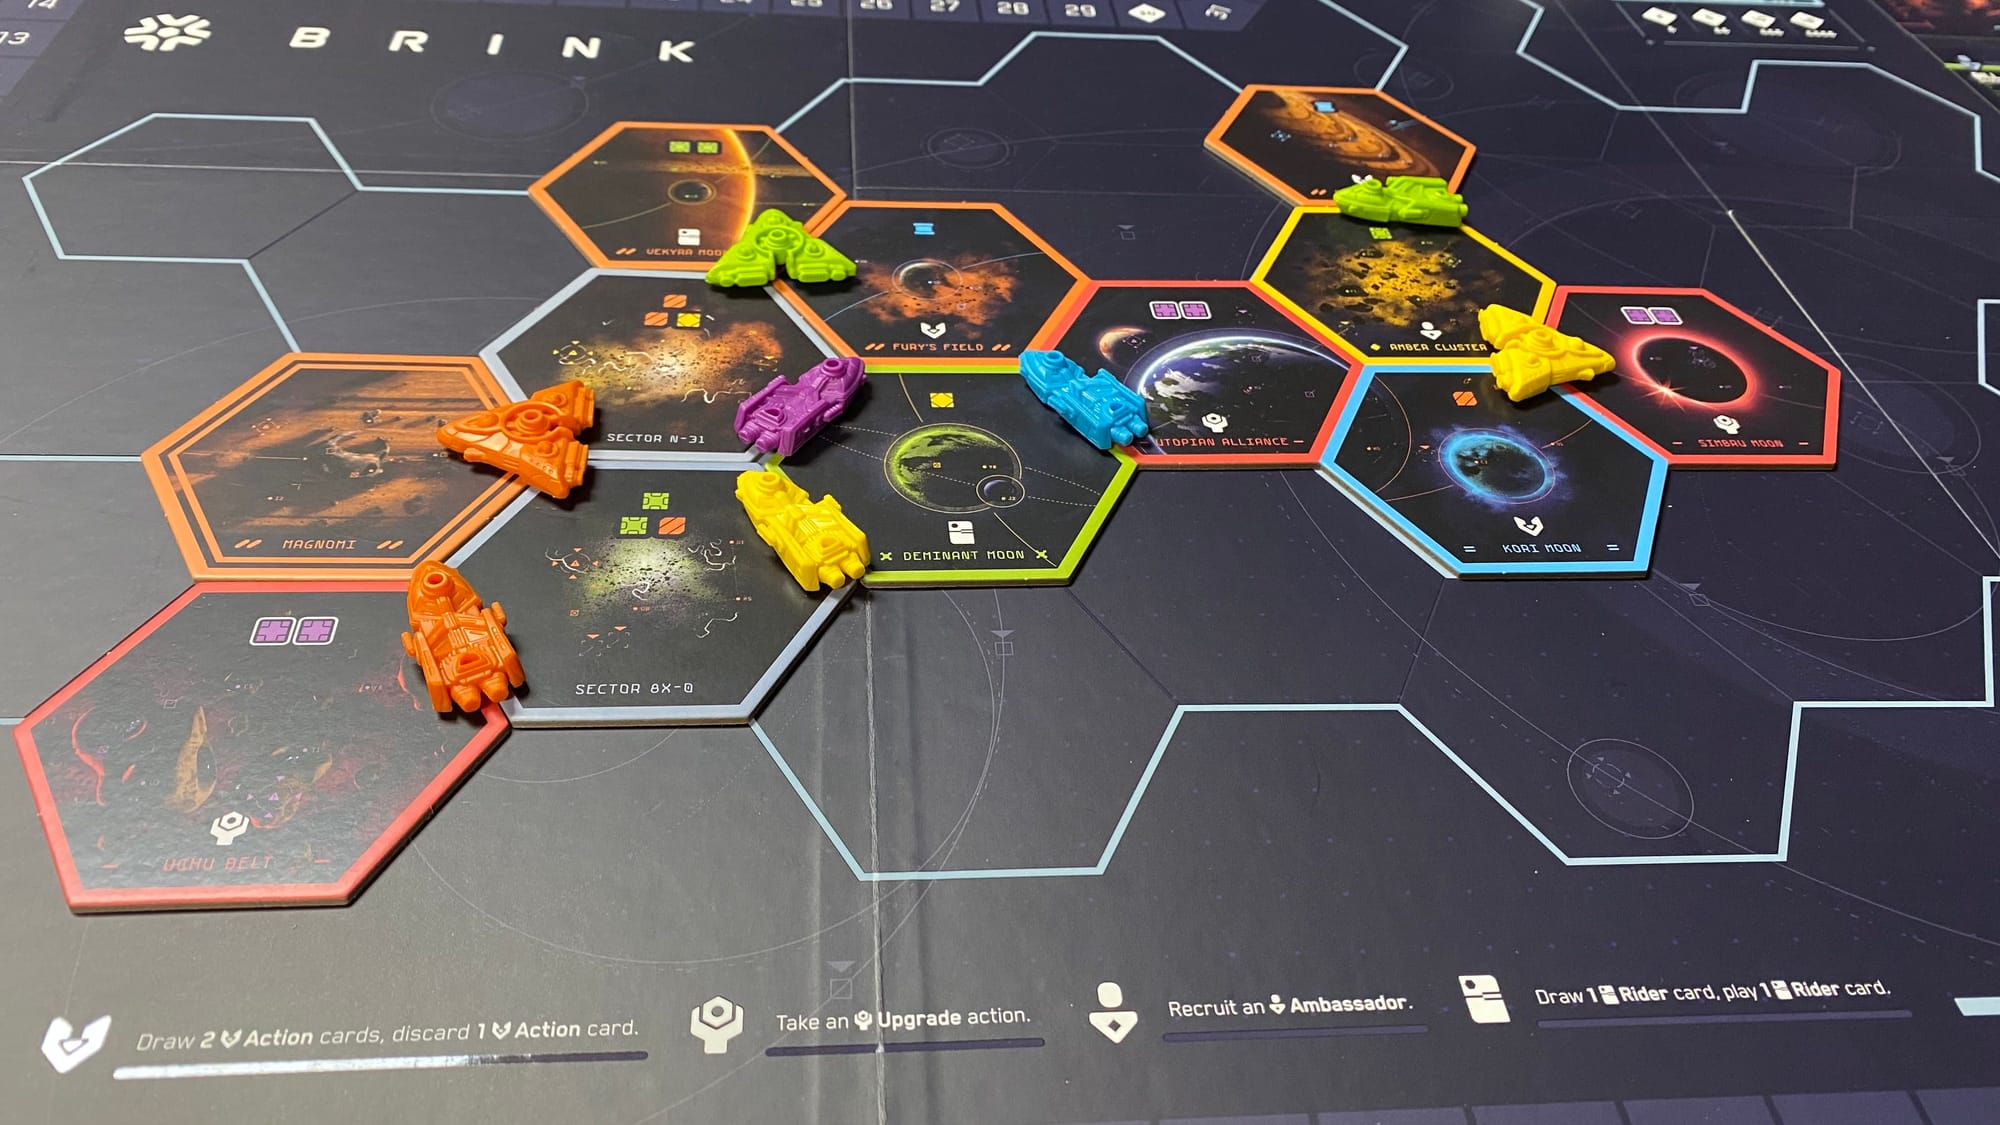
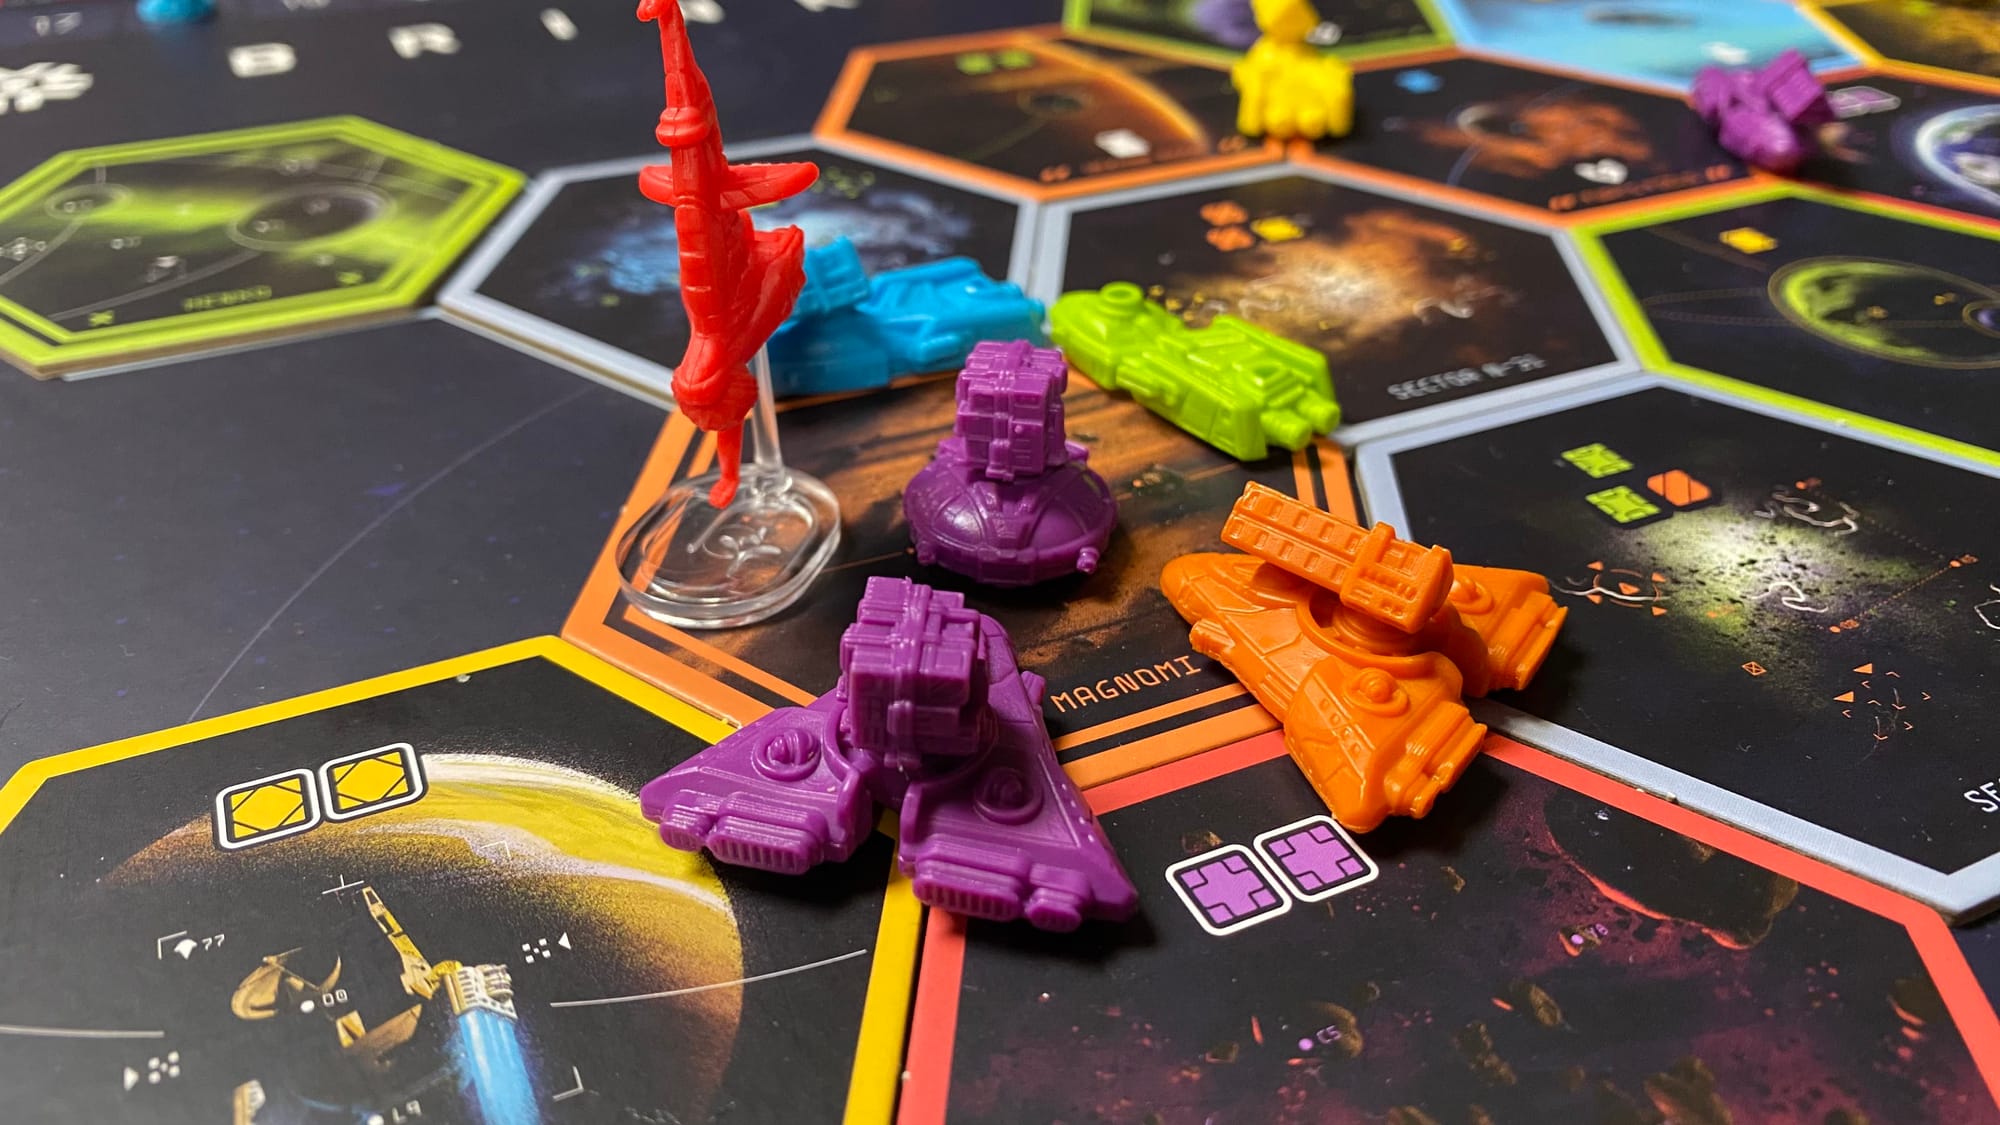
Each player has three different ships coming in small, medium, and large. A turn consists of first placing a ship—smalls are placed inside a hex, mediums on the line between two hexes, and larges on the convergence of 3 hexes—before performing actions and collecting resources based on the hex(es) your ship activates. If a ship is placed such that it’s in or touching an empty hex, that region of space is explored, and the player gets to add a new hex to the board, expanding the visible map. Most hexes have a colored border indicating which faction’s Power they provide to each ship. The larger ships that touch more than one hex are understandably more valuable, as they provide access to more resources, more actions, and more Power than the smaller ones. Some have a double-border, providing 2 power to each ship, while others are neutral and provide no power. Most hexes also have action icons on the bottom, but all hexes will grant resources in some way according to the icons on the top.
If the top icons have a dark border, the player placing their ship will gain Influence cubes directly into their supply. Influence is the main resource in the game and can be spent on practically everything from ship upgrades to Council Votes. If the icons have a white border, however, the player doesn’t get to spend them at all. Instead, these cubes are gained as Favors, which go into a well in front of their player screen. While Favor cannot be spent by their owner in any way, it can still be traded to other players, at which point it becomes typical Influence. If Favor is not traded by the end of the player’s turn, it gets returned to the supply. This is absolutely genius, as it forces players to engage and trade with each other. Players are much more willing to exchange goods if they have no method of benefiting from their own supply. The only physical components that can change hands are Influence and Favors, but players are free to exchange promises of future actions as well (“if you give me X influence, I promise to vote for faction Y in the Council Vote”). As with most similar games, promises are non-binding, but burning your fellow players on a deal is always a surefire way to ensure nobody supports you in the future. The purple Sorelian Influence is incredibly powerful, able to be spent as a wild resource if spent during your turn and counting as 2 wild votes each if spent during a Council Vote, but only appears on the board as Favors. Players can’t gain any of this without trading (until the Sorelian faction objective is achieved, which I’ll get to later). Another feature of Influence cubes to note is that if the supply ever runs out of a particular color, a Revolt is triggered, which forces each player to discard half of their Influence in that color.
The value of these resources depends on a lot of factors: players’ upgrade boards (which vary between the players and require different resources), what Ambassadors/objectives/votes players want, which tiles show up during exploration and simple player stinginess. If players aren’t keen on trading resources between each other, or set a high asking price, it may not happen as much at your table as it does on mine. Sometimes, the table will decide, for one reason or another, that a particular color is worthless for that round, and nobody is interested in it. If multiple players start to hoard a particular color, one of the players not participating could force a Revolt and tank the others’ resources. Much of the game will vary according to the group playing, and it might not work for some tables.
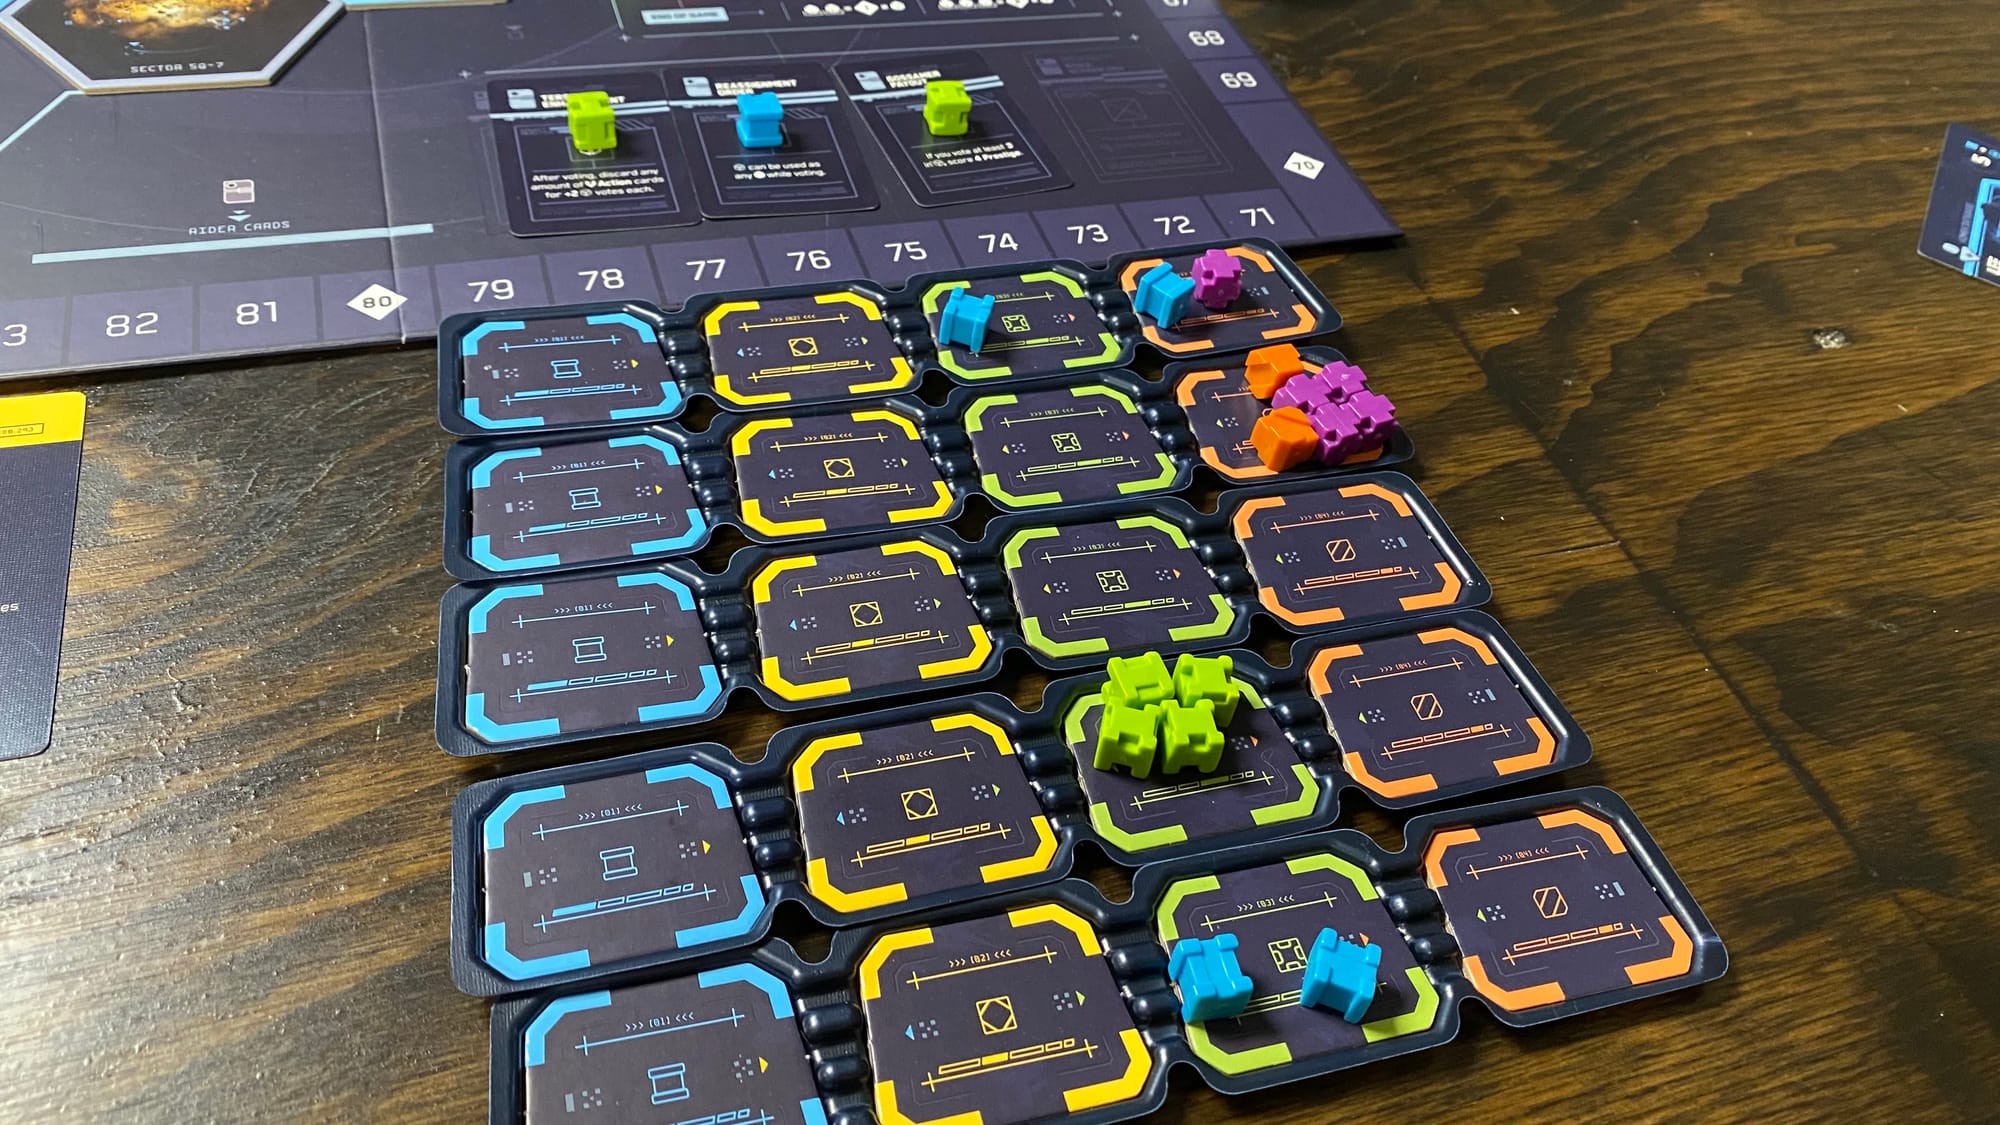
The icons at the bottom of hexes show which of the four actions they provide you, with some granting a choice between two. The Action Card action gives players access to the incredibly versatile action cards, letting them draw 2 and discard 1 (note: the discarded card doesn’t need to be one that they just drew, which I always enjoy). Ambassador lets players use Power and spend Influence to recruit Ambassadors, which grant various ongoing abilities. Taking a Rider action gives players the choice between two Riders (one from their hand and one they draw), they can add to the next Council Vote, affecting a faction of their choice in some way—from granting everyone the ability to adjust its vote total to making its Power worth more points. Lastly, the Ship Upgrade action lets players spend Influence to advance on their ship upgrade board, eventually getting the option to add either Cargo or a Railgun to their ships. Each ship is upgraded in order, but only once, and no ship can ever gain both (the extra slot on the medium ship is for something else). The Cargo addition lets that ship collect double the resources from each hex it touches, while the Railgun gives the ship +1 Power on all hexes it touches. Upgrades are game-changing, and the first upgrade could allow you to improve your small ship before you ever place it. These actions all have an additional “backup” action players can take if they can’t or don’t want to perform the normal action, so nothing is ever completely wasted.

The tiles control almost everything players do on their turns, between resources gained and actions taken, so it's a bit odd that players get such little control over them. When a player triggers the exploration of a space, they simply draw the top tile and add it to the map. There's only a choice if the player is exploring two tiles at once (only possible with the large ship) and the choice is just where to put the two tiles drawn. I've had games where a particular faction was made scarce simply because it wasn't until the final round that we saw any of their tiles. They were never worth points because nobody could gain a meaningful amount of Power with them. While I appreciate the variety that their randomness adds to the game, I wish it were a bit more controlled.
At any time on a player’s turn, they can complete a faction objective, provided they have 9 in any combination of Power and Influence in that faction (only the latter is spent). An exception to this is the Sorelian faction objective. These objectives, when claimed, affect everyone at the table in some way, but can provide great benefits to the player who claimed them. To start, the claiming player can now score an extra point at the end of the game for each of that faction’s Influence they have leftover. Then, there’s an ability granted based on the faction. The blue objective gives the claiming player 4 red X tokens that can be spent as a “-2” vote during the Council Vote; these tokens are also placed on the red hexes for any player to collect. The yellow objective unlocks a special upgrade for the claiming player’s medium ship, allowing them to spend a yellow Influence during their turn to move the ship to another valid location (moving doesn’t grant access to more resources/actions, but changes what Power the ship collects); other players can also perform this move, but it costs them 3 yellow Influence instead. The orange and green objectives work similarly, granting the player a special piece they place immediately and can move once per round; the green piece grants its hex +1 Power to all ships there, while the red piece lowers its hex’s Power by 1 (they cancel each other out if placed in the same hex). The purple Sorelian objective actually costs 7 in any combination of purple Influence or red Power, and makes the claiming player’s purple Influence worth 3 votes during the Council Vote instead of 2. Additionally, this objective places the purple Sorelia hex onto the board, allowing players to finally gain purple Influence directly while also providing a wild Power to any ships present. Obviously, all of these can have large ramifications for everybody once someone claims them, making it an exciting moment when somebody does.
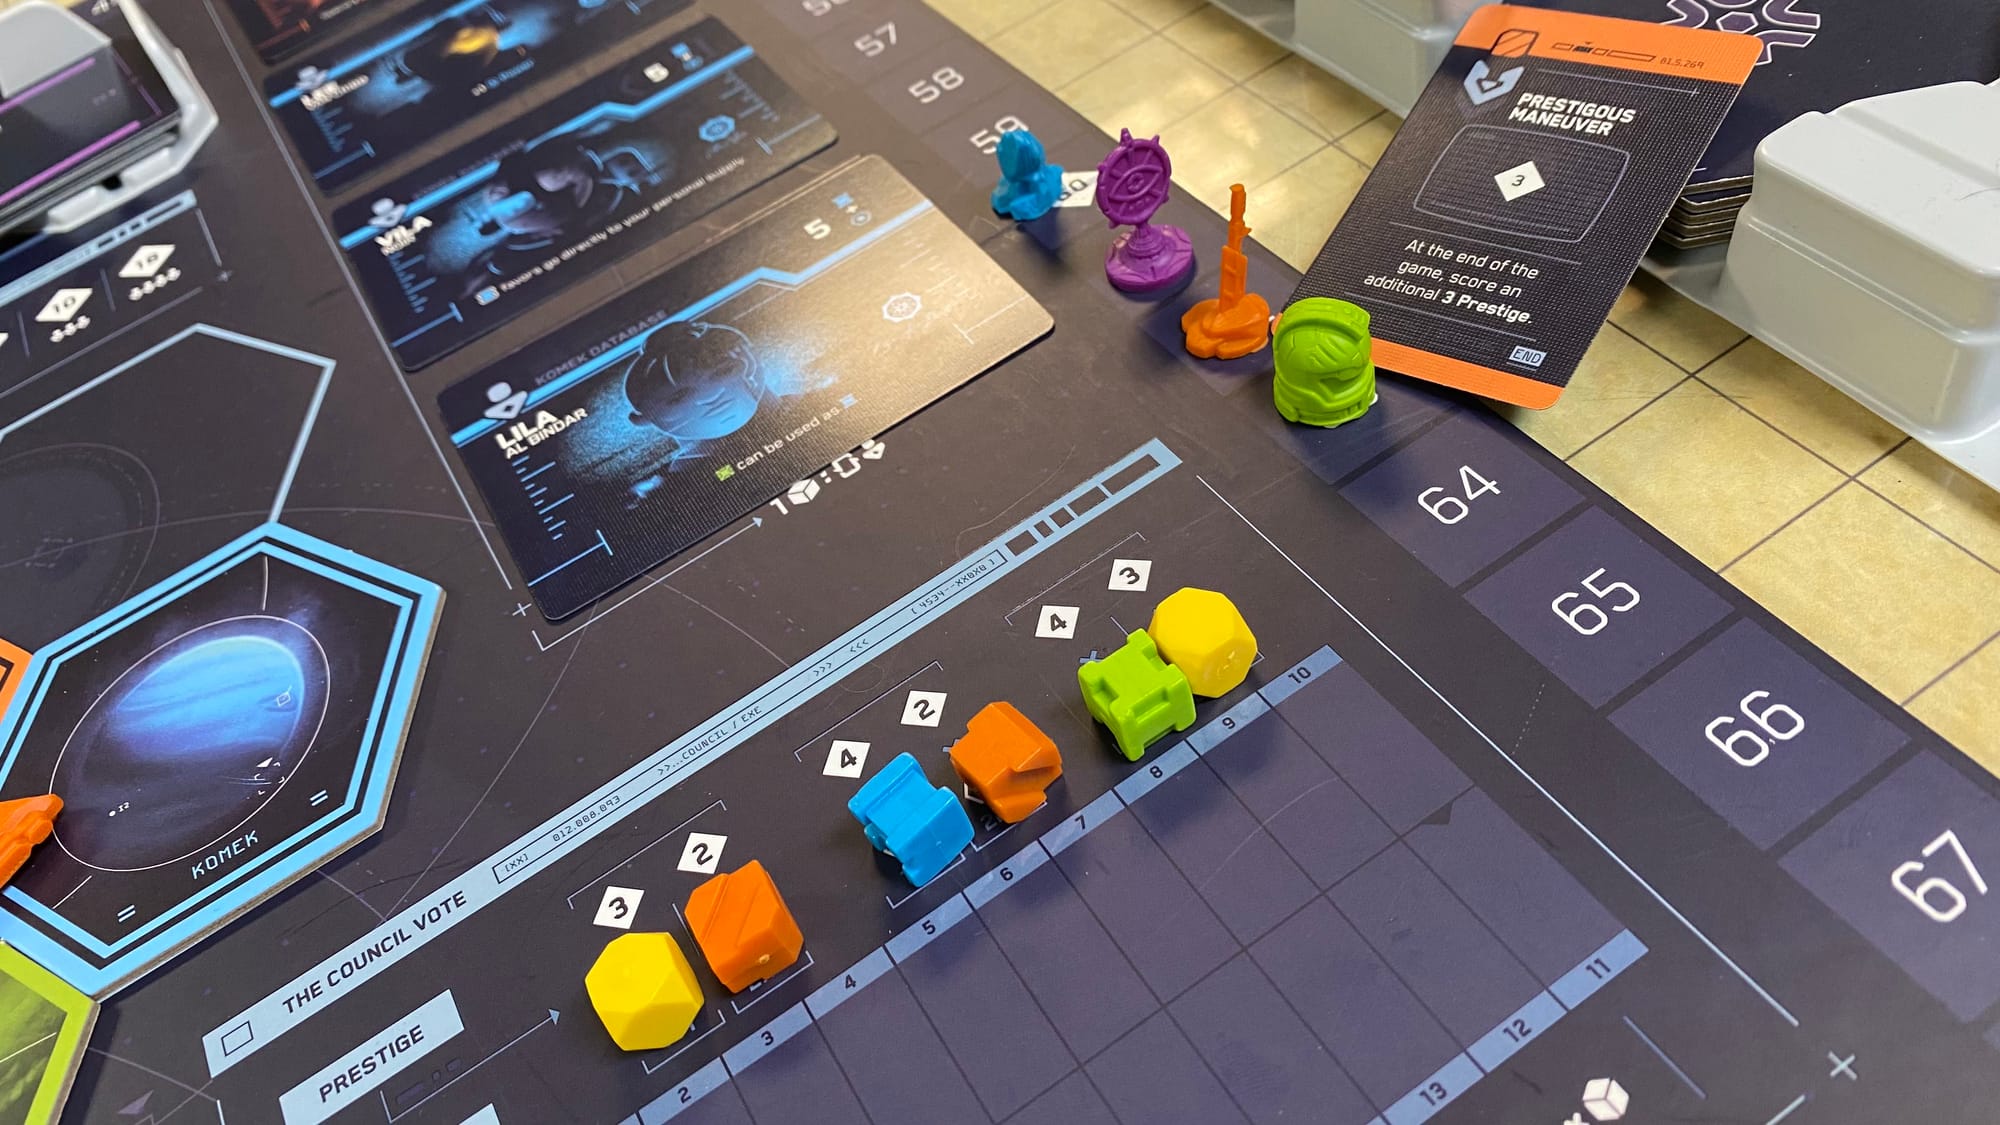
When all players have placed each of their 3 ships, the Council Vote begins. First, everyone secretly allocates their Influence onto their voting board—except for the purple Influence and red X’s, Influence can only be spent to vote for the same color faction unless a Rider says otherwise. When everybody’s done setting their votes, they’re revealed, and the initial vote is tallied, followed by certain Riders. Players can now use Action cards that modify votes, or spend them as 1 vote towards the faction matching the Influence on the card. During this step, players have the opportunity to either play an Action or pass until everybody has passed. Going later in turn order is actually beneficial here, as you can see what changes other players have made before deciding whether it's safe for you to pass yet. When these modifications are all finished, the top two factions will grant players a set amount of points for each Power they have with that faction. Players get to keep any Influence used as votes for factions that didn’t place, but the winners’ Influence is spent. Additionally, factions that place two or even three rounds grant players extra points at the end of the game for having leftover Influence in their color.
Brink has a lot going on, especially in the Council Vote, and can take a decent amount of time to teach new players how everything works together and builds up to those three votes. But once the game gets going, everything flows quite well without any breaks. Trades happen often, and players need to pay attention even when it’s not their turn so they can make an offer when somebody gains something they want, or to piggyback on other players’ deals. Because the Council Votes aren’t a zero-sum scoring (e.g. if the blue faction wins the vote, everybody with blue Power benefits) there’s a lot of table talk about how to manipulate the vote. I’ve had to convince players that even if they gain the most points from one faction winning, the third player (currently in the lead) would gain more, so it’s in their best interest to go for a faction the third player has no Power with (which I happened to have a fair bit of Power with, coincidentally). Brink is excellent at making interesting moments and intricate deals. Negotiation may not be the central mechanic in this game, but it is a crucial tool in each player’s toolbox. When scores are often incredibly tight, players will need every tool at their disposal to come out on top.
Of course, the way scoring works can occasionally lend itself to kingmaking or just sabotaging someone in particular. It’s nigh impossible to win a vote on your own against the table, so if even a couple of players decide to deny your ideal factions the ability to score in a round, things won’t look good. This doesn’t happen often, but because the capability is there, people who don’t enjoy “playing the table” likely won’t enjoy this game as much as those who do.
Two-Player Variant
Normally, I wouldn’t have much to say about the special rules for two players, since they’re typically just special allowances or restrictions required to make the game function. Nothing special. But Brink is a negotiation-heavy game. How do you make that work when the only option for trading is also the one player you need to beat? Apparently, you just add a third player. Well, sort of. When playing with 2, you also add the Rival into the mix. The Rival has a bag filled with two of each Influence and a deck of cards. The cards represent what the Rival is willing to accept in trade, which is always either one purple, three of anything, or two in a particular color determined by the card, in exchange for one cube of your choice (from the supply, not the Rival’s bag). Then, during the Council Vote, the Rival will draw four random cubes from their bag to represent their vote, with any purple 2 votes going towards the color on their card for the round.

This is an incredibly simple and elegant solution that solves the obvious problems with a two-player negotiation game. By offering some flat exchange rates, your opponent knows that they can’t outright deny you the ability to trade for resources you need, and they need to make an offer that’s better than the Rival. And the Rival doesn’t just add chaos to the Council Vote, but controlled chaos, since each resource you trade to the Rival influences the odds for their next vote. I am incredibly impressed by all of this, and have to give some major kudos to the designers for coming up with it.
Brink
Great
Brink gives players 9 turns total to maximize their value in the three Council Votes and score as much as possible. Along the way, there’s plenty to do as the objectives and Riders keep each game interesting. Negotiation is a key part of this game, and it still functions with only 2 players, so be sure that’s something your group enjoys. With interesting mechanics and a sleek design, Brink is a great game if you want a bit more meat to go with your trading.
Pros
- Beautiful board and components
- Interesting negotiations
- Map exploration and Rider cards give variety to each game
- Faction objectives can change the course of a game
- Actually works at 2 players
Cons
- New players may not understand the Council Vote at first
- Very table-dependent, especially trading/negotiating
- Player screens could have been improved
- Exploration is a bit too random
This review is based on a retail copy provided by the publisher.