
The second half of Season 3 for Call of Duty is kicking off, with nearly the content of a regular season. Zombies finally has a substantial update, two new 6v6 maps have entered multiplayer, and Warzone has a bunch of weapon changes that should spice up the meta. We posted all the details last week, but here are the map guides for the incoming newbies: Checkpoint and Grime.
Checkpoint
Bring the fight to the Stronghold area of Rebirth Island, renamed Checkpoint in this mid-sized Multiplayer variant featuring a condensed version of the environment with a greater focus on ground level combat. The upper walkways and the comms tower are sealed off here, and the Road is barricaded off from the main island, centralizing the battle around the main Gate.
Breach the Armory and Garage in the central building or skirmish outside on the Road or out back in Roundabout. There are environments suited to all playstyles here, with the best Operators moving seamlessly through the map. Begin your journey to Checkpoint mastery now by learning the lay of the land and more.
Quartermaster duties: Control a key passage through the map by locking down the middle buildings with a Shotgun or SMG. Stick to the Lobby, Storage, and Garage to focus on the north half of the map or hole up in the Armory to cover the south. Once you’ve got a handle on all the entryways, weave through both ends and along the outer Gate.
Bring in the big guns: Killstreaks can have a devastating effect on Checkpoint. Equip the Mission Control Comlink Perk to reduce the cost of your streaks and get the momentum rolling early.
Gate snipe: The view through the main Gate reaches from the Road to the Roundabout, a surefire lure to sharpshooters seeking cross-map eliminations. Join the fun using your own magnified Optic or avoid these long sight lines if you prefer to fight in closer ranges.
TACTICAL OVERVIEW
In team-based modes, squads will either spawn on the Road (west) or by the Shore (east).
A military comms outpost lies between the two spawns, split down the middle by the central checkpoint separating the road leading up to the island from the shoreline near the bunks and helipad.
We’ve divided Checkpoint into three sections based on key areas around the map:
- MAIN SPAWN POINT: Road (+ Gate, Parking, Yard)
- MAIN SPAWN POINT: Roundabout (+ Shore, Hangar, Depot, Pipes)
- ADDITIONAL AREA: Checkpoint (+ Lobby, Storage, Garage, Armory, Shack)
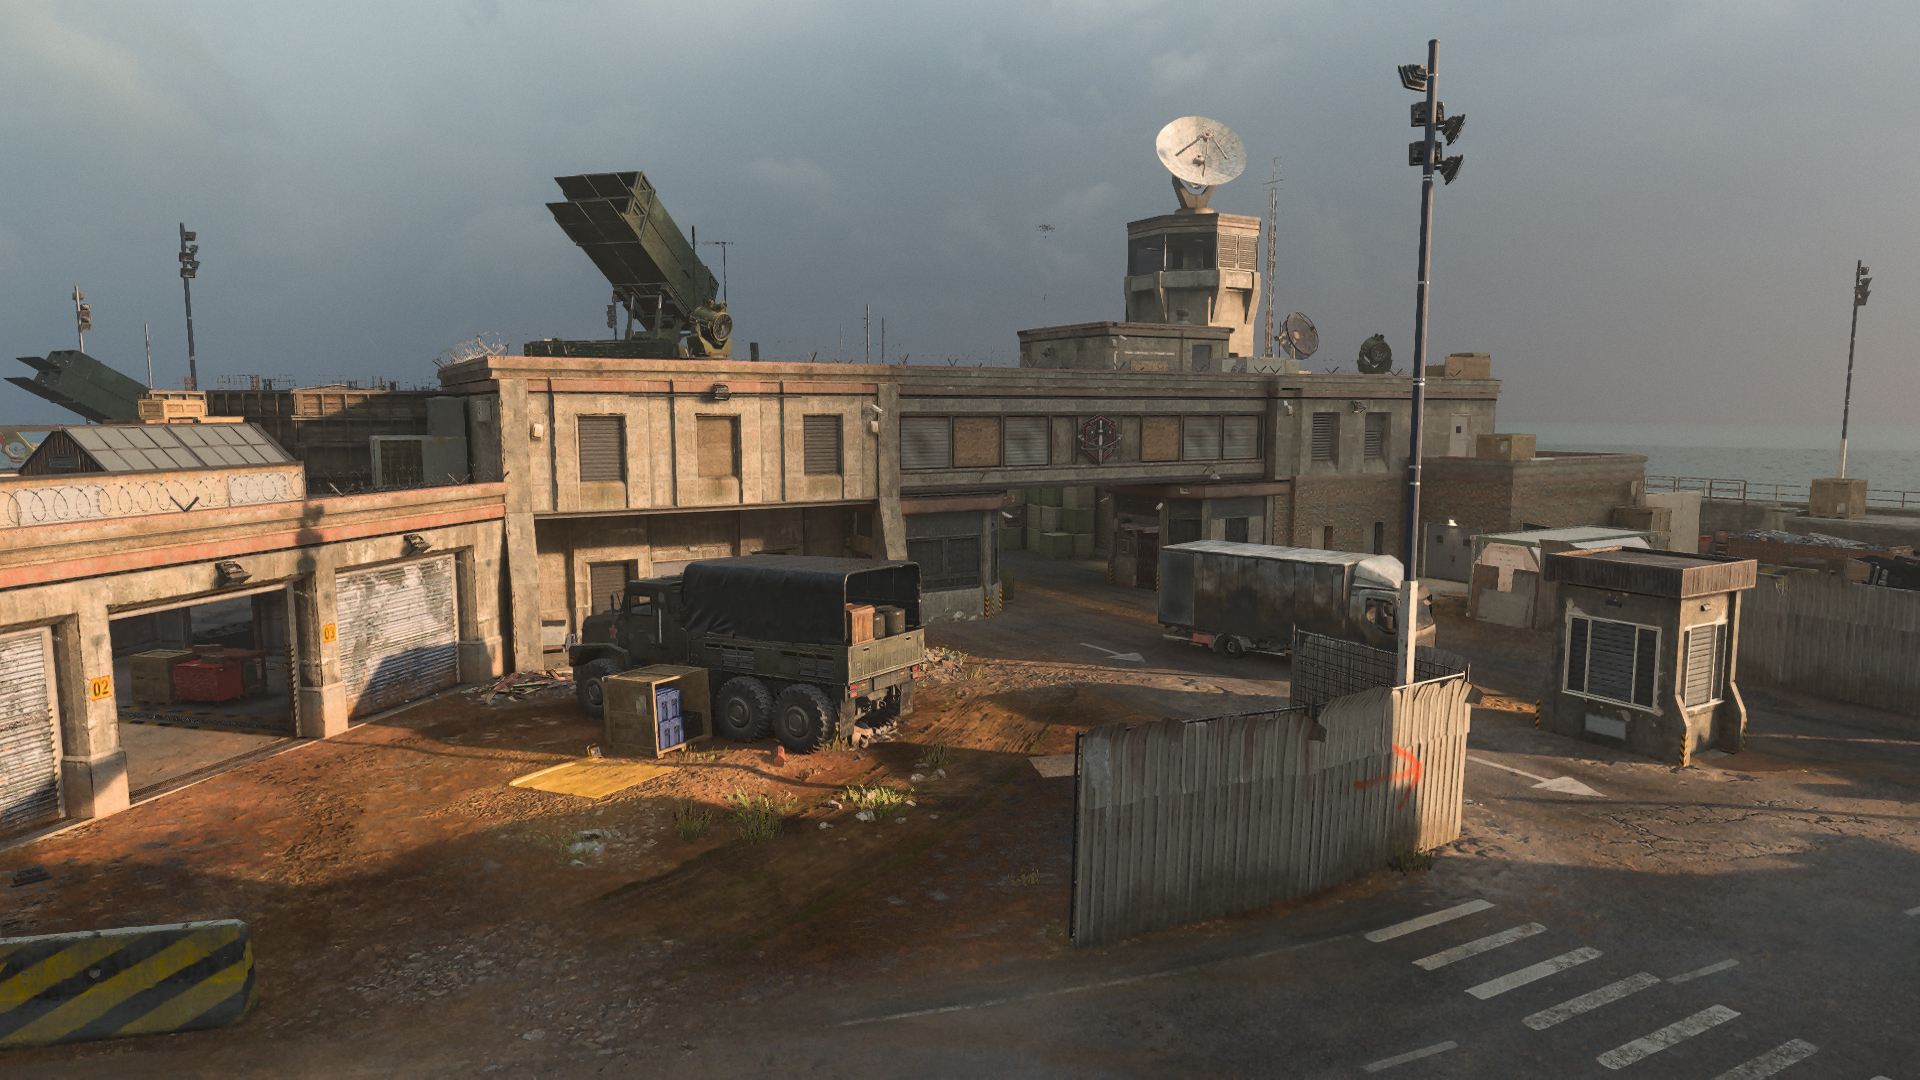
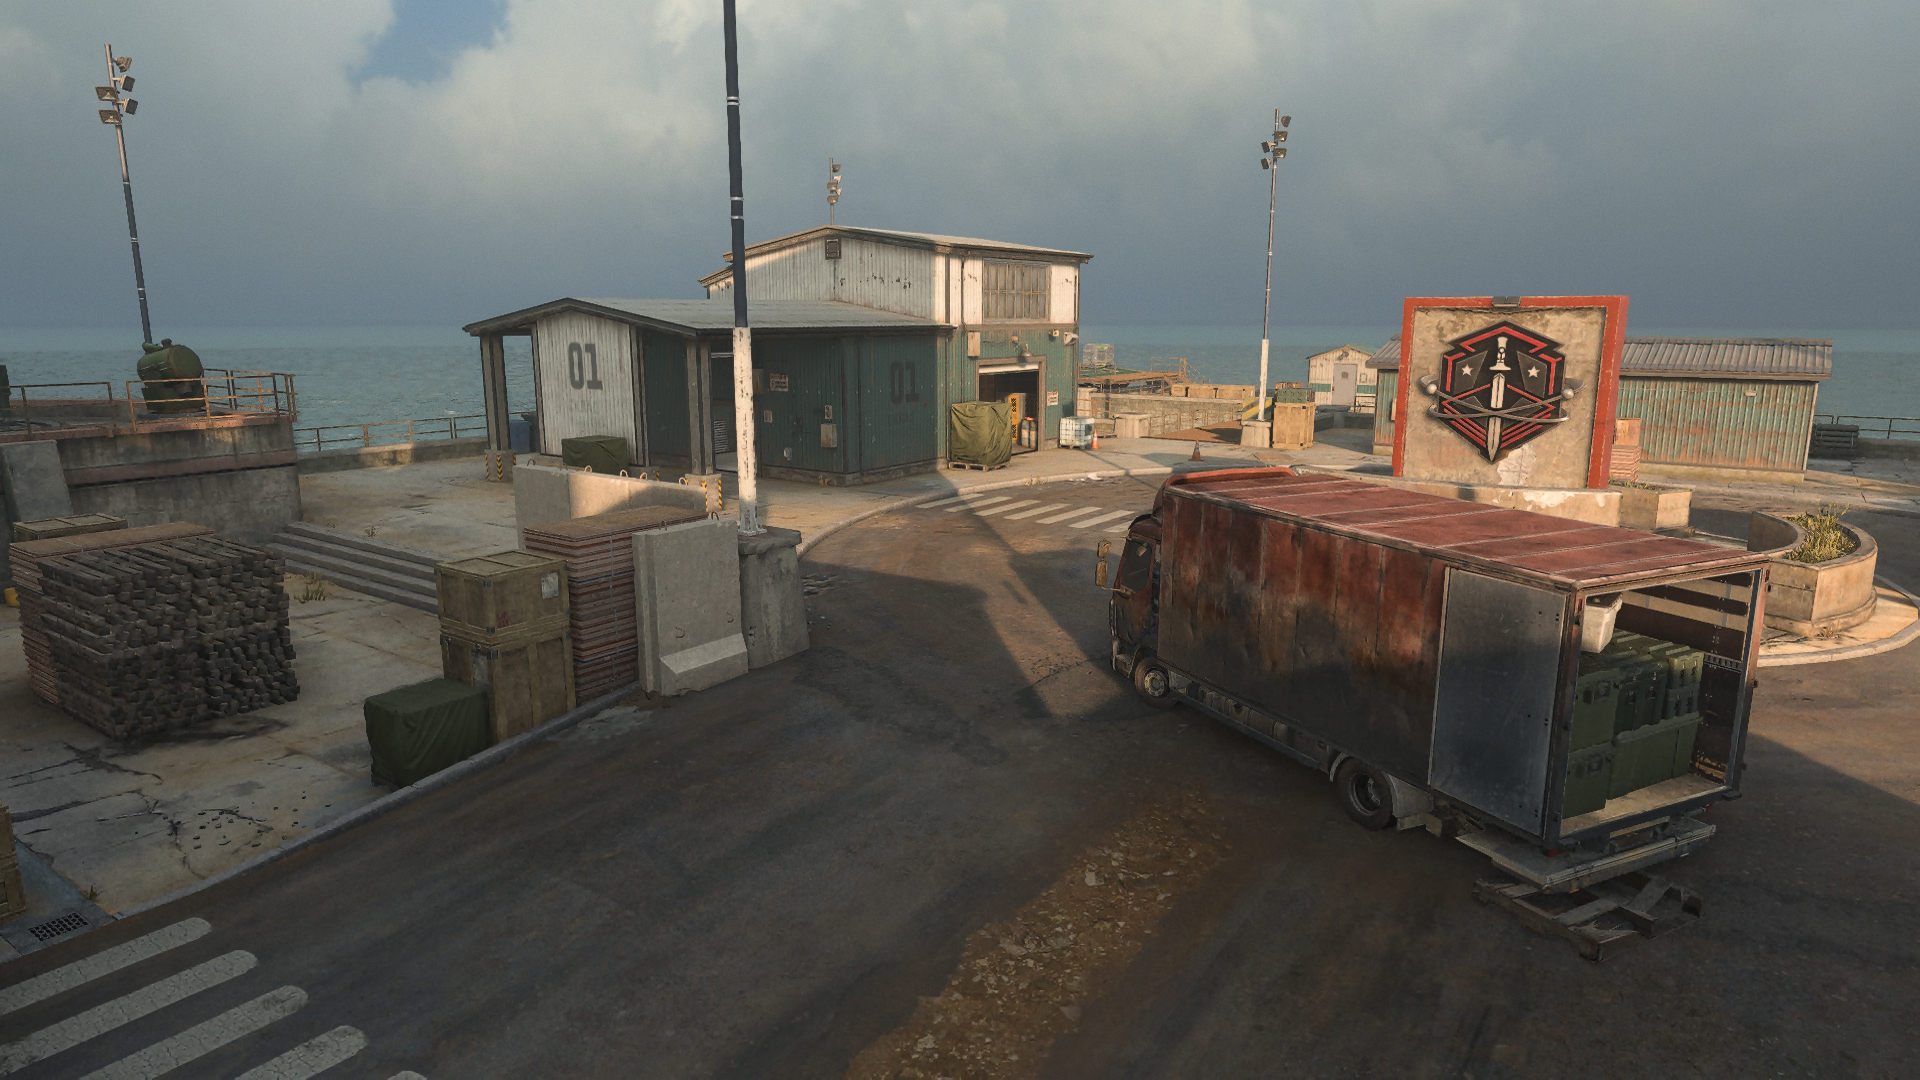
MAIN SPAWN POINT: ROAD (WEST)
The Road is closed off from access to the main island and is focused entirely on the entrance to the outpost. In general, this front area is geared toward mid-ranged sight lines, though short-ranged fighters can close the distance to their target using the parked trucks, fencing, and guard station for cover.
The most prominent points of contact are the Gate and the open Garage door. Always keep their position in mind when moving through the front yard, using the area’s cover to control your Operator’s exposure. The middle fence is great for covering one opening at a time, though be ready to seek out more substantial cover if the enemy fires shots through the sheet metal.
Though not as prominent as the Gate or Garage, the two sets of double doors leading into the central building are prime flashpoints for combat erupting from within the Checkpoint interior. The north set of doors by the parked truck opens into the Lobby while the southern entrance bursts into the Armory.
Use your grenades and other equipment to blast and disorient enemies who appear at these doorways while you’re fighting in the yard. You might also fall back to the Road to extend your sight lines to the building. As the interior spaces here are best handled with short-ranged weapons, your distant position may catch enemies off guard who expect to keep the fight up close.
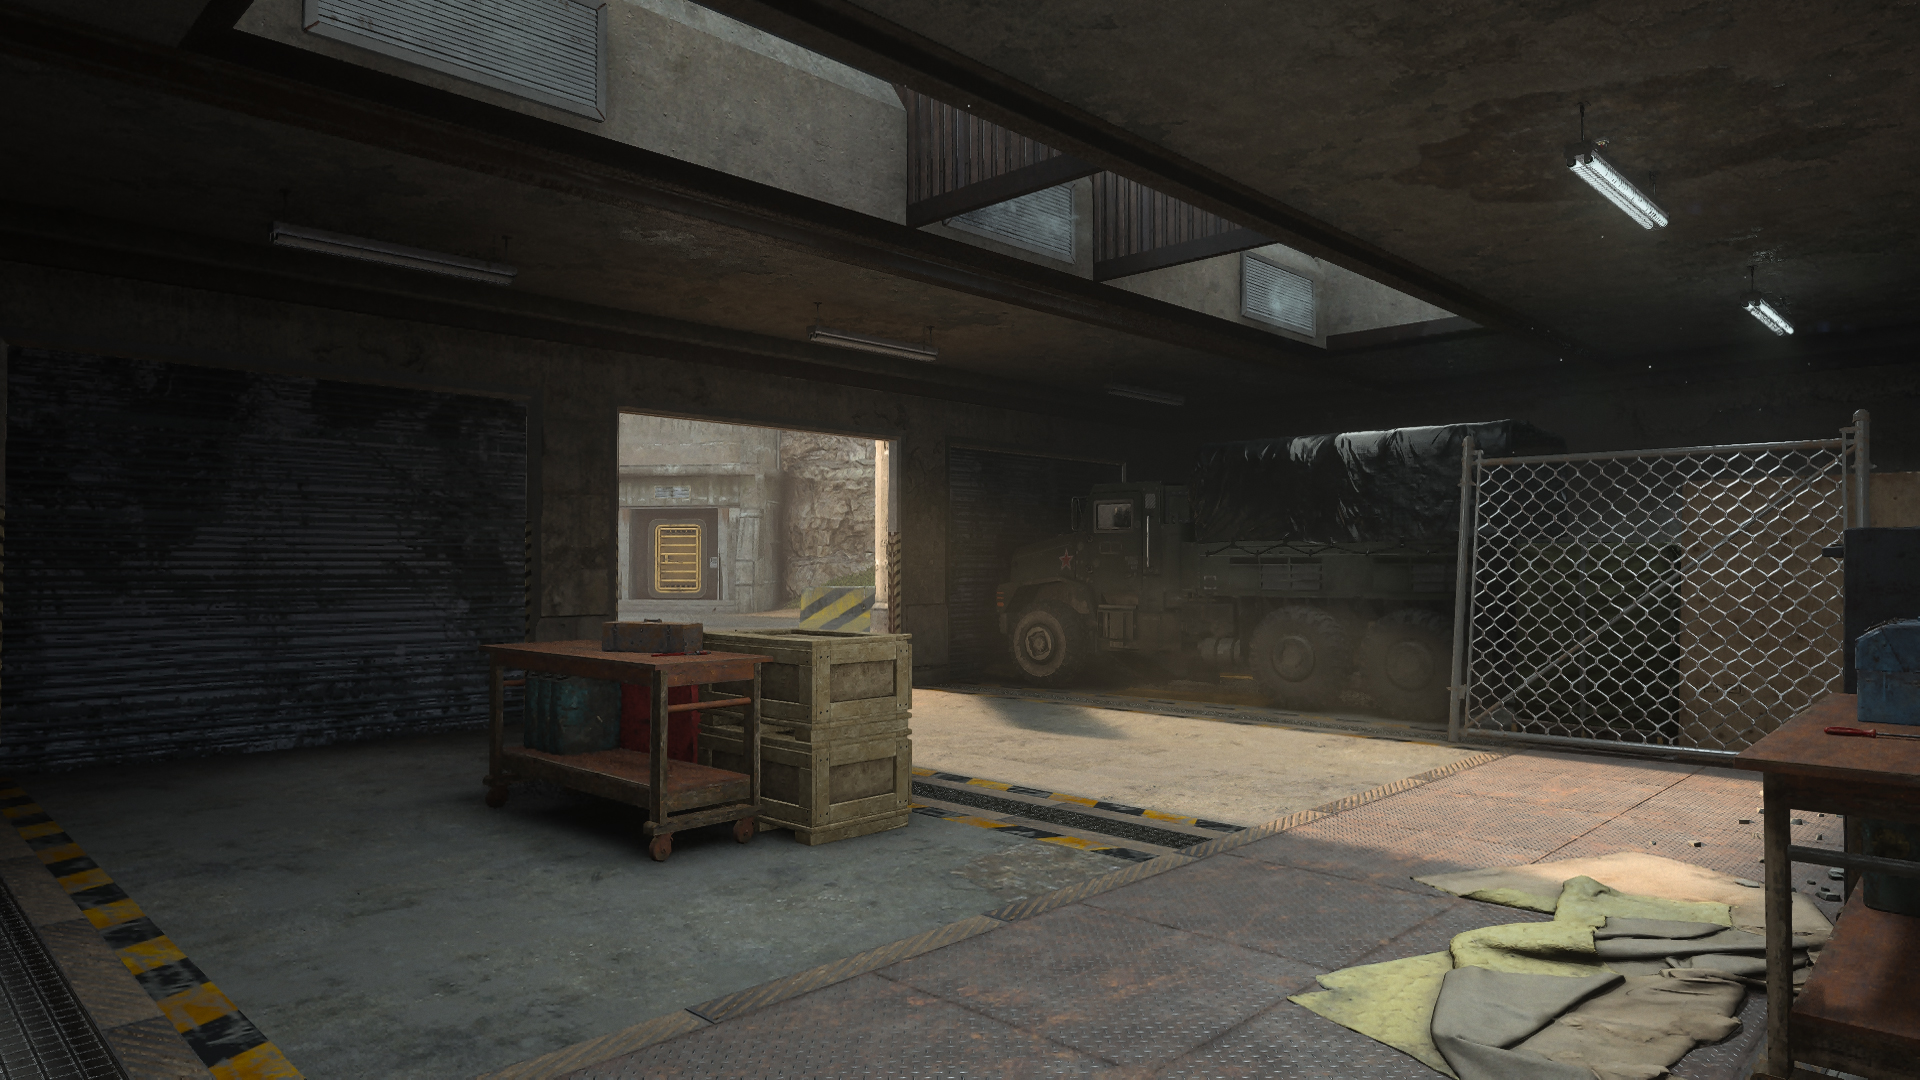
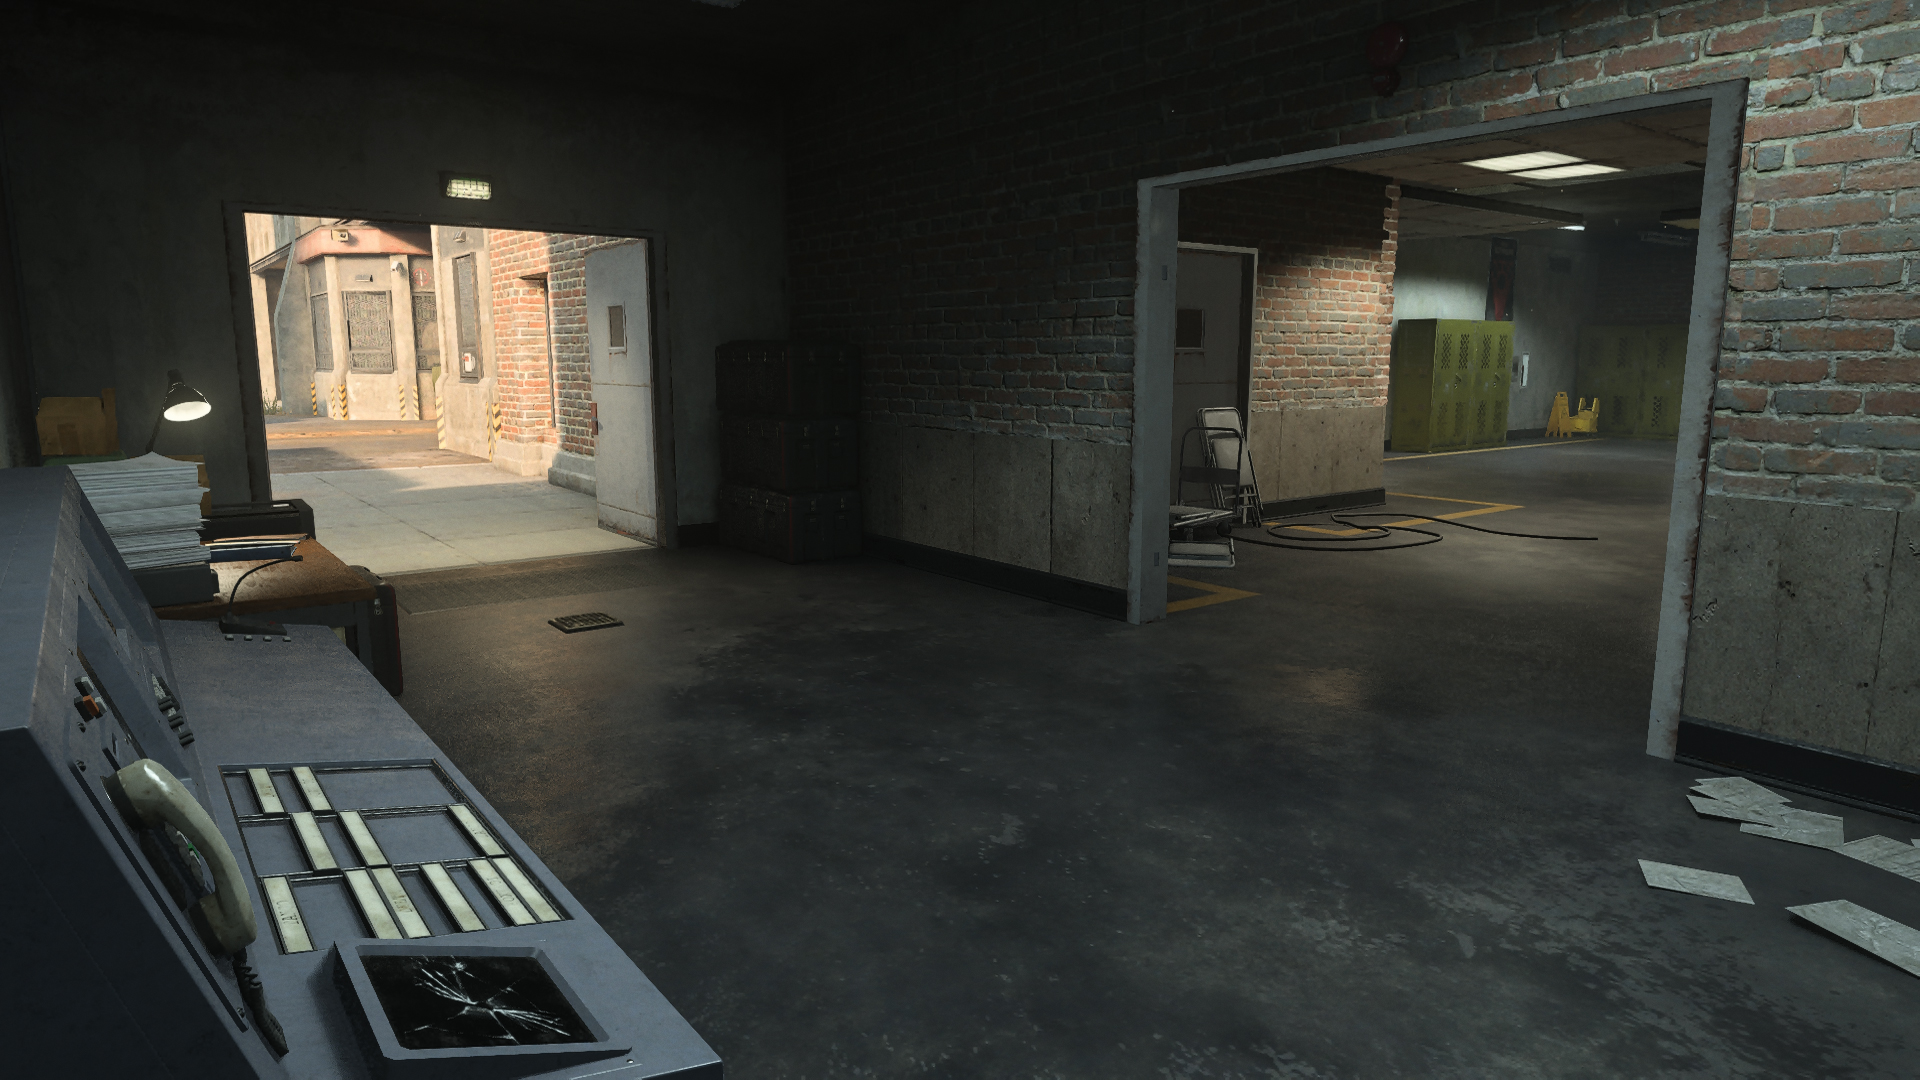
Though technically a part of Checkpoint, the Garage marks a crucial pivot point between the front yard and the inner building. The rollup door offers a wide-open sight over the Road, and you can use the work supplies in the middle of the room for cover when taking on enemies approaching from Storage.MAIN SPAWN POINT: ROUNDABOUT (EAST)
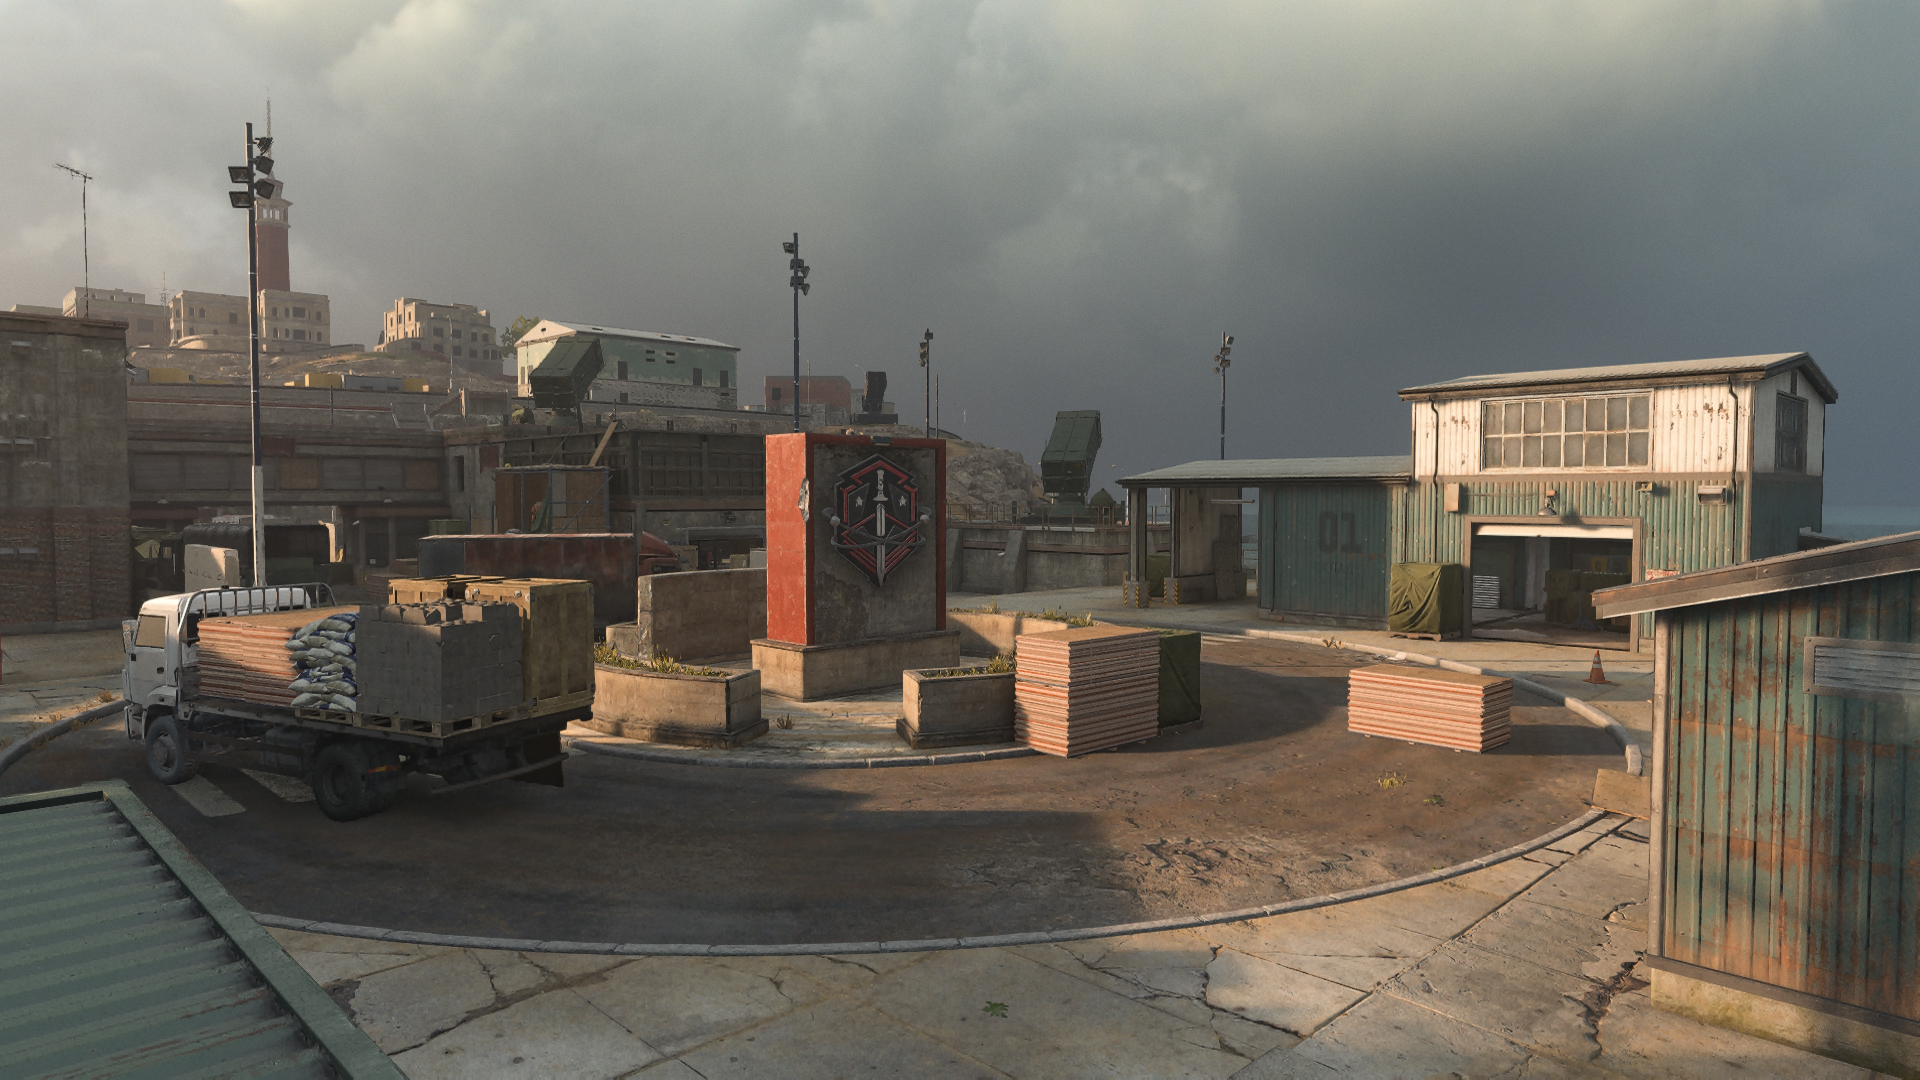
Roundabout is full of tactical opportunities, offering huge cover objects plus access to the bunkers and Hangar. The map boundary ends at the Shore, the water out of bounds to keep combat on the ground.
Because the area sits further back from the main Gate, Roundabout offers a great defensive position. Fall back toward the Shore to cut off views from the middle, forcing enemies to fight on your ground. Meet them at the monument, the corner containers, or set up an ambush from within either building.
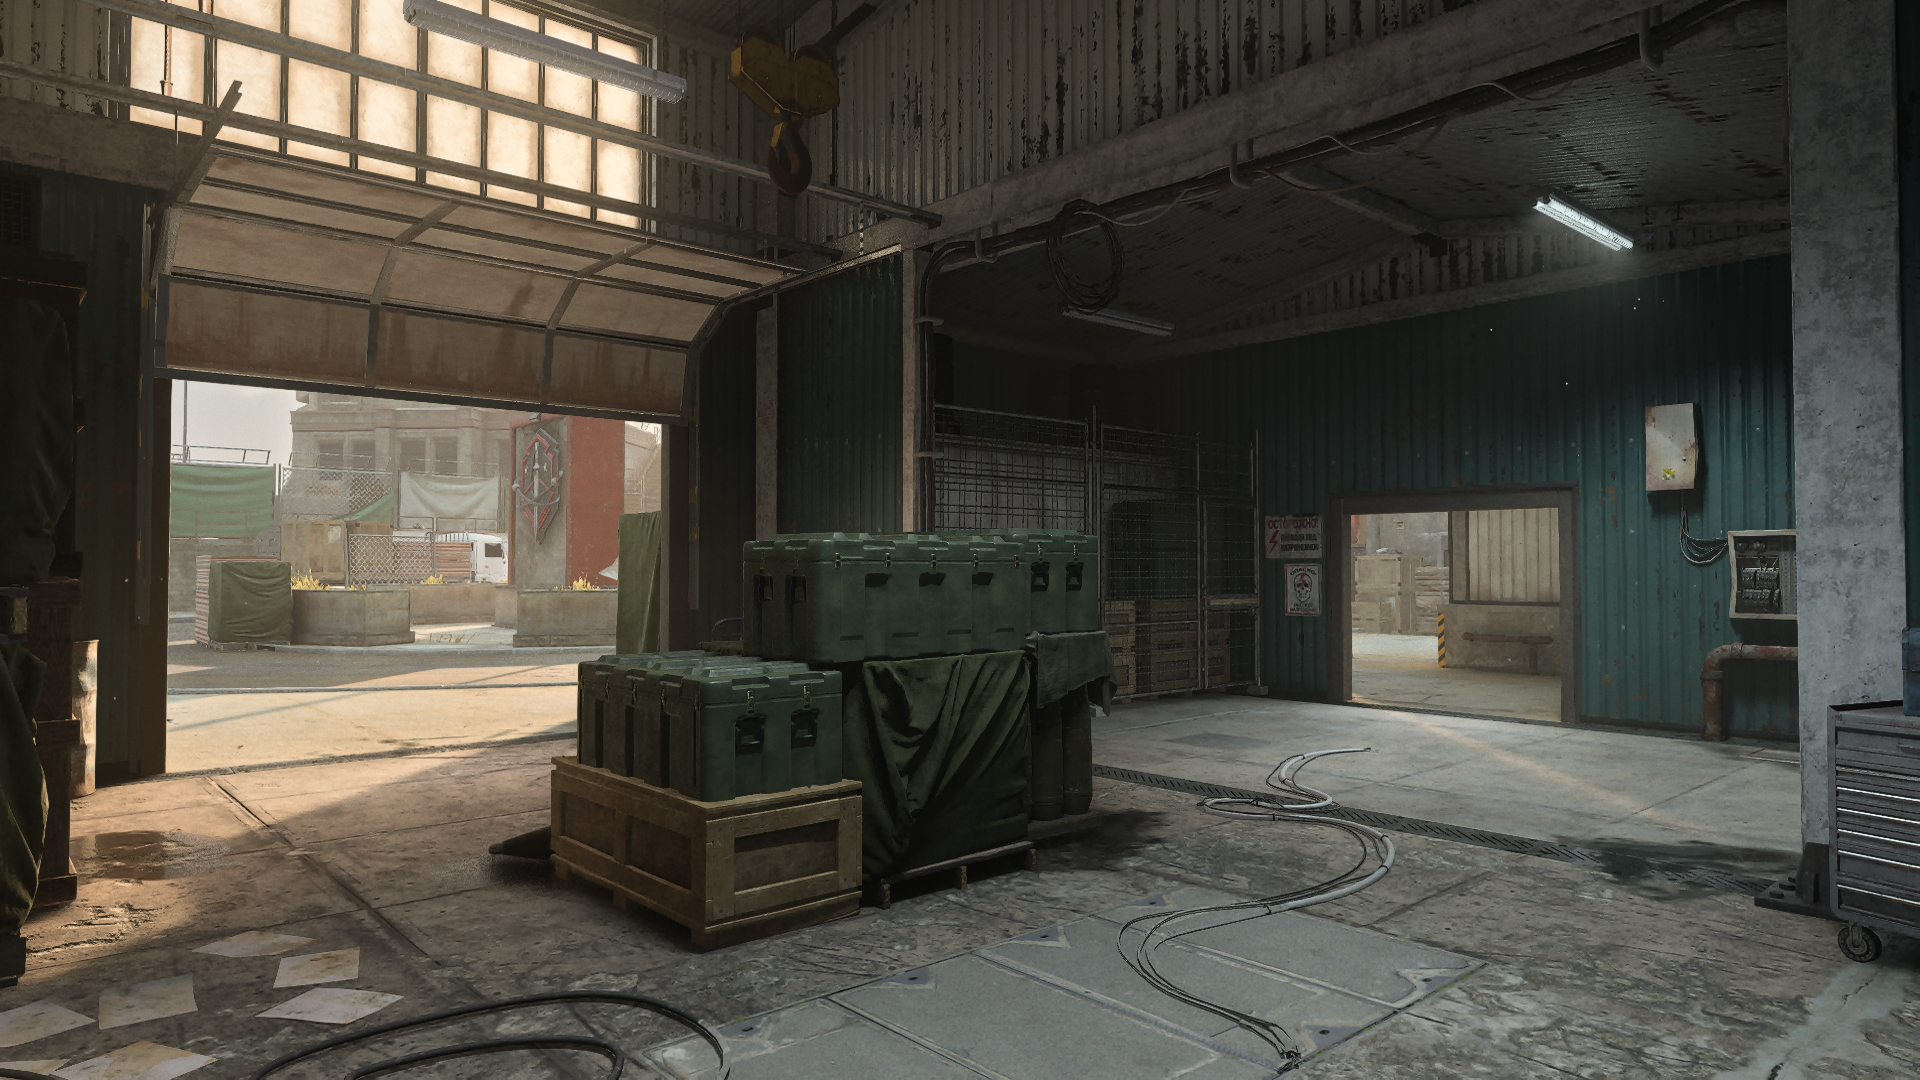
The Hangar is an invaluable space for controlling the action on this half of the map. Its larger opening offers a wide-open view of the Roundabout while the western exit provides coverage of the Depot leading into the building’s Storage room. It can be difficult to defend incoming attacks while in here, but you can always slip out the back door and reposition.
Nearer the Gate you’ll continue to encounter large cover pieces which can be used when pushing out to the Shore or when closing in on the Checkpoint. Note that the bed of the truck parked here is full, as is the case with all of the trucks on this map, so while it’s still possible to ambush enemies around the vehicle, you don’t need to worry about attacks from within.
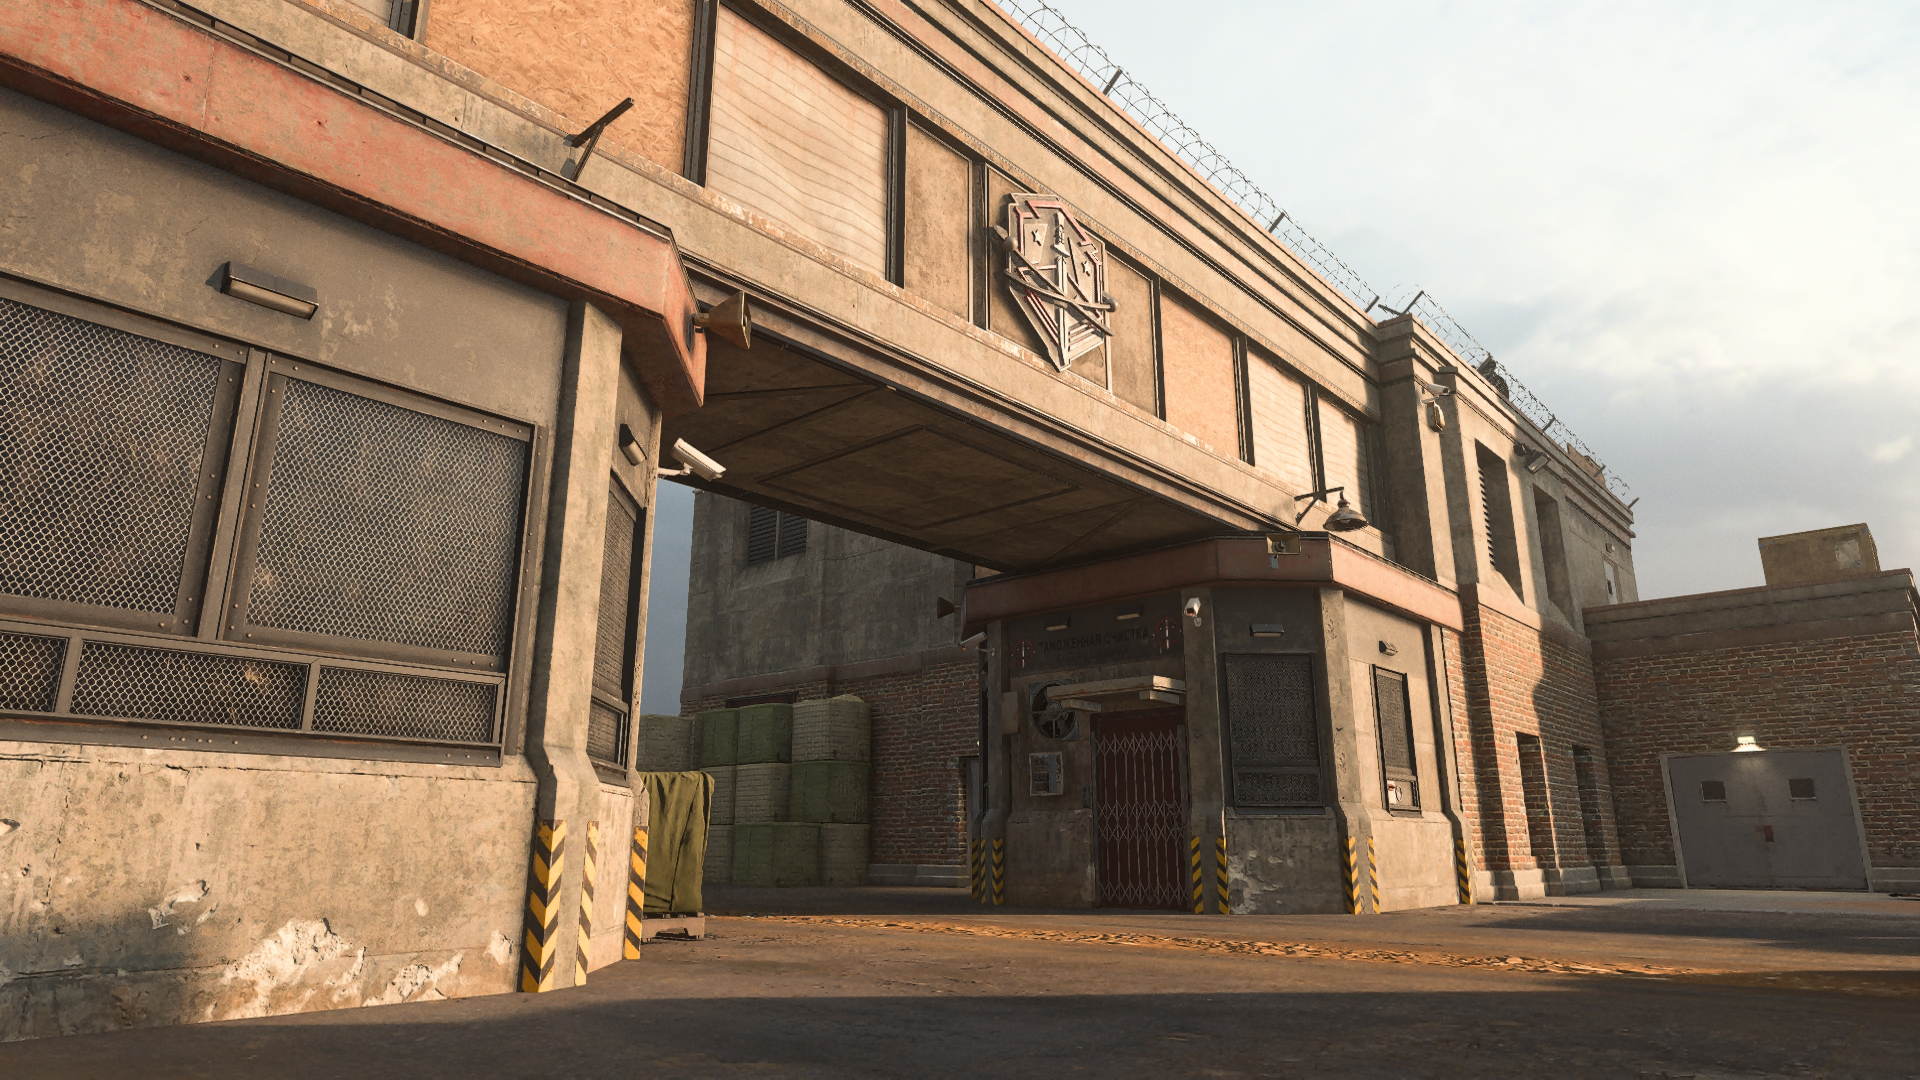
ADDITIONAL AREA: CHECKPOINT
The central Checkpoint dominates the map, splitting the Roundabout from the front yard. You don’t have to worry about attacks from the rooftop or the upper walkway in this iteration of the map, but there are still plentiful points of contact on the ground.
Toward Roundabout, note the supplies and parked truck sitting near the doorways between Storage and the Armory. This outer area is exposed on four sides and marks the site of both the B flag in Domination and the first objective in Hardpoint. A crafty Operator can try holding down the spot, using the Gate and other cover objects to limit exposure as you attack enemies incoming from both major spawn points and the middle building.
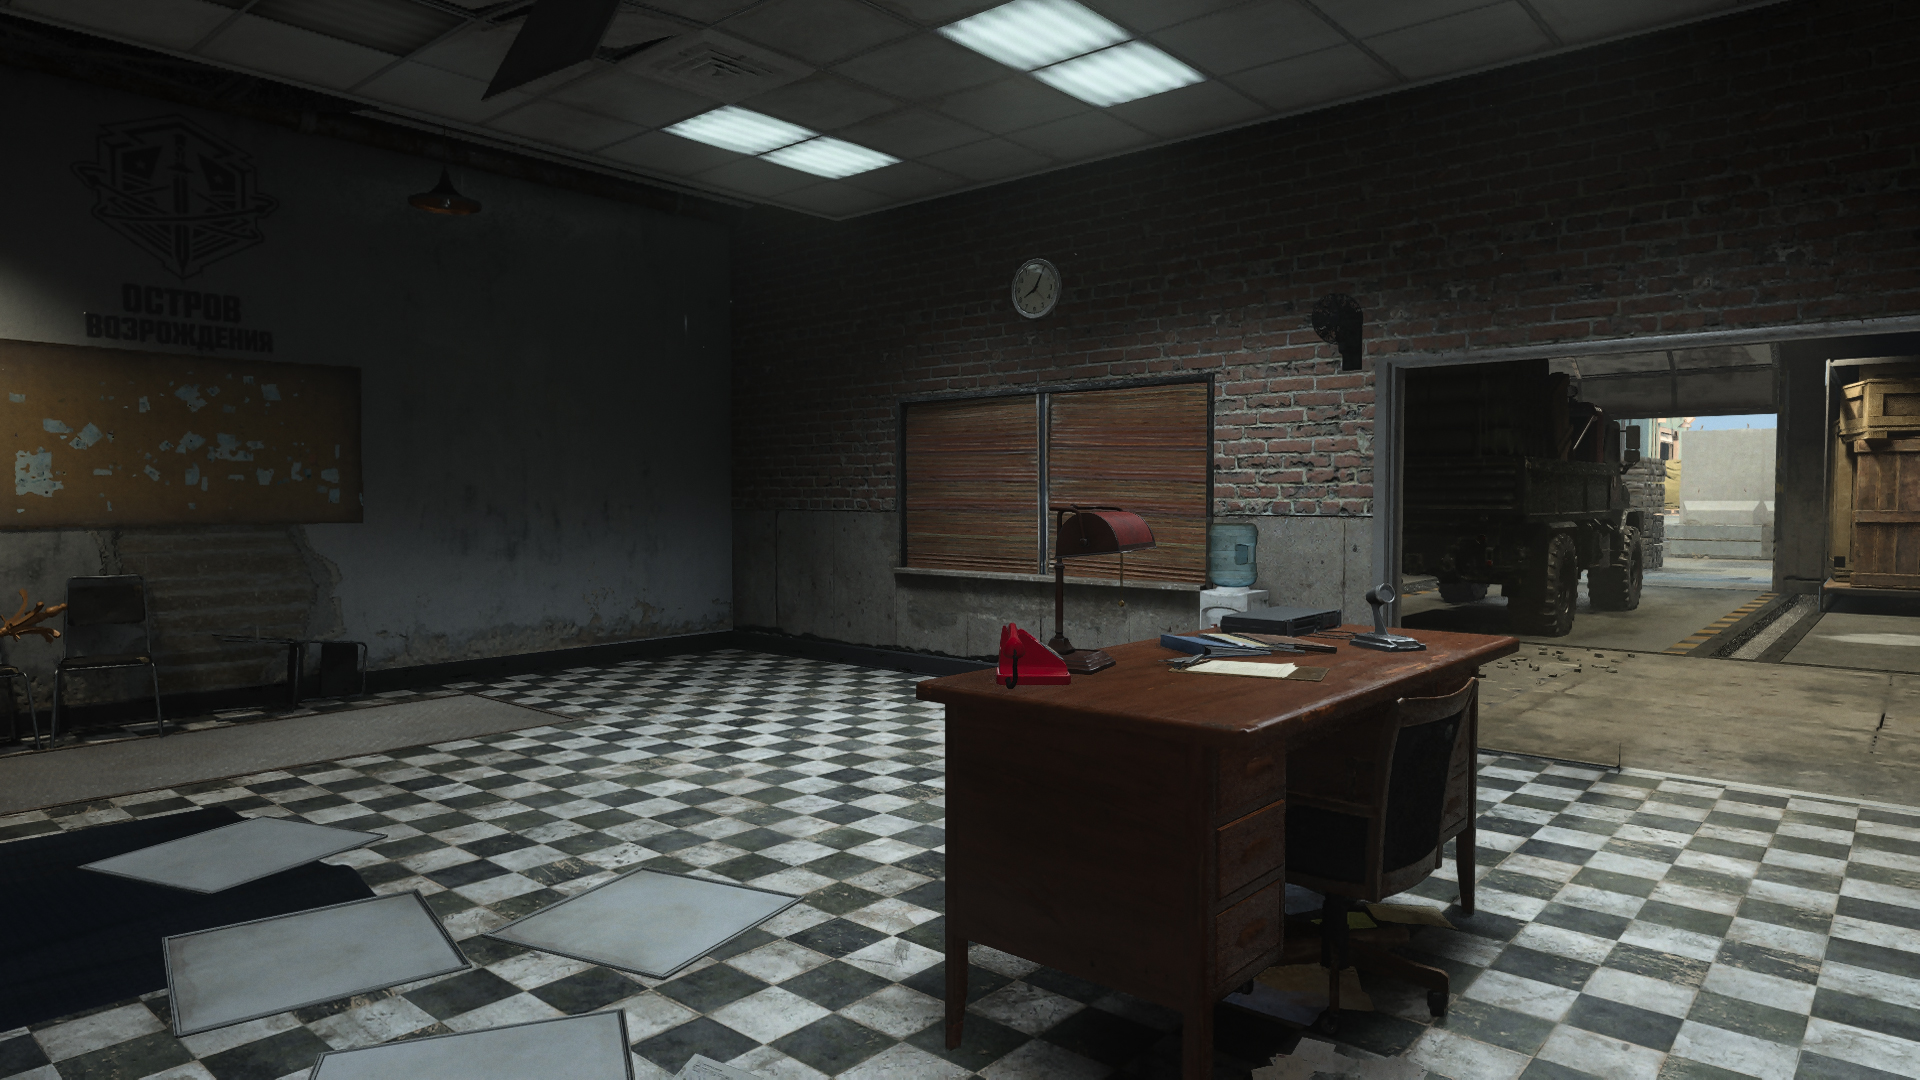
Enter the checkered Lobby through the northern double doors in the yard. The room provides a great view over much of the yard and it’s just a quick jaunt through Storage to reach the well defended Depot for excursions into Roundabout; you might also swing into the Garage for a view over the Road or step out into the open by the front Gate.
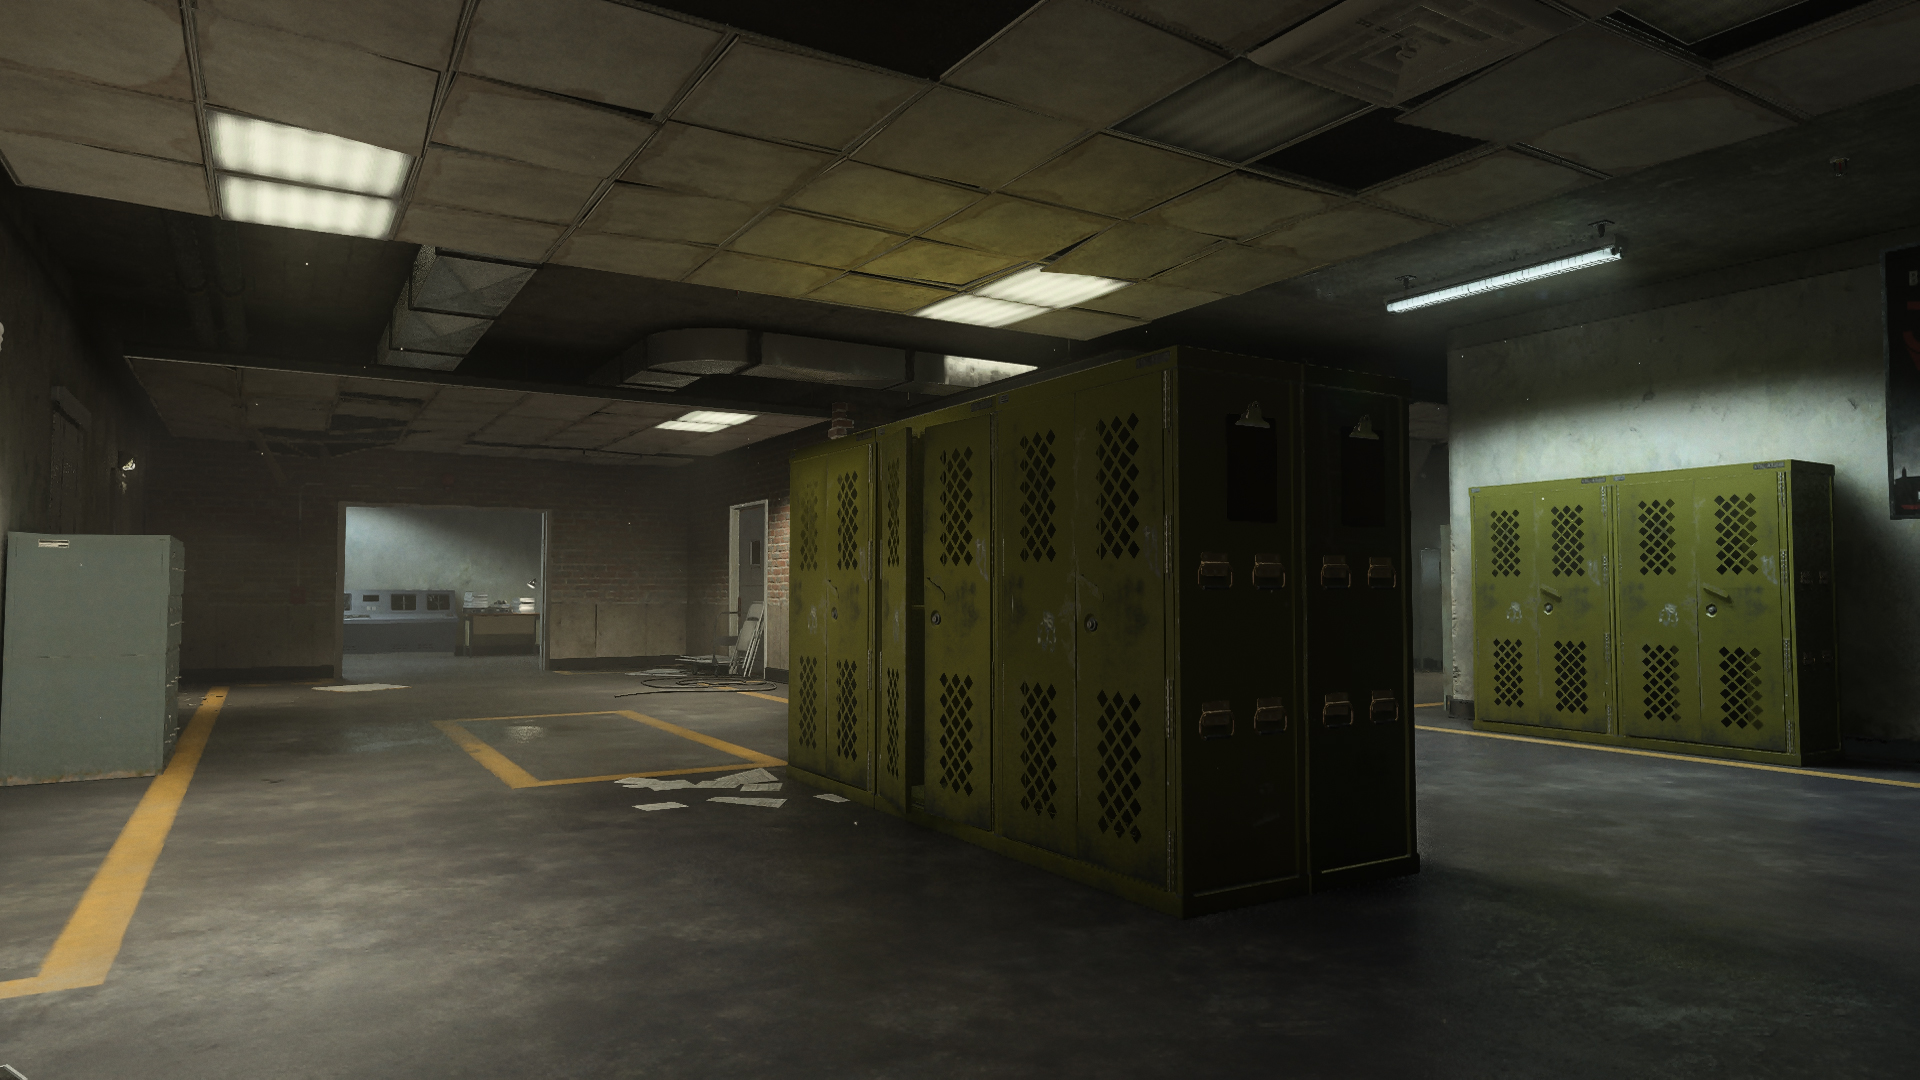
The Armory makes up the entire southern Checkpoint interior, an open room connected to a small office space and storage area. A stand of yellow lockers resembles all the available cover in the room. Success here requires intimate knowledge of the entry and exit routes leading to the Yard, Gate, Pipes, and the rear Shack.
The Armory’s small size can be useful if used wisely. The sight line down the length of the Checkpoint gives you the opportunity to land flank attacks against enemies focused on other targets, plus you can easily pivot out of the building into Shack which offers a stealthy approach toward Roundabout.1. Stay grounded. While it’s possible to climb up on some of the objects here, Checkpoint is primarily designed for combat on the ground. Consider Perks and Attachments that speed up your mobility and handling stats to optimize your reaction speed, thus improving your chances of winning head-on fights.
2. Get the trade. In team-based modes, don’t let your squadmate go down without returning the favor. Striving for the trade will help balance the total elimination count. On a tight map like Checkpoint, those small gains can really add up over the match.
3. Watch the skies. With the majority of the map positioned outside, enemy air streaks can inflict a lot of harm. Have a Loadout with a Launcher on hand to deal with opposing aerial threats. There are enough large cover pieces available to find the respite needed to lock on to your target and let loose.
4. Hardpoint. Use Hardpoint to focus the fight around key areas like the Gate, Hangar, Garage, and Roundabout. The extensive map knowledge you glean from playing the objective will aid you in other modes when the battle inevitably moves to these locations.
5. Trapped. Not keen on tight spaces? Stick to the Road and Roundabout and keep your eyes trained on the ins and outs of the Checkpoint building. Eliminate enemies as they move between the various interior spaces, effectively trapping them inside for your close-quarters teammates to finish them off.
6. Overkill. Prepare for anything by equipping the Overkill Vest and pairing a mid- to long-ranged Primary Weapon with your preferred close-quarters Primary. Benefit from an improved weapon swap speed which comes in handy when moving between the longer outdoor lanes and the map’s tight interior spaces.
7. Under the radar. Use the Ghost T/V Camo Gear item or the Assassin Vest to prevent enemy UAVs and other radar effects from displaying your position on the minimap. Attach a Suppressor to your weapon for the ultimate stealth play, allowing you to fly under the radar while traversing the map.
8. Scrambled. Share the element of surprise with your teammates by using the Counter UAV to scramble enemy minimaps. Roll that into the Cluster Mine in the next streak category to launch mines in a scrambled thoroughfare. With their radar blinded, enemies are more likely to stumble into your traps.
9. Shore shot. Take a Sniper Rifle or other long-ranged weapon and position your Operator on the Shore behind the bunkers in Roundabout. Use the long sight lines available to eliminate enemies near the Gate and those pushing into your territory. Move into the bunkers or up to the monument if you need to get closer to the action.
10. Catch ‘em in the crossfire. Fighting alongside your teammates is always a sound plan, but consider spreading out enough to attack enemies from different angles. The more you split your opponent’s attention, the better your chances of cutting them down before they can react.
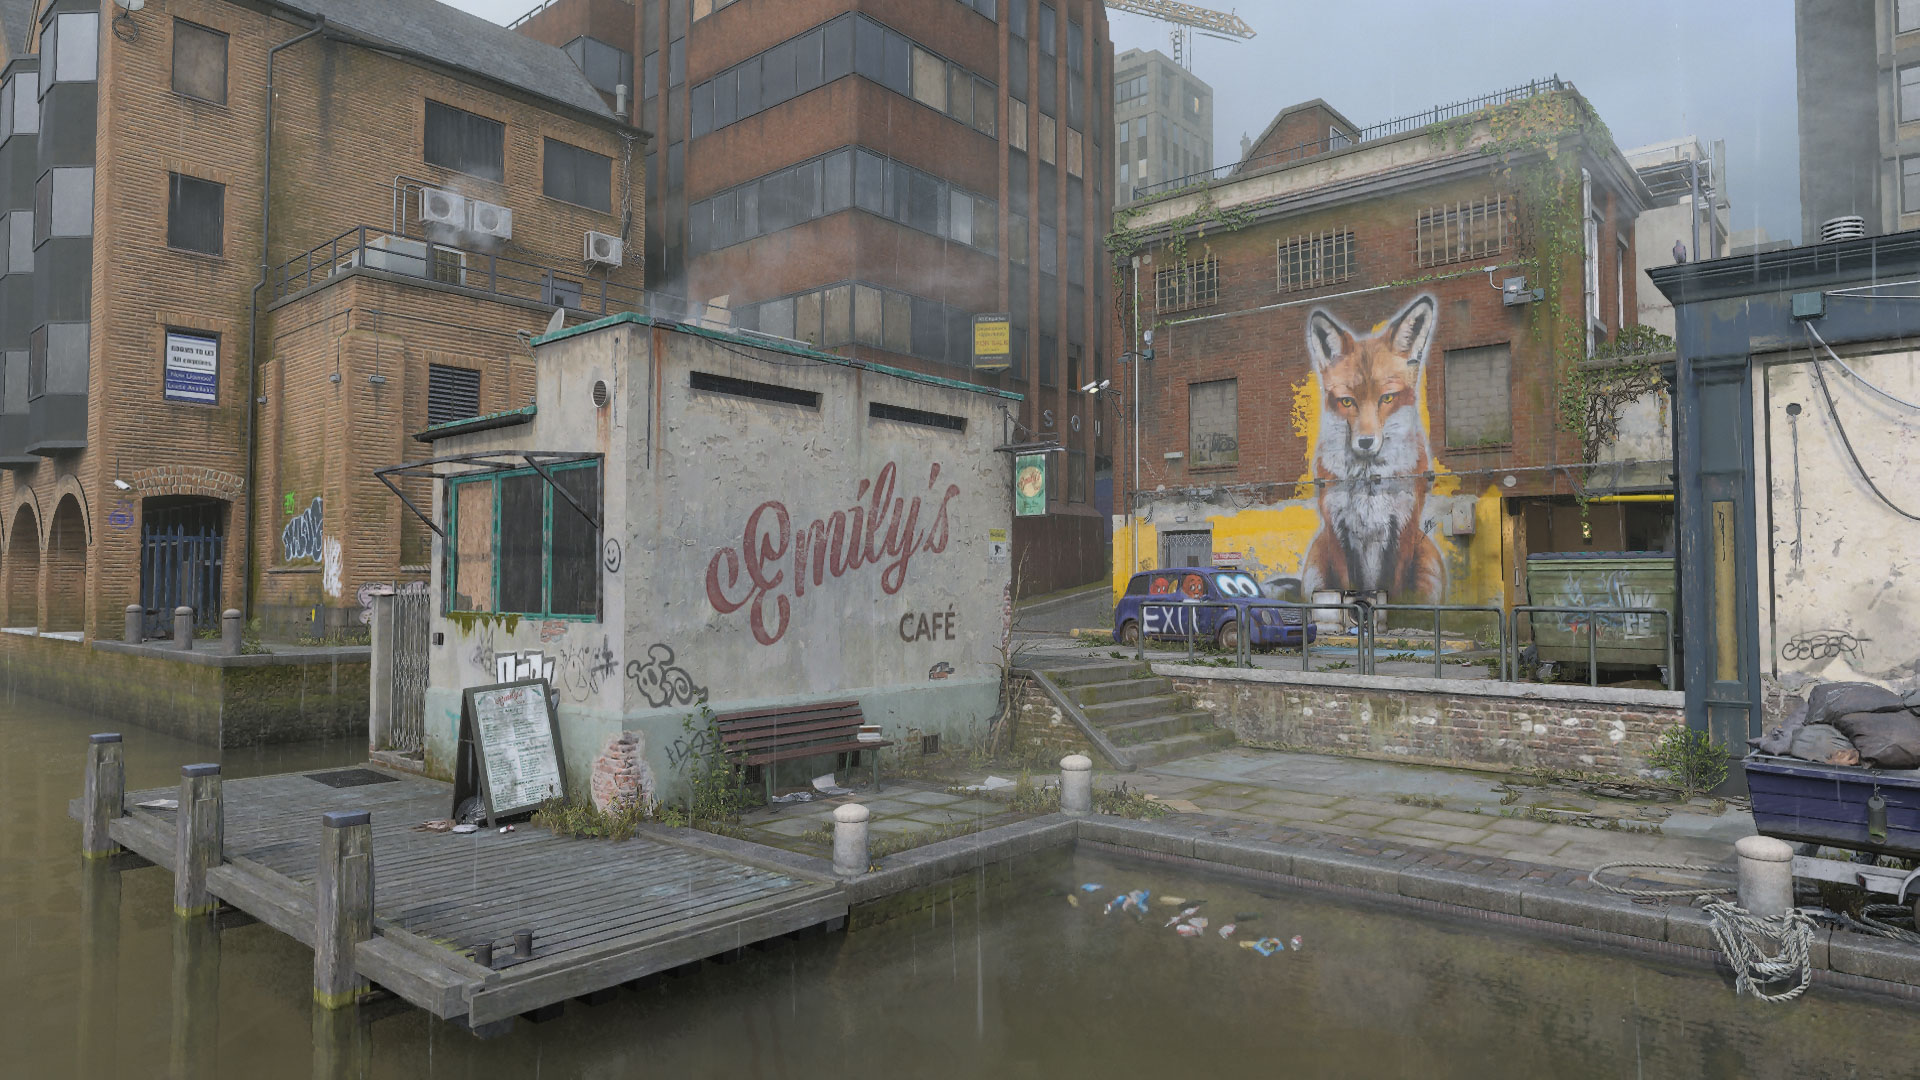
Grime
Deploy to an abandoned hub on the bank of a derelict London canal. The deprecated SKN Comms building looms over the center near a boat launch, bar, and café offering the glimpse of a once active corner in England’s capital city.
The small- to mid-sized urban landscape offers a mix of alleys and thoroughfares paired with tight interior locations, the canal at the bottom providing a stealthy means of crossing to the other side. Use this guide to familiarize yourself with Grime and get the advantage over your enemies from the start.
Needle and thread: Use the Balcony and Apartment vantage points found to the sides of the central Tower Loop for a clear sightline over the main thoroughfare, the front entry of SKN Comms, and down toward the Dock. Fall back and move down the map’s side when it’s time to relocate.
Pepper the walls: There’s not much concern over property damage in this abandoned hub. Pull out a Shotgun or SMG when traversing the map’s small indoor sections and start spraying at the first hint of danger. The more mobile and hard-hitting, the better.
Bring your goggles: Don’t expect clear waters in this metropolitan canal. The swim is worth it, however, to pivot around the enemy’s defenses without needing to fight on street level. Equip your favorite Handgun to improve your chances of winning underwater skirmishes.
TACTICAL OVERVIEW
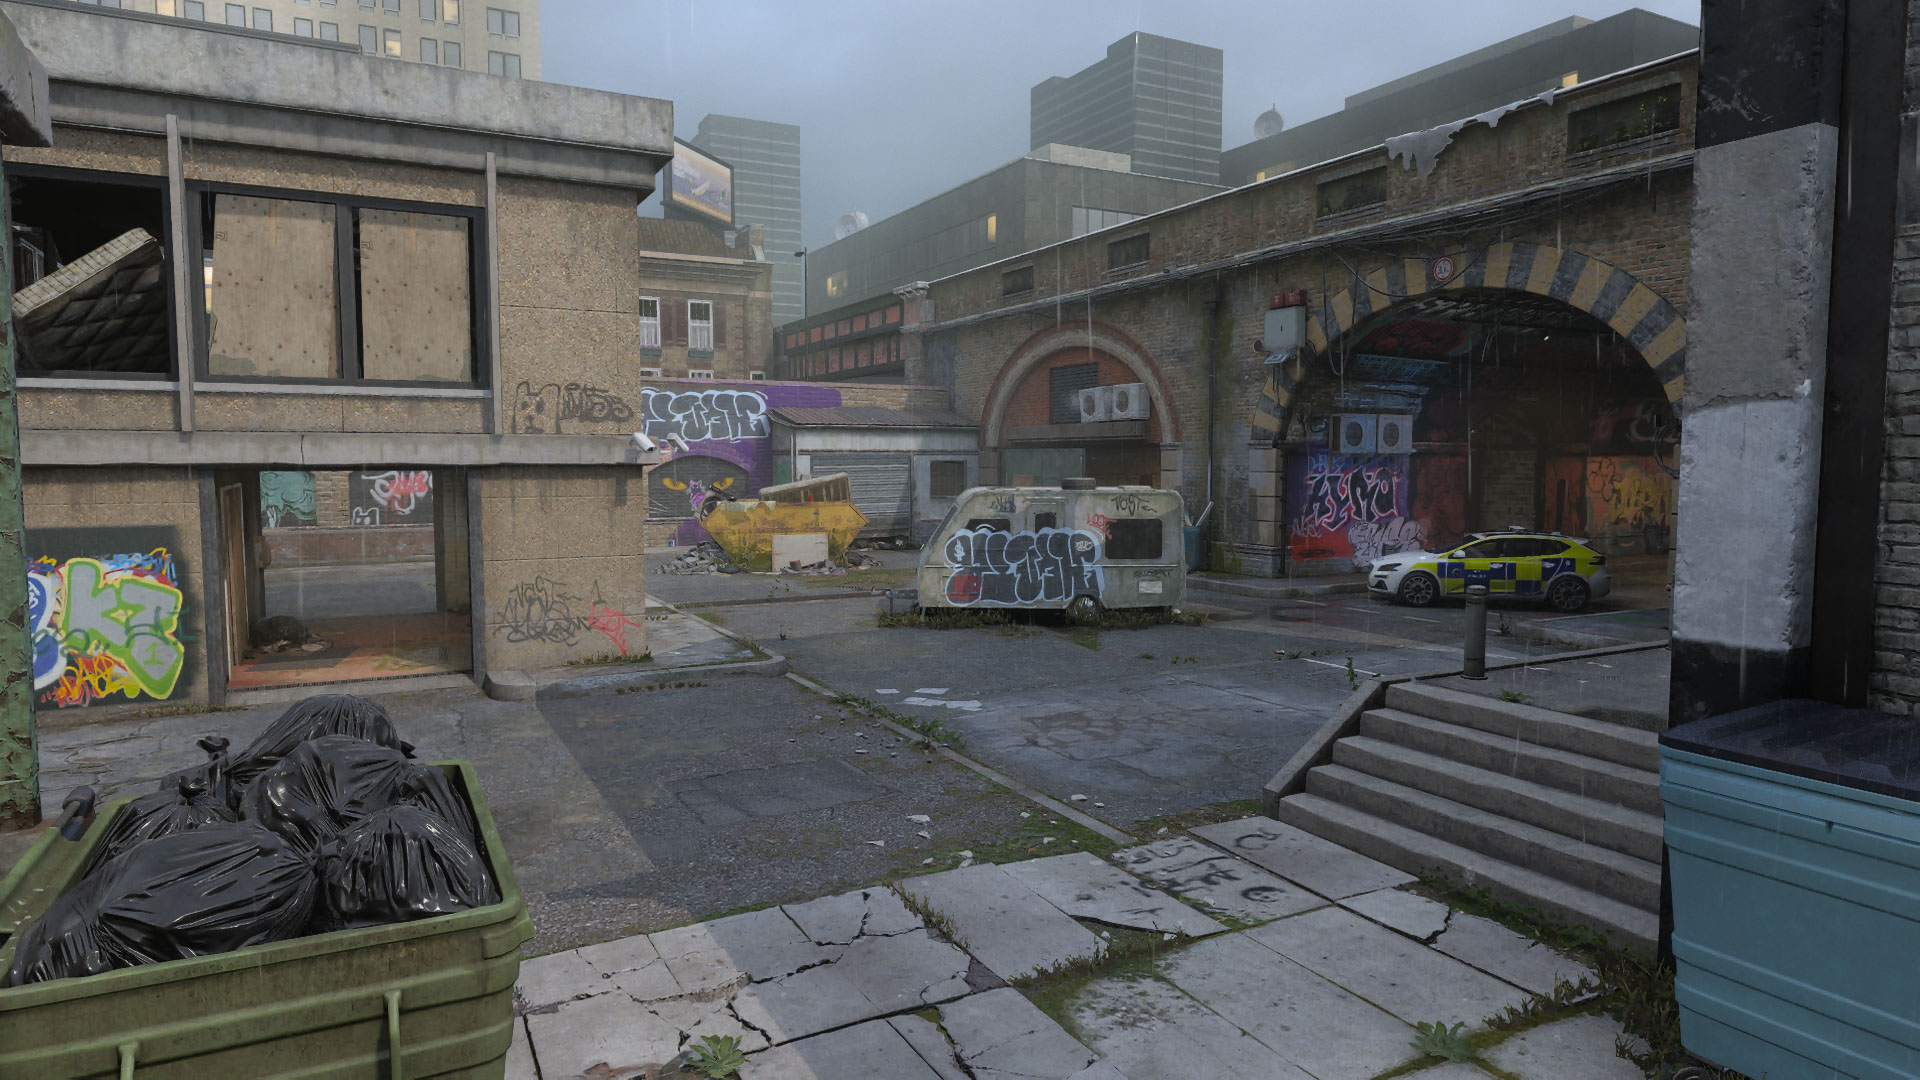
In team-based modes, squads will either spawn in the Alley (west) or under the Arches (east).
A derelict comms center and the remnants of an urban dockside community lie between the two points, graffitied walls and rubbish paving the way.
We’ve divided Grime into five sections based on key areas around the map:
- MAIN SPAWN POINT: Alley (+ Plaza, Skip, South House)
- MAIN SPAWN POINT: Arches (+ Caravan)
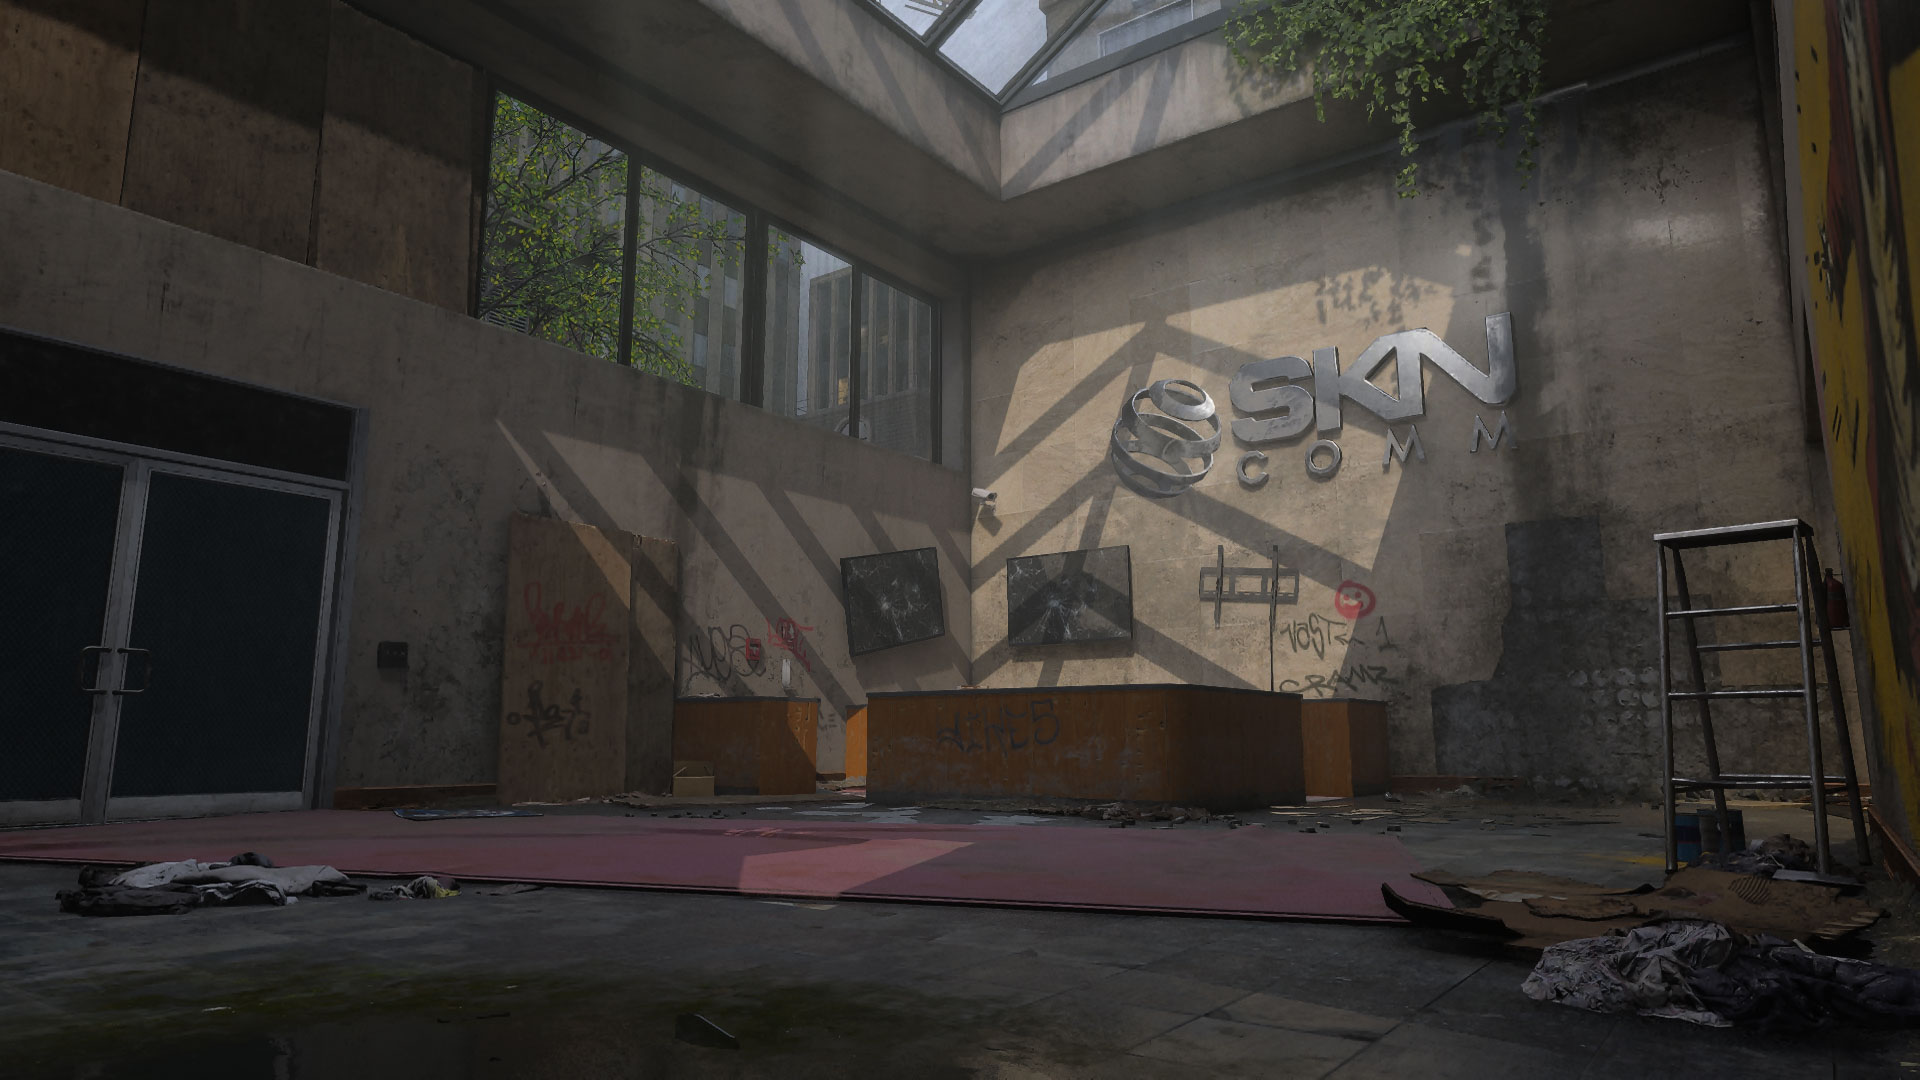
- ADDITIONAL AREA: SKN Comm (+ Lobby, Reception, Security)
- ADDITIONAL AREA: Tower Loop (+ Balcony, Pub, Boat House)
- ADDITIONAL AREA: West Dock (+ East Dock, Central Slip, Canal)
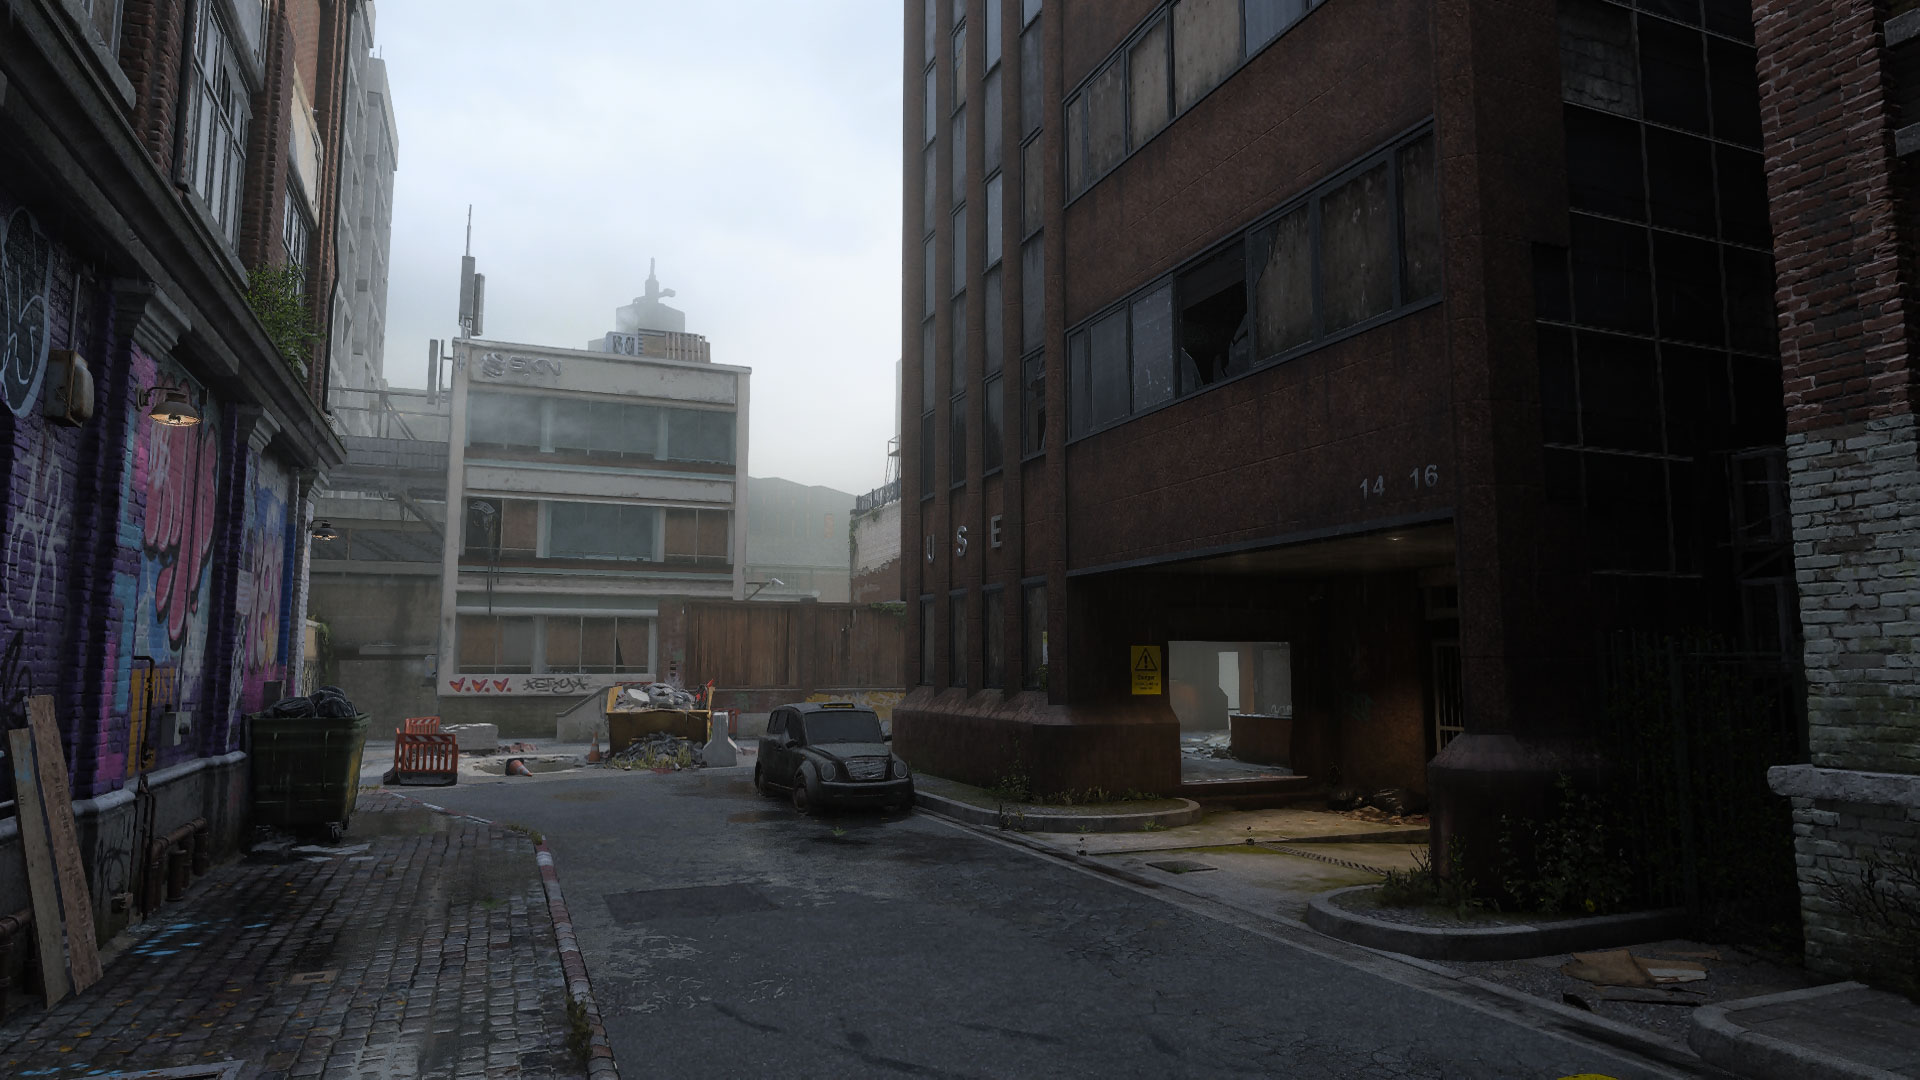
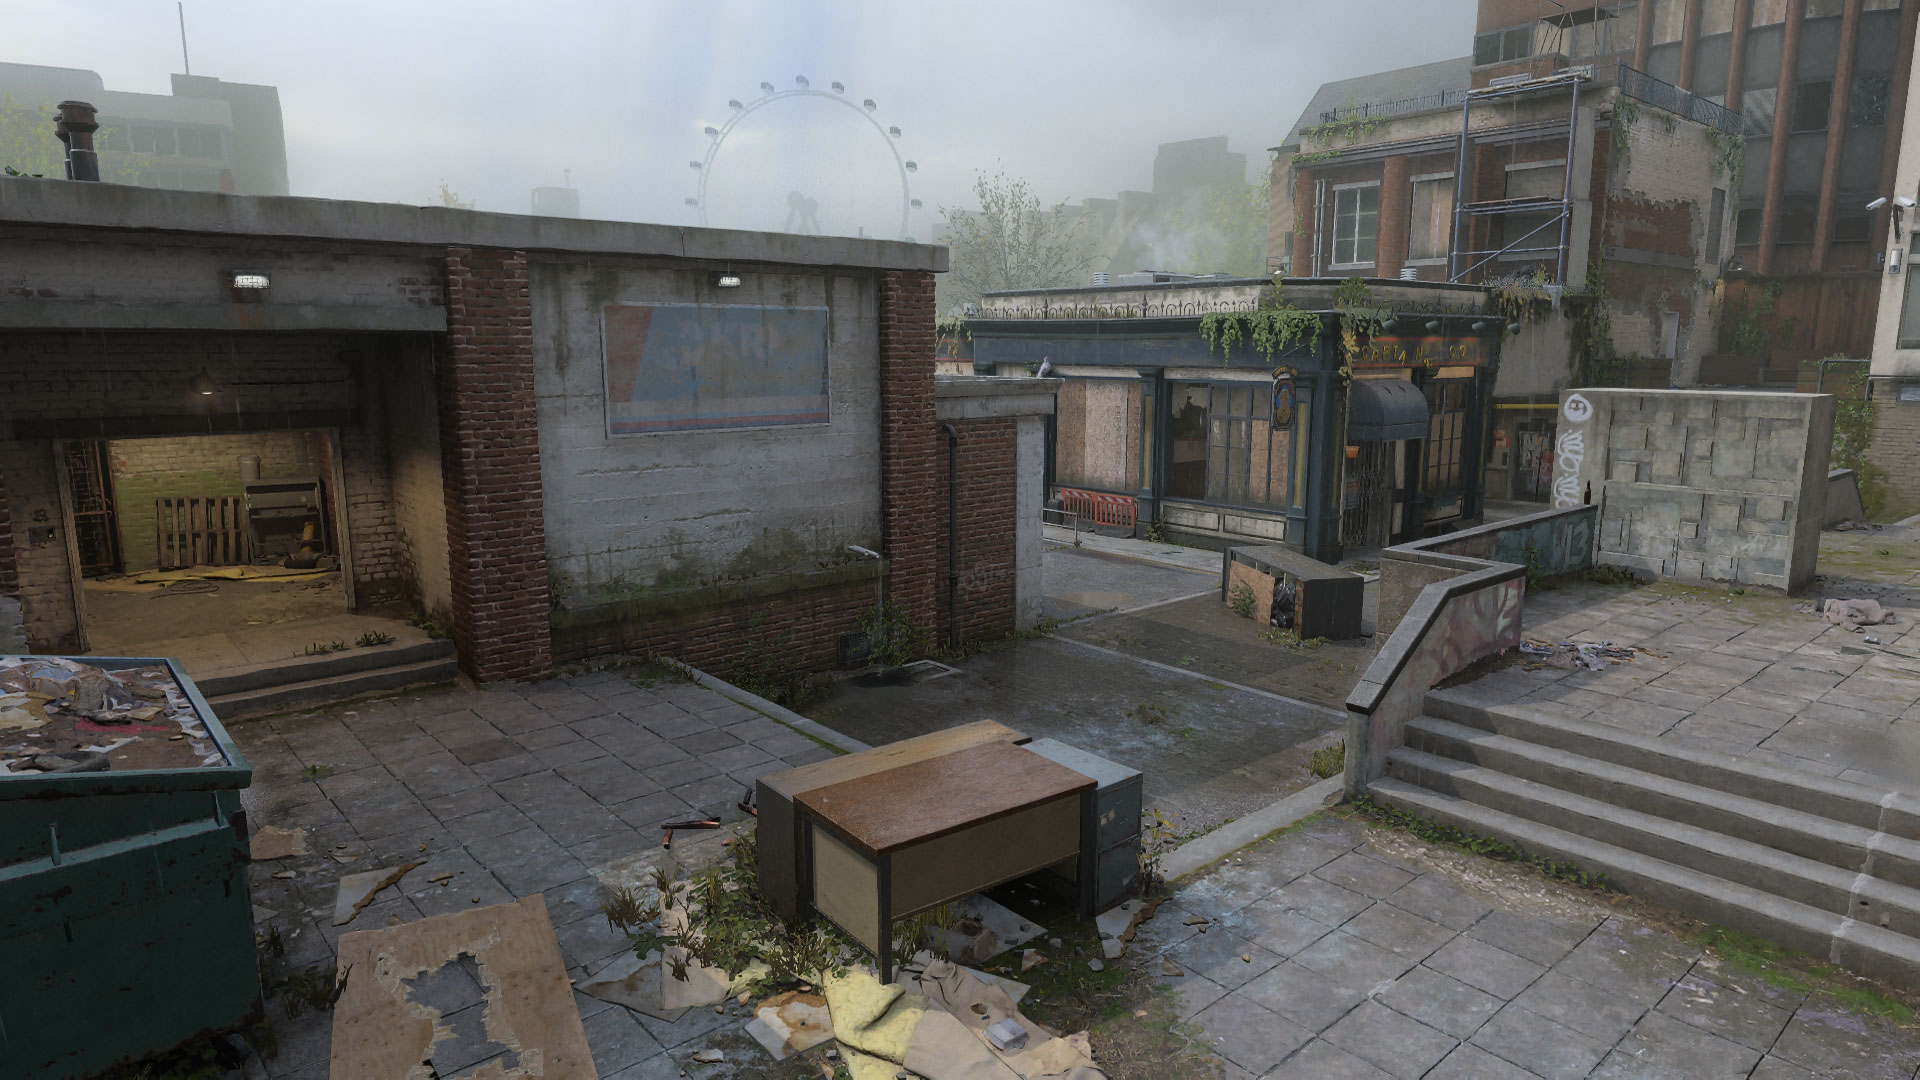
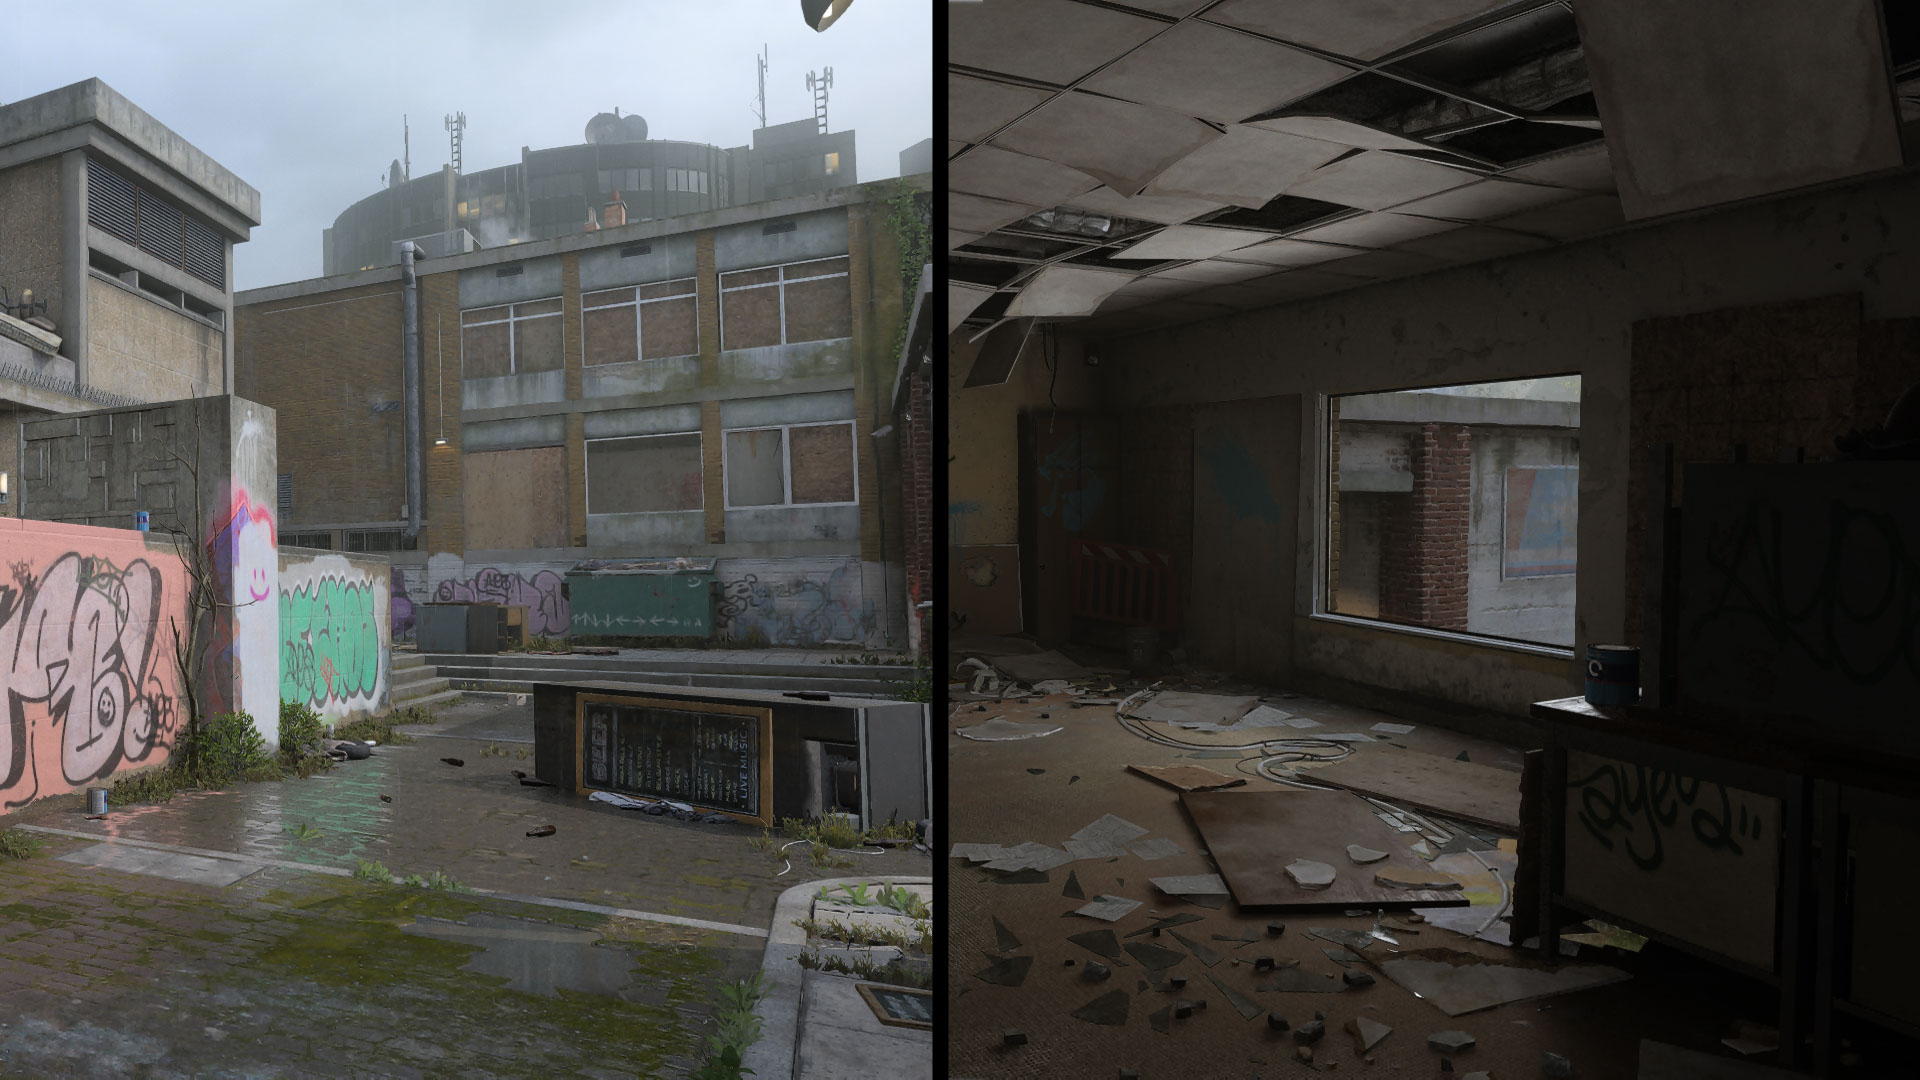
MAIN SPAWN POINT: ALLEY (WEST)
Though the upper windows of the SKN Comms building may appear deadly from the Alley, it’s street level where your attention is best directed. Mid-ranged weapons work well here against enemies incoming from the Plaza and Skip. Move into the South House if you’d rather avoid the streets. While the Plaza-facing windows do pose some threat, these ground floor areas will generally see the most action.
Cover becomes more abundant as you leave the Alley. Skip, though the most exposed, offers the best cover with the yellow dumpster and its surrounding barriers. From here you have several forward options: move up the small staircase to the Balcony overlooking the Tower Loop, head down the steps straight into the Tower Loop, or swing north into the open Plaza and the double doors leading into SKN Comms. You can also avoid the bustling center area entirely and move south toward the Docks and the Canal.
The South House marks a valuable pivot point between the Alley and the West Dock. With only two ways in and out, it’s straightforward to defend. Crouch behind the corner desk for extra cover. Move south to the Dock and take longshots by the covered boat or head out the west exit to eliminate opponents by the Skip and Plaza.MAIN SPAWN POINT: ARCHES (EAST)
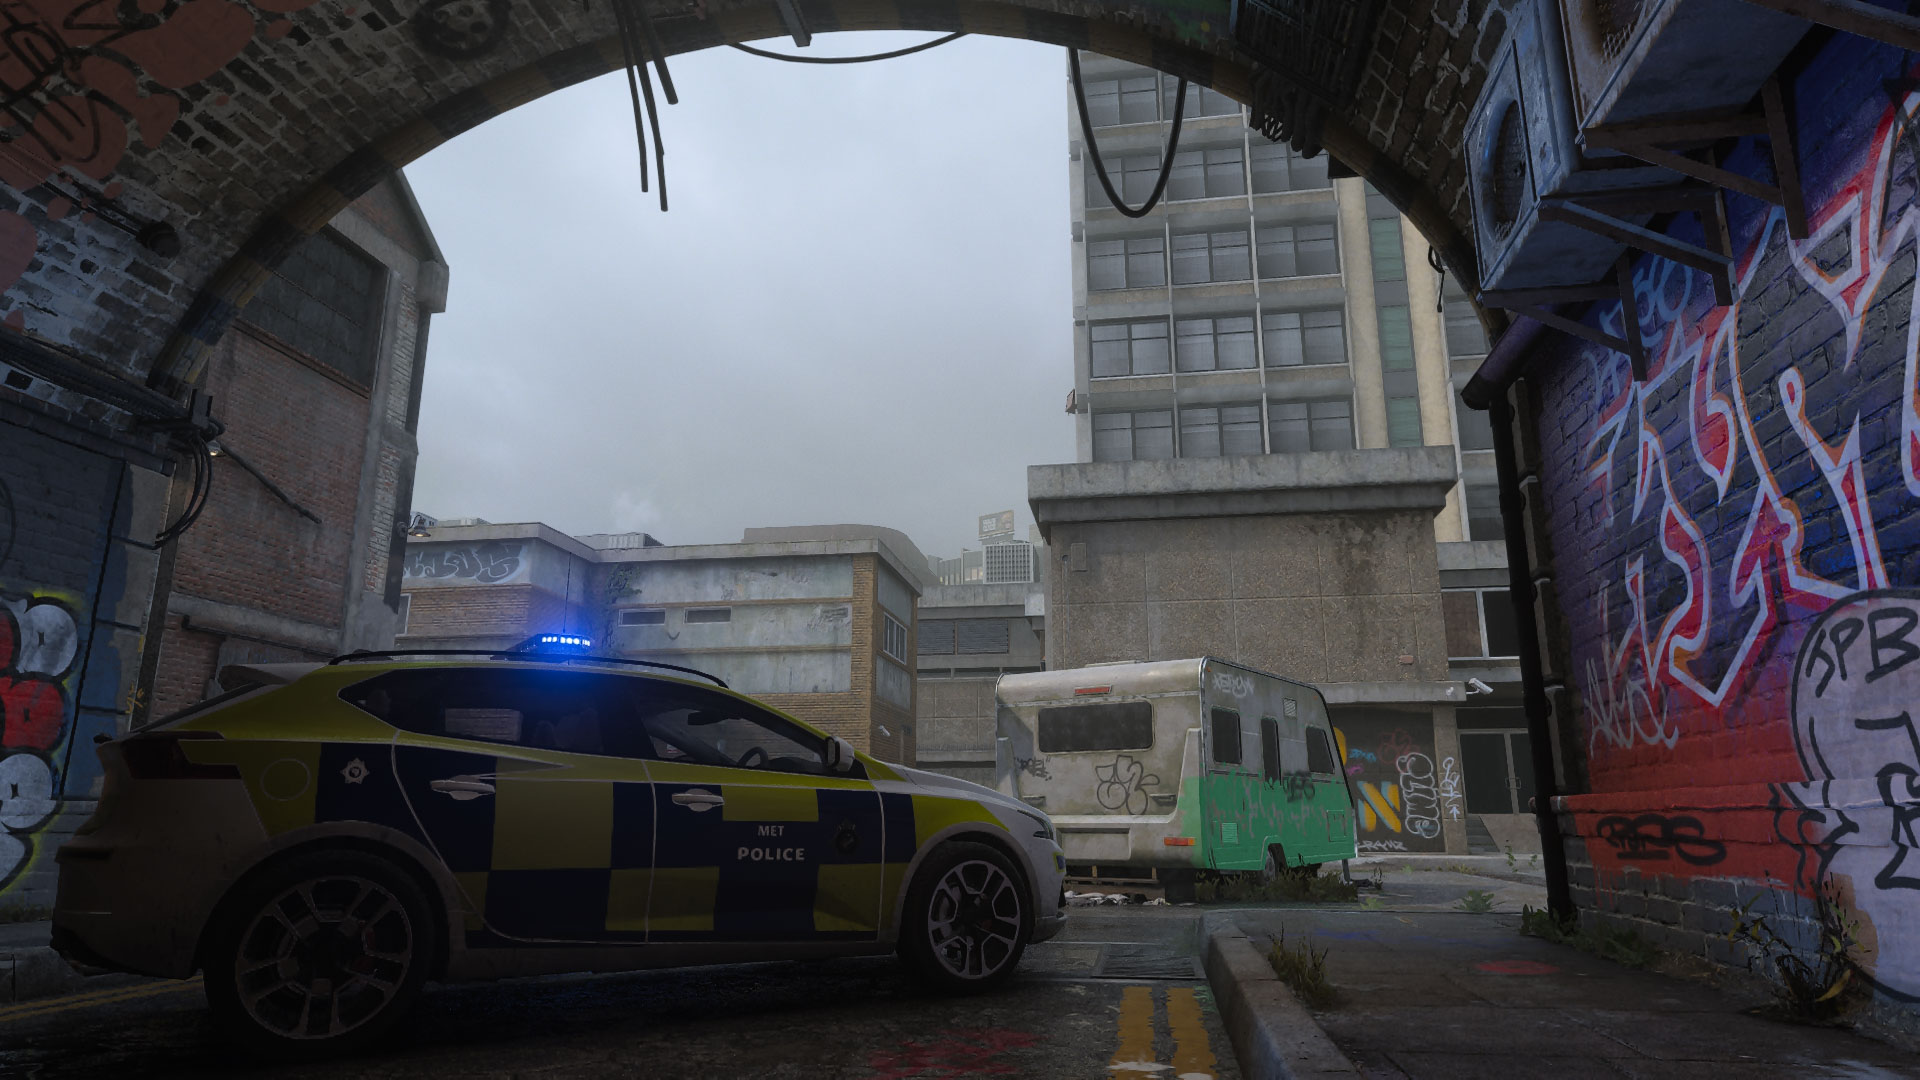
Hear the tube train rumbling overhead from within Arches. This lane doesn’t reach as far back as the opposing Alley, bringing the fight up close and quick. Duck into the nearby garage and weight room to focus on the top border of the map or move straight up toward the trailer to cover the whole area. You can also take the steps leading into the upper Apartment, granting a commanding view over the map’s center.
Note the path through the garbage dump behind the red “Hello” painted on the wall. Though it’s a short passage, beware of potential ambushes from here when entering the area, and use it yourself to get out of sight mid-battle or when setting up your own trap. For a greater view over the area, mantle up on top of the yellow dumpsters, the trailer or police car, or any of the various other trash bins pressed against the area’s borders.
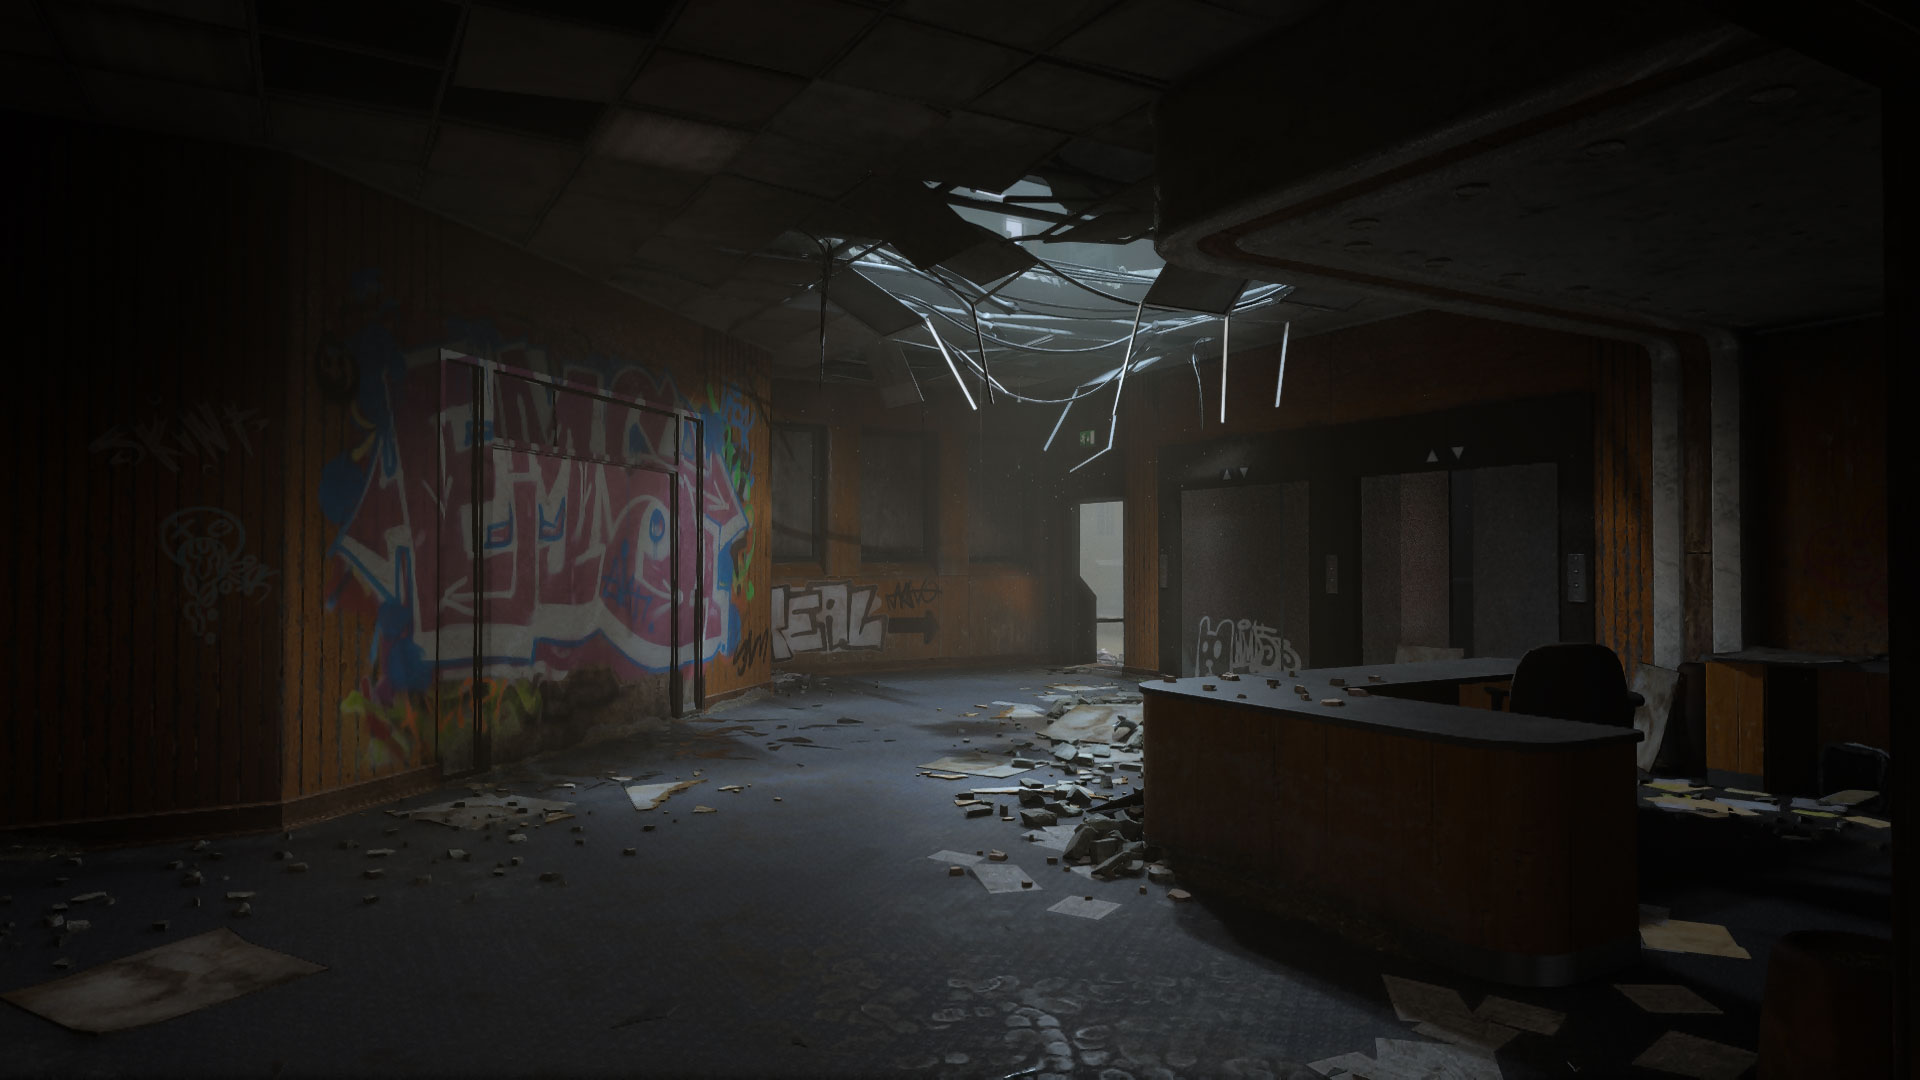
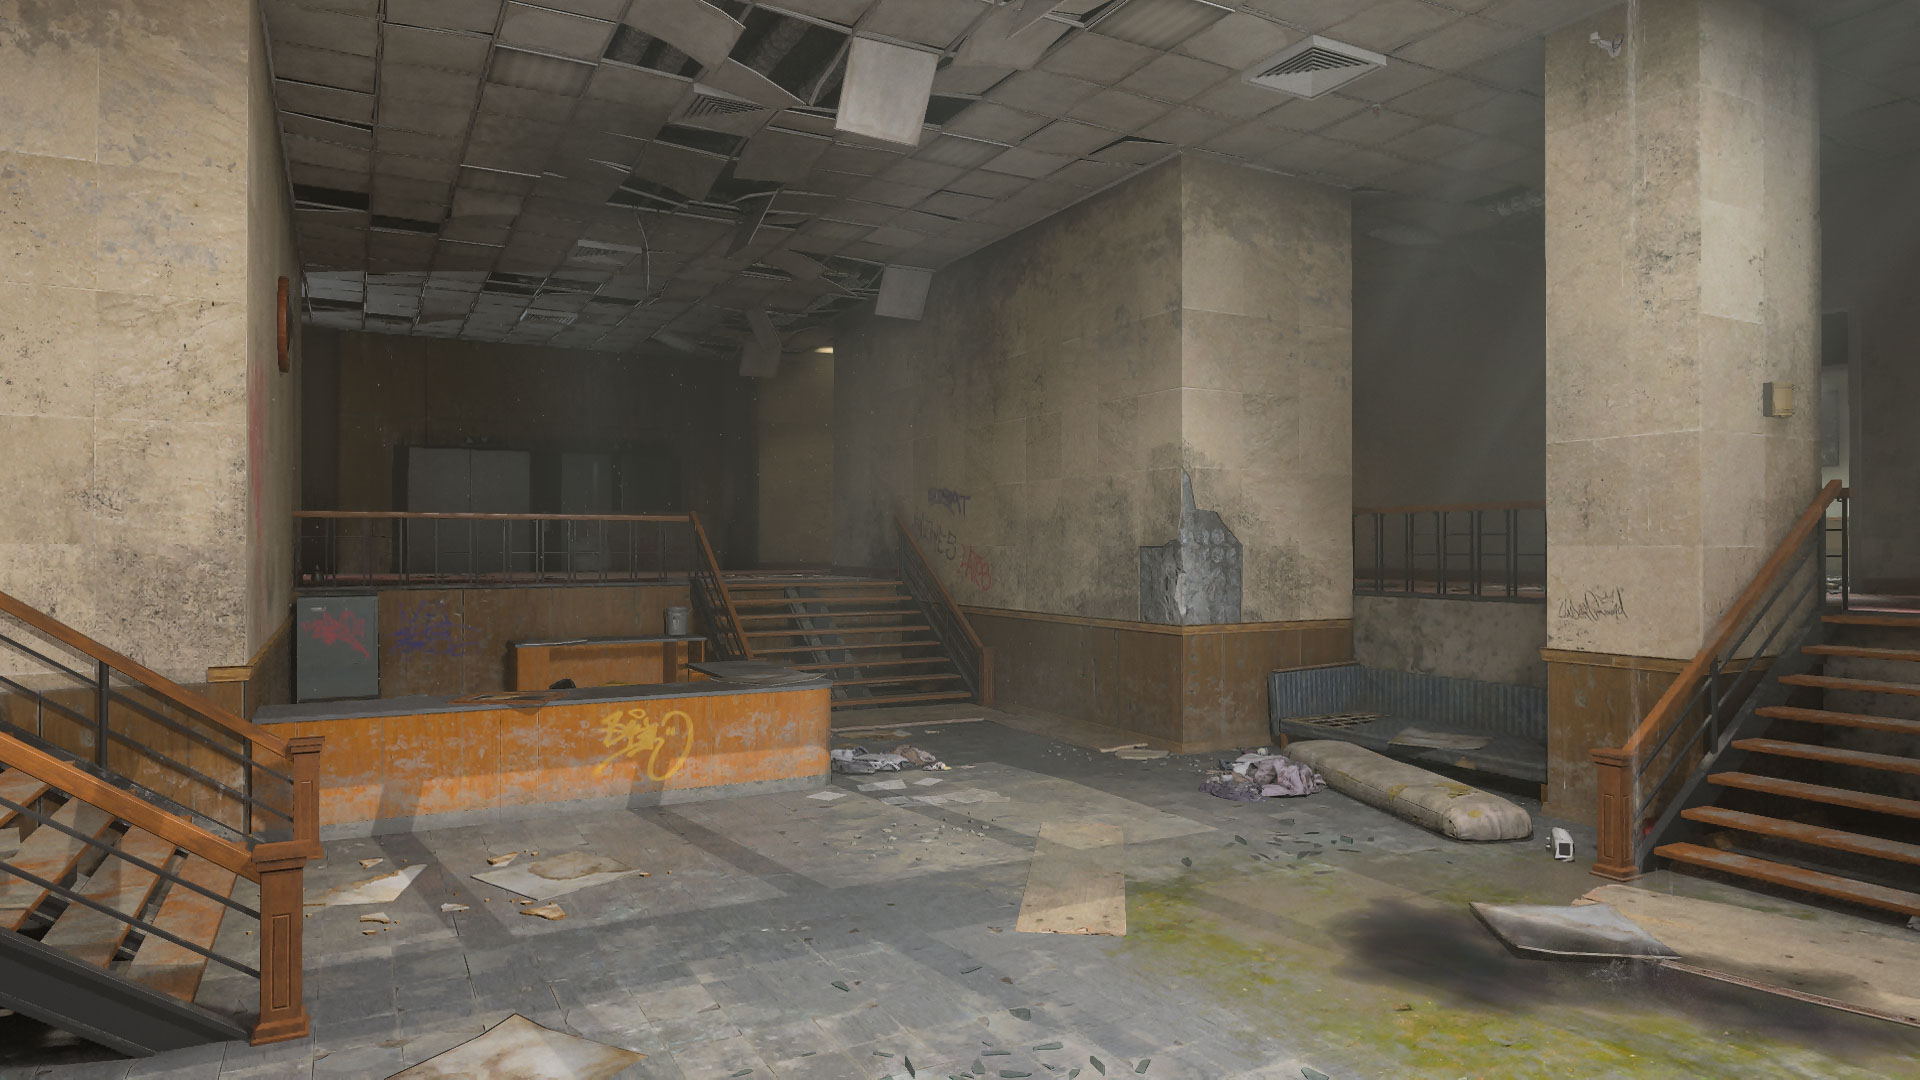
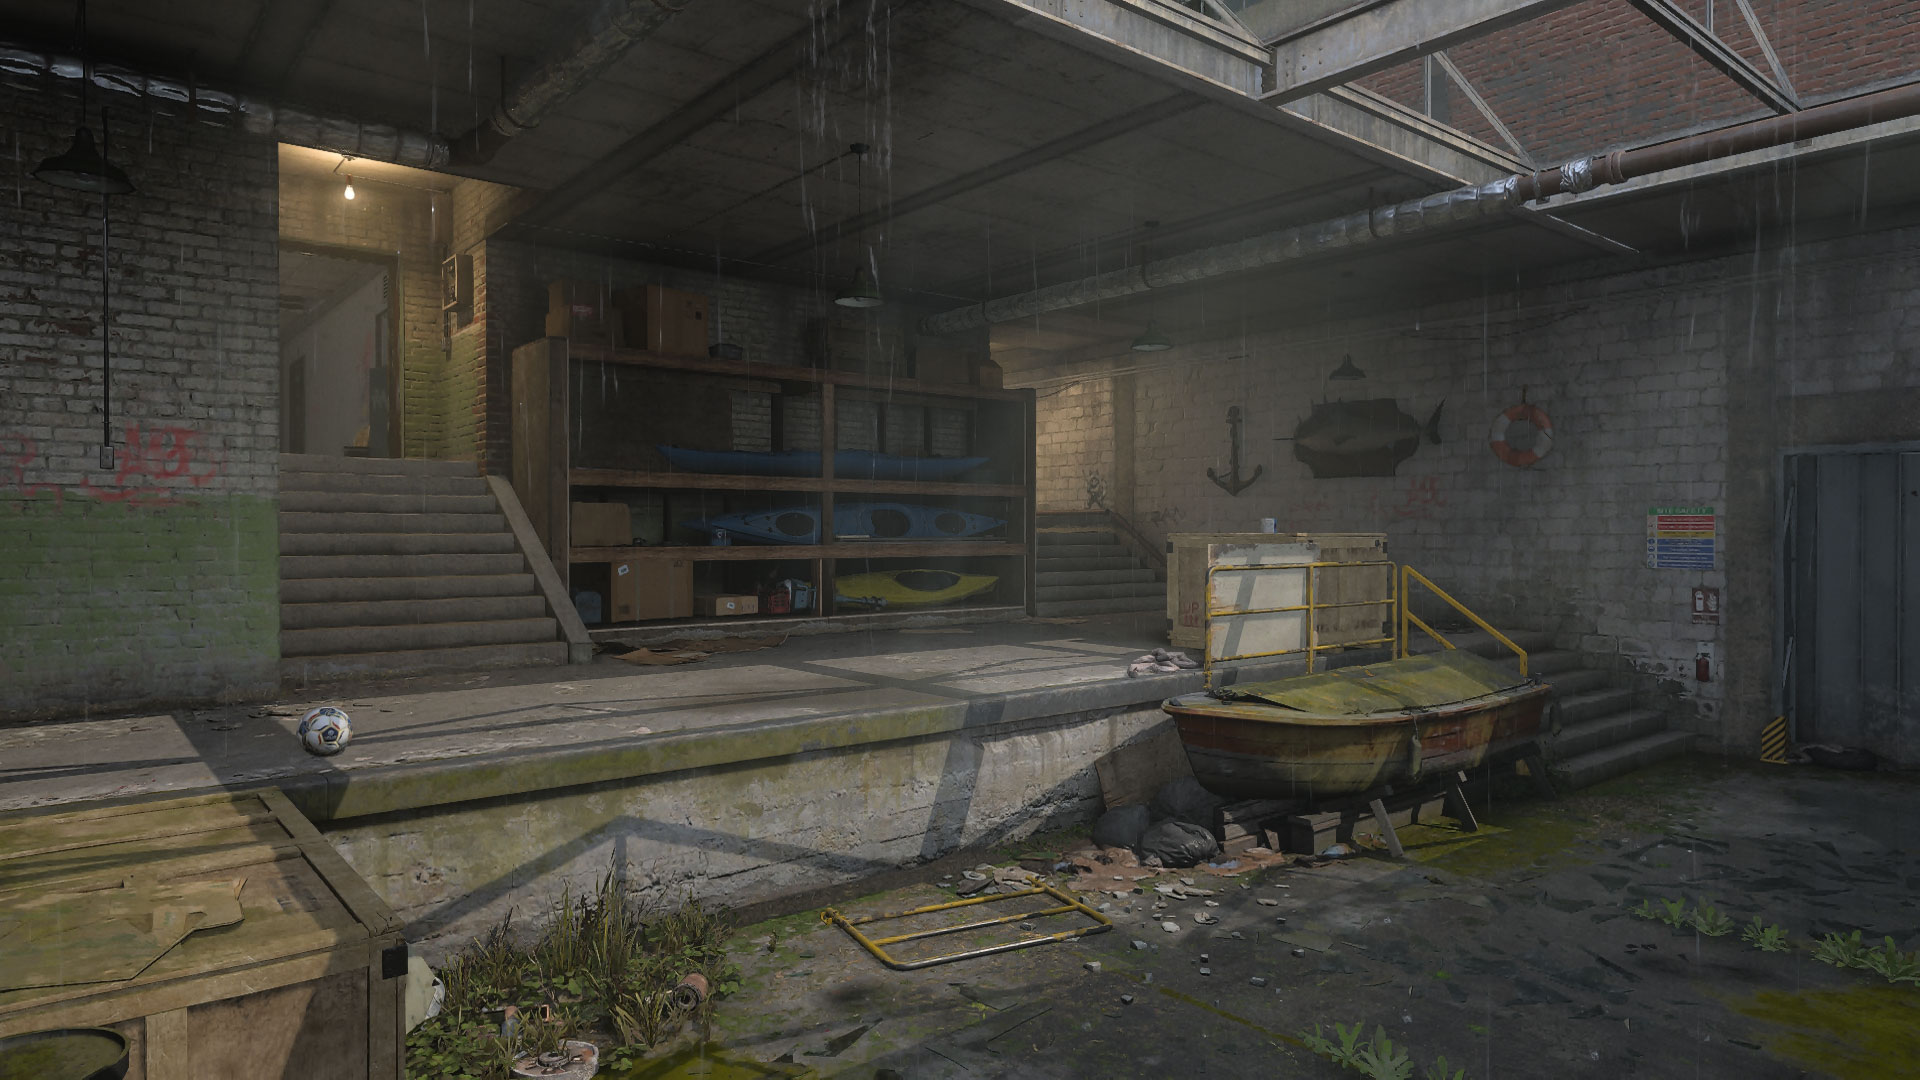
ADDITIONAL AREA: SKN COMMS
Despite formerly being the life blood of the area, the SKN Comms building has long been abandoned and now suffers vandalism and water damage with its walls and ceilings beginning to cave in. Its two wings funnel into the Lobby, composed of a lower center portion surrounded by an elevated walkway. Thick walls break up the view between the two areas, punctuated by three staircases and their guardrails.
To reach the upper windows from within Reception, get on top of the desk and jump up toward the plywood sheets stacked against the wall. Your Operator will grasp the material to help vault up to the windows, providing a good view over the Plaza and Alley below.Move to the west wing to reach Reception, empty except for the corner desk offering mild cover. The room is otherwise wide open, so be ready to engage the moment an enemy appears; use Tac-Stance to combine speed and accuracy if you suspect an incoming fight.
The east wing pivots through the long-defunct Security room, a tight space with busted electronics offering ambush potential against enemies in the Lobby and bursting in from Caravan. When there’s a lot of action inside, hop up onto the longer desk and attack enemies as they pass through.
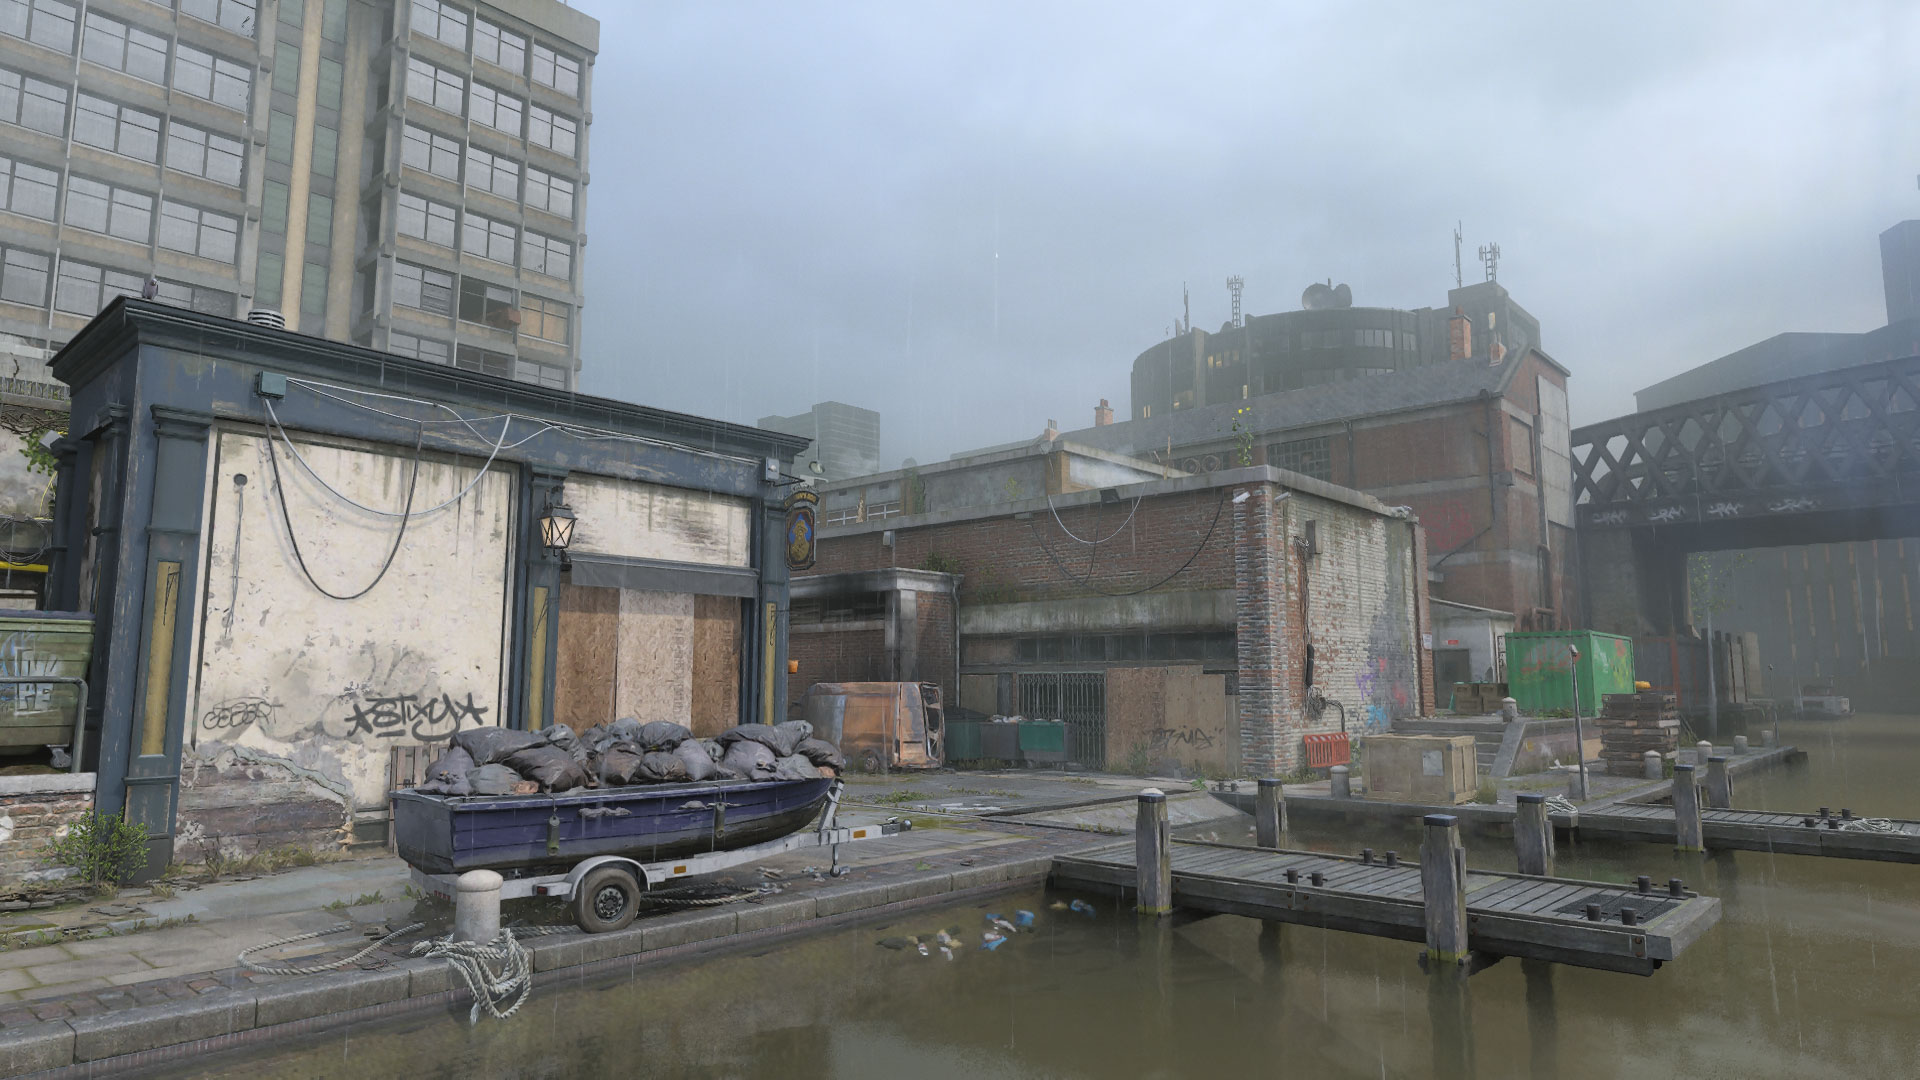
ADDITIONAL AREA: TOWER LOOP
All pathways lead back to the central Tower Loop, consisting of the steps and tiled walkway in front of the SKN Comms building and the lower street passing by the Pub and Boat House and sloping down toward the Docks.
Situational awareness is crucial when moving through here to help pinpoint the best available cover. Unless there’s imminent danger from SKN Comms, the upper walkway is generally the safer route, its low stone walls and the thick center slab providing some protection against attacks from the south and to either side respectively.
Toward the Dock, the Pub and Boat House offer additional interior spaces to traverse. Only the front of the Pub is accessible, as furniture and plywood have been stacked up to prevent further access within. This makes the interior more of a pathway to pivot between lanes, or as an ambush point to eliminate enemies moving between the Dock and Tower Loop. Be ready to move once you’ve drawn attention, as its tight confines make the area susceptible to grenades and rush attacks.
The Boat House provides more substantial room with entryways from the East Dock, Caravan, Apartment, and the Tower Loop. Cover is sparse in here, so use the walls and staircases to manage your angles and elevation and watch that minimap to help anticipate the next attack. Be ready with a Trophy System when defending objectives here.
The Balcony and Apartment are prime vantage points over the Tower Loop and the entrance into SKN Comms to help control the area and offer additional coverage to allies taking objectives in the nearby Lobby.If you spot an enemy in either position, take them down head on or sneak up from behind and eliminate them with a Finishing Move to usurp their position and be ready to fight back when they come seeking vengeance.
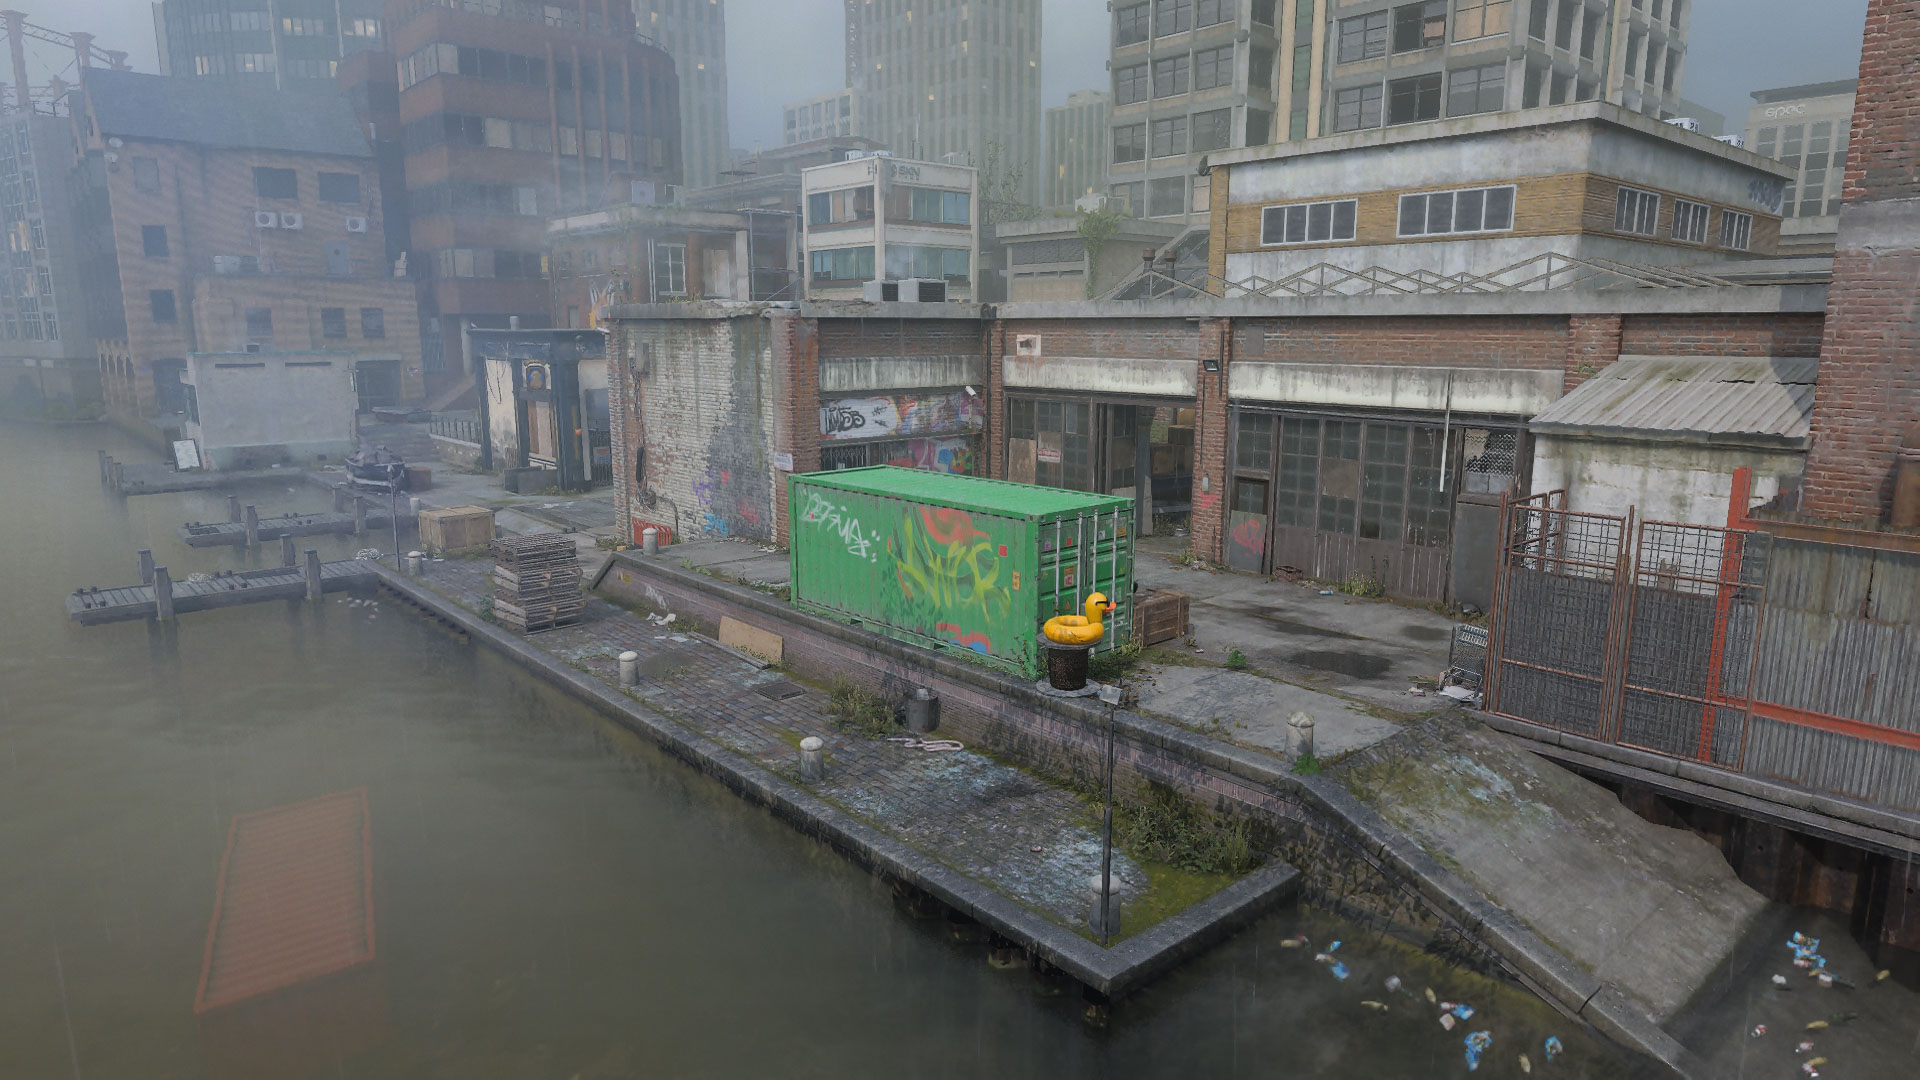
ADDITIONAL AREA: DOCK
The Dock offers the greatest opportunity for long-ranged combat, stretching over the whole length of the map. From the Boat House, you’ll emerge onto the East Dock, dominated by the large green container which can be used as a vantage point or a cover object against incoming fire. Stay on the upper platform to better control your angles when moving along the Dock or drop down to take advantage of a longer view.
Be careful when crossing over the Central Slip, open as it is to views from the Tower Loop. The wooden crate here is your best cover option when battling enemies from that direction.
If a fight starts going downhill, you can always jump into the Canal, its murky waters offering Operators the chance to escape or slip by the enemy. You’ll need to stay somewhat near the Dockside when swimming here, as navigating too far toward the other side or on either end will lead you outside of the combat zone.
1. Get dirty. In this part of town, everything’s fair game. Get down and dirty with mean tricks like dropping a Proximity Mine in the Pub, holding up in the Boat House with a Shotgun, and setting up a Remote Turret in the Apartment overlooking the Tower Loop. Whatever it takes to get the job done, do it.
2. Entrenched. The Lobby and Boat House are often the site of objectives on Grime. Utilize your entire Loadout when attacking and defending these locations. Lead with grenades, activate your Field Upgrade, and swap weapons when the fighting gets intense and there’s no time to reload. The more tools you bring to bear, the better your chances of securing the point.
3. Find a way. Climb over the dumpster in the western Plaza to reach the upper windows of Reception, also accessible with a jump from the desk over the plywood sheets inside. Though you’re confined to a slim ledge, the view over the Plaza and Alley — and a sliver of the West Dock if you edge out the window — is well worth the limited mobility.
4. Mount up. Grime features a variety of waist- height cover such as the desks in Lobby and Reception, the kegs behind the Pub, and the overturned beer fridge in the middle of the Tower Loop. When using these for defense, mount your weapon to crouch down and limit your exposure while improving the accuracy of your shots.
5. Underwater operations. Swimming in the Canal doesn’t have to be a mad dash back to the safety of the surface. Equip your favored Handgun and attachments to become a force underwater, eliminating opposing swimmers with ease.
6. Pinch ‘em. Coordinate with a teammate to lock down the center by having one of you set up on the western Balcony and the other in the eastern Apartment. By holding down both vantage points over Tower Loop, enemies will be torn over how to respond before falling to your damage. Be aware that you’ll draw attention fast, so prepare the necessary defenses to help hold down your position.
7. Knocked off their perch. Fighting solo from the Balcony or Apartment? Bring along a Breacher Drone and send it over the Tower Loop to blast enemies who appear on the opposite vantage point. Equip the new Season 3 Modular Assault Rig Vest to resupply the Breacher Drone from fallen players to keep your stock filled.
8. Marked up. Equip the new EMD Mine arriving in Season 3 Reloaded and set it up in the SKN Comms building or the Boat House. When triggered, tracker devices shoot out toward nearby enemies, lighting up their position on the minimap. Their attempts at outmaneuvering you in these tight spaces are now futile.
9. Shrug it off. Equip Season 3’s Compression Carrier Vest for its ability to regenerate health after eliminating an enemy Operator or capturing an objective. This allows you to play more aggressively without the need to fall back and recover after every skirmish, helping to move more quickly through high-traffic areas like the Lobby, Tower Loop, and Docks.
10. Reboot comms. The comms building may be down, but that doesn’t mean you can’t perfect your own team communication. Get on your mic and call out enemy positions, coordinate attacks, and get your squad working together. Group up with some friends to further tighten your teamwork and benefit from additional XP bonuses.


Stay tuned to GamingTrend for more Call of Duty: Modern Warfare III, Warzone, and Warzone Mobile news and info!


