This is the second part of a 3 part series where we assemble, paint, and play the latest version of Warmachine produced by Steamforged Games. Here’s where you can read part 1, where we dive into assembly and initial impressions.
In this article, let’s dive into 3 different methods and 3 different models, all from the 2 player starter set for Warmachine.
Priming and Zenithal Highlights
The first step to any painting project is to lay down a thin layer of primer. Primer is a special type of paint that, when it dries, provides a rough surface at a micro level. This allows paint to adhere to a model. If you tried to paint on just plastic alone, it won’t stick as much. There are many different types of primer, I tend to use a spray primer, or what some would call a “rattle can”.
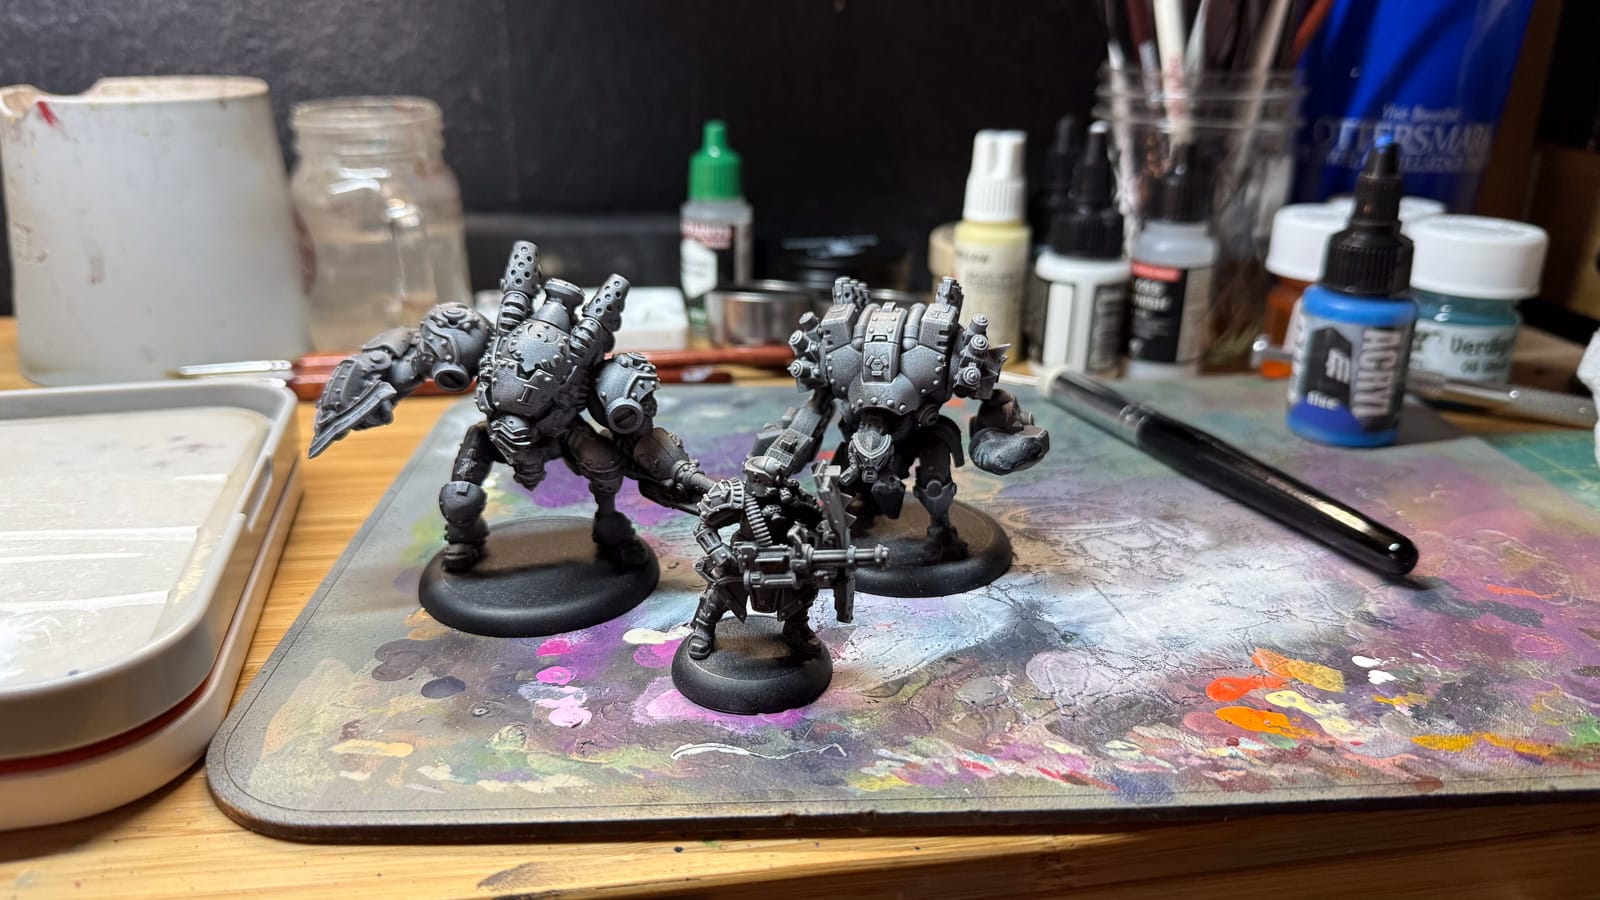
For these models, I used Citadel’s Chaos Black, which tends to spray evenly. When you prime in this method, use short bursts in a well ventilated area, and wear a mask. You don’t want to be inhaling paint or vapors. Then, I did something I briefly mentioned in the last article, Zenithal Highlighting.
Zenithal Highlighting has several benefits. The one that I benefit from is that it provides me a sense of where the light will hit the model, which is where I will paint my highlights. The other major benefit is for painters who use contrast or speed paints, as those paints tend to be transparent enough to allow the highlighted areas to show through the layers, as you’ll see in our second example.
I do this with a second aerosol paint, called White Scar, also from Citadel...I then tend to use a drybrush loaded with a titanium white to hit all of the edges on the model. Once again, since this is a guide for me, I can afford to be a little messy.
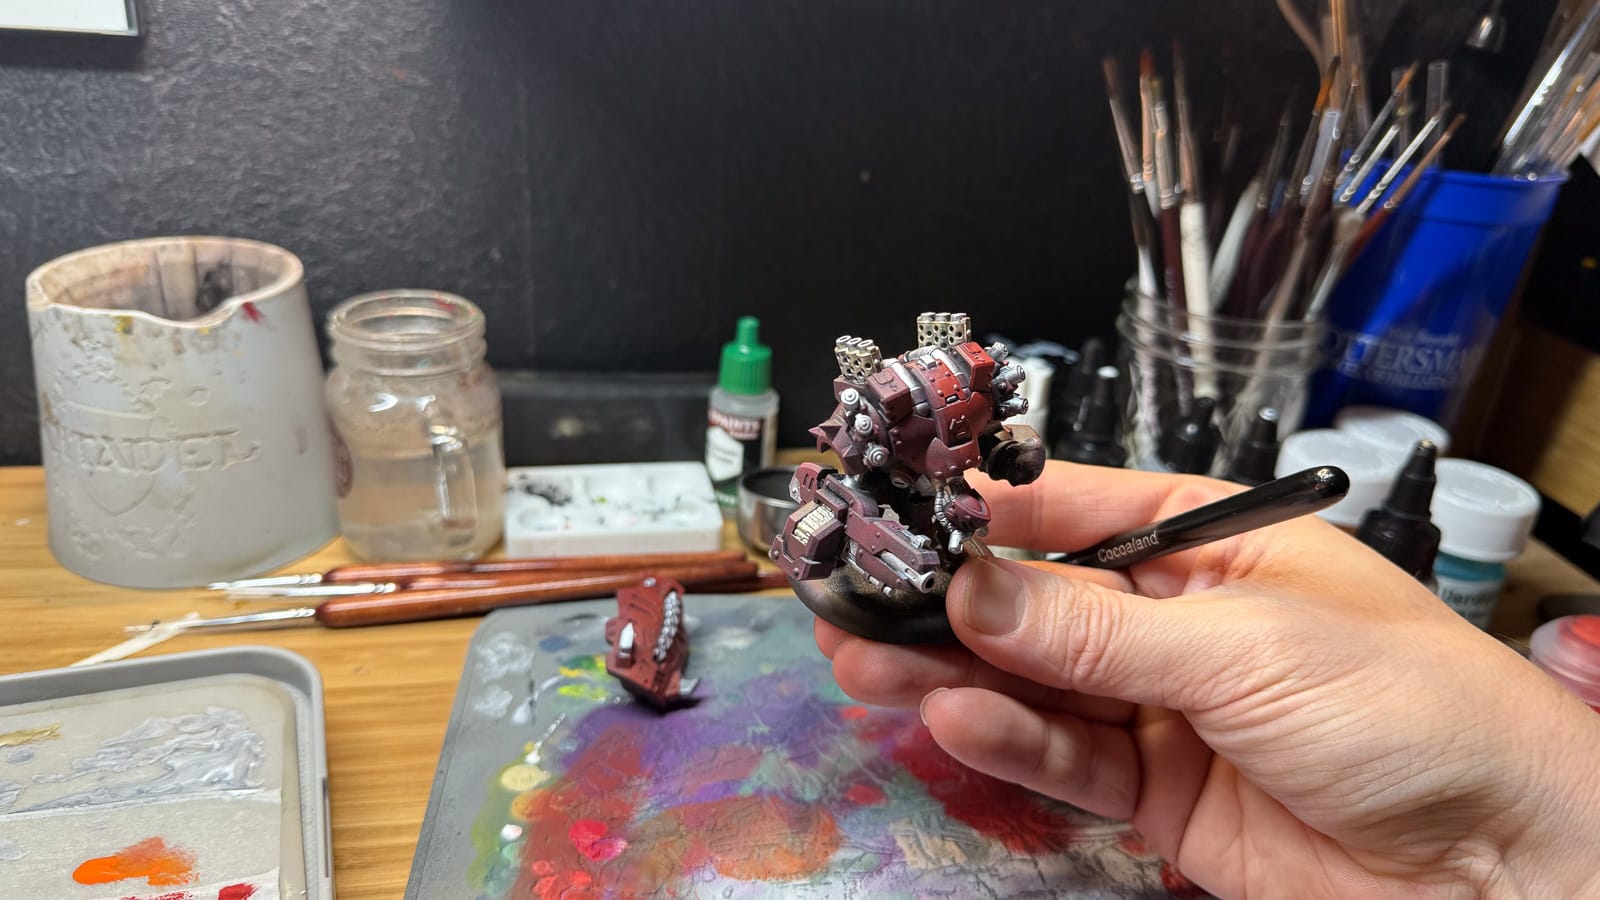
Method 1: Drybrushing
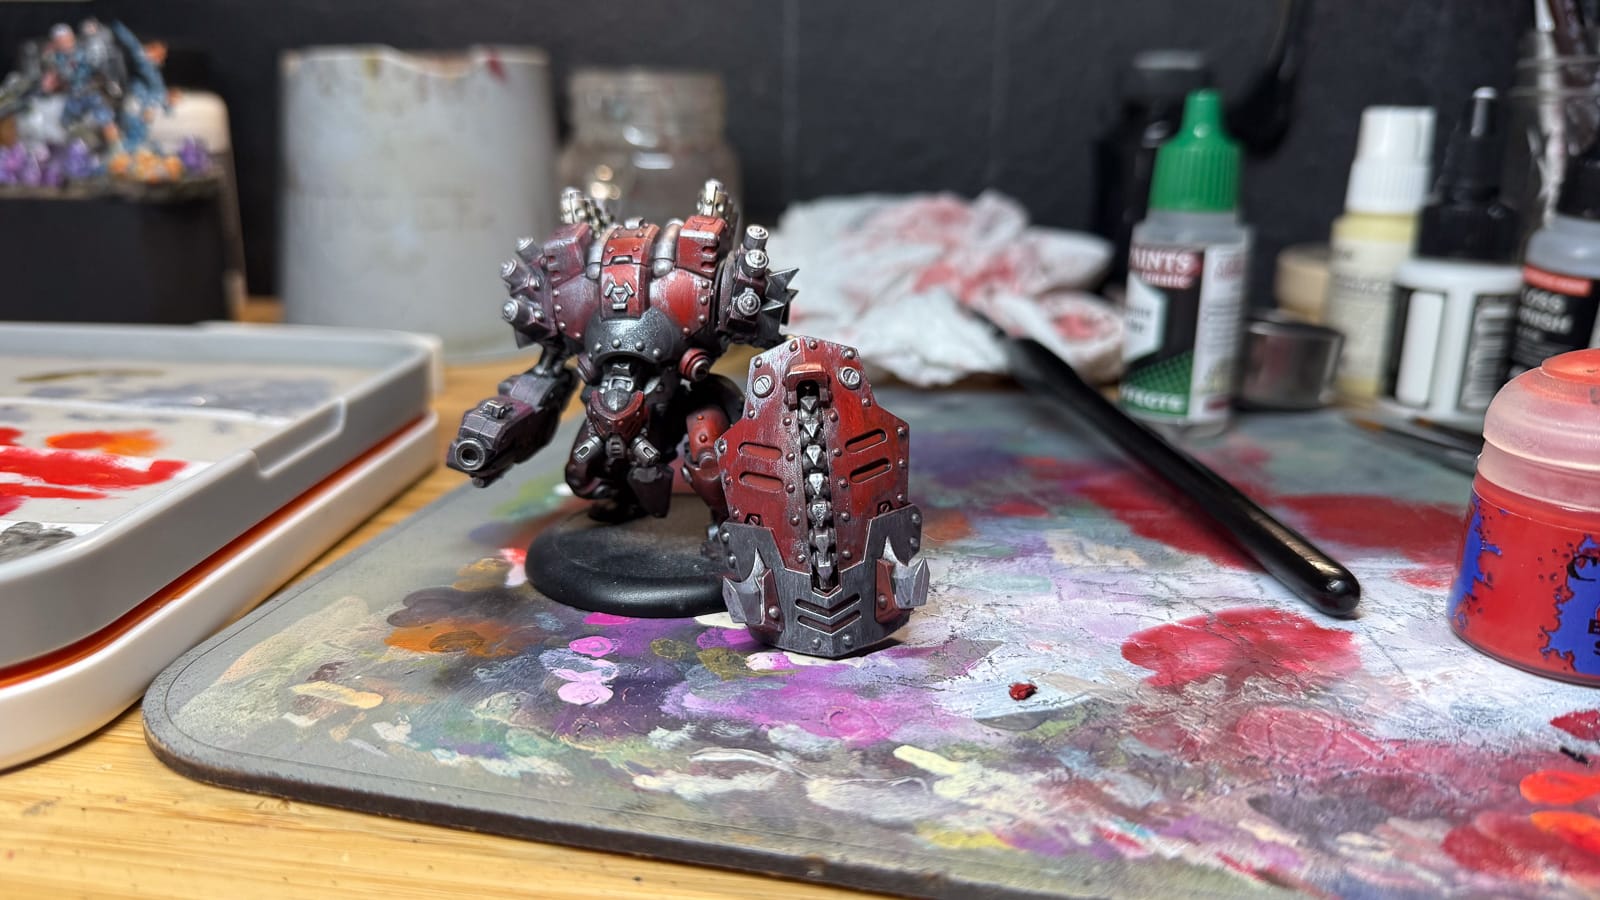
For our first model, the Khador Winter Korps Warjack, Razor, there’s a lot of angles and edges on this model, so I chose to Drybrush it. Drybrushing as a technique has 2 different methods that produce different results. Traditional drybrushing involves loading a square edged brush with paint, and wiping on a paper towel until you have removed a significant amount of painting medium (versus pigment). The end result is good for edges and angles, and because most of the medium is removed, you can get some sharp effects and a good texture. The other method, which I mainly used on this model, is the modern style of drybrushing, popularized by Artis Opus. We wrote a review for some modern drybrushes produced by Notts Hobbies, check it out.
Modern drybrushing involves the use of a texture palette and soft bristle brushes, sometimes referred to as Makeup brushes or Smudging brushes. This technique involves moistening the brush with a sponge, dipping the tip into the paint, and wiping most of it off on a textured surface, which doesn’t remove moisture from the paint. These results allow a painter to paint a broader surface, use stippling techniques, and to more easily create object source lighting (OSL) effects. The results can be brilliant and immediate.
In this photo, I took a Mephiston Red and used it to basecoat the model. This light layer works well with the zenithal, establishing where my highlight will go. And for that, I use Evil Suns Scarlet, which has a little bit of orange in it. This helps bring up the hue. It’s subtle, but more applications of the paint will bring a distinct result.
At this point, as I’m establishing base layers, I switch to a metallic for all of the metal parts of the model. Army Painter’s metallics fit the bill perfectly. Plate Mail Metal for the majority of the silver, and I mixed it with a little bit of Bronze to make a light bronze for the exhausts and bullets.
Next step, shadows and highlights. I reached into an old bag of tricks and hit the entire model with Nuln Oil, a black wash from GW. Then, I brought up highlights by using my highlight colors and base colors on particular areas of the model, once again thinking about where light hits the model. I also mixed black into my basecoat to paint some areas of the model a darker color.
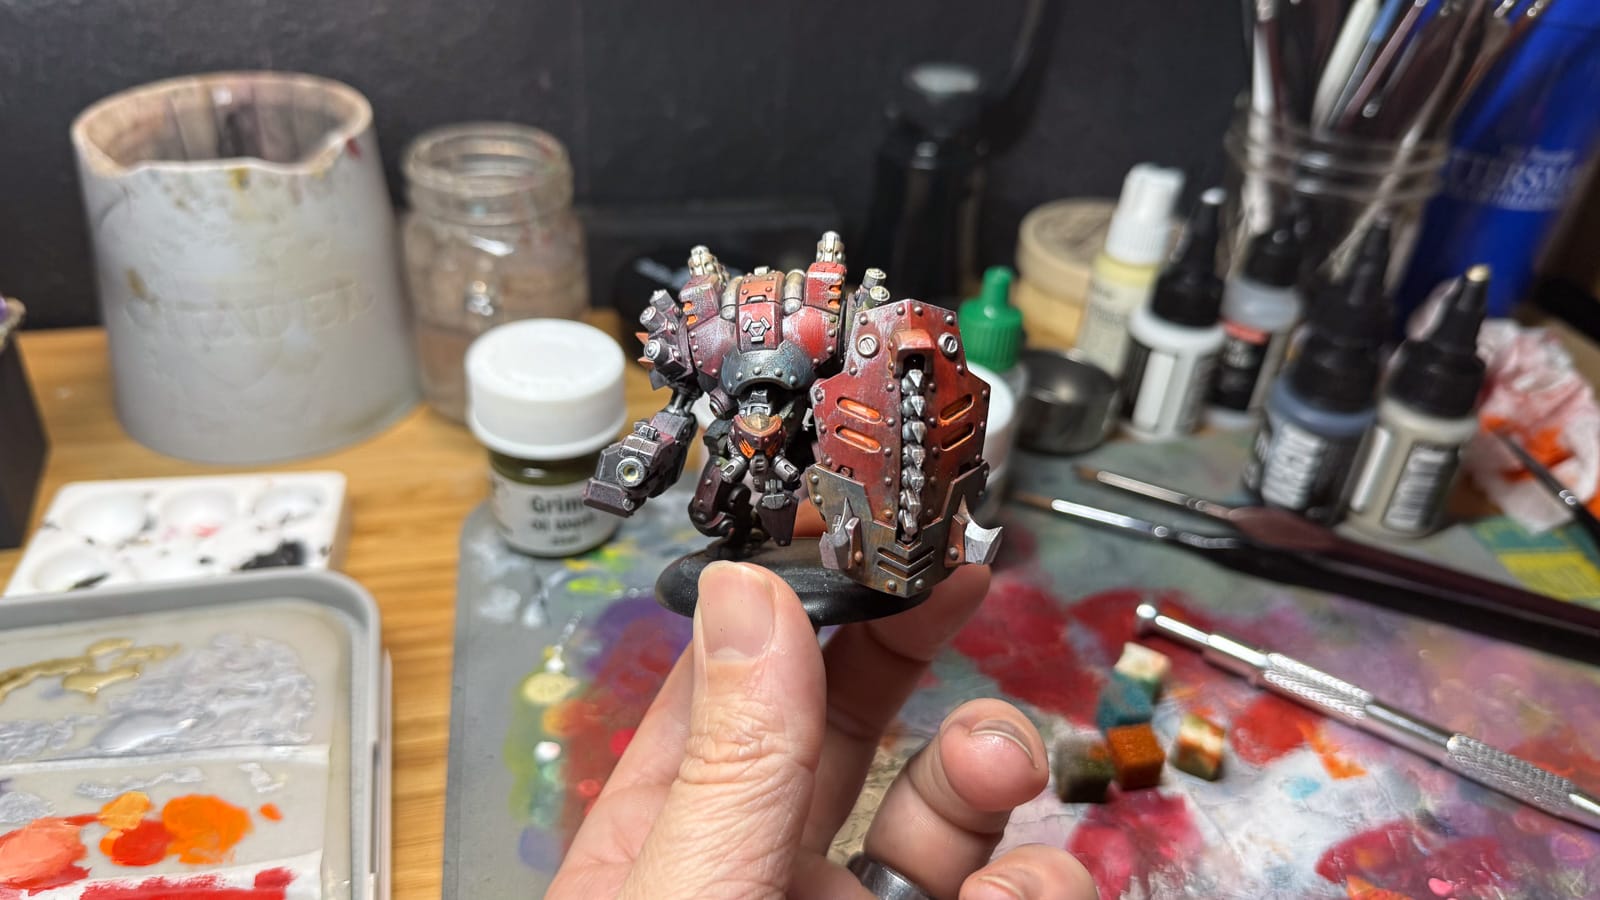
Happy enough, I busted out some weathering and special effects. I saw this as an opportunity to use the Weathering Set from Notts Hobbies, and the fluorescent paints from Lethal Shadows to bring some much needed grime and glow. The end result, which took about 6 hours from start to finish is a pretty solid model for the tabletop.
However, if I spent 6 hours per model, I’ll be 42 by the time I’m done.
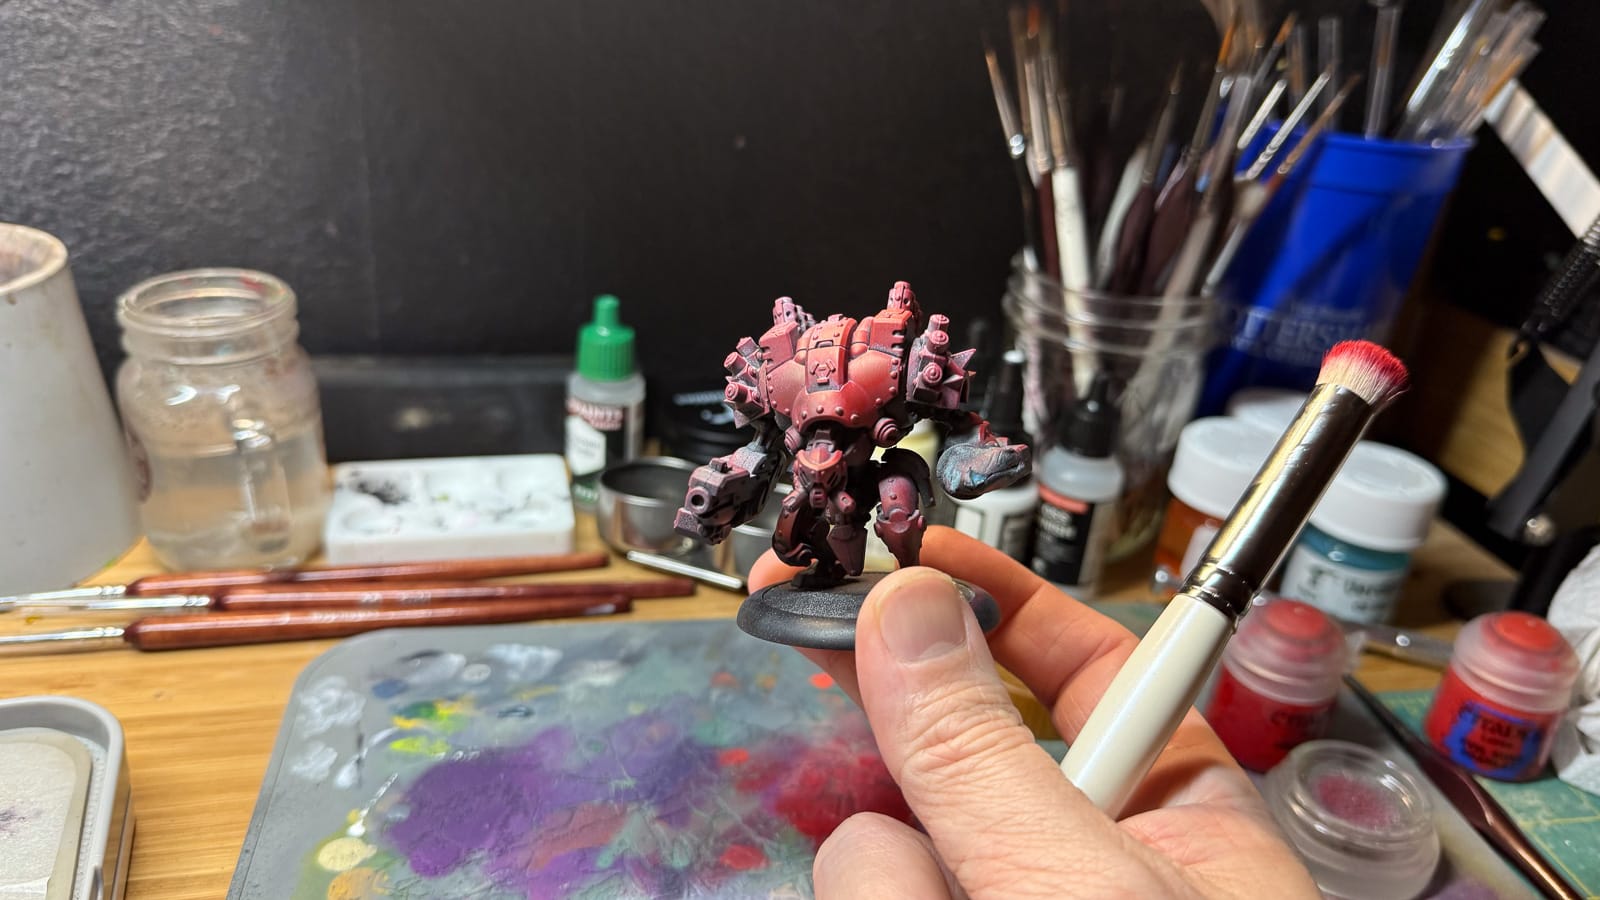
Method 2: Speed painting
Remember the Zenithal Highlighting? This technique will help you save a TON of time through the use of speed paints. Unlike traditional acrylics, speed paints are generally thinner which allows for a transparent paint. This means if you’ve established highlights on the model via zenithal, those angles and edges will show up through translucent paints.

On one of The Hounds, I firstly thinned my basecoat paint down to a slightly above wash consistency. This resulted in the ability to apply multiple thin layers and really control where I wanted paint to go. For the leathers, I used a contrast paint from GW, Snakebite Leather, which gave me a dark leather finish, literally one layer and done. For all the metallics, I reached for the Army Painter Speedpaint Metallics, which require just 1 layer to have a perfect metallic finish. The gun, bullets, facemask, armor plating, elements on the shield…lots of little place to place metallics and call it done!
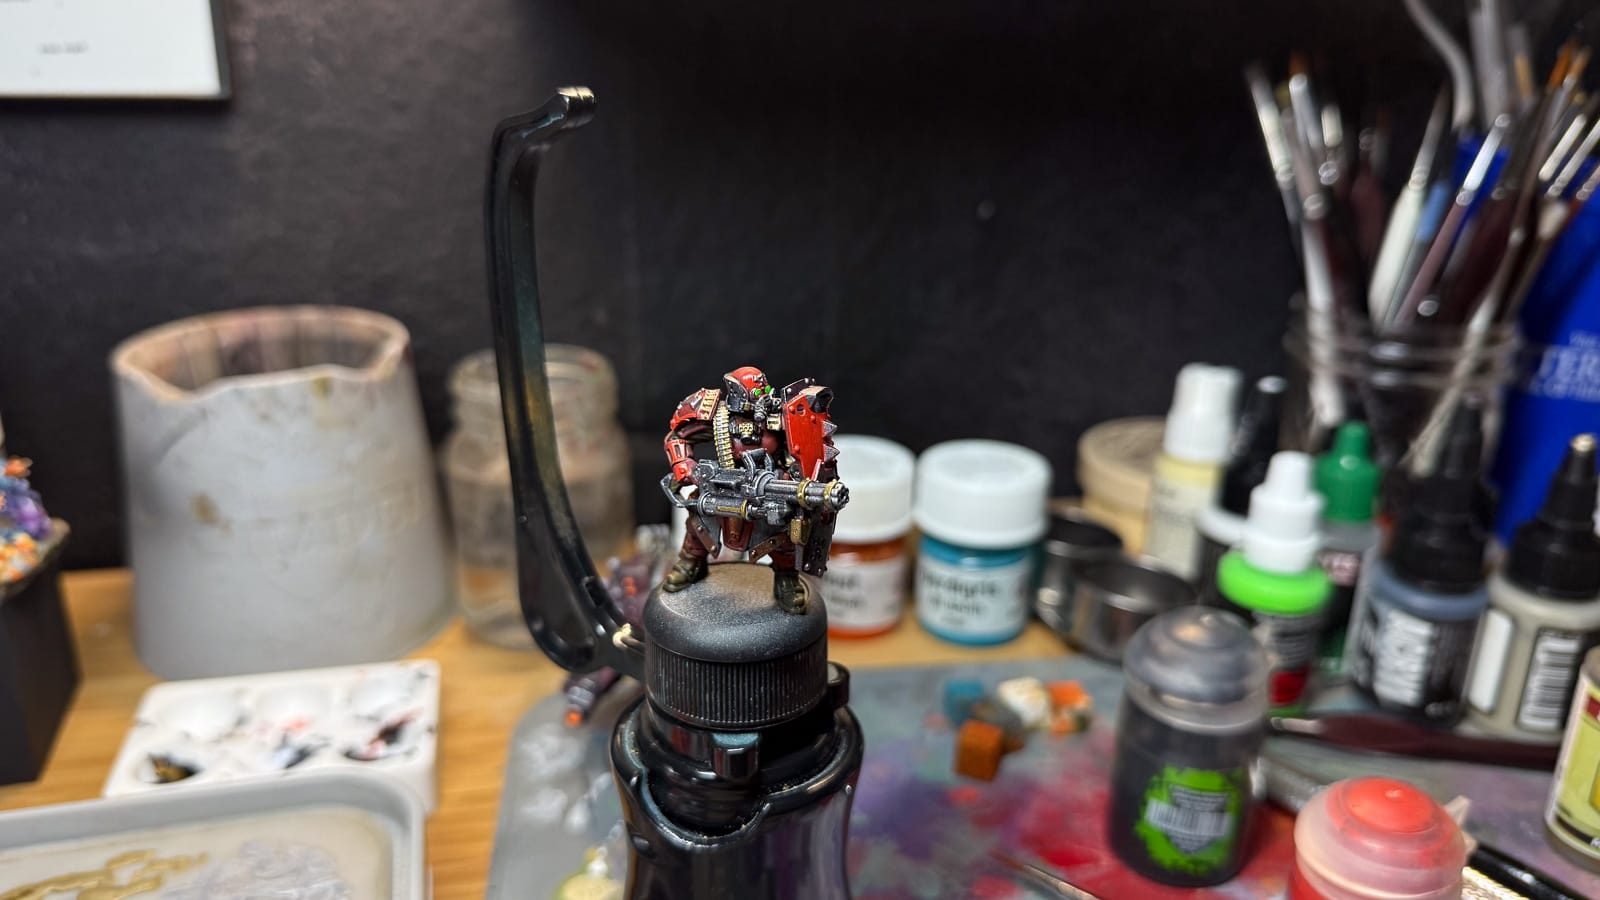
Some tips and tricks I used here involved the use of gloss varnish on the helmet to help maintain a sense of shine and highlight, and mixing and matching various metallics on the weapon to help create some contrast.
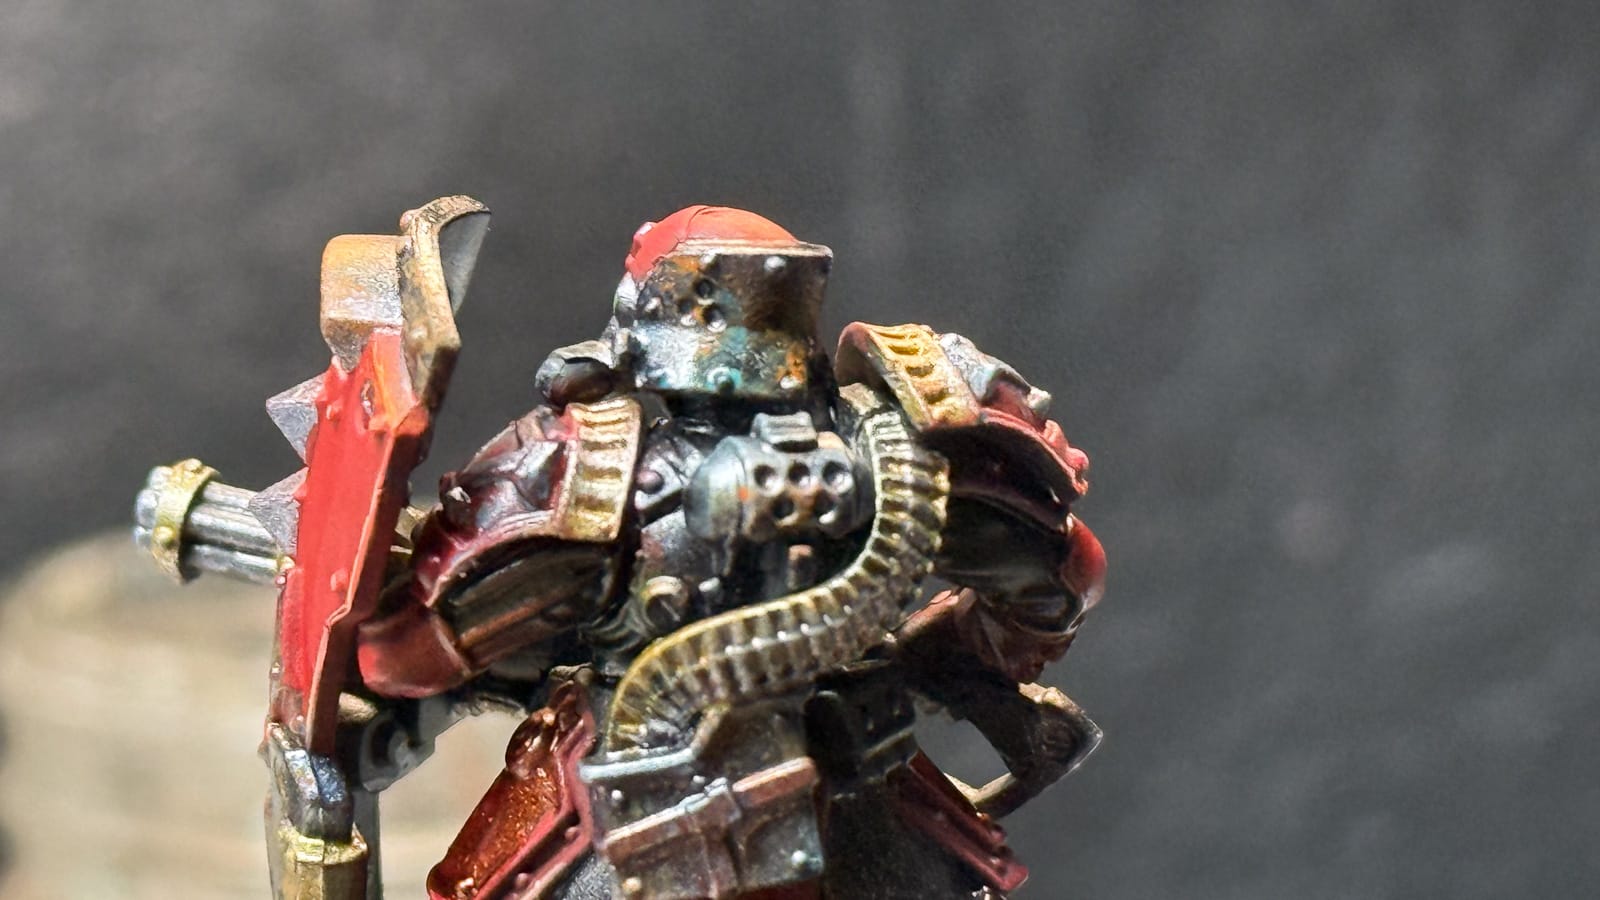
Lastly, I busted out the weather and fluors again, and the end result is a table ready Hound, from paint to finished in under 2 hours.
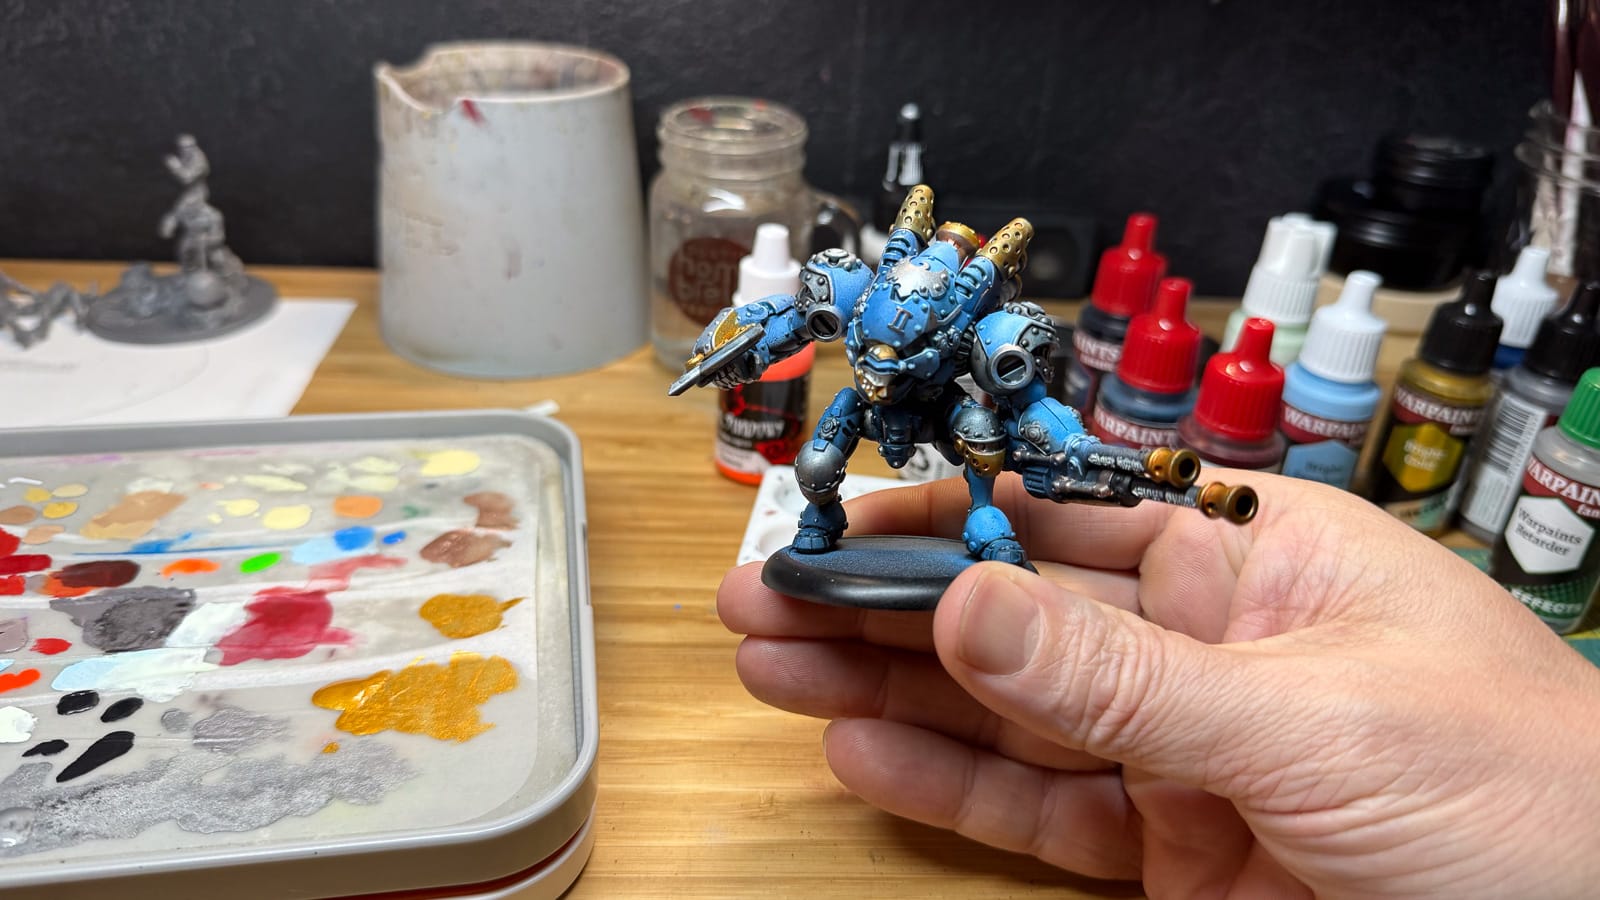
Method 3: Airbrushing
Airbrushing is a tricky thing. Airbrushes can dramatically decrease the time spent on tasks like priming, basecoating, and initial highlight place, along with adding special effects like OSL to a model, tinting tufts, adding foam elements with water effects… however, if your brush isn’t calibrated correctly, you’re going to spend more time cleaning, dissembling, and trying to solve problems with the airbrush vs. actually painting.
The latter is what happened to me, but I was able to establish some decent colors on the Cygnar Storm Legion warjack, Deuce.
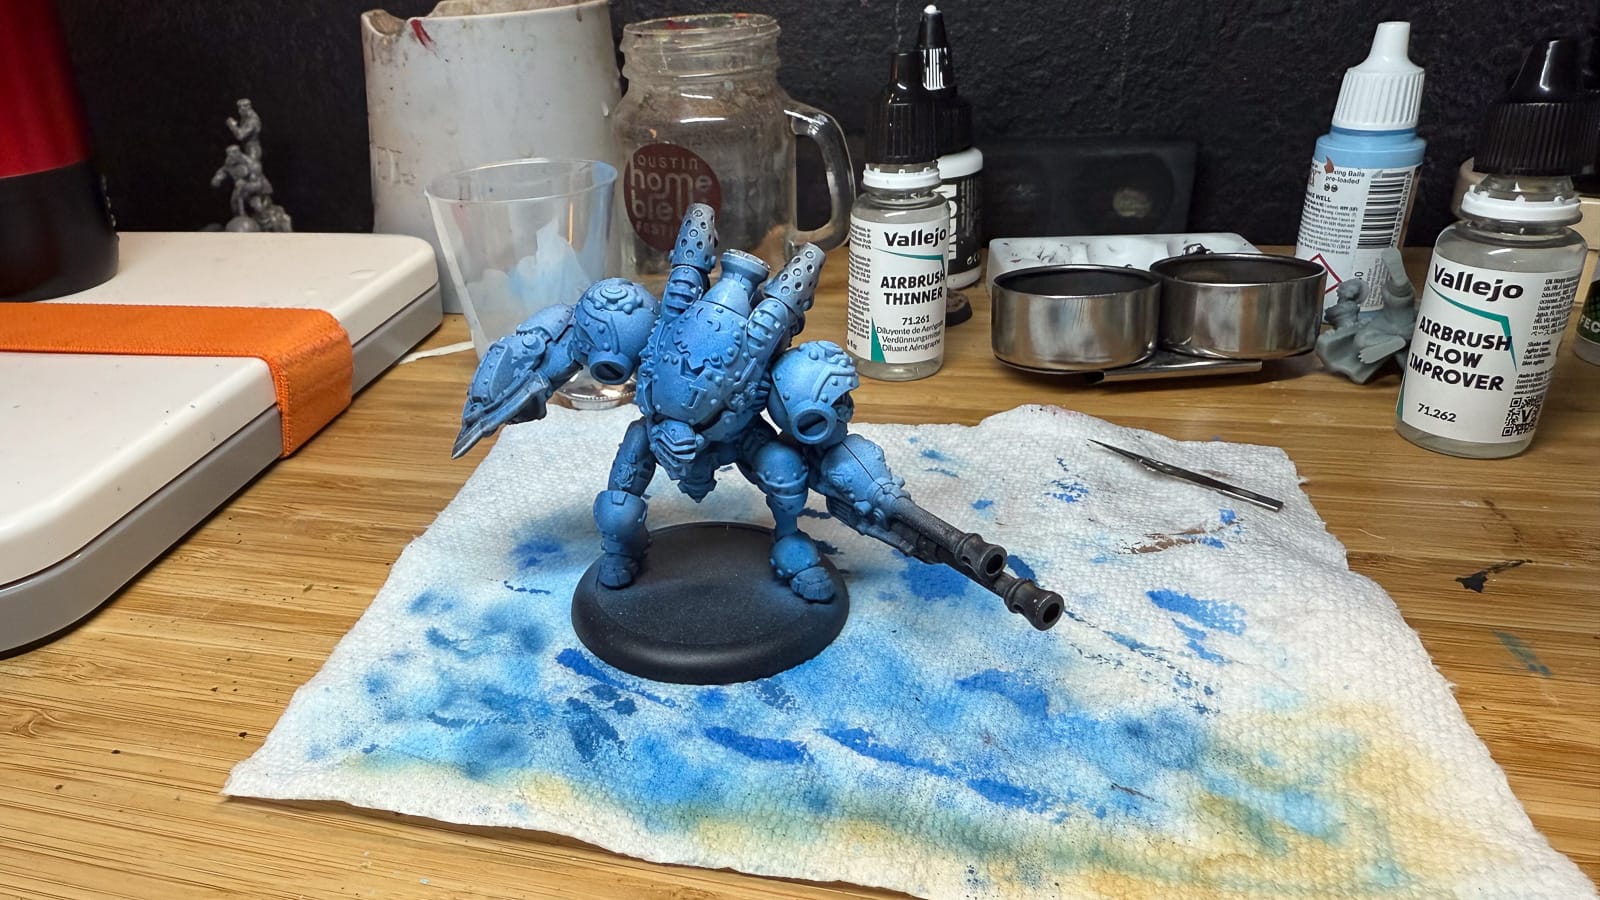
In the photo above, you can see that I started with a darker tone and then much like the drybrushing technique, I focused a lighter blue on the highlights. However, getting to that point, I dealt with splattering from the airbrush. This is what happens when paint dries on the needle, or in my case, was drying within the nozzle of the airbrush.
This resulted in a lot of cleaning sessions and experimentation. However, after putting together a mixture that was mostly 3:1 of thinner to paint, using a humidity trap on the air, and constantly swabbing the needle with a cleaner soaked cotton swab, I was able to lay down a smooth coat of a darker color and a mid tone.
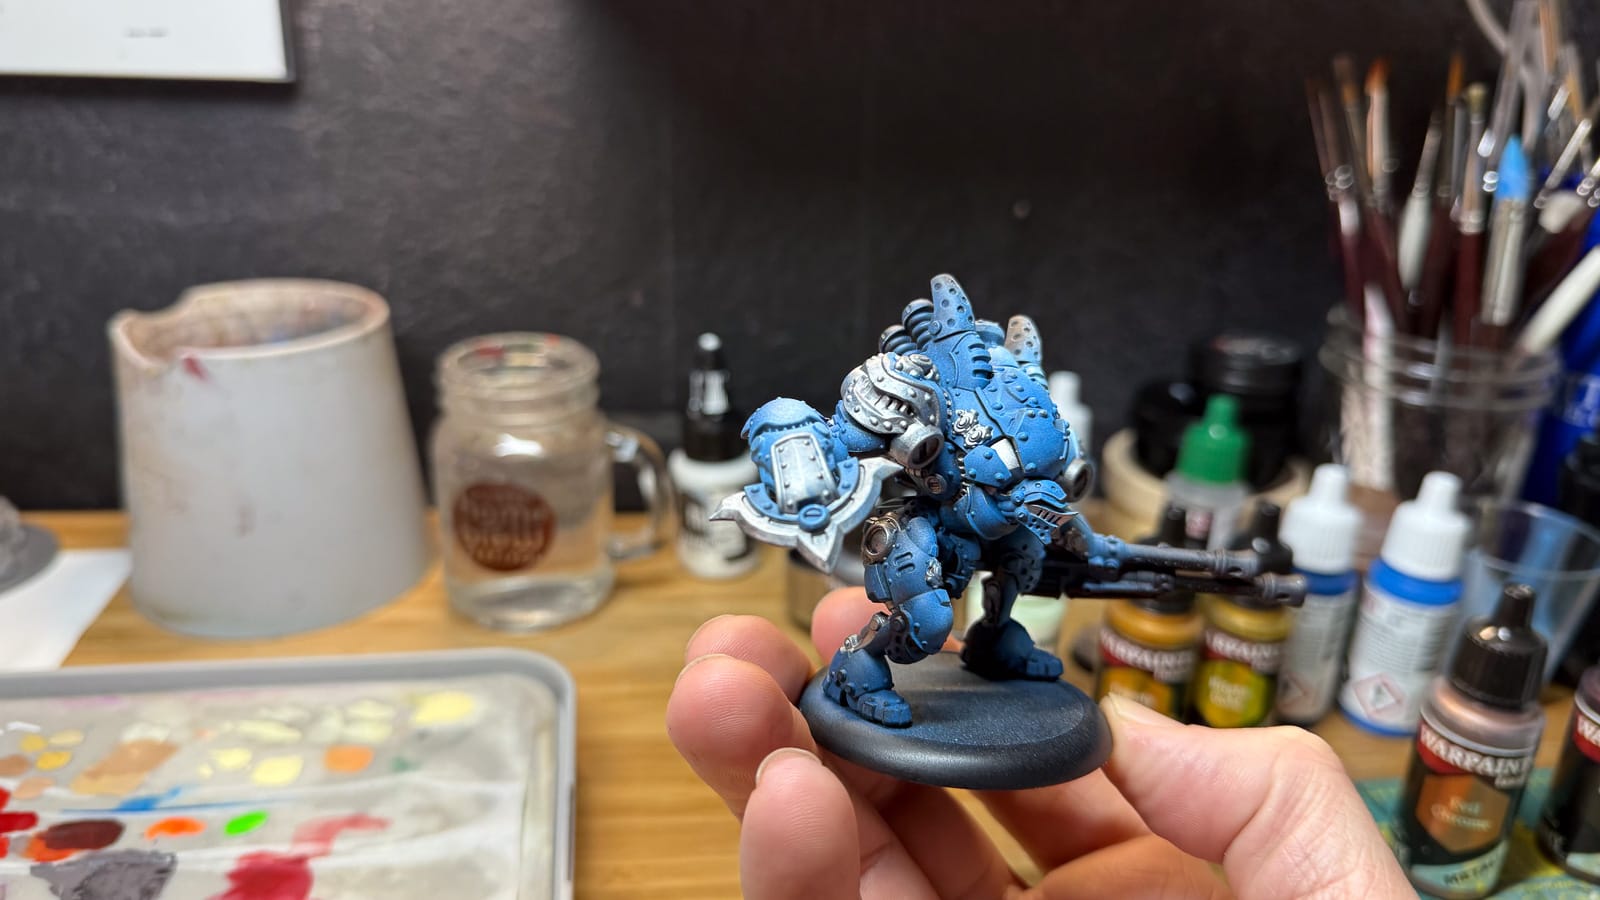
After some more work, I was able to put a lighter tone through the airbrush, and my initial layering was complete. Focusing on traditional layering and drybrushing techniques, I’m able to bring out a decent paint job. In particular, using Army Painter metallics + their washes results in some great outcomes, and the application of something like AK’s Paneliner, you can bring in some depth to the darker areas of the model.
Counting my cleaning issues aside, this took a few days. An airbrush is great for army painting, but for doing a one off like I did isn’t a good use of an airbrush. I’m still trying to figure out what my specific issue is, but don’t let this stop you from trying it out!
Wrap Up
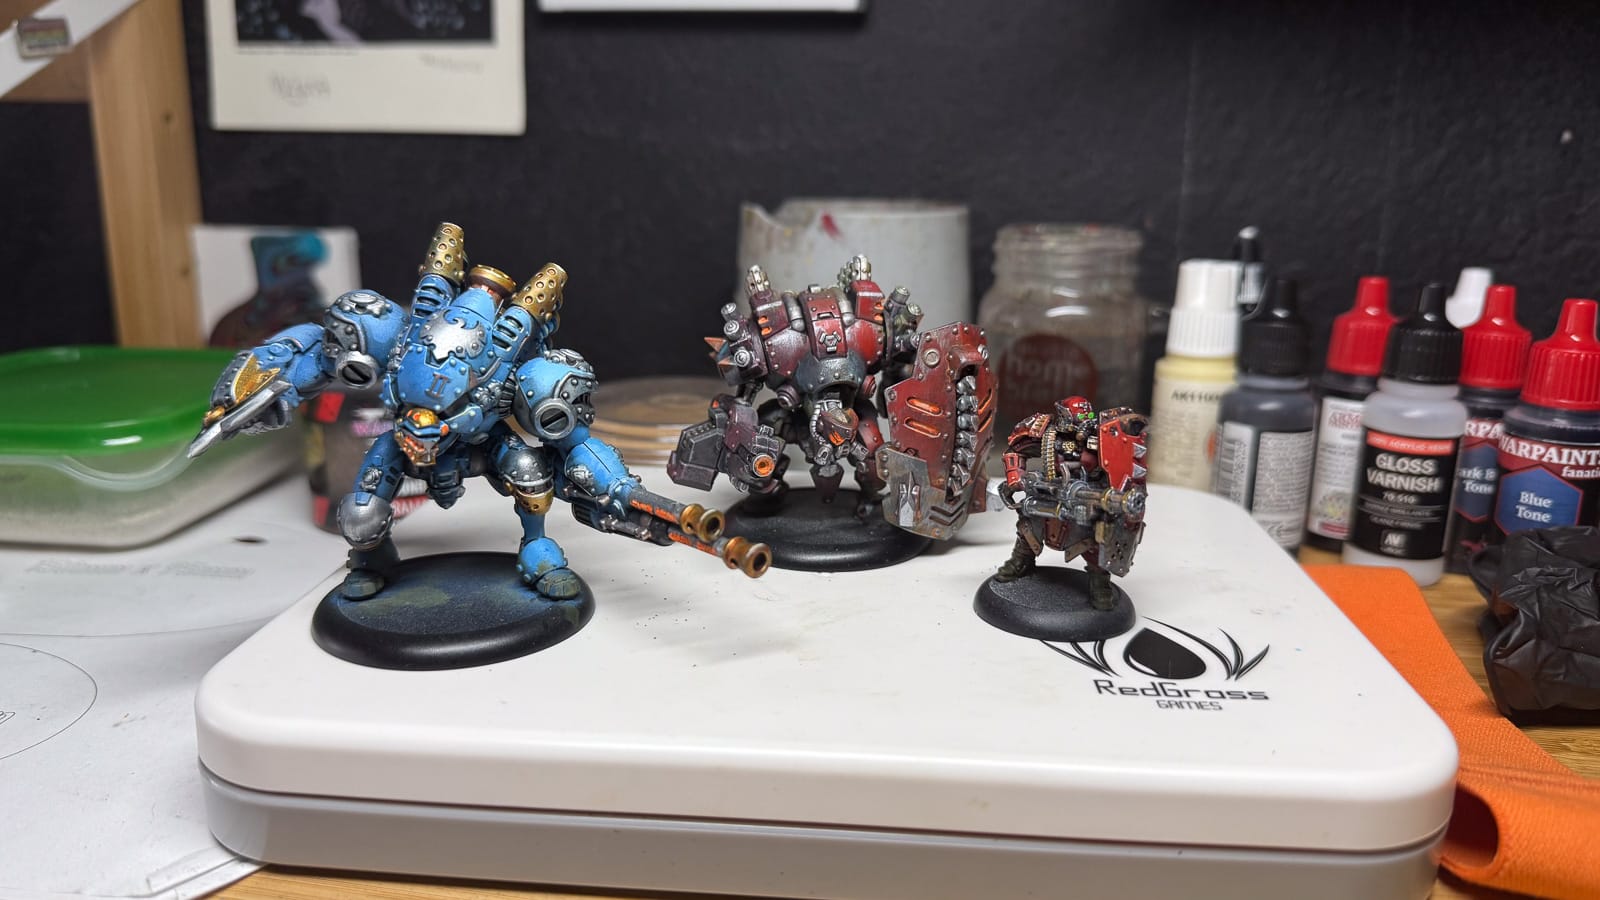
At the end of the day, there’s a lot of ways to paint models. It’s ultimately up to you, the hobbyist, to decide which is best for you. For me, it’s going to be a combination of drybrushing all of the base tones, then switching to layering for highlights, along with liberal use of metallics.
And with that, we’ve painted some minis! Next step is to learn Warmachine and play a game! In the next 3rd and final part of this series, I’ll jump into what it takes to really get into Warmachine!