
Let’s speak plainly here – there are a lot of cameras out there vying for your attention. They each have their own little niche, either offering integrated lights, higher resolutions, RGB, or just focusing on integration with various capture software. Ultimately if you put video captured from each of them side by side, you’ll struggle to identify which is which. You’d need something unprecedented to stand out above the crowd. And found one we did when we got our hands on the OBSBot Tiny 2 Lite. As we all collectively roll our eyes when a company says their product is AI-powered, it truly is the heart of this camera. Don’t believe me? Read on and I’ll make you a believer.
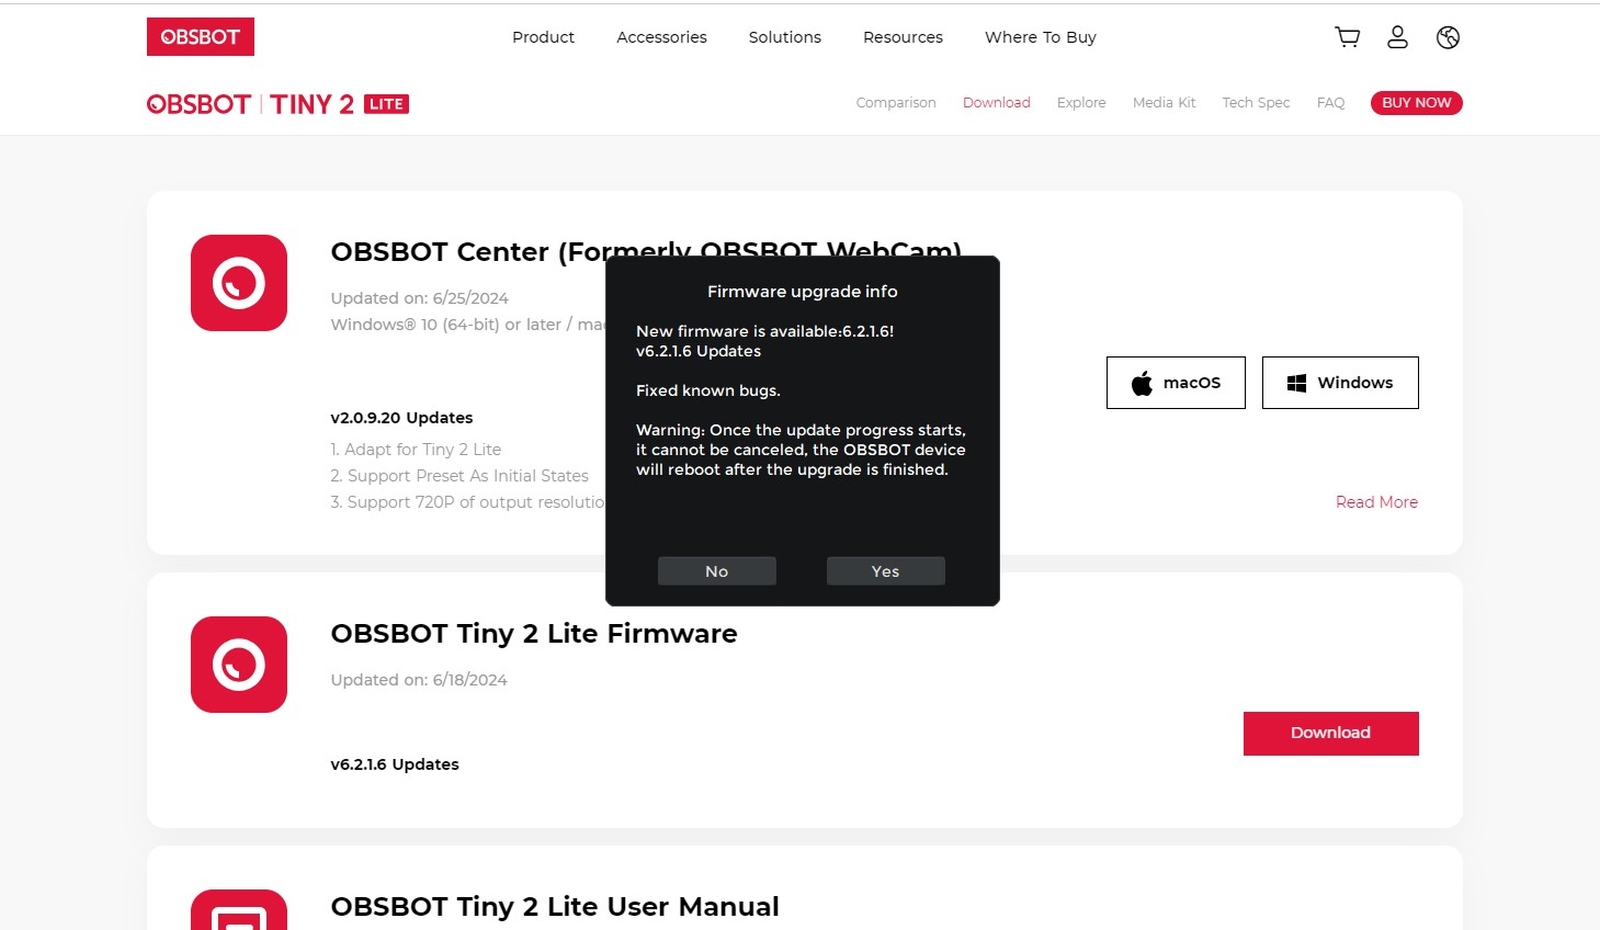
The box for the OBSBot Tiny 2 Lite is, as the name suggests, tiny. There’s not a ton in there, and that’s ok. You’ve got the camera, of course, as well as a USB-C cable, and a USB-C to USB-A adapter to ensure you can use it in any application – something that would become important if your laptop doesn’t have extra ports and you’ve taken the camera with you on the road. The last things are the user manual and the warranty card. Two QR codes provide a link to the site for any firmware updates (there was one at the time of writing), and the OBSBot software itself. While you don’t necessarily need that software for capture in something like OBS or Teams, there’s some incredible features inside – grab it. Trust me. Let’s take a look at the specs on the OBSBot Tiny 2 Lite before we get rolling.

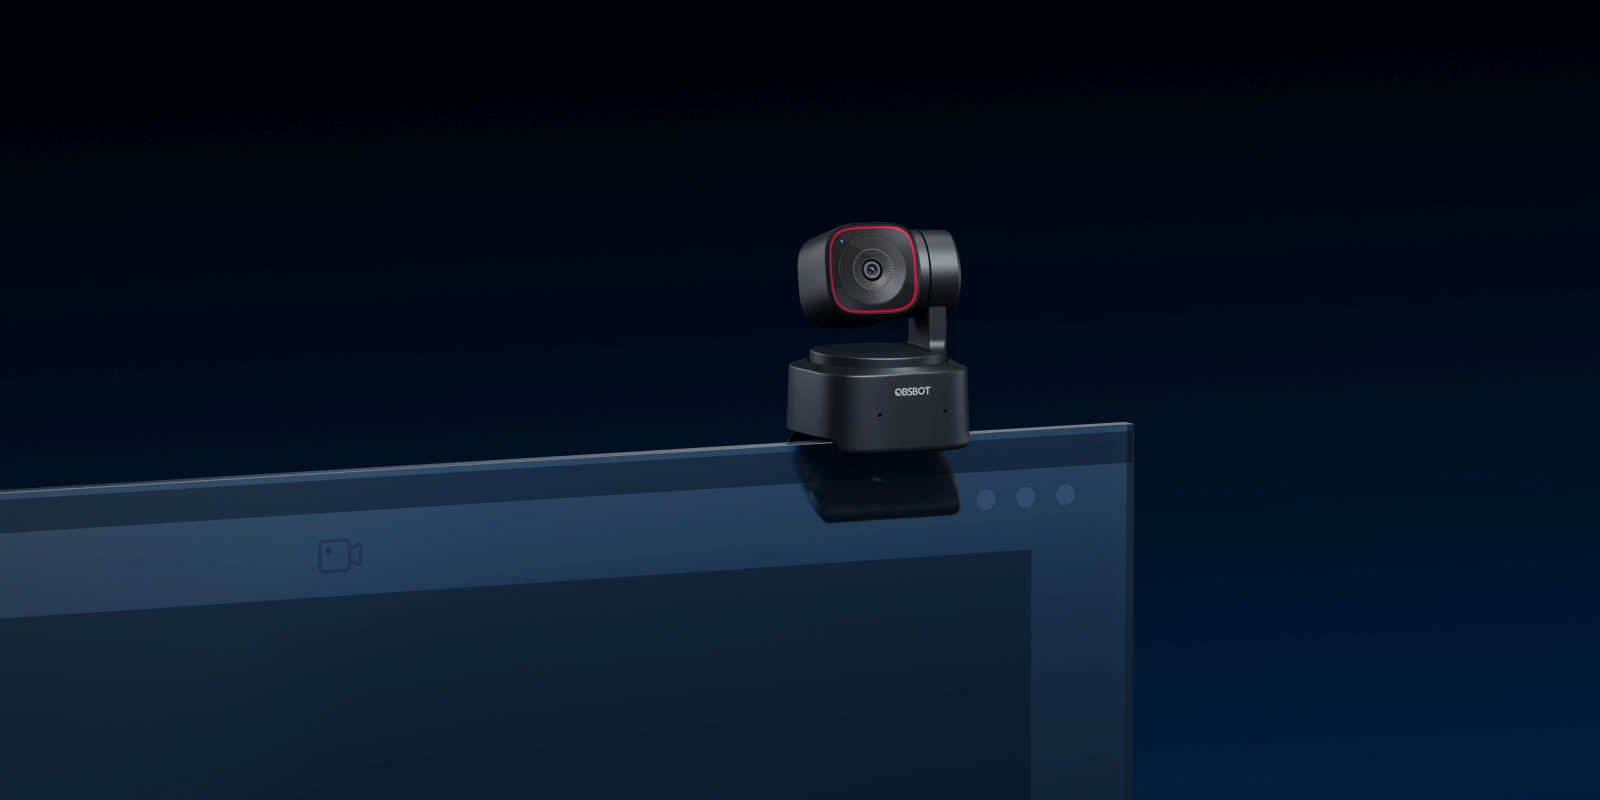
First off, the camera is tiny, as the name suggests. It’s 48mm by 46mm by 64mm tall, or expressed in inches it’s 1.8” by 1.7” by 2.5” tall, weighing just 91 grams. It packs a 48 megapixel camera with a ½” CMOS image sensor and a f/1.8 aperture into that tiny body. It has a non-removable gimbal that it uses for smooth movement and tracking, and it’s able to spin around 360 degrees, tilting up to 150 degrees and with a 90 degree tilt. It can also spin 120 degrees per second, and will operate on Windows 10 or later, or macOS 11 or later. It has a standard ¼” thread, meaning you can easily throw it onto a standard tripod, or set it on your desk or the top of a flatscreen monitor without a problem. To help it stay on a laptop or monitor, the bottom has a hinged base to clamp it in place.
There’s very little to talk about in a camera, right? Well, actually, there’s more than you might think. Yes, it has the usual things – it’s got a 4K lens, and it captures audio if you want to use that over an external solution. It has the ability to adjust a number of sliders to at least attempt to make your sleep-deprived self not look like a corpse, and you can blur the background. Nothing new under the sun. That said, when you fire up the OBSBot software and you’ll find that there’s plenty.

The first decision you’ll have to make is whether you want to run in 16:9 or 9:16 aspect ratio and orientation. Why? Well, 16:9 is widescreen, and that’s going to be your typical use case for streaming on YouTube, Zoom meetings, and really just about any other use case other than content built for mobile. That 9:16 is the correct aspect ratio for things like TikTok, YouTube shorts, and other mobile video platforms. You can change this in settings, so don’t get too bent around the axle – on with the show.
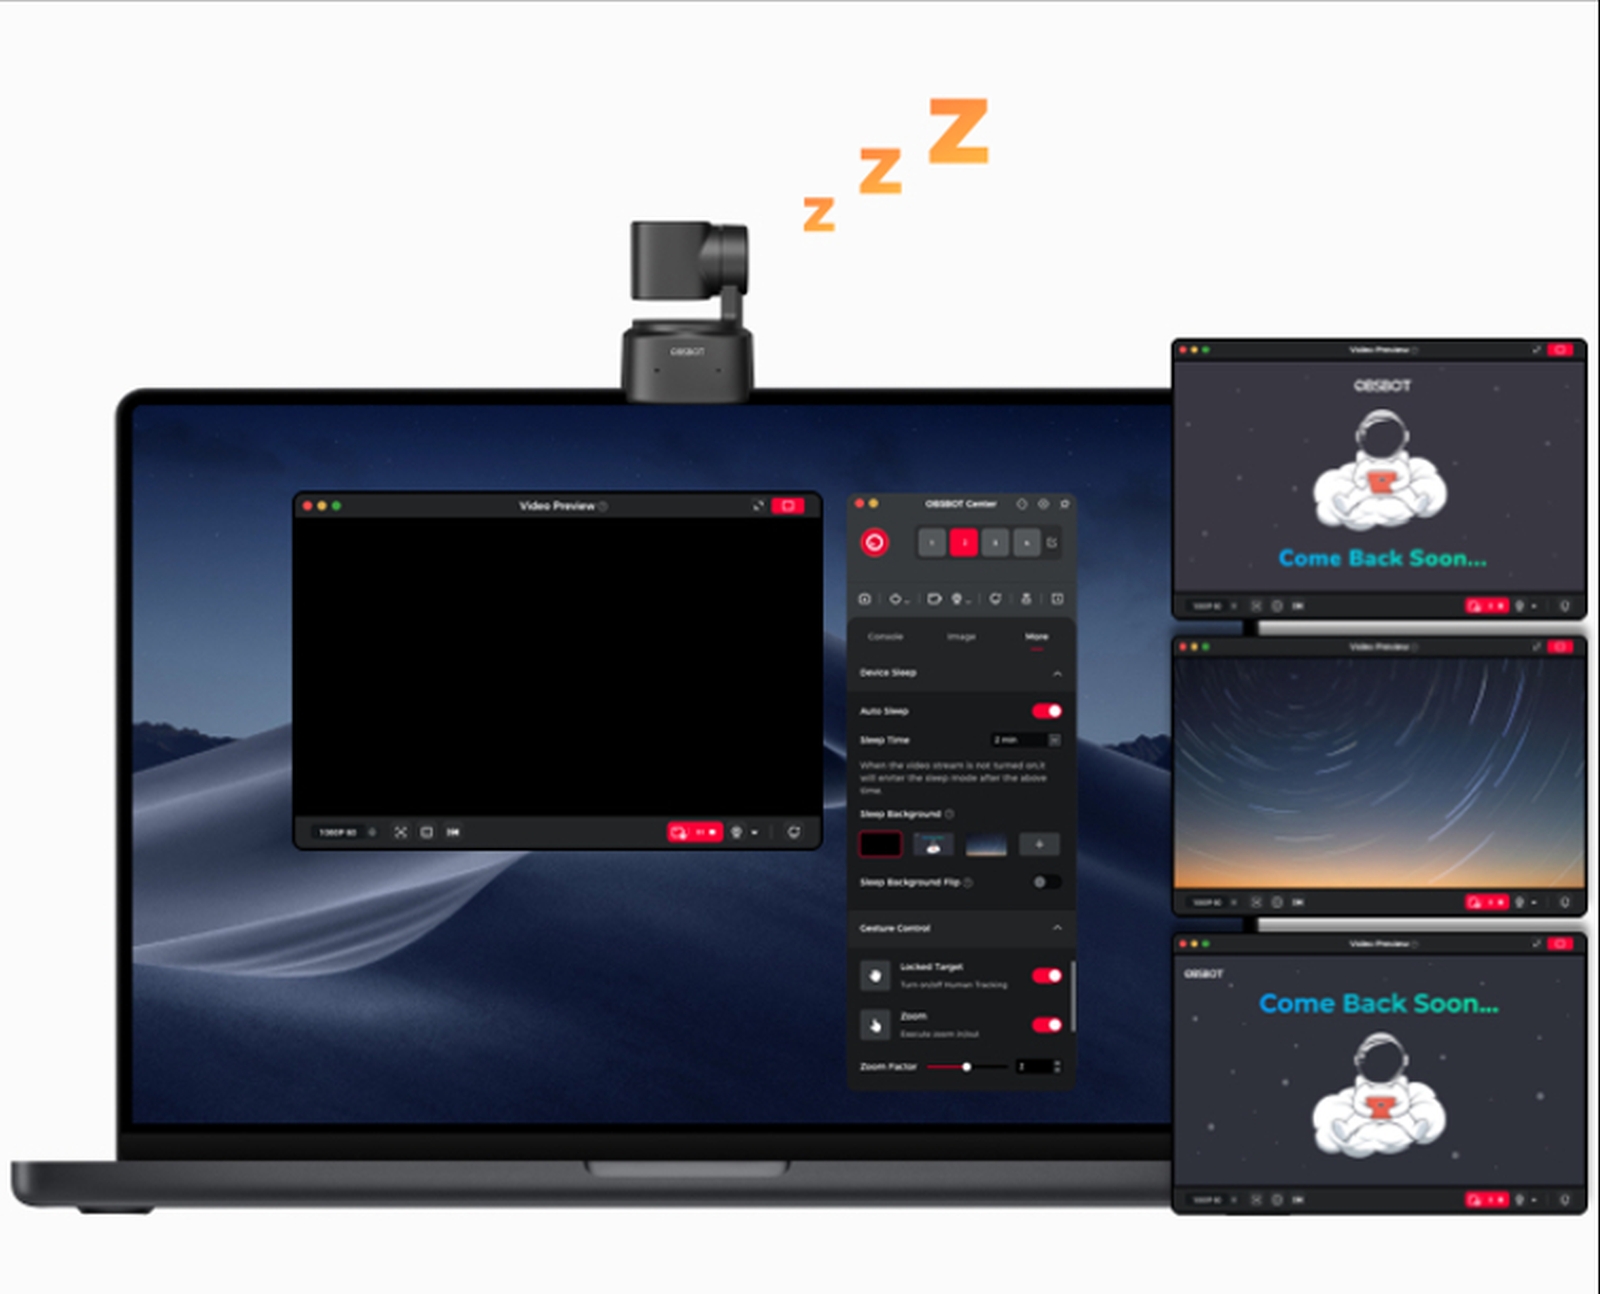
Inside the software you’ll see that the message “Device is sleeping”. Looking at your camera, this is immediately evident as the camera is pointed straight down at the base. This is fantastic as it’s very clear if the camera is operating or not without worrying about a sliding eye cover or a light – privacy confirmation at a glance. Tapping the Resume key causes it to spring to life with zero latency.
Unlike most software that you can use with a web camera, there’s an absolutely eye-watering number of options well beyond the typical sliders for brightness, contrast, hue, saturation, and the like (we’ve all seen the standard Windows property box that every camera relies upon). There’s a lot to cover, so we’ll start with the image quality tab. Here you can enable HDR, set auto-focus or not, and determine what the camera is looking at for focus (either a global focus, or one focused on your face). Next up you can set your camera’s exposure (turning off auto lets you set shutter speeds all the way up to 1/60, and your ISO from 100 to 6400), and the same mode to decide whether it does so globally or focused on your face. A small slider allows you to compensate up or down for ISO in very small increments to ensure you’ll look your best. There’s plenty of other ways to achieve that, but we’ll get to that when we get to the “beauty” settings”
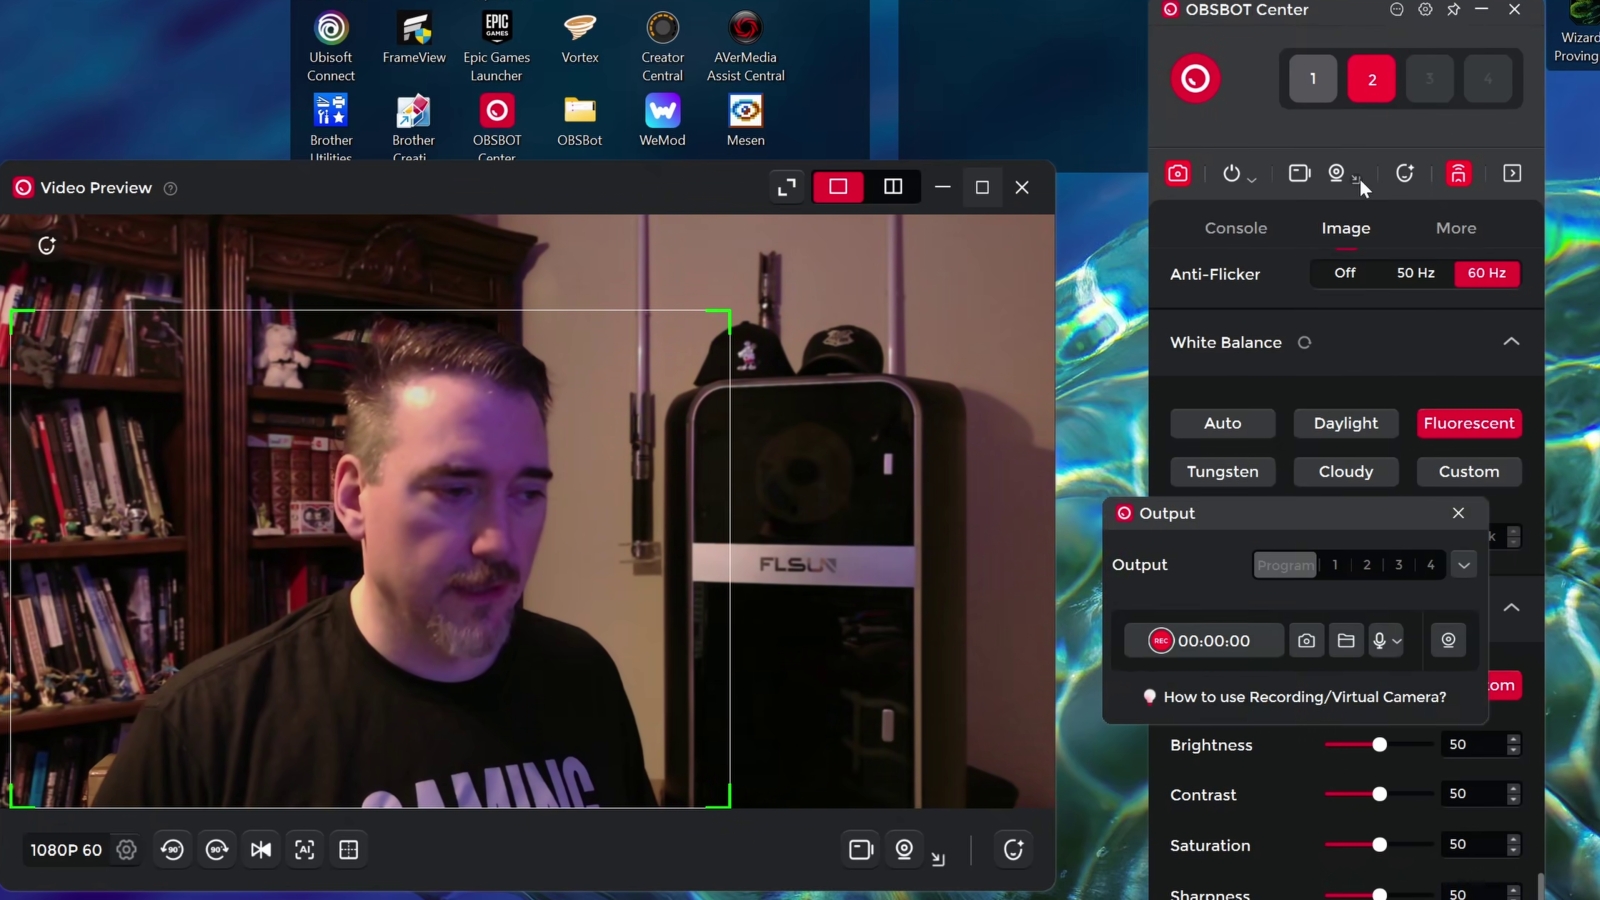
If you’ve got an LED-based light to provide brightness in your space, you may have run into a flickering issue in your video. That’d be because cameras commonly capture at the same frequency as those LEDs. There’s a toggle here to adjust for 60Hz (most US-based cameras) and 50Hz (hello rest of the world), or you can turn it off entirely if you’ve got your own compensation methods. White balance adjustments are also here, as are contrast, saturation, sharpness, and hue, allowing you to tweak each or also set these automatically.
Clicking over to the Console tab you’ll find a wealth of control options for the camera and its focus. Here’s where the AI bits shine. Human tracking via AI isn’t new, but I’ve rarely seen it outside of expensive tracking systems from the likes of Tilta, or the most expensive PTZ cameras (Pan-Tilt-Zoom cameras – the ones you’ll find tracking you in office conference rooms). Here you’ll find buttons that say Standard, Motion, Normal Tracking, Upper Body, and Close-Up. Standard mode provides a smooth tracking good enough to keep the camera trained on that guy who likes to pace back and forth during meetings. Motion mode aims to catch your whole body, and aims to catch things like dancing for you Just Dance players. From here you’ve got three additional toggles that change the way those two speed settings operate.
Normal tracking is the standard mode and it just tries to keep you in frame in an intelligent way, whether you’re close or far away. Upper Body is more likely what you’ll be using most of the time, and it’s very responsive in trying to keep you framed correctly, so if you’re working in sweatpants, the OBSBot Tiny 2 Lite won’t rat you out. Close-up, as the name suggests, is going to try to punch in a little bit closer, keeping your face framed. I have to say, it’s the only setting I can’t recommend as Close-up seems to have a great degree of trouble staying at the same zoom level, instead zooming in and out near constantly.
If the camera does lose track of you, which can happen if you move particularly fast out of frame, the light on the camera will switch from blue to a yellow color. When you are back near the camera, most of the time it’ll lock back onto your face and settle right back into where you expect it to be. If it doesn’t, simply wave at it and it’ll lock back on and get you back in frame based on your settings.
Below the Preset settings (one moment on those) is a “View and Gimbal” section. Here you have a joystick type control gimbal that allows you to move the camera around in a full 360 degree arc (there are no stops in the rotation), as well as adjusting the zoom all the way up to 4X. There are buttons to snap to wide, medium, or narrow, as well as a reset to get back to 1X if you want to do this in a more predictable manner.
Back to those three presets, here’s where you can really make some magic happen, especially if you are shooting your video solo. More often than not, you’ve got a few spots prepared for what you want to shoot, with your lighting already ready and your background prepared. With this software you can create up to three presets that you can snap to with a single click of a button. Moreover, you can go into advanced settings and adjust every single setting I’ve talked about in the last several paragraphs, from AI tracking to color saturation and white balance. If one of your presets is a television, this is CRUCIAL as normally the camera would have to adjust – you can dial that in instead and snap to that position with the right settings already ready to go. The move between them is very smooth, so it won’t make your users complain about the movement.
The last tab in this first section is “More” and in it you’ll find some adjustments for the sleep state, and you can even upload your own custom image to display when the camera is down – handy if you need a “Please Stand By” before you start a broadcast. It’s in here that you’ll also find your gesture controls.
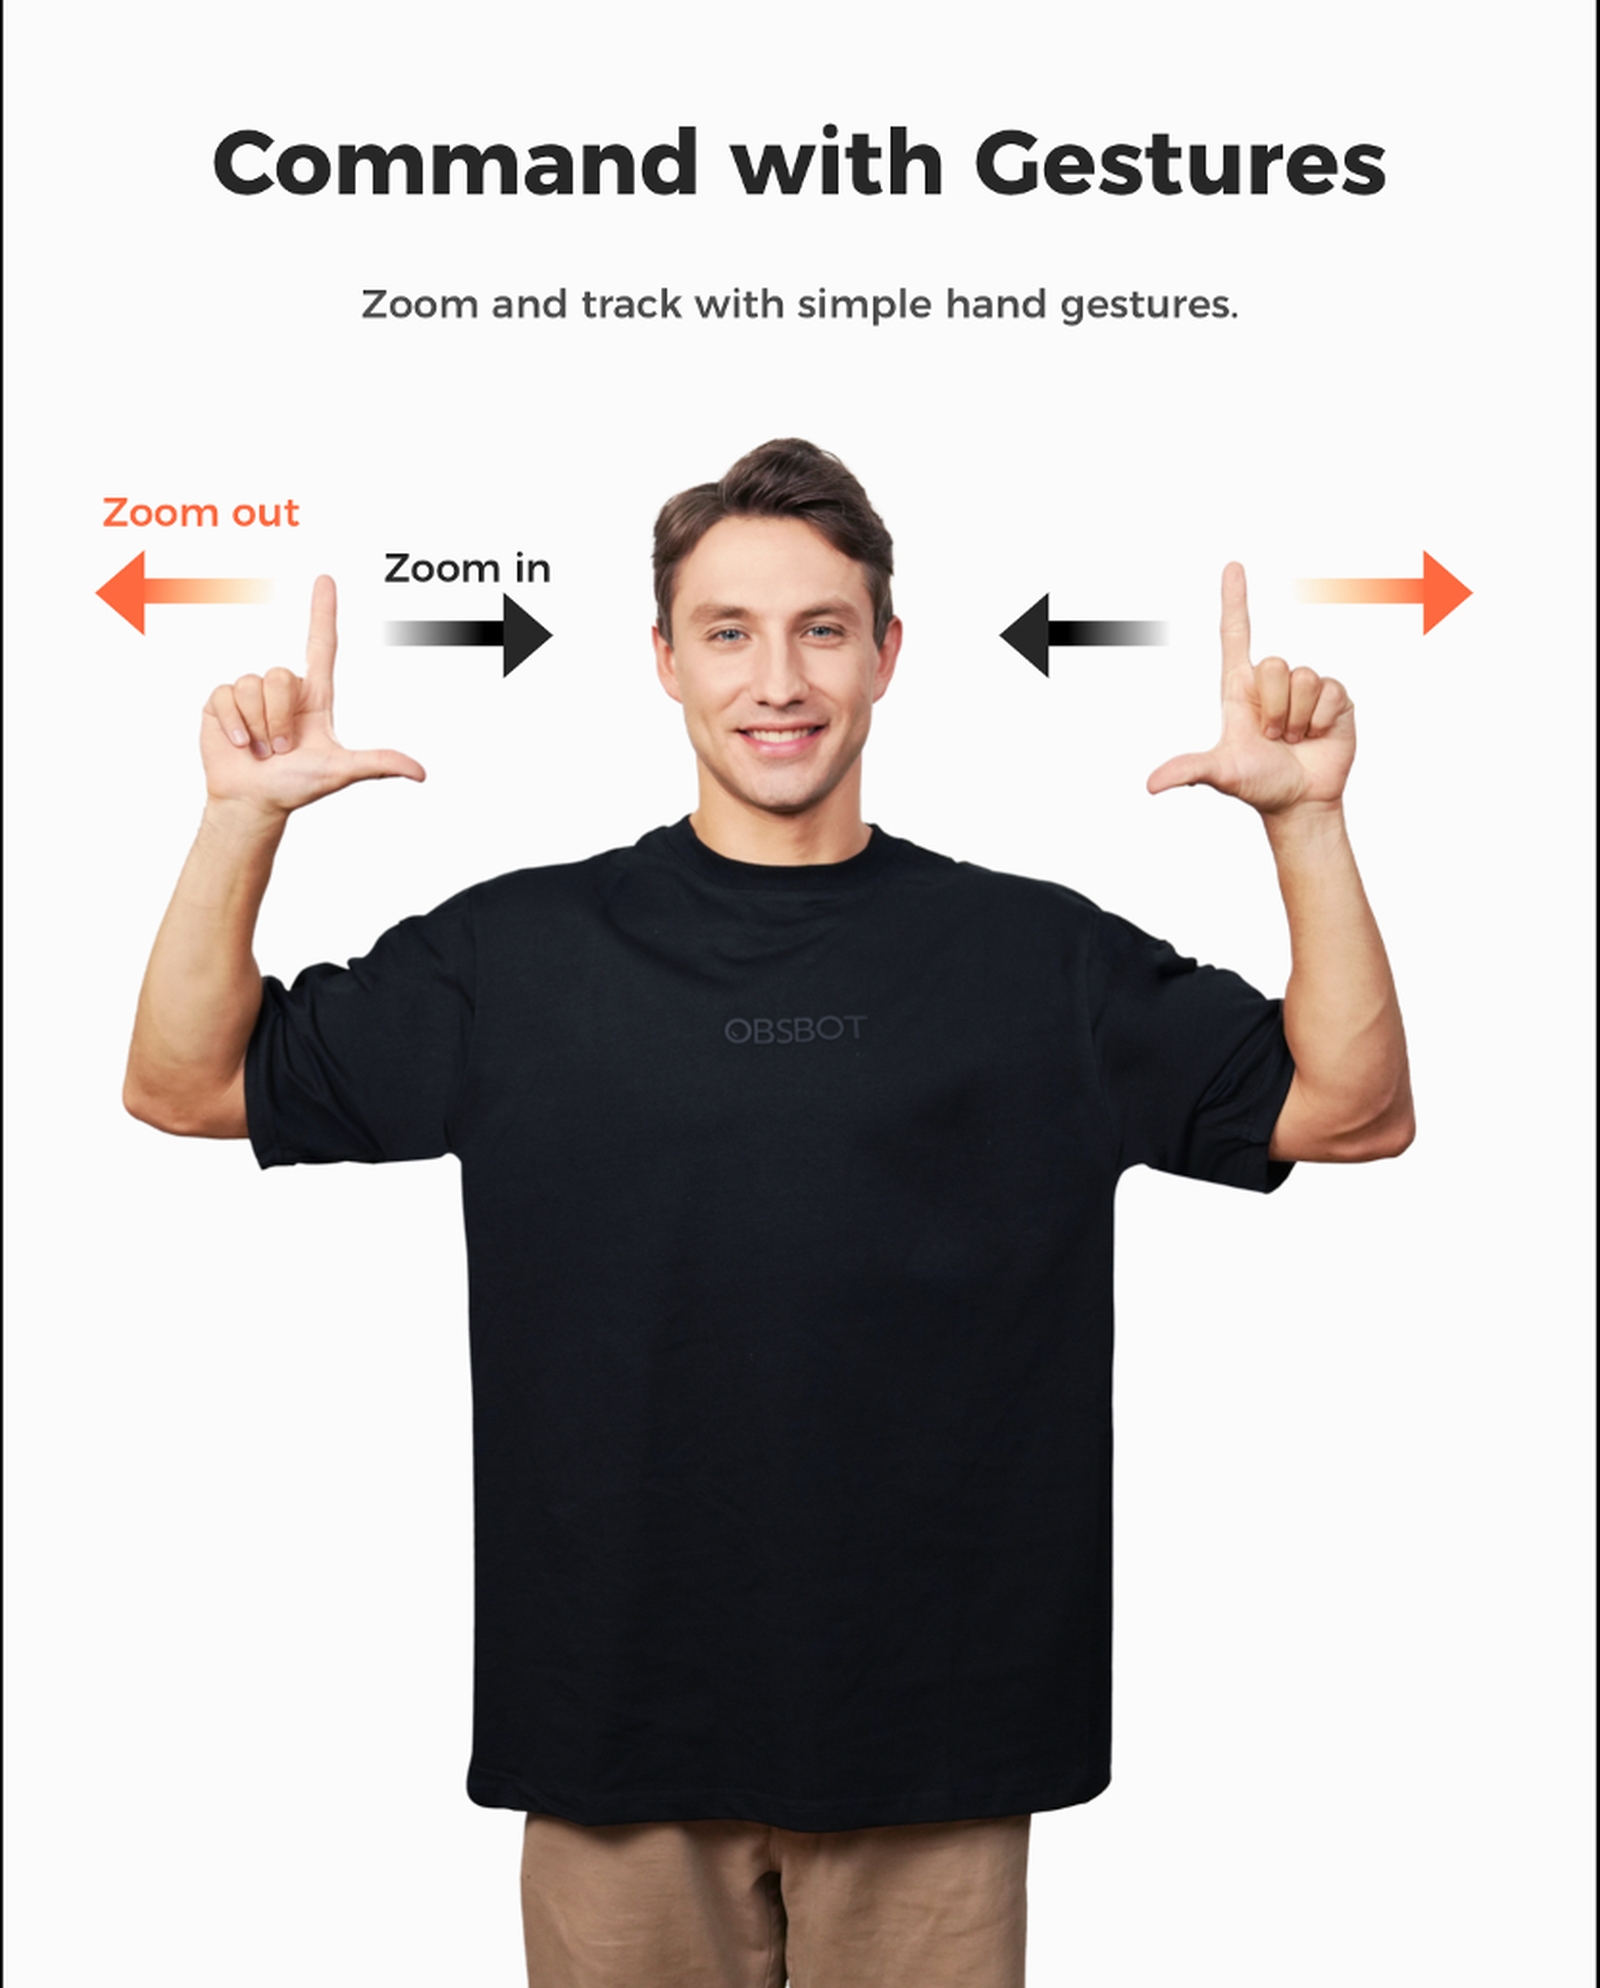
Gesture controls utilize the AI functionality of the camera to detect three hand gestures to make adjustments with just your hands. Holding up your hand with an open palm will lock your target and turn off or on human tracking. Holding up your index finger and thumb in an L and pushing towards or away tells the camera to zoom in or out, and a slider decides by how much. Holding your left and right hand in the L shape and them moving them towards one another or away enables dynamic zoom in and out, and a toggle allows you to reverse them if you are so inclined.
The camera has a pair of microphones onboard, complete with very solid background noise reduction. You can turn on gain control to amp up your own voice if you wish, as well as adjusting whether the microphone believes you to be close, mid, or far for said adjustments. You can turn the microphone off during sleep (you might want it on so you can call on it for various functions like turning it on, or toggle it off for maximized privacy). You can reverse the gimbal in the use case where you’ve mounted the camera upside down (like using it for a security camera), as well as upgrade your firmware and export logs when needed for troubleshooting.
Whew! That’s a lot of camera adjustments. We aren’t done. If you are, like me, not a naturally gorgeous person, you might need a bit of help. The “Beauty” tab has a handful of effects such as blurring the background (Bokeh) effect, and to what level. That won’t fix your face, but that’s what the “Retouch” tab is for. The adjustments are NOT the ones you’d find in the default windows panel, instead offering to adjust your facial tone, skin smoothness, clarity, and even slim or narrow your face. Lest you think I’m kidding, jump to this portion of the video above.
Yep – everything you see on the Internet is fake nowadays. Retouch has a Native, Classic, and MAN (in all caps!) setting that makes various adjustments to the aforementioned sliders to try to put us all in the best light. The last adjustment is filter, allowing you to drop in a color warmth for Nature, Fresh, Clear, Crystal, Film, Sheer, Pure, B&W, and “Soda” (whatever that is). Tinker with these, but off is also an option, folks.
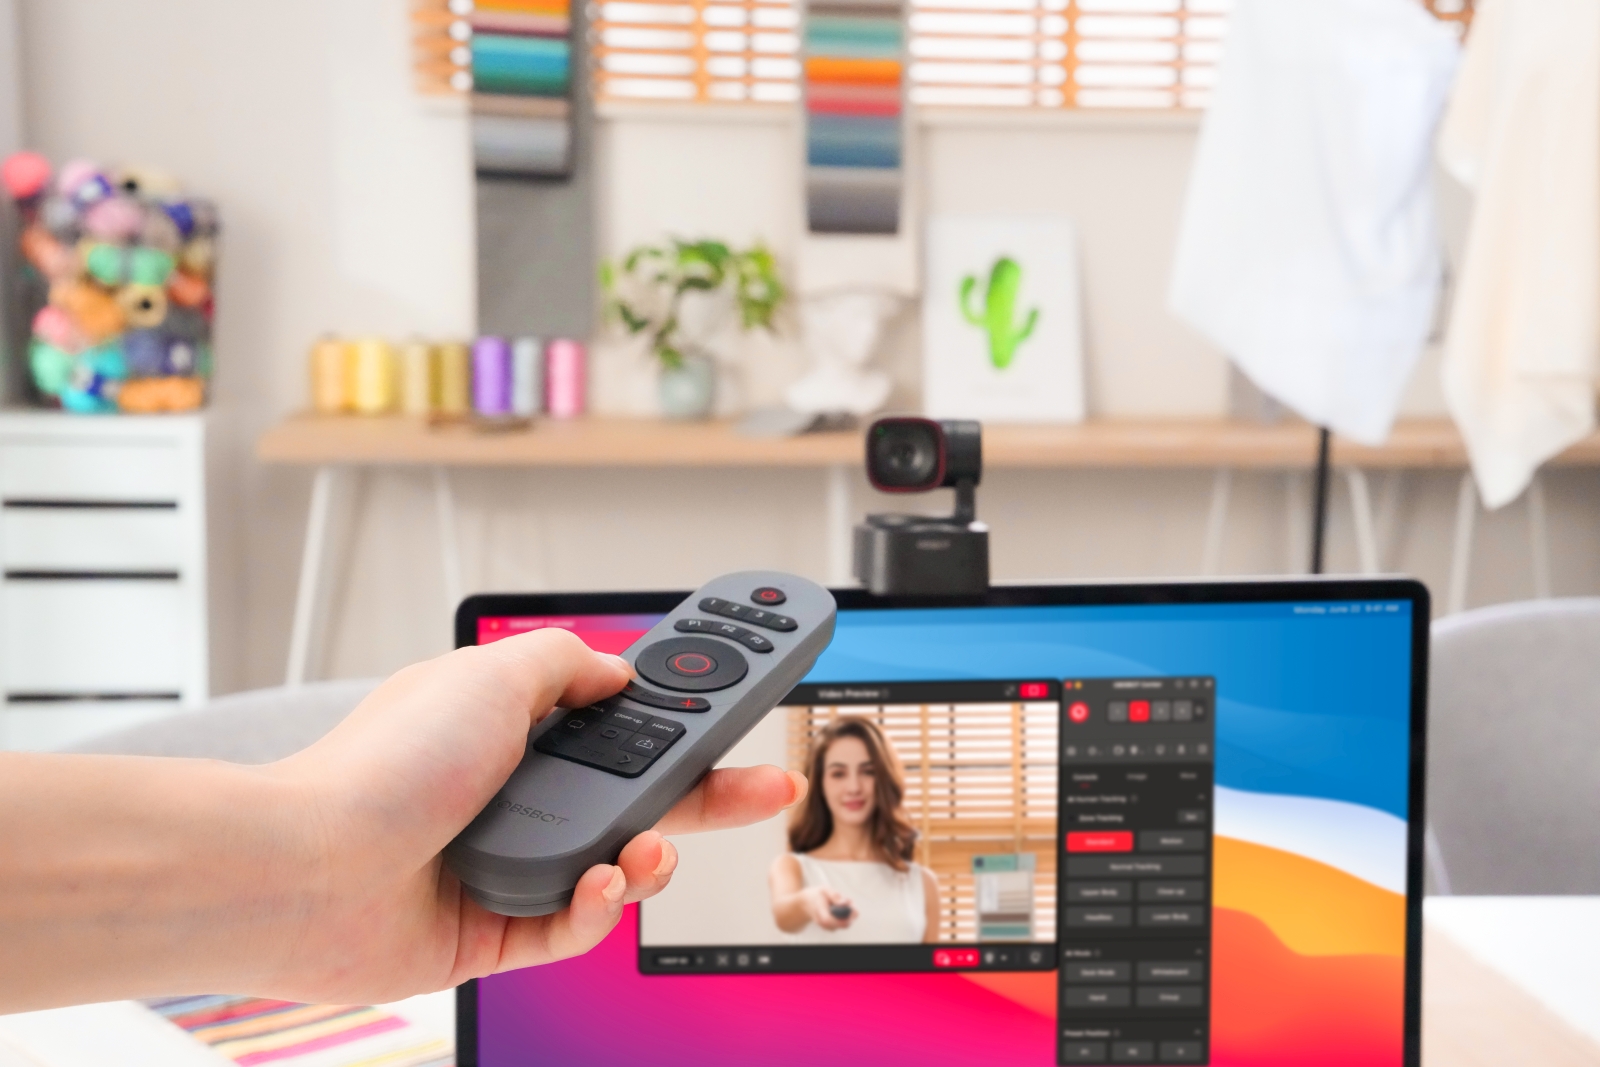
Certainly all of these settings make installing the software worth it, but the last trick in this amazing camera’s toolkit was the one that blew me away the most. Not only does the OBSBot Tiny 2 Lite support native capture (you can just hit record and it’ll drop an mkv mov, mp4, flv, or avi wherever you’d like in resolutions from 720p/30, 720p/60, 1080p/30, 1008p/60, and 4k/30, but it also has full UVC support for up to four cameras. At the top of the control screen you’ll see a “1”, and that is the only one that’s lit up with only one camera plugged in. Plugging in a second one now lights up the “2” next to it, and so on for up to four cameras. These can be controlled individually, or as a group, creating a full studio production inside of this simple software. When combined with the optional remote (which is again bafflingly easy to use – press a single button and it’s enabled, allowing you to control your cameras from across the room), you suddenly have a remote controlled studio that keeps you in front of the camera the entire time. If you’ve ever tried to record a multi-camera stream without having to keep a computer in front of you, it’s almost impossible. Here, OBSBot has made it dead simple, but you’ve got one more trick that might not be immediately obvious.
If you do happen to have a second person to run the show, or you want to keep something like a tablet or computer nearby, you’ve got full OSC support. OSC stands for Open Source Control, giving you access to a wide variety of free and paid control surfaces to orchestrate all of your cameras in one place. With up to four OBSBot cameras (or mixing in other OSC-capable cameras), you can deploy an entire four-camera professional 4K setup with a remote control orchestration surface running on a touchscreen tablet in a matter of SECONDS. Having lugged cameras that weigh more than 15 pounds a piece to trade shows, I can’t express just how my tired old back loves this idea.
With a name like OBSBot, I’d be remiss if I didn’t talk about how the camera operates in OBS. Opening OBS and adding it as a video capture device, you’ll then select OBSBot Virtual Camera. That’s it – you’re done. You’ll see the camera appear in the preview panel where you can make adjustments to position, size, add any filters, or do whatever other tweaks you normally would for your stream or capture. The same could be said of Zoom, Skype, Discord, and Google Chat as I had a chance to use each and every one of these over the course of the last month of testing. Each detected without a problem, and all of them were happy to utilize either the on-device microphone (complete with noise suppression) or my third party microphone as I saw fit. It’s nice when a device works perfectly right out of the box, and whether I was using it on my laptop while traveling, or on my desktop when at home, it does exactly that.
The last stop of any hardware review we do is always twofold – price and warranty. The MSRP for the OBSBot Tiny 2 Lite is $179, which is roughly half that of a device like the Razer Kiyo Pro, or about $30 cheaper than the Logitech MX Brio – the two top-rated 4K cameras to date. Or at least they were until now – this thing steals their lunch in every single way. Seriously, this camera and its supporting software is so packed with features that it’s hard to even compare them to the OBSBot Tiny 2 Lite.
The only problem we found with the OBSBot Tiny 2 Lite was the issue we ran into with the close-up feature – something that OBSBot will likely solve with a future firmware update. I was unable to get the close-up to stabilize (not that I want the camera looking THAT close at my face) no matter how I adjusted my lighting or positioning. Given the wealth of features and options on this camera, it seems almost petty to even mention, but it’s the only hitch we ran across in over a month of extensive testing.


