The race for the best home 3D printer is on. Advances and upgrades are coming so fast now that it is hard to keep up. Into the fray emerges FLSUN with the T1 delta-style FDM printer. It’s big, it’s fast, and it’s LOUD. Let’s get into it.
The T1 is a fully enclosed delta-style printer that is the not-so-little brother to the premium featured S1 that GamingTrend reviewed just a few weeks ago. The competition in the 3D printing space is immense and all of the players have rapidly responded to the BambuLabs printers exploding onto the scene. With so much competition and everyone offering the same features, the T1 stands out with its unique design and blistering speed.

You may be wondering, what is a delta-style printer? I’m so glad you asked. Rather than the traditional “bedslinger” style FDM printer where a square build plate moves in the y-axis while the print head moves in the X and Z directions to maneuver around the build plate and deposit plastic, a delta printer uses a fixed round build plate and a printhead on a 3 arm axis with all three arms moving independently in the Z direction.
Why would you do that? Speed and accuracy. A fixed build plate provides maximum stability to the model which in turn enables accuracy to be maintained at higher speeds. The free moving print head is also able to sling around the build volume at insane speeds. Because the bed doesn’t move at all, delta printers tend to hold their Z offset better and for longer than a cartesian “bedslinger” that moves around and may have manually adjusted heights.
Features
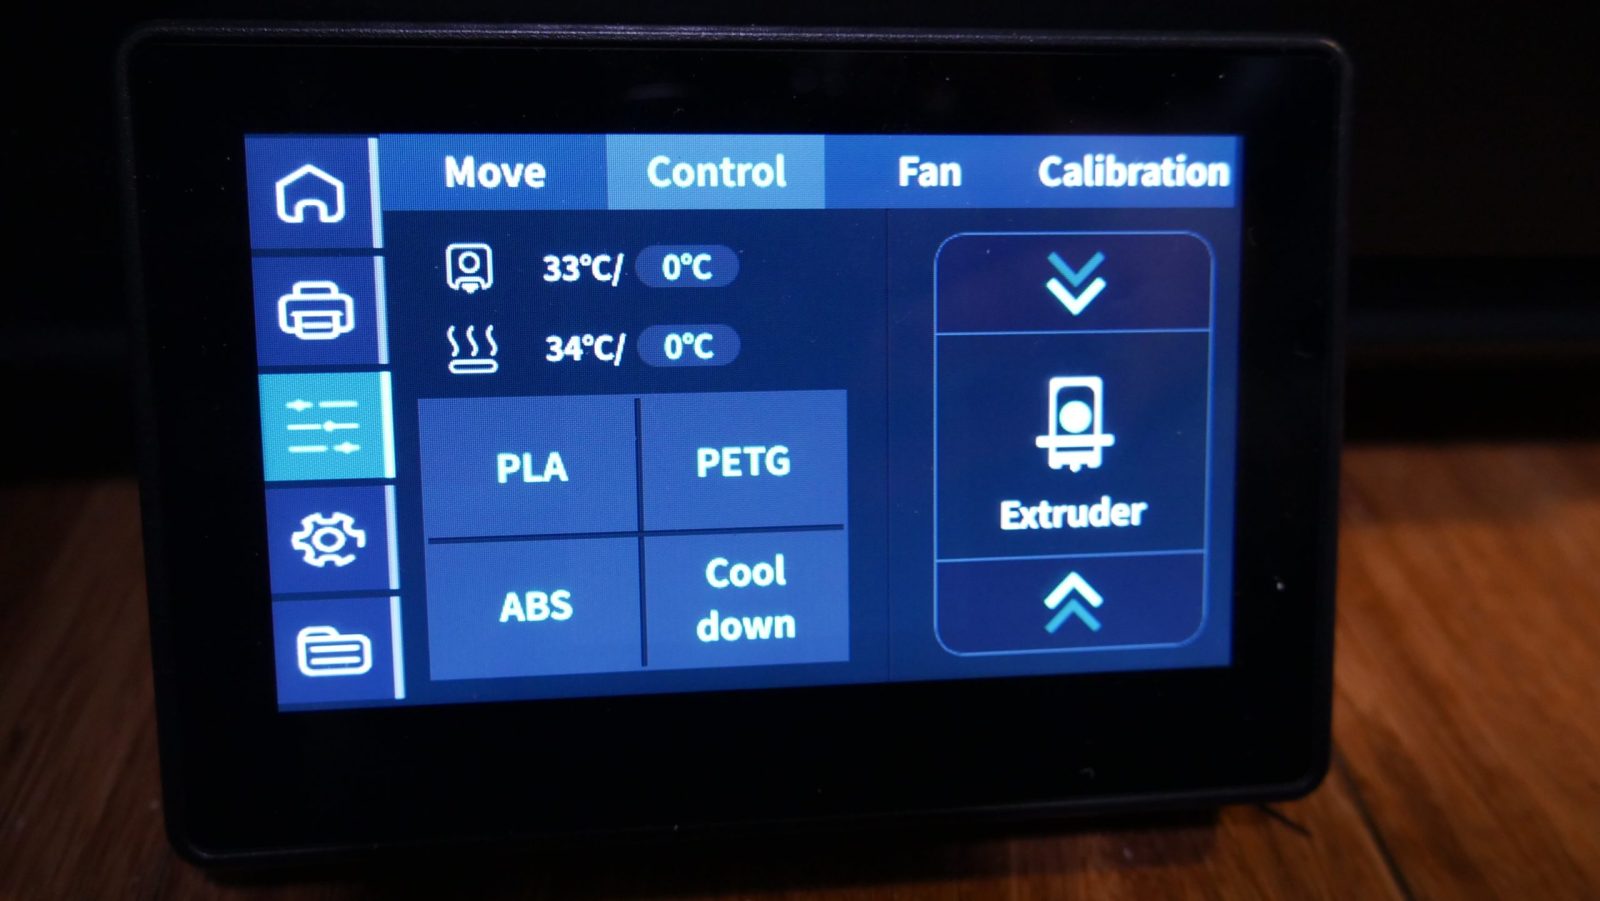
Besides crazy speed, the T1 has a whole host of features that we have come to expect with printers in 2024. Starting at the bottom of the printer, we have an integrated touchscreen control panel. From the control panel, you can set up a wifi connection, run calibrations, start prints, load and unload filament, pretty much anything you’d want or need to do while hands-on with the printer. The screen is bright and responds quickly and accurately to touch.
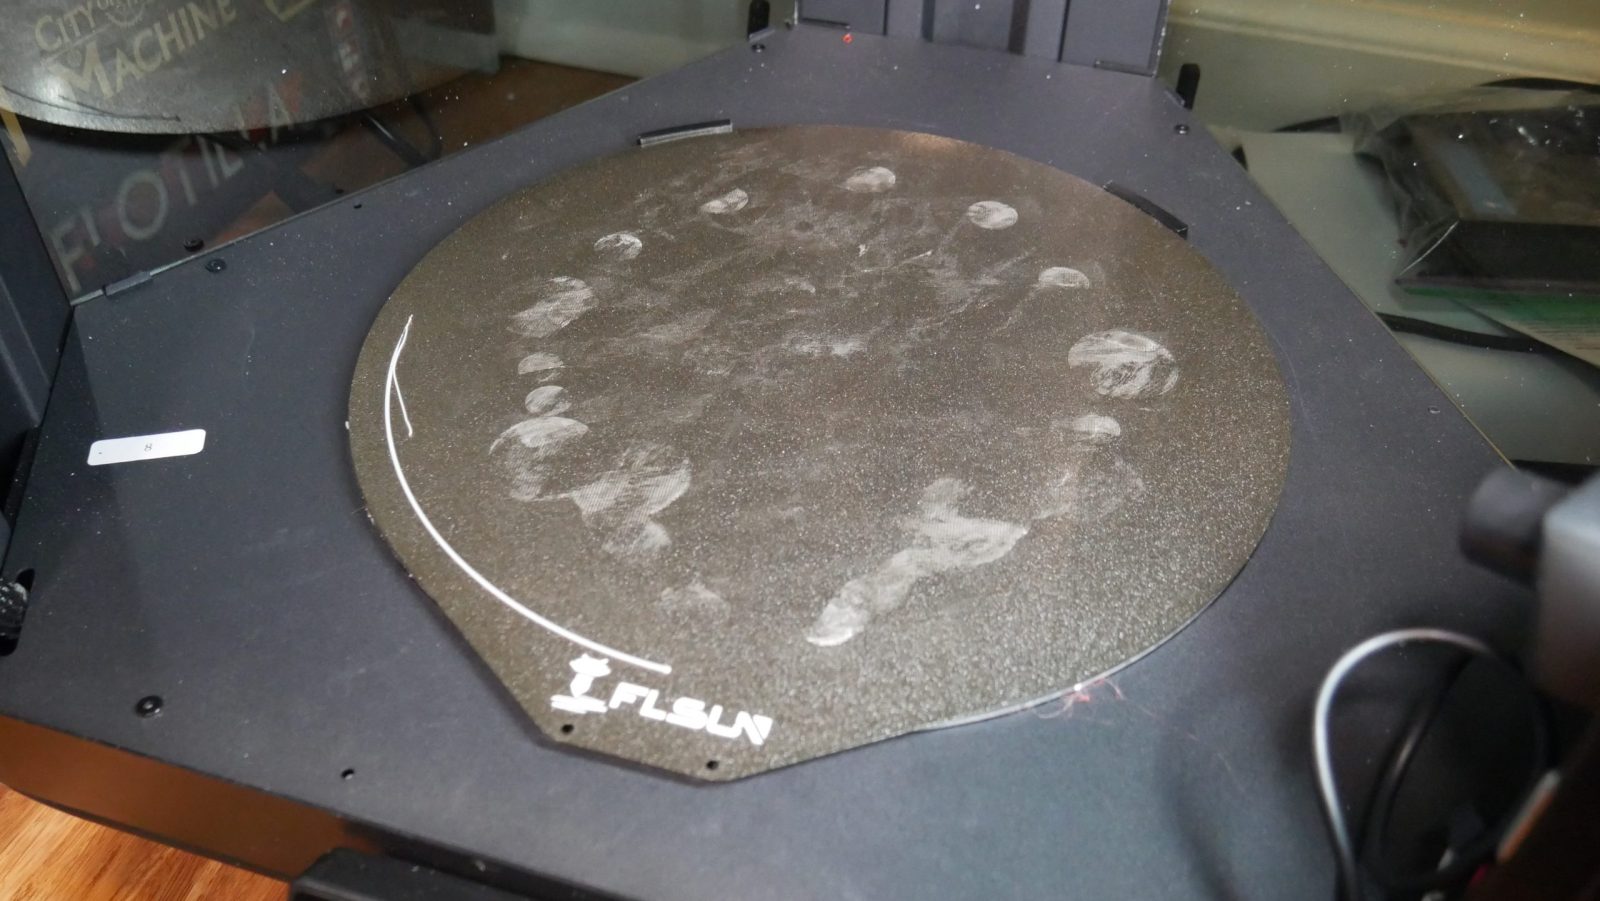
The build plate is a textured PEI spring steel plate that connects magnetically. There are two guides inside the chamber to help line up the plate when you are installing it to make sure it’s perfectly centered on the magnet. The plate can go up to 110 C for printing higher temperature materials. The maximum print volume is a 260mmx330mm cylinder.
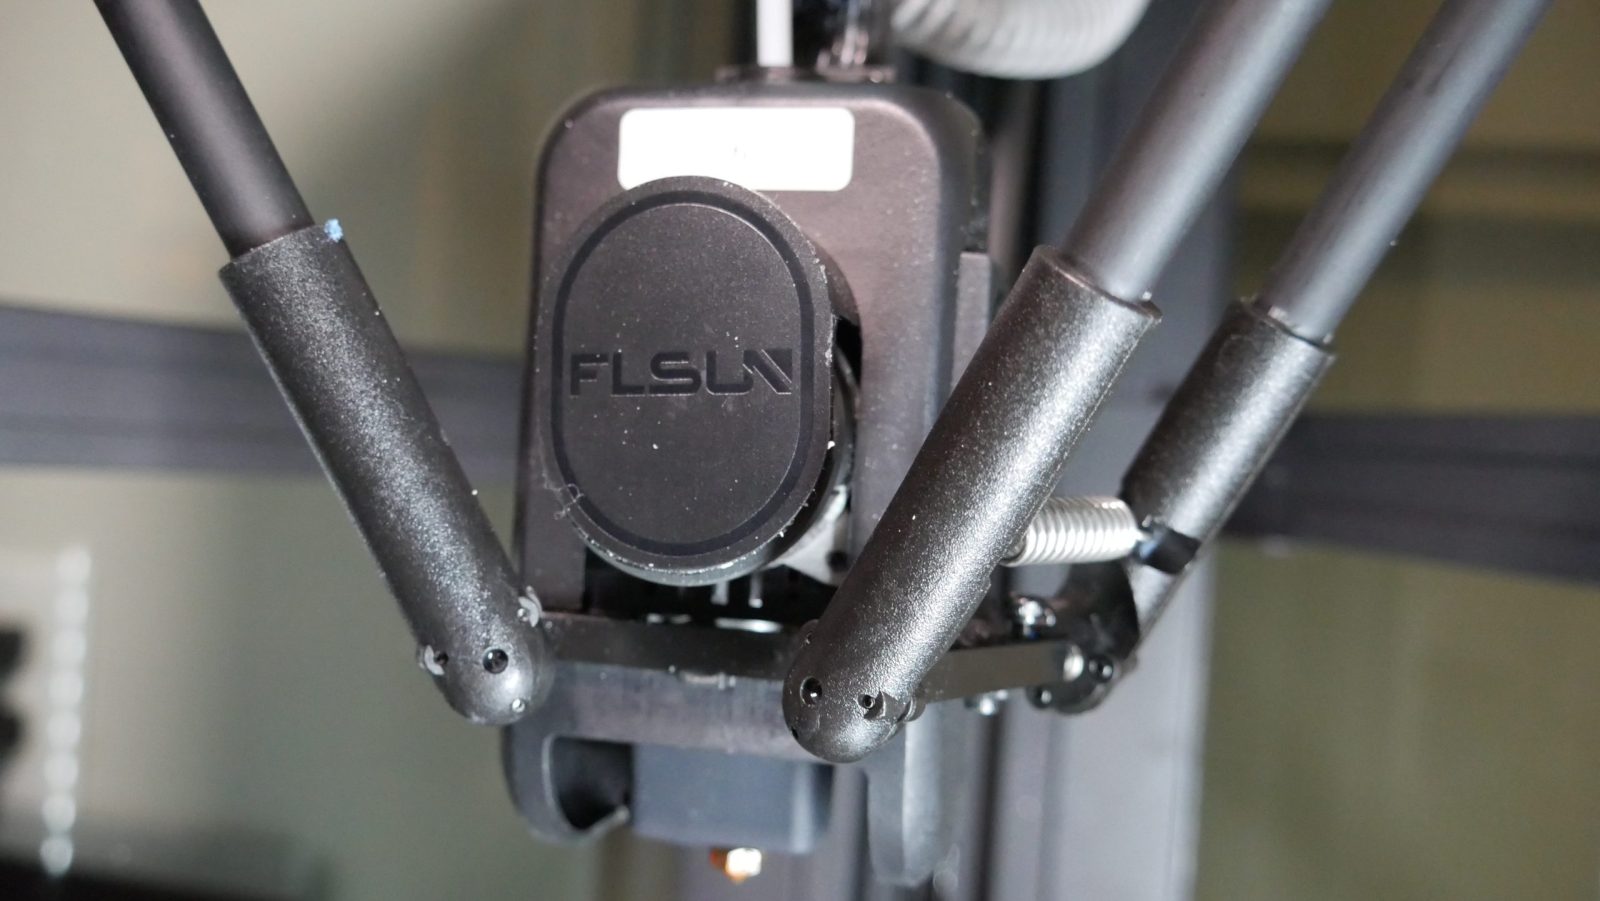
The print head includes a 300 deg. C capable high temp nozzle with a 90mm^3/s max flow rate. The nozzle is fed by a high-temperature dual-gear direct drive extruder that provides up to 78N of extrusion force. Basically, it’s able to push a lot of filament really fast to keep up with the 1000mm/s print speed. Though realistically you’ll be printing at 400-700 mm/s. Still crazy fast.
With all the speed and high-temperature capability, you need to move a ton of air to keep the enclosure from overheating. A CPAP High-Pressure Turbo Fan is mounted to the top of the printer and connected via the CPAP tube to the print head. A mind-numbingly loud turbo fan spinning at up to 30,000 rpm/min keeps the chamber temperature under control while also letting you and anyone who may be in your house know that the printer is running. Seriously. It’s so loud.
All of this is contained inside an enclosure. With parts moving this fast, an enclosure is a must from a safety standpoint alone but it is also important if you want to print things like ABS or ASA or other high temp materials that require a heated enclosure to print successfully. The enclosure also includes a controllable LED light that provides enough light to see inside but it could use another light on the other side to make things a bit brighter.
Inside the enclosure, you also get a camera to keep an eye on your printer if it is networked and to capture timelapse footage if you’re into that. It’s advertised as an AI Camera, but there are no AI features as far as I have been able to tell.
Other sensors and automation are the built-in Input Shaping calibration and algorithm as well as the standard filament runout sensor and power resume. Input shaping is a must as the high speeds produce a significant amount of vibration.
Usage
Before you can start busting out prints on the T1, you will need to assemble it. It comes in a large box packed with plenty of high-density foam to keep everything safe during shipping. Assembly is not complex but does require a fair bit of time due to the sheer number of bolts that need to be installed. The included directions are not what I would call clear, but the pictures were generally enough to get me where I needed to be. The twelve individual tiny bolts that connect the print head to the arms seem a bit excessive but I’m sure there is a reason for it. One thing I am disappointed to see on the T1 like so many similar enclosed printers is a glass door that does not fully open due to hinge restrictions. For most people, this won’t ever be a problem but if the door gets flung open or it’s hanging open and you inadvertently bump into it, there is a potential for it to break and shatter. With normal usage, there shouldn’t be any problem.
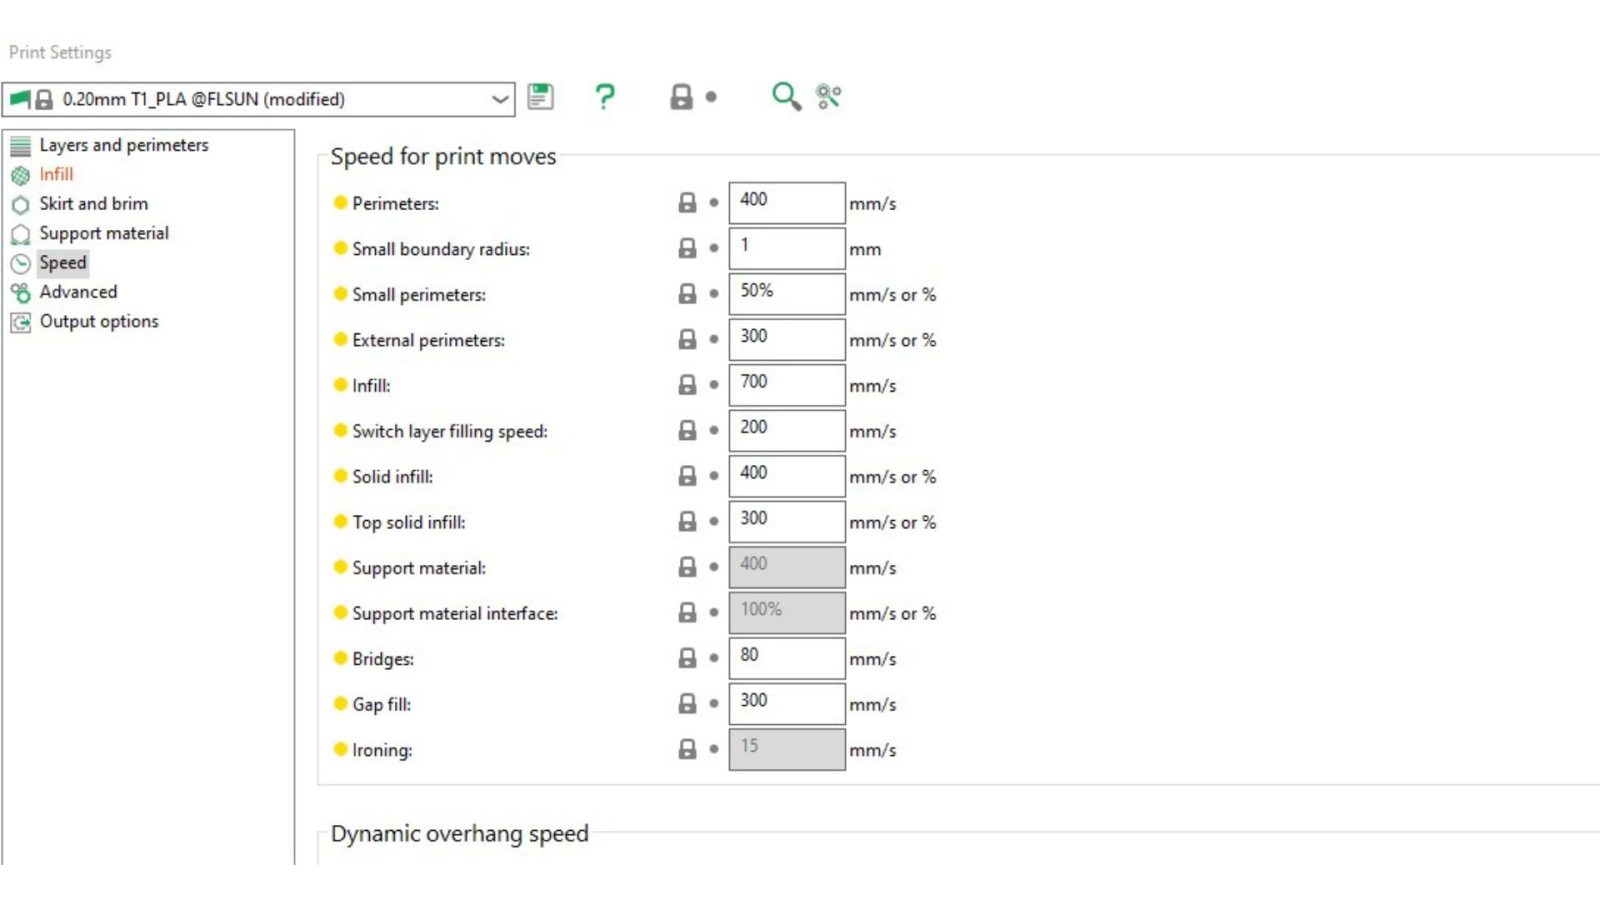
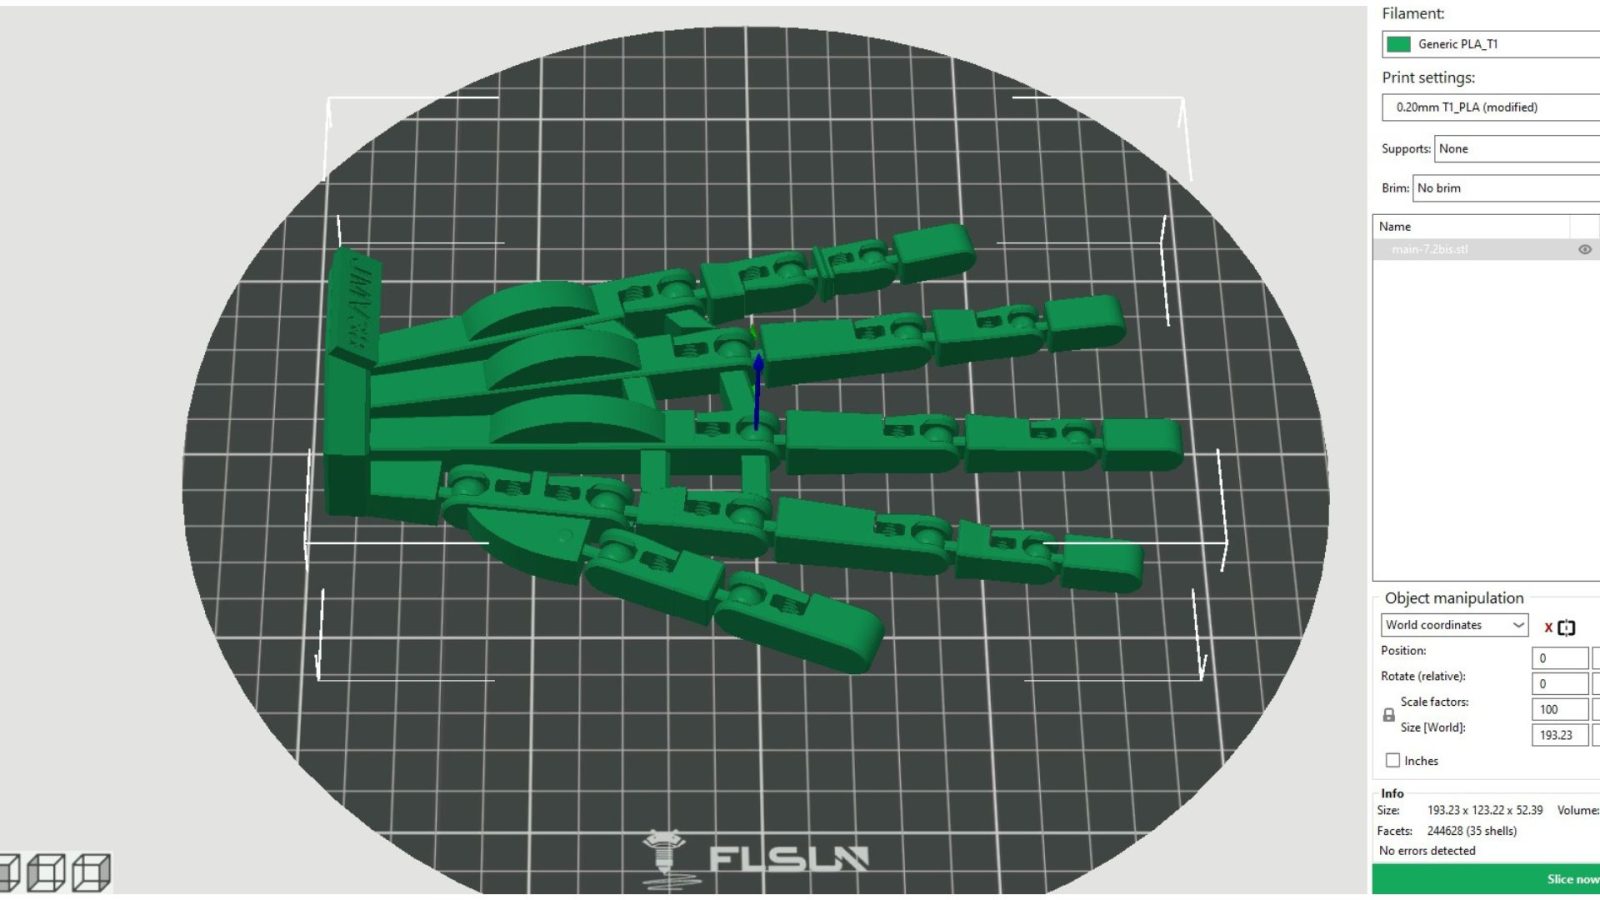
Operating the printer and setting up prints is incredibly easy. I already mentioned the touch screen with built in calibrations. Running the automatic calibration is all you need to do to be ready to start printing on the T1. The printer comes with a thumb drive with the Prusa based FLSUN Slicer on it. I ran all of my test prints with the default 0.2mm profile changing only support and infill types and percentages based on the model I was printing. Everything else was left stock.
I printed a collection of objects to test out the T1s capabilities. Starting with some fun prints, I printed a foot-tall statue of Yoda that required a lot of tree supports exposing a critical user error on my very first print. The printer came with a gluestick that I set aside and promptly forgot about. During the Yoda print, one of my tree supports fell over from the vibrations and caused one of his arms to come out mangled, though the print still completed successfully otherwise. Lesson learned. Use the glue stick. I printed a Mandalorian helmet with an unsupported dome that was attached to the build plate almost exclusively by supports. The helmet came out flawless. A full-size adult helmet won’t fit on the T1s 260mm diameter build plate but scaled to 80% for my son, the helmet came out perfect in an astonishing 8 hours. The last time I printed a helmet on an older marlin printer took over 24 hours. I also printed a handful of 30mm D&D style miniatures that came out pretty nice for an FDM printer at 0.2mm layer height. I’m confident you could dial the T1 settings in to achieve great results with a lower layer height and 0.2mm nozzle. I wanted to test the T1 straight out of the box though and the results are still pretty darn good.


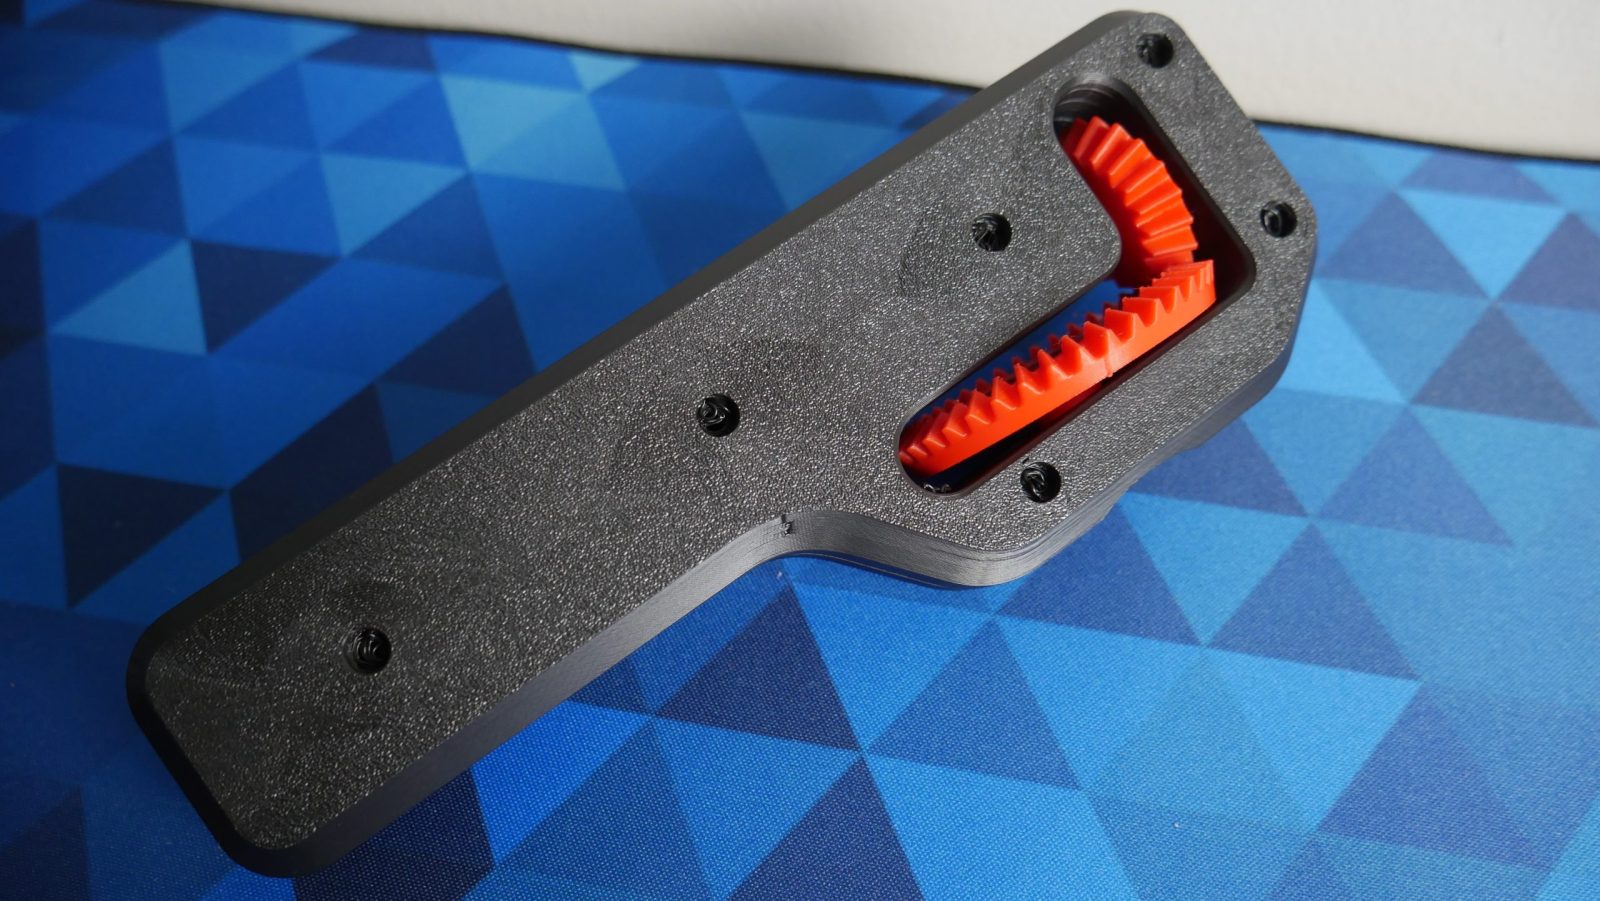
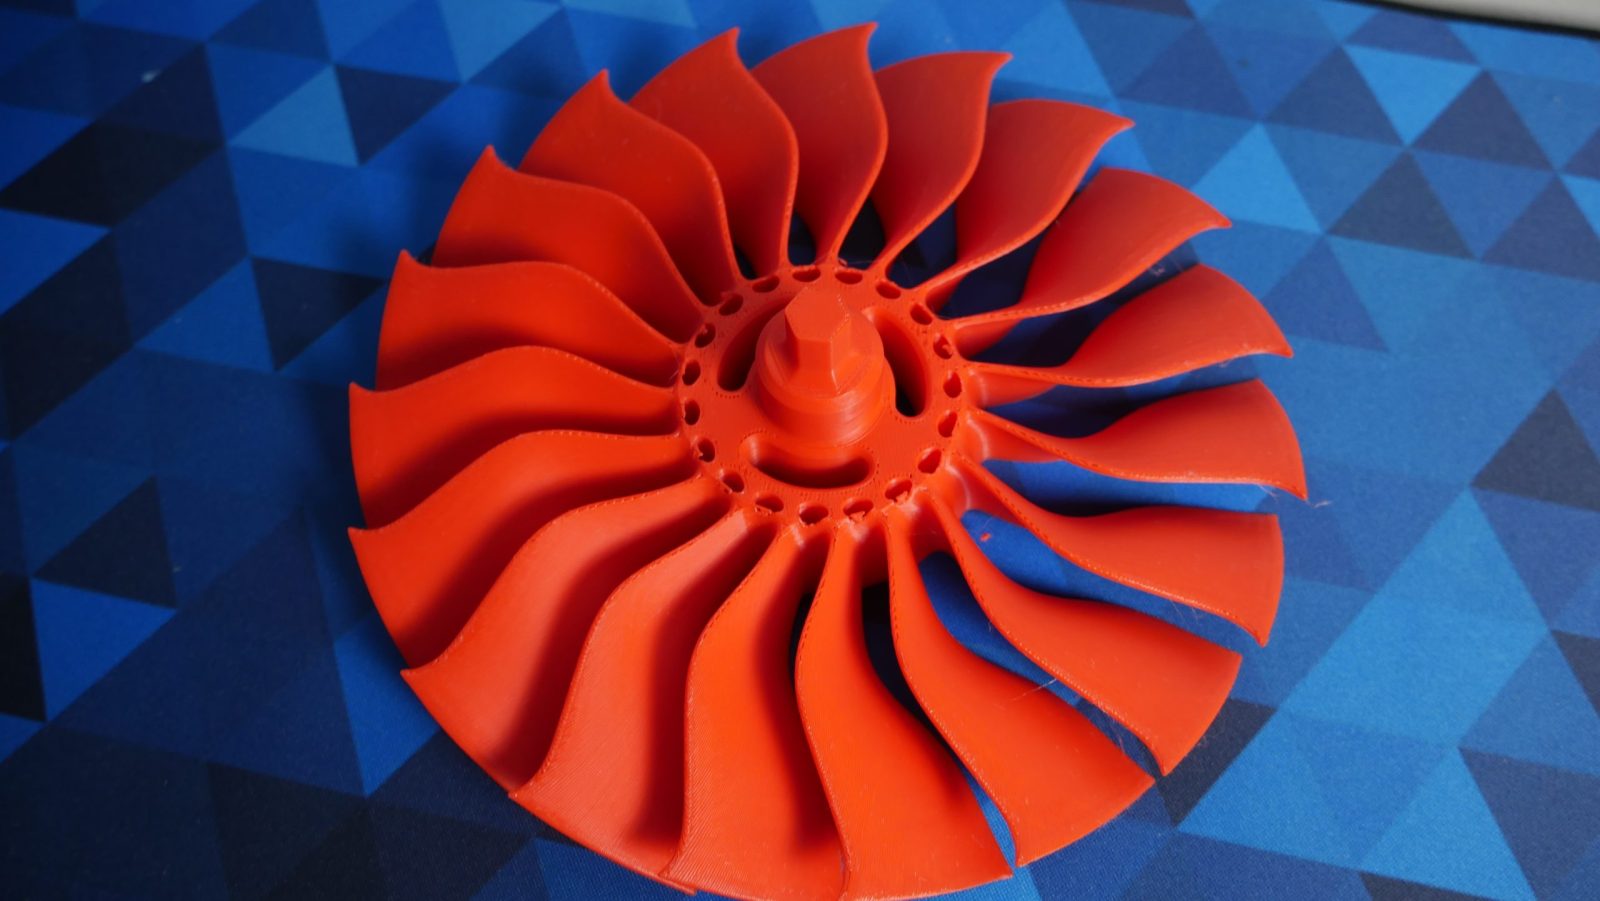
The T1 also did a fantastic job handling some practical prints. I found this hand-powered impeller fan on Printables and it came out pretty much flawless. The main housing is super clean but did have a few hiccups with the bridging inside the bolt holes. All of the gears came out without issue and the impeller is beautiful. The T1 handled the complex curves easily with the delta head smoothly following along the curves.
Changing filament between jobs or refilling during a pause is incredibly easy on the T1. There are no locks or tubes that need to be unplugged or set a certain way. You simply tap the controls for loading and unloading filament and the extruder does all of the work for you. I have worked on many printers that require a bit of finesse and various steps to feed filament into the print head. On the T1, gently pushing the end of the filament into the print head until it stops is enough. From there, the extruder gears take over and guide the filament where it needs to go. It really couldn’t be easier. Other manufacturers take note, this is the way.
I should mention that all of the testing for this review was done with PLA filament. While FLSUN claims that the T1 is capable of printing PLA, PETG, TP, PVA, PET, ABS, ASA, PA, PC etc. I did not evaluate those claims for the scope of this review. Perhaps in a future update or video.
Price and Warranty
Coming in at a retail price of $599, the T1 isn’t the cheapest printer on the market but you are getting a ton of capability for that price. Ultimately, only you can decide if that’s a good price, but I think it’s right on the mark for what you are getting. If you want the big brother S1 with an AI camera, a larger volume, and all metal construction you are looking at $1500, so the T1 looks like a bargain in comparison if it fits your needs.
The warranty is fairly standard 12 months for anything that doesn’t move or get hot and 3 months for everything else. That means your consumable parts aren’t going to be covered for long. FLSUN also offers lifetime after-sales technical support. I had no occasion to work with their customer support since the T1 operated flawlessly.
Final Thoughts
The FLSUN T1 is an impressive machine. After the initial assembly, it was a matter of minutes to get it powered on, calibrated, and ready to print. That has become the expectation nowadays rather than an elevating feature and I can happily say the T1 delivers. Throughout all my testing I did not encounter any issues running prints of various types and sizes using the default settings. A novice user should have no problem getting the T1 to deliver high-quality prints.
The speed of the T1 is truly impressive and a sight to behold. Speed combined with the accuracy you can achieve with delta printers positions the T1 to be a capable tool for rapid prototyping. At this price range, it does bring up the question of who this printer is for. I just mentioned rapid prototyping and I think that is where the T1 will shine. The ability to spit out quality prints at impressive speeds could be very valuable to someone working an engineering or design project.
For the group of 3d printing enthusiasts that largely print things like toys and game pieces, the T1 has a shortfall. No option for multi-color printing. Cue the eye-rolls from the “engineers” but the popularity of printers like the Bambu P1S with an AMS add-on for multi-color printing is undeniable. If that’s your use case, I’m not sure the T1 is where you want to be looking.
For rapid prototyping or any single-color application, the T1 may just be the best printer I’ve used yet.