
3D printing is barreling towards a future where the means of production is completely reimagined. We are already seeing it in aerospace, prosthetics, dental implants, toys, and more. As technology advances rapidly, the hobby-level 3D printers available to the mass consumer reap the rewards. No printer is more ubiquitous in hobby-level 3D printing than the Creality Ender 3.
The Ender wasn’t the first printer available for the hobbyist but it was the most accessible in terms of price and ease of use. I got my start on an Ender 3. It required a higher level of technical knowledge than your typical consumer product and benefited from many do-it-yourself upgrades. It required constant maintenance and was slow. It also introduced a massive number of people to the 3D printing world and enabled anyone to start making things at home. The foundation that Creality laid not only for themselves but for all of the others who came along with and after them is an achievement worth recognizing. Cheers Creality. I am here because of you.
10 years later and an admittedly confusing number of variations and versions of the Ender 3, and the Ender 3v3 has arrived. Forget what you think an Ender 3 is. The v3 builds on those 10 years of lessons learned and technology advances and combines all of the features you want in a low cost 3D printer. Auto leveling? Check. Auto Input Shaping? Check. Filament runout sensor? Check. Sensorless homing? Check. Speedy Klipper firmware? Check. Wifi? Check. Built in lights? Check. Linear rods and timing belts? Check. Plug and play? Check.
Features you won’t find on the Ender 3v3 are any kind of AI monitoring, built-in camera, multi-color printing, or exotic material printing. At $329 though, you can’t expect it all. Those kinds of premium features are reserved for the higher-end K2 or optional do it yourself upgrades.
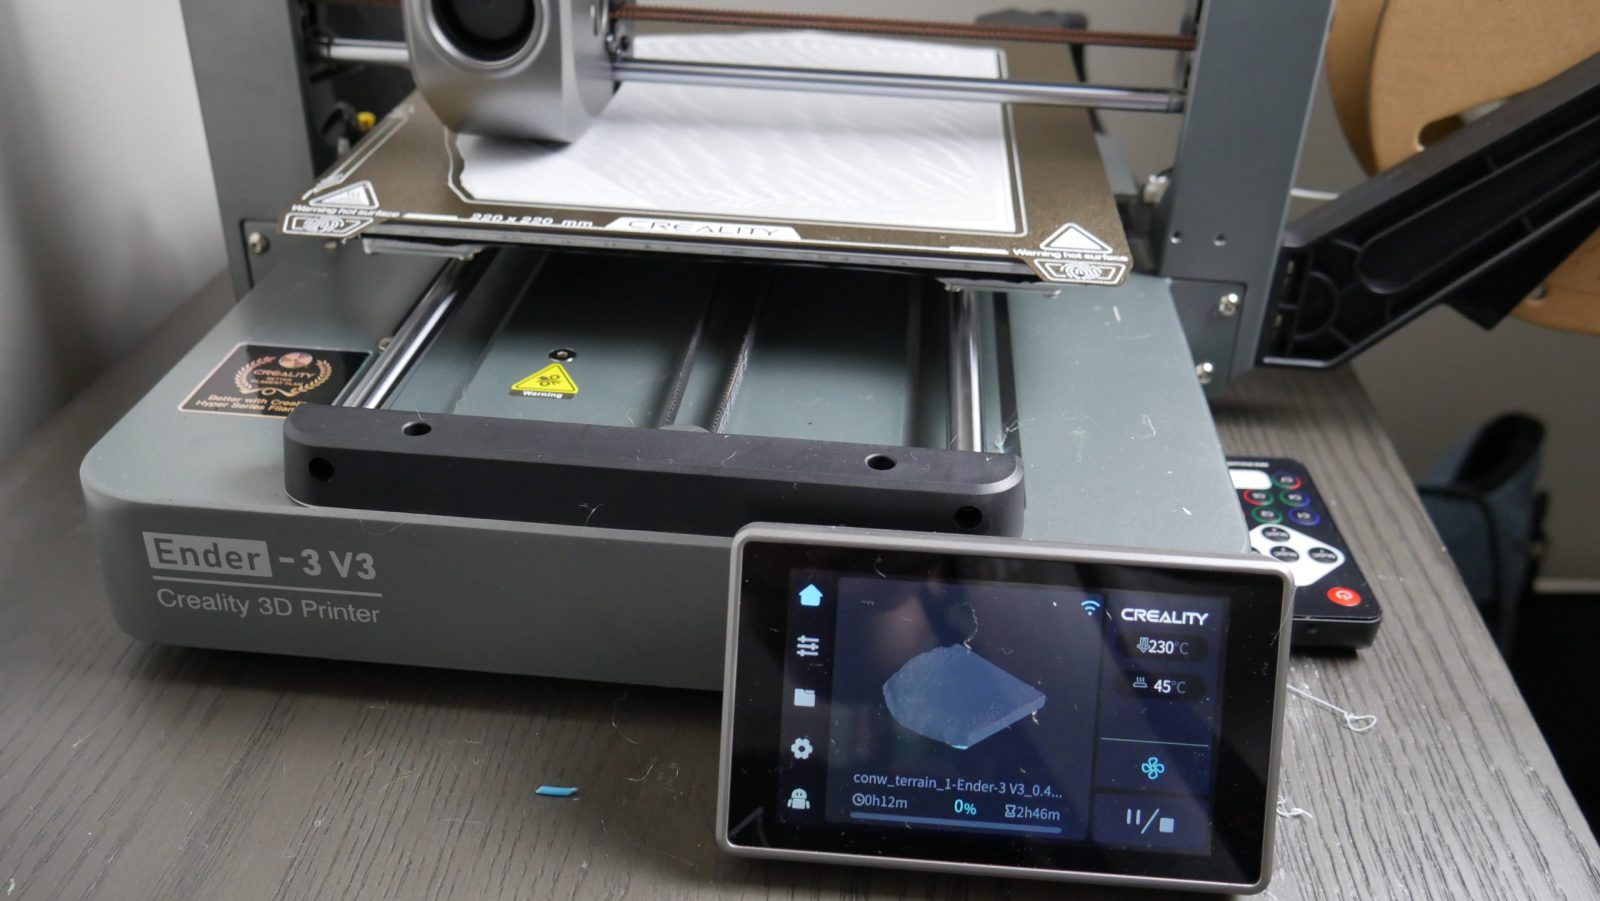
The Ender 3v3 is almost a complete redesign of the flagship Ender 3. It’s still a bedslinger but other than that it’s almost unrecognizable. The homemade-looking bolted-together aluminum extrusion contraption with attachments hanging off the side and cables running all over the place has been replaced with a sleek diecast frame that nicely integrates the power supply and control board underneath. The control panel is attached in a way that looks intentional and feels like a modern appliance. All of the wiring is tucked away and clean with only the minimum amount of leads exposed to make connections at the various motors and sensors. The Ender 3v3 looks like a proper machine designed for consumer use rather than a niche hobby item.
What is the 3v3 good for then? Your imagination is the limit, but since this is a GamingTrend review, I obviously printed game stuff. When I set out to do this review and pick objects to print, I wanted to really test the capabilities of the printer in terms of challenging geometries, but also the claims of one-click hassle-free printing. For every object I printed, I used the automatic calibration, the Creality slicer, and almost 100% default settings for the printer and PLA filament. The only settings that I changed were infill type and percentage depending on the model and I turned off auto-brim because I hate removing brims. That’s it. No extra calibrations. No temperature towers or retraction tests. Stock.

Getting set up to print with the Ender 3v3 is the fastest and easiest experience I have had to date with a 3D printer. The box comes with very clear instructions but they are hardly even needed. The XZ assembly needs to be mounted to the frame and drops right into a channel on either side that eliminates any potential tilt. If you’ve built any previous Ender or other brands with the same type of design, bolting the vertical assembly to the aluminum extrusions from underneath can be a pain. Creality has completely eliminated that with the v3. Instead of aluminum extrusions, the frame is a solid base plate, and the vertical assembly bolts in from the side. That’s right. The side. It’s so easy. It’s beautiful. Once the two main pieces are connected all you have to do is plug in all the clearly labeled cables, make sure you have the correct voltage selected for your region, and turn it on. I was lights on and ready to go in less than 10 minutes. Seriously. From there, the screen will guide you through an initial calibration that will take a few minutes and then you are ready to go.
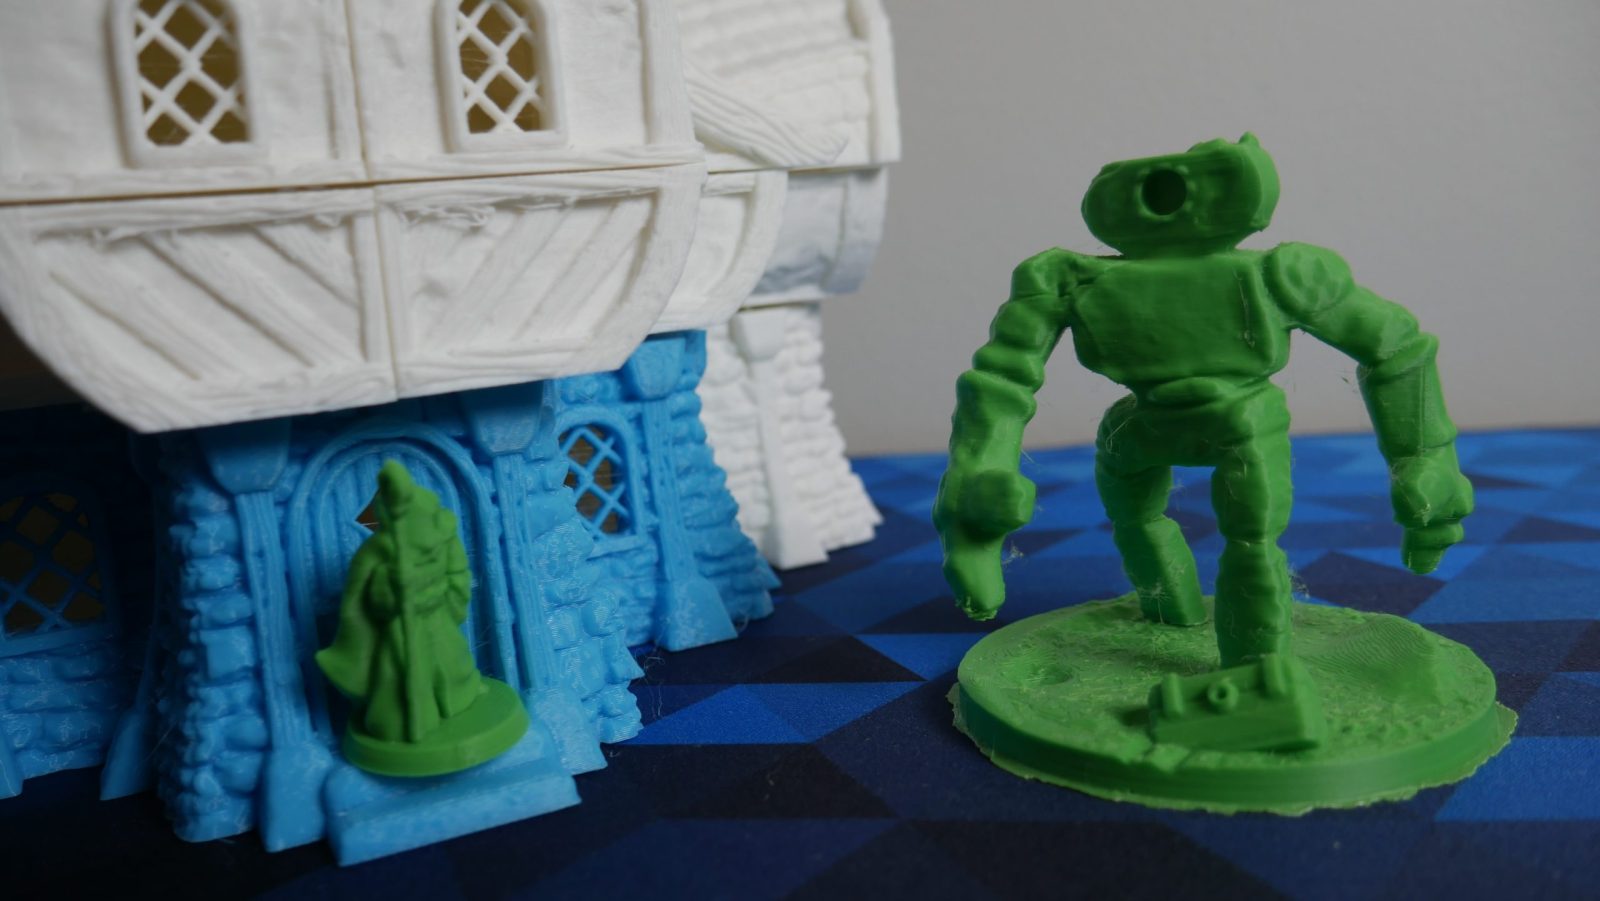
I decided not to hold back any punches and went straight for some miniatures. Using the finest default setting of 0.12mm layer height with the stock 0.4mm nozzle I was able to achieve decent results. Still wanting to be realistic with expectations, the models I chose are not super high detail. The Wizard has a bit of detail on the belt and cloak that came out clear. You can even see his teeny tiny fingers on the staff when you look at him in person. The rock giant isn’t necessarily a challenging print either but has an organic shape and requires support. It came out great as well. Both models do have a tiny bit of stringing that is not ideal. I’m confident this could be cleared up by dialing in settings but remember, we are running stock here.
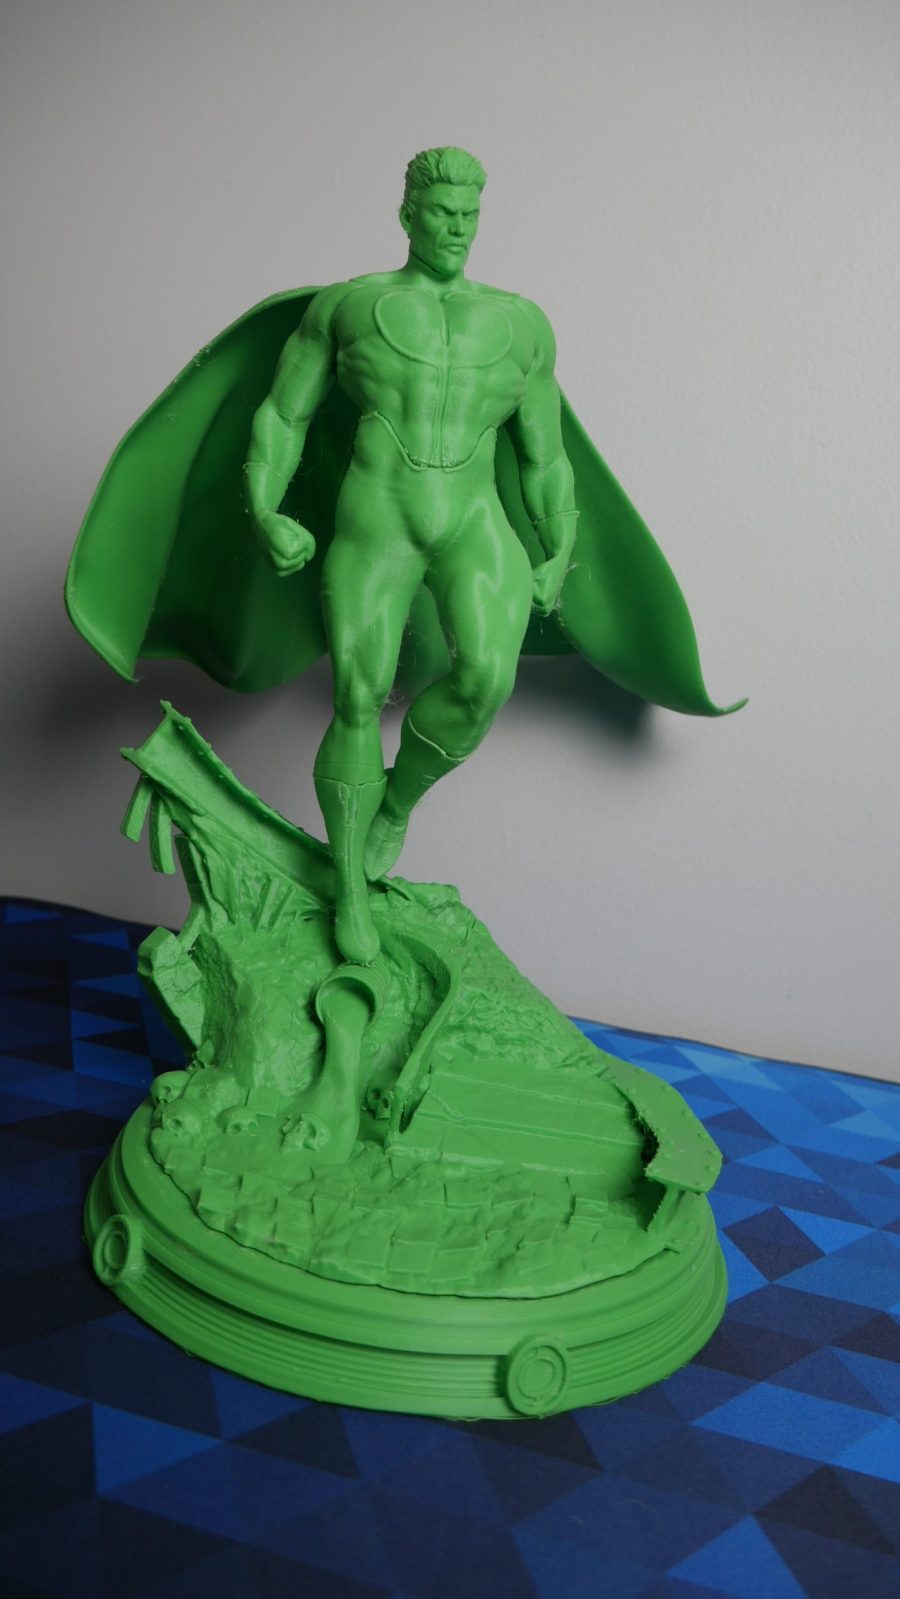
Seeing as I printed some tiny models, I had to see how the v3 would handle a big model. I found this multi-part statue of Omni Man on Thingiverse, dropped it in the slicer, and sent it. Well, sort of. This model was absolutely not designed for FDM printing and I had to do some work to clean up floating edges and non-flat slices as well as figure out the best orientation for supports. Settings were again all stock though. I was really quite impressed with how Omni Man came out. With zero extra calibrations and complete stock settings, he’s almost flawless. You can see a bit of sag on the edge of the waistline where the supports were. The slight stringing was still present but not as bad. That’s it. All of the pieces fit together perfectly, the massive cape that I had to cut in half to fit on the printer included. It’s an impressive print for putting in almost no effort into setting it up.
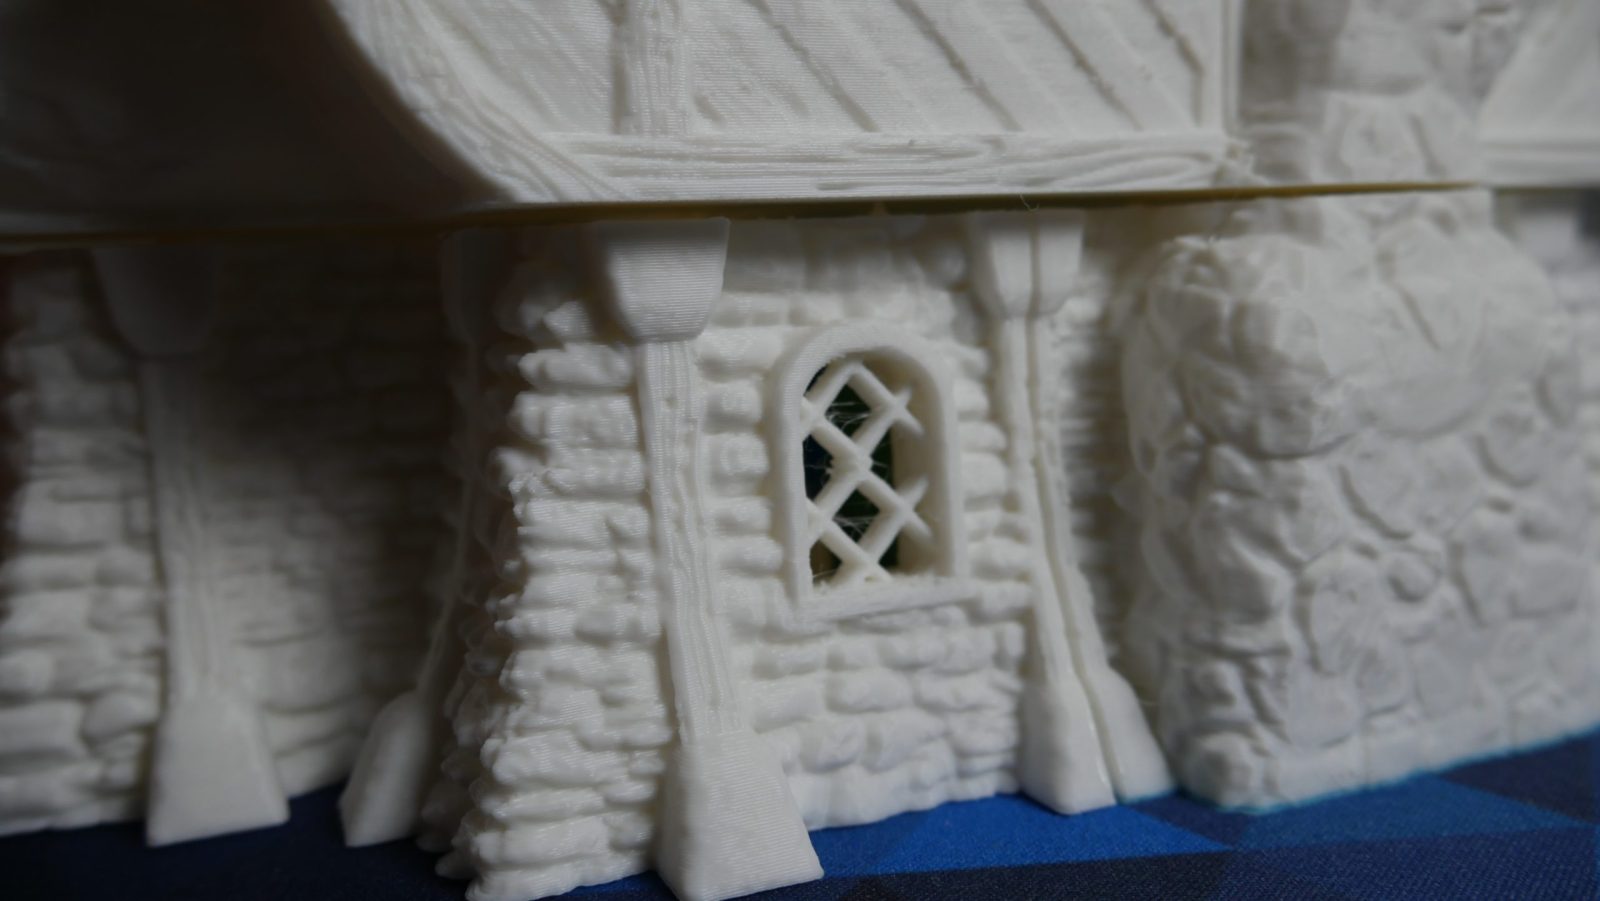
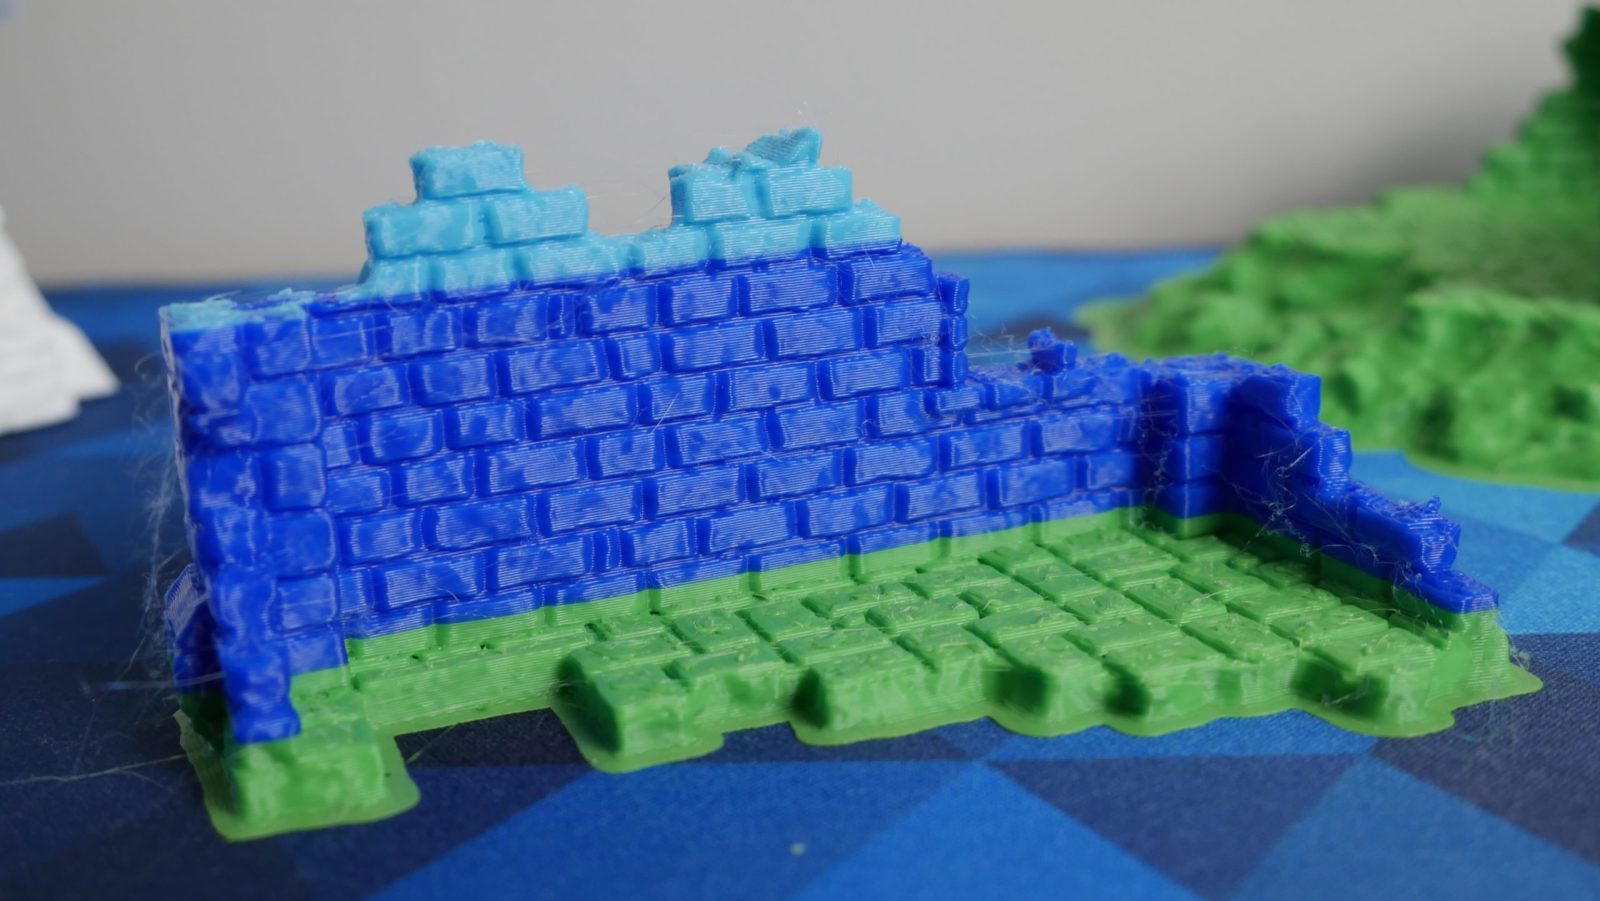
Moving away from miniatures and statues, I went for some terrain pieces. A 3D printer has incredible potential for tabletop gamers to easily and cheaply fill their games with 3D elements and terrain. Besides the previously mentioned stringing, these all came out flawless. Click start and forget it. Come back in a few hours and it’s done.
I also intentionally let the filament run out to test the runout and resume features. The printer did a clean pause and waited patiently for hours for me to come back and pop on a new roll. Here is where I hit my first negative. If you don’t straighten out the new filament just right, it’s a fight to get it through the runout sensor. Any curve and it’s going to get stuck inside. This is easy to fix by taking a second to straighten the end out but is frustrating if you’re not aware. Once you get the new filament in though, the screen has built-in filament change commands that will retract the old filament and then load the new one. You need to correctly unlock the extruder and remove the tube to feed in the new line and then lock it back up properly but it’s not hard at all. Then just resume the print and it continues like nothing happened.
The Ender 3v3 easily handled everything I threw at it. Without having to worry about choosing settings, random clogs, or leveling issues, 3D printing is more fun and less work. If you take the time to dial in the settings to your specific printer, the Ender 3v3 is going to be capable of knocking out anything tabletop-related with ease (with the exception of high-detail miniatures). Even at default settings, the 3v3 performed amazingly well.
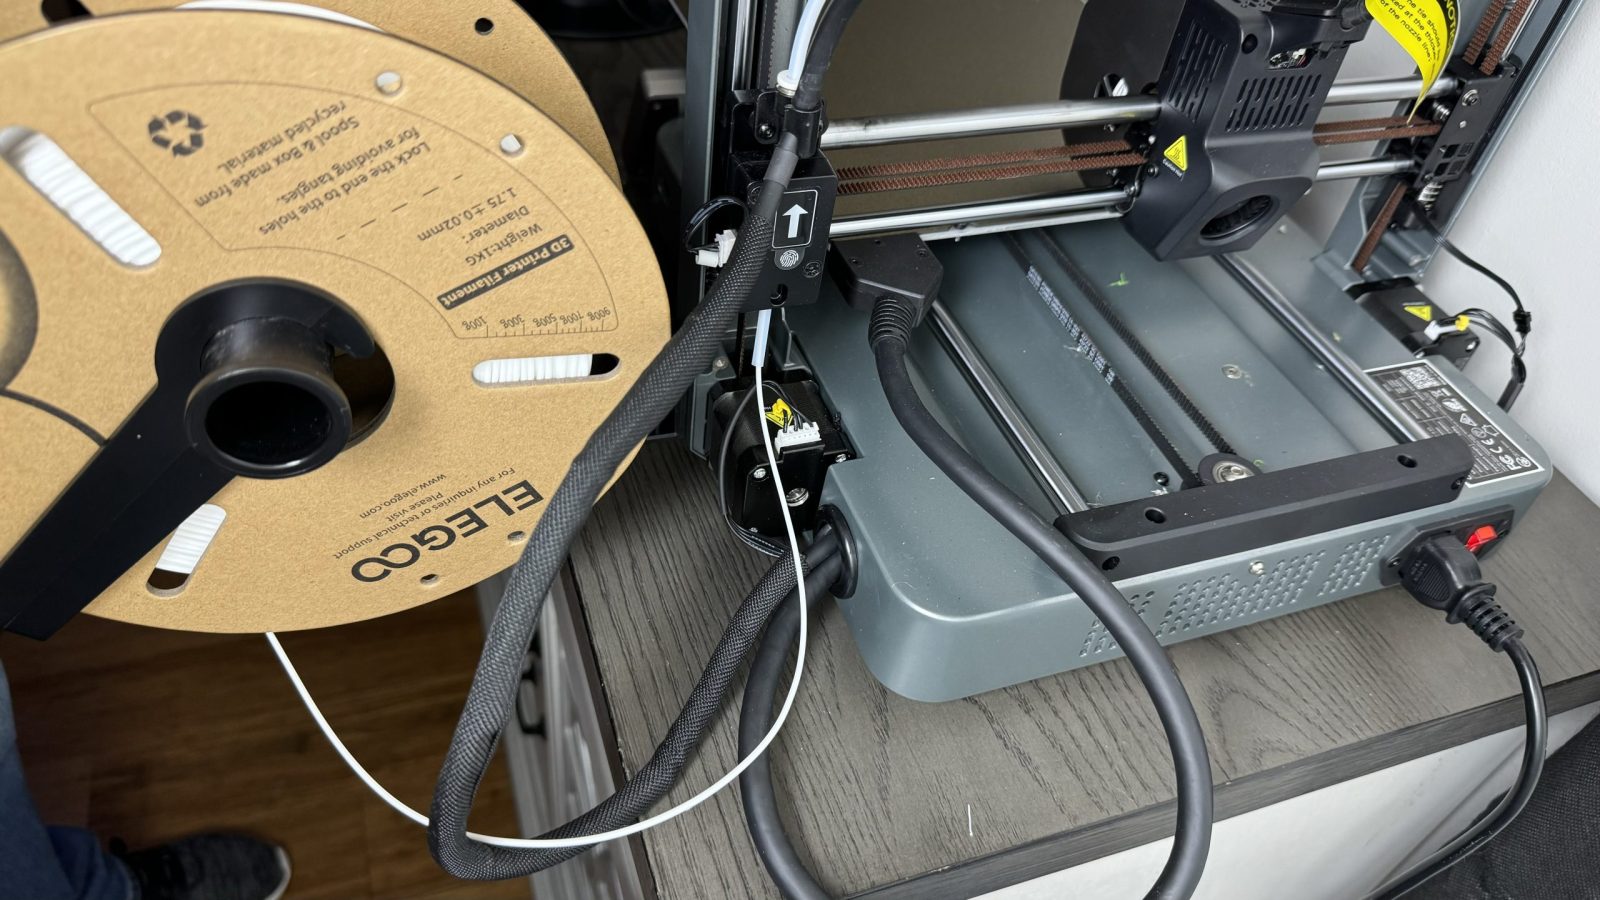
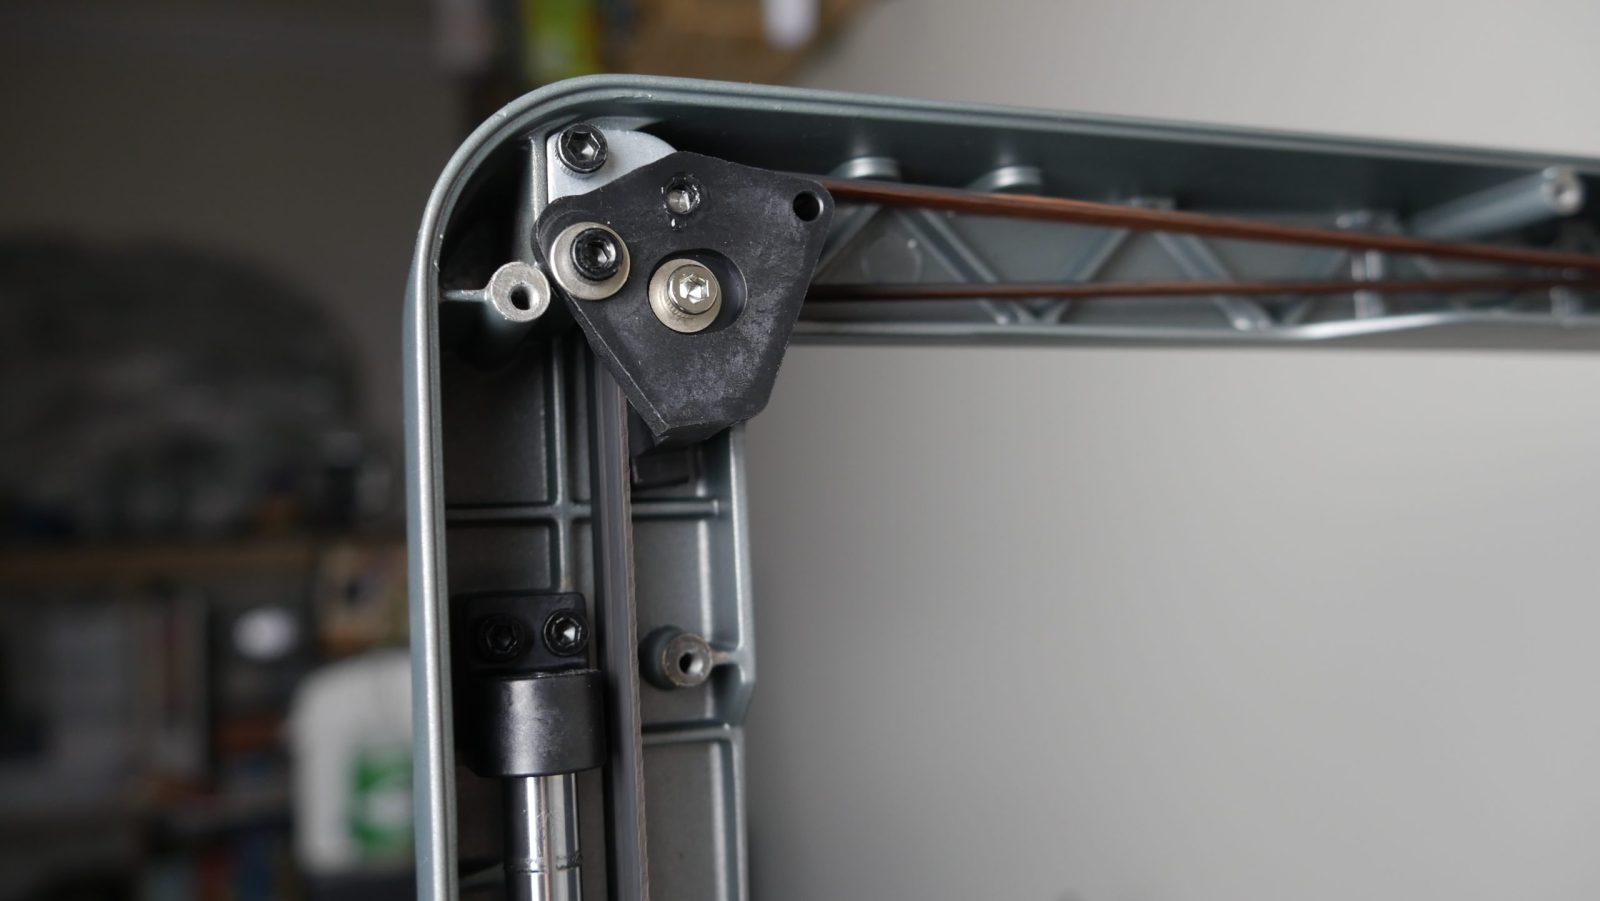
Of course, it’s not perfect. I encountered what I would consider a design issue with the way the filament holder and filament runout sensor are mounted and interact with the printer. When you run a calibration or select the option to have the printer automatically calibrate at the start of the print, the firmware has the print head move up to maximum Z height before coming back down. Doing this causes the filament to extend out but it obviously can not roll itself back up when the print head comes down. The result is a loop of filament that has the potential to get hung up or stuck. Most of the time, nothing got stuck and the print went on with no issue. I did have a major hangup on one print though where the filament somehow managed to loop back over the roll and go around the spool holder arm. This caused the filament to become completely stuck. Fortunately, no damage occurred and I caught it after just a few minutes of printing air. To prevent this, the filament either needs to be top mounted like in previous iterations or you need to standby during calibration and manually tighten the slack up in the filament after that initial Z height step.
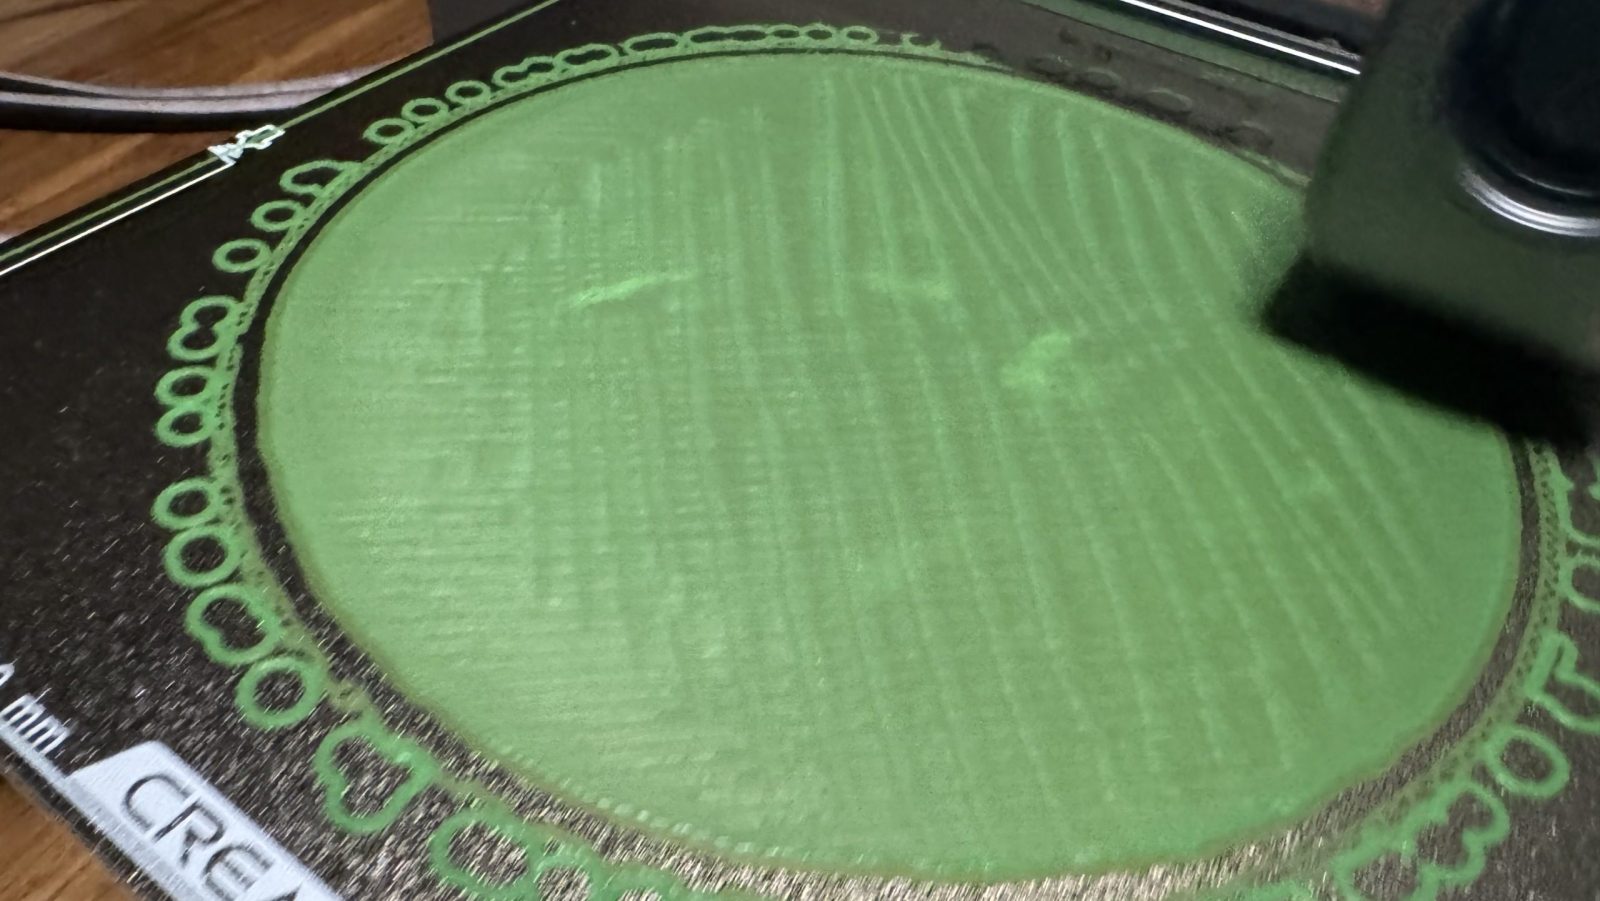
Another issue I encountered is a less-than-perfect first layer. The severity of this will depend on you and your application for the printer. It’s a fine balance between the first layer being too low and causing ridges or clogs and being too high and causing a spaghetti monster or failed print. In my case, it’s just slightly too low causing ripples and ridges in the first layer. Printing primarily terrain and board game pieces, it’s not really a problem. The printer recovers fine after a few layers and you wouldn’t even know there was a problem if you didn’t watch it happen. If you’re someone that chases silky smooth first layers, there is a manual Z offset you can play with but out of the box with auto level, it’s just off from perfect.
If you do decide to purchase an Ender 3v3, it comes with a 14-day return & refund policy and the standard 12-month warranty. At the speed new versions come out, you could look to upgrade before the warranty expires but if you decide to keep it long-term, Creality promises lifetime customer support. Personally, and before I ever started doing reviews, I’ve had good experiences with Creality support but others on the internet have not. Your mileage may vary.
If you are new to 3D printing or just want a new printer with all the latest features without dropping close to a thousand on the higher-end Core-XY models, you can’t go wrong with the Ender 3v3. It’s a huge speed boost from the older models and really does print great without requiring any extra work from the user. The Ender 3 is back and it’s worth taking notice.
[Updated 7/23/2024] Added verbiage to make clear that some premium features like AI camera, while not included, can be added on yourself.


