I was originally introduced to 3D printing with the Ender 3 V3 SE (you can see my review here). Creality recently released the Ender 3 V3 Plus, which is essentially the same as the Ender 3 V3 but with a 58% larger build volume—hence the “Plus” in the name. We also reviewed the Ender 3 V3, and you can find that review here. The V3 Plus maintains the same die-cast frame that’s easy to assemble, along with features like auto bed leveling, input shaping, auto belt tensioning, and a filament runout sensor. The key difference is the larger build volume of 300mm x 300mm x 330mm. However, the increased Z-height also makes filament tangles during calibration more likely compared to the previous version.
When I say it’s easy to assemble, I mean it’s the quickest printer I’ve ever put together. Starting with sliding the gantry into designated slots on the frame and bolting it in from the side, this method is much simpler than other printers where you have to bolt the gantry from the bottom. Next, you attach the angled support rods on the back of the gantry, which support the height of the frame and aren’t found on the smaller Ender 3 V3. After that, it’s just a matter of attaching the touchscreen and wiring up the print head, and you’re done with assembly. Once you set the voltage for your region and plug in the power, turning on the machine guides you through the initial setup. This process runs a self-check that tests nozzle heating, hotbed heating, the heat break fan, the mainboard fan, auto bed leveling, and input shaping.
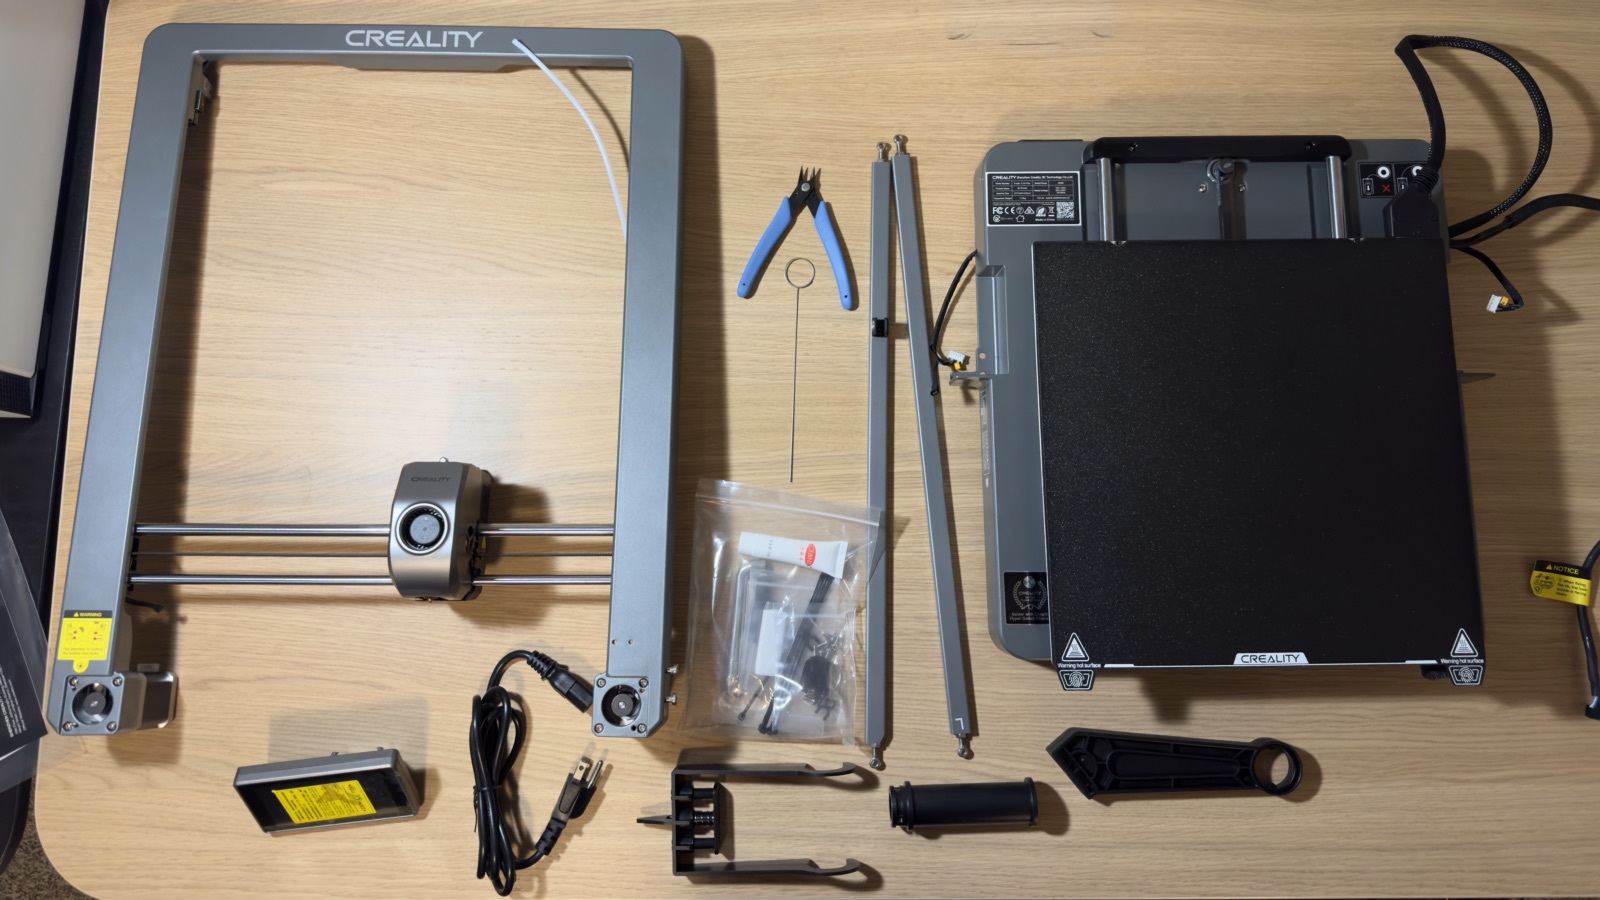
All the parts ready to be assembled
For the first print, I started with the Benchy using the G-code supplied in the printer’s storage. Not counting the initial heat-up and self-calibration, the print took 13 minutes. This is where I noticed two design flaws with the printer and made an observation about the noise level. During calibration, the Z-axis moves all the way up, unspooling some filament, then moves back down. This slack in the filament can wrap around the spool holder or, worse, get caught in the belts. I mention this because both issues happened to me during other prints. The second flaw I noticed is that since it’s a bed-slinger, the bed moves forward to present the print when it’s complete, which ends up blocking the screen.
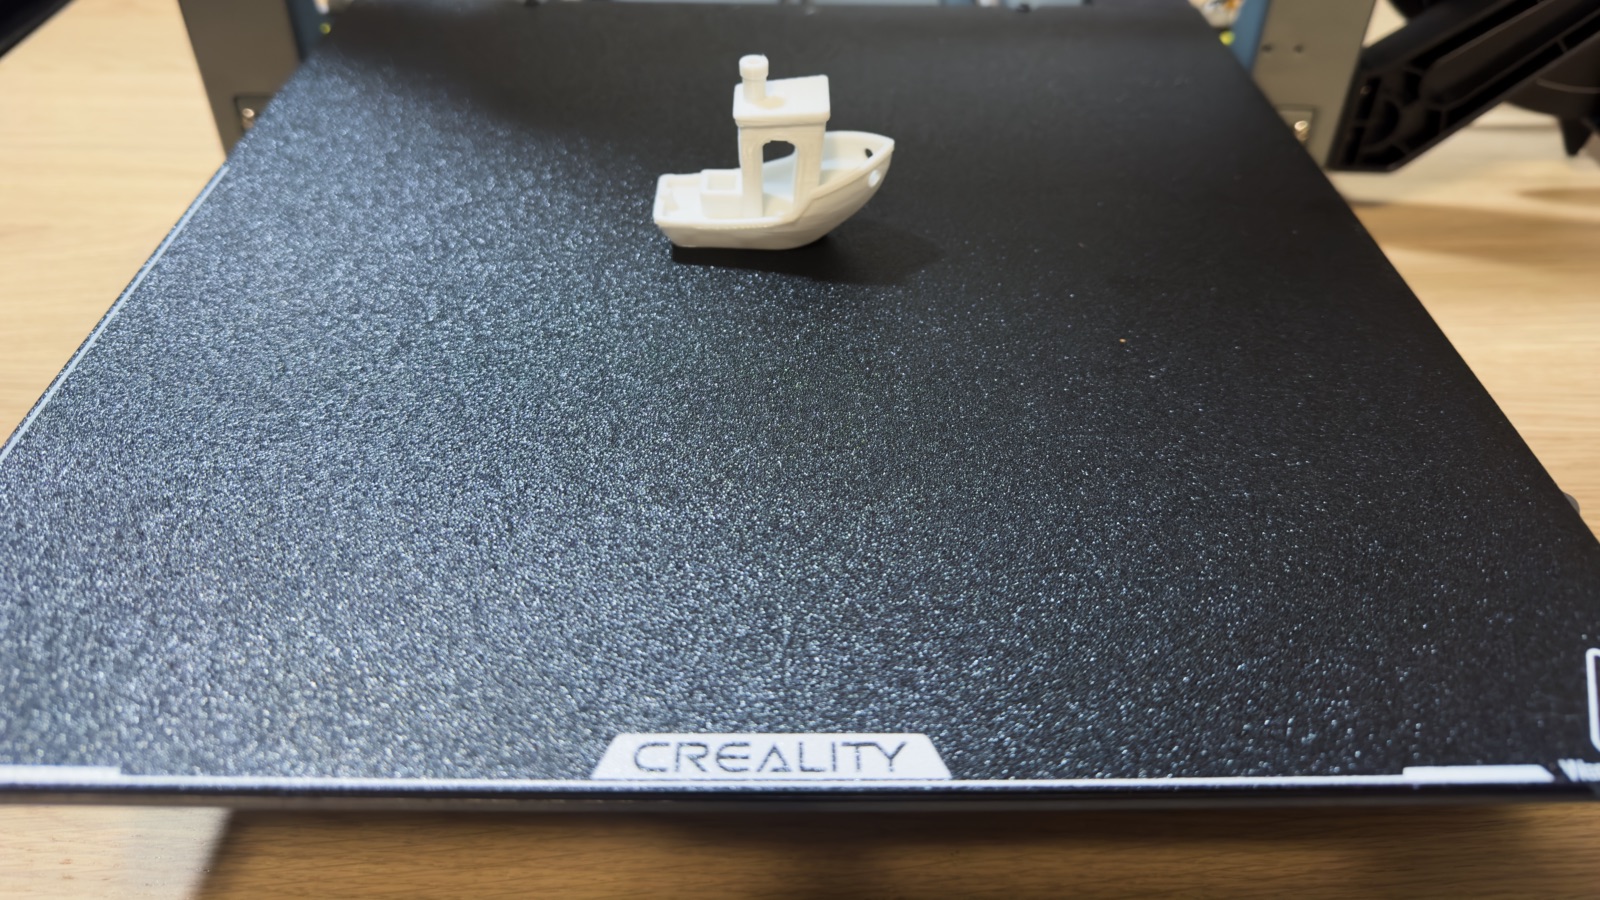
Completed print hiding the screen
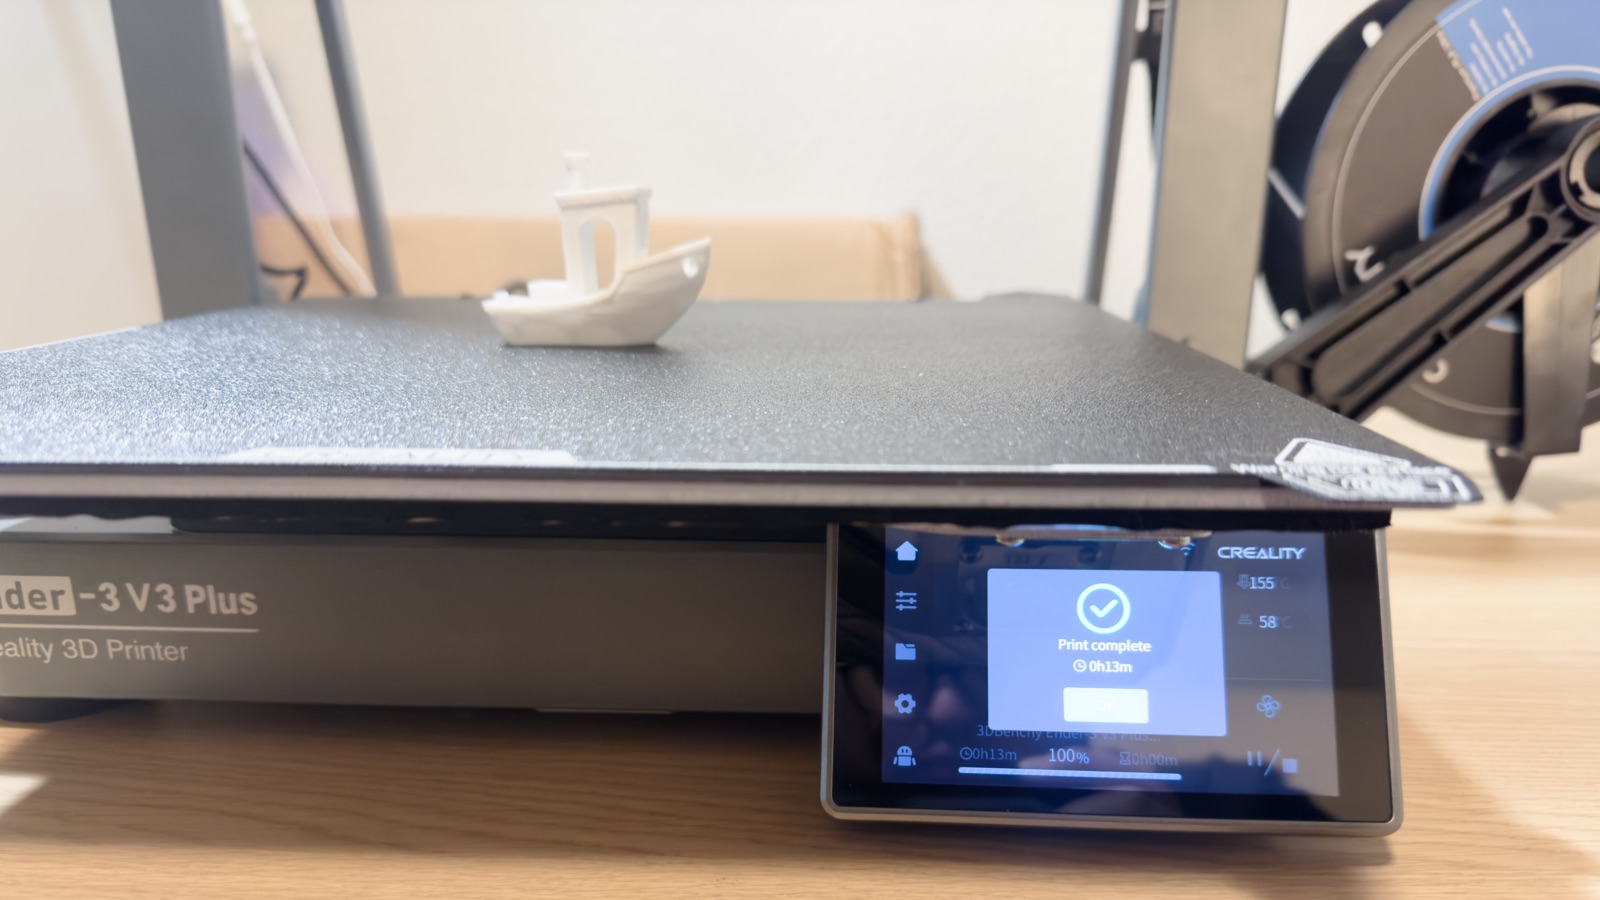
Completed print showing the screen
With great speed comes a great amount of noise. During large sweeping motions, I could hear the printer from another level in my house. The tiny movements aren’t as loud, but they have a bit of a squeak that reminds me of a sci-fi laser gunfight.
In the review of the regular Ender 3 V3, Mark focused on smaller prints and one large print. I’ll be mostly focusing on large prints. With a build volume of 300mm x 300mm x 330mm, this size is considered “helmet class,” allowing you to print a helmet in one go without needing to split it into multiple prints and glue it together. While I didn’t print a helmet, I did print a large mask—Reaper’s Nevermore mask from Overwatch. I didn’t measure the model beforehand, so the default size ended up being too big for my fat head. I also printed a loot box to go with the mask.
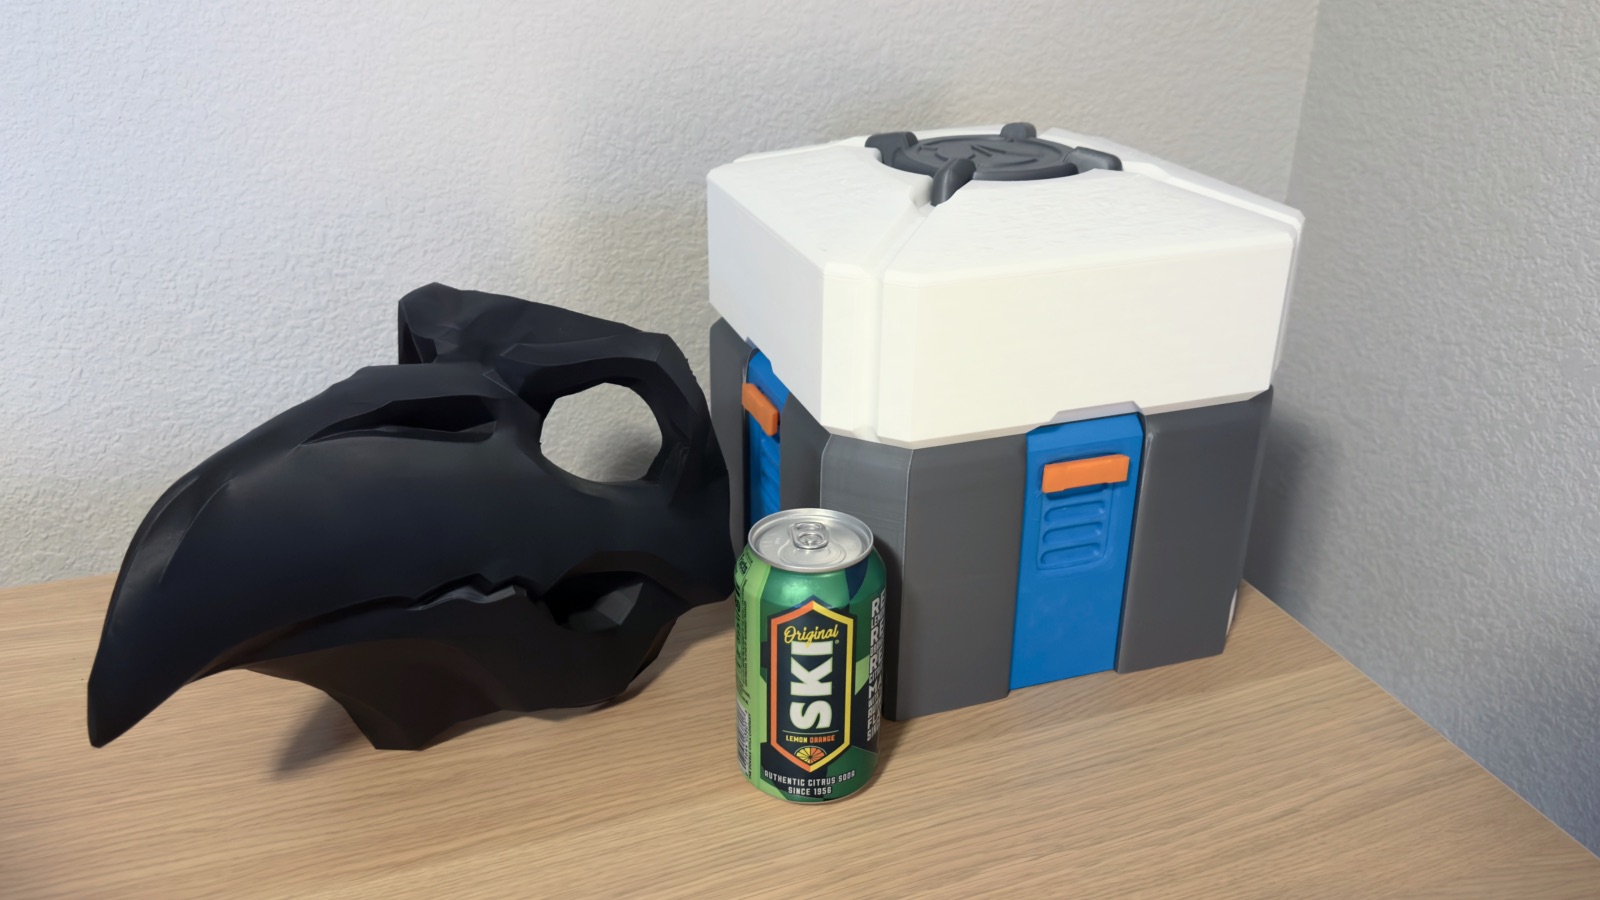
Overwatch Reaper Nevermore mask and loot box with a soda for scale
I found a model of the Legendary symbol from Halo and decided to print it scaled up as much as I could on the build plate. I started with the base plate and scaled it up to 250%. However, I forgot to scale up the UNSC machetes, so they ended up looking like they went swimming in cold water.
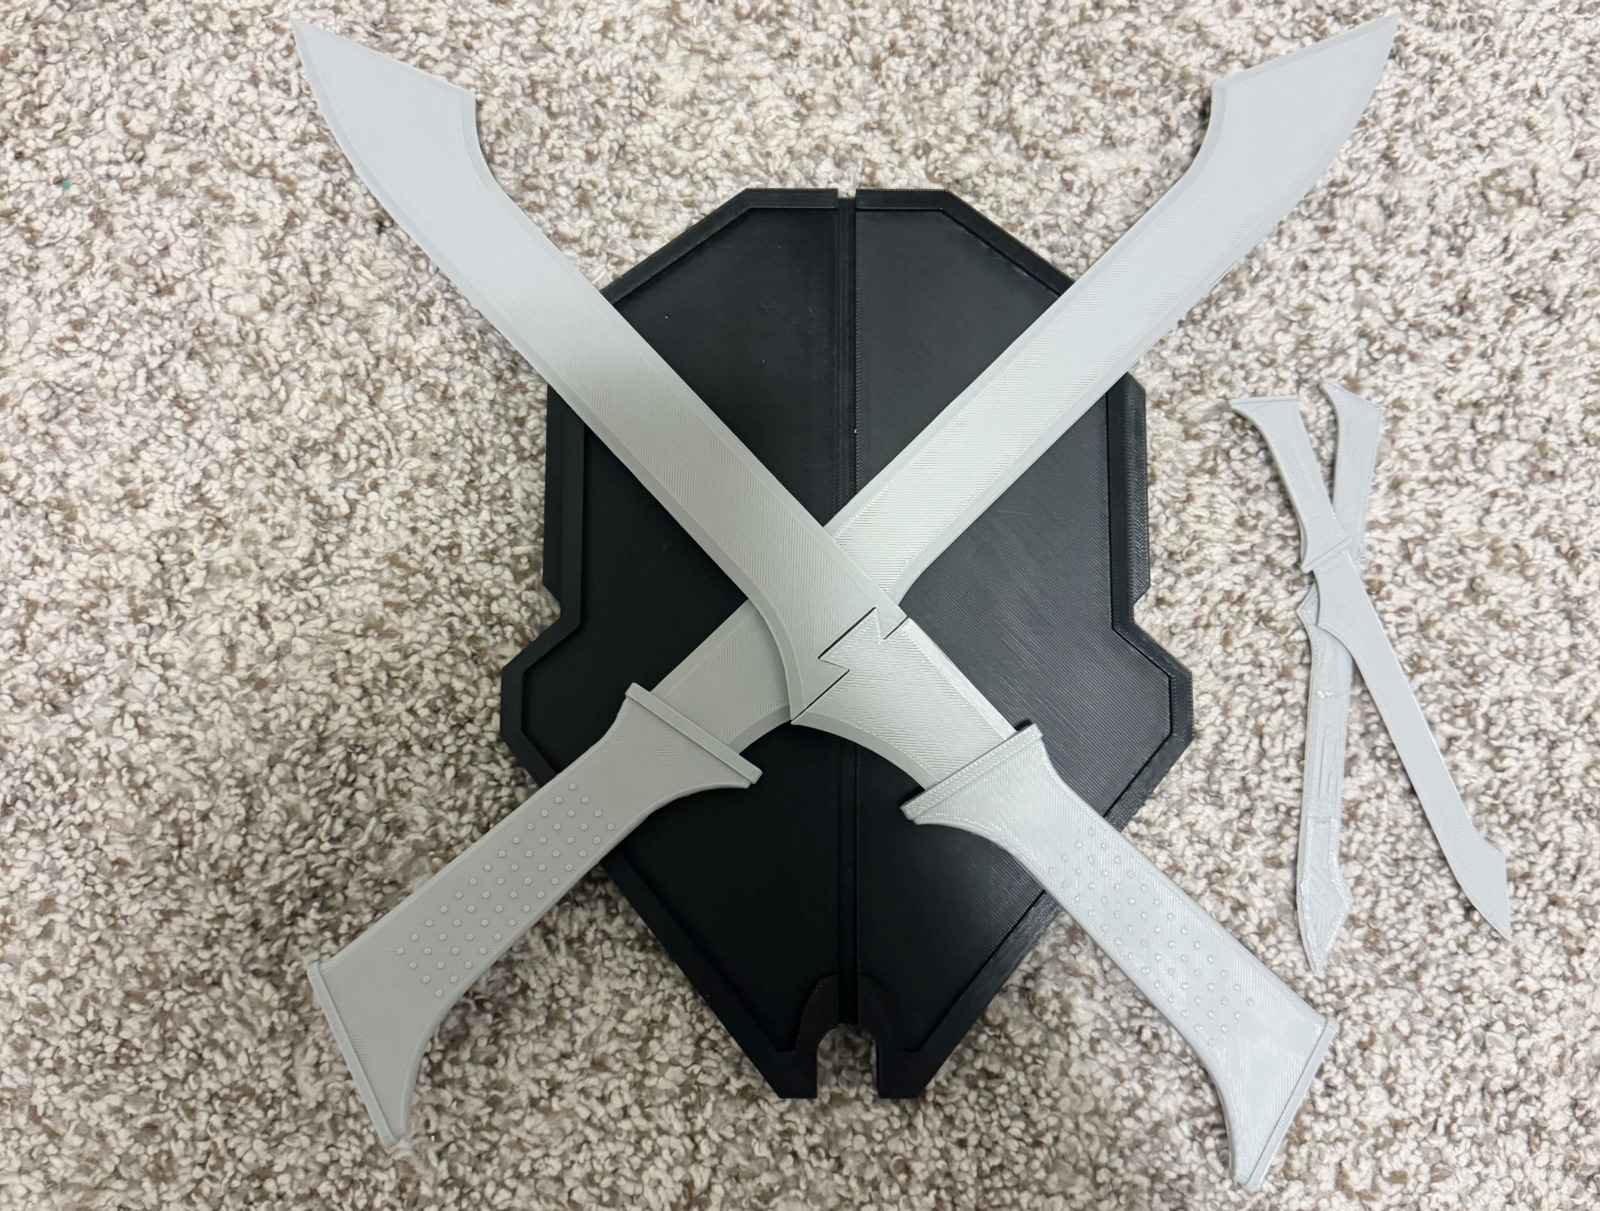
Tiny machetes since I forgot to scale up the print
When scaling up the base plate to 250%, I didn’t consider that the machetes were larger than the base plate. As a result, I had to cut each machete into two pieces to fit them on the build plate.
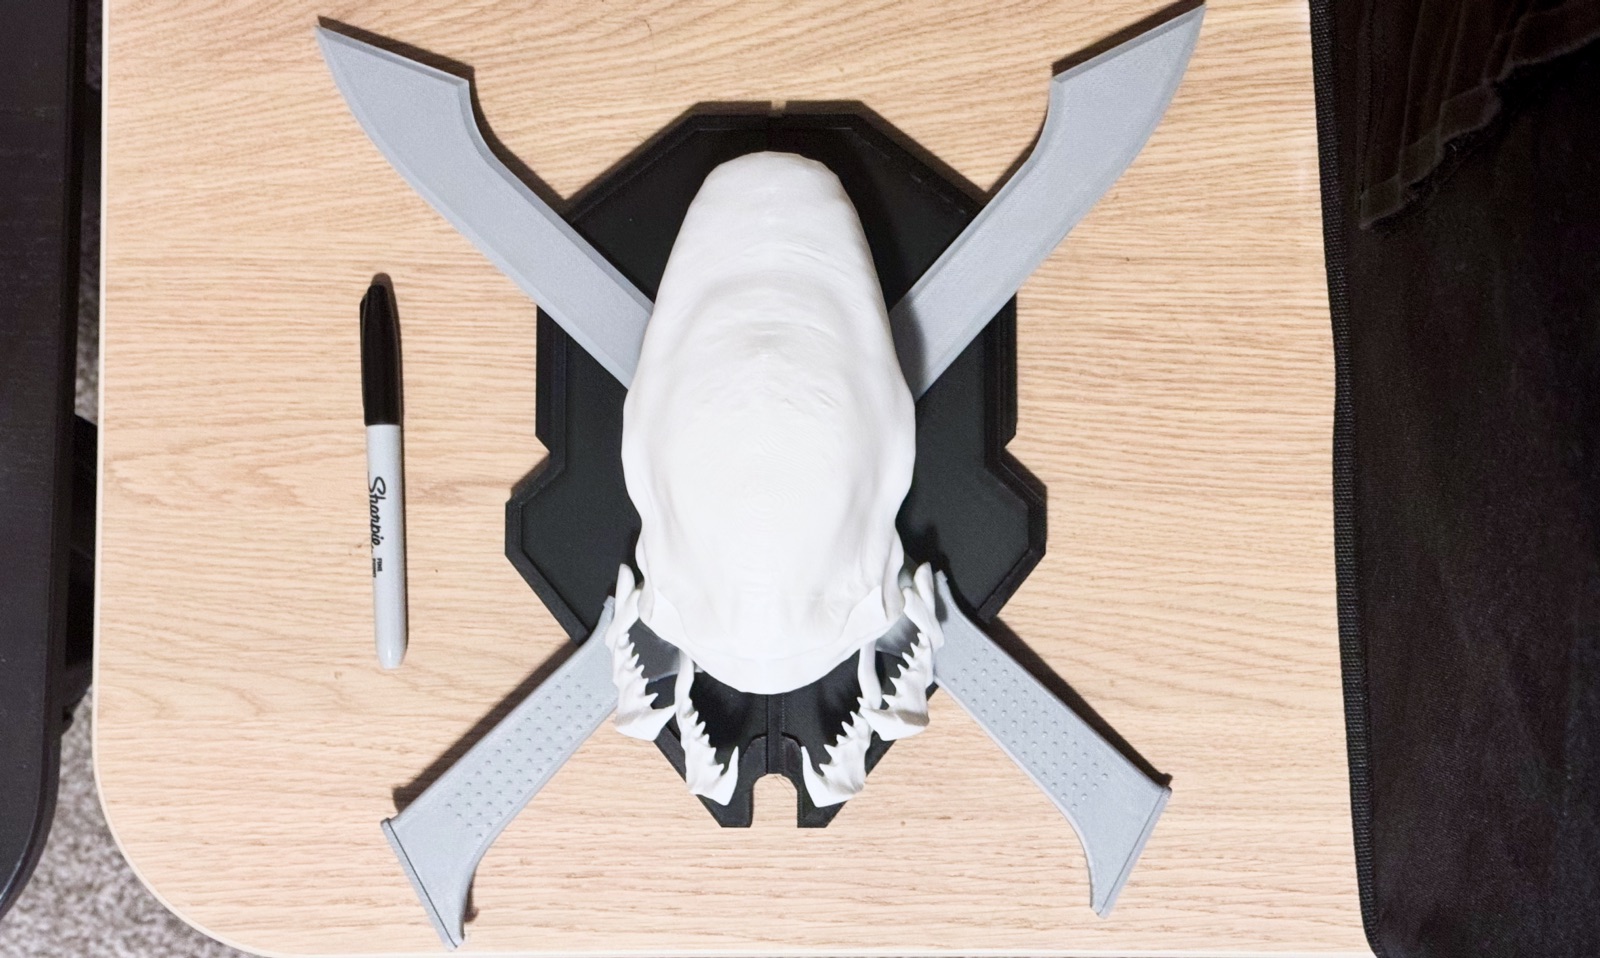
Halo Legendary symbol with marker for scale
If you’re familiar with Gridfinity, you’ll appreciate how the larger print volume of the V3 Plus can help crank out base grids much faster. For those unfamiliar, Gridfinity is a modular grid system for organizing spaces, using 42mm x 42mm squares. You start with baseplates to fill a volume, then print bins of various sizes to fit onto the baseplate. With the regular Ender 3 V3’s 220mm x 220mm print bed, you can print a 5×5 grid, which measures 210mm x 210mm. However, with the V3 Plus’s 300mm x 300mm build plate, you can print a 7×7 grid that just barely fits at 294mm x 294mm. Remember when I mentioned that the filament could get stuck in the belts during calibration? It happened while printing one of the Gridfinity base grids, causing a layer shift.
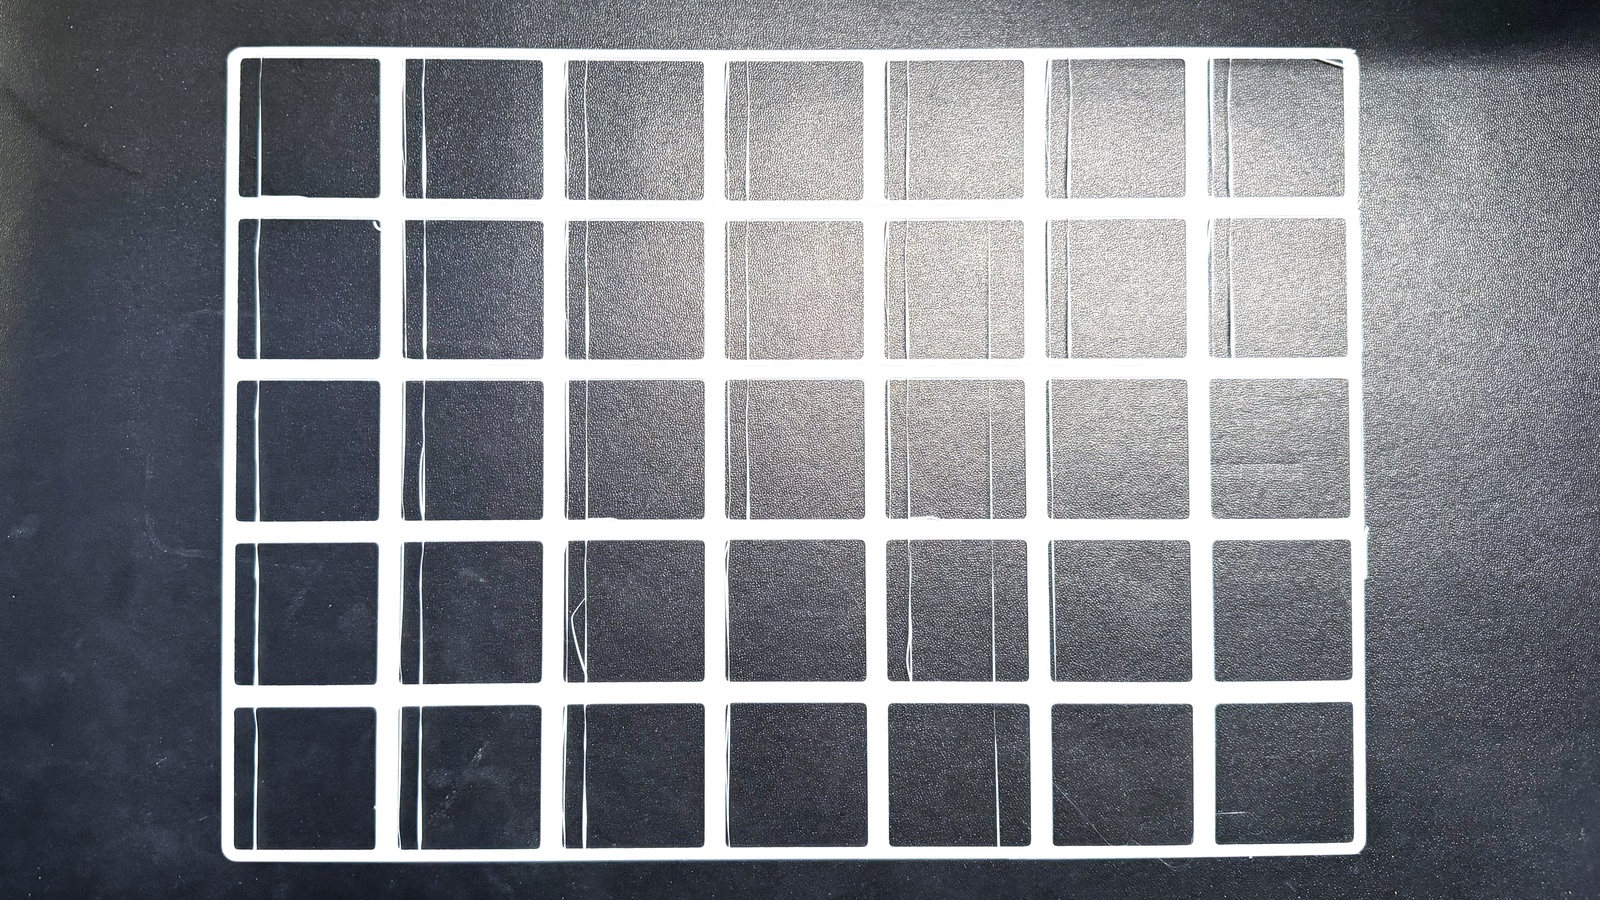
Layer shift due to the filament getting caught in the belts
All of my prints were done using Creality’s slicing software, Creality Print, with the default settings—except for changing the infill and disabling the auto-brim. In my review of the Ender 3 V3 SE, I encountered several issues with Creality Print version 4. However, with version 5, most of those issues were resolved. Many of the problems I experienced with the SE were also addressed in this new printer. The product page for the Ender 3 V3 Plus claims “easy operations like a smartphone,” and based on my out-of-the-box experience, I’d have to agree.
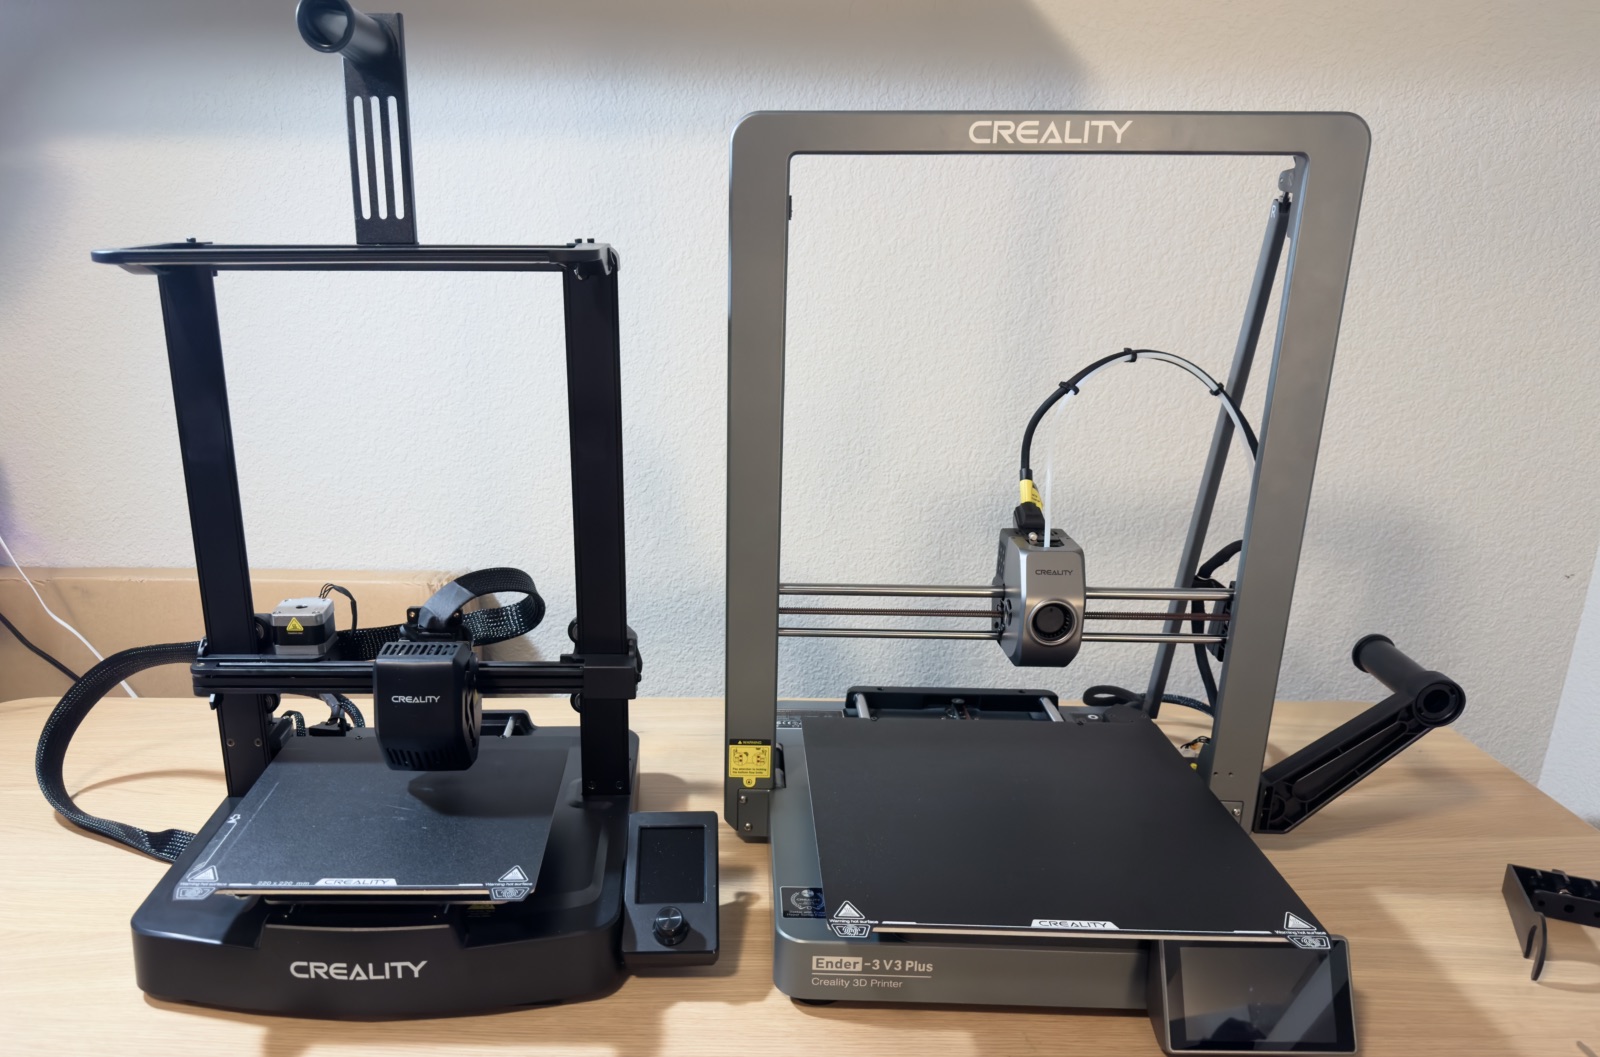
Ender 3 V3 SE next to Ender 3 V3 Plus
The Creality Ender 3 V3 Plus takes what worked well in the original and scales it up—literally. With a larger build volume, it’s perfect for those bigger projects that the standard Ender 3 V3 couldn’t handle in one go. Assembly is still a breeze, the frame is rock solid, and features like auto bed leveling and input shaping are just as convenient as before. Creality Print version 5 addresses many of the software issues I encountered with the SE, and overall, the interface feels much more intuitive. The added Z-height does make filament tangles more likely during calibration, and the bed-slinger design occasionally blocks the screen when prints finish. But despite those quirks, the Ender 3 V3 Plus delivers a strong balance of performance and ease of use, making it a great option for both hobbyists and those ready to tackle larger 3D printing projects.