
When the FLSun S1 arrives, it ARRIVES. As you can see in the video below, this printer is large enough to require a crate to ship it. The positive thing is that this means it’s almost fully assembled and ready to print the moment it arrives. Like FLSun’s V400, this is a delta printer (we’ll get into that difference later), using a trio of carbon fiber arms combined with three belts to move the print head, setting it up as an incredibly fast FDM printer. FLSun was founded in 2015, and with each printer they’ve released they’ve managed to not only raise the quality, but also the speed and volume. The FLSun S1 represents not only the largest printer they’ve ever made, but also the fastest printer they’ve produced. How fast? Unless I miss my mark, this is the fastest printer money can buy without entering the commercial printer space. Let’s unbox the FLSun S1, set it up, and see what it can do.

The FLSun S1 is remarkably easy to set up, as you can see. Using the easy-to-read instructions, you’ll attach the tempered glass window/doors to the solid metal frame, followed by the USB-connected touchscreen. Removing the three plastic clips that secure the belts for shipping, and then plugging in the printer finished off the physical setup. All told, the final assembly took roughly 5 minutes, and that includes my time to set up and record it for the video above.
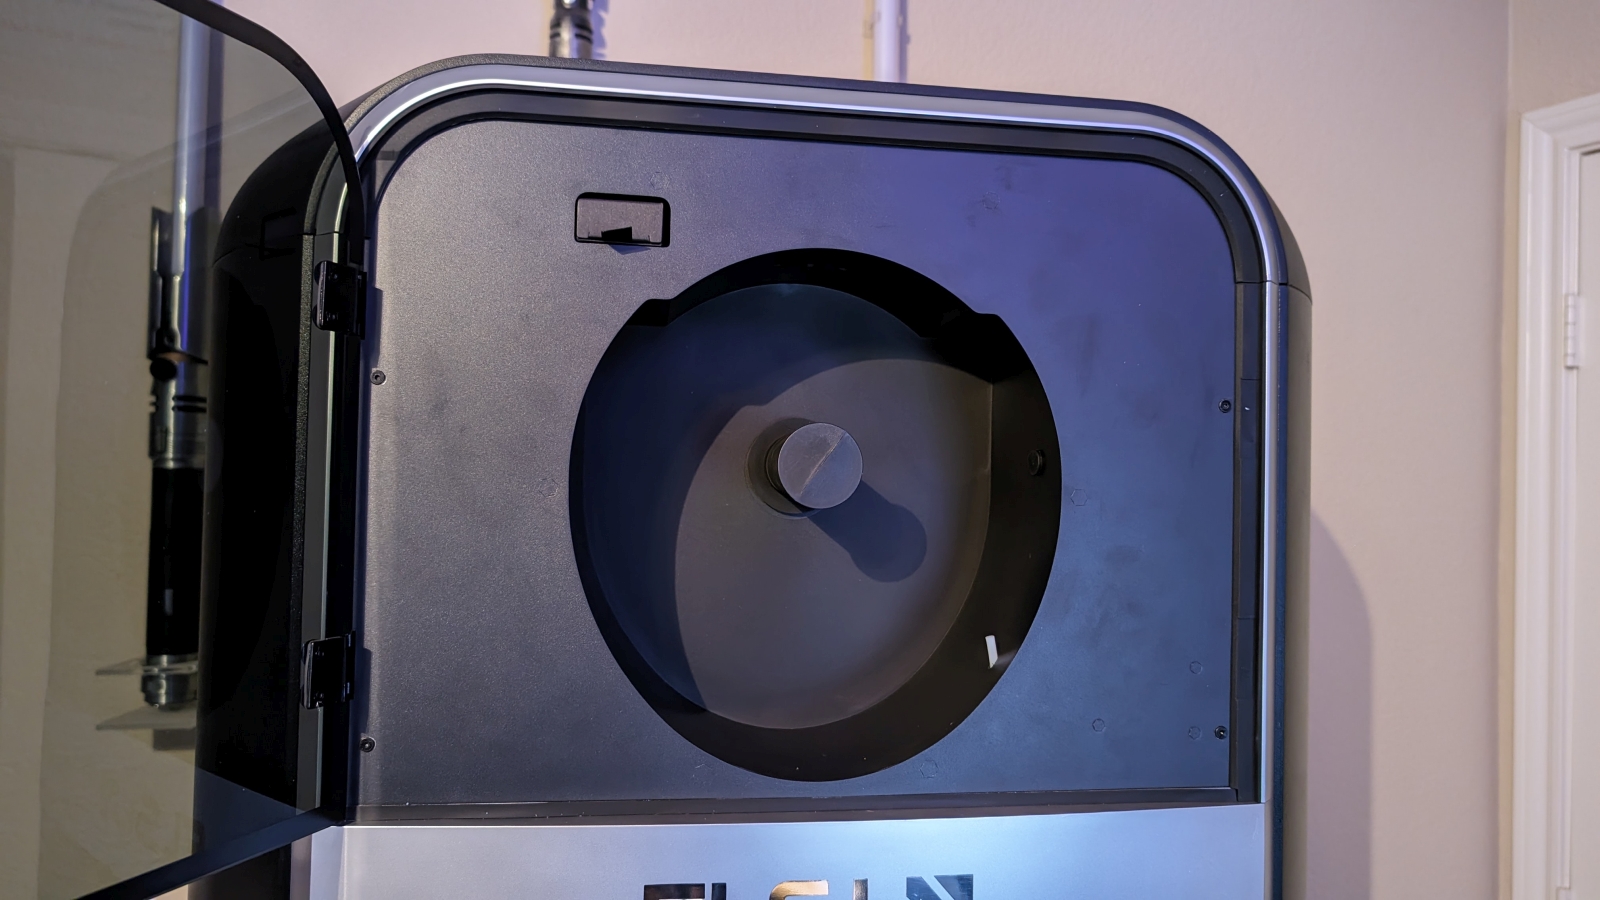
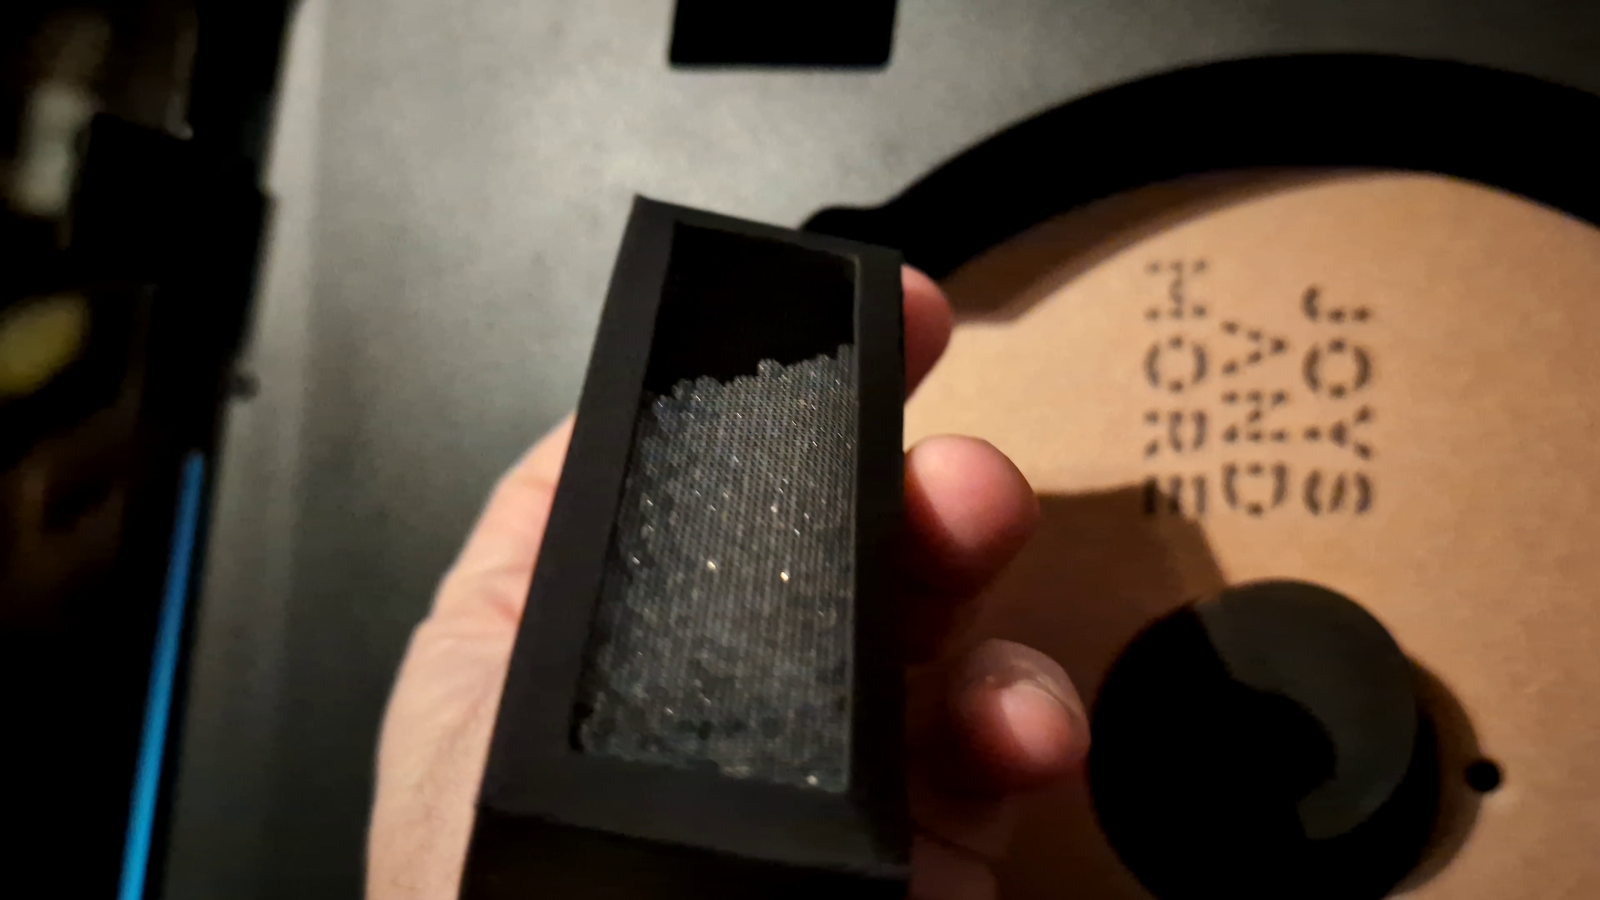
The device ships with two nozzles, a pre-installed 0.4mm, and an included 0.2mm, both made of hardened steel and with an 80W ceramic heating element. The printer has a printing accuracy up to 0.1mm, with layer heights ranging from 0.1-0.35mm, and a nozzle max temp of 350℃. Obviously you’d need to pick up different nozzle sizes for those various layer heights, but suffice it to say there is a wide range of options available. The nozzle system supports a 1.75mm filament diameter, handling PLA, PETG, TPU, ABS, ASA, PVA, PET, PA, PC, PLA-CF, and more. Better still was the surprise above the printer bed — an integrated dryer, complete with removable desiccant pack to keep your filament pliable and ready to print. It’s only a single spool, but that’s in line with the purpose of this printer – building single color items very, very quickly.
To ensure that the extrusion of your material is as clean and spaghetti/blob free as possible, FLSun has employed a dual-gear direct drive extruder. This means that instead of a single gear to pull filament through the pipe, a second gear is employed. This ensures the filament is gripped adequately at all times, reducing any hiccups with consistently feeding the filament to the nozzle. This dual-drive setup is a frequent upgrade for DIY 3D printers, so it’s great to see it built in here by default.
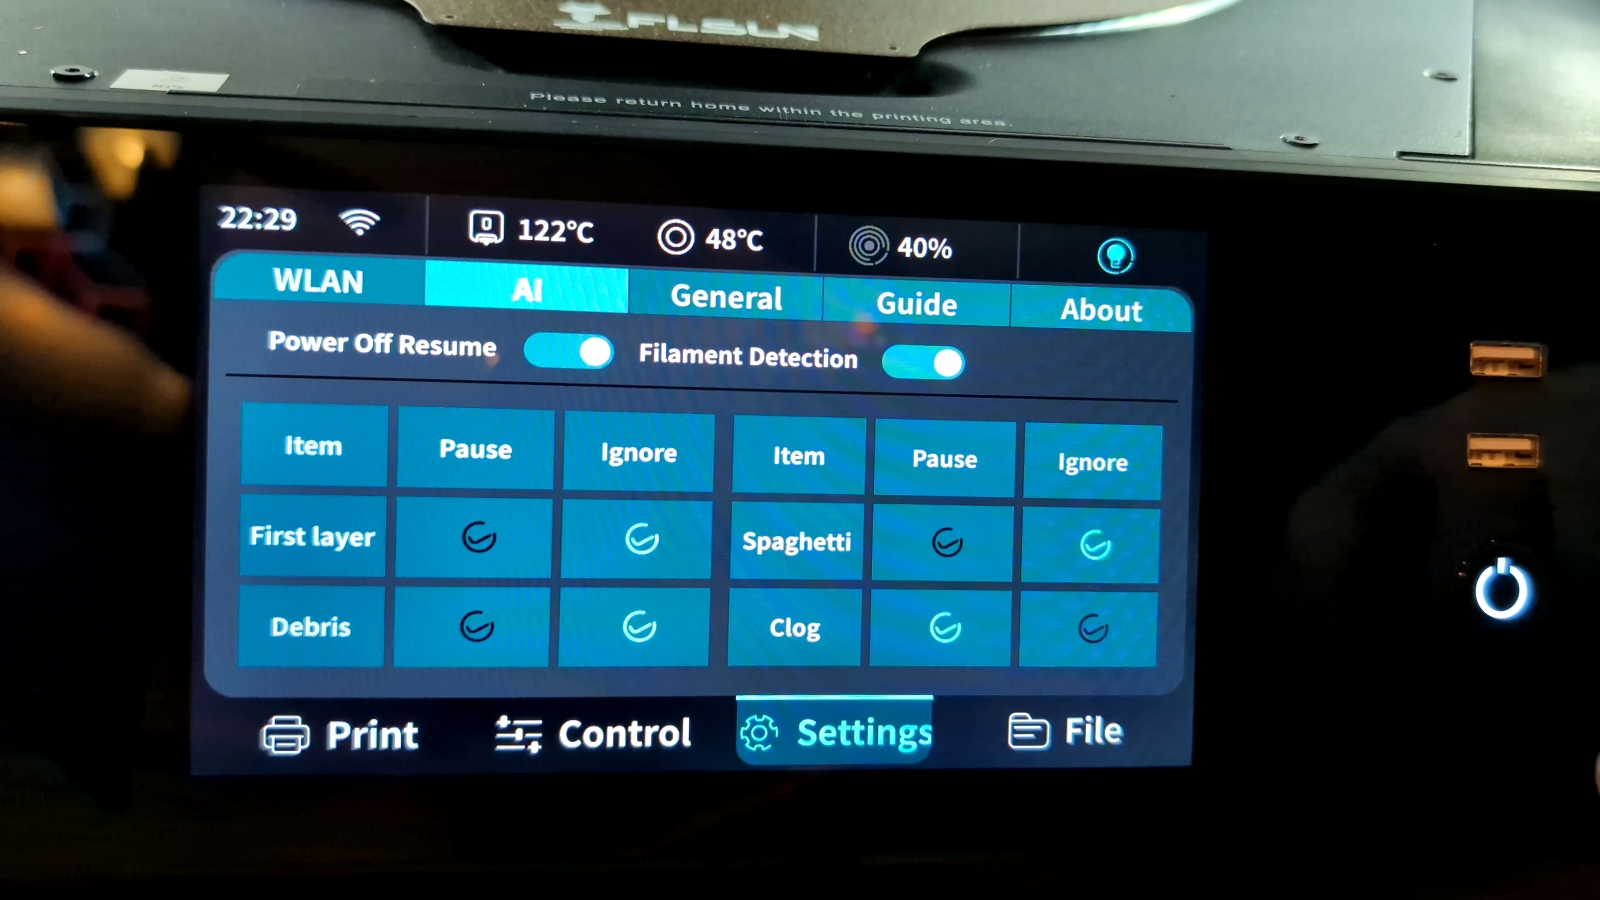
The next quality control item for this printer is the smart inclusion of AI elements. Most of the time when somebody says they have “AI” in their equipment, it doesn’t amount to much of anything. Here, we have an AI monitoring a number of activities, with sensors and cameras to support it. Here it can detect the first layer, any debris on the build plate, spaghetti, or clog situations, and it can pause the print and prompt you for what to do next. It even supports filament detection and power off resume, in case they’re needed. There’s also a Lidar camera underneath. When your first layer prints, the S1 pauses for a moment, activates a small red laser, and measures that layer for quality and adhesion. Once it’s satisfied, printing continues apace until it’s complete. These items combined ensure you have a trouble-free print as often as possible. In practice, I ran into issues with the spaghetti detection as it incorrectly stated that the printer was extruding incorrectly when it wasn’t. I set this to ignore and all following prints were trouble free.
Before we dig too far into this review, there are a few terms you should understand. There are a few different types of printers. Resin printers are typically SLA, or stereolithographic. These printers cure a thin layer of resin using light via a transparent resin tank, one layer at a time. The plate moves up and down thousands of times, popping loose from the resin tank over and over to create an object. There are a lot of chemicals at play, and even more when the object is done as it has to be cleaned and cured before it’s safe to be handled. The other type of printer is FDM, or fused deposition modeling. This uses a thermoplastic filament, once again printed one layer at a time, which is extruded from a hot end that heats that plastic onto the layer below it, to build up an object. Newer technologies have allowed these to be printed at such a small layer height as to be almost as good as the SLA method mentioned above, but the thermoplastic is often far less brittle, making them perfect for objects that need to be more resilient over time.
Within the FDM family of printers there are two methods of printing. Most printers are “Cartesian”, meaning they move the heated bed around in the X and Y directions, with Z providing the height as the object is built up. On the other hand, and certainly gaining popularity is the Delta printer. Delta printers instead leave the built plate stable, but instead moves the hot end around using a three point gantry system. This allows them to move FAR faster than the “bed slinger” type, are far easier to level, and have a higher success rate.
For reference, here are some of the recommended speeds from a few of the most popular Cartesian printers (though you can usually add about 10% for maximum speed, quality suffers):
($149) – Ender 3 – 40-50mm/s
($219) – Ender 3 SE – 250mm/s
($299) – Ender 3 V3 KE – 400mm/s
($386) – Creality Ender-5 S1 – 200mm/s
($349) – Elegoo Neptune 4 Plus – 500mm/s
($399) – Bamboo Lab A1 – 300mm/s
($599) – Bamboo Lab P1P – 300mm/s
($929) – Creatlity K1 Max 3D Printer, 500mm/s
($1099) – Snapmaker J1s – 350mm/s x2 heads
($1899) – R QIDI TECHNOLOGY i Fast – 120mm/s x2 heads
($69,995) – Nexa3D XiP Pro – 24cm/hour
Ok, so the last one is for fun, but as you can see, more expensive doesn’t mean better or faster. With all those numbers fresh in your mind, what if I told you that the FLSun S1 FDM printer retails for $1,499 USD but prints at a staggering 1200mm/s and 40000mm/s ² Acceleration on the hot end? Now what if I also said that it has a massive build volume of 320*320*430 mm³? If you combined the two fastest printers from our list (minus the one that costs more than a car) and then added a Creality Ender-5 S1 to it, you still would just barely hit the speed of the FLSun S1. It is, and by a very wide margin, the fastest printer on the planet without moving into the heavy industrial appliance space. Why would you need that speed? Well, let’s dig into the use cases.
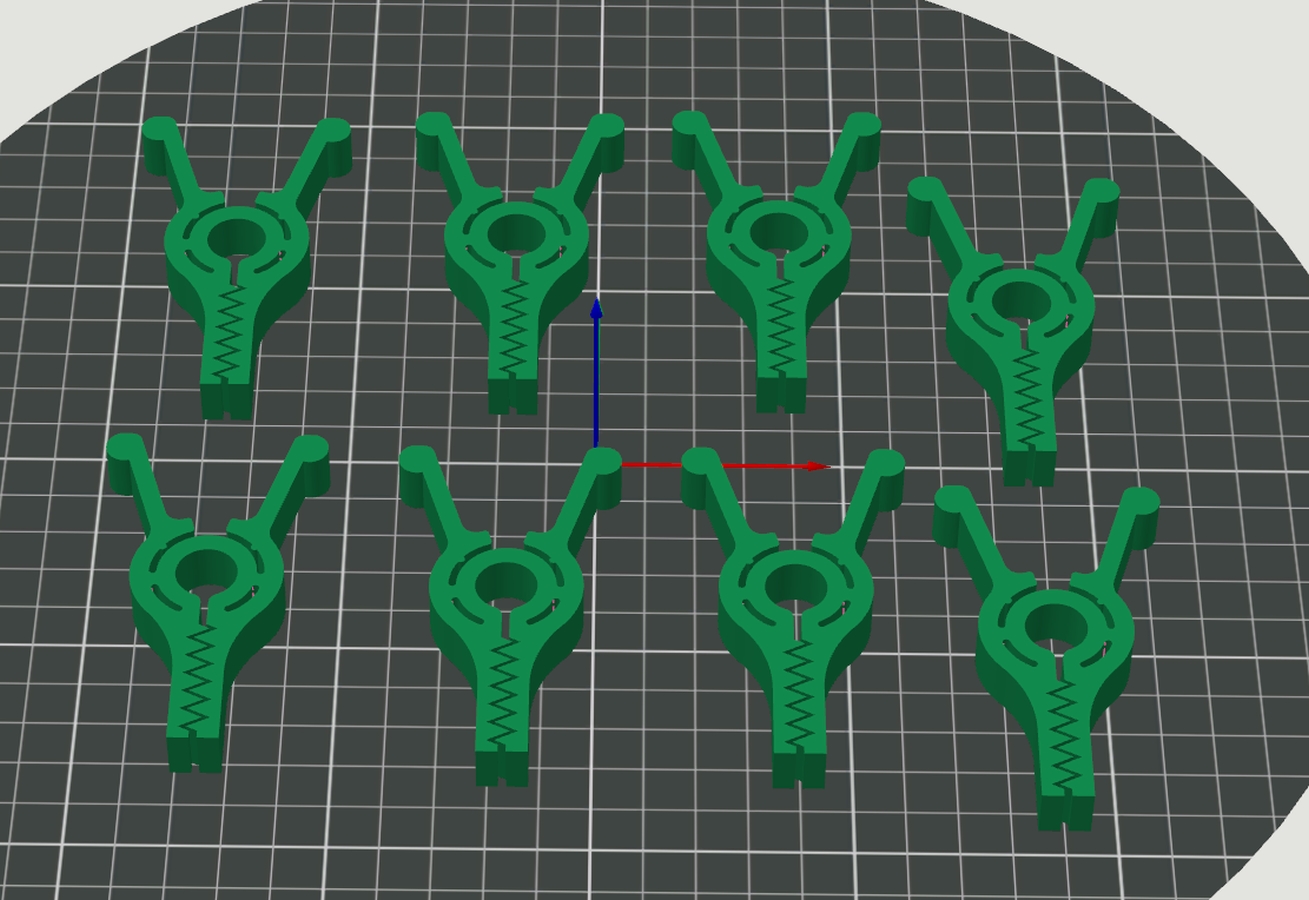
Obviously 3D printing is a growing industry, with rapid prototyping for anything from commercial parts to toys using 3D printers to quickly iterate through prototypes and ultimately into production. While you can obviously print lots of cool and fun things, the sky’s the limit on what this printer is capable of delivering. Building incredibly complex models for architectural representations, or recreating complicated mechanical parts on the fly go from a multi-week process into one that can be completed in hours with this printer. Creating high quality positives that you can then create negatives for molds becomes something you can iterate on instantly. Dental positives can be printed in minutes instead of hours. Creating mounting hardware where the original can’t be found or easily constructed is accomplished with a modicum of work in a modeling tool. The subreddit for functional prints is full to bursting with all sorts of devices to help with arthritic hands, reinvented camera battery mounts, repaired fishing rod handles, umbrella holders, replacement caps, modular organizational boxes, drill bit holders, door stops, shower shelves, and even a funnel to make sausage that all can be printed with just a few clicks.
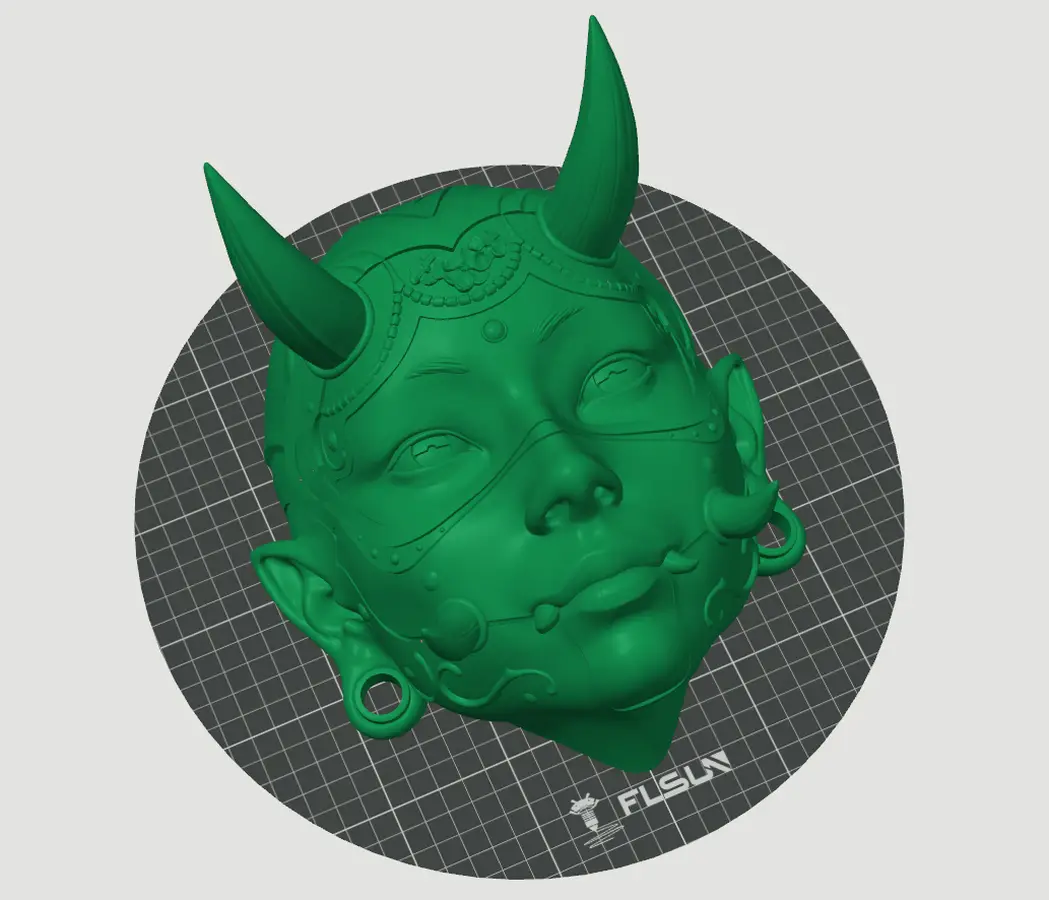
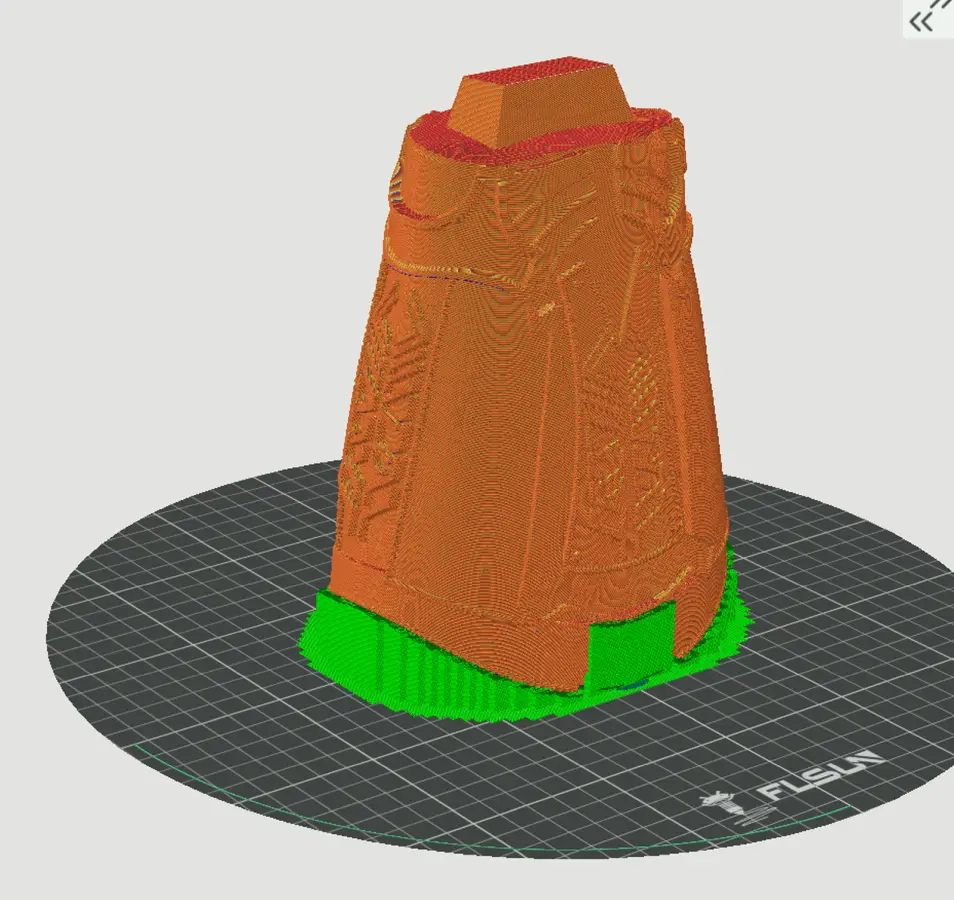
When we look at the list of printers above, you might note that most of them have one thing in common – a small build volume. As I mentioned, that is not a problem with the S1. The build volume on this printer is astronomical, providing 320 x 320 x 430 mm of space on the round magnetic PEI-coated build plate, making it perfect for building full-sized helmets, an Infinity Gauntlet (see below!), uncut full-sized statues, large swords in far less sections, wands, masks, and much more.
Heading back into settings, the S1 has a built-in 5 Ghz and 2.4 Ghz radio in it, allowing you to connect to your network without the need for a cable. It also enables you to update over the air. Sending a print to the printer is dependent on support from your chosen slicer, so your mileage may vary. Under the General tab you’ll find some toggles to save power, namely auto-sleep, auto power-off, screen brightness, and power off after printing settings.
There are a wealth of options under the tab. Here you can freely move the print head, as well as adjust the nozzle temperature, hotbed heating element, engage parts cooling and chamber cooling (the printer has high-speed fans to cool parts in just a second via a 40,000 rpm high-pressure CPAP turbofan!). There are five presets for PLA, ABS, PETG, FLEX, and “Cool”, though I can’t rightly tell you what that last setting does. These are handy as printing materials will require different combinations of temperatures to ensure clean layer printing.
The filament tab is where you’ll load or unload your filament materials. The FLSun S1 is the easiest filament loader I’ve ever used. Pressing the filament through a small tube in the dryer compartment, I fed the material into the print nozzle where the dual motors I mentioned earlier grabbed ahold of them. If I had trouble reaching the nozzle for whatever reason, a simple slip collar will release the tube, allowing direct access to the filament to speed it along to its destination. I have yet to need that, but it’s great that it’s an option. You’ll also find a simple toggle to “Dry filament”. It detects the moisture and temperature and automatically determines how long it should dry the filament to ensure it stays viable. It couldn’t be easier.
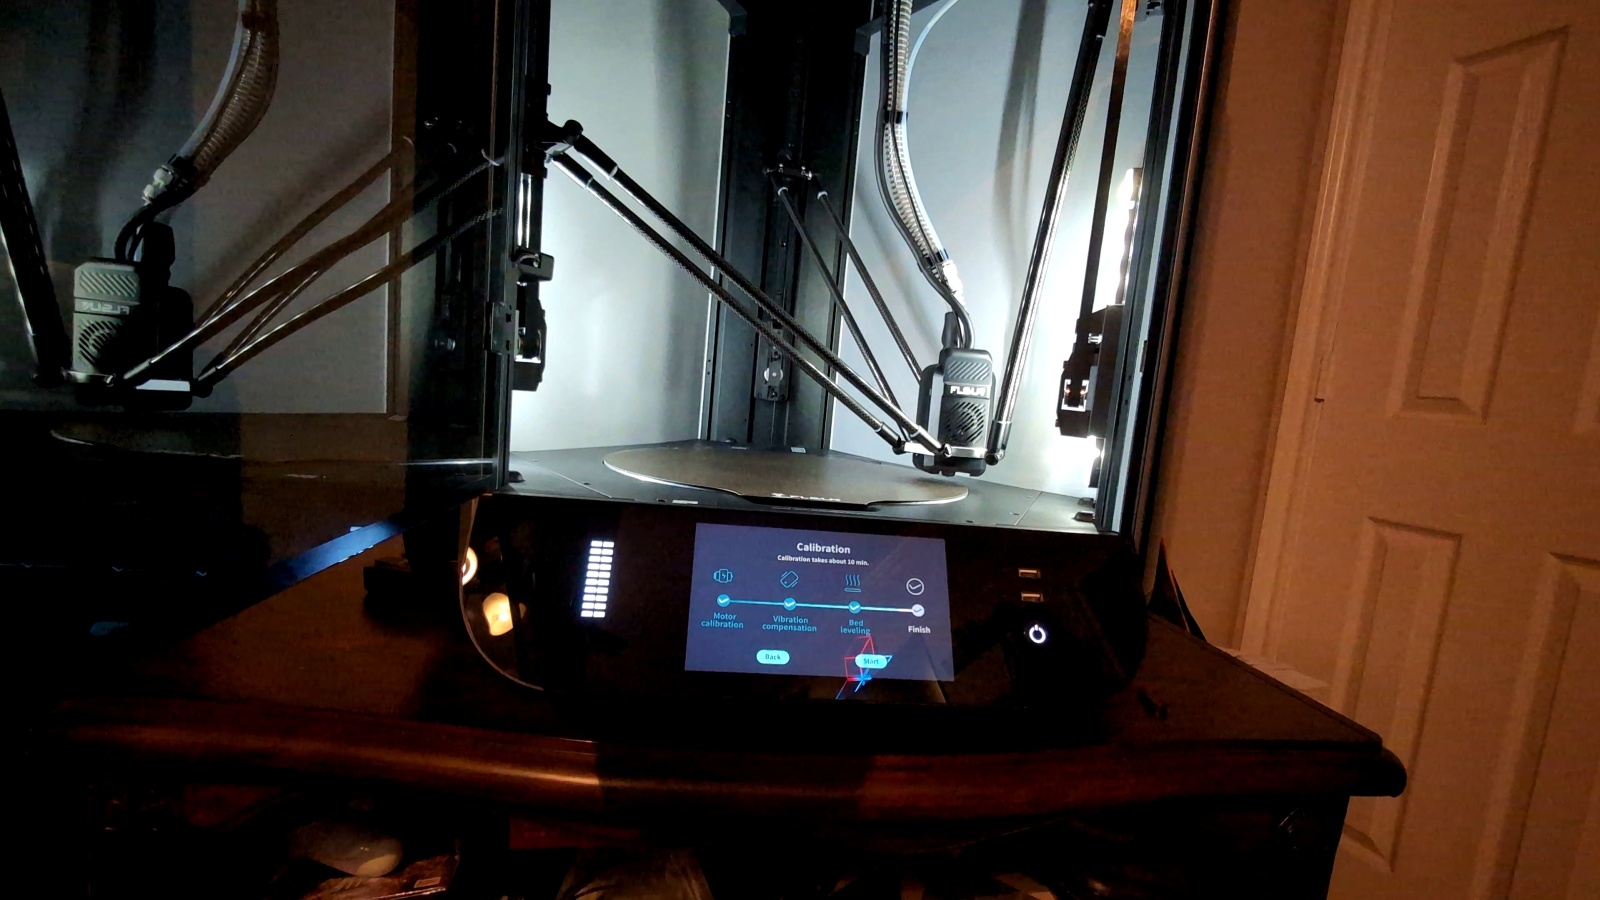
The calibration tab is fairly unused as the device performs a motor calibration, bed leveling, accuracy calibration, vibration compensation, and flow calibration (about 8 minutes of time to complete) before every print, so this should be all checked off any time you take a look.
You’ll spend most of your time in either the print or file tab. Under the file tab you’ll see three folders – models, videos, and logs. The printer has a 1080p black and white time lapse camera already installed, and if you toggle it, you’ll generate a video for what you just printed. Just a word of warning – it’s a single video that gets overwritten every time, you’ll want to use the copy function to send that to a USB drive so you can rename it and use it before it gets overwritten by whatever you print next. Logs are used for troubleshooting, and models are the local repository for whatever models you’d like to keep, such as calibration tools. You can also save a file from a thumb drive to the local storage – there’s 32GB of it, so it’s unlikely you’ll run out as long as you are pruning the list when you are done.
The print tab is simple and effective. It’ll say “Local” at the top, providing you with a picture of the six included files – Benchy, a vase, a lighthouse on a rock by Kijai, a flower basket, a cat that looks very much like a Snorlax, and a Dwarf Paladin by Brite Minis. Plugging in a USB drive causes a new tab to appear, cleverly labeled “USB”. Clicking that will then show pictures of any prepared prints. Here you can copy them to your local storage as I mentioned above, or select them for printing.

Once you’ve selected your print you’ll be presented with a new screen. On the left is the percentage complete with a radial indicator around the picture, as well as the time elapsed. On the right you’ll see a gauge that will have your jaw dropped almost immediately – the speed indicator. Here you can see how fast the print motor is moving. Since the motor can move at a staggering 40,000 mm/s² to get into position, and then print at 1200mm/s, it’s always whipping up and down. The speed isn’t always at 1200mm/s because sometimes it needs to move into position before it starts extruding. Truthfully, it’s a sight to behold – I’ve never seen a printer move this fast or print this efficiently. When I say that this is the next generation of printers, it’s not hyperbole.
One of my favorite parts of the S1 is one that I didn’t expect – vibration compensation and smart zone heating. Heating the entire bed is just inefficient and slow. The S1 instead looks at the .gcode and determines what part of the bed should heat, eschewing the others. This means you are quicker to print, and you don’t have nearly as much wasted power as you would to heat a bed this large. The other part, vibration compensation, is something I had to see for myself. By compensating for any errant vibration caused by the speed of printing, my prints came out so smooth that many parts of them would pass for resin printed. The Thanos Gauntlet palm is downright indistinguishable from something I’d print on my Saturn 4 or Saturn 3 Ultra – no sanding required. In fact, the only part I needed to sand was the fingertips where the supports connected.
There’s not enough data on the fumes from the FDM process to determine if there’s any harm to being around it during the process. Nonetheless, FLSun has taken precautions on our behalf – it’s the only printer I’m aware of that not only has the activated carbon system I mentioned before, but also a full HEPA filter to clean the air from the printing chamber. I’ve had this printer running in my office for days with few breaks in the action, but I don’t smell anything once the printing stops. The scent I do smell is certainly a more neutral one than the one I smell coming from my Ender 3, and a LOT better than the residual smell coming from my four resin printers while they’re in motion.
There is one area where FLSun could use a great deal of attention – spelling in their operating system. This thing is riddled with misspellings or clipped words. Similarly, errors are often in Chinese, requiring a trip to Google Translate to resolve. For a pro-level printer, this looks rather unprofessional. I’d be happy to help get these fixed, but nobody asked me.
I did run into two soft locks for the S1. I was trying to print the Predator bust you’ve seen above again, but with better supports for the busted teeth – I wanted a flawless print. The printer threw an error that I couldn’t catch and translate before it popped off the screen and the main light turned off. Everything operated seemingly as it should, but I was unable to turn the light back on, and any attempt to print or re-home the print head was ignored. Powering down the unit, bringing it back online, and then attempting the print once again was successful. The second came after printing the base of the Infinity Gauntlet when I attempted to print the basic tube that holds everything together – as basic a shape as it gets. Once again, the same behavior and the same solution. A firmware update is going to be needed here.
There is a consequence to moving as fast as the FLSun S1 can – quality. I normally print with the cheapest filament for my utility items because layer lines aren’t much of a concern on a chip clip. When I’m printing nicer items where quality matters and the layers would be unsightly, I’ll bump up to some name brand filament. What I discovered here is that rapid filament isn’t just a marketing ploy – it matters at these speeds. When using cheap filament I saw occasional extraneous extrusions (say that ten times fast) or layer line variations. Slowing the printer down eradicated these, so I know it’s about the movement speed. Switching to rapid filament (name brand didn’t seem to matter as much as the designation) solved this problem nicely as well. The price difference between rapid and non-rapid is negligible, so just plan on that. It’s not a surprise that FLSun’s own filament performed best, though the price is significantly higher at the time of writing.
As always, the last stop in our hardware reviews is warranty and price. I already mentioned that the FLSun S1 retails for $1,499. If you are intending to get into semi-commercial printing, selling your products or needing to rapid prototype, that price will be paid back rather quickly in either time or profits. Obviously if you are a more casual printer, there are more cost effective options that are a lot slower, albeit with a lot less features as well. The warranty on the S1 is two years for readers in the EU, Switzerland, and Norway, with the rest of the world receiving a one year warranty. Consumable parts such as the heating block, nozzle, metal pipe, belt, actuator temperature sensor, actuator heating rod, and spring steel hot bed are warrantied for 90 days, which is expected as they are more subject to wear and tear. This is fairly standard in the 3D market – I’ve not found any manufacturer exceeding these numbers, so they are fairly expected at this point.
FLSun has been working diligently to constantly improve their printers for the last seven years, and the S1 is the culmination of their best work. The FLSun SuperRacer, the V400, and a lot of competing products have clearly been amalgamated to create the S1, and we see that reflected in the technological advancements we can see on display here. It’s simply unmatched for speed and reliability – it truly is the next generation of FDM printers.


