It’s hard to describe what it’s like to experience Virtual Reality to someone who has never put on a headset. There is a sense of scale and interaction that simply doesn’t translate to typical gaming experience. Even the most basic of VR titles have a freedom of movement that you can’t find on a controller of any type, creating a completely immersive space that engulfs the senses…at least until you reach the end of your leash. Setting up the HTC Vive means plugging in a three-part wire set that connects the HMD to your PC, and that locks you into a space directly adjacent to your PC, which is not always the most convenient (or safe!) space to jump into Virtual Reality. Enter the HTC Vive Wireless Adapter.
It’s pretty likely that if you are the type of gamer that owns a VR headset, you are probably the type that feels comfortable cracking open your PC. Even if you aren’t, setting up the Vive Wireless Adapter is a breeze. Inside the box for the system is the boomerang-shaped adapter, a short USB-C adapter, one longer cord with a USB end on both sides, a proprietary 3-part cord set, a battery and holder, a sensor and a clip to hold it, and a tiny Intel PCI-e WiGig adapter.

It looks like a lot of gear, but it’s less complicated than it appears.
Setup
To install the WiGig adapter, you will need a PCI-e x1 slot (the smallest of the PCI Express card slots), but if you are shy on those, you can also use an available x4 slot (the next largest size). This may present a challenge in instances where you are running video cards in SLI, or if you have other devices like capture cards, but for most people, you likely have several PCI-e slots whiling away their time doing nothing. Installation, for those who have never plugged in a card, is as simple as it sounds — open the case, find the available slot, remove the protective plate, firmly press the card into the slot, and then button it all back up. There’s nothing to be nervous about.

Powerful WiGig technology from Intel lies underneath this simple looking collection of parts.
You can’t get free of wires without removing them, and that means popping open the front of the Vive HMD. Sliding the door hatch forward exposes the three-part wire and audio cable (if you have the deluxe audio strap). Pulling the HDMI, power, and USB cable allows you to free the entire wiring structure, preparing it to connect to the wireless adapter.

Once you get this far, you are halfway home!
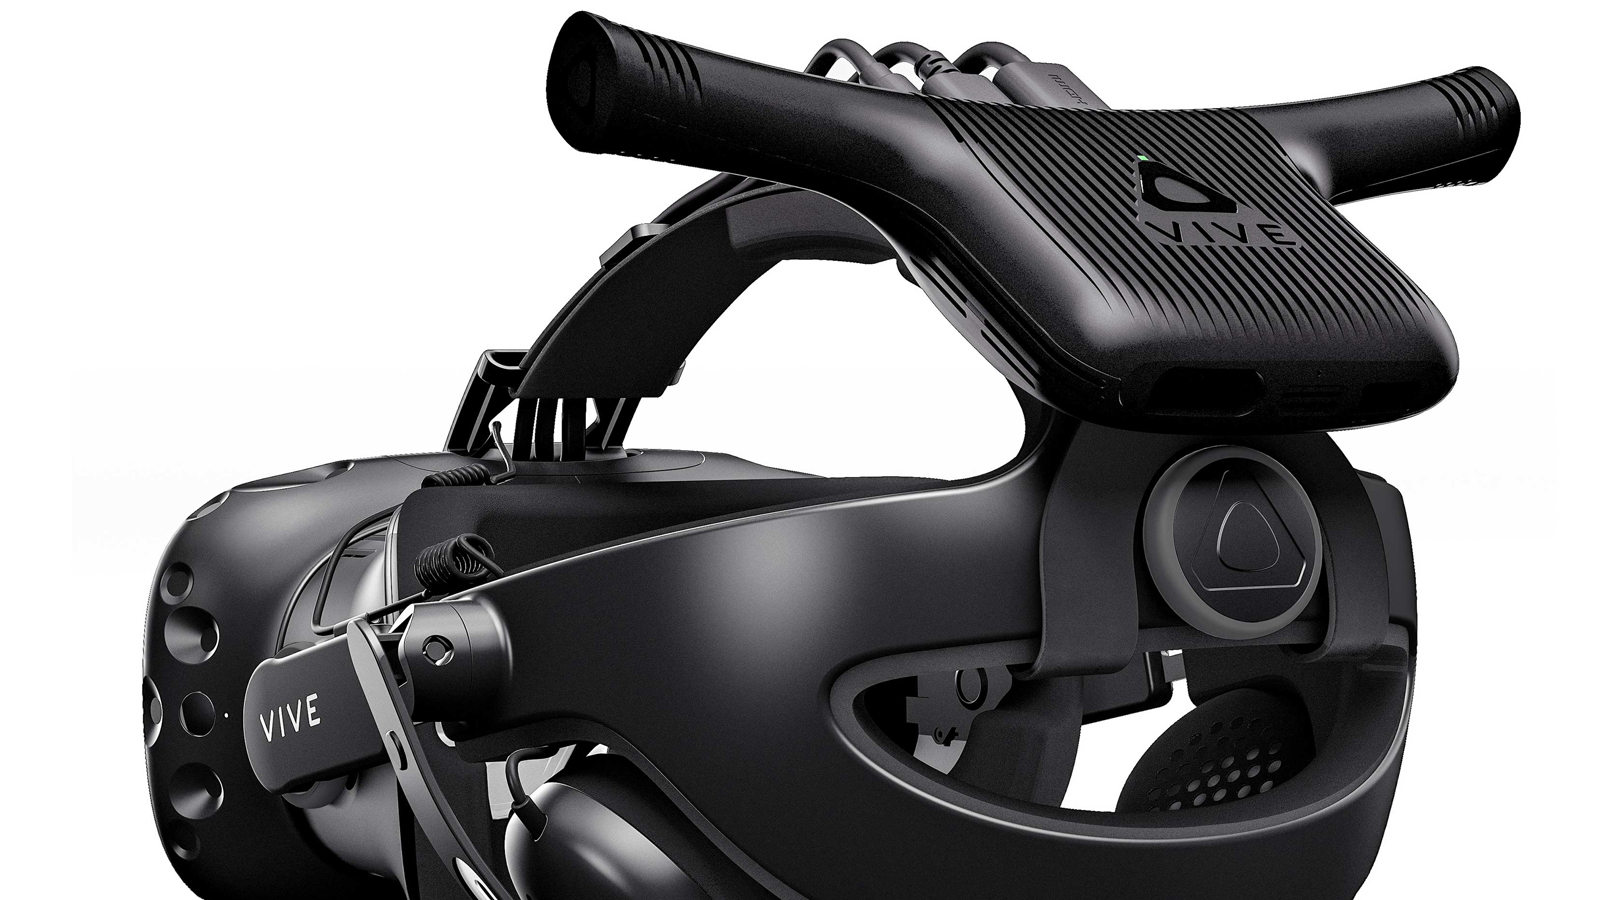
If you are using the original Vive headband, connecting the wireless adapter is as simple as slipping it over the rear of the velcro head strap, and then securing it with the small attached velcro strips to hold everything in place. If you have the deluxe audio strap, it’s even more secure as it locks into the hard shell on the top of the band, and then straps in similarly with velcro. With the adapter in place, you’ll use the short three-part cable to connect the front of the HMD to the adapter, closing up the front of the device.

Slot A into Tab B — assembly is incredibly simple.
On the back of the PCI-e card is a small connector where you’ll screw in the six foot coaxial connector that leads to the wireless sensor for the adapter. This is the device that connects to the aforementioned clip, letting you set it up just about anywhere, as long as it has line of sight to where you’ll be playing. In point of fact, it’ll allow multiple people to play in the same 20ft x 20ft play area, which is fairly impressive.

This sensor is doing the work of connecting your now-wireless HMD to your PC, eliminating the 3-part box.
As a long time PC builder, I got stuck at this point, and I’m somewhat embarrassed to admit it, but I will as a cautionary tale for you, the reader. In Device Manager I now showed an exclamation point over an unidentified wireless adapter — clearly the WiGig device I had just installed. Before I pressed forward, I wanted to resolve this issue. I tried regular Windows Update to auto-update the driver, I tried to find a driver to install by hand, and I even talked with Vive and Intel support over the course of a week’s worth of phone calls. Ready for the solution? Follow the damned directions. The next step in installation is to install the DisplayLink App on your PC, and contained within that app install is the driver installation. Once I stubbornly stopped trying to solve this device driver issue instead of moving forward in the prescribed steps, the problem was immediately resolved and I was ready to be free from wires.

You can see the PCI-e Intel WiGig card installed at the bottom, ready to go!
Truth be told, there is one last wire to connect — the USB to USB cable from the back of the Wireless Adapter to the HTC QC 3.0 Powerbank battery. At 10,050 mAh, it’ll power the whole rig for roughly 2.5 hours of gameplay, and will charge back to 45% in roughly 30 minutes. If you want a backup battery to swap in, they cost $79 on the HTC store, which is good as HTC recommends that you only use their batteries to “supply the proper voltage”. With the battery connected and attached to the belt clip, it was finally time to enjoy wireless virtual reality freedom.
Games
When it came to picking out titles to test the Vive Wireless Adapter with, a few sprang to mind. I chose Beat Saber, Gorn, and Creed: Rise to Glory.
Beat Saber is probably the hottest VR ticket in town right now, and with good reason. With a few mods on PC, the game is infinitely extensible through fan-created levels and popular songs. If you haven’t played Beat Saber, the concept is incredibly simple — arrows that indicate direction slide towards you in a Rock Band-esque way. You, holding a red and blue saber, slice through each block in the direction indicated with the matching colored blade. The songs that come with the unmodded game are pretty challenging, but the fan-created songs are often much more difficult. As a result, a little bit of freedom of movement goes a long way. While the stock songs don’t have a lot of squat-dodges, fan songs have them aplenty. With the Vive Wireless Adapter, I was able to squat without worrying about tangling my cable around my wrist.
While Beat Saber is certainly one of the faster VR titles, it’s not the most demanding on body positioning. It does, however, put a lot of demand on precision. At higher difficulties, dodging and swinging your arms to cut the boxes gets to a completely bonkers level. Happily, the WiGig adapter and Vive Wireless Adapter handled everything the game could throw at them without complaint.

Laura has already ran the battery dry more than once playing Beat Saber.
Creed: Rise to Glory is the latest VR title from VR veterans Survios. I’m not going to rehash Kay’s fantastic review, but as she pointed out, body position is a huge part of Creed’s strengths. Dodging and weaving at room scale is well and good, but snagging a cable is a not-so-hilarious way to accidentally spin the headset sideways on your face. With the Vive Wireless Adapter (and the comfort of the Deluxe Audio Strap), it’s a non-issue, leaving me free to bob, weave, hook, dodge, and counterpunch without having to worry about more than proper hand position and incoming punches.
One of the things I particularly enjoyed about playing Creed without wires was that it changed how I thought about the game. With the tether, I was always worried about the length of the cord, accidentally pulling it, getting out of position and ending up needing to spin around to get the cable back over my right shoulder. Without it, I was able to focus more on hand position, proper footing, and I never had to worry about how fast I was dodging my head out of the way of incoming punches. Yea, wireless freedom means not having wires, but here, it also meant I got to fully immerse myself once again in the virtual world.

Ready for some boxing action!
Gorn is one of my favorite VR titles to just blow off steam. If you’ve not experienced the bizarre fun that is Gorn, it’s a gladiator simulator where beefcake enemies wobble towards you, all of the deadly weapons are also wiggly, and with the press of a button, foes spout streams of candy instead of blood. It’s pure fun. There are mechanics with the controls to snap-turn to address enemies that might be bounce-wobbling towards your rear, but with the Vive Wireless Adapter, I was able to simply turn around without concerns about the wire getting tangled. While I’m sure this game has single handedly killed more TVs and busted more knuckles than any other, having full freedom of movement let me live out my piñata-pinhead busting warrior fantasies.
Summing up
Virtual Reality has a hurdle that hardware can overcome — nausea. If there’s any sort of issue with latency, jitter, or any interruption of any kind, it’s a jarring experience. I ran the battery dry to see what that looked like, and thankfully that’s a fade to black instead of some sort of horrible sickness-inducing halt. On the flip side, I’ve played with this adapter in place for over two weeks on a near-nightly basis and put simply…it just works. I never had a single dropped frame, any image degradation, jitter, or reprojection problems. When the hardware is designed to free you from your shackles, it’s important that it doesn’t fetter you with new ones.
There is one footnote that I have to mention — the price of freedom is a little steep. The cost of the HTC Vive Wireless Adapter is $299 if you are using the original HMD. If you have upgraded to a new Vive Pro, you’ll need an additional cable and head pad cushion, which bumps the price up to $359. (The replacement is a little more complicated, though the result is a little more sleek, as you can see here) Personally, I don’t see this as pushing it into the “Enthusiast” category, having experienced it for myself, but I can see how that price might give someone a moment of pause. Allow me to put it into a different perspective.
Every few years you upgrade your phone. New features, new hardware, and new functionality drives your decision, and you’ll happily (or possibly less happily) part with upwards of $1100 for the newest offering from Apple, Google, or their competitors. The HTC Vive came out on April 5, 2016. Since then we’ve seen an upgrade to the comfortability of it with an optional headset (my review here), a full hardware upgrade for those who wanted higher resolutions in the Vive Pro (my review here), and now we see the next iteration on that march towards true wireless immersion. $300 sounds like a stiff price to entry, but when you experience just how much freedom adds to every single game, it’s impossible to pass up.
Ron Burke is the Editor in Chief for Gaming Trend. Currently living in Fort Worth, Texas, Ron is an old-school gamer who enjoys CRPGs, action/adventure, platformers, music games, and has recently gotten into tabletop gaming.
Ron is also a fourth degree black belt, with a Master's rank in Matsumura Seito Shōrin-ryū, Moo Duk Kwan Tang Soo Do, Universal Tang Soo Do Alliance, and International Tang Soo Do Federation. He also holds ranks in several other styles in his search to be a well-rounded fighter.
Ron has been married to Gaming Trend Editor, Laura Burke, for 28 years. They have three dogs - Pazuzu (Irish Terrier), Atë, and Calliope (both Australian Kelpie/Pit Bull mixes), and an Axolotl named Dagon!

After spending a great deal of time with the Rift and the Vive, there’s no doubt that HTC has the only true room scale game in town. With this Wireless Adapter, HTC takes it to the next level, enabling players to experience virtual reality in a way that pushes us closer to our Star Trek Holodeck fantasies. VR is already an immersive experience, but with the Vive Wireless Adapter, we no longer have to break that immersion with tangled wires at our feet.
PROS
- Virtual Reality, free of wire entanglements
- WiGig technology works flawlessly and improves immersion
- Installation is a snap (when you follow directions!)
- Imperceptible weight difference
CONS
- Price of freedom is steep at $299 / $349
 Buy Now
 Buy Now
 Buy Now
 Buy Now
 Buy Now
 Buy Now